

Page 1
GSC
Care
Instructions for your Electric Range
CONTENTS
SAFETY INSTRUCTIONS ................... 1-3 Oven racks ............................... 8
Preheating ................................ 8
FEATURES ............................... 4-5 Howto bake or roast ........................ 9
Clock and timer ............................ 4 Common baking problem chart ................ 9
Continuous cleaning oven .................... 5 Howto broil .............................. 10
USING YOUR COOKTOP ................... 6-7 MAINTENANCE ............................ 11
Surface elements .......................... 6 Oven light ............................... 11
Drip bowls ................................ 6 Storage drawer ........................... 11
Control knobs ............................. 6 Oven door ............................... 11
Signal rights............................... 6 Leveling legs ............................. 11
Cooking tips .............................. 6 Fuses(Canada only) ....................... 11
Cookware ................................ 7
Heatsettings .............................. 7 CARE AND CLEANING CHART ............... 12
USINGYOUR OVEN ...................... 8-10 SERVICE .................................. 13
Oven characteristics ........................ 8 Troubleshooting ........................... 13
Oven controls ............................. 8
Oven indicator light ......................... 8 WARRANTY ............................... 14
_!_;_!_;_!_;_!_!_!:_i;;_i_i_!!_ii_!!!iii_i!!!_;_!!';i!!!iii!!!iii!!!i!!!i!!i !iiiiiiillilil_il ________;_____;________;_______;;______________________;_________;___________________:_________________________%__;________________;__________;;________________;_______;;___________________;_______
;_#erg_d_ reada_d ke_t_i_
8113P023-60
(2/92)
Page 2
SAFETY INSTRUCTIONS
Information inthe Safety Instructionsection covers all STORAGE IN, ON OR NEAR APPLIANCE - Do not
electriccooking appliances. You may find some infor- store oruse gasolineor otherflammable materials, va-
mation that does not pertain to your particular appli- porsandiiquidsintheoven, nearsurfaceunitsorinthe
ance. Please review this section before using your vicinity of this or any other appliance. The fumes can
cooking appliance, create a fire hazard or explosion. Do not usecooktop
oroven as a storage area forfood or cooking utensils.
Thefollowing instructions are based on safety consid-
erations and must be strictly followed to eliminate the
potential risksoffire, electricshock, or personalinjury. DO NOT USE WATER //(l,'=--_-4
ON GREASE FIRES -
Smotherfire or flame or
PROPERINSTALLATION-Besureyourapplianceis use dry chemical or
properly installedand grounded by a qualifiedtechni- foam-type extinguisher, _' -'-[_
clan. if available or sprinkle
heavily with baking soda.
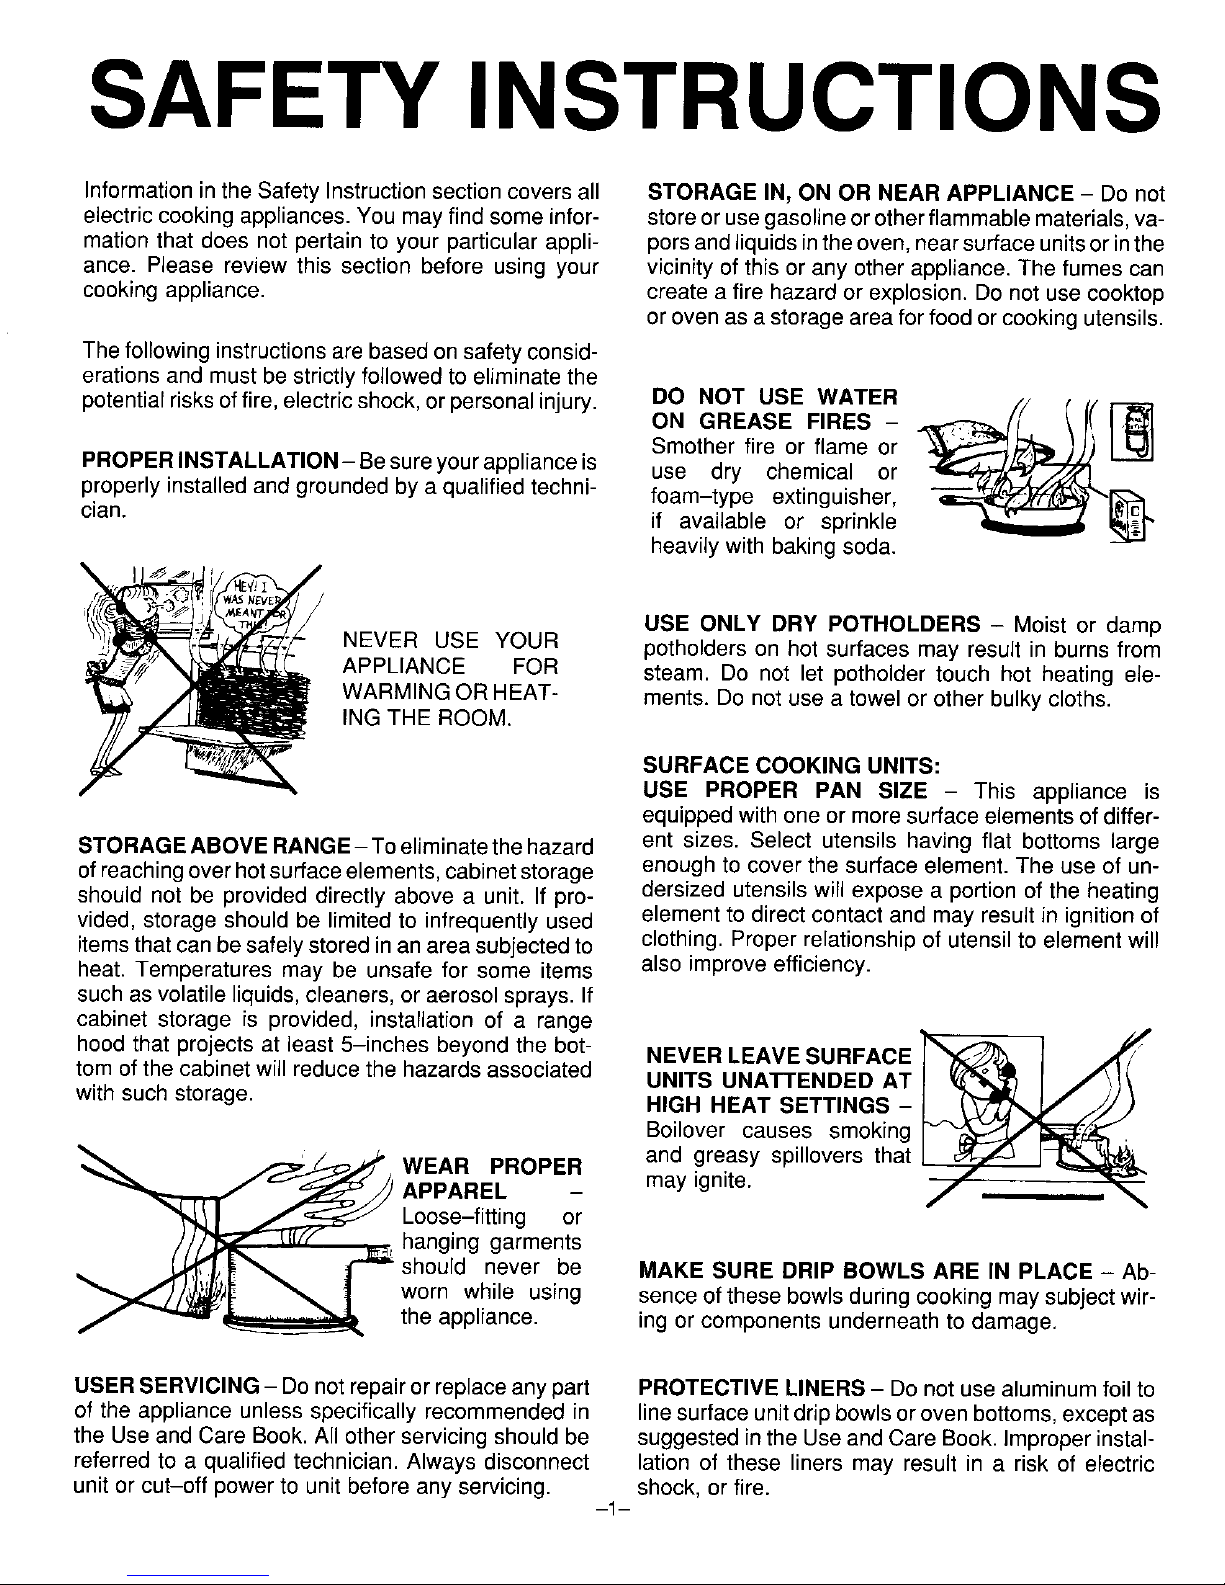
USE ONLY DRY POTHOLDERS - Moist or damp
NEVER USE YOUR potholders on hot surfaces may result in burns from
APPLIANCE FOR steam. Do not let potholder touch hot heating ele-
WARMINGOR HEAT- ments. Do not use a towel or other bulky cloths.
ING THE ROOM.
SURFACE COOKING UNITS:
USE PROPER PAN SIZE - This appliance is
equipped withone or moresurface elementsof differ-
STORAGEABOVERANGE-To eliminatethehazard ent sizes. Select utensils having flat bottoms large
ofreachingover hotsurface elements,cabinetstorage enough to cover the surface element. The use of un-
should not be provided directly above a unit. If pro- dersized utensils will expose a portion of the heating
vided, storage should be limited to infrequently used element to direct contact and may result in ignition of
itemsthat canbe safelystored in an areasubjected to clothing. Proper relationship of utensil to element will
heat. Temperatures may be unsafe for some items also improve efficiency.
such asvolatile liquids,cleaners, or aerosol sprays. If
cabinet storage is provided, installation of a range
hood that projects at least 5-inches beyond the bet- NEVER LEAVESURFACE ]"_ I ,,_"/
tomof thecabinet will reduce the hazards associated UNITS UNATTENDED AT
with such storage. HIGH HEAT SETTINGS -
Boilover causes smoking
'_'_-,,--_/-_-_.,_', WEAR PROPER and greasy spillovers that
APPAREL - may ignite.
Loose-fitting or
hanging garments
should never be MAKE SURE DRIP BOWLS ARE IN PLACE - Ab-
worn while using sence of these bowlsduringcookingmaysubjectwir-
the appliance, ingorcomponentsunderneathtodamage.
USERSERVICING - Donot repairor replace any part PROTECTIVE LINERS- Do not use aluminum foil to
of the appliance unless specifically recommended in linesurface unitdripbowls or oven bottoms, except as
the Use and Care Book. All other servicing should be suggested in the Useand Care Book. Improperinstal-
referred to a qualified technician. Always disconnect lation of these liners may result in a risk of electric
unitor cut-off powerto unit before any servicing, shock, or fire.
-1-
Page 3
SAFETY INSTRUCTIONS
GLAZED COOKING UTENSILS - Only certain types VENTILATING HOODS:
of glass, glass/ceramic, ceramic, earthenware, or CLEAN VENTILATING HOODS FREQUENTLY -
otherglazed utensilsare suitablefor range-top serv- Greaseshouldnotbe allowedtoaccumulateonhood
icewithoutbreakingcluetothesuddenchangeintem- or filter.When flamingfoods underthe hood,turnthe
perature, fan off. The fan, if operating,may spreadthe flame.
IMPORTANT SAFETY NOTICE AND WARNING
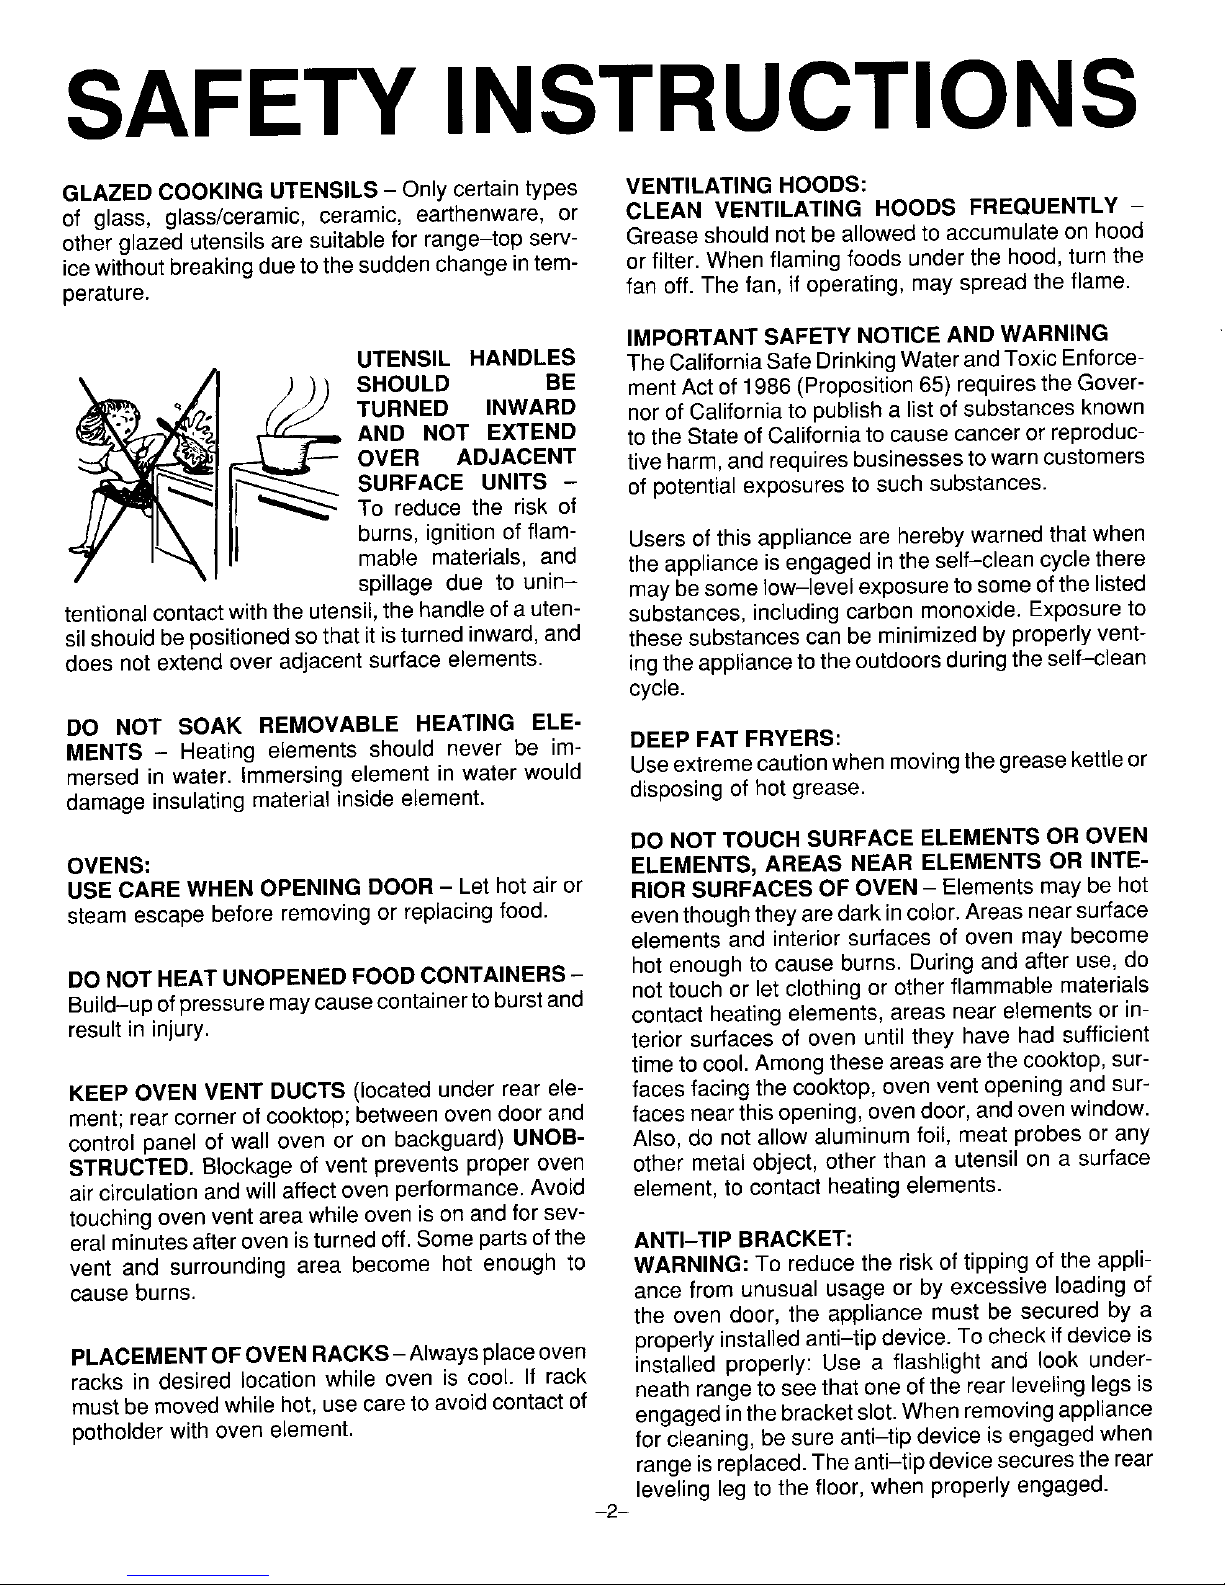
UTENSIL HANDLES The CaliforniaSafe DrinkingWaterandToxic Enforce-
_ _ SHOULD BE ment Act of 1986 (Proposition 65) requiresthe GOVer-
TURNED INWARD nor of California to publisha list of substances known
AND NOT EXTEND to the State of California to cause canceror reproduc-
OVER ADJACENT tive harm,and requiresbusinesses towarncustomers
SURFACE UNITS - of potential exposures to such substances.
To reduce the risk of
burns, ignition of flam- Users of this appliance are hereby warned that when
mable materials, and the appliance is engaged inthe self-clean cycle there
spillage due to unin- may besome low-level exposure to someofthe listed
tentionalcontact withthe utensil,the handle ofa uteri- substances, including carbon monoxide. Exposureto
sil should bepositioned sothat itisturned inward, and these substances can be minimized by properly vent-
does net extend over adjacent surface elements, ingthe appliancetothe outdoors duringtheself-clean
cycle.
DO NOT SOAK REMOVABLE HEATING ELE-
MENTS - Heating elements should never be im- DEEP FAT FRYERS:
mersed in water. Immersing element in water would Use extremecautionwhen movingthe greasekettleor
damage insulating material insideelement, disposing of hot grease.
DO NOT TOUCH SURFACE ELEMENTS OR OVEN
OVENS: ELEMENTS, AREAS NEAR ELEMENTS OR INTE-
USE CARE WHEN OPENING DOOR - Lethotairor RIOR SURFACES OF OVEN- Elementsmay be hot
steam escape before removing or replacing food. even though theyare dark incolor.Areas near surface
elements and interior surfaces of oven may become
DO NOTHEAT UNOPENED FOODCONTAINERS - hot enough to cause burns. During and after use, do
Build-up of pressure may causecontainerto burstand not touch or let clothing or other flammable materials
result in injury, contact heating elements, areas near elements or in-
terior surfaces of oven until they have had sufficient
timeto cool.Among these areas are the cooktop, sur-
KEEP OVEN VENT DUCTS (located under rear ele- faces facing the cooktop, ovenvent opening and sur-
ment; rear corner of cooktop; between oven door and faces near this opening, oven door, and ovenwindow.
control panel of wall oven or on backguard) UNOB- Also, do not allow aluminum foil, meat probes or any
STRUCTED. Blockage of vent prevents proper oven other metal object, other than a utensilon a surface
air circulationand will affect oven performance. Avoid element, to contact heating elements.
touching oven vent area while oven is on andfor sev-
eral minutesafter ovenis turned off.Some partsofthe ANTI-TIP BRACKET:
vent and surrounding area become hot enough to WARNING: To reduce the risk of tipping of the appli-
cause burns, ance from unusual usage or by excessive loading of
the oven door, the appliance must be secured by a
PLACEMENTOFOVEN RACKS- Alwaysplaceoven properlyinstalled anti-tip device, To check ifdevice is
racks in desired location while oven is cool. If rack installed properly: Use a flashlight and look under-
mustbe movedwhile hot, use care toavoid contact of neath rangeto seethat one ofthe rear leveling legs is
potholder with oven element, engagedinthe bracketslot. When removing appliance
forcleaning, be sure anti-tip device isengaged when
rangeis replaced. Theanti-tip devicesecures the rear
leveling leg to the floor, when properly engaged.
-2-
Page 4
SAFETY INSTRUCTIONS
ADDITIONAL INFORMATION:
After applianceis installed, be certain all packing ma- ATTENTION: NE LAISSER AUCUN ALIMENT, US-
terials are removedfrom the appliance before operat- TENSILE DE CUISINE, ETC., DANS LE FOUR
ing the unit. If appliance is installed near a window, DURANTLE CYCLE D'AUTONETTOYAGE.
take steps to prevent curtains from blowing over sur-
face elements creating a fire hazard. Onsome models, afanshould beheardduring theself
clean cycle. If not, cancel clean cycle and call a serv-
Careshould begiven to location of appliance. Besure iceman before self-cleaning again. (Refer to CON-
floor covering underappliance, walls adjacentto appli- TENTS onfrontcover for location ofself-clean instruc-
ance,cabinetryadjacentto appliance,and othermate- tions and fan information.)
rials adjacent to appliance can withstand prolonged
heat.This is a heavyappliance and cansettle intosoft SMOOTHTOP COOKTOP:
floor coverings such as cushioned vinyl. Use care Do not cook on broken cooktop. If cooktop should
when moving range on this type of floor covering, break, cleaning solutions and spillevers may pene-
trate the broken cooktop and create a risk of electric
shock. Contact a qualified technician immediately.
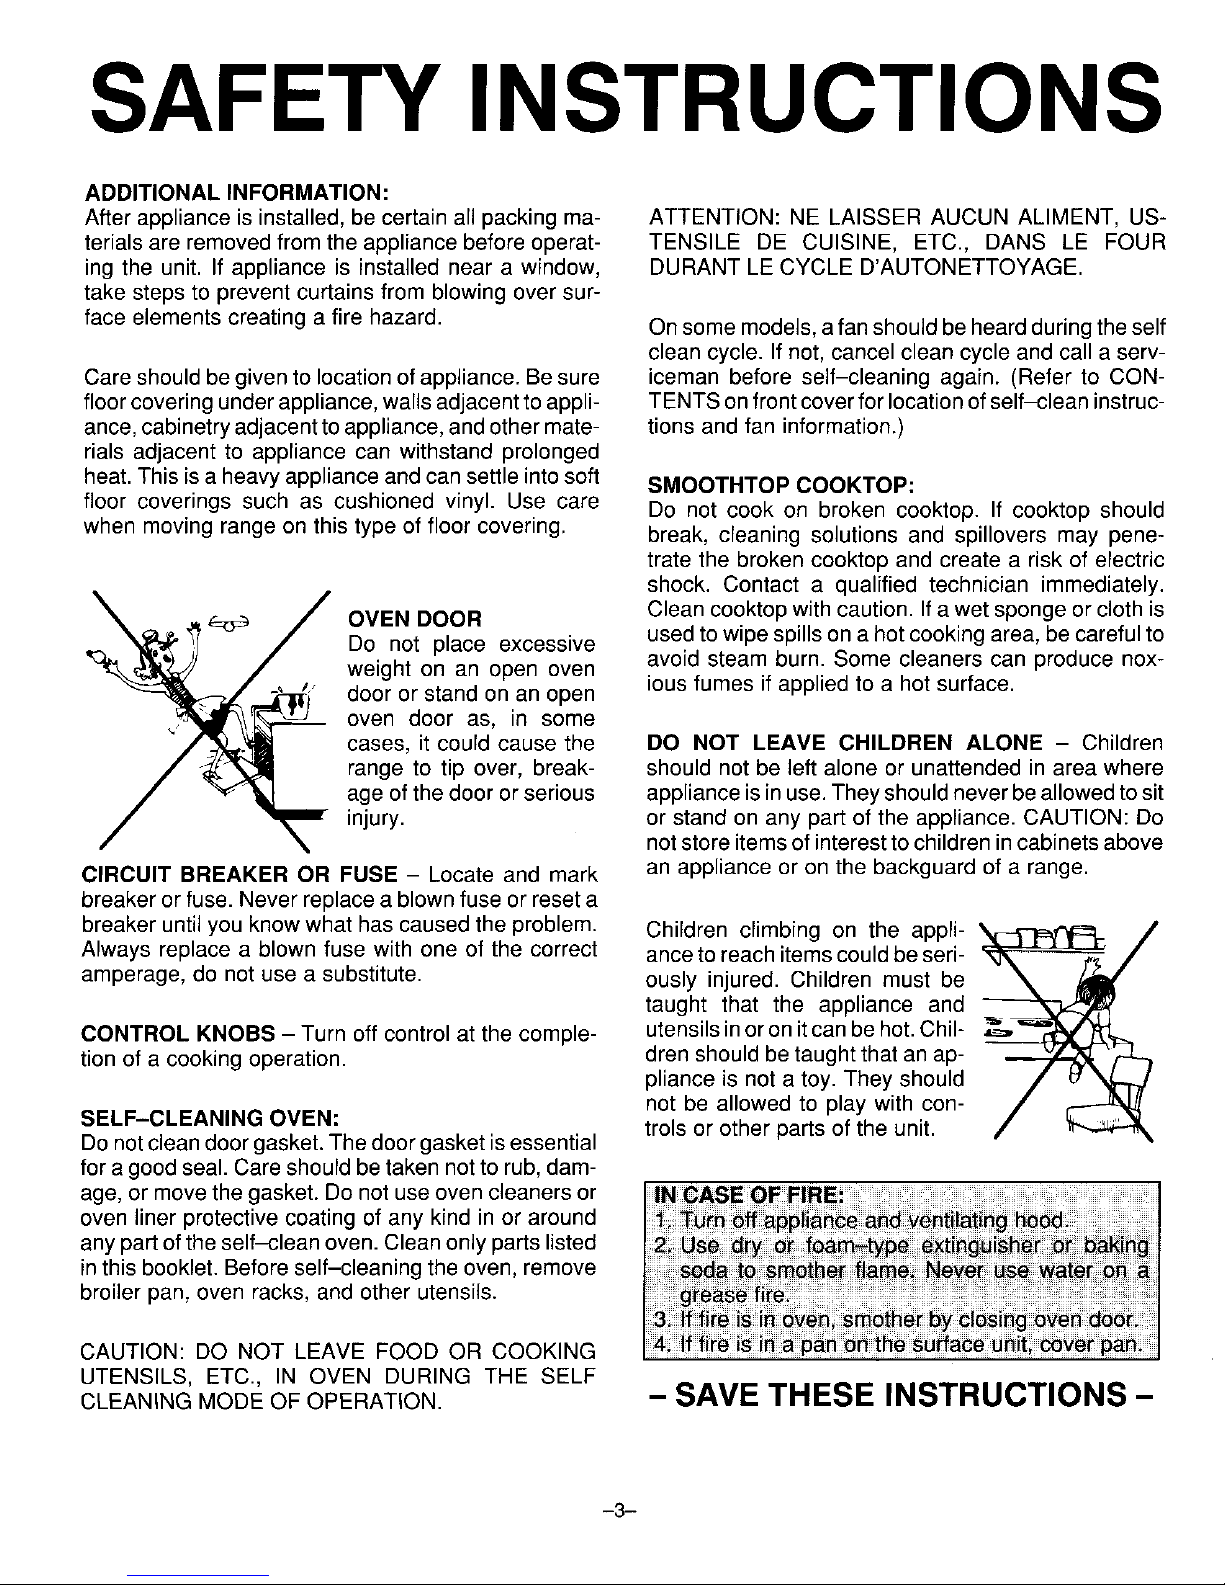
_..__ OVEN DOOR Clean cooktop with caution. Ifa wetsponge orclothis
Do not place excessive usedto wipe spills on a hotcooking area, becareful to
weight on an open oven avoid steam burn. Some cleaners can produce nox-
door or stand on an open ious fumes if applied to a hot surface.
oven door as, in some
cases, it could cause the DO NOT LEAVE CHILDREN ALONE - Children
range to tip over, break- should not be left alone or unattended in area where
age of the door or serious appliance is in use.Theyshouldnever beallowedtosit
injury, or stand on any part of the appliance. CAUTION: Do
notstore itemsof interestto children incabinets above
CIRCUIT BREAKER OR FUSE - Locate and mark an appliance or on the backguard of a range.
breaker or fuse.Never replace a blownfuse or reseta
breaker untilyou know what has causedthe problem. Children climbing on the appli-
/
Always replace a blown fuse with one of the correct anceto reach itemscould beseri- /
amperage, do not use a substitute, ously injured. Children must be
taught that the appliance and
CONTROL KNOBS - Turn off control at the comple- utensilsinoronit canbe hot.Chil-
tion of a cooking operation, dren should be taught that an ap-
pliance is not a toy. They should
not be allowed to play with con-
SELF-CLEANING OVEN: trois or other parts of the unit.
Do notcleandoor gasket.Thedoor gasket is essential
fora good seal. Care should betaken not to rub,dam-
age, or movethe gasket. Donot useoven cleaners or
oven liner protective coating of any kind in or around
anypartofthe self-clean oven. Clean only parts listed
inthis booklet. Beforeself-cleaning the oven, remove
broiler pan, oven racks, and other utensils.
CAUTION: DO NOT LEAVE FOOD OR COOKING
UTENSILS, ETC., IN OVEN DURING THE SELF
CLEANING MODE OFOPERATION. -- SAVE THESE INSTRUCTIONS -
-3-
Page 5
FEATURES
ELECTRONIC
TIME-OF-DAY CLOCK
AND TIMER
Ifyour range is equippedwith adigital
clock and timer, it will eitherbe design
1 or design 2. Follow the instructions
for the illustration that matches the
clock on your range.
DESIGN 1 DESIGN 2
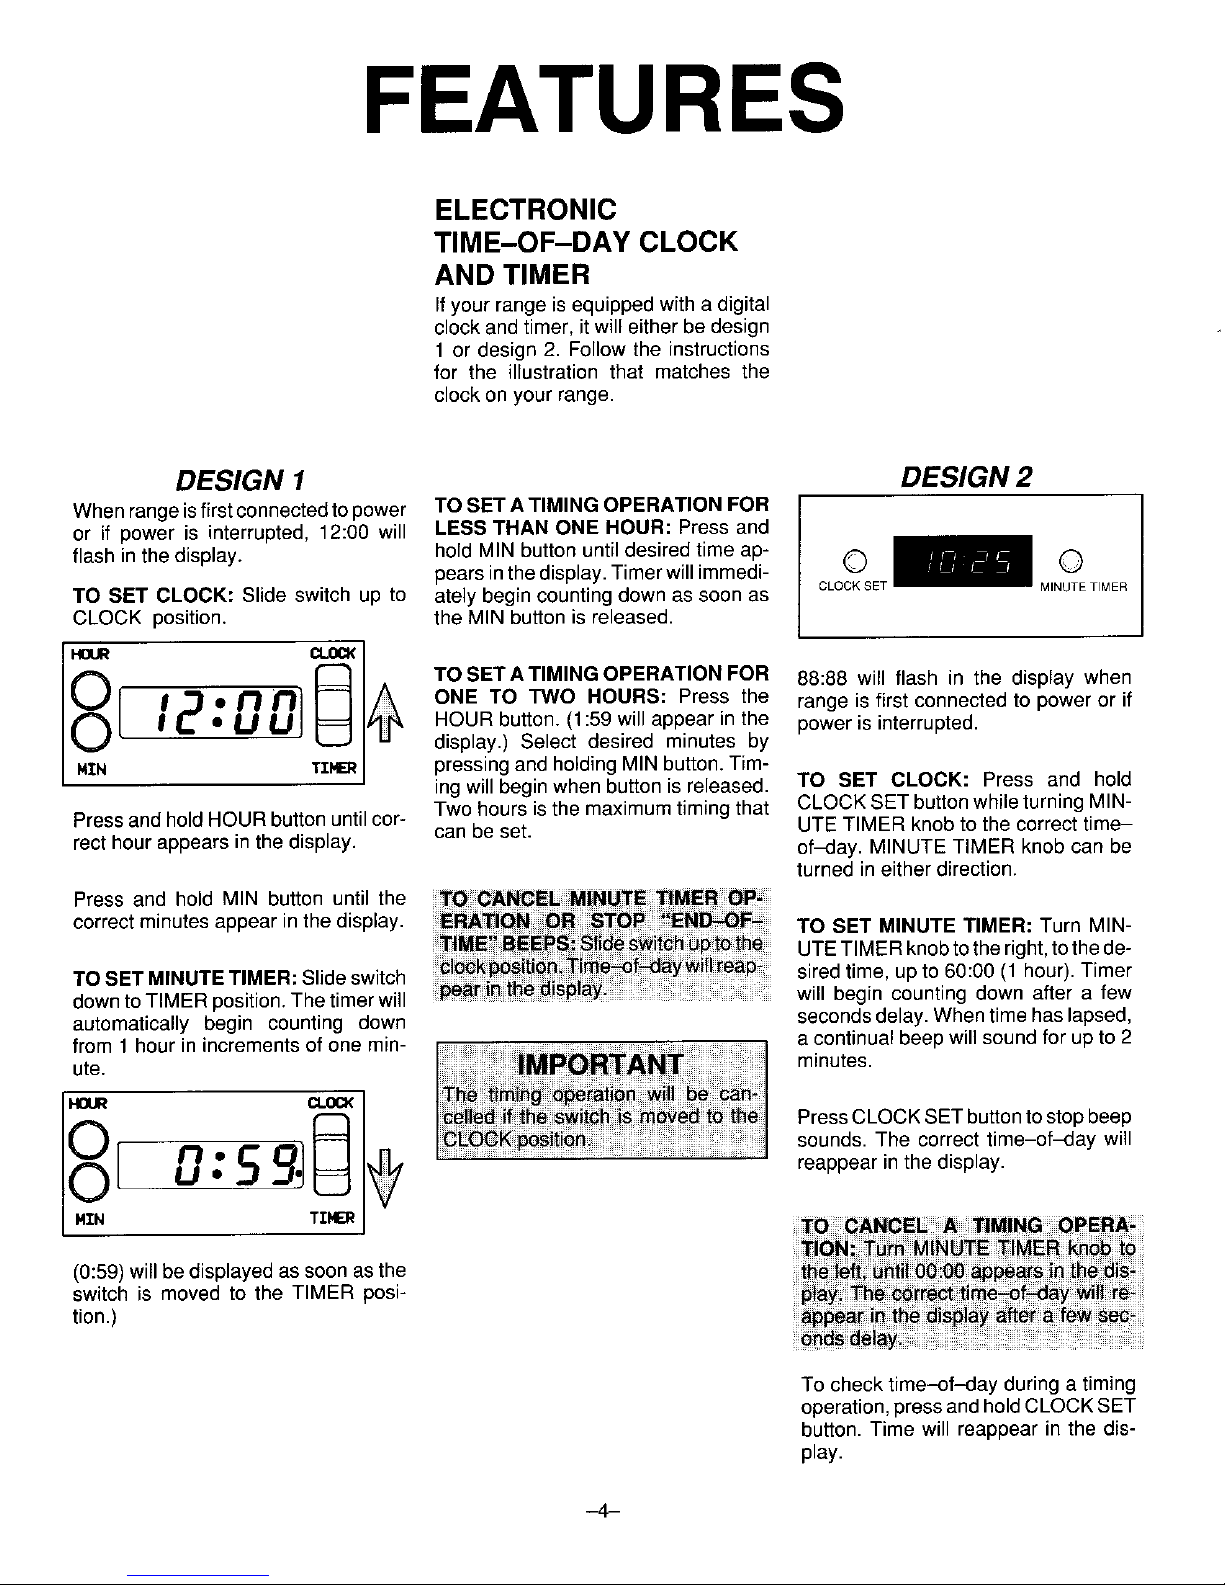
Whenrangeisfirstconnectedtopower TO SET ATIMINGOPERATION FOR
or if power is interrupted,12:00 will LESS THAN ONE HOUR: Press and
flash inthe display, holdMIN buttonuntildesiredtimeap-
pearsinthedisplay. Timerwill immedi- Q Q
CLOCKSET MINUTETIMER
TO SET CLOCK: Slide switch up to ately begin counting down as soon as
CLOCK position, the MIN button is released.
HOUR CLOCK
0[ 1 2 ] _ _ TO SET ATIMING OPERATION FOR 88:88will flash in the display when
I'D _"_ ONE TO TWO HOURS: Press the range is firstconnected to power or if
: QJ _j HOUR button. (1:59 will appear in the power is interrupted.
display.) Select desired minutes by
MZN TIMER pressing and holding MIN button. Tim-
ingwillbeginwhen buttonisreleased. TO SET CLOCK: Press and hold
PressandholdHOUR buttonuntilcot- Twohoursis themaximumtimingthat CLOCKSET buttonwhileturningMIN-
recthourappearsinthe display, canbe set. UTE TIMER knobto the correcttime-
of_day. MINUTE TIMER knobcan be
turnedineitherdirection.
Press and hold MIN buttonuntilthe TO CANGEE M|NUTE _MER QP
correctminutesappearinthe display. ER_ATII_N_R
TO SET MINUTE TIMER: Turn MIN-
_i_E _bs_ _i_f-d_ i _# UTETIMERknobtotheright,tothede-siredtime, up to 60:90 (1 hour).Timer
TO SET MINUTETIMER: Slideswitch _ i6_ _ _ ay will begincounting down after a few
downtoTIMER position.Thetimer will
automatically begin counting down seconds delay.Whentime haslapsed,
from 1hour in incrementsof one min- a continualbeep will sound forup to 2
ute. minutes.
HOUR CLOCK
_ _ PressCLOCKSETbuttonto stop beep
[ _= sounds. The correct time-of_;iay will
O _ 5 reappear inthe display.
MIN TIMER
(0:59)will bedisplayed as soon as the
switch is moved to the TIMER posi-
tion.)
To check time-of-day during a timing
operation,pressandholdCLOCKSET
button. Time will reappear in the dis-
play.
-4-
Page 6

FEATURES
CONTINUOUS CLEANING
OVEN (if equipped)
WHAT IS THE CONTINUOUS MANUALLY CLEANING HINTS
CLEANING OVEN? HEAVYSPILLOVERS Brittlecrusts or stains can be loosened
The finish of the ContinuousCleaning The specialfinishwill clean mostspat- by GENTLY tapping stain with a
Oven is identifiedbyitsdarkgraycolor, ters during normal oven use unless woodenor plasticutensil.Brush away
whitestippleandrough,poroustexture, there is a heavy buildupof soil.Heavy any loose soil that flakes off. Varnish
The rough texture prevents grease spillovers such as pie or casserole typestainsusuallyneed tobesoftened
spattersfrom formingbeads whichrun boiloverswillnotclean effectivelywith- with a smallamountof water or damp
down the walls leaving unsightly out some manual help.The crusty or cloth. Remainingsoilwillgraduallyre-
streaks. Rather, the rough texture ab- varnish-likestainsthatformfromthese ducewithcontinuedovenuseat normal
sorbs spatters and allows them to spilloversclog the pores and prevent bakingtemperatures.
spread,thus exposinga largerarea to the specialfinishfrombeingexposedto
the hotovenair. The catalyst,whenex- the hot ovenair. This greatly reduces
posedto heat, speeds the oxidationof the cleaningeffectivenessofthe finish.
soil. DO NOT USE ANY TYPE OF OVEN
CLEANER, POWDERED CLEANS-
Cleaning action automatically begins Thesecrustyorvarnish-likestainsmust ERS,SOAP, DETERGENTOR PASTE
whenever the ovenis turned onfor bak- either be removed or broken up before ON ANY CONTINUOUS CLEANING
ingor roasting.The ovenMUST be"on" cleaning can effectively take place. SURFACE. ALSO, DO NOT USE ANY
for cleaning to take place. No cleaning ABRASIVE MATERIALS, STEEL
will occur whentheoven is off. The spe- WOOL, SHARP INSTRUMENTS OR
cial catalytic finish must be exposed to TO MANUALLY CLEAN SCRAPERS FOR THEY WILL DAM-
hot oven air before soil will begin to HEAVY SPILLOVERS AGE THE FINISH.
graduallyreduceinsize. Brushoff heavysoilwitha nylonbrush
orplasticpad.DO NOT USE papertow-
FACTORSAFFECTING LENGTH OF els,clothsorspongesfortheovenwalls
areporousandparticlesofthese mate- Avoid spilloversby using utensilsthat
CLEANINGTIME rialswillruboffonthewalls.Rinsearea are largeenoughto holdfood.A cookie
The higher the oven temperature,the
fasterthecleaningaction.The lengthof withclearwateronly. sheetorpieceof aluminumfoil,justa lit-
cleaningtimewilldependon thesefac- tie largerthanthepan,canbeplacedon
tors:Typeof soil,amountorsizeofsoil, the rackdirectlybelowtherackholding
oven temperatureand length of time theutensiltocatchspills.
ovenisinuse.Time mayvaryfromafew
minutestoseveralhours.Soildeposited
attheendofa cyclemaystillbevisible.
This will usually fade with continued Overa periodoftime, wear marksmay
oven useuntilthe soilgraduallydisap- appearontheembossedracksupports.
pearsorcanbewipedupmanually.The This is normaland resultsfrom sliding
oven will appear presentably clean, the racksin and outofthe oven. Wear
eventhoughsomespattersmaybepre- markswillnotaffectthecleaningaction
sent. ofthe oven.
-5-
Page 7

USING YOUR COOKTOP
COOKTOP
Ranges with a coil-type cooktop will _ re_v_i R_i_e _le_e_ _HEN Drip bowls will turn blue or gold over
feature eitheran"upswept"cooktop or a _L _n_ _rei_ i__ii _ _ _ay time or if overheated.Thistype of discol-
"flat"cooktop. Bothtops can be liftedup _ i_ re_ac oration is permanent and will not affect
for convenient accesstothe areaunder cooking performance.To protect finish,
the cooktop, avoid using high settings for long peri-
ods of time. Reduce to a lower setting
once food begins cooking. Also, do not
To raise "upswept" cooktop: When use oversized utensils. Utensil should
cool, grasp front edge of cooktop and not extend more than 2 inchesfrom the
gently lift up untilthetwo support rodsat element.
the frontofthe cooktop snap into place.
CONTROL KNOBS
To replace: Insert the terminals onthe Your cooktop is equipped with control
element into the receptacle. Gently lift knobsthat provide an infinitechoice of
up on outer edge of element (opposite settings from LOW to HIGH. The knob
terminal-side of element) while insert- can be set on any of the numbered set-
ing terminals into receptacle. Gently tingsorbetweenthenumberedsettings.
press down on outer edge of element To operate push inand turn knobto the
• until element sits level on drip bowl. desired setting.
Be sure drip bowl and chrome trim ring,
if equipped, are properly installed. SIGNAL LIGHTS
Notch on trim ring should be centered Ranges are equipped with one to four
To lower top: Hold front edge of cook- over the screw securing the receptacle signal lights to indicatewhen a surface
top and carefully push back on each tothe maintop. Iftrim ringis not installed element is on. The light will remain on
support rod to releasethe notched sup- properlyand restsonthis screw,thetrim until the element is turned off. After a
port. Then gently lower top into place, ring and drip bowl will "rock". cooking operation, besure element and
Thesupportrodswill slide intotherange signal light are off.
frame.
DRIP BOWLS COOKING TIPS
To raise "flat" cooktop: Grasp front The drip bowls, locatedundereach sur- Food will not cook any faster when a
edge of cooktop and lift up. face element, are designed to catch higher heat setting isused than needed
spills or boilovers, to maintain a gentle boil. Water boils at
the same temperature whether boiling
SURFACE ELEMENTS gently or vigorously. If a highsetting is
S_; _at_ b_e:t !_ yo_ _ Be sure drip bowls are in place. Ab- used, excessive spattering will occur
_ _ _ dis__ _mb_ sence of these bowls during cooking andfood may stick or burnonto thebot-
.........................................................................may subject wiringor component parts tom of the pan.
underneath the cooktop to damage.
Surface elementsare self-cleaning. Do
not immerse elements in water. When _ Use a higher heat setting to bring liquid
an element isturned on, it will cycle on Clean after each use with soap and to a boil or to begin cooking, then re-
and offto maintain the heat setting, water. Remove stubborn stains with duce to a lower setting. Never leave
baking soda paste and plastic scouring food unattended during a cooking
To _ev_ d_n-_ag_i_g_ NSYE_ pad. To prevent scratchingthefinish, do operation.
_fat_ii_i_0u_i_ not use abrasive cleaning agents.
_[ac__r_d_EV_8 _ _ #_ to_! Rinse,dry and replace.
a_ Always place pan on the surface ele- '
To prevent risk of electric shock or fire, ment before turning element on.
do notlinedripbowlswith aluminumfoil.
Never let a pan boil dry as this could
damage the utensiland the appliance.
-6-
Page 8

USING YOUR COOKTOP
COOKWARE
Cookingperformanceisgreatlyaffected r'_,.--- ,, J are not recommended: Canners with
by the type of cookware used. Cook- I_ ridged bottoms, oversized canners
ware SHOULD HAVE A FLAT BOT- (2-inches larger than the surface ele-
TOM.The flat bottom allows good con- ment) or a very large canner that rests
i ductivity betweenthecookware and the on two surface elements.
element to provide uniform cooking re-
sults, faster heating and more efficient ,-,,,,_ .,m ._....., J
use of energy.
I Fitthesizeofthe cookwareto the size of
the element. This conserves energy.
When canning, use the HIGH setting
Cookware with uneven, warped, or just until water comes to a boil or pres-
grooved bottoms do not make good Do not use woks equipped with round sure is reached in the pressurecanner.
contact, will reduce heat conductivity metalrings. The ring, which is designed Then, reduce to the lowest heatsetting
and result in slower, less even heating, to support the wok above the element, that maintains the boil orpressure.
A pan with a badly curved bottom will will trap heat and may damage the ele-
notmakegoodcontactwith theelement ment and the cooktop. Prolonged use of the HIGH setting, or
and may not get enough heat to bring the use of incorrect canning utensils
water to a boil. CANNING produce excessive heat. Excessive
Acceptable water-bath or pressure heat can cause permanent damage to
canners should not be oversized and the porcelain cooktop, surface element
must have a flat bottom. The following and the drip bowl.
SUGGESTED HEAT SETTINGS
Usethefollowingchartasa GUIDELINE until you become morefamiliar with your cooktop. Keepin mindthatdifferenttypes of
cookware materialsrequire different heatsettingsfor thesamecooking operation.We suggestthat youexperimentto findthe
heat settingthat best suits your particular cooking needs. Informationin thechart is based on heavygauge aluminumcook-
ware. Lower the heat setting if using stainless steel, cast iron utensils or glassware designed for surface cooking.
HI To bring liquid to aboil, blanch, preheat skillet, or bring pressure up in pressure cooker. (Note:
Always follow instructionsin pressurecooker useandcare book.) Always reduce toa lowerheat
setting when liquidsjust begin to boil or food begins to cook.
Medium
6-5 To maintain moderate to slow boilfor large amounts of liquids.
LO To keep foods warm before serving.
NOTE: Refertocookware manufacturer's recommendations for suggested heat settings.Some manufacturersdonot rec-
ommendthe use of HIGH or the use of HIGH for extended cooking operations.
--7--
Page 9

USING YOUR OVEN
OVEN OVEN RACKS HINTS:
CHARACTERISTICS The twooven racks are designedwitha Ifcookingontwo racks,stagger pansso
"lock-stop" position to keep racks from one is not directly over the other. Use
accidentally coming completely out of rackpositions 2 and 4 or2 and 5,when
the oven. cooking on two racks.
°re°veesreracisc°°uI l
rack out to the "lock-stop" position.Tilt
up and continue pulling until rack re-
leases.
OVEN CONTROLS
To replace: Place rack on rack sup-
_ ports, tilt up and push toward rear of
oven. Pull rack out to "lock-stop" posi-
tionto besure rack iscorrectlyreplaced.
RACK POSITIONS:
RACK 1 (top of oven) used for broiling
THERMOSTAT SELECTOR thin non-fatty foods such asfish.
RACK 2 used for two-rack baking or
broiling thicker cuts of meat.
The THERMOSTATknob isused to se- RACK 3 usedformost one-rack baking
lect and maintaintheoventemperature, and for roasting some meats.
Always turn this knob just TO the de- RACK4usedforoneortworackbaking
sired temperature. Do not turn to a and roasting large meats, cooking
higher temperature and then back. On larger foods and for baking angel food
some models, there is an indent at the cake or pie shells. NEVER place pans directly on theoven
350°F setting. RACK 5usedfor roastingturkey orbak- bottom.
ing angelfood cake or pie shells.
The SELECTOR knob determines the Do not cover entire rackwith aluminum
typeofovenoperation.Turnthis knobto foilorplace foildirectlyunder cookware.
desired setting. Each setting is identi- Tocatch spillovers, cut a piece of foil a
fled by an indent (stop) and a "click" little larger than the panand place it on
sound, the rack below the rack containing the
pan.
To turn the oven on, both the Thermo-
stat and Selector knobs must be set.
The ovenwill not operate if the Selector _ PREHEATING
knob is left in the OFF position.To turn _ Preheating is necessaryfor baking. AI-
the oven off, turn the selector knobto lowovento heatfor 10to 15 minutesbe-
the OFF position. / fore adding food. It is not necessary to
/
preheat oven for roasting.
OVEN INDICATOR LIGHT Itisnotnecessarytopreheatforbroiling
TheOVENindicator light,locatedon the unless darker browning is desired or if
backguard, turns on whenever the se- cooking thin (3/4-inch) steaks. Allow
lectorknob is turnedto BAKEorBROIL. broil elementto preheat 3 to 5 minutes.
Whenthe ovenreachesthe presettem-
perature,the indicatorlightturnsoff and
on as the oven elements cycle off and Selecting temperature higher than de-
on. sired will NOT preheat the oven any
faster. Preheating at a higher tempera-
ture may havea negative effect on bak-
ing results.
-8-
Page 10

USING YOUR OVEN
HOW TO BAKE OR desired temperature and the selector time in recipe. Cook longer if neces-
knob to BAKE. sary. Remove food from the oven
ROAST 3. Place food in center of oven, allowing and turn the selector knob to OFF.
1. When cool, position rack in oven de- a minimum of 2 inches between uten- If you have carefully followed the basic
pending on what you are baking, sil and oven walls, instructions and still experience poor re-
2.To set oven: Turn thermostat knob to 4. Check food for doneness at minimum suits, these suggestions may be helpful:
COMMON BAKING PROBLEMS AND WHY THEY HAPPEN
Cakesare uneven. Pans touching each other or Cakes don't brown on top. Incorrect rack position.
ovenwalls. Temperature set too low.
Batter unevenin pans. Overmixing.
Temperature set too low or Too much liquid.
baking time too short. Pan size too large or too little
Oven not level, batter in pan.
Undermixing. Ovendoor opened too often.
Too much liquid.
Excessive shrinkage. Too little leavening.
Cake high inmiddle. Temperature set too high. Overmixing.
Bakingtime too long. Pantoo large.
Overmixing. Temperature set too high.
Too much flour. Bakingtime too long.
Panstouching each other or Panstoo close to each other
oven walls, or oven walls.
Incorrect rack position.
Cake falls. Too much shortening or sugar. Uneven texture. Too much liquid.
Too much or too little liquid. Undermixing.
Temperature set too low. Temperature set too low.
Old or too little baking powder. Baking time too short.
Pantoo small.
Oven door opened frequently. Cakes have tunnels. Notenough shortening.
Added incorrecttype of ail to Too much baking powder.
cake mix. Overmixingor at too high a
Added additional ingredients speed.
to cake mix or recipe. Temperature settoo high.
Cakes, cookies, biscuits Incorrect rack position.
don'tbrown evenly. Oven door notclosed properly. Cakes crack on top. Batter overmixed.
Doorgasket not sealing Temperature set too high.
properly. Too much leavening.
Incorrect use of aluminum foil. Incorrect rack position.
Oven not preheated.
Pansdarkened, dented, warped,
or large cookie sheet. Cake not done in middle. Temperature set too high.
Pan too small.
Bakingtime too short.
Cakes, cookies, biscuits too Oven not preheated.
brown on bottom. Panstouching each other or
oven walls. Pie crust edges toobrown. Temperature set too high.
Incorrect rack position. Pans touching each other or
Incorrect use of aluminumfoil. oven walls.
Placed2 cookie sheets on one Edgesof crust too thin.
rack.
Used glass,darkened, stained,
warped or dull finish metal Pies don't brown on bot- Used shiny metal pans.
pans. (Usea shiny cookie tom. Temperature set too low.
sheet.)
Pieshave soaked crust. Temperature too lowat startof
baking.
Fillingtoojuicy.
Used shiny metalpans.
-9-
Page 11

USING YOUR OVEN
HOW TO BROIL DO not use disposable broiler pans.
Broilingisamethodofcookingtender Theydon°tprovideaseparatetray" _ _
meats by direct heat under the element.
The cooking time is determined by the Preheat broil element 5 to 10 minutes if
distance between the meat and the ere- darker browning is desired.
ment, the desired degree of doneness
and the thickness of the meat. TO BROIL:
1. Prepare meat by removing excess fat THERMOSTAT SELECTOR
and slashing remaining fat, being
Broiling requires the use of the broiler
careful not to cut into meat. This will 4. Broiling should be done with oven
pan and insert. The correct position of help keep meat from curling, door opened tothe broil "STOP"posi-
the insert in the pan is very important. 2. Place broiler pan on the recom- tion (opened about 4 inches.).
The broiler insert should be placed in mended rack position. For brown ex- 5. Follow suggested times on broiling
the pan so grease will drain freely. Im- terior and rare interior, the meat chart. Meat should be turned once
proper use may cause grease fires, should be close to the element. Place about half way through cooking.
further down if you wish meat well 6. Check doneness by cutting a slit in
The broiler insert CANNOT be covered done. Excessive smoking may occur meat near center for desired color.
with aluminum foil as this prevents fat if meat is placed too close to the broil 7. Turn the selector knob to OFF after
from draining into pan below. However, element, cooking. Broil times may need to be
for easier cleaning, the broiler pan can 3. Tosetoven:Turnboththethermostat increased if range is installed on a
be tined with foil. and selector knobs to BROIL. 208-volt circuit.
BROILING CHART
BACON #2 Weir Done 6to 10 minutes
CHICKEN BROIL AT 450°F
Whole, split #3 Well Done 45to 60 minutes
Pieces #3 Well Done 30 to 45 minutes
GROUND BEEF PATTIES
3/4 to 1-inch thick #2 Rare 10 to 13 minutes
Medium 12 to 15 minutes
Well Done 15 to 18 minutes
LAMB CHOPS
1-inch thick #2 Medium 12 to 15 minutes
Well Done 16 to 20 minutes
1 1/2-inch thick #3 Medium 15 to 19 minutes
WeirDone 25 to 30 minutes
WIENERS, precooked
Hot dogs, smoked or Polishsausage, #2 8 to 12 minutes
Bratwurst,etc.
-10-
Page 12

MAINTENANCE
LIGHT REPLACEMENT OVEN DOOR LEVELING LEGS
Before replacing oven light bulb, DIS- Do not place excessive weight on an Some floors are not level. For proper
CONNECT POWER TO RANGE. Be open oven door or stand on an open baking,yourrange must belevel. Level-
surebulbis cool. Donottoucha hot bulb oven door as, in some cases, it could ing legs are located on each corner of
with a damp cloth as the bulb may causethe range totip over, breakageof the base of the range. Level by turning
break, the door or serious injury, the legs.
Very carefully remove bulb with a dry When opening oven door, allow steam
potholder to prevent possible harm to and hotair to escape before reachingin _
hands.Replacewith a40 wattappliance oven to check, add or remove food.
bulb.Reconnect powerto rangeand re-
setclock, ifequipped. To remove lift-off door: Opendoor to
the "stop" position (opened about 4
STORAGE DRAWER inches) and grasp doorwith both hands
at eachside. Do not use door handle to
The storagedrawer atthe bottomof the lift door. Lift up evenly until door clears
range is safe and convenient for storing the hinge arms. To prevent range from accidently tip-
metal and glass cookware. DO NOT ping, range should be secured to the
store plastic, paperware, food or flam- floor by sliding rear leveling leg intothe
drawermablematerialtocleaninunderthisdrawer.range.Remove I__ anti-tip bracketsuppliedwiththerange.
To remove: Empty drawer then pull _ FUSES
drawer outto the first stop position. Lift (CANADIAN RANGES ONLY)
upfrontofdrawerandpulltothesecond Your rangeis equippedwith seven (7)
stop position. Grasp sides and lift up type"P"fuses. Thefusesare locatedon
and out to remove drawer, the back wattof the range. Removethe
storage drawer for accessto the fuses.
To replace: Fit ends of drawer glides
onto rails. Liftup drawerfrontand gently
push in to first stop position. Lift up I II I
drawer again and continue to slide
drawer to theclosed position.
_ _ Toreplacedoor:Graspdoorateach
__ side, align slots in the door with the
hinge arms and slide door down onto
the hinge arms until completely seated If part of your range does not operate,
on hinges, check to see if a fusehas blown. A gap
in the fuse strip or a darkened window
indicatesa blownfuse. Replacewith the
sametype and amperage type "P"fuse.
-11-
Page 13

CARE AND CLEANING
Broiler pan & in- Soap &water. Plastic Remove from oven after use. Cool then pour off grease. Place soapy
sert scouring pad. Soap cloth over insert and pan; let soak to loosen soil. Wash in warm soapy
filled scouring pad. water. Usesoap filled scouring pad to remove stubborn soil. Clean in
dishwasher if desired.
Control knobs Mild detergent &water. To removeknobs,gently pullforward. Wash inmild detergent andwater.
Donotuseabrasivecleaning agents.They willscratchfinishand remove
markings. Rinse,dry and replace.Turneach element ONto see ifknobs
have been replaced correctly.
Metal finishes: Soap & water. Paste of Wash with soap and water. Remove stubborn soil with paste of baking
Aluminum - back- bakingsoda & water, soda and water. Do not use oven cleaners, abrasive or caustic agents.
guard base. They willdamage the finish.
Chrome & stainless
steel - trim parts
Plastic finishes: Soap & water. Paste Do not useoven cleaner, powderor liquidcleansers, abrasive orcaustic
Door handle, Trim, of baking soda and cleaning agents on plasticfinishes.These cleaningagentswill scratchor
Backguard trim, water. Non-abrasive marrfinish. To prevent staining or discoloration, wipe upfat, grease or
Overlay, Knobs, or plastic pad or sponge, acid (tomato, lemon, vinegar, milk, fruit juice, marinade) immediately
End caps witha drypapertowel orcloth.When surface is cool, clean withsoap and
water; rinse, and dry.
Silicone rubber Soap &water. Door gasket is located on the door plug. DO NOT REMOVEGASKET.
door gasket Wash with soap. Rinse thoroughly.
-12-
Page 14

SERVIC
PART OR ALL OF YOUR Istherange plugdisconnected fromtheelectrical outlet? •Are house fuses blown
RANGE DOES NOT OPERATE or circuit breakers tripped? • Is the range plug loose or improperly pluggedin?
Has power supplyto your home been interrupted? • Was oven properly set?
SURFACE ELEMENTS FAIL Is rangeplug disconnectedfrom theelectricaloutlet?Check circuitbreakerorfuse
TO TURN ON OR HEAT FOOD boxfortrippedcircuitbreakersorblownfuses. • iselementproperlypluggedinto
PROPERLY receptacle? * Was incorrectpanused?Foroptimumresults,panSHOULDHAVE
A FLATbottom.See pages6 and7foradditionalinformation.(NOTE:Expectcook-
ingtimesto increaseifrangeisconnectedto 208 volts).,,Haveservicemancheck
element.
FOOD NOT BAKING SATIS- Are racksproperlyin placeand incorrectpositionfor whatyou are baking? • Is
FACTORILY rangelevel? • Areyou usingtheproperpan?Isitbright,notsoiledordarkcolored?
• Have youusedfoilincorrectly? * Areyouusing standardmeasuringutensils? =
Didyoupreheat ifrecommended? *Oventemperatureisincorrectlyset-toolow
or toohigh.See CommonBakingProblemcharton page9.
OVEN DOES NOT OPERATE Is the rangedisconnectedfromthe electrical power? • Was the Selectorknob
turnedto bake or broil? • Was ovenproperlyset?
OVEN LIGHT DOES NOT Is bulblooseor burnedout?
WORK
SERVICE cover for locationof your modeland se- Ifyou did not receive satisfactory serv-
Do not attempt to service the appli- rial numbers.) ice through your servicer or Maycoryou
ance yourself unless directed to do may contact the Major Appliance Con-
so in this book. Contact the dealer sumerAction Panel by letter including
Ifyouare unabletoobtainservice,write your name, address, and telephone
who sold you the appliance for serv- to us.Ouraddressisfoundontherating number,aswellas the modelandserial
ice.
plate.See frontcoverforlocationofrat- numbersofthe appliance.
ingplate.
HOW TO OBTAIN
SERVICE If you are not satisfiedwiththe local re- MajorApplianceConsumerActionPanel
20NorthWackerDrive
When your appliance requires service sponse to your service requirements, Chicago,IL 60606
or replacement parts, contact your call or write MAYCORAppliance Parts
Dealeror AuthorizedServicer. Useonly and Service Company, 240 Edwards
genuine factory or Maycor parts if re- Street, S.E., Cleveland, TN 37311,
placementpartsarenecessary. Consult (615) 472-3500. Include or have avail- MACAP (Major Appliance Consumer
the Yellow Pages in your telephone di- able the complete model and serial Action Panel) is an independent agency
rectory under appliance for the service numbersoftheappliance, thenameand sponsored by three trade associations
center nearest you. Be sure to include address of the dealer from whom you as acourt of appeals onconsumer com-
your name, address, and phone num- purchased the appliance, the date of plaints which have not been resolved
ber, along with the model and serial purchase and details concerning your satisfactorilywithinareasonableperiod
numbers of the appliance. (See front problem, of time.
-13-
Page 15

FULL ONE-YEAR WARRANTY
&ServiceCompanywillrepairorreplace,withoutchar
defectinmaterialorworkmanshipduringthefirstyearafterthe dateoftheoriginalinstallation.Thiswarrantyextends
to any owner duringthe one-year warrantyperiod.
LIMITED 5 YEAR WARRANTY
Onelectricrangesequippedwithsoliddiscorsmoothtopheatingelements, andongasrangeswith sealedburners,for
anadditional4 yearperiodbeyondthe firstyear ofthegeneralcoverage ofthiswarranty, Maycorwillreplaceanyof the :
soliddisc orsmoothtop heating elements, orsealed burners whichfail toheat asa resultof defectiveworkmanship or
material. Additionally, Maycor will replace any smoothtop cooking surface which cracks or breaks during normal
householdcooking. These parts mustbe installedby aqualified person.Any laborcharge requiredfor replacementis
not covered by this warranty. I
HOW TO OBTAIN SERVICE
To obtainthe repair or replacement of adefective part under these warranties,you should contact the dealer from ;
whom you purchased the appliance or a servicer hedesignates.
WHAT IS NOT COVERED BY THESE WARRANTIES
1.Conditionsand damageresultingfrom improperin- 5. Any productusedforotherthan normalhousehold
stallation,delivery, unauthorizedrepair, modifica- use. It doesnot extendto productspurchasedfor
tion,or damage notattributable to a defect in mate- commercial or industrial use. ;
rial or workmanship.
6. Any expense incurred for service callsto correct in-
2. Conditions resulting from damage, such as: (1) im- stallation errors or to instruct youon howto usethe
proper maintenance, (b) misuse, abuse, accident, products.
or (c) incorrectelectrical current orvoltage.
7. CONSEQUENTIAL OR INCIDENTAL DAMAGES
3. Warrantiesare void if the original serialnumber has SUSTAINED BYANY PERSON ASA RESULT OF
been removed,altered, or cannot be readily deter- ANY BREACHOF THESEWARRANTIES ORANY
mined. IMPLIED WARRANTY. Some states do not allow
the exclusion or limitation of consequential or inci- :
dental damages, so the above exclusion may not
4. Light bulbs, apply to you.
ADDITIONAL HELP
Ifyou are not satisfied withthe local responseto your servicerequirements andwish to contact Maycor, please ad-
dressyour lettertothe CustomerRelationsDepartment, Maycor Parts& Service Company,240 EdwardsStreet,S.E.,
Cleveland, TN37311 or call (615)472-3500. Tosave time, your lettershould include thecomplete modeland serial
numbersofthe warrantedappliance,the name andaddressofthe dealerfromwhomyoupurchasedtheappliance,the
date of purchase and details concerning your problem.
These warranties are the only written or expressed warranties given by Maycor. No one is authorized to increase,
alter, or enlarge Maycor's responsibilitiesor obligations underthese warranties. These warrantiesgive you specific
legal rights, and you may also have other rights which vary from state to state.
8109P059-60
(6/91)
-14-
 Loading...