

Page 1
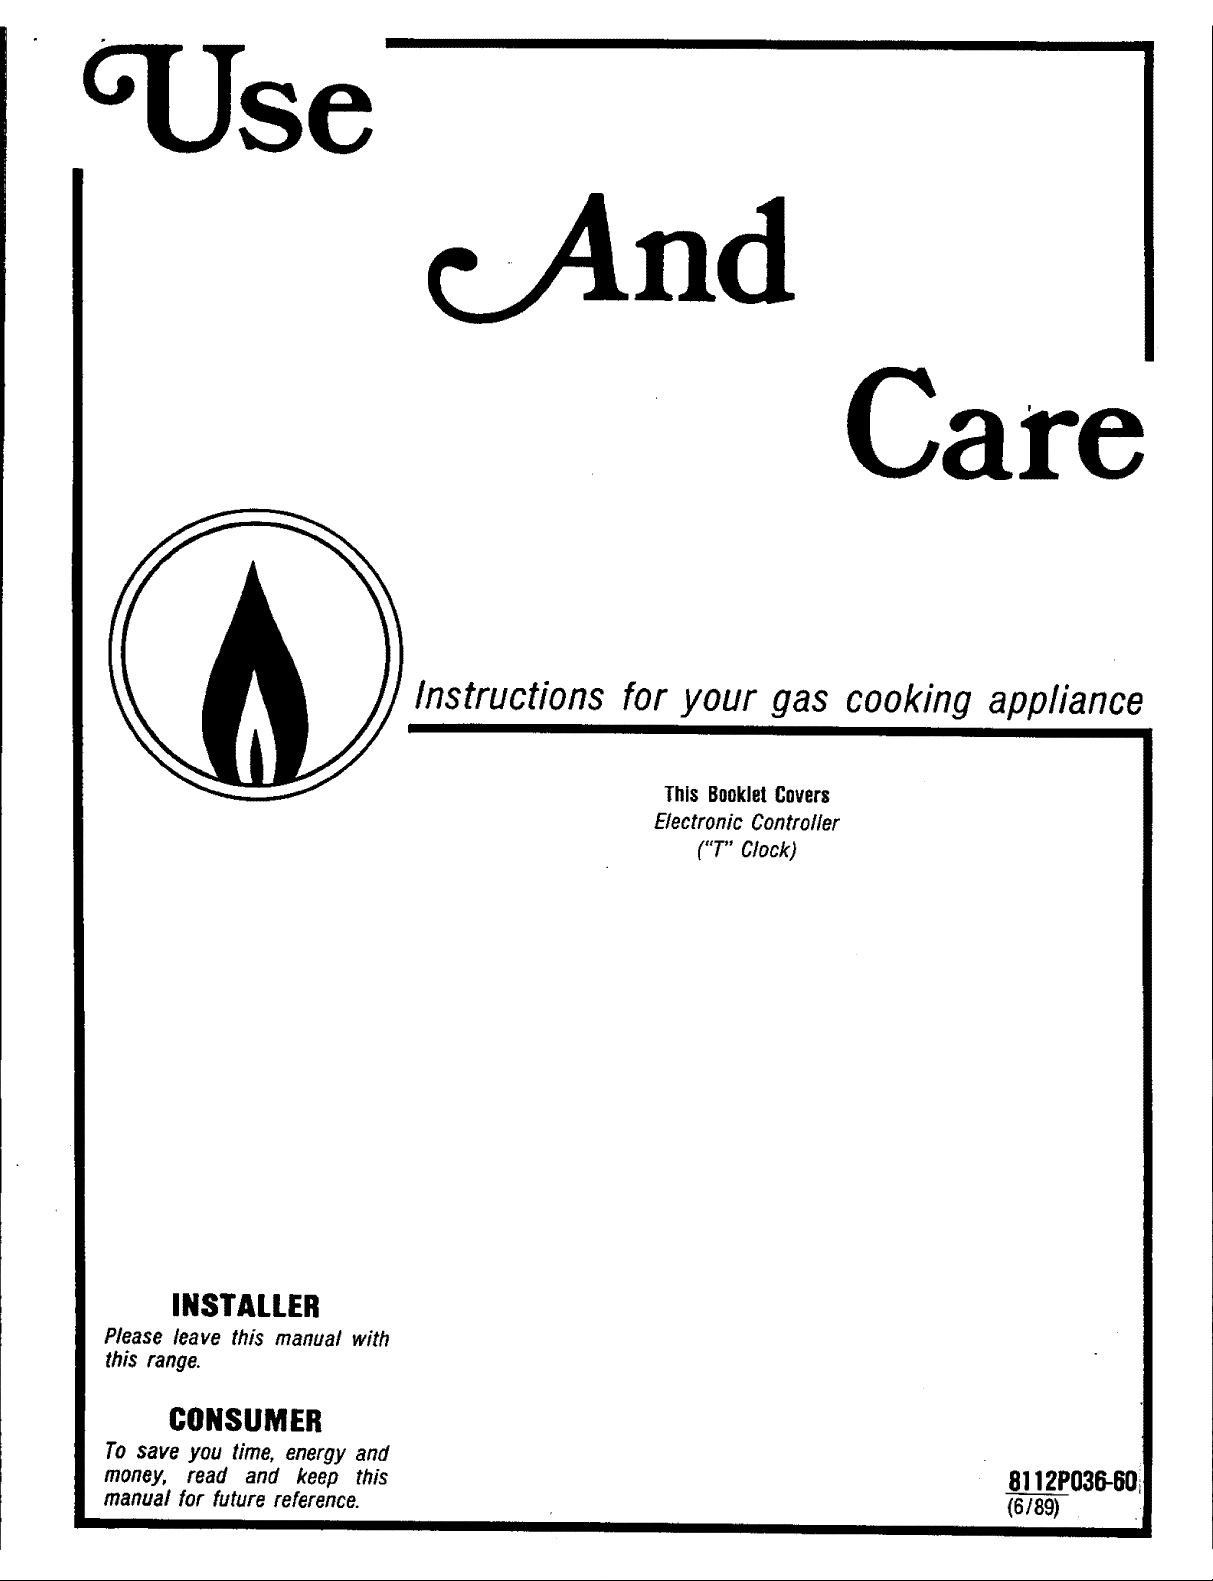
nd
I I IIIIIIIIIIIIIIIIIIIIIIIIIIII I III
Care
Instructions for your gas cooking appliance
I I I IIIIII III I I II I I
This BookletCovers
Electronic Controller
("T" Clock)
INSTALLER
Please leave this manual with
this range.
CONSUMER
To save you time, energy and
money, read and keep this 8112P036-60
manual for future reference. (6/89)
Page 2
ABOUTYOURNEW
COOKINGAPPLIANCE
Congratulationson your choice of
this cooking appliance!As you use
yournewapplianceweknowthat you
will appreciatethe manyfeatures that
provide excellentperformance, ease
of cleaning, convenience and de-
pendability.
New features have dramatically
changedtoday's cookingappliances
and the way we cook. It is therefore
very important to understand how
your new appliance operates before
you use it. On the following pages,
you will find a wealth of information
regarding all aspects of your
appliance. By following the instruc-
tions carefully, you will be able to
fully enjoy and properly maintain
your new appliance.
CONTENTS
_S BOOKLET: _
iiii i i iiiiiiiiii iii iiiiiiiiii
The features covered in this.
booklet are for several modeli
ranges. You may find informa-!
tion pertaining to features that_
are not on your particular range. !
I
In our continuing effort to I
improve the quality of our:
products, it may be necessary to_
make changes to the products
without revising this booklet.
For example, the knob on your
range may not look like the
illustration in this book.
iiiiiiiiiiiiiiiiiiiiiiiii I
SAFETYINSTRUCTIONS.......... 1-4
LEVELINGLEGS .................. 4
STORAGEORAWER................ 4
ELECTRONICCONTROLLER......... 5
SURFACECOOKING............. 6-7
Cooktop ...................... 6
Burner Grates ................ 6
Surface Burners .............. 6
Selecting Flame Size .......... 7
USINGYOUROVEN ............ 8-11
Oven Characteristics .......... 8
Oven Vent .................... 8
MODELIDENTIFICATION
Oven Racks .................. 8
Preheating .................... 8
How to Bake ................. 9
How to Roast ............... 10
How to Broil ................ 11
AUTOMATICOVENCOOKING....... 12
SELF CLEANOVEN............... 13
MAINTENANCE.................. 14
Oven Bottom
Oven Boor
Light Replacement
CLEANINGCHART................ 16
SERVICE....................... 17
iiiiiiii
If you have a question, or need
service, have this information ready:
1. Complete model and serial num-
bers from the rating plate which is
located under the lift-up cooktop
on the right side.
2. Purchase or installation date from
__your sales slip.
Copy this information in these
spaces. Keep this book, your
warranty, and the sales slip together
in a handy place.
,,,,,,,,,,,,,,,,,,,,,,,,,,,i
MODELNUMBER
SERIALNUMBER
PURCHASE/INSTALLATIONOATE
SERVICECOMPANY& PHONENUMBER
,,,mll
Page 3
SAFETYINSTRUCLIONS
IMPORTANT
INSTRUCTIONS
The following instructionsare based
onsafety considerationsand mustbe
strictly followed to eliminate the
potential risks of fire, electricshock
or personal injury.
IIIIIII
FORYOURSAFETY--
DO NOTSTOREOR USE
GASOLINE OR OTHER
FLAMMABLEVAPORSAND
LIQUIDSIN THEVICINITY
OFTHIS ORANYOTHER
APPLIANCE.
INSTALLATION
Installation of the appliance must
conform with local codes or, if no
codesexist,with thecurrentNational
Fuel Gas Code. Installation and
adjustmentof the appliancemust be
performed ONLY by a qualified
installerorserviceman inaccordance
with theInstallation Instructions, See
accompanying Installation Instruc-
tions.
Be sure floor covering under your
rangecan withstandprolongedheat.
This is a heavy appliance and can
settle into soft floor coverings,such
as cushioned-vinyl.Whenmovingon
this type of floor, use care.
A range should NOT be installed
directlyover kitchencarpetingunless
an insulating pad or 1/4-inch thick
piece of plywood is placed between
the rangeand carpet.
If range is installednear a window,
properprecautionsshouldbetakento
prevent curtains from blowing over
burnerscreatinga FIRE HAZARD.
FORYOURSAFETY
IF YOUSMELLGAS:
I.TURN ALLRANGECON-
TROLSOFF.
2.EXTINGUISHANY OPEN
FLAMEORCIGARETTE.
3.OPENWINDOWS.
4.DO NOTTOUCHELEC-
TRICALSWITCHES.(DO
NOTTURNANY ELEC-
TRICALSWITCHESON
OR OFF.SPARKSMAY
IGNITETHEGAS).
5.IMMEDIATELY CALL
YOURGASSUPPLIER.
IIIIIII IIIIIIIIIIH
Have the installer show you the
locationof the gas shutoff valve and
how to shut it off in an emergency.
Be certain all packing materials are
removed from the range before
operating,to prevent fire or smoke
damage shouldthe packingmaterial
ignite.
Observe all instructionsfor minimum
clearances to any combustible
surfaces. These should be in
accordancewith informationon the
rating plate and with national fire
laws.
iiiii iiiii iii i= i I
-iN CASEOFFIRE:
1. Turn rangecontrolsand venti-
lating hood, if equipped,off
immediately.
2. Smother fire orflame, usedry
chemical,orafoam-type extin-
guisher.
= If the fire is in the oven,
smotherit byclosingthe oven
door.
. If the fire is in a pan on a
surfaceburner,cover the pan.!
* Bakingsodais alsoeffective,iF,
available.
* Do not use water on greasei
fires.
GASTYPE
All modelsareadjustablefor usewith
NATURAL or LP (bottled) gas. An
appliance adjustedfor one type of
gas CANNOTbe usedwith the other
type until adjustmentsaremadeby a
qualified serviceman.
GASODOR
If gas odor is detected, cut offthegas
supply to the appliance. Then, call
your installerorlocalgascompanyto
have the leak checked.NEVERUSEA
MATCHOROTHERFLAMETOLOCATE
A GASLEAK.
SERVICING
Electrical supply must be dis-
connectedbeforeservicingappliance.
Do not repair or replaceany part of
your rangeunless specifically re-
commendedin this manual.All other
servicing should be referred to a
qualified technician.
1
Page 4
SAETYINSTRUCTIONS
I IIIIIIIIIIIIIII IIIIIIIIIIIIIII IIIIIIIIIIIIIIII I IIIIII IIIIIIIIIIIIIII III II IIIIIIIIIIIIIII Illlll 111111111111 IIIIIIIIIIII IIIIIIIIIIIIII I IIIIIIIIIII
GENERAL ............
Neveruse yourrangetowarm orheat
the room.
Nocookingapplianceshouldever be
usedas a spaceheater. Thisinstruc-
tion is based on safety considera-
tions to prevent potentialhazard to
the consumeras well as damageto
the appliance.
Keepareaaroundapplianceclearand
free from combustible materials,
gasoline,andotherflammablevapors
and materials.
In the event of a prolongedpower
failure, the surface burner can be
manually lighted with a match.The
oven cannot be operated during a
power failure.
-- CHILDSAFETY
1. Donot leave childrenaloneor
unsupervisednear the appli-
ancewhenit is in use or isstill
hot.
2. Children should never be
allowed to sit or standon any
part of the appliance.
3.Children MUST be taughtthat
theapplianceandutensilsin or
on it can be hot.
4. Childrenshouldbetaught that
an applianceisnot a toy.They
shouldnot be allowedto play
with controlsor otherpartsof
the unit.
5. Let hot utensilscool in a safe
place, out of reach of small
children.
. CAUTION:Donotstoreitemsof
interestto childrenin cabinets
above an appliance.Children
climbing on the appliance to
reachitems couldbeseriously
injured. An appliance should
not be usedas a stepstoolto
cabinetsabove.
mmmmlluiiii IIIII I
COOKING 'AF-ETY
ifflame shouldgo outduring cooking,
turn burner off. IF GAS HAS
COLLECTEDAND A STRONGGAS
ODORIS DETECTED,WAfT5 MINUTES
FOR GAS ODOR TO DISAPPEAR
BEFOREREUGHTINGBURNER.
Never leave a surface cooking
operation unattended especially
whenusinga high heatsetting. Boil-
overs cause smoking and greasy
spilloversmay ignite.
Be sure you know which knob
controls which surface burner.
Always make sure the correct burner
is turned on and that the burner has
ignited. When cooking is completed
turn burner off,
Do not usecooktop or oven as a
storage area for food or cooking
utensils.This instructionis basedon
safety considerations to prevent
potential hazard to user and to the
appliance.
Usecautionwhen wearing garments
madeof flammable materialto avoid
clothingfires. Loose fitting or long-
hanging-sleeved apparel should not
beworn while cooking.Clothing may
ignite or catchutensil handles.
Usedry, sturdy potholders.Damppot
holdersmaycauseburnsfrom steam.
Dish towels or other substitutes
shouldnever be usedas pot holders
becausethey can trail across hot
surface burners and ignite or get
caughton rangeparts.
Never heatan unopenedcontaineron
the surface burner or in the oven.
Pressure build-up may cause
containerto burstresultingin serious
personal injury or damage to the
range.
Usecare whenopeningovendoor.Let_
hot air or steam escape before
removing or replacingfood. Always
place oven racks in the desired
positions while oveniscool.If a rack
must be movedwhile hot, becareful
to avoid contactof potholderswith
oven burner flame.
Slide oven rack out to addor remove
food, using dry, sturdy pot holders.
Always avoid reachinginto oven to
place or removefood.
Use aluminum foil ONLY as:
instructed.Improperuseofaluminum'
foil may causedamageto the range,!
affect cookingresultsadversely and
can also result in shockand/or FIRE_
HAZARDS.
Do not cover broiler insert with foil.
To minimize chance of grease fires,
use a broiler pan that allows grease
to drip belowthe insert, away from
the broilerflame.
GREASE
Use extreme caution when moving
the greasekettleor disposingof hot
grease.
Hot grease is flammable. Avoid
letting greasedepositscollectaround
appliance,rangehood,orventfan. Do
not leave containerof greasearound
a cooking appliance. Always let
quantities of hot fat usedfor deepfat
fryingcoolbeforeattemptingto move
or handle, in the event of a grease
fire, DO NOTattempt to move pan.
Cover pan with a lid to extinguish
flame and turnsurfaceburneroff.Do
notdouseflame withwater.Usea dry
chemical or foam-type fire
extinguisher,if available, or sprinkle
heavily with bakingsoda.
Spills or boilovers which contain
grease should be cleaned up as soon
as possible. If they are allowed to
accumulate, they could create a FIRE
HAZARD.
Page 5
SAFETYINSTRUCTIONS
I IIII1_
VENTING
Never blockovenventor air intakes.
Do not obstructthe flow of combus-
tion andventilationair. Restrictionof
air flow to the burnerpreventsproper
performance.
Avoid touchingoven vent area while
oven is on and for several minutes
after ovenisturnedoff.Somepartsof
the vent and surrounding area
becomehot enoughto causeburns.
CLEANING
Turn off all controls and wait for
rangepartsto coolbeforetouchingor
cleaning them. Do not touch the
burner grates or surroundingareas
until they have hadsufficienttime to
cool.
Touchinga hotovenlightbulbwith a
damp cloth could causethe bulbto
break. Should the bulb break, dis-
connect power to the range before
trying to remove the bulb to avoid
electricalshock.
Clean range with caution. If a wet
spongeor clothis usedto wipe spills
on a hot cooking area, be carefulto
avoid steam burns. Some cleaners
canproducenoxiousfumes if applied
to a hot surface.
SELFCLEANOVEN
(if equipped)
Do not clean door gasket.The door
gasket is essentialfor a goodseal.
Care _hould be taken not to rub,
damage,or movethe gasket. Donot
useoven cleanersof any kind in or
around any part of the self clean
oven.Clean only partslisted in this
booklet. Before self cleaning the
oven,removebroilerpan,ovenracks,
and other utensils, and wipe off
excessivespillovers.
PLASTICS
Many plastics are vulnerableto heat.
Keepplastics away from parts of the
appliancethat may becomewarmor
hot.
AEROSOLSPRAYS
Many aerosol-typespray cans are
EXPLOSIVEwhenexposedtoheatand
may behighlyflammable. Avoidtheir
useor storagenear a hot appliance.
COOKINGUTENSILS I
ALUMINUM- Conductsheat quicklyi
and evenly. The heavier the gauge.!•
(thickness) the more durable.
Aluminum may discolorfrom alkaline
foods and pit from acid foods.
COPPE8- Very good heat conductor,
but discolors easily. Used primarily
for bottom coatings and gourmet
cookware.
STAINLESSSTEEL.Alone it is a poor
conductor,develops hot spots and
produces uneven cooking results.
However,it is durable,easyto clean,
and somewhat stain resistant.Coat-
ing stainless steel with a copperor
aluminum bottomresultsin an easy-
to-clean,utensil,durable, even cooking
CASTIRON- Slow to conductheat, but
retains the heatwell. Heavytohandle
and mustbe kept well seasonedto
preventstickingand rusting.
GLASS/GLASS.CERAMIC Transfers
heat slowly and unevenly, but holds
heat well.
Only certain types of glass,_
glasslceramic, ceramic, earthen-
ware, or other glazed utensils are
suitable for rangetopservicewithout
breaking dueto thesuddenchangein
temperature. Check and follow
manufacturer'srecommendeduseor
limitationsfor such utensils.
iiiiiiiiiiiii±
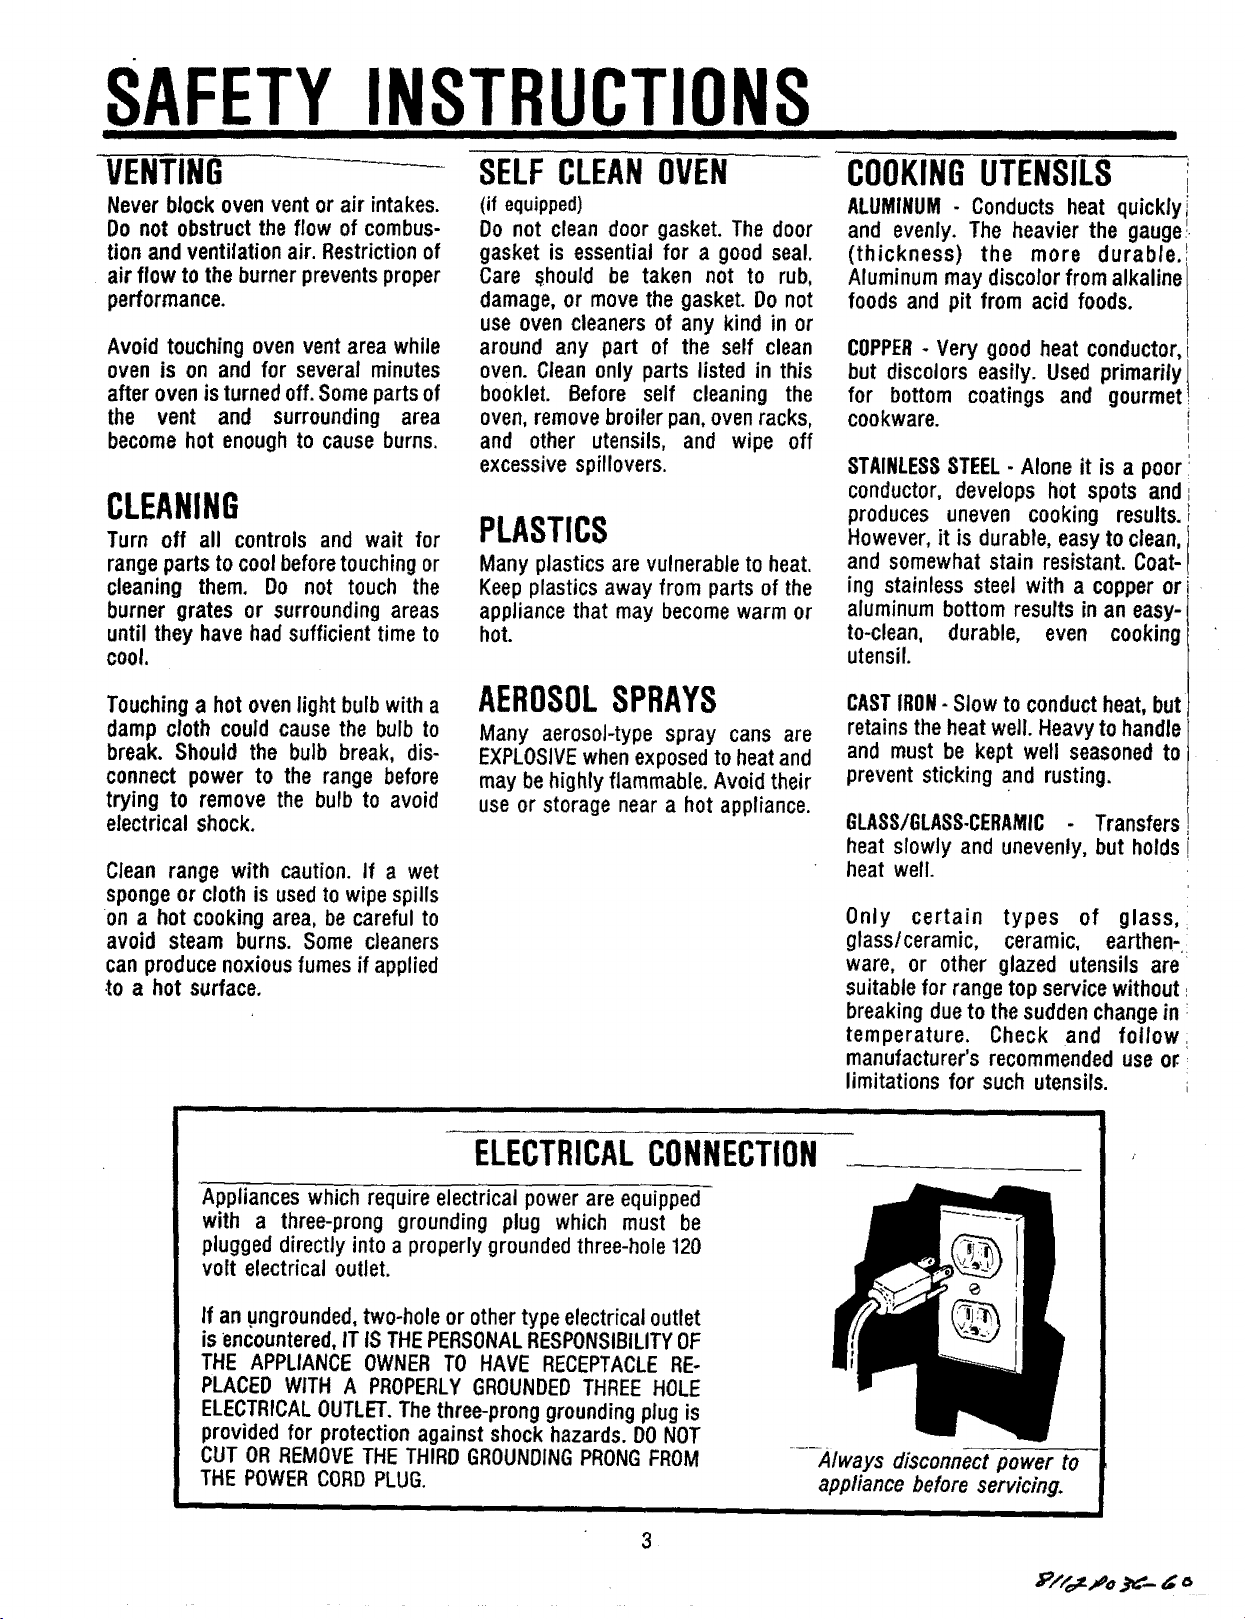
ELECTRICALCONNECTION
Applianceswhichrequire electricalpower are equipped
with a three-prong grounding plug which must be
pluggeddirectly into a properlygroundedthree-hole120
volt electricaloutlet.
If an ungrounded, two-hole or other type electrical outlet
is encountered, IT IS THE PERSONALRESPONSIBILITYOF
THE APPLIANCE OWNER TO HAVE RECEPTACLE RE-
PLACED WITH A PROPERLY GROUNDED THREE HOLE
ELECTRICAL OUTLET. The three-prong grounding plug is
provided for protection against shock hazards. DO NOT
CUT OR REMOVE THE THIRD GROUNDINGPRONGFROM
THE POWERCORD PLUG.
IIIIIIIII
3
....-Always disconnect power to
appliance beforeservicing.
............................... ,,,,,,,,,,,,,,,,,,,,,
Page 6
SAETYINS[RUCTIONS
I III I lllll!rlllI ]IIIII I IIIII I IIIIIII I I I I
UTENSILSAFETY
Useonly pansthat haveflat bottoms
and handlesthat are easily grasped
and stay cool. Avoid usingunstable,
warped, easily tipped or loose
handledpans. Donot usepansif their
handles twist and cannot be
tightened.Pans that are too heavy to
movewhenfilled with food may also
be hazardous.
If suchstorageis provided,it should
be limited to items which are used
infrequently and which are safely
stored in an area subjectedto heat
from an appliance.Temperaturesin
storageareas abovethe unit may be
unsafe for some items, such as
volatile liquids, cleaners or aerosol
sprays.
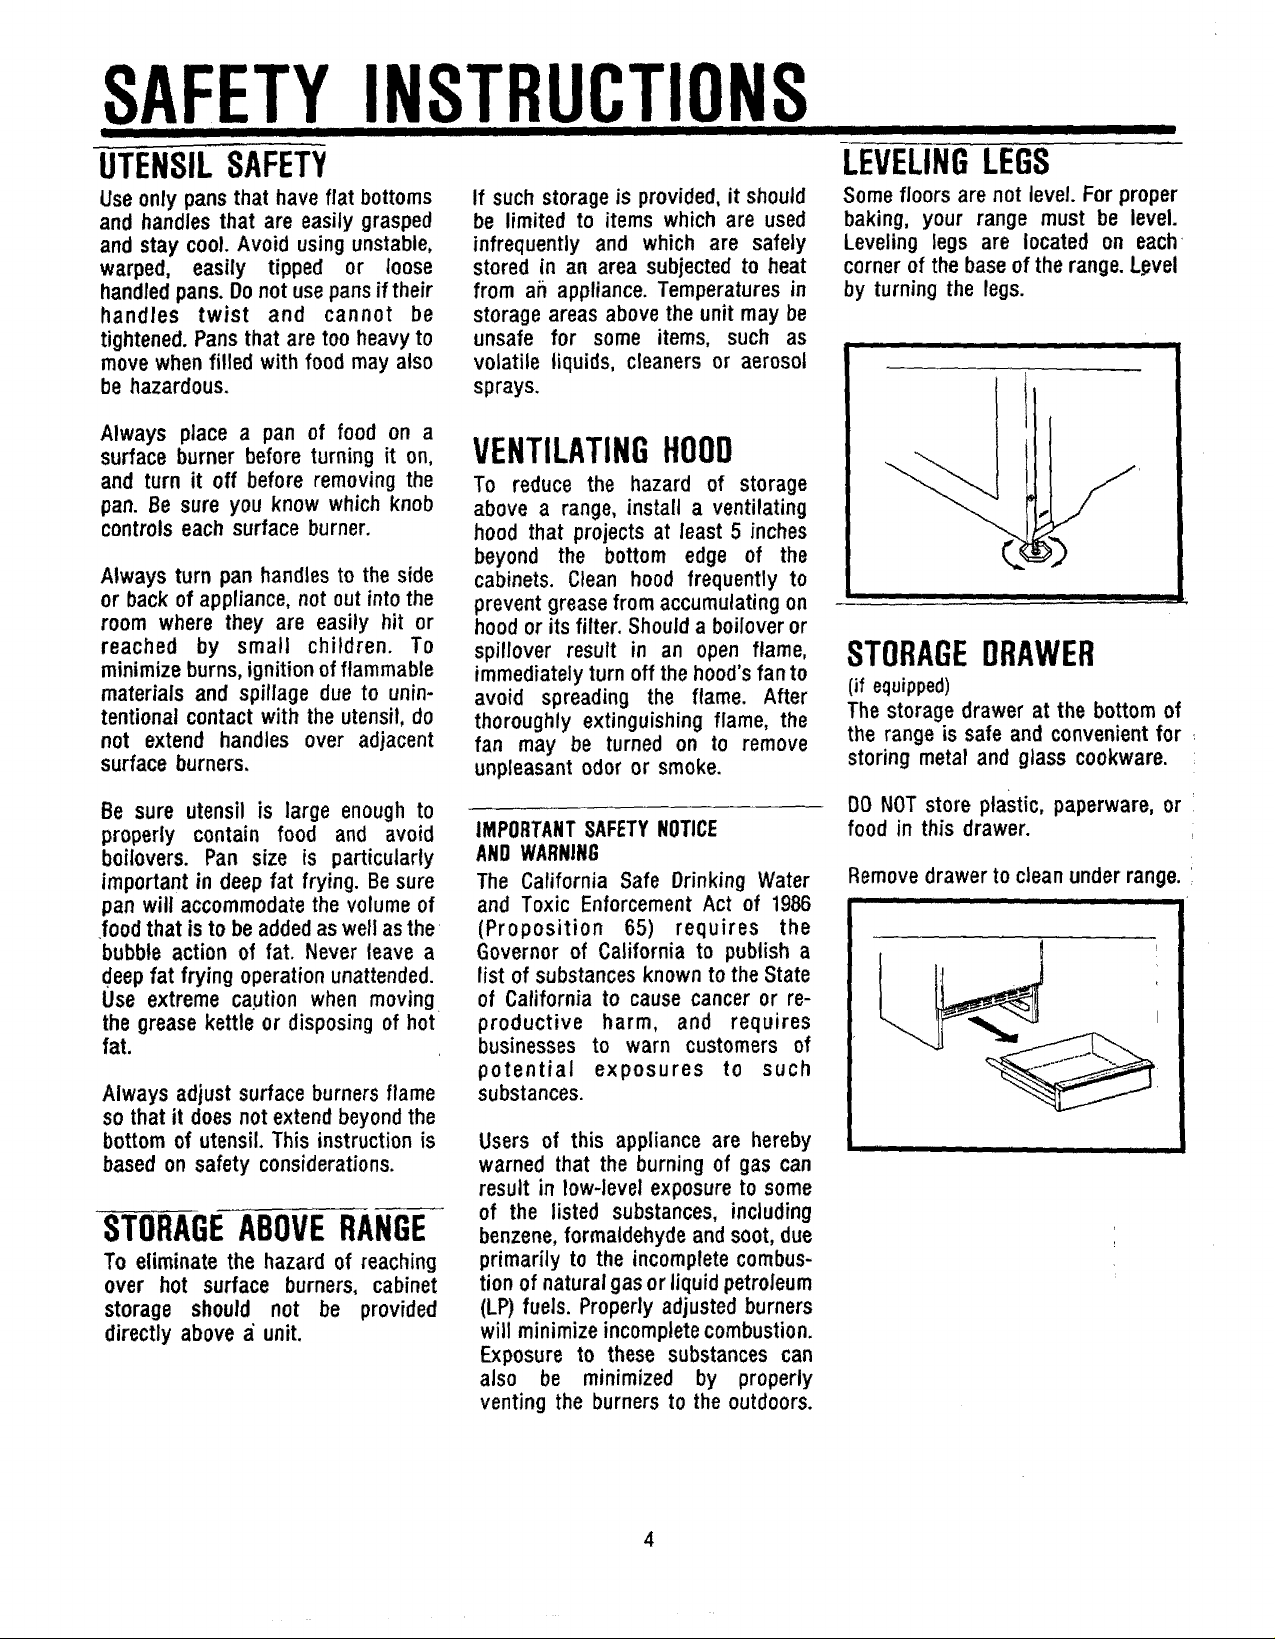
LEVELINGLEGS
Somefloors are not level. For proper
baking, your range must be level.
Leveling legs are located on each
cornerof the baseof the range.L_vel
by turningthe legs.
Always place a pan of food on a
surface burner before turning it on,
and turn it off before removing the
pan. Be sure you know which knob
controlseach surface burner.
Always turn pan handlesto the side
or back ofappliance,not outintothe
room where they are easily hit or
reached by small children. To
minimizeburns,ignitionofflammable
materials and spillage due to unin-
tentionalcontactwith the utensil,do
not extend handles over adjacent
surface burners.
Be sure utensil is large enoughto
properly contain food and avoid
boilovers. Pan size is particularly
importantin deepfat frying. Besure
pan will accommodatethe volumeof
food that isto be addedaswell asthe
bubble action of fat. Never leave a
deepfat frying operationunattended.
Use extreme caption when moving
the greasekettle or disposingof hot
fat.
Always adjust surfaceburnersflame
so that it doesnot extendbeyondthe
bottom of utensil.This instructionis
based on safety considerations.
STORAGEABOVERANGE
To eliminatethe hazard of reaching
over hot surface burners, cabinet
storage should not be provided
directly above ,_unit.
VENTILATINGHOOD
To reduce the hazard of storage
above a range, install a ventilating
hood that projectsat least 5 inches
beyond the bottom edge of the
cabinets. Clean hood frequently to
preventgrease from accumulating on
hood or itsfilter. Should a boiloveror
spillover result in an open flame,
immediatelyturnoff thehood's fan to
avoid spreading the flame. After
thoroughlyextinguishing flame, the
fan may be turned on to remove
unpleasantodor or smoke.
IMPORTANTSAFETYNOTICE
AND WARNING
The California Safe Drinking Water
and Toxic Enforcement Act of 1986
(Proposition 65) requires the
Governor of California to publish a
list of substances known to the State
of California to cause cancer or re-
productive harm, and requires
businesses to warn customers of
potential exposures to such
substances.
Users of this appliance are hereby
warned that the burning of gas can
result in low-level exposure to some
of the listed substances, including
benzene, formaldehyde and soot, due
primarily to the incomplete combus-
tion of natural gas or liquid petroleum
(LP) fuels. Properly adjusted burners
will minimize incomplete combustion.
Exposure to these substances can
also be minimized by properly
venting the burners to the outdoors.
STORAGEDRAWER
(if equipped)
The storage drawer at the bottom of
the range is safe and convenient for
storing metal and glass cookware.
DO NOTstore plastic, paperware, or
food in this drawer.
Removedrawertocleanunderrange.
4
Page 7

ELECTRONICCONTROLLER
[ I II I I[I I II II I
The following is a quick reference for operating the electronic controller. A beep sounds each time a
FUNCTION pad is pressed. At the end of an operation, three consecutive beeps will sound.
When in doubt, press the STOP/CLEAR button and start over. The STOP/CLEAR button clears
everything except the time-of-day c.fock and the TIMER.
The electronic controller is equipped with a self-diagnostic feature for service use ONLY. if a fault
code (F plus a number - F1) appears in the display along with a continuous beeping sound, press the
STOPtCLEAR button. See page 16 if the fault code reappears in the display.
II I I i i UUlliiii _-- " IIIIIIIIII II I iiiiiiiiiu ' Ii.... -'_ ........................
szoP ov . IT/ / "
CLEAR SI"OP"'""!'--It---I.I--'II'--I"AK "RO'L I "r
I IIIIIIIIIIIII C IIIII IIIIIIIIIII • IIIIIIIIII II...... IIIIIIIIIIIIIIL __1 IIIIIIIIIIIIIL I ...g _._ = r _ .....
....NOTE:The fun tion pads on some models are round rather than rectangular-shaped. Although they
do not look like this illustration, they function as described in this booklet.
STOP/CLEARBUTTON SET KNOB
Press to cancel a]t operations except Turn in either direction to enter time
the time-of-day clock and timer, or temperature. Knob is also used to
TIMER .... CLEAN LOCK I/,i {
CLO¢ K C LEAN eROIL
TIMER COOK TIME STOP TIME BAK
select HI or LO broil.
EXPLANATIONOFTHEFUNCTIONPADS
TIMER IMinute Timer]
• Press TIMER pad. "Timer" lights in
the display,
• Turn SET knob to the desired time.
• Timer starts automatically.
• To cancel, turn SET knob to 00:00, or
press and hold the TIMER pad.
CLOCKITime-el-Day)
-_-Press CLOCKpad. "Time" lights in
the display.
• Turn SET knob to the correct time-
of-day.
• To lock in time-of-day, press
STOP/CLEAR button until "Timer"
-light disappears in the display.
When power is first supplied to the
range, or if there is a power failure,
the display wilt blink. Follow above
instructions to set clock.
COOKTIME
Usedto automaticallyturn the oven
off atthe end ofcooking.Seepage12
for instructions.
STOPTIME
Used to delay the start of a cookor
clean operation. See page 12 for
instructions.
CLEAN
Usedto setthe ovenfor acleancycle.
See page 13 for instructions.
"door" will flash in the display if the
door latch is NOT in the lock position.
5
BROIL
Usedto set the ovenfor a LO or Hi
broil operation.See page 11.
BAKETEMP OR BAKE
Used to set the oven for a baking or
roasting operation. See pages 8 to 10.
TO CANCELBAKETEMP OR BROIL
Press STOP/CLEAR button. Time-of-
day reappears in the display.
Page 8

SURFACECOOKING
COOKTOP
To remove cooktop:When cool, first
remove grates and drip bowls, if
equipped. Grasp two front burner
wells and lift up.
The top can be completely removed
of, if equipped with a metal support
rod, can rest on the rod. Support rod
is located across the front of the
burner box.
I IIIIII
t
., ! iiiiiii1[[[
BURNERGRATES
Your range will be equipped with
either round or square grates.
CAUTION:Burner grates must be
properly positionedbefore cooking.
When reinstalling round grates, place
)ins in slots so grates stay in place.
When reinstalling square grates,
place indented sides together so
straight sides are at front and rear.
IIIIIIIIII III IIIIIII IIII
SURFACEBURNERS
All surface burners are secured in
place during transportation with
either a shipping screw or a spring
clip. Once the range is installed, these
must be removed to allow quick and
easy removal of the burner.
To removethe one piece uniburner:
Allow burner to cool. Lift cooktop. To
remove uniburner, lift up slightly and
pull out. Under no circumstances are
burners to be taken apart for
cleaning.
To removestandardsingle burner:
...... IIIIli
Remove or support cooktop. Grasp
burner head and tilt to release tab
from slot near igniter. Lift up and
toward back of cooktop until air
shutter end of burner releases from
valve.
LIGHTINGSURFACE
BURNERS
Your range is equipped with pilotless
ignition which eliminates the con-
stant standing pilot.
To light burneri
1. Place utensil on burner grate.
2. Push in and turn knob to the LITE
position. A clicking sound will be
heard and the burner will light.
After the burner lights, turn knob to
the desired flame size.
IIIIIIIIIIIIIIIII IIIIII
I i
If flame should go out during a_
cooking operation, turn the burner
off. IF GAS HAS ACCUMULATED AND
A STRONG GAS ODOR IS DETECTED,
WAIT 5 MINUTES FOR THE GAS ODOR
TO DISAPPEAR BEFORE RELIGHTING
BURNER.
OPERATINGRANGEDURING A POWER
FAILURE
-T-Hold a lighted match to the desired
surface burner head.
2. Turn knob to LfTE. The burner will
then light.
3. Adjust the flame to the desired
level.
CAUTION: When lighting surface
burners, besure all controlsare inthe
OFFposition. STRIKEMATCH FIRST
and hold in position before turning
knob on.
iiiiiiiiiiiiiii
Page 9

SURFACECOOKING
......................................__ IIII IIIIIIIIIIIIII IIIIIIIIIIIII
SELECTINGFLAMESIZE
If a knob is turned very quickly from
HIGH to WARM setting, the flame may
go out, particularly if burner is cold. If
this occurs, turn the knob to the OFF
position. Wait several seconds, then
light again,
IIIII i iii iiiiiiiii ii
Flame should be adjusted so it does
not extend beyond the edge of
cooking utensil. This is for personal
safety and to prevent damage to
cabinets above cooktop.
Use HIGHto quickly bring foods to a
boil or to begin a cooking operation.
Reduce.to a Powersetting a continue
cooking. Never leave food unattended
when using a HIGH flame setting.
Use SIMMER (medium) to continue a
cooking operation. Food will not cook
any faster when a higher flame
setting is used than needed to
maintain a gentle boil.
IIIIIIIIIIIIII I IIIIIIIII
I1[ IIIIII IIIIIII II IIIIII •
Use WARM (low) to simmer or keep
foods at serving temperatures. Some
cooking may take place if the utensil
is covered.
i iiiiiiiii IILI iiiiiiiiiiiiiii ,,,,ll
To obtain a lower flame size, turn
knob back toward the OFFposition
until the desired flame size is
reached.The lowestflame setting is
located adjacent to theOFFposition.
This is not a preset position.
7
Page 10

USINGYOUROVEN
................. IIIIIIIIII IIIIIIIIIIIIIIIIII
OVENCHARACTERISTICS
Every oven has its own character-
istics.You may find that the cooking
times and temperatures you were
accustomedto with your previous
rangemay needto bealteredslightly
with your new range.Please expect
somedifferenceswiththisnewrange.
OVENCANNOTBE
USEDDURINGA
POWERFAILURE
OVENVENT
Your ovenis ventedthroughaductat
the base of the backguard. Do not
block this opening. It is important
that the flow of hotair from theoven
and fresh air to the oven burnerbe
unrestricted.Do not touch the vent
openings or nearby surfaces during
oven operationas theymay be hot.
OVENRACKS
Thetwo ovenracksaredesignedwith
a "lock-stop" positionto keep racks
from accidentallycomingcompletely
Outof the oven.
NEVERplace pans directly on the
ovenbottom.Donotcoverentirerack
with aluminum foil or place foil
directly under utensil. To catch
spillovers,cut a pieceof foil a little
largerthanthe panandplaceit onthe
rack below the rack containingthe
utensil.
To replace: Place rack on rack
supports, tilt up and push toward rear
of oven. Pull rack out to "lock-stop"
position to be sure rack is correctly
replaced.
Toremove:Be sure rack is cool. PuJI
rack out to the "lock-stop" position.
Tilt up andcontinuepulling untilrack
releases.
iiiiiiiiiiiiiii ! i i
_RACK I
nAcK 2
RACKPOSITIONS:
RACKI (top of oven) used for broiling
thin foods.
RACK2 usedfor one-rackbaking or
broilingthicker cuts of meat.
RACK3 usedfor mostone-rackbaking
and for roasting somemeats.
RACK4 used for roasting large meats,
cooking larger foods and for baking
angel food cake or pie shells.
HINTS:
If cooking on two racks, stagger pans
so one is not directly over the other.
Use rack positions 1and 3, 2 and 4, or
1 and 4, depending on baking results,
when cooking on two racks.
Placefood intheovenonthecenterof
the rack. Allow 1 or2 inchesbetween
edgeof utensiland the ovensidesor
adjacentutensils:
IMPORTANT
The electroniccontrol automatically
keeps the oven at the desired
temperature by cycling the over)
burner on and off. After the oven
temperaturehas beenset, there will
beabout a 45 seconddelaybeforethe
burnerignites.Thisisnormal,and no
gas escapesduringthis delay.
PREHEATING
Preheating is necessary only for
baking,tt is notnecessary to preheat
for broilingor roasting.Allowovento
heat for about 10 minutes before
placingfood in the oven.
Selectinga temperaturehigherthan
desiredwill NOTpreheattheoven any
faster. Preheating at a higher
temperature may have a negative
effect on baking results.
To preheat:Set oven for baking and
allow the oven to heat until display
shows the preset temperature (100
will appear in the display until the
oven reachesIO0°F. The displaywill
thenshowtheoventemperaturein 5°
incrementsuntilthe ovenreachesthe
preset temperature).
Once the preset temperature is
reached, and the oven temperature
has stabilized, a single beep will
sound.
if the oventemperature is changed
after preheating,a beep will signal
that the oven has reachedthe new
temperaturesetting.
Page 11

USINGYOUROVEN
HOWTO BAKE
1. When cool, position rack in oven
dependingon what you are baking.
2.!To set oven:Press BAKE TEMP pad.
ll= J_
Bake lights in the display.
TurnSETknobto thedesiredoven
temperature. "ON" lights in the
display. The oven immediately
turns on and beginsto heat. The
display will register the oven
temperaturestarting at 100°F.
3.Place food in center of oven, PressSTOP/CLEARbuttontocancela i
allowing a minimum of 2 inches bakingoperation.
between utensil and oven walls.
4.Check food for doneness at basic instructions and still experi-
minimum time in recipe. Cook encepoor results,these suggestions
longer if necessary.Removefood may be helpful:
from the oven.
If you have carefully f0JJowed"th_
COMMONBAKING
PROBLEM CAUSE
Cakes are uneven.
Cakehighin middle.
i
Cakesdon'tbrown evenly
on bottom.
, •, ,,, ,, ,,,,, , ,,,,,,, ,,,,,
Cakesdon't brownon top,
ii iiiiiiiiiii iii ii i
Cakes,cookies, bTscuits too
brownon bottom.
Panstouching each otheror
oven walls.
Batter uneven in pans.
Oventemperature too low or
baking time too short.
Rangenot level.
Undermixing.
Toomuchliquid.
Temperaturetoo high.
Baking timetoo long.
Overmixing.
Toomuch flour.
Panstouching each otheror
ovenwalls.
Toomuch shortening orsugar.
Toomuchor too little liquid.
Temperaturetoo low.
Old or too little baking powder.
Pantoo small.
Ovendoor opened frequently.
Ovennotpreheated.
Pansdarkened,dented or warped.
Oventemperaturetoo low.
Overmixing.
Toomuchliquid.
Incorrectpansize or too little
batter inpan.
Ovendooropenedtoo often.
IIIIIIIII |1 IIII ! II
Oven not preheated.
Pans touchingeach other or
oven walls.
Usingglass, darkened,warped
or dull finish metal pans.
incorrectrack position,
Incorrect use of aluminum foil.
Placed 2 cookiesheetson one
rack.
PROBLEMSANDWHYTHEYHAPPEN
............................... ",1
PROBLEM CAUSE
Excessive shrinkage.
Crumbly or dry texture.
Uneventexture.
Cakeshave tunnels.
Cakescrack ontop.
Cakenot done in middle.
Piecrust edges too brown.
Piesdon'tbrown onbottom.
Pieshave soakedcrust.
........... ,,,,,,,,i ,,,,,,,,, i iiiiiiii
Too little leavening.
0vermixing.
Pantoo large.
Oventemperaturetoo high.
Baking time too long.
Panstoo closeto each other
Improper measurement of sugar,
01dbakingpowder.
Oventemperaturetoohigh.
Baking time too long.
Toomuchliquid.
Undermixing.
Oventemperaturetoolow.
Bakingtimetoo short.
Not enoughshortening.
Toomuchbaking powder.
0vermixing.
Oventemperaturetoohigh.
Batterovermixed. ,,
Oventemperaturetoohigh.
Toomuchleavening.
Temperaturetoohigh.
Pantoo small.
Oventemperaturetoohigh.
Panstouching eachother
Edgesof crust too thin.
Using shiny metal pans.
Temperaturetoo low at start
Filling too juicy.
Usingshiny metalpans.
or ovenwalls.
baking powder,liquidor fat.
=
or ovenwalls.
i ,,,i ,,,,,,,,,, • ,,,,,,,,,, m,
of baking.
9
Page 12

USINGYOUROVEN
li i II Illlllll Ill IIIIIIIIIII • I Ill IIIII I IIII IIIIIIIIIIIIIII IIIIIIIIIIIIIIII II IIIIIIIII
HOWTOROAST
To setovenfor roastingseepage9,
#2.
Roastingis thecookingoftendercuts
of meat with dry heat. No water is
added nor is the cooking utensil
covered.Searing is unnecessary.If
desired,season meat with salt and
pepper.
Checkweightof meatandplacemeat
fat-side-up on a rack in a shallow
roasting pan.
Place oven rack in one of the two
bottomrack positionsbeforeoven is
turnedon. Preheating is unnecessary
for roastingmeats.
Most meats are roasted at 325°F
except tenderloin at 425°F and
smaller poultry at 375°F to 400°F.
Cooking time is determinedby the-
weight of the meat and the desired
doneness.Usethe chartgivenbelow
as a guide in determiningcooking
times. Forthe mostaccurateresults,
use a meat thermometer.Insert the
thermometersothe tipis inthe center
ofthethickestpart ofthe meatand is
not touchingbone or fat.
After cooking,removemeat from the
oven and let stand 15 to 20 minutes
for easier carving. Rare or medium
rare meatsshouldbe removedfrom
the oven whenthe internaltempera-
ture is 5 to 10° less than the final
desiredtemperaturesince meat will
continue to cook slightly while
standing.
ROASTINGCHAR1;
Frozen meat may be cookedin the
sameway as fresh meatif the meatis
thawed first. It is also possible,
however, to cook meat fromthe
frozen state. Follow the same
roasting instructions but increase
cookingtime approximately10 to 25
minutes per pound. When using
frozen packaged meat, follow
package directions. Frozen poultry
should always be thawed before
cooking except when package
directionsrecommendcooking from
the frozen state such as for frozen
turkey rolls. DO NOT REFREF.ZE
MEATS THAT HAVE NOT BEEN
COOKEDFIRST.
PORK
Porkshouldalways becookedto an
internal temperature of 170" (well
done) throughout.
......CUT OF MEAT
BEEF
Standing Rib
Rolled Rib
Rib EYe
Tenderloin,Whole
=
PORKLOIN
LAMB, LEG
iiiii ii
SirloinTip
(highquality)
RolledRump
(highquality)
Center
Half
APPROXIMATE
WEIGHT
6 to 8 lbs.
...........4to6i s.
5 to 7 Ibs.
iiiii =1
4 to 6 Ibs.
4 to 6 Ibs.
2 to 3 Ibs.
• ill iiiiii iiiiiiiiii
3 to 4 Ibs.
6 to 8 Ibs.
,,,,m
4 to 6 Ibs.
3 to 5 ]bs.
5 to 7 Ibs.
,,,,,,,,
5 to 9 lbs.
INTERNALTEMP.
140°F
(rare) 23 to
160°F
(medium) 300-325°F 27 to
170°F
,(,we!l done) ..... 32 to
140°F
(rare) 26 to
160°F
(medium) 300-325°F 34 to
170°F
(well done) 40 to
140°F
(rare)
160°F
(medium) 300-325°F
170°F
(well done)
140°F
(rare) 18 to
160°F
(medium) 350°F 20 to
170°F
(well done) 22 to
140°F(rare)
140°F (rare)
140....................170°F
I 325_50_ F .......
TEMP.
IIIIIIIIIIIIIll II
425°F
425°F
140- 170°F
,,,,,,,
150- 170°F
170°FThroughout
m i mmmI U
325-350°F
325°F
170°F Throughout
160°F(medium)
325°F
170- 180°F (well)
TIME
25 min/tb.
30 mintib.
35 mintlb.
32 mintlb.
38 minllb.
42 minllb.
32 minilb.
38 mintlb.
48 minllb.
20 minllb.
22 minllb.
24 rain/lb.
I II IIIIII1[[
40 to 60 minutes
(total time)
45 to 50 minutes
(total time)
"35 to 40 mintlb. .........
30 to35 rain/lb.
)11
25 to 30 minllb.
IIIIIIII
30 to 35 rain/lb.
35 to 40 rain/lb.
25 to 30 min/Ib.
30 to 35 minlib.
Page 13

USINGYOUROVEN
................... ] iiiiiiiiiiiii /illliHii iii I /illli
HOW TOBROIL
Broilingisa methodof cookingtender
foods bydirectheat undertheburner.
Thedegreeof donenessis determined
bythedistancebetweenthe meatand
the burner,and the length of broiling
TO BROIL
=..
1. Prepare meat by removingexcess
fat and slashing remaining fat,
beingcareful not to cutintomeat.
This will help keep meat from
curling.
IIII IIIIIIIIIII
time.
2,
Placebroilerpan on anyof the re-
Broilingrequires theuseofthebroiler
panandinsert.Thecorrectpositionof
the insert in the pan is very
important.The broilinginsert should
beplacedinthe pansothegreasewill
commendedrack positions.Gen-
erally, for brownexteriorandrare
interior,the meatshould beclose
to the burner.Placefurther downif
you want meat well done.
drainfreely. Improperusemay cause
greasefires.
3. Broilingshouldbe donewith oven
doorclosed.Donotlockovendoor.
Thebroilerinsert CANNOTbecovered
with aluminumfoil as this prevents
fat from draining into pan below.
However, for easier cleaning, the
4. Followsuggestedtimesonbroiling
chart. Meat shouldbe turnedonce
about half way throughcooking.
broilerpan can belinedwith foil. Do
not usedisposablebroilerpans.They
do not provide a separatetray.
5.Checkdonenessbycuttinga slit in
meat near centerfor desiredcolor.
6. Press STOP/CLEAR button to
,'"qcel a broil operation.
BROILINGCHAR1 BROILisselected.
.......... I IIIIIII III II ' IIIIIIIIIIIL IIIlllll[ IIIIIIIIIIIIIL ] i,, i........ Z IHI_ iiiiiiiiiiL i111111=
TYPE OF FOOD
BACON, Thick slice
HAMBURGER PATTIES
3/4-inch
TEMP.
HI
HI
H!
HI
STEAKS
1-inch
HI
HI
HI
RACK
POSITION*
,,,,,,,,,,
,,,,,,,,,,,,,,,,,
2
2
2
2
2
2
2
I IIIII IIIIIIIIIII i IIIIIIII IIIIII IIIII IIIIIIIII
NOTE! Below are recommended rack
positions.Remember, the closer to
the flame, thequicker thefood cooks.
Youcan choosepositionaccording to
the desireddoneness.
Toseteven:
• 'Press BROILpad. "Broil" lights in
the display.
Turn SET knob clockwise one or
two clicks to selectHI for normal
broiling or LO for special low
temperaturebroiling.
* "ON"lights inthedisplay.Theoven
immediately turnson and beginsto
heat.
Use HI BROIL for most broil
operations. When broiling longer
cooking foods such as pork chops,
poultry or thick steaks, select LO
BROIL. Low temperature broiling
allows food to cook to the well done
stage without excessive browning.
Cooking time may increase if LO
DONENESS
Crisp
iiiiII lillliUili I ii
140°F Rare
160°F Medium
170°F Well
140°F Rare
160°F Medium
170°F Welt
TOTALTIME
4 to 6 rain.
IllllI
!0 to 12 rain.:,
12to 15 min.,i
15to 18 min.
mmmmmHi _mm
8 to 10 min.i
12 to 14 min.i
18to 20 rain.
1
11/2-inch
CHICKENBREASTHALVES
FISH FILLETS,fresh or thawed
HAM SLICE, Precooked
1/2-inch
PORKCHOPS
I/z-inch
Top rack position is #1.
HI
HI
HI
LO
HI
HI
Ht
2
2
2
3
2
2
,,,r, ...........................................
140°F Rare
160°F Medium
170°F Well
I85°F Welt
Flaky
140OF
170°F Wetl
14 to 16 mm.!
18to 20 min._
25 to 30 rain.
30 to 40 min_!
IIIIIIIIIIII I
10 to 15 rain.
8 to 12 rain.
I 11
15 to 20 min.:
Page 14

AUTOMATICOVENCOOKING
• I I II IIIIIIIIIIIIIIIIIIIIII IIIIIIIII
Automatic cooking feature is used to turn the oven on and off at a preset time-of-day. This feature
can be used to delay the start of a cooking operation or a self-clean cycle.
The automat{c cooking feature witl not operate unless the range clock is functioning and is set at the
correct time-of-day.
IMPOETANT:Highly perishable foods such as dairy products, pork, poultry, seafoods or stuffing are
not recommended for delayed cooking. If cooking more than one food, select foods that cook for the
same length of time and at the same oven temperature.
TOBAKEBYTIME
(wi_th immediatestart)
1. Press COOKTIME pad. "Oven" and
"Time" light in the display.
... -/" 7/--/35 u I
I °1
T,= 1..__ILI,,_
2. Enter cooking time (how iong you _
wish food to cook) with the SET
knob.
3. Press BAKE TEMP pad. "Bake"
lights in the display. Enter oven
temperature with the SET knob.
4. _"ON"lights in the display. The oven
automatically turns on and begins
to heat. The display begins to
count down.
At the end of the preset cooking time,
the oven automatically turns off.
EXAMPLE
Food is to cook for one hour and
30 minutes at 350°F,
1. Press COOK TIME pad.
2. Turn SET knob until 1:30 (1
hour, 30 minutes) appears in
the display.
3. Press BAKE TEMP pad.
4. Turn SET knob until 350°F
appears in the display.
Oven turns on immediately.
illlllllllll I ii ,,, illllllllll ,,,,,,,
TOBAKEBYTIME
(with delayed start)
1. Press COOKTIME pad. "Oven" and
"Time" light in the display.
2. Enter cooking time with SET knob.
3. Press STOP TIME pad. "Stop Time"
lights in the display.
........ _,= L "_ILl
4. Enter the time you wishthe oven to
turn off by turning the SET knob.
"Delay Oven" lights in the display.
5. Press BAKE TEMP pad. "Bake"
lights in the display.
i
6. Enter oven temperature with the
SET knob.
1Theoven will automatically turn on in
time to have the food ready by the
preselected STOP TIME.
EXAMPLE t
Food is to cook for 2hours and 30l
minutes at 350°F. You wish the/
food to be cooked by 6:00. I
1. Press COOKTIME pad.
- 1
2. Turn SET knob until 2:30 (2
hours, 30 minutes) appears in i
the display. I
3. Press STOP TIME pad. l
4. Turn SET knob until 6:00i
appears in the display. I
5. Press BAKE TEMP pad. l
6. Turn SET knob until 350°F
appears in the display.
The oven will turn on at 3:30, cook;
the food for 2Y2 hours and will,
automatically turn off at 6:00.
AODITIONALINFORMATION
1. The Electronic Controller will con-
tinuously beep if you delay in
entering a complete program. If
you hear the beeps, just continue
entering the program as described
above. The beeps will stop.
2. To reset or cancel the program:
Press the STOP/CLEAR button.
3. After setting the Automatic
Cooking feature, press the CLOCK
pad and the time-of-day will
reappear in the display. "Delay
Oven" and the preset oven temp-
erature wilt remain in the display
as a reminder that the oven is set
for a delayed cooking operation.
12
Page 15

SELFCLEANOVEN
• • II • IIIIIII III IIIIII IIIIIIII Ill IIIIII I IIII I I I I IIIIIIIII
The setf clean oven uses temperatures above normal cooking temperatures to automatically clean
the entire oven. The separate clean cycle eliminates soilcompletely or reduces it to a gray ash which
is easily wiped up with a damp cloth when the oven is cool.
PREPAREOVENFOR
SELFCLEANING
Remove all pans from the oven. The
racks may be left in, but will discolor
and may not slide easily after
cleaning.
Clean oven frame, door frame and
around the oven vent with a non-
abrasive cleaningagentsuchas Bon
Ami. Theseareas are notexposedto
cleaningtemperaturesandshouldbe
cleanedto preventsoil from baking
on duringthe clean cycle.
Wipe up excessgrease or spillovers
from the oven bottom to prevent
excessivesmokingduring the clean
cycle.
DO NOT USE OVEN CLEANERS OR
OVEN LINER PROTECTIVE COATINGS
OF ANY KIND ON THE SELF-CLEAN
OVEN FINISH OR AROUND ANY PART
OF THE OVEN.
To prevent damage, do not clean or
rub the gasket around the front oven
frame. The gasket is designed to seal
in heat during the clean cycle.
TOOPERATE
SELFCLEANCYCLE
1. Close door. Movedooriatch-t6-t_e
right until it rests in the tock
position.
J .......
....... I iii i
2. Press CLEAN pad. if the door is not
locked as described, "door" will
flash in the display.
! !
When the CLEAN pad is pressed, the
oven will automatically clean for 3
hours. A shorter (2 hours) or longer (4
hours) clean cycle can be selected by
turning the SET knob.
To prevent accidently changing the
clean cycle, press CLOCK pad to
return display to time-of-day.
IIII iiiiiiiiii i IIIIIIIIIIIII IIIIII II I
_" _.l__tLl
DURINGSELFCLEAN
CYCLE
The own aut-ornatically begins to
heat up when the CLEAN pad is
pressed and the door is locked. As the
oven reaches cleaning temperatures,
the LOCK light will turn on. At this
point, the oven door can not be
manually opened. A blower sound
can be heard during the clean cycle.
The first few times the oven is
cleaned, some smoke and odor may
be detected. This is normal and will
reduce or disappear with use. If the
oven is heavily soiled, or if the broiler
pan is left in the oven, smoke and
odor may occur.
As the oven heats and cools, you may
hear sounds of metal parts expanding
and contracting. This is normal and
will not damage your range.
TO CANCELCLEANCYCLE:
Push STOP/CLEAR button, lftheLOCK
light has notturned on, the ovendoor
can be opened.
If the LOCKlight has turnedon, allow
the oven to cool (up to 1 hour).Once
LOCKlight turnsoff, ovendoor can be
opened.
AFTERSELFCLEAN i
CYCLE
-- , 41
About one hour after the clean cycl_eii
is completed, the internal !ock wili l
disengage and the door latch can be '_i
returned to its original (unlocked)I!
position: The LOCK light will turn off
when the door latch is moved to the
left.
Some soil may leave a light gray,
powdery ash which can be removed
with a damp cloth. If stain remains, it
indicates that the clean cycle was not
long enough. The stain will be
removed during the next clean cycle.
If the oven racks do not slide
smoothly after a clean cycle, wipe
racks and embossed rack supports
with a small amount ofvegetable oil
to restore ease of movement.
Fine, hair-like lines may appear in the
oven interior or oven door. This is a
normal condition resulting from
heating and cooling of the porcelain
finish. These lines do not affect the
)erformance of the oven.
J IIIIII1_ II IIIIIIIII I
TODELAYtHE S-EL-FCLEANCYCI_E:
1. Lock the oven door.
2. Press STOP TIME pad. _-
3. Turn SET knob until the time
you wish the oven to turn off
appears in the display.
4. Press CLEAN PAD.
m
.
13
Page 16

MAINTENANCE
IIIIIIIII IIII Illl i ........................................
OVENBOTTOM
To remove: When coot, remove the
oven racks. Slide the two catches,
located at each rear corner of the
oven bottom, toward the front of the
oven.
Lift the rear edge of the oven bottom
slightly, then slide it back until the
holes in the front edge of the oven
bottom clear the pins in the oven front
frame. Remove oven bottom from
oven.
To replace:Fit holes onto pins, lower
rear of oven bottom and slide the
catches back to lock oven bottom into
place.
m= • i
mmll i ,.
OVENDOOR
To removelift-offdoor:Opendoor to the
"stop" position (opened about 4
inches) and grasp door with both
hands at each side. Do not use door
handle to lift door. Lift up evenly until
door clears the hinge arms.
........... iiiiiiiiiiii iii
CAUTION:
Hinge arms are spring mounted and
wilt slam shut against the range if
accidently hit. Never place hand or
fingers betweenthe hinges andthefront
oven frame. You could be injured Jf
hinge snaps back.
To replace door: Grasp door at each
side, align slots in the door with the
hinge arms and slide door down onto
the hinge arms until completely
seated on hinges.
Donot attemptto openor closedoor
until door is completelyseated on
hinge arms. Never turn on oven
unlessdoor is properly in place.
LIGHTREPLACEMENT
Before replacing light bulb, DIS-
CONNECTPOWERTO RANGE. Be sure
bulb is cool. Do not touch a hot bulb
with a damp cloth as the bulb may
break.
To replaceincandescentsurfacelight:Re-
move clock knob, two screws and
two retainer strips. Carefully remove
glass panel and light bulbs. Replace
with a 15 watt incandescent light
bulb. Replace parts and restore power
to appliance.
To replace fluorescent surface ught:-
Grasp the top trim of backguard with
thumbs under front edge and .pull
outward while lifting to release trim
from catches at each end.
Removebulb and replacewith an 18
watt fluorescent tube. Snap top trim
back into place and restore power.
Toreplaceovenlight:Self Clean oven i
models only. Remove4 screws and!
plates as illustratedbelow. Usecare
when removinggasket, it may tear.
Replace with a 40 watt appliance
bulb. (Notcoveredby warranty). Re-
connect power to range and reset
clock.
i iiiiii ] ii]1_] ii iiii ii iiiiii
14
Page 17

CLEANINGCHART
.............................. IIIIIIIIIIII mllllllllllllllll _1111111111mllllllllllllllll I IIIIIIIIIII NN II IIII IIIIII • I
z
PARTS
Broilerinsert & pan
CLEANINGAGENTs .... '.............................
Soap& water Reozovefrom broilerafter use,Allow to cool,then pour offgrease.Placesoapyclothover
Plasticscouringpad tray and pan, let soak to loosensoil. Wash in soapywater. Use soapfilled scouringpad
Soapfilled scouring pad to remove stubbornsoil. Clean in dishwasherif .desired.
Burnerbox
Soap & water Burnerbox, locatedundercooktop,shouldbe cleanedfrequentlyto removespilloveTs.If
Appliancewax soil is not removedand is allowed to accumulate,it may damage the finish. To clean,
Controlknobs
Backguard- glass
oven window
Mild detergent& water To removeknobsfor cleaning,gentlypull forward.Washin mild detergentand water. Do
Soap& water Wash with cloth wrung out in soapy water. Removestubbornsoil with pasteof baking i
Pasteof bakingsoda soda and water. To avoid insidestainingof oven doorglass, do not oversaturatecloth,
& water Do not useabrasive materials suchas scouringpads, steel wool or powderedCleaning
Windowcleaning fluid agents. They wilt damageglass. Rinsewith clean water and dry.
or ammonia
Drip bowls, chrome
Soap& water Clean bowlsafter each usewith soap and water, o b r stains with baking
Paste of baking soda sodapasteand plasticscouringpad. Topreventscratchingthe finish, donot useabrasive
& water cleaningagents.Rinse,dr/and replace.NOTE:Ringscanpermanentlydiscolorifexposed
Plastic sc,ouring pad to excessiveheat or if soil is allowed to bake on.
Endpanels,polyester
Grates
IIIIIII IIII iiiiiiilllllll
Soap & water Wash with soap and warm water. Oo not use abrasive cleaningmaterials. They will
iiii i iii1,1 HHI ............................
Detergent& water Gratesare madeof porcelaincoatedsteel.Theycan becleanedat thesink with detergent
Soap filled scouringpad and water or in the dishwasher.Cleanstubbornsoil with soap filled scouringpad.
Metalfinishes-
Aluminum- backguard
& control panel
Soap & water Wash with soapand water, Removestubbornsoil with paste of bakingSodaand water*-
Pasteof bakingsoda Do not useabrasive or causticagents.They will damage the finish.
& water
Chrome& stainless
steel - trim parts
Ovenracks
Soap & water Clean with soapywater. Removestubbornsoil with cleansingpowderor soap iiiled
Cleansingpowders & scouringpad. Rinseand dry.
plastic pads
Soap filled scouringpad
;Exteriorporcelain finish
Mild soap & water Porcelain enamelis glass fused on metal. It may crackor chip with misuse.Cleanwith
Paste of bakingsoda soap and water when partsare cool. All spilfovers,especiallyacidspillovers,shouldbe
& water wiped up immediatelywith a dry cloth. Whensurface is cool, clean with warm soapy
--- ii lllll i j,,, _ ,,,,, .......
Interior porcelainfinish
(See page 13 for self
clean oven instructions)
Surface burners Soap & water
Paste of baking soda
& water
Plasticscouringpad
suchas Tufty®
Vinyl finishes "
Doorhandles
Manifold panel
llll i ill ...........
Soap & water Never use abrasiveor caustic agentson vinyl finishes..
removesurface burners and clean with soap and water, rinse and dry. If desired, an
applicationof wax can be used.
lllllll_ llll , iH i ill
not use abrasive cleaningagents. Theywill scratchfinish and removemarkings.Rinse,
dry and replace. Turn each burner ONto see if knobs have been replacedcorrectly.
............. Re'.,v;stu'bo................
iii ii iiiiiiii i i iiiiiii iiiiii ml iii HHHHI ...................
scratchfinish. Never useoven cleaners.
,,,,,,, .2 ill '"" " " '"'" • ................ i mmm,ii
,, ,,,,, • ,,,,,, ,,,, ,, ............................. ,...........
.......... . ........................................ ,,,,,,, . ,,,,,,,.
water. NEVERWIPEOFFA WARMORHOTENAMELSURFACEWITHA OAMPCLOTH.THIS
MAY CAUSECRACKINGAND CHIPPING.Never use abrasiveor caustic cleaning agents
on exterior finish of range.
Follow selfcleaninginstructionson page 13. DONOTUSEOVENCLEANERS.Donot c!ean
braided gasket aroundoven frame.
Clean as necessarywith warm soapy waterl Removestubbornsoii by scouringwith
non-abrasiveplasticscouringpadanda pasteof bakingsoda andwater.Cleanportswith
a straight pin, Do not enlargeOrdistort theports.Donot use a woodentoothpick,it may
break off and clogport. DONOTCLEANBURNERSWITHTHEFOLLOWINGcausticcleaners:
steel wool, abrasivecleaningagents,dishwasherdetergent,or metalpolishes.Thesewill
damage finish. Donot cleanburnersin dishwasher. Burnerscan be driedin the oven set
at 140°F. CAUTION:Burnerand burner tube must be dry before use,
i ,,,, . ,,,,, , ,,, .......................
i i i iii ii i iiii1,1 HHHHI m HHH ,,
i1[ iiiiiii iiiii i iii iiiiiiui iiiiii iii _ ii ,,,
15
Page 18

SERVICE
Jill Jill i IIIIIIIIliiillli Jill II illlli E Illll Z IIIIIIIIIIIIIIII i IIIIIlillli IIIIIIIIii I illlli ill illiLI]JJ[_
BEFORE
PROBLEM
1. Surface burnerfails to light
2. Burner flame uneven
3. Surface burnerflame
* lifts off port
* yellow in color
4. Oven burnerfails to light
5: Oventemperatureinaccurate
* food takes too long or cooks
too fast
. pale browning
* food over-doneon outsideand
under-donein center
* over browning
CALLINGA SERVICETECHNICIAN,
, ,,,,,,,,,, ,, ,, ,,,,,,,,,,
CHECKTHEFOLLOWING:
CAUSE
IIIII IIIIIIIIIIIIlil IIIIIU li IIIIIIII
a. power supply not connected
(Pilotlessignition)
b. cloggedburner port(s)
IIIII mmmmmmm • m
a. clogged burnerport(s)
b. burner not properlypositioned
a. air/gas mixture not proper
a. power supply not connected
(Pilotlessign!tion)
b. electronicclock incorrectlyset
a. oven not preheated
b. incorrectrack position
c. incorrectuse of foil
d. oven bottom incorrectlyreplaced
e. oven thermostat sensingdevice
out of holdingclip(s)
CORRECTION
J IIIIII IIIII I I IIIIIIIIII
a. connectpower, check circuit
breakeror fuse box
b. clean ports with straight pin
a. clean ports with straight pin
b. see page 6 to correctlyreplace
burner
,,,,,,,,,,,,,,, ......................................................
a. call servicemanto adjust burner
primary air
a. connectpower, checkcircuit
breakeror fuse box
b. see page 5
a. preheatoven 10 minutes
b. see page 8
c. see page 9
d. replaceoven bottom correctly
e. reinsert sensingdevice securely
into clip(s)
iiii
P
6. Clock andlor light does not work
7.;Fplusa numberappearsinthe dis-
play. (Example F 1) Continuous
:beepssound.
SERVICE
Do not attempt to service the
appliance yourself unless directed to
do so in this book. Contact the dealer
who sold you the appliance for
service.
HOWTOOBTAINSERVICE
When your range requires service or
replacement parts, contact your
Dealer or Authorized Service Agency.
Consult the Yellow Pages in your
telephone directory under ranges for
the service source nearest you. Be
sure to include your name, address,
and phone number, along with the
model and serial numbers of the
appliance. (See inside cover for
location of your model and serial
numbers).
a. power supply not connected
b. burnedout light bulb
c. defectiveswitch, starter or ballast
d. defectiveclock or loose wiring
Theseare called FAULTCODES.If a fault code appears in the display anda €o_om--
tinuousbeepsounds,pressthe STOP/CLEARbutton. If the fault code reappears,
disconnectpowerto the rangeand call the service agency.
............................................................. mmmmm, |l mmmll
tf you are not satisfied with the local
response to your service require-
ments, call or write MAYCOR Parts
and Service Co., P. 0. Box 2370,
Cleveland, TN 37311, (615) 472-3333.
Include or have available the com-
plete model and serial numbers of the
appliance, the name and address of
the dealer from whom you purchased
the appliance, the date of purchase
and details concerning your problem.
If you did not receive satisfactory
service through your service agency
or Maycor you may contactthe Major
Appliance Consumer Action Panel by
letter including your name, address,
and telephone number, as well as the
model and serial numbers of the
appliance.
16
a. connect powersupply,check
circuit breaker or fuse box
b. replace light bulb
c. call servicemanto check
d. call servicemanto check
,,,,,,,,,,,,,,, , ,,,,,,,,,,,,,,,,,
Major Appliance ConsumerAction Panel
20 North Wacker Drive
Chicago, tL 60606
MACAP (Major Appliance Consumer
Action Panel) is an independent
agency sponsored by three trade
associations as a court of appeals on
consumer complaints which have not
been resolved satisfactorily within a
reasonable period of time.
[
.J.
 Loading...