

Page 1
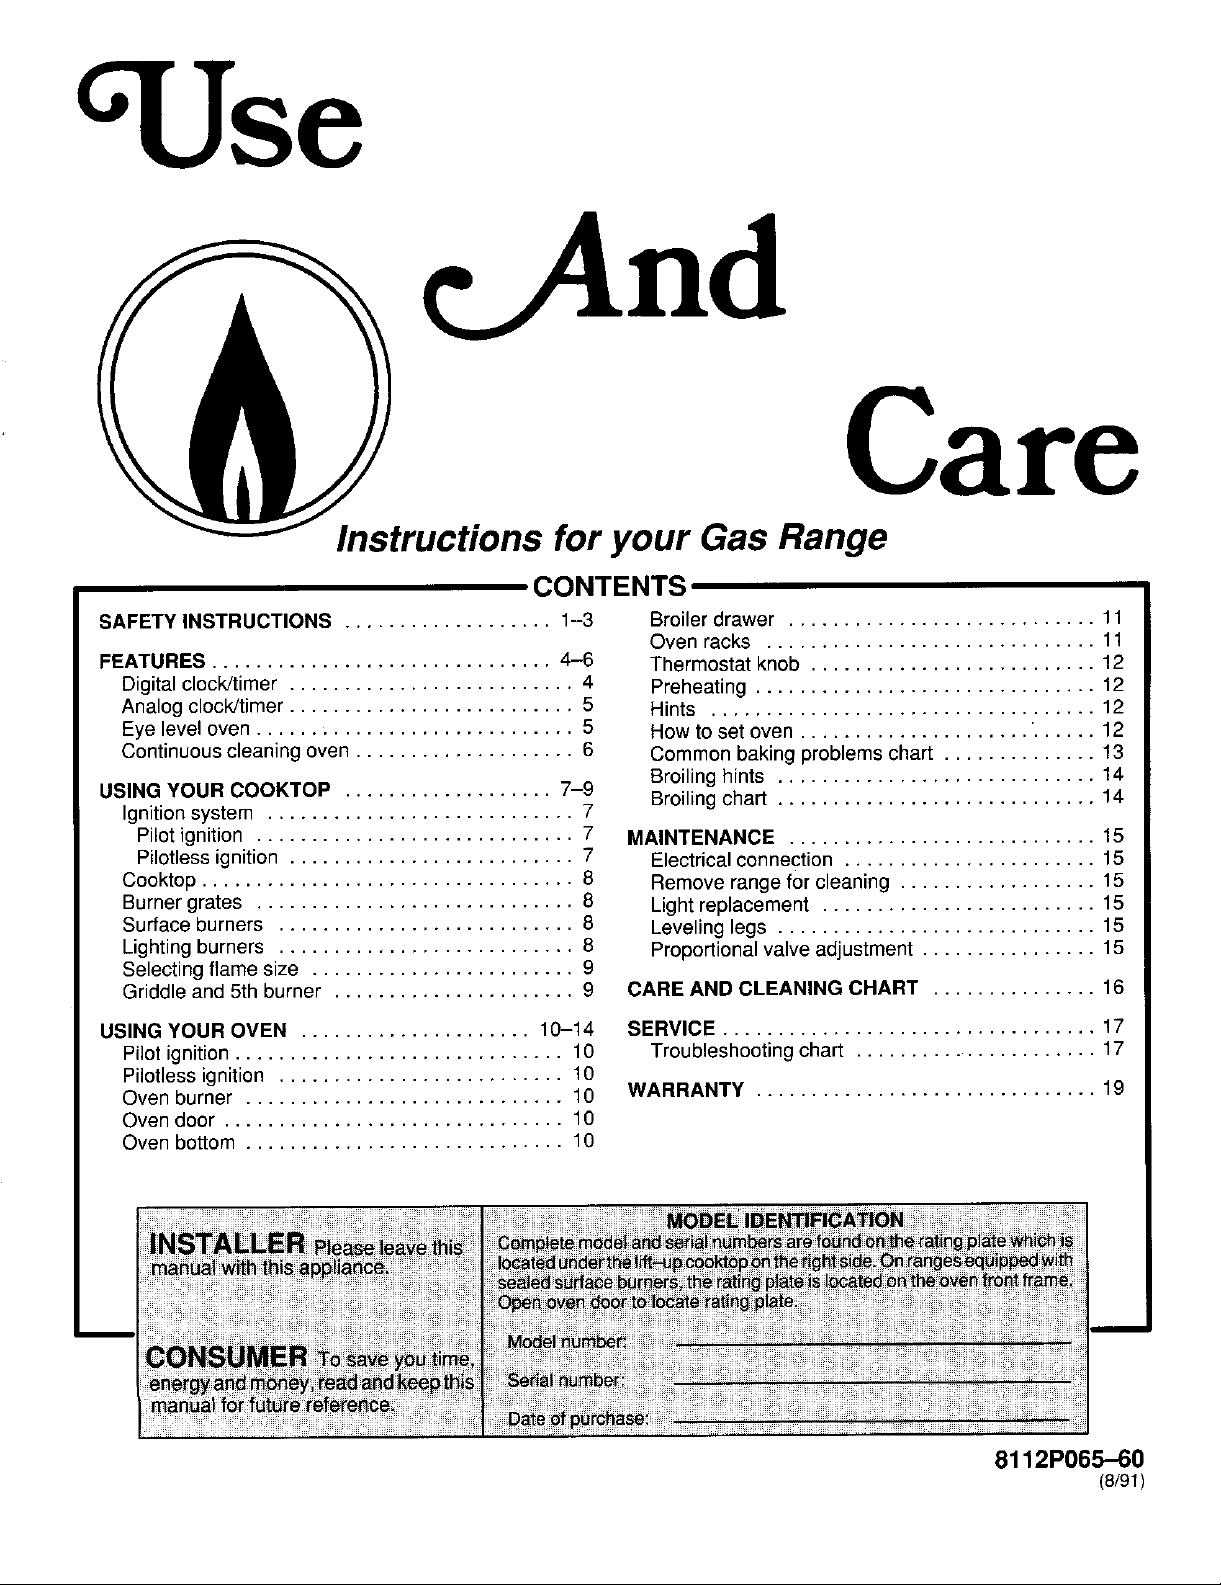
Care
Instructions for your Gas Range
CONTENTS
SAFETY INSTRUCTIONS ................... 1-3 Broilerdrawer ............................ 11
Oven racks .............................. 11
FEATURES ............................... 4-6 Thermostat knob .......................... 12
Digital clock/timer .......................... 4 Preheating ............................... 12
Analog clock/timer .......................... 5 Hints ................................... 12
Eye leveloven ............................. 5 Howto set oven ..................... "...... 12
Continuous cleaning oven .................... 6 Common baking problems chart .............. 13
Broiling hints ............................. 14
USINGYOUR COOKTOP ................... 7-9 Broiling chart ............................. 14
Ignitionsystem ............................ 7
Pilot ignition ............................. 7 MAINTENANCE ............................ 15
Pilotless ignition .......................... 7 Electrical connection ....................... 15
Cooktop .................................. 8 Remove range for cleaning .................. 15
Burnergrates ............................. 8 Light replacement ......................... 15
Surface burners ........................... 8 Leveling legs ............................. 15
Lightingburners ........................... 8 Proportional valve adjustment ................ 15
Selectingflame size ........................ 9
Griddle and 5th burner ...................... 9 CAREAND CLEANING CHART ............... 16
USINGYOUR OVEN ..................... 10-14 SERVICE .................................. 17
Pilot ignition .............................. 10 Troubleshooting chart ...................... 17
Pilotless ignition .......................... 10
Ovenburner ............................. 10 WARRANTY ............................... 19
Ovendoor ............................... 10
Ovenbottom ............................. 10
8112P065-60
(8/91)
Page 2
SAFETY INSTRUCTIONS
WARNING: If the information in this manual is not I
followed exactly, a fire or explosion may result
causing property damage, personal injury or death.
- Do not store or use gasoline or other flammable
vapors and liquids in the vicinity of this or any
other appliance.
- WHAT TO DO IF YOU SMELL GAS
• Do not try to light any appliance.
• Do not touch any electrical switch; do not
use any phone in your building.
• Immediately call your gas supplier from a
neighbor's phone. Follow the gas supplier's
instructions.
• If you cannot reach your gas supplier, call the
fire department.
I
- Installation and service must be performed by a
qualified installer, service agency or the gas
supplier.
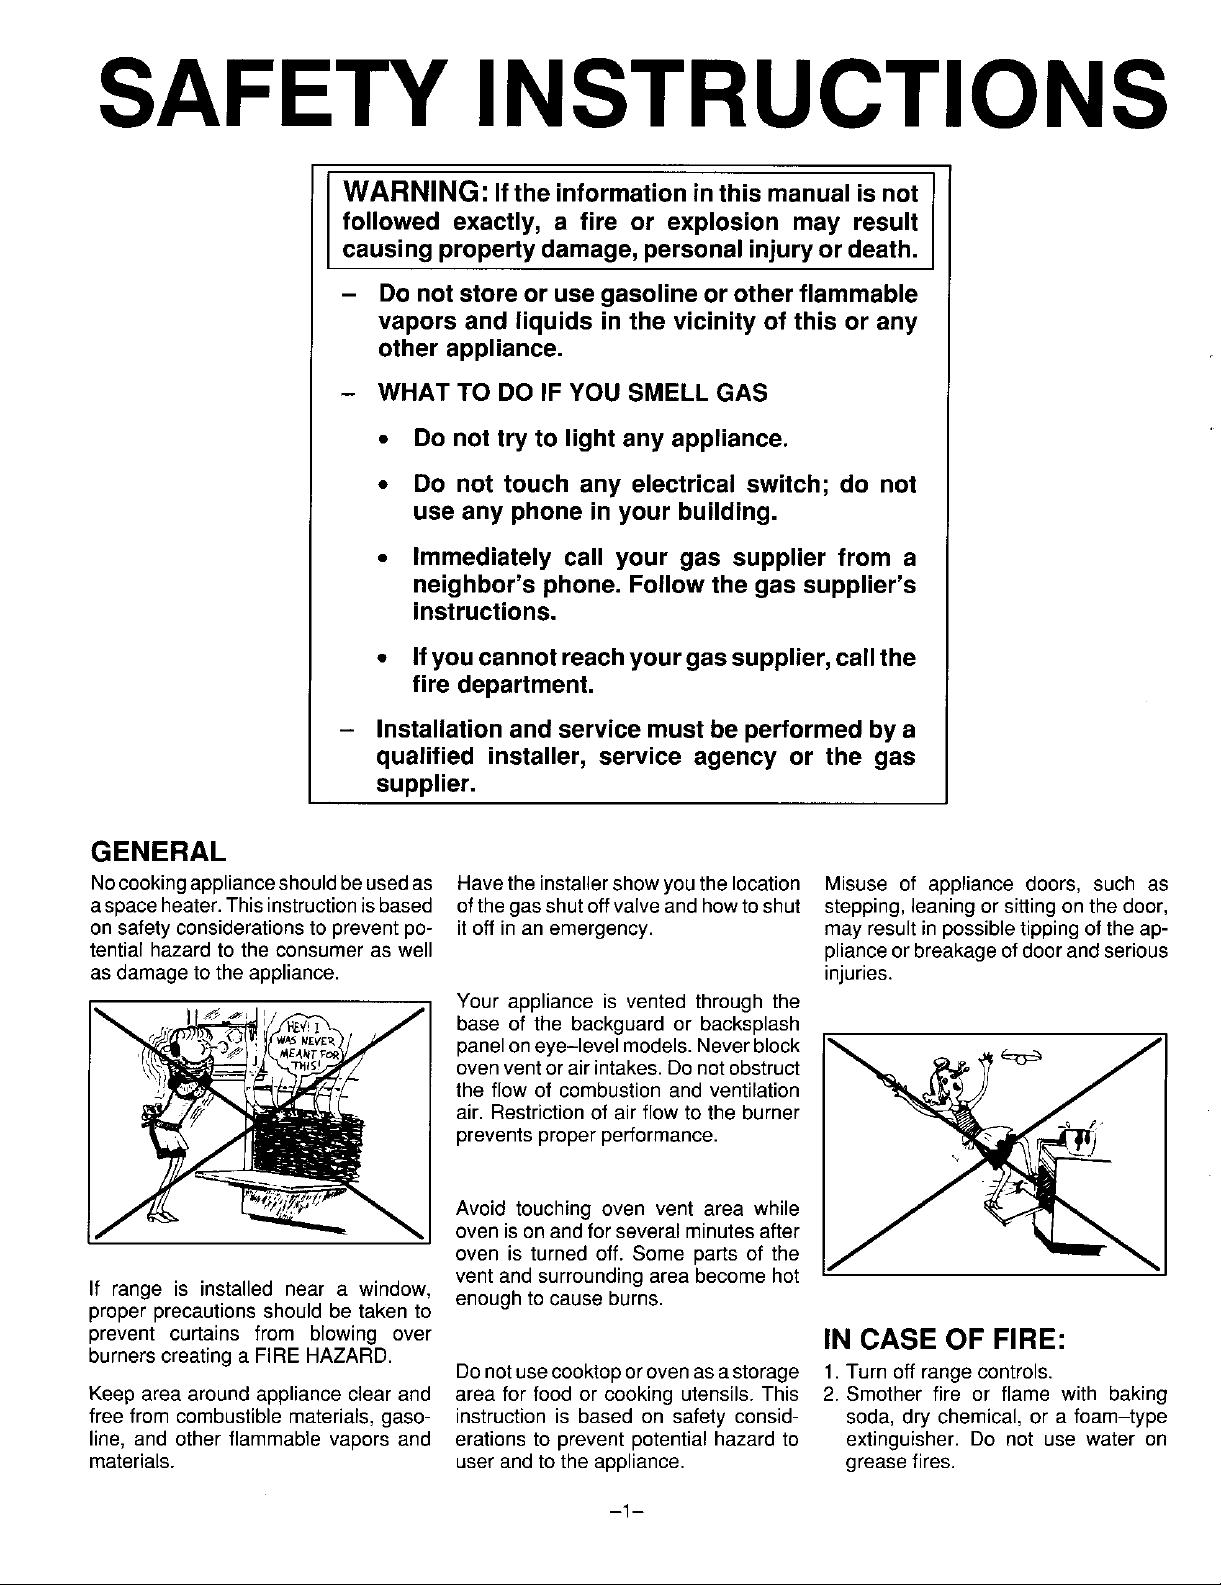
GENERAL
Nocookingapplianceshouldbeusedas Havetheinstallershowyouthelocation Misuse of appliancedoors, such as
aspaceheater.Thisinstructionisbased ofthegasshutoffvalveandhowtoshut stepping,leaningor sittingonthedoor,
onsafetyconsiderationsto preventpc- it offin anemergency, mayresultinpossibletippingoftheap-
tentialhazardto theconsumeraswell plianceorbreakageofdoorandserious
asdamageto theappliance, injuries.
Your applianceis ventedthroughthe
__ I//_"_ J baseof thebackguardor backsplash
_" the flow of combustionandventilation
_ ovenventorairintakes.Donotobstruct _
I_,,,_ paneloneye-levelmodels.Neverblock _. , - _
If range is installednear a window, enoughto causeburns.
properprecautionsshouldbe takento
prevent curtains from blowing over IN CASE OF FIRE:
burnerscreatingaFIREHAZARD.
Keepareaaroundapplianceclearand areaforfoodor cookingutensils.This 2.Smotherfire or flame with baking
freefromcombustiblematerials,gaso- instructionis basedon safetyconsid- soda,dry chemical,ora foam-type
line,andotherflammablevaporsand erationsto preventpotentialhazardto extinguisher.Do not usewater on
materials, userandtotheappliance, greasefires.
preventsproperperformance.
Avoid touchingoven vent area while
ovenisonandforseveralminutesafter
air.Restrictionof airflowtothe burner
oven is turnedoff. Some partsof the
ventandsurroundingareabecomehot
Donotusecooktoporovenasastorage 1. Turnoffrangecontrols.
-1-
Page 3
SAFETY INSTRUCTIONS
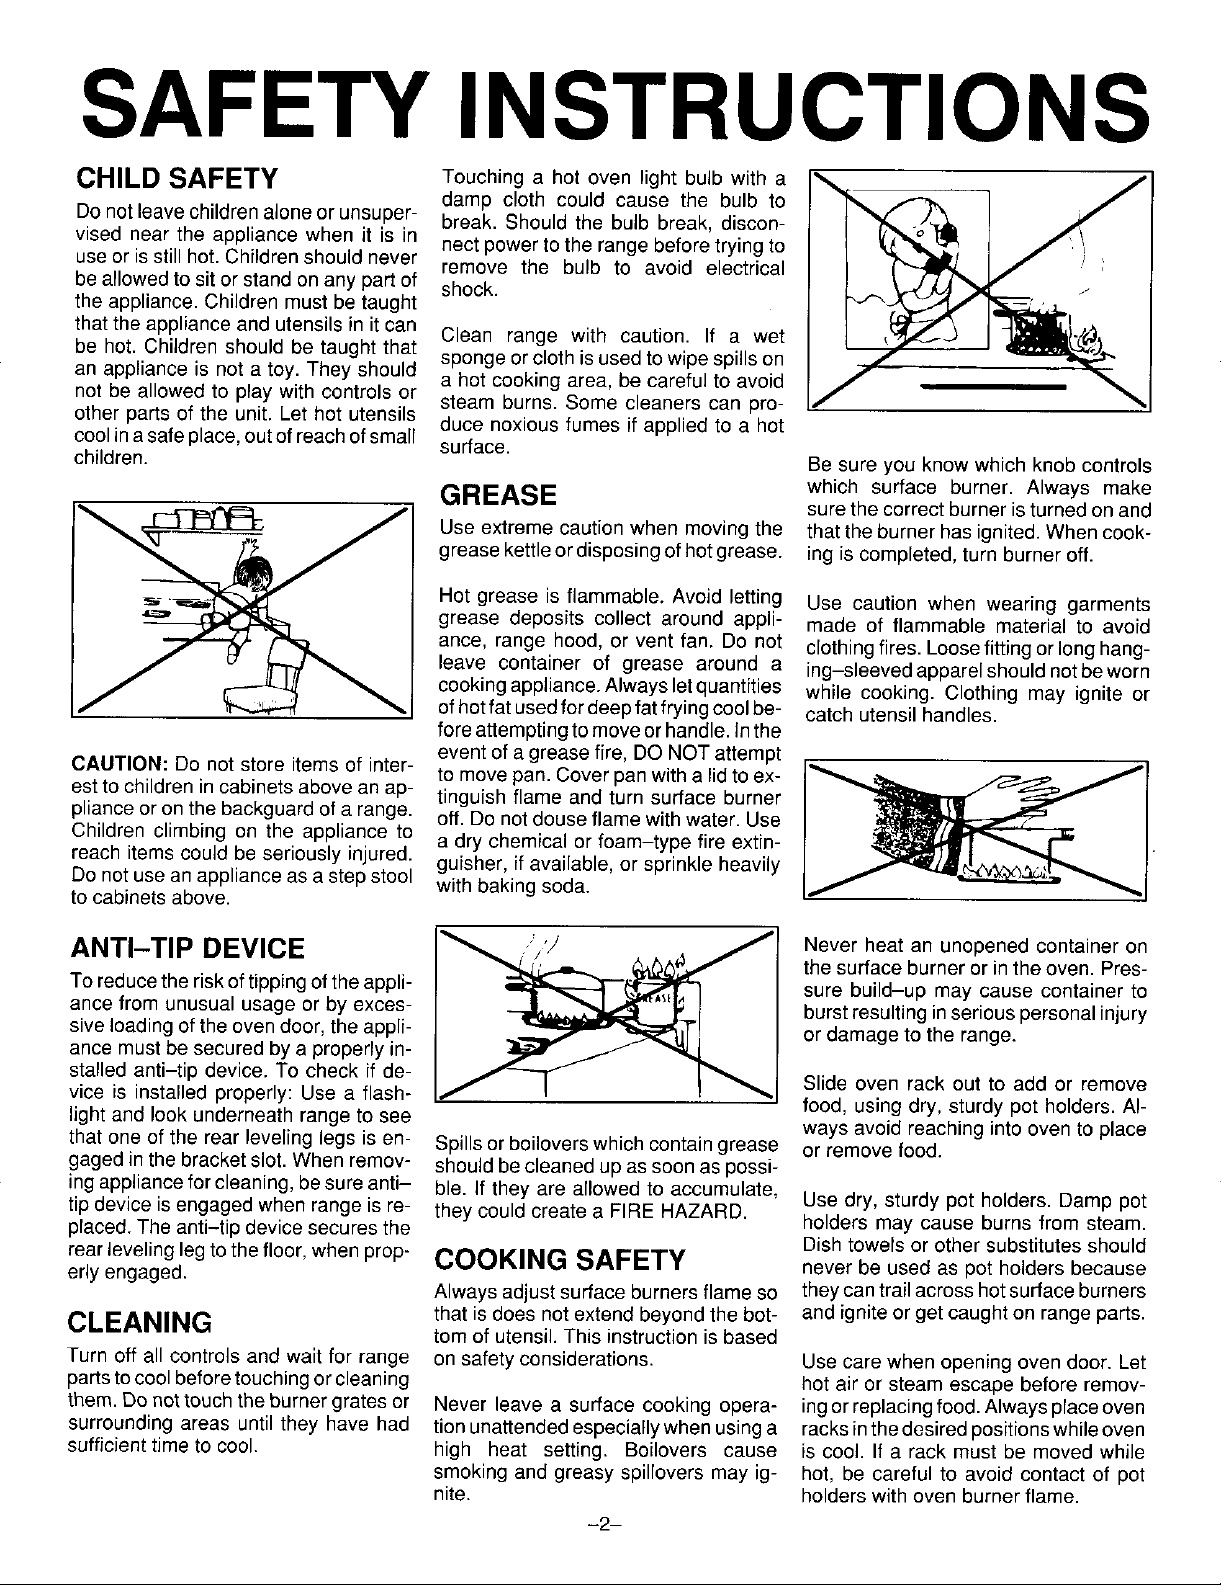
CHILD SAFETY Touching a hot oven light bulb with a _.
damp cloth could cause the bulb to
Do not leavechildrenalone orunsuper- break. Should the bulb break, discon-
vised near the appliance when it is in nect power to the range beforetrying to
useor is still hot.Childrenshould never remove the bulb to avoid electrical
be allowedto sit orstand on anypart of shock.
the appliance. Children must betaught
that the appliance and utensils in it can Clean range with caution. If a wet
be hot. Children should be taught that sponge or cloth isused towipe spills on
an appliance is not a toy. They should a hot cooking area, be careful to avoid
not be allowedto play with controls or steam burns. Some cleaners can pro-
other parts of the unit. Let hot utensils duce noxiousfumes if applied to a hot
coolinasafe place,outof reachof smalr surface.
children. Be sure you know which knob controls
GREASE which surface burner. Always make
grease kettleor disposingof hot grease, ing iscompleted, turn burner off.
J Use extreme caution when moving the that the burner has ignited. Whencook-
Hot grease is flammable. Avoid letting Use caution when wearing garments
ance, range hood, or vent fan. Do not clothingfires.Loose fitting or long hang-
leave container of grease around a ing-sleevedapparelshouldnotbeworn
cookingappliance.Alwaysletquantities while cooking. Clothing may ignite or
J _' ofhotfatusedfordeepfatfryingcoolbe- catch utensil handles.
CAUTION: Do not store items of inter- to movepan. Cover penwith a lidtoex- I_ __]
estto childrenin cabinets abovean ap- tinguish flame and turn surface burner
plianceor onthe backguard of a range, off. Do not douse flame with water. Use
Children climbing on the appliance to
reach itemscould be seriously injured, a dry chemical or foam-type fire extin-
Do netuse an appliance as a step stool with baking soda.
to cabinets above.
grease deposits collect around appli- made of flammable material to avoid
foreattemptingto moveor handle,inthe
event of a grease fire, DONOT attempt
guisher, if available, or sprinkle heavily
sure thecorrect burner isturnedon and
ANTI-TIP DEVICE Never heat an unopened container on
To reducethe risk of tippingofthe appli- sure build-up may cause container to
ance from unusual usage or byexces- burstresulting inserious personalinjury
sive loadingof the oven door,the appli- or damage to the range.
ance must be secured bya properly in-
stalled anti-tip device. To check if de-
vice is installed properly: Use a flash- Slide oven rack out to add or remove
light and look underneath range to see ways avoid reaching into oven to place
that one of the rear leveling legs is en- Spillsorboiloverswhich containgrease or remove food.
gaged in the bracket slot. Whenremov- should becleaned up as soonas possi-
ingappliancefor cleaning, be sureanti- ble. If they are allowed to accumulate,
tip device is engagedwhenrange is re- they couldcreate a FIRE HAZARD. Use dry, sturdy pot holders. Damp pot
praced+The anti-tip device secures the holders may cause burns from steam.
rear leveling legtothefloor,when prop- COOKING SAFETY Dish towels or other substitutes should
erly engaged, never be used as pot holders because
CLEANING that is does not extend beyondthe bot- andigniteor get caught on range parts.
Turn off all controls and wait for range on safety considerations. Use care when opening oven door. Let
partstocoolbeforetouchingorcleaning hotair or steam escape before remov-
them. Denottouchthe burnergrates or Never leave a surface cooking opera- ingor replacingfood. Alwayspraceoven
surrounding areas until they have had tion unattendedespeciallywhen using a racksin thedesired positionswhileoven
sufficient time to cool. high heat setting. Boilovers cause is cool. If a rack must be moved while
Always adjust surface burners flame so theycan trailacross hotsurface burners
tom of utensil.This instruction is based
smoking and greasy spilroversmay ig- hot, be careful to avoid contact of pot
nite. holderswith oven burner flame.
-2-
the surface burner or in the oven. Pres-
food, using dry, sturdy pot holders. AI-
Page 4
SAFETY INSTRUCTIONS
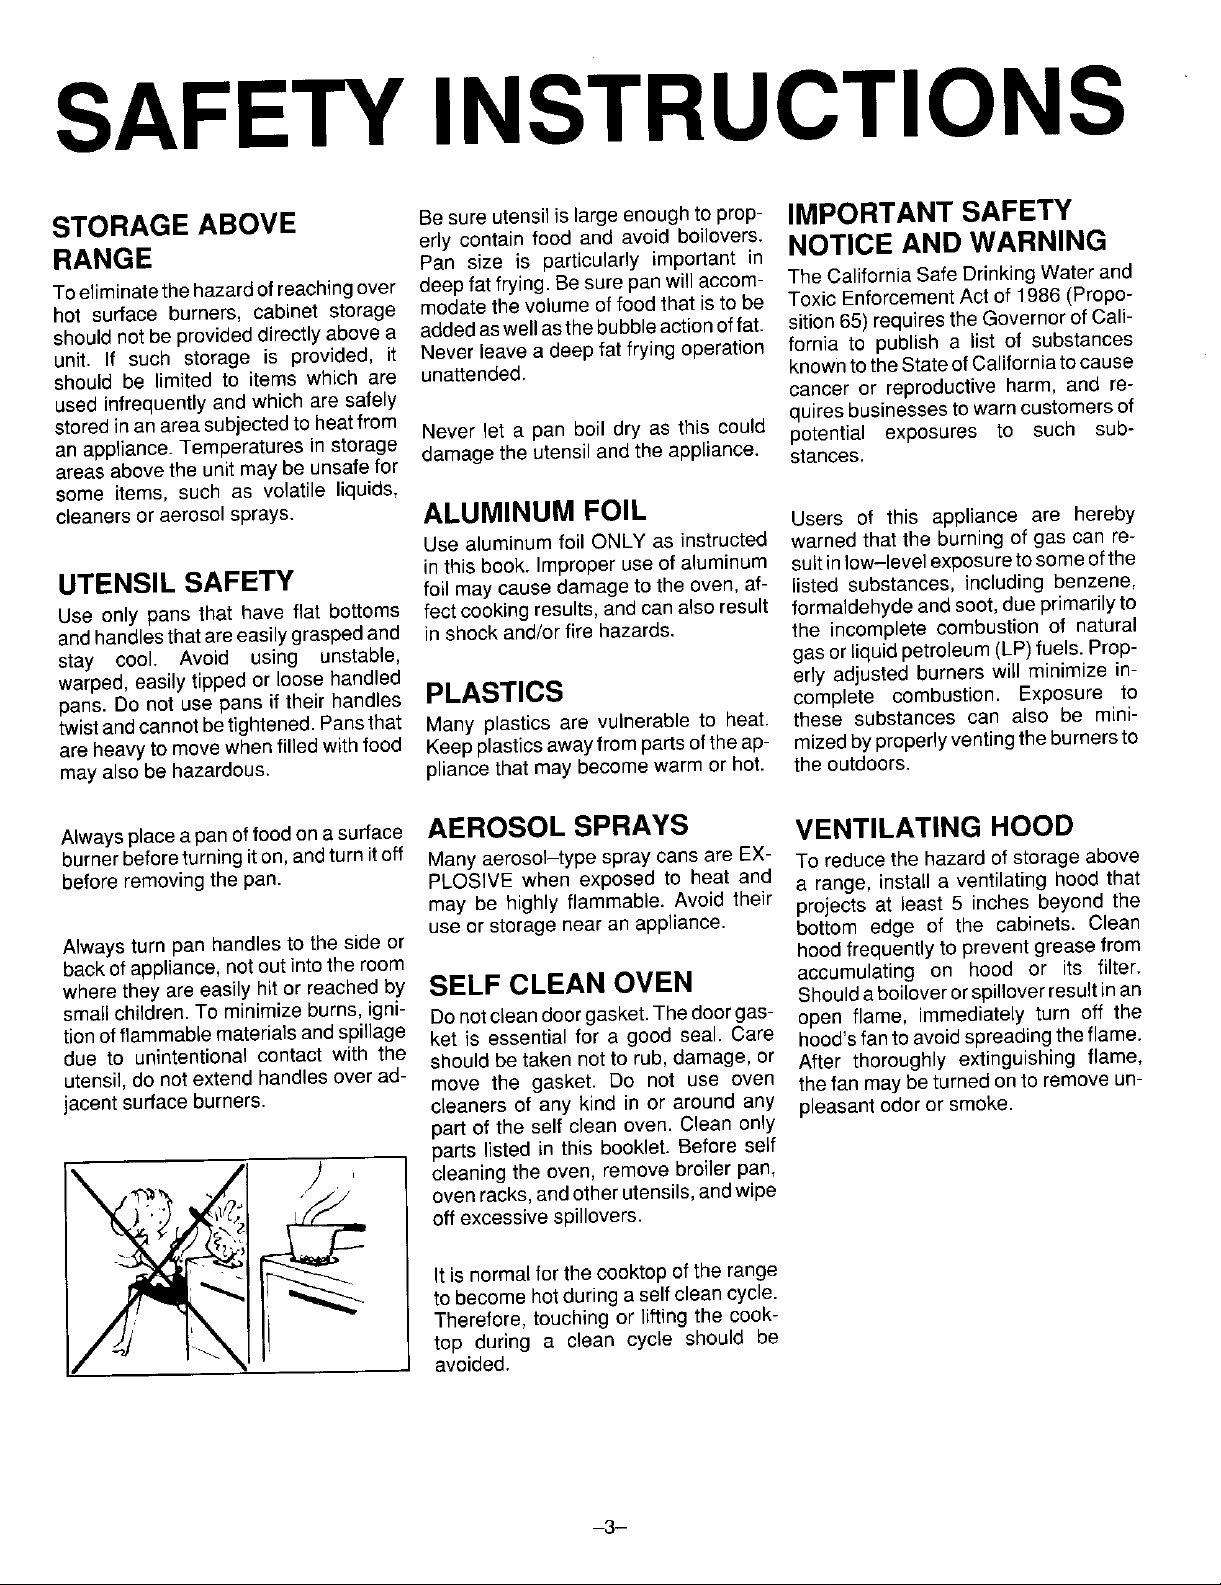
STORAGE ABOVE Besure utensil is large enoughto prop- IMPORTANT SAFETY
RANGE Pan size is particularly important in
Toeliminatethe hazardof reachingover deepfat frying. Besure pan will accom- The California Safe Drinking Water and
hot surface burners, cabinet storage modatethe volume of food that isto be Toxic EnforcementAct of 1986 (Propo-
should not be provideddirectly above a addedaswellasthe bubbleactionoffat. sition65) requires the Governor of Cali-
unit. If such storage is provided, it Never leave a deep fat frying operation fornia to publish a list of substances
should be limited to items which are unattended, knowntothe StateofCaliforniatocause
used infrequently and which are safely cancer or reproductive harm, and re-
storedinan area subjectedto heatfrom Never let a pan boil dry as this could potential exposures to such sub-
an appliance. Temperatures in storage damage the utensil and the appliance.
areas abovethe unit may beunsafe for stances.
some items, such as volatile liquids,
cJeanersor aerosolsprays. ALUMINUM FOIL Users of this appliance are hereby
UTENSIL SAFETY in this book. Improperuse of aluminum sultin low-level exposuretosome ofthe
Use only pans that have flat bottoms fect cooking results, and canalso result formaldehyde and soot,due primarilyto
andhandlesthatare easily graspedand in shock and/orfire hazards, the incomplete combustion of natural
stay cool. Avoid using unstable, gasor liquid petroleum(LP) fuels. Prop-
warped, easily tipped or loose handled erly adjusted burners will minimize in-
pans. Do not use pans if their handles PLASTICS complete combustion. Exposure to
twistandcannotbetightened. Pansthat Many plastics are vulnerable to heat. these substances can also be mini-
are heavyto movewhen filled with food Keepplastics awayfrom parts ofthe ap- mizedby properlyventingthe burners to
mayalso be hazardous, pliance that may become warm or hot. the outdoors.
erly contain food and avoid boilovers. NOTICE AND WARNING
quiresbusinesses towarn customersof
Use aluminum foil ONLY as instructed warned that the burning of gas can re-
foil may cause damage to the oven, af- listed substances, including benzene,
Alwaysplacea panoffood ona surface AEROSOL SPRAYS VENTILATING HOOD
burnerbeforeturning iton, andturn it off Many aerosol-type spray cans are EX- To reduce the hazard of storage above
before removing the pan. PLOSIVE when exposed to heat and a range, install a ventilating hood that
may be highly flammable. Avoid their projects at least 5 inches beyond the
Always turn pan handlesto the side or use or storage near an appliance, bottom edge of the cabinets. Clean
backof appliance, not out into the room hoodfrequently to prevent grease from
where they are easily hit or reachedby SELF CLEAN OVEN accumulating on hood or its filter.
smallchildren. To minimize burns, igni- Donotcleandoorgasket.Thedoorgas- open flame, immediately turn off the
tionofflammablematerialsandspillage ket is essential for a good seat. Care hood'sfantoavoidspreadingtheflame.
due to unintentional contact with the should be taken not to rub, damage, or After thoroughly extinguishing flame,
utensil, do not extend handles over ad- move the gasket. Do not use oven the fan may be turned onto remove un-
jacent surface burners, cleaners of any kind in or around any pleasant odor or smoke.
• ovenracks,and other utensils,andwipe
_J_ cleaning the oven, remove broiler pan,
part of the self clean oven. Clean only
parts listed in this booklet. Before self
off excessive spillovers.
It is normalfor the cooktop ofthe range
to become hotduring a selfclean cycle.
Therefore, touching or lifting the cook-
top during a clean cycle should be
avoided.
Shouldaboiloveror spilloverresultin an
-3-
Page 5
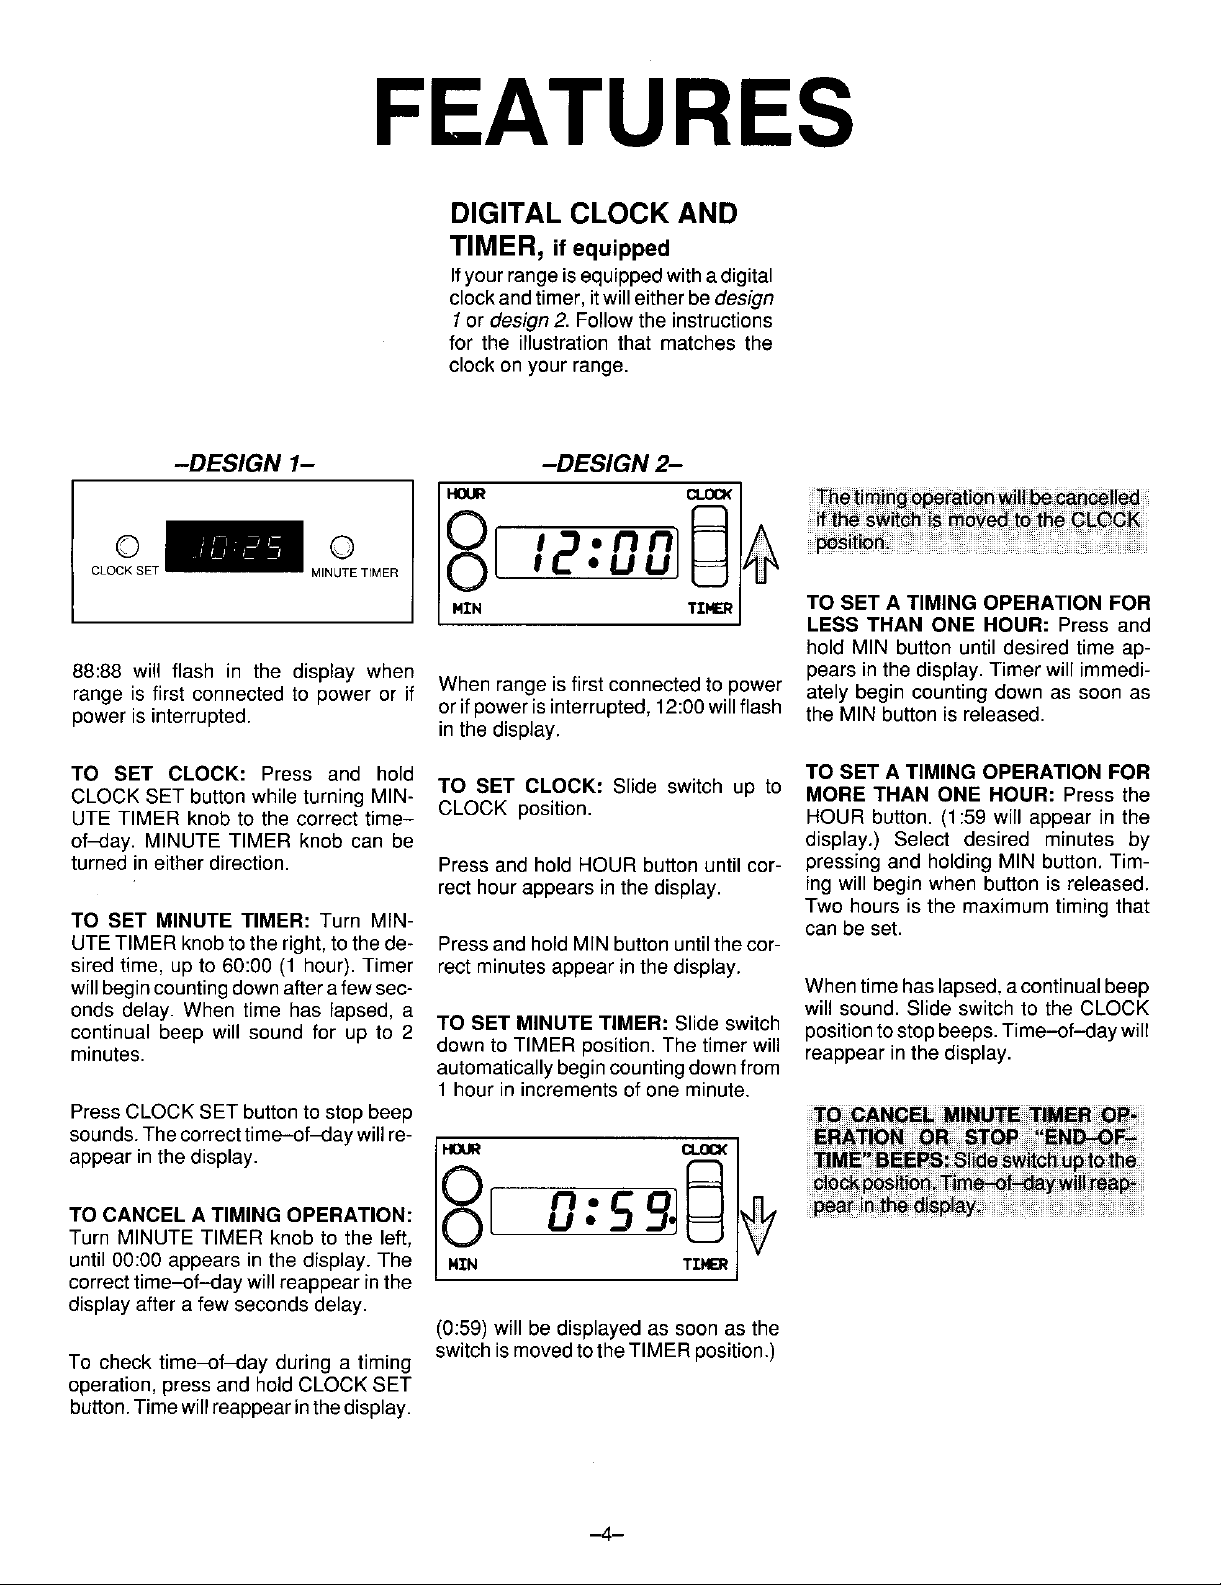
FEATURES
DIGITAL CLOCK AND
TIMER, if equipped
Ifyourrangeisequippedwith adigital
clockandtimer, itwilleither bedesign
1or design2. Followthe instructions
for the illustration that matches the
clock onyour range.
-DESIGN 1- -DESIGN2-
cLoOsE M,NOET,M RI2:00
MZN TZ_ TO SET A TIMING OPERATION FOR
88:88 will flash in the display when pearsinthe display.Timer willimmedi-
range is first connected to power or if When rangeisfirstconnectedto power ately begin countingdown as soon as
powerisinterrupted, orifpowerisinterrupted,12:00willflash the MIN buttonis released.
TO SET CLOCK: Press and hold TO SET A TIMING OPERATION FOR
CLOCK SET button whileturningMIN- TO SET CLOCK: Slide switch up to MORE THAN ONE HOUR: Press the
UTE TIMER knobto the correcttime- CLOCK position. HOUR button.(1:59 willappear inthe
of-day. MINUTE TIMER knob can be display.) Select desired minutes by
turnedin eitherdirection. Pressand holdHOUR buttonuntilcot- pressing and holdingMIN button.Tim-
TO SET MINUTE TIMER: Turn MIN- canbe set.
UTETIMER knobtotheright,tothede- PressandholdMIN buttonuntilthecor-
sired time, up to 60:00 (1 hour).Timer feetminutesappearin thedisplay.
willbegincountingdownafterafewsec- Whentimehaslapsed,acontinualbeep
onds delay. When time has lapsed, a will sound. Slide switch to the CLOCK
continual beep will sound for up to 2 TO SET MINUTE TIMER: Slide switch positiontostopbeeps. Time-of-daywill
minutes, down to TIMER position. The timer will reappear in the display.
Press CLOCKSET buttonto stop beep TO CANCEL MINUTE TIMER OR
sounds.The correcttime-off,lay will re-
appear inthe display. HOUR Ct..OCX
inthe display,
recthourappears inthe display, ingwillbeginwhen buttonisreleased,
automatically begincountingdown from
1 hour in increments of one minute.
_ _ if_ S_it_ N _OV_ to _ CLOGN
LESS THAN ONE HOUR: Press and
holdMIN buttonuntildesired time ap-
Two hoursis the maximumtiming that
Turn MINUTE TIMER knob to the left,
until 00:00 appears in the display. The NIN TZ._ER
correcttime-of-day will reappear inthe
display aftera few seconds delay.
To check time-of_ay during a timing
operation,press and hold CLOCK SET
button.Timewillreappearinthe display.
oLo.s g
(0:59)will be displayed as soon as the
switch ismovedtothe TIMER position.)
,_4_
Page 6

FEATURES
ANALOG CLOCK AND EYE LEVEL OVEN
TIMER, if equipped if equipped
The upperovenwilleitherbe a conven-
12 tional ovenor a microwaveoven.
11 1
In .\\\\\OrF//_,. ,.
--_ _,_ DOnot use the upper oven for cooking
-__--_._i i "_aw,-'--- itemsthatare tooheavyor bulkyto ban-
9 E__ 3 die easily, especially if considerable
8 "///,j 3o _.x__ 4 volved. Removing such foods from the
'snljll_\\\\"
7 6 5 oven isdifficultand can be hazardous.
TOSET CLOCK: Push in and turn Min- food. However, it does havesome limi-
uteMinder knobto the correcttime-of- tations.Do not usea large cookie sheet,
day. Be sure MinuteMinder hand ison pan or other utensilswhich willblock air
OFF after setting clock, flow inthe oven. Usethe largeroven for
TO SET MINUTE MINDER: Turn knob
in either direction to the desired time. MICROWAVE OVEN:
Whenthe buzzersounds, manuallyturn Refer to the separate Use and Care
the Minderto OFF. booklet for information on the micro-
amounts of hot fat or liquids are in-
CONVENTIONAL OVEN:
The size of this oven makes it conven-
ient for cooking smaller quantities of
optimum baking results.
wave oven,
-5-
Page 7

FEATURES
CONTINUOUS CLEANING
OVEN (if equipped)
WHAT IS THE CONTINUOUS MANUALLY CLEANING HINTS
CLEANING OVEN? HEAVY SPILLOVERS Brittle crustsor stainscanbe loosened
The finish of the ContinuousCleaning The special finish will clean most spat- by GENTLY tapping stain with a
Oven isidentified by its darkgray color, ters during normal oven use unless wooden or plastic utensil. Brush away
and rough, porous texture. The rough there is a heavy buildup of soil. Heavy any loose soil that flakes off. Varnish
texture prevents grease spatters from spillovers such as pie or casserole type stains usuallyneed to be softened
formingbeadswhich rundown thewalls boilovers will not clean effectively with- with a small amount of water or damp
leaving unsightly streaks. Rather, the out some manual help. The crusty or cloth. Remaining soil will gradually re-
rough texture absorbs spatters and al- varnish-like stainsthat form from these ducewith continuedoven use at normal
lows them to spread, thus exposing a spillovers clog the pores and prevent baking temperatures.
largerareato the hotoven air.The cata- the special finish from being exposedto
lyst, whenexposed to heat, speeds the the hot oven air. This greatly reduces
oxidationof soil. the cleaning effectiveness of the finish.
DO NOT USE ANY TYPE OF OVEN
CLEANER, POWDERED CLEANS-
Cleaning action automatically begins Thesecrustyorvarnish-likestainsmust ERS,SOAP, DETERGENT ORPASTE
wheneverthe oven is turned onfor bak- either be removed or broken up before ON ANY CONTINUOUS CLEANING
ingor roasting.The oven MUST be"on" cleaning can effectively take place. SURFACE. ALSO, DO NOT USE ANY
for cleaning to take place. No cleaning ABRASIVE MATERIALS, STEEL
will occurwhen the oven is off. Thespe- WOOL, SHARP INSTRUMENTS OR
cialcatalytic finish must be exposed to TO MANUALLY CLEAN SCRAPERS FOR THEY WILL DAM-
hot oven air before soil will begin to HEAVY SPILLOVERS AGE THE FINISH.
gradually reduce in size. Brushoff heavy soil with a nylonbrush
orplastic pad.DONOT USEpapertow-
FACTORSAFFECTING LENGTH OF els, cloths or sponges forthe oven walls
CLEANING TIME are porous and particles of thesemate- Avoid spirlovers by using utensils that
The higher the oven temperature, the rials willrub off onthe walls. Rinsearea are large enough to hold food. A cookie
fasterthe cleaning action. The length of with clear water only. sheetorpieceofaluminumfoil, just a lit-
cleaningtime will depend on these fac- tie largerthanthe pan,can be placedon
tors:Type ofsoil, amountor size ofsoil, the rack directly belowthe rack holding
oven temperature and length of time the utensilto catch spills.
ovenisin use.Time mayvaryfromafew
minutestoseveralhours.Soil deposited
atthe end of a cycle may still bevisible.
This will usually fade with continued Over a period of time, wear marks may
oven use until the soil gradually disap- appearon the embossedracksupports.
pearsorcan bewipedup manually.The This is normal and results from sliding
oven will appear presentably clean, the racks in and outof the oven. Wear
eventhough some spattersmaybe pre- markswill not affect thecleaning action
sent. ofthe oven.
-6-
Page 8

USING YOUR COOKTOP
IGNITION SYSTEM PILOT IGNITION PILOTLESS IGNITION
Your rangeis equippedwitheitherpilot Whentherange isfirstinstalled,the pi-
ignition(usinga pilotflame to lightthe lotsmay be difficulttolightdue toair in
burner) or pilotless ignition (using a the gas line. To bleed off air from the
sparkfrom an ignitorto lightthe burner), line, hold a lighted match next to the
Besureallsurfacecontrols aresetinthe ceed as directed below.
OFF position prior to supplying gas to
theappliance. To light pilot: Remove or raise and
burner and turn knob on. When the
burnerlights,turn the knob offand pro-
support cooktop on metal rod, if
equipped.Holdlightedmatch near the TO OPERATE SURFACE BURNER
pilot ports. WITH PILOTLESS IGNITION DURING
A POWER FAILURE:
sition. Hold a lightedmatch tothe de-
sired surface burner head.
2. Turn knob to LITE. The burner wilt
then light.
3. Adjust the flame tothe desired level.
I_ _ I 1. BesureallcontrolsareintheOFFpo-
-7 m
Page 9

USING YOUR COOKTOP
COOKTOP SURFACE BURNERS LIGHTING SURFACE
To remove cooktop: When cool, first BURNERS
remove grates and drip bowls, if 1. Place utensilonburnergrate.
equipped.Grasp two front burnerwells
and lift up, 2. Push in andturnknobto the LITE po-
Rang_ featuring Se_i_d I I
that matchesthe burners onyour range.
sition.
t curedinplaceduringtransportationwith
I eithera shipping screw or a spring clip.
Ii!_ I Uniburners and single burners are se-
. . . the desired flame size.
__@iiic_cdi_ / _ S Asthe burner heatsand cools,you may
Burner grates must be properly posi-
tioned before cooking. Do not operate Allow burner tocool. Liftcooktop. To re- Ifflame should go out during a cooking
burnerswithout a panon the grate. The move uniburner, lift up slightly andpull operation, turn the burner off. IF GAS
porcelainfinish may chip withouta pan out. Under nocircumstances are burn- HAS ACCUMULATED AND A
to absorb the intense heat.
When reinstallingsquare grates, place washer. Burner and burner tube must ODOR TO DISAPPEAR BEFORE
indented sides together so straight bedry before use. RELIGHTING BURNER.
sidesare at front and rear.
Followthe instructions tothe illustration _ _
Once the range is installed, these may
be removedto allow quick andeasy re-
moval of the burner.
One piece uniburner
I__ 3. After the burner lights, turn knob to
hearsounds ofthe metalexpandingand
contracting. This is a normal operating
sound of the burner.
ers to be taken apart for cleaning. STRONG GAS ODOR IS DETECTED,
Uniburner can be cleaned in the dish- WAIT 5 MINUTES FOR THE GAS
You may heara "popping" soundon LP
Standard single burner gas when the surface burner is turned
A properly adjusted burner with clean
portswill light within afew seconds.On
naturalgas, the flame will be bluewith a
deeperblue inner core; thereshould be
notrace of yellowintheflame. A yellow
I _ 11 _ theOff'Thisisan°rmal°peratingsound°fburner.
Remove or support cooktop. Grasp Iowflame occurs. On LPgas, some yel-
burner head and tilt to release tab from low tipping isacceptable, This isnormal
slot near ignitor, Liftup and toward back and adjustment is not necessary.
ofcooktop untilair shutter endof burner
releases fromvalve.
-8-
flame indicatesan improper mixture of
air/gas. This wastes fuel, so have a
serviceman adjust the mixture if a yel-
Page 10

USING YOUR COOKTOP
SELECTING FLAME SIZE
If a knob is turned very quicklyfrom __ I
HIGHto LOWsetting,theflamemay go
out, particularly if burner is cold. If this ---__
occurs,turn the knobOFF. Wait several
seconds,then lightagain.
Use HIGHto quicklybringfoodsto a boil
orto beginacooking operation. Reduce
to a lower setting to continue cooking.
Never leave food unattended when us-
ing a HIGHflame setting. PROPORTIONAL VALVE
To obtain a lower flame size, turn knob
back toward the OFF position until the
I desired flame size is reached. The Iow-
_-..... -_. the OFF position.
__"_j_'J"Z_-_'_"_ _ est flame setting is located adjacent to
Flameshould be adjustedso itdoes not _
extend beyond the edge of cooking
utensil.Thisisforpersonalsafety andto Use LOW to simmer or keep foods at
prevent damage to cabinets above serving temperatures. Some cooking
range, maytake placeifthe utensil is covered.
GRIDDLE AND 5TH BURNER
(36" RangeOnly) RemoveGriddle Cover: To Clean Griddle:
1. Press downon anycorner. Whengriddleiscool,removeandwash
2. Slidefingersunder2sidesofgriddle in hotsoapywater; rinse anddry. Do
GREASEPAN cover and lift off. DO NOT pry off not wash in the dishwasher. Deter-
with _,,,j instrument or tool. gents will completely remove the sea-
To Use Griddle:
_,._ _j _ _ soning.
turningongriddleburner. Top cover To Clean Grease Cup:
must be removedwhenever griddle There is a grease pan located under
burner is in use. the griddle burner. This pan should be
f\_ 2. Be sure grease cup, located under
• _ =_ griddle, is in place.
I 3. Position griddle correctly. For even FIFTH BURNER
5TReURNER cooking results, preheat griddle US-
UNOERGRIDDLE
Before using the griddle for the first minutes or until the entire cooking fifthsurface burner. Merely removethe
time, season it by lightly rubbing the surface is heated. Sprinkle a few griddle and replace with extra grate
surface with a small amount of un- dropsof water over griddle. If prop- provided.
salted shortening.To prevent damage erly heated, water will bead and
tothe finish, do notuse metal utensils, dance. The water will sizzle and
a high flame setting or suddenly steam if griddle is nothot enough.
change temperatures, such as im- 4. Never replace griddle cover until
mersing hot griddle in water, griddle has cooled completely.
_ 1. Remove griddle cover BEFORE
ing a low flame setting for about 5 The griddle burner can be used as a
removedand
cleaned as
necessary.
-9-
Page 11

USING YOUR OVEN
PILOT IGNITION OVEN DOOR OVEN BOTTOM
Be sure oven control is set in the OFF When opening oven door, allow steam _ro_eCt d_efi ;_ttom agaihst exces-
positionpriorto supplying gasto the ap- andhotairto escapebefore reachingin
pliance, oven to check, add or remove food. a_ysp!i[s)!USe_he,co_teCtsizecook-
_Umfoi!ithatiss!ightlyl_tg_rtha_t_e
To lightoven pilot:Whencool,remove Oven door isremovableon 30 and36 e_Qkingutensi! t_e _a_kbelOv,'tile
ovenracksand ovenbottom.With the inchranges only.20 inchrange has a utensil wil!Cat¢_s_ills
oventhermostat knob in the OFF posi- non-removable oven door.
tion, holda lighted matchto the pilotlo-
cated at the back end of the oven
burner. Once pilot lights, replace oven To remove door: Open door to the Your oven will be equipped with one of
bottom and racks. "stop" position(opened about4 inches) the following types ofoven bottoms. Be
and grasp doorwith both hands at each sure oven bottom iscool. Removeoven
/_ side. Donotusedoor handleto liftdoor. racks.
--_-;_ _ _ Lift upevenly until door clears thehinge
arms.
20 inch range: Loosen the two screws
located along the front of the oven bob
------ thefrontoftheoven bottom.Graspoven
bottom, lift up and pull forward until rear
tabs release. Then, remove oven bot-
tom from oven.
PILOTLESS IGNITION back ovenwall. Lower into place. Slide
GIo bar-type ignition bottomisfitted intoslots andscrews are
With this type of ignition system, the tight. If notcorrectly replaced,oven bot-
ovenwillnotoperateduringa powerfail-
ure or if unit is disconnected from the CAUTIONi tom may become warped and cooking
wall outlet. No attempt should be made resultswill beaffected.
to operate oven duringa powerfailure. _ I_!a_ _h_againS_ th_r_nge fa_i_
de_t!_ _i_Never p!a_e'hand Ot_in_
OVEN BURNER :fron_='oven:f_amelY_5 cedld be i:n:
The size and appearanceof a properly
adjustedoven burner flame should be
as shown:
To replace door: Grasp door at each
side, align slots in the door with the
r_ hinge arms and slide door down onto
I _;'_i the hinge arms until completely seated
,_ _] Cone in center is smaller DO h0t attempt _O_peh _r _i0se door
on hinges.
# ietey
tom. Slide the screws back to release
To replace: Inserttabs intoslots onthe
twoscrewsforwardand tighten. Be sure
_d
-- =" " Coneapprox, 1/2-inch ing reSuitswitl Ioeaffectedif doo#iSnot
besuredoor is_mpletel,y ¢i0sed:Bak_
SecurelyClosed.
-10-
Page 12

USING YOUR OVEN
36 inch range: Push oven bottom to- BROILER DRAWER OVEN RACKS
ward backofoven.Liftfront endup. Pull 20 inch range: When broileriscool, re- The two oven racksare designedwith a
towardfront of oven and remove, move broiler insert and pan. Open "lock-stop" position to keep racks from
drawer halfway and pull metal clip Io- accidentlycoming completely out of the
To replace: Reverse procedure, catedincenterofdrawerbottomupward oven.
_- , drawercannow bepulledalltheway out
i 'i ' _ / ofthe compartment. To remove: Be sure rack is cool. Pull
.. _ rack out to the "lock-stop" position.Tilt
_/ and continue pulling until rack re-
as far as itwill go (about 2 inches). The
up
leases.
_ _---._-. _ i' TO replace: Place rack on rack sup-
" tionto besure rackiscorrectlyreplaced.
30 inch range: Slide the two catches, RACK POSITIONS:
locatedat each rear corner of the oven RACK1 (topof oven) usedfortwo-rack
bottom,toward the front of the oven. Lift baking.
the rear edge of the oven bottom To replace: Slide grooves at top of
slightly, then slide it backuntilthe holes draweronto guiderailsat sidesofbroiler
in the front edge of the oven bottom compartment and push drawer in to RACK 2 used for one-rack baking or
clear the pins in the oven front frame, close, broiling.
Removeoven bottom from oven.
30 or 36 inch ranges: When broiler is RACK3 usedfor mostone-rack baking
cool, removebroiler insert andpan. Lift and for roasting somemeats.
and rotatethe two levers "A"tothe side,
pull drawer forward, up and out.
2t _ gelfood cake or pieshells.
_:_. ports, tilt up and push toward rear of
oven. Pull rack out to "lock-stop" posi-
RACK 4 used for roasting large meats,
cooking largerfoods and for bakingan-
2
3
To replace: Fit holes onto pins, lower _ '"
rear of oven bottom and slide the
catches back to lock oven bottom into To replace: Line up hooks on drawer
place, slides "B"with holesin drawerand push
untilhooksarecaught. Returnlevers "A"
to locking position.
-11-
Page 13

USING YOUR OVEN
THERMOSTAT KNOB
TheTHERMOSTAT knob is usedto se- Selectin0 temperature higher than de- Ifcooking on two racks,staggerpans so
lectand maintainthe oventemperature, sired will NOT preheat the oven any one is not directly over the other. Use
Always turn this knob just TO the de- faster. Preheating at a highertempera- rack positions 2 and 4, or 1 and 3, de-
sired temperature not to a higher tern- lure mayhave a negative effectonbak- pending on baking results, when cook-
peratureand then back. On some mod- ing results, ing on two racks.
els, there is an indent at the 350°F set-
ting. Turn this knob to OFF whenever
theoven is notin use.
) HINTS:
HOW TO SET OVEN:
THERMOSTAT 1. Place rack in correct position.
2. Turnthermostat knobto desired tem-
perature setting for baking or roast-
PREHEATING ing.Turn to BROIL for a broil opera-
Preheatingis necessary for baking. AI- tion.
lowoventoheatfor 10to 15minutesbe-
fore adding food. It is not necessary to NEVER placepansdirectly onthe oven
preheatoven for roasting, bottom. Do not cover entire rack with
aluminum foil. Donot placefoil directly 4. Checkfoodfordonenessatminimum
onoven bottomor placefoil directlyun- time in recipe. Cook longer if neces-
Itis notnecessarytopreheat for broiling der utensil. To catch spillovers, cut a sary.
unless darker browning is desired or if piece of foil a little larger than the pan
cooking thin (3/4-inch) steaks. Allow and place iton the rack below the rack 5. Turn thermostat knob toOFFand re-
burnerto preheat 3 to 5 minutes, containing the utensil, movefood from the oven.
3. Preheat oven for baking operations
or if called for in the recipe.
-12-
Page 14

USING YOUR OVEN
COMMON BAKING PROBLEMS AND WHY THEY HAPPEN
PROBLEM
Cakesare uneven. Pans touching each other or Cakes don't brown on top. Incorrect rack position.
Cake high in middle. Temperature set too high. Overmixing.
Cake fails. Too much shortening or sugar. Uneventexture. Too much liquid.
Cakes, cookies, biscuits Incorrect rack position.
don'tbrown evenly. Oven door notclosed properly. Cakes crack on top. Batterovermixed.
ovenwalls. Temperature set too low.
Batter unevenin pans. Overmixing.
Temperature set too low or Too much liquid.
baking time too short. Pan size too large or too little
Oven not level, batter in pan.
Undermixing. Ovendoor opened too often.
Too much liquid.
Excessive shrinkage. Too littleleavening.
Bakingtime too long. Pan too large.
Overmixing. Temperature settoo high.
Too much flour. Bakingtime too long.
Pans touching each other or Panstoo close to each other
ovenwalls, or oven walls.
Incorrect rack position.
Too much or too little liquid. Undermixing.
Temperature set too low. Temperature set too low.
Old or too little baking powder. Bakingtime too short.
Pan too small.
Oven door opened frequently. Cakes have tunnels. Not enough shod:ening.
Added incorrect type of oil to Too much baking powder.
cake mix. Overmixingor at too high a
Added additional ingredients speed.
to cake mix or recipe. Temperature set too high,
Door gasket notsealing Temperature set too high.
properly. Too muchleavening.
Incorrect use of aluminum foil. Incorrect rack position.
Oven not preheated.
Pans darkened, dented or
warped. Cake not done in middle. Temperature set too high.
I F&'oPi mu_[esU!_s _ak_o_e_k if_ _g_k_ t Pantoo small.
_0 _a_ks,staggerpabs S_ _n_ iS _0i dlrec_ty_e_ _ ] Bakingtime too short.
Cakes, cookies, biscuits too Oven not preheated.
brown on bottom. Pans touching each other or
oven walls. Pie crust edges too brown. Temperature set too high.
Incorrect rack position. Pans touching each other or
Incorrect useof aluminum foil. ovenwalls.
Placed 2 cookie sheets on one Edges of crust too thin.
rack.
Used glass, darkened, stained,
warped or dull finish metal Pies don't brown on bot- Used shiny metal pans.
pans. (Usea shiny cookie tom. Temperature set too low.
sheet.)
[ Fo!I0w _0okware rnanufactu!er!s !n_t!ucti0n_ i0r 0Y_n ] Pies have soaked crust. Temperaturetoo low at star{ of
I temperature:Glassware and d_rk cookw_re Such as] baking.
I Eck0 s Baker_Sec_'et require lower ngthe _verl tern | Filling too juicy.
peratureby25#F .......... _ Used shiny metal pans.
-13-
Page 15

USING YOUR OVEN
BROILING HINTS
Broiling is a method of cooking tender broiler pans. They do not provide a broiling is completed, remove broiler
foods by direct heat under the burner, separate tray. pan from compartment. Grease left in
The cooking time is determined bythe the pancan catch fire is the ovenisused
distance between the meat and the without removing the broiler pan.
burner, the desireddegree ofdoneness Prepare meat by removing excess fat
and the thickness of the meat. and slashing remaining fat, being care-
Broiling requires the use of the broiler
pan and insert. The correct position of Placebroiler pan on the recommended
the insert in the pan is very important, rack position. For brown exterior and _.
The broiler insert should be placed in rare interior,themeatshouldbecloseto
the pan so grease will drain freely. Im- the burner. Place further down if you
properuse maycause grease fires, wish meat well done. Excessive smok-
The broiler insert CANNOT be covered
with aluminum foil as this prevents fat
fromdraining into pan below. However, NOTE: Below are recommended rack
for easier cleaning,the broiler pancan positions. Remember,the closer to the
belined with foil. Donot use disposable flame,the quickerthefoodcooks. When
ful not to cut into meat. This will help Broilingisdone inthe lower broiler corn-
keep meatfrom curling, oartment.
, ,/;L J
ingmayoccurifmeat isplacedtooclose _/_)t:;;_._ .,_'_
to the oven burner.
BROILING CHART
STEAKS 2 140°F rare 8 to 12 min.
1-inch 2 160°F medium 12 to 16min.
2 170°F well done 16 to 22 min.
HAMBURGERPATTIES 2 140°F rare 10to 12 min.
3/4 to 1-inch 2 160°F medium 12 to 14 min.
2 170°F well done 14 to 18 rain.
FISH FILLETS,fresh or thawed
1-inch 2 flaky 14 to 20 min.
BACON 2 crisp 5 to 10min.
*Rack 1is thetop rackposition.
** Turn thermostat to 450°F.
t70°F well done t5to20 m!n :
-14-
Page 16

MAINTENANC
ELECTRICAL 4. Slide range forward to disengage ANTI-TIP BRACKET
CONNECTION range from the anti-tip bracket. (See
Appliances which require electrical bracket.) ping, range should be secured to the
powerare equippedwith a three-prong floor by sliding rear leveling leg intoan
grounding plug which must be plugged 5. Drop-in ranges, wall ovens and anti-tip bracketsupplied withthe range.
directly intoa properly groundedthree- cooktops: Remove screws that so-
hole 120volt electrical outlet, cure appliance to cabinet. Remove
7' forgasleaksafterreconnection.(SeeADJUSTMENT (if equipped)
_ test method.) The LOWsetting should producea sta-
" to LOW.Theflameshould be 1/8 inchor
__ Installation Instructionsfor gas leak
= CONNECT POWER TO RANGE. Be
Always disconnect power to appli- sure bulb and range parts are cool. Do
ance before servicing, nottouchahotbulbwithadampclothas To adjust: Operate burner on HI for
If an ungrounded, two-hole or other To replace oven light: Use a dry pot and insert a small screwdriver into the
type electrical outlet is encountered, IT holder, to prevent possible harm to center of the valve stem. Adjust flame
ISTHEPERSONALRESPONSIBILITY hands;verycarefullyremovebulb. Re- size by turning adjustment screw in
OF THE APPLIANCE OWNER TO place with a 40 watt APPLIANCE bulb. either direction. Flamemust be of suffi-
HAVE RECEPTACLE REPLACED Reconnectpower to the range, cient size to be stable on all burner
WITH A PROPERLY GROUNDED ports. Ifflameadjustmentis needed, ad-
THREEHOLE ELECTRICALOUTLET. just ONLY on the LOW setting. Never
The three-prong grounding plug is pro- LEVELING LEGS adjustflame size on a higher setting.
vided for protection against shock haz- Some floors are not level. For proper
ards. DO NOT CUTOR REMOVETHE
THIRD GROUNDING PRONG FROM baking, yourrange mustbelevel. Level-
THE POWER CORD PLUG. ing legs are located on each corner of
HOW TO REMOVE front-to-back and side-to-side. Level
RANGE FOR CLEANING by turningthe legs.
AND SERVICING
When necessary, follow these proce-
duresto removeapplianceforcleaning
or servicing:
Installation Instructionsforlocation of To prevent range from accidently tip-
appliance fromcabinet.
6. Reverse procedure to reinstall. Ifgas
line has been disconnected, check PROPORTIONAL VALVE
ble flamewhenturning the knobfrom HI
LIGHT REPLACEMENT lowerand must be stable on all portson
Before replacing oven light bulb, DIS- LOW setting.
the bulb may break, about5 minutes to preheatburner cap.
Turn knob back to LOW; remove knob,
thebase ofthe range. Placea level hori-
zontally on an oven rack and check
1. Shut-off gas supply to appliance. _
2. Disconnect electricalsupply to appli-
ance.
3. Disconnect gas supply tubing to ap- _)_ NOTE: All gas adjustments should be
pliance, done by a qualified servicer only.
-15-
Page 17

CARE AND CLEANING
Baked Enamel Soap &water. Pasteof Usea dry towelor clothto wipe upspiIIs,especiallyacid spills, assoonasthey occur. (Thisisespe-
Side panels baking soda & water, ciafly important for white surfaces.) When surface is cool, wash with soapand water. Donot use
Backguard abrasive or harsh cleaning liquids andpowders or oven cleaners. These will scratch and perma-
Oven door nently damage the finish. Dry with a soft cloth.
Broilerdrawer
Broi_r pah &
........ s_urih 9 pad I Cle_5 h dls_as_l'i_ d_si_ed
Burner box Soap & water. Burnerbox, located under lift-up cooktop, shouldbe cleanedfrequentlyto remove spillovers. Ifsoil
is not removed and is allowed to accumulate, it may damage the finish. To clean, removesurface
burnersandcleanwith soap andwater, rinse and dry. NOTE: Cooktop on sealed burner models do
not lift up.
Control knobs Soap & water. To remove knobsfor cleaning, gently pullforward. Wash in milddetergent and water. Do not use
ibap& water P_Ste_f Wasll _ _e_ an__a_e_ R_ _ib_bb_ _i! _th paste_f 68.ki_9_d_ and _tCr TOavoid
Backguard J t a_0 s_ & water i_siB_st_ini_bf #ve_dbe_:gl_s;a6#ot ove_tu_at#plOth_DS:dotaSeabrasiYematedNssUcb as
Over_Mndow .... .... _/indow¢ie_niSgtb d _b_i _g_as ste_ _b_ _ 56wd_red_e_n _g a_en_ T_ _ilt da_ag6 g &s_:R 6s_ _it_ _i_ar
Grates Paste of bakingsoda Gratesare madeofporcelain coatedsteel.Theycanbecleanedatthesinkwithdetergentandwater
andwater, scouring or in the dishwasher. Clean stubborn soil with soap filled scouring pad.
powder,detergent &
water. Soap filled scour-
ingpad.
Oven racks Soap & water. Cleansing Cleanwith soapywater. Remove stubborn soil with cleansing powder or soap filled scouring pad.
powders & plastic pads. Rinse and dry.
Soapfilled scouring pad.
Porcelain finish Soap & water. Paste of Porcelain enamel is glass fused on metal. Itmay crack or chip with misuse. Cleanwith soap and
Cooktop baking soda & water, water when partsare cool.Allspillovers, especially acidorsugarspillovers, should bewipedupira-
Non-abrasive plastic mediately with a dry cloth. Surface maydiscolor ordull if soil isnot removed.When surface iscool,
pad or sponge, clean withwarm soapy water.NEVERWIPE OFFA WARM OR HOT ENAMEL SURFACE WITHA
abrasive cleaning agents. They will scratch finish and remove markings. Rinse, dry and replace.
Turn each burner ON to see if knobs have been replacedcorrectly.
DAMP CLOTH.THIS MAY CAUSE CRACKINGAND CHIPPING. Never use abrasive or caustic
cleaning agents on exterior finish of range.
;See p_e B for _bmm#r_l C#e_ ei_b_e _6rcel_in _ _0( _ m_t_ii C_;rihg pad_a_t_ _ill _r_i_ the#o_¢ei_ic_b_tbi_i
_ht nous_ e_n e _anei
oven b_fr_ bns): : t_p6_eb _fi ove_ bu fNiow Na_ufa_r_'_ diigctibnS! ;;
Silicone rubber Soap& water. Doorgasketislocatedon ovenframe.Washwith soapandwater,rinseanddry. Donot removedoor
Doorgasket gasket.
Surface b_tnbrs Soap & _ate_: Pagi_ _f
Unib_mer baking S_;_ _er pi_i_ _C_r ng_ad;a_d _ pasi_of bak;ng;;sCdaandW_ Ciean;_0_ _i_h a;strai_t _in; _ not
_d C£EAN BUBNERSeiTa SHE FQU..OWiNGda_siic eiea6e& oven Cle_n6i_; s_eelwobl or &6ra-
.... ' : can be ari_d iCthe ovensei at i40_'F:
CAUT ON
-16-
Page 18

SERVIC
BEFORE CALLING A SERVICE TECHNICIAN, CHECK THE FOLLOWING:
PROBLEM CAUSE CORRECTION
1. Surface burner fails to light a. pilots are not lit(pilot ignition) a. see page 7 to light pilots
b. power supply not connected b. connect power, check circuit
(pilotless ignition) breaker or fuse box
c. clogged burner port(s) c. clean ports with straightpin
d. burners not placed correctlyonto d. remove andreinstallburnerprop-
gas valve erly
2. Burner flame uneven a. clogged burnerport(s) a. clean ports with straight pin
b. burner not properly positioned b. see page 8 to correctly replace
burner
3. Surface burnerflame a. air/gas mixture not proper a. call servicemanto adjust burner
• lifts off port
• yellow in color
4. Oven burner fails to light a. power supply not connected a. connect power, check circuit
(pilotless ignition) breakeror fuse box
b. pilot is out (pilot ignition) b. see page 10 to light pilots
c. powerfailure (pilotless ignition) c. glo-bar ignition system,
see page I0
5. Oven temperature inaccurate a. ovennot preheated a. preheat oven 3 to 5 minutes
• food takes too long or cooks b. incorrect rack position b. see page 11
too fast c. incorrect useof aluminum foil c. see page 12
• pale browning d. oven bottom incorrectly replaced d. replace ovenbottom correctly
• food over-done on outside e. oven thermostat sensing device e. reinstall sensing device securely
and under-done in center out of holdingclip(s) intoclip(s)
• over browning See Problem Chart on page 13.
6. Clock and/or oven light does not a. powersupply not connected a. connect power supply, check cir-
work (pilotless ignition) cult breaker or fuse box
b. burned out light bulb b. replace light bulb
c. malfunctioning switch, starter or c. call serviceman to check
ballast d. call serviceman to check
d. malfunctioningclock or loose wir-
ing
SERVICING
Electrical supply, if equipped, must be numbers of the appliance. (See front If you did not receive satisfactory serv-
disconnectedfromthe wall outletbefore cover for locationofyour modeland se- icethroughyourservicer or Maycor you
servicing appliance. Donot repair orre- rial numbers.) may contact the Major Appliance Con-
placeanypart ofyour rangeunlessspe- sumer Action Panel by letter including
cifically recommended in this manual. Ifyouare unable toobtain service,write your name, address, and telephone
All otherservicingshould be referred to to us. Our address isfound onthe rating number, aswell as themodel and serial
a qualified technician, plate.See front cover for locationof rat- numbers of the appliance.
ing plate.
HOW TO OBTAIN
SERVICE sponse to your service requirements, 20NorthWackerDrive
If you are not satisfied with thelocal re- MajorApplianceConsumerActionPanel
When your appliance requires service call or write MAYCOR Appliance Parts Chicago,IL 60606
or replacement parts, contact your and Service Company, 240 Edwards
DealerorAuthorized Servicer. Useonly Street, S.E., Cleveland, TN 37311,
genuine factory or Maycor parts if re- (615) 472-3500. Include or haveavail- MACAP (Major Appliance Consumer
placementpartsare necessary.Consult able the complete model and serial ActionPanel)isan independentagency
the Yellow Pages in your telephone di- numbersofthe appliance,thenameand sponsored by three trade associations
rectory under appliance for the service address of the dealer from whom you as acourtofappeals on consumer com-
center nearest you. Be sure to include purchased the appliance, the date of plaints which have not been resolved
your name, address, and phone num- purchase and details concerning your satisfactorily within a reasonable period
ber, along with the model and serial problem, of time.
-17-
Page 19

FULL ONE-YEAR WARRANTY
DOMESTIC GAS OR ELECTRIC RANGE
)liance Parts&ServiceCompanywill repairorreplace,withoutcharge, anypartof yourI
defect inmaterialorworkmanshipduringthefirstyear afterthedateoftheoriginalinstallation.Thiswarrantyextends
tOanyowner during the one-year warranty period.
LIMITED 5 YEAR WARRANTY
Onelectricrangesequippedwithsoliddiscorsmoothtopheatingelements,andongasrangeswithsealedburners,for
anadditional4year periodbeyondthefirstyearofthegeneralcoverageof thiswarranty,Maycorwillreplaceanyofthe
soliddiscorsmoothtopheatingelements,orsealedburnerswhichfailtoheatas a resultofdefectiveworkmanshipor
material.Additionally,Maycor willreplace any smoothtopcookingsurfacewhichcracks or breaksduringnormal
householdcooking.These partsmustbe installedbyaqualifiedperson.Anylaborchargerequiredfor replacementis
notcoveredbythiswarranty.
HOW TO OBTAIN SERVICE
To obtainthe repairor replacementof a defectivepartunderthese warranties,youshouldcontactthedealerfrom
whomyoupurchasedthe applianceora servicerhedesignates.
WHAT IS NOT COVERED BY THESE WARRANTIES
1. Conditionsanddamageresultingfrom improperin- 5. Anyproductusedfor other than normalhousehold
stallation,delivery,unauthorizedrepair,modifica- use. It does notextend to productspurchasedfor
tion,or damage notattributableto a defectinmate- commercialor industrialuse.
rialorworkmanship.
....... 6. Anyexpenseincurredfor servicecallstocorrectin-
2. Conditionsresultingfromdamage,suchas: (1) im- stallationerrorsortoinstructyou on howtousethe
proper maintenance, (b) misuse, abuse, accident, products.
or (c) incorrect electrical current or voltage.
7. CONSEQUENTIAL OR INCIDENTAL DAMAGES :::
3. Warranties arevoid ifthe originalserial number has SUSTAINEDBY ANY PERSONAS A RESULTOF
been removed, altered, or cannot be readily deter- ANY BREACHOFTHESE WARRANTIES ORANY :
mined. IMPLIED WARRANTY. Some states do not allow
the exclusion or limitation of consequential or inci-
dental damages, so the above exclusion may not ::
4. Light bulbs, apply to you.
ADDITIONAL HELP
Ifyou are not satisfied with the local responseto your service requirementsand wish to contact Maycor, please ad- :
dressyourletter tothe CustomerRelations Department,MaycorParts& ServiceCompany, 240 EdwardsStreet,S.E., :
Cleveland,TN 37311 or call (615)472-3500. To save time, your lettershould includethecomplete modeland serial :
numbersofthewarranted appliance,the nameandaddressofthedealer from whomyoupurchasedtheappliance,the
date of purchase anddetails concerningyour problem.
These warranties are the only written or expressed warranties given by Maycor. No one is authorized to increase,
alter,or enlarge Maycor's responsibilities or obligations underthese warranties. These warranties give you specific
legal rights, and you may also have other rights which vary from state to state.
8109P059-60
(6/91)
-19-
 Loading...