

Page 1

Gas Range Featuring
• Sealed surface burners
• Clock and timer, if equipped
• Pilotless ignition
8113P043-60
(1/93)
Page 2
FORFUTUREREFERENCE
Forfuturereferencewe suggest you re-
tain this manual after recording the WARNING: If the informa-
model numberandserialnumber ofthis tion in this manual is not
gas appliance in the spaces provided.
Thisinformationcanbefoundontherat-followed exactly, a fire or
ing platelocatedonthesidesofthelow- explosion may result caus-
er range front frame. Pull out lower ing property damage, per-
drawerto see ratingplate, sonal injury or death.
- Donot store oruse gaso- _z_._
line or other flammable
MODELNUMBER vapors and liquids in the
vicinity ofthis or any Oth-
SERIAL NUMBER er appliance.
-WHAT TO DO IF YOU
DATEOF PURCHASE
These numbers identify your range.
Pleaseusethem in anycorrespon- • Do not touch any elec- • INJURY TO PERSONS
dence or servicecallsconcerningyour trical switch; do not COULD RESULT
appliance, use any phone in your
Pleaseretaintheproofofpurchasedoc- building. • INSTALLANTI-TIP
umentsforwarrantyservice. DEVICES PACKED
SMELL GAS: ,_ WARNING
• Do not try to light any • ALL RANGES
appliance, CAN TIP
• Immediately call your WITH RANGE
gas supplier from a
neighbor's phone. • SEE INSTALLATION
Follow the gas suppli- INSTRUCTIONS
er's instructions.
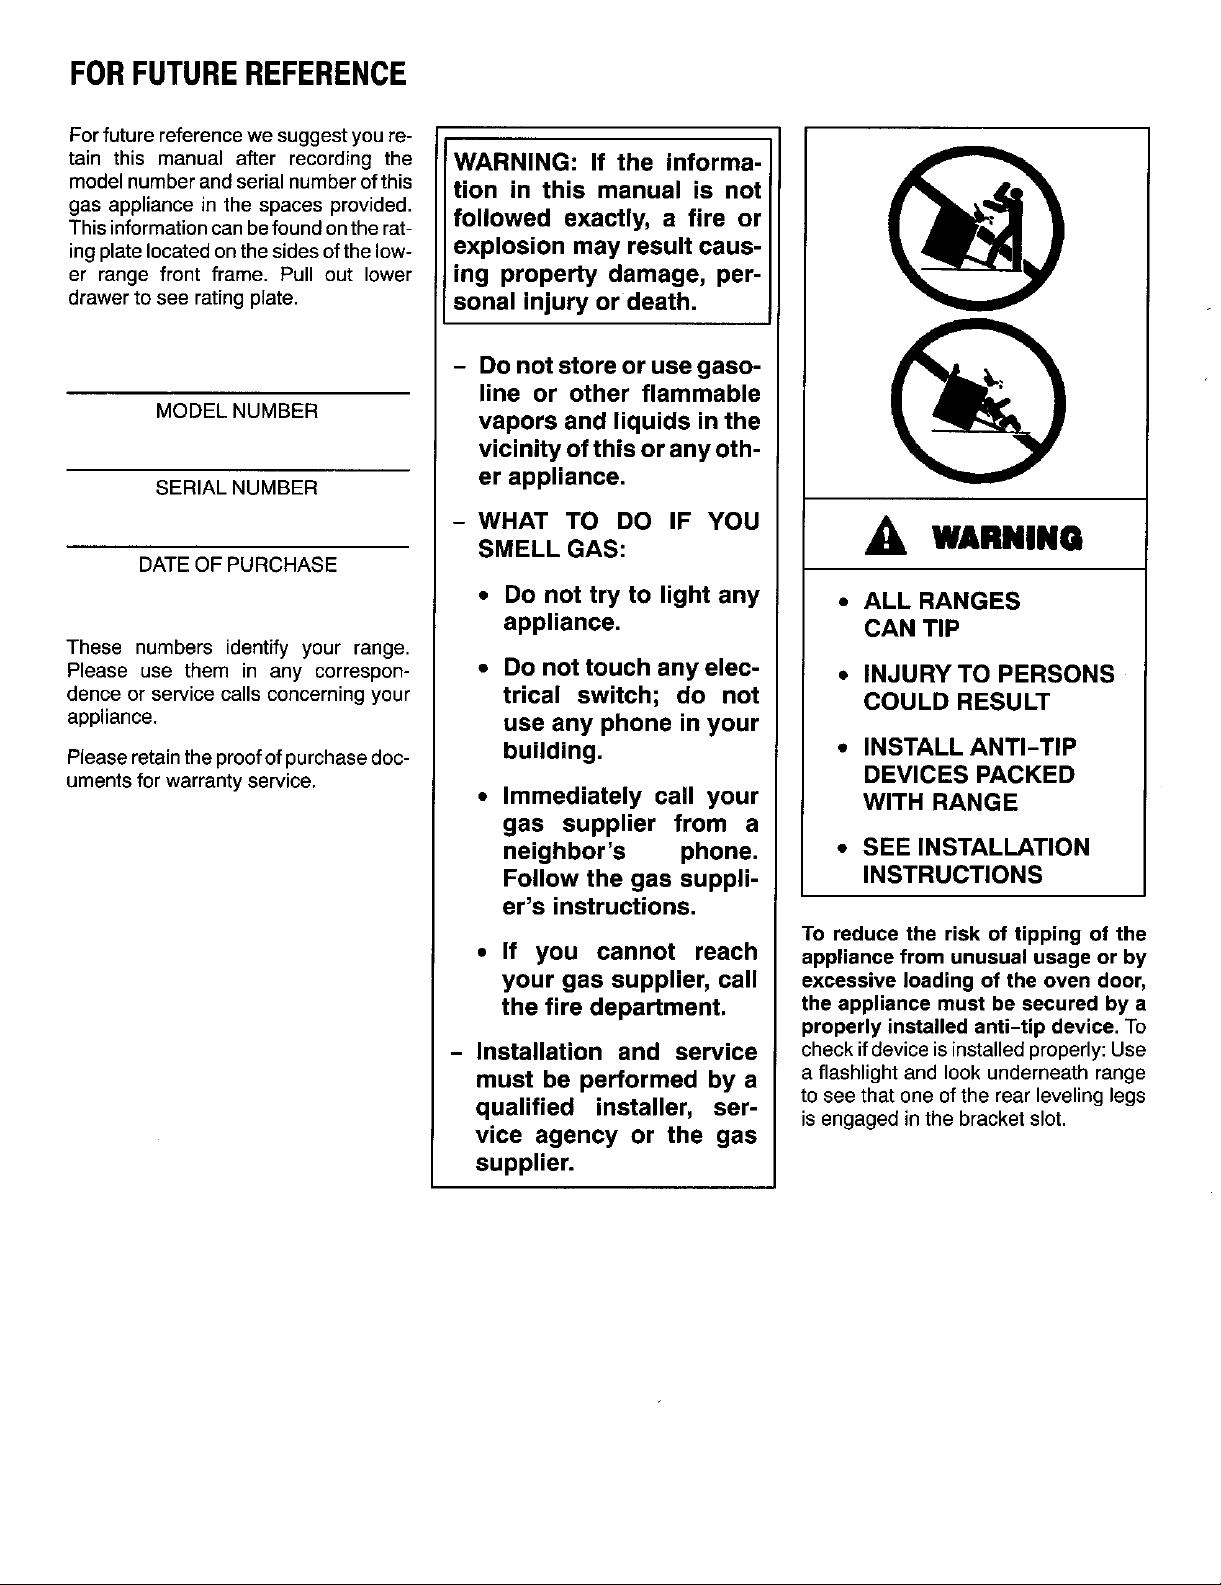
To reduce the risk of tipping of the
• If you cannot reach appliance from unusual usage or by
your gas supplier, call excessive loading of the oven door,
the fire department, the appliance must be secured by a
- Installation and service check ifdeviceisinstalledproperly:Use
must be performed by a a flashlight andlookunderneathrange
qualified installer, ser- to see that one of the rear leveling legs
vice agency or the gas
supplier.
properly installed anti-tip device, To
isengagedinthebracketslot.
L%J
Page 3
Page 4

Page 5
Page 6

Time-Of-DayClock
Ifyour rangefeaturesa time-of-day clockand minutetimer
follow the instructions for the illustration that matches the
clock on your range.
ANALOG CLOCK AND TIMER DIGITALAND CLOCK TIMER
12
11._\OFF/z1
1 ___- CLOCKSET MINUTET/MEFt
"'/llllJl_ TM 88:88 will flash in the display when the
7' 6 5 range is first connected to power or if
power is interrupted.
TOSETCLOCK: Push in and turn Min- TO SET CLOCK: Press and hold
uteTimerknobtothecorrecttimeofday. CLOCK SET button while turning MIN-
BesureMinuteTimer handisonOFFaf- UTE TIMER knob to the correct time of
tersetting clock, day. MINUTE TIMER knob can be
TO SET MINUTE TIMER: Turn knob in
either direction to the desired time. TO SET MINUTE TIMER: Turn MIN-
Whenthebuzzersounds,manuallyturn UTE TIMER knobtotheright,tothede-
theTimer to OFF, sired time, up to 60:00 (t hour). Timer
turned in either direction.
willbegincountingdownafterafew sec-
onds delay.When time has lapsed, a
continualbeepwillsoundforupto2min-
utes.
4
(continued on next page)
Page 7

Time-Of-Day Clock (continued)
ELECTRONIC
CLOCK AND TIMER TO SET MINUTE TIMER: Slide switch TO CANCEL MINUTE TIMER OP-
downtoTIMERposition.0:59willbedis- ERATION OR STOP "END-OF-
HOUR CLOO( playedassoonas theswitchismovedto TIME" BEEPS: Slideswitchuptothe
maticallybegincounting down from one pear inthe display.
8 1 2 : _------_ _ + the TIMER positi°n' The timer will aut°-clock position.Timeof day willreap-
MZN TZVER sound.Slide switchto the CLOCK posi-
When rangeisfirstconnectedto power reappearinthe display.
or ifpowerisinterrupted,12:00willflash
inthedisplay.
CLOCK position. =e
Press and hold HOUR button until cor-
+° +'+°°+t+u°'°O[ 05
rect hour appears inthe display, mZN
PressandholdMIN buttonuntilthe cor-
rectminutesappearinthedisplay.
hourin increments ofone minute. When
time has lapsed, a continual beep will
tionto stop beeps.The time of day will
+
TO SET A TIMING OPERATION
FOR LESS THAN ONE HOUR:
Pressand hold MIN buttonuntilde-
siredtimeappearsinthedisplay.Tim-
er will immediately begin counting
downassoonasthe MINbuttonisre-
leased.
TO SET A TIMING OPERATION
FOR GREATERTHAN ONE HOUR:
Pressthe HOUR button,1:59 willap-
pear in the display.Select desired
minutesbypressingandholdingMIN
button,Timingwillbeginwhen button
is released.
Two hours isthe maximum timing
that can be set.
5
Page 8

SurfaceCooking
IGNITION SYSTEM TO LIGHT SEALED BURNER ADDITIONAL INFORMATION
Your range will feature pilotless igni- 1. Place utensilon burnergrate. * When therange isfirstinstalled,the
tion;a sparkfromthe ignitorlightsthe pilotsmaybedifficulttolightduetoair
burner.Theignitorislocatedattheback 2. Push in and turn knob to the LITE inthegasline.Tobleedoffairfromthe
side of each surface burner, position. After the burner lights, turn line, hold a lighted match nextto the
Ignitor gasto the appliance.
REARVIEWOFSEALEDBURNER
the knob to the desired flame size. burner and turn knob on. When the
proceedas directed.
• Be sure all surface controls are set
in the OFF position prior to supplying
_ burner lights, turn the knob off and
NOTE: The knob on your appliance burneroff.If gas has accumulated
may not look likethe knob in this il- and a strong gas odor is detected,
lustration,but it will operate as de- wait 5 minutesfor the gas to dissi-
scribedinthis booklet, pate before relighting burner.
• CAUTION: If flame should go out
duringa cookingoperation,turnthe
Page 9

SurfaceCooking(continued)
FACTORS THAT DETERMINE SELECTING FLAME SIZE CANNING
FLAME SIZE • Use a HIGH flame settingto quickly Acceptablewater-bathorpressurecan-
UTENSIL SIZE: Adjustthe flamesize bringliquidstoa boilortobegina cook- nersshouldnotbeoversizedandshould
soitdoesnotextendbeyondtheedgeof ing operation.Then reduceto a lower haveaflatbottom.Thefollowingarenot
thecookingutensil.Thisisfor personal settingtocontinuecooking.Neverleave recommended:Oversizedcannersor a
safetyandto preventpossibledamage food unattended when using a HIGH verylargecannerthatrestsontwo sur-
to the appliance, utensil or cabinets flame setting, face burnergrates.
above the appliance. When canning, use the HIGH setting
ner,thenreducetothelowestflame set-
tingthat maintainsthe boilor pressure.
pressureisreached inthepressure can-
just until the water comes to a boil or
• An intermediateflame size is used to
continue acooking operation. Food will
not cook any faster when a higher
flame setting is used than that need-
, Utensilswhichextend morethan two ed to maintain a gentle boil, Remem-
inches beyond the grate or touch the ber,waterboilsatthe sametemperature
cooktopmay causeheat to buildup,re- whether boiling gently orvigorously.
suiting in damage to the burner grate,
burner or cooktop. • Use LOW to simmer or keepfoods at
• Utensils,such as woks with a support
ring, which restrict aircirculationaround
serving temperatures.
may result in damage to the burner
grate, burnerorcooktop.
UTENSIL MATERIALS: Optimum
theburnerwillcauseheattobuildupand __
cookingperformancecan be achieved
whenheavygauge, flat, smooth bottom,
metal utensils with straight sides and
tight fitting lids are used.
• Aluminum oraluminum-clad stain-
less steel pans heat more evenly so a
slightlytarger flamecan be used.
• Stainless steel, porcelain andheat-
proof ceramic orglass heat unevenly; _ _1_
cast aluminum and iron heat slowly; /_ _A"_ "
tire to heat. These materials require a "_
lowerflameto producemoreeven cook-
and, Teflon-coated utensils are sensi- (//'_
ing results. Adjust flame so it extends \'_
halfwayto the edge of the utensil bot-
tom. '.07
COVERED UTENSILS: Foods cook
fasterwhen the utensilis coveredbe- Be sure to adjust the knobso there is
causemoreheat isretained.Lowerthe an adequate supply of gas to main-
flamesizewhen coveringutensils, tain a stable flame on the burner.
Checkto besure burneris liteand the
flame is stable.
Page 10

UsingYourOven
OVEN VENT OVEN THERMOSTAT
The oven vent is located at the base of The oven thermostat knob isusedto se-
the backguard.Whenthe oven is inuse, lec_andmaintain the oven temperature.
this area may feel warm or hot to the Always turn this knob just to the desired
touch. To prevent problems do not: temperature - not to a higher tempera-
Block the vent opening, touch the area ture and then back. This provides more
nearthe opening or place utensils near accurate oven temperatures. Turn this
the vent opening, knobto OFFwheneverthe ovenis notin
OVEN BURNER
IGNITION SYSTEM adjustedoven burnerflame shouldbe as
Your appliance features pilotless igni- shown:
tion. A globarwill lightthe ovenburner. _
Be sure oven control is set in the OFF __
positionpriorto supplying gas to the ap- _-_
pliance. _ _ -
The size and appearance of a properly _ _,/_., _fF/_ t
- • Cone in center issmaller
use.
THERMOSTAT
On some models, there is an indent at
the 350°F setting.
--__. t I{ Core approx. 1/2-inch
The oven temperature is maintainedby
cycling the burner on and off. After the
oven temperature has been set, there
will be about a 45 second delay before
theburner ignites. This isnormaland no
gas escapes during this delay.
(continuednext page)
8
Page 11

UsingYourOven(continued)
TO SET THE OVEN PREHEATING
1. Whencool,placetheracksinthede- Preheatingisnecessaryfor properbak-
siredrackpositions, ingresults.Allowthe ovento heat until
thedesiredoventemperatureisreached
2. Pushinandturntheoventhermostat (approximately10 to 15 minutes).Se-
knobto the desiredoven tempera- lectingatemperaturehigherthanthede-
ture.Allowtheovento preheatfor10 siredtemperaturewill not preheat the
to 15minutes whenbaking, ovenanyfaster. Infact, this may havea
3. Place the food in the center of the negative effect on baking results.
oven, allowing a minimum of two in- It isnotnecessaryto preheatfor broiling
ches between the utensil(s) and the unless darker browning is desired or if
oven walls, cooking thin (3/4-inch) steaks. Allow
4. Check the food for doneness at the burnerto preheat 2 to 3 minutes.
minimum time given in the recipe. Preheatingis notnecessary for roasting
Cook longer if necessary. Opening operations.
the oven door frequently causes heat
losswhich may affectcooking results
and increasecooking time.
5. Turn the oven thermostat knob to
OFF and removefood from the oven.
(continuednextpage)
9
Page 12

UsingYourOven(continued)
10
(continuednextpage)
Page 13

CommonBakingProblemsAndWhyTheyHappen
Cakesare uneven. Panstouching each other or Cakes don't brown on top. Incorrectrack position.
Cake high in middle. Temperaturetoo high. Overmixing.
Cake falls. Toomuch shortening or sugar. Uneven texture. Toomuchliquid.
Cakes, cookies, biscuits Incorrectrack position.
don't brown evenly. Ovendoor not closed properly. Cakes crack on top. Batterovermixed.
oven walls. Temperaturetoo low.
Batter uneven in pans. Overmixing.
Oven temperature too low or Toomuch liquid.
baking time too short. Pan size too large or too little
Oven not level, batter in pan.
Undermixing. Oven door opened too often.
Toomuch liquid.
Excessive shrinkage. Toolittle leavening.
Bakingtime too long. Pan too large.
Overmixing. Temperaturetoo high.
Toomuchflour. Bakingtime too long.
Pans touching each other or Pans too close to each other
oven walls, or ovenwalls.
Incorrect rack position.
Toomuchortoo little liquid. Undermixing.
Temperaturetoo low. Temperature too low.
Old or too little baking powder. Bakingtime too short.
Pan too small.
Ovendoor opened frequently. Cakeshave tunnels. Not enough shortening.
Added incorrect type of oil to Too much baking powder.
cake mix. Overmixingor at too high a
Added additional ingredients speed.
to cake mix or recipe. Temperaturetoo high.
Doorgasket not sealing Temperaturetoo high.
properly. Too much leavening.
Incorrect use of aluminum foil. Incorrect rack position.
Oven not preheated.
Pansdarkened, dented or
warped. Cake not done in middle. Temperaturetoo high.
Pantoo small.
Baking time too short.
Cakes,cookies, biscuits too Oven not preheated.
brown on bottom. Panstouching each other or
oven wafts. Pie crust edges toobrown. Temperaturetoo high.
Incorrect rack position. Pans touching each other or
Incorrect useof aluminum foil. oven walls.
Placed 2 cookie sheets on one Edges of crust too thin.
rack. Incorrect rack position.
Used glass, darkened, stained,
warped or dull finish metal Pies or cakes don't brown Usedshiny metal pans.
pans. (Use a shiny cookie on bottom. Temperaturetoo low.
sheet.)
Pies have soaked crust. Temperaturetoo low at start of
baking.
Fillingtoo juicy.
Used shiny metal pans.
11
Page 14

UsingYourOven(continued)
HOW TO BROIL
Broiling is a method of cooking used for tender steaks, rareinterior,the meat shouldbe closeto the burner.Place
chops,hamburgers,chicken,fish,andsomefruitsandvege- the panfurtherdownifyouwishthemeatwelldoneorifspat-
tables.The foodis placeddirectlyunderthe ovenburner, teringand smokingoccurs.
The cookingtimeisdeterminedbythedistancebetweenthe The distancefromthe burner dependson the thicknessof
meatandthe burner,the desireddegree ofdoneness,and the meatanddesireddegreeofdoneness.Thincutsshould
thethicknessofthe meat. beplacedonrack#1(top)or#2 (middle);thickercutsshould
beplacedon rack#2or#3 (bottom).Broiluntilthetop ofthe
GENERAL TIPS meat is browned.Itshouldbeapproximatelyhalfcookedby
Broilingrequirestheuseofthe broilerpanandinsertsupplied thetimethetop isbrowned.
withyourappliance.Itisdesignedtodrainexcessliquidand
fat away from the cooking surface to prevent spatters, Trim excess fatto preventexcessive spattering or smoking.
smoke and flare ups. during cooking.
Foreasierclean-up, linethe broilerpan (bottompiece)with
aluminumfoilandspraythe insert witha non-stick vegetable If you plan to season the meat, it is better to do so after the
coating. Donotcoverthebroilerpan insertwith aluminumfoil surface has browned. Salt tends to delay browning which
as this prevents fat from draining into the pan below. The can resultinovercooking. Salting beforecooking alsodraws
broilercan be preheatedfor afew minutes. However,do not the juices out of the meat, causing dryness.
preheatthe broiler pan and insert.
Ifthefood isplacedtooclose to the burner,overbrowning
and smoking may occur.Generally for a brown exterior and
Cut slashes inthe outer edges ofthe meatto prevent curling
BROILING CHART
TO BROIL:
1. TurntheovenTHERMOSTATknobto
Food Thickness Position Doneness 1st Side 2nd Side
Quantity &]or Approx. Minutes/Side BROIL.
It is possibleto broillongercooking
Bacon thickslice middle well 4- 5 1- 2 foodssuchas porkchopsat a lower
Beef Patties 3/4"thick middle rare 3-4 2-3 temperature to preventoverbrown-
middle medium 5 6 3 4 ing. Turn the knob to 450°F, rather
middle well 5-6 4-5 than BROIL, for low temperature
Steaks 1"thick bottom rare 3 4 3 4 broiling.
bottom medium 5 7 4- 6 2. Preheatfor 2 to 3 minutes if desired.
bottom well 7 - 8 6 - 7
NOTE: Cooking times in the Broil
11/2"thick bottom rare 7 8 5-6 Chart are based on a 2 to 3 minute
bottom medium 8 - 10 6 - 8
bottom well 10 - 11 8 - 9 preheat.
ChickenBreastHalves bottom well 8- 9 7- 8 3. Place the broiler pan on the recom-
Fish Fillets 1" thick middle 5 - 6 3 - 5
1/2" thick middle 4 - 5 3- 5 broilingchart.
mended rack position shown in the
HamSlices 1/2"thick middle 5-6 4 5 4. Follow the suggested times in the
(precooked) broiling chart. Meat should be turned
once about halfwaythrough itscook-
PorkChops (450°) 1" thick bottom well 12 - 14 8 - 9 ing time.
Weiners/Sausage middle 2 - 4 2 - 3 5. Check the doneness by cutting a slit
(precooked) in the meat near the center to check
the color.
12
Page 15

Maintenance
COOKTOP BURNER GRATES DUAL PURPOSE
The cooktop is designedwithtwocon- SEALED BURNERS
touredwells which containspills until Thefoursealedburnersare securedto
they can be wipedup. Unlikethe stan- thecooktopandareNOT designedtobe
dard gas appliance,THIS COOKTOP removedbythe consumer.
DOES NOT LIFT-UP NOR IS IT RE-
MOVABLE.To preventdamage to the Since the four burnersare sealed into
gastubingor top,do not attemptto lift thecooktop,boiloverswon'tseepunder-
cooktop, neath to the burner box area. Thus,
When reinstallingsquaregrates, place thereare no hiddenspillsinthe burner
are atfrontandrear.
IGNITORS
Whencleaningaroundthesurfaceburn-
er, use care to preventdamage to the
spark ignitorwhich is located at the
back-sideof each burner.Ifa cleaning
cloth shouldcatch the ignitor,it could
indentedsidestogethersostraightsides boxarea toclean.
damageorbreakit.Iftheignitoris dam-
aged or broken,the surfaceburnerwill
notlight.
Burner grates are durable but may lose Ignitol
their shine due to usage and high tern- REARVIEWOFSEALEDBURNER
peratures.
(continuednext page)
13
Page 16

Maintenance(coot,hueS)
OVEN DOOR OVEN RACKS BROILER DRAWER
Thetwo oven racks are designedwitha Storeclean broilerpanandinsertinthe
lock-stop edgeto keepthe racksfrom broilerdrawer.
comingcompletelyoutof the oven.
Toremove: Besuretherackiscool.Pull stopposition.Liftupfrontofdrawerand
the rackstraightoutuntilitstops.Tilt the pullto the secondstop position.Grasp
frontoftherack upandcontinuepulling sides and lift up and out to remove
When openingoven door,allowsteam the rackoutofthe oven. drawer. Gently move drawer side-to-
andhotairtoescapebeforereachingin sideasyoupullthe drawerout.
ovento check, addorremovefood. To replace: Tiltthefrontendofthe rack
up and place the rack between the rack \ I
"stop"position(openedabout4 inches) lock-stopposition.Lowerthe front and
andgraspdoorwithbothhandsat each slidetherackstraightin.Pulltherackout
side.Do not use doorhandle to liftdoor. to the lock-stop positionto be sure it is _
Liftup evenly until door clears the hinge positioned correctly and then return it to
arms. its normal positon.
To remove door: Open door to the supports.Slideit back untilit clears the _t
To remove: Pulldraweroutto the first
/_ OVEN BO'rFOM To replace: Fit ends of drawer glides
To replace door: Grasp door at each _ 2
side,alignslotsinthedoorwiththe hinge
armsand slidedoordownontothe hinge
armsuntil completely seated on hinges. _,_ _--_.1"3 _._. _J,/
To remove: When cool, remove the position.
oven racks. Slide the two catches, lo-
cated at each rear corner of the oven
bottom, towardthe front of the oven.
Lift the rear edge of the oven bottom
slightly,then slide it back until the front
edgeofthe oven bottomclears the oven
front frame. Remove oven bottom from
oven.
onto rails. Liftupdrawerfront and gently
push in to first stop position. Gently
move drawer side-to-side as you push
in the drawer. Lift up drawer again and
continue to slide drawer to the closed
14
To replace: Fit front edge of oven bot-
tom intofront frame.Lowerrearof oven
bottom and slide the catches back to
lock oven bottom into place. (continued nextpage)
Page 17

Maintenance(continued)
OVEN LIGHT HOW TO REMOVE PROPORTIONAL VALVE
RANGE FOR CLEANING ADJUSTMENT (if equipped)
AND SERVICING The LOW setting should produce a sta-
Followtheseproceduresto removeap- bleflamewhenturningtheknobfromHI
Beforereplacingoven light bulb, DIS- plianceforcleaningor servicing: to LO. The flame shouldbe 1/8 inchor
CONNECT POWER TO RANGE. Be LOWsetting.
surebulband range partsare cool.Do 1. Shut-offgassupplytoappliance.
nottoucha hotbulbwithadampclothas To adjust: Operate burner on HI for
the bulbmaybreak. 2. Disconnect electrical supplyto ap- about5 minutesto preheatburnercap.
pliance,if equipped. TurnknobbacktoLO;removeknob,and
To replace oven light: Use a dry pot insertasmallscrewdriverintothe center
holder, to prevent possible harm to 3. Disconnectgas supplytubingto ap- of the valvestem.Adjustflamesize by
hands;very carefully removebulb.Re- pliance, turningadjustmentscrewineitherdirec-
placewitha 40 watt APPLIANCE bulb. tion.
Reconnectpowertothe range. 4. Slide range forward to disengage
rangefromtheanti-tipbracket.(See
InstallationInstructionsforlocationof
LEVELING LEGS bracket.)
lowerandmustbe stableonall portson
5. Reverse procedureto reinstall. If gas p_
linehas been disconnected, checkfor
Levelinglegsarelocated on eachcorner gasleaksafter reconnection. (See In-
ofthe base of the range, stallation Instructionsfor gas leak test
method.)
NOTE: A qualified servicer should dis-
connectand reconnectthe gas supply.
ping,rangemustbesecuredtothefloor
byslidingrearlevelinglegintoan anti-
tipbracketsuppliedwiththerange.
% _ TO prevent range from accidently tip-
Place a level horizontallyon an oven riskof tipover, shouldthe appliancenot
rackandcheckfront-to-back andside- be reinstalledaccordingto the installa-
to-side. Level byturningthe legs. tioninstructions.
_,,_ WARNING: Possible risks may result NOTE: All gas adjustments should be
from abnormalusage,includingexces- done bya qualifiedserviceronly.
siveloadingofthe ovendoorandofthe
J
15
Page 18

GeneralInformation
ELECTRICAL CONNECTION USE OF ALUMINUM FOIL
Appliances which require electrical Use aluminum foil ONLY as
power are equipped with a three- instructed in this book. Improperuse
prong grounding plug which must be of aluminum foil may cause damage to
plugged directly into a properly theoven, affectcookingresults, andcan
groundedthree-hole 120volt electrical also result inshock and/or fire hazards.
outlet.
Foil can be used if these guidelines are
followed:
_ • Do not use aluminum foil directly
_ heatawayfromtheutensilcausing inad-
equate browning. Placing a pie directly
onfoil may resultinasoggy bottomcrust
_ under the cookware. Foil will reflect
Always disconnect power to appli- on theoven bottom as this may dam-
ance before servicing, age the oven bottom. A piece of foil
The three-prong groundingplugoffers that is slightlylargerthan the cooking
protectionagainstshock hazards. DO utensilcanbeplacedontherackdirectly
NOT CUT OR REMOVE THE THIRD belowthe rack containJngtheutensil.
GROUNDING PRONG FROM THE
POWER CORD PLUG. • Do not completely cover an oven
and inadequate browning.
• Donot place aluminum foil directly
rack with foil. Thisblocksairflowinthe
oven,constitutesa safety hazard, and
willadverselyaffectcookingresults.
• Never cover the broiler insert with
aluminum foil as this prevents fat
from draining to the pan below. The
broiler pan can be linedwith foil.
16
Page 19

CareandCleaning
CLEANING CHART
PARTS CLEANING AGENTS DIRECTIONS
Baked Enamel • Soapand water Useadrytowelorclothtowipeupspills,especiallyacid(milk,lemonjuice,fruit,mustard,
or Porcelain Enamel • Pasteof bakingsoda and water tomatosauce)orsugaryspills.Surface maydiscolorordullif soilis not immediately re-
. Cooktop • Mildliquidcleaner moved.This isespeciallyimportant forwhitesurfaces.
• Oven door • Glass cleaner
• Broilerdrawer Whensurfaceiscool,washwithwarmsoapywater,rinseanddry.Forstubbornsoil,use
• Side panels mildlyabrasivecleaningagentssuchas bakingsodapasteorBonAmi. Ifdesired,athin
• Backguard coatof mildappliancewaxcanbeusedto protectthesidepanels.Aglasscleanercan be
usedtoadd "shine"to thesurface.
NOTE:Do notuseabrasive,causticorharshcleaningagentssuchassteelwoolpadsor
ovencleaners.These productswillscratchor permanentlydamage thesurface.
NOTE:Neverwipeawarmorhotsurfacewitha dampclothasthismaydamagethesur-
face and may causea steamburn.
Broiler pan and • Soapandwater Removefromovenafteruse.Coolthenpouroffgrease.Placesoapyclothoverinsertand
insert • Plasticscouringpad pan;letsoakto loosensoil.Washinwarmsoapywater.Usesoap-filledscouringpadto
• Soap-filled scouringpad removestubbornsoil.Clean indishwasherif desired.
• Dishwasher
Chrome drip bowls, • Soapand water Cleanbowlsafter eachusewithsoapandwater.Remove stubbornstainswithbaking
ifequipped = Pasteofbakingsodaandwater sodapasteandplasticScouringpad.Topreventscratchingthefinish,donotuseabrasive
• Plasticscouringpad cleaningagents.Rinse,dry and replace.
Control knobs * Soap andwater Toremoveknobsforcleaning,gentlypullforward.Wash inmild detergentand water.Do
Glass • Soap and water Wash withsoapandwater.Useawindowcleaneranda softclothaftercleaning.Remove
• Backguard • Paste of bakingsoda andwater stubbornsoilwithpasteofbaking sodaandwater.Rinsewitha clothwrungoutinclear
• Oven window • Glass cleaner water.Dry.Donotuseabrasivematerialssuchasscouringpads,steelwoolorpowdered
NOTE:Foreasiercleanup,sprayinsertwitha non-stickvegetablecoatingandlinebroiler
panwithaluminumfoil.
NOTE:Alwaysstorecleanbroilerpanand insertinthebroilercompartment.Ifpanand
insertarenotcleanedaftereachuse,thesoilmightbecomehotenoughtoignitethenext
i timethe ovenis used.
NOTE:Bowlscan permanentlydiscolorifexposedtoexcessiveheatorifsoil isallowedto
bake on.
notsoak knobsinwater.Donotuseabrasivecleaning agents.Theywillscratchfinishand
removemarkings.Rinsedryandreplace.TurnON each burnerto see if knobs have
been replaced correctly.
cleaningagents.
NOTE;To avoid inside staining of oven door glass, do not oversaturate cloth.
(continuedon next page)
17
Page 20

CareandCleaning
PARTS CLEANING AGENTS DIRECTIONS
Grates • Detergentandwater Gratesaremadeofporcelain-coatedsteel,Theycan becleanedatthesinkwithdeter-
Metalfinishes • Soap andwater Washwithsoapandwater,Removestubbornsoilwithpasteofbakingsodaand water,
• Backguard • Pasteof bakingsodaandwater Usea windowcleanerand a soft clothto removefingermarksorsmudges.
• Trim parts • Glass cleaner
• Manifold panel NOTE:Donotuseovencleaners,abrasiveorcausticagents.Theywilldamagethefinish.
Oven bottom • Soap and water Continuous clean oven bottom: See page 19.
• Porcelain enamel • Paste of baking soda and water
Oven cavity Cleaning action begins whenever the Brush off heavy soil with a nylon or plastic pad. Do not use paper towels, cloths, or
• Continuous clean ovenis on. The oven must be usedfor spongesbecausetheovenwallsareporousandparticlesofthesernaterialswillruboffon
oven cleaningtotakeplace.Higher oventem- thewalls. Rinseareawith cleanwateronly.Do notuse anytypeofovencleaner,cleanser
See page 19. _eratures and longer baking times ordetergent on this surface.
Oven cavity • Soap and water Cleanoven interiorwithsoapandwater; rinse.Usecleansing powdersor aplastic scour-
. Porcelainoven • Mild abrasive cleaners ingpadto remove stubborn soil.Wipeacidorsugar stainsassoon asthe oven iscoolas
Oven racks • Soap and water Cleanwith soapywater. Removestubbornsoilwith cleansingpowderorsoapfilledscour-
Plastic finishes • Soap andwater I When surface is cool, cleanwith soap andwater; rinse, and dry.Useawindow cleaner
• Door handles • Paste of bakingsoda and water and a soft cloth.
• Backguard trim • Non-abrasive plasticpad or sponge
• Overlays NOTE: Neveruseovencleaners, abrasiveorcausticliquidorpowdered cleaningagents
• Knobs on plasticfinishes. These cleaning agents will scratch or marr finish.
• End caps NOTE:Topreventstainingordiscoloration,wipe upfat, greaseor acid (tomato, lemon,
• Non-abrasive plasticpad gentandwaterorinthedishwasher,Tocleanbakedonsoil,piaceadampsoapypaper
toweloverthegrateandletstandfor30rainutes.Usea non-abrasiveplasticpadtoscour
stubbornsoil.
NOTE:Neveroperateburnerwithoutagrateinplace,Toprctecttheporcelainfinishonthe
gratefromexcessiveheat,neveroperatesurfaceburnerwithoutacookingutensilonthe
grate.It is normalforgratesto losetheirshineovera periodoftime,
• Non-abrasive plastic pad Porcelainoven bottom:Clean,when cool,with soap andwater,non-abrasive plastic pad
• Oven cleaner orovencleaner. Rinsewithclearwater.Tomake cleaningeasier,protect theovenbottom
by(1)using largeenough cookware to prevent boilovers;(2)place a piece ofaluminum
foil,that isslightlylarger than the cookware,onthe lower rack.NEVER place foildirectly
onthe oven bottom.
Protectoven bottomagainstacidspills (milk,cheese,tomato, lemonjuice, etc.)orsugary
spills (pie filling) as they may pit or discolor the oven bottom.
Foreasiercleaning,ovenbottomcan beremovedand cleanedat thesink.Donotsoak or
immerse oven bottom in wateror place under running water.
speedthe cleaning action.
• Plastic pad these stainsmaydiscolororetchtheporcelain.Donot usemetallicsecuring padsasthey
• Oven cleaner willscratchtheporcelain.Tomakecleaningeasier,place1/2cuphouseholdammoniain a
shallowglass andleaveina coldovenovernight.Theammoniafumes will helploosenthe
burnedongrease and food. Ovencleanerscan beused onthe porcelainoven butfollow
manufacturer's directions. If oven cleaner was used, thoroughly rinseovencavity and
capillarytube which islocatedatthe top oftheoven. Ovencleanerscannotbeusedonthe
continuous cleaning oven finish.
• Cleansing powders ing pad. Rinseand dry.
• Plasticpad
• Soap filled scouring pad NOTE: Ifracksbecomedifficulttoslide, athin coatofvegetableoilonthe undersideofthe
rack will make sliding easier.
vinegar, milk,fruitjuice, marinade) immediately with a dry paper towel or cloth.
Silicone rubber * Soapand water Wash with soap andwater,rinseand dry. Do not removedoorgasket.
• Doorgasket
Sealed burners • Soapand water Clean,whencool,asnecessarywithwarm soapywater.Rernovestubborn soilby scour-
• Paste of bakingsoda and water ingwitha non-abrasive plasticscouring padanda pasteofbaking sodaand water.Clean
• Plastic scouring sponge or pad portswith astraightpin.Donotenlargeor distortthe ports.Donot useawoodentoothpick.
Itmaybreakoffandclogport.Sealedsurface burnerscannotberemovedbytheconsurn-
er.
NOTE:Whencleaningaroundthesurfaceburner,usecaretopreventdamagetotheigni-
tor whichis locatedat the back-side ofeachburner. If a cleaningcloth should catch the
ignitor,itcoulddamageorbreakit.Ifthe ignitorisdamaged orbroken,thesurface burner
will not light.
18
Page 21

CareandCleaning(continued)
CONTINUOUS CLEANING OVEN (if equipped)
WHAT IS THE CONTINUOUS MANUALLY CLEANING HINTS
CLEANING OVEN? HEAVYSPILLOVERS Brittlecrustsor stainscanbe loosened
The finishof the ContinuousCleaning The specialfinishwillclean mostspat- byGENTLYtappingstainwithawooden
Ovenisidentifiedbyitsdarkgraycolor, ters during normal oven use unless orplasticutensil.Brushaway any loose
and rough,poroustexture.The rough there is a heavybuildupof soil. Heavy soilthatflakes off.Varnishtype stains
texture preventsgreasespattersfrom spilloverssuch as pie or casserole usuallyneedtobesoftenedwitha small
formingbeadswhichrundownthewalls boiloverswillnotcleaneffectivelywith- amountofwaterordampcloth.Remain-
leavingunsightlystreaks. Rather, the out some manual help. The crusty or ingsoilwillgraduallyreducewithcontin-
roughtextureabsorbsspattersand al- varnish-likestainsthatformfromthese uedovenuseatnormalbakingtempera-
lowsthem to spread,thus exposinga spilloversclogtheporesandpreventthe turas.
largerareato thehotovenair.The cata- specialfinishfrombeingexposedto the
lyst,when exposedto heat,speedsthe hot oven air. This greatly reducesthe
oxidationof soil. cleaningeffectivenessofthefinish. DO NOT USE ANY TYPE OF OVEN
CLEANER, POWDERED CLEANS-
ERS, SOAP,DETERGENT OR PASTE
Cleaning action automaticallybegins These crustyorvarnish-likestainsmust ON ANY CONTINUOUS CLEANING
whenevertheovenisturnedonfor bak- eitherbe removedorbrokenup before SURFACE.ALSO, DO NOT USE ANY
ingor roasting.The ovenMUST be"on" cleaningcaneffectivelytake place. ABRASIVE MATERIALS, STEEL
for cleaningto take place. No cleaning WOOL, SHARP INSTRUMENTS OR
willoccurwhentheovenisoff.Thespe- SCRAPERS FOR THEY WILL DAM-
cialcatalyticfinishmustbe exposedto TO MANUALLY CLEAN AGETHE FINISH.
hot oven air before soil will begin to HEAVYSPILLOVERS
graduallyreduceinsize. Brushoffheavysoilwithanylonbrushor
plasticpad.DO NOT USE papertowels, Avoidspilloversby usingutensilsthat
clothsorspongesfor theovenwallsare are largeenoughto holdfood. A cookie
FACTORSAFFECTING LENGTH OF porousand particlesof these materials sheetorpieceofaluminumfoil,justa lit-
The higherthe oven temperature,the
fasterthecleaningaction.Thelengthof clearwateronly. the rackdirectlybelowthe rackholding
cleaningtimewilldepend onthesefac- theutensiltocatchspills.
tots:Typeofsoil,amountorsizeofsoil,
oven temperatureand length of time
ovenisinuse.Timemayvaryfromafew Overa periodof time,wear marksmay
minutestoseveralhours.Soildeposited appearonthe embossedracksupports.
atthe endofa cyclemay stillbevisible. This is normaland resultsfrom sliding
This will usually fade with continued the racks in and outof the oven.Wear
ovenuseuntilthe soilgraduallydisap- markswillnotaffectthe cleaningaction
pearsorcanbewipedup manually.The ofthe oven.
oven will appear presentablyclean,
eventhoughsomespattersmaybepre-
sent.
CLEANINGTIME willruboffonthe walls.Rinsearea with tielargerthanthepan, canbe placedon
19
Page 22

Service
BEFORE CALLING A SERVICE TECHNICIAN, CHECK THE FOLLOWING:
PROBLEM CAUSE CORRECTION
1. Surfaceburnerfailsto light a. powersupplynot connected a. connect power, check circuitbreaker or
b. clogged burner port(s) b. clean ports with straight pin
c. surfacecontrolnot completely turnedto c. turn controlto the LITE position untilthe
the LITE position or turned too quickly burner ignites, then turn control to de-
fromthe LITE position (pilotlessignition) sired flame size
d. power failure d. seepage6tolightburnerduringapower
2. Burner flame uneven a. clogged burner port(s) a. clean portswith straight pin
3, Surface burner flame a. air/gas mixture not proper a. call serviceman to adjust burner
• liftsoffport NOTE: Some yellow tippingwithLP gas is
• yellow in color normal and acceptable.
fuse box
failure
4. Oven burner fails to light a. power supply not connected a. connect power,check circuit breaker or
b. powerfailure b. oven can not be operated during a
5. Poppingsound heard when burner This is a normalsound that occurs with some types of gas when a hot burner is turned off.
extinguishes The popping sound is not a safety hazard and will not damage the appliance.
6. Clockand/orovenlightdoesnotwork a. power supply notconnected a. connect power supply, check circuit
b. bulb may be loose or burned out b. tighten or replace light bulb
c. malfunctioning switch, starter or ballast c. call serviceman to check
d. malfunctioning clock or loosewiring d. call serviceman to check
7. Moisfurecondensation on oven a. it is normal for the windowto fog during a. leavedoorajarforoneortwominutesto
window, if equipped the first few minutesthe oven is on allow moisture to escape
b. cloth saturated with water is used to b, Use a damp cloth to clean window to
clean the window prevent excess water from seeping
8. Oventemperature inaccurate a. oven notpreheated a. preheat oven 10to 15minutes
• food takes too long or cooks too b. incorrect rack position b. see page 9
fast c. incorrect use ofaluminumfoil c. see page 16
• pale browning d. oven bottom incorrectly replaced d. replace oven bottom correctly
• food over-done on outside and e. oven thermostat sensing device out of e. reinstall sensing device securely into
under-done in center holding clip(s) clip(s)
• over browning See ProblemChart on page 11
fuse box
powerfailureor if disconnected
from power. See page 8
breaker or fuse box
between the panels ofglass
See baking tips on page 10
9. Oven smokes excessively during a a. food too closeto burner a. move broiler pandownone rack position
broil operation b. meat has too much fat b. trim fat
10. Poor baking results baking
c. sauceappliedtoo early or marinade not c. apply sauce during last few minutes of
completely drained cooking. If meat has been marinated,
drain thoroughly before cooking
d. soiled broiler pan d. always clean broilerpan and insert after
each use
e. broiler insert covered with aluminum foil e. never cover insertwith foil as this pre-
vents fat from draining to pan below
See pages 9 to 11for information on
20
Page 23

Service (continued)
SERVICING HOW TO OBTAINSERVICE
Whenyourappliancerequiresserviceor
replacementparts,contactyourDealer
orAuthorizedServicer.Use only genu-
ine factory or Maycor parts if replace-
ment parts are necessary. Consultthe
Yellow Pages in your telephone direc-
toryunderappliance for the service cen-
ter nearestyou. Be sure to include your
name, address, and phone number,
alongwiththemodelandserialnumbers
of the appliance. (See inside front cover
for location of your model and serial
numbers.)
Ifyou are unableto obtain service, write
to us.Our address isfound on the rating
plate. See inside front cover for location
of rating plate.
If you are not satisfied with the local re-
sponse to your service requirements,
call or write MAYCORAppliance Parts
and Service Company, 240 Edwards
Street,S.E.,Cleveland,TN 37311,(615)
472-3500. Include or haveavailable the
complete model and serial numbers of
theappliance, the name and address of
the dealer from whom you purchased
the appliance, the date of purchase and
detailsconcerning your problem.
Ifyou did notreceivesatisfactoryservice
through your servicer or Maycor you
may contact the Major Appliance Con-
sumer Action Panel by letter including
your name, address, and telephone
number,as well as the model and serial
numbersof the appliance.
MajorApplianceConsumerActionPanel
MACAP (Major Appliance Consumer
Action Panel) is an independent agency
sponsored by three trade associations
as a court of appeals on consumer com-
plaints which have not been resolved
satisfactorily withina reasonable period
of time.
20NorthWackerDrive
Chicago,IL 60606
21
Page 24

WHAT IS NOT COVERED BY THESE TWO WARRANTIES:
1. Conditions and damages resulting from any of the fol- 4. Products purchasedfor commercial or industrial use.
lowing: 5. The cost of service or service call to:
a. Improper installation, delivery, or maintenance.
b. Any repair, modification, alteration or adjustment not b. Instruct the consumer onthe proper use of the prod-
authorized byMaycor,ora Maycorauthorized servic- uct.
er.
c. Misuse, abuse, accidents or unreasonable use.
d. Incorrect electrical current, voltage or supply. 6. CONSEQUENTIAL OR INCIDENTALDAMAGES SUS-
e. Improper setting of any control. BREACH OF THESE WARRANTIES. Some states do
2. Warranties are void if the original serial numbers have not allow the exclusion or limitation of consequential or
beenremoved,altered,or cannot be readily determined, incidentaldamages, sotheaboveexclusion may not ap-
3. Light bulbs, ply to you.
a. Correct installation errors.
c. Transport the appliance to a servicer.
TAINED BY ANY PERSON AS A RESULT OF ANY
HOW TO RECEIVE WARRANTY SERVICE
1. Contact the dealer fromwhom you purchasedthe appliance or any authorized Maycor servicer to
receive warranty service under these warranties.
2. Should you not receive satisfactory warranty service from your local servicer, contact:
Customer Assistance
Maycor Appliance Partsand Service Company
240 EdwardsStreet, S.E.
Cleveland, TN 37311
(615) 472-3500
(1/93)
3. Havethe following informationavailable when requesting warranty service:
- Yournameand address.
- The model and serial numbers of your appliance.
- The nameand address of your dealeror servicer.
- The purchase date of your appliance.
- A clear descriptionof the problem.
 Loading...