

Page 1
ABOUT YOUR RANGE
Congratulationsonyourchoiceof thisgasrange.Asyouuse Shouldyou have any questionsabout using your new gas
your new range, we know you will appreciate the many appliance, please write to us at this address:
features that provide excellent performance, ease of
cleaning, convenience and dependability. Customer Assistance
c/o Maytag Customer Service
New features have dramatically changed today's cooking P.O.Box 2370
appliances and the way we cook. It is therefore very Cleveland, TN 37320-2370
importantto understand how your new gas range operates
BEFOREyou use it for thefirst time. Be sure to include the model and serial numbers of your
appliance. For your convenience, we have provided space
In this Owner's Guide, you will find a wealth of information onthe front cover to record this information.
regarding all aspects of your appliance. By carefully
followingthe instructions,you will beable tofully enjoy and Inour continuing effort to improvethe quality and customer
properly maintain your new range. NOTE: Your appliance satisfaction of our cooking products, we may find it
maynotbeequippedwith some ofthe features referredto in necessarytomakechanges toour line of applianceswithout
this manual, revisingthe Owner's Guide.
50%POST-COHSmBHER
1_%D_IIDNHISPAPUtS,MAGA_NES&|ATALOBS
Page 2
IMP(IRTANTSAFETYINSTRUCTIONS
Read all instructions before using this Have your appliance installedand properly grounded by a
qualifiedinstalleraccordingto the installationinstructions.
appliance. Have the installershowyouthelocationofthegas shutoff
The following instructions are based on safety valve and how to shut it off in an emergency.
considerationsand must bestrictly followed to eliminatethe
potential hsks offire, electric shock, or personal injury. Always disconnect power to appliance before servicing.
To ensure proper operation and avoid possible injury or
damage to unit do not attempt to adjust, repair, service,or
WARNING: If the Information in this replace any partof your appliance unless it is specifically
manual is not followed exactly, a fire or recommended in this book. All otherservicingshouldbe
explosion may result causing property referredto a qualified installerorservicer.
damage, personal injury or death.
I
- Do not store or use gasoline or other _ Be sureall packing materialsare removedfromthe
flammable vapors and liquids in the appliancebeforaoperatingit.
vicin ity of this or any other appliance. Keepareaaroundapplianceclearandfreefromcombustible
materials, gasoline, and other flammable vapors and
- WHATTO DO IF YOU SMELL GAS:
• Do not try to light any appliance, should be taken to prevent curtains from blowing over
• Do not touch any electrical switch; do
not use any phone in your building, ventmayigniteflammable itemsandmayincreasepressure
materials.
If appliance is installedneara window,properprecautions
burners.
Do not leave any itemsonthe cooktop.The hot airfrom the
• Immediately call your gas supplier inclosedcontainerswhichmaycausethemto burst.
from a neighbor's phone. Follow the Many aerosol-type spray cans are EXPLOSIVE when
gas supplier's instructions, exposedto heat and may be highlyflammable. Avoidtheir
• If you cannot reach your gas supplier, Many plasticsare vulnerableto heat. Keep plasticsaway
call the fire department, from parts of the appliancethat may becomewarm or hot.
use orstoragenearan appliance.
Do notleaveplasticitemsonthe cooktopasthey maymelt
or softenif left too closeto the vent or a lighted surface
- Installation and service must be burner.
performed by a qualified installer,service
agency or the gas supplier, cabinetstorageshouldnotbeprovideddirectlyabovea unit,
I & unsafefor some items,such as volatile liquids, cleaners or
A
,WARNING aeroso,sprays.
Toeliminatethe hazardofreachingoverhot surfaceburners,
Ifsuchstorageisprovided,itshouldbelimitedtoitemswhich
areusedinfrequentlyandwhichare safelystoredinan area
subjectedtoheatfroman appliance,Temperaturesmay be
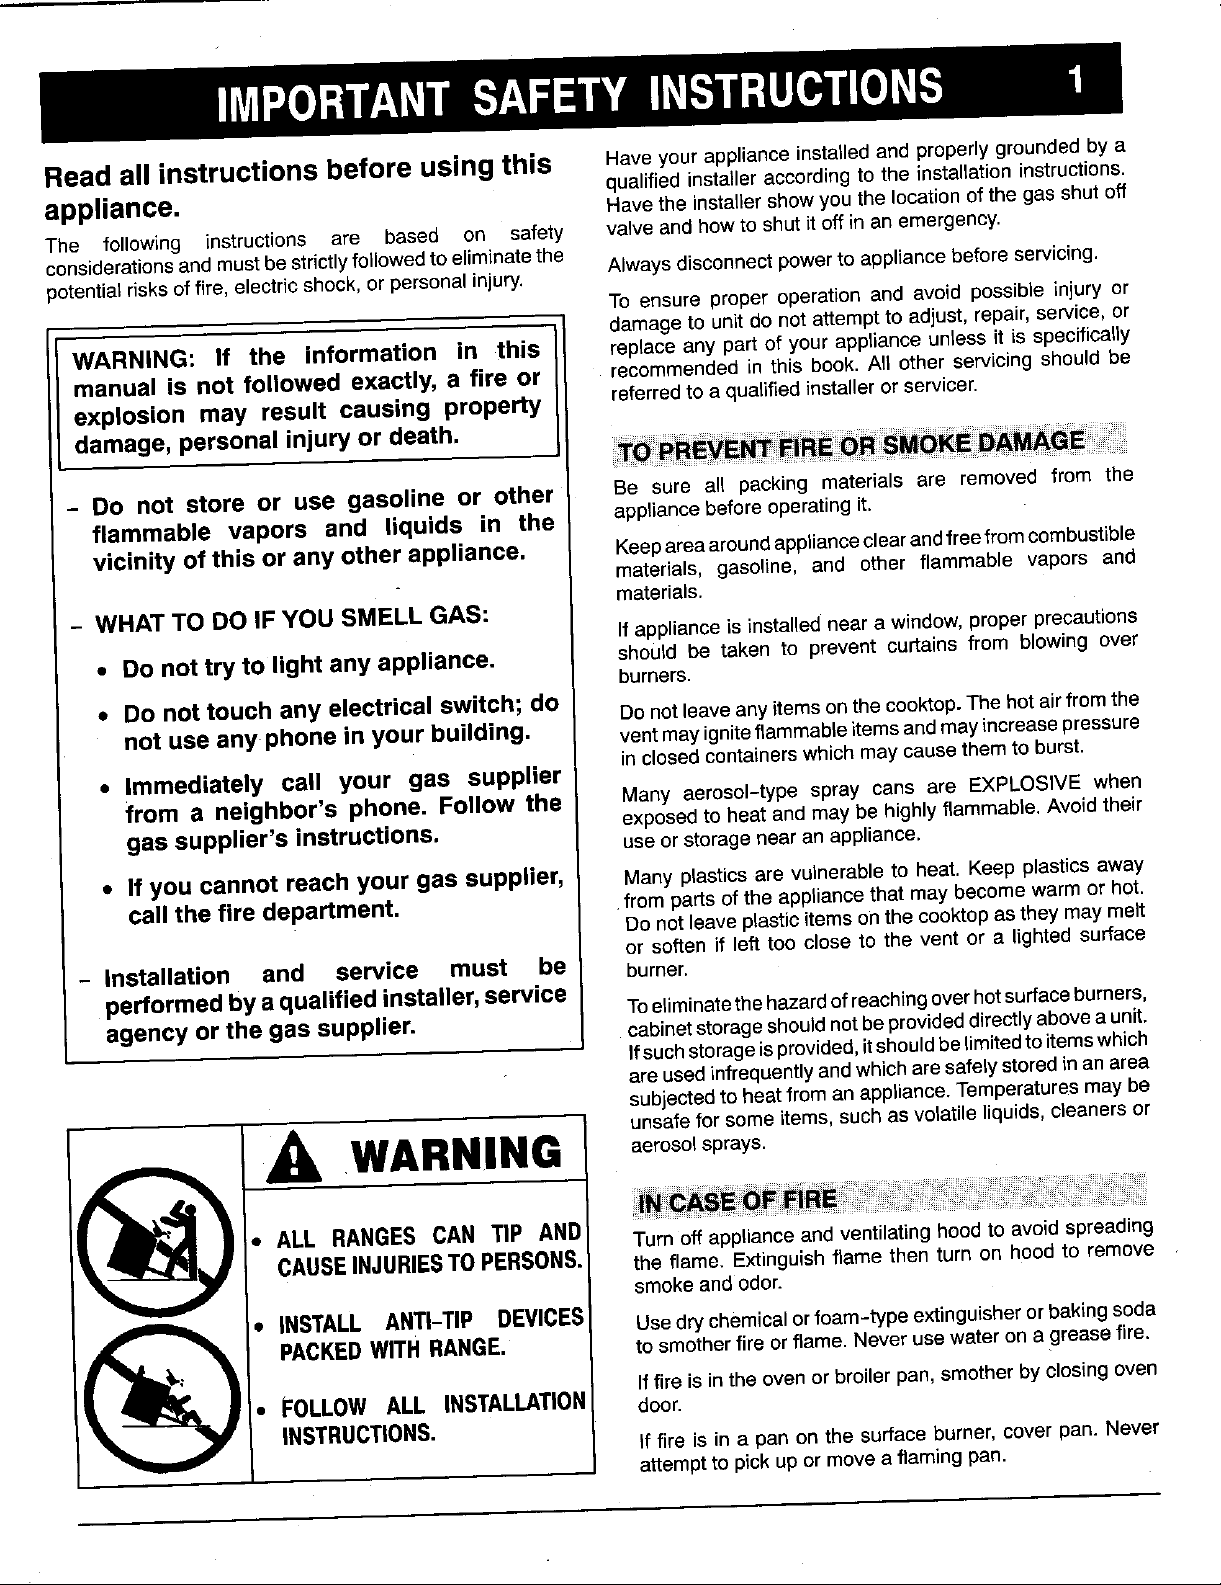
CAN TIP AND
CAUSEINJURIESTO PERSONS. the flame. Extinguishflamethen turn on hood to remove
_) • ALL RANGES Turn offappliance and ventilating hood to avoidspreading
PACKED WITH RANGE. to smotherfire orflame. Never usewater on a greasefire,
smokeand odor.
If fire is inthe ovenor broilerpan,smotherby closingoven
• FOLLOWALL INSTALLATION door.
_) • iNSTALL ANTI-TIP DEVICES Use drychemicalorfoam-type extinguisheror baking soda
iNSTRUCTIONS, if fire is in a pan on the surface burner,coverpan. Never
attemptto pickupor movea flaming pan.
Page 3
IMP(IRTANTSAFETYINSTRUCTIONS
WARNING: To reduce the risk of tippingof the appliance
from abnormal usage or by excessive loading of the oven
Do not leave children alone or unsupervised near the door, the appliance must be Securedby a properly installed
appliancewhen itisinuseorisstill hot.Children shouldnever anti-tip device. Ifthe range is moved from the wall, be sure
beallowed to sit or stand onany partof the appliance, the anti-tip device is engaged when the range is replaced.
Look underneath rangeto verify that one of the rearleveling
Children must betaught that the appliance and utensilsin legs is properly engaged in the bracket slot. The anti-tip
itcan be hot. Lethot utensilscootin devicesecuresthe rearleveling legtothe floor whenproperly
a safe place, out of reach of smail engaged. Also, besure the range is properly re-installed.
children. Childrenshould betaught
that an appliance is not a toy. Do nottouch a hot oven light bulb with a damp cloth as the
Children should not be allowed to bulb could break. Shouldthe bulb break,disconnect power
play with controls or other parts of to the appliance before removing bulb to avoid electrical
the unit. shock.
CAUTION: Do not store items of
interest to children in cabinets
above an appliance or on the
backguard of a range. Children Always place a pan on a surface burnerbefore turning it on.
climbingon the appliance or onthe Be sureyou knowwhich knobcontrolswhich surface burner.
appliance doorto reach itemscould " Makesurethe correctburner isturned on and thatthe burner
beseriously injured, has ignited. When cooking is completed, turn burner off
before removing pan to prevent exposure to burnerflame.
Always adjustsurface burnerflame sothat itdoes not extend
beyond the bottom edge of the pan. An excessive flame is
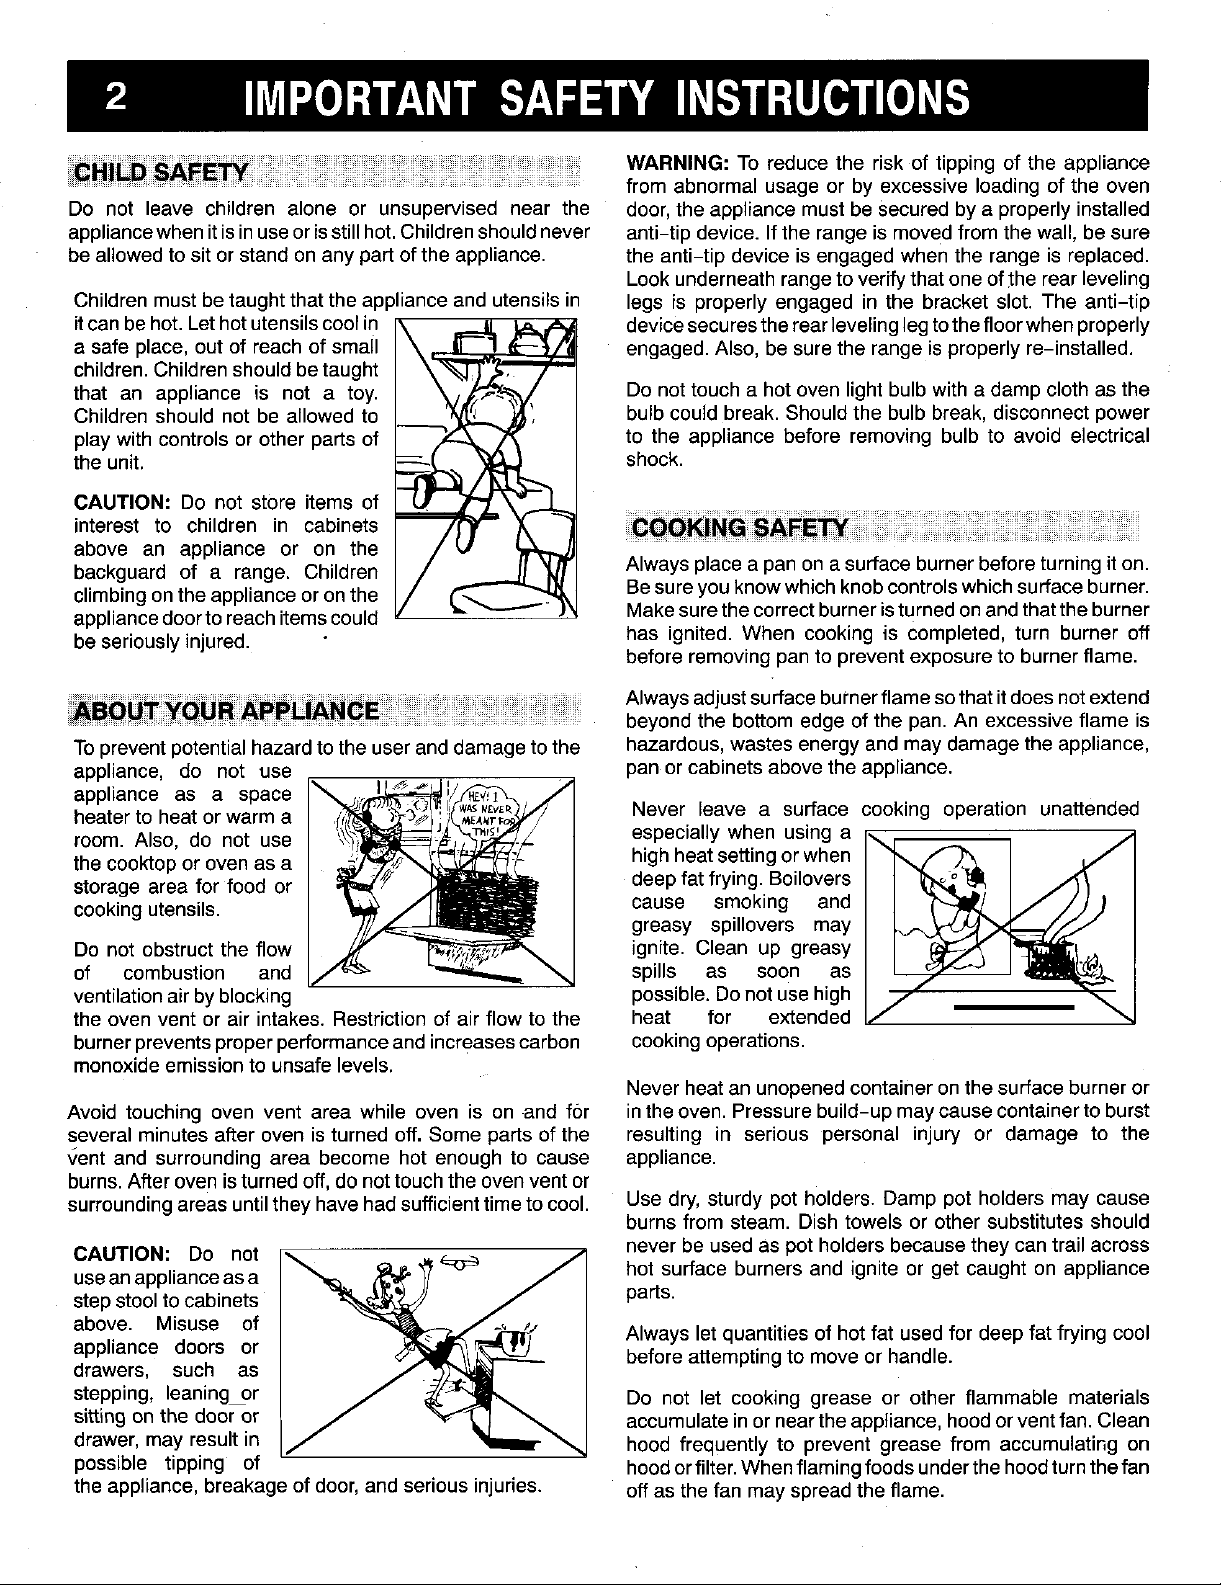
To preventpotential hazardto the userand damage to the hazardous, wastes energy and may damage the appliance,
appliance, do not use pan or cabinets above the appliance.
appliance as a space
heaterto heat or warm a Never leave a surface cooking operation unattended
the cooktop or oven as a highheat setting or when
storage area for food or deepfat frying. Boilovers
cooking utensils, cause smoking and
Do not obstruct the flow ignite. Clean up greasy
of combustion and spills as soon as
ventilationair byblocking possible. Donot use high
room. Also, do not use especially when using a ___
the oven vent or air intakes. Restriction of air flow to the heat for extended
burnerpreventsproper performance and increasescarbon cooking operations.
monoxideemission to unsafe levels.
Avoid touching oven vent area while oven is on .andfor inthe oven. Pressurebuild-up may cause container to burst
several minutes after oven is turned off. Some parts of the resulting in serious personal injury or damage to the
'_entand surrounding area become hot enough to cause appliance.
burns.After oven isturned off, do not touchthe oven vent or
surrounding areas untilthey havehad sufficienttime to cool. Use dry, sturdy pot holders. Damp pot holders may cause
CAUTION: Do not _... ,_ _4=0_ J hot surface burners and ignite or get caught on appliance
useanapplianceasa
greasy spillovers may
Never heat an unopened container onthesurface burneror
burns from steam. Dish towels or other substitutes should
never beused as pot holders because they cantrail across
above. Misuse of _' _ Always let quantities of hot fat used for deep fat frying cool
appliance doors or before attempting to move or handle.
drawers, such as
sitting onthe door or accumulatein or near theappliance, hood or vent fan. Clean
stepping, leaninggr J Do not let cooking grease or other flammable materials
stepstool to cabinets "_ _ parts.
drawer, may result in i" hood frequently to prevent grease from accumulating on
possible tipping of hoodorfilter.Whenflamingfoodsunderthehoodturnthefan
the appliance, breakage of door, and serious injuries, off as thefan may spread the flame.
Page 4
IMP(bRTANTSAFETYINSTRUCTIONS
Use caution when wearing garments made of flammable Neverleta panboil dry as thiscould damagethe utensil and
material to avoid clothing '_,_ _,_ the appliance.
fires. Loose fitting or long
hanging-sleeved apparel Follow the manufacturer's directions when using oven
should not be worn while cooking bags.
cooking.Clothing may ignite Only certain types of glass, glass/ceramic, ceramic, or
orcatch utensil handles, glazed utensils are suitable for cooktop or oven usage
Always place oven racks inthe desired positions whileoven
iscool. Slide oven rack out to add or removefood, usingdry This appliance has been tested for safe performanceusing
sturdy pot holders.Always avoid reaching into the oven to conventional cookware. Do not use any devices or
add or removefood. Ifa rack must be moved while hot, use accessories that are not specifically recommended in this
a dry pot holder. Always turn the oven off at the end of manual. Do not useeyelid coversfor the surface units,stove
cooking, top grills, or add-on oven convection systems. The use of
Use carewhen opening the oven door. Let hot air or steam in this manual can create serious safety hazards, result in
escape beforeremovingorreplacingfood, performance problems, and reduce the life of the
PREPAREDFOODWARNING: Followfood manufacturer's
instructions,Ifa plastic frozenfood container and/or its cover
distorts, warps, or is otherwise damaged during cooking,
immediately discard the food and its container. The food Turnoffallcontrolsandwaitforappliancepartstocoolbefore
could becontaminated, touchingor cleaningthem. Do not touchthe burner grates or
without breaking due to the sudden change in temperature.
devicesoraccessories that arenot expressly recommended
componentsof the appliance.
surrounding areas untilthey havehad sufficienttime to cool.
Cleanappliance with caution. Usecaretoavoid steam bums
ifawet sponge orclothis used towipe spillson a hotsurface.
Use pans with flat bottoms and handles that are easily Somecleaners canproducenoxiousfumesif appliedto a hot
grasped andstay cool. Avoid using unstable,warped, easily surface.
tipped or loosehandled pans. Pans that are heavy to move
whenfilled with food mayalso be hazardous.
Be sure utensilis largeenoughto properly containfood and
avoidboilovers. Pansize isparticularly importantindeep fat
frying. Besurepanwillaccommodatethevolumeoffoodthat The California Safe Drinking Water and Toxic Enforcement
is to be added aswell as the bubble action of fat, Act of 1986 (Proposition 65) requires the Governor" of
California to publish a list of substances known to the State
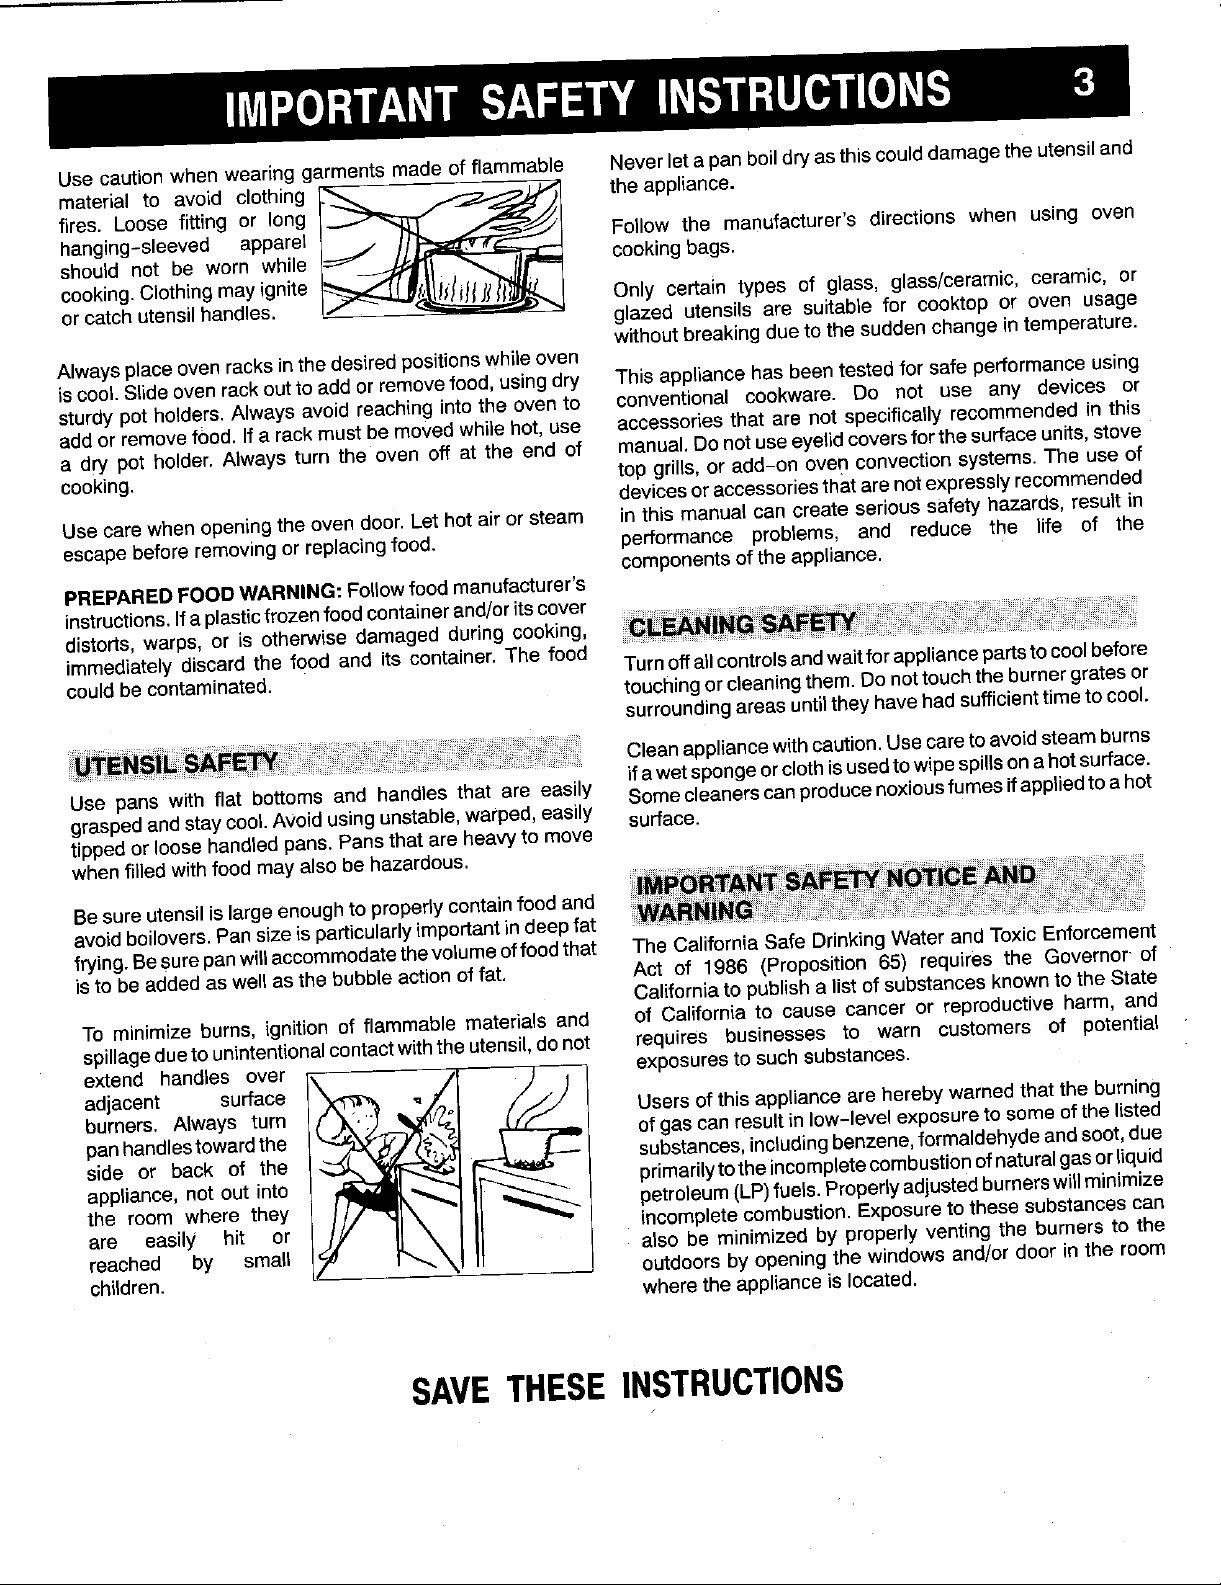
To minimize burns, ignition of flammable materials and of California to cause cancer or reproductive harm, and
spillagedueto unintentionalcontact with the utensil, do not requires businesses to warn customers of potential
extend handles over exposures to such substances.
burners. Always turn Usersof this appliance are hereby warned that the burning
pan handlestowardthe of gas can result in low-level exposureto some ofthe listed
side or back of the substances,including benzene,formaldehyde and soot, due
appliance, not out into primarilytothe incompletecombustionof naturalgasor liquid
the room where they petroleum(LP)fuels. Propedyadjustedburnerswitlminimize
are easily hit or incomplete combustion. Exposureto these substances can
adjacent surface _ .._______.._..__
reached by small also be minimized by properly venting the burners to the
children, where the appliance is located.
outdoors by opening the windows and/or door in the room
SAVETHESEINSTRUCTIONS
Page 5
4 CLOCK AND TIMER, ifequipped
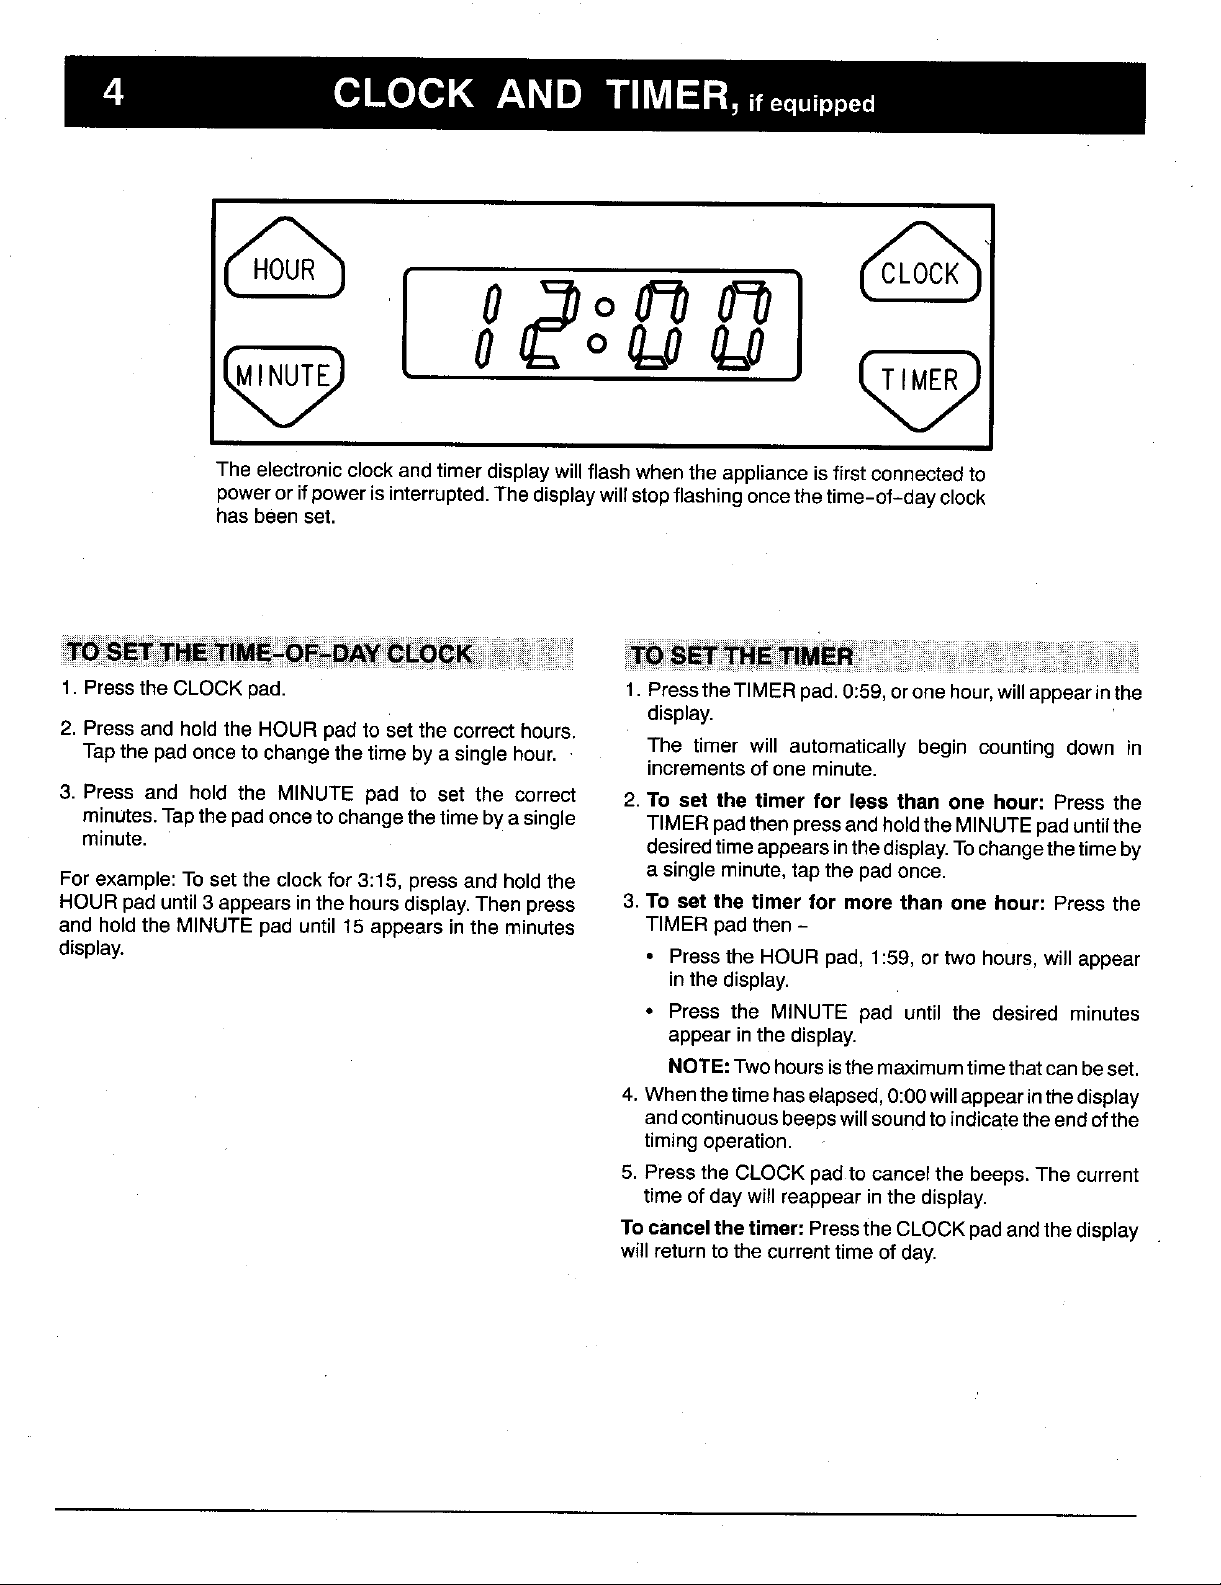
HOUR
The electronicclockandtimerdisplaywillflashwhenthe applianceisfirstconnectedto
poweror ifpowerisinterrupted.The displaywillstopflashingoncethetime-of-day clock
hasbeenset.
1. Pressthe CLOCK pad. 1. PresstheTIMER pad.0:59,oronehour,willappear in the
2. Press and hold the HOUR padto set the correct hours.
Tapthe pad once to change the time by a single hour. The timer will automatically begin counting down in
3. Press and hold the MINUTE pad to set the correct 2.To set the timer for lees than one hour: Press the
minutes. Tapthe pad once to changethetime by asingle TIMERpadthen pressand holdthe MINUTEpaduntilthe
minute, desiredtime appears inthedisplay.Tochangethe time by
Forexample: To set the clock for 3:15, press and holdthe asingle minute, tap the pad once.
HOUR pad until 3 appears in thehours display.Then press 3. To set the timer for more than one hour: Press the
and hold the MINUTE pad until 15 appears in the minutes TIMER pad then -
display. • Pressthe HOUR pad, 1:59, or two hours, will appear
display.
incrementsof one minute.
inthe display.
• Press the MINUTE pad until the desired minutes
appear in the display.
NOTE:Two hours isthe maximumtime that can beset.
4. Whenthetimehas elapsed,0:00will appear inthe display
andcontinuous beeps willsound to indicatetheendof the
timing operation.
5. Press the CLOCK pad to cancel the beeps. The current
time of day will reappear in the display.
Tocancel the timer: Pressthe CLOCKpad and the display
will return to the current time of day.
Page 6
USING THE COOKT()P
Your cooktop will feature either pilot ignition or pilotless Toprevent damageto the cooktop or pan, neveroperate
ignition.Ifthe gas supplyto the rangeis turnedoff,besure the surfaceburnerwithouta pan inplace, never allowa
all controlsareset inthe OFF positionbeforere-supplying pan to boil dry and never operate a surface burneron
gas to the appliance. HIGH for extendedperiodsoftime.
Pilot Ignition 1. Place a pan ontheburnergrate.
Whentherangeisfirst installed,the standingpilotsmaybe
difficultto lightdue to airin the gas line.Tobleed offairfrom NOTE:The burnerflame maylift offtheburner head anda
the line,holda lighted match next tothe burner and turnthe "roaring"sound may beheard ira pan isnot placed onthe
knob on. When the burner lights, turn the knob off and grate before lighting the burner.
proceed as directed below.
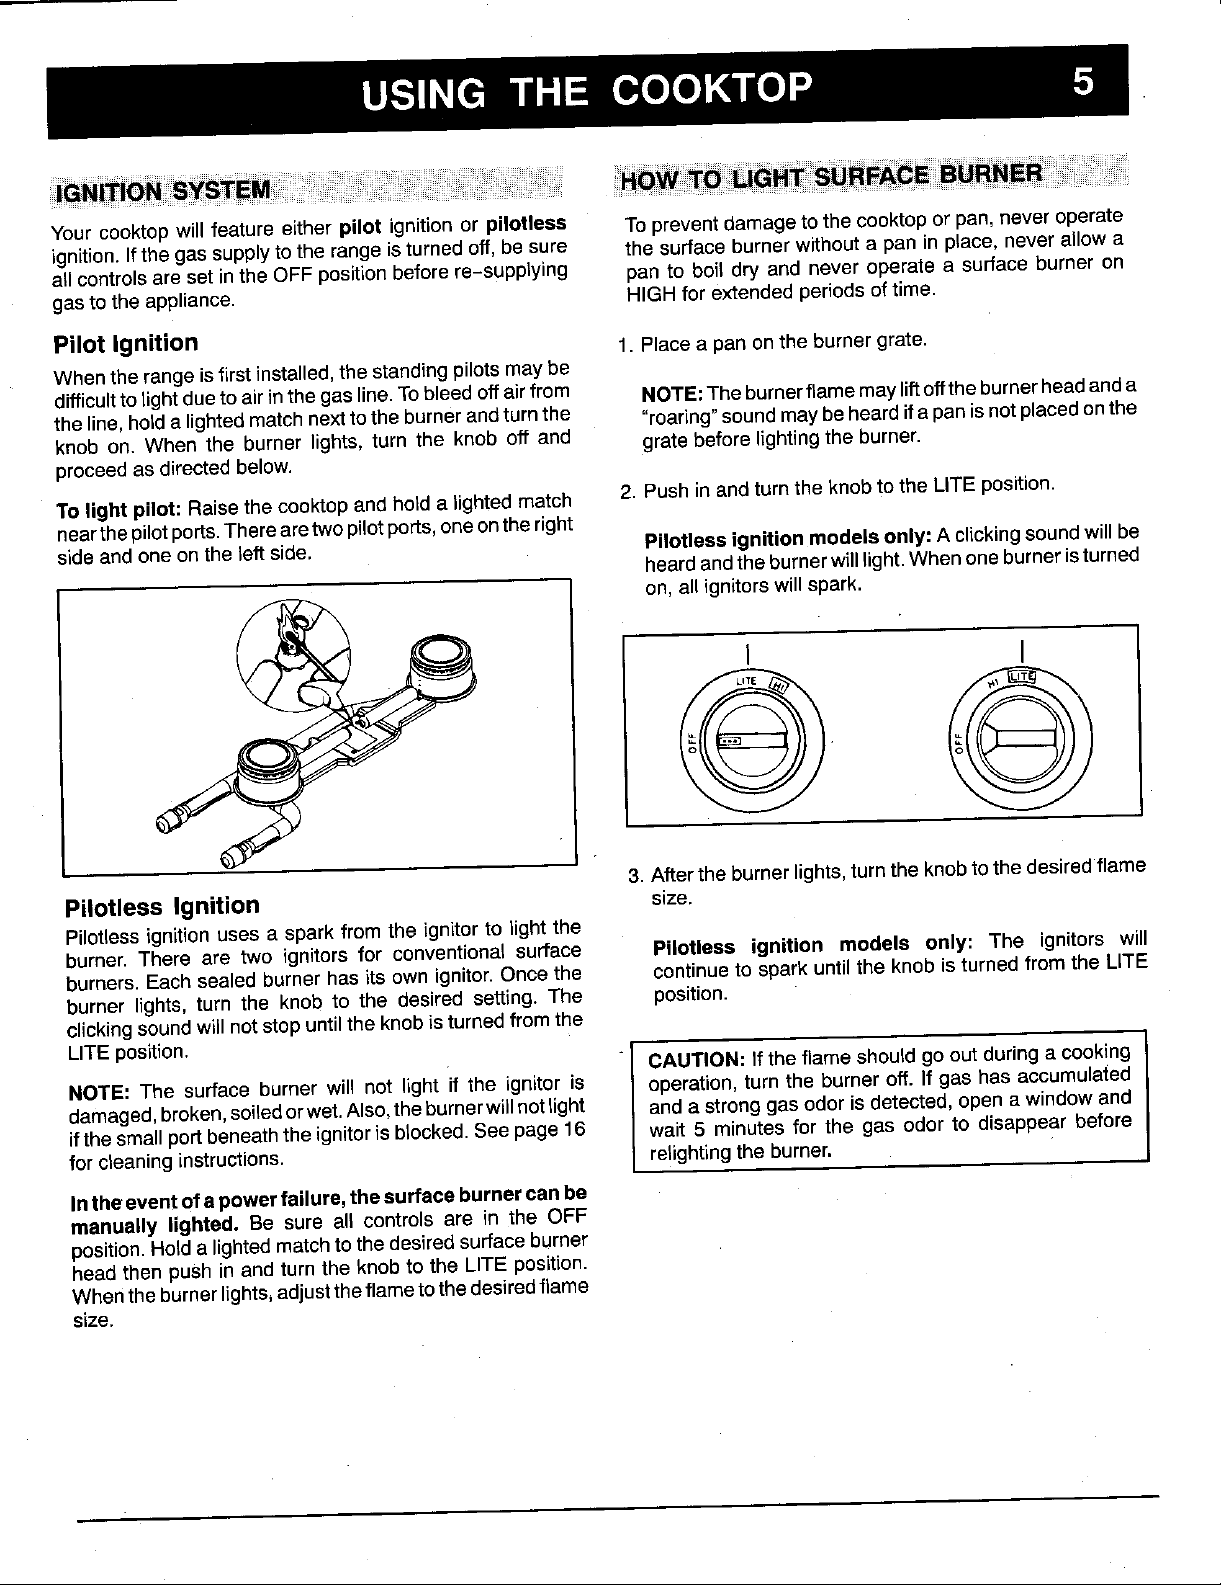
To light pilot: Raise the cooktop and hold a lighted match 2. Push in and turn the knob to the LITE position.
nearthe pilotports.Thereare twopilotports, oneonthe right
side and one on the left side. Pilotless ignition models only: A clickingsound will be
heardand the burner will light.When one burner is turned
on,all igniterswill spark.
3. After the burner lights, turn the knob to the desired flame
Pilotless Ignition size.
Pilotless ignition uses a spark from the ignitorto light the
burner. There are two ignitorsfor conventionalsurface Pilotless ignition models only: The ignitors will
burners.Each sealed burner has its own ignitor.Once the continueto sparkuntilthe knobisturnedfromthe LITE
burner lights, turn the knob to the desired setting. The position.
clickingsound will not stop until the knob is turned from the
LITE position,
CAUTION: If the flame should go out during a cooking
NOTE: The surface burner will not lightif the ignitor is operation,turnthe burner off.If gas has accumulated
damaged,broken,soiledorwet.Also,theburnerwillnotlight anda stronggasodor isdetected,opena windowand
ifthesmall portbeneaththe ignitoris blocked.See page 16 wait 5 minutes for the gas odor to disappear before
forcleaninginstructions, retightingthe burner.
inthe event ofa powerfailure, thesurface burner can be
manually lighted. Be sure all controlsare in the OFF
position.Holda lightedmatchtothe desiredsurfaceburner
head then push in and turn the knob to the LITE position.
Whenthe burnerlights,adjustthe flame tothe desiredflame
size.
Page 7
6 USING THE COOKTOP
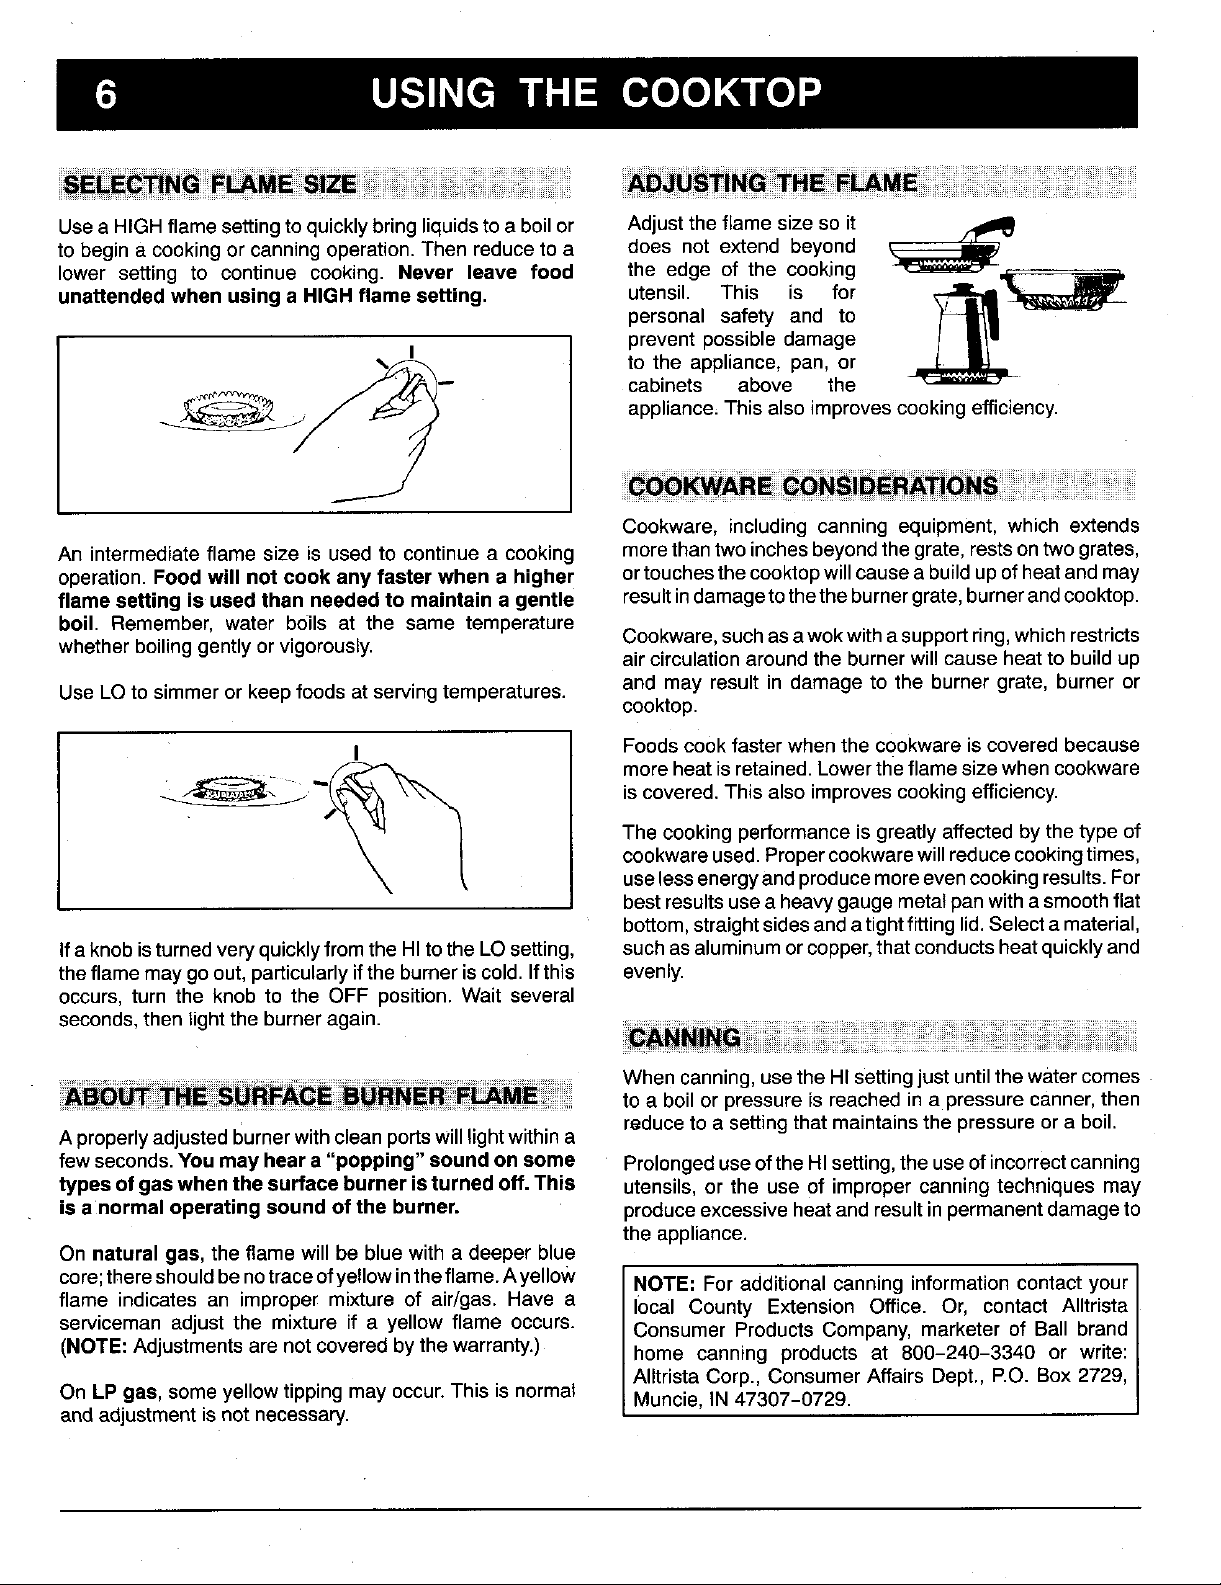
Usea HIGHflame setting to quickly bring liquidsto a boil or Adjust the flame size so it
to begin a cooking or canning operation. Then reduce to a does not extend beyond
lower setting to continue cooking. Never leave food the edge of the cooking
unattended when using a HIGH flame setting, utensil. This is for --_11_
I
personal safety and to
preventpossibledamage
.,_. cabinets above the
_.j_/_'.__ tO the appliance, pan, or
An intermediate flame size is used to continue a cooking morethan two inches beyond the grate, restson two grates,
operation. Foodwill not cook any faster when a higher ortouches the cooktopwillcausea buildup of heatandmay
flame setting is usedthan needed to maintain a gentle resultindamagetothetheburnergrate,burnerandcooktop.
boil. Remember, water boils at the same temperature Cookware,suchasawok withasupportring,whichrestricts
whetherboilinggentlyorvigorously, aircirculationaroundthe burnerwillcauseheat to buildup
Use LOtosimmeror keepfoodsat servingtemperatures, and may resultin damageto the burner grate, burner or
I Foodscookfasterwhen the cookwareis coveredbecause
___ is covered. This also improves cooking efficiency.
,../_ more heat isretained.Lowerthe flame size when cookware
If a knob isturned very quickly from the HIto the LO setting, suchas aluminumor copper,that conductsheatquickly and
theflame may go out, particularly ifthe burneris cold. Ifthis evenly.
occurs, turn the knob to the OFF position. Wait several
seconds,then lightthe burner again.
appliance, This also improves cooking efficiency.
Cookware, including canning equipment, which extends
cooktop.
The cooking performance is greatly affected by the type of
cookware used.Proper cookwarewill reduce cookingtimes,
uselessenergyand produce moreevencooking results.For
best resultsuse a heavy gauge metal pan with a smoothflat
bottom,straight sidesand atight fitting lid.Select a material,
When canning, usethe HIsettingjust untilthe water comes
to a boil or pressure is reached in a pressure canner,then
A properlyadjusted burnerwith cleanportswill lightwithin a reduceto a setting that maintainsthe pressure or a boil.
few seconds.You may hear a "popping" sound on some Prolongeduseof the HI setting,the use of incorrect canning
typesof gaswhen the surface burner is turned off. This utensils,or the use of improper canning techniques may
is a normaloperating soundof the burner, produceexcessiveheatand resultinpermanentdamageto
theappliance.
On natural gas, the flame willbe bluewith a deeper blue
core;thereshouldbenotraceofyellowintheflame.Ayellow NOTE: Foradditionalcanninginformationcontactyour
flame indicatesan impropermixture of air/gas. Have a local County Extension Office. Or, contact AIItrista
serviceman adjust the mixtureif a yellow flame occurs. ConsumerProductsCompany,marketerof Ball brand
(NOTE:Adjustmentsare notcoveredbythe warranty.) home canning products at 800-240-3340 or write:
AIItristaCorp., ConsumerAffairsDept., P.O. Box 2729,
On LP gas, someyellowtippingmayoccur.Thisisnormal Muncie,IN 47307-0729.
and adjustment is not necessary.
Page 8

U.C;INGTHE OVEN
Your oven will feature either pilot ignition or pilotless The Thermostat knob is used to select and maintain the
ignition. Ifthegassupplytotherangeisturnedoff,besure oventemperature,Push in and turn this knobjust to the
allcontrolsareset inthe OFFpositionbeforere-supplying desired temperature. To provide accurate oven
gas to the appliance, temperatures,do not turn the knob to a higher temperature
and then back to the desiredtemperature. Turnthis knobto
Pilot Ignition OFF whenever theoven is not in use.
To light oven pilot: When __
cool, open the broilerdoor Y_ After the oventemperaturehas
and remove the broiler rack second delay before the burner
and broiler pan. On models _ . ignites.Thisisnormaland nogas
without a broiling corn- escapes during this delay.
partment, remove the lower
panel. See page 14 for _ The oven temperature is
instructionson removingthe maintainedby cycling the oven
panel, burneron and off. THERMOSTATKNOB
Withthe Thermostat knob inthe OFFposition, hold alighted
match to the pilot located at the back of the oven burner.
Oncethe pilot lights, replacethe broiler rackand panor the
lower panel. (NOTE: The oven burner is shown with the 1.When cool, position the rack inthe oven.
metalflame spreader removed from the oven burner.) 2. Push in and turn the Thermostat knob to the desired
Pilotless Ignition temperature.
With thistype of ignitionsystem,a glo bar willlight the oven Selecting a temperature higher than desired wLIINOT
burner.The oven will not operate during a power failure or preheat the oven any faster and may have a negative
if the oven is disconnected from the wall outlet. NOTE: A effect on baking results.
lighted match will not light the burner. No attempt
shouldbemadetooperateovenduringapowerfailure: 3, Place the food in the centerof the oven, allowinga
Because each oven has its own personal baking the cooktop may feel warm or hot to the touch. Do not
characteristics, do not expect that your new oven will block this area or the vent opening as this may affect
perform exactlylike your previous oven. You may findthat baking results.
the cooking times, oven temperatures, and cooking results 4. Check thefood for doneness atthe minimum time in the
differ somewhatfrom your previous range.Allow a periodof recipe. Cook longer ifnecessary.Cooking timemayvary
adjustment. If you have questions concerning baking from oven to oven.
results, please referto pages 8, 9, 10 and 18 for additional
information. 5. Removethe food fromthe oven and turn the Thermostat
Do not coverthe oven bottom or an entire rack with foil
or place foil directly under cookware.Tocatch spJllovers, Preheating is necessary for baking. To preheat the oven,
placea pieceof foila littlelargerthanthe pan, onthe rack turn the Thermostat knobto the desiredtemperatureand
belowthepan.Forrangeswithonerack,itwillbenecessary allow10to 15 minutesforthe oventopreheat. Selectinga
to place the foil directlyunder the utensil.Cut a small higher temperaturewill not shortenthe preheattime and
openinginthefoiltoallowheattothebottomofthepan.This may affectbaking results.It is notnecessaryto preheatfor
isespeciallyimportantwhenbakingpies. roastingor broiling.
minimumof 1 to 2-inches between the utensil and the
oven walls.
' Whentheoven is inuse, the ovenvent area at the rearof
knob to OFF.
Page 9

8 USING THE OVEN
Yourrangewillfeature oneortwooven racks.The ovenrack To replace: Placethe rackon the rack supports and tilt the
isdesignedwith asafety lock-stop positionto keep the rack front end ofthe rack up slightly.Slideit back untilit clearsthe
from accidently coming completely out of the oven when Iock-stopposition. Lowerthefrontandslidetherackstraight
pullingthe rack out to add or removefood. in. Pull the rack outto the lock-stop position to be sure it is
positioned correctly and then return it to its normal position.
CAUTION: Do not attempt to change the rack positions For optimum baking results of cakes, cookies or biscuits,when the oven is hot. useone rack. Positionthe rack sothe food is inthe center of
Toremove: Besurethe rackiscool. Pullthe rackstraight out Ifcooking on two racks, userack positions2 and 4for cakes
untilit stops atthe lock-stop position. Tiltthe frontendofthe andrackpositions 1and¢when usingcookie sheets. Never
rack upand continue pulling the rack out of the oven. placetwo cookie sheets on one rack.
RACK 5 Fortwo-rack cooking. Usethe upper rack position __
(highestposition) for sidedishes whenroasting aturkeyon the lower
rack.
RACK 3 Used for most baked goods on a cookie sheet or i
jelly roll pan, or frozen convenience foods.
the oven. Use either rack position 2 or 3.
I
RACK 1 Used for roasting large cuts of meat and large Pos on j ;1
poultry, pies, souffles, or angel food cake, or for
two-rack baking.
/
Page 10

USING THE OVEN
PROBLEM ' CAUSE "
Cakesare uneven. • Pans too close or touching each other or oven walls. • Batter uneven in pans.
• Temperatureset too low or baking time too short.• Oven not level. • Undermixing. • Too
much liquid.
i i
:Cakehigh in middle. , Temperaturesettoo high:,Baking timetoo iongl_,ove_mixing,i Toomuch floUr:- Pans
touching eachothe_o_ovenwalls:_incorrectrackpositi0n.
cake falls. • Too much shortening or sugar.• Toomuch or too little liquid. • Temperatureset too low.
• Old or toolittle baking powder.• Pan too small. • Ovendooropened frequently. • Added
incorrecttype of oil to cake mix.• Added additional ingredients to cake mix orrecipe.
Ca.ecookiesbisc,its
don t brown evenly. :0_properyattached_0aeor
darkenedl dented0r warpedl ; ; ;; ; ;
: : : F0roptimum_e_uitsbake 0n0ne rack Ifb_king cakeS:ontwo:racks;staggerpans sooheis
I not directly_bove another: : : :
Cakes,cookies, biscuits • Oven not preheated. • Panstouching each other or ovenwalls. • Incorrectrack position.
toobrown onbottom. • Incorrect use of aluminumfoil. • Placed2 cookie sheets on one rack. • Usedglass, dark,
stained warped or dull finish metal pans. (Use a shiny cookie sheet.)
Follow cookware manufacturer's instructions for oven temperature. Glassware and dark
cookware such as Ecko's Baker's Secret may require lowering the oven temperature by
25°F.
:Cakes don't brown on "]n_oirect _ackposi_iOh:;Temperature_eitoo ibw_, overmi_ing;' Toomuch!iquid'Pan
top: size toe largeortOOli_leba_et inpah _ o_en dooropenedtoo ofteh_
Excessiveshrinkage. • Too little leavening.• Overmixing. • Pantoo large. • Temperature set too high.• Baking
time too long. • Pans too close to each other or oven walls.
Cakeshave tunnels. • Notenough shortening.• Toomuch bakingpowder.• Overmixing or attoo highaspeed.
• Temperature set too high.
cake notdone in i Temp_i'aturesettoo fiig", i Panioo smail i Bakingiime ioo Short.
middle. I ;
I If additionalingredientswere addedtomi×o_ recipe_expect cooking timeto increase,
Pie crust edges too • Temperatureset too high. • Pans touching each other or oven walls. • Edges ofcrust too
brown, thin;shield with foil.
Pies don't brown On :1 iUsedS"bymeta: :
bottom. I -Some froze5pess6ou _ be p acea on_'505k e sheet'check:p_ckagea re_ons
Pies have soaked crust. • Temperaturetoolow at startofbaking.• Fillingtoojuicy.• Usedshinymetalpans.
Page 11

10 USING THE OVEN
Use a reliable recipe and accurately measure fresh crisper crust. Use this type of pan for pies, pie crusts or
ingredients. Carefully follow directions for oven bread.
temperature and cooking time. Preheat oven if * If usingoven-proof glassware, ordarkpanssuchas
recommended.
Use the correct rack position. Baking results may be exceptwhen bakingpiesorbread. Usethe same baking
affected if the wrong rackposition is used. time as called for in the recipe.
• Top browning may be darker if food islocatedtoward Allow hot air to flow freely through the oven for optimum
thetop of the oven. baking results. Improper placement of pans in the oven will
• Bottom browning may be darker if food is located block air flow and may result in uneven browning, For
towardthe bottom ofthe oven. optimum browning and even cooking results:
• When using two racks for baking, allow enough space * Do not crowd a rackwith pans. Neverplace morethan
between the racks for proper air circulation. Browning one cookie sheet, one 13x9x2-inch cake pan or two
and cookingresultswill be affectedif airflow is blocked. 9-inch round cake pans on one rack.
Cookware material plays an important part in baking * Stagger pans when baking ontwo racks so one pan is
results.Always use the type and size of pan called for in the not directly over another pan.
recipe.Cooking times or cooking results may be affected if * Allow one to two inches between the panand the oven
thewrong size is used. walls.
Baker's Secret reduce the oven temperature by 25°F
• Shiny metal pan reflects heat away from the food, Check the cooking progress at the minimum time
produceslighter browninganda softer crust. Useshiny recommendedinthe recipe,If necessary,continuechecking
pansfor bakingcakes or cookies. For optimum baking
results, bake cookies and biscuits on a flat cookie at intervalsuntil the food isdone. Ifthe oven dooris opened
sheet, If the pan has sides, such as a jelly roll pan, toofrequently, heatwiilescapefromtheoven;thiscanaffect
browning may not be even. baking results and wastes energy.
• Dark metal pan or a pan with an anodized (dull) If you add additional ingredients or alter the recipe,
bottom absorbs heat,producesdarker browninganda expectcooking times to increase or decrease slightly.
Roastingisthe methodforcookinglarge, tendercutsof meat fat on top of the roast melts, the meat is basted naturally,
uncovered, without adding moisture. Most meats are eliminatingthe need for additional basting.
roasted at 325°E It is not necessary to preheat the oven.
Place the roasting pan on either of the two lowest rack The cooking time is determined by the weight of the meat
positionsor onthe special roasting position (see page 8). and the desired doneness. For more accurate results, use
Use tender cuts of meat weighing three pounds or more. thickest part of the meat. It should not touch fat or bone.
Some good choices are: Beef rib, ribeye, top round, high
qualitytip and rump roast,pork loin roast, leg of lamb,veal Remove the roast from the oven when the thermometer
shoulder roast and cured or smoked hams. registers the desired aloneness.
Seasonmeat,if desired,eitherbefore or after roasting. Rub NOTE- For more information about food safety, call]
intothe surface ofthe roast if added before cooking. USDAs Meat & Poultry Hotline at 1-800-535-4555. For/
Placethe meat fat-side-up on a rack in a shallow roasting Meat Board, 444 North Michigan Avenue, Chicago,|
pan. Placingthe meat ona rack holds itout of the drippings, Illinois 60611.
thusallowingbetterheat circulationfor even cooking.As the
- a meatthermometer. Insert itsothetip is inthe center ofthe
cooking information write to the National Live Stock and_
/
Page 12
USING THE OVEN 11
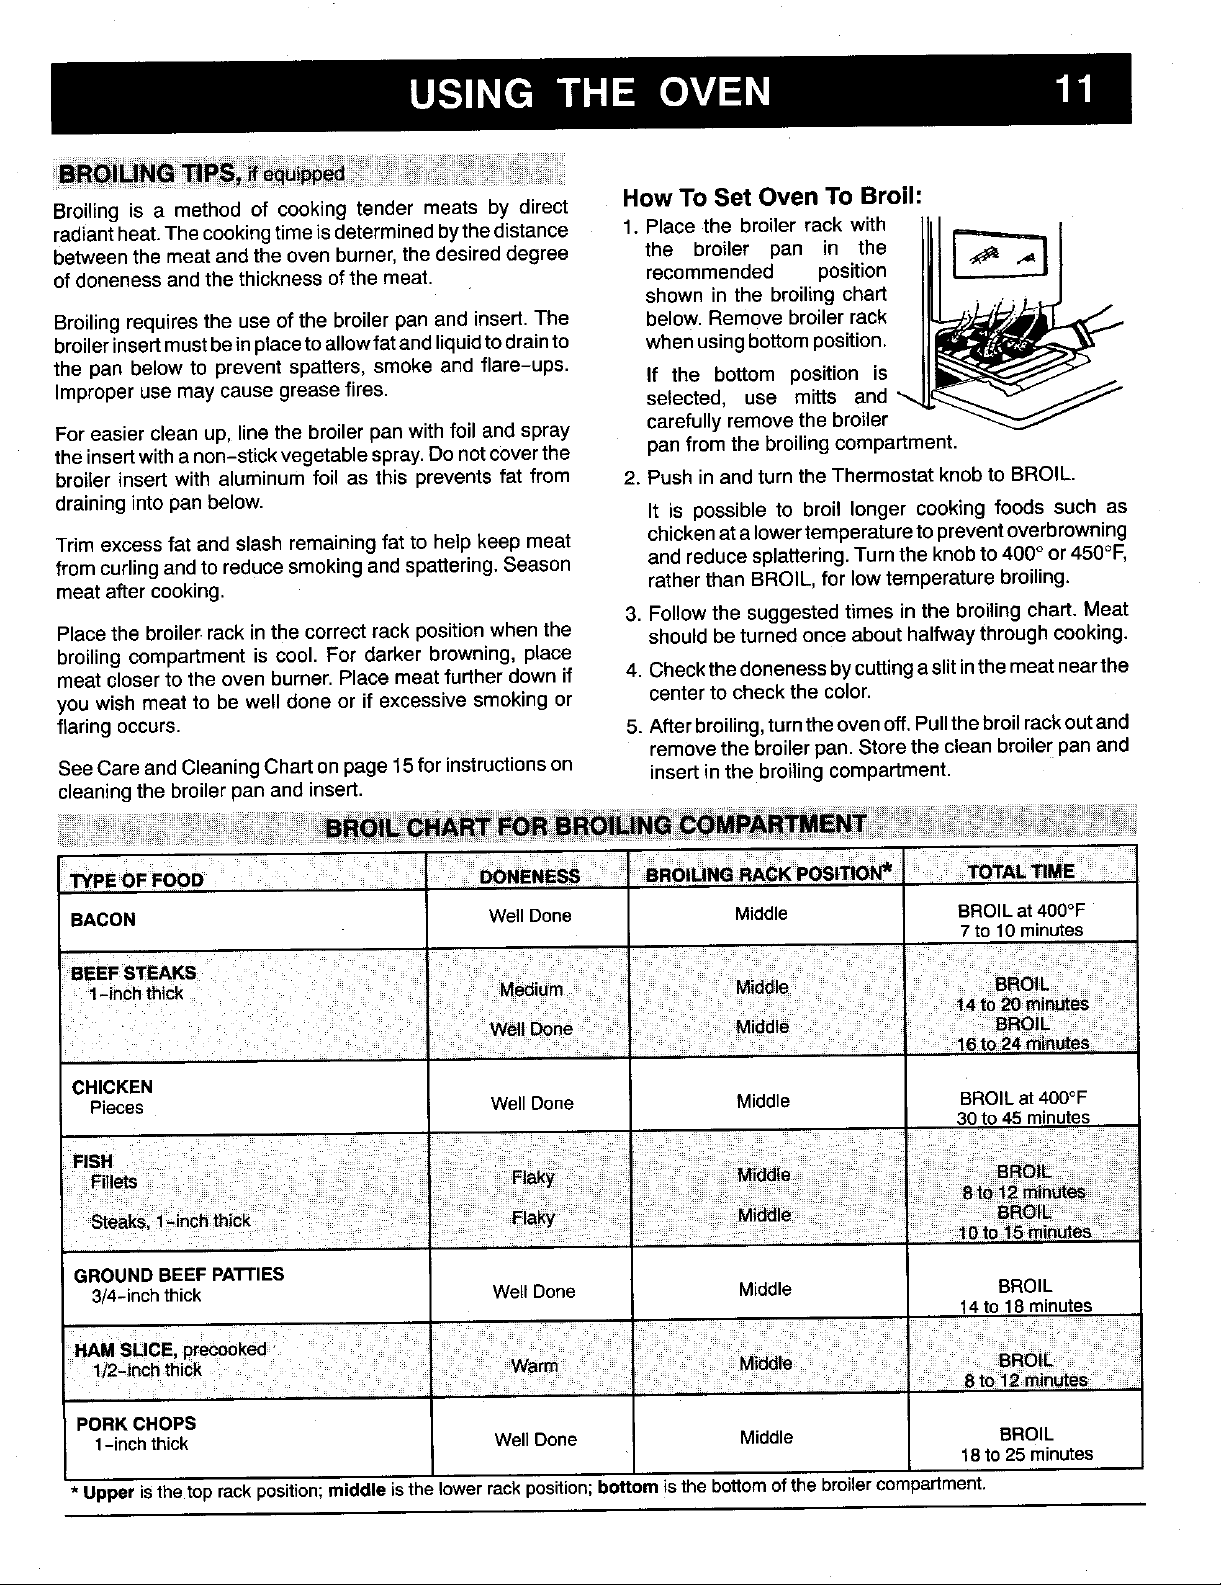
Broiling is a method of cooking tender meats by direct How To Set Oven To Broil:
radiant heat. The cooking time isdetermined by the distance 1, Place the broiler rack with IIiI r==.,._
betweenthe meat andthe oven burner, thedesired degree the broiler pan in the I_ _1
of doneness and the thickness of the meat. recommended position
shown in the broiling chart
Broiling requires the use of the broiler pan and insert. The below. Remove broiler rack
broilerinsert must be in place to allowfat and liquidto drain to when usingbottom position.
the pan below to prevent spatters, smoke and flare-ups.
Improper use may cause grease fires. If the bottom position is
For easier clean up, line the broiler pan with foil and spray carefully remove the broiler
the insert witha non-stick vegetable spray. Do not cover the pan from the broiling compartment.
broiler insert with aluminum foil as this prevents fat from 2. Push in and turn the Thermostat knob to BROIL.
draining into pan below. It is possible to broil longer cooking foods such as
Trim excess fat and slash remaining fat to help keep meat chicken at a lower temperature to prevent overbrowning
from curling and to reduce smoking and spattering. Season and reduce splattering. Turn the knob to 400° or 450°F,
meat after cooking, rather than BROIL, for low temperature broiling.
Place the broiler rack in the correct rack position when the should be turned once about halfway through cooking.
broiling compartment is cool. For darker browning, place
meat closer to the oven burner. Place meat further down if 4. Check the doneness by cutting a slit in the meat near the
you wish meat to be well done or if excessive smoking or center to check the color.
flaring occurs. 5. After broiling, turn the oven off. Pull thebroil rack out and
See Care and Cleaning Chart on page 15 for instructionson insert in the broiling compartment.
cleaning the broiler pan and insert.
selected use mitts and
3. Follow the suggested times in the broiling chart. Meat
remove the broiler pan. Store the clean broiler pan and
BACON Well Done Middle BROIL at400°F
I
CHICKEN
Pieces Well Done Middle BROILat 400°F
GROUND BEEF PATTIES
3/4-inch thick Well Done Middle BROIL
PORK CHOPS
1-inch thick Well Done Middle BROIL
* Upper is the toprack position;middle isthe lowerrackposition;bottom is the bottomofthe broilercompartment.
7 to 10minutes
30 to45 minutes
14to 18 minutes
18 to 25 minutes
Page 13

12 MAINTENAN(;E
To prevent staining or discoloration, clean cooktop after
each use.Wipe acid or sugar stains as soon asthe cooktop Under no circumstancesare the surface burner assemblies
has cooled as these stains may discolor or etch the tobe taken apart for cleaning.The surface burner assembly
porcelain, can be removedto cleanthe burner box area.
The sealed burner cooktop is designed with two contour The two surface burner assemblies are secured in place
wellsto catch and containspills. Becauseofthis design it is during transportation with screws. Once the range is
notnecessaryto liftup the cooktop to clean underneath.To installed,these screws may be removed to allow quick and
prevent damage to the gas tubing or cooktop, do not easy removal of the burner assemblies.
attempt to lift or remove the cooktop.
Thecooktop featuringconventionalsurface burners lifts up
for easycleaningofthe burnerbox area.
To raise the "lift-up" cooktop:Whencool,graspthefront \
edge of the cooktopandgently lift up untilthe two support
rods,ifequipped,atthefrontofthe cooktopsnapintoplace.
_'_/J /
• _ To remove: Allow the burner assembly to cool. Lift up
cooktop. Grasp the burner assembly and rotate it slightly
towardthe leftto releasethe two tabs onthe assembly.Then
liftthe assembly and pulltoward the backof the cooktopuntil
To lower the top: Hold the front edge of the cooktop and theairshutter endsontheassembly releasefromthevalves.
carefully push back on each support rod, if equipped, to
releasethe notched support.Then gently lowerthe top into To replace: Insert the air shutter ends on the burner
place.The support rods willslide into the cooktopframe, assemblyoverthe valvesand lowerthe assemblyintoplace.
Burnergrates must be properly positioned ==_==_//=_
,beforecooking. Burner grates are durable
butmay gradually lose their shine due to
usageand hightemperatures. _% The porcelain on the burner is durable but may gradually
VVhen installing square grates, place _ lose its shine due to usage and hightemperatures.
indented sides together so straight sides
are at the front and rear. Improper __-__'_'_uj The sealed surfaceburners are secured tothe cooktopand
installation of the grates may result in _/\_ are NOT designed to be removedby the consumer.
damage or chipping ofthe cooktop.
Besure to secure the two tabs on the burner assembly into
thetwoslots onthe burner supportbracketwhichis mounted
to theburner boxbottom. (NOTE:Ifthe tabsare notproperly
inserted into the slots, the assembly may rock and the
burnersmay not light properly.)
Select models feature two special SUPER HIGH SPEED
CAUTION: Do not operate a surface burnerwithout apan I sealed burners located atthe right-front and left-rear. Use
on the grate. The porcelain finish on the grate may chip these burnersto quickly bringwater to a boilandwhen using
without a panto absorb the intense heat from the burnerI larger pans. See information on rating plate, locatedon the
[fame. lower range front frame behind the broiler door or lower
panel,todetermine ifyour appliancefeatures these burners.
(Continuednextpage)
Page 14

MAINTENAN( ;E 13
Clean burner cap after each use especially if a spillover
occurs.A soiled burner may resultin improper ignition or an
usecareto preventdamage to the ignitor.If acleaning cloth proper baking, your range must
should catch the ignitor, it could bedamaged or broken, be level. Leveling legs are
uneven flame. When cleaning the sealed surface burner Some floors are not level. For __ _"
Ports
Ignitor To prevent range from accidently tipping, range should be
4 _. Portdirectlybelowignitor
The surface burner will not light if the ignitor is damaged, stand on an open oven door as, in some cases, it could
broken, soiled or wet. The burner will also not light if the causethe rangeto tip over,break the door or cause serious
ports, especially the small port located directly below the injuryto the user.
ignitor,are blocked. See page 16 for cleaninginstructions.
located on each corner at the
base of the range. Level by
turning the legs.
secured to the floor by sliding a rear leveling leg into the
anti-tip bracket supplied with the range.
Do not place excessive weight on an open oven door or
When opening the oven door, allow steam and hot air to
escape before reaching into the oven to check, add or
removefood.
Proportionalvalves havean adjustingscrew located inside Do notattempt to open or close the door until the door is
thevalvestem.Valvesthatdonothavethisscrewcannotbe completely seated on the hinge arms. Never turn on the
adjusted, oven unless the door is properly in place. When baking, be
The LO setting should produce astable flame when turning affected if the door is not securely closed.
the knob from HI to LO.On conventional surface burners,
theflameshould be 1/8-inch tall or lower and mustbe stable CAUTION: Hingearms arespring mounted andwill slam J
on all ports on LO setting. For sealed surface burners, the shut against the range if accidently hit. Never place
flameshould extendtothe outeredge ofthe lip onthe burner hand or fingers between the hinges and the front
cap ontheLO setting, oven frame. Youcouldbe injuredif hingesnaps back.
To adjust: Operate burneron HI for about 5 minutesto To remove nft-off door: When the door is cool,openthe
preheattheburnercap Turnthe knobbackto LO; remove doorto the "stop" position (openedabout 6 inches) and
knob, and insert a small screwdriverinto the center of the graspthe doorat eachside. Donot usethedoor handletolift
valve stem. Adjust the flame size byturning the adjustment the door. Liftup evenlyuntilthe door clearsthe hinge arms.
screw in either direction.
certain the door is completely closed. Baking results will be
q
Toreplacedoor: Graspthe door ateachside,alignthe slots
Theflame mustbeofsufficientsizetobestableonallburner inthedoorwiththehingearmsandslidethedoordownonto
ports.Iftheflameadjustmentisneeded, adjustONLYonthe the hingearms until itis completelyseatedon thehinges
LO setting.Never adjustflamesize ona highersetting.
Page 15

14 MAINTENAN(;E
Protect the oven bottom against excessive spillovers, Ranges that are dot equipped with a lower broiling
especiallyacidor sugaryspillovers,as they maydiscolorthe compartment will have a panel in place of the broiler door.
porcelain. Use the correct size cooking utensil to avoid This panel must be removed to access the rating plate
boilovers. Never placeutensils or aluminum foil directly on located on the lower range front frame. The rating plate
the oven bottom, contains the model and serial numbers for your appliance.
To remove panel: Grasp the bottomcorners of the panel.
To replace panel: Align the four slots onthe panel with the
2 and push down untilthe panel snaps into place.
_1'_ Then liftthe panel up and away from the range.
<_ ____3_3___,,_J Appliances which require electrical power are equipped
To remove: When cool, remove the oven racks. Slide the volt electrical outlet.
two catches,located at each rearcornerofthe ovenbottom,
toward the front of the oven. Liftthe rear edge of the oven
bottomslightly.Then slide itback untilthe front edge ofthe
ovenbottomclearsthe oven frontframe. Removethe oven _F,_b
To replace: Fit the front edge of the oven bottom intothe _
front frame. Lowerthe rear of the oven bottom and slidethe
two catches back to lock the oven bottom into place.
bottomfrom the oven. /
Before replacingthe light bulb, DISCONNECT POWER TO
THE RANGE. Be sure the bulb is cool. Do nottouch a hot The three-prong grounding plug offers protection against
bulbwith a damp cloth as the bulb may break, shock hazards. DO NOT CUT OR REMOVE THE THIRD
Toturn onoven light: Pushinthe rockerswitchlocatedon
the backguard. If an ungrounded,two-hole orothertypeelectricaloutletis
Toreplace oven light: Besurethe bulbiscool.Use a dry appliance owner to have the outlet replaced with a
potholder,to prevent possibleharm to hands, and very properly grounded three-hole electrical outlet.
carefullyunscrewbulb.
four screws on the range front frame. Then lowerthe panel
with a three-prong grounding plug which must be
plugged directly into a properly grounded three-hole 120
t
Always disconnect power toappliance before servicing.
GROUNDINGPRONG FROM THE POWER CORD PLUG.
encountered,it is the personal responsibility of the
Replace witha40 watt appliancebulb and reconnect power
to the range. Reset the clock.
Page 16

CARE AND CLEANING CHART 15
Because of the many new cleaning products introduced Non-Abrasive Cleaners - Bon Ami, paste of baking soda
each year, it is not possible to list all products that can be and water.
safely usedto clean this appliance.
READ THE MANUFACTURER'S INSTRUCTIONS to be Barkeepers Friend,Cameo, Comet, Soft Scrub.
surethe cleanercan be safely usedonthis appliance.Also, Non-Abrasive or Scratchless Plastic or Nylon Scouring
readandcarefullyfoUowthemanufacturer'sdirectionswhen Pads or Sponges - Chore Boy Plastic Cleaning Puff,
usingany cleaningproduct. Scrunge Scrub Sponges, or Scotch-Brite No Scratch,
To determine if a cleaning product is safe, test a small
inconspicuousarea using a very light pressureto see ifthe Abrasive Scouring Pads - S.O.S.,Brillo Steel Wool Soap,
surfacemayscratch ordiscolor.Thisisparticularlyimportant orScotch-Brite Wool Soap Pads.
forporcelain enamel,metal,plasticor highlypolished,shiny, (Brandnamesfor the abovecleaningproductsare registered
or painted surfaces, trademarks of the respective manufacturers.)
The following brands may help you make an appropriate Be sure appliance is off and all parts are cool before
selection: handlingor cleaning toavoiddamageandpossible burns.
Glass Cleaners - Bon Ami, Cinch, Glass Plus,Windex. Ifa part is removed, be sure itis correctly replaced.
Mildly Abrasive Powder or Liquid Cleansers - Ajax,
Cookwareor Kitchen Sponge.
DishwashingLiquid Detergents - Dawn,Dove, Ivory,Joy. To prevent staining or discoloration, clean range
after each use.
Mild Liquid Spray Cleaners - Fantastik,Formula409.
I pARrS CLEANING _QENT_ =. i DIRECTIONS
_ , , ,, ,,,,, , ,, h ,,, ,, i i , ,, ,, ,,,, .... , , , , ,, ,, ,,,
Baked enamel • Soap and water Useadrytowelorclothtowipe upspiUs,especiallyacid (milk,lemonjuice,fruit,mustard,
or painted ,,Mndliquid cleaner tomato sauce)or sugary spills. Surface may discolor or duff if soil is not immediately
• eackguard panels • Glasscleaner removed. This is especiallyimportantfor whit_surfaces.
• Broilerdoor Whensurface iscoo[,wash withwarmsoapy water, rinseanddry. Forstubborn soil,use
I • Ovendoor non-abrasive cleaning agentssuch asbakingsoda pasteor Bob AmL if desired, a thin
I * Range front frame coatofmildappiiancewaxcanbeusedtoprotectthesidepaneis.Aglasscleanercanbe
behindbroilerdoor used toadd "shine"to the surface.
I • Side panels NOTE;Do not useabrasive, causticor harshcleaningagents suchassteel wool padsor
oven cleaners.These productswill scratch or permanently damage the surface.
NOTE: Never wipe a warm or hot surface witha damp cloth as this may damage the
I surface and may cause a steam burn.
and
Pa.
insert ' ,, Pia._iCsC0ur_gp_ = [ C!othowrioSertandparr;=ietsoakto!oosensoi!,washinwarmsoapywatet:UsesoaP_
;;, , ; i ..... = = brd _erpanwithaJeminurnfoil: ....... =
i:
Burner box • Soap and water Burnerbox, for coektops withconventional burners, is located under rift-up cooktop.
Chrome dripboWlS,,. Soap_==wat_ i' = i _W_ e_ _e withs_a_ addwater.Re_o_ stu=bb_stai_ _ b_ ng
tfequip_d ....... • Pasteof Sakhg 'sodaaddwat_ _& _ete a_ _a_tlc _rihg padl To:prevent scratching the finish,,_ not use
...... : •,°laSt_ _Cddti_gpad ::, :: abrasi_e_l_hihgagents =,Rlhse,dry abdrs_e. ......
• soap and W_er = i { Re_ve ft_ btdiiing c0rnpartrnentaftei u_e. cool then pour0ff grease,Places_py
,,Soap_fitl_dscou_ng pad= '= ...... I fitJ_ _00dt_ngpadto f_ve stubborn,soil:Clean in=dishwasherif deSir_i =
;i i i • , ,, ,,, .... ,
• Paste ofbaking socksandwater Clean frequently to remove spiilovers. If soil is nor removed and is allowed to
• Non-abrasive plasticpad or sponge ascumutst_,it maydamage the finish.Toclean'remove grates and surface burnersand
•Liquidcleaner cleanwith soap and water, rinseand dry. (NOTE: SeaJedburner cooktop does notJilt
• Glass cleaner up.)
= =
ebit ailo_e_ to b_ke _RiT_e,did¢0i0rat!0n,wiltnot affectth_=cookingperfotm_ce.
Continuous clean Cleaning action begins whenever the Do not use papertowels, cloths, orsponges because the oven walls are porous an_
oven, ff equipped ovenis on.The oven must be used for particles ofthese materials will rub offon the walls. Brushoffheavysoil with anylonol
• Oven cavity cleaning to take place. Higher oven plastic pad. Rinse area with clean water only. Do not use any type of oven cleane_
temperaturesand longerbakingtimes cleanser or detergent on this surface.
speedthe cleaning action.
(Continuednext page)
Page 17

16 CARE AND CLEANING CHART
PARTS CLEANING AGENTS DIRECTIONS
Control knobs • Soapand water Toremove knobsfor cleaning, gently pullforward.Wash in mild detergent and water.Dc
Glass • Soapandwater = Wash withsoap endwater.Usea glasscleanerend asoftclothafterclaeninglRemove
• Ovenwindow ° Pasteofbakingsoda andwater stubbornSoilwithpaste of bakingsodaendwater; Rinsewith e clothwrungoutin clea_
Grates • Soapand water Gratesaremadeofporcelain-coatedsteel.They canbe cleanedatthe sinkwithsoapant
Metalfinishes • Soap and water WaShwithSoapandwater.RemoveStUbb0_ns0flin broi!ercompartmentcavitywithpaste
• Broilercompart- i Glasscleaner : of baking SOdaapewater,use a glassEleaderand a s0ftclothtoremove flngerrnarkSOr
mentcavity • Pasteof be(pegsodaend water smudgesontnmor handle.NOTE: Do notuseovencleaners abrasiveorcausticagents.
• Doorhandles • N0n-abrasivepla_sti_pad = They will0amage the finish ontrimor handle:
• Trim parfs I = : ' =,, ........... , =
Oven bottom I Protecttheporcelainenameloven bottomby (t) usinglargeenoughcookwaretoprevenl
Oven racks * Soapandwater Clean _th s0apy,water._emove StUbbornsbil with c!ean_iPg powde_or s0ap tiffed
Plasticfinishes • Soap andwater Whensurfaceiscool,cleanwithsoapandwater;rinse,anddry.Usea glasscleaneranda
• Doorhandles • Non-abrasiveplasticpad or sponge soft cloth. NOTE: Never use oven cleaners, abrasive or caustic liquidor powdered
• Backguardtrim • Glasscleaner cleansersonplasticfinishes.These cleaningagentswillscratchormarrfinish.NOTE:To
• Knobs preventstainingordiscoloration,wipe upfat, greaseor acid(tomate,lemon,vinegar, milk,
• End caps fruitjuice, marinade) immediatelywith a dry paper towel or cloth.
I POrcelainenamel * Soap and water Clean pbrceiainwithsoap _nd waterl rinse:use cleansing powdersor pl_tic SCoUr!_
,,Backguard =
• Glasscleaner water.Dry. Donotuseabrasivematerialssochasscouringpads, steelwoolorpowdere_
• Non-abrasive plasticpad water or inthe dishwasher.TOcleanbaked on soil, placea damp soapy paper towel ove_
• i , = • •
. Cleansingpowders Sc0Udngpad: Rnee anddry. NOTE: If rack_ become difficult tOSiide_a thin coat ol
I, Plastic pad ===vegetablepit on the uhdensideofthe rack wi(tmake sliding easier.
, soapfilled Scouringpa_ , ; =
notsoak knobs inwater.Do notuseabrasive cleaning agents,They willscratchfinish anc
removemarkings. Rinse dryand replace. Turn ON each burner to see if knobs have
been replacedcorrectly.
cleaningagents:NOTE: Toavoidinsidestainingof ovendoorglass,donotoversatufats
. cloth.
the grate and let standfor30 minutes. Use a non-abrasive plastic padto scour stubborn
soil. NOTE: Neveroperate burner without agrate in place.TOprotect the porcelainfinisP
onthegrate from excessiveheat, neveroperatesurfaceburnerwithoutacooking utensJ
on the grate.]t is normal for grates to losetheir shine over a period of time.
believers;(2)placingapieceofaluminumfoil,thatisslightlylargerthanthecookware,on
the lowerrack•NEVER placefoildirectlyontheoven bottomasfoil maymelt ontooven
bottom.Protectovenbottomagainstacidspills(milk,cheese,tomato,lemonjuice,etc.)o_
sugary api}]s(piefilling)asthey may pitor discolortheovenbottom.See porcelainenameJ
foradditional information.
inner o_N _ broilerJ
....ManifO!dl_anel : I = _n_aine_andieavei_a_eld0ve_oye_dight:_e_mmonia=_umeS_i_i_ei_i_
' Oven cavity bumedengreaseandfeod:Ovencleaner_canbeusedon_ilepdmOiainOvenonlyFellow
• Oven bottom : manufacturersdirections_i_:_en e e_ner Wasused; thOroUghiyrinse even cev_ and
: _i!_ tubeWhidhiSIo_atedatthe topOftheOven: ::
Siliconerubber • Soap andwater Washwithsoapand water,rinseanddry. Do notremovedoorgasket.
• Doorgasket
Surface burners _,Soapanclwaier A buiners Fbreassbfcea_ng_cteanbumerseaoht metheco0_epiSusedwith:War_
•ConVentional
• Sea!ed ;• plastic _couringSpongeQr_ removest_b_n _bil USead_ Clothand miidiy_braSiveE!eanser.Use caretOprevent
. Mitdlyabras_ c_eass_ = ] cleaner,=fromct_ggng po_, s_rn_t m_st be dry _efore qse: NOTE: Yeltowtlpplngor
: =_ distortionOfti_eflame_ay _cUt u_t!lthe bumpr s comp!etelydryi =
; ; I p_rtsi_rlot_se,'_=_od_e_O_thpiekasitmaybreakoffahdq!ogpo_.!fporfsareP!ogged
; ;; ] or SOite_itheburner may notlight properlyOrthe flame maynot be even: ;
= =1 C,nve_n,! b_!nei,_ Dr'y_U_ers ih_he_ve__ei ,t iTo_F. =
.... ; pbtt0ke_ty belowthe ighit0r
Page 18

SERVI( ;E INFORMATION 17
Do not attempt to service the appliance yourself unless
Follow these procedures to remove appliance for cleaning or directed to do so in this manual, Contact the dealer who
servicing: sold you the appliance for service or call us, Our
telephone number is found on the separate warranty
1. Shut-off gas supply to the appliance, sheet.
2. Disconnectetectricalsupplytotheappliance, ifequipped. If your appliance should require service or replacement
3. Disconnect gas supply tubing to the appliance, parts, contact your dealer or authorized servicer. Be sure to
4. Slide range forward to disengage range from the anti-tip have the model and serial numbers of the appliance
bracket. See the Installation Instructions for location of available. See the front cover of this manual for location of
the bracket, these numbers. Please review the separate warranty sheet
5. Reverse procedure to reinstall. If gas line has been requesting is covered by the warranty.
disconnected, check for gas leaks after reconnection. A
qualified servicer should disconnect and reconnect the Ifyou are net satisfied with the local response to your service
gas supply. See the Installation Instructions for gas leak requirements, write to Maytag Customer Service, P.O. Box
test method. 2370, Cleveland, TN 37320-2370. Include your name,
To prevent range from accidently tipping, range must be numbers of th e appliance, the name and address of the
secured tothe floorby sliding rear leveling leg into an anti-tip dealer from whom you purchased the appliance, the date of
bracket supplied with the range, purchase and details concerning your problem.
that comes with your appliance to see if the service you are
address, phone number, the complete model and serial
If you do not receive satisfactory service, you may contact
WARNING: Possible risks may result from abnormal the Major Appliance Consumer Action Program by letter.
usage, including excessive loading ofthe oven door and of Include the information listed above.
the risk oftip over, should the appliance not be reinstalled
according to the installation instructions. Major Appliance Consumer Action Program
MACAP (Major Appliance Consumer Action Program) is an
independent agency sponsored bythree trade associations
as a court of appeals on consumer complaints which have
not been resolved satisfactorilywithin a reasonable period of
time.
Surface burner fails to light, a. powersupplynotconnected, a. connect power,checkcircuit breakeror
b. cloggedburnerport(s), b. clean portswith straight pin or small
c. surfacecontrolnotcompletelyturnedto c. turncontroltothe LITE positionuntilthe
the LITE positionor tumed too quickly burner ignites, then turn control to
from the LITE position, desired flame size.
d. powerfailure (pilotlessignition), d. see page5to lightburnerduring apower
e. onsealedburner models:Burner willnot e. clean and dry burner head. If broken or
lightifthe igniterisdamaged,soiled, wet damaged, call a serviceman.
or if the portdirectlybelowthe ignitoris
blocked.
f, burnerassemblyincorrectlyinstalled, f. see page 12.
20 North Wacker Drive
Chicago, IL 60606
fuse box.
paper clip. See page 16 for cleaning
instructions.
failure.
a clean portswithstraight_t_.
(Continuednextpage)
Page 19

18 SERVI(;E INFORMATION
Surface burner flame lifts off port or a. air/gasmixture not proper, a. call servicemanto adjustburner.
isyellowin color, b. nopan inplace, b. always place pan on grate before
lightingburner.
NOTE: Liftingofflame isnormalforsealed NOTE: Besureinstallerproperlyadjusted
burners.SomeyellowtippingwithLP gas is range attime of installation.
normalandacceptable.
Surface burner ignitor producing ( a, co,to knob is in=theLITE p_siti0n Sure ALL SUrface b_rner con_ol
clicking sound. NOTE. _he ignition System = kn0b_ are=in the OFF _siti6_ orate
t
J L1TEDositiOn = ,: = = =,
= _ bl surface co_rol 'switch S;:m0st as a b allbwswtcht0drythenrelightbumer.
I resui_of Cea_ing t_e range= = i= :=
C: rnalfiunctioniogswitch:, #, _!1Service_an_o check. ,,,=
Oven burner fails to light, a. power supply not connected, a. connect power,check circuit breakeror
b. power failure, b, oven will not operate during a power
c. oven incorrectly set. c. Seepage 7.
fuse box.
failure.
extinguishes: :
Clock and/or oven light does not a. power supply not connected, a. connect power supply, check circuit
work. breakeror fuse box.
b. bulbmay be looseor burnedout. b. tightenor replace lightbulb.
c. maffunctioningswitch,starterorbaltast, c. callservicemantocheck.
d. malfunctioningclockor loosewiring, d. callservicemantocheck.
= ........ ..... ....... ....
Moisturecondenser!on on oven '_i it'isn_rm_ifor_e _ih_W t_fog dui _g _0_o_ Oi
window, ifequip_ whenoven isin t_e firstfew min_eS the 0yen!s0_i I _!low_Oisture to escape.
use , ql_ saturS.tSd _ith Water is gsed_ b. LISa
: :,: betwe:_ thbpasts _ glass
Baking results ere not satisfactory, a. ovennot preheatedorset at correct a. preheatoven10 to 15 minutes
• browning is too pale, too dark or temperature.
is uneven, b. used incorrect rackposition b. see page 7
• food cooks unevenly, c. incorrect use of aluminum foil c. see page8
• food is underdone or overdone, d, oven bottom incorrectly replaced d. replace oven bottom correctly
, preventexcesswater =fromseeping
e. oven thermostat sensing device is out e. reinstallthermostat sensing device
of the holding clip(s). See Problem Chart on page 9 for
additional information
b! tdmfat : ::
_P!Y sau_ ddingi_t f_ mi_eS b_
cooking. Ifme_ has _en m_!nated;
drainthoroughly
.... _ch Lisa ::
yent._ fat from draining tOpan beiow
¢J_anb_oilinO_p_rtment
Page 20

SERVIq;E INF( )RMATION 17
Do not attempt to service the appliance yourself unless
Followthese procedures to remove appliance for cleaning or directed to do so in this manual, Contact the dealer who
servicing: sold you the appliance for service or call us. Our
telephone number is found on the separate warranty
1. Shut-off gas supply tothe appliance, sheet.
2. Disconnectelectricalsupplytotheappliance, ifequipped. If your appliance should require service or replacement
3. Disconnect gas supply tubing to the appliance, parts, contact your dealer or authorized servicer. Be sureto
4. Slide range forward to disengage range from the anti-tip have the model and serial numbers of the appliance
bracket. See the Installation Instructions for location of available. See the front cover of this manual for location of
the bracket, these numbers. Please review the separate warranty sheet
that comes with your appliance to see if the service you are
5. Reverse procedure to reinstall. If gas line has been requesting is covered by the warranty.
disconnected, check for gas leaks after reconnection. A
qualified servicer should disconnect and reconnect the Ifyouarenotsatisfiedwiththelocalresponsetoyourservice
gas supply. See the Installation Instructionsfor gas leak requirements, write to Maytag Customer Service, P.O. Box
test method. 2370, Cleveland, TN 37320-2370. Include your name,
address, phone number, the complete model and serial
To prevent range from accidently tipping, range must be numbers of the appliance, the name and address of the
secured to the floor by sliding rear leveling leg intoan anti-tip dealer from whom you purchased the appliance, the date of
bracket supplied with the range, purchase and details concerning your problem.
If you do not receive satisfactory service, you may contact
WARNING: Possible risks may result from abnormal the Major Appliance Consumer Action Program by letter.
usage, including excessive loadingof the oven doorand of Include the information listed above.
the riskof tip over, should the appliance not be reinstalled:
according to the installation instructions. Major Appliance Consumer Action Program
20 North Wacker Drive
Chicago, IL 60606
MACAP (Major Appliance Consumer Action Program) is an
independent agency sponsored by three trade associations
as a court of appeals on consumer complaints which have
notbeen resolved satisfactorily within a reasonable period of
time.
Surface burner fails to light, a. powersupplynotconnected, a. connectpower,checkcircuitbreakeror
b. clogged burner port(s), b. clean ports with straight pin or small
c. surface control not completely turned to c. turn control to the LITE position untilthe
the LITE position or turned too quickly burner ignites, then turn control to
from the LITE position, desired flame size.
d. power failure (pilotlessignition), d. seepage5tolightburnerduringapower
e. on sealed burner models:Burnerwill not e. clean and dry burner head. If brokenor
light ifthe ignitorisdamaged,soiled, wet damaged, call a serviceman.
or ifthe portdirectly belowthe ignitor is
blocked.
f. burner assembly incorrectly installed, f. seepage 12.
fuse box.
paper clip. See page 16 for cleaning
instructions.
failure.
I Burner_ameiSu,eva.,
(Continuednextpage)
Page 21

18 SERVICE INF( tRMATION
, ,, PROBLEM ' , CORRECT!ON, , ,, ,,
Surface burner flame lifts off port or a. air]gas mixturenotproper, a. callserviceman to adjust burner.
is yellow in color, b. nopan in place, b. always place pan on grate before
lightingburner.
NOTE: Liftingofflame is normalforsealed NOTE: Be sure installerproperlyadjusted
burners. Someyellowtippingwith LPgasis range at time of installation.
normaland acceptable.
Surface burner ignitor producing a. control knob is in the L/TEposition, a. be sure ALL surface burner :control
clicking sound. NOTE: The life of the ignition system knobs are ]n the OFF position or are
maybeshortenedffthekn0bisleft inthe adjustedtothe desiredflame seWng.
LITE position.
Surface control switch iS moist as a b. aliowswitchto:drythehrelightburnerl
[ result ofcleaning=therange. = ....
Oven burner fails to light, a. powersupplynotconnected, a. connectpower,check circuitbreakeror
b. powerfailure, b. oven will not operate during a power
c. ovenincorrectlyset. c. See page 7.
_his is 'anbrrn_!SOundthatoccurswithSometypesof gas Whena hotburner isturned 0ft.
Clock and/or oven light does not a. power supply notconnected, a. connect power supply, check circuit
work. breakeror fusebox.
b. bulb may be loose or burned out. b. tightenor replacelight bulb.
c. malfunctioningswitch, starter or ballast, c, call serviceman to check.
d. malfunctioning clock or loose wiring, d. call servicemanto check.
Moisturecondensation on oven a; _i is'avedear ajarfor Oneortw0 minutest01
window, if equipped, when oven is in the firs_fewminUteSthe evenis on_ : aJ!ow=moisturetOeecapei:
use. : b, Cloth saturated Withwater is used to b; use a damp cloth to Clean win_w to
Baking results are not satisfactory, a. oven not preheatedor set at correct a. preheatoven 10 to 15 minutes
• browningistoopale,toodarkor temperature.
isuneven, b. used incorrect rack position b. see page 7
• food cooks unevenly, c. incorrect use of aluminum foil c. see page 8
• food is underdone or overdone, d. oven bottom incorrectly replaced d. replace oven bottom correctly
Cleanthe WindoWl preventexcesswater from Seeping
, , , , , , between the panels ofglas-s.,
e, oven thermostat sensing device is out e. reinstall thermostat sensing device
ofthe holdingclip(s). See Problem Chart on page 9 for
, .... =
fuse box.
failure.
additional information
broil operation, to.meat has toe muchfat : : b: trimfat :
c. sauceappiiedtOo=Saltyormarinadenot e. apply sauce during lastfew r_inutesof==
Cornplete!ydrained :: cooking, ff meathas been marinated;
drainthOrOUghlybefore cooking
= d Soiledbroier pan d. alwayscleanbroiler pan and insertafter
, e, broilerJosertsovered=withaluminum foil e. nevercover insertWithfoil asthispre-
f. broilingcompartmentbottomis=soiled f, cleanbroilingcOmpartment
== each use
ventsfat fromdrainingto ,panbelow
Page 22
Service (continued)
SERVICING HOW TO OBTAIN SERVICE
Whenyourappliancerequiresserviceor
replacement pads, contactyour Dealer
or Authorized Servicer. Use only genu-
ine factory or Maycor parts if replace-
ment parts are necessary. Consult the
Yellow Pages in your telephone direc-
tory underappliance for the servicecen-
ter nearestyou. Be sureto include your
name, address, and phone number,
alongwiththe modeland serial numbers
of the appliance. (Seeinsidefront cover
for location of your model and serial
numbers.)
If you are unable to obtain service, write
to us. Our address is foundonthe rating
plate. See insidefront cover for location
of ratingplate.
If you are notsatisfied with the local re-
sponse to your service requirements,
call or write MAYCORAppliance Parts
and Service Company, 240 Edwards
Street,S.E., Cleveland,TN 37311,(615)
472-3500. Include or haveavailable the
complete model and serial numbers of
the appliance,the name and address of
the dealer from whom you purchased
the appliance,the date of purchase and
details concerningyour problem.
Ifyou didnot receive satisfactoryservice
through your servicer or Maycor you
may contact the Major Appliance Con-
sumer Action Panel by letter including
your name, address, and telephone
number, as well asthe model and serial
numbers of the appliance.
MajorApplianceConsumerActionPanel
MACAP (Major Appliance Consumer
Action Panel) isan independent agency
sponsored by three trade associations
as a court of appealson consumer com-
plaints which have not been resolved
satisfactorily within a reasonable period
of time.
20NorthWackerDrive
Chicago,IL 60606
21
Page 23

WHAT IS NOT COVERED BY THESE TWO WARRANTIES:
1. Conditions and damages resulting from any of the fol- 4. Products purchased for commercial or industrial use.
lowing: 5. The cost of service or service call to:
a. Improper installation, delivery, or maintenance, a. Correct installation errors.
b. Any repair, modification, alteration or adjustment not b. Instruct the consumer on the proper use of the prod-
authorized by Maycor, or a Maycor authorized servic- uct.
er.
c. Misuse, abuse, accidents or unreasonable use.
d. Incorrect electrical current, voltage or supply. 6. CONSEQUENTIALOR INCIDENTAL DAMAGES SUS-
e. Improper setting of any control. BREACH OF THESE WARRANTIES. Some states do
2. Warranties are void if the original serial numbers have not allow the exclusion or limitation of consequential or
been removed, altered, or cannot be readily determined, incidental damages, so the above exclusion may not ap-
3. Light bulbs, pry to you.
HOW TO RECEIVE WARRANTY SERVICE
1. Contact the dealer from whom you purchased the appliance or any authorized Maycor servicer to
receive warranty service under these warranties.
2. Should you not receive satisfactory warranty service from your local servicer, contact:
Customer Assistance
Maycor Appliance Parts and Service Company
240 Edwards Street, S.E.
Cleveland, TN 37311
(615) 472-3500
c. Transport the appliance to a servicer.
TAINED BY ANY PERSON AS A RESULT OF ANY
(1/93)
3. Have the following information available when requesting warranty service:
- Your name and address.
- The model and serial numbers of your appliance.
- The name and address of your dealer or servicer.
- The purchase date of your appliance.
- A clear description of the problem.
 Loading...