

Page 1
GUsc
Care
Instructions for your Recreational Vehicle Appliance
CONTENTS
SAFETY INSTRUCTIONS ................... 1-3 USING YOUR OVEN .......................... 6
Ovencontrol .............................. 6
Oven pilot ................................ 6
USING YOUR COOKTOP ................... 4-5 Shutdown instructions ....................... 6
Stainless finish cooktop ..................... 4 Cooking hints .............................. 6
Burnergrates ............................. 4
Surfaceburners ........................... 4
Surfaceburner pilot ......................... 5 CARE AND CLEANING ....................... 7
Pilotadjustment ........................... 5
Shutdown instructions ....................... 5 SERVICE ................................... 8
Service chart .............................. 8
Service ................................... 9
WARRANTY ............................... 10
8112P098-60
(9/91)
Page 2
ABOUT YOUR NEW RATING PLATE ELECTRICAL CONNECTION
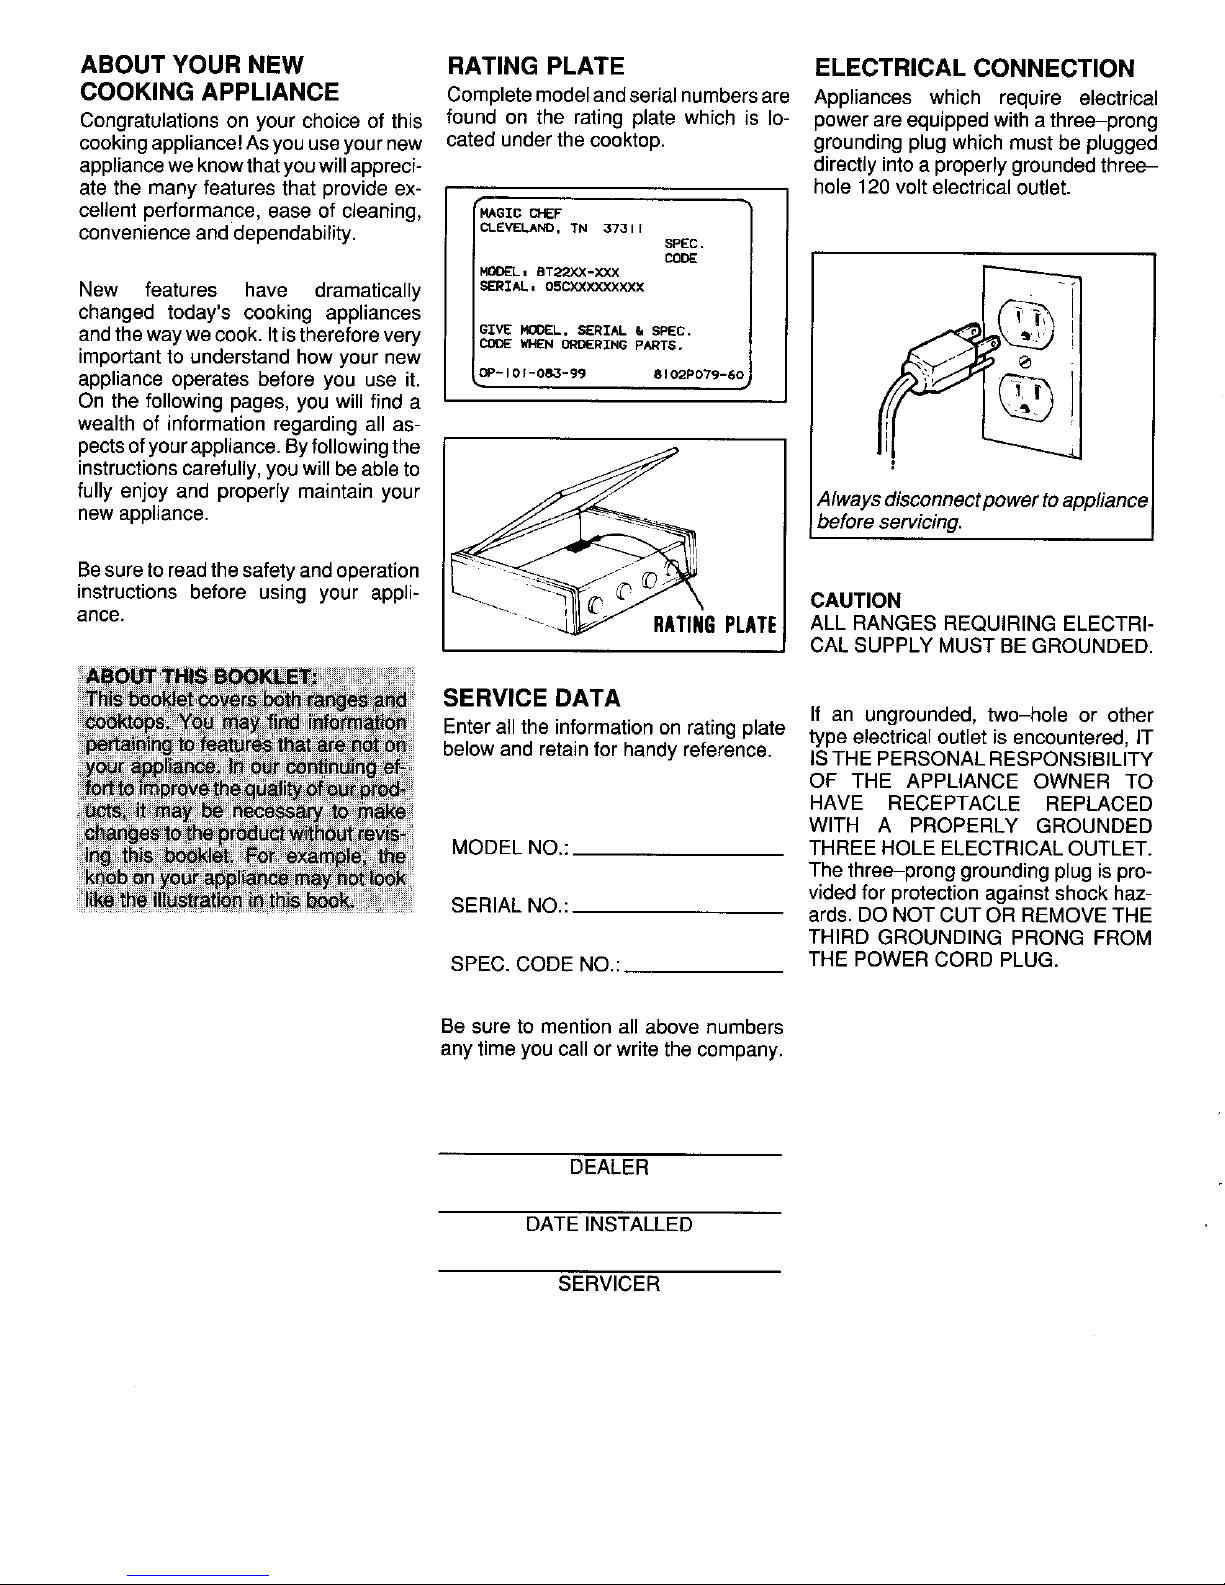
COOKING APPLIANCE Completemodelandserialnumbersare Appliances which require electrical
Congratulations on your choice of this found on the rating plate which is Io- powerare equipped with a three-prong
cookingappliance! Asyouuseyournew cated under the cooktop, grounding plug which must be plugged
appliancewe know thatyou willappreci- directly intoa properly grounded three-
ate the many features that provide ex- hole 120volt electrical outlet.
cellent performance, ease of cleaning, _GZCCHEF
convenienceand dependability, e-EVELA_O,TN 37311
SPEC.
CODE
MOOEL= BT22XX-XXX
New features have dramatically sa_z_, oscxxxxxxxxx
changed today's cooking appliances f"q_,,
importantandthewaywecook.tounderstandltisthereforeverYhowyour new COoEGZVE'sHE.MODEL'oRDERINGSERIALPARTS.t=SPEC. _/_ _{_
appliance operates before you use it. op-to_-o_-99 8=o2Po79-6o
On the following pages, you will find a
wealth of information regarding all as-
pectsofyourappliance.Byfollowing the _
instructionscarefully,you willbe ableto _fS"J
fully enjoy and properly maintain your _ Alwaysdisconnectpowertoappliance
newappliance. - beforeservicing.
iI
Besureto readthesafetyand operation
instructions before using your appli- CAUTION
ance. e PLATE ALL RANGES REQUIRING ELECTRI-
CAL SUPPLY MUST BE GROUNDED.
SERVICE DATA
If an ungrounded, two-hole or other
Enterall the information on rating plate type electrical outlet is encountered, IT
below and retain for handyreference. IS THE PERSONALRESPONSIBILITY
OF THE APPLIANCE OWNER TO
HAVE RECEPTACLE REPLACED
WITH A PROPERLY GROUNDED
MODEL NO.: THREEHOLE ELECTRICAL OUTLET.
The three-prong grounding plug is pro-
videdfor protection against shock haz-
SERIAL NO.: ards. DO NOT CUT OR REMOVETHE
THIRD GROUNDING PRONG FROM
SPEC. CODE NO.: THE POWER CORD PLUG.
Be sure to mention all above numbers
anytime you call or write the company.
DEALER
DATE INSTALLED
SERVICER
Page 3
SAFETY INSTRUCTIONS
WARNING: If the information in this manual is not
followed exactly, a fire or explosion may result
causing property damage, personal injury or death.
- Do not store or use gasoline or other flammable
vapors and liquids in the vicinity of this or any
other appliance.
- WHAT TO DO IF YOU SMELL GAS
• Do not try to light any appliance.
• Do not touch any electrical switch; do not
use any phone in your building.
• Immediately call your gas supplier from a
neighbor's phone. Follow the gas supplier's
instructions.
• If you cannot reach your gas supplier, call the
fire department.
- Installation and service must be performed by a
qualified installer, service agency or the gas
supplier.
GENERAL
Nocookingappliance shouldbeusedas Havethe installershow youthe location Misuse of appliance doors, such as
aspace heater.This instructionisbased ofthegas shut off valveand howto shut stepping, leaning or sitting on the door,
onsafety considerationsto preventpc- it off in an emergency, mayresult in possible tipping ofthe ap-
tential hazard to the consumer as well plianceor breakage ofdoor andserious
as damageto the appliance, injuries.
Your appliance is vented through the
_.._._/_._ I//_'_'_ J base of the backguard or backsplash
IJfw_E,,_E,_r/f paneloneye-level modelS.DoNeverobstructblock_ _.# ._e_=_ /
_,, ,, ,,,,-_'_=%_-'mtJ'_- _ ovenvent or air intakes, not
,; , the flow of combustion and ventilation
_r... air. Restrictionof air flow to the burner -_
prevents proper performance.
Avoid touching oven vent area while
oven ison and for several minutes after
oven is turned off. Some parts of the
vent and surrounding area become hot
If range is installed near a window, enough to cause burns.
proper precautions should be taken to
prevent curtains from blowing over IN CASE OF FIRE:
burnerscreating a FIRE HAZARD.
Do notuse cooktopor oven asastorage 1. Turn off range controls.
Keep area around appliance clear and area for food or cooking utensils. This 2. Smother fire or flame with baking
free from combustible materials, gaso- Lnstructionis based on safety consid- soda, dry chemical, or a foam-type
line, and other flammable vapors and erations to prevent potential hazard to extinguisher. Do not use water on
materials, user and to the appliance, grease fires.
-1-
Page 4
SAFETY INSTRUCTIONS
CHILD SAFETY Touchinga hot oven lightbulb with a _ _ /
damp cloth could cause the bulb to
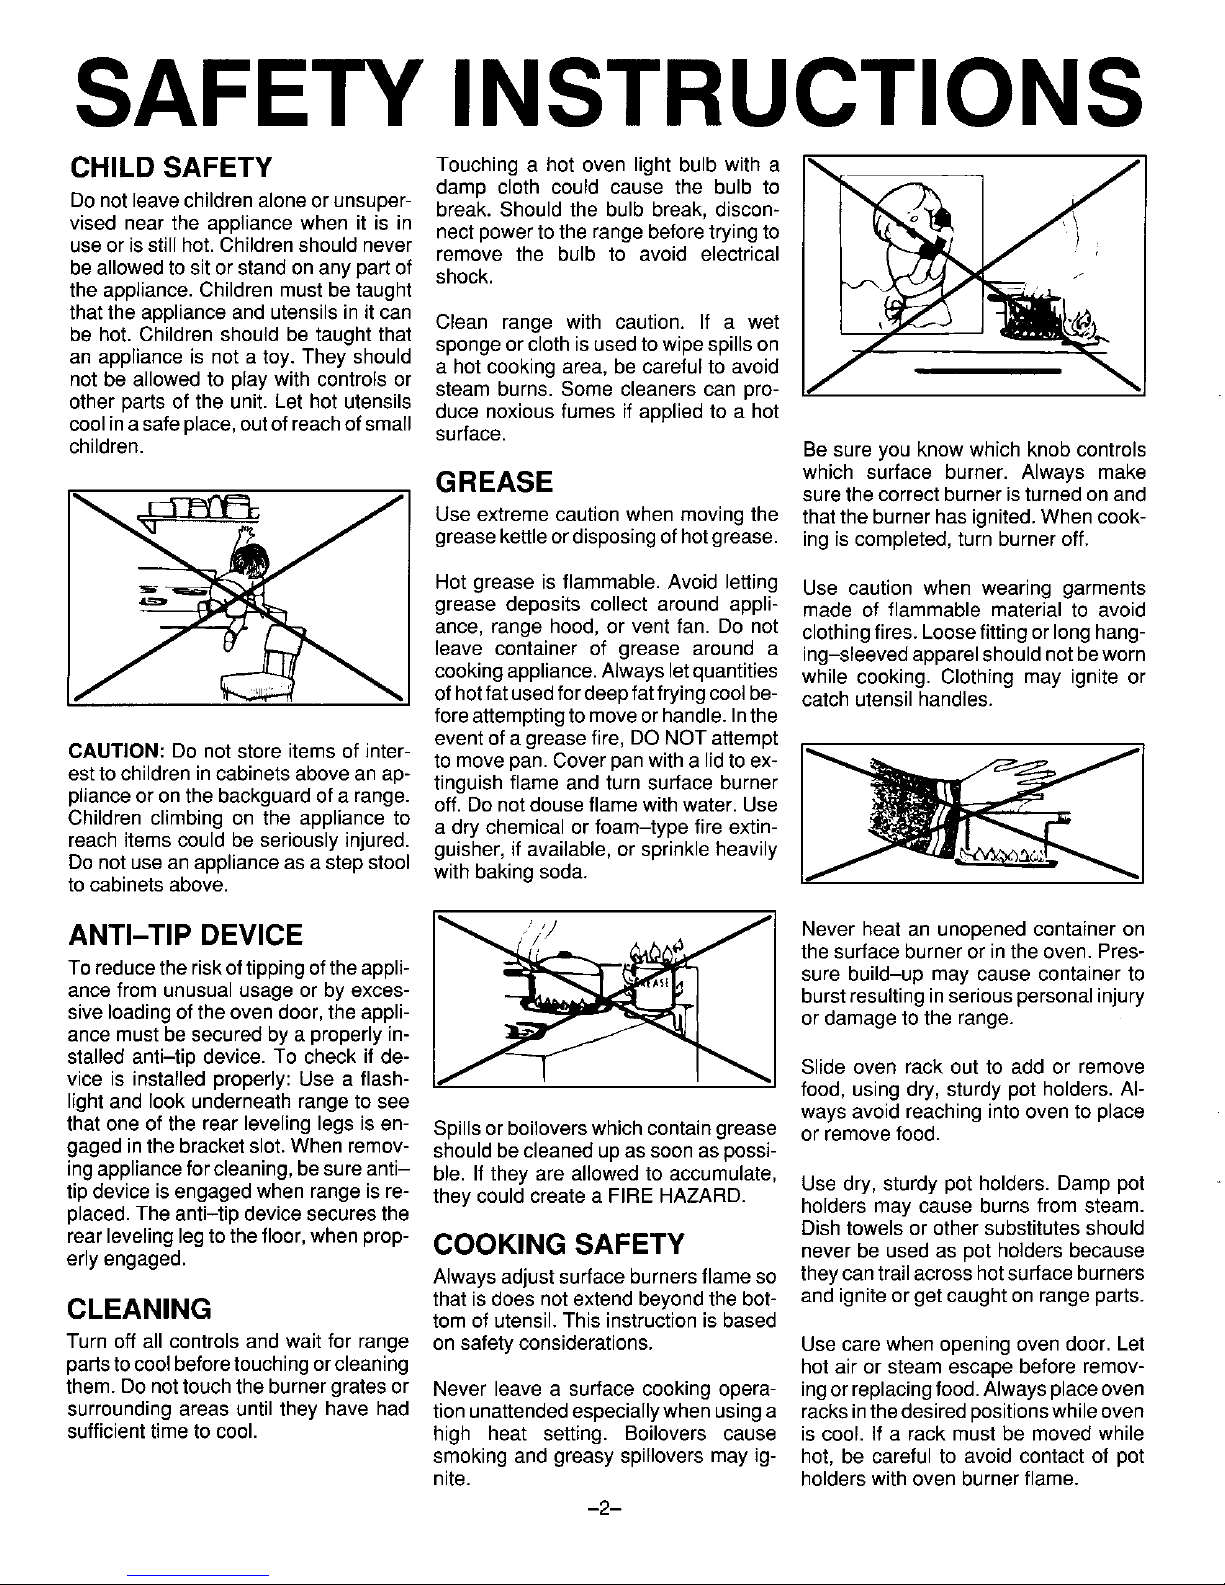
Donotleavechildrenaloneorunsuper- break. Shouldthe bulb break,discon-
vised nearthe appliancewhen it is in nectpowertothe rangebeforetryingto
useorisstillhot.Childrenshouldnever remove the bulb to avoid electrical
beallowedtositor standonany partof shock.
the appliance. Children must be taught v--_,.._,,j,,,__ _... z
that the appliance and utensils init can Clean range with caution. If a wet _t".._ J/[.._j, _
be hot. Children should be taught that spongeor cloth is usedto wipe spills on
7"
an appliance is not a toy. They should a hot cooking area, be careful to avoid
not be allowed to play with controls or steam burns. Some cleaners can pro-
other parts of the unit. Let hot utensils duce noxious fumes if applied to a hot
cool inasafeplace,outof reachofsmall surface.
children. Besure you know which knob controls
GREASE which surface burner. Always make
surethe correct burner isturned on and
Use extreme caution when moving the thatthe burner has ignited. Whencook-
grease kettleor disposingof hotgrease, ing is completed, turn burner off.
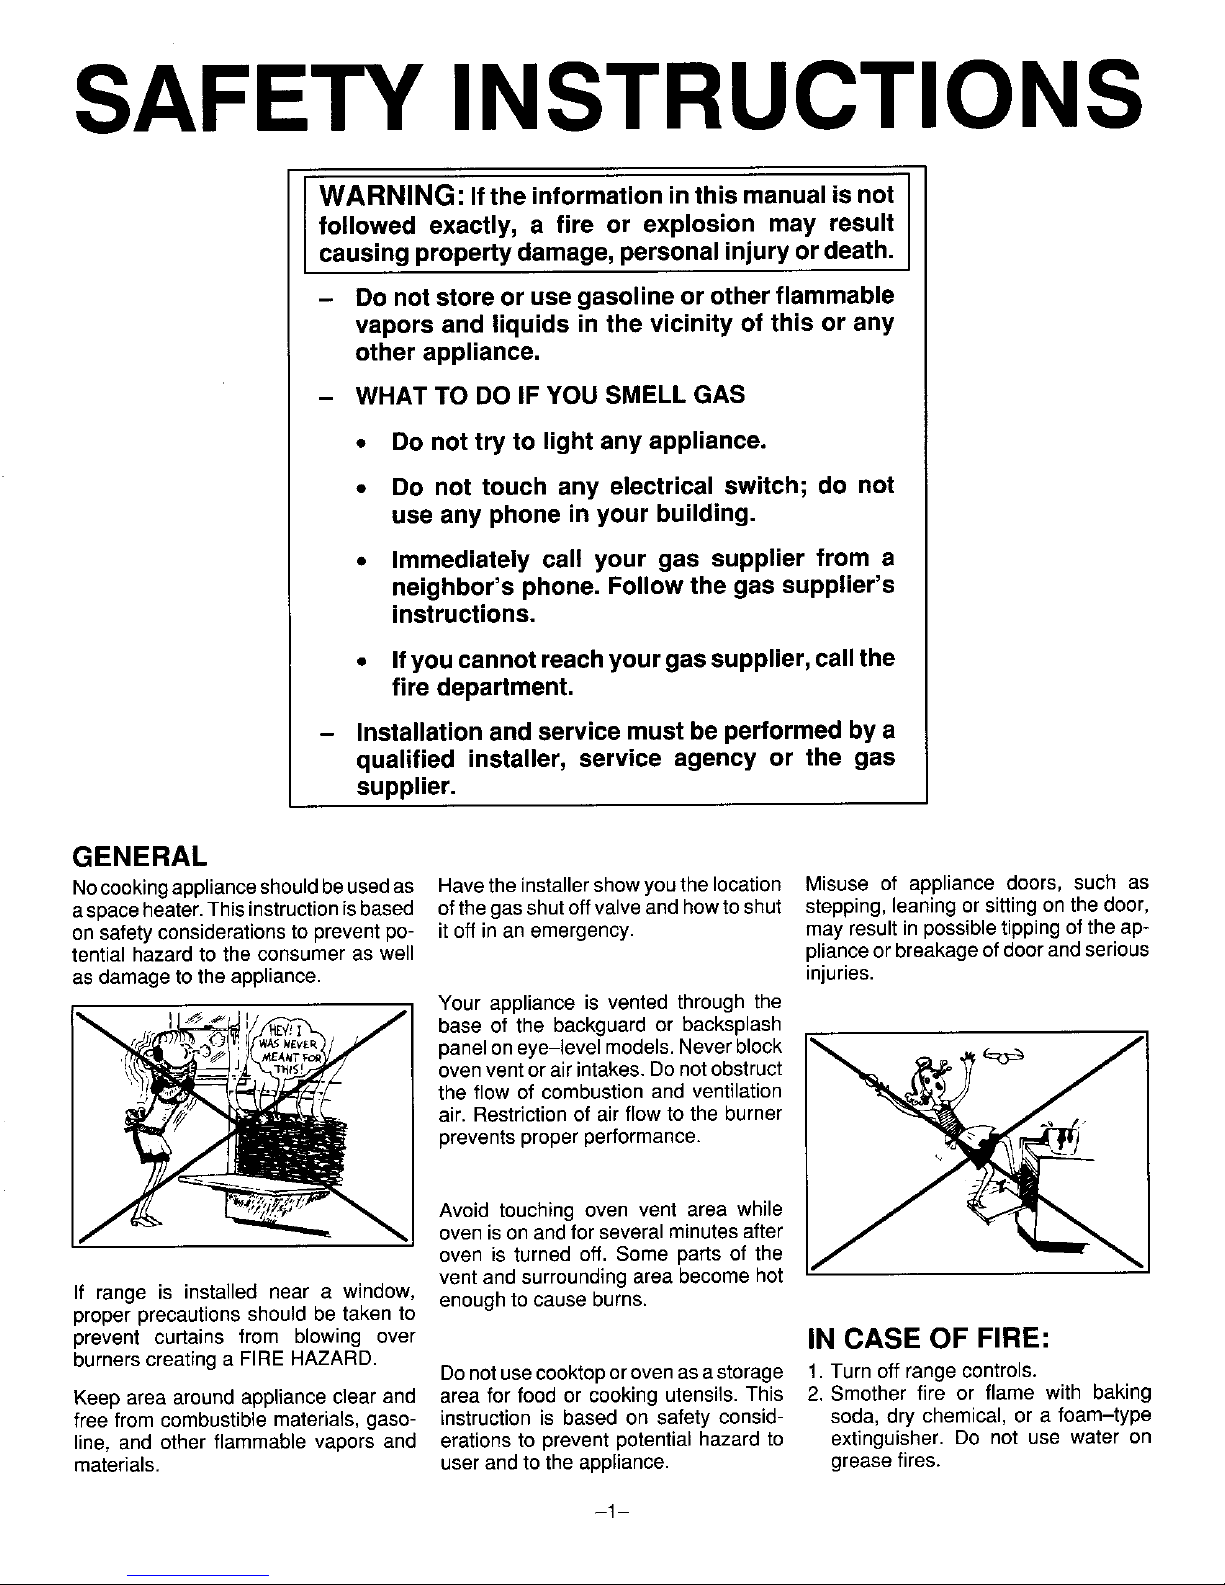
Hot grease is flammable. Avoid letting Use caution when wearing garments
grease deposits collect around appli- made of flammable material to avoid
ance, range hood, or vent fan. Do not clothingfires. Loosefitting orlong hang-
leave container of grease around a ing-sleevedapparelshouldnotbeworn
cookingappliance.AIwaysletquantities while cooking. Clothing may ignite or
ofhotfatusedfordeepfatfryingcoolbe- catch utensil handles.
foreattemptingtomoveor handle.Inthe
event of agrease fire, DONOT attempt
CAUTION: Do notstore items of inter- to movepan. Cover pan witha lid to ex- I_ _J]
estto children incabinets above an ap- tinguish flame and turn surface burner
plianceor on the backguard of a range, off. Do notdouse flame with water. Use
Children climbing on the appliance to a dry chemical or foam-type fire extin-
reach items could be seriously injured, guisher, if available, or sprinkle heavily
Do notuse an appliance as a step stool withbaking soda.
tocabinets above.
ANTI-TIP DEVICE / Never heat an unopened container on
the surfaceburneror in theoven. Pres-
Toreducethe riskoftippingoftheappli- sure build-up may cause containerto
ancefrom unusualusage or byexces- burstresultinginseriouspersonalinjury
siveloadingofthe ovendoor,the appli- or damageto the range.
ance mustbesecured bya properlyin-
stalled anti-tipdevice.To check if de- Slide oven rack out to add or remove
vice is installedproperly:Use a flash- food, usingdry, sturdy potholders. AI-
lightandlook underneathrangetosee waysavoidreachingintooventoplace
thatone of the rear levelinglegsis en- Spillsorboiloverswhichcontaingrease or removefood.
gagedinthebracketslot.When remov- shouldbe cleanedupas soonas possi-
ingapplianceforcleaning,besureanti- ble. If they are allowedto accumulate, Use dry, sturdypotholders.Damp pot
tipdeviceisengagedwhenrange isre- they couldcreatea FIRE HAZARD.
placed.Theanti-tipdevicesecuresthe holders maycause burnsfrom steam.
Dish towelsor othersubstitutesshould
rearlevelinglegtothefloor,whenprop- COOKING SAFETY never be usedas pot holdersbecause
erlyengaged.
Alwaysadjustsurface burnersflameso theycantrailacrosshotsurfaceburners
thatisdoes notextendbeyondthe bob and igniteor getcaughtonrangeparts.
CLEANING tom of utensil.This instructionis based
Turn off all controlsand wait for range onsafety considerations. Use carewhen openingoven door.Let
partstocoolbeforetouchingor cleaning hot air or steam escape beforeremov-
them.Do nottouchtheburnergratesor Never leave a surface cookingopera- ingorreplacingfood.Alwaysplaceoven
surroundingareas untilthey have had tionunattendedespeciallywhenusinga racksinthedesiredpositionswhileoven
sufficienttimeto cool. high heat setting. Boilovers cause is cool. if a rackmustbe movedwhile
smokingand greasyspilloversmay ig- hot, be carefulto avoid contactof pot
nite. holderswithovenburnerflame.
--2--
Page 5

SAFETY INSTRUCTIONS
STORAGE ABOVE Be sure utensil is large enough to prop- IMPORTANT SAFETY
erly contain food and avoid boilovers. NOTICE AND WARNING
RANGE Pan size is particularly important in
Toeliminatethe hazardof reaching over deepfat frying. Be sure pan will accom- The CaliforniaSafe DrinkingWater and
hot surface burners, cabinet storage modate the volume of food that isto be Toxic Enforcement Actof 1986 (Propo-
should not beprovided directly above a addedaswellasthebubble actionoffat. sition65) requiresthe Governor of Calf
unit. If such storage is provided, it Neverleave adeep fat frying operation fornia to publish a list of substances
should be limited to items which are unattended, knowntotheStateofCaliforniatocause
used infrequently and which are safely cancer or reproductive harm, and re-
quires businessesto warn customersof
storedinan area subjected to heatfrom Never let a pan boil dry as this could potential exposures to such sub-
an appliance. Temperatures in storage damage the utensil and the appliance, stances.
areas above the unit may be unsafe for
some items, such as volatile liquids,
cleaners or aerosol sprays. ALUMINUM FOIL Users of this appliance are hereby
Use aluminum foil ONLY as instructed warned that the burning of gas can re-
in this book. Improper use of aluminum suitin low-level exposure tosomeofthe
UTENSIL SAFETY foil may cause damage to the oven,af- listed substances, including benzene,
Use only pans that have flat bottoms fect cookingresults,and can also result formaldehyde and soot, due primarilyto
and handlesthatare easilygraspedand in shock and/or fire hazards, the incomplete combustion of natural
stay cool. Avoid using unstable, gas or liquidpetroleum (LP)fuels. Prop-
warped, easily tipped or loose handled erly adjusted burners will minimize in-
pans. Do not use pans if their handles PLASTICS complete combustion. Exposure to
twistandcannotbetightened. Pansthat Many plastics are vulnerable to heat. these substances can also be mini-
areheavy to movewhen filled with food Keepplasticsawayfrom partsof the ap- mizedbyproperlyventingthe burnersto
mayalso be hazardous, pliance that may become warm or hot. the outdoors.
Always placea panof food ona surface AEROSOL SPRAYS VENTILATING HOOD
burnerbeforeturningiton,andturn itoff Manyaerosol-typespray cansare EX- To reducethe hazardofstorageabove
beforeremovingthe pan. PLOSIVE when exposed to heat and a range, installa ventilatinghood that
may be highly flammable. Avoid their projectsat least 5 inches beyondthe
use or storagenearan appliance, bottom edge of the cabinets. Clean
Alwaysturn pan handlestothe side or
backof appliance,notoutintothe room hoodfrequentlytoprevent grease from
wheretheyare easilyhitor reachedby SELF CLEAN OVEN accumulating on hood or its filter.
Shoulda boiloverorspilloverresultinan
smallchildren.Tominimizeburns,igni- Donotcleandoorgasket.Thedoorgas- open flame, immediately turn off the
tionofflammablematerialsandspillage ket is essential for a good seal. Care hood'sfanto avoidspreadingtheflame.
due to unintentionalcontact with the shouldbe taken notto rub, damage,or After thoroughly extinguishingflame,
utensil,do notextendhandlesoverad-
move the gasket. Do not use oven thetan maybeturnedontoremoveun-
jacentsurfaceburners, cleanersof any kind in or around any pleasant odoror smoke.
partof the self cleanoven. Clean only
parts listed in this booklet.Before self
_-_/'_'_ _ _ cleaning the oven, remove broiler pan,
• oven racks,and otherutensils,and wipe
_'_'_'_/_1 off excessive spillovers.
_1 It isnormal for the cooktop of the range
to become hotduring a selfclean cycle.
Therefore, touching or lifting the cook-
top during a clean cycle should be
avoided.
-3-
Page 6

USING YOUR COOKTOP
STAINLESS FINISH COOKTOP
Due to certain atmospheric conditions To install grates: Models with lighter pilots:
and becauseof oxidationfromthe sur- 1. Placegrateoncooktop,locatingeach Tolightsurfaceburners,turntheknobto
face burner pilot,the stainless top on ofthefourgratelegsontopofthefour the left (counter-clockwise)to the "Hi
your appliancemayshowsignsof rust blackplasticgrommets. Lite" position.When the burnerlights,
on the underneath side. This is espe- adjust knob to desired flame size.
ciallytrue in areasof high humidity and
salt air areas. _ _ Models without surface burner pi-
Tohelpeliminatethiscondition,caution _ _ lots:
should be taken to make sure that the !_ _ Light match.Turn control knobtothe left
underneath side of the main top is kept _=_._- _-_. : (counter-clockwise) to the "HiLite" pc-
dry.This isespeciatlyimportantinareas "_______.___.__ sit,onand apply lighted match ,mmedi-
of high humidity where moisture accu- _-_.__ _ _._ ately to the burner. Adjust knob to the
mulates. If you detect signs of rust. we _ desired flame size.
havefound it helpfulto spraythe under-
neath side with a coat of high-heat
tested rustolium orsilicone paint. 2. Pressdown at each corner to secure
burnergrate to cooktop.
CAUTION; Removetop from appliance
and spray in a well vented area. SURFACE BURNERS
The surface burner control hasno pre-
BURNER GRATES set position.The flame canbe adjusted
Burner grates must be properly in- to any desired height between "OFF"
stalled. Do not operate burners without and "HI".
a panon thegrate. The porcelainfinish CAUTION
may chip without a pan to absorb the Do not turn control knob on and allow
heat. gas to escape before lighting match.
_4 m
Page 7

USING YOUR COOKTOP
SURFACE BURNER PILOT
ifequipped for _ __"_PILOT g
Ifappliancehas notbeen operated a _ FLAM LIGHTER
longperiod of time, a longerwaitingpe- '/8; _ c_p CONE
riodfor ignition of the pilot may be nec-
essarydue to air in the gas line.
To light pilot:
1. Be sure all control valves are in the
"OFF" position before turning on FLASHTUBE
maingas supply to the range. _ "_"
2. Turn on main gas supply to range. LIGHTING TOPPILOT SHUTDOWN INSTRUCTIONS
3. Lift cooktop and turn pilot shut off PILOT ADJUSTMENT When surface burner cooking is fin-
valveto "ON" position. To adjust pilot: ished,thecontrol knobshould beturned
Lift the main top. Turn pilot adjustment to "OFF" position. The top burner pilot
Pilot adjustment screw screw with a screwdriver.The surface willremainlit.When the recreationalre-
burner pilot flame should be about 1/8 hicle is not in use or while traveling, lift
OFF. - -.,_ _ inch abovethe lighter cup as shown in thecooktop andturn pilotshut-off valve
illustration, handle to "OFF" position and turn off
main gas supply.
P/LOT SHUT OFF VALVE
4. Touch lighted matchto pilot.
-5-
Page 8

USING YOUR OVEN
OVEN CONTROL _ COOKING HINTS
Depressand turnthe oven control knob _ Baking
(counter-clockwise) tothe desired tem- Oven Control Makesure oven is level, otherwise bak-
perature setting. There is a delay of Knob in "PILOT ing may be uneven. After turning the
about45 seconds beforethe mainburn- ON'position. oven control knob to the desired tem-
er ignites.This is normaland nogas es- perature, let the oven preheat for about
capes duringthis delay. Itis alsonormal 10 minutes.
for the oven burner flame to cycle off
and on at all set temperatures except
broil. This maintains a constant tem- 4. Open oven door and light oven pilot When baking inone pan place it in the
perature in the oven.
with a match. Small flame will be center of the oven. Ifa flat cookie sheet
notedat the top of the pilot burner, is used, allow two inches of space be-
tween back, side, and front of oven.
When glass or very dark metals are
_ used for baking, reduce temperature
_ setting recommended in the recipe by
25+.
0 0 O 0 D 0 , r
0
Roasting
Season meat,if desired. Place meatfat
sideuponthe rackinanuncovered pan.
. Turn oven control knob to the desired
temperature. Most meats can be
Lighting oven pilot (when pilot is Io- cooked at 300-350°F. Small poultry
OVEN PILOT cated on the right side of burner.) may be cooked at 375°F., for best
Ifappliance has not been operated fora browning.Cook porkto an internaltem-
longperiod oftime, a longer waiting pe- perature of 170°F. The only accurate
riod for ignition ofthe pilot may be nec- way to tell internal doneness of meat
essary due to air in the gas line. _ (rare,medium, welldone) iswith ameat
thermometer. Be sure thermometer is
inserted into meat portion of the roast
To light pilot: withtipnotrestinginfator againstbone.
1. Besureallvalvesareinthe"OFF"po- Add no water. Roast in oven to the
sition.The oven control knob should donenessdesired. No basting is neces-
be in "OFF" position, sary.
Lighting oven pilot (when pilot is /o- Broiling
cated on the left side of burner.) Broiling in your recreational vehicle ap-
Oven Control pliance isvery much like broiling inyour
Knob in "OFF" kitchen appliance at home. Generally,
position. SHUTDOWN INSTRUCTIONS the distance between the meat and the
Whenoven cooking is finished, turn the burner flame regulates degree of done-
ovencontrol knobto the"PILOTON"pc- ness and broiling time. Setoven control
sition. The oven standby pilot will re- knobto broil "BR' position. Placefood to
main lit. be broiled on a broiler grille and pan.
Placepan inbroiler (areadirectly below
2. Turn on main gas supply to appli-
oven burner.) You can count on your
ance. When the recreational vehicle is not in gas appliance broilerto provide smoke-
useorwhiletraveling, turn theoven con- less, "closed-door" broiling.
3. Depress and turn control knob to the trol knob to "OFF" position and turn off
"PILOT ON" position. This will allow main gas supply, this will turn off the
gas to oven pilot, oven pilot.
-6-
Page 9

CARE AND CLEANING
Burner box Soap &water. Paste of Burnerbox, located undercooktop, should be cleanedfrequentlyto removespillovers. Ifsoil is not
bakingsoda & water, removedand isallowedto accumulate, itmaydamage thefinish. To clean, removesurface burners :
and clean with soap and water, rinse anddry.
Doorgasket Soap &water. Wash with soap andwater, rinse and dry. Do not removedoor gaskets.
Silicone rubber
Metal finishes Soap & water. Pasteof Washwith soap and water. Removestubborn soil with paste of bakingsoda and water. Do not use
Aluminum - bakingsoda & water, abrasive or caustic agents. They will damage the finish. Use a chrome polish to remove stubborn
baekguard & con- stains on chrome parts. See page4 forcooktop instructions.
trol panel.
Chrome & stain- CAUTION: Protect aluminumgastubing fromexposure tocaustic cleaners such asoven cleaners.
less steel - trim See note below.
parts.
Porcelain finish, Mildsoap & water. Porcelainenamel is glass fusedon metal. It may crack or chip with misuse. Clean with soap and
exterior Pasteof baking soda & water when partsare cool.All spillovers, especiallyacid spillovers,should bewiped upimmediately
water, witha dry cloth.When surfaceiscool, clean with warm soapy water. NEVERWIPE OFFA WARM
OR HOTENAMELSURFACEWITH A DAMPCLOTH. THIS MAY CAUSE CRACKINGAND CHIP-
PING. Never useabrasive or caustic cleaning agents on exterior finish of appliance.
Surface burners Soap & water. Paste of Cleanasnecessarywith warmsoapy water.Removestubbornsoil by scouringwith a non-abrasive
bakingsoda & water, plasticscouringpad and a paste ofbaking sodaand water. Clean portswith a straight pin. Do not
Plasticscouring pad enlarge or distortthe ports. Donot use awooden toothpick. Itmay breakoff and clog port. DONOT
such as Tufty® CLEAN BURNERS WITH THE FOLLOWINGcaustic cleaners: ovencleaners,steel wool or abra-
sive cleaning agents. These may damage finish. CAUTION: Burner and burner tube must bedry
before use.
NOTE: Commercial Oven Cleaners- Never use cleaners on the oven burner, exterior finishes, trim parts. These parts will be permanently
damaged by the cleaner.
-7-
Page 10

SERVICE
BEFORE CALLING A SERVICE TECHNICIAN, CHECK THE FOLLOWING:
1. No gas to oven pilot, a. Check and make sure ovencontrol knob is in "PILOT ON" position.
2. Oven slow heating up. a. Theseconditions maybecausedby adefective gaspressure regulator.Have
Poorbaking, the regulatortested by your gas dealer.
Poorignition of burners.
Pilotswon't stay lit.
Popping soundfrom top burners.
Carbon on pilotshield.
Burnerflame too low or too high.
3. Oven pilot will not light or stay lit. a. Check pilot tubings: May be kinked,clogged or leaking at fittings.
b. Have gas pressure regulator tested.
c. Be sure oven control knob is not in the "OFF" position.
4. Surface burnerswon't light, a. Checkinstallation of,._urfaceburners. (Seefigure A below.) DoesburnertubeQ
fit over orifice hood_?
b. Checkinstallationofflashtubing. (Seefigure B below.)Are thetwotabson the
flashtubeQ securely insertedinto the two slots on the burner headO?
c. Check installationofflashtube hold-down clips. (Seefigure C below.) Dothe
clipsQ hold the flashtubes Gsecurely in place?
d. Check pilot flame.
e. Clogged burner ports, clean with atoothpick.
5. Gas smell, a. Check allconnections with soapywater (never useamatch orflameto check
for leaks.) This should be checked periodically in recreationalvehicles as vi-
brations due to travel may loosen connections.
6. Cake rises higher on one side. a. Pans set too close to side of oven. Allow two inches from allsides.
b. Range not level.
7. Cakes burnon bottom, a. Oven toofull for proper circulation (see baking instructions.)
b. Using pan with dark bottom.
8. Oven will not operate, a. Check and make sure oven pilot is lit.
... ,,- Q ® r
- Q
i_"
SURFACE BURNER FLASHTUBING FLASHTUBE HOLD-DOWN CLIPS
FIGURE A FIGURE B FIGURE C
-8-
Page 11

SERVICE
SERVICING
Electrical supply, if equipped, must be numbers of the appliance. (See front If you did not receive satisfactory serv-
disconnectedfrom thewall outletbefore cover for location of your model and se- ice through your servicer or Maycor you
servicingappliance. Do notrepair or re- rial numbers.) may contact the Major Appliance Con-
placeany partofyour rangeunless spe- sumer Action Panel by letter including
your name, address, and telephone
cifically recommended in this manual. Ifyouare unableto obtainservice,write number, aswell asthe model and serial
Allother servicing should be referred to to us. Ouraddress isfound on the rating numbers of the appliance.
a qualified technician.
plate. See frontcoverfor locationof rat-
ing plate.
HOW TO OBTAIN MajorApplianceConsumerActionPanel
Ifyou are notsatisfied with the local re- 20NorthWackerDrive
SERVICE sponse to your service requirements, Chicago,IL 60606
When your appliance requires service call or write MAYCOR ApplianceParts
or replacement parts, contact your and Service Company, 240 Edwards
DealerorAuthorizedServicer.Useonly Street, S.E., Cleveland, TN 37311,
genuinefactory or Maycor parts if re- (615) 472-3500. Includeorhaveavail- MACAP (Major Appliance Consumer
placementpartsare necessary.Consult able the complete model and serial ActionPanel)isan independentagency
the YellowPagesin yourtelephonedi- numbersoftheappliance,thenameand sponsoredby threetrade associations
rectoryunderapplianceforthe service address ofthe dealer from whomyou asacourt of appealsonconsumercom-
centernearestyou. Be sure to include purchasedthe appliance, the date of plaintswhich have not been resolved
yourname, address, and phone num- purchaseand detailsconcerningyour satisfactorilywithinareasonableperiod
ber, along with the model and serial problem, oftime.
-9-
Page 12

LIMITED CONSUMER PROTECTION WARRANTY
MAGIC CHEF RECREATIONALVEHICLE RANGE
Thiswarranty gives you specific legal rights,and you may also have other rights which vary from state to state.
Subjecttothe limitationssetforth, we warrantyour rec- 3. External Factors. This warranty does not apply to
reational vehicle range under normal use and repair damage to the product caused by misuse,failure to
againstdefects inworkmanship or materialfor a period maintain the unit properly,accident or act of God.
of one year from date of installation.
4. EXCLUSIVE WARRANTY.This limited written war-
rantyisthe only warranty made by MagicChef. This
Underthis warrantywe will replaceanydefective partat limited warranty is in lieu of any other warranties or
nocost orexpense to youexcept for the costsof deliv- liabilities onthe partofMagic Chef exceptfor implied
ery and labor involved in the removal of the defective warranties which are limited as to duration. Magic
part and the installation of the replacement. The re- Chef does not authorize any person to provide any
placement parts assumes the unused portion of this otherwarranty or to assumeany furtherobligation in
warranty, connection with the saleof this Magic Chef range.
5. LIMITATION ON IMPLIED WARRANTIES. Implied
LIMITATIONS warranties of merchantabilityor, to the extend appli-
cable, fitness for a particular purpose are limited to
1. PorcelainEnameland Decorativefinishes. Porcelain oneyear, the same duration asthe basic limitedwrit-
enamel isactually glass fused on steel andwill chip tenwarranty provided hereby. Somestatesdo notal-
orcraze ifnot properly cared for.This warranty does low limitationson how longan impliedwarranty lasts,
not applyto porcelainenamel or other finishes or to so the above limitations may notapply to you.
scratches in ordiscoloration of decorative finishes.
6. CONSEQUENTIAL DAMAGES. Magic Chef shall
not be responsiblefor any consequential damages
2. Consumable Items.This warranty does not apply to caused by defect in the range. Some states do not
light bulbs or fluorescent tubes which must be peri- allowthe exclusion or limitationof incidental or con-
odically replaced in the course of routine mainte- sequential damages, so the above limitation or ex-
nance, clusion may not apply to you.
-10-
 Loading...