

Page 1
And
Instructionsfor your gas range
This BookletCovers
1. Range with No Clock.
2. Range with Time-Of-OayClock.
3. Range with a Clock and Timer.
CONTENTS
SAFETYINSTRUCTIONS.......... 1-4 Preheating.................... 9
Oven racks ................... 9
FEATURES..................... 5-6 How to bake ................ 10
Clock ........................ 5 How to roast ................ 11
Minute timer ................. 5
How to broil ................ 12
Eye level oven ................ 5
Continuous clean oven ........ 6 MAINTENANCE............... 13-14
Light replacement ............ 13
SURFACECOOKING............. 7-8 Leveling legs ................ 13
Cooktop ...................... 7 Oven door ................... 13
Burner grate .................. 7 Broiler drawer ............... 13
Surface burners .............. 7 Oven bottom ................ 13
Lighting surface burner ....... 7 Lighting pilots ............... 14
Selecting flame size........... 8 Pilotless ignition ............. 14
Griddle and fifth burner ....... 8 Spark ignition ............... 14
GIo bar ignition .............. 14
USINGYOUROVEN............ 9-12 Surface burner
Oven characteristics .......... 9 valve adjustment ........... 14
Oven vent.................... 9 CLEANINGCHART................ 15
Oven control ................. 9
Oven burner .................. 9 SERVICE............. .......... 16
CONSUMER
INSTALLER To save you time, energy and
Please leave this manual with money, read and keep this 8112P053-60
this range, manual for future reference. (2/90)
Page 2
ABOUTYOURNEW OVENCHARACTERISTICSABOUTTHISBOOKLET:
COOKING APPLIANCE over the years, design changes have The features covered in this
beenmadeto rangesto improveheat booklet are for several model
Congratulations on your choice of distributionin theoven andto reduce ranges. You may find informa-
this cooking appliance!As you use heat loss. Please expect some tion pertaining to features that
your newapplianceweknowthat you differences with this new range, are not onyourparticularrange.
will appreciatethemanyfeaturesthat In our continuing effort to
provide excellent performance,ease The oven temperature control has improve the quality of our
of cleaning, convenience and de- been checked for proper operation, products,it may benecessaryto
make changes to the product
pendability. Youmay noticethat yournewovenis without revising this booklet.
hotter(foodscookfaster/browningis For example, the knobon your
New features have dramatically darker) or cooler(foodscookslower/
range may not look like the
changedtoday's cookingappliances browning is lighter) than your ' illustration in this book.
and the way we cook. It is therefore previousoven. (It is not unusualfor
very important to understand how the oven temperature of older
your new appliance operates before appliances to be out of adjustment).
you use it. On the following pages,
you will find a wealthof information You may find it necessaryto increase
regarding all aspects of your or decreasethe cookingtime or oven
appliance. By following the instruc-
temperatureof yourfavorite recipe.If
tions carefully, you will be able to using a packaged mix, follow the
fully enjoy and properly maintain directions on the label. Please
your new appliance, rememberthateachovenhasitsown
characteristics.
MODELIDENTIFICATION
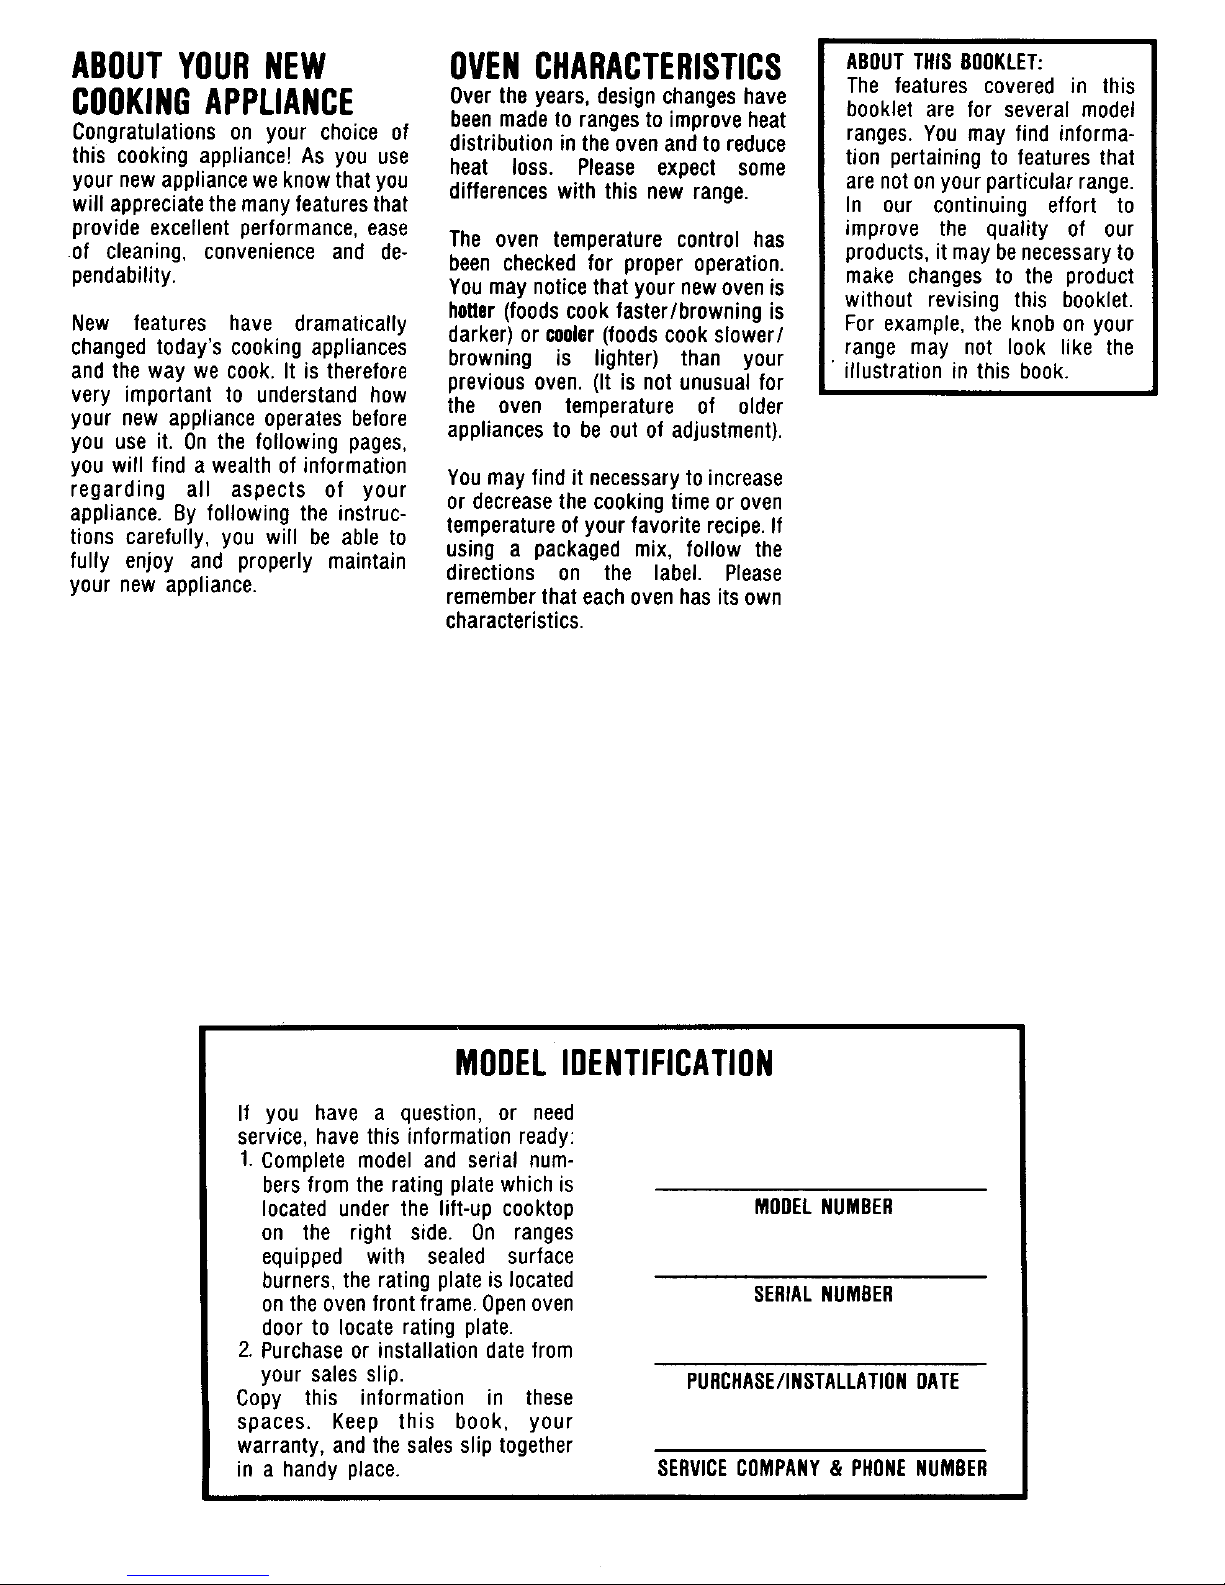
If you have a question, or need
service, have this information ready:
1.Complete model and serial num-
bers from the rating plate which is
located under the lift-up cooktop MODELNUMBER
on the right side. On ranges
equipped with sealed surface
burners,the rating plate is located
SERIALNUMBER
on theoven frontframe.Openoven
doorto locate rating plate.
2. Purchaseor installation date from
your sales slip. PURCHASE/INSTALLATIONDATE
Copy this information in these
spaces. Keep this book, your
warranty, and the sales sliptogether
in a handy place. SERVICECOMPANY& PHONENUMOER
Page 3
SAFETYINSTRUCTIONS
FORYOURSAFETY FORYOURSAFETY WARNING
DONOTSTOREORUSE IF YOUSMELLGAS: Improperinstallation,ad-
GASOLINEOR OTHER 1.0PENWINDOWS. justment,alteration,ser-
FLAMMABLEVAPORS 2.DONOTTOUCHELEC- vice or maintenancecan
TRICALSWITCHES. causeinjury or property
ANDLIQUIDSIN THE 3.EXTINGUISH ANY damage.Refer to this
manual.Forassistanceor
VICINITYOFTHISOR OPENFLAME. additionalinformationcon-
ANYOTHERAPPLIANCE. 4.IMMEDIATELY CALL suit a qualifiedinstaller,
YOURGASSUPPLIER. serviceagency,manufac-
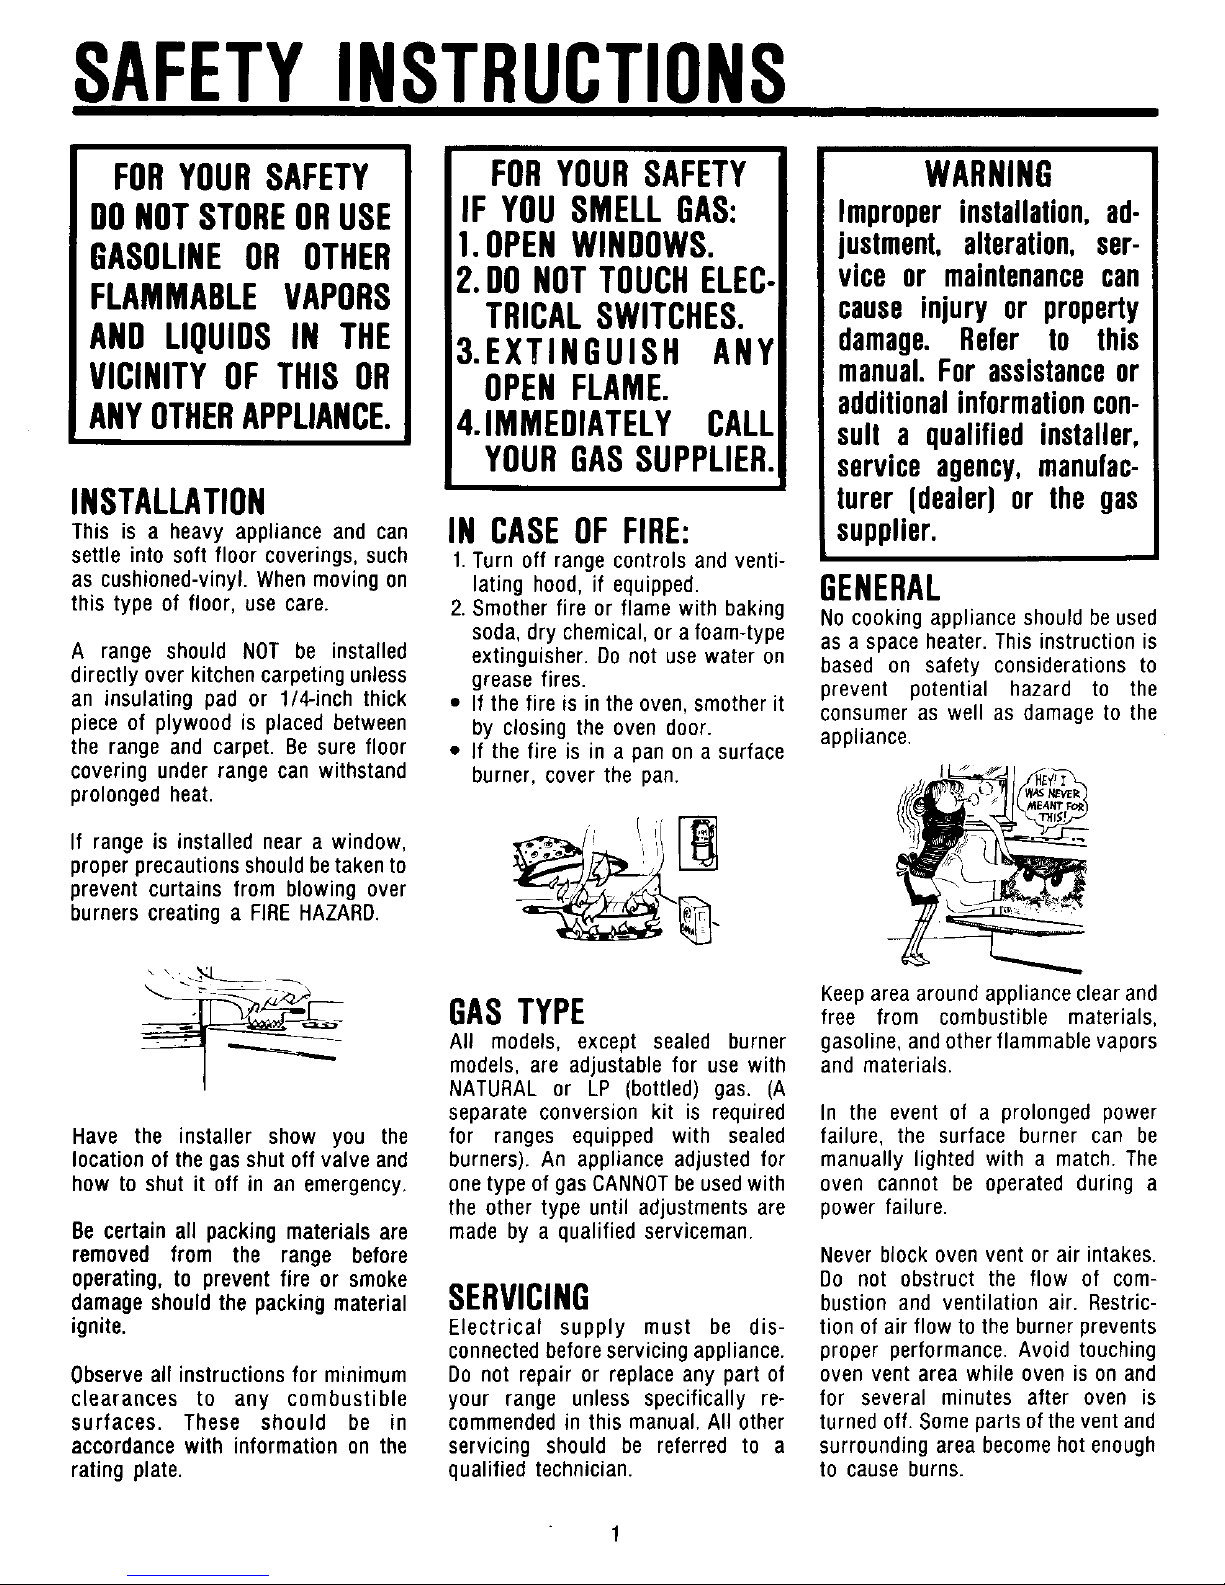
INSTALLATION turer (dealer)or the gas
This is a heavy appliance and can IN CASE OF FIRE: supplier.
settle into soft floor coverings,such 1. Turn off range controlsand venti-
as cushioned-vinyl. Whenmoving on lating hood, if equipped. GENERAL
this type of floor, use care. 2. Smotherfire or flame with baking No cookingappliance should beused
soda,dry chemical, or a foam-type as a space heater. This instructionis
A range should NOT be installed extinguisher.Donot usewater on based on safety considerations to
directlyover kitchencarpetingunless grease fires, prevent potential hazard to the
an insulating pad or 1/4-inch thick • If the fire is in theoven, smotherit consumeras well as damageto the
piece of plywood is placed between by closing the oven door. appliance.
the range and carpet. Be sure floor • If the fire is in a pan on a surface
covering under range can withstand burner,cover the pan.
prolongedheat.
If range is installed near a window, _i_" '
properprecautionsshouldbetakento
prevent curtains from blowing over
burners creating a FIRE HAZARD.
_.._,_L._ _ Keeparea around appliance clearand
--- GASTYPE free from combustible materials,
__ All models, except sealed burner gasoline, andother flammable vapors
models, are adjustable for use with and materials.
NATURAL or LP (bottled) gas. (A
separate conversion kit is required In the event of a prolonged power
Have the installer show you the for ranges equipped with sealed failure, the surface burner can be
location of the gas shut off valve and burners). An appliance adjusted for manually lighted with a match. The
how to shut it off in an emergency, one type of gas CANNOTbeusedwith oven cannot be operated during a
the other type until adjustments are power failure.
Be certain all packing materials are made by a qualified serviceman.
removed from the range before Never block oven vent or air intakes.
operating, to prevent fire or smoke Do not obstruct the flow of corn-
damage should the packing material SERVICING bustion and ventilation air. Restric-
ignite. Electrical supply must be dis- tion of air flow to the burner prevents
connected beforeservicing appliance, proper performance. Avoid touching
Observe all instructions for minimum Do not repair or replace any part of oven vent area while oven is on and
clearances to any combustible your range unless specifically re- for several minutes after oven is
surfaces. These should be in commended in this manual. All other turned off. Someparts of theventand
accordance with information on the servicing should be referred to a surrounding area becomehot enough
rating plate, qualified technician, to cause burns.
Page 4
SAFETYINSTRUCTIONS
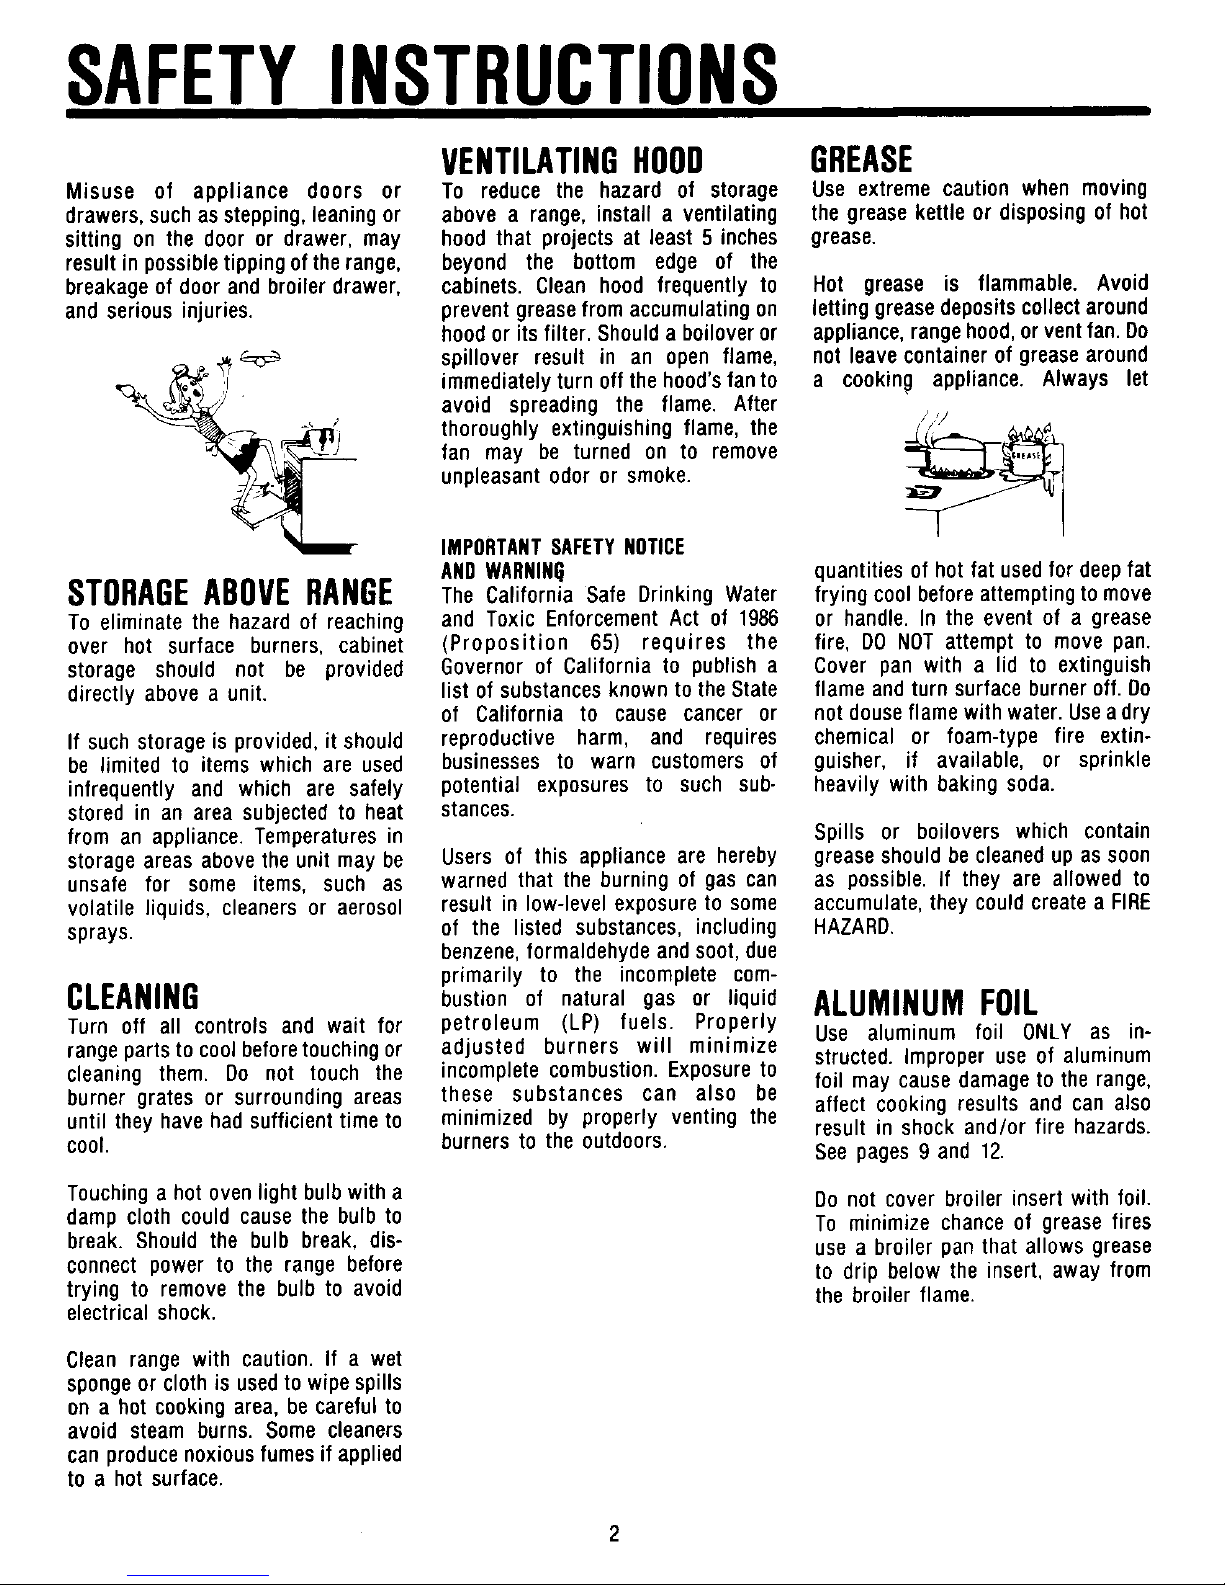
VENTILATINGHOOD GREASE
Misuse of appliance doors or To reduce the hazard of storage Use extremecaution when moving
drawers,suchasstepping,leaningor above a range,installa ventilating thegreasekettleor disposingof hot
sittingon the dooror drawer,may hoodthat projectsat least5 inches grease.
resultinpossibletippingoftherange, beyond the bottom edge of the
breakageof doorandbroilerdrawer, cabinets.Clean hoodfrequentlyto Hot grease is flammable.Avoid
andseriousinjuries, preventgreasefromaccumulatingon lettinggreasedepositscollectaround
hoodoritsfilter.Shoulda boiloveror appliance,rangehood,orventfan.Do
,_ _.__,__ spilloverresult in an openflame, not leavecontainerof greasearound
immediatelyturnoffthehood'sfanto a cooking appliance. Always let
avoid spreading the flame. After
_ _ thoroughly extinguishingflame, the / y __,_
"_--__-- _' fan may be turned on to remove _-"__:__L--_[-_
unpleasantodor or smoke.
IMPORTANTSAFETYNOTICE
ANDWARNIN(j quantitiesofhotfatusedfordeepfat
STORAGE ABOVE RANGE The CaliforniaSafe DrinkingWater fryingcoolbeforeattemptingtomove
To eliminatethehazardof reaching and ToxicEnforcementAct of 1986 or handle.Inthe eventof a grease
over hot surface burners,cabinet (Proposition 65) requires the fire, DONOTattemptto movepan.
storage should not be provided Governorof Californiato publisha Coverpan with a lid to extinguish
directlyabovea unit. listof substancesknownto theState flameandturnsurfaceburneroff.Do
of California to cause cancer or notdouseflamewithwater.Useadry
If suchstorageis provided,it should reproductive harm, and requires chemical or foam-typefire extin-
be limitedto itemswhichare used businessesto warn customersof guisher, if available, or sprinkle
infrequentlyand which are safely potential exposuresto such sub- heavilywith bakingsoda.
storedin an areasubjectedto heat stances.
from an appliance.Temperaturesin Spills or boiloverswhich contain
storageareasabovetheunitmaybe Usersof this applianceare hereby greaseshouldbecleanedupassoon
unsafe for some items, such as warnedthatthe burningof gascan as possible.If they are allowedto
volatileliquids,cleanersor aerosol resultin low-levelexposureto some accumulate,theycouldcreatea FIRE
sprays, of the listedsubstances,including HAZARD.
benzene,formaldehydeandsoot,due
primarily to the incompletecorn-
CLEANING bustion of natural gas or liquid ALUMINUM FOIL
Turn off all controlsand wait for petroleum (LP) fuels. Properly Use aluminumfoil ONLY as in-
rangepartsto coolbeforetouchingor adjusted burners will minimize structed,improperuseof aluminum
cleaningthem. Do not touch the incompletecombustion.Exposureto foil maycausedamagetothe range,
burnergratesor surroundingareas these substances can also be affect cookingresultsand canalso
untiltheyhavehadsufficienttimeto minimizedby properlyventingthe resultin shockand/orfire hazards.
cool. burnersto the outdoors. Seepages9 and12.
Touchinga hotovenlightbulbwitha Do not coverbroilerinsertwith foil.
dampcloth couldcausethe bulbto To minimizechanceof greasefires
break.Shouldthe bulbbreak,dis- usea broilerpanthatallowsgrease
connectpowerto the rangebefore to drip belowtheinsert,awayfrom
tryingto removethe bulbto avoid the broilerflame.
electricalshock.
Cleanrangewith caution.If a wet
spongeor clothisusedtowipespills
ona hotcookingarea,becarefulto
avoid steamburns.Somecleaners
canproducenoxiousfumesif applied
to a hotsurface.
2
Page 5
SAFETYINSTRUCTIONS
COOKINGSAFETY
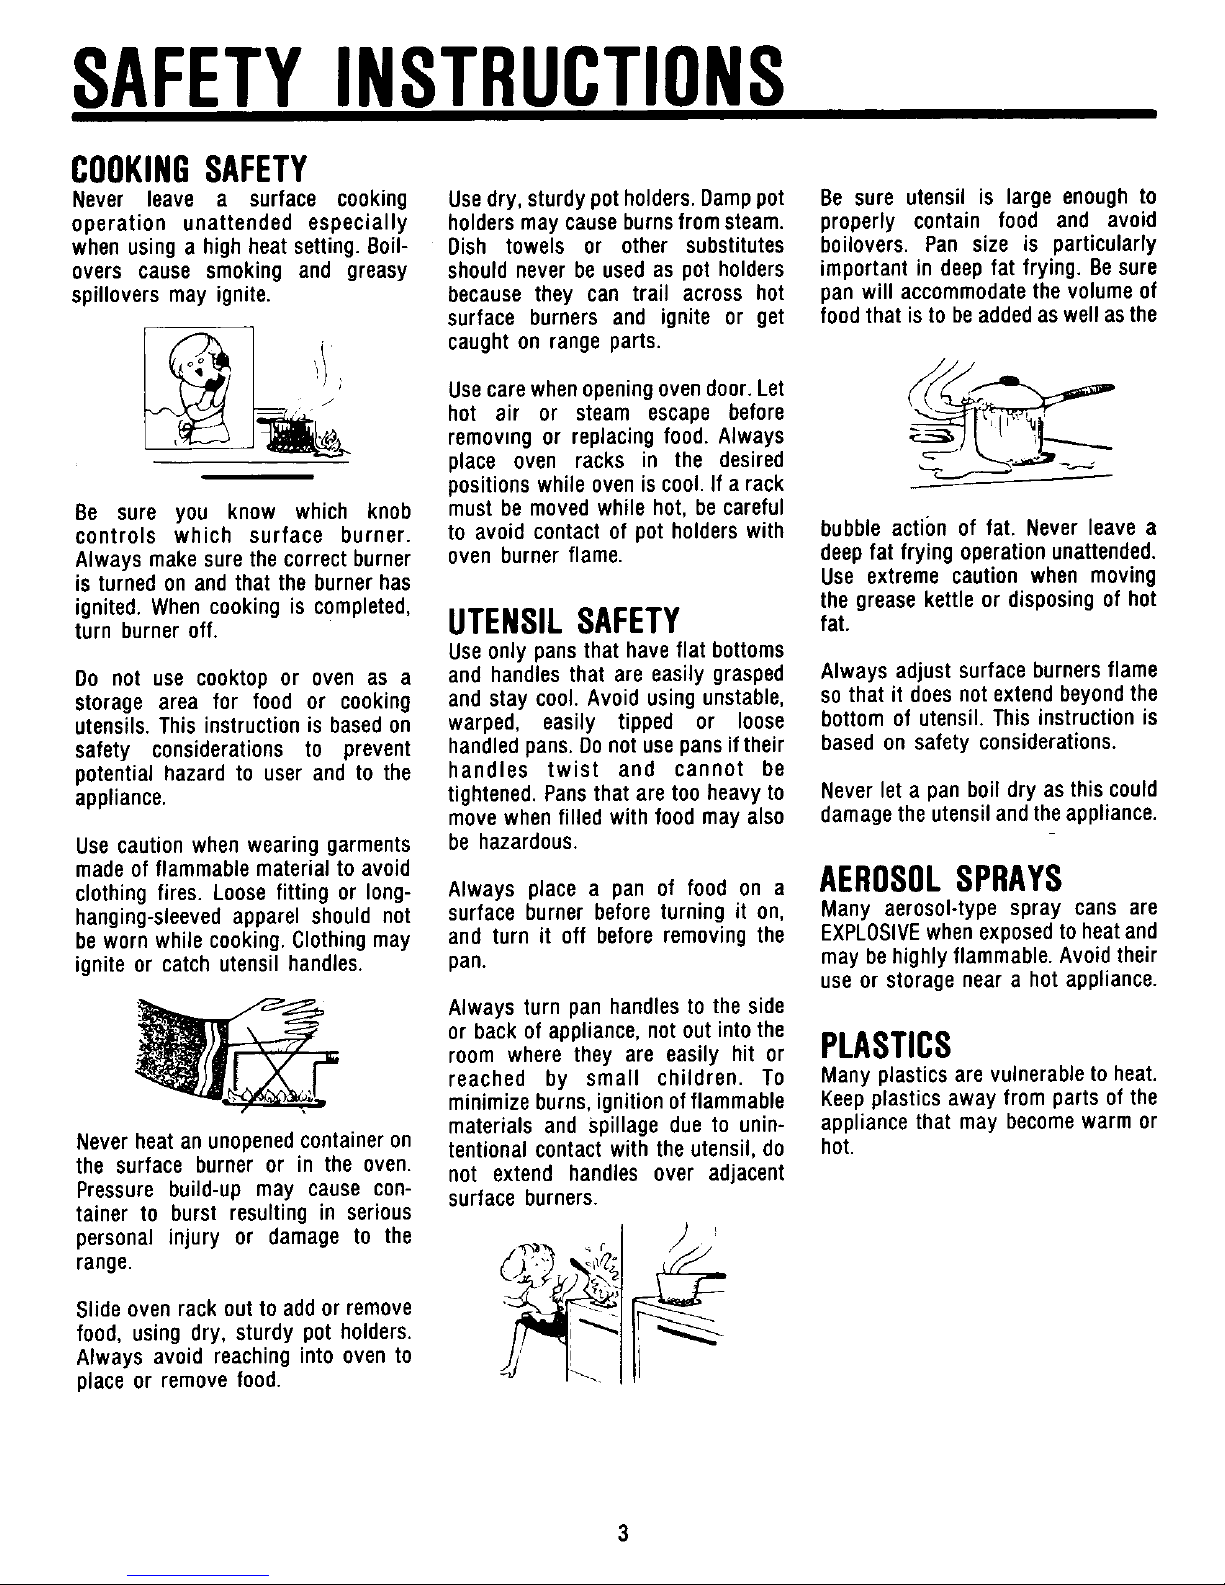
Never leave a surface cooking Usedry,sturdypotholders.Damppot Be sure utensilis largeenoughto
operation unattended especially holdersmaycauseburnsfromsteam, properly contain food and avoid
whenusinga highheatsetting.Boil- Dish towels or other substitutes boilovers.Pan size is particularly
overs cause smokingand greasy shouldneverbeusedas potholders importantindeepfat frying.Besure
spilloversmay ignite, becausethey can trail acrosshot panwill accommodatethevolumeof
surface burnersand ignite or get foodthatisto beaddedaswellasthe
]_ caughtonrangeparts. _-r__._
usecarewhenopeningovendoor.Let
hot air or steam escape before _r_j_-F_ _,_ .
- removingor replacingfood.Always
place oven racks in the desired
positionswhile ovenis cool.If arack
Be sure you know which knob mustbe movedwhile hot, becareful
controls which surface burner, to avoid contactof pot holderswith bubbleacti()n of fat. Neverleave a
Alwaysmakesurethe correctburner ovenburner flame, deepfat frying operationunattended.
is turnedon andthat the burnerhas Useextreme caution when moving
ignited. Whencooking is completed, the greasekettleor disposingof hot
turn burneroff. UTENSIL SAFETY fat.
useonlypansthat haveflat bottoms
Do not use cooktopor ovenas a andhandlesthat are easilygrasped Alwaysadjustsurfaceburnersflame
storage area for food or cooking andstay cool.Avoidusingunstable, sothatit doesnotextendbeyondthe
utensils.Thisinstructionis basedon warped, easily tipped or loose bottomof utensil.Thisinstructionis
safety considerationsto prevent handledpans.Donotusepansiftheir basedonsafetyconsiderations.
potentialhazardto userand to the handles twist and cannot be
appliance, tightened.Pansthataretooheavyto Neverleta panboildryasthiscould
movewhenfilledwithfoodmayalso damagethe utensilandtheappliance.
Usecautionwhenwearinggarments be hazardous.
madeofflammablematerialto avoid AEROSOL SPRAYS
clothingfires. Loosefittingor long- Alwaysplace a pan of food on a
hanging-sleevedapparelshouldnot surfaceburnerbeforeturningit on, Many aerosol-typespray cansare
bewornwhilecooking.Clothingmay and turn it off beforeremovingthe EXPLOSIVEwhenexposedtoheatand
igniteor catchutensilhandles, pan. maybehighlyflammable.Avoidtheir
useor storageneara hotappliance.
Alwaysturn panhandlesto the side
or backof appliance,not out intothe
room where they are easily hit or PLASTICS
reached by small children. To Manyplasticsarevulnerableto heat.
minimizeburns,ignitionofflammable Keepplasticsawayfrompartsofthe
materialsandSpillagedueto unin- appliancethat maybecomewarmor
Neverheatanunopenedcontaineron tentionalcontactwiththeutensil,do hot.
the surfaceburneror in the oven. not extend handlesover adjacent
Pressurebuild-up may cause con- surfaceburners.
tainerto burst resultingin serious
personalinjury or damageto the -_ _
range. _-_;_ L,_',___ ×_'J.J_2_
Slideovenrack outto addor remove _
food, usingdry, sturdypot holders. ,r__._
Always avoid reachinginto ovento
placeor removefood.
Page 6
SAFETYINSTRUCTIONS
COOKINGUTENSILS ELECTRICAL
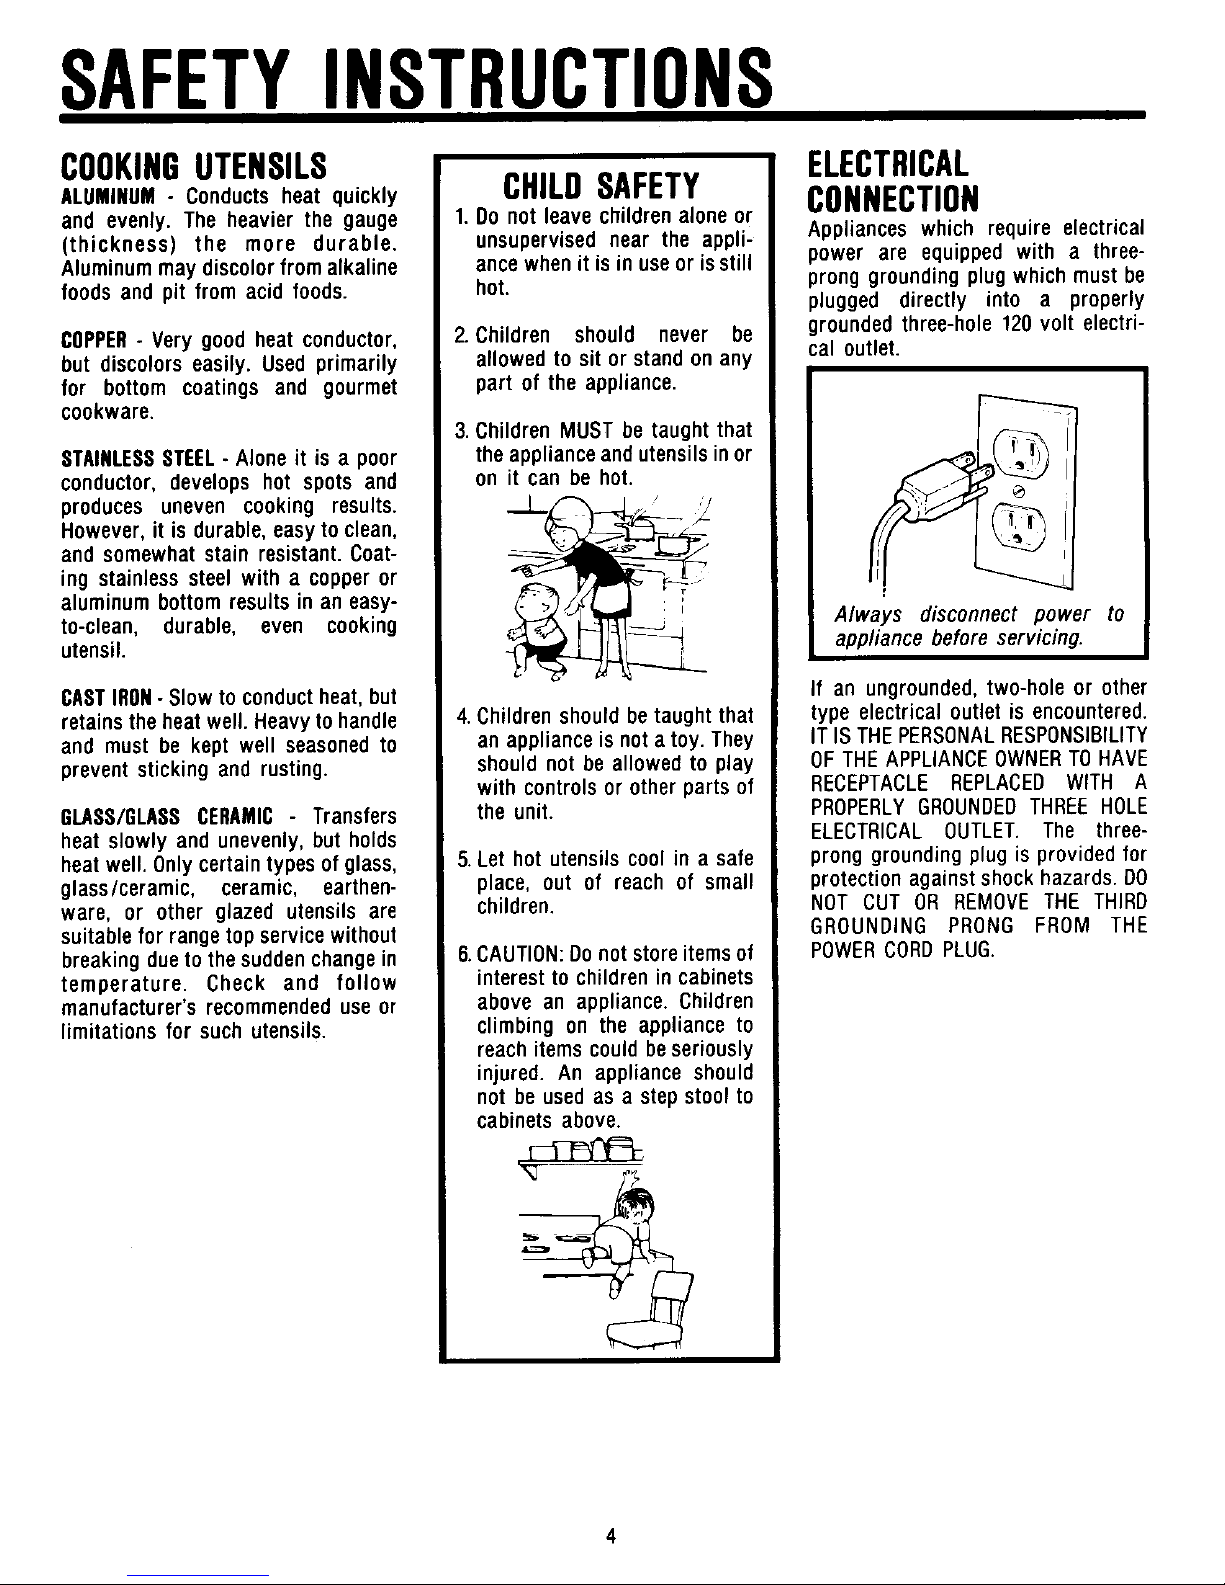
ALUMINUM- Conductsheat quickly CHILD SAFETY CONNECTION
and evenly. The heavier the gauge 1.Do not leavechildrenaloneor
(thickness) the more durable, unsupervisednear the appli- Applianceswhich requireelectrical
Aluminummaydiscolorfromalkaline ancewhenit isinuseorisstill power are equippedwith a three-
foodsandpit from acidfoods, hot. pronggroundingplugwhichmustbe
plugged directly into a properly
COPPER- Verygoodheatconductor, 2.Children should never be groundedthree-hole120voltelectri-
cal outlet.
but discolorseasily.Usedprimarily allowedto sitorstandonany
for bottom coatingsand gourmet partof theappliance.
cookware.
3.ChildrenMUSTbetaughtthat
STAINLESSSTEEL- Aloneit is a poor the I_/'_'_--_J_._/applianceandutensilsinor __ _)_
conductor,developshot spotsand on it canbe hot.
producesuneven cooking results. I .' '
However,it is durable,easytoclean, _'==j_;-_,=._
andsomewhatstainresistant.Coat-
ing stainlesssteelwitha copperor _:>_ v,_,.._ _ ,
aluminumbottomresultsin aneasy- _-_/J/,,r_ ; '
to-clean, durable, even cooking _ A/ways disconnect power to
utensil, app/iancebeforeservicing.
CASTIRON- Slowtoconductheat,but If an ungrounded,two-holeor other
retainstheheatwell.Heavytohandle 4.Childrenshouldbetaughtthat typeelectricaloutletis encountered.
and mustbe keptwell seasonedto an applianceisnotatoy.They IT ISTHEPERSONALRESPONSIBILITY
preventstickingandrusting, shouldnotbeallowedto play OFTHEAPPLIANCEOWNERTOHAVE
withcontrolsorotherpartsof RECEPTACLEREPLACEDWITH A
GLASS/GLASSCERAMIC Transfers the unit. PROPERLYGROUNDEDTHREEHOLE
heatslowlyandunevenly,butholds ELECTRICALOUTLET.The three-
heatwell.Onlycertaintypesof glass, 5.Lethot utensilscoolin a safe pronggroundingplugis providedfor
glass/ceramic, ceramic, earthen- place, out of reach of small protectionagainstshockhazards.DO
ware, or otherglazed utensilsare children. NOTCUT OR REMOVETHE THIRD
suitableforrangetopservicewithout GROUNDINGPRONG FROM THE
breakingduetothesuddenchangein 6.CAUTION:Donotstoreitemsof POWERCORDPLUG.
temperature. Check and follow interestto childrenincabinets
manufacturer'srecommendeduseor abovean appliance.Children
limitationsfor suchutensils, climbingon the applianceto
reachitemscouldbeseriously
injured.An applianceshould
notbeusedasa stepstoolto
cabinetsabove.
4
Page 7

FEATURES
DIGITALCLOCK ANALOGCLOCK EYELEVELOVEN
ANDTIMER ANDTIMER )if equipped)
Donotusetheupperovenforcooking
itemsthataretooheavyor bulkyto
12 handleeasily,especiallyif consider-
11 1
10 involved.Removingsuchfoodsfrom
Q (_ 9__1_3 the oven is difficult and can be
- - hazardous.
CLOCKSET _IINUTETIMER
13_t_\\,,_4 The size of this oven makes it
8 _/////I
7 6 5 convenient for cooking smaller
quantitiesof food.However,it does
havesomelimitations.Donotusea
88:88will flash in the displaywhen TO SET CLOCK:Push in and turn large cookie sheet,pan or other
rangeisfirstconnectedto powerorif MinuteTimerknobto theleftto the utensilswhichwill blockair flow in
poweris interrupted, correcttime-of-day.Be sureMinute the oven. Use the largeroven for
Timerhandis on OFFaftersetting optimumbakingresults.
TOSETCLOCK:PressandholdClock clock.
SetbuttonwhileturningMinuteTimer
knob to the correct time-of-day. TOSETMINUTETIMER:Turnknobin
MinuteTimerknobcan beturnedin eitherdirectionto the desiredtime.
eitherdirection. Whenthebellrings,manuallyturnthe
Timerto OFF.
TOSETMINUTETIMER:Turn Minute
Timerknobtotheright,tothedesired
time,upto 60:00(1hour).Timerwill
begin countingdown after a few
secondsdelay.Whentimehaslapsed,
acontinualbeepwillsoundforupto2
minutes.PressClockSet buttonto
stopbeepsounds.ThecorrectTime-
of-daywill reappearinthe display.
To cancela timingoperation,turn
MinuteTimerknobto the left, until
00:00 appearsin the display.The
correcttime-of-daywill reappearin
thedisplayafterafewsecondsdelay.
Tochecktime-of-dayduringatiming
operation,pressandholdClockSet
button.Time will reappearin the
display.
5
Page 8

FEATURES
CONTINUOUSCLEANINGOVEN
WHATIS THECONTINUOUS MANUALLYCLEANING
CLEANINGOVEN? HEAVYGPILLOVERS HINTS
Thefinish oftheContinuousCleaning The special finish will clean most Brittle crusts or stains can be
Ovencontainsa specialcatalystand spatters duringnormal oven use loosenedby GENTLYtappingstain
is identifiedby its darkgray color, unlessthere is a heavy buildupof with a woodenor plastic utensil.
white stipple and rough, porous soil.Heavyspilloverssuchas pieor Brushawayanyloosesoilthatflakes
texture.The roughtextureprevents casseroleboiloverswill not clean off. Varnishtypestainsusuallyneed
greasespattersfromformingbeads effectively without some manual tobesoftenedwithasmallamountof
which run downthe walls leaving help.Thecrustyorvarnish-likestains water ordampcloth.Remainingsoil
unsightlystreaks.Rather,the rough thatformfromthesespilloversclog will gradua!lyreducewithcontinued
textureabsorbsspattersand allows the poresand preventthe special ovenuseat normalbakingtempera-
them to spread,thus exposinga finishfrombeingexposedto the hot tures.
largerareato the hot ovenair. The oven air. This greatlyreducesthe
catalyst, when exposedto heat, cleaningeffectivenessofthe finish. DONOT USEANY TYPEOF OVEN
speedsthe oxidationof soil. CLEANER,POWDEREDCLEANSERS,
Thesecrusty or varnish-likestains SOAP,DETERGENTORPASTEONANY
Cleaningactionautomaticallybegins musteitherberemovedor brokenup CONTINUOUSCLEANINGSURFACE,
wheneverthe ovenis turnedonfor beforecleaningcan effectivelytake ALSO,DONOTUSEANYABRASIVE
bakingor roasting.TheovenMUST place. MATERIALS,STEELWOOL,SHARP
be onfor cleaningtotakeplace- no INSTRUMENTSOR SCRAPERSFOR
cleaningwill occurwhentheovenis THEYWILLDAMAGETHEFINISH.
off.Thespecialcatalyticfinishmust TOMANUALLYCLEAN
beexposedtohotovenairbeforesoil HEAVYGPILLOVERS Avoid spilloversby usingutensils
will begintograduallyreduceinsize. Brushoff heavy soil with a nylon thatarelargeenoughto holdfood.A
brushor plasticpad. DONOTUSE cookiesheetor pieceof aluminum
papertowels,clothsor spongesfor foil, just a littlelargerthanthe pan,
FACTORSAFFECTINGLENGTHOF the oven walls are porous and can be placedon the rackdirectly
CLEANINGTIME particlesof thesematerialswill rub belowtherack holdingtheutensilto
Thehighertheoventemperature,the offonthewalls.Rinseareawithclear catchspills.
fasterthecleaningaction.Thelength wateronly.
of cleaningtimewilldependonthese Over a periodof time,wear marks
factors:typeofsoil,amountorsizeof may appearon the embossedrack
soil,oventemperatureandlengthof _' supports.Thisis normalandresults
timeovenis in use.Timemayvary fromslidingtheracksin andoutof
froma fewminutestoseveralhours, theoven.Wearmarkswillnotaffect
Soildepositedat the endof a cycle the cleaningactionof theoven.
may still bevisible.Thiswill usually
fadewithcontinuedovenuseuntilthe NOTE:Thelowerbroilercompartment
soil graduallydisappearsor canbe may be linedwith porcelain-enamel
wiped up manually.The oven will and NOT with the Continuous
appear presentably clean, even Cleaning finish. Follow cleaning
though some spatters may be instructionincleaningchartonpage
present. 15.
Page 9

SURFACECOOKING
COOKTOP SURFACEBURNERS LIGHTINGSURFACE
Te removecooktop:Whencool, first All surfaceburnersare securedin BURNERS
remove grates and drip bowls, if place during transportation with Your range is equippedwith either
equipped.Grasp two front burner eithera shippingscrewor a spring standingpilotsor pilotlessignition.
wells and lift up. (Cooktopis not clip.Oncetherangeisinstalled,these Seepage14for instructionsonhow
removableonsealedburnermodels), may beremovedto allowquickand
easyremovalof the burner, to lightpilot.
Thetop canbecompletelyremoved
or, if equippedwitha metalsupport Toremovetheonepieceunlburner: Tolightburner:
rod,canrestontherod.Supportrod 1.Place utensilon burnergrate.
is locatedacrossthe front of the _ ... 2. Pushin andturnknobto theLITE
burnerbox. __z,__..._ ____ position.Onmodelsequippedwith
pilotlessignitiona clickingsound
. will be heardandthe burnerwill
_. I ght After the burnerlights,turn
• knobto thedesiredflamesize.
I I
Allow burnerto cool.Lift cooktop.To __
removeuniburner,lift upslightlyand
BURNER GRATES pu,out. Undernocircumstancesare
Burner grates must be properly burners to be taken apart for
positionedbeforecooking.Do not cleaning.Uniburnercanbecleanedin If flame should go out during a
operateburnerswithouta panonthe the dishwasher, cookingoperation,turn the burner
grate.The porcelainfinishmaychip off. IFGASHASACCUMULATEDAND
withouta panto absorbtheintense Toremovestandardsingleburner: A STRONGGASODORIS DETECTED,
heat. Yourrangewill be equipped WAIT5 MINUTESFORTHEGASODOR
with eitherroundor squaregrates. .f_ _ TODISAPPEARBEFORERELIGHTING
Whenreinstallingroundgratesplace _'___ BURNER.
pinsinslotssogratesstayin place.
J
L PILOTLESSIGNITION
TOOPERATESURFACERURNEROOR,NO
A POWERFAILURE:
1 Whenlightingsurfaceburners,be
sure all controlsare in the OFF
position.Holda lightedmatchto
Removeor supportcooktop.Grasp the desiredsurfaceburnerhead.
burnerheadand tilt to releasetab 2.Turnknobto LITE.Theburnerwill
from slot near igniter.Lift up and then light.
toward back of cooktopuntil air 3.Adjustthe flame to the desired
When reinstalling square grates, shutterendof burnerreleasesfrom level.
place indentedsides togetherso valve.
straightsidesare at front andrear.
Aproperlyadjustedburnerwithclean
I _ L portswill lightwithina fewseconds.
-__ Theflamewill be bluewitha deeper
blueinnercore.Thereshouldbeno
traceofyellowintheflame.Ayellow
flameindicatesan impropermixture
of air/gas.Thiswastesfuel,sohave
a servicemanadjustthemixtureif a
yellowflameoccurs.
7
Page 10

SURFACECOOKING
SELECTING FLAME SIZE To obtain a lower flame size, turn
If a knobis turnedvery quickly from Use HIGHto quickly bring foodsto a knob back toward the OFF position
HIGHto WARMsetting,theflamemay boil or to begina cookingoperation, until the desired flame size is
goout,particularlyif burneriscold.If Reduceto a lower settingto continue reached.The lowestflame settingis
this occurs,turn the knobOFF.Wait cooking.Neverleavefoodunattended located adjacent to the OFFposition.
several seconds,then light again, when using a HIGHflame setting. This is not a preset position.
I
Use WARM(low) to simmer or keep
foodsat servingtemperatures.Some
Flame should be adjustedso it does cookingmay take placeif the utensil
not extend beyond the edge of is covered.
cooking utensil. This is for personal
safety and to prevent damage to
cabinets above range.
I
GRIDDLEAND5THBURNER
(36" RangeOnly) RemeveGriddleCover:
1. Pressdown on any corner. 4. Never replace griddle cover until
GREASEPAN 2. Slide fingers under 2 sides of griddle has cooled completely.
griddle cover and lift off. DONOT
""_---_ When griddle is cool, remove and
To UseGriddle: wash in hot soapy water; rinse and
1.Remove porcelain griddle cover dry. Donot wash in the dishwasher.
l BEFOREturning on griddle burner. Detergents will completely remove
Top cover must be removed the seasoning.
whenevergriddle burner is in use.
2. Be sure grease cup,locatedunder To CleanGreaseCup:
5THBURNER griddle, is in place. There is a greasepan located under
UNDERGRIDDLE
3. Positiongriddlecorrectly.Foreven thegriddleburner.Thispan shouldbe
cooking results, preheat griddle removed and cleaned as necessary.
Before usingthe griddle for the first usinga lowflame settingfor about
time, seasonit by lightlyrubbingthe 5 minutesor until the entirecook-
surface with a small amount of ing surface is heated. Sprinkle a FIFTH BURNER
unsalted shortening. To prevent few dropsof water overgriddle.If The griddleburnercan be usedas a
damagetothefinish, donotusemetal properly heated, water will bead fifth surface burner. Merely remove
utensils, a high flame setting or and dance. The water will sizzle the griddle and replace with extra
suddenlychangetemperatures,such and steam if griddle is not hot grate provided.
as immersinghot griddle in water, enough.
8
Page 11

USINGYOUROVEN
OVENCHARACTERISTICSOVENBURNER RACKPOSITIONS:
Every oven has its own character- The size and appearance of a RACKI (top of oven) used for two-
istics. You may find that the cooking properly adjustedoven burnerflame rack baking.
times and temperatures you were should be as shown:
accustomed to with your previous RACK2 usedfor one-rack bakingor
range may needto bealteredslightly _ L_/._ broiling.
with your new range. Pleaseexpect j
somedifferenceswith this newrange. • HACK3 usedfor mostone-rackbaking
-I :_ and for roastingsome meats.
ON30 AND36 INCHRANGES co.ei. corer=mailer RACK4 usedfor roasting _argemeats,
WITH PILOTLESS IGNITION: cookinglarger foods andfor baking
OVEN CANNOT BE USED i "_ caneapprox.3/a"on angel food cake or pie shells.
DURINGA POWERFAILURE . :____._upperoven
=Vz" Oo lower OVM
SEEPAGE14FOR20" RANGE RACKI
_RACK 2
__---- RACK3
OVENVENT PREHEATING 4
Youroven is ventedthroughaductat Preheating is necessary only for
the base of the backguard or baking. It is not necessary to preheat
backsplash panel on eye-level for broiling or roasting. AIIow oven to
models. Donot block this opening. It heat for about 10minutes. Selectinga
is important that the flow of hot air temperature higher than desired will
from the oven and fresh air to the NOT preheat the oven any faster.
oven burner be unrestricted. Do not Preheating at a higher temperature
touch the vent openings or nearby may have a negative effect on baking
surfaces during oven operation as results. HINTS:
they may be hot. NEVER place pans directly on the
ovenbottom.Donot coverentire rack
The oven temperature is maintained with aluminumfoil, place foil directly
by cyclingthe burneronandoff.After
OVEN CONTROL the oven temperature has been set, on oven bottom, or placefoil directly
Your rangeis equippedwith anOVEN there will beabouta 45seconddelay underutensil.Tocatchspillovers,cut
THERMOSTATknob which is used to before the burner ignites. This is a pieceof foil a little larger thanthe
select and maintain the oven normal, and no gas escapesduring panandplaceit onthe rackbelowthe
temperature.Always turn this knob this delay, rack containingthe utensil.
just TOthedesiredtemperaturenotto
a highertemperatureand then back. If cookingontwo racks,staggerpans
(Some modelsare equipped with a so one is not directly overthe other.
push-to-turnthermostat knob). Turn OVEN RACKS use rackpositions1 and3,2and4,or
1and 4, dependingon bakingresults,
this knobto OFFwhenevertheovenis Thetwo ovenracks aredesignedwith when cookingon two racks.
not in use. a "lock-stop" positionto keepracks
from accidentallycomingcompletely Placefoodinthe ovenoncenterof the
out of the oven. rack. Allow 1 or 2 inches between
edgeof utensiland the ovensidesof
To remove:Be sure rack is cool. Pull adjacent utensils.
rack out to the "lock.stop" position.
Tilt up and continuepullinguntilrack
releases.
To replace: Place rack on rack
THERMOSTAT supports,tilt up andpushtowardrear
of oven. Pull rack out to "lock-stop"
positionto be sure rack is correctly
replaced.
9
Page 12

USINGYOUROVEN
HOWTOBAKE
1. When cool, position rack in oven 3. Place food in center of oven, If you have carefully followed the
dependingon what youare baking, allowing a minimumof 2 inches basicinstructionsandstUlexperience
between utensil and oven walls, poor results, these suggestionsmay
2. Turn oven thermostat knobto de- be helpful:
sired temperature.Allow oven to 4. Check food for doneness at
preheat until oven burner cycles minimum time in recipe. Cook
off. longer if necessary. Turn oven
thermostat knob to OFF. Remove
food from the oven.
COMMONBAKINGPROBLEMSANDWHYTHEYHAPPEN
PROBLEM CAUSE PROBLEM CAUSE
;akesare uneven. Panstouchingeachotheror Excessive,.._rinkage. Too littleleavening.
ovenwalls. Overmixing.
Batterunevenin pans. Pantoo large.
Oventemperaturetoolow or Oventemperaturetoo high.
bakingtimetooshort. Bakingtime toolong.
Rangenotlevel. Panstoo closeto eachother
Undermixing. or ovenwalls.
Toomuchliquid.
Crumblyor dry texture. Impropermeasurementof sugar,
Cakehigh in middle. Temperaturetoo high. bakingpowder,liquidor fat.
Bakingtimetoolong. Oldbakingpowder.
Overmixing. Oventemperaturetoohigh.
Toomuchflour. Bakingtimetoolong.
Panstouchingeachotheror
ovenwalls. Ineventexture. Toomuchliquid.
Undermixing.
Cakefalls. Too muchshorteningor sugar. Oventemperaturetoolow.
Toomuchor too littleliquid. Bakingtimetooshort.
Temperaturetoo low.
Oldor too littlebakingpowder. Cakeshave tunnels. Notenoughshortening.
Pantoo small. Toomuchbakingpowder.
Ovendooropenedfrequently. Overmixing.
Oventemperaturetoo high.
_akesdon't brown evenly Ovennotpreheated.
on bottom. Pansdarkened,dentedorwarped.Cakescrack on top. Batterovermixed.
Oventemperaturetoo high.
_akesdon't brown on top. Oventemperaturetoolow. Toomuchleavening.
Overmixing.
Toomuchliquid. :akenot donein middle. Temperaturetoohigh.
Incorrectpansizeortoo little Pantoo small.
batterin pan. Diecrust edgestoo brown. Oventemperaturetoohigh.
Ovendooropenedtoooften. Panstouchingeachotheror
_akes,cookies,biscuitstoo Ovennot preheated, ovenwalls.
brown on bottom. Panstouchingeachotheror Edgesof crusttoothin.
ovenwalls.
Usingglass,darkened,warped Piesdon't brown onbottom. Usingshinymetalpans.
or dullfinishmetalpans.
Incorrectrack position. Dieshavesoakedcrust. Temperaturetoolowat start
Incorrectuseof aluminumfoil. of baking.
Placed2 cookiesheetsonone Fillingtoojuicy.
rack. Usingshinymetalpans.
10
Page 13

USINGYOUROVEN
[
HOW TO ROAST Frozenmeat may be cookedin the
Roastingisthecookingoftendercuts Cookingtime is determinedby the samewayasfreshmeatifthemeatis
of meatwith dry heat.No water is weightof the meatandthe desired thawed first. It is also possible,
added nor is the cookingutensil aloneness.Usethechartgivenbelow however, to cook meat from the
covered.Searingis unnecessary.If as a guidein determiningcooking frozen state. Follow the same
desired,seasonmeatwith salt and times.Forthemostaccurateresults, roasting instructionsbut increase
pepper, use a meat thermometer.Insertthe cookingtime approximately10to 25
thermometersothetipisinthecenter minutes per pound. When using
Checkweightofmeatandplacemeat ofthethickestpartofthemeatandis frozen packaged meat, follow
fat-side-upon a rack in a shallow not touchingboneor fat. package directions.Frozen poultry
roastingpan. should always be thawed before
Aftercooking,removemeatfromthe cooking except when package
Placeovenrack in one of the two ovenand letstand 15to 20minutes directionsrecommendcookingfrom
bottomrackpositionsbeforeovenis for easiercarving.Rareor medium the frozenstatesuchas for frozen
turnedon.Preheatingisunnecessary rare meatsshouldbe removedfrom turkey rolls. DO NOT REFREEZE
for roastingmeats, theovenwhentheinternaltempera- MEATS THAT HAVE NOT BEEN
ture is 5 to 10° lessthanthefinal COOKEDFIRST.
Meatsareroastedat 325°Fgenerally desiredtemperaturesincemeatwill
(excepttenderloin,425°Fandsmaller continue to cook slightly while PORK
poultryat 375°Fto 400°F). standing. Porkshouldalwaysbecookedtoan
internal temperatureof 170° (well
ROASTINGCHART done)throughout.
APPROXIMATE
CUTOFMEAT WEIGHT INTERNALTEMP. TEMP. TIME
BEEF
StandingRib 6 to 8 Ibs, 140°F(rare) 23to 25 min/Ib.
160°F(medium) 300-325°F 27to 30 rain/lb.
170°F(welldone) 32 to 35rain/lb.
4 to 6 Ibs. t40°F (rare) 26 to 32 min/Ib.
160°F(medium) 300-325°F 34 to 38 rain/lb.
170°F(welldone) 40 to 42rain/lb.
RolledRib 5 to 7 Ibs. 140°F(rare) 32 min/Ib.
160°F(medium) 300-325°F 38 min/Ib,
170°F(welldone) 48 rain/lb.
RibEye 4 to 6 Ibs. 140°F(rare) 18to 20 min/Ib.
160°F(medium) 350°F 20 to 22 min/Ib,
170°F(welldone) 22 to 24 rain/lb.
Tenderloin,Whole 4 to 6 Ibs. 140°F(rare) 425°F 40to 60minutes
(totaltime)
2 to 3 Ihs. 140°F(rare) 425°F 45 to 50 minutes
(totaltime)
SirloinTip 3 to 4 Ibs. 140- 170°F 325-350°F 35 to 40 rain/lb.
(highquality) 6 to 8 Ibs. 140- 170°F 30 to 35 rain/lb.
RolledRump 4 to 6 Ibs. 150- 170°F 325-350°F 25 to 30 rain/lb.
(highquality)
PORKLOIN
Center 3 to 5 Ibs. 170°FThroughout 325°F 30to 35 min/Ib,
Half 5 to 7 Ibs. 170°FThroughout 35to 40 rain/lb.
LAMB,LEG 5 to 9 Ibs. 160°F(medium) !325°F 25 to 30 min/Ib.
170- 180° (well) 30 to 35 min/Ib.
11
Page 14

USINGYOUROVEN
HOWTOBROIL
Broilingis amethodof cookingtender TOBROIL
foodsby directheatundertheburner. 1.Beforebroiling,trimexcessfatto 4. Checkdonenessby cuttingslitin
Yourrangeis equippedwith a broil preventexcessivespatteringand meatnearcenterfordesiredcolor.
compartmentbelowthe oven. The cutslashesaroundtheouteredges
degreeof donenessisdeterminedby of the meat to preventcurling
the distancebetweenthe meatand duringcooking. _- _ .|
theburner,andthelengthofbroiling
time. 2.Placebroilerpanonanyof there-
commendedrackpositions.Iffood I _ ,,/_)-.l_ J
Broilingrequirestheuseofthebroiler is placedtoo closeto theburner
panandinsert.Thecorrectpositionof overbrowningand smokingmay
the insert in the pan is very occur. Generally, for brown
important. The broiler insert is exteriorandrareinterior,themeat
designedto keep fat from being shouldbeclosetotheburner.Place
directlyexposedto the burnerto furtherdownifyouwantmeatwell
eliminatepossiblefire hazards, done.
NOTE:Beloware recommendedrack
ThebroilerinsertCANNOTbecovered 3. Broilingis donewithlower broil positions.Remember,the closerto
with aluminumfoil as thisprevents compartmentdoor closed.Turn theflame,thequickerthefoodcooks.
fat from draininginto pan below, oven thermostatknob to BROIL. Whenbroilingis completed,remove
However,for easier cleaning,the Followsuggestedtimesin broiling broiler pan from compartment.
broilerpancanbe linedwithfoil.Do chart.Meatshouldbeturnedonce Greaseleftinthepancancatchfireif
notusedisposablebroilerpans.They abouthalfway throughcooking, theovenisusedwithoutremovingthe
do notprovidea separatetray. broilerpan.
BROILINGCHART
RACK
TYPEOFFOOD POSITION* DONENESS TOTALTIME
STEAKS
1-inch 2 140°FRare 8to 12min.
2 160°FMedium 12to 16min.
2 170°FWell 16to 22min.
lYe-inches 2 140°FRare 14to 18rain.
2 160°FMedium 18to 22 min.
2 170°FWell 22to 30rain.
HAMBURGERPATTIES
3/4to 1-inch 2 140°FRare 10to 12min.
2 160°FMedium 12to 14min.
2 170°FWell 14to 18min.
CHICKENHALVES** 3 185°FWell 40to 50rain.
FISHFILLETS,fresh or thawed
1-inch 2 Flaky 14to 20min.
HAMSLICE,Precooked
_/2-inch 2 140°F 8 to 15min.
BACON 2 Crisp 5 to 10rain.
PORKCHOPS
_/2-inch 2 170°FWell 15to 20min.
Toprack positionis #1.
•* Turnoventhermostatknobto 450°F. 12
Page 15

MAINTENANCE
LIGHTREPLACEMENT OVENDOOR
Before replacing light bulb, DIS- Ovendoor isremovableon30and 36 20 Inchrange:When broiler is cool,
CONNECTPOWERTORANGE.Besure inchrangesonly.20inchrangehasa removebroilerinsertandpan.Open
bulbandrangepartsarecool.Donot nonremovableovendoor. drawer halfwayand pull metalclip
toucha hotbulbwithadampclothas locatedin centerof drawerbottom
the bulbmaybreak. To removerift-eftdoor:Whendooris upwardas far as it willgo(about2
cool,opendoortothe"stop"position inches).The drawer can now be
Tereplaceovenfight:Removebulbwith (openedabout4 inches)and grasp pulledall the way out of the com-
a dry potholderto preventpossible doorwithbothhandsateachside.Do partment.
harm to hands and very carelully notusedoorhandleto liftdoor.Lift
removebulb.Replacewitha 40watt upevenlyuntildoorclearsthehinge Te replace:Slidegroovesat top of
APPLIANCEbulb.Reconnectpowerto rms. draweronto guiderails at sidesof
_I broilercompartmentandpushdrawer
the range. _ in toclose.
To replacefluorescentbackguardlight:
Graspthetoptrim of backguardwith _ '
thumbsunderfront edgeand pull
outwardwhileliftingto releasetrim _11
from catchesat eachend. Remove _ '
bulband replacewith an 18 watt _'_L_
fluorescenttube.Snaptoptrimback
intoplaceandrestorepower. ;AUTION:Hinge arms are spring
mountedandwill slamshutagainst
therangeifaccidentlyhit.Neverplace
handorlingersbetweenthehingesand
the frontovenframe.You could be
injuredif hingesnapsback. OVEN BOTTOM
Yourovenwill beequippedwithone
__ TOreplacedeer:Graspdoor at each of the following types of oven
side,alignslotsinthedoorwiththe bottoms.Besureovenbottomiscool.
hingearmsandslidedownontothe Removeovenracks.
hingearmsuntilcompletelyseatedon
hinges. 20Inchrange:Loosenthetwoscrews
locatedalongthe frontof theoven
Donotattemptto openor closedoor bottom.Slide the screwsback to
-- until door is completelyseatedon releasethefrontoftheovenbottom.
hinge arms. Never turn on oven Graspovenbottom,lift up andpull
LEVELING LEGS uol_ssdooris properlyin place, forwardremoveovenUntilrearbottomtabSfromrelease.oven.Then,
Somefloorsarenotlevel.Forproper BROILER DRAWER
baking,your rangemustbe level. Toreplace:Inserttabsintoslotsonthe
Levelinglegsare locatedon each 30or 36 Inchranges:Whenbroileris back oven wall. Lowerinto place.
cornerof thebaseoftherange.Place cool,removebroilerinsertandpan. Slidetwoscrewsforwardandtighten.
a levelhorizontallyonan ovenrack Lift androtatethetwolevers"A" to Besurebottomisfittedintoslotsand
andcheckfront-to-backandside-to- theside,pulldrawerforward,upand screws are tight. If not correctly
side.Levelby turningthe legs. out. replaced,ovenbottommaybecome
Tereplace:Lineup hooksondrawer warpedand cookingresultswill be
slides"B" with holesin drawerand affected.
pushuntilhooksare caught.Return
_ levers"A" to lockingposition.
13
Page 16

MAINTENANCE
LIGHTINGPILOTS HI-SIM-WARMVALVE
30 inchrange:Slide the two catches, Besureall surfaceandovencontrolsare ADJUSTMENT
located at each rear corner of the setin theOFFpositionpriortosupplying (if equipped)
oven bottom,toward the front ofthe gasto the appliance. The WARM settingshouldproducea
oven. Lift the rear edge of the oven
bottom slightly, then slide it back When the range is first installed,the stable flame when turning the knob
from HI to WARM. On conventional
until the holesin thefront edgeof the pilots may be difficult to light dueto
ovenbottomclear thepinsinthe oven air in the gas line. To bleed off air surface burners, the flameshould be
front frame. Remove oven bottom from the line, hold a lighted match 1/8 inch or lower and mustbe stable
from oven. next to the burner and turn knobon. on all ports on WARM setting. For
Whenthe burnerlights, turn the knob sealed burners, the flame should
To replace:Fit holes onto pins,lower off and proceed as directed below, extend to the outeredgeof the lip on
rear of oven bottom and slide the the burnercapon the WARMsetting.
catchesbacktolock oven bottominto SurfaceBurnerandGriddle/5thBurner
place. Pilots:Remove or raise and support To adjust:Operate burner on HI for
cooktop on metal rod. Hold lighted about 5 minutes to preheat burner
match near the pilot ports, cap. Turn knob back to WARM;
t_ remove knob, and insert a small
Oven Pilot: Removeoven racks and screwdriver into the center of the
oven bottom. With the oven valve stem. Adjust flame size by
thermostat knob in the OFFposition, turning adjustment screw in either
_ 2 hold a lighted match to the pilot direction. Flame must beof sufficient
located at the back end of the oven size to be stable on all burner ports.
burner. Oncepilot is lit, replace oven NEVERadjust flame size at the HI or
_/__,l _ bottom and racks. SIMMERsettings. If flame adjustment
3 . ._ is needed,adjust ONLYon the WARM
_.._,_. jF_, setting.
38 inch range: Push oven bottom _'_
toward back of oven. Lift front end ' '/
up. Pull toward front of oven and
remove.
Toreplace:Reverseprocedure. OVENPILOT SURFACEBURNER
PILOTLESSIGNITION
20,30 and36 inchrangesequippedwith
gig bar-typepilotlessignition:Oven can
not be manually lightedwith a match
during a power failure.
The oven on the 20 inch range will
have one of the ignition systems
described below:
1. Spark-typeignition.
Be sure oven thermostat knob is
OFF. Open broiler drawer and
HINT: removebroilerinsertand pan. Hold
Protect oven bottom against a lighted match next to pilot as
excessivespillovers (especially acid illustrated above. Replace broiler
or sugary spills). Usethecorrect size insert and pan.
cooking utensil. Placing a sheet of 2. Gig bar-typeIgnition.
aluminum foil, that is slightly larger With this type of ignition system,
than the cooking utensil on the rack the oven will not operate during a
below the utensil will catch spills, power failure or if the range is dis-
connected from the wall outlet.
14
Page 17

CLEANINGCHART
PARTS CLEANINGAGENTS DIRECTIONS
Broiler insert & pan Soap&water Removefrombroiler after use.Allowtocool,thenpouroffgrease.Placesoapyclothover
Plasticscouringpad insertandpan,letsoakto loosensoil.Washinsoapywater.Usesoapfilledscouringpad
Soapfilledscouringpad to removestubbornsoil.Cleanin dishwasherif desired.
Burnerbox Soap&water Burnerbox,locatedundercooktop,shouldbe cleanedfrequentlyto removespillovers.If
,oilis notremovedandis allowedto accumulate,it may damagethe finish.Toclean,
removesurfaceburnersandcleanwithsoapandwater,rinseanddr)'.
Chromedripbowls Soap& water Cleanbowlsaftereachusewithsoapandwater. Removestubbornstainswithbaking
Pasteof bakingsoda sodapasteandplasticscouringpad.Topreventscratchingthe finish,donotuseabrasive
& water cleaningagents.Rinse,dry andreplace.NOTE:Bowlscanpermanentlydiscolorifexposed
Plasticscouringpad to excessiveheator if soilis allowedto bakeon.
Controlknobs Soap& water To removeknobsforcleaning,gentlypullforward.Washin milddetergentandwater.Do
notuseabrasivecleaningagents.Theywillscratchfinishandremovemarkings.Rinse,
dryandreplace.TurneachburnerONto seeif knobshavebeenreplacedcorrectly.
Doorgasket Soap& water Washwithsoapandwater,rinseanddry.Donotremovedoorgaskets.
Siliconerubber
Glass,backguard Soap& water Washwith clothwrungoutin soapywater.Removestubbornsoilwithpasteof baking
ovenwindow Pasteof bakingsoda sodaandwater.Toavoidinsidestainingof ovendoorglass,donotoversaturatecloth.
& water Donotuseabrasivematerialssuchasscouringpads,steelwoolorpowderedcleaning
Windowcleaningfluid agents.Theywill damageglass.Rinsewithclearwater anddry.
or ammonia
Grates Detergent& water Gratesare madeof porcelaincoatedsteel.Theycanbecleanedat thesinkwithdetergent
Soapfilledscouring]pad andwateror in thedishwasher.Cleanstubbornsoilwithsoapfilledscourin_lpad.
Metalfinishes Soap& water Washwithsoapandwater.Removestubbornsoilwith pasteof bakingsodaandwater.
Aluminum- backguard Pasteof bakingsoda Donotuseabrasiveor causticagents.Theywill damagethefinish.
&controlpanel & water
Chrome& stainless
steel- trimparts
Ovenracks Soap& water Cleanwith soapywater.Removestubbornsoilwithcleansingpowderorsoapfilled
Cleansingpowders& scouringpad.Rinseanddry.
plasticpads
Soapfilledscouring]pad
Polyester,endpanels Soap& water Washwithsoapandwarmwater.Donotuseabrasivecleaningmaterials.Theywill
scratchfinish.Neveruseovencleaners.
Porcelainfinish, Mildsoap& water Porcelainenamelis glassfusedonmetal It may crackor chipwith misuse.Cleanwith
exterior Pasteofbakingsoda soapandwaterwhenpartsare cool.All spillovers,especiallyacidspillovers,shouldbe
&water wipedupimmediatelywitha drycloth.Whensurfaceis cool,cleanwithwarmsoapy
water.NEVERWIPEOFFA WARMORHOTENAMELSURFACEWITHA DAMPCLOTH.THIS
MAYCAUSECRACKINGANDCHIPPING.Neveruseabrasiveor causticcleaningagents
on exteriorfinishof range.
Porcelainfinish, Soap& water Cleanoveninteriorwithsoapandwater.Usecleansingpowdersor a plasticscouringpad
interior- (seepage6 Cleansingpowders& to removestubbornsoil.Wipeacidor sugarstainsas soonasthe ovenis coolas these
forcontinuousclean plasticpads stainsmaydiscoloror etchtheporcelain.Donot usemetallicscouringpadsas theywill
oveninstructions) Commercialoven ;cratchtheporcelain.Commercialovencleanerscan NOTbeusedontheContinuous
cleaner Cleaningovenfinishor on theself-cleaningovenfinish.Ovencleanerscanbeusedonthe
nonself-cleanin_porcelainovenbutfollowmanufacturer'sdirections.Seenotebelow.
Surfaceburners Soap& water Cleanas necessarywithwarmsoapywater.Removestubbornsoilby scouringwitha
(Sealedburners- refer Pasteof bakingsoda non-abrasiveplasticscouringpadanda pasteofbakingsodaandwater.Cleanportswith
to separateinsertfor & water a straightpin.Oonotenlargeor distorttheports.Donotusea woodentoothpick.It may
cleaninginstructions) Plasticscouringpad breakoff andclogport.DONOTCLEANBURNERSWITHTHEFOLLOWINGcausticcleaners:
suchas Tully® ovencleaners,steelwoolor abrasivecleaningagents.Thesemay damagefinish.Burners
canbe driedinthe ovensetat 140°F.CAUTION:Burnerandburnertubemustbedry
beforeuse.
Vinylfinishes Soap& water Neveruseabrasiveorcausticcleaningagentsonvinyl finishes.
Boorhandles
Manifoldpane]
NOTE:CommercialOvenCleaners- Neverusecleanersontheovenburner,exteriorfinishes,trimpartsoronthecontinuouscleaningovenfinish.Theseparts
will bepermanentlydamagedbythe cleaner.
15
Page 18

SERBEVLCcELLINGA SERVICETECHNICIAN,CHECKTHEFOLLOWING:
PROBLEM CAUSE CORRECTION
1.Surfaceburnerfails to light a. pilotsare not lit a. seepage14to fightpilots
b. powersupplynotconnected b. connectpower,checkcircuit
(pilotlessignition) breakeror fuse box
c. cloggedburner port(s) c.clean ports with straight pin
d. burnersnot placedcorrectly d. removeand reinstall burner
onto gas valve properly
2. Burner flameuneven a. cloggedburner port(s) a. clean ports with straight pin
b. burnernot properly positioned b. seepage7 to correctly replace
burner
3. Surfaceburner flame a. air/gas mixture not proper a. call servicemanto adjust burner
• lifts off port primary air
• yellow in color
4. Ovenburnerfails to light a. powersupply not connected a. connectpower,checkcircuit
(pilotlessignition) breakeror fuse box
b. glo-bar ignition system,
seepage14.
5. Oventemperatureinaccurate a. oven not preheated a. preheatoven9 minutes
• food takes too long or cooks b. incorrect rack position b. see page9
too fast c. incorrectuse of aluminumfoil c. seepage 9 and 12
• pale browning d. ovenbottom incorrectly replaced d. replaceovenbottom correctly
• food over-doneon outsideand e. oventhermostat sensingdevice e. reinstall sensingdevicesecurely
under-donein center out of holding clip(s) into clip(s)
• overbrowning
6. Clockand/or oven light does a. powersupply not connected a. connectpowersupply, check
not work circuit breakeror fuse box
b. burnedout light bulb b. replacelight bulb
c. defectiveswitch,starteror ballast c. call servicemanto check
d. defectiveclock or loosewiring d. call servicemanto check
HOW TO OBTAIN SERVICE , youare notsatisfiedwiththelocal MajorApplianceConsumerActionPanel
Do not attempt to service the responseto your service require- 20NorthWackerDrive
applianceyourselfunlessdirectedto ments,call or write MAYCORParts Chicago, IL 60606
doSOinthisbook.Contactthedealer and Service Co., P.O. Box 2370,
who sold you the appliancefor Cleveland,TN 37311,(615)472-3333. MACAP(MajorApplianceConsumer
service. Include or have available the Action Panel) is an independent
completemodeland serialnumbers agency sponsoredby three trade
Whenyourrangerequiresserviceor of the appliance,the name and associationsas a courtofappealson
replacementparts, contact your addressofthedealerfromwhomyou consumercomplaintswhichhavenot
Dealeror AuthorizedServiceAgency. purchasedthe appliance,thedateof beenresolvedsatisfactorilywithina
Useonlygenuinefactoryor Maycor purchaseanddetailsconcerningyour reasonableperiodof time.
parts if replacementparts are problem.
necessary.Consultthe YellowPages
in your telephonedirectoryunder If you did not receivesatisfactory
rangesfortheservicesourcenearest servicethroughyourserviceagency
you.Be sureto includeyour name, or MaycoryoumaycontacttheMajor
address,and phonenumber,along ApplianceConsumerActionPanelby
withthemodelandserialnumbersof letterincludingyourname,address,
the appliance.(Seeinsidecoverfor andtelephonenumber,aswellasthe
locationof your modeland serial modeland serial numbersof the
numbers), appliance.
16
 Loading...