

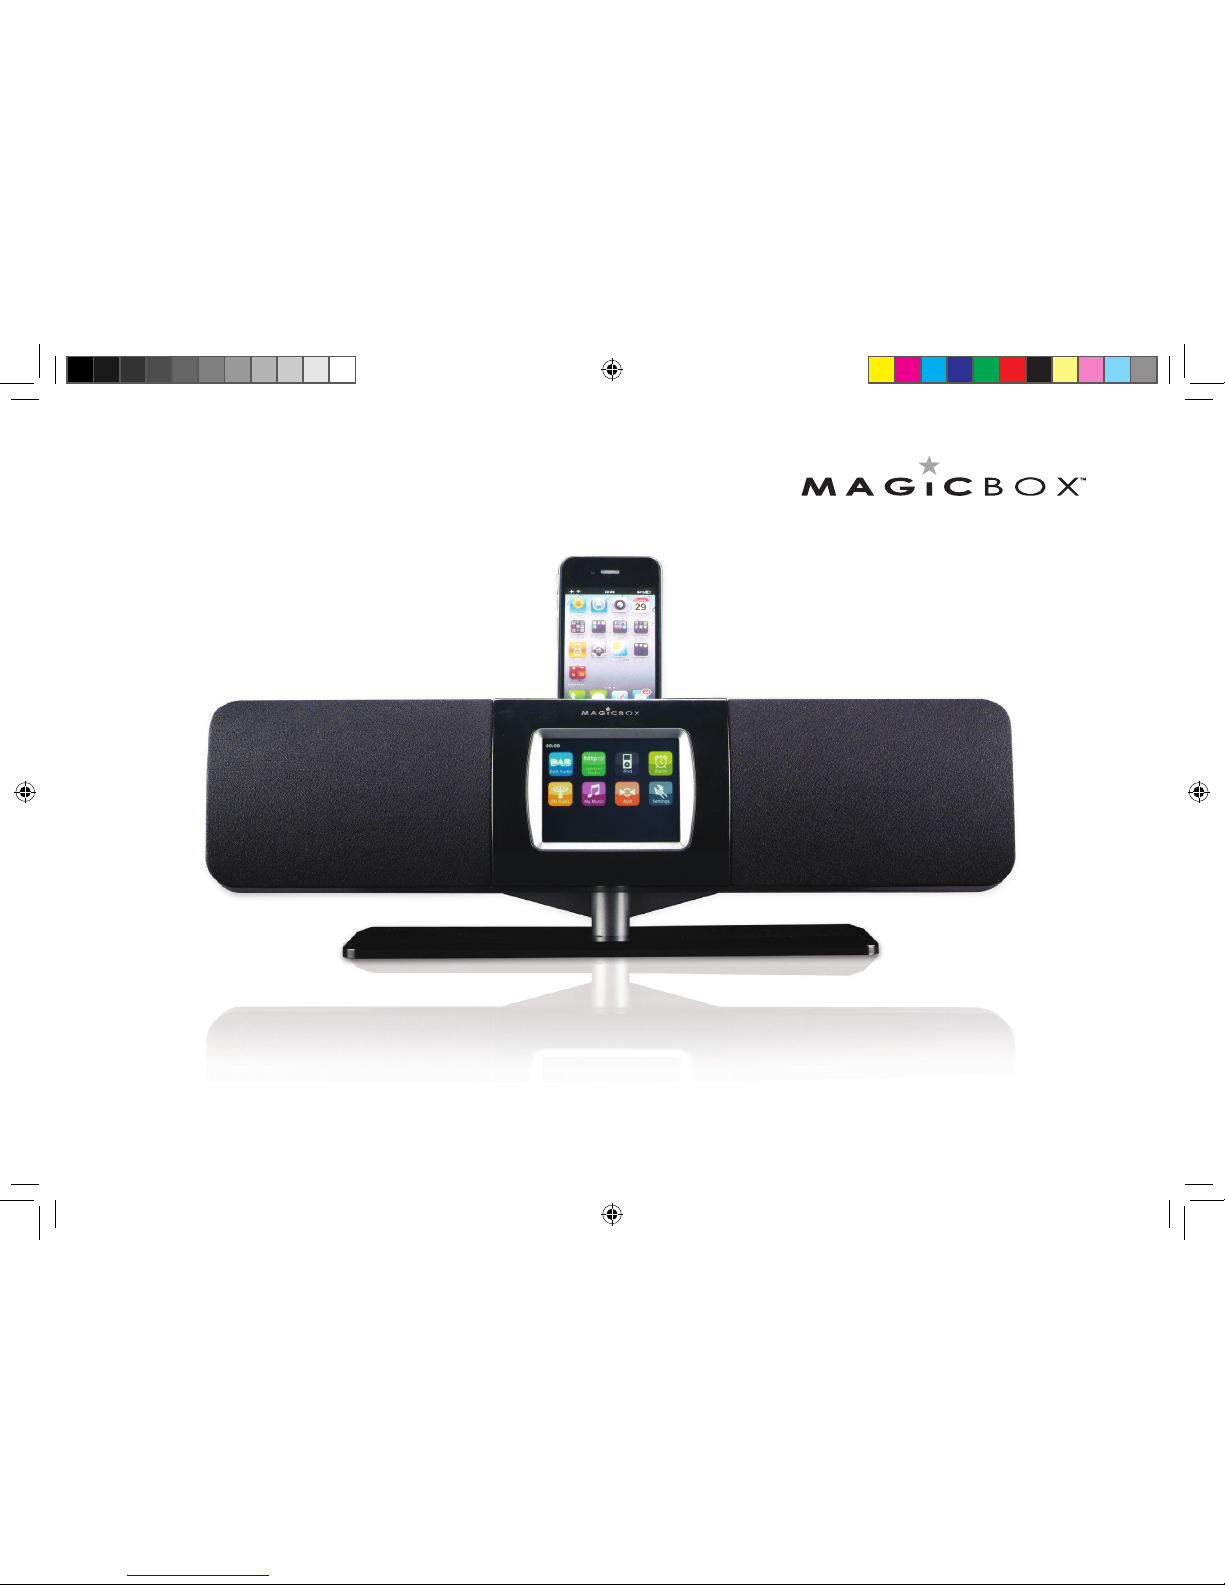
BEAM Extreme
Wi-Fi Internet DAB/FM Radio with dock for iPhone and iPod
BEAM.indd 1 19/9/11 12:44:43

2
2
CO N T E N T S
Welcome . . . . . . . . . . . . . . . . . . . . . . . . . . . . . . . . . . . . . . . . . 4
Introducing the BEAM Extreme from Magicbox . . . . . . . . 4
Your BEAM Extreme . . . . . . . . . . . . . . . . . . . . . . . . . . . . . . 5
The BEAM display . . . . . . . . . . . . . . . . . . . . . . . . . . . . . . . . 6
Main menu screen . . . . . . . . . . . . . . . . . . . . . . . . . . . . . . . . . . . . 6
Standby screen . . . . . . . . . . . . . . . . . . . . . . . . . . . . . . . . . . . . . . . 6
Touch icons on the display . . . . . . . . . . . . . . . . . . . . . . . . . . . . 7
Product set up . . . . . . . . . . . . . . . . . . . . . . . . . . . . . . . . . . . . 8
Where to put your radio . . . . . . . . . . . . . . . . . . . . . . . . . . . . . . . 8
Switching on and connecting to your wireless network . 8
Using the internet radio . . . . . . . . . . . . . . . . . . . . . . . . . . 10
Key entry . . . . . . . . . . . . . . . . . . . . . . . . . . . . . . . . . . . . . . . . . . . . . 9
Switch on . . . . . . . . . . . . . . . . . . . . . . . . . . . . . . . . . . . . . . . . . . . . 10
Switch o . . . . . . . . . . . . . . . . . . . . . . . . . . . . . . . . . . . . . . . . . . . . 10
Changing modes. . . . . . . . . . . . . . . . . . . . . . . . . . . . . . . . . . . . . 10
Adjusting the volume . . . . . . . . . . . . . . . . . . . . . . . . . . . . . . . . 10
Selecting internet mode . . . . . . . . . . . . . . . . . . . . . . . . . . . . . 10
Choosing an internet radio station . . . . . . . . . . . . . . . . . . . . 10
Internet radio menu . . . . . . . . . . . . . . . . . . . . . . . . . . . . . . . . . . 11
Additional information . . . . . . . . . . . . . . . . . . . . . . . . . . . . . . . 12
Storing a radio station preset (My Favourites) . . . . . . . . . 12
Tune to a radio station preset (Favourite) . . . . . . . . . . . . . 12
My Music mode . . . . . . . . . . . . . . . . . . . . . . . . . . . . . . . . . . 13
Setting up your Windows computer to allow
access to your audio les . . . . . . . . . . . . . . . . . . . . . . . . . . . . 13
Select My Music mode . . . . . . . . . . . . . . . . . . . . . . . . . . . . . . . 13
My Music menu . . . . . . . . . . . . . . . . . . . . . . . . . . . . . . . . . . . . . . 14
DAB mode . . . . . . . . . . . . . . . . . . . . . . . . . . . . . . . . . . . . . .15
Telescopic aerial . . . . . . . . . . . . . . . . . . . . . . . . . . . . . . . . . . . . . 15
Select DAB mode . . . . . . . . . . . . . . . . . . . . . . . . . . . . . . . . . . . . 15
Scanning for DAB stations . . . . . . . . . . . . . . . . . . . . . . . . . . . . 15
DAB menu options . . . . . . . . . . . . . . . . . . . . . . . . . . . . . . . . . . . 16
Additional DAB information . . . . . . . . . . . . . . . . . . . . . . . . . . 17
FM mode . . . . . . . . . . . . . . . . . . . . . . . . . . . . . . . . . . . . . . . 18
Telescopic aerial . . . . . . . . . . . . . . . . . . . . . . . . . . . . . . . . . . . . . 18
Select FM mode . . . . . . . . . . . . . . . . . . . . . . . . . . . . . . . . . . . . . . 18
Tune to an FM station . . . . . . . . . . . . . . . . . . . . . . . . . . . . . . . . 18
FM menu options . . . . . . . . . . . . . . . . . . . . . . . . . . . . . . . . . . . . 18
BEAM.indd 2 19/9/11 12:44:44
3
iPod mode . . . . . . . . . . . . . . . . . . . . . . . . . . . . . . . . . . . . . . 19
Select iPod mode . . . . . . . . . . . . . . . . . . . . . . . . . . . . . . . . . . . . 19
Dock your iPod / iPhone . . . . . . . . . . . . . . . . . . . . . . . . . . . . . 19
Playing your iPod / iPhone . . . . . . . . . . . . . . . . . . . . . . . . . . . 19
Video out . . . . . . . . . . . . . . . . . . . . . . . . . . . . . . . . . . . . . . . . . . . . 19
Adjusting the volume . . . . . . . . . . . . . . . . . . . . . . . . . . . . . . . . 19
Aux in mode . . . . . . . . . . . . . . . . . . . . . . . . . . . . . . . . . . . . 20
Select Aux mode . . . . . . . . . . . . . . . . . . . . . . . . . . . . . . . . . . . . . 20
Aux mode . . . . . . . . . . . . . . . . . . . . . . . . . . . . . . . . . . . . . . . . . . . 20
Alarm . . . . . . . . . . . . . . . . . . . . . . . . . . . . . . . . . . . . . . . . . . . 21
Select alarm . . . . . . . . . . . . . . . . . . . . . . . . . . . . . . . . . . . . . . . . . 21
Setting an alarm . . . . . . . . . . . . . . . . . . . . . . . . . . . . . . . . . . . . . 21
Stop the alarm . . . . . . . . . . . . . . . . . . . . . . . . . . . . . . . . . . . . . . . 21
Settings . . . . . . . . . . . . . . . . . . . . . . . . . . . . . . . . . . . . . . . . . 22
Select settings . . . . . . . . . . . . . . . . . . . . . . . . . . . . . . . . . . . . . . . 22
Settings menu . . . . . . . . . . . . . . . . . . . . . . . . . . . . . . . . . . . . . . . 22
Time setting . . . . . . . . . . . . . . . . . . . . . . . . . . . . . . . . . . . . . . . . . 22
Set the alarms . . . . . . . . . . . . . . . . . . . . . . . . . . . . . . . . . . . . . . . 22
Equalizer . . . . . . . . . . . . . . . . . . . . . . . . . . . . . . . . . . . . . . . . . . . . 22
Network settings . . . . . . . . . . . . . . . . . . . . . . . . . . . . . . . . . . . . . 22
Product settings . . . . . . . . . . . . . . . . . . . . . . . . . . . . . . . . . . . . . 22
Setup wizard . . . . . . . . . . . . . . . . . . . . . . . . . . . . . . . . . . . . . . . . . 22
Wall mount. . . . . . . . . . . . . . . . . . . . . . . . . . . . . . . . . . . . . .23
Technical information . . . . . . . . . . . . . . . . . . . . . . . . . . . . 24
Simple solutions . . . . . . . . . . . . . . . . . . . . . . . . . . . . . . . . . 25
Helpdesk . . . . . . . . . . . . . . . . . . . . . . . . . . . . . . . . . . . . . . . 26
General information . . . . . . . . . . . . . . . . . . . . . . . . . . . . . 27
Care and maintenance . . . . . . . . . . . . . . . . . . . . . . . . . . . . . . . 27
Product guarantee . . . . . . . . . . . . . . . . . . . . . . . . . . . . . . . . . . . 28
Weee directive . . . . . . . . . . . . . . . . . . . . . . . . . . . . . . . . . . 29
BEAM.indd 3 19/9/11 12:44:44

4
Introducing the BEAM Extreme from Magicbox
Your BEAM Extreme is a combined DAB, FM and Internet
stereo radio with media streaming and dock for iPhone
and iPod. It utilises the very latest colour touch screen
technology and is quick and easy to set up with a clear
information display.
Before you can receive internet radio stations you will need
to check that you have the following:
* A broadband internet connection
* If using a LAN cable connection, you will need to ensure
that your network is set up for this and that you have the
relevant LAN cable available.
* If using a Wi-Fi connection, you will need a wireless access
point (Wi-Fi) connected to your broadband internet,
preferably via a router.
* If your wireless network is congured to use Wired
Equivalent Privacy (WEP) or Wi-Fi Protected Access (WPA)
data encryption then you will need to know the WEP or
WPA code so that your radio can communicate with your
network.
* Your radio should work in all locations where the Wi-Fi
network is available. You will also need to know the name
of your wireless network, i.e. its SSID.
* Depending on the security used on your network you
may need to enter your Radio’s ‘MAC address’. To nd your
Radio’s MAC address, select:
- For LAN cable connection: ‘Menu screen -> Settings ->
Network settings -> Current settings -> Wired MAC’.
- For Wi-Fi connection: ‘Menu screen -> Settings -> Network
settings -> Current settings -> WLAN MAC’.
* To enter the MAC address into your wireless access point
you will need to read the instructions provided with your
wireless access point and router.
* Before you continue please make sure that your wireless
access point is turned on and connected to your broadband
internet. You may need to read the instructions provided
with your wireless access point and router.
Note: If you have a wireless laptop computer available you
can use this to check that the wireless network is working OK
before you begin to set up your radio.
W E LCOM E
BEAM.indd 4 19/9/11 12:44:45
5
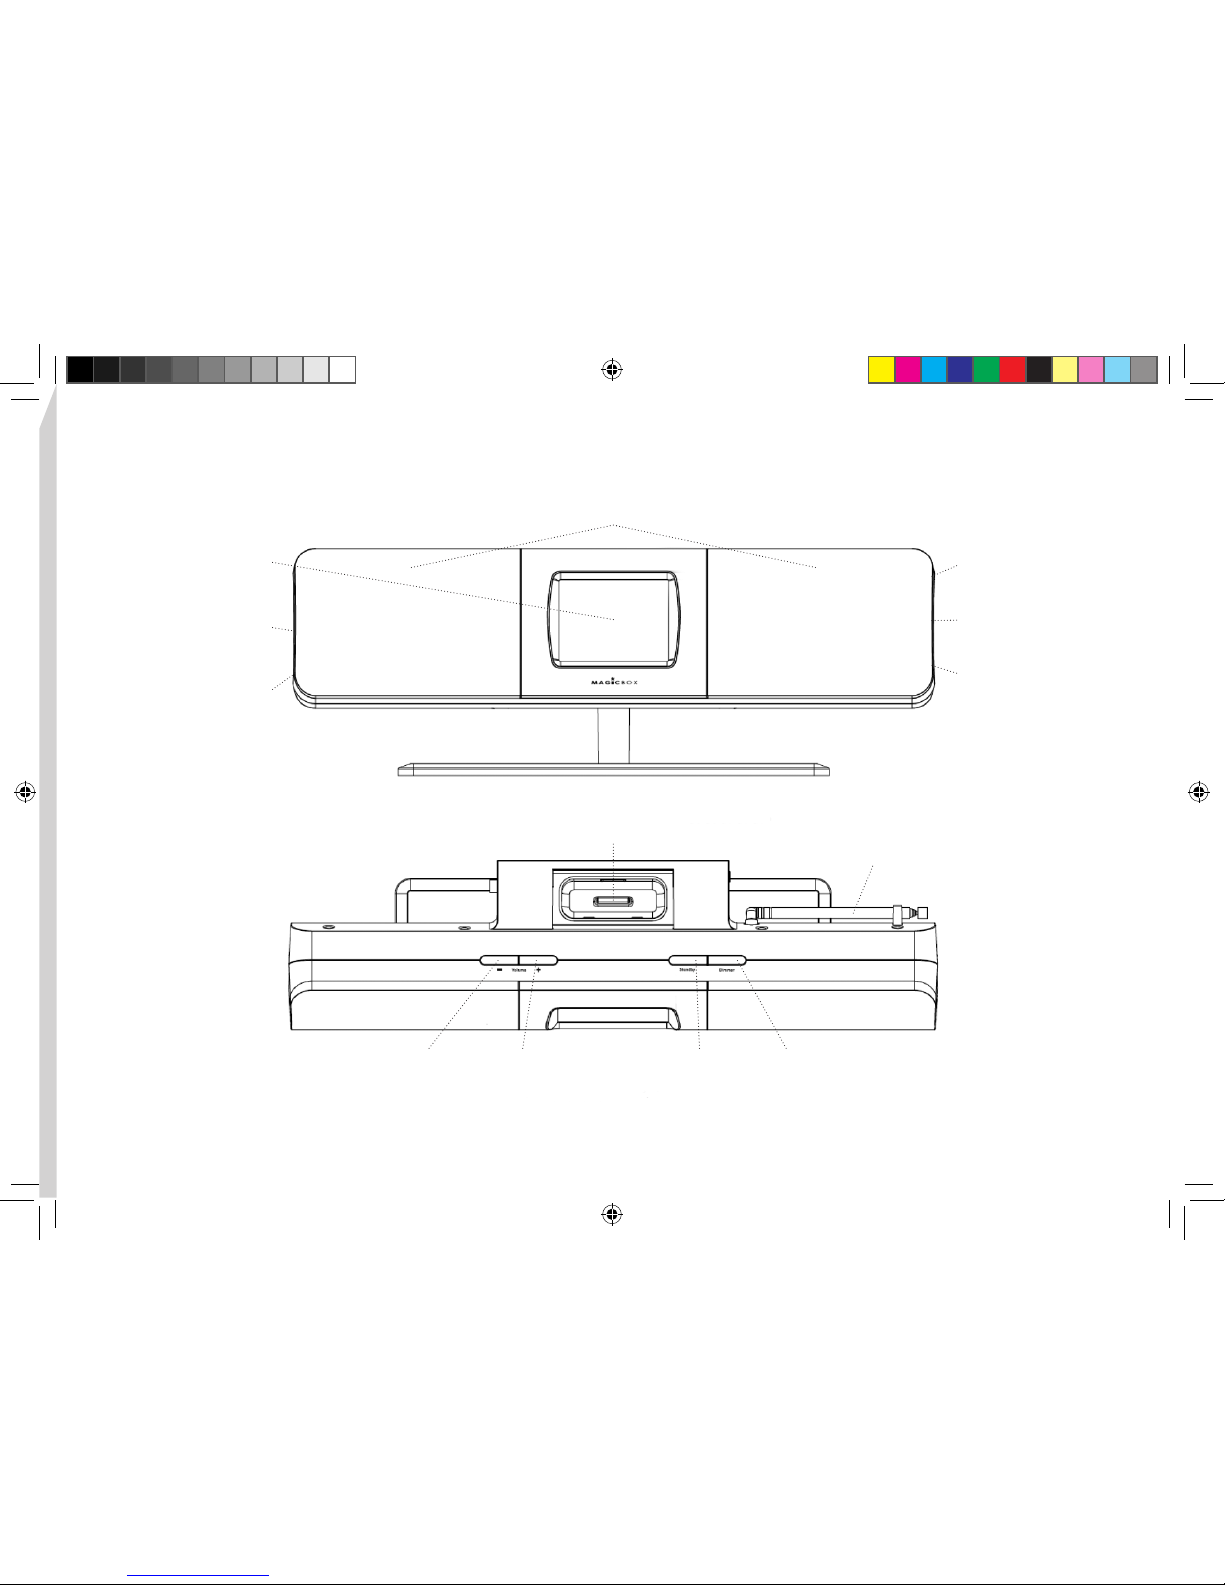
YOU R B E A M E X T R E M E
Stereo speakers
iPhone/iPod dock
Telescopic aerial
Touch screen display
Front view:
Top view:
Update Port
(at rear)
Aux in socket
(at rear)
Mains power socket
(at rear)
Video Out socket
(at rear)
LAN socket
(at rear)
Volume - Volume + Standby Display dimmer
BEAM.indd 5 19/9/11 12:44:45
6
T H E B E A M D I S P L AY
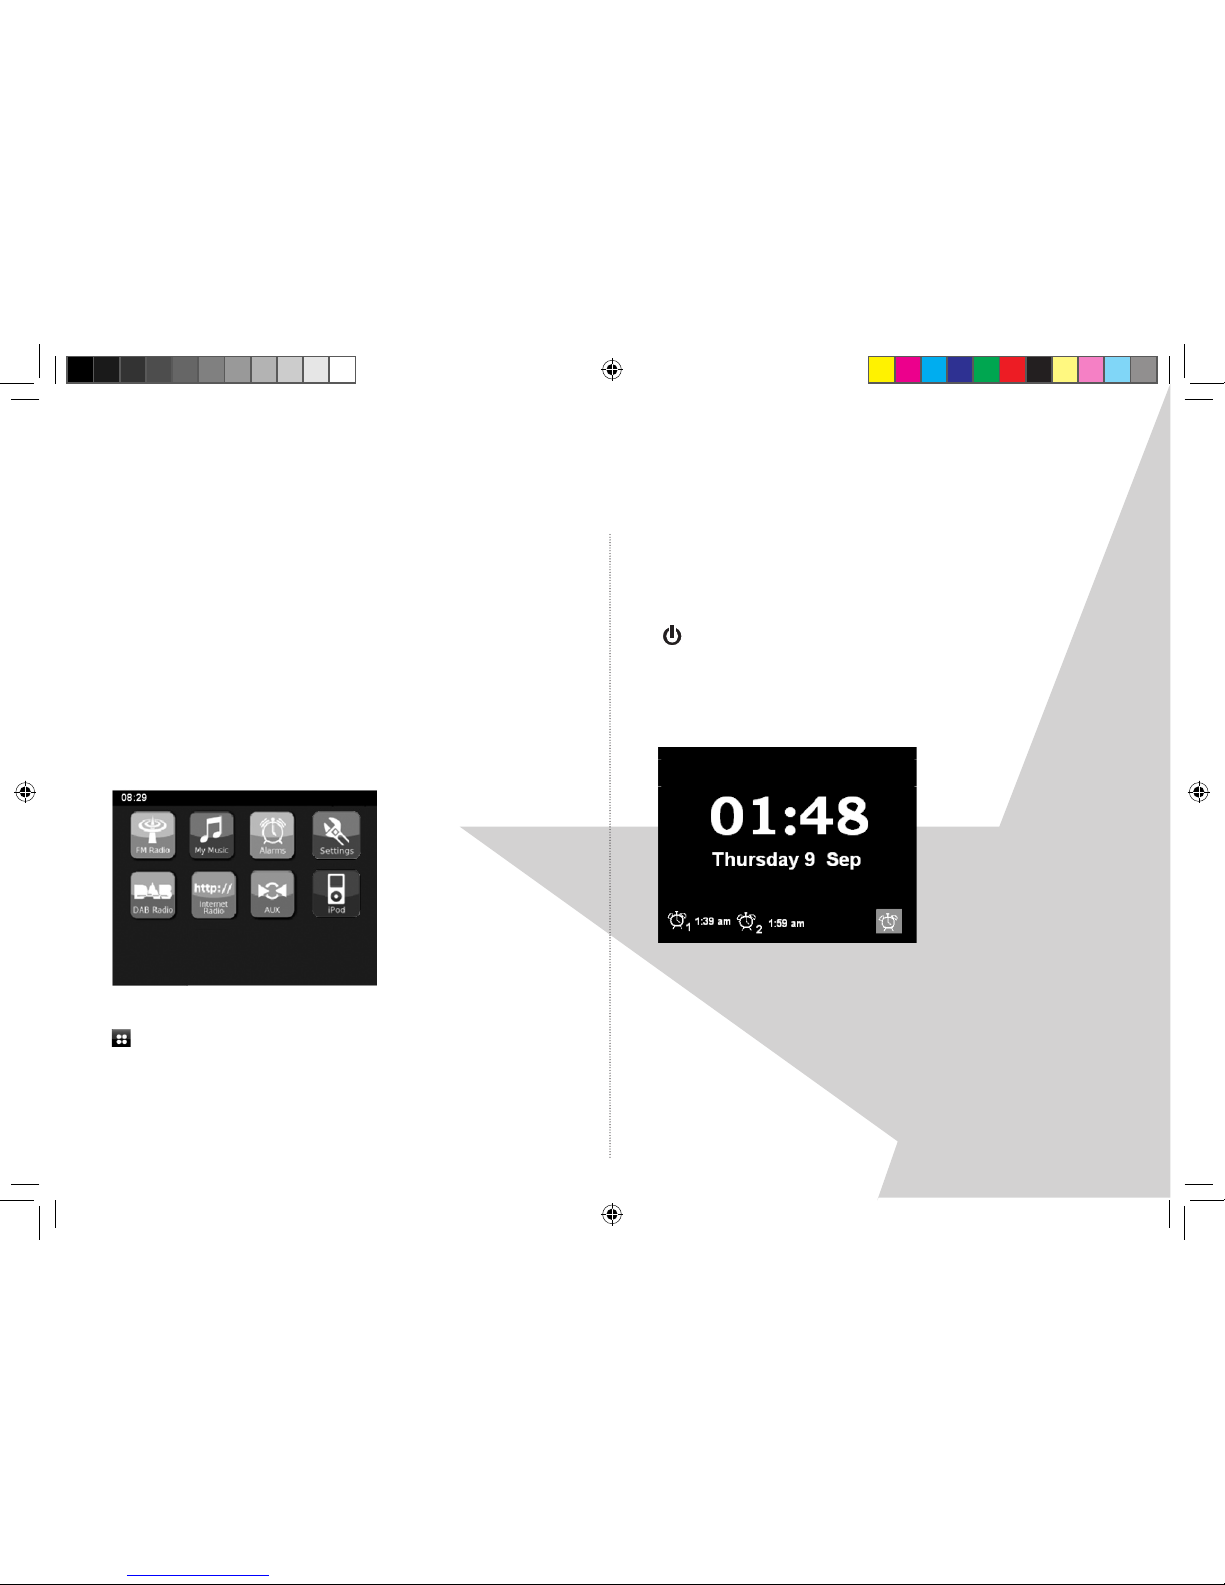
Main menu screen
There are 8 touch icons on the BEAM Extreme main menu
screen and using this screen is the quickest way to navigate
around the main product functions of:
DAB Radio iPod
FM Radio Aux
Internet Radio Alarm
My Music Settings
If the menu screen is not currently displayed, just touch the
icon in the bottom left of the screen to go to the main
menu screen.
Standby screen
When you are listening to your BEAM product and then
press the ‘Standby’ button on the top of the BEAM or the
button on the remote control the standby screen will be
displayed. The standby screen displays the current time and
date as well as the snooze time counter if set and any active
alarms.
BEAM.indd 6 19/9/11 12:44:46
7
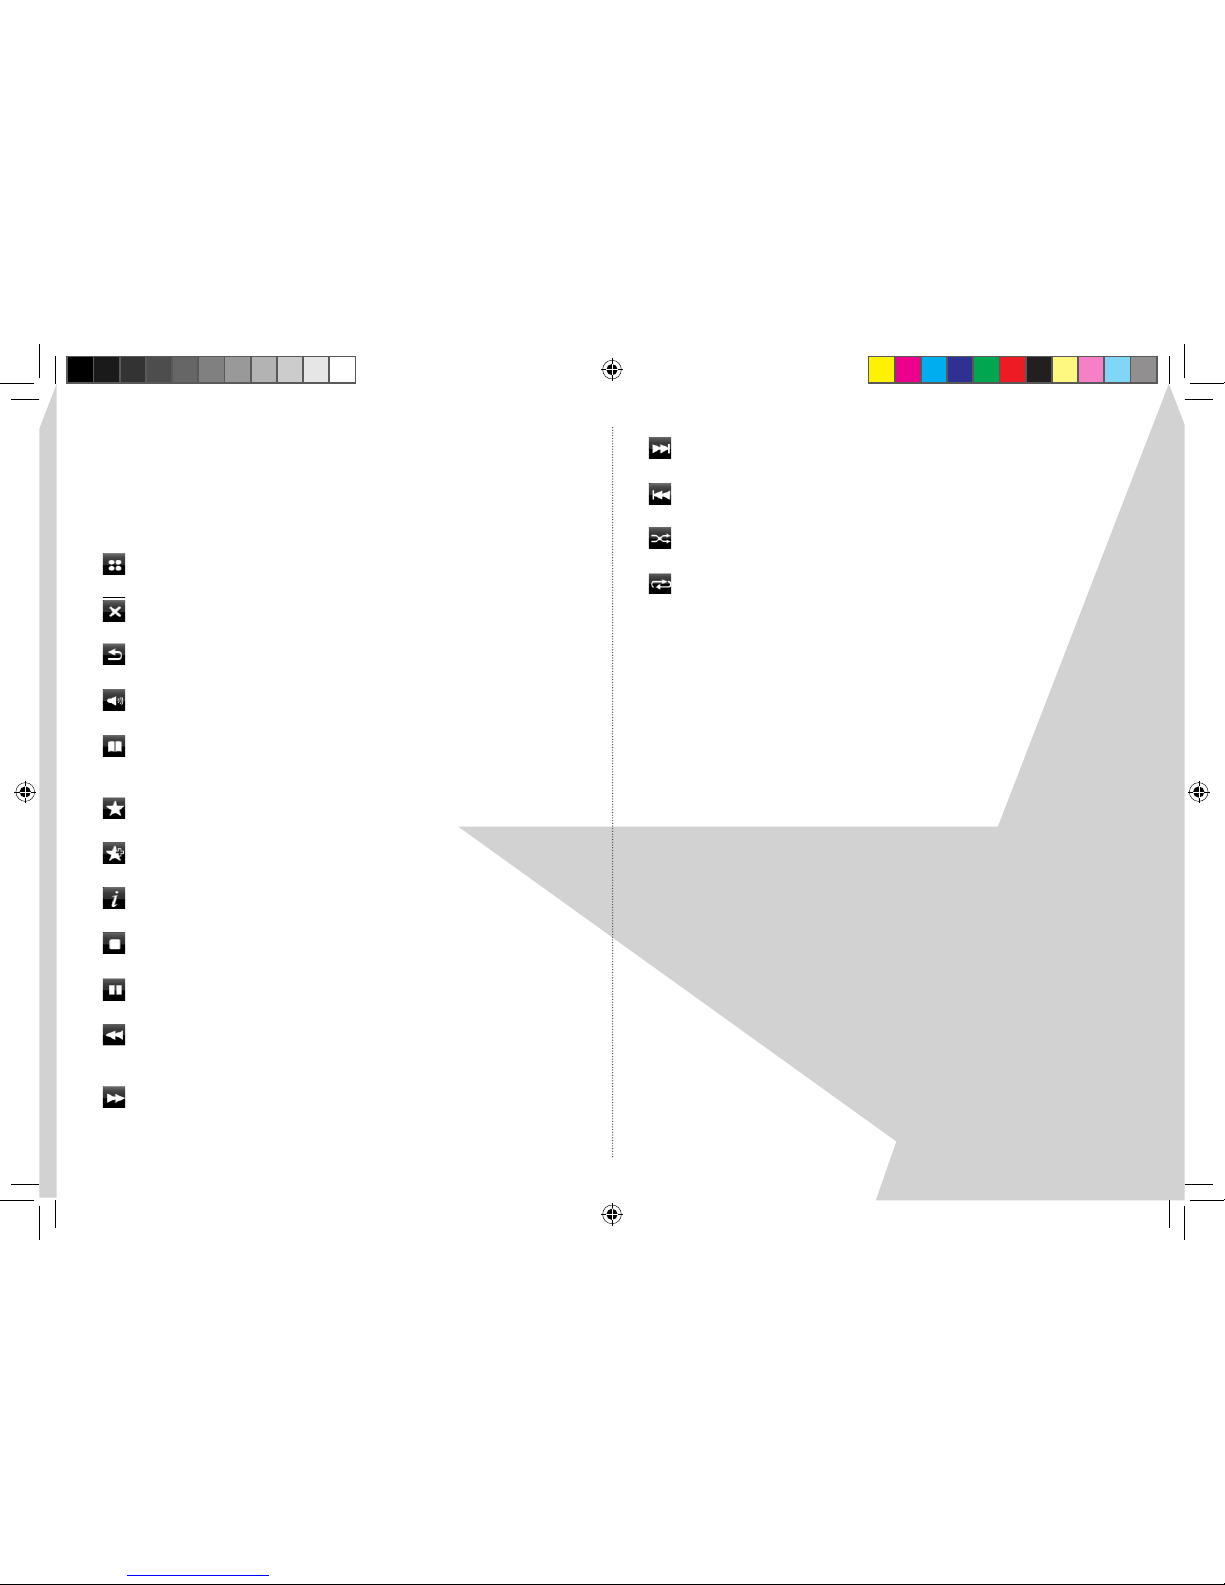
Touch icons on the display
When using your BEAM you will see icons in the bottom part
of the display. Touch each icon for access to the following
functions as appropriate.
Main menu
Close
Return to previous screen/go back
Displays the volume bar and +/- controls
In play mode, press to go to the last track or
station list
Displays ‘My favourites’
Adds to favourites
Additional information display
Stop
Play/Pause
Previous track or in FM mode, auto tune fast
downward scan on/o
Next track or in FM mode, auto tune fast
upward scan on/o
Skip track/fast forward
Previous track/rewind
Shue on/o
Repeat on/o
Note: If no icons are displayed in the bottom part of the
display, briey touch the screen to display the available icon
options for the mode you are in.
BEAM.indd 7 19/9/11 12:44:47
8
P R O D U C T S E T U P
Where to put your radio
It is important that you consider carefully in advance where
your BEAM Extreme will be situated and make sure that it is:
* on a at and stable surface
Note: Never place your BEAM on antique or polished
surfaces.
* within 1.8 metres of a power socket
* where you have good wireless network reception or a LAN
network cable connection
* where you can fully extend the telescopic aerial when
listening to DAB or FM stations.
* away from bright sunlight or heat sources, such as a radiator
* not in a humid or very damp place such as a bathroom
Switching on and connecting to your wireless
network.
Step 1: Connect the mains power lead into the socket on the
back of the BEAM on the right hand side and plug the power
adaptor into the mains power wall socket and switch on.
Step 2: ‘Magicbox’ will be displayed followed by ‘Loading...’
The power up sequence for your BEAM product does take
some time so please be patient.
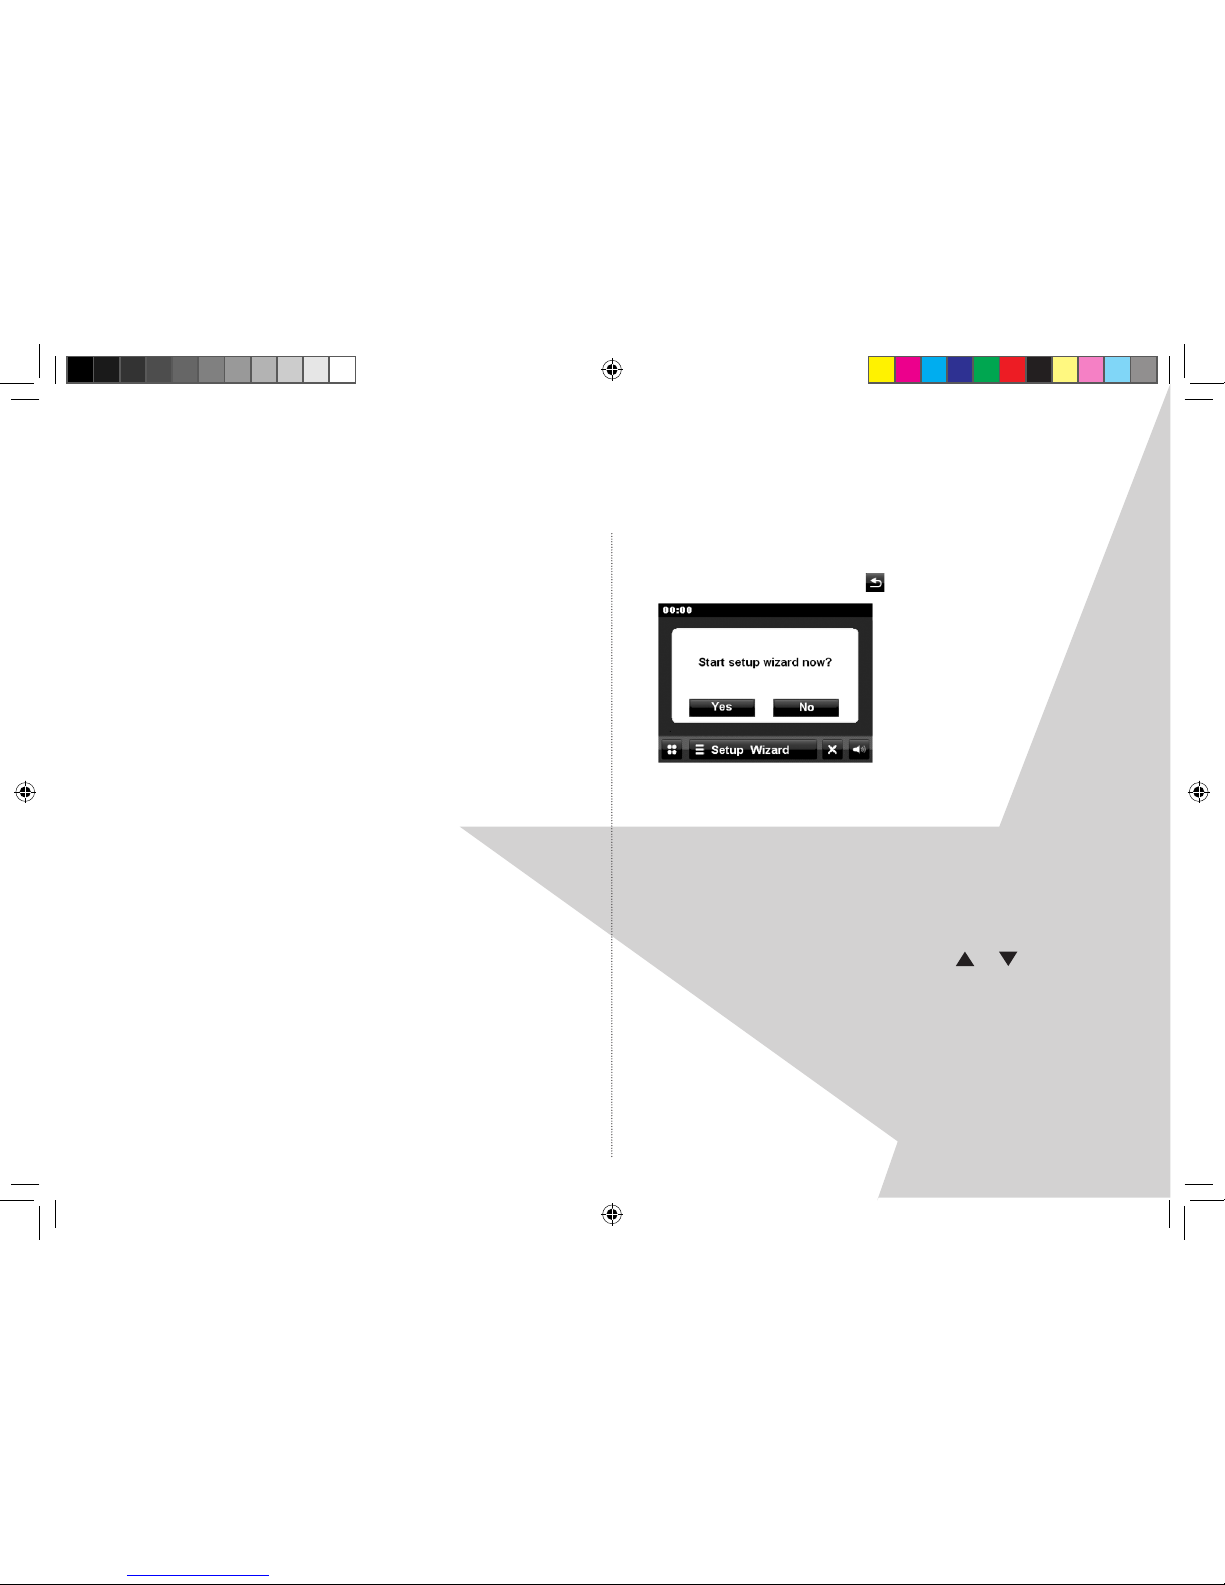
Step 3: The set up wizard screen will be displayed. Touch
‘YES’ on the screen to begin the setup process. If you make a
mistake you can press the icon to go back.
Step 4: Touch the screen to make your selections for
Language, 12 or 24 hour clock, time sync. source and WLAN
region. For the UK ‘Most of Europe’ is normally selected.
Step 5: Your radio will scan for available networks. Your radio
may nd more than one network. Please touch the screen to
select the network that you would like to connect to. Please
note that you may need to touch the or on the screen
to browse all the networks that have been found.
If your network is not congured to request a password
(WEP/WPA), the radio will connect to the network and the
following screen will be displayed:
Note: You should only connect to wireless access points/
networks that you own or have agreement to use.
BEAM.indd 8 19/9/11 12:44:47
9
9
Step 6: If your network does have security enabled the radio
will prompt you to enter your WPS connection type. You can
select from:
PIN: Touch this option to display a PIN code to be entered
into your wireless access point or router.
Push button: Touch this option if your wireless access point
or router has a push button function to add new devices to
your network.
No WPS: Touch this option to enter the relevant Wired
Equivalent Privacy (WEP) or Wi-Fi Protected Access (WPA)
code or pass phrase. WEP/WPA pass codes are case sensitive.
Note: The security details must be the same as those saved in
the wireless access point or router, which would have been
set up by the person who installed your wireless network.
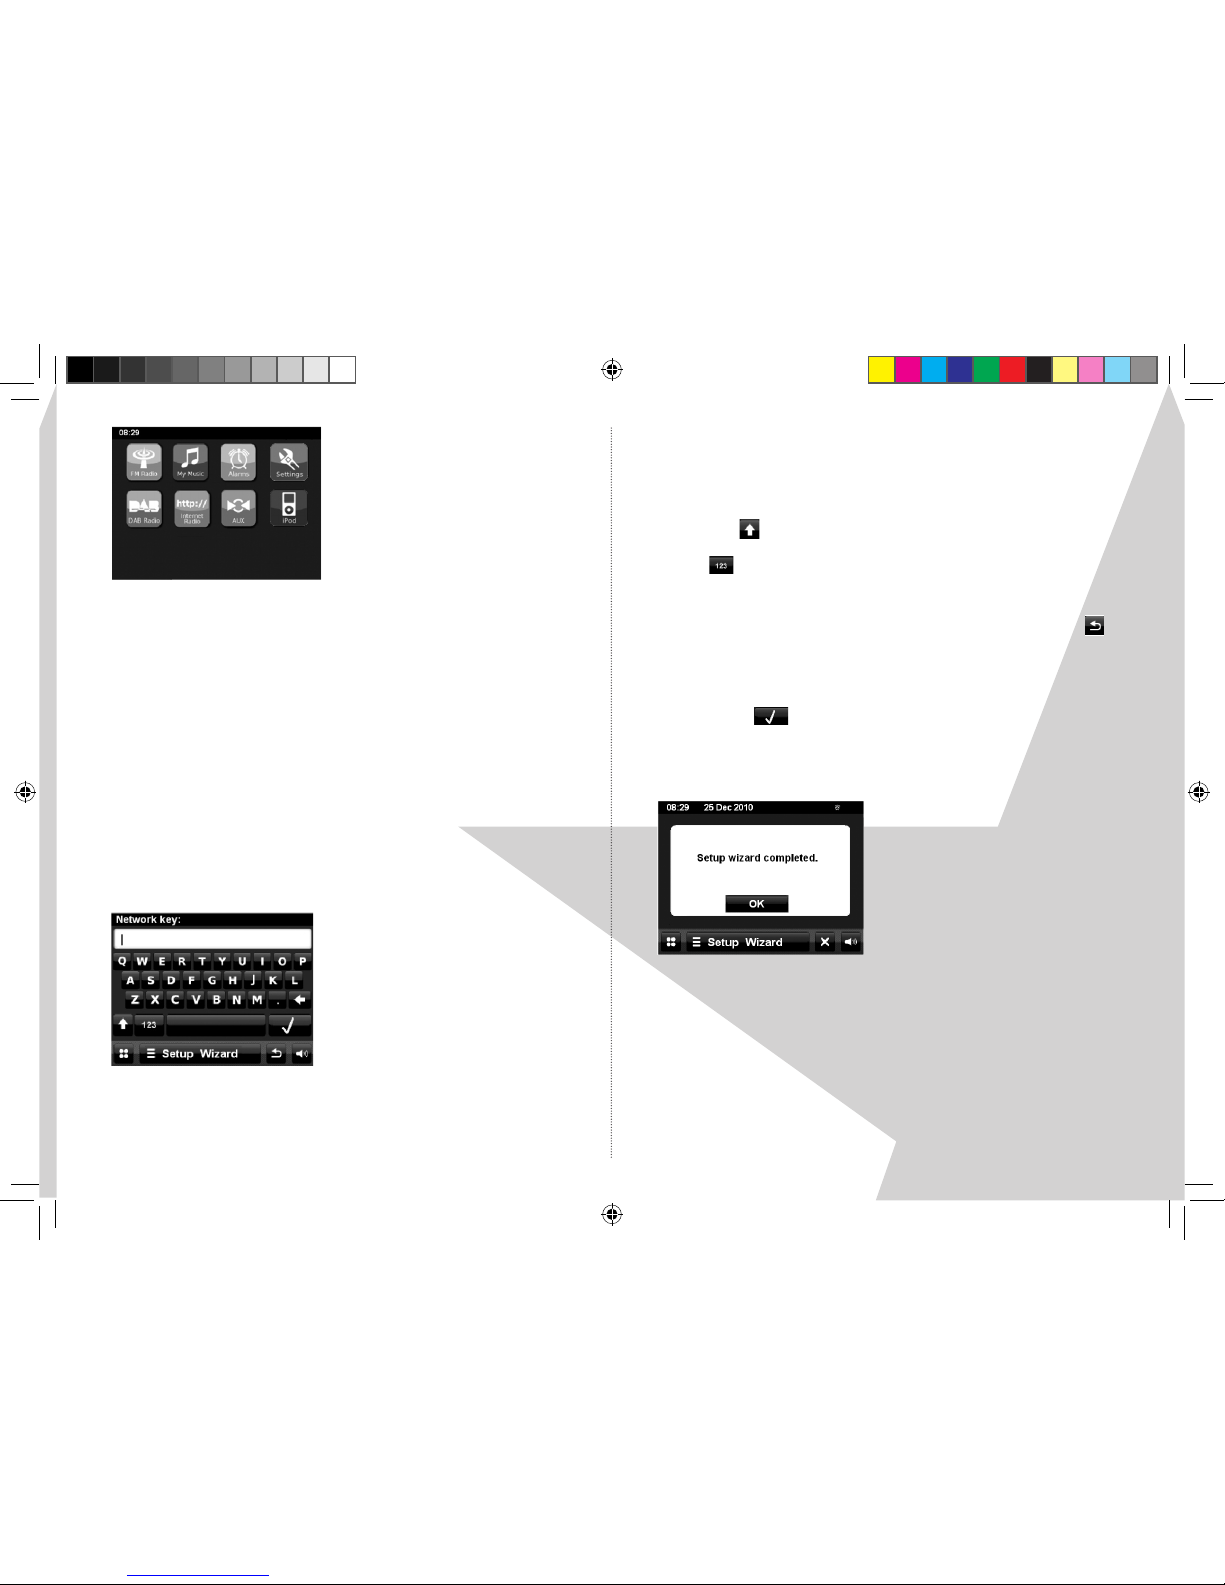
Key entry
1. To enter a code or pass phrase, touch each letter on the
screen.
Touch the to display CAPITAL letters.
Touch to display digits. Touch this key twice more to go
back to displaying letters.
If you select a character or digit in error, just select the to
delete each one.
2. When you have selected the nal letter or digit of your pass
code, touch to conrm.
3. Your radio will now connect to your selected network and
after a short delay the following screen will be displayed:
4. Touch ‘OK’ to exit this screen and go to the Main menu.
BEAM.indd 9 19/9/11 12:44:48
U S I N G TH E I N T E R N E T R A D I O
Switch on
Press the ‘Standby’ button on the top of the BEAM or the
button on the remote control and the display will switch on
and the product will return to the mode it was last used in
(DAB/FM/Internet/My Music/iPod). If you were listening to
a radio station when you switched the radio o, then this
station will automatically be selected and begin to play.
If this is the rst time you have switched your BEAM product
on after using the network wizard, then the Main menu
screen will be displayed.
Switch o
Press the ‘Standby’ button on the top of the BEAM or the
button on the remote control. The product will go
into standby mode and the current time and date will be
displayed, if set. (See page 22).
Changing modes
Your BEAM product has 6 modes available, these are Internet/
My Music/DAB/FM/iPod and Aux in.
1. Touch the icon on the BEAM screen and then touch the
mode that you would like to go to or press the ‘Mode’ button
on the remote control and use the or buttons followed
by ‘Select’, each time you wish to change the mode.
Adjusting the volume
1. Use the ‘+’ and ‘-’ buttons on the top of the BEAM or on the
remote control to increase or decrease the volume.
Selecting internet radio mode
Touch ‘http://’ on the main menu screen or select ‘http://’
using the mode button and the or buttons followed
by ‘Select’ on the remote control. The internet radio option
screen will now be displayed.
Choosing an internet radio station
In Internet radio mode:
1. There are several dierent ways to select an internet radio
station. You can touch any of the options on the internet
radio screen or use the or buttons on the remote
control, followed by ‘Select’ to choose from:
10
BEAM.indd 10 19/9/11 12:44:49

My favourites - Touch the icon when a radio station you
wish to save to ‘My favourites’ is playing. You can also add to
‘My favourites’ via the frontier silicon website. Please refer to
‘My Added Stations’ below for how to register.
Local United Kingdom - select from radio stations only
available in the UK.
BBC - select from a list of BBC radio stations
Stations - select by location, genre, popular stations, new
stations or search for a station
Podcasts - Some radio stations enable you to listen to
programmes or a compilation of programmes that have
already been broadcast. These are known as ‘On demand’
services or ‘Podcasts’. You can select by location, genre or use
the search feature within the podcasts menu.
My Added Stations - you can add new stations to listen to
via the frontier silicon website http://www.wiradio-frontier.
com, which will then appear under this option.
Before you can add stations to the ‘My favourites’ and ‘My
added stations’ options you will need to register on the
frontier silicon website (http://www.wiradio-frontier.com)
and enter the Access code from your radio, which can be
found under ‘Help’. Touch ‘Help’ on the internet radio screen,
followed by ‘Get access code’. The code will be displayed.
Help - If you need help with your radio you can browse
through the Frequently Asked Questions (FAQs), which can
be found in internet radio mode, under ‘Help’.
Alternatively you can call the Helpline.
The helpdesk is open from 8.30am to 5.00pm, Monday to
Friday (excluding Bank Holidays) and can be contacted on:
0845 833 1673 (local call rate).
2. Continue to touch the screen or use the or buttons
followed by ‘Select’ on the remote control to nd the station
that you would like to listen to.
3. Once you have made your selection the BEAM will then
connect to the radio station. The name of the station will be
displayed as well as the status eg: ‘Connecting. . .’, ‘Buering . .’
then the radio begins to play your selected station.
Note: Not all radio stations broadcast 24 hours a day and
some stations are not always online.
Internet radio menu
Touch at the bottom of the screen in the
middle, to list the internet radio options and to select an
alternative station from the station list.
11
BEAM.indd 11 19/9/11 12:44:49

12
Additional information
Whilst an internet radio station is playing you can touch
the icon to display further information such as the
Description, Metadata, Genre, Bit rate, Codec and Sampling
rate for that particular radio station or programme.
Storing a radio station preset (My Favourites)
The BEAM can store up to 30 radio stations (10 Internet, 10
DAB and 10 FM) in its preset or ‘Favourites’ memories for
instant access to your favourite stations.
On your BEAM:
1. Tune to the station that you wish to preset.
2. Press the icon on the display. ‘Favourite added’ will be
displayed.
Note: If the icon is not displayed, briey touch the display
and the options available to you will be displayed at the
bottom of the screen.
Tune to a radio station preset (Favourite)
On your BEAM:
1. Touch the relevant icon on the Main menu screen to go to
‘Internet’, ‘DAB or ‘FM’ mode as appropriate.
2. Touch the icon at the bottom of the display to open the
preset list. Touch the name of the station that you would
like to listen to. You may need to touch the or on the
right hand side of the screen to browse through all the stored
preset stations.
3. Once you have touched the name of the station that you
would like to listen to, your radio will tune to your selected
station.
BEAM.indd 12 19/9/11 12:44:50

13
M Y M U S I C M O D E
In order to play the audio les you have stored on your
computer via the Music player you must rst ensure the
following:
* that the audio les on your computer are not ‘protected’
* that the audio les are stored in the correct location on your
computer
* that your computer has the correct type of audio les and
playlists stored on a networked computer.
* your computer has le sharing turned on
* the audio les can be shared on the network
* you know the name of your computer
Setting up your Windows computer to allow
access to your audio les
Shared media, Universal Plug and Play (UPnP) - If you are
running Microsoft Windows XP or Windows Vista then you
can use Windows Media Player 11 and above. This option
does not require any settings to be changed on your BEAM
but your computer will need to be congured to allow the
BEAM access to the media les. You will only need to do this
once.
1. The computer must be connected to the network that will be
used to share the media with the BEAM.
2. The BEAM must be switched on and connected to the same
network as the computer (see page 8).
3. On the computer, once Windows Media Player 11 or above
has been installed it will create a library from all the media
les available to it on your computer.
4. Click on the ‘Library’ tab within Windows Media Player 11 and
select ‘Media sharing’.
5. Your BEAM will be listed within Windows Media Player as
an ‘Unknown device’. You will be asked to conrm which
devices to share your media to. Click on ‘Unknown device’
and then click ‘Allow’, followed by ‘OK’.
6. Your computer is now ready to stream music to the BEAM.
Select My Music mode
1. Touch ‘My Music’ on the main menu screen or select ‘My
Music’ using the mode button and the or buttons
followed by ‘Select’ on the remote control. The My Music
options of ‘Shared Media’ and ‘My Playlist’ will now be
displayed.
BEAM.indd 13 19/9/11 12:44:51

14
2. Touch ‘Shared Media’ or ‘My Playlist’ to access the music you
would like to listen to. Alternatively you can use the or
buttons to highlight ‘Shared media’ or ‘My Playlist’ on your
remote control and press ‘Select’.
Continue to either touch the screen or use the remote control
to make your selection options.
Note: If you have more than one computer sharing music on
your network, each computer will be listed. Just touch the
screen to select the computer where the music is stored that
you wish to listen to.
3. You can touch the following icons on the display to control
the music player:
Lists the last track / album tracks
Displays additional information
Shue toggle
Repeat toggle
Previous track
Next track
Play / Pause
Stop
My Music menu
Touch at the bottom of the screen in the
middle, to list the My Music options and to add to or clear ‘My
Playlist’.
BEAM.indd 14 19/9/11 12:44:51

15
DA B M O D E
Telescopic aerial
Please make sure that the aerial on the back of the BEAM is
fully extended and adjusted before you switch to DAB mode
for the rst time (a vertical position is recommended). This
will ensure that the maximum signal strength is available
when the BEAM automatically begins to scan for DAB radio
stations. Extending the aerial also ensures the best possible
sound quality.
Select DAB mode
1. Touch ‘DAB’ on the main menu screen or select ‘DAB’ using
the mode button and the or buttons followed by
‘Select’ on the remote control.
The rst time you select DAB mode your BEAM will
automatically begin to scan for DAB radio stations.
‘Scanning...’ will be displayed and a progress bar will show
the progress of the scan and the number of stations found
during the scan will also be displayed. When the scan is
complete your radio will select the rst available station and
begin to play.
Changing DAB stations
1. Touch the or on the right hand side of the screen
to scroll through the available stations and touch the
station name you would like to listen when it is displayed.
Alternatively you can use the or buttons on your
remote control and press ‘Select’. Your radio will tune to that
station and begin to play.
Scanning for DAB stations
With DAB radio, additional stations and services regularly
become available so it’s a good idea to carry out a manual
scan every now and then to make sure that you have the
most up to date station listing stored within the memory of
your BEAM. If you have moved your radio to another location,
eg: if you go on holiday, then it’s also a good idea to
carry out a manual scan.
1. If you are not already in DAB mode, go to DAB mode.
2. Touch at the bottom of the screen in the middle,
to display the DAB menu options.
BEAM.indd 15 19/9/11 12:44:52

16
3. Touch ‘Scan’. The display will change to ‘Scanning...’. A progress
bar will show the progress of the scan and the number of
stations found during the scan will also be displayed.
DAB menu options
Touch ‘DAB’ at the bottom of the screen in the middle to
access the following further DAB menu options:
Scan - See previous page, scanning for DAB stations.
Edit presets - see saving presets (favourites) on page 12.
DRC (Dynamic range control) - The dynamic range for each
radio programme is set by the broadcaster for each radio
station and may be dierent for the types of programme
broadcast, such as pop or classical music or a chat show. The
dynamic range control signal is transmitted in parallel with
the audio signal for each programme and with your radio
you can use this control signal to expand or compress the
dynamic range (the dierence between the loudest and
quietest sounds) of the reproduced audio signal. Changing
the dynamic range can aect the ‘loudness’ and/or ‘quality of
sound’ of the programme that you hear so that it will be more
suited to your listening conditions and your own personal
listening requirements. e.g. in a noisy environment, where
quiet sounds might be swamped, setting the compression
to maximum will ‘boost’ the quiet sounds, whilst keeping the
loudest sounds at their original level.
There are 3 levels of compression:
DRC O - no compression.
DRC Low - medium compression.
DRC High - maximum compression.
Manual tune - Using the manual tune feature, you can select
a specic digital radio channel frequency and then manually
adjust the aerial, or the location of the radio, to get the
strongest possible signal for that channel in your location.
A red line will appear within a yellow rectangle to indicate
the minimum signal strength for acceptable listening. The
solid bar within the yellow rectangle indicates the actual
signal strength that you are receiving. The stronger the
signal, the further to the right the solid bar will be.
Note: If only a red line is displayed within the yellow
rectangle, you are not receiving any signal at all for that
particular digital radio channel in your area.
Adjust the position of the aerial on the radio, to obtain the
maximum signal strength.
Prune invalid - You can remove all stations from the station
list that are ‘invalid’ such as those that are not currently
broadcasting or ‘inactive’.
BEAM.indd 16 19/9/11 12:44:53

17
Additional DAB information
When listening to a DAB station you can touch the icon to
display additional information such as the Station ensemble,
Frequency, Error rate, Signal strength, Codec, Bit rate and
Sampling rate.
BEAM.indd 17 19/9/11 12:44:53

18
FM M O D E
Telescopic aerial
Please make sure that the aerial on the back of the BEAM is
fully extended and adjusted before you attempt to tune to
an FM station (a vertical position is recommended). This will
ensure that the maximum signal strength is available when
the BEAM begins to scan. Extending the aerial also ensures
the best possible sound quality.
Select FM mode
1. Touch ‘FM’ on the main menu screen or select ‘FM’ using the
mode button and the or buttons followed by ‘Select’
on the remote control.
When your BEAM is in FM mode it can receive Radio Data
System or ‘RDS’ information if this is being transmitted by the
broadcaster. RDS information will often include the station
name, detail about the programme and the current time.
Tune to an FM station
1. Touch on the display and then touch the or to
scan up or down the frequency band. The BEAM will stop
each time a station is received.
2. To scan manually for stations, just touch again to
disable the auto scan function and then touch the or to
scan up or down the frequency band.
FM menu options
Touch ‘FM’ at the bottom of the screen in the middle to
access the following further FM menu options:
My presets and edit presets - see saving presets (favourites)
on page 12.
Stop on stations - select to stop on ‘All’ and the scan will stop
for every station it receives, even if the signal strength is poor
or set to stop on those with a ‘Strong’ signal only.
Force mono - by default all stations are played in stereo but
for weak stations this can result in a poor signal to noise ratio
or hiss. To improve the sound quality of these stations, set
the Force mono option to ‘Yes’.
BEAM.indd 18 19/9/11 12:44:54

19
I P O D M O D E
Select iPod mode
1. Touch ‘iPod’ on the main menu screen or select ‘iPod’ using
the mode button and the or buttons followed by
‘Select’ on the remote control.
If your iPod or iPhone is already connected the last track you
were listening to will begin to play.
Dock your iPod/iPhone
Line up the connector on the bottom of your iPod or iPhone
with the dock connector on the top of the BEAM and push
down to connect.
The dock will begin to charge your iPod / iPhone, if necessary.
Charging will stop automatically when your iPod / iPhone is
fully charged (check your iPod /iPhone display).
Playing your iPod/iPhone
You can use the controls on your iPod as normal when it is
docked with your BEAM but you can also use the following
touch controls on the screen or on the remote control.
Previous track
Next track
Play / Pause
Stop (Touch screen only)
Video out
To play videos on your BEAM product whilst your iPod / iPhone
is docked, connect a video cable (not supplied) into the video
out socket at the back of the BEAM on the left hand side.
Adjusting the volume
Adjust the volume by touching the icon on the display or
by pressing the Volume + or - buttons on the remote control.
Do not adjust the volume on your iPod / iPhone.
BEAM.indd 19 19/9/11 12:44:55

20
AU X I N M O D E
Select Aux mode
1. Touch ‘Aux’ on the main menu screen or select ‘Aux’ using the
mode button and the or buttons followed by ‘Select’
on the remote control.
Aux mode
Using an Aux in connection lead (not supplied), Aux in mode
allows for a quick and easy connection to an external sound
source. Your BEAM is then transformed into a high quality
digital audio speaker system.
1. Connect one end of an Aux in audio lead to the headphone
(or auxiliary out) socket of your secondary device, connect
the other end to the Aux in 3.5 mm stereo socket on the back
of your BEAM.
2. To gain optimal volume levels, adjust the output volume
level on both the secondary device and on your BEAM.
BEAM.indd 20 19/9/11 12:44:55

21
A L A R M
Select alarm
1. Touch ‘Alarm’ on the main menu screen or select ‘Alarm’ using
the mode button and the or buttons followed by
‘Select’ on the remote control.
Setting an alarm
Note: Ensure that you have set the correct time and date
within Settings -> Time settings, before you set an Alarm.
There are 2 alarm settings available.
1. Touch Alarm 1 or Alarm 2.
2. Touch the screen to set your preferences for each of the
available options:
Enable - Daily/Once/Weekend/Weekday/OFF
Time - Set the time for your alarm
Mode - Wake to DAB/FM/Internet/iPod/Buzzer
My presets - Wake to one of your preset stations
Volume - Set the volume level for your alarm
3. Touch after you have completed your alarm settings.
The icon will be displayed to conrm that an alarm has
been set.
Stop the alarm
1. When the alarm sounds the following screen will be
displayed. Touch ‘Cancel’ or ‘Snooze’
Note: The default snooze time is 5 minutes but you can
change this within Settings -> Product settings -> Alarm
snooze. Options are available from 1 - 30 minutes.
BEAM.indd 21 19/9/11 12:44:56

22
S E T T I N G S
Select settings
1. Touch ‘Settings’ on the main menu screen or select ‘Settings’
using the mode button and the or buttons followed by
‘Select’ on the remote control.
Settings menu
Within Settings on your BEAM product you can access/
change the following:
Time setting - Touch this option to manually set the time and
date, change the time zone, turn daylight saving on or o and
set the time source (Internet or DAB) for your BEAM product.
Set the Alarms - there are two available, these can also be
accessed under the ‘Alarm’ option from the main menu.
Equalizer - Custom, Normal, Classic, Jazz, Pop, Rock and
Speech are available.
Network settings - the settings you entered using the setup
wizard are listed here.
Product settings - Language, Alarm snooze time, Idle
timeout, Sleep setting, Standby display, Software update,
Display backlight, Software version and Factory reset options
are available.
Note: Do not disconnect the mains power or interrupt a
software update should you select this option.
Setup wizard - You can select to run the setup wizard to
connect to your LAN or Wi-Fi network.
BEAM.indd 22 19/9/11 12:44:57

WA L L M O U N T
How to wall mount your BEAM product
Your BEAM product can be wall mounted and you will nd a wall mount bracket inside the packaging with your product. To wall
mount your product, follow these steps.
Step 1: Push down the 2 latches underneath and at the back of the product to unlock and remove the stand.
Step 2: Use 2 screws and any rawl plugs or hollow wall xings required, as appropriate, to x the wall mount bracket supplied to
your wall. Please make sure that you x it securely and avoid any electrical or other cables or pipes which may be inside your wall.
Step 3: Carefully slide your BEAM product onto the wall mount bracket, making sure that the protruding hooks on the wall mount
bracket locate into the 2 keyholes on the back of the BEAM to hold it securely.
23
Step 1 Step 2
Step 3
Hooks
BEAM.indd 23 19/9/11 12:44:57

24
T E C H N I C A L I N F O R M AT I O N
Technical specication
DAB frequency range:
Band III, 174 MHz - 240 MHz
FM frequency range:
87.5 MHz to 108 MHz
Presets (Favourites):
10 Internet / 10 DAB / 10 FM
Power requirement:
100-240V/50-60Hz
Frequency response:
90 Hz to 20 kHz (-6dB)
Sensitivity:
83dB 1W, 1m (per channel)
Max SPL:
>90dB SPL at 1m
This product has been designed specically to work with
iPod / iPhone and has been certied by the developer to
meet Apple performance standards.
BEAM.indd 24 19/9/11 12:44:57

25
S I M P L E S O LU T I O N S
If you are experiencing problems with your BEAM, there
are some quick and easy checks that you can do, which
may help to solve the problem.
Unable to connect to the wireless network
- Some access points may be set up so that only registered
MAC addresses can connect to them. The person who set
up your network will be able to advise if you need to enter
the MAC address of your radio to the list of allowed devices
in your access point. See page 4 for how to nd the MAC
address of your radio. You will need to refer to your access
point guide to nd out how to add the radio’s MAC address
into the list of allowed devices.
- If you have an encrypted network, check that you have
entered the correct key or passphrase into the radio.
Remember that you must enter the key or passphrase exactly
as it appears in your access point.
You can connect to the network but cannot play some
internet radio stations
- The station may not be broadcasting at the time of day that
you have tried to listen to it. (Depending on the particular
radio station if may be in a dierent time zone)
- The station may have too many people trying to connect to
its servers and their server capacity may not be enough to
enable everyone to connect.
- The station is not broadcasting any more
- The internet connection between the server (often located
in another country) and you is slow. Some Internet Service
Providers may fail to provide service is some geographical
areas. You could use a computer to check if the internet radio
station can be received.
- If the radio station connection is intermittent or
keeps stopping. Check your broadband connection and
speed. If you are experiencing an intermittent service or
high error rate on your broadband connection your radio
will not be able to continuously connect and play in internet
radio mode. If you are experiencing problems with your
broadband connection, you will need to contact your
broadband provider
Radio reception is poor
- Please check that the aerial is FULLY extended for the
maximum signal strength and improved reception.
BEAM.indd 25 19/9/11 12:44:57

26
- Try moving your BEAM to an alternative location to see if the
reception improves. Please remember to scan for DAB
stations again once you have moved your radio. See page 15.
- Check that you do not have other electrical equipment too
close to your radio, causing interference.
- Visit www.digitalradionow.com for information about DAB
reception in your area.
No sound
- Adjust the volume using the ‘+’ and ‘-’ buttons on the top of
the BEAM or on the remote control.
- Check that the mains power lead is connected at the back of
the radio and the mains power wall socket is switched on.
- You may need to re-scan if the station you last listened to is
no longer available. See page 15.
The touch screen does not respond
- Check that the power lead is plugged into the back of the
radio and that the mains adaptor is plugged in and switched
on. Press and release the ‘Standby’ button on the top of the
BEAM or the button on the remote control.
- Turn o the BEAM and unplug the mains power. Leave for one
minute and then reconnect your radio.
- Try a reset to factory defaults. See page 22.
iPod/iPhone does not play
- Check that the power lead is plugged into the back of the
radio and that the mains adaptor is plugged in and switched
on. Press and release the ‘Standby’ button on the top of the
BEAM or press the button on the remote control.
- Check that you are in iPod mode.
- Check that the iPod is docked with the radio. Line up the
connector on the bottom of your iPod/iPhone with the iPod
dock on the top of the radio and push down to connect.
If you are experiencing any diculty after making
the above checks please call the helpdesk for
further assistance.
Helpdesk
The helpdesk is open from 8.30am to 5.00pm, Monday to
Friday (excluding Bank Holidays) and can be contacted on
0845 833 1673 (local rate call charge applies).
BEAM.indd 26 19/9/11 12:44:58

27
G E N E R A L I N F O R M AT I O N
Care and Maintenance
Your BEAM is of superior design and manufacture and should
be treated with care. The suggestions below will help you to
enjoy this product and the benets it brings for many years.
- Keep the product and all its parts out of reach of small
children.
- Keep it dry. Avoid exposure to precipitation, humidity and
liquids which could all aect the product circuitry.
- Do not leave it in high temperatures as electronic devices
and plastic parts may warp in heat.
- Do not leave it in low temperatures as moisture can form
inside the product, which may damage the circuit board.
- Do not store in dusty or dirty areas.
- Do not use harsh chemicals, cleaning solvents or detergents
to clean the product. Wipe with a damp (not wet) soft cloth
to clean.
- Do not attempt to open the product. Unauthorised handling
of the device may damage it and will void your warranty.
- Only use the power supply that came with the product.
Using an unauthorised power supply will invalidate your
guarantee and may irrecoverably damage the BEAM
BEAM.indd 27 19/9/11 12:44:58

28
Product guarantee
This product has a warranty of 12 months and is therefore
guaranteed to be free from defects in materials and
workmanship during that period. If you experience a
problem within that time, simply call the Helpdesk on
0845 833 1673 (local rate call charge applies).
If your problem cannot be solved by our Helpdesk, you will
need to return your product to the place it was purchased.
Remember to take your receipt as proof of purchase as it
must be produced before the warranty can be honoured.
This product must have been used only for the intended
purpose and not been subjected to wilful or accidental
damage.
This warranty does not cover damage caused by excessive
voltage or lightning.
If this product has been tampered with in any way, the
warranty shall be considered null and void.
This guarantee does not aect your statutory rights.
BEAM.indd 28 19/9/11 12:44:58

29
W E E E D I R E C T I V E
WEEE Directive – Directive 2002/96/EC of the European
Parliament and Council of 27th January 2003 on waste
electrical and electronic equipment.
At the end of the product’s lifecycle, you should not throw
this product into the normal household waste but take it to
a collection point for the recycling of electrical and electronic
equipment. The ‘WEEE’ symbol below, on the product, user
manual and packaging indicate this.
Please contact your local authority if you need more
information about the collection points in your area.
For more information telephone Envirowise on 0800 585794
BEAM.indd 29 19/9/11 12:44:59

BEAM.indd 30 19/9/11 12:44:59

BEAM.indd 31 19/9/11 12:44:59

Helpline
0845 833 1673
(local call rate)
Sept 11 Issue 1
32
Magicbox is a trademark of Euro Suisse International Ltd.
BEAM.indd 32 19/9/11 12:44:59
 Loading...