

Made GasTracker Operation Manuals

GAS TRACKER
OPERATION MANUAL
March 2011
MADE V1.00

GU_GAS_TRACKER_V_1_00_US 2/18
Table of contents
Table of contents Page 2
Overview Page 3
The GasTracker™ Page 4
The transmitter Page 5
Procedure for connection of the transmitter Page 6
The receiver Page 8
Procedure for connection of the receiver Page 9
Prelocate mode Page 10
Pin-point mode Page 11
Frequently asked questions Page 16
Technical characteristics of the GasTracker™ Page 17
Warranty Page 18
Copyright Page 18

GU_GAS_TRACKER_V_1_00_US 3/18
Overview
The GasTracker™ is an instrument for tracing and identifying buried plastic gas pipes.
The method used is based on the propagation of a complex acoustic wave. Thanks to the
application-specific sensor and sophisticated signal analysis software, it is able to trace the
position and direction of a buried plastic pipe from the surface, even in noisy urban
environments.
The GasTracker™ is used on pipes operating at low pressure (21 mbar / 3 psi) or at medium
pressure (4 bars / 58 psi). Scientific tests have been validated by GDF at up to 7 bars / 101 psi,
and field tests have been made at a maximum of 11 bars / 160 psi. It can actually even be used in
‘open air’ (atmospheric pressure).
It was developed to provide an easier, more efficient means to locate pipes resulting in a savings
of time and money. Manufactured in France and validated almost one decade ago by the French
group GDF, it is now used on all continents. This unique signal injection method is internationally
patented.
Operating the GasTracker™ typically requires the temporary disconnection of a customer for the
duration of the research.
However, the system can be connected at any convenient point.
The GasTracker™ just needs to access the gas, to vibrate it.
GU_GAS_TRACKER_V_1_00_US 4/18
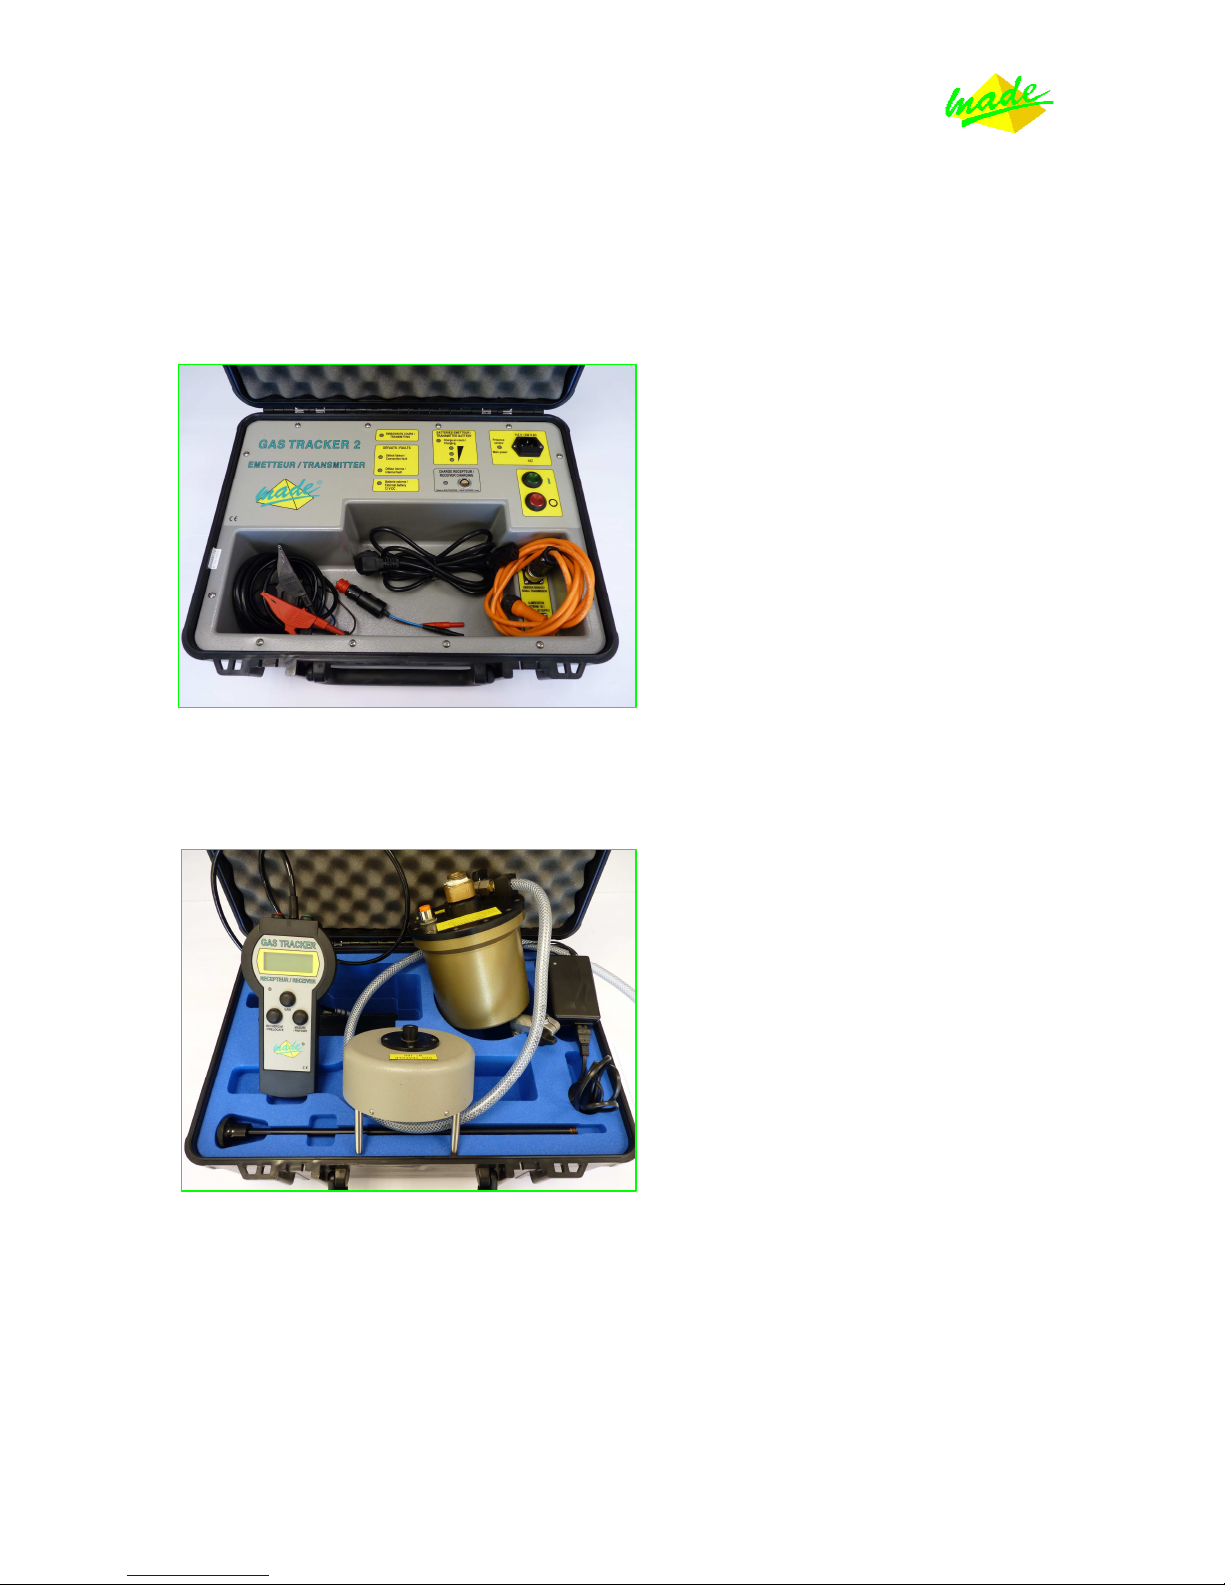
The GasTracker™
It comes with two robust transport cases: one for the transmitter and one for the receiver.
The transmitter case:
• A carrying case containing the controls
and the internal batteries
• An orange cord to connect the transmitter
to the resonator tank
• A cigar-lighter plug
• An electric main cable
The receiver case:
• A hand-held receiver
• A listening device
• A resonator tank
• A rod
• A charger for the hand-held receiver
If some parts are missing, they can be purchased separately. Do not hesitate to contact your local
GasTracker™ dealer.
GU_GAS_TRACKER_V_1_00_US 5/18
The transmitter
Simple to manipulate, the transmitter sends a vibration through the gas.
In order to do this, a direct access to the gas is required, so you need a point of connection to
the network.
We usually recommend disconnecting a customer’s meter to connect the resonator tank here.
But it can actually be connected anywhere on the network, since you have made the good
adaptor.
Inside the resonator tank, an acoustic membrane will vibrate and create a very special acoustic
signature. This acoustic wave will vibrate every close particle of gas, which will in turn, vibrate
the next particles. This is how the signal is propagated into the network.
There is one simple rule: the bigger the diameter of injection, the greater the distance.
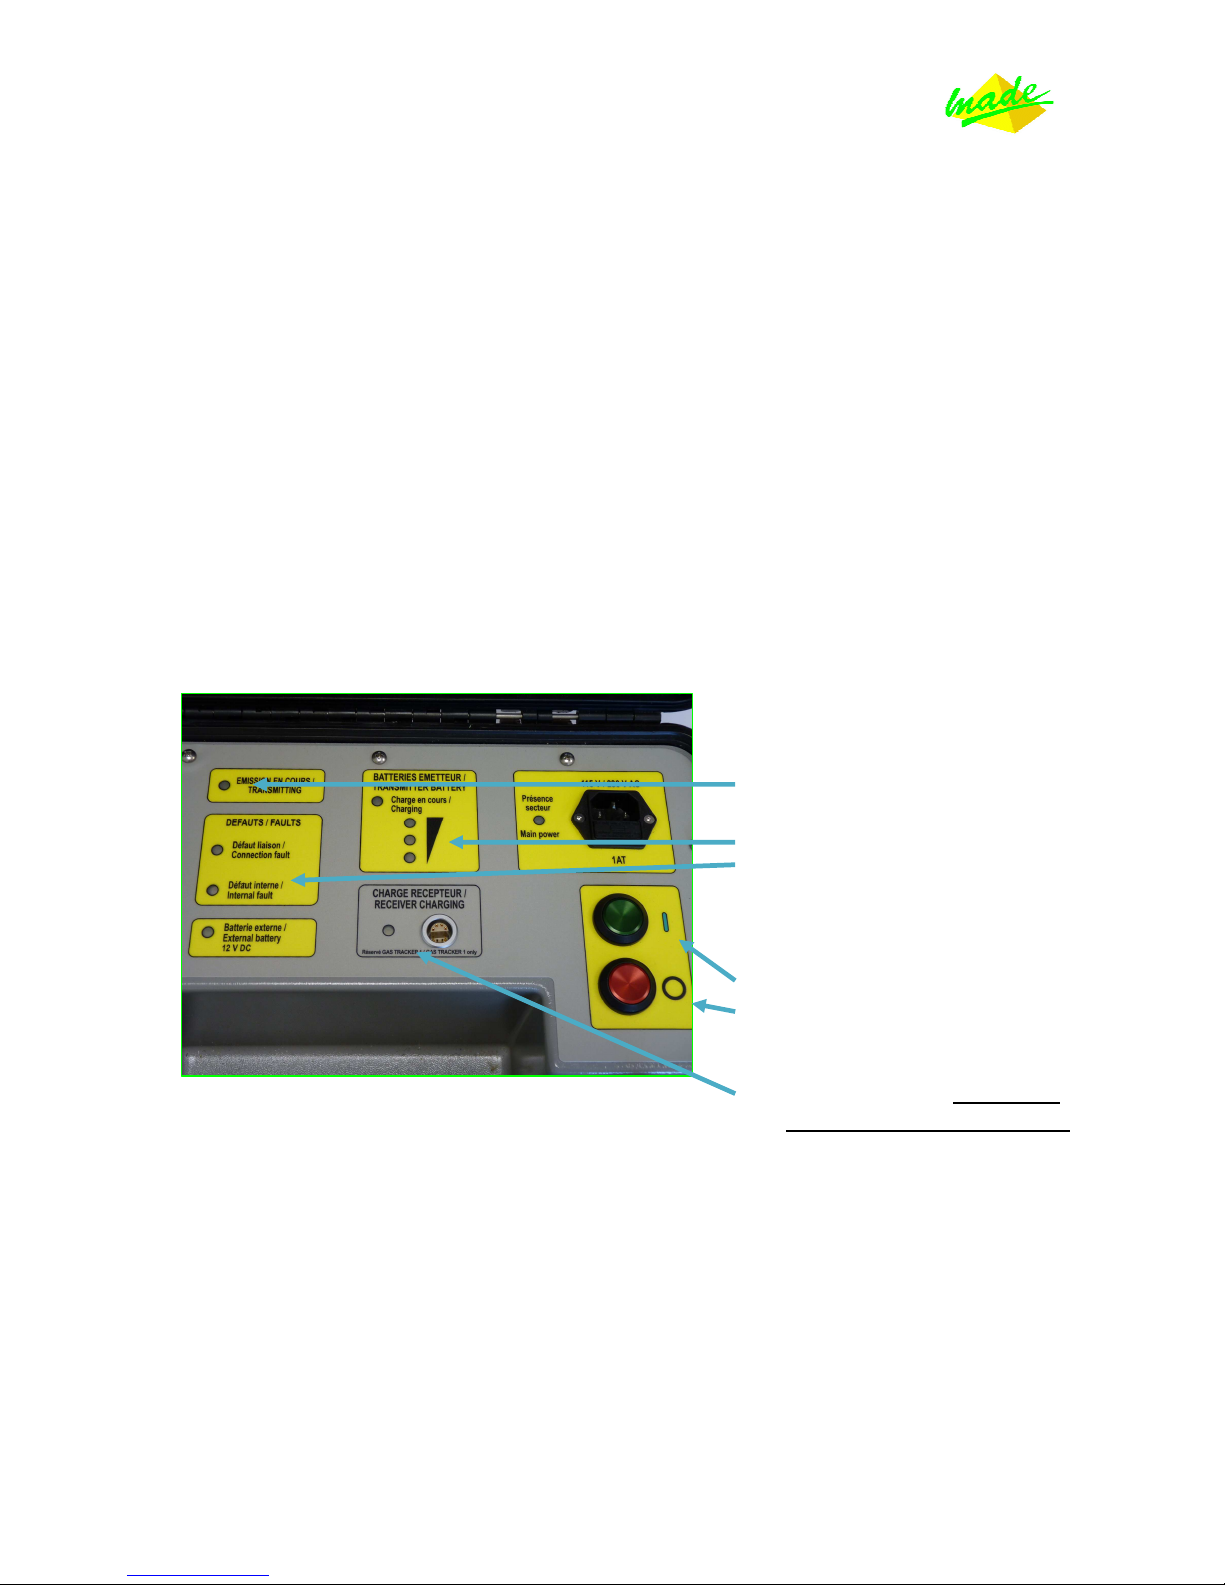
Here is a front view of the transmitter:
• Transmission signal (blinks
when the transmitter is in use)
• Battery level of charge
• Fault indicators
• ON button
• OFF button
• Receiver charger, only for the
old version of the GasTracker™
The GasTracker™ transmitter has two 12Volt (16A/h) internal rechargeable batteries. The
autonomy is about 5 hours on the field (in standard conditions).
In order to completely recharge the batteries, leave the transmitter connected to the electric
main overnight. It will automatically stop once the charge is completed, to avoid damaging the
batteries.
If you intend to store the GasTracker™ for a long period of time, we recommend doing this
with batteries fully charged.
GU_GAS_TRACKER_V_1_00_US 6/18
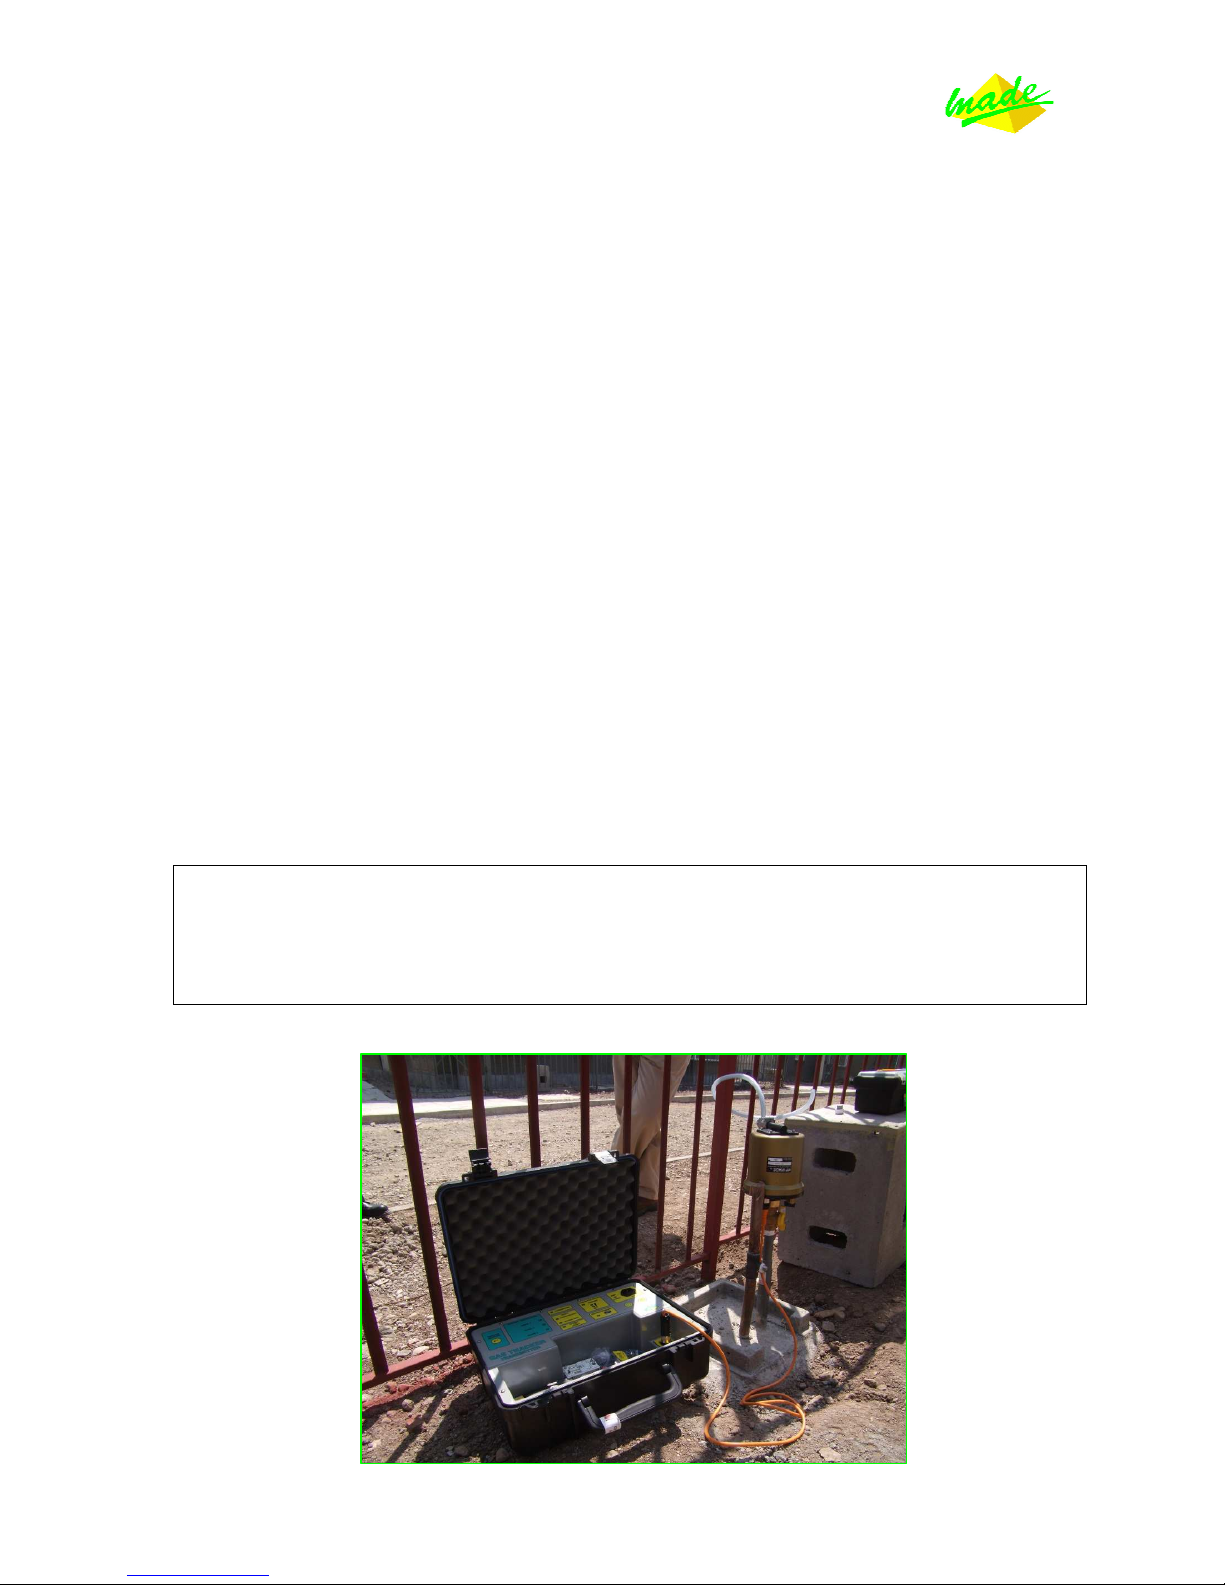
Procedure for connection of the transmitter
1. Connecting the resonator tank.
- Disconnect a customer’s meter with all the safety procedures required for this operation.
(Or find an access point anywhere on the network).
- Affix the resonator tank to the pipe end thanks to the proper adaptor.
- Check to ensure the purge valve is open (on the resonator tank).
- Slowly open the gas valve and check there are no leaks on the pipe.
- Using the purge valve of the resonator tank, remove the air out of it totally.
(Keep the purge valve open about 5 seconds)
- Close the purge valve on the resonator tank.
- Open your gas valve fully.
Now your system is safely connected to the gas network, and almost ready to be used.
2. Connecting the transmitter and starting it.
- Plug the orange cord from the transmitter to the resonator tank.
- Press the ‘on’ button.
You should now hear the noise of the signal.
ATTENTION: ALWAYS OPEN/CLOSE NETWORK AND PURGE VALVE SLOWYLY TO AVOID
DAMAGING THE MEMBRANE INSIDE THE RESONATOR TANK.
Repeated shocks due to pressure on the membrane may break it.
 Loading...