

Page 1

Shuttle TT
for Casablanca
User manual
Page 2

Legal Information
We recommend that you carefully read the information in this manual, in order to avoid operator errors.
We have taken great care in developing and testing this program.
Since it is currently not possible to guarantee error-free operation under all circumstances and at all times, we can unfortunately not entirely exclude that some errors may have crept in.
Hence, MacroSystem Digital Video GmbH and its distributors do not guarantee a problem-free or completely error-free operation of the product.
As far as reasonably possible, we will rework the program in order to correct any errors and, if applicable, provide the new software for free to the users concerned.
Our liability for defects in material and/or workmanship for newly manufactured products is limited to 24 months. This is not the case when the law prescribes longer terms or in case of
damage to life, body or health, in case of deliberate or gross negligence of duty by the supplier or intentional concealment of a flaw.
The purchaser shall notify defects to the supplier without undue delay and in writing. Claims for reimbursement of expenses in connection with searching for defects will only be
accepted after prior agreement with the management of MacroSystem Digital Video GmbH.
Further claims by the purchaser on account of supplementary performance, including costs of transport, travel, labor and material are excluded. This is not applicable to claims for other
reasons such as newly discovered software errors.
Claims on the grounds of defects are excluded for minor deviations from the agreed quality, minor impairments in usability, normal wear and tear, or damage arising after the transfer of
risk from faulty or negligent handling, excessive strain, unsuitable equipment, or from other particular external influences not assumed under the agreement. Claims based on defects
attributable to improper modifications or repair work carried out by the purchaser or third parties and the consequences thereof shall be likewise excluded.
We cannot accept any liability for loss of data/time or any consequential damages that may occur as a result, particularly since we have no influence over correct software installation
and operation by the customer. MacroSystem Digital Video GmbH and its dealers therefore cannot be held liable for any defects or unintentional damage in connection with the
installation or use of the MacroSystem Shuttle TT.
Claims for damages and compensation, regardless of the legal basis, in particular due to breach of duties in connection with obligation or tortuous acts are therefore excluded. This shall
not apply in the case of mandatory liability, e.g. under the German Product Liability Act (Produkthaftungsgesetz), in the case of intent, gross negligence, injury of life, body or health, or
breach of essential contractual obligations. Damage compensation entitlement for breach of essential contractual obligations is, however, limited to the foreseeable damage typical of the
contract, unless there is willful intent or gross negligence or in case of injury to life, body or health. The provisions above do not imply a change of the burden of proof to the detriment of
the purchaser.
Neither MacroSystem Digital Video GmbH nor its dealers are responsible for any damages resulting either directly or indirectly through the use of the software or the operating
instructions. This applies in particular to loss of profits and compensation for expenses.
Any implied guarantee is excluded, including guarantee of suitability of the software or operating instructions for a particular purpose.
For this reason, you should make a backup of your video footage before you start using the device. We recommend that you do not delete the video footage and that you create a
backup copy beforehand.
Since it is possible that changes were made to the software after the manual was prepared, the functions shown and described in this manual might differ from the software.
Page 3

Table of contents
Page
1. General information . . . . . . . . . . . . . . . . . . . . . . . . . . . . . . . . . . . . . . . . . . . . . . . . . . . . . . . .5
1.1 Welcome ............................................................5
1.2 What is Shuttle TT .....................................................5
2. Installation ...............................................................5
3. Operation ................................................................6
3.1 Functions of the individual keys ...........................................6
3.2 Key assignments in individual menus ......................................6
3.2.1 Main menu .......................................................7
3.2.2 Video settings .....................................................7
3.2.3 Edit .............................................................7
3.2.4 Splitting (edit) .....................................................7
3.2.5 Trimming (edit) ....................................................7
3.2.6 Insert, period of time (edit) ...........................................8
3.2.7 Recording, edit (audio) ..............................................8
3.2.8 Splitting (audio) ....................................................8
3.2.9 Trimming (audio) ...................................................8
3.2.10 Audio dubbing ...................................................8
3.2.11 Inserting (audio dubbing) ...........................................8
3.2.12 Period of time (audio dubbing) .......................................9
3.2.13 Envelope (audio dubbing) ...........................................9
3.2.14 Transition effects .................................................9
3.2.15 Specifying effect duration (transitional effects) ..........................9
3.2.16 Single image (transition and image processing effects) ....................9
3.2.17 Image processing effects ...........................................9
3.2.18 Specifying duration (image processing effects) .........................10
3.2.19 Duration menu (image processing effects) .............................10
3.2.20 Shuttle TT with QuadCam .........................................10
Since it is possible that changes were made to the software after the manual was prepared, the functions shown and described in this manual might differ from the
software. Changes and errors excepted.
Page 4

Page 5

Shuttle TT for Casablanca User manual
5
1. General information
1.1 Welcome
Thank you very much for purchasing the Shuttle TT.
We are grateful for your confidence and we hope that this
product will live up to your expectations.
The Shuttle TT will give you the opportunity to use your Casablanca video editing system even more intensively than before.
Feel free to contact us for further questions or if you would like
to give us suggestions for improving the product.
Whenever you contact us, please have your customer number
or the serial number of your device at hand so that we can help
you more quickly.
MacroSystem US
5541 Central Ave., Suite 135
Boulder, Colorado
USA 80301
Phone: 303-440-5311
E-mail: info@macrosystem.us
Fax: 303-440-5396
2. Installation
In contrast with other add-on products, the Shuttle-TT software must not be installed. It has been factory pre-installed on
all devices with the corresponding Bogart version and you only
need to acquire the license code to activate it.
After activating the product, you can simply connect the
Shuttle TT via a USB port and work with it. It is not important
which USB port you use to do this, since all ports have the
same functionality. Please refer to the hardware manual for
your device to find out where the USB ports are.
The top nine buttons of the shuttle have removable button
covers. This makes it possible to simply label them with the
supplied preprinted template. It is up to you whether you decide to put the letters under the button covers or – depending
on the button configuration (please refer to the next chapter)
– if you use the symbols in accordance with the configuration
table.
Up-to-date information on MacroSystem products and our
sales department can be found on the Internet.
Please visit our website: http://www.macrosystem.us
Phone support
If you have special technical questions, you can call our technical support hotline: 303-801-1010
Monday - Friday 9 a.m. - 5 p.m. (Mountain Standard Time)
When calling, please have the serial number of your device
at hand. Outside of these times, please e-mail us. Messages
received in this way are handled during business hours.
E-mail support: BogartSupport@macrosystem.us
1.2 What is Shuttle TT?
The Shuttle TT is an input and control device used mainly for
trimming and splitting and that will make this work both easier
and faster.
It cannot replace the trackball in all menus, but it does provide
a meaningful addition in many menus.
The Shuttle TT has 15 different buttons for navigating in different menus and also a so-called jog-wheel. This function consists of an external rocker (jog) with which you can fast forward
and rewind (e.g. when splitting or trimming) and an internal
wheel with which you can go frame by frame.
Wheel
W
Jog
L
X
R
Y
Z
Assignments 1 and 2, with the corresponding symbol assignments
for the buttons of the Shuttle TT
Page 6
6
3. Operation
3.1 Functions of the individual buttons
For the buttons A-I, the shuttle TT offers two configuration
possibilities from which you can choose. You will find the functions of the individual buttons in the different configurations
modes in the chapter Configuration of buttons in individual
menus. A button has not been assigned a function if a menu
is not listed. The assignment can be change by pressing the Z
button (not possible in all menus).
The L and R buttons have similar functions as both big trackball buttons, but they don‘t replace them. Use L to confirm a
choice or an action, such as marking a scene in the scene bin,
and use R to abort or reject. Directly controlling the elements
under the mouse pointer is not possible, however.
The W button opens the navigation menu, in which you may
use the wheel of the Shuttle TT to select the menu you want to
access. This choice can be confirmed with L, rejected with R.
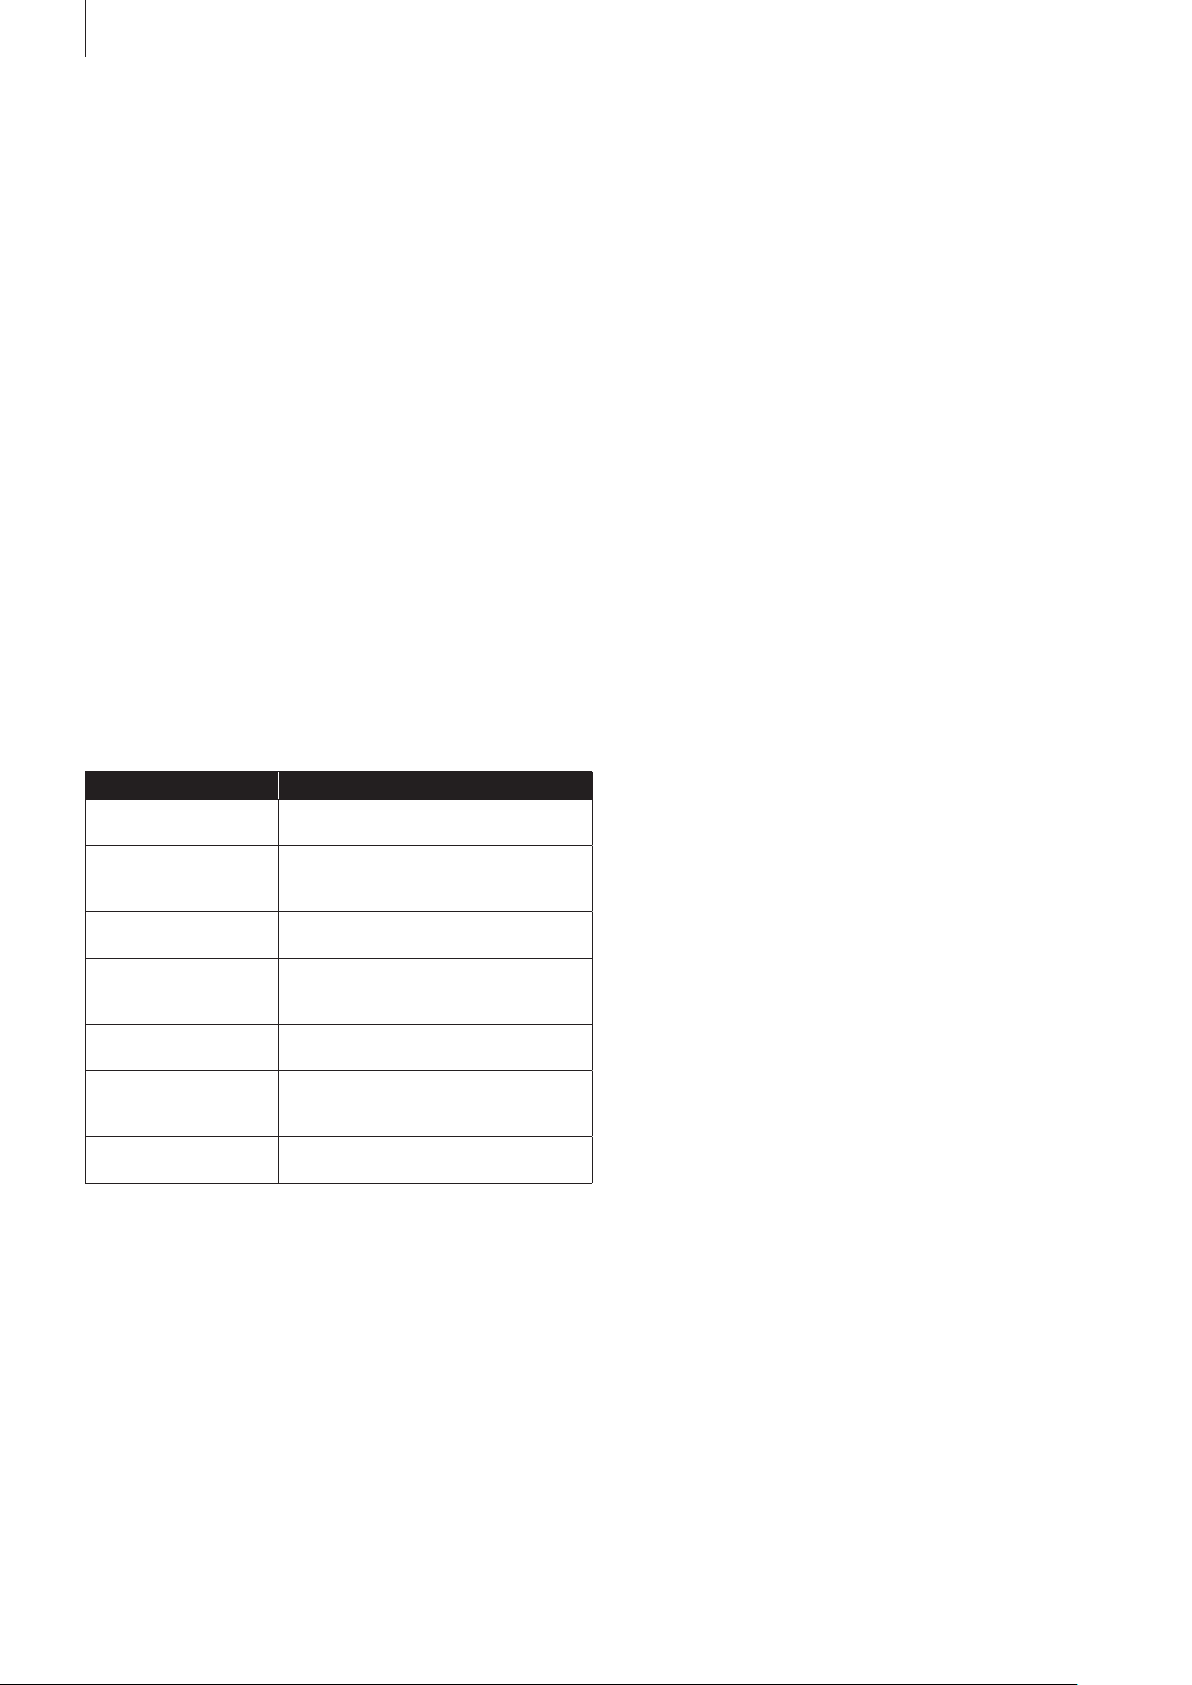
Depending on the menu, the X button is used to abort an action. The table below contains an overview of the corresponding action in each menu:
Menu Action
Splitting, trimming Switching between the different display
Insert, duration,
Period of time (audio
dubbing)
Video Opens a context menu for selecting an
Transition, image processing and title effects
Individual image (video
effects)
Audio dubbing Opens a context menu to select the
Inserting (audio dubbing) Opens the context menu for sorting the
The Y button is used to switch between using the storyboard
and the scene bin in the Edit menu, identified by a symbol
for the title text of the part that is active at the time. This button
is also used to switch between the storyboard and the effect list in the transition, image processing and title effects. In
Video, Splitting, Trimming and Inserting, the Y button can be
used to change the position of the tool bar, just as in Duration
in the “Audio dubbing” menu and “Individual image” in Video
effects. In the “Audio dubbing” menu, pressing this button will
switch between the storyboard and the timeline display, if the
Gold Edition has been installed on your device.
The Z button includes the configuration options of buttons A-I,
which you can select.
modes.
The context menu is opened to make it
possible to select between “Moving” and
“Trimming”.
input.
The context menu is opened to make
it possible to select between different
products.
Opens a context menu to select the
display.
sound track for correcting the sound
volume.
list.
When using wheel and jog, the so-called jog-wheel, you
will be able to control these also with both components, in
all menus where the storyboard is displayed. If you turn the
external jog, you will roll through the storyboard, just as you
would with the slider located below the storyboard. Other than
the wheel, the jog has a resting position and can be turned
in both directions until it reaches a clear stop. The farther you
turn, the faster the scroll movement is in that direction. Use the
inner wheel if you want to navigate scene by scene through
the storyboard, it will behave in a similar way as the individual
buttons located below the storyboard.
In the Edit menu there is also the possibility to navigate
through the scene bin with the wheel or the jog. The inner
wheel is used, just as with the storyboard, to scroll image by
image through the scene bin. The jog behaves like the slider. If
you are in one of the “Video effect” menus, both components
will allow you to navigate through the active effect list. The
wheel will allow you to scroll slowly, whereas the jog will allow
you to scroll faster through the effect list.
As described before, the Y button can be used to select what
has to be controlled by the wheel or the jog.
Sliders and individual context menus can also be used through
the wheel or the jog. The selection can accordingly be confirmed with L or rejected with R. Selecting a piece of music to
insert in audio dubbing is also possible.
Additionally, the wheel or the jog can also be used in the audio dubbing menu to scroll through the individual sound clips
of the active sound track.
3.2 Key assignments in individual menus
Below, you will find a list of the functions that can be controlled by buttons A-I, depending on the assignments. Some
function could not present, depending on whether you are
using the Basic, Silver or Gold Edition.
The lists indicate the situation at the moment of writing. It is
possible that the functions and available assignments will be
expanded.
Labelling the buttons with the supplied prints will help you to
become familiar with the operation of the shuttle as fast as
possible. Besides letters, we also offer you symbols to make it
easier to assign the functions:
Page 7
Shuttle TT for Casablanca User manual
7
Function But-
Play, pause, preview A
IN, start, position, index,
splitting, length, up, left
OUT, end, trimming, down,
right
Rename D
Insert, duration (audio) E
Inserting scene in storyboard
Remove, erase G
Insert H
Sound, scrubbing on/off,
sound volume
Symbols
ton
B
C
F
I
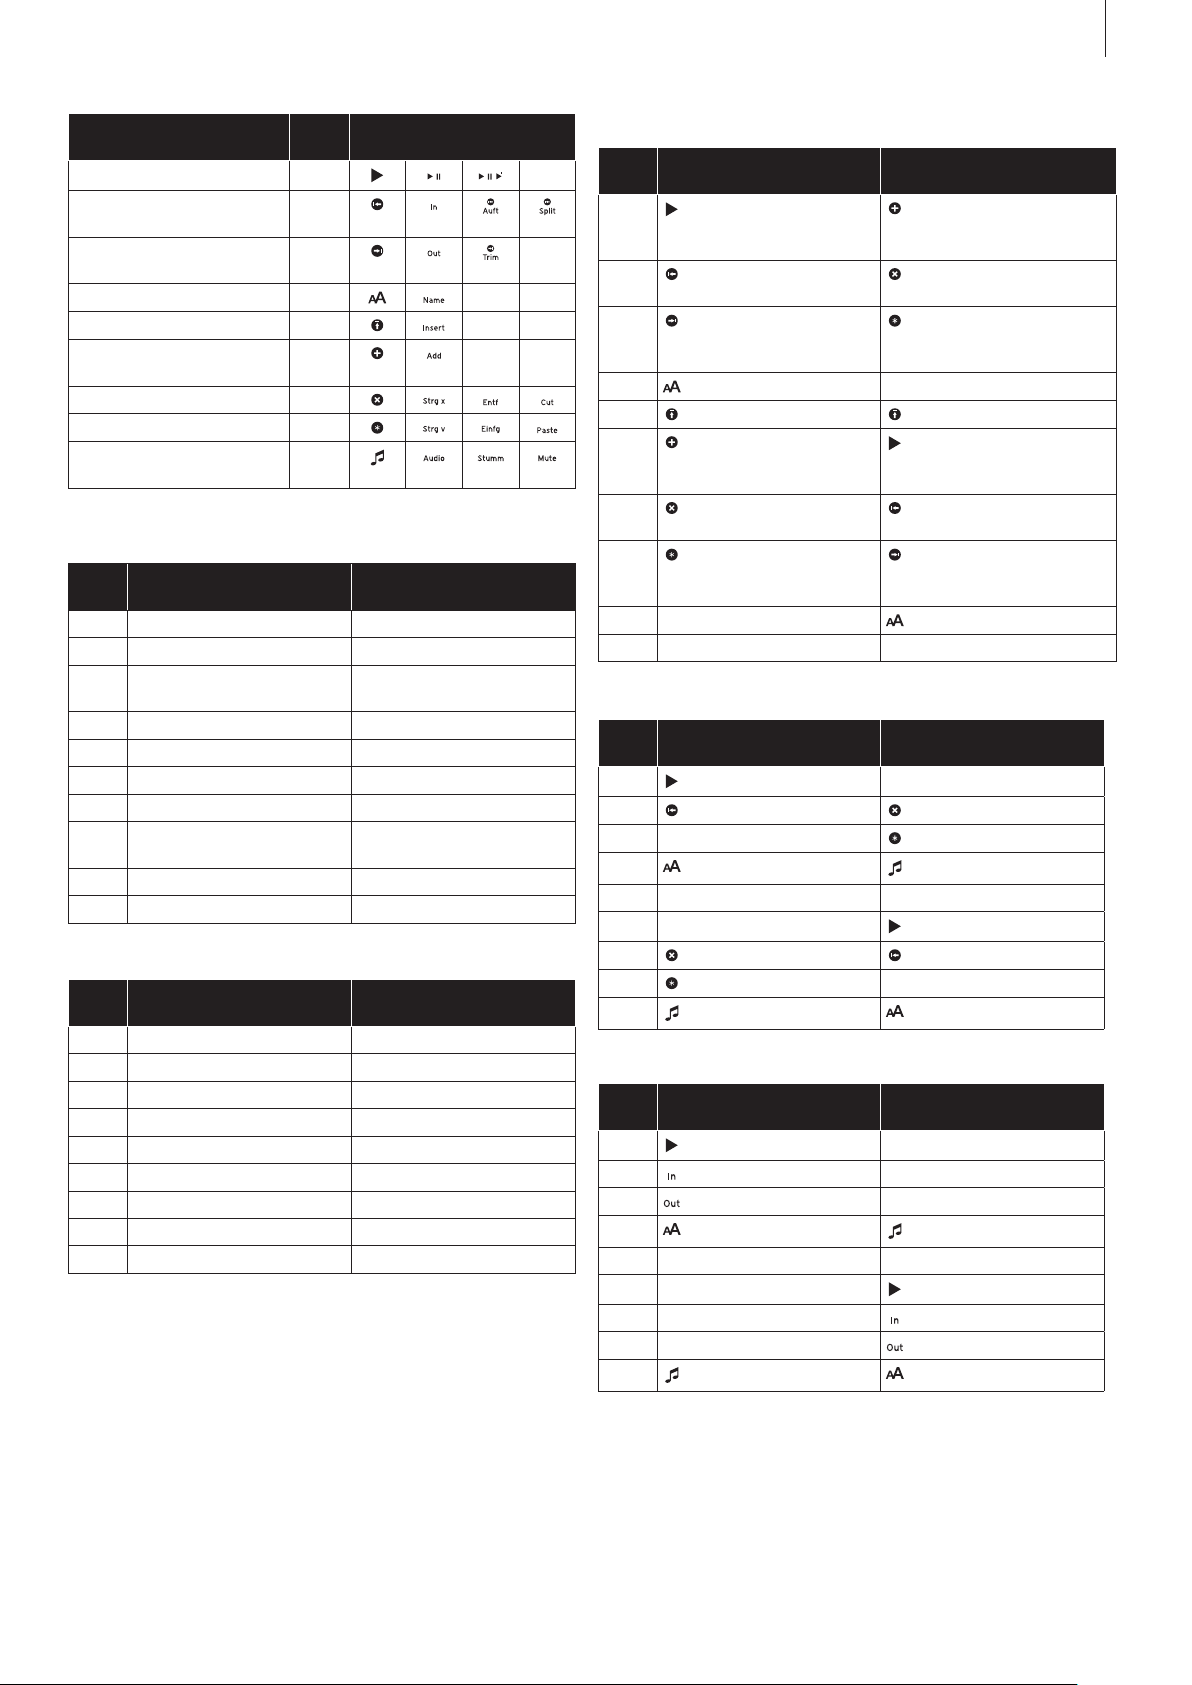
3.2.1 Main menu
But-
Assignment 1 Assignment 2
ton
A - Activate audio dubbing
B Activate video Activate transition effects
C Activate recording Activate image processing
D Activate editing Activate title effects
E Activate recording, editing Activate recording, editing
F Activate audio dubbing -
G Activate transition effects Activate video
H Activate image processing
effects
I Activate title effects Activate editing
effects
Activate recording
3.2.2 Video settings
But-
Assignment 1 Assignment 2
ton
A Brightness selection SVHS input selection
B Contrast selection DV input selection
C Color selection -
D -
E Back cinch input selection Back cinch input selection
F SVHS input selection Brightness selection
G DV input selection Contrast selection
H - Color selection
I - -
3.2.3 Edit
But-
Assignment 1 Assignment 2
ton
A Play selected scene or
storyboard, pause when
pressed again
B Activate splitting menu Delete selected scene
C Activate trimming menu Fetch back scene deleted
D Rename selected scene -
E Activate insert menu Activate insert menu
F Insert selected scene in
storyboard
G Delete selected scene
from storyboard
H Fetch back scene de-
leted from storyboard or
scene bin
I - Rename selected scene
Inserting selected scene in
storyboard
from storyboard
from storyboard or scene
bin
Play selected scene or
storyboard, pause when
pressed again
Activate splitting menu
Activate trimming menu
3.2.4 Splitting (Edit)
But-
Assignment 1 Assignment 2
ton
A Play -
B Select split position Discard
C - Use
D Rename scene Sound on/off
E - -
F - Play
G Discard Select split position
H Use -
I Sound on/off Rename scene
3.2.5 Trimming (Edit)
But-
Assignment 1 Assignment 2
ton
A Play -
B IN/select start -
C OUT/select end -
D Rename scene Sound on/off
E - -
F - Play
G - IN/select start
H - OUT/select end
I Sound on/off Rename scene
Page 8
8
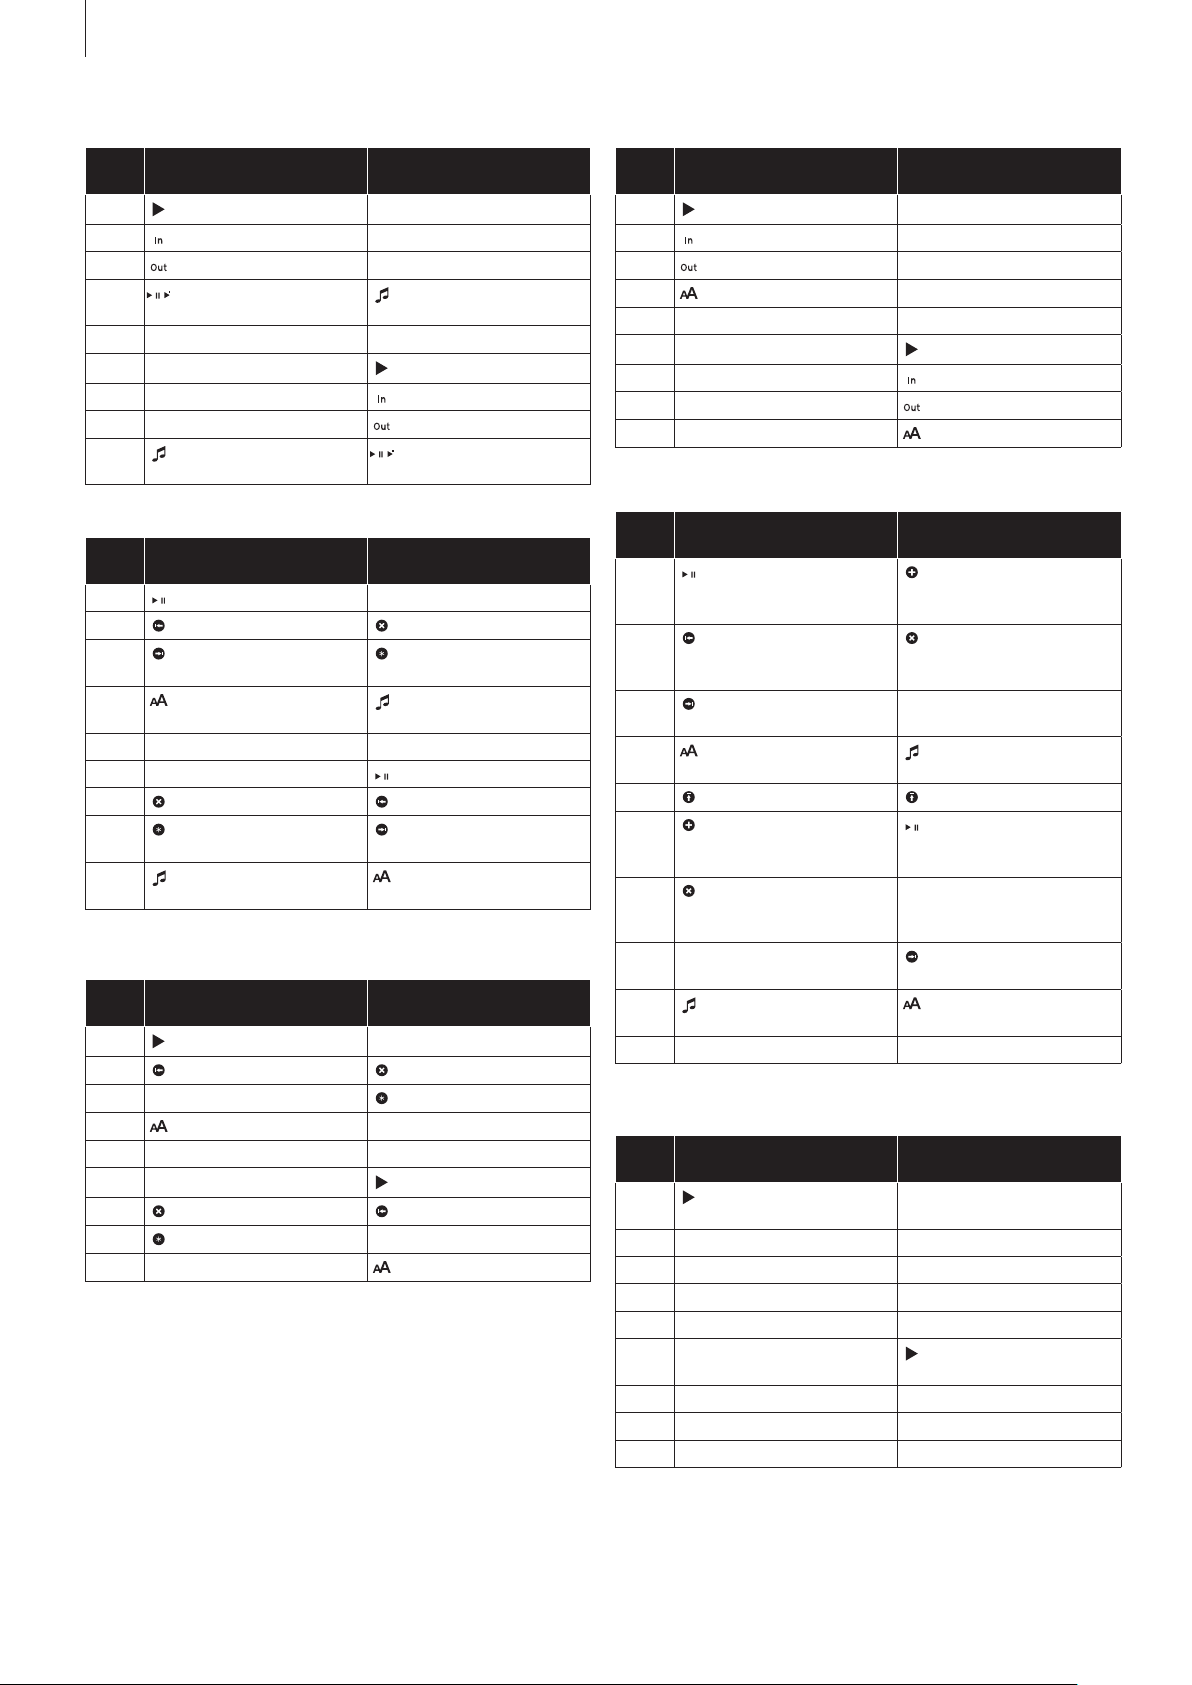
3.2.6 Insert, period of time (Edit)
But-
Assignment 1 Assignment 2
ton
A Play -
B IN/select start -
C OUT/select end -
D Play background and
insert side-by-side
E - -
F - Play
G - IN/select start
H - OUT/select end
I Sound on/off Play background and
Sound on/off
insert side-by-side
3.2.7 Recording, edit (audio)
But-
Assignment 1 Assignment 2
ton
A Play, pause during play -
B Activate splitting menu Delete
C Activate trimming menu Fetch back deleted
D Rename
E - -
F - Play, pause during play
G Delete Activate splitting menu
H Fetch back deleted
I
sample
Select slider for level
control
sample
Select slider for level
control
Activate trimming menu
Rename
3.2.8 Splitting (audio)
But-
Assignment 1 Assignment 2
ton
A Play -
B Select split position Discard
C - Use
D Rename -
E - -
F - Play
G Discard Select split position
H Use -
I Abort the splitting menu Rename
3.2.9 Trimming (audio)
But-
Assignment 1 Assignment 2
ton
A Play -
B IN/select start -
C OUT/select end -
D Rename -
E - -
F - Play
G - IN/select start
H - OUT/select end
I - Rename
3.2.10 Audio dubbing
But-
Assignment 1 Assignment 2
ton
A Play selected scene in
storyboard, pause when
pressed again
B Move the individual
sound track up
C Move the individual
sound track down
D Select volume control for
correction
E Select duration menu Select duration menu
F Insert a sound sample Play selected scene in
G Remove the selected
sound sample from the
sound track
H - Move the individual
I Select volume control Select volume control for
Insert a sound sample
Remove the selected
sound sample from the
sound track
-
Select volume control
storyboard, pause when
pressed again
Change to the original
sound track
sound track down
correction
3.2.11 Inserting (audio dubbing)
But-
Assignment 1 Assignment 2
ton
A Play the selected sound
sample
B - -
C - -
D - -
E - -
F - Play the selected sound
G - -
H - -
I - -
-
sample
Page 9

Shuttle TT for Casablanca User manual
9
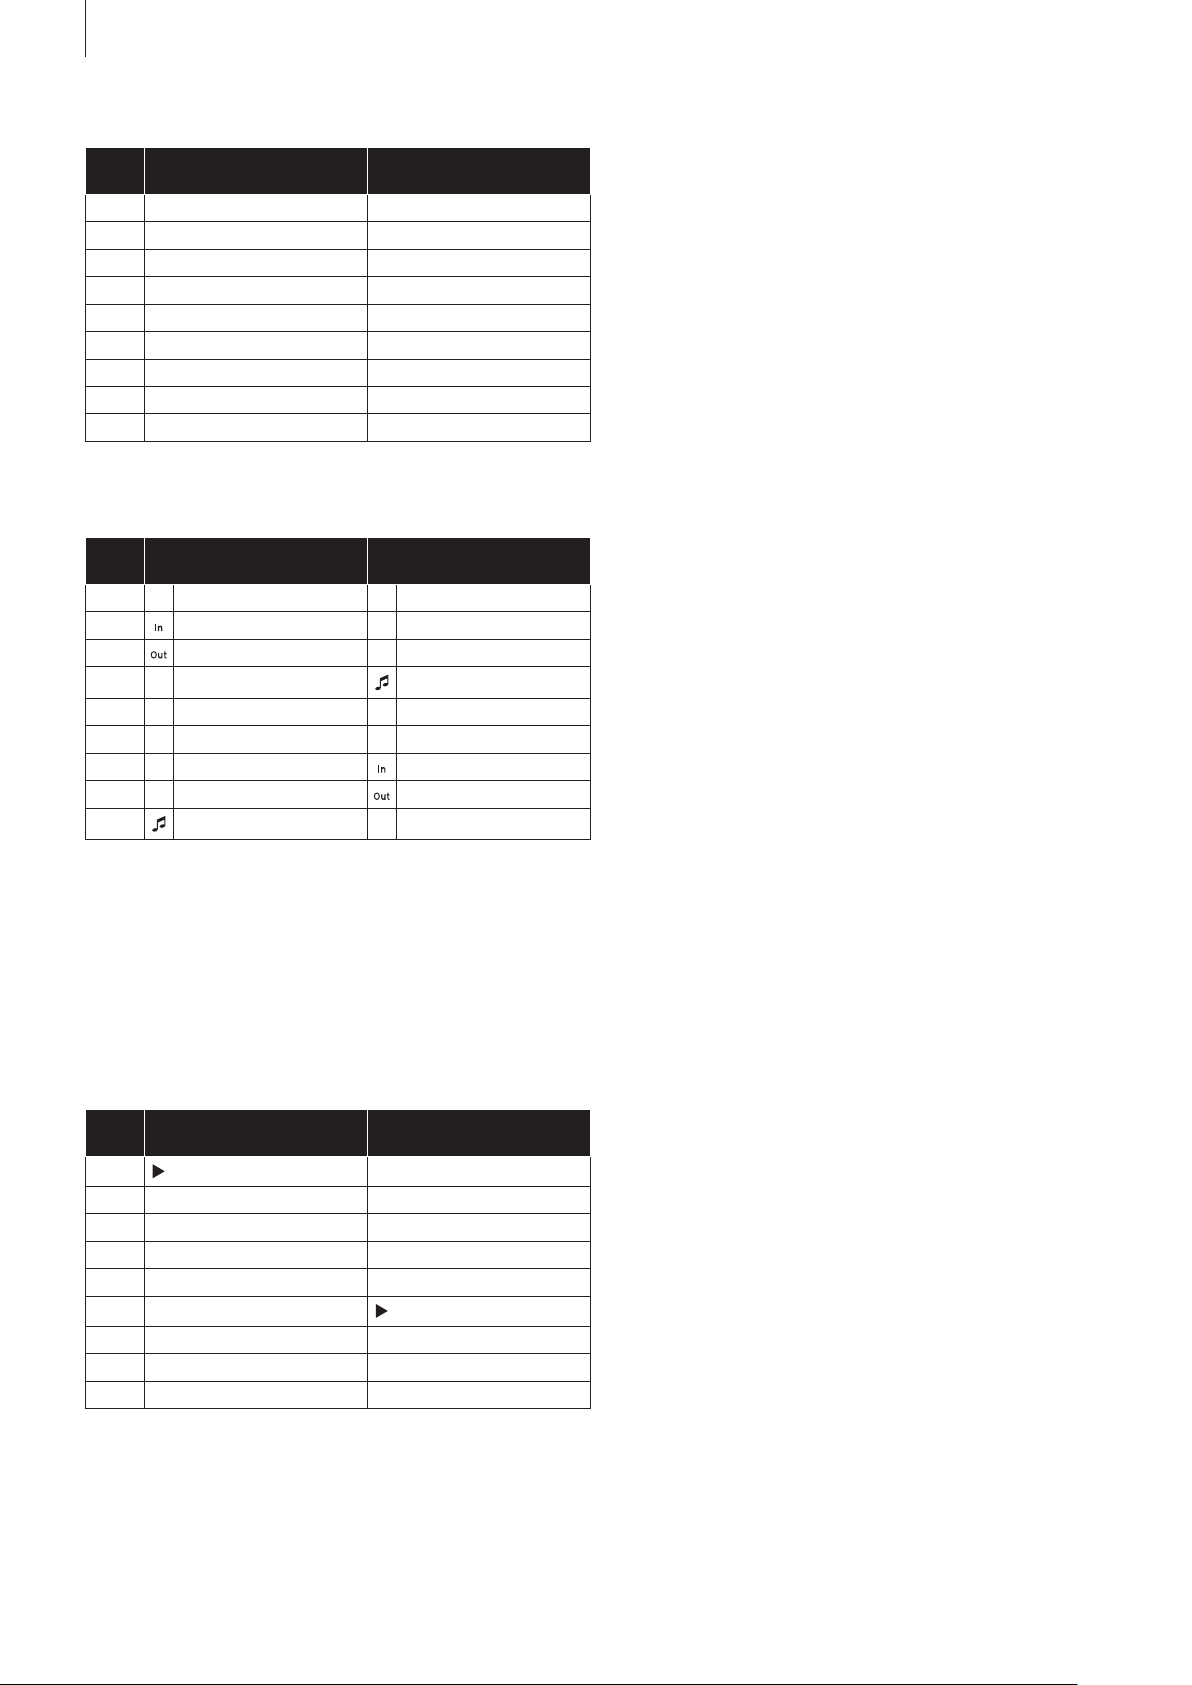
3.2.12 Period of time (audio dubbing)
But-
Assignment 1 Assignment 2
ton
A Play -
B IN/select start -
C OUT/select end -
D - Sound on/off
E - -
F - Play
G - IN/select start
H - OUT/select end
I Sound on/off -
3.2.13 Envelope (audio dubbing)
But-
Assignment 1 Assignment 2
ton
A Play sample Insert
B Jump one editing point
to the left
C Jump one editing point
to the right
D Play all sound tracks Select volume slider
E - -
F Insert Play sample
G Remove Jump one editing point
H - Jump one editing point
I Select volume slider Play all sound tracks
Remove
-
to the left
to the right
3.2.14 Transition effects
But-
Assignment 1 Assignment 2
ton
A Play Insert effect
B Open “Specify effect
duration”
C Individual image Calculate effect
D Display preview -
E Display extended
preview
F Insert effect Play
G Remove effect Open “Specify effect
H Calculate effect Individual image
I - Display preview
Remove effect
Display extended
preview
duration”
3.2.15 Specify effect duration (transition effects)
But-
Assignment 1 Assignment 2
ton
A - -
B Select duration 1 -
C Select duration 2 -
D Select duration 3 -
E - -
F - -
G - Select duration 1
H - Select duration 2
I - Select duration 3
3.2.16 Single image (transition and image processing
effects)
But-
Assignment 1 Assignment 2
ton
A Display preview Display “Effect”
B - Display “Original + Ef-
C - -
D - -
E Display “Original” Display “Original”
F Display “Effect” Display preview
G Display “Original + Ef-
fect”
H - -
I - -
fect”
-
Here, it is possible to select a position in the scene without
activating the relevant slider via the wheel and the jog of the
Shuttle TT.
3.2.17 Image processing effects
But-
Assignment 1 Assignment 2
ton
A Play Insert effect
B Open “Specify duration” Remove effect
C Individual image Calculate effect
D Display preview -
E Display extended
preview
F Insert effect Play
G Remove effect Open “Specify duration”
H Calculate effect Individual image
I - Display preview
Display extended
preview
Page 10
10
3.2.18 Specifying duration (image processing effects)
But-
Assignment 1 Assignment 2
ton
A - -
B Select “1s at the start” -
C Select “1s at the end” -
D Select “Entire scene” -
E Select “Duration” Select “Duration”
F - -
G - Select “1s at the start”
H - Select “1s at the end”
I - Select “Entire scene”
3.2.19 Duration menu (in “Specify duration” of the
image processing effects):
But-
Assignment 1 Assignment 2
ton
A - -
B IN/select start -
C OUT/select end -
D - Sound on/off
E - -
F - -
G - IN/select start
H - OUT/select end
I Sound on/off -
3.2.20 Shuttle TT with QuadCam
Shuttle TT also supports working in the (optionally available)
QuadCam software product.
The L and R buttons support here, just as in other menus, the
confirmation or cancellation of an action.
The assignment of buttons A-I in QuadCam is as follows:
But-
Assignment 1 Assignment 2
ton
A Play Select insert 1
B - Select insert 2
C - Select insert 3
D - -
E Select background Select background
F Select insert 1 Play
G Select insert 2 -
H Select insert 3 -
I - -
Page 11

Shuttle TT for Casablanca User manual
11
Page 12

MacroSystem Digital Video GmbH
www.macrosystem.de
Shuttle TT E-07/2012
 Loading...