

Page 1

Using HomeSite+ for
Dreamweaver MX
HomeSite+ for Dreamweaver MX
for Windows 98, Windows ME,
Windows NT 4.0, Windows 2000,
and Windows XP
Macromedia® Incorporated
Page 2

Copyright Notice
Copyright 2002 Macromedia, Inc. All rights reserved.
Macromedia, the Macromedia logo, ColdFusion, Dreamweaver, Flash, HomeSite,
JRun, Quick Tag Editor, Roundtrip, and what the web can be are trademarks or
registered trademarks of Macromedia, Inc. which may be registered in the United
States and internationally. Java and Solaris are trademarks of Sun Microsystems, Inc.
Microsoft, Windows, Windows NT, Windows 98, Windows ME, Windows XP, and
Windows 2000 are registered trademarks of Microsoft Corporation. UNIX is a
trademark of The Open Group. Other brand names may be trademarks or registered
trademarks of others.
This manual, as well as the software described in it, is furnished under license and
may be used or copied only in accordance with the terms of such license. The
content of this manual is furnished for informational use only, is subject to change
without notice, and should not be construed as a commitment by Macromedia Inc.
Macromedia Inc. assumes no responsibility or liability for any errors or inaccuracies
that may appear in this book.
Except as permitted by such license, no part of this publication may be reproduced,
stored in a retrieval system, or transmitted in any form or by any means, electronic,
mechanical, recording, or otherwise, without the prior written permission of
Macromedia Inc.
Part number: ZCS50M100
Page 3

Contents
About This Book . . . . . . . . . . . . . . . . . . . . . . . . . . . . . . . xiii
Intended audience . . . . . . . . . . . . . . . . . . . . . . . . . . . . . . . . . . . . . . . . . . . . . . . . . . . . . xiv
Developer resources. . . . . . . . . . . . . . . . . . . . . . . . . . . . . . . . . . . . . . . . . . . . . . . . . . . . xiv
About the documentation. . . . . . . . . . . . . . . . . . . . . . . . . . . . . . . . . . . . . . . . . . . . . . . xvi
Getting answers . . . . . . . . . . . . . . . . . . . . . . . . . . . . . . . . . . . . . . . . . . . . . . . . . . . . . . xviii
Contacting Macromedia . . . . . . . . . . . . . . . . . . . . . . . . . . . . . . . . . . . . . . . . . . . . . . xviii
Copyright information. . . . . . . . . . . . . . . . . . . . . . . . . . . . . . . . . . . . . . . . . . . . . . . . . . xix
Macromedia website . . . . . . . . . . . . . . . . . . . . . . . . . . . . . . . . . . . . . . . . . . . . . . xiv
ColdFusion web resources . . . . . . . . . . . . . . . . . . . . . . . . . . . . . . . . . . . . . . . . . xv
Tutorials . . . . . . . . . . . . . . . . . . . . . . . . . . . . . . . . . . . . . . . . . . . . . . . . . . . . . . . . . xv
Documentation conventions . . . . . . . . . . . . . . . . . . . . . . . . . . . . . . . . . . . . . . . xvi
Viewing online documentation . . . . . . . . . . . . . . . . . . . . . . . . . . . . . . . . . . . . . xvi
Printing online documentation . . . . . . . . . . . . . . . . . . . . . . . . . . . . . . . . . . . . xvii
Chapter 1 Setting Up the Product . . . . . . . . . . . . . . . . . 1
System requirements . . . . . . . . . . . . . . . . . . . . . . . . . . . . . . . . . . . . . . . . . . . . . . . . . . . . 2
Installing or upgrading. . . . . . . . . . . . . . . . . . . . . . . . . . . . . . . . . . . . . . . . . . . . . . . . . . . 2
Completing the setup. . . . . . . . . . . . . . . . . . . . . . . . . . . . . . . . . . . . . . . . . . . . . . . . . . . . 3
About the Initial Configuration Wizard . . . . . . . . . . . . . . . . . . . . . . . . . . . . . . . 3
Using the Initial Configuration Wizard . . . . . . . . . . . . . . . . . . . . . . . . . . . . . . . 4
Monitoring system resources . . . . . . . . . . . . . . . . . . . . . . . . . . . . . . . . . . . . . . . . . . . . . 6
Releasing system resources taken at startup . . . . . . . . . . . . . . . . . . . . . . . . . . 6
About the Resource Level Monitor . . . . . . . . . . . . . . . . . . . . . . . . . . . . . . . . . . . 6
Using the Resource Level Monitor . . . . . . . . . . . . . . . . . . . . . . . . . . . . . . . . . . . 7
Chapter 2 Configuring Browsers and Servers . . . . . . . 9
Configuring the internal browser . . . . . . . . . . . . . . . . . . . . . . . . . . . . . . . . . . . . . . . . 10
Configuring an external browser . . . . . . . . . . . . . . . . . . . . . . . . . . . . . . . . . . . . . . . . . 12
Working with files on remote servers . . . . . . . . . . . . . . . . . . . . . . . . . . . . . . . . . . . . . 14
Using the SNE node . . . . . . . . . . . . . . . . . . . . . . . . . . . . . . . . . . . . . . . . . . . . . . . 14
Connecting to a server . . . . . . . . . . . . . . . . . . . . . . . . . . . . . . . . . . . . . . . . . . . . . 15
Page 4

iv Contents
Managing servers . . . . . . . . . . . . . . . . . . . . . . . . . . . . . . . . . . . . . . . . . . . . . . . . . 19
About server mappings . . . . . . . . . . . . . . . . . . . . . . . . . . . . . . . . . . . . . . . . . . . . 20
Adding a server mapping . . . . . . . . . . . . . . . . . . . . . . . . . . . . . . . . . . . . . . . . . . 23
Chapter 3 Exploring the Workspace . . . . . . . . . . . . . . 25
The workspace areas. . . . . . . . . . . . . . . . . . . . . . . . . . . . . . . . . . . . . . . . . . . . . . . . . . . . 26
Setting options . . . . . . . . . . . . . . . . . . . . . . . . . . . . . . . . . . . . . . . . . . . . . . . . . . . 27
Working in the Resources window. . . . . . . . . . . . . . . . . . . . . . . . . . . . . . . . . . . . . . . . 28
Creating and browsing files in the Document window. . . . . . . . . . . . . . . . . . . . . . 29
About the Edit tab . . . . . . . . . . . . . . . . . . . . . . . . . . . . . . . . . . . . . . . . . . . . . . . . . 29
About the Browse tab . . . . . . . . . . . . . . . . . . . . . . . . . . . . . . . . . . . . . . . . . . . . . . 29
About the Help tab . . . . . . . . . . . . . . . . . . . . . . . . . . . . . . . . . . . . . . . . . . . . . . . . 29
Tracking your work in the Results window . . . . . . . . . . . . . . . . . . . . . . . . . . . . . . . . 30
Customizing the workspace . . . . . . . . . . . . . . . . . . . . . . . . . . . . . . . . . . . . . . . . . . . . . 31
Managing application toolbars and the QuickBar . . . . . . . . . . . . . . . . . . . . 31
Customizing toolbars . . . . . . . . . . . . . . . . . . . . . . . . . . . . . . . . . . . . . . . . . . . . . . 32
Getting the most from the online Help system. . . . . . . . . . . . . . . . . . . . . . . . . . . . . 35
Opening Help in tag editors and Tag Chooser . . . . . . . . . . . . . . . . . . . . . . . . 35
Editing Help in tag editors and Tag Chooser . . . . . . . . . . . . . . . . . . . . . . . . . 35
Accessing online Help . . . . . . . . . . . . . . . . . . . . . . . . . . . . . . . . . . . . . . . . . . . . . 35
Printing Help . . . . . . . . . . . . . . . . . . . . . . . . . . . . . . . . . . . . . . . . . . . . . . . . . . . . . 35
Bookmarking Help . . . . . . . . . . . . . . . . . . . . . . . . . . . . . . . . . . . . . . . . . . . . . . . . 36
Searching the online Help . . . . . . . . . . . . . . . . . . . . . . . . . . . . . . . . . . . . . . . . . 36
Extending the Help system . . . . . . . . . . . . . . . . . . . . . . . . . . . . . . . . . . . . . . . . . 38
Adding media content . . . . . . . . . . . . . . . . . . . . . . . . . . . . . . . . . . . . . . . . . . . . . 40
Chapter 4 Managing Files . . . . . . . . . . . . . . . . . . . . . . . 41
About the Files tabs. . . . . . . . . . . . . . . . . . . . . . . . . . . . . . . . . . . . . . . . . . . . . . . . . . . . . 42
About file encoding. . . . . . . . . . . . . . . . . . . . . . . . . . . . . . . . . . . . . . . . . . . . . . . . . . . . . 43
Working with files . . . . . . . . . . . . . . . . . . . . . . . . . . . . . . . . . . . . . . . . . . . . . . . . . . . . . . 44
Setting startup options . . . . . . . . . . . . . . . . . . . . . . . . . . . . . . . . . . . . . . . . . . . . 44
Opening a file . . . . . . . . . . . . . . . . . . . . . . . . . . . . . . . . . . . . . . . . . . . . . . . . . . . . 44
Adding a link to an open file . . . . . . . . . . . . . . . . . . . . . . . . . . . . . . . . . . . . . . . . 45
Saving a file . . . . . . . . . . . . . . . . . . . . . . . . . . . . . . . . . . . . . . . . . . . . . . . . . . . . . . 45
Backing up files . . . . . . . . . . . . . . . . . . . . . . . . . . . . . . . . . . . . . . . . . . . . . . . . . . . 46
Changing the file list display . . . . . . . . . . . . . . . . . . . . . . . . . . . . . . . . . . . . . . . 48
Dragging a file from Windows Explorer . . . . . . . . . . . . . . . . . . . . . . . . . . . . . . 48
Building a Favorite Folders list . . . . . . . . . . . . . . . . . . . . . . . . . . . . . . . . . . . . . 48
Downloading a web page . . . . . . . . . . . . . . . . . . . . . . . . . . . . . . . . . . . . . . . . . . 49
Chapter 5 Writing Code and Web Content . . . . . . . . . 51
Inserting code . . . . . . . . . . . . . . . . . . . . . . . . . . . . . . . . . . . . . . . . . . . . . . . . . . . . . . . . . 52
Inserting a tag from the QuickBar . . . . . . . . . . . . . . . . . . . . . . . . . . . . . . . . . . . 52
Page 5

Contents v
Selecting a tag from Tag Chooser . . . . . . . . . . . . . . . . . . . . . . . . . . . . . . . . . . . 53
Completing a tag with a tag editor . . . . . . . . . . . . . . . . . . . . . . . . . . . . . . . . . . 54
Using inline tools to enter code . . . . . . . . . . . . . . . . . . . . . . . . . . . . . . . . . . . . . . . . . . 55
Using Tag Insight . . . . . . . . . . . . . . . . . . . . . . . . . . . . . . . . . . . . . . . . . . . . . . . . . 55
Using Function Insight . . . . . . . . . . . . . . . . . . . . . . . . . . . . . . . . . . . . . . . . . . . . 56
Using Tag Completion . . . . . . . . . . . . . . . . . . . . . . . . . . . . . . . . . . . . . . . . . . . . . 56
Using Auto Completion . . . . . . . . . . . . . . . . . . . . . . . . . . . . . . . . . . . . . . . . . . . . 57
Using Code Templates . . . . . . . . . . . . . . . . . . . . . . . . . . . . . . . . . . . . . . . . . . . . 57
Using the Extended and Special Characters palette . . . . . . . . . . . . . . . . . . . 58
Using code generating tools . . . . . . . . . . . . . . . . . . . . . . . . . . . . . . . . . . . . . . . . . . . . . 58
Adding document content . . . . . . . . . . . . . . . . . . . . . . . . . . . . . . . . . . . . . . . . . . . . . . 59
Using keyboard shortcuts . . . . . . . . . . . . . . . . . . . . . . . . . . . . . . . . . . . . . . . . . . . . . . . 61
Saving a code block as a snippet . . . . . . . . . . . . . . . . . . . . . . . . . . . . . . . . . . . . . . . . . 62
Sharing snippets . . . . . . . . . . . . . . . . . . . . . . . . . . . . . . . . . . . . . . . . . . . . . . . . . . 63
Sharing snippets between Dreamweaver MX and HomeSite+ . . . . . . . . . . 63
Using dynamic variables in snippets . . . . . . . . . . . . . . . . . . . . . . . . . . . . . . . . 64
Assigning a shortcut key to a snippet . . . . . . . . . . . . . . . . . . . . . . . . . . . . . . . . 64
Resources for website accessibility . . . . . . . . . . . . . . . . . . . . . . . . . . . . . . . . . . . . . . . 65
Tips for visually impaired users . . . . . . . . . . . . . . . . . . . . . . . . . . . . . . . . . . . . . . . . . . 66
Assigning keyboard shortcuts . . . . . . . . . . . . . . . . . . . . . . . . . . . . . . . . . . . . . . 66
Working with user interface elements . . . . . . . . . . . . . . . . . . . . . . . . . . . . . . . 67
Chapter 6 Editing Pages . . . . . . . . . . . . . . . . . . . . . . . . 69
Setting editor options. . . . . . . . . . . . . . . . . . . . . . . . . . . . . . . . . . . . . . . . . . . . . . . . . . . 70
Using the Editor toolbar . . . . . . . . . . . . . . . . . . . . . . . . . . . . . . . . . . . . . . . . . . . 70
Settings editor options . . . . . . . . . . . . . . . . . . . . . . . . . . . . . . . . . . . . . . . . . . . . 70
Selecting a code or text block . . . . . . . . . . . . . . . . . . . . . . . . . . . . . . . . . . . . . . . . . . . . 71
Saving text to the multiple-entry Clipboard . . . . . . . . . . . . . . . . . . . . . . . . . . . . . . . 71
Using the Clipboard . . . . . . . . . . . . . . . . . . . . . . . . . . . . . . . . . . . . . . . . . . . . . . . 71
Setting the Clipboard entry limit . . . . . . . . . . . . . . . . . . . . . . . . . . . . . . . . . . . . 71
Collapsing text . . . . . . . . . . . . . . . . . . . . . . . . . . . . . . . . . . . . . . . . . . . . . . . . . . . . . . . . . 72
Editing a referenced file . . . . . . . . . . . . . . . . . . . . . . . . . . . . . . . . . . . . . . . . . . . . . . . . . 73
Editing an image file . . . . . . . . . . . . . . . . . . . . . . . . . . . . . . . . . . . . . . . . . . . . . . 73
Editing an included file . . . . . . . . . . . . . . . . . . . . . . . . . . . . . . . . . . . . . . . . . . . . 74
Using tag editors . . . . . . . . . . . . . . . . . . . . . . . . . . . . . . . . . . . . . . . . . . . . . . . . . . . . . . . 75
About VTML tag editors . . . . . . . . . . . . . . . . . . . . . . . . . . . . . . . . . . . . . . . . . . . 75
Editing a tag with a tag editor . . . . . . . . . . . . . . . . . . . . . . . . . . . . . . . . . . . . . . 75
Navigating the structure of a document. . . . . . . . . . . . . . . . . . . . . . . . . . . . . . . . . . . 76
About outline profiles . . . . . . . . . . . . . . . . . . . . . . . . . . . . . . . . . . . . . . . . . . . . . 76
Setting the Tag Tree display . . . . . . . . . . . . . . . . . . . . . . . . . . . . . . . . . . . . . . . . 77
Editing code in the Tag Inspector . . . . . . . . . . . . . . . . . . . . . . . . . . . . . . . . . . . . . . . . 78
Setting the Tag Inspector display . . . . . . . . . . . . . . . . . . . . . . . . . . . . . . . . . . . 78
Page 6

vi Contents
Creating and editing an event handler script block . . . . . . . . . . . . . . . . . . . 79
Formatting pages with Cascading Style Sheets. . . . . . . . . . . . . . . . . . . . . . . . . . . . . 80
About Cascading Style Sheets (CSS) . . . . . . . . . . . . . . . . . . . . . . . . . . . . . . . . . 80
About the integrated style editor . . . . . . . . . . . . . . . . . . . . . . . . . . . . . . . . . . . . 81
Macro Recorder . . . . . . . . . . . . . . . . . . . . . . . . . . . . . . . . . . . . . . . . . . . . . . . . . . . . . . . . 83
Using the Macro Recorder . . . . . . . . . . . . . . . . . . . . . . . . . . . . . . . . . . . . . . . . . 83
VTOM methods . . . . . . . . . . . . . . . . . . . . . . . . . . . . . . . . . . . . . . . . . . . . . . . . . . . 85
Command IDs . . . . . . . . . . . . . . . . . . . . . . . . . . . . . . . . . . . . . . . . . . . . . . . . . . . . 85
Chapter 7 Using Web Development Languages . . . . . 97
About language support . . . . . . . . . . . . . . . . . . . . . . . . . . . . . . . . . . . . . . . . . . . . . . . . 98
Supported languages . . . . . . . . . . . . . . . . . . . . . . . . . . . . . . . . . . . . . . . . . . . . . . 98
How a language is detected . . . . . . . . . . . . . . . . . . . . . . . . . . . . . . . . . . . . . . . . 99
Setting options for markup languages . . . . . . . . . . . . . . . . . . . . . . . . . . . . . . . . . . . . 99
Coding in XHTML . . . . . . . . . . . . . . . . . . . . . . . . . . . . . . . . . . . . . . . . . . . . . . . . . . . . . 101
What is XHTML? . . . . . . . . . . . . . . . . . . . . . . . . . . . . . . . . . . . . . . . . . . . . . . . . . 102
Setting options for XHTML . . . . . . . . . . . . . . . . . . . . . . . . . . . . . . . . . . . . . . . . 103
Using coding tools that support XHTML . . . . . . . . . . . . . . . . . . . . . . . . . . . . 103
Setting color coding for XHTML . . . . . . . . . . . . . . . . . . . . . . . . . . . . . . . . . . . 104
Using CodeSweepers to convert your code to XHTML . . . . . . . . . . . . . . . 105
Validating XHTML code . . . . . . . . . . . . . . . . . . . . . . . . . . . . . . . . . . . . . . . . . . 105
Using regular expressions . . . . . . . . . . . . . . . . . . . . . . . . . . . . . . . . . . . . . . . . . . . . . . 107
About regular expressions . . . . . . . . . . . . . . . . . . . . . . . . . . . . . . . . . . . . . . . . 107
Writing regular expressions . . . . . . . . . . . . . . . . . . . . . . . . . . . . . . . . . . . . . . . 107
Using a special character . . . . . . . . . . . . . . . . . . . . . . . . . . . . . . . . . . . . . . . . . 108
Creating a single-character regular expression . . . . . . . . . . . . . . . . . . . . . . 108
Using a character class . . . . . . . . . . . . . . . . . . . . . . . . . . . . . . . . . . . . . . . . . . . 109
Creating a multi-character regular expression . . . . . . . . . . . . . . . . . . . . . . 110
Using a back reference . . . . . . . . . . . . . . . . . . . . . . . . . . . . . . . . . . . . . . . . . . . 110
Anchoring a regular expression to a string . . . . . . . . . . . . . . . . . . . . . . . . . . 111
Regular expression examples . . . . . . . . . . . . . . . . . . . . . . . . . . . . . . . . . . . . . . 111
Using color coding schemes. . . . . . . . . . . . . . . . . . . . . . . . . . . . . . . . . . . . . . . . . . . . 112
Setting the supported file types for a scheme . . . . . . . . . . . . . . . . . . . . . . . . 112
Setting the display of tags in the Editor . . . . . . . . . . . . . . . . . . . . . . . . . . . . . 113
Formatting code with CodeSweepers. . . . . . . . . . . . . . . . . . . . . . . . . . . . . . . . . . . . 114
Running a CodeSweeper . . . . . . . . . . . . . . . . . . . . . . . . . . . . . . . . . . . . . . . . . . 115
Managing CodeSweepers . . . . . . . . . . . . . . . . . . . . . . . . . . . . . . . . . . . . . . . . . 116
Setting Macromedia CodeSweeper options . . . . . . . . . . . . . . . . . . . . . . . . . 118
Validating code . . . . . . . . . . . . . . . . . . . . . . . . . . . . . . . . . . . . . . . . . . . . . . . . . . . . . . . 120
Using the default Validator . . . . . . . . . . . . . . . . . . . . . . . . . . . . . . . . . . . . . . . . 120
Using the CSE HTML Validator . . . . . . . . . . . . . . . . . . . . . . . . . . . . . . . . . . . . 124
Working with tag definitions. . . . . . . . . . . . . . . . . . . . . . . . . . . . . . . . . . . . . . . . . . . . 125
About namespace precedence . . . . . . . . . . . . . . . . . . . . . . . . . . . . . . . . . . . . . 125
Setting namespace precedence . . . . . . . . . . . . . . . . . . . . . . . . . . . . . . . . . . . . 125
Page 7

Contents vii
Editing tag definitions . . . . . . . . . . . . . . . . . . . . . . . . . . . . . . . . . . . . . . . . . . . . 126
Chapter 8 Accessing Data Sources . . . . . . . . . . . . . . 129
Introduction to database tools . . . . . . . . . . . . . . . . . . . . . . . . . . . . . . . . . . . . . . . . . . 130
Working with data sources . . . . . . . . . . . . . . . . . . . . . . . . . . . . . . . . . . . . . . . . . . . . . 130
Configuring a ColdFusion data source . . . . . . . . . . . . . . . . . . . . . . . . . . . . . 130
Connecting to a data source . . . . . . . . . . . . . . . . . . . . . . . . . . . . . . . . . . . . . . . 130
Viewing a data source . . . . . . . . . . . . . . . . . . . . . . . . . . . . . . . . . . . . . . . . . . . . 131
Using SQL Builder for database queries. . . . . . . . . . . . . . . . . . . . . . . . . . . . . . . . . . 132
The SQL Builder user interface . . . . . . . . . . . . . . . . . . . . . . . . . . . . . . . . . . . . 133
Writing an SQL statement . . . . . . . . . . . . . . . . . . . . . . . . . . . . . . . . . . . . . . . . . 133
Building a SELECT statement . . . . . . . . . . . . . . . . . . . . . . . . . . . . . . . . . . . . . 134
Inserting SQL into a page . . . . . . . . . . . . . . . . . . . . . . . . . . . . . . . . . . . . . . . . . 135
Testing and editing a query . . . . . . . . . . . . . . . . . . . . . . . . . . . . . . . . . . . . . . . 136
Chapter 9 Managing Projects . . . . . . . . . . . . . . . . . . . 137
Understanding projects. . . . . . . . . . . . . . . . . . . . . . . . . . . . . . . . . . . . . . . . . . . . . . . . 138
What is a project? . . . . . . . . . . . . . . . . . . . . . . . . . . . . . . . . . . . . . . . . . . . . . . . . 138
Why use a project? . . . . . . . . . . . . . . . . . . . . . . . . . . . . . . . . . . . . . . . . . . . . . . . 138
About project folders . . . . . . . . . . . . . . . . . . . . . . . . . . . . . . . . . . . . . . . . . . . . . 138
About the project file . . . . . . . . . . . . . . . . . . . . . . . . . . . . . . . . . . . . . . . . . . . . . 139
Creating a project . . . . . . . . . . . . . . . . . . . . . . . . . . . . . . . . . . . . . . . . . . . . . . . . . . . . . 140
Setting project options . . . . . . . . . . . . . . . . . . . . . . . . . . . . . . . . . . . . . . . . . . . 140
Creating a project . . . . . . . . . . . . . . . . . . . . . . . . . . . . . . . . . . . . . . . . . . . . . . . . 141
Populating a project . . . . . . . . . . . . . . . . . . . . . . . . . . . . . . . . . . . . . . . . . . . . . . 141
Working with a project . . . . . . . . . . . . . . . . . . . . . . . . . . . . . . . . . . . . . . . . . . . . . . . . . 144
Using the Projects tab . . . . . . . . . . . . . . . . . . . . . . . . . . . . . . . . . . . . . . . . . . . . 144
Managing project files . . . . . . . . . . . . . . . . . . . . . . . . . . . . . . . . . . . . . . . . . . . . 145
Managing project resources . . . . . . . . . . . . . . . . . . . . . . . . . . . . . . . . . . . . . . . 146
Performing other project-level tasks . . . . . . . . . . . . . . . . . . . . . . . . . . . . . . . 147
Adding a project to source control . . . . . . . . . . . . . . . . . . . . . . . . . . . . . . . . . . . . . . 148
Why use source control? . . . . . . . . . . . . . . . . . . . . . . . . . . . . . . . . . . . . . . . . . . 148
Supported source control systems . . . . . . . . . . . . . . . . . . . . . . . . . . . . . . . . . 148
Setting up a project in source control . . . . . . . . . . . . . . . . . . . . . . . . . . . . . . 148
Using source control in HomeSite+ for Dreamweaver MX . . . . . . . . . . . . 150
Displaying the Source Control toolbar . . . . . . . . . . . . . . . . . . . . . . . . . . . . . 150
Sharing project files in Visual SourceSafe . . . . . . . . . . . . . . . . . . . . . . . . . . . 150
Chapter 10 Debugging Application Code . . . . . . . . . 151
Overview of the Interactive Debugger . . . . . . . . . . . . . . . . . . . . . . . . . . . . . . . . . . . 152
Setting up a debugging session . . . . . . . . . . . . . . . . . . . . . . . . . . . . . . . . . . . . . . . . . 153
Using the Debugger . . . . . . . . . . . . . . . . . . . . . . . . . . . . . . . . . . . . . . . . . . . . . . . . . . . 156
About the Debugger toolbar . . . . . . . . . . . . . . . . . . . . . . . . . . . . . . . . . . . . . . . 156
Page 8

viii Contents
Running the Debugger . . . . . . . . . . . . . . . . . . . . . . . . . . . . . . . . . . . . . . . . . . . 156
About the Debug window . . . . . . . . . . . . . . . . . . . . . . . . . . . . . . . . . . . . . . . . . 157
Debugging across multiple pages . . . . . . . . . . . . . . . . . . . . . . . . . . . . . . . . . . 157
Stepping through code . . . . . . . . . . . . . . . . . . . . . . . . . . . . . . . . . . . . . . . . . . . 158
Evaluating an expression and setting a watch . . . . . . . . . . . . . . . . . . . . . . . 158
Chapter 11 Deploying Files . . . . . . . . . . . . . . . . . . . . . 159
Setting default deployment options . . . . . . . . . . . . . . . . . . . . . . . . . . . . . . . . . . . . . 160
Deploying a single file or folder . . . . . . . . . . . . . . . . . . . . . . . . . . . . . . . . . . . . . . . . . 161
Performing a custom deployment . . . . . . . . . . . . . . . . . . . . . . . . . . . . . . . . . . . . . . . 162
Selecting folders and files to deploy . . . . . . . . . . . . . . . . . . . . . . . . . . . . . . . . 162
Adding a deployment server . . . . . . . . . . . . . . . . . . . . . . . . . . . . . . . . . . . . . . 164
Running the Deployment Wizard . . . . . . . . . . . . . . . . . . . . . . . . . . . . . . . . . . 165
Saving deployment results . . . . . . . . . . . . . . . . . . . . . . . . . . . . . . . . . . . . . . . . . . . . . 169
Chapter 12 Testing and Maintaining
Web Pages . . . . . . . . . . . . . . . . . . . . . . . . . . . . . . . . . . . 171
Working in the Results window . . . . . . . . . . . . . . . . . . . . . . . . . . . . . . . . . . . . . . . . . 172
Opening the Results window . . . . . . . . . . . . . . . . . . . . . . . . . . . . . . . . . . . . . . 172
Saving results . . . . . . . . . . . . . . . . . . . . . . . . . . . . . . . . . . . . . . . . . . . . . . . . . . . . 173
Searching documents. . . . . . . . . . . . . . . . . . . . . . . . . . . . . . . . . . . . . . . . . . . . . . . . . . 174
Selecting search text . . . . . . . . . . . . . . . . . . . . . . . . . . . . . . . . . . . . . . . . . . . . . . 174
Saving search text . . . . . . . . . . . . . . . . . . . . . . . . . . . . . . . . . . . . . . . . . . . . . . . . 174
Using basic search commands . . . . . . . . . . . . . . . . . . . . . . . . . . . . . . . . . . . . 175
Using extended search commands . . . . . . . . . . . . . . . . . . . . . . . . . . . . . . . . . 176
Searching with regular expressions . . . . . . . . . . . . . . . . . . . . . . . . . . . . . . . . 180
Checking spelling . . . . . . . . . . . . . . . . . . . . . . . . . . . . . . . . . . . . . . . . . . . . . . . . . . . . . 181
Configuring the spelling checker . . . . . . . . . . . . . . . . . . . . . . . . . . . . . . . . . . 181
Using the spelling checker . . . . . . . . . . . . . . . . . . . . . . . . . . . . . . . . . . . . . . . . 184
Verifying links. . . . . . . . . . . . . . . . . . . . . . . . . . . . . . . . . . . . . . . . . . . . . . . . . . . . . . . . .185
Using Site View to check page links. . . . . . . . . . . . . . . . . . . . . . . . . . . . . . . . . . . . . . 187
Testing page download times . . . . . . . . . . . . . . . . . . . . . . . . . . . . . . . . . . . . . . . . . . . 188
Chapter 13 Extending the Help System . . . . . . . . . . . 191
Introduction . . . . . . . . . . . . . . . . . . . . . . . . . . . . . . . . . . . . . . . . . . . . . . . . . . . . . . . . . . 192
Adding content to the Help tree . . . . . . . . . . . . . . . . . . . . . . . . . . . . . . . . . . . . . . . . . 193
Changing the order of items in the Help tree . . . . . . . . . . . . . . . . . . . . . . . . . . . . . 194
Displaying text files in the Help tree . . . . . . . . . . . . . . . . . . . . . . . . . . . . . . . . . . . . . 195
Chapter 14 Customizing the Development Environment . .
Page 9

Contents ix
197
About Visual Tools Markup Language (VTML) . . . . . . . . . . . . . . . . . . . . . . . . . . . . 198
Using Tag Chooser . . . . . . . . . . . . . . . . . . . . . . . . . . . . . . . . . . . . . . . . . . . . . . . . . . . . 199
Exploring the new VTML structure . . . . . . . . . . . . . . . . . . . . . . . . . . . . . . . . . . . . . . 200
About dialog definition files . . . . . . . . . . . . . . . . . . . . . . . . . . . . . . . . . . . . . . . . . . . . 201
Category tag . . . . . . . . . . . . . . . . . . . . . . . . . . . . . . . . . . . . . . . . . . . . . . . . . . . . . 201
Element tag . . . . . . . . . . . . . . . . . . . . . . . . . . . . . . . . . . . . . . . . . . . . . . . . . . . . . 201
Creating a tag definition file . . . . . . . . . . . . . . . . . . . . . . . . . . . . . . . . . . . . . . . . . . . . 202
Tag definition file structure . . . . . . . . . . . . . . . . . . . . . . . . . . . . . . . . . . . . . . . 202
Defining attributes . . . . . . . . . . . . . . . . . . . . . . . . . . . . . . . . . . . . . . . . . . . . . . . 203
Defining attribute categories . . . . . . . . . . . . . . . . . . . . . . . . . . . . . . . . . . . . . . 203
Building a tag editor . . . . . . . . . . . . . . . . . . . . . . . . . . . . . . . . . . . . . . . . . . . . . . . . . . . 204
Defining controls . . . . . . . . . . . . . . . . . . . . . . . . . . . . . . . . . . . . . . . . . . . . . . . . 204
Populating dialog boxes with tag data . . . . . . . . . . . . . . . . . . . . . . . . . . . . . . 205
Generating a tag . . . . . . . . . . . . . . . . . . . . . . . . . . . . . . . . . . . . . . . . . . . . . . . . . 205
Adding tag Help. . . . . . . . . . . . . . . . . . . . . . . . . . . . . . . . . . . . . . . . . . . . . . . . . . . . . . . 208
Container and Control examples. . . . . . . . . . . . . . . . . . . . . . . . . . . . . . . . . . . . . . . . 209
TabDialog . . . . . . . . . . . . . . . . . . . . . . . . . . . . . . . . . . . . . . . . . . . . . . . . . . . . . . . 209
TabPage . . . . . . . . . . . . . . . . . . . . . . . . . . . . . . . . . . . . . . . . . . . . . . . . . . . . . . . . 209
Panel . . . . . . . . . . . . . . . . . . . . . . . . . . . . . . . . . . . . . . . . . . . . . . . . . . . . . . . . . . . 209
Label . . . . . . . . . . . . . . . . . . . . . . . . . . . . . . . . . . . . . . . . . . . . . . . . . . . . . . . . . . . 210
DropDown . . . . . . . . . . . . . . . . . . . . . . . . . . . . . . . . . . . . . . . . . . . . . . . . . . . . . . 210
ListBox . . . . . . . . . . . . . . . . . . . . . . . . . . . . . . . . . . . . . . . . . . . . . . . . . . . . . . . . . . 210
FontPicker . . . . . . . . . . . . . . . . . . . . . . . . . . . . . . . . . . . . . . . . . . . . . . . . . . . . . . 211
ColorPicker . . . . . . . . . . . . . . . . . . . . . . . . . . . . . . . . . . . . . . . . . . . . . . . . . . . . . 211
Checkbox . . . . . . . . . . . . . . . . . . . . . . . . . . . . . . . . . . . . . . . . . . . . . . . . . . . . . . . 211
RadioGroup . . . . . . . . . . . . . . . . . . . . . . . . . . . . . . . . . . . . . . . . . . . . . . . . . . . . . 211
TextArea . . . . . . . . . . . . . . . . . . . . . . . . . . . . . . . . . . . . . . . . . . . . . . . . . . . . . . . . 212
SQLTextArea . . . . . . . . . . . . . . . . . . . . . . . . . . . . . . . . . . . . . . . . . . . . . . . . . . . . 212
FileBrowser . . . . . . . . . . . . . . . . . . . . . . . . . . . . . . . . . . . . . . . . . . . . . . . . . . . . . 213
Image . . . . . . . . . . . . . . . . . . . . . . . . . . . . . . . . . . . . . . . . . . . . . . . . . . . . . . . . . . . 213
StyleTextBox . . . . . . . . . . . . . . . . . . . . . . . . . . . . . . . . . . . . . . . . . . . . . . . . . . . . 213
ActiveX . . . . . . . . . . . . . . . . . . . . . . . . . . . . . . . . . . . . . . . . . . . . . . . . . . . . . . . . . 213
Building a custom wizard . . . . . . . . . . . . . . . . . . . . . . . . . . . . . . . . . . . . . . . . . . . . . . 214
Creating a wizard definition page . . . . . . . . . . . . . . . . . . . . . . . . . . . . . . . . . . . . . . . 215
Dynamic expressions in tags . . . . . . . . . . . . . . . . . . . . . . . . . . . . . . . . . . . . . . 215
Bound controls . . . . . . . . . . . . . . . . . . . . . . . . . . . . . . . . . . . . . . . . . . . . . . . . . . 215
Wizard definition page example . . . . . . . . . . . . . . . . . . . . . . . . . . . . . . . . . . . 215
Creating a wizard output template . . . . . . . . . . . . . . . . . . . . . . . . . . . . . . . . . . . . . . 218
Parameters . . . . . . . . . . . . . . . . . . . . . . . . . . . . . . . . . . . . . . . . . . . . . . . . . . . . . . 218
Expressions and functions . . . . . . . . . . . . . . . . . . . . . . . . . . . . . . . . . . . . . . . . 218
WIZ Tags . . . . . . . . . . . . . . . . . . . . . . . . . . . . . . . . . . . . . . . . . . . . . . . . . . . . . . . . 219
Special considerations . . . . . . . . . . . . . . . . . . . . . . . . . . . . . . . . . . . . . . . . . . . . 219
Page 10

x Contents
Wizard definition page library . . . . . . . . . . . . . . . . . . . . . . . . . . . . . . . . . . . . . . . . . . 220
Examples . . . . . . . . . . . . . . . . . . . . . . . . . . . . . . . . . . . . . . . . . . . . . . . . . . . . . . . 220
SelectDataSource . . . . . . . . . . . . . . . . . . . . . . . . . . . . . . . . . . . . . . . . . . . . . . . . 220
Chapter 15 Scripting the Visual Tools Object Model 223
Writing and executing scripts . . . . . . . . . . . . . . . . . . . . . . . . . . . . . . . . . . . . . . . . . . . 224
The VTOM hierarchy . . . . . . . . . . . . . . . . . . . . . . . . . . . . . . . . . . . . . . . . . . . . . 224
Writing a script . . . . . . . . . . . . . . . . . . . . . . . . . . . . . . . . . . . . . . . . . . . . . . . . . . 224
Executing a script . . . . . . . . . . . . . . . . . . . . . . . . . . . . . . . . . . . . . . . . . . . . . . . . 225
Creating a custom toolbutton or toolbar . . . . . . . . . . . . . . . . . . . . . . . . . . . . 226
Application object. . . . . . . . . . . . . . . . . . . . . . . . . . . . . . . . . . . . . . . . . . . . . . . . . . . . . 227
Properties . . . . . . . . . . . . . . . . . . . . . . . . . . . . . . . . . . . . . . . . . . . . . . . . . . . . . . . 227
Methods . . . . . . . . . . . . . . . . . . . . . . . . . . . . . . . . . . . . . . . . . . . . . . . . . . . . . . . . 234
Toolbar and toolbutton methods . . . . . . . . . . . . . . . . . . . . . . . . . . . . . . . . . . 252
ActiveDocument object . . . . . . . . . . . . . . . . . . . . . . . . . . . . . . . . . . . . . . . . . . . . . . . . 258
Properties . . . . . . . . . . . . . . . . . . . . . . . . . . . . . . . . . . . . . . . . . . . . . . . . . . . . . . . 258
Methods . . . . . . . . . . . . . . . . . . . . . . . . . . . . . . . . . . . . . . . . . . . . . . . . . . . . . . . . 262
DocumentCache object. . . . . . . . . . . . . . . . . . . . . . . . . . . . . . . . . . . . . . . . . . . . . . . . 269
Properties . . . . . . . . . . . . . . . . . . . . . . . . . . . . . . . . . . . . . . . . . . . . . . . . . . . . . . . 269
Project object . . . . . . . . . . . . . . . . . . . . . . . . . . . . . . . . . . . . . . . . . . . . . . . . . . . . . . . . .272
Properties . . . . . . . . . . . . . . . . . . . . . . . . . . . . . . . . . . . . . . . . . . . . . . . . . . . . . . . 272
Methods . . . . . . . . . . . . . . . . . . . . . . . . . . . . . . . . . . . . . . . . . . . . . . . . . . . . . . . . 272
ProjectManager object. . . . . . . . . . . . . . . . . . . . . . . . . . . . . . . . . . . . . . . . . . . . . . . . . 274
Properties . . . . . . . . . . . . . . . . . . . . . . . . . . . . . . . . . . . . . . . . . . . . . . . . . . . . . . . 274
Methods . . . . . . . . . . . . . . . . . . . . . . . . . . . . . . . . . . . . . . . . . . . . . . . . . . . . . . . . 274
Folder methods . . . . . . . . . . . . . . . . . . . . . . . . . . . . . . . . . . . . . . . . . . . . . . . . . . 276
Deployment methods . . . . . . . . . . . . . . . . . . . . . . . . . . . . . . . . . . . . . . . . . . . . 278
DeploymentManager object. . . . . . . . . . . . . . . . . . . . . . . . . . . . . . . . . . . . . . . . . . . . 280
Properties . . . . . . . . . . . . . . . . . . . . . . . . . . . . . . . . . . . . . . . . . . . . . . . . . . . . . . . 280
Methods . . . . . . . . . . . . . . . . . . . . . . . . . . . . . . . . . . . . . . . . . . . . . . . . . . . . . . . . 281
Project folder names . . . . . . . . . . . . . . . . . . . . . . . . . . . . . . . . . . . . . . . . . . . . . 285
HTTPProvider object . . . . . . . . . . . . . . . . . . . . . . . . . . . . . . . . . . . . . . . . . . . . . . . . . . 288
Properties . . . . . . . . . . . . . . . . . . . . . . . . . . . . . . . . . . . . . . . . . . . . . . . . . . . . . . . 288
Methods . . . . . . . . . . . . . . . . . . . . . . . . . . . . . . . . . . . . . . . . . . . . . . . . . . . . . . . . 293
ZIPProvider object. . . . . . . . . . . . . . . . . . . . . . . . . . . . . . . . . . . . . . . . . . . . . . . . . . . . . 298
Properties . . . . . . . . . . . . . . . . . . . . . . . . . . . . . . . . . . . . . . . . . . . . . . . . . . . . . . . 298
Methods . . . . . . . . . . . . . . . . . . . . . . . . . . . . . . . . . . . . . . . . . . . . . . . . . . . . . . . . 299
ActiveScripting examples . . . . . . . . . . . . . . . . . . . . . . . . . . . . . . . . . . . . . . . . . . . . . . 304
JScript . . . . . . . . . . . . . . . . . . . . . . . . . . . . . . . . . . . . . . . . . . . . . . . . . . . . . . . . . . 304
VBScript . . . . . . . . . . . . . . . . . . . . . . . . . . . . . . . . . . . . . . . . . . . . . . . . . . . . . . . . 306
Third-party add-ins . . . . . . . . . . . . . . . . . . . . . . . . . . . . . . . . . . . . . . . . . . . . . . . . . . . 308
Running a script at startup . . . . . . . . . . . . . . . . . . . . . . . . . . . . . . . . . . . . . . . . 308
Sample startup script . . . . . . . . . . . . . . . . . . . . . . . . . . . . . . . . . . . . . . . . . . . . . 308
Page 11

Contents xi
Table of CommandID values . . . . . . . . . . . . . . . . . . . . . . . . . . . . . . . . . . . . . . . . . . . 310
Table of SettingID values . . . . . . . . . . . . . . . . . . . . . . . . . . . . . . . . . . . . . . . . . . . . . . . 314
Glossary . . . . . . . . . . . . . . . . . . . . . . . . . . . . . . . . . . . . 323
Page 12

xii Contents
Page 13

About This Book
Using HomeSite+ for Dreamweaver MX is designed to familiarize you with the
product’s user interface and the productivity tools that you can use to quickly
develop high-quality applications and web content.
Contents
• Intended audience................................................................................................... xiv
• Developer resources................................................................................................. xiv
• About the documentation ....................................................................................... xvi
• Getting answers......................................................................................................xviii
• Contacting Macromedia........................................................................................ xviii
• Copyright information............................................................................................. xix
Page 14
xiv About This Book
Intended audience
This book is intended for professional web developers who have a working
knowledge of HTML and web server environments. It introduces you to the user
interface and development tools, and provides instructions for installing,
configuring, and using the product.
Developer resources
Macromedia Corporation is committed to setting the standard for customer support
in developer education, technical support, and professional services. Therefore, the
Macromedia web site provides a wealth of online resources.
This section also describes other resources available for HomeSite+ for
Dreamweaver MX developers.
Macromedia website
The Macromedia website is designed to give you quick access to the entire range of
online resources, as described in the following table:
Resource Description URL
Macromedia website General information about Macromedia
products and services
Product information Detailed product information on Macromedia
products and related topics
Technical support Macromedia HomeSite Support Center with
links to many support services
Search the repository of technical articles on
Macromedia products
Installation support Support for installation-related issues for all
Macromedia products
Support forums Online access to experienced developers
and Macromedia support staff, where you
can post messages and read replies on
subjects relating to HomeSite+ for
Dreamweaver MX features
Developer Center All the resources that you need to stay
current in your skills, including online
discussion groups, Knowledge Base,
technical papers and more
Browser testing sites Links to websites that provide online testing
services, as browser compatibility is still an
important issue for website developers.
www.macromedia.com/
www.macromedia.com/software/
www.macromedia.com/support/
homesite
www.macromedia.com/support/
homesite/installation.html
http://
webforums.macromedia.com/
homesite/
www.macromedia.com/desdev/
developer/
http://builder.cnet.com/
webbuilding/
0-7255-8-5801921-1.html
Page 15

Developer resources xv
Resource Description URL
Professional education Information about developer certification
and the classes, on-site training, and online
courses offered by Macromedia
Macromedia alliances Connection with the growing network of
solution providers, application developers,
resellers, and hosting services that create
solutions with Macromedia products
www.macromedia.com/support/
training/
www.macromedia.com/partners/
ColdFusion web resources
Following are just a few of the many sites dedicated to ColdFusion Markup Language
(CFML) development:
• CF Advisor Online at http://www.cfadvisor.com/api-shl/
engine.cfmwww.cfadvisor.com/api-shl/engine.cfm/a.
• Haznet’s Fallout shelter, a CF portal, at http://www.hudziak.com/haznet/
cfml.htmlwww.hudziak.com/haznet/cfml.html/a.
• ColdFusion Developer’s Journal, an online version of the popular print journal, at
http://www.sys-con.com/coldfusion/index2.cfmwww.sys-con.com/coldfusion/
index2.cfm/a.
Tutorials
The World Wide Web Consortium (W3C) at www.W3Schools.com offers free web
tutorials.
Page 16

xvi About This Book
About the documentation
The documentation is designed to provide support for the complete spectrum of
participants. The print and online versions are organized to allow you to quickly
locate the information that you need. The online documentation is provided in
HTML and Adobe Acrobat formats.
You can also access release notes, product support information, and several
developer resources from the Help menu.
The rest of this section describes the conventions used in the documentation and the
contents of the HomeSite+ for Dreamweaver MX documentation set.
Documentation conventions
When reading the documentation, note formatting cues, as described in the
following table:
Typ e o f
information Convention
Code sample Set in a
Levels to access
a dialog box or
pane
Book titles and
emphasized text
New terms Set in boldface
Separated by the greater than sign (>), and the path is set in bold.
Following are two examples:
• “Select File > New” means “Select New from the File menu.”
• “Select Options > Settings > Editor > Auto Completion”
Set in italics
monospaced font
means “Select Settings from the Options menu. In the Settings
dialog box, expand the Editor node and select Auto Completion.”
Viewing online documentation
You can view Help for a specific tag, Help topics in HTML format, or online
documentation in Adobe Acrobat (PDF) format.
To view Help for a tag:
• Position the cursor in a tag and press F1 or right-click and select Edit Tag. Help for
the selected tag appears, including syntax and usage information.
F1 Help is available for all supported languages. To view a list of the supported
languages, open Tag Chooser (Ctrl+E).
Page 17

About the documentation xvii
To view the online HTML Help:
1 Select Help > Open Help References Window.
The Help tab of the Resources window appears, displaying a tree of online books
that includes several language references, as well as the documentation.
2 Find the Help topic you need, using the tree, search engine, index, or bookmarks.
For details, see “Getting the most from the online Help system” on page 35.
3 Double-click a topic to display it in the Document window.
To view the PDF documentation:
Open the PDF documentation from the product CD-ROM or download it from the
HomeSite+ for Dreamweaver MX section of the Macromedia website.
Printing online documentation
You can print one Help topic at a time in the HTML Help, or print as many pages of
the Help as you need from the Adobe Acrobat (PDF) format of the Help.
To print a single Help topic in the HTML Help:
1 Display the Help topic that you want to print.
For instructions, see “Viewing online documentation” on page xvi.
2 Right-click the topic in the Document window and select your browser’s
command to print.
To print several pages from the PDF documentation:
1 Open the PDF documentation from the product CD-ROM or download it from
the HomeSite+ for Dreamweaver MX section of the Macromedia website.
2 Print as many pages of the documentation as you need.
For more information, see the Adobe Acrobat Reader online Help.
Page 18

xviii About This Book
Getting answers
One of the best ways to solve particular programming problems is to tap into the vast
expertise of the HomeSite+ for Dreamweaver MX developer communities which you
can by following the Community links on http://www.macromedia.com/software/
homesite/.
Other developers on the forum can help you figure out how to do just about anything
with http://www.macromedia.com/software/homesite/. The search facility can also
help you search messages from the previous 12 months, allowing you to learn how
others have solved a problem that you might be facing. The forum is a great resource
for learning HomeSite+ for Dreamweaver MX, and it is also a great place to see the
HomeSite+ for Dreamweaver MX developer community in action.
Contacting Macromedia
Corporate
headquarters
Technical
support
Sales
Macromedia, Inc.
600 Townsend Street
San Francisco, CA 94103
Tel: 415.252.2000
Fax: 415.626.0554
Web: http://www.macromedia.commacromedia.com/a
Macromedia offers a range of telephone and web-based
support options. Go to http://www.macromedia.com/
support/www.macromedia.com/support//a for a complete
description of technical support services.
All user forums are listed on the Macromedia Forums home
page at http://www.macromedia.com/support/forums/
http://www.macromedia.com/support/forums//a. You can
post an entry anytime.
To ll - fr e e: 888.939.2545
Tel: 617.219.2100
Fax: 617.219.2101
E-mail:
mailto:sales@macromedia.comsales@macromedia.com/
a
Online store: http://dynamic.macromedia.com/bin/MM/
store/US/home.jsphttp://dynamic.macromedia.com/bin/
MM/store/US/home.jsp/a.
Page 19

Copyright information xix
Copyright information
Portions of the software are copyrighted as follows:
Copyright © 2001, Macromedia Inc. All rights reserved.
Copyright © 1987-2000 by Francois Piette, Rue de Grady 24, 4053 Embourg, Belgium.
Copyright © 1998-2000 World Wide Web Consortium (Massachusetts Institute of
Technology, Institut National de Recherche en Informatique et en Automatique, Keio
University) ARR.
Quality freeware from Sight&Sound, Slovenia: http://www.sight-sound.si Version 1.0:
release date 15.11.1996.
The Drag & Drop Component Suite Copyright © 1997-1999 (Version 3.7) by Angus
Johnson & Anders Melander. All Rights Reserved.
Copyright © 1999 Bradley D. Stowers.
Copyright © 1996-2000 Plasmatech Software Design, All Rights Reserved.
Copyright © 1995-2000 by L. David Baldwin, All Rights Reserved.
Copyright © 1995-1998 Xceed Software Inc., All Rights Reserved
Copyright © 1996-1999, EFD Systems, All Rights Reserved.
Copyright © 1998 by REDSystems.
Copyright © 1999-2001 by Hydrix Technologies.
Copyright © 2001 Ipswitch Inc.
The Sentry Spelling Checker Engine Copyright © 2000 Wintertree Software Inc.
Ttree Component Library Copyright © 1998-2000 by David Berneda.
Copyright © 1997-1999, Top Support.
Copyright © 1997 by Jordan Russell.
Page 20

xx About This Book
Page 21

Chapter 1
Setting Up the Product
This chapter describes how to install or upgrade HomeSite+ for Dreamweaver MX
and how to initially configure it.
Contents
• System requirements .................................................................................................. 2
• Installing or upgrading ............................................................................................... 2
• Completing the setup ................................................................................................. 3
• Monitoring system resources ..................................................................................... 6
Page 22

2 Chapter 1 Setting Up the Product
System requirements
The minimum installation requirements are as follows:
• Pentium-compatible processor (Pentium II or higher recommended)
®
• Microsoft Windows
Windows XP
• Internet Explorer 4.5 or later
• 128 MB available RAM
• 800 x 600 pixel screen resolution with 256-color display
• 200 MB of hard disk space
®
• ColdFusion
• CD-ROM drive for packaged (not trial) version
Server for debugging, database access, and deployment
98, Windows ME, Windows NT® 4.0, Windows 2000, or
Installing or upgrading
This section contains instructions for installing and upgrading HomeSite+ for
Dreamweaver MX. The installation also installs TopStyle 2.1 Lite, its integrated style
sheet editor, unless your computer already has TopStyle version 2.1 or 2.5 installed.
Do not install an earlier version of HomeSite+ for Dreamweaver MX over a later
version; however, later versions are backward-compatible with earlier versions. If
both this version and a previous version are installed on your computer, you can run
either version, but the earlier version will reflect changes made in the current version
to searching, source control and projects, debugging, FTP, RDS, and validation.
HomeSite+ for Dreamweaver MX records any errors that are encountered during the
installation to install.log in the root directory. Please be ready to send this file to
Technical Support if you need help with the installation.
Page 23

Completing the setup 3
To install or upgrade:
1 If you are upgrading, you can uninstall the previous version before installing the
new version, but do not delete the UserData and AutoBackup folders from the
previous installation. If you delete them, you cannot import your customizations,
or the files that were created by Auto Backup, into the new version.
2 Close all open applications and insert the HomeSite+ for Dreamweaver MX
CD-ROM.
3 When the initial window displays, click Install.
4 Follow the instructions in the Installation Wizard.
5 After the program files are copied to your computer, select the option to restart
your computer and click Finish.
Note
If you would like to configure Microsoft Internet Explorer so that it opens this
product as the default HTML editor (instead of Microsoft Frontpage, for example),
see Knowledge Base article http://www.allaire.com/handlers/
index.cfm?ID=10425&Method=Full10425/a on the Macromedia website.
Completing the setup
This section explains how to initially set up HomeSite+ for Dreamweaver MX if you
have installed it for the first time, and how to set up HomeSite+ for Dreamweaver MX
based on the options that were set in a previous version. The Initial Configuration
Wizard (ICW) guides you through both of these processes.
Note
The English language version of HomeSite+ for Dreamweaver MX is installed with
support for Chinese (traditional and simplified), Korean, and Japanese character sets
on localized Windows systems. To enter characters from these sets, use the
Microsoft input method. This support depends on your system language, and does
not work if the Western language option is set. In Windows, you can reset your
system language from the Control Panel, in Regional Settings or Regional Options.
About the Initial Configuration Wizard
The Initial Configuration Wizard (ICW) lets you carry over options from a previous
version and also set new options.
The first time you run the current version of HomeSite+ for Dreamweaver MX, the
ICW automatically starts, and it checks for a previous version:
• If one is found, you can selectively import options from the previous version.
• If one is not found, the Wizard prompts you to set a few initial options.
When you are finished, HomeSite+ for Dreamweaver MX starts.
Page 24

4 Chapter 1 Setting Up the Product
You can run the ICW again at any time by selecting File > New and then selecting
Initial Configuration Wizard from the Custom tab.
Using the Initial Configuration Wizard
This section explains how to complete the ICW after a first-time installation on a
computer, and after an upgrade.
The ICW automatically starts when you run HomeSite+ for Dreamweaver MX for the
first time.
To complete the ICW after a first-time installation:
1 In the initial Welcome dialog box of the Wizard, click Next.
2 In the Debug Settings dialog box, add, modify, or delete RDS server
configurations. Click Next.
3 In the Debug Mappings dialog box, add, modify, or delete mappings to RDS
servers. Click Next.
You can view or modify this information later using the Debug menu commands.
4 In the Development Style dialog box, select the language toolbars to include in
the QuickBar, and select or browse to the template that you want to use as your
default for all HomeSite+ for Dreamweaver MX documents.
5 In the Perform Upgrade dialog box, confirm your selections (you can click Back
and make changes if necessary), and then click Finish.
The initial configuration is complete and you can start using HomeSite+ for
Dreamweaver MX.
To complete the ICW after an upgrade:
1 In the initial Welcome dialog box of the Wizard, click Next.
2 In the Upgrade Product Settings dialog box, note the items that you can upgrade,
based on the changes made in the previous version. Click Next.
What appears next depends on the changes made in the previous version:
• If remote servers were defined in the previous version, the Upgrade Remote
Servers dialog box appears.
Select every server that you need for the current version or any previous
version. (If you do not select a server in this list, it will no longer work in the
previous version either.) Click Next.
• If toolbars were added or modified, the Upgrade Toolbars dialog box appears.
Select every toolbar change that you want to carry over to the current version.
Click Next.
• If the previous version contained customizations such as shortcuts, snippets,
code templates, and modifications to Tag Completion and Tag Insight, then
the Upgrade Feature Customizations dialog box appears. Select every
customization that you want to carry over to the current version. Click Next.
Page 25

Completing the setup 5
3 In the Preserve Editor Settings dialog box, select the options to carry over to the
current version. Click Next.
You can change these options later by selecting Options > Settings and making
changes in the Editor pane, Validation pane, and the panes underneath Editor.
4 In the Preserve General Settings dialog box, select the customizations to carry
over to the current version. (Only nondefault options appear.) Click Next.
You can change these options later by selecting Options > Settings and making
changes in the following panes: General, Markup Languages, Startup, Locations,
File Settings, Browse, Spelling, Dreamweaver/UltraDev, Projects, and Tag
Definitions Library.
5 In the Miscellaneous Settings dialog box, select the items whose options you
want to carry over to the current version. For example, to carry over color coding
customizations, select Color Settings. Or if Auto Completion was enabled in the
previous version, and you want to keep it turned on in the current version, select
Auto Completion. Click Next.
6 In the Debug Settings dialog box, add, modify, or delete RDS server
configurations. Click Next.
7 In the Debug Mappings dialog box, add, modify, or delete mapping to RDS
servers. Click Next.
You can view or modify this information later using the Debug menu commands.
Note
To import a localhost RDS development mapping from a previous version,
complete the Wizard, open HomeSite+ for Dreamweaver MX, expand the
Macromedia FTP & RDS node on one of the Files tabs, right-click the localhost
server and select Delete server. Run the Wizard again and import the previous
version of the localhost RDS development mapping.
8 In the Development Style dialog box, select the language toolbars to include in
the QuickBar, and select or browse to the template that you want to use as your
default for all HomeSite+ for Dreamweaver MX documents.
9 In the Perform Upgrade dialog box, confirm your selections (you can click Back
and make changes if necessary), and then click Finish.
The initial configuration is complete and you can start using HomeSite+ for
Dreamweaver MX.
Page 26

6 Chapter 1 Setting Up the Product
Monitoring system resources
On Windows 98 and Windows ME platforms, HomeSite+ for Dreamweaver MX uses
a great amount of Windows Graphics Device Interface (GDI) and user resources. This
section describes the resource problem and how to mitigate it.
For more information, also see http://www.allaire.com/Handlers/
index.cfm?ID=21011&Method=FullKnowledge Base article 21011/a on the
Macromedia website.
Releasing system resources taken at startup
You can free up Windows 98/ME resources by preventing unnecessary programs and
processes from running at startup.
To release resources that Windows 98/ME takes at startup:
1 In Windows, select Start > Run.
2 In the Run dialog box, enter msconfig and click OK.
3 Clear the options that you are absolutely certain that you do not need, use, or
have. Record your changes as you proceed, in case you need to change back.
4 Click Apply.
For a useful description of memory usage on Windows 98/ME systems, see the
Windows 9.x System Resources article on http://www.windows-help.net/techfiles/
win-resources.htmlInfiniSource/a.
After reclaiming these resources, if you still encounter difficulties with system
resources, you might benefit from configuring the Resource Level Monitor.
About the Resource Level Monitor
The Resource Level Monitor runs in the background when you start HomeSite+ for
Dreamweaver MX and warns you when resources reach a critical level, enabling
them to save documents and close the application before a crash occurs. However,
the warning dialog box was not labeled with the application name, and users had to
edit the Windows registry to configure the monitor.
As a result, the Resource Level Monitor has been enhanced for this release so that the
warning dialog box includes the application name in the window title and in the
message text, to indicate that it is generated by HomeSite+ for Dreamweaver MX.
Also, users can now configure the monitor in a graphical user interface.
Note
You must have rsrc32.dll installed on your computer to use the Resource Monitor.
This DLL file comes from the Windows System Resource Monitor.
Page 27

Monitoring system resources 7
Using the Resource Level Monitor
This section explains how to respond to warnings and how to configure the monitor.
Responding to warnings
A warning dialog box appears if your available Windows Graphics Device (GDI) or
user resources drop below your default warning thresholds. For example, it appears
if your default warning threshold for GDI resources is 15% and your available GDI
resources drop to 14%.
For best results, save your work, even if you choose to continue. If you continue, the
warning dialog box closes and does not appear again unless your system resources
drop another 5%; for example, when your GDI resources drop to 9%.
Configuring the monitor
You should configure the Resource Level Monitor if your system crashes without
having been warned, or if you are being warned frequently or unnecessarily. You can
adjust monitor options until you find a stable level for your computer.
To configure the Resource Level Monitor:
1In the Options > Settings > Resource Monitoring pane, specify any of the
following options:
• Enable resource monitoring Clear this to disable resource monitoring.
GDI level threshold (%) Select the minimum percentage of remaining
Windows Graphics Device Interface (GDI) resources before the system issues
a warning. The default is 15%.
• User level threshold (%) Select the minimum percentage of remaining user
level resources before the system issues a warning. The default is 15%.
• Monitoring interval (minutes) Select a time interval in minutes for the
system to monitor your available resources.
2 Click Apply.
Page 28

8 Chapter 1 Setting Up the Product
Page 29

Chapter 2
Configuring Browsers and Servers
This chapter contains instructions for setting up browsers and servers.
Contents
• Configuring the internal browser............................................................................. 10
• Configuring an external browser ............................................................................. 12
• Working with files on remote servers ...................................................................... 14
Page 30

10 Chapter 2 Configuring Browsers and Servers
Configuring the internal browser
You can use the internal browser to browse documents and application pages from
within HomeSite+ for Dreamweaver MX.
With a server mapping, you can also preview server-side processes in your page; for
example, server-side includes, results from submitting a form to a CGI program, and
the results of server-side code. For more information, see “About server mappings”
on page 20.
You can also use the Browse toolbar to view pages in external browsers, test the page
in different screen resolutions, and more. For more information, see “A b ou t t he
Browse tab” on page 29.
To set internal browser options:
1In the Options > Settings > Browse pane, select one of these browser options:
• Use Microsoft Internet Explorer Uses Microsoft Internet Explorer (version
3.01 or later) as the internal browser. To download the latest version, see
http://www.microsoft.com/downloads/http://www.microsoft.com/
downloads//a.
• Use Netscape Uses Netscape (version 6 or later) as the internal browser.
For this option you must correctly install and configure the Mozilla browser
NGLayout/Gecko control. (Please note that the Mozilla control is under
continual development, and could lack stability.)
For setup instructions, “To install and configure Mozilla:” on page 10.
• Use the built-in browser Uses the built-in browser as the internal browser.
Please note that this browser has only limited support of HTML and browser
extensions.
You can only use one internal browser at a time, but you can change this setting
as needed. Restart the product for the change to take effect.
2 To have the same file saving behavior when viewing pages in the internal browser
as when viewing pages in the external browser, select Use External Browser
Configuration for Internal Browser.
For more information, see “Configuring an external browser” on page 12.
To install and configure Mozilla:
1 Download a Mozilla build from http://ftp.mozilla.org/pub/mozilla/releases/
http://ftp.mozilla.org/pub/mozilla/releases//a.
For best results, download the Mozilla 0.8.1 build created on 8/28/2001, from
http://ftp.mozilla.org/pub/mozilla/releases/mozilla0.8.1/
mozilla-win32-0.8.1.ziphttp://ftp.mozilla.org/pub/mozilla/releases/
mozilla0.8.1/mozilla-win32-0.8.1.zip/a.
2 Unzip the Mozilla binary files into a new directory on your computer.
Page 31

Configuring the internal browser 11
3 Add the Mozilla bin directory to your PATH environment variable. Reboot if
necessary. If you are using Windows 95/98, you may have to specify the short
name version of the path; for example, c:\mozil~1\bin.
4 If your Mozilla bin directory does not have component.reg, or it is small ( < 5k),
then delete it and run mozilla.exe. This generates a new component.reg file.
This file is the database that XPCOM uses to create new objects. If it is not there or
it is empty, the Mozilla control will not be able to create Gecko components.
5 Open a Command prompt and change to the Mozilla bin directory. For example,
if the bin directory is in D:\mozilla, enter
d: and then enter cd mozilla\bin.
6Enter regsvr32 mozctlx.dll.
If this does not work, the directory containing regsvr32.exe is not in your
PATH
variable. Use the Windows Find Files utility to locate the program and then run it
using its full path; for example c:\winnt\system32\regsvr32.exe mozctl.dll.
7 Run regedit.exe and, under HKEY_LOCAL_MACHINE\Software, create a new key
called Mozilla; for example, HKEY_LOCAL_MACHINE\Software\Mozilla.
8 Create a string value under this key called BinDirectoryPath, with a value of the
path to the Mozilla bin directory; for example, c:\mozilla\bin.
For more information, see Knowledge Base article http://www.allaire.com/
Handlers/index.cfm?ID=9927&Method=Full9927/a on the Macromedia website.
Page 32

12 Chapter 2 Configuring Browsers and Servers
Configuring an external browser
As part of the installation process, the program compiles a list of the web browsers it
detects on your computer. You can view, add, edit, and remove browser
configurations; you can change the default browser; and you can set the file saving
behavior for your browsers.
The following procedures describe how to configure the external browsers.
To view the list of browsers:
• Select Options > Configure External Browsers.
The External Browsers dialog box appears.
To add a browser to the list:
1 Select Options > Configure External Browsers.
2 In the External Browsers dialog box, verify that the browser is installed on your
computer, and then click Add.
3 Complete the Browser dialog box, as follows:
• Name Enter a name for the new browser.
• Use DDE Select this if the browser uses Dynamic Data Exchange (DDE) for
object linking and embedding. (Most browsers use Object Linking and
Embedding (OLE) instead.)
• Location Click the file icon, find the browser program file, and click Open.
4 Click OK.
The External Browsers dialog box displays the new browser configuration.
5Click OK.
HomeSite+ for Dreamweaver MX saves your changes.
To edit a browser in the list:
1 Select Options > Configure External Browsers.
2 In the External Browsers dialog box, select a browser and click Edit.
3 (Optional) In the Browser dialog box, change information for the browser:
• Name Enter a different name for the browser.
• Use DDE Select this if the browser uses Dynamic Data Exchange (DDE) for
object linking and embedding. (Most browsers use OLE instead.)
• Location Select a different program file for the browser (for example, select
a later version of the browser).
4Click OK.
5 In the External Browsers dialog box, click OK.
HomeSite+ for Dreamweaver MX saves your changes.
Page 33

Configuring an external browser 13
To remove a browser from the list:
1 Select Options > Configure External Browsers.
2 In the External Browsers dialog box, select a browser and click Delete.
3 Click Yes to confirm.
4Click OK.
HomeSite+ for Dreamweaver MX saves your changes.
To change the default browser:
1 Select Options > Configure External Browsers.
2 In the External Browsers dialog box, select the appropriate browser, and click the
up arrow until it is the first item in the list.
3Click OK.
HomeSite+ for Dreamweaver MX saves your changes.
To set the file saving behavior for your browsers:
1 Select Options > Configure External Browsers.
2 In the External Browsers dialog box, select one of the following options:
• Prompt to save changes to the current document Asks you whether to
save the current document before opening it in the external browser.
• Automatically save changes to the current document Saves the current
document before opening it in the external browser.
• Browse using a temporary copy (no need to save) Copies the current
document and opens this copy in the external browser. This option is useful
when you are making many changes to a page, but it requires more system
resources.
3Click OK.
HomeSite+ for Dreamweaver MX saves your changes.
Note
If you select the Use External Browser Configuration for Internal Browser option, the
file saving behavior that you specify here also applies to the internal browser.
Page 34
14 Chapter 2 Configuring Browsers and Servers
Working with files on remote servers
Working with directories and files on remote servers is similar to working with them
on local or network drives. For example, when you save files, changes are saved to the
remote server. The primary difference is that you must establish a connection to a
remote server before you can work with its files.
Using the SNE node
You can use the Macromedia FTP & RDS node, called the Shell Namespace
Extension (SNE) node, to add FTP and RDS servers. Then you can work with files on
configured remote servers from within HomeSite+ for Dreamweaver MX and in
Windows Explorer, as the following describes:
• In HomeSite+ for Dreamweaver MX Display a Files resource tab and, in the top
pane, select My Computer from the drop-down list.
The top pane displays all of your drives and SNE node servers.
• In Windows Explorer Find the SNE node under My Computer, and access the
files under the SNE node in the same way as you access files in a folder.
If you cannot find the SNE node, open the Options > Settings > File Settings >
FTP & RDS pane and select the Enable Explorer shell integration option.
You must also select this option to debug pages and access RDS servers.
In previous releases, the SNE node was called Allaire FTP & RDS. In this version, the
node is called Macromedia FTP & RDS. If you install this version on a computer that
has a previous version of the product installed, the previous version no longer
recognizes the node. To fix this, you must modify the SNE node.
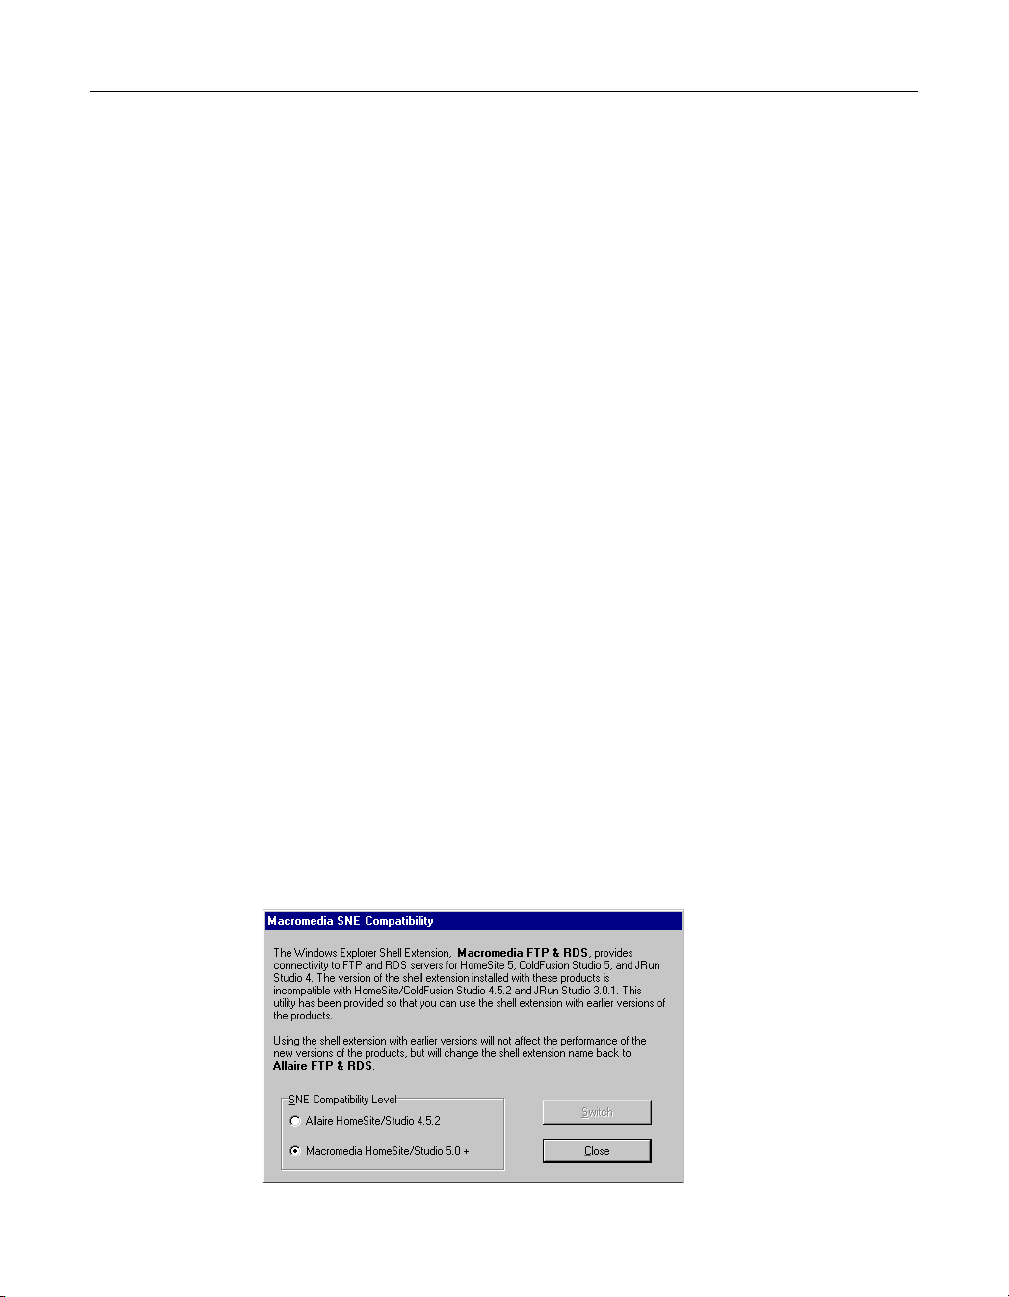
To use the SNE node with earlier versions:
1 After completing the installation, run the SNECompatibility.exe program in the
program directory; for example, C:\Program
Files\Macromedia\HomeSite+\SNECompatibility.exe.
The Macromedia SNE Compatibility dialog box appears:
Page 35

Working with files on remote servers 15
2 Select the appropriate compatibility option:
• Allaire HomeSite/Studio 4.5.2 Enables the remote server functionality in
both this version and in previous versions, and changes the name of the SNE
node to “Allaire FTP & RDS.”
• Macromedia HomeSite/Studio 5.0+ Enables the remote server
functionality only in this version.
3 Click Switch, then click Close.
Connecting to a server
HomeSite+ for Dreamweaver MX provides FTP server access, and secure HTTP
access through Remote Development Services (RDS).
RDS lets you communicate using HTTP with ColdFusion on your local computer and
on any configured remote host. RDS features include:
• Secure server access
• Remote file access
• Data source browsing and SQL query building
• CFML debugging
You must have an RDS server connection to access data sources and to debug pages.
Required server information
You must have specific information about a remote server to connect to it, such as its
host name and user access requirements. You can obtain this information from the
owner of the server, whether it is your IT group, an ISP, or another provider.
Connecting to an FTP server
You can remotely access FTP servers for file transfers and other site management
tasks using the Macromedia FTP & RDS node. After the connection is established,
you can access files on remote servers and maintain websites located anywhere on
the Internet.
FTP server connection requirements vary greatly. The following instructions work in
the majority of cases.
Page 36

16 Chapter 2 Configuring Browsers and Servers
To connect to an FTP server:
1 On the Files resource tab, in the top pane, select Macromedia FTP & RDS from
the drop-down list.
• If you see Allaire FTP & RDS in the list, you can select this instead. For more
information, see “Using the SNE node” on page 14.
• If you do not see any FTP & RDS node in the list, select Options > Settings >
File Settings > FTP & RDS > Enable Explorer shell integration.
2 In the list of servers in the top pane, right-click the top-level node labeled
Macromedia FTP & RDS and select Add FTP Server.
3 Complete the Configure FTP Server dialog box, as follows:
Field Description Comment
Description Name for the FTP server to
display in the Files tab and in
Windows Explorer.
Host Name Server’s IP address or domain
name, such as
macromedia.com.
Initial Directory Top-level directory for the
account.
Relative from
server-assigned
directory
Username Login name for the account
Password Password for the account used
Root URL The http:// address of the site. This setting allows you to
Remote Port Port used by the FTP server. Use the default 21, unless the
Option to specify if the initial
directory should be set from
the server-assigned user
directory or from the server
root.
used to access the remote
server, or “anonymous” for
anonymous FTP servers.
to access the remote server.
Servers with ftp as part of the
domain name require you to
enter the complete name; for
example, ftp.somesite.com.
This is optional for accounts
that default to the root directory
of the FTP server, but it is
required if the account
specifies an initial directory.
Clear this option if the Initial
Directory should be set from
the server root.
If you leave this field blank, you
must provide a username
when you log in.
If this field is left blank, you are
asked for a password when
you log in.
browse files that were opened
from the remote server, edited,
and saved.
server administrator or ISP
specifies another port.
Page 37

Working with files on remote servers 17
Field Description Comment
Request Timeout Maximum number of seconds
to wait for a server connection
to complete.
Disable passive
mode
File time offset The number of hours ahead or
Assume UTC file
times
4Click OK.
You can now work with files on the server.
Option to select if the server
does not use passive
connections.
behind the current local time to
use in the date and time
information for files on the FTP
server.
Option to adjust date/time
information on the FTP server
for servers using the Universal
Coordinated Time format.
If you set this value, you
cannot select the Assume UTC
file times option.
Select this if you see incorrect
date/time information for files
on the FTP server.
To do a file size check after transferring a file:
1 Open a local file.
2 Select File > Save As, and save the local file to the remote server.
3 If nothing happens, the file transfer was successful.
Otherwise, if there is a discrepancy between the byte counts of the local copy and
the copy saved to the remote server, an error message appears.
Enabling secure FTP
You can transfer data using Secure Sockets Layer (SSL) to servers that support 40-bit
encryption and decryption. HomeSite+ for Dreamweaver MX installs this FTP
technology, from Ipswitch, as well as a default certificate and key.
Note
For this release, you cannot successfully transfer Unicode and Unicode Big Endian
files through FTP using SSL. Therefore, disable the Secure (SSL) feature in the
Configure FTP Server dialog box before transferring these types of files.
To enable SSL for an FTP connection:
1 On the Files resource tab, in the top pane, with Macromedia FTP & RDS selected
in the drop-down box, right-click the FTP server and select Properties.
2 In the Configure FTP Server dialog box, select the Secure (SSL) option.
Page 38

18 Chapter 2 Configuring Browsers and Servers
3 Click Configure SSL and enter the appropriate certificate information.
For more information, click Help.
4Click OK.
The following table summarizes the error messages that you could receive:
Error message Cause
Unable to connect to the FTP
server.Success
Remote Server Operation Failure:
Winsock Error: Connection aborted.
Secure Connection Error - you have
requested a secure connection to the
server but either the server does not
support SSL or WS_FTP could not
negotiate a secure connection. This
connection is NOT secure. Do you wish
to continue?
SSL has not been enabled in the Configure
FTP Server dialog box, and you attempted
to connect to a server requiring SSL.
An SSL-enabled connection is selected at
startup, but SSL is disabled on the server.
To revert to the installed certificate and key:
1In the Options > Settings > File Settings > FTP & RDS pane, select the Reset FTP
SSL Certificate to Default option.
2 Click Apply.
Connecting to an RDS server
Complete the following configuration procedure for each ColdFusion Server that
you want to access.
To connect to an RDS server:
1 On the Files resource tab, in the top pane, select Macromedia FTP & RDS from
the drop-down list.
• If you see Allaire FTP & RDS in the list, you can select this instead. For more
information, see “Using the SNE node” on page 14.
• If you do not see any FTP & RDS node in the list, select Options > Settings >
File Settings > FTP & RDS > Enable Explorer shell integration.
2 In the list of servers in the top pane, right-click the top-level node labeled
Macromedia FTP & RDS and select Add RDS Server.
3. Complete the Configure RDS Server dialog box, as follows:
Field Description
Description Enter a label for the ColdFusion Server connection.
Host name Enter localhost or an IP address.
Page 39

Working with files on remote servers 19
Field Description
Port Accept the default Port or enter your ColdFusion Server port
number.
Use Secure
Sockets Layer
Remaining RDS
security fields
4 Click OK.
The ColdFusion Server appears in the Macromedia FTP & RDS list on the Files
resource tab and in Windows Explorer.
Select this option if needed for SSL security.
Complete these fields based on the settings in the ColdFusion
Administrator. For details, see “Managing ColdFusion security
for RDS” on page 19.
Managing ColdFusion security for RDS
The ColdFusion installation configures basic security for the server and, by default,
requires a password for the ColdFusion Administrator and for HomeSite+ for
Dreamweaver MX.
To change the default security settings:
1 Open ColdFusion Administrator.
2 Select Basic Security from the ColdFusion Server link list.
3 Change the password security settings.
For more information, see the ColdFusion documentation.
4 Click Apply.
Managing servers
You can view, change, and delete server configurations.
To view and edit the configuration for a server:
1 On the Files resource tab, in the top pane, with Macromedia FTP & RDS selected
in the drop-down box, right-click the server and select Properties.
2 (Optional) Make changes in the server configuration.
3Click OK.
HomeSite+ for Dreamweaver MX saves the changes to the server configuration.
To delete a server:
1 On the Files resource tab, in the top pane, with Macromedia FTP & RDS selected
in the drop-down box, right-click the server and select Delete Server.
Page 40

20 Chapter 2 Configuring Browsers and Servers
2 In the confirmation dialog box, click Yes.
HomeSite+ for Dreamweaver MX removes the remote server from the Macromedia
FTP & RDS list.
About server mappings
A development mapping is essential for working with files using Remote
Development Services (RDS). With mappings, you can process pages on a server
from within HomeSite+ for Dreamweaver MX, and you can debug application code
on a remote server using RDS.
To add a server mapping, see “Adding a server mapping” on page 23.
Mapping for page processing
By default, when you browse a page in the internal or external browser, HomeSite+
for Dreamweaver MX opens the page from the local file system, or returns it using
FTP from a remote server. That is adequate for checking page content and
formatting. For developing a website, however, you must see dynamic pages as
visitors to your site will experience them.
To do this, you can route the documents through a web server. The server software
can be on your local computer, a network server, or a remote system. So, instead of
opening the files, an HTTP request for the page is sent to the server. If any server-side
processing is required, such as for CFML, JavaServer Pages ( JSP), or other scripting
languages, the web server transfers the page to the appropriate server for further
processing, and then returns it to the browser. This is valuable for previewing
applications and site elements in a test environment before deploying the site.
You establish this routing by associating the physical directories where your files are
stored with the server that processes the files. This association is called a mapping. A
wide range of web servers is supported, so you can create multiple mappings and
select which server to use for processing. Consult your server documentation or
provider for the specifics of accessing server directories.
To use server mappings, you must configure Microsoft Internet Explorer or Netscape
Mozilla NGLayout as the internal browser. For more information, see “Configuring
the internal browser” on page 10.
Mapping for debugging
If you have ColdFusion and HomeSite+ for Dreamweaver MX on the same computer,
you can run the debugger against files opened from the file system, including
mapped network drives. But if you are working with a remote ColdFusion Server
using RDS, you must set a mapping to that server to run the debugger.
To debug applications in HomeSite+ for Dreamweaver MX, you also must complete
the procedures in “Debugging Application Code” on page 151.
Page 41

Working with files on remote servers 21
Understanding RDS mappings
A file mapping ensures that HomeSite+ for Dreamweaver MX, the RDS server, and
your browser can resolve a local path into a server path and URL. The path fields in
the Configure RDS Server dialog box specify how each — HomeSite+ for
Dreamweaver MX, the RDS server, and your browser—can find the directory that you
are mapping.
Note
An error occurs if you try to browse a file when the HomeSite+ Path set in an RDS
mapping does not match the path of the active file. For example, you cannot browse
a file opened from a mapped drive unless that drive path matches the mapping path.
The next section presents the most common RDS mapping scenarios.
RDS file mapping examples
The following scenarios show how file mappings work when you have local or
remote files matched with either local or remote servers:
• HomeSite+ for Dreamweaver MX and ColdFusion on the same computer
• Debugging in HomeSite+ for Dreamweaver MX on a remote ColdFusion Server
using one of the following:
− Drive mappings
− Network Neighborhood
− RDS file access
Using local paths
Debugging against a locally installed version of ColdFusion Server (localhost) is the
most common scenario. In most cases, this arrangement allows both the ColdFusion
Server and HomeSite+ for Dreamweaver MX to see the directories in the same way.
In this scenario, you use mappings to resolve URL paths. The URL part of the
mapping determines how HomeSite+ for Dreamweaver MX displays a physical file in
a browser.
For example, both HomeSite+ for Dreamweaver MX and the ColdFusion Server
might see a file as C:\webprojects\App1\index.cfm, and the browser as
http://215.180.21.1/index.cfm.
Page 42

22 Chapter 2 Configuring Browsers and Servers
To resolve the URL paths, you must create a mapping for the App1 directory, as in
the following table:
ColdFusion Server and HomeSite+ for Dreamweaver MX on same computer
HomeSite+ path C:\webprojects\App1\
ColdFusion Server path C:\webprojects\App1\
Browser/URL path http://215.180.21.1/
Using drive mappings
Developers often debug against a remote server across an internal network. In many
cases, they use a network drive mapping.
For example, a developer might have a remote drive X mapped to a network shared
directory \\MyServer\webprojects\ where webprojects is the name of the shared
directory in the network server MyServer.
In this scenario, HomeSite+ for Dreamweaver MX might see a file as
X:\App1\index.cfm, the ColdFusion Server as C:\webprojects\App1\index.cfm, and
the browser as http://215.180.21.1/App1/index.cfm.
To resolve communication between HomeSite+ for Dreamweaver MX and the
ColdFusion Server, you must create a mapping for the App1 directory, as in the
following table:
HomeSite+ access to a remote server using drive mappings
HomeSite+ path X:\App1\
ColdFusion Server path C:\webprojects\App1\
Browser/URL path http://215.180.21.1/App1/
Using UNC paths and the Network Neighborhood
Developers can debug code against remote ColdFusion Servers across an internal
network using UNC paths. They often use the Network Neighborhood to access a file
on a remote server. For example, a developer might access a file on
\\MyServer\webprojects\, where webprojects is the name of the shared directory in
the network server MyServer.
In this scenario, HomeSite+ for Dreamweaver MX might see a file as
\\MyServer\webprojects\App1\index.cfm, the ColdFusion Server as
C:\webprojects\App1\index.cfm, and the browser as http://215.180.21.1/App1/
index.cfm.
Page 43

Working with files on remote servers 23
HomeSite+ for Dreamweaver MX and the ColdFusion Server must understand how a
file location appears to the parties involved, so you must create a mapping for the
App1 directory, as in the following table:
HomeSite+ accesses files on remote server using UNC paths/Network
Neighborhood
HomeSite+ path \\MyServer\webprojects\App1\
ColdFusion Server path C:\webprojects\App1\
Browser/URL path http://215.180.21.1/App1/
Using Remote Development Services
When developing outside local area networks, you access files on a ColdFusion
Server across the Internet using Remote Development Services (RDS).
In this scenario, HomeSite+ for Dreamweaver MX might see a file as
RDS://MyRDSserver/C:/webprojects/App1/index.cfm, the ColdFusion Server as
C:\webprojects\App1\index.cfm, and the browser as http://215.180.21.1/App1/
index.cfm.
Although the server path can be inferred from the local RDS path, you still must
create a mapping. In special scenarios, the path resolution from the ColdFusion
Server to HomeSite+ for Dreamweaver MX can be ambiguous. Therefore, you must
create a mapping for the App1 directory, as in the following table:
HomeSite+ accesses files on remote server using RDS remote file access
HomeSite+ path RDS://MyRDSserver/C:/webprojects/App1/
ColdFusion Server path C:\webprojects\App1\
Browser/URL path http://215.180.21.1/App1/
Adding a server mapping
This section provides instructions for adding a server mapping in HomeSite+ for
Dreamweaver MX, and how to set a default mapping.
For more information on setting up server mappings, see the following articles on
the Macromedia website:
• http://www.allaire.com/Handlers/index.cfm?ID=8347&Method=FullHow to set
up a server mapping in HomeSite 4.0/a
• http://www.allaire.com/handlers/index.cfm?ID=8500&Method=FullSetting up
Server Mappings in HomeSite/a
Note
If you use Personal Home Page Tools (PHP) on an Apache web server, see Dave
Alder’s article, http://www.roundridge.com/hs/index.phpSetting up server
mappings with HomeSite/Apache/PHP/a.
Page 44

24 Chapter 2 Configuring Browsers and Servers
To add a mapping:
1In the Options > Settings > Browse pane, select Microsoft Internet Explorer,
Netscape Mozilla NGLayout, or the built-in browser as the internal browser.
2 Click Development Mappings.
3 In the Remote Development Settings dialog box, on the Mapping tab, select a
server from the drop-down list of configured servers.
If a server is not on the list, add it. For more information, see “Adding a server
mapping” on page 23.
4 Enter path information for the mapping:
• HomeSite+ Path Path for HomeSite+ to access a directory
• ColdFusion Server Path Path for the ColdFusion Server to access the same
directory
• Browser Path Path for the internal browser to access the same directory
For page browsing on localhost, only HomeSite+ Path and Browser Path are
required.
5 Click Add, then click OK.
6 Click Apply.
HomeSite+ for Dreamweaver MX saves the mapping. You can now browse your
documents in the internal or external browser.
To edit a mapping:
1In the Options > Settings > Browse pane, click Development Mappings.
2 In the Remote Development Settings dialog box, on the Mapping tab, select a
mapping and click Edit.
3 (Optional) Edit the information for the mapping.
4 Click Update, then click Apply.
To change to the mappings for a different server:
1In the Options > Settings > Browse pane, click Development Mappings.
2 In the Remote Development Settings dialog box, on the Mapping tab, select the
server for the mapping that you want to use.
3 Click OK, then click Apply.
To set a mapping as the default:
1In the Options > Settings > Browse pane, click Development Mappings.
2 In the Remote Development Settings dialog box, on the Mapping tab, select the
mapping that you want to move.
3 Click the up arrow to move the mapping to the top of the list.
4Click OK.
Page 45

Chapter 3
Exploring the Workspace
This chapter acquaints you with the main areas of the user interface. It also guides
you in customizing the workspace to make your development work as productive as
possible.
Contents
• The workspace areas................................................................................................. 26
• Working in the Resources window........................................................................... 28
• Creating and browsing files in the Document window.......................................... 29
• Tracking your work in the Results window ............................................................. 30
• Customizing the workspace ..................................................................................... 31
• Getting the most from the online Help system....................................................... 35
Page 46

26 Chapter 3 Exploring the Workspace
The workspace areas
The term workspace describes the user interface that you see when you first load the
program. The workspace has four principal areas:
• Command area At the top of the workspace is the title bar, which displays the
file path of the current document. Below that is the menu bar, which contains
standard Windows commands plus development menus. Below the menus are
toolbars that provide one-click access to commands and application tools. To the
right is the QuickBar, a tabbed toolbar for inserting JSP, HTML, and other web
language elements.
• Resources window Contains tabs for file management, data sources, projects,
code snippets, online Help, and Tag Inspector.
• Document window Contains tabs for writing and browsing pages.
• Results window Contains tabs to track search and replace operations, code
validation, link verification, images, project deployment, and compilation.
The following figure shows the main workspace areas:
Page 47

The workspace areas 27
Setting options
The Settings dialog box lets you configure many HomeSite+ for Dreamweaver MX
options to fit your work style, and you can easily change settings for different tasks.
To set options:
1 Select Options > Settings (F8) to open the dialog box.
2 Click a feature category in the left pane to display options in the right pane.
Expand a category to view further options.
3 Click Apply to save the settings.
To customize the workspace, see “Customizing the workspace” on page 31.
Page 48

28 Chapter 3 Exploring the Workspace
Working in the Resources window
The Resources window is a tabbed user interface that gives you quick access to file
management, development, and Help resources. Select a tab at the bottom of the
window to open the pane for each resource. Context menus and specialized toolbars
provide the set of commands for each pane.
The following table describes each tab in the Resources window:
Resources tab Description
Files 1 and Files 2 Lets you manage files on local and network drives and on remote
servers. The drop-down list at the top allows you to pick a drive or
server; the bottom two panes display directories and files for the
selected drive or server. The two Files tabs, labeled Files 1 and
Files 2, facilitate working with files in multiple locations, including
directories, drives, and remote systems.
For information about how HomeSite+ for Dreamweaver MX
determines the current directory with two Files tabs, see “About
the Files tabs” on page 42.
Database Shows your application data sources. When you add a data
source, it appears in the drop-down list at the top. Just select a
data source to view its schema. You can write and test database
queries in the SQL Builder.
Projects Helps you manage site content by organizing pages and
supporting files. You have the option of adding a project to your
version source control system. The drop-down list at the top
displays recent projects. The bottom two panes display the folders
and files for the selected project.
Site View Provides a visual representation of each link in the current
document. Right-click in the pane to select a view type and display
options. Right-click a link to expand the view.
Snippets Provides a convenient place to store code blocks and content for
reuse. You can also share snippets with other users.
Help Contains product documentation and other online resources. You
can customize the Help by adding and editing Help files. For more
information, see “Extending the Help system” on page 38.
Tag Inspector Lets you edit in an interactive property sheet user interface. The
top pane is the Tag Tre e , a customizable view of the document
hierarchy. The bottom pane is the Tag Inspector, where you can
edit code instead of working directly in the Document window.
Page 49

Creating and browsing files in the Document window 29
Creating and browsing files in the Document window
You work primarily in the Document window as you develop code and content. The
three tabs at the top of the give you access to the following activities:
• Edit Develop code and content.
• Browse Preview your work in the internal browser.
• Help View Help. This tab appears the first time you open a file from the Help tab
at the bottom of the Resources window.
The following sections explain how to use each of these tabs.
About the Edit tab
The Edit tab opens the Editor, which can be used for everything from simple text
editing to developing application code and content.
The Edit toolbar extends vertically to the left of the Document window below the Edit
tab when you select the Edit tab. You can position the cursor over each toolbutton to
display a descriptive tooltip.
About the Browse tab
The Browse tab displays the current document in the internal browser. This is helpful
when you are making many changes to a page that do not require processing by a
server; for example, previewing formatting changes. For information on configuring
the internal browser, see “Configuring the internal browser” on page 10.
The Browse toolbar displays at the top of the Document window when you select the
Browse tab. You can position the cursor over each toolbutton to display a descriptive
tooltip. You can use the toolbar to browse a page, refresh the display, and test a page
in different screen resolutions. Use Toggle Rulers to frame your page with rulers
measuring in pixels, with the 640x480 markers highlighted in red. Use Browser Size to
preview a page in a 640x480 or 800x600 screen resolution.
Press F12 to display the current document in the internal browser, or press F11 to
view the document in the default external browser.
About the Help tab
This tab displays tag-specific Help and pages from the Help. This tab becomes visible
in the workspace upon opening it for the first time.
To open the Help tab, do one of the following:
• Press F1 in a tag editor
• Select a tag in Tag Chooser and press F1
• In the Editor, position the cursor in a tag and press F1
• In the Resources window, on the Help tab, display a Help page
Page 50

30 Chapter 3 Exploring the Workspace
Note
You can cycle through all of the pages that have been opened in the Help tab during
the current session. To do this, click in a page and then hold down the Alt key while
pressing the left or right arrow key.
Tracking your work in the Results window
The Results window displays the results of document operations in individual
panels. It opens automatically when you run an extended search (Extended Find or
Extended Replace), Code Validation, Link Verification, Image Thumbnails, or Project
Deployment.
Select View > Results to display the Results window above the Status bar. You can use
the drag bar at the top of the window to resize the view. Right-click any tab to open a
menu of commands that apply to the tab.
Page 51

Customizing the workspace 31
Customizing the workspace
If you are interested in configuring the workspace to more readily support the way
you work, you can start by viewing a list of the functions that are available in
HomeSite+ for Dreamweaver MX, to see if you are using the program to its full
potential.
To view a list of HomeSite+ for Dreamweaver MX functions:
1 Select Options > Customize.
2 In the Customize dialog box, on the Toolbars tab, review the contents of the
Toolbuttons list.
3 (Optional) Add a toolbutton for a function to a toolbar. For more information, see
“Customizing toolbars” on page 32.
4Click Close.
There are many ways to customize the look and functionality of your workspace,
including setting the display and positioning of toolbars and tabs in the Resources
window; assigning shortcut keys for commands, code snippets, and scripts; and
creating custom toolbuttons.
For advanced customizations, such as editing tag editors and creating new ones, use
the Visual Tools Markup Language (VTML). For more information, see “Customizing
the Development Environment” on page 197.
You can extend or change the program’s functionality by scripting the Visual Tools
Object Model (VTOM). For more information, see “Scripting the Visual Tools Object
Model” on page 223.
Managing application toolbars and the QuickBar
The application toolbars and the QuickBar are divided by location, function, and the
level of customization available.
The application toolbars, on the left of the workspace, provide standard Windows
commands, and access to tools such as external browsers, the Style Editor, Code
Validation, and the Link Checker.
The QuickBar, on the right of the workspace, lets you insert tags from any of the
supported languages.
You can change the order of tabs on the QuickBar, hide a default toolbar, show a
toolbar that is hidden by default, or move a toolbar.
To change the order of tabs in the QuickBar:
1 In the workspace, right-click in any toolbar or the QuickBar, and select Organize
QuickBar.
2 In the Organize QuickBar dialog box, select names of tabs and press the Up and
Down arrow keys until you are satisfied with the order of the tabs.
Page 52

32 Chapter 3 Exploring the Workspace
The tab on the top of the list appears on the far left side of the QuickBar.
3Click Close.
To hide or show a toolbar:
1 Select Options > Customize.
2 In the Customize dialog box, in the Visible Toolbars box, clear the check box next
to every toolbar that you want to hide, and select the check box next to every
toolbar that you want to show.
3 If you want to use the default settings for toolbars—which toolbars display in the
workspace and in what position—click Reset to Defaults.
This does not override any changes that you have made to toolbuttons.
4Click Close.
To move a toolbar or QuickBar tab:
1 For a QuickBar tab, verify that the tab is active.
2 Drag a toolbar or QuickBar tab by its handle (the two vertical bars on its left edge)
to a new position.
3 To move every toolbar back to its default position in the workspace, select
Options > Customize. In the Customize dialog box, click Reset to Defaults.
This also resets the default settings for which toolbars are shown or hidden. It
does not override any changes that you have made to toolbuttons.
4 To move every floating toolbar and QuickBar tab to its default position in the
workspace, right-click in a toolbar or QuickBar and select Dock floating toolbars.
Customizing toolbars
You can add standard and custom toolbuttons to a toolbar, change the order of
toolbuttons in a toolbar, remove toolbuttons from a toolbar, and add and remove a
custom toolbar. You cannot delete a standard toolbar, but you can hide it.
To add a standard toolbutton:
1 Select Options > Customize.
2 In the Customize dialog box, in the Visible Toolbars box, select the toolbar to
which you want to add a toolbutton.
If you are using the default workspace, you might want to select the View toolbar,
since it has room for a few more toolbuttons.
A picture of the selected toolbar appears near the top of the dialog box.
3 In the Toolbuttons box, scroll until you see the toolbutton that you want to add.
4 Drag the toolbutton to an empty space in the picture of the toolbar.
5Click Close.
Page 53

Customizing the workspace 33
The toolbutton is added to the toolbar in the workspace.
To add a custom toolbutton to a toolbar:
1 Select Options > Customize.
2 In the Customize dialog box, in the Visible Toolbars box, select a toolbar.
3 Click Add Custom Button.
4 In the Custom Toolbutton dialog box, specify what you want the custom
toolbutton to do, as described in the following table:
For the custom
button to do this... Do this...
Insert start and end
tags into the current
document
Display a custom
dialog box
Launch an application
besides Dreamweaver
MX, which already has
a toolbutton in the
Editor toolbar
Run an ActiveScript file Select Execute an ActiveScript file, and complete the
Select Insert custom start and end tags into the current
document, and complete the Start Tag and End Tag
boxes.
Select Display a custom dialog, and complete the Dialog
File box with the full path of the VTML file.
Select Launch external application, complete the
Filename box with the absolute path of the program’s
executable file, and complete the Command Line box
with the necessary commands; for example,
passes the current document’s name to the external
program.
Script File box with the absolute path of the script file.
%CURRENT%
5 Click Browse and select an image file, or enter the absolute path of the image for
the toolbutton in the Button Image box.
This is not applicable when launching an external application.
6 In the Caption box, enter a text label to appear under the toolbutton when a user
displays both toolbuttons and their captions.
This is not applicable when launching an external application.
7 In the Button Hint box, enter text for the toolbutton’s tooltip.
8Click OK.
9 In the Customize dialog box, click Close.
The toolbutton is added to the toolbar in the workspace.
To change the order of toolbuttons:
1 Select Options > Customize.
2 In the Customize dialog box, in the Visible Toolbars box, select a toolbar.
Page 54

34 Chapter 3 Exploring the Workspace
3 In the picture of the toolbar, drag each toolbutton that you want to move to its
new position.
4Click Close.
To remove a toolbutton:
1 Select Options > Customize.
2 In the Customize dialog box, in the Visible Toolbars box, select a toolbar.
3 In the picture of the toolbar, drag the toolbutton that you want to remove to a
position outside of the toolbar.
4Click Close.
To add a custom toolbar:
1 Select Options > Customize.
2 In the Customize dialog box, to the right of the Visible Toolbars box, click Add
To o lb a r.
3 In the Add Toolbar dialog box, enter a name for the toolbar and click OK.
4 (Optional) Add toolbuttons and separators to the new toolbar.
5 (Optional) To make the new toolbar visible in the workspace, select the check box
next to it.
6Click Close.
To delete a custom toolbar:
1 Select Options > Customize.
2 In the Customize dialog box, in the Visible Toolbars box, select a toolbar.
3 Click Delete Toolbar.
4 Click Yes to confirm.
The custom toolbar is deleted.
Page 55

Getting the most from the online Help system 35
Getting the most from the online Help system
The online Help system provides you with several types of information:
• Pop-up Help for basic tag syntax (press F2)
• Comprehensive context-sensitive tag Help (press F1)
• Embedded Help in tag editors, Tag Chooser, and Expression Builder (press F1 or
Ctrl+F1)
• An extensive collection of searchable references in the Help tab
Opening Help in tag editors and Tag Chooser
Help text in tag editors and in Tag Chooser provides context-sensitive syntax and
usage information.
To view Help in a tag editor or Tag Chooser, do one of the following:
• Click Toggle Embedded Help. Help text displays in a pane at the bottom of the
dialog box.
• Click Browse help in separate panel. Help text displays in a new browser window.
• Press F1. Help text displays on the Help tab in the Document window.
For more information, see “About the Help tab” on page 29.
Editing Help in tag editors and Tag Chooser
Using the Visual Tools Markup Language (VTML), you can edit Help text in dialog
boxes or add your own text. For details, see “Customizing the Development
Environment” on page 197, and particularly “Adding tag Help” on page 208.
Accessing online Help
The online Help tab contains the printed product documentation in HTML format
and additional online references. They are an extensible resource for learning about
product features, technology extensions, and other development topics.
In the Resources window, click the Help tab to display the Help. You can access other
options for viewing Help from the Help toolbar, located at the top of the Help tab.
Printing Help
If you are using Internet Explorer as the internal browser, you can print a Help topic
by displaying the document on the Browse tab, then right-clicking the document and
selecting Print.
The default internal browser does not support printing.
Page 56

36 Chapter 3 Exploring the Workspace
Bookmarking Help
You can quickly access your favorite Help documents by bookmarking them. You can
assign bookmarks to documents in the Help, file system, or the Internet.
To bookmark a document in the Help Tree:
• Right-click the document title and select Add bookmark.
If the Help document is open, it automatically displays in the Bookmarks list. If
the document is not open, right-click again and select Refresh.
To bookmark an external document:
1 On the Help toolbar, click the down arrow next to the Bookmarks toolbutton and
select Organize Bookmarks.
2 In the Help Bookmarks dialog box, click Add.
3 In the Add Bookmark dialog box, enter a name for the bookmark.
4 Click Browse and find the document to bookmark, or enter the appropriate URL
or file path.
5Click OK.
The bookmark is added to the Help Bookmarks list.
6Click Close.
To open a bookmarked Help document:
• On the Help tab toolbar, click the down arrow next to the Bookmarks toolbutton
and select a bookmark from the list.
To maintain bookmarks:
On the Help tab toolbar, click the Down arrow key next to the Bookmarks toolbutton
and select Organize Bookmarks to open the Help Bookmarks dialog box. you can
then perform any of the following tasks:
• To add a bookmark, click Add, enter a name, select Browse, find the file or web
page, click Open, and click OK.
The bookmark appears in the Help Bookmarks dialog box.
• To remove a bookmark, click the bookmark and click Remove.
The bookmark is removed from the list.
• To rename a bookmark, select the bookmark, click Rename, enter a new name,
and press Enter.
Searching the online Help
You can access a book’s online index in the Help tree, or you can search the entire set
of Help references using basic to complex search criteria.
Page 57

Getting the most from the online Help system 37
Using an online index
With the exception of language references, each book in the Help has an online
index.
To search a book using an index:
1 Decide on the term or terms that you want to find in the index.
2 Do one of the following:
• On the Help tab, in the Help toolbar, click Help tree, and open the book that
you want to search. Double-click the Index page.
• In the top right corner of a topic, click the i toolbutton to open the index for
that topic’s book (and make sure that you search the correct book).
The Index for the selected book appears with a link for each letter of the alphabet.
3 Click the link for the first letter of your search term, and scroll the list of terms as
necessary to find the term. Repeat this step for every search term you need.
Using the full-text search engine
To search the Help for the first time on your computer, allow the program to index
the files; that is, to generate a full-text search database from the files in the Help. This
greatly improves the quality of search results.
After the initial indexing, each time you open the Help tab the program checks the
Help for changes. If Help files have been added or deleted, the program
automatically indexes the Help files again.
If you have problems with Help Search, re-index (regenerate the search database for)
the contents of the Help folder. To do so, close the program, delete the
Verity/Collections folder in your installation directory, open the program again, and
run a search. Click Yes to allow Verity to re-index the Help files.
To run a full-text search of every Help reference:
1 On the Help toolbar, click Search.
2 If this is the first time that you are running a search on your computer, you are
prompted to index the Help text. Click Yes.
3 In the Search Help References dialog box, in the Enter the word(s) to find box,
enter a word or phrase.
For information on using search operators, click Search Tips.
4 To only search the titles in Help pages, select Search titles only (faster).
This is fast but not complete. If you select this and your search does not have the
desired results, try searching again without selecting this option.
5 To limit the references searched, select the Search only in selected references
option and select the check box next to one or more references.
Page 58

38 Chapter 3 Exploring the Workspace
6 Click Search.
The search results appear in the Help pane.
7 To open a document from the results list, double-click it.
The results list is saved until a new search is run.
To return to the search results:
• On the Help toolbar, click Search results.
To redo a recent search:
1 On the Help toolbar, click Search.
2 In the Search Help References dialog box, in the Enter the word(s) to find box,
click the down arrow and select the search string that you previously used.
Using advanced search operators
You can use a variety of advanced search operators to make your searching more
precise. For information on using advanced search operators, click Search on the
Help toolbar and, in the Search Help References dialog box, click Search Tips.
To print this list of search tips, open the file \Help\VeritySearchTips.htm and use
your browser’s print command.
Extending the Help system
Like the product, the Help system is fully extensible. You can add documents to the
Help system by dragging and dropping them into the Help folder, either from the
Files tab or Windows Explorer.
Help document files are generally in HTML, but you can include text files. The Help
browser will use the filename as the title. You can also create a link from within an
HTML file to files with TXT, DTD, and PDF extensions if you use Internet Explorer as
the internal browser. You can view web graphics files (GIF, JPG, PNG) in Help files.
This extensibility enables you to do the following:
• Write and install your own custom Help files
• Download documents from the web and add them to the Help system
• Edit existing Help topics
• Distribute Help files; this can be particularly helpful for a development team
Documents are not visible in the Help tree—only folders are. Therefore you must
place files in an existing folder or a new Help folder.
Page 59

Getting the most from the online Help system 39
Adding content to the Help tree
You can add files or whole references (folders) to the Help tree.
To create a new folder in the Help tree:
1 In a Files tab, navigate to the Help folder in your installation.
2 Right-click in the Files pane and select Create Folder.
A new folder with a highlighted name box appears.
3 Enter a name for the folder in the box, and press Enter.
4 If necessary, press F5 to refresh the Help display.
The new folder appears at the bottom of the Help tree.
To add documents to the Help tree, do one of the following:
• Write an HTML Help file and save it to a folder in the Help directory.
• Use standard Windows commands to paste a file into a folder in the Help
directory.
• Display the document to add in a web browser, and then select the Save As
command and save it to a folder in the Help directory.
Changing the order of items in the Help tree
If you add a folder to the Help directory, the folder appears at the bottom of the Help
tree. For most users, this is all you need to do.
If, however, you want to control the order in which the Help references appear, you
can edit the booktree.xml file in the Help root directory. The structure of the booktree
file uses a basic tag set to configure how the Help displays on the book, chapter, and
page levels.
The parser reads the booktree tags from top to bottom, so you can insert folder and
file tags where you want the references to appear in the Help tree. You can edit this
file to rearrange existing Help content as well as to add custom folders and files to a
specific location in the Help tree. Alternatively, you can use the
book and chapter tags to specify the folder’s location on your computer.
path attribute in the
To add a folder to a specific location in the Help tree:
1 In Windows Explorer, open the Help root directory, make a backup copy of the
booktree.xml file, and copy the new folder into the Help root directory.
2 In HomeSite+ for Dreamweaver MX, open the new Help folder.
3 In the file list, double-click the booktree.xml file.
The booktree file opens in the Editor.
4 Add a book tag for the new folder and save the file.
Example:
<help_book path="folder name”>Custom Help Files
Page 60

40 Chapter 3 Exploring the Workspace
The new folder appears in the order that you set, but the files in the folder appear in
alphabetical order. If you want to control the order of chapters and pages, add tags in
the booktree file for these entries, and rearrange them.
Displaying text files in the Help tree
You can add text files to the Help tree. The Help browser default file type is HTML, so
it looks for a title tag in each file. If it does not find one, or if the tag is empty, it
displays the filename as the document’s title in the Help tree.
To change an HTML file’s title in the Help tree:
• Edit the HTML file to include its new name in the <title> tag.
To change a text file’s title in the Help tree:
1 Make a backup copy of the booktree.xml file in the Help root folder of your
installation directory.
2 Open the booktree.xml file.
3Find the
for example,
help_page tag for the text file, and add a title attribute for the text file;
<help_page title="My Readme">.
Adding media content
You have considerable flexibility in adding supporting files (such as graphics,
animations, video, and sound) to Help documents. The following are two ways to do
this:
• Create a file structure in the Help tree that conforms to the media file references
in your documents. For example, you can copy an Images folder into your custom
Help folder.
• In your custom documents’ references to media content, supply a URL or
accessible file location for remote files. For example, you might reference a
remote site to display a chart of the NASDAQ, so the chart remains up-to-date.
Generally, this approach is not optimal for adding static information, since
external servers can go down and/or your computer can slow down, you use it
with caution.
Note
If you are using the default internal browser or an older external browser, proper
playback of media files is limited.
Page 61

Chapter 4
Managing Files
This chapter describes how to perform file management tasks such as opening,
closing, saving, and automatically backing up files. This chapter also describes how
to work with Unicode and DBCS (Double-Byte Character Set) files.
The tasks described in this chapter do not replace the need for creating a project to
organize the files in a website or web application. For instructions on how to use
projects, see “Managing Projects” on page 137.
To manage remote files, see “Working with files on remote servers” on page 14.
Contents
• About the Files tabs................................................................................................... 42
• About file encoding...................................................................................................43
• Working with files...................................................................................................... 44
Page 62

42 Chapter 4 Managing Files
About the Files tabs
You can select the Files tabs in the Resources window to access servers, drives,
directories, and files.
Having two Files tabs reduces the amount of file system navigation needed to work
across multiple directories and drives. The following screenshot shows the main
areas of the Files tabs.
Following are some tips on how the two Files tabs work together:
• Set the Drive list to My Computer to easily access local and network drives and
Macromedia FTP & RDS.
• You can use the standard copy, move, and paste commands between tabs.
• If you undock one or both of the tabs, you can drag files and folders between
them. To move them, drag them. To copy them, drag them while holding down
the Ctrl key.
• When you select Filter or View from the right-click menu, the setting is only
applied to the active tab; HomeSite+ for Dreamweaver MX maintains separate
settings for each tab.
• Both Files tabs share the same Favorite Folders settings.
• If both File tabs point to the same location, HomeSite+ for Dreamweaver MX
refreshes both tabs to display changes to files and folders in that location.
Page 63

About file encoding 43
Several operations—such as opening and saving files, backing up before replacing
text in files, displaying thumbnails for the images in a folder, browsing to files in tag
editors, and creating an image map—refer to the current directory.
The Files tabs use the following rules to determine which directory is the current
directory:
• When browsing to a file in a tag editor, the current directory is the folder that the
current document is in.
Options > Settings > General > Display current folder in file dialogs must be set.
• If only one Files tab is visible, the current directory is the one displayed in the
visible File tab.
• If both Files tabs are visible, or neither Files tab is visible, then the current
directory is the one displayed in the primary Files tab (Files 1 tooltip).
You can move and dock tabs, for example to display or hide both Files tabs.
About file encoding
If you work with non-ANSI–encoded documents, you can open encoded files and
save files with character encoding.
The following encoding formats are supported:
• ANSI (Current system code page)
• Unic ode
• Unicode Big Endian
• UTF-8
Processing files from Unicode encoding formats involves codepage checking,
detection of file encoding, and format conversions. Therefore, enabling non-ANSI
file encoding slows document handling operations in the Editor. You can also work
with ANSI files while working with Unicode files, but for optimal performance, only
enable non-ANSI file encoding when you must open or save Unicode files.
By default, files are not handled as Unicode.
Note
You cannot transfer a Unicode file successfully using a Secure Sockets Layer (SSL)
enabled FTP server. Disable the SSL feature in the Configure FTP Server dialog box
before transferring these types of files.
To enable non-ANSI file encoding:
1In the Options > Settings > File Settings pane, select Enable non-ANSI file
encoding.
2 (Optional) Select the option to display encoding information on the Document
tab in the Editor window.
3 Click Apply.
Page 64

44 Chapter 4 Managing Files
Working with files
You can use the following procedures to work with files, regardless of their location
(local drive, network drive, or remote server).
Opening and saving files refer to the current directory. For information about how
HomeSite+ for Dreamweaver MX determines the current directory with two Files
tabs, see “About the Files tabs” on page 42.
Setting startup options
You have a number of choices in how files are folders are displayed when you start
HomeSite+.
To set startup options:
1In the Options > Settings > Startup pane, select the files and folders to open
when you open HomeSite+ for Dreamweaver MX.
2 Under Startup, select what you want to open.
3 Under Startup folder, select the folder you want to display in the Files tab.
4 Click Apply.
Opening a file
Use the following procedures to open a file in the file list.
To open a standard file:
1 On the Files tab, use the drive drop-down list and the directory tree to navigate to
2 Double-click the file in the file list.
Note
Read-only files are marked with a red dot in the file list. You can right-click a file and
select Properties to set read and write access. This is not recommended, however, if
you are using a source control application to manage read and write privileges.
To open an encoded file:
1 Verify that you have Unicode formatting enabled.
2 Open the file.
the directory that contains the file.
For more information, see “About file encoding” on page 43.
Page 65

Working with files 45
If you attempt to open a Unicode file without having selected the Enable non-ANSI
file encoding option, the encoding format of the file cannot be detected or handled
properly. The file is loaded as an ANSI string of the same type specified in your
system language settings.
To open a recently used file:
1 Select File > Recent Files.
A drop-down list appears, listing the last ten files that were closed.
2 Select a file from the list.
3 (Optional) To clear the list of recently used files, select File > Recent Files > Clear
MRU List.
4 (Optional) To remove files from the list, select File >Recent Files > Remove
Obsolete.
Adding a link to an open file
To create a link to a file:
1 Open the file in which you want to add a link.
2 From the file list, drag a file or image to the Editor, to the desired cursor position
on the page.
Note
Alternatively, you can right-click a file and select Insert as Link. The link is inserted in
the current page at the cursor position.
Saving a file
In the Document tab at the bottom of the Editor, an X next to a filename indicates
that there are unsaved changes in the file.
This section describes standard file saving behavior and the file saving behavior of
files with encoding.
Saving a standard file
Use the Save commands from the File menu to save a file: Save, Save As, Save All, and
Save as Template. You can specify a format for saved files in the Options > Settings >
File Settings pane. The default format is PC, but UNIX and Macintosh formats are
available. You can also set a default file extension in this pane.
When you add a link or image to a new file, you are prompted to save the file. This
ensures that the relative path to each of these page elements resolves correctly.
Page 66

46 Chapter 4 Managing Files
Saving a file with encoding
If you work with non-ANSI–encoded documents, select character encoding from the
Save As dialog box.
For this release, do not save a file as Unicode or Unicode Big Endian on an
SSL-enabled FTP server, or else the files are not created and saved correctly.
Also, saving Unicode files might result in zero-byte files. This is a known problem that
tends to occur when changing Unicode encoding selections.
To save a file with encoding enabled:
1 Select File > Save As.
2 In the Save As dialog box, in the Encoding drop-down list, select a format.
3 (Optional) Select Check the document character set.
This displays a warning message if the Save As encoding selection conflicts with
the file’s document character set statement (the
HTML), or with the encoding attributes in an XML processing instruction. You
can cancel the Save As operation and reconcile the encoding formats.
4 Complete the other fields as you would for a standard file and click Save.
HomeSite+ for Dreamweaver MX saves the file with the encoding that you specified.
<meta> charset statement in
Backing up files
This section describes the Auto-Backup feature and how to use it.
Auto-Backup operates much like the backup systems in many desktop applications.
It is a convenient way to save files while working, but more importantly, it is a
safeguard against the loss of local and remote files caused by program or computer
crashes, network disruptions, or power outages.
You can configure Auto-Backup to do any of the following tasks:
• Create a backup before the original file is saved.
• Create a backup of all open, modified files at a timed interval.
• Create a backup of files modified by search and replace operations.
In addition, you can back up files that are affected by a Replace operation in the
Search > Extended Replace dialog box.
How Auto-Backup works
Following are the steps that HomeSite+ for Dreamweaver MX takes to back up files:
1 During installation, HomeSite+ for Dreamweaver MX creates a default
Auto-Backup folder under the product root directory, and creates a control
filenamed Auto-Backup.ini to track the files in the Auto-Backup folder.
You can change the backup location. If you do, HomeSite+ for Dreamweaver MX
creates a new INI file in the new location.
Page 67

Working with files 47
2 While you are working on a file, Auto-Backup creates a backup file with the
following name convention: filename + an incremented 3 digit number + the file
extension; for example, myfile000.htm.
3 If the application closes abnormally, when you restart the application,
Auto-Backup opens all of the open files that were saved by Timed Backup.
If Timed Backup is not enabled and the application closes abnormally, you can
open the last backup version of a lost file from the backup location.
4 When the original file is saved, or when the application closes normally,
Auto-Backup deletes a Timed Backup file.
Configuring Auto-Backup
You can configure Auto-Backup to best meet your needs.
To set Auto-Backup options:
1In the Options > Settings > Editor > Auto-Backup pane, enable or disable
Auto-Backup.
2 Accept the default backup directory or select a different one.
3 (Optional) For Auto-Backup on Save, set the following options:
− Use the backup directory for local and network files, or save the backup with
the original file. Note that the backup directory is always used for remote files.
− Set a time interval (in days) after which backup files are deleted.
4 For Timed Auto-Backup, set a time interval (in minutes) after which HomeSite+
for Dreamweaver MX saves all open modified files.
Using Auto-Backup
You can use Auto-Backup to manage backups or to recover a lost file.
To manage backups created by Auto-Backup:
1 Select Options > Auto-Backup File Maintenance.
2 In the Auto-Backup File Maintenance dialog box, manage backups created
during Save and Extended Search and Replace operations.
3Click Close.
To recover unsaved files after the application closes abnormally:
1 Open HomeSite+ for Dreamweaver MX again.
2 If you have set options for Timed Auto-Backup, the Timed Auto-Backup File
Recovery dialog box automatically appears. Recover each lost file by selecting it
and clicking OK.
Page 68

48 Chapter 4 Managing Files
3 Otherwise, select Options > Auto-Backup File Maintenance and, in the
Auto-Backup File Maintenance dialog box, check the files that you must recover
and select File > Open Selected Files for Edit.
The files open in the Editor.
Changing the file list display
You can arrange the file list to display exactly what you want.
To filter the file list:
1 Right-click in the file list, select Filter, and select one of the following options:
• Web Documents displays web documents only.
• Web Images displays web images only (JPEG, JPG, PNG, and GIF).
You can edit the list of file extensions for Web Documents and Web Images in
the Options > Settings > File Settings pane.
• All Web Files displays both web documents and web images.
• All Files displays every file in the selected directory.
2 To refresh the file list display, press F5.
To change the information listed for each file:
1 Right-click in the file list and select View.
2 From the View submenu, show or hide the document title, document size,
modified date/time, and document type.
3 To refresh the file list display, press F5.
Dragging a file from Windows Explorer
You can drag a file or image from Windows Explorer into the current document in the
Editor to create a link to the file.
If you hold down the Ctrl key while dragging the file into the Editor, the file opens in a
new document. If the file is not a recognized file type, you are prompted to open it in
the associated program for that file type.
Building a Favorite Folders list
You can build a list of favorite folders to quickly access their files.
To add a folder to the favorites list:
1 On a Files tab, in the directory tree, select a folder.
2 In the file list, right-click and select Favorite Folders > Add Current Folder to
Favor ites.
Page 69

Working with files 49
To view a favorite folder:
1 On a Files tab, right-click in the file list and select Favorite Folders.
2 From the Favorite Folders submenu, select the folder.
The folder opens in the directory tree and its files appear in the file list.
To organize your favorite folders:
1 On a Files tab, right-click in the file list and select Favorite Folders > Organize
Favor ites.
2 In the Favorite Folders dialog box, select a folder and click the up and down
arrows to move its location in the favorite folders list.
3 Select a folder and click Remove.
4 When you are prompted to confirm the deletion, click Yes.
5Click OK.
Downloading a web page
You can download any HTML page and open it in the Editor.
Note
These files cannot be saved back to the server.
To open a page from a website:
1 Select File > Open from Web.
2 Enter the URL for the page, or select from your Bookmarks or Favorites list.
3 If the site is accessed using a proxy server, click Proxy and enter the server name
and port number.
4 (Optional) Set a time-out limit for the connection.
5Click OK.
The file opens as an untitled document.
To copy web page content, do one of the following:
• Select a block of text on a web page, use the Windows copy commands, and paste
the text into a document. Note that page formatting is not preserved.
• Use the browser’s command to view the web page source code, then copy and
paste the source code that you want into a document.
Note
Please honor any copyright and other restrictions on web document content.
Page 70

50 Chapter 4 Managing Files
Page 71

Chapter 5
Writing Code and Web Content
HomeSite+ for Dreamweaver MX manages many different web development tasks,
from writing basic HTML pages to designing, testing, and deploying complex,
dynamic sites.
This chapter describes basic techniques for creating web content and application
code.
Contents
• Inserting code............................................................................................................ 52
• Using inline tools to enter code ............................................................................... 55
• Using code generating tools.....................................................................................58
• Adding document content ....................................................................................... 59
• Using keyboard shortcuts......................................................................................... 61
• Saving a code block as a snippet.............................................................................. 62
• Resources for website accessibility..........................................................................65
• Tips for visually impaired users ...............................................................................66
Page 72

52 Chapter 5 Writing Code and Web Content
Inserting code
HomeSite+ for Dreamweaver MX coding tools support a range of writing styles, from
typing to point-and-click, and you can set the level of support you want: for
repetitive tasks, you can use its productivity tools to enter repeated code blocks and
required text; when coding tags that you are not familiar with, you can display
pop-up tips and lists of language elements.
Note
Some operations, such as browsing to files in tag editors and creating an image map,
refer to the current directory. For information about how HomeSite+ for
Dreamweaver MX determines the current directory with two Files tabs, see “A b o u t
the Files tabs” on page 42.
Inserting a tag from the QuickBar
The QuickBar is a customizable development toolbar. When you click a QuickBar
toolbutton, it inserts code directly into the document or, for tags that require
attributes, opens a tag editor.
In addition to toolbars for product tools and standard Windows commands, you can
display toolbars for HTML, CFML, JSP, scripting, and ASP code.
Customizing a toolbar
You can customize the QuickBar and toolbars in these ways:.
To do this Do this
Change tab order
in QuickBar
Move QuickBar Drag the double lines at the left end of the toolbar
Reset QuickBar
configuration
You can customize a toolbar in these ways:
To do this Do this
Display Customize
dialog box
Change order of
items in toolbar
Add toolbutton In Customize dialog box, Visible Toolbars list, click a toolbar.
Right-click QuickBar; select Organize QuickBar; use the arrows
to set the tab order
In Customize dialog box, Toolbars tab, click Reset to Defaults.
This does not remove toolbuttons that you have added.
Select Options > Customize.
In Customize dialog box, Visible Toolbars list, click a toolbar.
Drag toolbuttons and separators.
Drag a toolbutton from the list to the toolbar.
Page 73

Inserting code 53
To do this Do this
Add custom
toolbutton
Add separator In Customize dialog box, Visible Toolbars list, click a toolbar.
Remove toolbutton
or separator
Add custom
toolbar
Delete custom
toolbar
Click Add Custom Button. Custom Toolbutton dialog box
displays. Select an action; complete entries for action; click OK.
Click Add Separator. Separator is added. Drag separator.
In Customize dialog box, Visible Toolbars list, click a toolbar.
Drag item from toolbar to outside of toolbar.
In Customize dialog box, click Add Toolbar; enter a name; click
OK. Select new toolbar; add toolbuttons.
In Customize dialog box, select a toolbar, and click Delete
Toolbar.
Selecting a tag from Tag Chooser
Tag Chooser provides access to the tag set in all supported languages. For details, see
“About language support” on page 98.
To use Tag Chooser:
1 In the Editor, right-click and select Insert Tag.
The left pane in Tag Chooser displays the supported languages. The right pane
displays the tags for the selected language.
2 Do either of the following:
• Click a language folder. Its elements display in the right pane.
• Expand a language folder. Its elements display in functional categories. Click
a category. Its tags display in the right pane.
3 Click a tag in the right pane.
If you want to view syntax and usage information for the tag, click one of the Help
icons below the right pane. The Help pane opens to display tag-specific Help.
4 To insert a tag, click Select for the highlighted tag or double-click it.
Tags that are inserted directly into a document are listed with brackets in the right
pane, such as
when the tag is selected.
5 If a tag editor opens for the selected tag, complete the entries as needed and click
OK to insert the tag.
You can open the Help pane in a tag editor for syntax and usage information.
You can resize Tag Chooser and keep it open while you work.
<HTML></HTML>. All other tags have individual editors that open
Page 74

54 Chapter 5 Writing Code and Web Content
Completing a tag with a tag editor
You can use a tag editor to add a lot of content within an existing tag, for example in
the body tag.
To complete the details for a tag:
1 In the Editor, position the cursor in the tag to complete.
2 Right-click, and select Edit Current Tag from the pop-up menu.
3 Complete the tag editor dialog box.
4Click OK.
The tag editor closes, adding the attributes and values that you specified to the tag.
Page 75

Using inline tools to enter code 55
Using inline tools to enter code
You have a number of tools to help you insert new code and to edit existing code as
you type. Each of these tools supports a distinct language element, such as tags,
objects, and functions.
You can set the options for these inline tools in the Settings dialog box (F8).
Using Tag Insight
Tag Insight lets you insert tag names, attributes, and values as you type, after typing a
start bracket (<) for a tag.
To enable and configure Tag Insight:
1Open Options > Settings > Editor > Tag Insight and select the Enable tag insight
and Enable tag insight tag List options.
2 Set how many seconds Tag Insight waits before displaying a list of options.
3 To add an item to the drop-down list of options that appears after typing < in the
Editor: Click Add, enter the item, and click OK.
4 To delete an item from the drop-down list: Click the item in the list and click
Delete. The item is immediately deleted from the list.
5 Click Apply.
To view a Tag Tip:
1 Position the cursor inside a tag and press F2 to see the attributes and values for
the tag.
2 Press the Esc key to close the pop-up.
To insert a tag with Tag Insight:
1 In the Editor, enter a start bracket (<) to display a drop-down list of tags.
Press the Esc key to close a drop-down list.
2 Scroll down the list, select a tag, and press Enter to insert the tag.
3 Press the spacebar to display the drop-down list of attributes for the tag, then
select an attribute and press Enter.
4 Press the spacebar again to display a drop-down list of known values for the
attribute, then select a value and press Enter.
5 Repeat the last two steps until you have entered every element for the tag.
To edit a tag using Tag Insight, do any of the following:
• To add an attribute — Position the cursor to the left of a tag end bracket (>) and
press the spacebar to display a drop-down list of attributes for the tag. Select an
attribute and press Enter.
Page 76

56 Chapter 5 Writing Code and Web Content
Press the Esc key to close a drop-down list.
• To change an attribute — Delete the attribute and add a new attribute.
• To add a value — Press the spacebar after the attribute to display a drop-down
list of known values for the attribute. Select a value and press Enter.
• To change a value — Delete the value and add a new value.
Using Function Insight
Function Insight lets you insert function argument syntax as you type.
To enable and configure Function Insight:
1In the Options > Settings > Editor > Function Insight pane, select the Enable
function insight option.
2 Set how many seconds Function Insight waits before displaying a list of options.
3 To change the list of available functions, modify the Expression Builder definition
file. The Expression Builder function library determines the entries in the
function list. For more information, see “Customizing the Development
Environment” on page 197.
4 Click Apply.
To insert arguments using Function Insight:
1 Enter a function name followed by a left parenthesis, (, to display a drop-down
list of recognized arguments.
2 Select an argument from the list and press Enter to insert it.
Arguments must be separated by commas. If there is more than one possible
argument for a function, a comma is automatically inserted after the argument.
3 To add another argument, press the spacebar after the previous argument and its
comma. Select an argument from the list and press Enter to insert it.
4 Repeat the previous step as needed.
5 To complete the function call, delete the comma after the last argument, if
applicable, and add a closing right parenthesis.
Using Tag Completion
When Tag Completion is turned on, the end tag is automatically inserted after you
finish typing the start tag.
You can set options for this feature in the Options > Settings > Editor > Tag
Completion pane.
The default tag completion set does not include every container tag necessary for
coding in XHTML; for example, it does not include < />.
Page 77

Using inline tools to enter code 57
Using Auto Completion
Auto Completion completes a code block by inserting the appropriate code when
you enter the opening code fragment (trigger string).
You can set options for this feature in the Options > Settings > Editor > Auto
Completion pane.
A few strings are listed by default; such as, to insert a Comment end tag (-->) after
you enter the start tag (<!--). You can also specify the cursor position after insertion;
for example, before --> in the previous example of the code comment. You can insert
any user-defined string, even blocks of text or code; however, you might want to use
code templates for whole blocks of text and code snippets for whole blocks of code.
Using Code Templates
A code template provides a shortcut for entering static text blocks. As with Auto
Completion, this feature is intended for user-defined strings.
To define a code template:
1Open Options > Settings > Editor > Code Templates.
2 In the Code Templates pane, click Add.
3 In the Add Code Template dialog box, enter a keyword, a description of the code
template, and a value to be inserted in place of the keyword. Click OK.
For example, you could enter dt4 for the keyword, HTML 4.0 Doctype for the
description, and for the value,
Transitional//EN">
If the value includes a tab, it is inserted as an ASCII #9 character, unless the
Options > Settings > Editor > Insert tabs as spaces option is selected.
4 The code template displays in the list. Click Apply to save your changes.
.
<!DOCTYPE HTML PUBLIC "-//W3C//DTD HTML 4.0
To edit a code template:
1Open Options > Settings > Editor > Code Templates.
2 In the Code Templates pane, click Edit.
3 In the Edit Code Template dialog box, change values as needed and click OK.
4 Click Apply to save your changes.
To insert code template text:
1 In the Editor, enter the keyword.
2 Press Ctrl+J to expand the text.
For example, the keyword dt4 expands to <!DOCTYPE HTML PUBLIC "-//W3C//DTD
HTML 4.0 Transitional//EN">
.
Page 78

58 Chapter 5 Writing Code and Web Content
Using the Extended and Special Characters palette
To enter special characters and Latin-1 extended characters, you either can enter the
ASCII code or select from a special characters palette.
To display the special characters palette:
• Select View > Extended and Special Characters.
The palette appears at the bottom of the window.
To change the character to its entity name:
• Select Options > Settings > Editor > Automatically convert extended characters.
This converts every character higher than ASCII 127 to its entity name so that it
will be properly rendered in browsers.
Using code generating tools
Following are some tools that you can use to speed up your web development:
• Temp l at e s ( File > New) are useful for creating many pages with the same
standard content, for example the same header and footer or the same
application logic. To use your current document as a template for future
documents, select File > Save As Template. Then, to create new files from this
template, select File > New and, in the New Document dialog box, select the
template from the Custom tab.
• Wizards (File > New) generate HTML, DHTML, CFML, Java, and JSP code. The
Wizards for Deployment Scripts and Initial Configuration are in the Custom tab.
• Expression Builder provides an expandable tree of all supported expression
elements, including functions, constants, operators, and variables. It fully
supports ColdFusion 5. Expression Builder lets you insert expressions into a
working area, where you can edit or expand your expression before inserting it
into your code.
• The JavaScript Tree provides quick access to an expandable tree of JavaScript
elements, allowing quick insertion of a JavaScript element. There is also a
JavaScript Wizard available to generate and insert several JavaScript functions.
Both the JavaScript Tree and JavaScript Wizard are in the list of toolbuttons that
can be added to your workspace. For instructions on adding a toolbutton to a
toolbar, see “Customizing toolbars” on page 32.
• TopStyle Lite enables you to design, preview, and reference CSS files.
• If Macromedia Dreamweaver MX is installed on your computer, you can use it for
visual page editing. It lets you to prototype page layouts, create HTML tables and
forms, set font and image formatting, generate DHTML elements, and more.
To open your page in Dreamweaver MX, select View > Open in Macromedia
Dreamweaver/UltraDev.
• The Image Map Editor lets you to add more than one link to the same web image
(GIF, JPG). To get started, select Tools > New Image Map.
Page 79

Adding document content 59
Adding document content
The default template contains just the code required for a valid HTML document.
This default template is stored as \Wizards\HTML\Default Template.htm below
your root directory. You can edit this file and save it to change its content. Or you can
save a document as a template by choosing File > Save as Template.
To open a new document, do either of the following:
• Press Ctrl+N to open the default document template.
• Select File > New to select a different template or a wizard.
You can add a link from an HTML, CFML, JSP or other HTML embedded document
to a URL.
To add a link, do either of the following:
• Drag a file from a Files tab to insert a link into the current HTML document, in an
image tag, or in an audio or video clip.
• Click the Anchor toolbutton on the Common QuickBar tab to define internal and
external links.
For other supported languages, such as WML and SMIL, use the appropriate link
syntax.
To insert a file into a document:
1 Select File > Insert File.
2 Open the drop-down Files of type list to filter file extensions.
3 Locate the file and click OK to insert the file contents in the current document.
To convert a text file to HTML:
1 Select File > Convert Text File and locate a local or remote file with a .txt
extension.
2 Click OK to open the file in the Editor, surrounded by basic HTML tags.
3 Add formatting or link to a style sheet.
To copy text from a browser:
1 To strip the HTML formatting code from copied text, select the Treat HTML
dropped from external application as plain text option in the
Options > Settings > Editor pane.
2 In the browser, select the text that you want to copy.
3 Use Windows copy and paste commands to enter the text block in the Editor.
To insert Microsoft Office content, do either of the following:
• To convert Microsoft Office content, such as lists, tables, and worksheet cells, to
plain text, select the content and copy it to the Editor.
Page 80

60 Chapter 5 Writing Code and Web Content
• To insert content with the equivalent HTML formatting, open Dreamweaver MX,
copy the content into Dreamweaver MX, and save.
You can edit the content visually in Dreamweaver MX, or close it and return to
working directly in the code.
To preview a page in a browser, do one of the following:
• To view the current document in the internal browser, press F12.
For more information, see “About the Browse tab” on page 29.
• To view the current document in the default external browser, press F11.
• To switch to a different external browser, click the View External Browser List
toolbutton on the View toolbar, and select a browser from the list.
To add content in a visual WYSIWYG editor:
1 Select View > Open in Macromedia Dreamweaver/UltraDev.
• If this command does not appear in the View menu, select Options > Settings.
In the Settings dialog box, select Dreamweaver/UltraDev > Enable
Dreamweaver/UltraDev integration.
• If the menu command appears but does not work, install Macromedia
Dreamweaver MX.
2 Add content in Dreamweaver MX.
For more information, see the Dreamweaver MX tutorials and online Help.
3 Save your work and close Dreamweaver MX.
The page displays in HomeSite+ for Dreamweaver MX again, with the changes you
made in Dreamweaver MX.
Page 81

Using keyboard shortcuts 61
Using keyboard shortcuts
Keyboard shortcuts are active for many file management, editing, and debugging
commands.
To see the current keyboard assignments:
1 Select Options > Customize.
2Click the Keyboard Shortcuts tab.
To print the list of shortcut keys:
1In the Options > Customize > Keyboard Shortcuts tab, right-click the list and
select Browse.
2 Use the browser’s print command to print the document.
To assign a key combination:
1In the Options > Customize > Keyboard Shortcuts tab, select a command from
the list.
2 Click in the text box beside the Apply toolbutton and press the key combination
you want to use.
If the key combination is already in use, the command that is currently assigned
to the key combination appears below the text box. If you click Apply, you can no
longer use the key combination for that command.
3 Click Apply.
The list automatically refreshes and displays the change.
Page 82

62 Chapter 5 Writing Code and Web Content
Saving a code block as a snippet
A code snippet is a block of code or content that you store for reuse. You can
comment your snippets just as you would any code block.
To create a code snippet:
1 Before adding a snippet, you must create a folder. To do so, click the Snippets tab
in the Resources window and click on the Create Folder toolbutton or right-click
in the Snippets panel, and select Create Folder.
You can create additional folders or subfolders as needed. The default location
for snippets is the \UserData\Snippets folder below your root directory.
2 Enter a name for the folder.
3 To add a snippet, do one of the following:
− Drag and drop a block of selected text from the Editor to an existing folder.
− Click on the Add Snippet toolbutton.
− Right-click in the Snippets pane and select Add Snippet.
− Highlight a block of code in the Editor and right-click > Selection > Create
Snippet.
4 Enter a name for the snippet in the Description box. Note that snippet names
cannot contain characters that are illegal in filenames, such as slashes, special
characters, or double quotes.
5 In the Start Text window, enter or paste an opening code block. You can set a
default spacing between the blocks by pressing the Enter key at the end of the
start text and at the beginning of the end text.
6 In the End Text window, enter a closing code block.
7 Click OK.
Because snippets can be created as start and end blocks, you can use them to
surround other tags and content. This is handy for inserting special formatting,
navigation elements, and script blocks. Simply highlight the content you want to
surround, then insert the snippet.
To insert a code snippet, do one of the following:
• Click the Insert into Document toolbutton.
• Double-click an entry in the Snippets panel.
• Right-click and select Insert into Document from the popup menu.
To edit or delete a code snippet, do either of the following:
• Click the Edit Snippet or the Delete toolbuttons.
• Right-click the snippet and choose the appropriate command (Edit or Delete)
from the snippets shortcut menus.
Page 83

Saving a code block as a snippet 63
To manage code snippets and snippet folders, do either of the
following:
• Drag and drop folders or snippets to move or copy them to another folder.
• Use the snippets shortcut (right-click) menus.
To assign a shortcut key to a snippet, do either of the following:
• Select a snippet, and click the Edit Snippet toolbutton. Enter keyboard
combinations in the box and click Apply. You can view shortcuts associated with
each snippet in the Snippets resource window by checking the View Keyboard
Shortcuts context menu option.
• Open the Options > Customize dialog box and select the Snippet Shortcuts tab to
enable a keyboard shortcuts for a snippet. Select a snippet and press keys to enter
keyboard combinations in the box.
If a combination is in use, the current command appears below the shortcut box. To
overwrite a keyboard combination, click Apply.
Sharing snippets
You can share code snippets with other developers by giving them access to a shared
folder on your computer or on another network computer. Shared folders icons are
blue and shared snippets icons have blue angle brackets on them.
To create a shared snippets folder:
1Open Options > Settings > Locations.
2 In the Shared Snippets box, click Browse and navigate to the shared folder
location and click OK.
3 In the Snippets panel, right-click, and select Create Shared Folder.
The folder toolbutton changes color to show that it is shared.
Anyone with access to the shared folder can now add, edit, and delete snippets.
The shared folder icon and the brackets on the snippet icon are blue.
Sharing snippets between Dreamweaver MX and HomeSite+
If Dreamweaver MX is installed on your computer, the snippets tree appears in the
HomeSite+ Snippets resource window. The Dreamweaver Snippets node has a green
d icon. The folder is yellow and the brackets on the snippet icon are green.
In HomeSite+, you can insert, edit, or assign shortcuts to existing Dreamweaver
snippets as well as create folders and snippets in the Dreamweaver snippets tree. You
can view, edit, delete, and use the folders and snippets in Dreamweaver.
However, you cannot delete or drag and drop any folders or snippets in the
Dreamweaver Snippets folder in HomeSite+.
Page 84

64 Chapter 5 Writing Code and Web Content
Using dynamic variables in snippets
You can add variables to snippets. Snippet variables take the same form as VTML
variables: $${VARNAME}. When you insert a snippet with a variable into a document,
HomeSite+ prompts you to enter a value.
You can also include a list of values for a variable; for example,
$${COLOR:Blue,Red,Green}. When a snippet with this variable is executed, a
drop-down list appears with the options (Blue, Red, Green) in the Value column. You
can use variables in a snippet for attribute values.
The following is a list of supported predefined variables:
• $${DATE}
• $${MONTH}
• $${TIME}
• $${DATETIME}
• $${DAYOFWEEK}
• $${CURRENTFILE} - Current file name (just the file)
• $${CURRENTFOLDER} - Current folder (just the folder)
• $${CURRENTPATH} - Current path (full file name)
• $${USERNAME} - Current user
• $${MONTHNUMBER} - Month as a number
• $${DAYOFMONTH} - Day of month as a number
• $${DAYOFWEEKNUMBER} - Day of week (the week starts on Sunday)
• $${DATETIME24} - DateTime24 - a 24 hour clock version of datetime.
• $${YEAR} - Current year.
• $${YEAR2DIGIT} - Current two digit year.
Assigning a shortcut key to a snippet
Open the Options > Customize dialog box and select the Snippet Shortcuts tab to
enable a keyboard shortcuts for a snippet. Select a snippet and press keys to enter the
combination in the box at the bottom.
If a combination is in use, the current command appears below the shortcut box. To
overwrite a combination, click Apply.
Page 85

Resources for website accessibility 65
Resources for website accessibility
The W3C Web Accessibility Initiative (WAI) at http://www.w3.org/WAI/ provides a
great deal of practical information about designing applications and interfaces for
the broadest range of users. Macromedia supports user accessibility in its product
interfaces and is striving to fully implement the WAI recommendations.
Basic steps, such as providing a text alternative for images, graphics, and animations,
and using descriptive text for page elements and navigation, can make a world of
difference to a visually impaired user’s experience of your site. Validation tools are
available on the site to check compliance with established standards.
Standards may change more quickly than the product, but you can script the Visual
Tools Object Model (VTOM) to extend or manipulate its functionality. For details,
please see “Customizing the Development Environment” on page 197 and “Scripting
the Visual Tools Object Model” on page 223.
Page 86

66 Chapter 5 Writing Code and Web Content
Tips for visually impaired users
Macromedia is committed to enabling a high level of accessibility in our products.
HomeSite+ for Dreamweaver MX includes support for customizable keyboard
shortcuts and browser-based HTML online documentation, including Alt text for all
images.
This section offers suggestions for ways to work productively in HomeSite+ for
Dreamweaver MX.
Assigning keyboard shortcuts
Keyboard shortcuts are enabled for many file management, editing, and debugging
commands. The shortcut list also contains many commands and language elements
that are unassigned.
To open the shortcut key list:
1 Select Options > Customize (Shift+F8).
The Customize dialog box appears.
2 Press Ctrl+Tab to switch to the Keyboard Shortcut tab.
3 Press Tab to highlight the first key assignment in the list.
4 Use the arrow keys to scroll the list
5 To open the list in the external browser, press Shift+F10 to open the context
menu, then select the Browse command.
You can change any of the current key combinations and you can also enter new key
combinations to unassigned items in the list.
To assign a key combination:
1 In the Customize dialog box, on the Keyboard Shortcut tab, select a command
from the list.
2 Press Tab to place the cursor in the key assignment box and then press the key
combination you want to assign.
3 Select Apply to save the assignment.
If the key combination is already in use, a message box displays. You can then
choose to overwrite the current assignment or cancel the dialog and press
Shift+Tab to place the cursor in the key assignment box again.
The list automatically refreshes when changes are made.
Creating additional key combinations
The Snippets Shortcuts and Scripts Shortcuts tabs in the Customize dialog box also
contain a key assignment box that you can use to enter key combinations for those
code components.
Page 87

Tips for visually impaired users 67
Using shortcut keys for common tasks
Here are a few handy shortcuts:
• Press F11 opens the current document in the default external browser, then use
Alt+Tab to move between the applications.
• F9 toggles the Resources window display.
• Shift+F9 changes the focus between the Document Window and the Resources
Window.
• In the Document Window, use Ctrl+Tab to move between open documents.
• In the Resources Window, use Ctrl+Tab to move between Resources tabs.
• In the Help tab, use the arrow keys and the plus and minus keys to navigate the
Help tree and press Enter to open a Help topic.
• F12 toggles the Edit and Browse modes.
• Shift+F12 toggles the Edit and Help modes.
Working with user interface elements
The following list describes some ways to work productively in the user interface.
• You can use Windows Explorer instead of the Files tabs for working with the file
system, network drives, and remote servers.
• Tag Chooser (Ctrl+E) gives you access to the tag sets of all supported languages.
Selecting a tag from Tag Chooser opens the tag editor or inserts the tag directly if
the tag does not have attributes. This is an alternative to using the tag toolbuttons
on the QuickBar.
• The Results window opens to display output from the Search, Code Validation,
Link Tester, and Project Deployment operations as well as showing Image
Thumbnails. You can hide or display the Results window by pressing Ctrl+Shift+L.
The Keyboard Shortcuts list contains key combinations to focus the view on the
various Results tabs.
• Enable the Options > Settings > General > Use standard file dialogs option. It is
off by default. The standard dialogs are accessible by screen readers.
Page 88

68 Chapter 5 Writing Code and Web Content
Page 89

Chapter 6
Editing Pages
HomeSite+ for Dreamweaver MX has a wealth of tools for updating code and
content. This chapter explains how you can use these tools to your best advantage.
Contents
• Setting editor options ............................................................................................... 70
• Selecting a code or text block ................................................................................... 71
• Saving text to the multiple-entry Clipboard ........................................................... 71
• Collapsing text........................................................................................................... 72
• Editing a referenced file ............................................................................................73
• Using tag editors........................................................................................................ 75
• Navigating the structure of a document.................................................................. 76
• Editing code in the Tag Inspector ............................................................................78
• Formatting pages with Cascading Style Sheets....................................................... 80
Page 90

70 Chapter 6 Editing Pages
Setting editor options
HomeSite+ for Dreamweaver MX features a flexible editing environment that gives
you control over all aspects of web maintenance.
Using the Editor toolbar
The column between the Document window and the Resources window contains
the Editor toolbar. This toolbar gives you quick access to formatting, document
management, and coding options.
Settings editor options
You can configure the following Editor display and coding tool options in the
Options > Settings > Editor pane and its sub-panes:
• Default font, color, and text formatting
• Collapsed text lets you close a block of selected text while editing other parts of a
document.
• Auto Completion saves typing by completing the string when a trigger string is
entered.
• Tag Insight gives you pop-up access to tags, attributes, and values as you type.
After settings options for this feature, you can toggle it on the Edit toolbar.
• Function Insight supports typing of function syntax.
• Tag Completion inserts the end tag when you type the start tag. You can edit tag
syntax and add tags.
• Color Coding gives you a customizable set of colors for code, based on the file
extension of the document.
• Code Templates insert a text block when enter a keyword and press the shortcut
keys. Templates can be edited and you can your own.
• Auto-Backup lets you create a backup file when saving and at timed intervals.
Page 91

Selecting a code or text block 71
Selecting a code or text block
You can use the mouse and standard Windows keyboard commands to highlight
sections of a document, or use the following shortcuts:
• To select a tag, press Ctrl and double-click.
• To select an entire tag block, press Shift+Ctrl and double-click in either the start
or end tag.
• To select a range of code and text, click at the start of the selection, then press
Shift and click at the end of the selection.
Saving text to the multiple-entry Clipboard
The multiple-entry clipboard lets you store multiple text blocks in the clipboard and
selectively paste items from it. You can use the Edit toolbar to complete these tasks,
and you can set the maximum number of text blocks that you can store.
Using the Clipboard
To use the multiple-entry clipboard, access the following toolbuttons on the Edit
toolbar:
• Show Clipboard Displays a drop-down window of copied items. You can
position the mouse over an item to display a tooltip of the item’s contents.
Click an item to paste it into the current document at the current cursor position.
• Paste All Pastes all the current items into the current document at the current
position. Items are pasted in the same order in which they were copied.
• Clear Clipboard Deletes all copied items from the clipboard.
These toolbuttons are not available until you have copied some code or text.
Setting the Clipboard entry limit
By default, the clipboard window stores a maximum of 36 entries. When the
maximum number of clipboard entries is reached, the next copy operation deletes
the oldest clipboard entry and adds the new copied text to the bottom of the
clipboard entry window.
To change the maximum number of entries:
1In the Options > Settings > Editor pane, in the Maximum clipboard entries box,
select a new number.
2 Click Apply.
Page 92

72 Chapter 6 Editing Pages
Collapsing text
When editing long documents or complex applications, you can hide text and code
blocks so that you can focus on just a portion of the content. A customizable marker
displays the first few characters of the collapsed selection.
You can drag collapsed text in the same way as text blocks. Also, you can nest
collapsed text blocks. When you run a search operation or check spelling, and a
match or misspelling is found in the collapsed section, the collapsed text expands.
To set collapsing text options:
1In the Options > Settings > Editor > Collapsed Text pane, do any of the following:
• Customize the appearance of the collapsed text marker, including the font
and size of the text on the marker, and the foreground and background colors
for the marker.
• In the Length (characters) box, specify the width of the marker—that is, how
many monospaced characters of the collapsed text can fit on the marker.
• Enable a tooltip to display the text when you position the mouse over a
collapsed text marker, and set the maximum number of lines to display.
• Enable the automatic selection of a collapsed text section when it is
expanded. This lets you preview and re-collapse the section quickly.
• To keep text collapsed when saving and opening a file, select Preserve
collapsed text on file open/save. Also, specify the number of days to keep the
text collapsed (enter 0 for no limit).
2 Click Apply.
To collapse text, do any of the following:
• Select text, then click one of the collapse buttons (–) in the document gutter:
• To collapse the entire contents of a tag, right-click a tag and select Collapse Tag.
• To collapse a specific tag throughout a document, for example to collapse every
script tag, right-click one of the tags and select Collapse All Identical Tags. This
also collapses the tags that are nested inside the collapsed tags.
• To collapse text based on the current Tag Inspector outline, display the Tag
Inspector resource tab and, in the top toolbar, click the blue plus sign <+>.
Page 93

Editing a referenced file 73
To expand collapsed text:
• To expand a single block of collapsed text, double-click a collapsed text marker.
• To expand all collapsed text, right-click anywhere in the document and select
Expand All Collapsed Sections.
Editing a referenced file
You can edit image files and included files from HomeSite+ for Dreamweaver MX.
Editing an image file
If Macromedia Fireworks MX is installed on your computer, you can open your GIF,
JPG, and PNG image files for editing in Fireworks MX. You can also view a thumbnail
for an image, to preview it.
To display thumbnails for the images in a folder:
1 In one of the Files tabs, select the directory with the images.
2Press Shift+Ctrl+F4.
3 In the Results window, right-click on the Thumbnails tab and select Reset to
current folder.
For information about how the current folder is determined between the two files
tabs, see “About the Files tabs” on page 42.
The Results window displays thumbnails for the images in the current folder.
To edit an image:
1 Select the image to edit, by doing one of the following:
• Right-click an image file in the Project tab or one of the Files tabs, and then
select Edit in Macromedia Fireworks.
• In the Results window, on the Thumbnails tab, right-click a thumbnail for an
image and select Edit in Macromedia Fireworks.
• In the Editor, right-click an
Fireworks. The image tag must be complete and the file path and filename for
the src attribute must refer to an actual file.
2 If the image you selected is in PNG format, skip this step. Otherwise, in the dialog
box that appears, specify whether to open the source PNG file for the image:
• If you never create your images in PNG format and export them to GIF or JPG
format, then select Never Use Source PNG in the drop-down list and click No.
The image that you selected opens in Fireworks MX and, when you edit an
image in the future, the image opens in Fireworks MX without displaying this
dialog box.
<img> tag and select Edit in Macromedia
Page 94

74 Chapter 6 Editing Pages
• If you always maintain your images in PNG format and export them to GIF or
JPG format, then select Always Use Source PNG in the drop-down list and
click Yes. Browse to the source PNG file and click Open.
The image you selected opens in Fireworks MX and, when you edit an image
in the future, you can immediately browse to the source PNG file without
seeing this dialog box again.
• Otherwise, select Ask When Launching in the drop-down list. Click No if you
want to open the selected image for editing, or click Yes to browse for and
open the source PNG file.
Fireworks MX opens.
3 (Optional) Edit the image.
4 Save your changes and close Fireworks MX.
Editing an included file
You can edit included files in certain tags. However, the referenced file must have an
absolute or relative path. You cannot open an included file from a logical file
reference, that is, a virtual mapping on the server.
To open an included file for editing:
1 In the Editor, right-click in one of these tags:
<cfinclude>
•
•
<cfmodule>
• <script>
<jsp:include>
•
<%@ include>
•
•
<jsp:forward>
• <vtinclude>
• <wizinclude>
• <!--#include>
2 Select Edit Include file.
The file,
3 Edit the file, save your changes, and close the file.
src, template, or page that is referenced in the include tag opens.
Page 95

Using tag editors 75
Using tag editors
A tag editor is a tag-specific dialog box that lets you enter information for a specific
tag, and then inserts the tag with the attributes and values that you specified. Tag
editors fully support ColdFusion Server. Each tag editor has its own online Help for
tag syntax and usage information. You can also customize a tag editor; for more
information, see “Working with tag definitions” on page 125.
About VTML tag editors
You can choose from two different tag editors for three tags: Anchor <a>, Body
<body>, and Image <img>. The standard Image tag editor calculates the height and
width of an image and provides an image preview, unlike the VTML Image tag editor.
The standard Body tag editor has a preview for the colors of the page background,
text, and each type of link, unlike the VTML Body tag editor.
Otherwise, the tag editors that are written in Visual Tools Markup Language (VTML)
are the same, except the VTML tag editors support multiple languages, browsers,
event code, and coding preferences. The VTML Anchor tag editor supports multiple
protocols and accessibility options, unlike the standard Anchor tag editor.
For more information about VTML, see “Customizing the Development
Environment” on page 197.
To use a VTML tag editor instead of a standard tag editor:
1On the Options > Settings > Markup Languages > HTML/XHTML pane, select
the Anchor - <A>, Body - <BODY>, or Image - <IMG> options as desired.
2 Click Apply.
Editing a tag with a tag editor
You can open a tag editor and access Help for completing the tag editor dialog box.
Note
If the tag editor is labeled with “NOTE: This is a write-only Tag Editor,” then the tag
editor is only intended for inserting a tag, not for editing the content of the tag.
To open the editor for a tag, do one of the following:
• Right-click in a tag and select Edit Tag.
• Position the cursor in a tag and press Ctrl+F4.
• Position the cursor in a tag and select Tags > E d it Cur r e n t Tag.
To view syntax and usage Help for the tag:
• Press F1.
Tag-specific Help appears at the bottom of the tag editor dialog box.
Page 96

76 Chapter 6 Editing Pages
Navigating the structure of a document
You can inspect and navigate the structure of a document in the Tag Tree. The Tag
Tree is in the Resources window, in the top pane of the Tag Inspector tab. You can
configure the Tag Tree to display only the tags you want.
Using the Tag Tree and Tag Inspector together, you can edit the code in a document
without having to work directly in the Editor. For information about Tag Inspector,
see “Editing code in the Tag Inspector” on page 78.
To use the Tag Tree:
1 On the Tag Inspector resource tab, in the top pane, select an outline profile from
the drop-down list.
For more information, see “About outline profiles” on page 76.
2 Click a tag in the tree.
In the Editor, the cursor moves to that tag in the current document.
3 In the Editor, press Shift+Ctrl and double-click the tag.
The entire tag block is selected and, if the selected tag has attributes, they appear
with their values on the Tag Inspector resource tab.
4 To update the Tag Tree with your edits in the document, in the Tag Tree toolbar,
click Refresh.
5 To display the contents of the selected tag in a single node on the Tag Tree, in the
Tag Tree toolbar, click Collapse document based on outline.
About outline profiles
Outline profiles let you restrict the Tag Tree display to specific tag sets. This is useful
when you must work with mixed language elements and language versions in your
documents. The default set of outline profiles provides many options for filtering the
Tag Tree display, but you can also customize profiles.
Outline profiles are written in the Visual Tools Markup Language (VTML), and they
fully support ColdFusion Server. They are stored in the \Extensions\Outline Profiles
folder. You can open a profile in this folder to examine its syntax, to learn how to
create or customize an outline profile.
To create or customize an outline profile:
1 In the Editor, open an outline profile in the \Extensions\Outline Profiles folder
and examine its syntax.
The VTML markup identifies the tags that are included in the outline profile.
2 If you are editing an outline profile, make a backup copy of the VTML (.vtm) file
and then edit the original VTML file.
3 If you are creating a new outline profile, save the file with a new name and then
edit the new file.
Page 97

Navigating the structure of a document 77
Alternatively, you can create or edit an outline profile in the Outline Profile Editor
dialog box. To open this dialog box, display the Tag Inspector resource tab and, in
the toolbar in the top pane, click Configure Outline Profiles.
Setting the Tag Tree display
You can edit the list of outline profiles in the Tag Tree, and import an outline profile
from a VTML (.vtm) file or a Document Type Definition (DTD) file.
To modify the list of outline profiles:
1 On the Tag Inspector resource tab, in the top pane, in the Tag Tree toolbar, click
Configure Outline Profiles.
2 In the Outline Profiles dialog box, in the Outline Profiles box, select a profile and
click Add or Remove, as desired.
3 Repeat the previous step until you are satisfied with the list of outline profiles.
4 In the Recognized Tags frame, do any of the following:
• Select a tag in the list and click Remove.
• Click Add Tag and enter the name of the tag to add to the list.
5 Repeat the previous step until you are satisfied with the list of recognized tags for
the selected outline profile.
6 To customize a tag, select a tag in the list and complete the Tag Settings frame:
• Caption Select a caption for the tag, to display in the Tag Tree.
• Icon Enter or select an image file for the tag, to display in the Tag Tree.
• Unenclosed tag warning Select this to display a warning icon next to the
tag in the Tag Tree if it does not have a closing tag
• Warning icon Enter or select an image file for the warning icon.
7 Click Done. (Note that there is no Cancel button.)
The outline profiles are updated for the Tag Tree.
</..>.
To import an outline profile:
1 On the Tag Inspector resource tab, in the top pane, in the Tag Tree toolbar, click
Configure Outline Profiles.
2 In the Outline Profiles dialog box, click Import.
3 In the Outline Profile Import Wizard dialog box, select one of the following:
• Import an existing Outline Profile (VTM) Imports a VTM outline profile.
• Import from a DTD file Creates a VTM outline profile from a DTD file.
4 Click Browse and select a VTML or DTD file.
5 Click Next.
The Outline Profile Import Wizard reports the status of the import process.
Page 98

78 Chapter 6 Editing Pages
6 Click Finish.
If you imported a DTD file, HomeSite+ for Dreamweaver MX stores its
information in a VTML file in the /Extensions/Outline Profiles folder.
Otherwise, the selected VTML file is copied to /Extensions/Outline Profiles.
7 In the Outline Profiles dialog box, click Done. ( There is no Cancel button.)
To use the Tag Tree with imported DTD information:
1 Open a document that adheres to a DTD that you imported.
If you imported multiple DTDs, HomeSite+ for Dreamweaver MX automatically
accesses the correct VTML information file.
2 On the Tag Inspector resource tab, in the top pane, select DTD Elements and
Entities from the drop-down list.
3 Select entities and elements in the Tag Tree.
Whatever you select in the Tag Tree is highlighted in the document.
Editing code in the Tag Inspector
Tag Inspector lets you edit code in a property sheet user interface that is similar to
the property sheets in Visual Basic and Delphi. Tag Inspector fully supports
ColdFusion Server.
You can also edit tag definitions from Tag Inspector; for example, to change the valid
attributes for a tag. For details, see “Working with tag definitions” on page 125.
Setting the Tag Inspector display
To control the order in which Tag Inspector displays attributes and scripting events,
select from the following toolbuttons in the Tag Inspector toolbar:
• Version Specific Sorts by language and browser version.
• Categorized Sorts by type and browser version.
• Alphabetically Z-to-A Sorts by name in descending alphabetical order.
• Alphabetically A-to-Z Sorts by name in ascending alphabetical order.
To resolve cross-browser and language issues, select Version Specific or Categorized.
To use Tag Inspector:
1 Click a tag in the Tag Tree or in the Editor.
The Tag Inspector tab displays a list of the attributes and values for the tag.
2 Click an attribute name, and enter or select a value.
3 Click outside the field for the attribute.
The new attribute or updated value appears in your code in the Editor.
Page 99

Editing code in the Tag Inspector 79
Creating and editing an event handler script block
You can add and modify script blocks for events such as onClick from Tag Inspector.
If the selected tag supports an event as an attribute, you can edit the event in its
attribute field. Otherwise, you can edit the event directly under the Events list.
To add an event handler script block:
1 On the Tag Inspector resources tab, in the Tag Tree pane, select a tag.
A list of the tag’s supported attributes and events, with their values, appears in
the Tag Inspector pane.
2 Click the event in the Attributes list or in the Events list.
3 In the drop-down list, select a script language for the event handler; for example,
select Create JavaScript Event.
4 In the Specify Event Handler Name dialog box, select the default entry or enter a
name, then click OK.
The event handler is added as an attribute to the tag, and a script block is created
head section of the document.
in the
5 Complete the script block for the handler.
6 Select File > Save.
To find an event handler function, do one of the following:
• On the Tag Inspector tab, under Attributes or Events, double-click the event.
• From a tag with an attribute for the event, right-click the event attribute; for
example, right-click
border=”0” onClick=”_onclick()”>
Function.
The cursor moves to the selected event handler function.
onClick=”_onclick()” in <table width=”640”
. Then select Navigate to <function name>
Page 100

80 Chapter 6 Editing Pages
Formatting pages with Cascading Style Sheets
This section describes Cascading Style Sheets (CSS), and provides information for
using the integrated TopStyle Lite Style Editor and for coding styles by hand.
About Cascading Style Sheets (CSS)
CSS (also known as styles) lets you specify a format for a page element, such as a
paragraph or table, and then specify where to apply this format.
You can create a style block (also called embedded styles) in a single HTML page to
apply the formats to a single block of HTML code; or you can create a separate CSS
file and apply its formats across one or more pages in a website.
At whatever level you specify styles, the styles “cascade” down to apply to the lower
levels as well. For example, a style block in the <head> section applies to the entire
HTML document, and a style block in a
there is more than one style block, the “local” style rules; in the preceding example,
the table style overrides the head style in the table.
About classes
A class is just like a style, except that it is not automatically applied to a page element,
but only to a page element whose tag contains the attribute
for example, <p class="note">.
This means that you can define an unlimited number of styles for a single page
element. For example, you can define classes for a paragraph tag to apply different
formatting to introductory text, important notes, and contact information.
<table> tag applies to the entire table. When
class="<class name>";
Benefits of using CSS
Styles provide the following benefits:
• Lets you quickly preview text, color, and layout designs. This is a great help when
you are prototyping a new or redesigned website. Imagine the alternative:
changing every tag with formatting—for example,
color=”black”>
• Lets you make rapid and dramatic changes to all HTML elements in a website;
you can reference a style sheet by adding a single attribute to the
by doing so, immediately change the look of the entire page.
• Ensures a consistent look and feel throughout the website, even with multiple
contributors. This makes it easier for visitors to find what they need.
• Reduces the amount of code required to format a page, so a browser can
download, process, and display pages more quickly.
• Lets you manipulate styles and other document objects, when used in
conjunction with scripts and Dynamic HTML (DHTML).
• Lets you focus on developing content, and solving any organizational or
navigation issues in your site, instead of maintaining formatting code.
<font="Arial" size=”10”
and <p align="center">—in every page!
<head> tag and,
 Loading...