

Page 1

Using Dreamweaver
Page 2

Trademarks
1 Step RoboPDF, ActiveEdit, ActiveTest, Authorware, Blue Sky Software, Blue Sky, Breeze, Breezo, Captivate, Central,
ColdFusion, Contribute, Database Explorer, Director, Dreamweaver, Fireworks, Flash, FlashCast, FlashHelp, Flash Lite,
FlashPaper, Flex, Flex Builder, Fontographer, FreeHand, Generator, HomeSite, JRun, MacRecorder, Macromedia, MXML,
RoboEngine, RoboHelp, RoboInfo, RoboPDF, Roundtrip, Roundtrip HTML, Shockwave, SoundEdit, Studio MX, UltraDev,
and WebHelp are either registered trademarks or trademarks of Macromedia, Inc. and may be registered in the United States or
in other jurisdictions including internationally. Other product names, logos, designs, titles, words, or phrases mentioned within
this publication may be trademarks, service marks, or trade names of Macromedia, Inc. or other entities and may be registered in
certain jurisdictions including internationally.
Third-Party Information
This guide contains links to third-party websites that are not under the control of Macromedia, and Macromedia is not
responsible for the content on any linked site. If you access a third-party website mentioned in this guide, then you do so at your
own risk. Macromedia provides these links only as a convenience, and the inclusion of the link does not imply that Macromedia
endorses or accepts any responsibility for the content on those third-party sites.
Copyright © 1997-2005 Macromedia, Inc. All rights reserved. This manual may not be copied, photocopied, reproduced,
translated, or converted to any electronic or machine-readable form in whole or in part without written approval from
Macromedia, Inc. Notwithstanding the foregoing, the owner or authorized user of a valid copy of the software with which
this manual was provided may print out one copy of this manual from an electronic version of this manual for the sole
purpose of such owner or authorized user learning to use such software, provided that no part of this manual may be
printed out, reproduced, distributed, resold, or transmitted for any other purposes, including, without limitation,
commercial purposes, such as selling copies of this documentation or providing paid-for support services.
Acknowledgments
Project Management: Charles Nadeau
Writing: Jon Michael Varese
Additional Writing: Jennifer Rowe, Paul Gubbay, Charles Nadeau
Editing: Rosana Francescato, Lisa Stanziano, Anne Szabla, Mary Ferguson, Mark Nigara
Production and Editing Management: Patrice O’Neill and Rosana Francescato
Media Design and Production: Adam Barnett, Aaron Begley, Paul Benkman, John Francis, Geeta Karmarkar, Paul Rangel,
Arena Reed, Mario Reynoso
Localization Management: Melissa Baerwald
Special thanks to Sheila McGinn, Paul Gubbay, Vic Mitnick, Jim Doubek, Joaquin Blas, Wenlan Du, Ken Karleskint, Jennifer
Taylor, Jorge Taylor, Nick Halbakken, Scott Richards, Sami Kaied, John Skidgel, Masayo Noda, Kristin Conradi, Yuko Yagi, the
beta testers, and the entire Dreamweaver engineering and QA teams.
First Edition: September 2005
Macromedia, Inc.
601 Townsend St.
San Francisco, CA 94103
Page 3

Contents
PART 1: DREAMWEAVER BASICS
Introduction . . . . . . . . . . . . . . . . . . . . . . . . . . . . . . . . . . . . . . . . . . . . 17
What’s new in Dreamweaver 8 . . . . . . . . . . . . . . . . . . . . . . . . . . . . . . . . . . 18
Where to start . . . . . . . . . . . . . . . . . . . . . . . . . . . . . . . . . . . . . . . . . . . . . . . . . 21
Dreamweaver workflow for creating websites. . . . . . . . . . . . . . . . . . . . 25
Using Dreamweaver with other applications . . . . . . . . . . . . . . . . . . . . . 29
Dreamweaver and accessibility. . . . . . . . . . . . . . . . . . . . . . . . . . . . . . . . . 30
Guide to Dreamweaver instructional media . . . . . . . . . . . . . . . . . . . . . . . 31
Typographical conventions . . . . . . . . . . . . . . . . . . . . . . . . . . . . . . . . . . . . 36
HTML and web technologies resources . . . . . . . . . . . . . . . . . . . . . . . . . 36
Chapter 1: Exploring the Workspace. . . . . . . . . . . . . . . . . . . . . . . 39
About the Dreamweaver workspace . . . . . . . . . . . . . . . . . . . . . . . . . . . . 39
Working in the Document window . . . . . . . . . . . . . . . . . . . . . . . . . . . . . . . 51
Using toolbars, inspectors, and context menus . . . . . . . . . . . . . . . . . . . 54
Using panels and panel groups . . . . . . . . . . . . . . . . . . . . . . . . . . . . . . . . . . 61
Using Dreamweaver accessibility features . . . . . . . . . . . . . . . . . . . . . . . 64
Optimizing the workspace for accessible page design . . . . . . . . . . . . 69
Using visual guides in Dreamweaver . . . . . . . . . . . . . . . . . . . . . . . . . . . . . 71
Dreamweaver customizing basics . . . . . . . . . . . . . . . . . . . . . . . . . . . . . . . 71
Chapter 2: Setting Up a Dreamweaver Site . . . . . . . . . . . . . . . . .79
About Dreamweaver sites . . . . . . . . . . . . . . . . . . . . . . . . . . . . . . . . . . . . . .79
Setting up a new Dreamweaver site. . . . . . . . . . . . . . . . . . . . . . . . . . . . . 82
Using the Advanced settings to set up a Dreamweaver site. . . . . . . . 83
Editing settings for a Dreamweaver site . . . . . . . . . . . . . . . . . . . . . . . . . .87
Editing existing websites in Dreamweaver . . . . . . . . . . . . . . . . . . . . . . . 88
3
Page 4

Chapter 3: Creating and Opening Documents . . . . . . . . . . . . . . . 91
Creating new documents . . . . . . . . . . . . . . . . . . . . . . . . . . . . . . . . . . . . . . . 92
Saving a new document. . . . . . . . . . . . . . . . . . . . . . . . . . . . . . . . . . . . . . . . 95
Setting a default new document type . . . . . . . . . . . . . . . . . . . . . . . . . . . .95
Setting the default file extension of new HTML documents . . . . . . . . 96
Opening existing documents . . . . . . . . . . . . . . . . . . . . . . . . . . . . . . . . . . . 96
Cleaning up Microsoft Word HTML files . . . . . . . . . . . . . . . . . . . . . . . . . 97
PART 2: WORKING WITH DREAMWEAVER SITES
Chapter 4: Managing Your Files . . . . . . . . . . . . . . . . . . . . . . . . . . 101
About site management . . . . . . . . . . . . . . . . . . . . . . . . . . . . . . . . . . . . . . . 102
Accessing sites, a server, and local drives . . . . . . . . . . . . . . . . . . . . . . . 106
Viewing files and folders . . . . . . . . . . . . . . . . . . . . . . . . . . . . . . . . . . . . . . .110
Comparing files for differences. . . . . . . . . . . . . . . . . . . . . . . . . . . . . . . . . .113
Rolling back files (Contribute users) . . . . . . . . . . . . . . . . . . . . . . . . . . . . .119
Managing files and folders in the Files panel. . . . . . . . . . . . . . . . . . . . . .119
Working with a visual map of your site . . . . . . . . . . . . . . . . . . . . . . . . . . 124
Importing and exporting sites . . . . . . . . . . . . . . . . . . . . . . . . . . . . . . . . . . 132
Removing a Dreamweaver site from your list of sites . . . . . . . . . . . . . 133
Checking in and checking out files . . . . . . . . . . . . . . . . . . . . . . . . . . . . . 134
Getting and putting files to and from your server . . . . . . . . . . . . . . . . . 140
Synchronizing the files on your local and remote sites . . . . . . . . . . . . 144
Identifying and deleting unused files . . . . . . . . . . . . . . . . . . . . . . . . . . . . 146
Cloaking folders and files in your site . . . . . . . . . . . . . . . . . . . . . . . . . . . 146
Storing file information in Design Notes. . . . . . . . . . . . . . . . . . . . . . . . . 150
Testing your site . . . . . . . . . . . . . . . . . . . . . . . . . . . . . . . . . . . . . . . . . . . . . 154
Chapter 5: Managing Site Assets and Libraries . . . . . . . . . . . . . 159
About library items. . . . . . . . . . . . . . . . . . . . . . . . . . . . . . . . . . . . . . . . . . . . 159
Working with assets . . . . . . . . . . . . . . . . . . . . . . . . . . . . . . . . . . . . . . . . . . .161
Creating and managing a list of favorite assets . . . . . . . . . . . . . . . . . . 168
Working with library items . . . . . . . . . . . . . . . . . . . . . . . . . . . . . . . . . . . . . 172
Chapter 6: Managing Contribute Sites with Dreamweaver . . . . 181
About managing Contribute sites. . . . . . . . . . . . . . . . . . . . . . . . . . . . . . . 182
Preparing a site for use with Contribute . . . . . . . . . . . . . . . . . . . . . . . . . 186
Administering a Contribute site using Dreamweaver. . . . . . . . . . . . . . 187
Managing Contribute files using Dreamweaver . . . . . . . . . . . . . . . . . . 189
Troubleshooting a Contribute site . . . . . . . . . . . . . . . . . . . . . . . . . . . . . . 192
4Contents
Page 5

PART 3: LAYING OUT PAGES
Chapter 7: Laying Out Pages with CSS . . . . . . . . . . . . . . . . . . . . 197
About layers in Dreamweaver . . . . . . . . . . . . . . . . . . . . . . . . . . . . . . . . . .198
Inserting a layer . . . . . . . . . . . . . . . . . . . . . . . . . . . . . . . . . . . . . . . . . . . . . 200
Setting layer preferences and properties . . . . . . . . . . . . . . . . . . . . . . . 202
Managing layers . . . . . . . . . . . . . . . . . . . . . . . . . . . . . . . . . . . . . . . . . . . . . 204
Manipulating layers . . . . . . . . . . . . . . . . . . . . . . . . . . . . . . . . . . . . . . . . . . 208
Converting layers to tables . . . . . . . . . . . . . . . . . . . . . . . . . . . . . . . . . . . . .210
Animating layers . . . . . . . . . . . . . . . . . . . . . . . . . . . . . . . . . . . . . . . . . . . . . .212
Inserting div tags for layout. . . . . . . . . . . . . . . . . . . . . . . . . . . . . . . . . . . . .221
Working with div tags for layout . . . . . . . . . . . . . . . . . . . . . . . . . . . . . . . 222
Changing the highlight color for div tags. . . . . . . . . . . . . . . . . . . . . . . . 223
Working with CSS layout visualization . . . . . . . . . . . . . . . . . . . . . . . . . 224
Using rulers, guides, and the grid to lay out pages . . . . . . . . . . . . . . . 226
Using a tracing image . . . . . . . . . . . . . . . . . . . . . . . . . . . . . . . . . . . . . . . . 230
Chapter 8: Presenting Content with Tables. . . . . . . . . . . . . . . . 233
About tables. . . . . . . . . . . . . . . . . . . . . . . . . . . . . . . . . . . . . . . . . . . . . . . . . 234
Inserting a table and adding content . . . . . . . . . . . . . . . . . . . . . . . . . . . 235
Importing and exporting tabular data . . . . . . . . . . . . . . . . . . . . . . . . . . . 237
Selecting table elements . . . . . . . . . . . . . . . . . . . . . . . . . . . . . . . . . . . . . 238
Using Expanded Tables mode for easier table editing. . . . . . . . . . . . .241
Formatting tables and cells . . . . . . . . . . . . . . . . . . . . . . . . . . . . . . . . . . . 243
Resizing tables, columns, and rows . . . . . . . . . . . . . . . . . . . . . . . . . . . . 245
Adding and removing rows and columns . . . . . . . . . . . . . . . . . . . . . . 250
Splitting and merging cells . . . . . . . . . . . . . . . . . . . . . . . . . . . . . . . . . . . .251
Copying, pasting, and deleting cells. . . . . . . . . . . . . . . . . . . . . . . . . . . . 253
Nesting tables . . . . . . . . . . . . . . . . . . . . . . . . . . . . . . . . . . . . . . . . . . . . . . . 255
Sorting tables . . . . . . . . . . . . . . . . . . . . . . . . . . . . . . . . . . . . . . . . . . . . . . . 256
Chapter 9: Laying Out Pages in Layout Mode . . . . . . . . . . . . . 257
About Layout mode . . . . . . . . . . . . . . . . . . . . . . . . . . . . . . . . . . . . . . . . . . 258
Switching from Standard to Layout mode . . . . . . . . . . . . . . . . . . . . . . .261
Drawing in Layout mode. . . . . . . . . . . . . . . . . . . . . . . . . . . . . . . . . . . . . . 262
Adding content to a layout cell . . . . . . . . . . . . . . . . . . . . . . . . . . . . . . . . 265
Clearing automatically set cell heights. . . . . . . . . . . . . . . . . . . . . . . . . . 267
Resizing and moving layout cells and tables . . . . . . . . . . . . . . . . . . . . 267
Formatting layout cells and tables . . . . . . . . . . . . . . . . . . . . . . . . . . . . . 269
Setting column width. . . . . . . . . . . . . . . . . . . . . . . . . . . . . . . . . . . . . . . . . 270
Setting preferences for Layout mode . . . . . . . . . . . . . . . . . . . . . . . . . . 273
Contents 5
Page 6

Chapter 10: Using Frames . . . . . . . . . . . . . . . . . . . . . . . . . . . . . . 275
About frames and framesets . . . . . . . . . . . . . . . . . . . . . . . . . . . . . . . . . .276
Working with framesets in the Document window. . . . . . . . . . . . . . . 280
Creating frames and framesets . . . . . . . . . . . . . . . . . . . . . . . . . . . . . . . . 281
Selecting frames and framesets. . . . . . . . . . . . . . . . . . . . . . . . . . . . . . . .284
Opening a document in a frame . . . . . . . . . . . . . . . . . . . . . . . . . . . . . . . .287
Saving frame and frameset files. . . . . . . . . . . . . . . . . . . . . . . . . . . . . . . .287
Viewing and setting frame properties and attributes . . . . . . . . . . . . . .288
Viewing and setting frameset properties . . . . . . . . . . . . . . . . . . . . . . . 290
Controlling frame content with links . . . . . . . . . . . . . . . . . . . . . . . . . . . . 291
Handling browsers that can’t display frames. . . . . . . . . . . . . . . . . . . . .292
Using JavaScript behaviors with frames . . . . . . . . . . . . . . . . . . . . . . . .293
Chapter 11: Managing Templates . . . . . . . . . . . . . . . . . . . . . . . . 295
About Dreamweaver templates . . . . . . . . . . . . . . . . . . . . . . . . . . . . . . . .296
Creating a Dreamweaver template . . . . . . . . . . . . . . . . . . . . . . . . . . . . 308
Creating templates for a Contribute site. . . . . . . . . . . . . . . . . . . . . . . . . 312
Creating editable regions . . . . . . . . . . . . . . . . . . . . . . . . . . . . . . . . . . . . . . 314
Creating repeating regions . . . . . . . . . . . . . . . . . . . . . . . . . . . . . . . . . . . . 317
Using optional regions . . . . . . . . . . . . . . . . . . . . . . . . . . . . . . . . . . . . . . . 320
Defining editable tag attributes. . . . . . . . . . . . . . . . . . . . . . . . . . . . . . . . .323
Creating a nested template . . . . . . . . . . . . . . . . . . . . . . . . . . . . . . . . . . . .324
Editing and updating templates . . . . . . . . . . . . . . . . . . . . . . . . . . . . . . . .326
Managing templates . . . . . . . . . . . . . . . . . . . . . . . . . . . . . . . . . . . . . . . . . .329
Exporting and importing template XML content . . . . . . . . . . . . . . . . 330
Exporting a site without template markup . . . . . . . . . . . . . . . . . . . . . . .332
Applying or removing a template from an existing document . . . . . .332
Editing content in a template-based document . . . . . . . . . . . . . . . . . .334
PART 4: ADDING CONTENT TO PAGES
Chapter 12: Working with Pages . . . . . . . . . . . . . . . . . . . . . . . . . 341
About working with pages . . . . . . . . . . . . . . . . . . . . . . . . . . . . . . . . . . . . . 341
Saving web pages . . . . . . . . . . . . . . . . . . . . . . . . . . . . . . . . . . . . . . . . . . . .345
Specifying HTML instead of CSS . . . . . . . . . . . . . . . . . . . . . . . . . . . . . .347
Setting page properties . . . . . . . . . . . . . . . . . . . . . . . . . . . . . . . . . . . . . . .347
Working with colors . . . . . . . . . . . . . . . . . . . . . . . . . . . . . . . . . . . . . . . . . 350
Selecting elements in the Document window. . . . . . . . . . . . . . . . . . . . 351
Zooming in and out . . . . . . . . . . . . . . . . . . . . . . . . . . . . . . . . . . . . . . . . . . .354
Using the History panel . . . . . . . . . . . . . . . . . . . . . . . . . . . . . . . . . . . . . . .355
6Contents
Page 7

Automating tasks . . . . . . . . . . . . . . . . . . . . . . . . . . . . . . . . . . . . . . . . . . . . 356
Using JavaScript behaviors to detect browsers and plug-ins . . . . . 363
Previewing and testing pages in browsers . . . . . . . . . . . . . . . . . . . . . . 363
Setting download time and size preferences . . . . . . . . . . . . . . . . . . . . 366
Chapter 13: Inserting and Formatting Text . . . . . . . . . . . . . . . . 369
About text formatting in Dreamweaver . . . . . . . . . . . . . . . . . . . . . . . . . 369
Inserting text . . . . . . . . . . . . . . . . . . . . . . . . . . . . . . . . . . . . . . . . . . . . . . . . .381
Formatting paragraphs and document structure. . . . . . . . . . . . . . . . . 385
Formatting text . . . . . . . . . . . . . . . . . . . . . . . . . . . . . . . . . . . . . . . . . . . . . . 388
Using Cascading Style Sheets to format text . . . . . . . . . . . . . . . . . . . 394
Checking spelling . . . . . . . . . . . . . . . . . . . . . . . . . . . . . . . . . . . . . . . . . . . . 404
Searching for and replacing text . . . . . . . . . . . . . . . . . . . . . . . . . . . . . . . 405
Chapter 14: Inserting Images. . . . . . . . . . . . . . . . . . . . . . . . . . . . 407
About images . . . . . . . . . . . . . . . . . . . . . . . . . . . . . . . . . . . . . . . . . . . . . . . 407
Inserting an image . . . . . . . . . . . . . . . . . . . . . . . . . . . . . . . . . . . . . . . . . . . 409
Resizing an image . . . . . . . . . . . . . . . . . . . . . . . . . . . . . . . . . . . . . . . . . . . .414
Cropping an image. . . . . . . . . . . . . . . . . . . . . . . . . . . . . . . . . . . . . . . . . . . .415
Optimizing an image using Fireworks . . . . . . . . . . . . . . . . . . . . . . . . . . .416
Adjusting the brightness and contrast of an image. . . . . . . . . . . . . . . .416
Sharpening an image. . . . . . . . . . . . . . . . . . . . . . . . . . . . . . . . . . . . . . . . . .417
Creating a rollover image . . . . . . . . . . . . . . . . . . . . . . . . . . . . . . . . . . . . . .418
Using an external image editor . . . . . . . . . . . . . . . . . . . . . . . . . . . . . . . . .419
Applying behaviors to images . . . . . . . . . . . . . . . . . . . . . . . . . . . . . . . . . 420
Chapter 15: Linking and Navigation . . . . . . . . . . . . . . . . . . . . . . . 421
Understanding document locations and paths . . . . . . . . . . . . . . . . . . 422
Jump menus . . . . . . . . . . . . . . . . . . . . . . . . . . . . . . . . . . . . . . . . . . . . . . . . 425
Navigation bars . . . . . . . . . . . . . . . . . . . . . . . . . . . . . . . . . . . . . . . . . . . . . . 425
About image maps . . . . . . . . . . . . . . . . . . . . . . . . . . . . . . . . . . . . . . . . . . . 426
Creating links. . . . . . . . . . . . . . . . . . . . . . . . . . . . . . . . . . . . . . . . . . . . . . . . 427
Managing links . . . . . . . . . . . . . . . . . . . . . . . . . . . . . . . . . . . . . . . . . . . . . . 437
Inserting jump menus. . . . . . . . . . . . . . . . . . . . . . . . . . . . . . . . . . . . . . . . . .441
Using navigation bars . . . . . . . . . . . . . . . . . . . . . . . . . . . . . . . . . . . . . . . . 444
Using image maps . . . . . . . . . . . . . . . . . . . . . . . . . . . . . . . . . . . . . . . . . . . 446
Attaching JavaScript behaviors to links . . . . . . . . . . . . . . . . . . . . . . . . 448
Checking for broken, external, and orphaned links. . . . . . . . . . . . . . . 449
Fixing broken links . . . . . . . . . . . . . . . . . . . . . . . . . . . . . . . . . . . . . . . . . . . 450
Opening linked documents in Dreamweaver . . . . . . . . . . . . . . . . . . . . 452
Contents 7
Page 8

Chapter 16: Working with Other Applications . . . . . . . . . . . . . . 453
About Fireworks and Flash integration. . . . . . . . . . . . . . . . . . . . . . . . . .453
Optimizing your work environment for Fireworks and Flash . . . . . . 454
Working with Fireworks . . . . . . . . . . . . . . . . . . . . . . . . . . . . . . . . . . . . . . 455
Working with Flash . . . . . . . . . . . . . . . . . . . . . . . . . . . . . . . . . . . . . . . . . . .466
Chapter 17: Adding Audio, Video, and Interactive Elements . . 469
About media files . . . . . . . . . . . . . . . . . . . . . . . . . . . . . . . . . . . . . . . . . . . . .470
Inserting and editing media objects. . . . . . . . . . . . . . . . . . . . . . . . . . . . .472
Starting an external editor for media files. . . . . . . . . . . . . . . . . . . . . . . .474
Using Design Notes with media objects. . . . . . . . . . . . . . . . . . . . . . . . .476
Inserting and modifying a Flash button object . . . . . . . . . . . . . . . . . . .476
Inserting a Flash text object. . . . . . . . . . . . . . . . . . . . . . . . . . . . . . . . . . . .479
Inserting Flash content. . . . . . . . . . . . . . . . . . . . . . . . . . . . . . . . . . . . . . . 480
Downloading and installing Flash elements . . . . . . . . . . . . . . . . . . . . 480
Inserting Flash elements . . . . . . . . . . . . . . . . . . . . . . . . . . . . . . . . . . . . . . 481
Editing Flash element attributes. . . . . . . . . . . . . . . . . . . . . . . . . . . . . . . . 481
Inserting FlashPaper documents . . . . . . . . . . . . . . . . . . . . . . . . . . . . . . .482
Inserting Flash Video content . . . . . . . . . . . . . . . . . . . . . . . . . . . . . . . . . .483
Inserting Shockwave movies . . . . . . . . . . . . . . . . . . . . . . . . . . . . . . . . . .487
Adding video (non-Flash) . . . . . . . . . . . . . . . . . . . . . . . . . . . . . . . . . . . . .487
Adding sound to a page . . . . . . . . . . . . . . . . . . . . . . . . . . . . . . . . . . . . . . .488
Inserting Netscape Navigator plug-in content . . . . . . . . . . . . . . . . . . 489
Inserting an ActiveX control . . . . . . . . . . . . . . . . . . . . . . . . . . . . . . . . . . . 491
Inserting a Java applet . . . . . . . . . . . . . . . . . . . . . . . . . . . . . . . . . . . . . . . 492
Using behaviors to control media. . . . . . . . . . . . . . . . . . . . . . . . . . . . . . 492
Chapter 18: Using JavaScript Behaviors . . . . . . . . . . . . . . . . . . 493
Using the Behaviors panel. . . . . . . . . . . . . . . . . . . . . . . . . . . . . . . . . . . . 494
About events. . . . . . . . . . . . . . . . . . . . . . . . . . . . . . . . . . . . . . . . . . . . . . . . 495
Applying a behavior. . . . . . . . . . . . . . . . . . . . . . . . . . . . . . . . . . . . . . . . . . 496
Attaching a behavior to text . . . . . . . . . . . . . . . . . . . . . . . . . . . . . . . . . . .497
Changing a behavior . . . . . . . . . . . . . . . . . . . . . . . . . . . . . . . . . . . . . . . . . 498
Updating a behavior . . . . . . . . . . . . . . . . . . . . . . . . . . . . . . . . . . . . . . . . . 498
Creating new actions . . . . . . . . . . . . . . . . . . . . . . . . . . . . . . . . . . . . . . . . 499
Downloading and installing third-party behaviors . . . . . . . . . . . . . . . 499
Using the behavior actions that come with Dreamweaver . . . . . . . . 499
8Contents
Page 9

PART 5: WORKING WITH PAGE CODE
Chapter 19: Setting Up Your Coding Environment . . . . . . . . . . . 531
Viewing your code . . . . . . . . . . . . . . . . . . . . . . . . . . . . . . . . . . . . . . . . . . . .531
Using the coder-oriented workspace (Windows only). . . . . . . . . . . . 533
Setting coding preferences . . . . . . . . . . . . . . . . . . . . . . . . . . . . . . . . . . . 533
Customizing keyboard shortcuts . . . . . . . . . . . . . . . . . . . . . . . . . . . . . . 537
Opening files in Code view by default . . . . . . . . . . . . . . . . . . . . . . . . . . 537
Setting Validator preferences . . . . . . . . . . . . . . . . . . . . . . . . . . . . . . . . . 538
Managing tag libraries . . . . . . . . . . . . . . . . . . . . . . . . . . . . . . . . . . . . . . . . 538
Importing custom tags into Dreamweaver . . . . . . . . . . . . . . . . . . . . . . 543
Using an external HTML editor with Dreamweaver . . . . . . . . . . . . . . 545
Chapter 20: Coding in Dreamweaver. . . . . . . . . . . . . . . . . . . . . 549
About coding in Dreamweaver . . . . . . . . . . . . . . . . . . . . . . . . . . . . . . . . 549
Writing and editing code. . . . . . . . . . . . . . . . . . . . . . . . . . . . . . . . . . . . . . 558
Searching and replacing tags and attributes . . . . . . . . . . . . . . . . . . . . 570
Making quick changes to a code selection. . . . . . . . . . . . . . . . . . . . . . 572
Using language-reference material . . . . . . . . . . . . . . . . . . . . . . . . . . . . 573
Printing your code . . . . . . . . . . . . . . . . . . . . . . . . . . . . . . . . . . . . . . . . . . . 574
Chapter 21: Optimizing and Debugging Your Code . . . . . . . . . 575
Cleaning up your code. . . . . . . . . . . . . . . . . . . . . . . . . . . . . . . . . . . . . . . . 575
Verifying that tags and braces are balanced . . . . . . . . . . . . . . . . . . . . 576
Checking for browser compatibility . . . . . . . . . . . . . . . . . . . . . . . . . . . . 577
Validating your tags . . . . . . . . . . . . . . . . . . . . . . . . . . . . . . . . . . . . . . . . . . 580
Making pages XHTML-compliant . . . . . . . . . . . . . . . . . . . . . . . . . . . . . .581
Using the ColdFusion debugger (Windows only) . . . . . . . . . . . . . . . . 582
Chapter 22: Editing Code in Design View . . . . . . . . . . . . . . . . . 585
Editing code with the Property inspector . . . . . . . . . . . . . . . . . . . . . . . 585
Changing attributes with the Tag inspector . . . . . . . . . . . . . . . . . . . . . 586
Editing code with the Quick Tag Editor . . . . . . . . . . . . . . . . . . . . . . . . . 587
Editing code with the tag selector. . . . . . . . . . . . . . . . . . . . . . . . . . . . . . 590
Editing scripts . . . . . . . . . . . . . . . . . . . . . . . . . . . . . . . . . . . . . . . . . . . . . . . .591
Working with server-side includes . . . . . . . . . . . . . . . . . . . . . . . . . . . . . 593
Using JavaScript behaviors . . . . . . . . . . . . . . . . . . . . . . . . . . . . . . . . . . . 594
Viewing and editing head content. . . . . . . . . . . . . . . . . . . . . . . . . . . . . . 595
Contents 9
Page 10

PART 6: PREPARING TO BUILD DYNAMIC SITES
Chapter 23: Setting Up a Web Application . . . . . . . . . . . . . . . . 599
What you need to build web applications. . . . . . . . . . . . . . . . . . . . . . . 599
Setting up a web server . . . . . . . . . . . . . . . . . . . . . . . . . . . . . . . . . . . . . . 600
Setting up an application server. . . . . . . . . . . . . . . . . . . . . . . . . . . . . . . . 601
Creating a root folder for the application . . . . . . . . . . . . . . . . . . . . . . . 605
Defining a Dreamweaver site . . . . . . . . . . . . . . . . . . . . . . . . . . . . . . . . . 606
Connecting to a database . . . . . . . . . . . . . . . . . . . . . . . . . . . . . . . . . . . . 609
Chapter 24: Database Connections for ColdFusion
Developers . . . . . . . . . . . . . . . . . . . . . . . . . . . . . . . . . . . . . . . . . . . . 611
Connecting to a database . . . . . . . . . . . . . . . . . . . . . . . . . . . . . . . . . . . . . .611
Editing or deleting a database connection. . . . . . . . . . . . . . . . . . . . . . . 613
Chapter 25: Database Connections for ASP.NET Developers. 615
Connecting to a database . . . . . . . . . . . . . . . . . . . . . . . . . . . . . . . . . . . . . 615
Editing or deleting a database connection. . . . . . . . . . . . . . . . . . . . . . . 619
Chapter 26: Database Connections for ASP Developers . . . . . 621
About database connections in ASP . . . . . . . . . . . . . . . . . . . . . . . . . . . 621
Creating a DSN connection . . . . . . . . . . . . . . . . . . . . . . . . . . . . . . . . . . .624
Creating a DSN-less connection . . . . . . . . . . . . . . . . . . . . . . . . . . . . . .627
Connecting to a database on an ISP. . . . . . . . . . . . . . . . . . . . . . . . . . . .628
Editing or deleting a database connection. . . . . . . . . . . . . . . . . . . . . . .632
Chapter 27: Database Connections for JSP Developers . . . . 633
About database connections in JSP. . . . . . . . . . . . . . . . . . . . . . . . . . . .633
Connecting to a database . . . . . . . . . . . . . . . . . . . . . . . . . . . . . . . . . . . . .635
Connecting through an ODBC driver . . . . . . . . . . . . . . . . . . . . . . . . . . .637
Editing or deleting a database connection. . . . . . . . . . . . . . . . . . . . . . 640
Chapter 28: Database Connections for PHP Developers . . . . . 641
Connecting to a database . . . . . . . . . . . . . . . . . . . . . . . . . . . . . . . . . . . . . 641
Editing or deleting a database connection. . . . . . . . . . . . . . . . . . . . . . .642
Chapter 29: Troubleshooting Database Connections . . . . . . . 643
Troubleshooting permissions problems . . . . . . . . . . . . . . . . . . . . . . . . .643
Troubleshooting Microsoft error messages. . . . . . . . . . . . . . . . . . . . . .645
Troubleshooting MySQL error messages . . . . . . . . . . . . . . . . . . . . . . 650
10 Contents
Page 11

PART 7: MAKING PAGES DYNAMIC
Chapter 30: Optimizing the Workspace for
Visual Development. . . . . . . . . . . . . . . . . . . . . . . . . . . . . . . . . . . . 653
Displaying web-application development panels . . . . . . . . . . . . . . . . 653
Viewing your database within Dreamweaver . . . . . . . . . . . . . . . . . . . . 656
Viewing live data in Design view . . . . . . . . . . . . . . . . . . . . . . . . . . . . . . 656
Working in Design view without live data . . . . . . . . . . . . . . . . . . . . . . . 662
Previewing dynamic pages in a browser . . . . . . . . . . . . . . . . . . . . . . . . 663
Restricting database information displayed in Dreamweaver . . . . . 664
Chapter 31: The Workflow for Dynamic Page Design . . . . . . . 665
Designing the page . . . . . . . . . . . . . . . . . . . . . . . . . . . . . . . . . . . . . . . . . . 665
Creating a source of dynamic content . . . . . . . . . . . . . . . . . . . . . . . . . . 666
Adding dynamic content to a web page . . . . . . . . . . . . . . . . . . . . . . . . 668
Enhancing the functionality of a dynamic page . . . . . . . . . . . . . . . . . . 668
Testing and debugging the page . . . . . . . . . . . . . . . . . . . . . . . . . . . . . . 670
Chapter 32: Obtaining Data for Your Page . . . . . . . . . . . . . . . . 673
Using a database to store content . . . . . . . . . . . . . . . . . . . . . . . . . . . . . 673
Collecting data submitted by users. . . . . . . . . . . . . . . . . . . . . . . . . . . . . 674
Accessing data stored in session variables . . . . . . . . . . . . . . . . . . . . . 679
Chapter 33: Defining Sources of Dynamic Content . . . . . . . . . 685
About dynamic content sources . . . . . . . . . . . . . . . . . . . . . . . . . . . . . . . 685
Defining a recordset. . . . . . . . . . . . . . . . . . . . . . . . . . . . . . . . . . . . . . . . . . .691
Defining URL parameters. . . . . . . . . . . . . . . . . . . . . . . . . . . . . . . . . . . . . 695
Defining form parameters. . . . . . . . . . . . . . . . . . . . . . . . . . . . . . . . . . . . . 696
Defining session variables . . . . . . . . . . . . . . . . . . . . . . . . . . . . . . . . . . . . 698
Defining application variables for ASP and ColdFusion . . . . . . . . . . 699
Using a variable as a data source for a ColdFusion recordset . . . . . 700
Defining server variables. . . . . . . . . . . . . . . . . . . . . . . . . . . . . . . . . . . . . . . 701
Caching content sources . . . . . . . . . . . . . . . . . . . . . . . . . . . . . . . . . . . . . 703
Changing or deleting content sources. . . . . . . . . . . . . . . . . . . . . . . . . . 704
Copying a recordset from one page to another page. . . . . . . . . . . . . 705
Chapter 34: Adding Dynamic Content to Web Pages . . . . . . . 707
About adding dynamic content . . . . . . . . . . . . . . . . . . . . . . . . . . . . . . . . 707
Making text dynamic . . . . . . . . . . . . . . . . . . . . . . . . . . . . . . . . . . . . . . . . . 709
Making images dynamic . . . . . . . . . . . . . . . . . . . . . . . . . . . . . . . . . . . . . .710
Making HTML attributes dynamic . . . . . . . . . . . . . . . . . . . . . . . . . . . . . . 711
Contents 11
Page 12

Making ActiveX, Flash, and other object parameters dynamic . . . . . 714
Editing dynamic content . . . . . . . . . . . . . . . . . . . . . . . . . . . . . . . . . . . . . . 715
Deleting dynamic content . . . . . . . . . . . . . . . . . . . . . . . . . . . . . . . . . . . . . 715
Creating dynamic pages in a Contribute site . . . . . . . . . . . . . . . . . . . . . 716
Chapter 35: Displaying Database Records. . . . . . . . . . . . . . . . . 717
About displaying database records . . . . . . . . . . . . . . . . . . . . . . . . . . . . . 717
Using predefined data formats . . . . . . . . . . . . . . . . . . . . . . . . . . . . . . . . .723
Creating recordset navigation links . . . . . . . . . . . . . . . . . . . . . . . . . . . .725
Showing and hiding regions based on recordset results . . . . . . . . . .728
Displaying multiple recordset results . . . . . . . . . . . . . . . . . . . . . . . . . . .729
Creating a table with a Repeat Region server behavior . . . . . . . . . . .730
Creating a record counter . . . . . . . . . . . . . . . . . . . . . . . . . . . . . . . . . . . . . 731
Chapter 36: Displaying XML Data in Web Pages. . . . . . . . . . . .735
About using XML and XSL with web pages . . . . . . . . . . . . . . . . . . . . .735
About server-side XSL transformations. . . . . . . . . . . . . . . . . . . . . . . . . 737
About client-side XSL transformations . . . . . . . . . . . . . . . . . . . . . . . . .740
About XML data and repeating elements . . . . . . . . . . . . . . . . . . . . . . .743
About previewing XML data . . . . . . . . . . . . . . . . . . . . . . . . . . . . . . . . . . .744
Performing XSL transformations on the server . . . . . . . . . . . . . . . . . . 746
Performing XSL transformations on the client . . . . . . . . . . . . . . . . . . .760
Applying styles to XSLT fragments. . . . . . . . . . . . . . . . . . . . . . . . . . . . .763
Troubleshooting XSL transformations . . . . . . . . . . . . . . . . . . . . . . . . . .764
Chapter 37: Using Web Services . . . . . . . . . . . . . . . . . . . . . . . . .765
About web services. . . . . . . . . . . . . . . . . . . . . . . . . . . . . . . . . . . . . . . . . . .766
Configuring proxy generators for use with Dreamweaver . . . . . . . . .770
Adding a web service proxy using the WSDL description . . . . . . . . . 773
Adding a web service to a page . . . . . . . . . . . . . . . . . . . . . . . . . . . . . . . .774
Editing the UDDI web service site list . . . . . . . . . . . . . . . . . . . . . . . . . . . 776
Chapter 38: Adding Custom Server Behaviors. . . . . . . . . . . . . . 777
About custom server behaviors . . . . . . . . . . . . . . . . . . . . . . . . . . . . . . . . 777
Installing third-party server behaviors . . . . . . . . . . . . . . . . . . . . . . . . . . 787
Using the Server Behavior Builder . . . . . . . . . . . . . . . . . . . . . . . . . . . . .788
Using parameters in server behaviors. . . . . . . . . . . . . . . . . . . . . . . . . . . 791
Positioning code blocks . . . . . . . . . . . . . . . . . . . . . . . . . . . . . . . . . . . . . .792
Creating a dialog box for a custom server behavior . . . . . . . . . . . . . .794
Editing and modifying server behaviors . . . . . . . . . . . . . . . . . . . . . . . . .796
12 Contents
Page 13

Chapter 39: Creating Forms . . . . . . . . . . . . . . . . . . . . . . . . . . . . 799
About forms . . . . . . . . . . . . . . . . . . . . . . . . . . . . . . . . . . . . . . . . . . . . . . . . . 799
Creating HTML forms . . . . . . . . . . . . . . . . . . . . . . . . . . . . . . . . . . . . . . . . 803
Inserting HTML form objects. . . . . . . . . . . . . . . . . . . . . . . . . . . . . . . . . . 805
Inserting dynamic HTML form objects . . . . . . . . . . . . . . . . . . . . . . . . . .810
Validating HTML form data . . . . . . . . . . . . . . . . . . . . . . . . . . . . . . . . . . . .814
Attaching JavaScript behaviors to HTML form objects . . . . . . . . . . .815
Attaching custom scripts to HTML form buttons . . . . . . . . . . . . . . . . .815
Creating accessible HTML forms . . . . . . . . . . . . . . . . . . . . . . . . . . . . . . .816
PART 8: DEVELOPING APPLICATIONS RAPIDLY
Chapter 40: Building ColdFusion Applications Rapidly. . . . . . . 821
About rapid application development (all servers) . . . . . . . . . . . . . . . .821
Building ColdFusion MX 7 forms . . . . . . . . . . . . . . . . . . . . . . . . . . . . . . 827
Building master/detail pages (ColdFusion) . . . . . . . . . . . . . . . . . . . . . 838
Building search/results pages (ColdFusion, ASP, JSP, PHP). . . . . 847
Building a record insert page (all servers). . . . . . . . . . . . . . . . . . . . . . . 853
Building pages to update a record (ColdFusion). . . . . . . . . . . . . . . . . 856
Building pages to delete a record (ColdFusion) . . . . . . . . . . . . . . . . . 863
Using stored procedures to modify databases (ColdFusion) . . . . . . 872
Building pages that restrict access to your site (ColdFusion,
ASP, JSP, PHP). . . . . . . . . . . . . . . . . . . . . . . . . . . . . . . . . . . . . . . . . . . . . 874
Securing a folder in your application (ColdFusion) . . . . . . . . . . . . . . . 884
Using ColdFusion components . . . . . . . . . . . . . . . . . . . . . . . . . . . . . . . . 884
Chapter 41: Building ASP.NET Applications Rapidly . . . . . . . . 893
Building ASP.NET forms . . . . . . . . . . . . . . . . . . . . . . . . . . . . . . . . . . . . . 893
Creating ASP.NET DataGrid and DataList web controls . . . . . . . . . 897
Building master/detail pages (ASP.NET) . . . . . . . . . . . . . . . . . . . . . . . 902
Building a database search page (ASP.NET) . . . . . . . . . . . . . . . . . . . 909
Building a record insert page (ASP.NET) . . . . . . . . . . . . . . . . . . . . . . . .915
Building pages to update a record (ASP.NET) . . . . . . . . . . . . . . . . . . .915
Building pages to delete a record (ASP.NET) . . . . . . . . . . . . . . . . . . . 924
Using stored procedures to modify databases (ASP.NET) . . . . . . . 932
Building pages that restrict access to your site (ASP.NET) . . . . . . . 934
Chapter 42: Building ASP and JSP Applications Rapidly. . . . 935
Building master/detail pages (ASP and JSP) . . . . . . . . . . . . . . . . . . . 935
Building search/results pages (ASP and JSP) . . . . . . . . . . . . . . . . . . 939
Contents 13
Page 14

Building a record insert page (ASP and JSP). . . . . . . . . . . . . . . . . . . 939
Building pages to update a record (ASP and JSP) . . . . . . . . . . . . . . 940
Building pages to delete a record (ASP and JSP). . . . . . . . . . . . . . . 945
Building pages with advanced data manipulation objects
(ASP and JSP). . . . . . . . . . . . . . . . . . . . . . . . . . . . . . . . . . . . . . . . . . . . . . 949
Building pages that restrict access to your site (ASP and JSP) . . . 953
Using JavaBeans (JSP) . . . . . . . . . . . . . . . . . . . . . . . . . . . . . . . . . . . . . 953
Chapter 43: Building PHP Applications Rapidly . . . . . . . . . . . 957
Building master/detail pages (PHP) . . . . . . . . . . . . . . . . . . . . . . . . . . . .957
Building search/results pages (PHP) . . . . . . . . . . . . . . . . . . . . . . . . . . .963
Building a record insert page (PHP) . . . . . . . . . . . . . . . . . . . . . . . . . . . 964
Building pages to update a record (PHP) . . . . . . . . . . . . . . . . . . . . . . 964
Building pages to delete a record (PHP) . . . . . . . . . . . . . . . . . . . . . . . . 971
Building pages that restrict access to your site (PHP) . . . . . . . . . . . .979
PART 9: APPENDIXES
Appendix A: Beginner’s Guide to Databases . . . . . . . . . . . . . . 983
About databases . . . . . . . . . . . . . . . . . . . . . . . . . . . . . . . . . . . . . . . . . . . . .983
Database design basics . . . . . . . . . . . . . . . . . . . . . . . . . . . . . . . . . . . . . . 984
Understanding database connections . . . . . . . . . . . . . . . . . . . . . . . . . . 991
Appendix B: SQL Primer . . . . . . . . . . . . . . . . . . . . . . . . . . . . . . . 997
Syntax basics . . . . . . . . . . . . . . . . . . . . . . . . . . . . . . . . . . . . . . . . . . . . . . . .997
Defining the columns of a recordset . . . . . . . . . . . . . . . . . . . . . . . . . . . 999
Limiting the records in a recordset . . . . . . . . . . . . . . . . . . . . . . . . . . . . 999
Sorting the records in a recordset . . . . . . . . . . . . . . . . . . . . . . . . . . . . .1003
Joining tables . . . . . . . . . . . . . . . . . . . . . . . . . . . . . . . . . . . . . . . . . . . . . . .1003
Index . . . . . . . . . . . . . . . . . . . . . . . . . . . . . . . . . . . . . . . . . . . . . . . .1005
14 Contents
Page 15

PART 1
Dreamweaver Basics
Learn how to use Macromedia Dreamweaver 8 documentation and other
resources, and set up the Dreamweaver workspace to fit your preferred
working style. Then plan and set up a site, and begin to create pages.
This part contains the following chapters:
Introduction . . . . . . . . . . . . . . . . . . . . . . . . . . . . . . . . . . . . . . . . . . . . . . . 17
Chapter 1: Exploring the Workspace . . . . . . . . . . . . . . . . . . . . . . . . .39
Chapter 2: Setting Up a Dreamweaver Site . . . . . . . . . . . . . . . . . . . 79
Chapter 3: Creating and Opening Documents. . . . . . . . . . . . . . . . . 91
1
15
Page 16

Page 17

Introduction
Macromedia Dreamweaver 8 is a professional HTML editor for designing, coding, and
developing websites, web pages, and web applications. Whether you enjoy the control of
hand-coding HTML or prefer to work in a visual editing environment, Dreamweaver
provides you with helpful tools to enhance your web creation experience.
The visual editing features in Dreamweaver let you quickly create pages without writing a line
of code. You can view all your site elements or assets and drag them from an easy-to-use panel
directly into a document. You can streamline your development workflow by creating and
editing images in Macromedia Fireworks or another graphics application, then importing
them directly into Dreamweaver, or by adding Macromedia Flash objects.
Dreamweaver also provides a full-featured coding environment that includes code-editing
tools (such as code coloring and tag completion) and language reference material on
Cascading Style Sheets (CSS), JavaScript, and ColdFusion Markup Language (CFML),
among others. Macromedia Roundtrip HTML technology imports your hand-coded HTML
documents without reformatting the code; you can then reformat code with your preferred
formatting style.
Dreamweaver also enables you to build dynamic database-backed web applications using
s e r v e r t e c h n o l o g i e s s uc h a s C F M L , A S P. N E T, A S P, J SP, a n d P H P.
Dreamweaver is fully customizable. You can create your own objects and commands, modify
keyboard shortcuts, and even write JavaScript code to extend Dreamweaver capabilities with
new behaviors, Property inspectors, and site reports.
This chapter contains the following sections:
What’s new in Dreamweaver 8 . . . . . . . . . . . . . . . . . . . . . . . . . . . . . . . . . . . . . . . . . . . . . 18
Where to start . . . . . . . . . . . . . . . . . . . . . . . . . . . . . . . . . . . . . . . . . . . . . . . . . . . . . . . . . . . . 21
Dreamweaver workflow for creating websites. . . . . . . . . . . . . . . . . . . . . . . . . . . . . . . . 25
Using Dreamweaver with other applications . . . . . . . . . . . . . . . . . . . . . . . . . . . . . . . . . 29
Dreamweaver and accessibility. . . . . . . . . . . . . . . . . . . . . . . . . . . . . . . . . . . . . . . . . . . . . 30
17
Page 18

Guide to Dreamweaver instructional media . . . . . . . . . . . . . . . . . . . . . . . . . . . . . . . . . . 31
Typographical conventions . . . . . . . . . . . . . . . . . . . . . . . . . . . . . . . . . . . . . . . . . . . . . . . . 36
HTML and web technologies resources . . . . . . . . . . . . . . . . . . . . . . . . . . . . . . . . . . . . . 36
What’s new in Dreamweaver 8
Dreamweaver 8 includes various new features that improve usability and help you to build
pages whether you’re working in the design or the coding environment.
First, Dreamweaver 8 provides support for best practices and industry standards, including
support for advanced CSS use, XML and RSS feeds, and accessibility requirements.
Work with best practices
Visual authoring with XML
data
New, unified CSS panel The new, unified CSS panel provides a central location for
CSS layout visualization Apply visual aides at design time to outline CSS layout borders
Style Rendering toolbar View content the same way users will see it no matter what the
Get up to speed with XML using powerful, visual tools to
integrate feeds into work and remove the mystery from XML to
HTML translation. Integrate XML-based data, such as RSS
feeds, into web pages using a simple drag-and-drop workflow.
Jump to Code view to customize the transformation, using
improved code hinting for XML and XSLT. For more
information, see Chapter 36, “Displaying XML Data in
Web Pages,” on page 735.
learning, understanding, and working with the CSS styles
applied to pages in a visual way. All the CSS functionality is
consolidated into one panel set and enhanced to make working
with CSS styles easier and more productive. The new interface
makes it easier to see the cascade of styles applied to a specific
element so that you can easily identify where attributes are
defined. A property grid allows for quick edits. For more
information, see “Using the CSS Styles panel” on page 394,
or color CSS layouts. Applying visual aides reveals complex
nesting schemes and improves selection. Click the CSS layout
for valuable tooltips that help you understand the elements that
are controlling the design. See Chapter 7, “Laying Out Pages
with CSS,” on page 197.
delivery mechanism with new support for CSS media types.
Use the Style Rendering toolbar to toggle to Design view and
see how it will look in print, on a handheld, or onscreen. See
“The Style Rendering toolbar” on page 49.
18 Introduction
Page 19

Work with best practices
CSS rendering
improvements
Accessibility: Support for
WCAG/W3C priority 2
checkpoints
Improved WebDAV WebDAV in Dreamweaver 8 now supports digest
Match how complex CSS layouts will render in most browsers
with substantial improvements in Design view accuracy.
Dreamweaver now fully supports advanced CSS techniques,
such as overflow, pseudo-elements, and form elements.
In addition to the integrated accessibility evaluation tool for
Section 508 and WCAG Priority 1 checkpoints, Dreamweaver
now supports both CSS and accessibility with an updated
evaluation tool that includes WCAG Priority 2 checkpoints.
authentication and SSL for secure file transfer, and offers
improved connectivity with a wider array of servers. See “Using
WebDAV to check in and check out files” on page 136.
Get more done in less time with optimized user workflows that reduce the time required to
complete common tasks. Dreamweaver 8 takes the hassle out of the little things so you can
spend more time designing and developing engaging websites and applications.
Get more done
Background file transfer Keep working while Dreamweaver 8 uploads files to the server.
For more information, see “Managing file transfers”
on page 144.
Zoom Get greater control over your design with zoom. Zoom in and
inspect an image or work with a complex nested table layout.
Zoom out to preview how a page will look. For more
information, see “Zooming in and out” on page 354.
Guides Compare the page layout to page mockups with pixel-perfect
accuracy using guides to measure page layouts. Visual
feedback helps measure distances accurately and supports
intelligent snapping. For more information, see “Using guides”
on page 227.
Coding toolbar The new Coding toolbar provides buttons for common coding
features in a gutter bar along the side of Code view. For more
information, see “Inserting code quickly with the Coding
toolbar” on page 561.
Code collapse Focus only on the code you want to see by hiding and
expanding blocks of code. For more information, see
“Collapsing and expanding code fragments” on page 566.
What’s new in Dreamweaver 8 19
Page 20

Get more done
Workspace layouts Customize and save workspace configurations. Dreamweaver
8 ships with four different configurations tailored to the needs of
designers and coders. You can also build a custom workspace.
For more information, see “Saving custom workspace layouts”
on page 73.
Tabbed documents for the
Mac
New starter pages New layouts and designs let you to create sites quickly.
Improved site synchronize
and check-in/check-out
Compare files Quickly compare files to identify what has changed. You can
Paste Special With the new pasting options in Dreamweaver, you can retain
Site-relative references Work seamlessly with server-side includes at design time and
Code-editing improvements Gain greater control over how Dreamweaver provides code
New document tabs on the Mac help simplify the user interface
and make it easier to select documents. For more information,
see “Displaying tabbed documents (Macintosh)” on page 72.
Manage sites with increased reliability and confidence.
Improved site synchronization features help ensure that the file
in use is the latest version. Prevent accidental overwriting of
others' work with improved check-in/check-out functionality.
For more information, see “Synchronizing the files on your local
and remote sites” on page 144.
compare two local files, a file on the local computer and one on
a remote computer, or two files on the remote computer. Use
your favorite file comparison tool with Dreamweaver on both
the Macintosh and Windows platforms. For more information,
see “Comparing files for differences” on page 113.
all the source formatting created in Microsoft Word, or just
paste the text. For more information, see “Adding text to a
document” on page 381.
runtime by ensuring that references are relative to sites instead
of local files. For more information, see “Setting the relative
path of new links” on page 432.
hints and completes tags to fit with your coding style.
20 Introduction
Page 21

Dreamweaver 8 supports efforts to learn and take advantage of new technologies, including
PHP 5, Flash Video, ColdFusion MX 7, and the Macromedia Web Publishing System.
Integrates with the latest technologies and standards
Support for ColdFusion MX 7Updated support for ColdFusion MX 7 includes new server
behaviors and code hinting. To match the code hinting and
debugging with the correct version of ColdFusion,
Dreamweaver automatically detects the server version the first
time it connects to the site. The tight integration between
Dreamweaver and ColdFusion lets you add and remove
databases directly from the Databases panel, and view only
ColdFusion components defined in the current site. For more
information, see “Enabling the ColdFusion enhancements”
on page 828.
Support for PHP 5 Take advantage of updated support for PHP 5, including server
behaviors and code hinting.
Flash Video Quickly and easily insert a Flash Video file in a web page. For
more information, see “Inserting Flash Video content”
on page 483.
Macromedia Web
Publishing System:
notification and event
logging
Updated reference material
from O'Reilly
Keep track of everything that is going on within your site.
Events in Dreamweaver notify the Macromedia Web Publishing
System server so that all changes to a website in the WPS
system are recorded.
Consult new reference content for XML, XSLT, and XPath, and
updated content for ASP and JSP.
Where to start
Dreamweaver documentation includes information for readers from various backgrounds.
To get the most out of the documentation, start by reading the parts that are most appropriate
for you.
For information about Dreamweaver resources, see “Guide to Dreamweaver instructional
media” on page 31.
Where to start 21
Page 22

Web-design novices
If you are relatively new to web design, this section will point you to sections of the
Dreamweaver documentation that are most appropriate for your background.
For web-design novices:
1. Begin by reading the tutorials in Getting Started in Dreamweaver.
2. In Using Dreamweaver (Help > Using Dreamweaver), read Chapter 1, “Exploring the
Workspace,” on page 39, Chapter 2, “Setting Up a Dreamweaver Site,” on page 79,
Chapter 4, “Managing Your Files,” on page 101, and Chapter 3, “Creating and Opening
Documents,” on page 91.
3. Learn about page layout by reading Chapter 9, “Laying Out Pages in Layout Mode,” on
page 257.
4. To learn about formatting text and including images in your pages, read Chapter 13,
“Inserting and Formatting Text,” on page 369 and Chapter 14, “Inserting Images,” on
page 407.
That’s all you really need to begin producing high-quality websites, but when you’re ready to
learn how to use more advanced tools, you can proceed through the rest of the static-page
chapters in Using Dreamweaver. You might want to wait to read the dynamic-page chapters
until you’re more familiar with creating web pages.
Experienced web designers
If you are an experienced web designer, this section will point you to sections of the
Dreamweaver documentation that are most appropriate for your background. There are two
different approaches: one for designers who are new to Dreamweaver and one for designers
who are familiar with Dreamweaver but would like to learn more about creating dynamic
pages.
For experienced web designers who are new to Dreamweaver:
1. Begin by reading the tutorials in Getting Started in Dreamweaver.
2. In Using Dreamweaver, read Chapter 1, “Exploring the Workspace,” on page 39 to learn
more about the Dreamweaver user interface.
3. Although much of the material in Chapter 2, “Setting Up a Dreamweaver Site,” on page 79
and Chapter 4, “Managing Your Files,” on page 101 is probably familiar to you, you
should skim those chapters to see how these familiar concepts are implemented in
Dreamweaver. Pay particular attention to the sections about setting up a Dreamweaver site.
22 Introduction
Page 23

4. For useful information on the details of using Dreamweaver to create basic HTML pages,
read Chapter 13, “Inserting and Formatting Text,” on page 369 and Chapter 14,
“Inserting Images,” on page 407.
5. For information about coding in Dreamweaver, see “Setting Up Your Coding
Environment” on page 531, “Coding in Dreamweaver” on page 549, “Optimizing and
Debugging Your Code” on page 575, and “Editing Code in Design View” on page 585.
6. Read the overview at the beginning of each of the other chapters in Using Dreamweaver to
determine whether its topics are of interest to you.
For experienced web designers, familiar with Dreamweaver, who want to learn
about creating dynamic pages:
1. Begin by reading Chapter 12, “Understanding Web Applications” and “Tutorial:
Developing a Web Application” in Getting Started with Dreamweaver.
2. In Using Dreamweaver, skim Chapter 1, “Exploring the Workspace,” on page 39 to learn
about new aspects of the Dreamweaver user interface, then read “Optimizing the
Workspace for Visual Development” on page 653.
3. Become familiar with the Dreamweaver workflow for dynamic pages by reading “The
Workflow for Dynamic Page Design” on page 665.
4. Set up a web server and application server. (See Chapter 23, “Setting Up a Web
Application,” on page 599.)
5. Connect to a database. (See “Connecting to a database” on page 609.)
6. Read the overview at the beginning of each chapter in Using Dreamweaver to determine
whether its topics are of interest to you.
7. If you’re interested in customizing Dreamweaver by hand, read “Customizing
Dreamweaver” on the Macromedia Support Center at www.macromedia.com/go/
customizing_dreamweaver. If you want to write extensions for Dreamweaver, read
Extending Dreamweaver.
Where to start 23
Page 24

Experienced hand-coders
If you are an experienced hand-coder, this section will point you to sections of the
Dreamweaver documentation that are most appropriate for your background.
For experienced hand-coders:
1. In Using Dreamweaver, read Chapter 1, “Exploring the Workspace,” on page 39 to learn
more about the Dreamweaver user interface.
2. Although much of the material in Chapter 2, “Setting Up a Dreamweaver Site,” on page 79
and Chapter 4, “Managing Your Files,” on page 101 is probably familiar to you, skim those
chapters to see how these familiar concepts are implemented in Dreamweaver. Pay
particular attention to the sections on setting up a Dreamweaver site.
3. Read more about coding with Dreamweaver in Chapter 19, “Setting Up Your Coding
Environment,” on page 531, Chapter 20, “Coding in Dreamweaver,” on page 549,
Chapter 21, “Optimizing and Debugging Your Code,” on page 575, and Chapter 22,
“Editing Code in Design View,” on page 585.
4. Read the overview at the beginning of each chapter in Using Dreamweaver to determine
whether its topics are of interest to you.
Web application developers
If you are a web application developer, this section will point you to sections of the
Dreamweaver documentation that are most appropriate for your background. There are two
different approaches, depending on whether you’ve used Dreamweaver before.
For web application developers who have not used Dreamweaver:
1. Begin by quickly reading Getting Started in Dreamweaver to familiarize yourself with the
basics of using Dreamweaver.
2. In Using Dreamweaver, read Chapter 1, “Exploring the Workspace,” on page 39 to learn
more about the Dreamweaver user interface.
3. Although much of the material in Chapter 2, “Setting Up a Dreamweaver Site,” on page 79
and Chapter 4, “Managing Your Files,” on page 101 is probably familiar to you, skim those
chapters to see how these familiar concepts are implemented in Dreamweaver. Pay
particular attention to the sections on setting up a Dreamweaver site.
4. Set up a web server and application server using Dreamweaver. (See Chapter 23, “Setting
Up a Web Application,” on page 599.)
24 Introduction
Page 25

5. Connect to a database. (See “Connecting to a database” on page 609.)
6. Read the overview at the beginning of each of the chapter in Using Dreamweaver to
determine whether its topics are of interest to you.
For experienced web application developers who have used Dreamweaver:
1. Begin by reading “What’s new in Dreamweaver 8” on page 18.
2. In Using Dreamweaver, skim Chapter 1, “Exploring the Workspace,” on page 39 to learn
about new aspects of the Dreamweaver user interface.
3. If you’re interested in customizing Dreamweaver by hand, read “Customizing
Dreamweaver” on the Macromedia Support Center at www.macromedia.com/go/
customizing_dreamweaver. If you want to write extensions for Dreamweaver, read
Extending Dreamweaver.
Dreamweaver workflow for creating websites
There are many possible approaches to creating a website. The workflow presented in this
documentation starts by defining a site’s strategy or goals. If you’re developing web
applications, you have to set up servers and databases as needed. Then you design the look
and feel of the site. When the design is complete, you build the site and code the pages,
adding content and interactivity; then you link pages together, and test the site for
functionality and to see if it meets its defined objectives. You can include dynamic pages in
your site as well. At the end of the cycle, you publish the site on a server. Many developers also
schedule periodic maintenance to ensure that the site remains current and functional.
Planning your site
Planning and organizing your site carefully from the start can save you time later on.
Organizing your site includes not only determining where the files will go, but also examining
site requirements, audience profiles, and site goals. Additionally, you should consider
technical requirements such as user access, as well as browser, plug-in, and download
restrictions.
Dreamweaver workflow for creating websites 25
Page 26

Once you’ve organized your information and determined a structure, you can begin creating
your site.
■ Use the Dreamweaver Files panel to set up your site’s organizational structure. In the Files
panel, you can easily add, delete, and rename files and folders to change the organization
as needed. (See Chapter 2, “Setting Up a Dreamweaver Site,” on page 79 and Chapter 4,
“Managing Your Files,” on page 101.)
■ You can begin to create simple pages which you’ll later turn into more complex designs.
Create new blank pages or pages based on predesigned page designs. (See Chapter 3,
“Creating and Opening Documents,” on page 91.)
If you work on a web-development team, you may also be interested in these topics:
■ Set up a system to prevent team members from overwriting files. (See “Checking in and
checking out files” on page 134.)
■ Use Design Notes to communicate with web team members. (See “Storing file
information in Design Notes” on page 150.)
Managing your site files
The Dreamweaver Files and Assets panels make it easy for you to manage your site files.
■ In the Dreamweaver Files panel you’ll find many tools to help you manage your site,
transfer files to and from a remote server, set up a Check In/Check Out process to prevent
files from being overwritten, and synchronize the files on your local and remote sites. (See
“Managing Your Files” on page 101.)
■ Use the Assets panel to easily organize the assets in a site; you can then drag most assets
directly from the Assets panel into a Dreamweaver document. (See Chapter 5, “Managing
Site Assets and Libraries,” on page 159.)
■ You can use Dreamweaver to manage aspects of your Contribute sites. (See Chapter 6,
“Managing Contribute Sites with Dreamweaver,” on page 181.)
Laying out web pages
Dreamweaver provides you flexibility as you mock-up and work toward a final layout for your
pages. Choose the layout technique that works for you, or use the Dreamweaver layout
options in conjunction with one another to create your site’s look.
■ You can use Dreamweaver layers or CSS positioning styles to create your layout. (See
Chapter 7, “Laying Out Pages with CSS,” on page 197.)
26 Introduction
Page 27

■ The table tools and Layout mode in Dreamweaver let you quickly design web pages by
drawing and then rearranging the page structure. (See Chapter 8, “Presenting Content
with Tables,” on page 233 and Chapter 9, “Laying Out Pages in Layout Mode,” on
page 257.)
■ If you want to display multiple documents at once in a web browser, you can lay out
documents using frames. (See Chapter 10, “Using Frames,” on page 275.)
■ Dreamweaver templates enable you to easily apply reusable content and page designs to
your site. You can create new pages based on a Dreamweaver template, then update the
layout of those pages automatically when the template changes. (See Chapter 11,
“Managing Templates,” on page 295.)
Adding content to pages
Using Dreamweaver, you can easily add a variety of content to web pages. Add assets and
design elements, such as text, images, colors, movies, sound, and other forms of media.
■ Dreamweaver page creation features enable you to specify web page properties such, as
page titles, background images and colors. In addition, Dreamweaver provides tools to
help you maximize website performance, and to test pages to ensure compatibility with
different web browsers. (See Chapter 12, “Working with Pages,” on page 341.)
■ Type directly in a Dreamweaver document, or import text from other documents, then
format the text using the Dreamweaver Property inspector. You can also easily create your
own Cascading Style Sheets. (See Chapter 13, “Inserting and Formatting Text,” on
page 369.)
■ Insert images, including rollover images, image maps, and Fireworks sliced images, and
use alignment tools to position images in a page. You can also resize images directly in
Dreamweaver. (See Chapter 14, “Inserting Images,” on page 407 and Chapter 16,
“Working with Other Applications,” on page 453.)
■ With Dreamweaver you can create standard HTML links, including anchor links and e-
mail links, or easily set up graphical navigation systems, such as jump menus and
navigation bars. (See Chapter 15, “Linking and Navigation,” on page 421.)
■ Insert other types of media in a web page, such as Flash, Shockwave, and QuickTime
movies, sound, and applets. (See Chapter 17, “Adding Audio, Video, and Interactive
Elements,” on page 469.)
■ Use behaviors to perform tasks in response to specific events, such as highlighting a button
when the visitor passes the pointer over it, validating a form when the visitor clicks the
Submit button, or opening a second browser window when the main page is finished
loading. (See Chapter 18, “Using JavaScript Behaviors,” on page 493.)
Dreamweaver workflow for creating websites 27
Page 28

Hand-coding
Coding web pages by hand is another approach to creating pages. Dreamweaver provides easyto-use visual editing tools, but it also provides a sophisticated coding environment; you can
use either approach, or both, to create and edit your pages.
■ You can work in a coding environment without visual tools; coding tools help you create
and edit code, format code, and make sure that your code adheres to standards. (See
Chapter 19, “Setting Up Your Coding Environment,” on page 531 and Chapter 20,
“Coding in Dreamweaver,” on page 549, and Chapter 21, “Optimizing and Debugging
Your Code,” on page 575.)
■ You can also use some Dreamweaver coding tools in Design view, the visual design
environment. (See Chapter 22, “Editing Code in Design View,” on page 585.)
Setting up a web application
Many websites contain dynamic pages that allow visitors to view information stored in
databases, and usually allow some visitors to add new information and edit information in the
databases. To create such pages, you must first complete several preparatory steps.
■ Set up a web server and application server, then create or modify a Dreamweaver site. (See
Chapter 23, “Setting Up a Web Application,” on page 599.)
■ Connect to a database. (See “Connecting to a database” on page 609).
Creating dynamic pages
In Dreamweaver, you can define a variety of sources of dynamic content, including recordsets
extracted from databases, form parameters, and JavaBeans components. To add the dynamic
content to a page, simply drag it onto the page.
You can set your page to display one record or many records at a time, display more than one
page of records, add special links to move from one page of records to the next (and back),
and create record counters to help users keep track of the records.
■ If you’re unfamiliar with creating web applications in Dreamweaver, learn how to use
Dreamweaver to build dynamic pages. (See Chapter 30, “Optimizing the Workspace for
Visual Development,” on page 653 and Chapter 31, “The Workflow for Dynamic Page
Design,” on page 665.)
■ Define and display dynamic content on your pages. (See Chapter 32, “Obtaining Data for
Your Page,” on page 673, Chapter 33, “Defining Sources of Dynamic Content,” on
page 685, Chapter 34, “Adding Dynamic Content to Web Pages,” on page 707, and
Chapter 35, “Displaying Database Records,” on page 717.)
28 Introduction
Page 29

■ Encapsulate application or business logic using leading-edge technologies such as
Macromedia ColdFusion components and web services. (See “Using ColdFusion
components” on page 884 and Chapter 37, “Using Web Services,” on page 765.)
■ If you need more flexibility, you can create your own server behaviors and interactive
forms. (See Chapter 38, “Adding Custom Server Behaviors,” on page 777 and Chapter 39,
“Creating Forms,” on page 799.)
Rapid application development
Dreamweaver offers a number of rapid application development (RAD) tools, including
server behaviors and application objects, that help you build sophisticated web applications
without having to write any server-side code.
■ Quickly create pages that search and modify databases and display the results. Provide
security by restricting access to your pages. (See “Building ColdFusion Applications
Rapidly” on page 821, “Building ASP.NET Applications Rapidly” on page 893, “Building
ASP and JSP Applications Rapidly” on page 935, and “Building PHP Applications
Rapidly” on page 957.)
Using Dreamweaver with other applications
Dreamweaver accommodates your web design and development process by making it easy for
you to work with other applications. For information about working with other applications
such as browsers, HTML editors, image editors, and animation tools, see the following topics:
■ For information about using Dreamweaver with other HTML editors, such as HomeSite
or BBEdit, see “Using an external HTML editor with Dreamweaver” on page 545.
■ You can specify preferred browsers for previewing your site. (See “Previewing and testing
pages in browsers” on page 363.)
■ You can start an external image editor, such as Macromedia Fireworks or Adobe
Photoshop, from within Dreamweaver. (See “Using an external image editor”
on page 419.)
■ You can configure Dreamweaver to start a different editor for each file type. (See “Starting
an external editor for media files” on page 474.)
Using Dreamweaver with other applications 29
Page 30
■ For information about adding interactivity to your site using Macromedia Flash, see
“Inserting and modifying a Flash button object” on page 476, “Inserting a Flash text
object” on page 479, or “Downloading and installing Flash elements” on page 480.
■ For information about using ColdFusion, see Using ColdFusion (Help > Using
ColdFusion).
Dreamweaver and accessibility
Accessibility refers to making websites and web products usable for people with visual,
auditory, motor, and other disabilities. Examples of accessibility features for software products
and websites include screen reader support, text equivalents for graphics, keyboard shortcuts,
change of display colors to high contrast, and so on.
NOTE
For more information about two significant accessibility initiatives, see the World Wide
Web Consortium Web Accessibility Initiative (www.w3.org/wai) and Section 508 of the
Federal Rehabilitation Act (www.section508.gov).
Dreamweaver provides tools that make the product accessible and tools that help you author
accessible content:
Using Dreamweaver accessibility features For Dreamweaver web designers who need to
use accessibility features, Dreamweaver offers screen reader support, keyboard navigation, and
operating system accessibility support.
For more information, see “Using Dreamweaver accessibility features” on page 64.
Authoring for accessibility For Dreamweaver web designers who need to create accessible
content, Dreamweaver assists you in creating accessible pages that contain useful content for
screen readers and comply with government guidelines.
Dreamweaver provides dialog boxes that prompt you to enter accessibility attributes when you
insert page elements (see “Optimizing the workspace for accessible page design” on page 69).
For example, the accessibility dialog box for images reminds you to add text equivalents for
graphics. Then, when the image appears on a page for a user with visual disabilities, the screen
reader reads the description.
30 Introduction
Page 31

Dreamweaver also provides sample web pages that were designed for accessibility (see
“Creating a document based on a Dreamweaver design file” on page 93) and an accessibility
report that you can run to test your page or site against the Section 508 accessibility guidelines
(see “Testing your site” on page 154).
NOTE
Remember that no authoring tool can automate the development process. Designing
accessible websites requires you to understand accessibility requirements and make
many ongoing subjective decisions about how users with disabilities interact with web
pages. The best way to ensure that a website is accessible is through deliberate
planning, development, testing, and evaluation.
The Dreamweaver accessibility validation feature
The accessibility validation feature in Dreamweaver uses technology from UsableNet.
UsableNet is an industry leader in developing easy-to-use software to automate usability and
accessibility testing and repair. For additional assistance with accessibility testing, try the
UsableNet LIFT for Macromedia Dreamweaver, a complete solution for developing usable
and accessible websites. UsableNet LIFT for Macromedia Dreamweaver includes fix wizards
for complex tables, forms, and images; a global ALT editor; customizable reporting; and a new
active monitoring mode that ensures content is accessible as pages are being built. Request a
demo of LIFT for Macromedia Dreamweaver at www.usablenet.com.
Guide to Dreamweaver instructional media
Dreamweaver includes a variety of media to help you learn the program quickly and become
proficient in creating web pages. The Dreamweaver Help system includes several documents
that help you learn about Dreamweaver, Dreamweaver Extensibility, and ColdFusion. There
are also a number of additional online resources that you can consult as you learn how to
build web pages.
Accessing the Dreamweaver documentation
The following table summarizes the documentation included in the Dreamweaver Help
system.
Guide to Dreamweaver instructional media 31
Page 32

You can purchase printed versions of select titles. For more information, see
www.macromedia.com/go/buy_books.
Title Description/
Audience
Getting Started
with Dreamweaver
Using
Dreamweaver
Extending
Dreamweaver
Provides a basic
introduction to
Dreamweaver
concepts and the
interface, with
detailed beginner
tutorials. Intended
for beginning
users, as well as
intermediate and
advanced users
who might want to
learn about new
features.
Comprehensive
information about
all Dreamweaver
features. Intended
for all
Dreamweaver
users.
Describes the
Dreamweaver
framework and
application
programming
interface (API).
Intended for
advanced users
who want to build
extensions or
customize the
Dreamweaver
interface.
Where to Find It
• View in Dreamweaver: Select
Help > Getting Started with
Dreamweaver
• View online: http://
livedocs.macromedia.com/go/
livedocs_dreamweaver/
• Get the PDF:
www.macromedia.com/go/
dw_documentation
• View in Dreamweaver: Select
Help > Dreamweaver Help, or
Help > Using Dreamweaver
• View online: http://
livedocs.macromedia.com/go/
livedocs_dreamweaver/
• Get the PDF:
www.macromedia.com/go/
dw_documentation
• View in Dreamweaver: Select
Help > Extending Dreamweaver
• View online: http://
livedocs.macromedia.com/go/
livedocs_dreamweaver/
• Get the PDF:
www.macromedia.com/go/
dw_documentation
32 Introduction
Page 33

Title Description/
Audience
Dreamweaver API
Reference
Describes the
utility API and the
JavaScript API,
both of which let
you perform
various
supporting tasks
when developing
Dreamweaver
extensions.
Intended for
advanced users
who want to build
extensions or
customize the
Dreamweaver
interface.
Where to Find It
• View in Dreamweaver: Select
Help > Dreamweaver API
Reference
• View online: http://
livedocs.macromedia.com/go/
livedocs_dreamweaver/
• Get the PDF:
www.macromedia.com/go/
dw_documentation
Guide to Dreamweaver instructional media 33
Page 34

Title Description/
Audience
Using ColdFusion Includes a
selection of the
most important
books in the
ColdFusion
documentation
set. (The full set is
available on
LiveDocs.)
Intended for
anyone interested
in ColdFusion,
from beginners to
advanced
developers.
Reference Includes many
kinds of reference
manuals about
HTML, server
models, and other
topics, mainly
published by
O’Reilly. Intended
for anyone
needing more
information about
coding syntax,
concepts, and so
on.
Where to Find It
• View in Dreamweaver: Select
Help > Using ColdFusion
• View online: http://
livedocs.macromedia.com/go/
livedocs_coldfusion/
• Get the PDF:
www.macromedia.com/go/
cf_documentation
• View in Dreamweaver: Select
Help > Reference. For a full list of
manuals, click the Book pop-up
menu in the Reference panel.
34 Introduction
Page 35

Accessing additional online Dreamweaver resources
The following table summarizes additional online resources for learning Dreamweaver.
Resource Description/
Audience
Dreamweaver
Support Center
Dreamweaver
Developer Center
Dreamweaver
Documentation
Resource Center
Macromedia
Online Forums
Macromedia
Training
TechNotes,
support, and
problem-solving
information for
Dreamweaver
users.
Articles and
tutorials to help
you improve your
skills and learn
new ones.
Get product
manuals in PDF
format, errata,
tutorials, and
release notes.
Discussion and
problem-solving
information by
Dreamweaver
users, technical
support
representatives,
and the
Dreamweaver
development
team.
Courses featuring
hands-on tasks
and real-world
scenarios.
Where to Find It
www.macromedia.com/go/
dreamweaver_support
www.macromedia.com/go/
dreamweaver_devcenter
www.macromedia.com/go/
dw_documentation
www.macromedia.com/go/
dreamweaver_newsgroup
www.macromedia.com/go/
dreamweaver_training
To get the most out of the Dreamweaver resources, see “Where to start” on page 21.
Guide to Dreamweaver instructional media 35
Page 36

Typographical conventions
The following typographical conventions are used in this guide:
■ Menu items are shown in this format: menu name > menu item name. Items in submenus
are shown in this format: menu name > submenu name > menu item name.
■ Code font indicates HTML tag and attribute names as well as literal text
used in examples.
■ Italic code font indicates replaceable items (sometimes called metasymbols) in code.
■ Bold roman text indicates text for you to enter verbatim.
For a complete list of Dreamweaver resources, see “Guide to Dreamweaver instructional
media” on page 31.
HTML and web technologies resources
The following are some useful resources available on the web:
NOTE
For a list of Dreamweaver resources, see “Guide to Dreamweaver instructional media”
on page 31.
Cascading Style Sheets, Level 1 specification (CSS1) (www.w3.org/TR/REC-CSS1) and
Level 2 specification (CSS2) (www.w3.org/TR/REC-CSS2/) are the official specifications
for style sheets from the World Wide Web Consortium.
HTML 4.01 specification (www.w3.org/TR/REC-html40/) is the official specification for
HTML from the World Wide Web Consortium.
Index DOT HTML (www.blooberry.com/indexdot/html/) is a comprehensive listing of
HTML tags, attributes, and values, as well as their compatibility with the various browsers.
XHTML 1.0 specification (www.w3.org/TR/xhtml1/) is the official specification for
Extensible Hypertext Markup Language.
O’Reilly XML.com site (www.xml.com/) provides information, tutorials, and tips about
Extensible Markup Language (XML), as well as other web technologies.
xFront site (www.xfront.com/rescuing-xslt.html) provides an introduction to XSL
transformations for new users.
Microsoft ASP Overview pages (http://msdn.microsoft.com/library/en-us/dnasp/html/
ASPover.asp) provide information about Active Server Pages (ASP).
Microsoft ASP.NET page (http://msdn.microsoft.com/asp.net/) provides information about
ASP.NET.
36 Introduction
Page 37

Sun JSP page (http://java.sun.com/products/jsp/) provides information about JavaServer
Pages (JSP).
PHP website (www.php.net/) provides information about PHP.
MySQL site (www.mysql.com/) provides information about MySQL.
Entities Table (www.bbsinc.com/iso8859.html) lists the entity names used in ISO 8859-1
(Latin-1).
Macromedia ColdFusion product page (www.macromedia.com/go/coldfusion/) provides
information about ColdFusion.
Macromedia JRun Server product page (www.macromedia.com/go/jrun/) provides
information about the JRun Java application server.
Web Services Demystified (www.sitepoint.com/article/692) explains what web services are
and how they work.
JavaScript Bible, by Danny Goodman (IDG Books), comprehensively covers the
JavaScript 1.2 language.
JavaScript: The Definitive Guide, by David Flanagan (O’Reilly & Associates), provides
reference information for every JavaScript function, object, method, property, and event
handler.
CGI Resource Index (www.cgi-resources.com/) is a repository of all things related to CGI,
including ready-made scripts, documentation, books, and even programmers for hire.
Common Gateway Interface site (http://hoohoo.ncsa.uiuc.edu/cgi/) includes an
introduction to CGI.
HTML and web technologies resources 37
Page 38

38 Introduction
Page 39

CHAPTER 1
Exploring the Workspace
To get the most out of your Macromedia Dreamweaver 8 experience, you should understand
the basic concepts behind the Dreamweaver workspace and how to select options, use
inspectors and panels, and set preferences that fit your work style best.
This chapter contains the following sections:
About the Dreamweaver workspace . . . . . . . . . . . . . . . . . . . . . . . . . . . . . . . . . . . . . . . . 39
Working in the Document window . . . . . . . . . . . . . . . . . . . . . . . . . . . . . . . . . . . . . . . . . . 51
Using toolbars, inspectors, and context menus. . . . . . . . . . . . . . . . . . . . . . . . . . . . . . . 54
Using panels and panel groups . . . . . . . . . . . . . . . . . . . . . . . . . . . . . . . . . . . . . . . . . . . . . 61
Using Dreamweaver accessibility features . . . . . . . . . . . . . . . . . . . . . . . . . . . . . . . . . . . 64
Optimizing the workspace for accessible page design . . . . . . . . . . . . . . . . . . . . . . . . 69
Using visual guides in Dreamweaver . . . . . . . . . . . . . . . . . . . . . . . . . . . . . . . . . . . . . . . . .71
Dreamweaver customizing basics . . . . . . . . . . . . . . . . . . . . . . . . . . . . . . . . . . . . . . . . . . .71
Related topics
■ “Optimizing the Workspace for Visual Development” on page 653
About the Dreamweaver workspace
1
The Dreamweaver workspace enables you to view documents and object properties. The
workspace also places many of the most common operations in toolbars so that you can
quickly make changes to your documents.
39
Page 40

The workspace layout
I
In Windows, Dreamweaver provides an all-in-one-window integrated layout. In the
integrated workspace, all windows and panels are integrated into a single larger application
window.
nsert bar
Document toolbar
Document window
Panel groups
Files panelProperty inspectorTag selector
NOTE
The Windows workspace also has a Coder option, which docks the panel groups on the
left side and displays the Document window in Code view by default. For more
information, see “Using the coder-oriented workspace (Windows only)” on page 533.
To use this option, see “Choosing the workspace layout (Windows only)” on page 72.
40 Exploring the Workspace
Page 41

On the Macintosh, Dreamweaver can display multiple documents in a single window with
tabs that identify each document. Dreamweaver can also display a floating workspace in
which each document appears in its own individual window. Panel groups are initially docked
together, but can be undocked into their own windows. Windows “snap” automatically to
each other, to the sides of the screen, and to the Document window as you drag or resize
them.
Insert bar
Tag selector
Document toolbar
Document window
Property inspector
Panel groups
Files panel
You can switch between different layouts in both Windows and Macintosh. For more
information, see “Choosing the workspace layout (Windows only)” on page 72, and
“Displaying tabbed documents (Macintosh)” on page 72.
Related topics
■ “Dreamweaver workspace elements” on page 42
■ “Using toolbars, inspectors, and context menus” on page 54
■ “Using panels and panel groups” on page 61.
About the Dreamweaver workspace 41
Page 42

Dreamweaver workspace elements
This section briefly describes some elements of the Dreamweaver workspace.
NOTE
Dreamweaver provides many other panels, inspectors, and windows. To open
Dreamweaver panels, inspectors, and windows, use the Window menu. If you can’t find
a panel, inspector, or window that’s marked as open, select Window > Arrange Panels to
neatly lay out all open panels.
The Start page enables you to open a recent document or create a new document. From the
Start page you can also learn more about Dreamweaver by taking a product tour or a tutorial.
The Insert bar contains buttons for inserting various types of “objects,” such as images, tables,
and layers, into a document. Each object is a piece of HTML code that enables you to set
various attributes as you insert it. For example, you can insert a table by clicking the Table
button in the Insert bar. If you prefer, you can insert objects using the Insert menu instead of
the Insert bar.
The Document toolbar contains buttons that provide options for different views of the
Document window (such as Design view and Code view), various viewing options, and some
common operations such as previewing in a browser.
The Standard toolbar (not displayed in the default workspace layout) contains buttons for
common operations from the File and Edit menus: New, Open, Save, Save All, Cut, Copy,
Paste, Undo, and Redo. To display the Standard toolbar, select View > Toolbars > Standard.
The Coding toolbar (displayed in Code view only) contains buttons that let you perform
many standard coding operations.
The Style Rendering toolbar (hidden by default) contains buttons that let you see how your
design would look in different media types if you used media-dependent style sheets. It also
contains a button that lets you enable or disable CSS styles.
The Document window displays the current document as you create and edit it.
The Property inspector lets you view and change a variety of properties for the selected
object or text. Each kind of object has different properties. The Property inspector is not
expanded by default in the Coder workspace layout.
The tag selector in the status bar at the bottom of the Document window shows the
hierarchy of tags surrounding the current selection. Click any tag in the hierarchy to select
that tag and all its contents.
Panel groups are sets of related panels grouped together under one heading. To expand a
panel group, click the expander arrow at the left of the group’s name; to undock a panel
group, drag the gripper at the left edge of the group’s title bar.
42 Exploring the Workspace
Page 43

The Files panel enables you to manage your files and folders, whether they are part of a
Dreamweaver site or on a remote server. The Files panel also enables you to access all the files
on your local disk, much like Windows Explorer (Windows) or the Finder (Macintosh).
Related topics
■ “Working in the Document window” on page 51
■ “Using toolbars, inspectors, and context menus” on page 54
■ “Using panels and panel groups” on page 61
■ “Managing files and folders in the Files panel” on page 119
The Document window
The Document window shows the current document. You can select any of the following
views:
Design view is a design environment for visual page layout, visual editing, and rapid
application development. In this view, Dreamweaver displays a fully editable, visual
representation of the document, similar to what you would see viewing the page in a browser.
You can configure the Design view to display dynamic content while you’re working on the
document (see “Viewing live data in Design view” on page 656).
Code view is a hand-coding environment for writing and editing HTML, JavaScript,
server-language code—such PHP or ColdFusion Markup Language (CFML)—and any other
kind of code. For more information, see Chapter 20, “Coding in Dreamweaver,” on page 549.
Code and Design view enables you to see both Code view and Design view for the same
document in a single window.
When the Document window has a title bar, the title bar displays the page title and, in
parentheses, the file’s path and filename. After the filename, Dreamweaver displays an asterisk
if you’ve made changes that you haven’t saved yet.
When the Document window is maximized in the integrated workspace layout (Windows
only), it has no title bar; in that case the page title and the file’s path and filename appear in
the title bar of the main workspace window.
When a Document window is maximized, tabs appear at the top of the Document window
area showing the filenames of all open documents. To switch to a document, click its tab.
Related topics
■ “Working in the Document window” on page 51
About the Dreamweaver workspace 43
Page 44

The Document toolbar
The Document toolbar contains buttons that let you toggle between different views of your
document quickly: Code, Design, and a split view that shows both Code and Design view.
The toolbar also contains some common commands and options related to viewing the
document and transferring it between the local and remote sites.
Show Code View
Show Code and Design Views
Show Design View
Server Debug
Document Title
No Browser/Check Errors
Validate Markup
File Management
Visual Aids
View Options
Refresh Design View
Preview/Debug in Browser
The following options appear in the Document toolbar:
Show Code View displays only the Code view in the Document window.
Show Code and Design Views displays Code view in part of the Document window and
Design view in another part. When you select this combined view, the option Design View on
Top becomes available in the View Options menu. Use this option to specify which view
appears at the top of your Document window.
Show Design View displays only the Design view in the Document window.
Server Debug displays a report to help you debug the current ColdFusion page. The report
includes errors, if any, in your page.
Document Title allows you to enter a title for your document, to be displayed in the browser’s
title bar. If your document already has a title, it appears in this field.
No Browser/Check Errors enables you to check cross-browser compatibility.
Validate Markup lets you validate the current document or a selected tag.
File Management displays the File Management pop-up menu.
Preview/Debug in Browser allows you to preview or debug your document in a browser.
Select a browser from the pop-up menu.
Refresh Design View refreshes the document’s Design view after you make changes in Code
view. Changes you make in Code view don’t automatically appear in Design view until you
perform certain actions, such as saving the file or clicking this button.
44 Exploring the Workspace
Page 45

View Options allows you to set options for Code view and Design view, including which view
should appear above the other. Options in the menu are for the current view: Design view,
Code view, or both. For information about Code view options, see “Setting coding
preferences” on page 533. For information about Design view options, see “Selecting
elements in the Document window” on page 351, “Viewing and editing head content”
on page 595, and “Using visual guides in Dreamweaver” on page 71.
Visual Aids lets you use different visual aids to design your pages.
Related topics
■ “Displaying toolbars” on page 54
The Standard toolbar
The Standard toolbar contains buttons for common operations from the File and Edit menus:
New, Open, Save, Save All, Cut, Copy, Paste, Undo, and Redo. Use these buttons just as you
would use the equivalent menu commands.
For more information about operations such as Open and Save, see Chapter 3, “Creating and
Opening Documents,” on page 91.
Related topics
■ “Displaying toolbars” on page 54
The status bar
The status bar at the bottom of the Document window provides additional information about
the document you are creating.
Document size and
estimated download time
Tag selector
Zoom tool
Hand tool
Select tool
Window Size pop-up menu
Set magnification
About the Dreamweaver workspace 45
Page 46

The tag selector shows the hierarchy of tags surrounding the current selection. Click any tag
in the hierarchy to select that tag and all its contents. Click
the document. To set the
class or id attributes for a tag in the tag selector, right-click
<body> to select the entire body of
(Windows) or Control-click (Macintosh) the tag and select a class or ID from the context
menu.
The Hand tool lets you click the document and drag it in the Document window. Click the
Select tool to disable the Hand tool.
The Zoom tool and Set Magnification pop-up menu let you set a magnification level for your
document. For more information, see “Zooming in and out” on page 354.
The Window Size pop-up menu (visible in Design view only) lets you resize the Document
window to predetermined or custom dimensions. For more information, see “Resizing the
Document window” on page 52.
To the right of the Window Size pop-up menu are the estimated document size and estimated
download time for the page, including all dependent files such as images and other media
files. For more information, see “Setting download time and size preferences” on page 366.
Related topics
■ “Setting Status Bar preferences” on page 53
The Insert bar
The Insert bar contains buttons for creating and inserting objects such as tables, layers, and
images. When you roll the pointer over a button, a tooltip appears with the name of the
button.
The buttons are organized into several categories, which you can switch on the left side of the
Insert bar. Additional categories appear when the current document contains server code,
such as ASP or CFML documents. When you start Dreamweaver, the category you were last
working in opens.
NOTE
If you prefer to view the categories as tabs across the top of the Insert bar, you can
change the layout of the Insert bar (see “Setting Fonts preferences for Dreamweaver
display” on page 75).
46 Exploring the Workspace
Page 47

Some categories have buttons with pop-up menus. When you select an option from a pop-up
menu, it becomes the default action for the button. For example, if you select Image
Placeholder from the Image button’s pop-up menu, the next time you click the Image button,
Dreamweaver inserts an image placeholder. Anytime you select a new option from the pop-up
menu, the default action for the button changes.
The Insert bar is organized in the following categories:
The Common category enables you to create and insert the most commonly used objects,
such as images and tables.
The Layout category enables you to insert tables, div tags, layers, and frames. You can also
you choose among three views of tables: Standard (default), Expanded Tables, and Layout.
When Layout mode is selected, you can use the Dreamweaver layout tools: Draw Layout Cell
and Draw Layout Table.
The Forms category contains buttons for creating forms and inserting form elements.
The Text category enables you to insert a variety of text- and list-formatting tags, such as b,
em, p, h1, and ul.
The HTML category enables you to insert HTML tags for horizontal rules, head content,
tables, frames, and scripts.
Server-code categories are available only for pages that use a particular server language,
including ASP, ASP.NET, CFML Basic, CFML Flow, CFML Advanced, JSP, and PHP. Each
of these categories provides server-code objects that you can insert in Code view.
The Application category enables you to insert dynamic elements such as recordsets,
repeated regions, and record insertion and update forms.
The Flash elements category enables you to insert Macromedia Flash elements.
The Favorites category enables you to group and organize the Insert bar buttons you use the
most in one common place.
You can modify any object in the Insert bar or create your own objects (see “Customizing
Dreamweaver” on the Macromedia Support Center at www.macromedia.com/go/
customizing_dreamweaver).
Related topics
■ “Using the Insert bar” on page 55
About the Dreamweaver workspace 47
Page 48

The Coding toolbar
The Coding toolbar contains buttons that let you perform many standard coding operations,
such as collapsing and expanding code selections, highlighting invalid code, applying and
removing comments, indenting code, and inserting recently used code snippets. The Coding
toolbar is visible only in Code view and appears vertically on the left side of the Document
window.
You cannot undock or move the Coding toolbar, but you can hide it. For more information,
see “Displaying toolbars” on page 54.
You can also edit the Coding toolbar to display more buttons (such as Word Wrap, Show
Hidden Characters, and Auto Indent), or hide buttons that you don’t want to use. To do so,
however, you must edit the XML file that generates the toolbar. For more information, see
Extending Dreamweaver.
Related topics
■ “Inserting code quickly with the Coding toolbar” on page 561
■ “Displaying toolbars” on page 54
48 Exploring the Workspace
Page 49

The Style Rendering toolbar
The Style Rendering toolbar (hidden by default) contains buttons that let you see how your
design would look in different media types if you use media-dependent style sheets. It also
contains a button that lets you enable or disable CSS styles. To display the toolbar, select
View > Toolbars > Style Rendering.
This toolbar only works if your documents use media-dependent style sheets. For example,
your style sheet might specify a body rule for print and a different body rule for handheld
devices. For more information on creating media-dependent style sheets, see the World Wide
Web Consortium website at www.w3.org/TR/CSS21/media.html.
By default, Dreamweaver displays your design for the screen media type (which shows you
how a page is rendered on a computer screen). You can view the following media type
renderings by clicking the respective buttons in the Style Rendering toolbar.
Render Screen Media Type shows you how the page appears on a computer screen.
Render Print Media Type shows you how the page appears on a printed piece of paper.
Render Handheld Media Type shows you how the page appears on a handheld device, such
as a mobile phone or a BlackBerry device.
Render Projection Media Type shows you how the page appears on a projection device.
Render TTY Media Type shows you how the page appears on a teletype machine.
Render TV Media Type shows you how the page appears on a television screen.
Toggle Displaying of CSS Styles lets you enable or disable CSS styles. This button works
independently of the other media buttons.
Related topics
■ “Displaying toolbars” on page 54
Reports in Dreamweaver
You can run reports in Dreamweaver to find content, troubleshoot, or test content. You can
generate the following types of reports:
Search enables you to search for tags, attributes, and specific text within tags. To search your
code, see “Searching and replacing tags and attributes” on page 570.
Validation enables you to check for code or syntax errors. To validate your code, see
“Validating your tags” on page 580.
About the Dreamweaver workspace 49
Page 50

Target Browser Check enables you to test the HTML in your documents to see if any tags or
attributes are unsupported by your target browsers. To run a target browser check, see
“Checking for browser compatibility” on page 577.
Link Checker enables you to find and fix broken, external, and orphaned links. To run the
link checker, see “Checking for broken, external, and orphaned links” on page 449.
Site Reports enable you to improve workflow and test HTML attributes in your site.
Workflow reports include checked out by, recently modified, and design notes; HTML
reports include combinable nested font tags, accessibility, missing Alt text, redundant nested
tags, removable empty tags, and untitled documents. To run site reports, see “Testing your
site” on page 154.
FTP Log enables you view all FTP file transfer activity. To view the FTP log, see “Getting
files from a remote server” on page 140 or “Putting files on a remote server” on page 142.
Server Debug enables you to view information to debug a ColdFusion application. To view
debugging information, see “Using the ColdFusion debugger (Windows only)” on page 582.
About customizing Dreamweaver in multiuser systems
You can customize Dreamweaver to suit your needs even in a multiuser operating system such
as Windows XP or Mac OS X.
Dreamweaver prevents any user’s customized configuration from affecting any other user’s
customized configuration. To accomplish this goal, the first time you run Dreamweaver in
one of the multiuser operating systems that it recognizes, the application creates copies of a
variety of configuration files for you. These user configuration files are stored in a folder
belonging to you.
For example, in Windows XP they’re stored in C:\Documents and
Settings\username\Application Data\Macromedia\Dreamweaver 8\Configuration (which may
be inside a hidden folder).
In Mac OS X they’re stored inside your Home folder; specifically, in Users/username/Library/
Application Support/Macromedia/Dreamweaver 8/Configuration.
If you reinstall or upgrade Dreamweaver, Dreamweaver automatically makes backup copies of
existing user configuration files, so that if you’ve customized those files by hand, you still have
access to the changes you made.
Related topics
■ “Dreamweaver customizing basics”
50 Exploring the Workspace
Page 51
Working in the Document window
The Document window shows the current document. You can view a document in Design
view, Code view, or Code and Design views. The Document window’s status bar provides
information about the current document.
Related topics
■ “The Document window” on page 43
■ “The status bar” on page 45
Switching between views in the Document window
You can view a document in the Document window in Code view, Design view, or Code and
Design views.
To switch views in the Document window, do one of the following:
■ Use the View menu:
■ Select View > Code.
■ Select View > Design.
■ Select View > Code and Design.
■ Use the Document toolbar:
■ Click the Show Code View button.
■ Click the Show Code and Design Views button.
■ Click the Show Design View button.
To toggle between Code view and Design view:
■ Press Control+tilde (~) (Windows) or Command+backquote (‘) (Macintosh).
NOTE
If both views are showing in the Document window, this keyboard shortcut changes
keyboard focus from one view to the other.
Related topics
■ “The Document window” on page 43
Working in the Document window 51
Page 52

Cascading or tiling Document windows
If you have many documents open at once, you can cascade or tile them.
To cascade Document windows, do the following:
■ Select Window > Cascade.
To tile Documents windows, do one of the following:
■ In Windows, select Window > Tile Horizontally or Window > Tile Vertically.
■ On the Macintosh, select Window > Tile.
Related topics
■ “Choosing the workspace layout (Windows only)” on page 72
■ “Displaying tabbed documents (Macintosh)” on page 72
■ “Saving custom workspace layouts” on page 73
Resizing the Document window
The status bar displays the Document window’s current dimensions (in pixels). To design a
page that looks its best at a specific size, you can adjust the Document window to any of the
predetermined sizes, edit those predetermined sizes, or create new sizes.
To resize the Document window to a predetermined size:
■ Select one of the sizes from the Window Size pop-up menu at the bottom of the
Document window.
NOTE
In Windows, you can maximize a Document window so that it fills the entire
document area of the integrated window. You can’t resize a Document window when
it is maximized.
52 Exploring the Workspace
Page 53

The window size shown reflects the inside dimensions of the browser window, without
borders; the monitor size is listed in parentheses. For example, you would use the size “536 x
196 (640 x 480, Default)” if your visitors are likely to be using Microsoft Internet Explorer or
Netscape Navigator in their default configurations on a 640 x 480 monitor.
TIP
For less precise resizing, use your operating system’s standard methods of resizing
windows, such as dragging the lower-right corner of a window.
To change the values listed in the Window Size pop-up menu:
1. Select Edit Sizes from the Window Size pop-up menu.
2. Click any of the width or height values in the Window Sizes list, then type a new value.
To make the Document window adjust only to a specific width (leaving the height
unchanged), select a height value and delete it.
3. Click the Description text box to enter descriptive text about a specific size.
4. Click OK to save the change and return to the Document window.
To add a new size to the Window Size pop-up menu:
1. Select Edit Sizes from the Window Size pop-up menu.
2. Click the blank space below the last value in the Width column.
3. Enter values for Width and Height.
To set the Width or Height only, simply leave one field empty.
4. Click the Description field to enter descriptive text about the size you added.
5. Click OK to save the change and return to the Document window.
For example, you might type SVGA or average PC next to the entry for an 800 x 600
pixel monitor, and 17-in. Mac next to the entry for an 832 x 624 pixel monitor. Most
monitors can be adjusted to a variety of pixel dimensions.
Setting Status Bar preferences
Set preferences for the status bar using the Preferences dialog box.
To set preferences for the status bar:
1. Select Edit > Preferences (Windows) or Dreamweaver > Preferences (Macintosh).
The Preferences dialog box appears.
2. Select Status Bar from the Category list on the left.
Working in the Document window 53
Page 54
3. Set preference options.
For more information, click the Help button in the dialog box.
4. Click OK.
Related topics
■ “The status bar” on page 45
Using toolbars, inspectors, and context menus
Dreamweaver contains several tools that enable you to quickly make changes as you create or
edit a document.
The Document, Standard, and Coding toolbars are for editing and working with the current
document. The Insert bar contains buttons for creating and inserting objects such as tables,
layers, and images, while the Property inspector enables you to edit properties for those
objects.
NOTE
You can also use the Tag inspector to view and edit properties (see “Changing attributes
with the Tag inspector” on page 586). The Tag inspector enables you to view and edit
every attribute associated with a given tag, while the Property inspector shows only the
most common attributes.
Context menus give you an alternative to the Insert bar and Property inspector for creating
and editing objects.
Displaying toolbars
Use the Document and Standard toolbars to perform document-related and standard editing
operations; use the Coding toolbar to insert code quickly; and use the Style Rendering toolbar
to display your page as it would appear in different media types. You can choose to display or
hide the toolbars as necessary.
54 Exploring the Workspace
Page 55

To display or hide a toolbar, do one of the following:
■ Select View > Toolbars, and then select the toolbar.
■ Right-click (Windows) or Control-click (Macintosh) any of the toolbars and select the
toolbar from the context menu.
NOTE
To display or hide the Coding toolbar in the Code inspector (Window > Code
Inspector), select Coding Toolbar from the View Options pop-up menu at the top of
the inspector.
Related topics
■ “The Document toolbar” on page 44
■ “The Standard toolbar” on page 45
■ “The Coding toolbar” on page 48
■ “The Style Rendering toolbar” on page 49
Using the Insert bar
The Insert bar contains buttons for creating and inserting objects such as tables and images.
The buttons are organized into categories. When you roll the pointer over a button, a tooltip
appears with the name of the button.
Related topics
■ “The Insert bar” on page 46
Displaying the Insert bar and its categories and menus
You can hide or show, and collapse or expand the Insert bar as necessary. You can also display
the different categories of the Insert bar. Some categories of the Insert bar have buttons that
contain menus with common commands.
If you prefer to view the categories as tabs across the top of the Insert bar, you can change the
layout of the Insert bar.
To hide or show the Insert bar, do either of the following:
■ Select Window > Insert.
■ Right-click (Windows) or Control-click (Macintosh) in the Insert bar or the Document,
Standard, or Coding toolbar, and then select Insert Bar.
Using toolbars, inspectors, and context menus 55
Page 56

To show the buttons in a particular category:
■ Click the arrow beside the category name on the left end of the Insert bar, and then select
another category from the pop-up menu.
To display the pop-up menu for a button:
■ Click the down arrow beside the button’s icon.
To show Insert bar categories as tabs:
■ Click the arrow beside the category name on the left end of the Insert bar, and then select
Show as Tabs.
The Insert bar displays the categories as tabs across the top of the Insert bar.
NOTE
You might need to click the Insert bar title bar to reopen the Insert bar.
To show Insert bar categories as a menu:
■ Right-click (Windows) or Control-click (Macintosh) in the Insert bar, and then select
Show as Menus.
The Insert bar displays the categories in a menu instead of tabs.
Related topics
■ “Customizing and using the Favorites category in the Insert bar” on page 58
56 Exploring the Workspace
Page 57
Using the Insert bar to insert objects
The Insert bar is a convenient method for creating and inserting objects.
To insert an object:
1. Select the appropriate category from the left side of the Insert bar.
2. Do one of the following:
■ Click an object button or drag the button’s icon into the Document window.
■ Click the arrow on a button, then select an option from the menu.
Depending on the object, a corresponding object-insertion dialog box may appear, prompting
you to browse to a file or specify parameters for an object. Or, Dreamweaver may insert code
into the document, or open a tag editor (see “Editing tags with Tag editors” on page 564) or
panel for you to specify information before the code is inserted.
For some objects, no dialog box appears if you insert the object in Design view, but a tag
editor appears if you insert the object in Code view. For a few objects, inserting the object in
Design view causes Dreamweaver to switch to Code view before inserting the object.
NOTE
Some objects, such as named anchors, are not visible when the page is viewed in a
browser window. To display icons in Design view that mark the locations of such invisible
objects, see “Showing and hiding invisible elements” on page 353.
To bypass the object-insertion dialog box and insert an empty placeholder
object:
■ Control-click (Windows) or Option-click (Macintosh) the button for the object.
For example, to insert a placeholder for an image without specifying an image file,
Control-click or Option-click the Image button.
NOTE
This procedure does not bypass all object-insertion dialog boxes. Many objects,
including navigation bars, layers, Flash buttons, and framesets, do not insert
placeholders or default-valued objects.
To modify preferences for the Insert bar:
1. Select Edit > Preferences (Windows) or Dreamweaver > Preferences (Macintosh).
The Preferences dialog box displays the General preferences category.
Using toolbars, inspectors, and context menus 57
Page 58

2. Deselect Show Dialog When Inserting Objects to suppress dialog boxes when you insert
objects such as images, tables, scripts, and head elements or by holding down the Control
key (Windows) or the Option key (Macintosh) while creating the object.
TIP
When you insert an object with this option off, the object is given default attribute
values. Use the Property inspector to change object properties after inserting the
object.
3. Click OK.
Related topics
■ “Displaying the Insert bar and its categories and menus” on page 55
Customizing and using the Favorites category in the Insert bar
The Favorites category of the Insert bar enables you to group and organize commonly used
Insert bar buttons. You can add, manage, and delete buttons from the Favorites category.
To add, delete, or manage items in the Favorites category:
1. Select any category in the Insert bar.
2. Right-click (Windows) or Control-click (Macintosh) in the area where the buttons appear
(do not right-click in the category name), and then select Customize Objects.
The Customize Favorite Objects dialog box appears.
3. Make changes as necessary.
For more information, click the Help button in the dialog box.
4. Click OK.
The Favorites category reflects the changes you made.
TIP
If you’re not in the Favorites category, select that category to see your changes.
To insert objects using buttons in the Favorites category:
■ Select the Favorites category from the left side of the Insert bar, then click the button for
any Favorites object you’ve added.
NOTE
The Favorites category does not contain any buttons until you customize Favorites
to add objects.
Related topics
■ “Displaying the Insert bar and its categories and menus” on page 55
■ “Using the Insert bar to insert objects” on page 57
58 Exploring the Workspace
Page 59

Using the Property inspector
The Property inspector lets you examine and edit the most common properties for the
currently selected page element, such as text or an inserted object. The contents of the
Property inspector vary depending on the element selected.
NOTE
Use the Tag inspector to view and edit every attribute associated with a given tag
properties (see “Changing attributes with the Tag inspector” on page 586).
TIP
The Property inspector is at the bottom of the workspace by default, but you can dock it
at the top of the workspace if you want. Or, you can make it a floating panel in the
workspace. For more information about moving the Property inspector, see “Docking
and undocking panels and panel groups” on page 62.
To show or hide the Property inspector:
■ Select Window > Properties.
To expand or collapse the Property inspector:
■ Click the expander arrow in the lower-right corner of the Property inspector.
To view properties for a page element:
■ Select the page element in the Document window.
NOTE
You might need to expand the Property inspector to view all the properties for the
selected element.
To change properties for a page element:
1. Select the page element in the Document window.
2. Change any of the properties in the Property inspector.
NOTE
For information on specific properties, select an element in the Document window
and then click the Help icon in the upper-right corner of the Property inspector.
Most changes you make to properties are immediately applied in the Document window.
Using toolbars, inspectors, and context menus 59
Page 60

3. If your changes are not applied immediately, do one of the following:
■ Click outside the property-editing text fields.
■ Press Enter (Windows) or Return (Macintosh).
■ Press Tab to switch to another property.
Using context menus
Dreamweaver makes extensive use of context menus, which provide convenient access to the
most useful commands and properties related to the object or window you’re working with.
Context menus list only those commands that pertain to the current selection.
To use a context menu:
1. Right-click (Windows) or Control-click (Macintosh) the object or window.
The context menu for the selected object or window appears.
2. Select a command from the context menu.
60 Exploring the Workspace
Page 61

Using panels and panel groups
Panels in Dreamweaver are grouped together into panel groups. The selected panel within a
panel group appears as a tab. Each panel group can be expanded or collapsed, and can be
docked or undocked with other panel groups.
Panel groups can also be docked to the integrated application window (Windows only). This
makes it easy to access the panels you need without cluttering your workspace.
NOTE
When a panel group is floating (undocked), a narrow blank bar appears at the top of the
panel group. In this documentation, the term “panel group’s title bar” refers to the area
where the panel group’s name appears, rather than to this narrow blank bar.
Viewing panels and panel groups
You can display or hide panel groups and panels in the workspace as necessary.
To expand or collapse a panel group, do one of the following:
■ Click the expander arrow on the left side of the panel group’s title bar.
■ Click the panel group’s title.
To close a panel group so that it isn’t visible on your screen:
■ Select Close Panel Group from the Options menu in the panel group’s title bar.
The panel group disappears from your screen.
To open a panel group or panel that isn’t visible on your screen:
■ Select the Window menu, then select a panel name from the menu.
A check mark next to an item in the Window menu indicates that the named item is
currently open (though it may be hidden behind other windows).
TIP
If you can’t find a panel, inspector, or window that’s marked as open, select Window
> Arrange Panels to neatly lay out all open panels.
To select a panel within an expanded panel group:
■ Click the panel’s name.
To see a panel group’s Options menu if it isn’t showing:
■ Expand the panel group by clicking its name or its expander arrow.
Using panels and panel groups 61
Page 62

The Options menu is visible only when the panel group is expanded.
TIP
Some options are available in the panel group’s context menu even when the group
is collapsed; right-click (Windows) or Control-click (Macintosh) the panel group’s
title bar to view the context menu.
Docking and undocking panels and panel groups
You can move panels and panel groups as necessary, and arrange them so that they are floating
or docked in the workspace.
Most panels can be docked only to either the left or the right of the Document window area
in the integrated workspace, while others (such as the Property inspector and the Insert bar)
can be docked only to the top or bottom of the integrated window.
To undock a panel group:
■ Drag the panel group by its gripper (on the left side of the panel group’s title bar) until its
outline indicates that it’s no longer docked.
To dock a panel group to other panel groups (floating workspace) or to the
integrated window (Windows only):
■ Drag the panel group by its gripper until its outline indicates that it’s docked.
To undock a panel from a panel group:
■ Select Group With > New Panel Group from the Options menu in the panel group’s title
bar. (The Group With command’s name changes depending on the name of the active
panel.)
The panel appears in a new panel group of its own.
To dock a panel in a panel group:
■ Select the name of a panel group from the Group With submenu of the panel group’s
Options menu. (The Group With command’s name changes depending on the name of
the active panel.)
62 Exploring the Workspace
Page 63

To drag a floating (undocked) panel group without docking it:
■ Drag the panel group by the bar above its title bar. The panel group doesn’t dock as long as
you don’t drag it by its gripper.
Resizing and renaming panel groups
You can change the size and name of panel groups depending on your needs.
To change the size of the panel groups:
■ For floating panels, drag to resize the set of panel groups just as you would drag to resize
any window in your operating system.
For example, you can drag the resize area at the lower-right corner of the set of panel
groups.
■ For docked panels, drag the splitter bar between the panels and the Document window.
To maximize a panel group, do one of the following:
■ Select Maximize Panel Group from the Options menu in the panel group’s title bar.
■ Double-click anywhere in the panel group’s title bar.
The panel group grows vertically to fill all of the available vertical space.
To rename a panel group:
1. Select Rename Panel Group from the Options menu in the panel group’s title bar.
2. Enter a new name, then click OK.
Saving panel groups
Dreamweaver lets you save and restore different panel groups so that you can customize your
workspace for different activities. When you save a workspace layout, Dreamweaver
remembers the panels in the specified layout, as well as other attributes such as the positions
and sizes of the panels, their collapsed or expanded states, the position and size of the
application window, and the position and size of the Document window.
For more information, see “Saving custom workspace layouts” on page 73.
Using panels and panel groups 63
Page 64

Setting Panels preferences
You can set preferences to specify which panels and inspectors always appear in front of the
Document window, and which ones may be obscured by the Document window.
To set preferences for panels:
1. Select Edit > Preferences (Windows) or Dreamweaver > Preferences (Macintosh).
The Preferences dialog box appears.
2. Select Panels from the Category list on the left.
3. Select options.
For more information, click the Help button in the dialog box.
4. Click OK.
Using Dreamweaver accessibility features
Dreamweaver provides features that make it accessible to users with disabilities.
Specifically, Dreamweaver supports screen readers, operating system accessibility features,
and keyboard navigation.
Related topics
■ “Dreamweaver and accessibility” on page 30
Using screen readers with Dreamweaver
A screen reader recites text that appears on the computer screen. It also reads non-textual
information, such as button labels or image descriptions in the application, provided in
accessibility tags or attributes during authoring.
As a Dreamweaver user, you can use a screen reader to assist you in creating your web pages.
The screen reader starts reading in the upper-left corner of the Document window.
Dreamweaver supports JAWS for Windows, from Freedom Scientific
(www.freedomscientific.com), and Window-Eyes screen readers, from GW Micro
(www.gwmicro.com).
Related topics
■ “Using the keyboard to navigate Dreamweaver” on page 65
64 Exploring the Workspace
Page 65

Support for operating system accessibility features
Dreamweaver supports accessibility features in both the Windows and Macintosh operating
systems. For example, on the Macintosh you set the visual preferences in the Universal Access
Preferences dialog box (Apple > System Preferences). Your settings are reflected in the
Dreamweaver workspace.
Dreamweaver also supports the Windows operating system’s high contrast setting. You
activate this option through the Windows Control Panel. When high contrast is on, it affects
Dreamweaver as follows:
■ Dialog boxes and panels use system color settings.
For example, if you set the color to White on Black, all Dreamweaver dialog boxes and
panels appear with a white foreground color and black background.
■ Code view syntax coloring is off.
Code view uses the system window and window text color, and ignores color settings in
Preferences. For example, if you set the system color to White on Black, and then change
text colors in Preferences > Code Coloring, Dreamweaver ignores the colors set in
Preferences and displays the code text with a white foreground color and black
background.
■ Design view uses the background and text colors you set in Modify > Page Properties so
that pages you design render colors as a browser will.
Related topics
■ “Using screen readers with Dreamweaver” on page 64
Using the keyboard to navigate Dreamweaver
You can use the keyboard to navigate Dreamweaver panels, inspectors, dialog boxes, frames,
and tables without a mouse.
Related topics
■ “Using screen readers with Dreamweaver” on page 64
■ “Support for operating system accessibility features” on page 65
Navigating panels
You can use the keyboard to navigate the panels.
NOTE
Tabbing and the use of arrow keys are supported for Windows only.
Using Dreamweaver accessibility features 65
Page 66

To navigate panels:
1. In the Document window, press Control+Alt+Tab to shift focus to a panel.
A white outline around the panel title bar indicates that focus is on that panel. The screen
reader reads the panel title bar that has focus.
2. Press Control+Alt+Tab again to shift focus to the next panel.
Continue until you have focus on the panel you want to work in.
3. Press Control+Alt+Shift+Tab to shift focus to the previous panel, if necessary.
4. If the panel you want to work in is not open, use the keyboard shortcuts listed in the
Windows menu to display the appropriate panel; then press Control+Alt+Tab to shift
focus to that panel.
If the panel you want to work in is open, but not expanded, place focus on the panel title
bar, and then press the Spacebar. Press the Spacebar again to collapse the panel.
5. Press the Tab key to move through the options in the panel.
A dotted outline around the option indicates that focus is on that option.
6. Use the arrow keys as appropriate:
■ If an option has choices, use the arrow keys to scroll through the choices, and then
press the Spacebar to make a selection.
■ If there are tabs in the panel group to open other panels, place focus on the open tab,
and then use the left or right arrow key to open another tabs. Once you open a new
tab, press the Tab key to move through the options in that panel.
Related topics
■ “Navigating dialog boxes” on page 67
■ “Navigating frames” on page 68
■ “Navigating tables” on page 68
Navigating the Property inspector
You can use the keyboard to navigate the Property inspector and make changes to your
document.
NOTE
The use of arrow keys is supported for Windows only.
66 Exploring the Workspace
Page 67

To navigate the Property inspector:
1. Press Control+F3 (Windows) or Command+F3 (Macintosh) to display the Property
inspector, if it is not visible.
2. (Windows) Press Control+Alt+Tab until you shift focus to the Property inspector.
3. Press the Tab key to move through the Property inspector options.
4. (Windows) Use the arrow keys as appropriate to move through option choices.
5. Press Control+Tab (Windows) or Option+Tab (Macintosh) to open and close the
expanded section of the Property inspector, as necessary, or, with focus on the expander
arrow at the lower right, press the Spacebar.
Related topics
■ “Navigating panels” on page 65
■ “Navigating frames” on page 68
■ “Navigating tables” on page 68
Navigating dialog boxes
You can use the keyboard to navigate dialog boxes.
NOTE
The use of arrow keys is supported for Windows only.
To navigate a dialog box:
1. Press the Tab key to move through the options in a dialog box.
2. (Windows) Use the arrow keys to move through choices for an option.
For example, if an option has a pop-up menu, move focus to that option, and then use the
down arrow to move through the choices.
3. If the dialog box has a Category list, press Control+Tab (Windows) or Option+Tab
(Macintosh) to shift focus to the category list, and then use the arrow keys to move up or
down the list.
4. Press Control+Tab (Windows) or Option+Tab (Macintosh) again to shift to the options
for a category.
5. Press Enter (Windows) or Return (Macintosh) to exit the dialog box.
Using Dreamweaver accessibility features 67
Page 68

Related topics
■ “Navigating panels” on page 65
■ “Navigating the Property inspector” on page 66
■ “Navigating tables” on page 68
Navigating frames
If your document contains frames, you can use the arrow keys to shift focus to a frame.
NOTE
The use of arrow keys is supported for Windows only.
To select a frame:
1. Place the insertion point in the Document window.
2. Press Alt+Up Arrow to select the frame that currently has focus.
A dotted line indicates the frame that has focus.
3. Continue pressing Alt+Up Arrow to shift focus to the frameset, and then parent framesets,
if there are nested framesets.
4. Press Alt+Down Arrow to shift focus to a child frameset or a single frame within the
frameset.
5. With focus on a single frame, press Alt+Left or Right Arrow to move between frames.
6. Press Alt+Down Arrow to place the insertion point in the Document window.
Related topics
■ “Navigating panels” on page 65
■ “Navigating the Property inspector” on page 66
■ “Navigating dialog boxes” on page 67
Navigating tables
After you select a table, you can use the keyboard to navigate through it.
To navigate a table:
1. Use the arrow keys or press Tab to move to other cells in a table as necessary.
TIP
Pressing Tab in a right-most cell adds another row to the table.
2. To select a cell, press Control+A (Windows) or Command+A (Macintosh) while the
insertion point is in the cell.
68 Exploring the Workspace
Page 69

3. To select a table, press Control+A (Windows) or Command+A (Macintosh) twice if the
insertion point is in a cell, or once if a cell is selected.
4. To exit the table, press Control+A (Windows) or Command+A (Macintosh) three times if
the insertion point is in a cell, twice if the cell is selected, or once if the table is selected, and
then press the Up, Left, or Right Arrow key.
Related topics
■ “Navigating panels” on page 65
■ “Navigating the Property inspector” on page 66
■ “Navigating dialog boxes” on page 67
■ “Navigating frames” on page 68
Optimizing the workspace for accessible page design
When you create accessible pages, you need to associate information, such as labels and
descriptions, with your page objects to make your content accessible to all users.
To do this, activate the Accessibility dialog box for each object, so that Dreamweaver prompts
you for accessibility information when you insert objects. You can activate a dialog box for any
of the objects in the Accessibility category in Preferences.
To activate the Accessibility dialog boxes:
1. Select Edit > Preferences (Windows) or Dreamweaver > Preferences (Macintosh).
The Preferences dialog box appears.
2. Select Accessibility from the Category list on the left.
Optimizing the workspace for accessible page design 69
Page 70

The Preferences dialog box displays accessibility options.
3. Select the objects you want to activate Accessibility dialog boxes for.
For more information, click the Help button in the dialog box.
NOTE
Accessibility attributes automatically appear in the Insert Table dialog box when you
insert a new table.
4. Click OK.
For each object you select, an Accessibility dialog box prompts you to enter accessibility tags
and attributes when you insert that object in a document.
Related topics
■ “Dreamweaver and accessibility” on page 30
■ “Inserting an image” on page 409
■ “Validating HTML form data” on page 814
■ “Creating frames and framesets” on page 281
■ “Inserting and editing media objects” on page 472
■ “Inserting a table and adding content” on page 235
70 Exploring the Workspace
Page 71

Using visual guides in Dreamweaver
Dreamweaver provides several kinds of visual guides to help you design documents and
predict (approximately) how they will appear in browsers. You can do any of the following:
■ Instantly snap the Document window to a desired window size to see how the elements fit
on the page. (See “Resizing the Document window” on page 52.)
■ Use a tracing image as the page background to help you duplicate a design created in an
illustration or image-editing application such as Macromedia Fireworks. (See “Using a
tracing image” on page 230.)
■ Use rulers and guides to provide a visual cue for precise positioning and resizing of page
elements. (See “Using rulers, guides, and the grid to lay out pages” on page 226.)
■ Use the grid for precise positioning and resizing of layers. (See “Using the grid”
on page 229.)
Grid marks on the page help you align layers, and when snapping is enabled, layers
automatically snap to the closest grid point when moved or resized. (Other objects, such
as images and paragraphs, do not snap to the grid.) Snapping works regardless of whether
the grid is visible.
Dreamweaver customizing basics
There are some basic techniques you can use to customize Dreamweaver to suit your needs
without knowing complex code or editing text files. For example, you can change the
workspace layout, hide or display the Start page, set preferences, create your own keyboard
shortcuts, and add extensions to Dreamweaver.
For information about customizing panel layout in the workspace, see “Using panels and
panel groups” on page 61.
NOTE
For information about customizing configuration files by hand, see “Customizing
Dreamweaver” on the Macromedia Support Center at www.macromedia.com/go/
customizing_dreamweaver.
This section describes only the most common of the preference options. For information on a
specific preference option not covered here, search for the corresponding topic in Using
Dreamweaver.
Related topics
■ “About customizing Dreamweaver in multiuser systems”
■ Extending Dreamweaver
Dreamweaver customizing basics 71
Page 72

Choosing the workspace layout (Windows only)
In Windows, you can choose between the Designer and Coder workspace layouts. The first
time you start Dreamweaver, a dialog box lets you choose a workspace layout. You can switch
to a different workspace at any time.
To choose a workspace layout the first time you start Dreamweaver:
1. Select one of the following layouts:
Designer is an integrated workspace using MDI (Multiple Document Interface), in which
all Document windows and panels are integrated into one larger application window, with
the panel groups docked on the right.
Coder is the same integrated workspace, but with the panel groups docked on the left, in
a layout similar to that used by Macromedia HomeSite and Macromedia ColdFusion
Studio, and with the Document window showing Code view by default.
NOTE
You can dock panel groups on either side of the workspace in either layout.
2. Click OK.
To switch to a different workspace after you’ve chosen one:
■ Select Window > Workspace Layout, and select the workspace layout you prefer.
In addition to selecting Coder and Designer, you can select Dual Screen Right or Dual Screen
Left. If you have a secondary monitor to the right of your primary monitor, Dual Screen
Right puts all panels on the right monitor, and keeps the Document window on the primary
monitor. If you have a secondary monitor to the left of your primary monitor, Dual Screen
Left puts all panels on the left monitor, and keeps the Document window on the primary
monitor.
Related topics
■ “The workspace layout” on page 40
■ “Saving custom workspace layouts” on page 73
■ “Cascading or tiling Document windows” on page 52
Displaying tabbed documents (Macintosh)
On the Macintosh, Dreamweaver can display multiple documents in a single Document
window by using tabs to identify each document. Dreamweaver can also display them as part
of a floating workspace, in which each document appears in its own window.
72 Exploring the Workspace
Page 73
To open a tabbed document in a separate window:
■ Right-click or Control-click the tab and select Move to New Window from the context
menu.
To combine separate documents into tabbed windows:
■ Select Window > Combine as Tabs.
To change the default tabbed document setting:
1. Select Dreamweaver > Preferences, and then select the General category.
2. Select or deselect Open Documents in Tabs, and click OK.
NOTE
Dreamweaver does not alter the display of documents that are currently open when
you change preferences. Documents opened after you select a new preference,
however, will display according to the preference you selected.
Related topics
■ “The workspace layout” on page 40
■ “Cascading or tiling Document windows” on page 52
Saving custom workspace layouts
Dreamweaver lets you save and restore different panel sets so that you can customize your
workspace for different activities. When you save a workspace layout, Dreamweaver
remembers the panels in the specified layout, as well as other attributes such as the positions
and sizes of the panels, their collapsed or expanded states, and the position and size of the
application window.
To save a custom workspace layout:
1. Arrange the panels as desired.
2. Select Window > Workspace Layout > Save Current.
3. Enter a name for the layout and click OK.
To switch to another custom workspace layout:
■ Select Window > Workspace Layout, and select your custom layout.
Dreamweaver customizing basics 73
Page 74

To rename or delete a custom workspace layout:
1. Select Window > Workspace Layout > Manage.
2. Select a layout and do one of the following:
■ To rename a layout, click the Rename button, enter a new layout name, and click OK.
■ To delete a layout, click the Delete button.
3. Click OK.
Related topics
■ “Using panels and panel groups” on page 61
■ “Choosing the workspace layout (Windows only)” on page 72
■ “Displaying tabbed documents (Macintosh)” on page 72
Hiding and displaying the Start page
The Dreamweaver Start page appears when you start Dreamweaver and anytime that you do
not have any documents open. You can choose to hide the Start page, then later display it
again. When the Start page is hidden and there are no documents open, the Document
window is blank.
NOTE
You can choose to have Dreamweaver open the last document you were working each
time you start. For more information, see “Setting General preferences for
Dreamweaver” on page 75.
To hide the Start page:
■ Select the Don’t Show Again checkbox on the Start page.
The Start page will not appear when you start Dreamweaver, or after you open and close
a document.
To display the Start page:
1. Select Edit > Preferences (Windows) or Dreamweaver > Preferences (Macintosh).
The Preferences dialog box appears displaying the General preferences category.
2. Select the Show Start Page checkbox.
The Start page appears when you start Dreamweaver, or after you open and close a document.
74 Exploring the Workspace
Page 75

Setting General preferences for Dreamweaver
The General preferences control the general appearance of Dreamweaver.
To change the General preferences:
1. Select Edit > Preferences (Windows) or Dreamweaver > Preferences (Macintosh).
The Preferences dialog box appears displaying the General preferences category.
2. Set preference options.
For more information, click Help.
3. Click OK.
Setting Fonts preferences for Dreamweaver display
A document’s encoding determines how the document appears in a browser. Dreamweaver
font preferences let you view a given encoding in the font and size you prefer without
affecting how the document appears when viewed by others in a browser.
To set the fonts to use in Dreamweaver for each type of encoding:
1. Select Edit > Preferences (Windows) or Dreamweaver > Preferences (Macintosh).
The Preferences dialog box appears.
2. Select Fonts from the Category list on the left.
3. Select an encoding type (such as Western (Latin1) or Japanese) from the Font Settings list,
then select fonts to use within Dreamweaver for that encoding, using the font pop-up
menus below the Font Settings list.
For more information, click Help.
NOTE
The fonts you select do not affect how the document appears in a visitor’s browser.
4. Click OK.
Related topics
■ “Understanding document encoding” on page 344
Dreamweaver customizing basics 75
Page 76

Customizing keyboard shortcuts
Use the Keyboard Shortcut Editor to create your own shortcut keys, including keyboard
shortcuts for code snippets. You can also remove shortcuts, edit existing shortcuts, and select a
predetermined set of shortcuts in the Keyboard Shortcut Editor.
NOTE
A chart showing all the keyboard shortcuts in the default Dreamweaver configuration are
available as a quick reference guide on the Macromedia website at
www.macromedia.com/go/dw_documentation.
To customize keyboard shortcuts:
1. Select Edit > Keyboard Shortcuts (Windows) or Dreamweaver > Keyboard Shortcuts
(Macintosh).
The Keyboard Shortcuts dialog box appears.
Duplicate Set button
Delete Set button
Export Set as HTML button
Rename Set button
2. Add, delete, or edit keyboard shortcuts.
For more information, click Help.
3. Click OK.
76 Exploring the Workspace
Page 77

Adding extensions to Dreamweaver
Extensions are new features that you can add easily to Dreamweaver. You can use many types
of extensions; for example, there are extensions that let you reformat tables, connect to backend databases, or help you write scripts for browsers.
NOTE
To install extensions that all users have access to in a multiuser operating system, you
must be logged in as Administrator (Windows) or root (Mac OS X). For more information
about multiuser systems, see “About customizing Dreamweaver in multiuser systems”
on page 50.
To find the latest extensions for Dreamweaver, use the Macromedia Exchange website at
www.macromedia.com/go/dreamweaver_exchange/. Once there, you can log in and
download extensions (many of which are free), join discussion groups, view user ratings and
reviews, and install and use the Extension Manager. You must install the Extension Manager
before you can install extensions.
The Extension Manager is a separate application that lets you install and manage extensions in
Macromedia applications. Start the Extension Manager from Dreamweaver by choosing
Commands > Manage Extensions.
To install and manage extensions:
1. On the Macromedia Exchange website, click the download link for an extension.
Your browser may let you choose to open and install it directly from the site or save it to
disk.
■ If you are opening the extension directly from the site, the Extension Manager handles
the installation automatically.
■ If you are saving the extension to disk, a good place to save the extension package file
(.mxp) is the Downloaded Extensions folder within the Dreamweaver application
folder on your computer.
2. Double-click the extension package file, or open the Extension Manager and select File >
Install Extension.
The extension is installed in Dreamweaver. Some extensions aren’t accessible until
Dreamweaver has restarted; you may be prompted to quit and restart the application.
NOTE
Use the Extension Manager to remove extensions or to see more information about
an extension.
Dreamweaver customizing basics 77
Page 78

78 Exploring the Workspace
Page 79

CHAPTER 2
Setting Up a Dreamweaver Site
A website is a set of linked documents and assets with shared attributes, such as related topics,
a similar design, or a shared purpose. Macromedia Dreamweaver 8 is a site creation
and management tool, so you can use it to create complete websites, in addition to
individual documents.
The first step in creating a website is planning. For best results, design and plan the structure
of your website before you create any of the pages that the site will contain.
The next step is to set up Dreamweaver so that you can work on the basic structure of the site.
If you already have a site on a web server, you can use Dreamweaver to edit that site.
TIP
As you develop site content, consider basing your pages on Dreamweaver templates.
See “About Dreamweaver templates” on page 296 and “Creating a Dreamweaver
template” on page 308.
This chapter includes the following sections:
About Dreamweaver sites . . . . . . . . . . . . . . . . . . . . . . . . . . . . . . . . . . . . . . . . . . . . . . . . . 79
Setting up a new Dreamweaver site. . . . . . . . . . . . . . . . . . . . . . . . . . . . . . . . . . . . . . . . . 82
Using the Advanced settings to set up a Dreamweaver site. . . . . . . . . . . . . . . . . . . . 83
Editing settings for a Dreamweaver site . . . . . . . . . . . . . . . . . . . . . . . . . . . . . . . . . . . . . 87
Editing existing websites in Dreamweaver . . . . . . . . . . . . . . . . . . . . . . . . . . . . . . . . . . . 88
2
About Dreamweaver sites
A Dreamweaver site provides a way to organize all of the documents associated with a website.
Organizing your files in a site enables you to use Dreamweaver to upload your site to the web
server, automatically track and maintain your links, manage files, and share files. To take full
advantage of Dreamweaver features, you should define a site.
A Dreamweaver site consists of as many as three parts, or folders, depending on your
development environment and the type of website you are developing:
79
Page 80
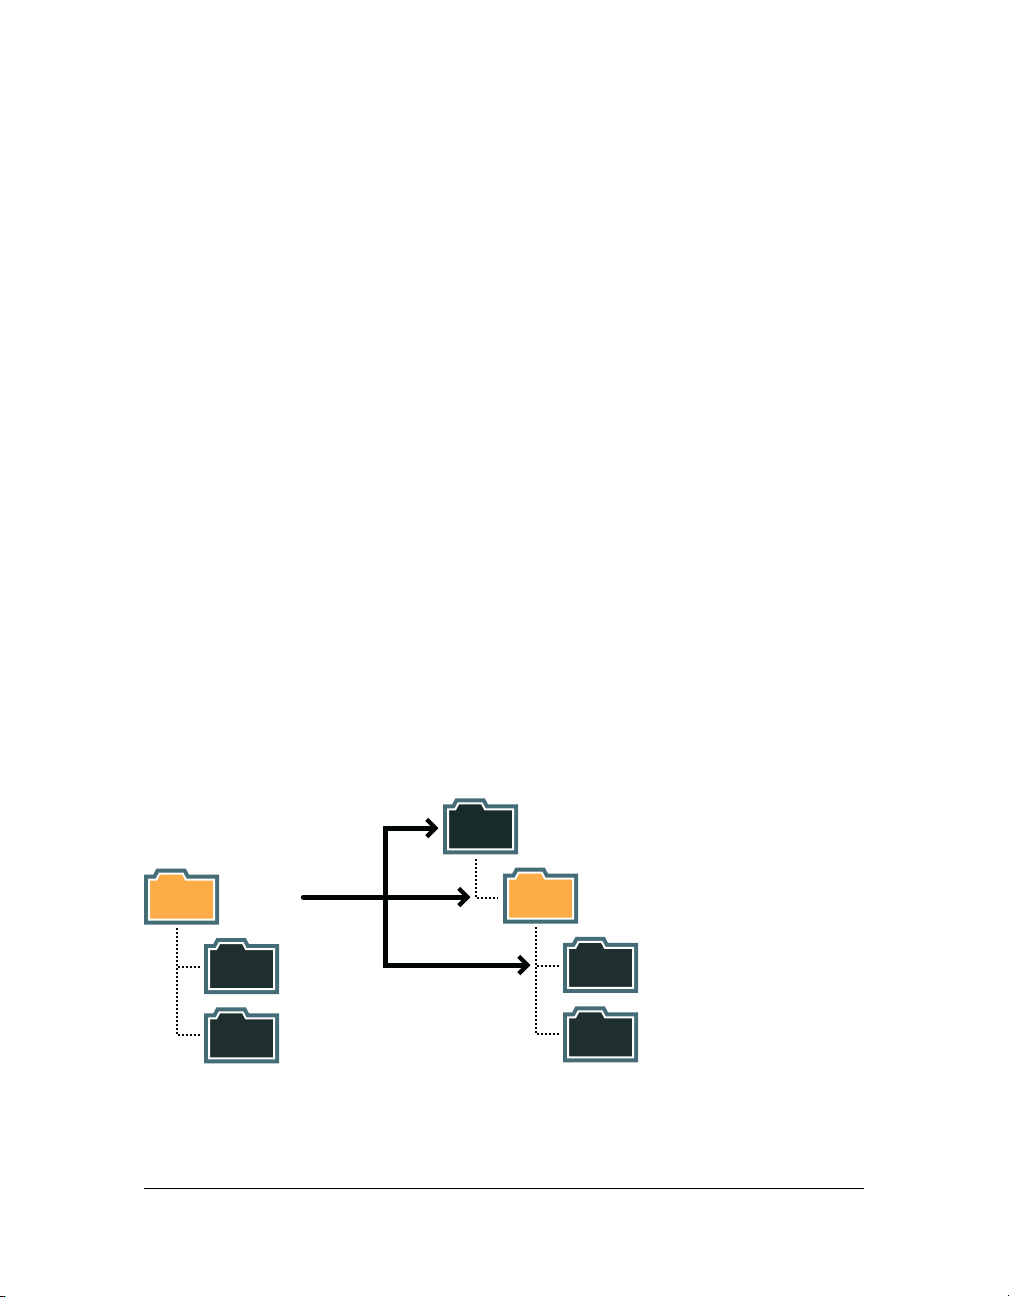
The local folder is your working directory. Dreamweaver refers to this folder as your “local
site.” This folder can be on your local machine or it can be on a network server. It is where you
store the files you are working on for a Dreamweaver site.
All you need to do to define a Dreamweaver site is set up a local folder. To transfer files to a
web server or to develop web applications, you need to also add information for a remote site
and testing server.
The remote folder is where you store your files, depending on your development
environment, for testing, production, collaboration, and so on. Dreamweaver refers to this
folder as your “remote site” in the Files panel. Typically, your remote folder is on the machine
where your web server is running.
Together, the local and remote folders enable you to transfer files between your local disk and
web server; this makes it easy for you to manage files in your Dreamweaver sites.
The testing server folder is the folder where Dreamweaver processes dynamic pages. For
more information, see “Specifying where dynamic pages can be processed” on page 608.
Related topics
■ “Setting up a new Dreamweaver site” on page 82
Understanding local and remote folder structure
When you set up access to the remote folder for your Dreamweaver site (see “Setting up a
remote folder” on page 85), you must determine the remote folder’s host directory. The host
directory you specify should correspond to the root folder of the local folder. The following
diagram shows a sample local folder on the left and a sample remote folder on the right.
login directory
(Shouldn't be Host
Directory in this case)
public_html
(Should be
Host Directory)
Assets
(Shouldn't be
Host Directory)
HTML
local site
(root folder)
Assets
HTML
no
yes
no
If the structure of your remote folder doesn’t match the structure of your local folder,
Dreamweaver uploads your files to the wrong place and the files might not be visible to site
visitors. Also, your image and link paths might be broken.
80 Chapter 2: Setting Up a Dreamweaver Site
Page 81

The remote root directory must exist before Dreamweaver can connect to it. If you don’t have
a root directory for your remote folder, create one or ask the server’s administrator to create
one for you.
Even if you intend to edit only part of the remote site, you must locally duplicate the entire
structure of the relevant branch of the remote site, from the remote site’s root folder down to
the files you want to edit.
For example, if your remote site’s root folder, named public_html, contains two folders,
Project1 and Project2, and you want to work only on the HTML files in Project1, you don’t
need to download the files in Project2, but you must map your local root folder to
public_html, not to Project1.
REMOTE SITE
public_html
Project 1
Assets
HTML
Project 2
Assets
HTML
LOCAL SITE
Related topics
■ “About Dreamweaver sites” on page 79
■ “Setting up a remote folder” on page 85
local root folder
(map this to public_html, not to
Project1 or Project1/HTML)
Project 1
(must be present on local site;
corresponds to Project1 on remote site)
HTML
(must be present on local site;
corresponds to Project1/HTML
on remote site)
About Dreamweaver sites 81
Page 82

Setting up a new Dreamweaver site
After you plan your site structure, or if you already have an existing site, you should define a
site in Dreamweaver before you start developing. Setting up a Dreamweaver site is a way to
organize all of the documents associated with a website. For more information, see “About
Dreamweaver sites” on page 79.
NOTE
You can also edit files without setting up a Dreamweaver site. For more information, see
“Accessing sites, a server, and local drives” on page 106.
After you set up a Dreamweaver site, it’s a good idea to export the site so that you have a local
backup copy. For more information, see “Importing and exporting sites” on page 132.
To set up a Dreamweaver site:
1. Select Site > Manage Sites.
The Manage Sites dialog box appears.
NOTE
If you don’t have any Dreamweaver sites defined, then the Site Definition dialog box
appears and you can skip the next step.
2. Click the New button.
The Site Definition dialog box appears.
3. Do one of the following:
■ Click the Basic tab to use the Site Definition Wizard, which steps you through the
setup process.
NOTE
Users who are new to Dreamweaver are encouraged to use the Site Definition
Wizard; experienced Dreamweaver users might prefer to use the Advanced
settings.
■ Click the Advanced tab to use the Advanced settings, which enable you to set up local,
remote, and testing folders individually, as necessary.
NOTE
To get started, you can set up a Dreamweaver site completely or you can just
start with the first step, setting up your local folder.
4. Complete the Dreamweaver site setup process:
■ For the Site Definition Wizard, answer the questions on each screen, then click Next
to advance through the setup process or click Back to return to a previous screen.
82 Chapter 2: Setting Up a Dreamweaver Site
Page 83
■ For Advanced settings, complete the Local Info category, the RemoteInfo category,
and the Testing Server category, as necessary (see “Using the Advanced settings to set
up a Dreamweaver site” on page 83).
TIP
After you set up a Dreamweaver site, it’s a good idea to export the site so that
you have a local backup copy. For more information, see “Importing and
exporting sites” on page 132.
If you are setting up a Dreamweaver site for a web application, see Chapter 23, “Setting Up a
Web Application,” on page 599.
Using the Advanced settings to set up a Dreamweaver site
You can use the Advanced settings of the Site Definition dialog box to set up a Dreamweaver
site. The Advanced settings enable you to set up local, remote, and testing (for processing
dynamic pages) folders individually, as necessary. This method is recommended for users who
have experience with using Dreamweaver.
NOTE
To get started quickly, you can just start with the first step of setting up a Dreamweaver
site, setting up your local folder. Then, you can add remote and testing information later.
You should at least set up a local folder before you start using Dreamweaver.
If you are new to Dreamweaver, you can use the Site Definition Wizard, instead of the
Advanced settings, to guide you through the setup process. (See “Setting up a new
Dreamweaver site” on page 82.)
If you are setting up a Dreamweaver site for a web application, skip this section and see
Chapter 23, “Setting Up a Web Application,” on page 599.
TIP
After you set up a Dreamweaver site, it’s a good idea to export the site so that you have a
local backup copy. For more information, see “Importing and exporting sites”
on page 132.
Related topics
■ “About Dreamweaver sites” on page 79
■ “Specifying where dynamic pages can be processed” on page 608
Using the Advanced settings to set up a Dreamweaver site 83
Page 84

Setting up a local folder
The local folder is your working directory for your Dreamweaver site. This folder can be on
your local machine or it can be on a network server.
To set up a local folder:
1. Select Site > Manage Sites.
The Manage Sites dialog box appears.
NOTE
If you don’t have any Dreamweaver sites defined, then the Site Definition dialog box
appears and you can skip the next step.
2. Click New.
The Site Definition dialog box appears.
3. Click the Advanced button, if the Advanced settings aren’t showing.
The Advanced tab of the Site Definition dialog box displays the Local Info category
options.
84 Chapter 2: Setting Up a Dreamweaver Site
Page 85

4. Enter the Local Info options.
For more information, click the Help button in the dialog box.
5. (Optional) If you are ready to set up your remote server now, skip the remaining step; select
the Remote Info category on the left, then complete the dialog box.
For more information, click the Help button in the dialog box.
6. Click OK.
Dreamweaver creates the initial site cache, and the new Dreamweaver site appears in the
Files panel.
After you set up a local folder, you might also add remote and testing folders (see “Setting up
a remote folder” on page 85 and “Specifying where dynamic pages can be processed”
on page 608).
Related topics
■ “About Dreamweaver sites” on page 79
■ “Managing Your Files” on page 101
Setting up a remote folder
After you set up a local folder for a Dreamweaver site (see “Setting up a local folder”
on page 84), you can set up a remote folder. Depending on your development environment,
the remote folder is where you store files for testing, collaboration, production, deployment,
or so on.
NOTE
You don’t need to specify a remote folder if the folder you specified as your local folder is
the same folder you created for your site files on the system running your web server.
This implies the web server is running on your local computer.
Determine how you will access the remote folder and note the connection information. This
section describes how to set up a remote folder and connect to it.
To set up a remote folder:
1. Select Site > Manage Sites.
The Manage Sites dialog box appears.
2. Select an existing Dreamweaver site.
If you have not defined any Dreamweaver sites, create a local folder before proceeding
(see “Setting up a local folder” on page 84).
3. Click Edit.
The Site Definition dialog box appears.
Using the Advanced settings to set up a Dreamweaver site 85
Page 86

4. Click the Advanced button, if the Advanced settings aren’t showing.
5. Select Remote Info from the Category list on the left.
6. Select an Access option.
For more information, click the Help button in the dialog box.
7. Click OK.
Dreamweaver creates a connection to the remote folder. If you are developing a dynamic
site, you can add a Testing Server folder for processing dynamic pages (see “Specifying
where dynamic pages can be processed” on page 608).
To connect to a remote folder with FTP access:
■ In the Files panel, click the Connects to Remote Host button in the toolbar.
To disconnect from a remote folder with FTP access:
■ In the Files panel, click the Disconnect button in the toolbar.
To connect or disconnect from a remote folder with network access:
■ You don’t need to connect to the remote folder; you’re always connected. Click the Refresh
button to see your remote files.
Related topics
■ “About Dreamweaver sites” on page 79
■ “Understanding local and remote folder structure” on page 80
■ “Troubleshooting the remote folder setup” on page 86
Troubleshooting the remote folder setup
A web server can be configured in a wide variety of ways. The following list provides
information on some common issues you may encounter in setting up a remote folder (see
“Setting up a remote folder” on page 85), and how to resolve them:
■ The Dreamweaver FTP implementation may not work properly with certain proxy
servers, multilevel firewalls, and other forms of indirect server access.
If you encounter problems with FTP access, ask your local system administrator for help.
■ For the Dreamweaver FTP implementation, you must connect to the remote system’s root
folder. (In many applications, you can connect to any remote directory, then navigate
through the remote file system to find the directory you want.)
Be sure that you indicate the remote system’s root folder as the host directory.
86 Chapter 2: Setting Up a Dreamweaver Site
Page 87

If you have problems connecting, and you’ve specified the host directory using a single
slash (/), you might need to specify a relative path from the directory you are connecting
to and the remote root folder.
For example, if the remote root folder is a higher level directory, you may need to specify a
../../ for the host directory.
■ File and folder names that contain spaces and special characters often cause problems
when transferred to a remote site.
Use underscores in place of spaces, and avoid special characters in file and folder names
wherever possible. In particular, colons, slashes, periods, and apostrophes in file or folder
names can cause problems. Special characters in file or folder names may also sometimes
prevent Dreamweaver from creating a site map.
■ If you encounter problems with long filenames, rename them with shorter names. On
Macintosh, filenames cannot be more than 31 characters long.
■ Note that many servers use symbolic links (UNIX), shortcuts (Windows), or aliases
(Macintosh) to connect a folder on one part of the server’s disk with another folder
elsewhere.
For example, the public_html subdirectory of your home directory on the server may
really be a link to another part of the server entirely. In most cases, such aliases have no
effect on your ability to connect to the appropriate folder or directory; however, if you can
connect to one part of the server but not another, there may be an alias discrepancy.
■ If you encounter an error message such as “cannot put file,” your remote folder may be out
of space. For more detailed information, look at the FTP log.
NOTE
In general, when you encounter a problem with an FTP transfer, examine the FTP log
by selecting Window > Results (Windows) or Site > FTP Log (Macintosh), then
clicking the FTP Log tag.
Editing settings for a Dreamweaver site
Use the Site Definition Advanced settings to edit your Dreamweaver sites.
To edit settings for a Dreamweaver site, do one of the following:
■ Select Site > Manage Sites, select a site in the Manage Sites dialog box, then click Edit.
■ In the Files panel, select Manage Sites from the pop-up menu where the current site,
server, or drive appears; select a site in the Manage Sites dialog box, then click Edit.
Related topics
■ “Setting up a new Dreamweaver site” on page 82
Editing settings for a Dreamweaver site 87
Page 88
Editing existing websites in Dreamweaver
You can use Dreamweaver to edit existing sites, even if you didn’t use Dreamweaver to create
the original site. You can edit existing sites that are on your local system or sites that are on a
remote system.
Editing an existing local website in Dreamweaver
You can use Dreamweaver to edit an existing website on your local disk, even if you didn’t use
Dreamweaver to create the original site.
NOTE
This section sets up a Dreamweaver site to edit an existing local website. You can also
edit the existing site without creating a Dreamweaver site. For more information, see
“Accessing sites, a server, and local drives” on page 106.
To edit an existing local website:
1. Select Site > Manage Sites.
The Manage Sites dialog box appears.
2. Click New.
The Site Definition dialog box appears.
3. Click the Advanced button, if the Advanced settings aren’t showing.
The Advanced tab of the Site Definition dialog box displays the Local Info category
options.
4. Complete the dialog box.
For more information, click the Help button in the dialog box.
5. Click OK.
Editing an existing remote website in Dreamweaver
You can use Dreamweaver to copy an existing remote site (or any branch of a remote site) to
your local disk and edit it there, even if you didn’t use Dreamweaver to create the original site.
NOTE
This section sets up a Dreamweaver site to edit an existing remote website. You can also
edit the existing site without creating a Dreamweaver site. For more information, see
“Accessing sites, a server, and local drives” on page 106.
88 Chapter 2: Setting Up a Dreamweaver Site
Page 89

To edit an existing remote site:
1. Create a local folder to contain the existing site, then set it up as the local folder for the site
(see “Setting up a local folder” on page 84).
NOTE
You must locally duplicate the entire structure of the relevant branch of the existing
remote site. For more information, see “Understanding local and remote folder
structure” on page 80.
2. Set up a remote folder (see “Setting up a remote folder” on page 85), using information
about your existing site.
Make sure to choose the correct root folder for the remote site.
3. In the Files panel (Window > Files), click the Connects to Remote Host button (for FTP
access) or the Refresh button (for network access) in the toolbar to view the remote site.
4. Depending on how much of the remote site you want to edit, do one of the following:
■ If you want to work with the entire site, select the root folder of the remote site in the
Files panel, then click Get in the toolbar to download the entire site to your local disk.
■ If you want to work with just one of the files or folders of the site, locate the file or
folder in the Remote view of the Files panel, then click Get in the toolbar to download
that file to your local disk.
Dreamweaver automatically duplicates as much of the remote site’s structure as is
necessary to place the downloaded file in the correct part of the site hierarchy. When
editing only one part of a site, you should generally choose to include dependent files.
5. Use Dreamweaver to work on your site.
Related topics
■ “Editing an existing local website in Dreamweaver” on page 88
Editing existing websites in Dreamweaver 89
Page 90

90 Chapter 2: Setting Up a Dreamweaver Site
Page 91

CHAPTER 3
Creating and Opening Documents
Macromedia Dreamweaver 8 offers a flexible environment for working with a variety of web
design and development documents. In addition to HTML documents, you can create and
open a variety of text-based documents, including CFML, ASP, JavaScript, and CSS.
Dreamweaver also supports source code files, such as Visual Basic, .NET, C#, and Java.
Dreamweaver provides several options for creating a new document. You can create any of
the following:
■ A new blank document or template
■ A document based on one of the predesigned page layouts included with Dreamweaver
■ A document based on one of your existing templates
Other document options are also available. For example, if you typically work with one type
of document, you can set it as the default document type for new pages you create.
In Dreamweaver, you can easily define document properties, such as meta tags, document
title, and background colors, and several other page properties in either the Design view or
Code view.
This chapter contains the following sections:
Creating new documents . . . . . . . . . . . . . . . . . . . . . . . . . . . . . . . . . . . . . . . . . . . . . . . . . . 90
Saving a new document . . . . . . . . . . . . . . . . . . . . . . . . . . . . . . . . . . . . . . . . . . . . . . . . . . . 93
Setting a default new document type . . . . . . . . . . . . . . . . . . . . . . . . . . . . . . . . . . . . . . . 93
Setting the default file extension of new HTML documents. . . . . . . . . . . . . . . . . . . . 94
Opening existing documents . . . . . . . . . . . . . . . . . . . . . . . . . . . . . . . . . . . . . . . . . . . . . . .94
Cleaning up Microsoft Word HTML files. . . . . . . . . . . . . . . . . . . . . . . . . . . . . . . . . . . . . 95
3
89
Page 92

Creating new documents
Dreamweaver provides you with several choices for selecting a new document to work in. You
can create a new document in the following ways:
■ Start with a blank document (see “Creating a new blank document” on page 90).
■ Create a blank document or template based on a Dreamweaver design file (see “Creating a
document based on a Dreamweaver design file” on page 91).
■ Use a template that defines how a document looks, and sets which parts of a document
can be edited (see “Creating a document based on an existing template” on page 92).
TIP
If you typically work with a specific document type, you can set a default document
and automatically open a new document based on the default document you’ve
defined. For information, see “Setting a default new document type” on page 93.
Creating a new blank document
You can select the type of blank document you want to create.
To create a new blank document:
1. Select File > New.
The New Document dialog box appears. The General tab is already selected.
2. From the Category list, select Basic Page, Dynamic Page, Template Page, Other, or
Framesets; then, from the list on the right, select the type of document you want to create.
For example, select Basic Page to create an HTML document, or select Dynamic page to
create a ColdFusion or ASP document, and so on.
For more information about options in this dialog box, click the Help button in the
dialog box.
3. Click the Create button.
The new document opens in the Document window.
4. Save the document (see “Saving a new document” on page 93).
Related topics
■ “Creating a document based on an existing template” on page 92
90 Chapter 3: Creating and Opening Documents
Page 93

Creating a document based on a Dreamweaver design file
Dreamweaver comes with several professionally developed page layout and design element
files. You can use these design files as starting points for designing pages in your sites. When
you create a document based on a design file, Dreamweaver creates a copy of the file.
NOTE
If you create a document based on a predefined frameset only the frameset structure is
copied, not the frame contents; additionally, you will have to save each frame file
separately. For information about saving frames, see “Saving frame and frameset files”
on page 285.
To create a new document from a Dreamweaver design file:
1. Select File > New.
The New Document dialog box appears. The General tab is already selected.
2. In the Category list, select CSS Style Sheets, Table Based Layouts, Page Designs (CSS),
Page Designs, or Page Designs (Accessible); then select a design file from the list on the
right.
You can preview a design file and read a brief description of a document’s design elements.
For more information about options in this dialog box, click the Help button in the
dialog box.
3. Click the Create button.
The new document opens in the Document window. If you selected a CSS style sheet, the
CSS document appears in the Document window and the CSS Style Sheet opens in Code
view.
4. Save the document (see “Saving a new document” on page 93).
If the file contains links to asset files, the Copy Dependent Files dialog box appears for you
to save a copy of the dependent files.
5. If the Copy Dependent Files dialog box appears, set options, then click Copy to copy the
assets to the selected folder.
You can choose your own location for the dependent files or use the default folder location
Dreamweaver generates (based on the design file’s source name).
Related topics
■ “Creating a new blank document” on page 90
Creating new documents 91
Page 94

Creating a document based on an existing template
You can select, preview, and create a new document from an existing template. You can use
the New Document dialog box to select a template from any of your Dreamweaver-defined
sites or you can use the Assets panel to create a new document from an existing template.
For information about creating templates, see “Creating a Dreamweaver template”
on page 306.
TIP
If you don’t have any templates in your site, you can save a document in one of the
design file categories of the New Document dialog box as a template, then create pages
based on that template. For information about saving a design file as a template, see
“Creating a document based on a Dreamweaver design file” on page 91.
To create a new document based on a template:
1. Select File > New.
The New Document dialog box opens.
2. Click the Templates tab.
3. In the Templates For list, select the Dreamweaver site that contains the template you want
use, then select a template from the list on the right.
For more information about options in this dialog box, click the Help button in the
dialog box.
4. Click Create.
The new document opens in the Document window.
5. Save the document (see “Saving a new document” on page 93).
To create a new document from a template in the Assets panel:
1. Open the Assets panel (Window > Assets), if it is not already open.
2. In the Assets panel, click the Templates icon on the left to view the list of templates in your
current site.
TIP
If you just created the template you want to apply, you might need to click the
Refresh button to see it.
3. Right-click (Windows) or Control-click (Macintosh) the template you want to apply, then
select New From Template.
The document opens in the Document window.
92 Chapter 3: Creating and Opening Documents
Page 95

Related topics
■ “Creating a new blank document” on page 90
■ “Creating a document based on a Dreamweaver design file” on page 91
Saving a new document
When you create a new document, you need to save it.
To save a new document:
1. Select File > Save.
2. In the dialog box that appears, navigate to the folder where you want to save the file.
TIP
It’s a good idea to save your file in a Dreamweaver site. For more information, see
“Setting up a new Dreamweaver site” on page 80.
3. In the File Name text box, type a name for the file.
Avoid using spaces and special characters in file and folder names and do not begin a
filename with a numeral. In particular, do not use special characters (such as é, ç, or ¥) or
punctuation (such as colons, slashes, or periods) in the names of files you intend to put on
a remote server; many servers change these characters during upload, which will cause any
links to the files to break.
4. Click Save.
Setting a default new document type
You can define which document type Dreamweaver uses as a default document for a site.
For example, if most pages in your site will be a specific file type (such as Cold Fusion,
HTML, or ASP documents), you can set document preferences that automatically create new
documents of the specified file type.
To set a default new document type and preferences:
1. Select Edit > Preferences (Windows) or Dreamweaver > Preferences (Macintosh).
The Preferences dialog box appears.
TIP
You can also click the Preferences button in the New Document dialog box to set
new document preferences when you create a new document (see “Creating a new
blank document” on page 90).
2. Click New Document from the category list on the left.
Setting a default new document type 93
Page 96

3. Set or change preferences as necessary.
For more information on options in the dialog box, click the Help button.
4. Click OK.
Dreamweaver saves your preferences.
Setting the default file extension of new HTML documents
You can define the default file extension of HTML documents created in Dreamweaver. For
example, you can tell Dreamweaver to use an .htm or .html extension for all new HTML
documents.
To set the default file extension of new HTML documents:
1. Select Edit > Preferences (Windows) or Dreamweaver > Preferences (Macintosh).
The Preferences dialog box appears.
TIP
You can also click the Preferences button in the New Document dialog box to set
new document preferences when you create a new document (see “Creating a new
blank document” on page 90).
2. Click New Document from the category list on the left.
3. In the Default Document Type, make sure HTML is selected.
4. In the Default Extension text box, specify the file extension you want for new HTML
documents created in Dreamweaver.
For Windows, you can specify the following extensions: .html, .htm, .shtml, .shtm, .stm,
.tpl, .lasso, .xhtml.
For Macintosh, you can specify the following extensions: .html, .htm, .shtml, .shtm, .tpl,
.lasso, .xhtml, .ssi.
Opening existing documents
In Dreamweaver, you can open an existing web page or text-based document, even if it wasn’t
created in Dreamweaver. You can open the document and use Dreamweaver to edit it in either
Design view or Code view.
94 Chapter 3: Creating and Opening Documents
Page 97
If the document you open is a Microsoft Word file that was saved as an HTML document,
you can use the Cleanup Word HTML command to remove the extraneous markup tags that
Word inserts into HTML files. For more information, see “Cleaning up Microsoft Word
HTML files” on page 95.
To clean up HTML or XHTML that was not generated by Microsoft Word, see “Cleaning up
your code” on page 573.
You can also open non-HTML text files, such as JavaScript files, XML files, CSS style sheets,
or text files saved by word processors or text editors.
To open an existing file:
1. Select File > Open.
The Open dialog box appears.
TIP
You can also use the Files panel to open files. For more information, see “Working
with files in the Files panel” on page 119.
2. Navigate to and select the file you want to open.
NOTE
If you haven’t already done so, it’s a good idea to organize files you plan to open and
edit in a Dreamweaver site, instead of opening them from another location. For
information about setting up a Dreamweaver site, see “Setting up a new
Dreamweaver site” on page 80.
3. Click Open.
The document opens in the Document window.
JavaScript, text, and CSS Style Sheets open in Code view by default. You can update the
document while working in Dreamweaver, then save the changes in the file. For
information about setting an external text editor for viewing these types of files, see
“Starting an external editor for media files” on page 472.
Cleaning up Microsoft Word HTML files
In Dreamweaver, you can open documents saved by Microsoft Word as HTML files, and then
use the Clean Up Word HTML command to remove the extraneous HTML code generated
by Word. The Clean Up Word HTML command is available for documents saved as HTML
files by Word 97 or later.
Cleaning up Microsoft Word HTML files 95
Page 98

The code that Dreamweaver removes is primarily used by Word to format and display
documents in Word and is not needed to display the HTML file. Retain a copy of your
original Word (.doc) file as a backup, because you may not be able to reopen the HTML
document in Word once you’ve applied the Clean Up Word HTML feature.
To clean up HTML or XHTML that was not generated by Microsoft Word, see “Cleaning up
your code” on page 573.
To open and clean up a Microsoft Word HTML file:
1. If you haven’t already done so in Microsoft Word, save your document as an HTML file.
NOTE
In Windows, close the file in Word to avoid a sharing violation.
2. Open the HTML file in Dreamweaver.
To view the HTML code generated by Word, switch to Code view (View > Code).
3. Select Commands > Clean Up Word HTML.
The Clean Up Word HTML dialog box appears.
There may be a slight delay while Dreamweaver attempts to determine which version of
Word was used to save the file. If Dreamweaver is unable to determine this, select the
correct version using the pop-up menu.
4. Deselect options in the dialog box if you want.
For more information about options in the dialog box, click the Help button.
5. Click OK.
Dreamweaver applies the cleanup settings to the HTML document and a log of the
changes appears (unless you deselected that option in the dialog box).
Related topics
■ “Importing Microsoft Office documents (Windows only)” on page 381
96 Chapter 3: Creating and Opening Documents
Page 99

PART 2
Working with Dreamweaver Sites
Learn how to manage Macromedia Dreamweaver 8 sites and site-specific
assets.
This part contains the following chapters:
Chapter 4: Managing Your Files . . . . . . . . . . . . . . . . . . . . . . . . . . . . 101
Chapter 5: Managing Site Assets and Libraries . . . . . . . . . . . . . . 159
Chapter 6: Managing Contribute Sites with Dreamweaver. . . . . 181
2
99
Page 100

 Loading...