

Page 1

Exploring Studio 8
Page 2

Trademarks
1 Step RoboPDF, ActiveEdit, ActiveTest, Authorware, Blue Sky Software, Blue Sky, Breeze, Breezo, Captivate, Central,
ColdFusion, Contribute, Database Explorer, Director, Dreamweaver, Fireworks, Flash, FlashCast, FlashHelp, Flash Lite,
FlashPaper, Flash Video Encoder, Flex, Flex Builder, Fontographer, FreeHand, Generator, HomeSite, JRun, MacRecorder,
Macromedia, MXML, RoboEngine, RoboHelp, RoboInfo, RoboPDF, Roundtrip, Roundtrip HTML, Shockwave, SoundEdit,
Studio MX, UltraDev, and WebHelp are either registered trademarks or trademarks of Macromedia, Inc. and may be registered in
the United States or in other jurisdictions including internationally. Other product names, logos, designs, titles, words, or phrases
mentioned within this publication may be trademarks, service marks, or trade names of Macromedia, Inc. or other entities and
may be registered in certain jurisdictions including internationally.
Third-Party Information
This guide contains links to third-party websites that are not under the control of Macromedia, and Macromedia is not
responsible for the content on any linked site. If you access a third-party website mentioned in this guide, then you do so at your
own risk. Macromedia provides these links only as a convenience, and the inclusion of the link does not imply that Macromedia
endorses or accepts any responsibility for the content on those third-party sites.
Speech compression and decompression technology licensed from Nellymoser, Inc. (www.nellymoser.com).
Sorenson™ Spark™ video compression and decompression technology licensed from
Sorenson Media, Inc.
Opera ® browser Copyright © 1995-2002 Opera Software ASA and its suppliers. All rights reserved.
Macromedia Flash 8 video is powered by On2 TrueMotion video technology. © 1992-2005 On2 Technologies, Inc. All Rights
Reserved. http://www.on2.com.
Visual SourceSafe is a registered trademark or trademark of Microsoft Corporation in the United States and/or other countries.
Copyright © 2005 Macromedia, Inc. All rights reserved. This manual may not be copied, photocopied, reproduced,
translated, or converted to any electronic or machine-readable form in whole or in part without written approval from
Macromedia, Inc. Notwithstanding the foregoing, the owner or authorized user of a valid copy of the software with which
this manual was provided may print out one copy of this manual from an electronic version of this manual for the sole
purpose of such owner or authorized user learning to use such software, provided that no part of this manual may be
printed out, reproduced, distributed, resold, or transmitted for any other purposes, including, without limitation,
commercial purposes, such as selling copies of this documentation or providing paid-for support services.
Part Number ZWP80M100
Acknowledgments
Project Management: Jennifer Rowe, Sheila McGinn
Writing: Jay Armstrong, Charles Nadeau, Jennifer Rowe, David Sullivan, Jon Michael Varese
Managing Editor: Rosana Francescato
Editing: Evelyn Eldridge, Rosana Francescato, Mark Nigara, Anne Szabla
Production Management: Patrice O’Neill
Media Design and Production: Adam Barnett, Aaron Begley, Paul Benkman, John Francis, Geeta Karmarkar, Masayo Noda,
Paul Rangel, Arena Reed, Mario Reynoso
Special thanks to Maureen Keating, Jennifer Taylor, Mike Downey, Greg Clausen, Doug Wolens, Melissa Baerwald, Alan
Musselman, David Acala, Jason Wylie
First Edition: September 2005
Macromedia, Inc.
601 Townsend St.
San Francisco, CA 94103
Page 3

Contents
PART 1: GETTING STARTED
Introduction . . . . . . . . . . . . . . . . . . . . . . . . . . . . . . . . . . . . . . . . . . . . . 9
What you can do with Studio 8 . . . . . . . . . . . . . . . . . . . . . . . . . . . . . . . . . . 10
Installing Studio 8. . . . . . . . . . . . . . . . . . . . . . . . . . . . . . . . . . . . . . . . . . . . . . 14
Activating your Studio products . . . . . . . . . . . . . . . . . . . . . . . . . . . . . . . . . 16
Registering your Studio products . . . . . . . . . . . . . . . . . . . . . . . . . . . . . . . . 16
Chapter 1: Learning Studio . . . . . . . . . . . . . . . . . . . . . . . . . . . . . . . 17
Getting the most from the Studio documentation. . . . . . . . . . . . . . . . . . 17
Using the Studio help systems . . . . . . . . . . . . . . . . . . . . . . . . . . . . . . . . . 32
Chapter 2: Studio Basics . . . . . . . . . . . . . . . . . . . . . . . . . . . . . . . . 43
Dreamweaver basics . . . . . . . . . . . . . . . . . . . . . . . . . . . . . . . . . . . . . . . . . . 43
Flash basics . . . . . . . . . . . . . . . . . . . . . . . . . . . . . . . . . . . . . . . . . . . . . . . . . . .57
Fireworks basics. . . . . . . . . . . . . . . . . . . . . . . . . . . . . . . . . . . . . . . . . . . . . .102
Contribute basics . . . . . . . . . . . . . . . . . . . . . . . . . . . . . . . . . . . . . . . . . . . . . 112
FlashPaper basics . . . . . . . . . . . . . . . . . . . . . . . . . . . . . . . . . . . . . . . . . . . . 118
Chapter 3: Web Development Workflow . . . . . . . . . . . . . . . . . . . 121
About the web development workflow . . . . . . . . . . . . . . . . . . . . . . . . . . 121
Planning your website . . . . . . . . . . . . . . . . . . . . . . . . . . . . . . . . . . . . . . . . .122
Setting up the development environment. . . . . . . . . . . . . . . . . . . . . . . .123
Planning page design and layout . . . . . . . . . . . . . . . . . . . . . . . . . . . . . . .125
Creating content assets . . . . . . . . . . . . . . . . . . . . . . . . . . . . . . . . . . . . . . .128
Assembling, testing, and deploying . . . . . . . . . . . . . . . . . . . . . . . . . . . . .130
Maintaining and updating your site. . . . . . . . . . . . . . . . . . . . . . . . . . . . . .133
3
Page 4

PART 2: SETTING UP YOUR ENVIRONMENT AND PLANNING
YOUR PAGE DESIGN
Chapter 4: Tutorial: Setting Up Your Site and Project Files . . . 137
Learn about Dreamweaver sites . . . . . . . . . . . . . . . . . . . . . . . . . . . . . . . 137
Set up your project files . . . . . . . . . . . . . . . . . . . . . . . . . . . . . . . . . . . . . . . 139
Define a local folder . . . . . . . . . . . . . . . . . . . . . . . . . . . . . . . . . . . . . . . . . . 140
Chapter 5: Tutorial: Creating Page Mock-ups . . . . . . . . . . . . . . 143
Review your task . . . . . . . . . . . . . . . . . . . . . . . . . . . . . . . . . . . . . . . . . . . . . 143
Create and save a new document . . . . . . . . . . . . . . . . . . . . . . . . . . . . . . 145
Import and place images . . . . . . . . . . . . . . . . . . . . . . . . . . . . . . . . . . . . . . 146
Create a composite of the content area . . . . . . . . . . . . . . . . . . . . . . . . . 148
Place text and images. . . . . . . . . . . . . . . . . . . . . . . . . . . . . . . . . . . . . . . . . 153
Export the image for the web . . . . . . . . . . . . . . . . . . . . . . . . . . . . . . . . . . 160
Chapter 6: Tutorial: Creating a Table-based Page Layout . . . . 163
Examine the design comp . . . . . . . . . . . . . . . . . . . . . . . . . . . . . . . . . . . . . 163
Create and save a new page . . . . . . . . . . . . . . . . . . . . . . . . . . . . . . . . . . . 165
Insert tables. . . . . . . . . . . . . . . . . . . . . . . . . . . . . . . . . . . . . . . . . . . . . . . . . . 166
Set table properties. . . . . . . . . . . . . . . . . . . . . . . . . . . . . . . . . . . . . . . . . . . 170
Insert an image placeholder . . . . . . . . . . . . . . . . . . . . . . . . . . . . . . . . . . . 175
Add color to the page . . . . . . . . . . . . . . . . . . . . . . . . . . . . . . . . . . . . . . . . . 177
PART 3: CREATING CONTENT ASSETS
Chapter 7: Tutorial: Handling Photographs. . . . . . . . . . . . . . . . . 183
Review your task . . . . . . . . . . . . . . . . . . . . . . . . . . . . . . . . . . . . . . . . . . . . . 183
Batch process large image files . . . . . . . . . . . . . . . . . . . . . . . . . . . . . . . . 184
Compose the images . . . . . . . . . . . . . . . . . . . . . . . . . . . . . . . . . . . . . . . . . 186
Preview and export the images . . . . . . . . . . . . . . . . . . . . . . . . . . . . . . . . .191
View the final optimized images . . . . . . . . . . . . . . . . . . . . . . . . . . . . . . . . 192
Chapter 8: Tutorial: Creating a Page Banner . . . . . . . . . . . . . . . 195
Review your task . . . . . . . . . . . . . . . . . . . . . . . . . . . . . . . . . . . . . . . . . . . . . 195
Add a background and place the logo . . . . . . . . . . . . . . . . . . . . . . . . . . 196
Organize your objects with layers . . . . . . . . . . . . . . . . . . . . . . . . . . . . . . 201
Create a contrasting background for the logo. . . . . . . . . . . . . . . . . . . 203
Create an outline around the banner . . . . . . . . . . . . . . . . . . . . . . . . . . . .207
Create a slanted edge effect . . . . . . . . . . . . . . . . . . . . . . . . . . . . . . . . . . 209
Add a tag line to the banner. . . . . . . . . . . . . . . . . . . . . . . . . . . . . . . . . . . . 210
Export an optimized image file . . . . . . . . . . . . . . . . . . . . . . . . . . . . . . . . . .211
4Contents
Page 5

Chapter 9: Tutorial: Building Your First Flash Application . . . .215
Review your task. . . . . . . . . . . . . . . . . . . . . . . . . . . . . . . . . . . . . . . . . . . . . .216
Examine the completed application . . . . . . . . . . . . . . . . . . . . . . . . . . . . .216
Create a new document . . . . . . . . . . . . . . . . . . . . . . . . . . . . . . . . . . . . . . .218
Create symbols . . . . . . . . . . . . . . . . . . . . . . . . . . . . . . . . . . . . . . . . . . . . . . .221
Edit a symbol Timeline . . . . . . . . . . . . . . . . . . . . . . . . . . . . . . . . . . . . . . . 225
Add actions to frames . . . . . . . . . . . . . . . . . . . . . . . . . . . . . . . . . . . . . . . . 227
Add labels to frames . . . . . . . . . . . . . . . . . . . . . . . . . . . . . . . . . . . . . . . . . 228
Add motion tweens . . . . . . . . . . . . . . . . . . . . . . . . . . . . . . . . . . . . . . . . . . 229
Edit the main Timeline . . . . . . . . . . . . . . . . . . . . . . . . . . . . . . . . . . . . . . . . .231
Create the border . . . . . . . . . . . . . . . . . . . . . . . . . . . . . . . . . . . . . . . . . . . . 232
Add a symbol. . . . . . . . . . . . . . . . . . . . . . . . . . . . . . . . . . . . . . . . . . . . . . . . 238
Add a text box . . . . . . . . . . . . . . . . . . . . . . . . . . . . . . . . . . . . . . . . . . . . . . . 239
Add the movie clip to the Stage . . . . . . . . . . . . . . . . . . . . . . . . . . . . . . . 242
Add a button component . . . . . . . . . . . . . . . . . . . . . . . . . . . . . . . . . . . . . 243
Add ActionScript code . . . . . . . . . . . . . . . . . . . . . . . . . . . . . . . . . . . . . . . 244
Publish your document . . . . . . . . . . . . . . . . . . . . . . . . . . . . . . . . . . . . . . . 250
Resources . . . . . . . . . . . . . . . . . . . . . . . . . . . . . . . . . . . . . . . . . . . . . . . . . . .251
Chapter 10: Tutorial: Building a Video Player
(Flash Professional only). . . . . . . . . . . . . . . . . . . . . . . . . . . . . . . . 255
Review your task. . . . . . . . . . . . . . . . . . . . . . . . . . . . . . . . . . . . . . . . . . . . . 255
Examine the completed application . . . . . . . . . . . . . . . . . . . . . . . . . . . . 256
Encode a video file . . . . . . . . . . . . . . . . . . . . . . . . . . . . . . . . . . . . . . . . . . . 258
Create a new Flash document. . . . . . . . . . . . . . . . . . . . . . . . . . . . . . . . . 259
Add a media component. . . . . . . . . . . . . . . . . . . . . . . . . . . . . . . . . . . . . . .261
Publish your document . . . . . . . . . . . . . . . . . . . . . . . . . . . . . . . . . . . . . . . 264
The next steps. . . . . . . . . . . . . . . . . . . . . . . . . . . . . . . . . . . . . . . . . . . . . . . 265
PART 4: ASSEMBLING AND DEPLOYING YOUR WEBSITE
Chapter 11: Tutorial: Adding Content to Pages . . . . . . . . . . . . . 269
Locate your files . . . . . . . . . . . . . . . . . . . . . . . . . . . . . . . . . . . . . . . . . . . . . 269
Review your task. . . . . . . . . . . . . . . . . . . . . . . . . . . . . . . . . . . . . . . . . . . . . . 271
Insert images . . . . . . . . . . . . . . . . . . . . . . . . . . . . . . . . . . . . . . . . . . . . . . . . 272
Insert and play a Flash file. . . . . . . . . . . . . . . . . . . . . . . . . . . . . . . . . . . . . 279
Insert Flash Video. . . . . . . . . . . . . . . . . . . . . . . . . . . . . . . . . . . . . . . . . . . . 282
Insert text . . . . . . . . . . . . . . . . . . . . . . . . . . . . . . . . . . . . . . . . . . . . . . . . . . . 285
Create links . . . . . . . . . . . . . . . . . . . . . . . . . . . . . . . . . . . . . . . . . . . . . . . . . 290
Preview your page in a browser . . . . . . . . . . . . . . . . . . . . . . . . . . . . . . . 292
Contents 5
Page 6

Chapter 12: Tutorial: Formatting Your Page with CSS . . . . . . 295
Locate your files. . . . . . . . . . . . . . . . . . . . . . . . . . . . . . . . . . . . . . . . . . . . . .296
Review your task . . . . . . . . . . . . . . . . . . . . . . . . . . . . . . . . . . . . . . . . . . . . .297
Learn about CSS. . . . . . . . . . . . . . . . . . . . . . . . . . . . . . . . . . . . . . . . . . . . .298
Create a new style sheet . . . . . . . . . . . . . . . . . . . . . . . . . . . . . . . . . . . . . 300
Attach a style sheet. . . . . . . . . . . . . . . . . . . . . . . . . . . . . . . . . . . . . . . . . . 302
Explore the CSS Styles panel. . . . . . . . . . . . . . . . . . . . . . . . . . . . . . . . . 305
Create a new CSS rule . . . . . . . . . . . . . . . . . . . . . . . . . . . . . . . . . . . . . . . .307
Apply a class style to text. . . . . . . . . . . . . . . . . . . . . . . . . . . . . . . . . . . . . 309
Format the navigation bar text . . . . . . . . . . . . . . . . . . . . . . . . . . . . . . . . . 310
(Optional) Center the contents of the page . . . . . . . . . . . . . . . . . . . . . . 321
Chapter 13: Tutorial: Publishing Your Site. . . . . . . . . . . . . . . . . 325
Learn about remote sites . . . . . . . . . . . . . . . . . . . . . . . . . . . . . . . . . . . . . .325
Define a remote folder . . . . . . . . . . . . . . . . . . . . . . . . . . . . . . . . . . . . . . . .326
Upload your local files. . . . . . . . . . . . . . . . . . . . . . . . . . . . . . . . . . . . . . . . .329
Troubleshoot the remote folder setup (optional) . . . . . . . . . . . . . . . . 330
Chapter 14: Tutorial: Setting Up Your Website
for Contribute Users . . . . . . . . . . . . . . . . . . . . . . . . . . . . . . . . . . . 333
Review your task . . . . . . . . . . . . . . . . . . . . . . . . . . . . . . . . . . . . . . . . . . . . .334
Learn about website connections and administration. . . . . . . . . . . . .334
Connect to a website as an administrator . . . . . . . . . . . . . . . . . . . . . . .335
Set administrative settings . . . . . . . . . . . . . . . . . . . . . . . . . . . . . . . . . . . .336
Create a user role. . . . . . . . . . . . . . . . . . . . . . . . . . . . . . . . . . . . . . . . . . . . . 337
Edit a role’s settings . . . . . . . . . . . . . . . . . . . . . . . . . . . . . . . . . . . . . . . . . .338
Create a connection key and send it to users . . . . . . . . . . . . . . . . . . . 340
Index . . . . . . . . . . . . . . . . . . . . . . . . . . . . . . . . . . . . . . . . . . . . . . . . 343
6Contents
Page 7

PART 1
Getting Started
In this part, you’ll familiarize yourself with the Macromedia Studio 8
software suite and learn everything you need to do before you begin
building your website.
This part contains the following sections:
Introduction . . . . . . . . . . . . . . . . . . . . . . . . . . . . . . . . . . . . . . . . . . . . . . . . 9
Learning Studio . . . . . . . . . . . . . . . . . . . . . . . . . . . . . . . . . . . . . . . . . . . 17
Studio Basics . . . . . . . . . . . . . . . . . . . . . . . . . . . . . . . . . . . . . . . . . . . . .43
Web Development Workflow . . . . . . . . . . . . . . . . . . . . . . . . . . . . . . 121
1
7
Page 8

Page 9

Introduction
This manual introduces you to Macromedia Studio 8, an integrated web
development suite that includes Macromedia Dreamweaver 8,
Macromedia Flash Professional 8, Macromedia Fireworks 8, Macromedia
Contribute 3.1, and Macromedia FlashPaper 2.
This manual gives an overview of the products, introduces conceptual
information about website development, and shows you how to build a
simple but functional website through a series of tutorials.
The information in this manual is designed for beginners, especially users
who are unfamiliar with one or all of the products in the Studio 8 family.
Intermediate and advanced users can benefit by learning recommended
techniques.
NOTE
This manual is not a comprehensive reference for all of the features of the
Studio products. For in-depth information, see each product’s help
system. To use a product’s help system, in the product’s Help menu,
select Using Product Name.
This chapter contains the following sections:
What you can do with Studio 8. . . . . . . . . . . . . . . . . . . . . . . . . . . . . . 10
Installing Studio 8 . . . . . . . . . . . . . . . . . . . . . . . . . . . . . . . . . . . . . . . . . 14
Activating your Studio products . . . . . . . . . . . . . . . . . . . . . . . . . . . . . 16
Registering your Studio products. . . . . . . . . . . . . . . . . . . . . . . . . . . . 16
9
Page 10

What you can do with Studio 8
Studio 8 includes five Macromedia products: Dreamweaver, Flash,
Fireworks, Contribute, and FlashPaper. This section provides a brief
overview of each product.
This section covers the following topics:
■ “What you can do with Dreamweaver” on page 10
■ “What you can do with Flash” on page 11
■ “What you can do with Fireworks” on page 12
■ “What you can do with Contribute” on page 13
■ “What you can do with FlashPaper” on page 13
What you can do with Dreamweaver
The visual editing features in Macromedia Dreamweaver let you quickly
create web pages without writing a line of code. You can view all your site
elements or assets and drag them from an easy-to-use panel directly into a
document. You can streamline your development workflow by creating and
editing images in Macromedia Fireworks or another graphics application,
and then import them directly into Dreamweaver. Dreamweaver also
provides tools that make it easy to add Macromedia Flash assets to
web pages.
10 Introduction
In addition to drag-and-drop features that help you build web pages,
Dreamweaver provides a full-featured coding environment that includes
code-editing tools such as code coloring, tag completion, a coding toolbar,
and code collapse. Also provided is language reference material about
Cascading Style Sheets (CSS), JavaScript, ColdFusion Markup Language
(CFML), and other languages. Macromedia Roundtrip HTML technology
imports your hand-coded HTML documents without reformatting the
code; you can then reformat code with your preferred formatting style.
Dreamweaver also lets you build dynamic, database-driven web
applications using server technologies such as CFML, ASP.NET, ASP, JSP,
and PHP. If you prefer working with XML data, Dreamweaver provides
tools that let you easily create XSLT pages, attach XML files, and display
XML data on your web pages.
Page 11

Dreamweaver is fully customizable. Using new behaviors, Property
inspectors, and site reports, you can create your own objects and
commands, modify keyboard shortcuts, and even write JavaScript code to
extend Dreamweaver capabilities.
For more information on the resources available for learning Dreamweaver,
see “Getting the most from the Dreamweaver documentation” on page 18.
What you can do with Flash
With the wide array of features in Macromedia Flash, you can create many
types of applications. The following are some examples of the kinds of
applications Flash can generate:
Animations These include banner ads, online greeting cards, and
cartoons. Many other types of Flash applications include animation
elements as well.
Games Many games are built with Flash. Games usually combine the
animation capabilities of Flash with the logic capabilities of ActionScript.
User interfaces Many website designers use Flash to design user
interfaces. The interfaces include simple navigation bars as well as much
more complex interfaces. You can find an example of a navigation bar
created with Flash across the top of the www.macromedia.com home page.
Flexible messaging areas These are areas in web pages that designers
use for displaying information that may change over time. A flexible
messaging area (FMA) on a restaurant website might display information
about each day’s menu specials. You can find an example of an FMA on the
www.macromedia.com home page. The procedures in “Tutorial: Building
Your First Flash Application” on page 215 guide you through the process of
building an FMA.
Rich Internet applications These include a wide spectrum of
applications that provide a rich user interface for displaying and
manipulating remotely stored data over the Internet. A rich Internet
application could be a calendar application, a price-finding application, a
shopping catalog, an education and testing application, or any other
application that presents remote data with a graphically rich interface.
You can find many examples of real projects created by Flash users on the
Macromedia website at www.macromedia.com/cfusion/showcase/.
What you can do with Studio 8 11
Page 12

To build a Flash application, you typically perform the following
basic steps:
1. Decide which basic tasks the application will perform.
2. Create and import media elements, such as images, video, sound,
and text.
3. Arrange the media elements on the Stage and in the Timeline to define
when and how they appear in your application.
4. Apply special effects to media elements.
5. Write ActionScript code to control how the media elements behave,
including how the elements respond to user interactions.
6. Test your application throughout the creation process to determine if it
is working as planned and find any bugs in its construction.
7. Publish your FLA file as a SWF file that can be displayed in a web page
and played back with Flash Player.
Depending on your project and your working style, you may use these
steps in a different order. As you become familiar with Flash and its
workflows, you will discover a style of working that suits you best.
What you can do with Fireworks
You can use Macromedia Fireworks to create, edit, and animate web
graphics, add advanced interactivity, and optimize images in a professional
environment. In Fireworks, you can create and edit bitmap and vector
graphics in a single application. Everything is editable, all the time. And
you can automate the workflow to meet the demands of time-consuming
updates and changes.
Fireworks integrates with other Macromedia products such as
Dreamweaver, Flash, FreeHand, and Director, as well as your other favorite
graphics applications and HTML editors, to provide a truly integrated web
solution. You can easily export Fireworks graphics with HTML and
JavaScript code customized for the HTML editor you’re using.
12 Introduction
Page 13

What you can do with Contribute
As a web developer or designer, you use a website-creation application,
such as Dreamweaver, to build your website. That includes planning,
designing, developing, testing, and publishing the website. When that
work is done, you can use Macromedia Contribute to manage your site,
and to set up users to maintain content on the site.
As a Contribute administrator, you set up Contribute users and help them
use Contribute to maintain the website. You can set folder and user
permissions, which determine who can edit website content and what they
can edit.
Contribute users maintain the website. The Contribute browse-edit-publish
workflow helps users easily find the page to edit, make changes to the
page, and then update the page on the website. The user needs no
experience in HTML or web design. Because Contribute works like a
word processor, the user experience for editing pages is intuitive and
familiar. Users can add or update text, images, tables, links, and Microsoft
Word and Excel documents.
What you can do with FlashPaper
Macromedia FlashPaper lets you easily convert any printable document to
a Flash document (SWF file or PDF file). Flash documents are typically
much smaller than other document types, and you can view them in any
browser that supports Flash, or directly in Flash Player.
You can view Flash documents across platforms, and retain the formatting,
graphics, fonts, special characters, and colors of source documents,
regardless of the application and platform used to create the document. For
example, if you created a Microsoft Excel spreadsheet on a Windows XP
computer, you can use FlashPaper to convert it to a Flash document, and
then send it to a Macintosh user.
Because you can embed a Flash document in a web page, you can publish
file types that most people can’t easily view on the web today, such as
Microsoft Project, Microsoft Visio, and even QuarkXPress and AutoCAD.
When a user opens your web page, the Flash document opens instantly, so
the user can view the file without leaving the web page.
What you can do with Studio 8 13
Page 14

Flash documents also work well as stand-alone files. Anyone who has Flash
Player installed on their computer can view SWF files, and anyone who has
Adobe Acrobat Reader installed on their computer can view PDF files.
NOTE
You cannot edit a Flash document in FlashPaper; if you need to update
the document, make changes to the original document, and then convert it
again to a Flash document.
Installing Studio 8
This section describes the installation procedure for Studio 8. You can
install Studio 8 on Windows and Macintosh systems. Macromedia
recommends that you install the suite of tools in one simple operation, but
you can selectively install individual applications if you choose to do so.
Before you install Studio 8, be sure you meet the minimum system
requirements for each Studio product. For a complete list of product
system requirements and recommendations, visit www.macromedia.com/
go/sysreqs/.
To install Studio 8 on Windows or Macintosh operating
systems:
1. Insert the Studio 8 CD into your computer’s CD-ROM drive to display
the Studio 8 installation screen.
14 Introduction
Page 15

If the screen does not appear, or if you are installing from a network
drive, in Windows, use Windows Explorer to locate the Studio 8
Installer.exe file in the Accessibility directory, double-click the filename,
and follow the installation instructions. On the Macintosh, doubleclick the Install Studio 8 icon on the desktop.
2. Do one of the following:
■ To install the Studio 8 suite of tools, click Install. (Macromedia
recommends this option.)
■ To install only a single application, select it from the screen, and
then click Install.
You can repeat this process to install other products individually.
NOTE
You cannot install FlashPaper as an individual application. When you
select FlashPaper and click Install, the Contribute installer starts.
Contribute automatically installs FlashPaper.
3. Follow the installation instructions.
NOTE
If you are asked for a password, enter your system administrator login
password and click OK.
4. Click Done when the installation process is complete.
The installed Studio 8 applications are now available.
5. In Windows, select Programs > Macromedia from the Windows Start
menu. On the Macintosh, open the Applications folder.
To view extra material provided with Studio 8:
■ Click the Browse CD Contents link at the bottom right of the
installation screen.
To uninstall the applications (Windows):
■ Select Start > Settings > Control Panel > Add/Remove Programs, and
select the application to uninstall.
To uninstall the applications (Macintosh):
■ Drag a product folder from the Application folder to the Trash icon.
Installing Studio 8 15
Page 16

Activating your Studio products
If you are a single-license user, you must activate the license for your
Macromedia products within 30 days of installation. When you activate
one of the Studio 8 products, the other products are also activated.
You can activate the product through an Internet connection
in a
process that takes only a few moments. Product activation does not
require you to submit personal information, just your product
serial number.
NOTE
For more information on product activation, visit www.macromedia.com/
go/activation/.
To activate a product:
1. Double-click the Dreamweaver, Flash, Fireworks, or Contribute
executable icon to start one of the products.
NOTE
You cannot activate FlashPaper.
2. Click Continue to go to the next screen.
3. Enter your serial number in the Macromedia Product Activation
window and click Continue.
After activation, your Studio 8 products are ready to use.
16 Introduction
Registering your Studio products
It’s a good idea to register your Studio 8 products electronically or by mail.
Registration entitles you to additional Macromedia support. When you
register one of the Studio 8 products, the other products are also registered.
When you register, you can sign up to receive up-to-the-minute notices
about upgrades and new Macromedia products. You can also sign up for
timely e-mail notices about product updates and new content that appears
on www.macromedia.com.
To register a product:
■ In any of the Studio 8 products, select Help and then select either the
online or the print registration option.
Page 17

CHAPTER 1
Learning Studio
Macromedia Studio 8 includes a variety of resources to help you learn the
Studio programs quickly. This chapter outlines all of the documentation
resources that are available to you, and provides detailed information about
using the help systems in the Studio products.
This chapter contains the following sections:
Getting the most from the Studio documentation . . . . . . . . . . . . . .17
Using the Studio help systems . . . . . . . . . . . . . . . . . . . . . . . . . . . . . .32
Getting the most from the Studio
documentation
This section describes the documentation in the Studio products. It also
points you to helpful online resources.
1
This section covers the following topics:
■ “Getting the most from the Dreamweaver documentation” on page 18
■ “Getting the most from the Flash documentation” on page 21
■ “Getting the most from the Fireworks documentation” on page 27
■ “Getting the most from the Contribute and FlashPaper
documentation” on page 29
17
Page 18

Getting the most from the Dreamweaver
documentation
Dreamweaver includes a variety of media to help you learn the program
quickly and become proficient in creating web pages. The Dreamweaver
help system includes several documents that help you learn about
Dreamweaver, Dreamweaver Extensibility, and ColdFusion. You can also
consult a number of additional online resources as you learn how to build
web pages.
Accessing the Dreamweaver documentation
The following table summarizes the documentation included in the
Dreamweaver help system.
You can purchase printed versions of select titles. For more information,
see www.macromedia.com/go/buy_books.
Title Description/
Audience
Getting Started
with Dreamweaver
Using
Dreamweaver
Basic introduction to
Dreamweaver
concepts and the
interface, with
detailed beginner
tutorials. Intended for
beginning users, as
well as intermediate
and advanced users
who want to learn
about new features.
Comprehensive
information about all
Dreamweaver
features. Intended for
all Dreamweaver
users.
Where to Find It
• View in Dreamweaver:
Select Help > Getting Started
with Dreamweaver
• View online: http://
livedocs.macromedia.com/
go/livedocs_dreamweaver/
• Get the PDF:
www.macromedia.com/go/
dw_documentation
• View in Dreamweaver:
Select Help > Dreamweaver
Help, or Help > Using
Dreamweaver
• View online: http://
livedocs.macromedia.com/
go/livedocs_dreamweaver/
• Get the PDF:
www.macromedia.com/go/
dw_documentation
18 Learning Studio
Page 19

Title Description/
Audience
Where to Find It
Extending
Dreamweaver
Dreamweaver API
Reference
Description of the
Dreamweaver
framework and
application
programming
interface (API).
Intended for advanced
users who want to
build extensions or
customize the
Dreamweaver
interface.
Descriptions of the
utility API and the
JavaScript API, both
of which let you
perform various
supporting tasks
when developing
Dreamweaver
extensions. Intended
for advanced users
who want to build
extensions or
customize the
Dreamweaver
interface.
• View in Dreamweaver:
Select Help > Extending
Dreamweaver
• View online: http://
livedocs.macromedia.com/
go/livedocs_dreamweaver/
• Get the PDF:
www.macromedia.com/go/
dw_documentation
• View in Dreamweaver:
Select Help > Dreamweaver
API Reference
• View online: http://
livedocs.macromedia.com/
go/livedocs_dreamweaver/
• Get the PDF:
www.macromedia.com/go/
dw_documentation
Getting the most from the Studio documentation 19
Page 20

Title Description/
Audience
Where to Find It
Using ColdFusion A selection of the
most important books
in the ColdFusion
documentation set.
(The full set is
available on
LiveDocs.) Intended
for anyone interested
in ColdFusion, from
beginners to
advanced developers.
Reference HTML, server model,
and other types of
reference manuals,
mainly published by
O’Reilly. Intended for
anyone needing more
information about
coding syntax,
concepts, and so on.
• View in Dreamweaver:
Select Help > Using
ColdFusion
• View online: http://
livedocs.macromedia.com/
go/livedocs_coldfusion/
• Get the PDF:
www.macromedia.com/go/
cf_documentation
• View in Dreamweaver:
Select Help > Reference. For
a full list of manuals, click the
Book pop-up menu in the
Reference panel.
Accessing additional online Dreamweaver
resources
The following table summarizes additional online resources for learning
Dreamweaver.
Resource Description/
Audience
Dreamweaver
Support Center
Dreamweaver
Developer Center
TechNotes, plus
support and problemsolving information for
Dreamweaver users.
Articles and tutorials
to help you improve
your skills and learn
new ones.
Where to Find It
www.macromedia.com/go/
dreamweaver_support
www.macromedia.com/go/
dreamweaver_devcenter
20 Learning Studio
Page 21

Resource Description/
Audience
Where to Find It
Dreamweaver
Documentation
Resource Center
Macromedia
Online Forums
Macromedia
Training
Product manuals in
PDF format, errata,
tutorials, and release
notes.
Discussion and
problem-solving
information by
Dreamweaver users,
technical support
representatives, and
the Dreamweaver
development team.
Courses featuring
hands-on tasks and
real-world scenarios.
www.macromedia.com/go/
dw_documentation
www.macromedia.com/go/
dreamweaver_newsgroup
www.macromedia.com/go/
dreamweaver_training
Getting the most from the Flash
documentation
The Macromedia Flash help system contains a great deal of information
and resources that describe the full range of Flash authoring capabilities
and the ActionScript language. Many online resources are also available to
help you learn Flash. This document is intended to help you navigate these
resources and find the information that is most helpful to you in realizing
your goals with Flash.
Accessing the Flash documentation
The following tables summarize the documents included in the Flash
help system.
You can purchase printed versions of select titles. For more information,
see www.macromedia.com/go/buy_books.
Getting the most from the Studio documentation 21
Page 22

Feature information
Title Description/
Audience
Getting Started
with Flash
Using Flash Comprehensive
Flash 8 Video
Encoder Help
Basic introduction to
Flash concepts and
interface, with a
detailed beginner
tutorial. Intended for
beginning Flash users.
information about all
the features of Flash
except ActionScript.
Intended for all Flash
users.
Complete information
about using the Flash
8 Video Encoder
application.
Intended for Flash
designers creating
video content.
Where to Find It
• View in Flash: Select Help >
Flash Help
• View online:
livedocs.macromedia.com/
go/livedocs_flash
• Get the PDF:
www.macromedia.com/go/
fl_documentation
• View in Flash: Select Help >
Flash Help
• View online:
livedocs.macromedia.com/
go/livedocs_flash
• Get the PDF:
www.macromedia.com/go/
fl_documentation
• View in Flash 8 Video
Encoder: Select Help > Using
Flash Video Encoder
• View online:
livedocs.macromedia.com/
go/livedocs_flash
• Get the PDF:
www.macromedia.com/go/
fl_documentation
22 Learning Studio
Page 23

Tutorials and samples
Title Description/
Audience
Flash Tutorials A collection of step-
by-step tutorials that
teach a variety of both
beginning and
advanced Flash
techniques. Intended
for all Flash users.
Flash Samples A collection of sample
files demonstrating
various Flash features
and techniques, with a
detailed description of
each one. Intended for
all Flash users.
ActionScript
Title Description/
Audience
Where to Find It
• View in Flash: Select Help >
Flash Help
• View online:
livedocs.macromedia.com/
go/livedocs_flash
• Get the PDF:
www.macromedia.com/go/
fl_documentation
• View in Flash: Select Help >
Flash Help
• View online:
livedocs.macromedia.com/
go/livedocs_flash
• Get the PDF:
www.macromedia.com/go/
fl_documentation
Where to Find It
Learning
ActionScript 2.0
in Flash
ActionScript 2.0
Language
Reference
A detailed
introduction to coding
with ActionScript,
including extensive
reusable code
examples. Intended
for beginning and
intermediate
ActionScript users.
Dictionary-style
reference entries for
each term in the
ActionScript
language. Intended for
all ActionScript users.
• View in Flash: Select Help >
Flash Help
• View online:
livedocs.macromedia.com/
go/livedocs_flash
• Get the PDF:
www.macromedia.com/go/
fl_documentation
• View in Flash: Select Help >
Flash Help
• View online:
livedocs.macromedia.com/
go/livedocs_flash
• Get the PDF:
www.macromedia.com/go/
fl_documentation
Getting the most from the Studio documentation 23
Page 24

Components
Title Description/
Audience
Using
Components
Components
Language
Reference
Information about how
to use and customize
components in your
Flash documents.
Intended for all Flash
users.
Dictionary-style
reference entries for
each term in the
ActionScript
component API.
Intended for all Flash
users.
Extending Flash
Title Description/
Audience
Where to Find It
• View in Flash: Select Help >
Flash Help
• View online:
livedocs.macromedia.com/
go/livedocs_flash
• Get the PDF:
www.macromedia.com/go/
fl_documentation
• View in Flash: Select Help >
Flash Help
• View online:
livedocs.macromedia.com/
go/livedocs_flash
• Get the PDF:
www.macromedia.com/go/
fl_documentation
Where to Find It
Extending Flash Information about
adding functionality to
the Flash authoring
tool with JavaScript.
Intended for
JavaScript users and
advanced Flash users.
• View in Flash: Select Help >
Flash Help
• View online:
livedocs.macromedia.com/
go/livedocs_flash
• Get the PDF:
www.macromedia.com/go/
fl_documentation
24 Learning Studio
Page 25

Flash Lite
Title Description/
Audience
Getting Started
with Flash Lite
Developing Flash
Lite Applications
Learning Flash
Lite 1.x
ActionScript
Introductory
information about
Flash Lite workflows
and authoring
considerations.
Intended for mobile
and device developers
and intermediate
Flash users.
Information about
creating Flash content
for mobile phones and
devices. Intended for
mobile and device
developers and
intermediate Flash
users.
Information about
writing ActionScript
for mobile phones and
devices. Intended for
mobile and device
developers and
intermediate Flash
users.
Where to Find It
• View in Flash: Select
Help > Flash Help
• View online:
livedocs.macromedia.com/
go/livedocs_flash
• Get the PDF:
www.macromedia.com/go/
flash_lite_documentation
• View in Flash: Select Help >
Flash Help
• View online:
livedocs.macromedia.com/
go/livedocs_flash
• Get the PDF:
www.macromedia.com/go/
flash_lite_documentation
• View in Flash: Select Help >
Flash Help
• View online:
livedocs.macromedia.com/
go/livedocs_flash
• Get the PDF:
www.macromedia.com/go/
flash_lite_documentation
Flash Lite 1.x
ActionScript
Language
Reference
Dictionary-style
reference entries for
each term in the Flash
Lite 1.x ActionScript
language. Intended for
mobile and device
developers and
intermediate Flash
users.
• View in Flash: Select Help >
Flash Help
• View online:
livedocs.macromedia.com/
go/livedocs_flash
• Get the PDF:
www.macromedia.com/go/
flash_lite_documentation
Getting the most from the Studio documentation 25
Page 26

Accessing additional online Flash resources
The following table summarizes additional online resources for
learning Flash.
Resource Description Where to Find It
Flash Support
Center
Flash Developer
Center
Flash
Documentation
Resource Center
Macromedia
Online Forums
Macromedia
Training
TechNotes, plus
support and problemsolving information.
Articles and tutorials
to help you improve
your skills and learn
new ones.
PDF and HTML
versions of the Flash
documentation.
Discussion and
problem-solving
information by Flash
users, technical
support
representatives, and
the Flash
development team.
Classroom and online
instruction offered by
Macromedia training
partners.
• www.macromedia.com/go/
flash_support
• www.macromedia.com/go/
flash_devcenter
• www.macromedia.com/go/
fl_documentation
• www.macromedia.com/go/
flash_forums
• www.macromedia.com/go/
flash_training
Flash Resource
Manager (English
only)
26 Learning Studio
An alternative viewer
for viewing the Flash
help system outside
the Flash application.
• www.macromedia.com/go/
flash_resource_manager
Page 27

Getting the most from the Fireworks
documentation
Fireworks includes a variety of media to help you learn the program
quickly. The Fireworks help system includes several documents that help
you learn about using and extending Fireworks. You can also consult a
number of additional online resources as you learn to use Fireworks.
Accessing the Fireworks documentation
The following table summarizes the documentation included in the
Fireworks help system.
Title Description/
Audience
Getting Started
with Fireworks
Using Fireworks Comprehensive
Extending
Fireworks
Basic introduction to
Fireworks concepts
and interface, with a
detailed beginner
tutorials. Intended for
beginning Fireworks
users.
information about all
the features of
Fireworks. Intended
for all Fireworks users.
Information about
adding functionality to
Fireworks with
JavaScript. Intended
for JavaScript users
and advanced
Fireworks users.
Where to Find It
• View in Fireworks: Select
Help > Getting Started with
Fireworks
• View online:
www.macromedia.com/go/
livedocs_fireworks
• Get the PDF:
www.macromedia.com/go/
fireworks_documentation
• View in Fireworks: Select
Help > Using Fireworks
• View online:
www.macromedia.com/go/
livedocs_fireworks
• Get the PDF:
www.macromedia.com/go/
fireworks_documentation
• View in Fireworks: Select
Help > Extending Fireworks
• View online:
www.macromedia.com/go/
livedocs_fireworks
• Get the PDF:
www.macromedia.com/go/
fireworks_documentation
Getting the most from the Studio documentation 27
Page 28

Accessing additional online Fireworks resources
The following table summarizes additional online resources for learning
Fireworks.
Resource Description Where to Find It
Fireworks
Documentation
Resource Center
Fireworks
Developer Center
Fireworks
Support Center
Fireworks Forum Discussion and
Macromedia
Training
Product manuals,
errata, tutorials, and
release notes.
Articles and tutorials
to help you improve
your skills and learn
new ones.
TechNotes, plus
support and problemsolving information for
Fireworks users.
problem-solving
information by
Fireworks users,
technical support
representatives, and
the Fireworks
development team.
Courses featuring
hands-on tasks and
real-world scenarios.
• www.macromedia.com/go/
fw_documentation
• www.macromedia.com/go/
fireworks_devnet
• www.macromedia.com/go/
fireworks_support
• View in a news reader: news:/
/forums.macromedia.com/
macromedia.fireworks
• View in a browser:
www.macromedia.com/go/
fireworks_forum
• www.macromedia.com/go/
fireworks_training
28 Learning Studio
Page 29

Getting the most from the Contribute and
FlashPaper documentation
Contribute and FlashPaper include a variety of media to help you learn the
programs quickly. Both products include several documents that help you
learn about using Contribute and FlashPaper. You can also consult a
number of additional online resources as you learn how to use Contribute
and FlashPaper.
Accessing the Contribute and FlashPaper
documentation
The following table summarizes the documentation included in
Contribute and FlashPaper.
Title Description/
Audience
Contribute Quick
Start
Deploying
Contribute
Basic introduction to
installing Contribute,
connecting to a
website, and
completing some
simple tasks quickly.
Intended for
beginning Contribute
users.
Overview of what a
system administrator
should know when
deploying Contribute
within an organization.
Topics include setting
network and server
permissions,
configuring Contribute
to work with your
website, managing
users, and
understanding site
structure. Intended for
Contribute
administrators.
Where to Find It
• In Contribute: Select Help >
Quick Start Guide
• View the FlashPaper format:
www.macromedia.com/go/
contribute_docs_en
• View online:
livedocs.macromedia.com
• Get the PDF:
www.macromedia.com/go/
contribute_docs_en
• In Contribute: Select Help >
Macromedia Contribute Help,
and open Administering
Contribute.
Getting the most from the Studio documentation 29
Page 30

Title Description/
Audience
Where to Find It
Using and
Administering
Contribute
How Do I panel Quick step-by-step
Contribute
tutorial
Comprehensive
information about the
Contribute features.
Intended for all
Contribute users and
administrators.
instructions on
completing some
common Contribute
tasks. Intended for
Contribute users and
administrators.
Step-by-step tutorial
that guides you
through
representative
Contribute tasks. In
the tutorial you’ll
update the web pages
of a sample website
and quickly become
familiar with
Contribute features.
Intended for
beginning Contribute
users.
• In Contribute: Select Help >
Macromedia Contribute Help
• View online:
livedocs.macromedia.com
• Get the PDF:
www.macromedia.com/go/
contribute_docs_en
• In Contribute: Select View >
Sidebar
• In Contribute: Select Help >
Contribute Tutorial
Using
FlashPaper
30 Learning Studio
Comprehensive
information about all
FlashPaper features.
Intended for all
FlashPaper users.
• In Contribute: Select Help >
FlashPaper Help
• www.macromedia.com/go/
flashpaper_documentation
Page 31

Accessing additional online Contribute and
FlashPaper resources
The following table summarizes additional online resources for learning
Contribute and FlashPaper.
Resource Description Where to Find It
Contribute
Documentation
Resource Center
Contribute
Developer Center
Contribute
Support Center
Contribute Forum Discussion and
Macromedia
Training
Product manuals,
errata, tutorials, and
release notes.
Articles and tutorials
to help you improve
your skills and learn
new ones.
TechNotes, plus
support and problemsolving information for
Contribute users.
problem-solving
information by
Contribute users,
technical support
representatives, and
the Contribute
development team.
Courses featuring
hands-on tasks and
real-world scenarios.
• www.macromedia.com/go/
contribute_docs_en
• www.macromedia.com/go/
contribute_devcenter
• www.macromedia.com/go/
contribute_support
• www.macromedia.com/go/
contribute_forums
• www.macromedia.com/go/
contribute_training
FlashPaper
Documentation
Resource Center
FlashPaper
Support Center
Product manuals,
errata, tutorials, and
release notes.
TechNotes, plus
support and problemsolving information for
FlashPaper users.
• www.macromedia.com/go/
flashpaper_documentation
• www.macromedia.com/go/
flashpaper_support
Getting the most from the Studio documentation 31
Page 32

Resource Description Where to Find It
FlashPaper
Forum
Discussion and
problem-solving
information by
FlashPaper users,
technical support
representatives, and
the FlashPaper
development team.
• www.macromedia.com/go/
flashpaper_forums
Using the Studio help systems
The online help systems for the Studio products are available in the Help
menu of each product. Each help system provides detailed information on
all tasks you can perform with the Studio products.
This section describes how to use the Studio help systems to find the
information you need.
NOTE
To see a list of documents available in Studio Help, see “Getting the most
from the Studio documentation” on page 17.
This section covers the following topics:
■ “Using the Dreamweaver, Fireworks, Contribute, and FlashPaper help
systems” on page 32
■ “Using the Flash help system” on page 35
Using the Dreamweaver, Fireworks,
Contribute, and FlashPaper help systems
The online help systems available in the Help menu for each Studio
product provide detailed information on all tasks you can perform with the
product. The Dreamweaver, Fireworks, Contribute, and FlashPaper help
systems all work the same way.
NOTE
For information about using the Flash help system, see “Using the Flash
help system” on page 35.
32 Learning Studio
Page 33

This section covers the following topics:
■ “Opening in-product help” on page 33
■ “Searching help” on page 33
■ “Using the help index” on page 34
■ “Using the Start page” on page 34
■ “Printing the documentation” on page 35
■ “Purchasing printed documentation” on page 35
■ “Discussing the Studio documentation with LiveDocs” on page 35
Opening in-product help
You can access in-product help while you work in the product.
To open Dreamweaver Help:
■ Select Help > Dreamweaver Help.
To open Fireworks Help:
■ Select Help > Fireworks Help.
To open Contribute Help:
■ Select Help > Macromedia Contribute Help.
To open FlashPaper Help:
■ Select Help > FlashPaper Help.
Searching help
You can do a full text search in the help systems.
To search in-product help (Windows):
1. In the help system, click the Search tab.
2. Type a word or phrase in the text box, and then click List Topics.
3. Double-click a topic in the list of results to display it.
To search in-product help (Macintosh):
1. In the help sys tem, type a word or ph rase in the Ask a Question text box,
and then press Enter.
2. Double-click a topic in the list of results to display it.
TIP
To search for a
specific phrase,
enclose it in double
quotes.
Using the Studio help systems 33
Page 34

Using the help index
You can find information quickly in the help index.
To use the index (Windows):
1. In the help system, click the Index tab.
2. Scroll to an index entry in the alphabetized list and double-click it to
display the indexed information.
TIP
You can start typing
a keyword in the text
box to quickly scroll
to an index entry.
To use the index (Macintosh):
1. In the help system, click the Index link in the table of contents.
2. Click a letter and scroll to an index entry in the list.
3. Click a number beside the entry to display the indexed information.
Changing the font size
You can change the size of the font used by the help system.
To change the font size in the Windows help viewer:
1. Open Internet Explorer.
The font size in the Windows help viewer is set in Internet Explorer.
2. Select View > Text Size, and then select a size.
To change the font size in the Macintosh help viewer:
■ In help, select Edit > Decrease Font Size, or Edit > Increase Font Size.
Using the Start page
When you start a Studio product without opening a document, the Start
page appears in the work environment. The Start page gives you quick
access to tutorials, recent files, and the product Exchange, where you can
add new capabilities to some features. You can use the Start page much like
a web page. To use any of the features you see, you simply click them.
To disable the Start page:
1. Run a Studio product without opening a document.
2. Click Don’t Show Again.
34 Learning Studio
The Start page is displayed.
Page 35

Printing the documentation
The Studio documentation is available in PDF format on the Macromedia
website at www.macromedia.com/go/st_documentation.
You can print all or part of the PDF on your own printer, or you can take
the PDF to a copy shop to have it printed.
Purchasing printed documentation
You can purchase printed versions of select Studio titles. For more
information, see www.macromedia.com/go/buy_books.
Discussing the Studio documentation with
LiveDocs
The documentation is also available online in LiveDocs format. The
LiveDocs version of help looks very similar to the in-product help, but it
allows you to comment on the contents of individual help pages. You can
add useful information on a specific topic based on your own experience,
or solicit advice from fellow users.
Using the Flash help system
The Flash online help system available in the Help menu provides detailed
information on all tasks you can perform with Flash. The Flash help
system works differently than the help systems in Dreamweaver, Fireworks,
Contribute, and FlashPaper.
NOTE
For information about using the help systems for the other Studio
products, see “Using the Dreamweaver, Fireworks, Contribute, and
FlashPaper help systems” on page 32.
Using the Studio help systems 35
Page 36
This section covers the following topics:
■ “Opening the Help panel” on page 36
■ “Searching the help system” on page 36
■ “Using context-sensitive help” on page 38
■ “Printing the Flash documentation” on page 39
■ “Purchasing printed documentation” on page 39
■ “Discussing the Flash documentation with LiveDocs” on page 39
■ “Controlling the appearance of the Help panel” on page 40
■ “Getting updates to Flash Help” on page 41
Opening the Help panel
The Flash Help panel contains the full set of user-assistance information
provided with the Flash application.
To access help and the table of contents:
1. To open the Help panel, select Help > Flash Help or press F.
2. If the table of contents is not visible, click the Table of Contents button
to display the Table of Contents pane.
A list of help books is displayed.
3. Click a book title to open it and display its topics.
4. Click a topic title to display it.
NOTE
The topic hierarchy for the current topic is displayed at the top of each
help page.
Searching the help system
Flash Basic 8 and Flash Professional 8 provide thorough search capabilities
that help you easily find the information you need. In the Flash Help
panel, you can search for help pages that contain specific words or phrases.
You can search Flash Help in the following ways:
Single-word searches return a list of help pages that contain the specified
word. For example, you might type timeline in the search text box. This
search returns a list of help pages that contain the word timeline or
Timeline.
36 Learning Studio
Page 37

Multiple-word searches return a list of help pages that each contain all of
the search terms you enter. In this case the word and is implicit in the
search. For example, you might type movie clip in the search text box. This
action returns a list of pages that contain both movie and clip—that is, clip
movie, movie clip, or movie...clip, and so on.
Explicit AND/OR searches use the words and or or to refine the search
results. For example, you might type timeline and keyframe or tween in
the search text box. This action returns a list of help pages that contain
timeline and keyframe and help pages that contain timeline and tween.
Exact phrase searches allow you to use quotation marks to return only
pages that contain the specific phrase you enter. For example, you might
type “motion tween” in the search text box. This action returns a list of
help pages that contain the phrase motion tween, but not pages that contain
separate instances of motion and tween.
Exact phrase with explicit AND/OR searches allow you to use a
combination of quotation marks and the words and or or to further refine
your searches. For example, you might type “motion tween” and
“ActionScript” in the search field. This action returns a list of pages that
contain both the phrase motion tween and the word ActionScript.
To search for a word or phrase in the Help panel:
1. In the Category menu, select a category of books to search.
To search all of the books, select All Books.
2. Enter a word or phrase in the text box, and then click Search.
A list of help topics that contain the word or phrase is displayed,
organized by book.
3. Click a help topic to select it from the list.
The topic appears in the Table of Contents pane of the Help panel.
The table of contents path to the topic appears at the top of each
help page.
NOTE
Click Clear to return to the Table of Contents view.
To find reference information about a specific ActionScript term, use the
ActionScript 2.0 Language Reference, or use Search.
Using the Studio help systems 37
Page 38

To search for a word or phrase within a specific help page:
1. Locate the help page you want to search.
2. Click in the help page so it has the focus.
3. Press Ctrl+F (Windows) or Command+F (Macintosh).
4. In the Find dialog box, enter the word or phrase you want to search for
and click Find Next.
If the word or phrase exists in the current help page, it is highlighted in
the Help panel.
Using context-sensitive help
The Help panel contains context-sensitive reference information that you
can access from the Actions panel. By clicking an ActionScript term in the
Actions panel, you can display help information about that term.
To access context-sensitive help from the Actions panel:
1. To select an item for reference, do any one of the following:
■ Select an item in the Actions panel toolbox pane (on the left side of
the Actions panel).
■ Select an ActionScript term in the Actions panel in the Script pane.
■ Place the insertion point before an ActionScript term in the Actions
panel in the Script pane.
2. To open the Help panel reference page for the selected item, do one of
the following:
■ Press F1.
■ Right-click the item and select View Help.
■ Click Reference above the Script pane.
To access context-sensitive help from a Flash panel:
■ Click the pop-up menu in the panel and select Help.
To access context-sensitive help from a dialog box:
■ Click the Help icon in the dialog box.
NOTE
The Flash Tutorials book in the Help panel contains many tutorials that
introduce you to the features of Flash. These tutorials allow you to practice
on isolated examples. If you are new to Flash, or if you have used only a
limited set of Flash features, start with the Flash Tutorials book.
38 Learning Studio
Page 39

Printing the Flash documentation
Printable versions of each of the books in the Flash help system are
available on the Macromedia website. You can also print individual help
pages from within the Flash Help panel.
To print an individual book or chapter from the Macromedia
website:
1. Go to the Macromedia Flash Documentation page at
www.macromedia.com/go/fl_documentation/.
2. Locate the PDF file for the book you wish to print.
3. Download the PDF file.
4. Open the PDF file in Adobe Reader.
5. Print the file, or a single chapter from the file if you prefer.
The Flash End User License Agreement allows you to print the
documentation PDFs at retail copy stores if you prefer.
To print an individual help page:
1. Click Print in the Help panel toolbar.
2. In the Print dialog box, select the printer and other printing options,
and then click Print.
You can also purchase the printed manuals at the Macromedia Online
Store at www.macromedia.com/go/books_and_training.
Purchasing printed documentation
To purchase printed versions of the Flash documentation, go to
www.macromedia.com/go/books.
Discussing the Flash documentation with
LiveDocs
In addition to accessing Flash documentation in the Flash Help panel, you
can get the same documentation online in the LiveDocs format. To find
that equivalent page on the LiveDocs website, you simply click the View
Comments on LiveDocs link at the bottom of a help page in the Help
panel. The Flash LiveDocs are available at livedocs.macromedia.com/go/
livedocs_flash.
Using the Studio help systems 39
Page 40

One of the advantages of LiveDocs is the ability to see comments that
clarify the documentation, or correct any errata or issues that arise after a
software release. LiveDocs is not the place to ask for help requests, such as
asking questions about your code that doesn’t work, or how to complete a
specific task. LiveDocs is the correct place to provide feedback about the
documentation (for example, if you notice a sentence or paragraph that
could be clarified).
When you click the link to add a comment on LiveDocs, you see several
points about the kinds of comments that are acceptable on the system.
Please read these guidelines closely, or your comment might be removed
from the website if it does not conform to the guidelines.
If you have a question about Flash, please ask it on the Macromedia Flash
web forums: www.macromedia.com/go/flash_forums. The web forums are
the best place to ask questions, because many Macromedia employees,
Team Macromedia volunteers, Macromedia user group managers and
members, and even technical writers monitor these forums.
Controlling the appearance of the Help panel
You can control how the Help panel appears in Flash.
Arranging the Help panel in the Flash workspace
You can arrange the Help panel position in the workspace to optimize its
usability. You can easily control the size of the display area, and where and
when the Help panel is displayed. For more details about working with
panels, see “Using panels and the Property inspector” on page 81.
To arrange the Help panel in a docked position:
1. Dock the Help panel in the desired position.
2. Expand the Help panel if it is not already expanded.
3. Drag the split bar between the panel or panel group and the Document
window so you can see the Stage area.
4. Press F1 to collapse and expand the Help panel as needed.
40 Learning Studio
Page 41

To arrange the Help panel in an undocked (floating) position:
1. Undock the Help panel to the desired position.
2. Expand the Help panel if it is not already expanded.
3. Resize the panel window.
4. Press F1 to close or open the Help panel as needed.
Changing the size of text displayed in the Help panel
If you are using a laptop, you may find it useful to change the text in the
Help panel to a larger size. You can change the size of the text in the Help
panel by changing the size of the text in your web browser.
To use your browser to change the size of the text displayed in
the Help panel:
■ Open your browser and edit the preferences to change the size of text in
the browser to a larger size. You must restart Flash for the change to
take effect.
Getting updates to Flash Help
The Update feature in Flash allows you to update your help system with
new and revised documentation, including procedures and lessons. You can
click the Update button to see if new information is available.
To update Flash Help:
1. Verify that you’re connected to the Internet.
2. Click Update in the Help panel toolbar and follow the instructions to
download the help system update.
When a help update is released, Macromedia creates and posts a new PDF
of each updated book on the Macromedia documentation page at
www.macromedia.com/go/fl_documentation/.
TIP
In Windows, you can
change the size of
the text in the Help
panel by clicking in
the Table of
Contents pane of the
Help panel, pressing
Control, and
scrolling the mouse
wheel. This also
changes the size of
text in your web
browser.
Using the Studio help systems 41
Page 42

42 Learning Studio
Page 43

CHAPTER 2
Studio Basics
Macromedia Studio offers an integrated workspace that allows for seamless
transition between products. You will find that panels, menus, selection
icons, and other user interface elements are similar across products and are
easy to use. As you move between products, the consistent and familiar
workspace helps you increase productivity while decreasing the amount of
time you need to spend learning a new product.
This chapter contains the following sections:
Dreamweaver basics . . . . . . . . . . . . . . . . . . . . . . . . . . . . . . . . . . . . . . .43
Flash basics. . . . . . . . . . . . . . . . . . . . . . . . . . . . . . . . . . . . . . . . . . . . . . . 57
Fireworks basics. . . . . . . . . . . . . . . . . . . . . . . . . . . . . . . . . . . . . . . . . . 102
Contribute basics . . . . . . . . . . . . . . . . . . . . . . . . . . . . . . . . . . . . . . . . . .112
FlashPaper basics . . . . . . . . . . . . . . . . . . . . . . . . . . . . . . . . . . . . . . . . .118
Dreamweaver basics
2
To get the most out of your Dreamweaver experience, you should
understand the basic elements of the Dreamweaver workspace. This section
gives you an overview of Dreamweaver files and introduces you to the most
important and commonly used workspace elements.
This section contains the following topics:
■ “About Dreamweaver files” on page 44
■ “Getting to know the Dreamweaver workspace” on page 45
43
Page 44

About Dreamweaver files
You can work with a variety of file types in Dreamweaver. The primary
kind of file you will work with is the HTML file. HTML files—or
Hypertext Markup Language files—contain the tag-based language
responsible for displaying a web page in a browser. You can save HTML
files with either the .html or the .htm extension. Dreamweaver saves files
using the .html extension by default.
Following are some of the other common file types you might use when
working in Dreamweaver:
CSS, or Cascading Style Sheet files, have a .css extension. They are used to
format HTML content and control the positioning of various page
elements. For more information on working with these types of files, see
“Understanding Cascading Style Sheets” in Using Dreamweaver.
GIF, or Graphics Interchange Format files, have a .gif extension. GIF
format is a popular web graphic format for cartoons, logos, graphics with
transparent areas, and animations. GIF files contain a maximum of
256 colors.
JPEG, or Joint Photographic Experts Group files (named after the
organization that created the format), have a .jpg extension and are usually
photographs or high-color images. The JPEG format is best for digital or
scanned photographs, images using textures, images with gradient color
transitions, and any images that require more than 256 colors.
44 Studio Basics
XML, or Extensible Markup Language files, have a .xml extension. They
contain data in a raw form that can be formatted using XSL (Extensible
Stylesheet Language). For more information on working with these types
of files, see Chapter 36, “Displaying XML Data in Web Pages,” in
Using Dreamweaver.
XSL, or Extensible Stylesheet Language files, have a .xsl or .xslt extension.
They are used to style XML data that you want to display on a web page.
For more information on working with these types of files, see Chapter 36,
“Displaying XML Data in Web Pages,” in Using Dreamweaver.
CFML, or ColdFusion Markup Language files, have a .cfm extension.
They are used to process dynamic pages. For more information on working
with these types of files, see Chapter 40, “Building ColdFusion
Applications Rapidly,” in Using Dreamweaver.
Page 45

ASPX, or ASP.NET files, have a .aspx extension. They are used to process
dynamic pages. For more information on working with these types of files,
see Chapter 41, “Building ASP.NET Applications Rapidly,” in
Using Dreamweaver.
PHP, or PHP: Hypertext Preprocessor files, have a .php extension. They
are used to process dynamic pages. For more information on working with
these types of files, see Chapter 43, “Building PHP Applications Rapidly,”
in Using Dreamweaver.
Getting to know the Dreamweaver
workspace
The Dreamweaver workspace lets you view documents and object
properties. The workspace also places many of the most common
operations in toolbars so that you can quickly make changes to your
documents.
This section is designed to give you an overview of the Dreamweaver 8
workspace. For more comprehensive information about any of the
workspace elements introduced in this section, see Chapter 1, “Exploring
the Workspace,” in Using Dreamweaver.
This section contains the following topics:
■ “The workspace layout” on page 46
■ “The Document window” on page 48
■ “The Document toolbar” on page 49
■ “The status bar” on page 50
■ “The Insert bar” on page 51
■ “The Coding toolbar” on page 53
■ “The Property inspector” on page 54
■ “The Files panel” on page 55
■ “The CSS Styles panel” on page 56
Dreamweaver basics 45
Page 46

The workspace layout
In Windows, Dreamweaver provides an all-in-one-window integrated
layout. In the integrated workspace, all windows and panels are integrated
into a single larger application window.
Document toolbarInsert bar Document window Panel groups
46 Studio Basics
Files panelProperty inspectorTag selector
NOTE
The Windows workspace also has a Coder option, which docks the panel
groups on the left side and displays the Document window in Code view
by default. For more information, see “Using the coder-oriented
workspace (Windows only)” in Using Dreamweaver. To use this option,
see “Choosing the workspace layout (Windows only)” in
Using Dreamweaver.
Page 47

On the Macintosh, Dreamweaver can display multiple documents in a
single window with tabs that identify each document. Dreamweaver can
also appear as part of a floating workspace in which each document appears
in its own individual window. Panel groups are initially docked together,
but can be undocked into their own windows. Windows “snap”
automatically to each other, to the sides of the screen, and to the
Document window as you drag or resize them.
Document toolbar
Insert bar
Document window
Panel groups
Tag selector
Property inspector
You can switch between different layouts both in Windows and on the
Macintosh. For more information, see “Choosing the workspace layout
(Windows only)” and “Displaying tabbed documents (Macintosh)” in
Using Dreamweaver.
Files panel
Dreamweaver basics 47
Page 48

The Document window
The Document window shows the current document. You can select any of
the following views:
Design view is a design environment for visual page layout, visual editing,
and rapid application development. In this view, Dreamweaver displays a
fully editable, visual representation of the document, similar to what you
would see viewing the page in a browser.
Code view is a hand-coding environment for writing and editing HTML,
JavaScript, server-language code—such as PHP or ColdFusion Markup
Language (CFML)—and any other kind of code. For more information,
see Chapter 20, “Coding in Dreamweaver,” in Using Dreamweaver.
Code and Design view lets you view both Code view and Design view for
the same document in a single window.
When the Document window has a title bar, the title bar displays the page
title and, in parentheses, the file’s path and filename. After the filename,
Dreamweaver displays an asterisk if you’ve made changes that you haven’t
saved yet.
When the Document window is maximized in the integrated workspace
layout (Windows only), it has no title bar; in that case the page title and
the file’s path and filename appear in the title bar of the main workspace
window.
Additionally, when a Document window is maximized, tabs appear at the
top of the Document window area showing the filenames of all open
documents. To switch to a document, click its tab.
For more information about using the Document window, see Chapter 1,
“Exploring the Workspace,” in Using Dreamweaver.
48 Studio Basics
Page 49
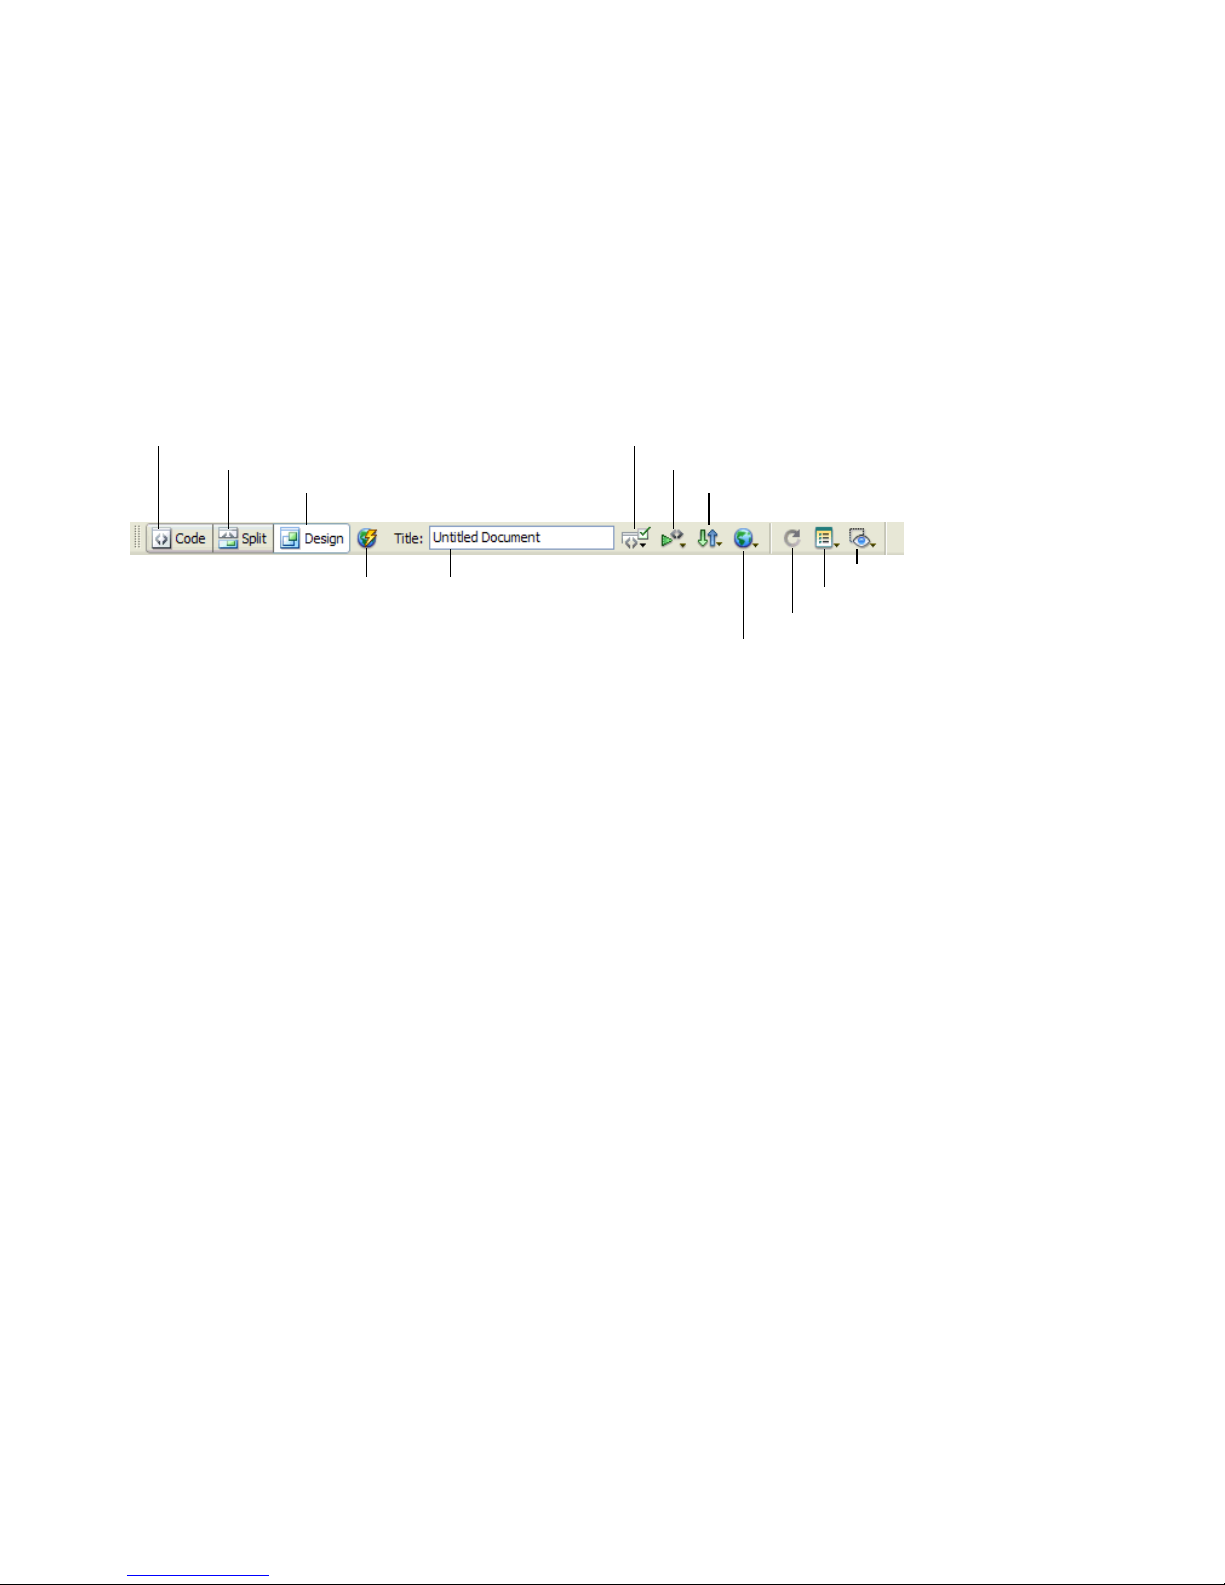
The Document toolbar
The Document toolbar contains buttons that let you toggle between
different views of your document quickly: Code, Design, and a split view
that shows both Code and Design views.
The toolbar also contains some common commands and options related to
viewing the document and transferring it between the local and
remote sites.
Show Code View
Show Code and Design Views
Server Debug
Show Design View
Document Title
No Browser/Check Errors
Validate Markup
File Management
Refresh Design View
Preview/Debug in Browser
The following options appear in the Document toolbar:
Show Code View displays only the Code view in the Document window.
Show Code and Design Views displays Code view in part of the
Document window and Design view in another part. When you select this
combined view, the option Design View on Top becomes available in the
View Options menu. Use this option to specify which view appears at the
top of your Document window.
Show Design View displays only the Design view in the Document
window.
Server Debug displays a report to help you debug the current ColdFusion
page. The report includes errors, if any, in your page.
Visual Aids
View Options
Document Title allows you to enter a title for your document, to be
displayed in the browser’s title bar. If your document already has a title, it
appears in this field.
No Browser/Check Errors enables you to check cross-browser
compatibility.
Validate Markup lets you validate the current document or a selected tag.
Dreamweaver basics 49
Page 50

File Management displays the File Management pop-up menu.
Preview/Debug in Browser allows you to preview or debug your
document in a browser. Select a browser from the pop-up menu.
Refresh Design View refreshes the document’s Design view after you
make changes in Code view. Changes you make in Code view don’t
automatically appear in Design view until you perform certain actions,
such as saving the file or clicking this button.
View Options allows you to set options for Code view and Design view,
including which view should appear above the other. Options in the menu
are for the current view: Design view, Code view, or both.
Visual Aids lets you use different visual aids to design your pages.
For more information about using the Document toolbar, see Chapter 1,
“Exploring the Workspace,” in Using Dreamweaver.
The status bar
The status bar at the bottom of the Document window provides additional
information about the document you are creating.
Document size and
estimated download time
Tag selector
Set magnification
Zoom tool
Hand tool
Select tool
Window Size pop-up menu
The tag selector shows the hierarchy of tags surrounding the current
selection. Click any tag in the hierarchy to select that tag and all its
contents. Click
the
class or id attributes for a tag in the tag selector, right-click
<body> to select the entire body of the document. To set
(Windows) or Control-click (Macintosh) the tag and select a class or ID
from the context menu. The tag selector is the preferable method for
selecting tags because it ensures that you are always selecting the tag
with accuracy.
50 Studio Basics
Page 51

The Hand tool lets you click the document and drag it in the Document
window. Click the Select tool to disable the Hand tool.
The Zoom tool and Set Magnification pop-up menu let you set a
magnification level for your document. For more information, see
“Zooming in and out” in Using Dreamweaver.
The Window Size pop-up menu (visible in Design view only) lets you
resize the Document window to predetermined or custom dimensions.
For more information, see “Resizing the Document window” in
Using Dreamweaver.
To the right of the Window Size pop-up menu are the estimated document
size and estimated download time for the page, including all dependent
files such as images and other media files. For more information, see
“Setting download time and size preferences” in Using Dreamweaver.
For more information about using the status bar, see Chapter 1, “Exploring
the Workspace,” in Using Dreamweaver.
The Insert bar
The Insert bar contains buttons for creating and inserting objects such as
tables, layers, and images. When you roll the pointer over a button, a
tooltip appears with the name of the button.
The buttons are organized into several categories, which you can switch on
the left side of the Insert bar. Additional categories appear when the current
document contains server code, such as ASP or CFML documents. When
you start Dreamweaver, the category you were last working in opens.
Some categories have buttons with pop-up menus. When you select an
option from a pop-up menu, it becomes the default action for the button.
For example, if you select Image Placeholder from the Image button’s popup menu, the next time you click the Image button, Dreamweaver inserts
an image placeholder. Anytime you select a new option from the pop-up
menu, the default action for the button changes.
Dreamweaver basics 51
Page 52

The Insert bar is organized in the following categories:
The Common category enables you to create and insert the most
commonly used objects, such as images and tables.
The Layout category enables you to insert tables, div tags, layers, and
frames. You can also you choose among three views of tables: Standard
(default), Expanded Tables, and Layout. When Layout mode is selected,
you can use the Dreamweaver layout tools: Draw Layout Cell and Draw
Layout Table.
The Forms category contains buttons for creating forms and inserting
form elements.
The Text category enables you to insert a variety of text- and list-
formatting tags, such as
The HTML category enables you to insert HTML tags for horizontal
b, em, p, h1, and ul.
rules, head content, tables, frames, and scripts.
Server-code categories are available only for pages that use a particular
server language, including ASP, ASP.NET, CFML Basic, CFML Flow,
CFML Advanced, JSP, and PHP. Each of these categories provides servercode objects that you can insert in Code view.
The Application category enables you to insert dynamic elements such as
recordsets, repeated regions, and record insertion and update forms.
The Flash elements category enables you to insert Macromedia
Flash elements.
The Favorites category enables you to group and organize the Insert bar
buttons you use the most in one common place.
For more information about using the Insert bar, see Chapter 1, “Exploring
the Workspace,” in Using Dreamweaver.
52 Studio Basics
Page 53

The Coding toolbar
The Coding toolbar contains buttons that let you perform many standard
coding operations, such as collapsing and expanding code selections,
highlighting invalid code, applying and removing comments, indenting
code, and inserting recently used code snippets. The Coding toolbar is
visible only in Code view and appears vertically on the left side of the
Document window.
You cannot undock or move the Coding toolbar, but you can hide it. For
more information, see “Displaying toolbars” in Using Dreamweaver.
For more information about using the Coding toolbar, see “Inserting code
quickly with the Coding toolbar” in Using Dreamweaver.
Dreamweaver basics 53
Page 54
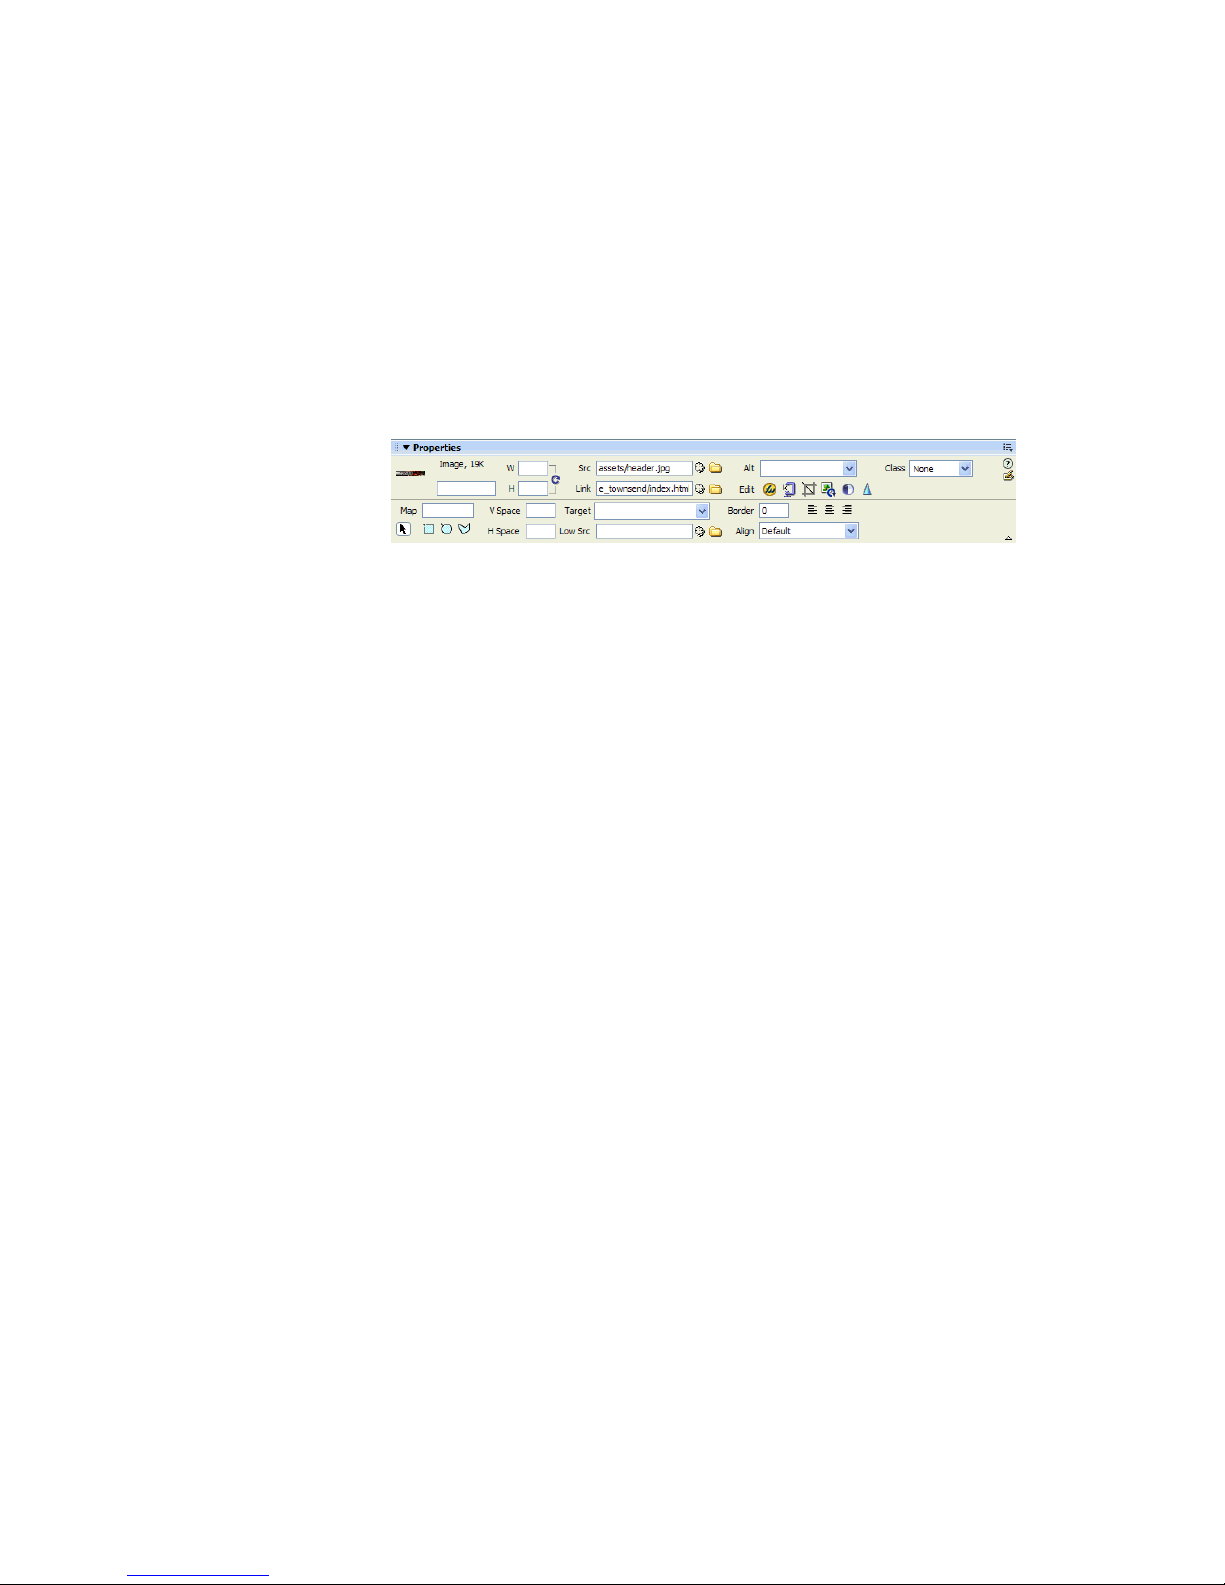
The Property inspector
The Property inspector lets you examine and edit the most common
properties for the currently selected page element, such as text or an
inserted object. The contents of the Property inspector vary depending on
the element selected. For example, if you select an image on your page, the
Property inspector changes to show properties for the image (such as the
file path to the image, the width and height of the image, the border
around the image, if any, and so on).
The Property inspector is at the bottom of the workspace by default, but
you can dock it at the top of the workspace if you want. Or, you can make
it a floating panel in the workspace. For more information about moving
the Property inspector, see “Docking and undocking panels and panel
groups” in Using Dreamweaver.
For more information about using the Property inspector, see “Using the
Property inspector” in Using Dreamweaver.
54 Studio Basics
Page 55

The Files panel
You use the Files panel to view and manage the files in your
Dreamweaver site.
When you view sites, files, or folders in the Files panel, you can change the
size of the viewing area, as well as expand or collapse the Files panel. When
the Files panel is collapsed it displays the contents of the local site, the
remote site, or the testing server as a list of files. When expanded, it
displays the local site and either the remote site or testing server. The Files
panel can also display a visual site map of the local site.
For Dreamweaver sites, you can also customize the Files panel by changing
the view—either your local or remote site—that appears by default in the
collapsed panel.
For more information about using the Files panel to manage your site, see
Chapter 4, “Managing Your Files,” in Using Dreamweaver.
Dreamweaver basics 55
Page 56

The CSS Styles panel
The CSS Styles panel lets you track the CSS rules and properties affecting a
currently selected page element (Current mode), or the rules and properties
affecting an entire document (All mode). A toggle button at the top of the
CSS Styles panel lets you switch between the two modes. The CSS Styles
panel also lets you modify CSS properties in both All and Current mode.
You can resize any of the panes by dragging the borders between the panes.
In Current mode, the CSS Styles panel displays three panes: a Summary for
Selection pane that displays the CSS properties for the current selection in
the document, a Rules pane that displays the location of selected properties
(or a cascade of rules for the selected tag, depending on your selection), and
a Properties pane that lets you edit CSS properties for the rule defining
the selection.
56 Studio Basics
Page 57

In All mode, the CSS Styles panel displays two panes: an All Rules pane
(on top), and a Properties pane (on bottom). The All Rules pane displays a
list of rules defined in the current document as well as all rules defined in
style sheets attached to the current document. The Properties pane lets you
edit CSS properties for any selected rule in the All Rules pane.
Any changes you make in the Properties pane are applied immediately,
letting you preview your work as you go.
For more information about the CSS Styles panel, see “About the CSS
Styles panel” in Using Dreamweaver.
Flash basics
To get the most out of your Flash experience, you should understand the
basic elements of the Flash workspace. This section gives you an overview
of Flash files and introduces you to the most important and commonly
used workspace elements, including the Stage, Property inspector, and
Tools panel.
This section contains the following topics:
■ “About Flash files” on page 57
■ “Getting to know the Flash workspace” on page 59
About Flash files
The primary Flash file type, FLA files, contain three basic types of
information that comprise a Flash document. These include the following:
Media objects are the various graphic, text, sound and video objects that
comprise the content of your Flash document. By importing or creating
these elements in Flash and then arranging them on the Stage and in the
Timeline, you define what the viewer of your document will see and when
they will see it.
The Timeline is the place in Flash where you tell Flash when specific media
objects should appear on the Stage. The Timeline is like a spreadsheet that
progresses from left to right, with the columns representing time. The rows
represent layers, with the content in higher layers appearing above the
content in lower layers on the Stage.
Flash basics 57
Page 58

ActionScript code is the programming code you can add to Flash
documents to make them respond to user interactions and to more finely
control the behavior of your Flash documents. Much can be accomplished
in Flash without ActionScript, but using ActionScript offers many
more possibilities.
Flash can be used to work with a variety of file types. Each type has a
separate purpose. The following list describes each file type and its uses:
■ FLA files are the primary files you work with in Flash. These are the
files that contain the basic media, Timeline, and script information for
a Flash document.
■ SWF files are the compressed versions of FLA files. These files are the
ones you display in a web page.
■ AS files are ActionScript files. You can use these files if you prefer to
keep some or all of your ActionScript code outside of your FLA files.
These can be helpful for code organization and for projects that have
multiple people working on different parts of the Flash content.
■ SWC files contain the reusable Flash components. Each SWC file
contains a compiled movie clip, ActionScript code, and any other assets
that the component requires.
■ ASC files are files used to store ActionScript that will be executed on a
computer running Flash Communication Server. These files provide
the ability to implement server-side logic that works in conjunction
with ActionScript in a SWF file.
■ JSFL files are JavaScript files that you can use to add new functionality
to the Flash authoring tool. See Extending Flash for more information.
■ FLP files are Flash Project files (Flash Professional 8 only). You can use
Flash Projects to manage multiple document files in a single project.
Flash Projects allow you to group multiple, related files together to
create complex applications.
58 Studio Basics
Page 59

Getting to know the Flash workspace
The following sections provide a detailed introduction to the tools, panels,
and other elements of the Flash workspace.
This section contains the following topics:
■ “Using the Start page” on page 59
■ “Using the Stage” on page 60
■ “Using the Timeline” on page 62
■ “Using frames and keyframes” on page 66
■ “Using layers” on page 69
■ “About the main toolbar and edit bar” on page 75
■ “Using the Tools panel” on page 76
■ “Using the grid, guides, and rulers” on page 78
■ “Using panels and the Property inspector” on page 81
■ “Setting preferences in Flash” on page 87
■ “Customizing keyboard shortcuts” on page 92
■ “Using context menus” on page 95
■ “Accessibility in the Flash authoring environment” on page 95
Using the Start page
Whenever Flash is running with no documents open, the Start page
appears. The Start page provides easy access to frequently used actions.
The Start page contains the following four areas:
Open a Recent Item lets you open your most recent documents.You can
also display the Open File dialog box by clicking the Open icon.
Create New lists Flash file types, such as Flash documents and
ActionScript files. You can quickly create a new file by clicking the desired
file type in the list.
Create from Template lists the templates most commonly used to create
new Flash documents. You can create a new file by clicking the desired
template in the list.
Extend links to the Macromedia Flash Exchange website, where you
can download helper applications for Flash, Flash extensions, and related
information.
Flash basics 59
Page 60

The Start page also offers quick access to Help resources. You can take a
tour of Flash, learn about Flash documentation resources, and find
Macromedia Authorized Training facilities.
TIP
You can control
whether or not Flash
displays the Start
page.
To hide the Start page:
■ On the Start page, select Don’t Show Again.
To display the Start page again, do one of the following:
■ (Windows) Select Edit > Preferences and select Show Start Page in the
General category.
■ (Macintosh) Select Flash > Preferences and select Show Start Page in
the General category.
Using the Stage
The Stage is the rectangular area where you place graphic content,
including vector art, text boxes, buttons, imported bitmap graphics or
video clips, and so on when creating Flash documents. The Stage in the
Flash authoring environment represents the rectangular space in
Macromedia Flash Player or in a web browser window where your Flash
document appears during playback. You can zoom in and out to change
the view of the Stage as you work.
The grid, guides, and rulers help you position content precisely on the
Stage. For more information, see “Using the grid, guides, and rulers”
on page 78.
60 Studio Basics
Page 61

Zooming
To view the entire Stage on the screen, or to view a particular area of your
drawing at high magnification, you can change the magnification level.
The maximum magnification depends on the resolution of your monitor
and the document size. The minimum value for zooming out on the Stage
is 8%. The maximum value for zooming in on the Stage is 2000%.
To magnify or reduce your view of the Stage, do one of the
following:
■ To zoom in on a certain element, select the Zoom tool in the Tools
panel, and click the element. To switch the Zoom tool between
zooming in or out, use the Enlarge or Reduce modifiers (in the options
area of the Tools panel when the Zoom tool is selected) or Alt-click
(Windows) or Option-click (Macintosh).
■ To zoom in on a specific area of your drawing, drag a rectangular
selection on the Stage with the Zoom tool. Flash sets the magnification
level so that the specified rectangle fills the window.
■ To zoom in on or out of the entire Stage, select View > Zoom In or
View > Zoom Out.
■ To zoom in or out by a specified percentage, select View >
Magnification, and select a percentage from the submenu or select a
percentage from the Zoom control at the upper-right corner of
the Timeline.
■ To scale the Stage so it fits completely in the application window, select
View > Magnification > Fit in Window.
■ To display the contents of the current frame, select View >
Magnification > Show All, or select Show All from the Zoom control at
the upper-right side of the application window. If the scene is empty,
the entire Stage appears.
Flash basics 61
Page 62

■ To display the entire Stage, select View > Magnification > Show Frame
or select Show Frame from the Zoom control at the upper-right corner
of the Timeline.
■ To display the workspace surrounding the Stage, select View > Work
Area. The work area is shown in light gray. Use the Work Area
command to view elements in a scene that are partly or completely
outside of the Stage area. For example, to have a bird fly into a frame,
you would initially position the bird outside of the Stage in the work
area and then animate it into the Stage area.
Moving the view of the Stage
When the Stage is magnified, you may not be able to see all of it. The
Hand tool lets you move the Stage to change the view without having to
change the magnification.
To move the Stage view:
1. In the Tools panel, select the Hand tool. To temporarily switch between
another tool and the Hand tool, hold down the Spacebar and click the
tool in the Tools panel.
2. Drag the Stage.
Using the Timeline
The Timeline organizes and controls a document’s content over time in
layers and frames. Like films, Flash documents divide lengths of time into
frames. Layers are like multiple film strips stacked on top of one another,
each containing a different image that appears on the Stage. The major
components of the Timeline are layers, frames, and the playhead.
Layers in a document are listed in a column on the left side of the
Timeline. Frames contained in each layer appear in a row to the right of
the layer name. The Timeline header at the top of the Timeline indicates
frame numbers. The playhead indicates the current frame displayed on
the Stage. As a Flash document plays, the playhead moves from left to right
through the Timeline.
62 Studio Basics
Page 63
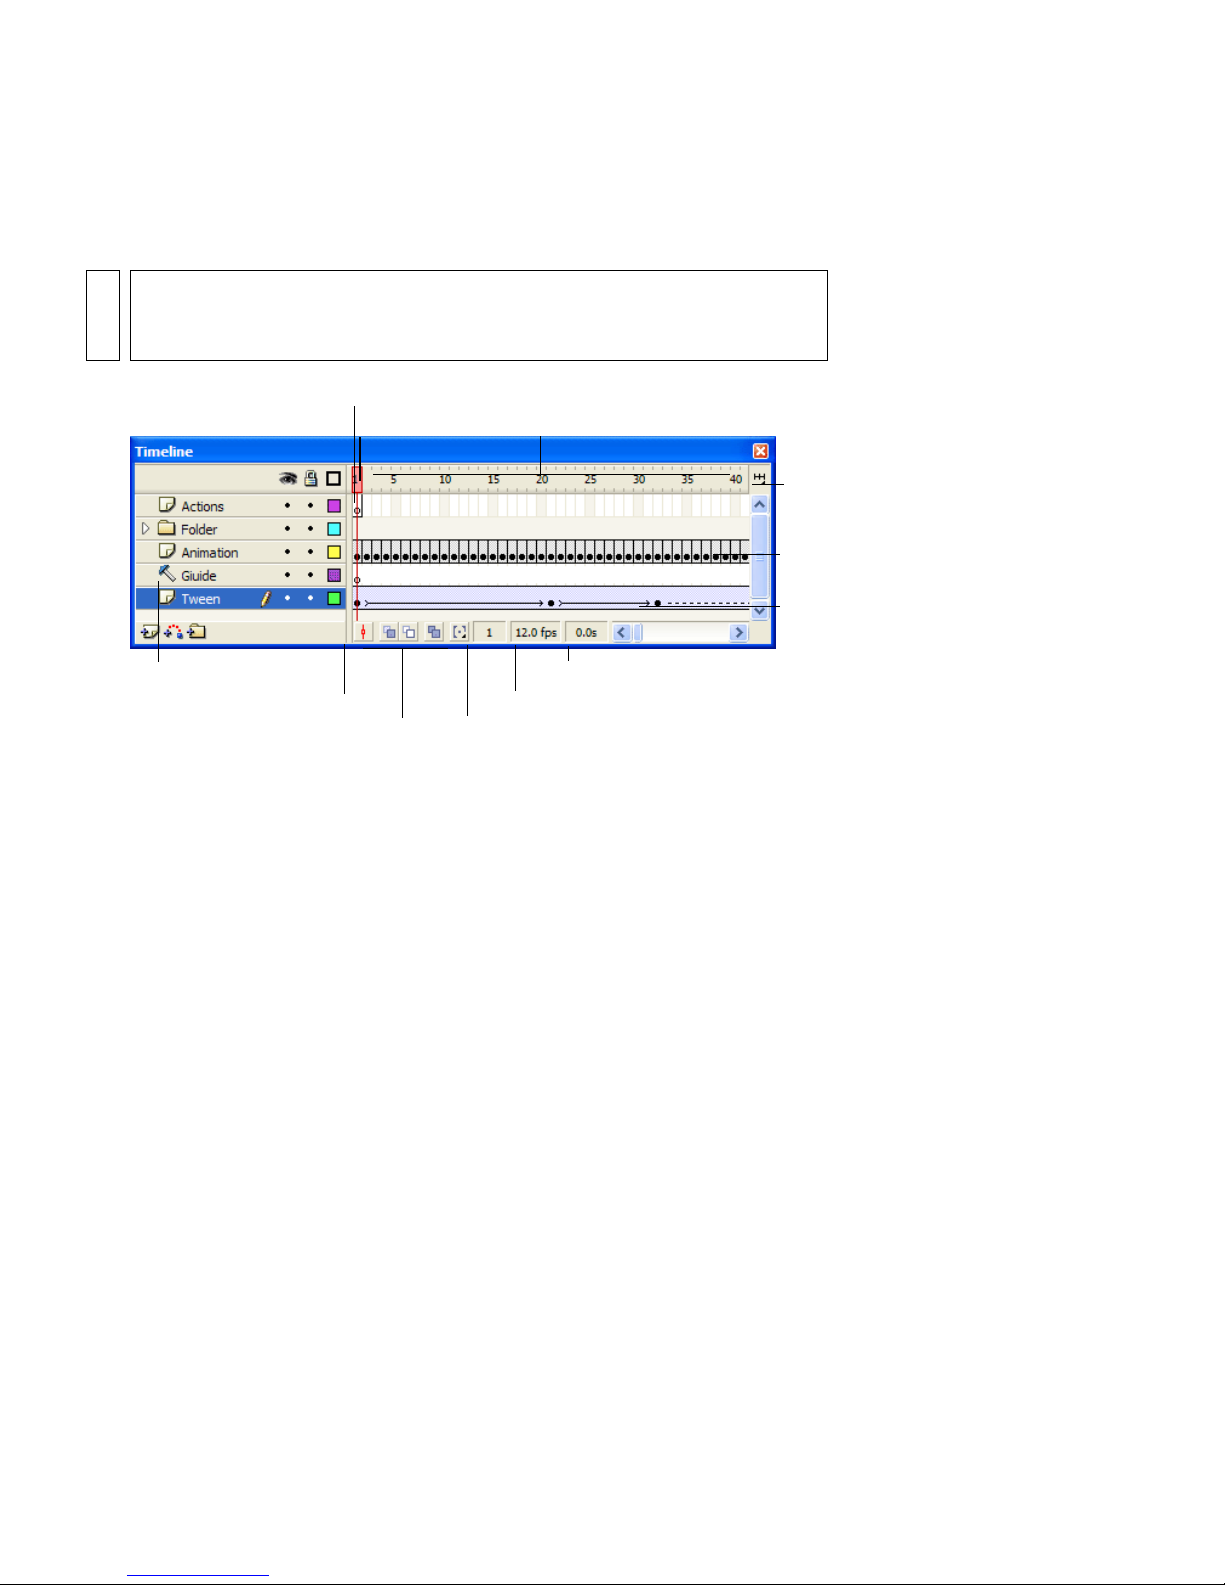
The Timeline status display at the bottom of the Timeline indicates the
selected frame number, the current frame rate, and the elapsed time to the
current frame.
NOTE
When an animation is played, the actual frame rate is displayed; this may
differ from the document’s frame rate setting if the computer can’t
calculate and display the animation quickly enough.
Empty keyframe
Playhead
Timeline header
Frame View pop-up menu
Frame-by-frame animation
Tweened animation
Guide layer icon
Center Frame button
Onion-skinning buttons
Current Frame indicator
Elapsed Time indicator
Frame Rate indicator
You can change the way frames are displayed in the Timeline, as well as
display thumbnails of frame content in the Timeline. The Timeline shows
where there is animation in a document, including frame-by-frame
animation, tweened animation, and motion paths. For more information
on animation, see “Creating Motion” in Using Flash.
Controls in the layers section of the Timeline let you hide, show, lock, or
unlock layers, as well as display layer contents as outlines. For more
information, see “Editing layers and layer folders” on page 72.
You can insert, delete, select, and move frames in the Timeline. You can
also drag frames to a new location on the same layer or to a different layer.
For more information, see “Working with frames in the Timeline”
on page 66.
Changing the appearance of the Timeline
By default, the Timeline appears at the top of the main application
window, above the Stage. To change its position, you can dock the
Timeline to the bottom or either side of the main application window, or
display the Timeline as its own window. You can also hide the Timeline.
Flash basics 63
Page 64

You can resize the Timeline to change the number of layers and frames that
are visible. When there are more layers than can be displayed in the
Timeline, you can view additional layers by using the scroll bars on the
right side of the Timeline.
To move the Timeline when it is docked to the application
window:
■ Drag the gripper at the left of the word Timeline in the panel title bar.
To dock an undocked Timeline:
■ Drag the Timeline title bar to an edge of the application window. Press
Control and drag to prevent the Timeline from docking.
To lengthen or shorten layer name fields:
■ Drag the bar separating the layer names and the frames portions of
the Timeline.
To resize the Timeline, do one of the following:
■ If the Timeline is docked to the main application window, drag the bar
separating the Timeline from the Stage area.
■ If the Timeline is not docked to the main application window, drag the
lower-right corner (Windows) or the size box in the lower-right corner
(Macintosh).
Moving the playhead
The playhead moves through the Timeline as a document plays to indicate
the current frame displayed on the Stage. The Timeline header shows the
frame numbers of the animation. To display a frame on the Stage, you
move the playhead to the frame in the Timeline.
64 Studio Basics
Page 65

When you’re working with a large number of frames that can’t all be
displayed in the Timeline at once, you can move the playhead along the
Timeline to easily display a specific frame.
To go to a frame:
■ Click the frame’s location in the Timeline header, or drag the playhead
to the desired position.
To center the Timeline on the current frame:
■ Click the Center Frame button at the bottom of the Timeline.
Changing the display of frames in the Timeline
You can change the size of frames in the Timeline, and add color to
sequences of frames to highlight them. You can also include thumbnail
previews of frame content in the Timeline. These thumbnails are useful as
an overview of the animation, but they require extra screen space.
Frame View button
Frame View pop-up menu
Short and Normal frame view options
Flash basics 65
Page 66

To change the display of frames in the Timeline:
1. Click the Frame View button in the upper-right corner of the Timeline
to display the Frame View pop-up menu.
2. Select from the following options:
■ To change the width of frame cells, select Tiny, Small, Normal,
Medium, or Large. (The Large frame-width setting is useful for
viewing the details of sound waveforms.)
■ To decrease the height of frame cell rows, select Short.
■ To turn the tinting of frame sequences on or off, select
Tinted Frames.
■ To display thumbnails of the content of each frame scaled to fit the
Timeline frames, select Preview. This can cause the apparent
content size to vary.
■ To display thumbnails of each full frame (including empty space),
select Preview in Context. This is useful for viewing the way
elements move within their frames over the course of the
animation, but previews are generally smaller than with the
Preview option.
Using frames and keyframes
A keyframe is a frame in which you define a change to an object’s
properties for an animation or include ActionScript code to control some
aspect of your document. Flash can tween, or automatically fill in, the
frames between keyframes you define in order to produce fluid animations.
Because keyframes let you produce animation without drawing each
individual frame, they make creating animation easier. You can easily
change the length of a tweened animation by dragging a keyframe in the
Timeline.
The order in which frames and keyframes appear in the Timeline
determines the order in which they are displayed in a Flash application.
You can arrange keyframes in the Timeline to edit the sequence of events in
an animation.
Working with frames in the Timeline
In the Timeline, you work with frames and keyframes, placing them in the
order you want the objects in the frames to appear. You can change the
length of a tweened animation by dragging a keyframe in the Timeline.
66 Studio Basics
Page 67

You can perform the following modifications on frames or keyframes:
■ Insert, select, delete, and move frames or keyframes
■ Drag frames and keyframes to a new location on the same layer or on a
different layer
■ Copy and paste frames and keyframes
■ Convert keyframes to frames
■ Drag an item from the Library panel onto the Stage to add the item to
the current keyframe
The Timeline provides a view of tweened frames in an animation. For
information on editing tweened frames, see “Creating Motion” in
Using Flash.
Flash offers two different methods for selecting frames in the Timeline. In
frame-based selection (the default) you select individual frames in the
Timeline. In span-based selection, the entire frame sequence, from one
keyframe to the next, is selected when you click any frame in the sequence.
You can specify span-based selection in Flash preferences.
To specify span-based selection:
1. Select Edit > Preferences.
2. Select the General category.
3. In the Timeline section, select Span based selection.
4. Click OK.
For more information, see “Setting preferences in Flash” on page 87.
To insert frames in the Timeline, do one of the following:
■ To insert a new frame, select Insert > Frame.
■ To create a new keyframe, select Insert > Keyframe, or right-click
(Windows) or Control-click (Macintosh) the frame where you want to
place a keyframe, and select Insert Keyframe from the context menu.
■ To create a new blank keyframe, select Insert > Blank Keyframe, or
right-click (Windows) or Control-click (Macintosh) the frame where
you want to place the keyframe, and select Insert Blank Keyframe from
the context menu.
Flash basics 67
Page 68

To select one or more frames in the Timeline:
■ To select one frame, click the frame. If you have Span Based Selection
enabled in the Preferences dialog box, clicking one frame selects the
entire frame sequence between two keyframes. For more information,
see “Setting preferences in Flash” on page 87.
■ To select multiple contiguous frames, Shift-click additional frames.
■ To select multiple discontiguous frames, Control-click (Windows) or
Command-click (Macintosh) additional frames.
To select all frames in the Timeline:
■ Select Edit > Timeline > Select All Frames.
To delete or modify a frame or keyframe, do one of the
following:
■ To delete a frame, keyframe, or frame sequence, select the frame,
keyframe, or sequence and select Edit > Timeline > Remove Frame, or
right-click (Windows) or Control-click (Macintosh) the frame,
keyframe, or sequence and select Remove Frame from the context
menu. Surrounding frames remain unchanged.
■ To move a keyframe or frame sequence and its contents, drag the
keyframe or sequence to the desired location.
■ To extend the duration of a keyframe animation, press Alt and drag
(Windows) or press Option and drag (Macintosh) the keyframe to the
frame that you want to be the final frame of the sequence.
■ To copy a keyframe or frame sequence by dragging, Alt-click
(Windows) or Option-click (Macintosh) and drag the keyframe to the
new location.
■ To copy and paste a frame or frame sequence, select the frame or
sequence and select Edit > Timeline > Copy Frames. Select a frame or
sequence that you want to replace, and select Edit > Timeline >
Paste Frames.
68 Studio Basics
Page 69

■ To convert a keyframe to a frame, select the keyframe and select Edit >
Timeline > Clear Keyframe, or right-click (Windows) or Control-click
(Macintosh) the keyframe and select Clear Keyframe from the context
menu. The Stage contents of the cleared keyframe and all frames up
to the subsequent keyframe are replaced with the Stage contents of the
frame preceding the cleared keyframe.
■ To change the length of a tweened sequence, drag the beginning or
ending keyframe left or right. To change the length of a frame-by-frame
animation sequence, see “Creating frame-by-frame animations” in
Using Flash.
■ To add an item from the library to the current keyframe, drag the item
from the Library panel onto the Stage.
Using layers
Layers are like transparent sheets of acetate stacked on top of each other on
the Stage. Layers help you organize the artwork in your document. You can
draw and edit objects on one layer without affecting objects on another
layer. Where there is nothing on a layer, you can see through it to the layers
below.
To draw, paint, or otherwise modify a layer or folder, you select the layer in
the Timeline to make it active. A pencil icon next to a layer or folder name
in the Timeline indicates that the layer or folder is active. Only one layer
can be active at a time (although more than one layer can be selected at
a time).
When you create a new Flash document, it contains only one layer. You
can add more layers to organize the artwork, animation, and other
elements in your document. The number of layers you can create is limited
only by your computer’s memory, and layers do not increase the file size of
your published SWF file. Only the objects you place into layers add to the
file size. You can also hide, lock, or rearrange layers.
Flash basics 69
Page 70

You can also organize and manage layers by creating layer folders and
placing layers in them. You can expand or collapse layer folders in the
Timeline without affecting what you see on the Stage. It’s a good idea to
use separate layers or folders for sound files, ActionScript, frame labels,
and frame comments. This helps you find these items quickly when you
need to edit them.
In addition, you can use special guide layers to make drawing and editing
easier, and mask layers to help you create sophisticated effects.
For an interactive introduction to working with layers in Flash, select
Help > Flash Tutorials > Basic Tasks > Work with Layers.
Creating layers and layer folders
When you create a new layer or folder, it appears above the selected layer.
The newly added layer becomes the active layer.
To create a layer, do one of the following:
■ Click the Insert Layer button at the bottom of the Timeline.
■ Select Insert > Timeline > Layer.
■ Right-click (Windows) or Control-click (Macintosh) a layer name in
the Timeline and select Insert Layer from the context menu.
To create a layer folder, do one of the following:
■ Select a layer or folder in the Timeline, and then select Insert >
Timeline > Layer Folder.
■ Right-click (Windows) or Control-click (Macintosh) a layer name in
the Timeline, and then select Insert Folder from the context menu.
The new folder appears above the layer or folder you selected.
Viewing layers and layer folders
As you work, you may want to show or hide layers or folders. A red X next
to the name of a layer or folder in the Timeline indicates that it is hidden.
When you publish a Flash SWF file, any layers that were hidden in the
FLA document are preserved and visible in the SWF file.
To help you distinguish which layer an object belongs to, you can display
all objects on a layer as colored outlines. You can change the outline color
used by each layer.
70 Studio Basics
Page 71

You can change the height of layers in the Timeline in order to display
more information (such as sound waveforms) in the Timeline. You can also
change the number of layers displayed in the Timeline.
To show or hide a layer or folder, do one of the following:
■ Click in the Eye column to the right of the layer or folder name in the
Timeline to hide that layer or folder. Click in it again to show the layer
or folder.
■ Click the eye icon to hide all the layers and folders in the Timeline.
Click it again to show all layers and folders.
■ Drag through the Eye column to show or hide multiple layers
or folders.
■ Alt-click (Windows) or Option-click (Macintosh) in the Eye column to
the right of a layer or folder name to hide all other layers and folders.
Alt-click or Option-click it again to show all layers and folders.
To view the contents of a layer as outlines, do one of the
following:
■ Click in the Outline column to the right of the layer’s name to display
all objects on that layer as outlines. Click in it again to turn off outline
display.
■ Click the outline icon to display objects on all layers as outlines. Click
it again to turn off outline display on all layers.
■ Alt-click (Windows) or Option-click (Macintosh) in the Outline
column to the right of a layer’s name to display objects on all other
layers as outlines. Alt-click or Option-click in it again to turn off the
outline display for all layers.
To change a layer’s outline color:
1. Do one of the following:
■ Double-click the layer’s icon (the icon to the left of the layer name)
in the Timeline.
■ Right-click (Windows) or Control-click (Macintosh) the layer
name and select Properties from the context menu.
■ Select the layer in the Timeline and select Modify > Layer.
2. In the Layer Properties dialog box, click the Outline Color box and
select a new color, enter the hexadecimal value for a color, or click the
Color Picker button and select a color.
3. Click OK.
Flash basics 71
Page 72

To change layer height in the Timeline:
1. Do one of the following:
■ Double-click the layer’s icon (the icon to the left of the layer name)
in the Timeline.
■ Right-click (Windows) or Control-click (Macintosh) the layer
name and select Properties from the context menu.
■ Select the layer in the Timeline and select Modify > Timeline >
Layer Properties.
2. In the Layer Properties dialog box, select an option for Layer Height and
click OK.
To change the number of layers displayed in the Timeline:
■ Drag the bar that separates the Timeline from the Stage area.
Editing layers and layer folders
You can rename, copy, and delete layers and folders. You can also lock
layers and folders to prevent them from being edited.
By default, new layers are named by the order in which they are created:
Layer 1, Layer 2, and so on. You can rename layers to better reflect
their contents.
To select a layer or folder, do one of the following:
■ Click the name of a layer or folder in the Timeline.
■ Click any frame in the Timeline of the layer you want to select.
■ Select an object on the Stage that is located in the layer you want
to select.
To select two or more layers or folders, do one of the following:
■ To select contiguous layers or folders, Shift-click their names in the
Timeline.
■ To select discontiguous layers or folders, Control-click (Windows) or
Command-click (Macintosh) their names in the Timeline.
72 Studio Basics
Page 73

To rename a layer or folder, do one of the following:
■ Double-click the name of the layer or folder in the Timeline and enter
a new name.
■ Right-click (Windows) or Control-click (Macintosh) the name of the
layer or folder and select Properties from the context menu. Enter the
new name in the Name text box and click OK.
■ Select the layer or folder in the Timeline and select Modify >
Timeline > Layer Properties. In the Layer Properties dialog box, enter
the new name in the Name text box and click OK.
To lock or unlock one or more layers or folders, do one of
the following:
■ Click in the Lock column to the right of the name of a layer or folder
to lock it. Click in the Lock column again to unlock the layer or folder.
■ Click the padlock icon to lock all layers and folders. Click it again to
unlock all layers and folders.
■ Drag through the Lock column to lock or unlock multiple layers
or folders.
■ Alt-click (Windows) or Option-click (Macintosh) in the Lock column
to the right of a layer or folder name to lock all other layers or folders.
Alt-click or Option-click in the Lock column again to unlock all layers
or folders.
To copy a layer:
1. Click the layer name in the Timeline to select the entire layer.
2. Select Edit > Timeline > Copy Frames.
3. Click the Insert Layer button to create a new layer.
4. Click the new layer and select Edit > Timeline > Paste Frames.
To copy the contents of a layer folder:
1. Click the triangle to the left of the folder name in the Timeline to
collapse it, if necessary.
2. Click the folder name to select the entire folder.
3. Select Edit > Timeline > Copy Frames.
4. Select Insert > Timeline > Layer Folder to create a new folder.
5. Click the new folder and select Edit > Timeline > Paste Frames.
Flash basics 73
Page 74

To delete a layer or folder:
1. Select the layer or folder by clicking its name in the Timeline or any
frame in the layer.
2. Do one of the following:
■ Click the Delete Layer button in the Timeline.
■ Drag the layer or folder to the Delete Layer button.
■ Right-click (Windows) or Control-click (Macintosh) the layer or
folder name and select Delete Layer from the context menu.
NOTE
When you delete a layer folder, all the enclosed layers and all their
contents are also deleted.
Organizing layers and layer folders
You can rearrange layers and folders in the Timeline to organize your
document.
Layer folders help organize your workflow by letting you place layers in a
tree structure. You can expand or collapse a folder to see the layers it
contains without affecting which layers are visible on the Stage. Folders can
contain both layers and other folders, allowing you to organize layers in
much the same way you organize files on your computer.
The layer controls in the Timeline affect all layers within a folder. For
example, locking a layer folder locks all layers within that folder.
To move a layer or layer folder into a layer folder:
■ Drag the layer or layer folder name to the destination layer
folder name.
The layer or layer folder appears inside the destination layer folder in
the Timeline.
To change the order of layers or folders:
■ Drag one or more layers or folders in the Timeline to the desired
position above or below other layers in the Timeline.
To expand or collapse a folder:
■ Click the triangle to the left of the folder name.
74 Studio Basics
Page 75

To expand or collapse all folders:
■ Right-click (Windows) or Control-click (Macintosh) and select
Expand All Folders or Collapse All Folders from the context menu.
Using guide layers
For help in aligning objects when drawing, you can create guide layers. You
can then align objects on other layers to the objects you create on the guide
layers. Guide layers are not exported and do not appear in a published
SWF file. You can make any layer a guide layer. Guide layers are indicated
by a guide icon to the left of the layer name.
You can also create a motion guide layer to control the movement of
objects in a motion tweened animation. For more information, see
“Tweening motion along a path” in Using Flash.
NOTE
Dragging a normal layer onto a guide layer converts the guide layer to a
motion guide layer. To prevent accidentally converting a guide layer, place
all guide layers at the bottom of the layer order.
To designate a layer as a guide layer:
■ Select the layer and right-click (Windows) or Control-click
(Macintosh) and select Guide from the context menu. Select Guide
again to change the layer back to a normal layer.
About the main toolbar and edit bar
The menu bar at the top of the Flash application window displays menus
with commands for controlling Flash functionality. The menus include
File, Edit, View, Insert, Modify, Text, Commands, Control, Window,
and Help.
The edit bar, at the top of the Timeline, contains controls and information
for editing scenes and symbols, and for changing the magnification level of
the Stage.
For information on changing the Stage magnification level, see “Zooming”
on page 61. For information on editing symbols, see “Using Symbols,
Instances, and Library Assets” in Using Flash. For information on working
with scenes, see “Working with scenes” in Using Flash.
Flash basics 75
Page 76

Using the Tools panel
The tools in the Tools panel let you draw, paint, select, and modify
artwork, as well as change the view of the Stage. The Tools panel is divided
into four sections:
■ The tools area contains drawing, painting, and selection tools.
■ The view area contains tools for zooming and panning in the
application window.
■ The colors area contains modifiers for stroke and fill colors.
■ The options area displays modifiers for the currently selected tool.
Modifiers affect the tool’s painting or editing operations.
Using the Customize Tools panel dialog box, you can specify which tools
to display in the Flash authoring environment. For more information, see
“Customizing the Tools panel” on page 77.
For information on using the drawing and painting tools, see “About Flash
drawing and painting tools” in Using Flash. For information on using the
selection tools, see “Selecting objects” in Using Flash. For information on
using the view modification tools, see “Moving the view of the Stage”
on page 62.
To show or hide the Tools panel:
■ Select Window > Tools.
Selecting tools
You can select tools by clicking in the Tools panel, or by using a keyboard
shortcut.
To select a tool, do one of the following:
■ Click the tool you want to use. Depending on the tool you select, a set
of modifiers may be displayed in the options area at the bottom of the
Tools panel.
■ Press the tool’s keyboard shortcut. You can view the keyboard shortcuts
by selecting Edit > Keyboard Shortcuts.
■ To select a tool located in the pop-up menu for a visible tool such as the
Rectangle tool, press the icon of the visible tool and select another tool
from the pop-up menu.
76 Studio Basics
Page 77

Customizing the Tools panel
You can customize the Tools panel to specify which tools appear in the
authoring environment. You use the Customize Tools panel dialog box to
add or remove tools from the Tools panel.
You can display more than one tool in one location. When more than one
tool is displayed in a location, the top tool in the group (the most recently
used) is displayed with an arrow in the lower-right corner of its icon. When
you press and hold the mouse button on the icon, the other tools in the
group appear in a pop-up menu. You can then select a tool from the menu.
To customize the Tools panel:
1. To display the Customize Tools panel dialog box, do one of
the following:
■ (Windows) Select Edit > Customize Tools panel.
■ (Macintosh) Select Flash > Customize Tools panel.
The Available Tools menu indicates the tools that are currently
available in the Flash. The Current Selection menu indicates the
tool (or tools) currently assigned to the selected location in the
Tools panel.
NOTE
If more than one tool is assigned to one location in the Tools panel, a small
arrow appears in the lower-right corner of the tool. This arrow indicates
that additional tools are present in a pop-up menu. The same keyboard
shortcut functions for all tools in the pop-up menu.
2. Click a tool in the Tools panel image or use the arrows to cycle
through the tools to specify the location to which you want to assign
another tool.
3. To add a tool to the selected location, select the tool in the Available
Tools list and click the Add button. It is possible to assign a tool to more
than one location.
4. To remove a tool from the selected location, select the tool in the
Current Selection scroll list and click the Remove button.
5. Click OK to apply your changes and close the Customize Tools panel
dialog box.
To restore the default Tools panel layout:
■ Click Restore Default in the Customize Tools panel dialog box.
Flash basics 77
Page 78

Using the grid, guides, and rulers
Flash can display rulers and guides that help you draw and lay out objects
precisely. You can place guides in a document and snap objects to those
guides, or turn on the grid and snap objects to it.
NOTE
You can also snap objects to other objects or to pixels, or align objects
using specified snap tolerance boundaries. For more information, see
“Snapping” in Using Flash.
Using rulers
When rulers are displayed, they appear along the top and left sides of the
document. You can change the unit of measure used in the rulers from the
default of pixels to some other unit. When you move an element on the
Stage with the rulers displayed, lines indicating the element’s dimensions
appear on the rulers.
To display or hide rulers:
■ Select View > Rulers.
To specify the rulers’ unit of measure for a document:
■ Select Modify > Document, and then select a unit from the Ruler Units
menu at the lower-left side of the dialog box.
Using guides
You can drag horizontal and vertical guides from the rulers onto the Stage
when the rulers are displayed. You can move guides, lock guides, hide
guides, and remove guides. You can also snap objects to guides, and change
the guide color and snap tolerance (how close objects must be to snap to a
guide). Flash allows you to create nested Timelines. Draggable guides
appear on Stage only when the Timeline in which they were created is
active.
You can clear all the guides in the current editing mode—documentediting mode or symbol-editing mode. If you clear guides in documentediting mode, all the guides in the document are cleared. If you clear
guides in symbol-editing mode, all the guides in all symbols are cleared.
To create custom guides or irregular guides, you use guide layers. For more
information, see “Using guide layers” on page 75.
78 Studio Basics
Page 79

To display or hide the drawing guides:
■ Select View > Guides > Show Guides.
NOTE
If the grid is visible and Snap to Grid is turned on when you create guides,
guides will snap to the grid.
To turn snapping to guides on or off:
■ Select View > Snapping > Snap to Guides.
NOTE
Snapping to guides takes precedence over snapping to the grid in places
where guides fall between grid lines.
To move a guide:
1. Make sure rulers are visible by selecting View > Rulers.
2. With the Selection tool, click anywhere on the ruler and drag the guide
to the desired place on the Stage.
To remove a guide:
■ With guides unlocked, use the Selection tool to drag the guide to the
horizontal or vertical ruler. For information on locking and unlocking
guides, see the following procedure.
To lock guides:
■ Select View > Guides > Lock Guides.
NOTE
You can also use the Lock Guides option in the Edit Guides (View >
Guides > Edit Guides) dialog box. For more information, see the following
procedure.
Flash basics 79
Page 80

To set guide preferences:
1. Select View > Guides > Edit Guides and do any of the following:
■ For Color, click the triangle in the color box and select a guide line
color from the palette. The default guide color is green.
■ Select or deselect Show Guides to display or hide guides.
■ Select or deselect Snap to Guides to turn snapping to guides on
or off.
■ Select or deselect Lock Guides to lock or unlock guides.
■ For Snap Accuracy, select an option from the pop-up menu.
■ If you want to remove all guides, click Clear All.
■ Clear All removes all guides from the current scene.
■ If you want to save the current settings as the default, click
Save Default.
2. Click OK.
To clear guides:
■ Select View > Guides > Clear Guides.
If you are in document-editing mode, all guides in the document are
cleared. If you are in symbol-editing mode, only guides used in symbols
are cleared.
Using the grid
When the grid is displayed in a document, it appears as a set of lines
behind the artwork in all scenes. You can snap objects to the grid, and you
can modify the grid size and grid line color.
To display or hide the drawing grid, do one of the following:
■ Select View > Grid > Show Grid.
■ Press Control+'' (quote) (Windows) or Command+'' (quote)
(Macintosh).
To turn snapping to grid lines on or off:
■ Select View > Snapping > Snap to Grid.
80 Studio Basics
Page 81

To set grid preferences:
1. Select View > Grid > Edit Grid.
2. For Color, click the triangle in the color box and select a grid line color
from the palette.
The default grid line color is gray.
3. Select or deselect Show Grid to display or hide the grid.
4. Select or deselect Snap to Grid to turn snapping to grid lines on or off.
5. For grid spacing, enter values in the text boxes to the right of the
horizontal and vertical arrows.
6. For Snap Accuracy, select an option from the pop-up menu.
7. If you want to save the current settings as the default, click Save Default.
Using panels and the Property inspector
Flash offers many ways to customize the workspace to your needs. Using
panels and the Property inspector, you can view, organize, and change
media and other assets and their attributes. You can show, hide, and resize
panels. You can also group panels together and save custom panel sets to
make the workspace match your personal preferences. The Property
inspector changes to reflect the tool or asset you are working with, giving
you quick access to frequently used features.
About the Property inspector
The Property inspector simplifies document creation by making it easy to
access the most commonly used attributes of the current selection, either
on the Stage or in the Timeline. You can make changes to the object or
document attributes in the Property inspector without accessing the menus
or panels that also control these attributes.
Flash basics 81
Page 82

Depending on what is currently selected, the Property inspector displays
information and settings for the current document, text, symbol, shape,
bitmap, video, group, frame, or tool. When two or more different types of
objects are selected, the Property inspector displays the total number of
objects selected.
The Property inspector showing the properties for the Text tool
To display the Property inspector, do one of the following:
■ Select Window > Properties > Properties.
■ Press Control+F3 (Windows) or Command+F3 (Macintosh).
About the Library panel
The Library panel is where you store and organize symbols created in
Flash, as well as imported files, including bitmap graphics, sound files, and
video clips. The Library panel lets you organize library items in folders, see
how often an item is used in a document, and sort items by type. For more
information, see “Managing media assets with the library” in Using Flash.
The Library panel showing a movie clip symbol
82 Studio Basics
Page 83

To display the Library panel, do one of the following:
■ Select Window > Library.
■ Press Control+L (Windows) or Command+L (Macintosh).
About the Actions panel
The Actions panel lets you create and edit ActionScript code for an object
or frame. Selecting a frame, button, or movie clip instance makes the
Actions panel active. The Actions panel title changes to Button Actions,
Movie Clip Actions, or Frame Actions, depending on what is selected.
For information on using the Actions panel and writing ActionScript code,
including switching between editing modes, see “Using the Actions panel
and Script window” in Learning ActionScript 2.0 in Flash.
The Actions panel showing a
stop() action in a frame
To display the Actions panel, do one of the following:
■ Select Window > Actions.
■ Press F9.
Using panels
The various panels in Flash help you view, organize, and change elements
in a document. The options available in panels control the characteristics
of symbols, instances, colors, type, frames, and other elements. You can
customize the Flash interface by displaying the panels you need for a
specific task and hiding others.
Flash basics 83
Page 84
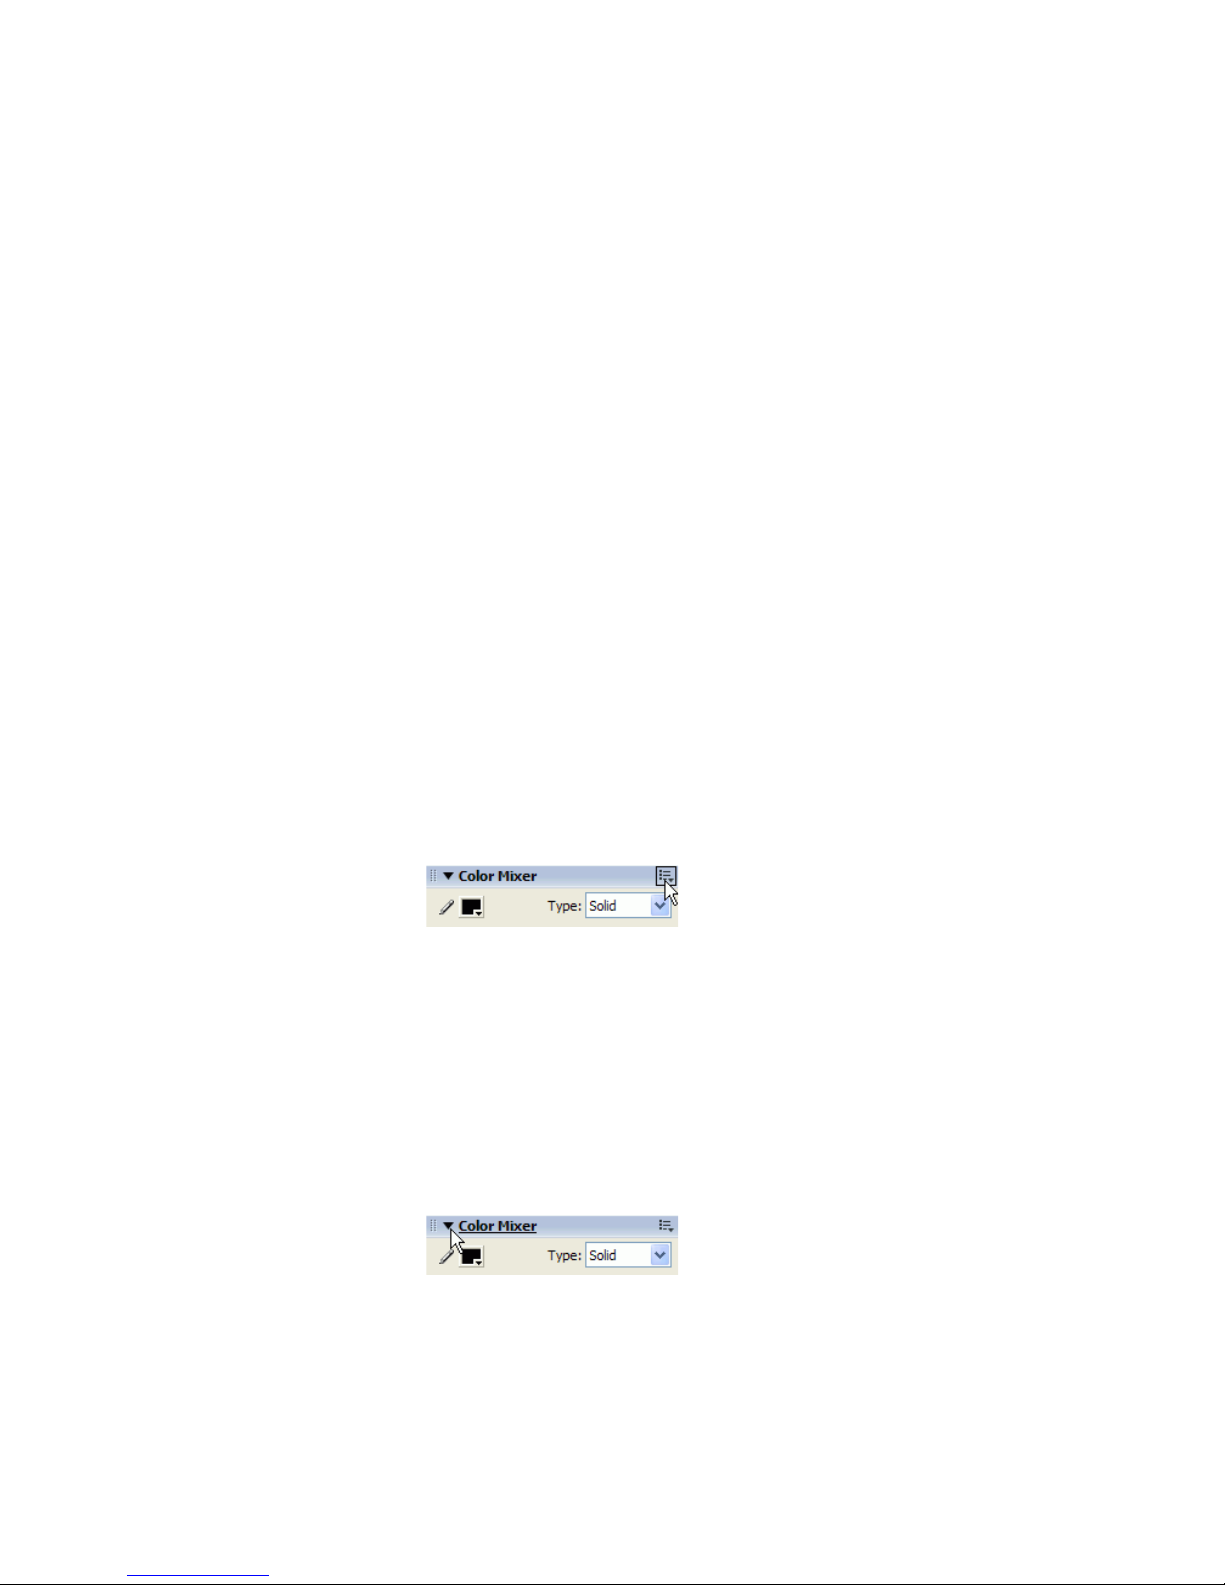
Panels let you work with objects, colors, text, instances, frames, scenes, and
entire documents. For example, you use the Color Mixer panel to create
colors, and the Align panel to align objects to each other or the Stage. To
view the complete list of panels available in Flash, see the Window menu.
Most panels include a pop-up menu with additional options. This pop-up
menu is indicated by a control at the right end of the panel’s title bar. (If no
pop-up menu control appears, there is no pop-up menu for that panel.)
By default, panels appear grouped at the bottom and at the right of the
Flash workspace.
To open a panel:
■ Select the desired panel from the Window menu.
To close a panel, do one of the following:
■ Select the desired panel from the Window menu.
■ Right-click (Windows) or Control-click (Macintosh) the panel’s title
bar and select Close Panel Group from the context menu.
To use a panel’s pop-up menu:
1. Click the control at the far right in the panel’s title bar to view the
pop-up menu.
2. Click an item in the menu.
Clicking a panel’s pop-up menu
To resize a panel:
■ Drag the panel’s border (Windows) or drag the size box at the panel’s
lower-right corner (Macintosh).
To expand or collapse a panel to its title bar:
■ Click the collapse arrow in the title bar. Click the collapse arrow again
to expand the panel to its previous size.
Clicking a panel’s collapse arrow
84 Studio Basics
Page 85
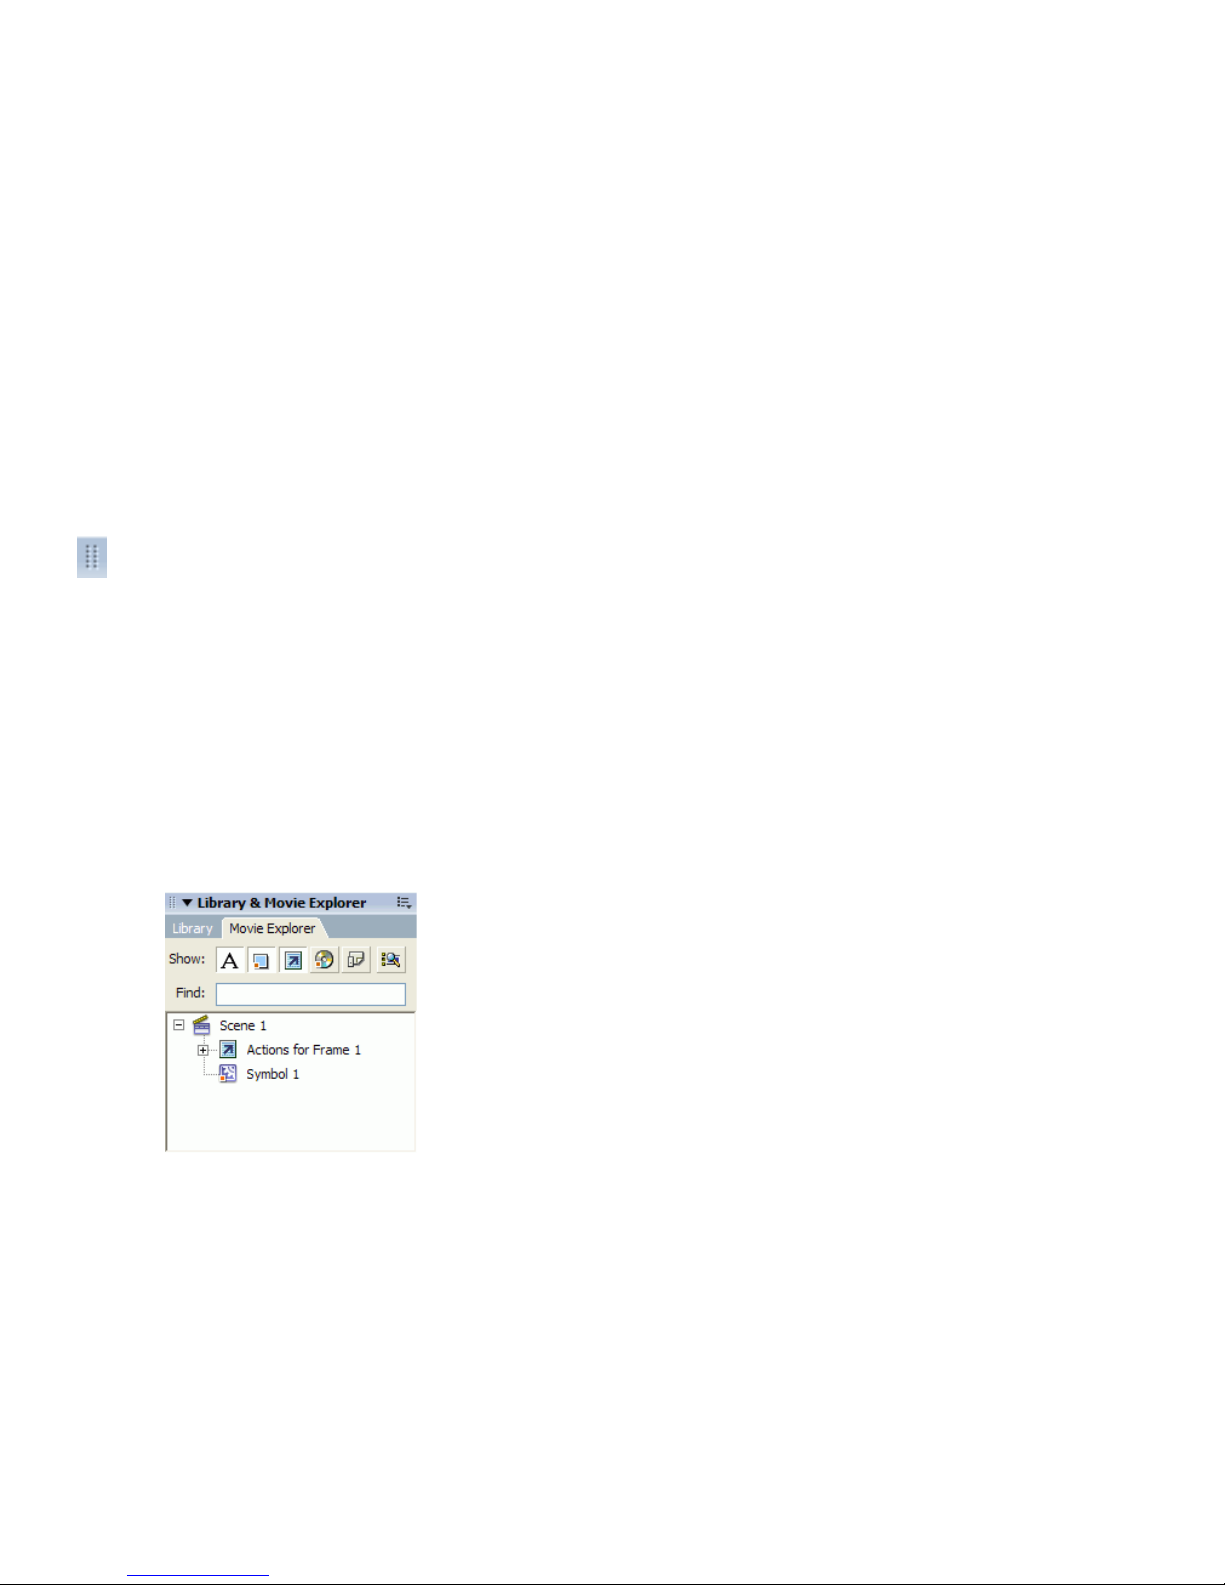
To close all panels:
■ Select Window > Hide Panels.
Arranging panels
In Flash, you can organize panels into groups. You can rearrange the order
in which panels appear within panel groups. You can also create new panel
groups and dock panels to existing panel groups. If you want a panel to
appear on its own, separated from other panel groups, you can float the
panel. This is particularly useful for panels that you want access to all the
time, for example, the Help panel or the Actions panel.
To move a panel:
■ Drag the panel by its gripper (on the left side of the title bar).
To add a panel to an existing panel group:
■ Drag the panel by its gripper onto another panel. A black line appears
next to the target panel to show where the panel will be placed.
To display multiple panels in a single panel window:
1. Click a panel’s pop-up menu.
2. Select the Group Panel Name With option.
3. Select another panel to add the current panel to from the submenu.
The first panel is added as a tab to the second panel.
A tabbed panel showing the Library and Movie Explorer panels
Flash basics 85
Page 86

To float a panel:
■ Drag the panel by its gripper and move it away from other panels.
To create a new panel group:
■ Drag the panel by its gripper, away from other panel groups. Add
additional panels to the first panel to form a new group.
Using panel sets
You can create custom panel arrangements, and save these as custom panel
sets. You can switch the panel display to the default layout (displaying the
Color Mixer, Actions, Property inspector and Library panels) or to a
custom layout that you have saved previously.
To save a custom panel set:
1. Select Window > Save Current.
2. Enter a name for the layout and click OK.
To select a panel layout:
1. Select Window > Workspace Layout.
2. From the submenu, select Default Layout to reset panels to the default
layout, or select a custom layout that you have saved previously.
To delete custom layouts:
1. Select Window > Workspace Layout > Manage.
2. In the Manage Workspace Layouts dialog box, select the panel set you
want to delete.
3. Click Delete.
4. Click Yes to confirm the deletion.
5. Click OK.
86 Studio Basics
Page 87

Setting preferences in Flash
Flash lets you set preferences for general application operations, editing
operations, and Clipboard operations. For more information about the
drawing preferences, see “Specifying drawing settings” in Using Flash.
The General category in the Preferences dialog box
Flash basics 87
Page 88

To set preferences:
1. Select Edit > Preferences (Windows) or Flash > Preferences
(Macintosh).
2. In the Category list, select the one of the following:
■ General
■ ActionScript
■ Auto Format
■ Clipboard
■ Drawing
■ Te x t
■ War ni ng
3. Select from the respective options as described in the procedures that
follow. For more information on ActionScript Editor preferences, see
“Using the ActionScript editor” in Learning ActionScript 2.0 in Flash.
To set General preferences, select from the following options:
■ For On Launch options, select an option to specify which document
Flash opens when you start the application. Select Show Start Page to
display the Start Page. Select New Document to open a new, blank
document. Select Last Documents Open to open the documents that
were open when you last quit Flash. Select No Document to start Flash
without opening a document.
88 Studio Basics
■ For Undo, enter a value from 2 to 300 to set the number of undo/redo
levels. Undo levels require memory; the more undo levels you use, the
more system memory is consumed. The default is 100. Next select
Document- or Object-level undo. Document-level undo maintains a
single list of all your actions for the entire Flash document. Object-level
undo maintains separate lists of your actions for each object in your
Flash document. Object-level undo gives you greater flexibility, since
you can undo an action on one object without having to also undo
actions on other objects that may have been modified more recently
than the target object.
■ For Printing Options (Windows only), select Disable PostScript if you
want to disable PostScript output when printing to a PostScript printer.
By default, this option is deselected. Select this option if you have
problems printing to a PostScript printer, but keep in mind that this
will slow down printing.
Page 89

■ For Test Movie Options, select Open Test Movie in Tabs to have Flash
open a new document tab in the application window when you select
Control > Test Movie. The default is to open the test movie in its
own window.
■ For Selection Options, select or deselect Shift Select to control how
Flash handles selection of multiple elements. When Shift Select is off,
clicking additional elements adds them to the current selection. When
Shift Select is on, clicking additional elements deselects other elements
unless you hold down Shift.
Select Show Tooltips to display tooltips when the pointer pauses over a
control. Deselect this option if you don’t want to see the tooltips.
■ Select Contact Sensitive to have objects become selected when any part
of them is included in the marquee rectangle when dragging with the
Selection or Lasso tools. The default is that objects are only selected
when the tool’s marquee rectangle completely surrounds the object.
■ For Timeline Options, select Span Based Selection to use span-based
selection in the Timeline, rather than the default frame-based selection.
For more information on span-based and frame-based selection, see
“Working with frames in the Timeline” on page 66.
Select Named Anchor on Scenes to have Flash make the first frame of
each scene in a document a named anchor. Named anchors let you use
the Forward and Back buttons in a browser to jump from scene to
scene in a Flash application. For more information, see “Using the
Timeline” on page 62.
■ For Highlight Color, select a color from the panel, or select Use Layer
Color to use the current layer’s outline color.
■ For Project, select Close Files with Project to have all files in a project
close when the project file is closed.
Select Save Files on Test or Publish Project to have each file in a project
saved whenever the project is tested or published.
For more information, see “Creating and managing project (Flash
Professional only) in Using Flash.
To set ActionScript preferences:
■ See “About ActionScript preferences” in Learning ActionScript 2.0
in Flash.
Flash basics 89
Page 90

To set AutoFormat preferences for ActionScript:
■ Select any of the check boxes. To see the effect of each selection, look in
the Preview pane.
To set Clipboard preferences, select from the
following options:
■ For Bitmaps (Windows only), select options for Color Depth and
Resolution to specify these parameters for bitmaps copied to the
Clipboard. Select Smooth to apply anti-aliasing. Enter a value in the
Size Limit text box to specify the amount of RAM that is used when
placing a bitmap image on the Clipboard. Increase this value when
working with large or high-resolution bitmap images. If your computer
has limited memory, select None.
■ For Gradient Quality (Windows only), select an option to specify the
quality of gradient fills placed in the Windows Metafile. Choosing a
higher quality increases the time required to copy artwork. Use this
setting to specify gradient quality when pasting items to a location
outside of Flash. When you are pasting within Flash, the full gradient
quality of the copied data is preserved regardless of the Gradients on
Clipboard setting.
■ For PICT Settings (Macintosh only), for Type, select Objects to
preserve data copied to the Clipboard as vector artwork, or select one of
the bitmap formats to convert the copied artwork to a bitmap. Enter a
value for Resolution. Select Include PostScript to include PostScript
data. For Gradients, select an option to specify gradient quality in the
PICT. Choosing a higher quality increases the time required to copy
artwork. Use the Gradients setting to specify gradient quality when
pasting items to a location outside of Flash. When you are pasting
within Flash, the full gradient quality of the copied data is preserved
regardless of the Gradient setting.
■ For FreeHand Text, select Maintain Text as Blocks to keep text editable
in a pasted FreeHand file.
To set Drawing preferences:
■ For Pen Tool options, see “Setting Pen tool preferences” in Using Flash.
■ For Drawing Settings, see “Specifying drawing settings” in Using Flash.
90 Studio Basics
Page 91

To set text preferences, select one of the following options:
■ For Font Mapping Default, select a font to use when substituting
missing fonts in documents you open in Flash. For more information,
see “Substituting missing fonts” in Using Flash.
■ For Vertical Text options, select Default Text Orientation to make the
default orientation of text vertical, which is useful for some Asian
language fonts. By default, this option is deselected.
Select Right to Left Text Flow to reverse the default text display
direction. This option is deselected by default.
Select No Kerning to turn off kerning for vertical text. This option is
deselected by default but is useful to improve spacing for some fonts
that use kerning tables.
■ For Input Method, select the appropriate language.
To set warning preferences, select one of the following
options:
■ Select Warn on Save for Macromedia Flash 8 Compatibility to have
Flash warn you when you try to save documents with content that is
specific to the Flash Basic 8 or Flash Professional 8 authoring tool as a
Flash MX 2004 file. This option is selected by default.
■ Select Warn on Missing Fonts to have Flash warn you when you open a
Flash document that uses fonts that are not installed on your computer.
This option is selected by default.
■ Select Warn on URL Changes in Launch and Edit to have Flash warn
you if the URL for a document has changed since the last time you
opened and edited it.
■ Select Warn on Reading Generator Content to have Flash display a red
X over any Generator objects as a reminder that Generator objects are
not supported in Flash 8.
■ Select Warn on Inserting Frames when Importing Content to have
Flash alert you when it inserts frames in your document to
accommodate audio or video files that you import.
■ Select Warn on Encoding Conflicts When Exporting .as Files to have
Flash alert you when selecting Default Encoding could potentially lead
to data loss or character corruption. (For example, if you create a file
with English, Japanese, and Korean characters and select Default
Encoding on an English system, the Japanese and Korean characters
will be corrupted.)
Flash basics 91
Page 92

■ Select Warn on Conversion of Effect Graphic Objects to have Flash
warn you when you attempt to edit a symbol that has Timeline effects
applied to it.
■ Select Warn on Exporting to Flash Player 6 r65 to have Flash warn you
when you export a document to this earlier version of Flash Player.
■ Select Warn on Sites with Overlapped Root Folder to have Flash warn
you when you create a site in which the local root folder overlaps with
another site.
■ Select Warn on Behavior Symbol Conversion to have Flash warn
when you convert a symbol with a behavior attached to a symbol of
a different type—for example, when you convert a movie clip to
a button.
■ Select Warn on Symbol Conversion to have Flash warn you when you
convert a symbol to a symbol of a different type.
■ Select Warn on Automatically Converting from Drawing Object to
Group to have Flash warn you when it converts a graphic object drawn
in Object Drawing mode to a group.
■ Select Show Incompatibility Warnings on Feature Controls to have
Flash display warnings on controls for features not supported by the
Flash Player version that the current FLA file is targeting in its
Publish Settings.
92 Studio Basics
Customizing keyboard shortcuts
You can select keyboard shortcuts in Flash to match the shortcuts you use
in other applications, or to streamline your Flash workflow. By default,
Flash uses built-in keyboard shortcuts designed for the Flash application.
You can also select a built-in keyboard shortcut set from one of several
popular graphics applications, including Macromedia Fireworks, Adobe
Illustrator, and Adobe Photoshop.
To create a custom keyboard shortcut set, you duplicate an existing set, and
then add or remove shortcuts from the new set. You can also delete custom
shortcut sets.
Page 93

To view or print the current set of keyboard shortcuts:
1. Select Edit > Keyboard Shortcuts.
2. In the Keyboard Shortcuts dialog box, select the shortcut set you wish
to view from the Current pop-up menu.
3. Click the Export Set as HTML button.
The Export Set as HTML button
4. In the Save As dialog box that appears, select a name and location for
the exported HTML file. The default file name is the name of the
selected shortcut set.
5. Click Save.
6. Find the exported file in the folder you selected and open the file in a
web browser.
7. To print the file, use the browser’s Print command.
To select a keyboard shortcut set:
1. Select Edit > Keyboard Shortcuts (Windows) or Flash > Keyboard
Shortcuts (Macintosh).
2. In the Keyboard Shortcuts dialog box, select a shortcut set from the
Current Set pop-up menu.
To create a new keyboard shortcut set:
1. Select a keyboard shortcut set as described in the previous procedure.
2. Click the Duplicate Set button.
3. Enter a name for the new shortcut set and click OK.
To rename a custom keyboard shortcut set:
1. In the Keyboard Shortcuts dialog box, select a shortcut set from the
Current Set pop-up menu.
2. Click the Rename Set button.
3. In the Rename dialog box, enter a new name and click OK.
Flash basics 93
Page 94

To add or remove a keyboard shortcut:
1. Select Edit > Keyboard Shortcuts (Windows) or Flash > Keyboard
Shortcuts (Macintosh) and select the set that you want to modify.
2. From the Commands pop-up menu, select Drawing Menu Commands,
Drawing Tools, Test Movie Menu Commands, or Workplace
Accessibility Commands to view shortcuts for the selected category.
3. In the Commands list, select the command for which you want to add
or remove a shortcut.
An explanation of the selected command appears in the description
area in the dialog box.
4. Do one of the following:
■ To add a shortcut, click the Add Shortcut (+) button.
■ To remove a shortcut, click the Remove Shortcut (-) button and
proceed to step 6.
5. If you are adding a shortcut, enter the new shortcut key combination in
the Press Key text box.
NOTE
To enter the key combination, simply press the keys on the keyboard. You
do not need to spell out key names, such as Control, Option, and so on.
6. Click Change.
7. Repeat this procedure to add or remove additional shortcuts.
8. Click OK.
To delete a keyboard shortcut set:
1. Select Edit > Keyboard Shortcuts (Windows) or Flash > Keyboard
Shortcuts (Macintosh). In the Keyboard Shortcuts dialog box, click the
Delete Set button.
2. In the Delete Set dialog box, select a shortcut set and click Delete.
NOTE
You cannot delete the built-in keyboard shortcut sets that ship with Flash.
94 Studio Basics
Page 95

Using context menus
Context menus contain commands relevant to the current selection. For
example, when you select a frame in the Timeline window, the context
menu contains commands for creating, deleting, and modifying frames
and keyframes. Context menus exist for many items and controls in many
locations, including on the Stage, in the Timeline, in the Library panel,
and in the Actions panel.
To open a context menu:
■ Right-click (Windows) or Control-click (Macintosh) an item.
Accessibility in the Flash authoring environment
Accessibility support in the Flash authoring environment provides
keyboard shortcuts for navigating and using interface controls, including
panels, the Property inspector, dialog boxes, the Stage, and objects on the
Stage, so that you can work with these interface elements without using
the mouse.
NOTE
Certain keyboard controls are available only in Windows. For more
information, see
on page 95.
“About Flash authoring accessibility on the Macintosh”
You can customize the keyboard shortcuts for accessibility in the authoring
environment using the Workspace Accessibility Commands section of the
Keyboard Shortcuts dialog box. For more information, see “Customizing
keyboard shortcuts” on page 92.
Some authoring environment accessibility features are unavailable on the
Macintosh. For more information, see the following section.
About Flash authoring accessibility on the Macintosh
Accessibility for the Flash authoring environment on the Macintosh has
the following limitations:
■ The Panel Focus keyboard shortcut (Command+Option+Tab) is not
supported for the Property inspector.
■ The Panel Control Focus keyboard shortcut (Tab) is supported only for
the Timeline, not for other panels or the Property inspector.
Flash basics 95
Page 96

Selecting panels or the Property inspector with keyboard
shortcuts
You can select a panel or the Property inspector (also referred to as applying
focus to the panel or Property inspector) by using the keyboard shortcut
Control+Alt+Tab (Windows) or Command+Option+Tab (Macintosh).
You can apply focus to a panel or the Property inspector only when the
panel or Property inspector is visible in the Flash application window. The
panel can be expanded or collapsed.
When you use the keyboard shortcut to select panels, focus is applied to
panels using the following criteria:
■ Docked panels are given focus first.
■ If the Timeline is displayed and docked, the Timeline is given focus the
first time you press Control+Alt+Tab (Windows) or
Command+Option+Tab (Macintosh).
■ If the Timeline is not displayed and docked, or if you press the
keyboard shortcut again, focus moves to the rightmost and highest
docked panel. Pressing the keyboard shortcut repeatedly then moves
the focus through the other docked panels, from right to left and from
top to bottom of the workspace.
■ If you move the focus through all the docked panels, or if there are no
docked panels displayed, focus then moves to the rightmost and
highest floating panel. Pressing the keyboard shortcut repeatedly then
moves the focus through the other floating panels, from right to left
and from top to bottom of the workspace.
To use keyboard shortcuts to select or deselect, expand, or
collapse panels or the Property inspector:
■ To move the focus through the panels currently displayed in the
workspace, press Control+Alt+Tab (Windows) or
Command+Option+Tab (Macintosh). A dotted line appears around
the title of the currently focused panel.
■ To move the focus to the previously selected panel, press
Control+Shift+Alt+Tab (Windows) or Command+Shift+Option+Tab
(Macintosh).
■ To deselect a panel, press Escape, or move, dock, or undock the panel.
■ To move the focus to the panel above or below the current panel in a
panel group, press the Up Arrow or Down Arrow key.
96 Studio Basics
Page 97

To use keyboard shortcuts to expand or collapse panels or the
Property inspector:
1. Press Control+Alt+Tab (Windows) or Command+Option+Tab
(Macintosh) until the panel you wish to expand or collapse has focus. A
dotted line appears around the title of the currently focused panel.
2. Press the Spacebar to expand or collapse the currently selected panel.
To hide all panels and the Property inspector:
■ Press F4. Press F4 again to display all panels and the Property inspector.
Selecting controls in a panel or the Property inspector using
keyboard shortcuts
When a panel or the Property inspector has the current focus, you can use
the Tab key to move the focus through the panel controls. You can use the
Spacebar to activate the control that has the current focus (that is, pressing
Spacebar is equivalent to clicking a control in the panel).
When you use the keyboard shortcut for panel controls, focus is applied to
a control and the control is activated using the following criteria:
■ The panel with the current focus must be expanded in order for you to
select a control in the panel with the Tab key. If the panel is collapsed,
pressing Tab has no effect.
■ When the panel with the current focus is expanded, pressing Tab the
first time moves the focus to the panel’s pop-up menu.
■ You can use the Right Arrow and Left Arrow keys to move the focus
between the pop-up menu and the panel title bar.
■ If the focus is on the pop-up menu, pressing Tab again moves the focus
through the other controls in the panel. Pressing Tab again will not
return the focus to the panel pop-up menu.
■ When the pop-up menu has the focus, you can press Enter (Windows
only) to display the pop-up menu items.
■ In panels that are grouped, you can use the Up Arrow and Down
Arrow keys to move the focus between the pop-up menus of the panels
in the group.
■ You can move the focus to a panel control only if the control is active.
If a control is dimmed (inactive), you cannot apply focus to
the control.
Flash basics 97
Page 98

To move the focus from a panel title bar to a panel pop-up
menu, do one of the following:
■ Press Tab.
■ Press the Right Arrow key. Press the Left Arrow key or Shift+Tab to
return the focus to the panel title bar.
■ If the panel is in a group, press the Up Arrow key to move the focus to
the options pop-up menu of the panel immediately above the panel
with the current focus. Press the Down Arrow key to move the focus to
the pop-up menu of the panel immediately below the panel with the
current focus.
To move the focus through the items in a panel pop-up menu:
1. With the focus currently applied to the panel pop-up menu, press the
Spacebar to display the pop-up menu items.
2. Press the Down Arrow key to move through the items in the
pop-up menu.
3. Press Enter (Windows) or Return (Macintosh) to activate the currently
selected pop-up menu item.
To move the focus through the controls in a panel:
1. Press Tab when the focus is currently applied to the panel pop-up
menu. Press Tab repeatedly to move the focus through the controls in
the panel.
2. Press Enter (Windows only) to activate the currently selected
panel control.
Navigating dialog box controls using keyboard shortcuts
(Windows only)
In Windows operating systems, you can use keyboard shortcuts to navigate
controls in dialog boxes. You can move from one control to another, apply
controls, or cancel and exit the dialog box.
To navigate dialog box controls using keyboard shortcuts, do
one of the following:
■ Press Tab to move through the controls in the dialog box.
■ To move through the controls within one section of a dialog box, press
the Up Arrow and Down Arrow keys. For example, in the Spelling
Setup dialog box, press the Up Arrow and Down Arrow keys to move
through the controls within the Document Options section.
98 Studio Basics
Page 99

■ When the focus is applied to a dialog box control button—such as the
OK, Cancel, or Apply button—press Enter to activate the button
(equivalent to clicking the button).
■ When the focus is not applied to any dialog box control button—such
as the OK, Cancel, or Apply button—press Enter to apply the current
settings and close the dialog box (equivalent to clicking OK).
■ Press Escape to close the dialog box without applying the changes
(equivalent to clicking Cancel).
■ When the focus is applied to the Help button, press Enter or Spacebar
to view the Help content for the dialog box (equivalent to
clicking Help).
Selecting the Stage or objects on the Stage using keyboard
shortcuts
You can select the Stage or an object on the Stage using keyboard shortcuts.
Selecting the Stage with a keyboard shortcut is equivalent to clicking on
the Stage. Any other element currently selected becomes deselected when
the Stage is selected.
Once the Stage is selected, you can use the Tab key to navigate through all
objects on all layers, one at a time. You can select instances (including
graphic symbols, buttons, movie clips, bitmaps, videos, or sounds), groups,
or text boxes. You cannot select shapes (such as rectangles) unless those
shapes are instances of symbols. You cannot select more than one object at
a time using keyboard shortcuts. Objects are selected on the Stage using the
following criteria:
■ If an object is currently selected, pressing Shift+Tab selects the
previous object.
■ Pressing Tab the first time selects the first object that was created on the
active frame in the active layer. When the last object on the top layer is
selected, pressing Tab moves to the next layer beneath it and selects the
first object there, and so on.
■ When the last object on the last layer is selected, pressing Tab moves to
the next frame and selects the first object on the top layer there.
Flash basics 99
Page 100

■ Objects on layers that are hidden or locked cannot be selected with the
Tab k e y.
NOTE
If you are currently typing text into a text box, you cannot select an object
using the keyboard focus. You must first change the focus to the Stage
and then select an object.
To select the Stage:
■ Press Control+Alt+Home (Windows) or Command+Option+Home
(Macintosh).
To select an object on the Stage:
■ With the Stage selected, press Tab.
Navigating tree controls using keyboard shortcuts
You can navigate tree structures, the hierarchical displays of file structures in
certain Flash panels, using keyboard shortcuts. You can expand and
collapse folders in the tree control and move up and down between parent
and child folders.
To navigate tree controls with keyboard shortcuts, do any of
the following:
■ To expand a collapsed folder, select the folder and press the Right
Arrow key.
■ To collapse an expanded folder, select the folder and press the Left
Arrow key.
■ To move to the parent folder of an expanded folder, press the Left
Arrow key.
■ To move to the child folder of an expanded folder, press the Right
Arrow key.
Working with library items using keyboard shortcuts
You can cut, copy, and paste library items using keyboard shortcuts. You
can cut or copy an item from the Library panel and paste it onto the Stage
or into another library, or paste a folder into another library. If you paste a
folder, each item in the folder is included.
You can use keyboard shortcuts to select a library item. For more
information, see “Navigating tree controls using keyboard shortcuts”
on page 100.
100 Studio Basics
 Loading...