

Page 1

Adobe® Presenter® 11
Help
Page 2

Legal notices
Legal notices
For legal notices, see http://help.adobe.com/en_US/legalnotices/index.html.
Last updated 9/12/2015
Page 3

Contents
Adobe Presenter
What's new in Adobe Presenter 11 . . . . . . . . . . . . . . . . . . . . . . . . . . . . . . . . . . . . . . . . . . . . . . . . . . . . . . . . . . . . . . . . . . . . . . . . . . . . . . . . . . . . . .1
Embedding videos and web objects . . . . . . . . . . . . . . . . . . . . . . . . . . . . . . . . . . . . . . . . . . . . . . . . . . . . . . . . . . . . . . . . . . . . . . . . . . . . . . . . . . . .5
Publishing and viewing presentations . . . . . . . . . . . . . . . . . . . . . . . . . . . . . . . . . . . . . . . . . . . . . . . . . . . . . . . . . . . . . . . . . . . . . . . . . . . . . . . . . . .8
What’s new in Adobe Presenter 10 . . . . . . . . . . . . . . . . . . . . . . . . . . . . . . . . . . . . . . . . . . . . . . . . . . . . . . . . . . . . . . . . . . . . . . . . . . . . . . . . . . . . 24
Drag and drop questions . . . . . . . . . . . . . . . . . . . . . . . . . . . . . . . . . . . . . . . . . . . . . . . . . . . . . . . . . . . . . . . . . . . . . . . . . . . . . . . . . . . . . . . . . . . . . 30
Inserting scenario interactions . . . . . . . . . . . . . . . . . . . . . . . . . . . . . . . . . . . . . . . . . . . . . . . . . . . . . . . . . . . . . . . . . . . . . . . . . . . . . . . . . . . . . . . . 32
Adobe Presenter Video Express (Windows & Mac) . . . . . . . . . . . . . . . . . . . . . . . . . . . . . . . . . . . . . . . . . . . . . . . . . . . . . . . . . . . . . . . . . . . . . 33
Adding quizzes and questions . . . . . . . . . . . . . . . . . . . . . . . . . . . . . . . . . . . . . . . . . . . . . . . . . . . . . . . . . . . . . . . . . . . . . . . . . . . . . . . . . . . . . . . . 48
Enable Analytics and Collaboration . . . . . . . . . . . . . . . . . . . . . . . . . . . . . . . . . . . . . . . . . . . . . . . . . . . . . . . . . . . . . . . . . . . . . . . . . . . . . . . . . . . 80
What’s new in Adobe Presenter 10 . . . . . . . . . . . . . . . . . . . . . . . . . . . . . . . . . . . . . . . . . . . . . . . . . . . . . . . . . . . . . . . . . . . . . . . . . . . . . . . . . . . . 85
Closed captions . . . . . . . . . . . . . . . . . . . . . . . . . . . . . . . . . . . . . . . . . . . . . . . . . . . . . . . . . . . . . . . . . . . . . . . . . . . . . . . . . . . . . . . . . . . . . . . . . . . . . . 91
Accessibility and 508-compliance . . . . . . . . . . . . . . . . . . . . . . . . . . . . . . . . . . . . . . . . . . . . . . . . . . . . . . . . . . . . . . . . . . . . . . . . . . . . . . . . . . . . . 93
Audio in presentations . . . . . . . . . . . . . . . . . . . . . . . . . . . . . . . . . . . . . . . . . . . . . . . . . . . . . . . . . . . . . . . . . . . . . . . . . . . . . . . . . . . . . . . . . . . . . . . 93
Creating presentations . . . . . . . . . . . . . . . . . . . . . . . . . . . . . . . . . . . . . . . . . . . . . . . . . . . . . . . . . . . . . . . . . . . . . . . . . . . . . . . . . . . . . . . . . . . . . . 104
Designing presentations . . . . . . . . . . . . . . . . . . . . . . . . . . . . . . . . . . . . . . . . . . . . . . . . . . . . . . . . . . . . . . . . . . . . . . . . . . . . . . . . . . . . . . . . . . . . . 109
Editing Adobe Presenter presentations . . . . . . . . . . . . . . . . . . . . . . . . . . . . . . . . . . . . . . . . . . . . . . . . . . . . . . . . . . . . . . . . . . . . . . . . . . . . . . . 118
Importing SWF files and video files . . . . . . . . . . . . . . . . . . . . . . . . . . . . . . . . . . . . . . . . . . . . . . . . . . . . . . . . . . . . . . . . . . . . . . . . . . . . . . . . . . . 127
Inserting learning interactions . . . . . . . . . . . . . . . . . . . . . . . . . . . . . . . . . . . . . . . . . . . . . . . . . . . . . . . . . . . . . . . . . . . . . . . . . . . . . . . . . . . . . . . 130
Recording application simulations . . . . . . . . . . . . . . . . . . . . . . . . . . . . . . . . . . . . . . . . . . . . . . . . . . . . . . . . . . . . . . . . . . . . . . . . . . . . . . . . . . . 132
iii
Last updated 9/12/2015
Page 4

Adobe Presenter
What's new in Adobe Presenter 11
Adobe Presenter 11 software lets you transform your PowerPoint slides into interactive eLearning with stunning assets
and quizzes. Simultaneously capture your screen content with your webcam video and turn static content into HD
videos right from your desktop. Edit videos within the project timeline and publish to popular video sharing sites.
Leverage HTML5 publishing to deliver courses to desktops and tablets. Track learner performance with the integration
of leading LMSs.
For video enthusiasts, Presenter also comes with Presenter Video Express.
With Adobe Presenter Video Express 11 you get a personal video studio right at your desktop. Save time, money and
effort while you create, edit and mix interactive HD videos. Record yourself or your screen, or bring in external video.
Mix and enhance to transform the video viewing experience using dynamic background replacement, effects, in-video
questions and much more. Seamlessly deliver a multi-device viewing experience, and enable the content for analytics.
1
What's new and changed in Adobe Presenter
Embed WebObjects and Videos
You can now embed open web content into your project. The content is dynamically fetched at run-time without adding
bulk to your project.
You can also embed videos into your project. Customize the appearance and length of the embedded videos as per your
requirements easily.
For more information on this feature, click here
Last updated 9/12/2015
Page 5
Adobe Presenter
Publish project to Adobe Captivate Prime
Adobe Captivate Prime is a Learning Management System (LMS) that you can use to distribute your e-learning course
over the internet to learners.
You can now publish your project to Adobe Captivate Prime. Here's Publish project to Adobe Captivate Prime.
Slide transitions supported for HTML5
2
Earlier versions of Adobe Presenter supported slide transitions in SWF output. In this release slide transitions are also
supported in HTML5 output.
With this release, the following slide transitions are supported in HTML5 output:
• blinds
• cover
• fade
• pan
• push
• randomBar
• split
• wipe
• zoom
• door
• comb
Note: When an un-supported transition is added, by default Presenter uses the fade transition in the output.
Last updated 9/12/2015
Page 6

Adobe Presenter
New stock characters included
This version of Adobe Presenter includes additional characters that you can include in your projects.
Click the Character widget in the Adobe Presenter ribbon from within PowerPoint to access stock characters that you
can use.
3
Localization-related changes
Availability of Adobe Presenter in Arabic language
From this version on, Adobe Presenter is available in Arabic language as well. This also includes the localized Arabic
version of Presenter Video Express.
Localized interactions
From this version on, the interactions in Adobe Presenter are also available in all localized languages, except Arabic.
Last updated 9/12/2015
Page 7
Adobe Presenter
What's new and changed in Adobe Presenter Video Express
Customize background and enhance video
4
Add quiz questions to your video
Add annotations
Publish to Adobe Captivate Prime
Insert videos into the timeline
Last updated 9/12/2015
Page 8

Adobe Presenter
Record over external video
Updated editing interface
5
Enhanced preferences and settings options
Embedding videos and web objects
Embed web object
You can use this feature to embed content from the web into your module.
When you embed a web object, you are dynamically including content from a website at run time, without having to
“physically” embed that content in your project. The content could virtually be anything - a whole web page, a widget,
a video, a game, or just plain text.
Add a web object to your project
To add a web object to your project:
1 Click the Adobe Presenter ribbon from within your PowerPoint presentation, and click Web Object.
2 Enter the url of the webpage or the embed code of the web content you want to embed (if provided).
Note: Until you click Preview, the OK button in the dialog box is not enabled.
Last updated 9/12/2015
Page 9

Adobe Presenter
6
3 Check Auto Load if you want the web object to start playing as soon as the slide is loaded. Uncheck this option if
you want the user to click Play to manually start playing the content.
4 Check Scrolling if you want the user to be able to scroll down the web object content.
5 Click OK to embed the web object into your e-learning course. You can drag the points of the web object to increase
or decrease its size.
Note: You can embed only one web object per slide.
Note: Not all websites may work, because some of them may not support rendering their content on an iframe. Only
websites that support content to be loaded in external iframes can be embedded.
Remove a web object from your project
To re move a web obj ect from your p roject , se lec t the web obj ect ins erte d on the sli de and pre ss D ele te o n your key boar d.
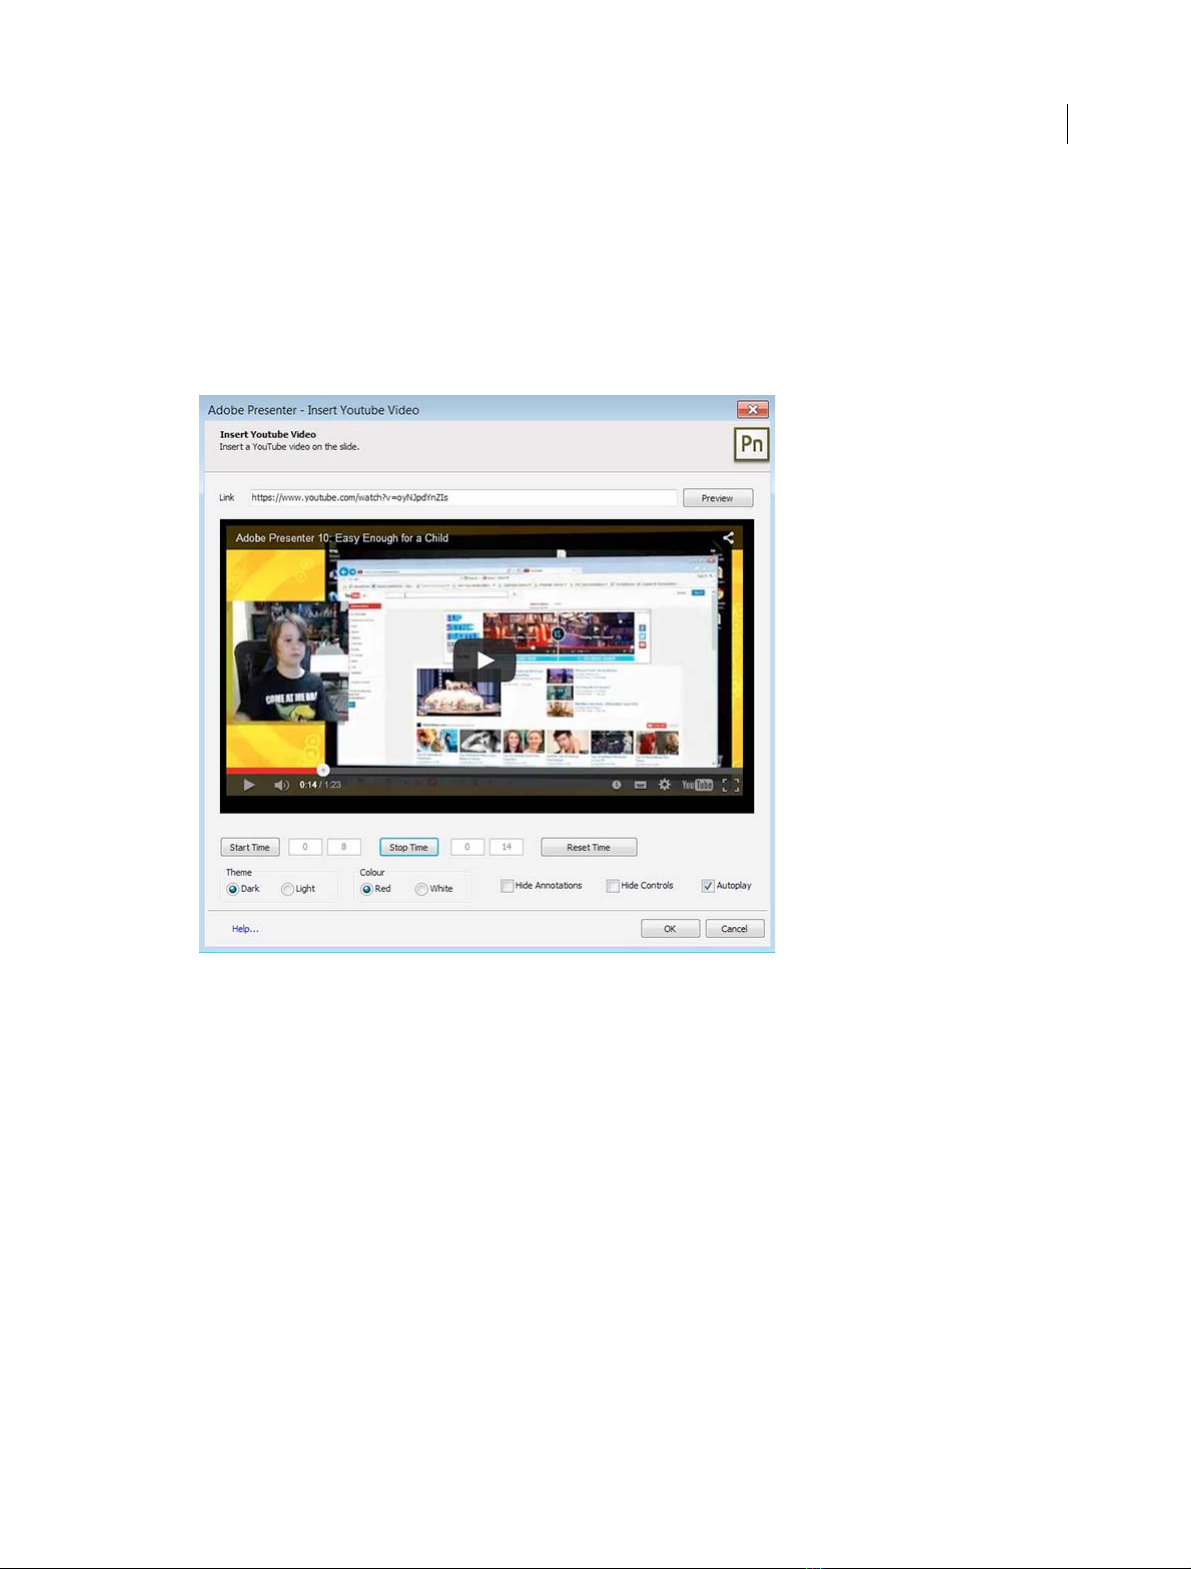
Embed YouTube videos
You can embed video content from YouTube into your project.
Last updated 9/12/2015
Page 10
Adobe Presenter
While you can use the Web Object feature to embed online videos (subject to websites supporting such embeds), the
YouTube feature goes a bit further allowing you to control/customize the play back.
1 Click the Adobe Presenter ribbon from within your PowerPoint presentation, and click YouTube.
2 Enter the URL of the YouTube video that you want to embed and click Preview to preview the video within the
dialog box.
Note: Until you click Preview, the OK button in the dialog box is not enabled.
7
3 You can embed an entire YouTube video or only a part of it.
To embed only a section:
a Play the video within the Insert YouTube dialog box.
b Click Start Time at the point where you want the video to start.
c Click Stop Time at the point where you want the video to stop.
d Click Reset Time if you want to reset the start and stop times.
Only that section of the video is embedded into your project.
4 You can also customize the appearance of the video using the Theme and Color options in the Insert YouTube Video
dialog box.
Theme: Choose whether you want a light or dark frame color.
Color: Choose whether you want red or white color to be used in the player's video progress bar to highlight the
amount of the video that the viewer has already seen
Hide Annotations: Check this if you do not want to display the annotations in the video.
Last updated 9/12/2015
Page 11
Adobe Presenter
Hide Controls: Check this if you do not want to display the video player controls.
Note: These theme options are the standard customization options provided by YouTube. These cannot be previewed
through the Preview window, you can view the customization only in the published presentation.
5 Check Autoplay if you want the video to play automatically when the slide loads.
Note: Autoplay is not supported on Apple devices. If you select this, it will not work if the user is viewing the e-learning
course on an Apple device.
Publishing and viewing presentations
Publish as HTML5 output
Now let your learners have full access to your courses, even on tablets. Deliver eLearning on the go with full support
for scalable HTML5.
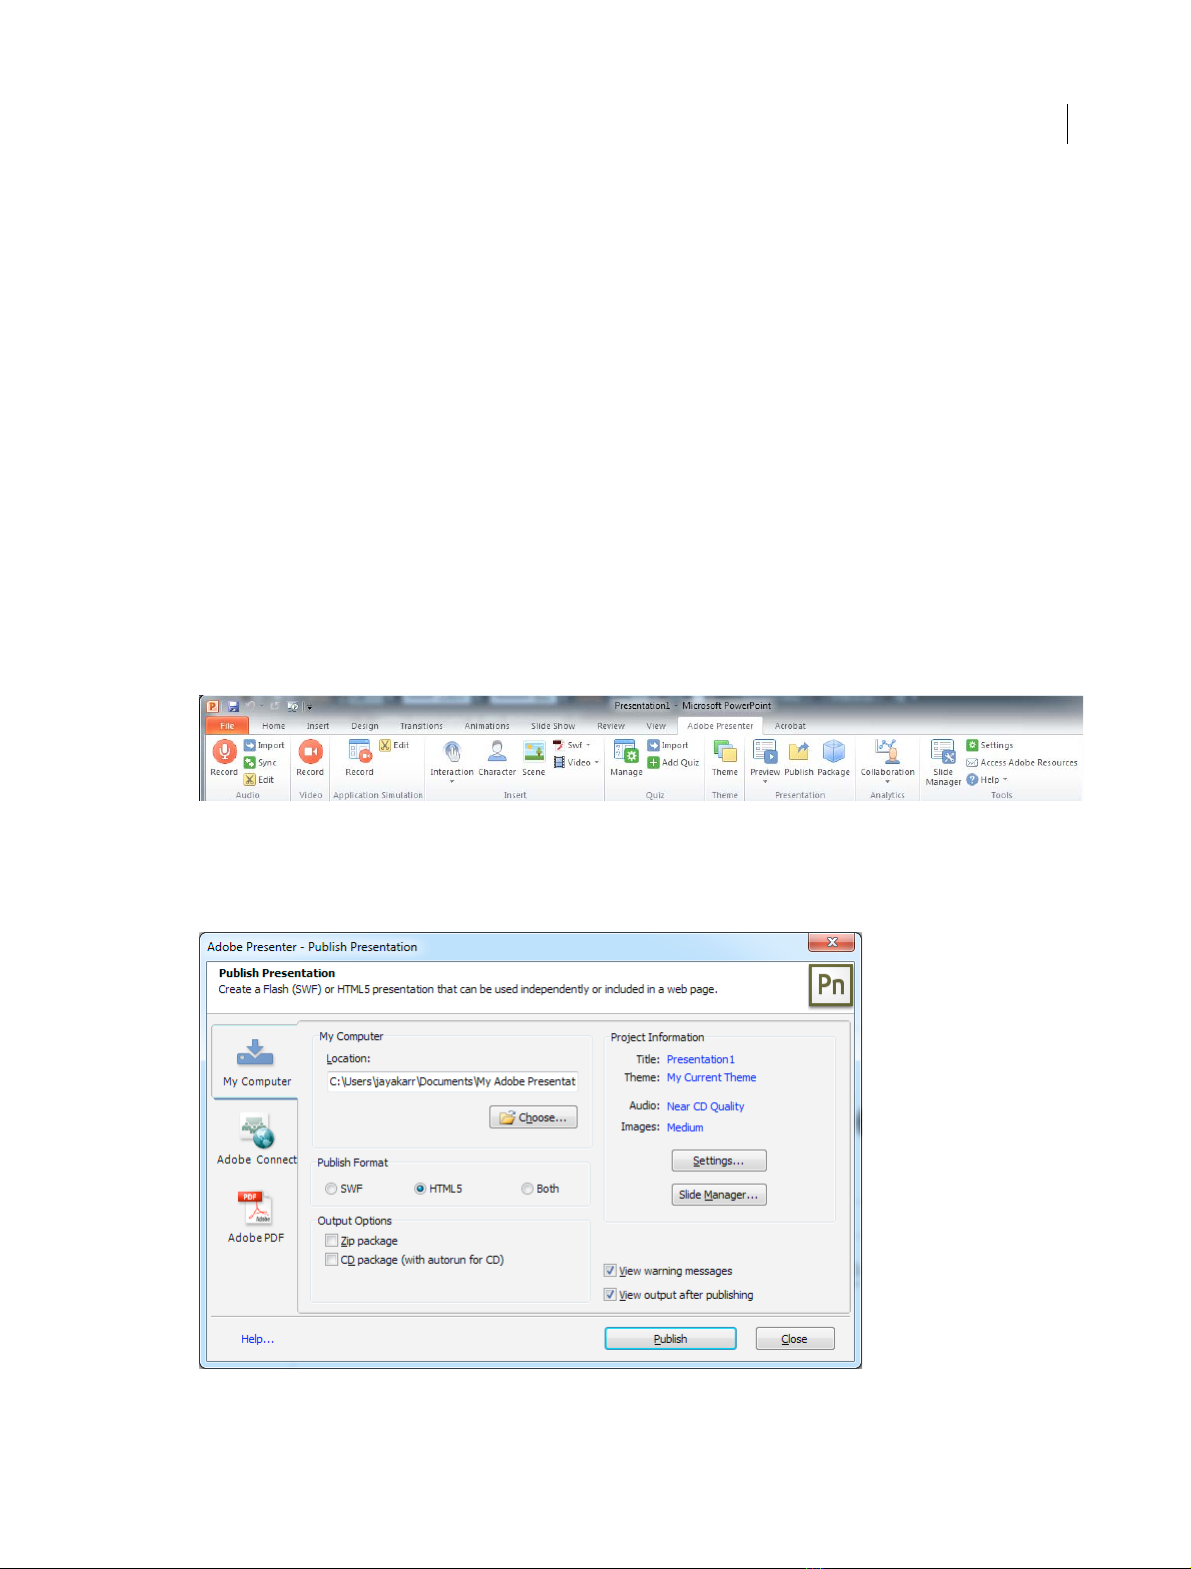
1 In Microsoft Powerpoint, click Adobe Presenter menu.
8
2 Click Publish icon in the Adobe Presenter.
Publish Presentation window appears.
Last updated 9/12/2015
Page 12

Adobe Presenter
3 In Publish Presentation window, click HTML5 to publish as HTML5 output or Both option to publish the
presentation as both SWF and HTML5 output formats.
4 Click Publish to view the HTML5 output in browser.
Note: If your local computer does not have Flash Player installed, and you publish the output as SWF, you are prompted
to install Flash Player. If your local computer does not have Flash Player installed and you publish the output as Both
(SWF and HTML5), then by default, the output will be shown as HTML5 in browser.
Note: While using HTML 5 content, you might observe some of the known behavior in different user scenarios as listed
Known behavior with HTML5 content.
Publishing and viewing content in Tablets
HTML5 output can be accessed on tablets only through web browsers. Upload the entire HTML5 output folder to a
web server root folder and make the URL available to your users. Your users can access the URL from their tablets and
view the content that plays within the web browser.
• Webserver root for IIS: C:\Inetpub\wwwroot\
• Webserver root for Apache: <Apache install folder>\htdocs\
Type the following URL in one of the above web browsers:
9
• http://<webserver_hostname>:<port>/<HTML5_outputfolder>/
For example, if the HTML5 output folder is MyPnProject, the URL will be:
• http://localhost:80/MyPnProject/
Publish locally
Publishing to your local machine is a good way to test your presentation and see how it will look to your end users.
1 Click Adobe Presenter , and in the Presentation group, click Publish.
2 Select My Computer.
3 (Optional) Select Zip Package to add all presentation files to a Zip file. This is useful if you need to give or send the
files to someone else to preview.
4 (Optional) Select CD Package if you are going to distribute the presentation on a CD-ROM after previewing it. (If
you select this option, you can burn the presentation onto a CD-ROM and when it is opened, the presentation
automatically begins playing.)
5 Click Publish. (If a message appears stating that all files will be deleted, click Yes. Each time you generate your
presentation, the files in your current output folder are deleted and replaced by the newly generated files.)
When you publish, a new folder with the same name as the presentation is created and placed in your My
Documents\My Adobe Presentations folder. The new folder contains all of the presentation files, copies of
attachments, and any audio, video, and image files that are part of the presentation.
6 When the conversion is finished, click View Output. (If you selected the Select Zip Package option, you will not see
the View Output option. To view the presentation, go to the location where you saved the Zip file, unzip the file, and
double-click the index.htm file.) The presentation appears in your default web browser.
Note: If you try to publish a presentation that has been encrypted in PowerPoint and requires a password to open or edit
the PPT or PPTX file, the presentation may not publish correctly. Remove the encryption, publish, and then reset the
encryption again.
Last updated 9/12/2015
Page 13

Adobe Presenter
Publish a presentation to PDF
You can publish a presentation to PDF if you have Acrobat Pro or Acrobat Reader installed.
1 In PowerPoint, open a presentation (PPT or PPTX file).
2 Click Adobe Presenter, and in the Presentation group, click Publish.
3 Select Adobe PDF on the left side.
4 Under Publish as Adobe PDF, click Choose and navigate to the location where you want to save the file.
5 In File Name, type a name for the PDF.
6 Click Open.
7 (Optional) Select View Output After Publishing to open the PDF when publishing is complete.
8 Click Publish.
After publishing is complete, the PDF opens. If Acrobat Pro or Acrobat Reader are not installed, a blank PDF is
displayed.
Publish the entire presentation as a package
Adobe Presenter provides a quick option to publish the entire presentation along with the assets and media as a single
package. This option is especially useful if you need to work on the presentation from multiple computers or multiple
authors need to work on it.
10
1 Open the presentation (PPT or PPTX file) in PowerPoint.
2 Click Adobe Presenter, and in the Presentation group, click Package.
3 Specify the name and path for the package. Click the browse icon to browse for the required location.
The default path is the path where the presentation is saved.
4 Click Pack.
You can open a packaged presentation in one of the following ways:
• Browse to the location where you have saved the package using Windows Explorer, and double-click the .prpkg file.
• Click the Microsoft Office button in PowerPoint, and click Adobe Presenter Unpackage. Specify the Package
Location and the Output Folder where Adobe Presenter needs to unpackage the contents.
Publish to Adobe Connect Server
Adobe Connect is a web communication system that lets you quickly and easily view presentations, attend meetings,
and receive training over the Internet using the familiar PowerPoint application, web browsers, and Flash Player.
If you have Adobe Connect Server, you can publish to it so others can view your presentations. Users see your
presentation in the viewer within Adobe Connect Server, as part of a course or curriculum in Connect Pro Training, or
with a URL provided by the Content library.
Con nect P ro i nclu des a se t of com pon ent s that provid es an inte grat ed sol uti on. Co nne ct Pr o can be dep loy ed wit h som e
or all of these components:
Connect Pro Meeting Lets you view and participate in a meeting over the Internet in real time.
Connect Pro Training Lets you participate in online training systems, including integrated surveys, tracking, analysis,
and course management.
Last updated 9/12/2015
Page 14

Adobe Presenter
Connect Pro Events Provides tools to manage the full cycle of an event, from registration and qualification of users to
post-event follow-up.
Add and access Adobe Connect Servers
You can access your Adobe Connect Server account quickly and easily from Adobe Presenter.
1 Click Adobe Presenter, and in the Tools group, click Settings.
2 In the Application menu on the left, click Servers.
3 Click Add, enter the name and URL of the Adobe Connect server, and click OK.
The name and URL of the server appears in the Settings dialog box.
4 To access the server, click Manage Accounts.
The default web browser appears and the Adobe Connect Server login page appears.
Manage the Adobe Connect Server publishing list
Adobe Presenter provides you with an easy way to maintain a list of Adobe Connect Servers that you publish to
regularly. You can add one or several Adobe Connect Servers to the publishing list. After a server has been added to the
list, it’s easy and quick to publish to that server.
11
Edit an Adobe Connect Server in the publishing list
After you have added a Adobe Connect Server to the publishing list, you can edit the server name or URL at any time.
1 In PowerPoint, open a presentation (PPT or PPTX file).
2 Click Adobe Presenter, and in the Tools group, click Settings.
3 In the Application menu on the left, click Servers.
4 Select a server from the list and click Edit.
5 Make any necessary changes to the server name or URL.
6 Click OK.
Remove a Adobe Connect Server from the publishing list
1 In PowerPoint, open a presentation (PPT or PPTX file).
2 Click Adobe Presenter, and in the Tools group, click Settings.
3 In the Application menu on the left, click Servers.
4 Select a server from the list and click Delete.
5 Click OK.
Publish to an Adobe Connect Server
After creating and previewing your presentation, you can publish the presentation directly to an Adobe Connect Server
in your publishing list. You must be connected to the Internet and have a Connect Pro account. Adobe Presenter
integrates fully with Connect Pro so that, for example, presentations containing quizzes can have quiz results
automatically sent to and managed by an Adobe Connect Server.
When you publish to an Adobe Connect Server, the presentation is published to the Content library. The presentation
can be taken from the Content library and added to a Connect Pro meeting or training session.
Last updated 9/12/2015
Page 15

Adobe Presenter
To publish to an Adobe Connect Server, follow this general workflow: Select an Adobe Connect Server, log in to
Connect Pro Central, select a location for your presentation, enter information about the presentation, and finally set
permissions specifying who can view it.
Note: At times, you may need to republish a presentation to the Connect library. For example, if you need to update
information in the presentation. If you republish a presentation to the Content library and that presentation is included in
a Training course on Adobe Connect Server, you must update the presentation in the course. Follow the steps in the Connect
Pro User Guide topic “Change or update course content” and ensure that you save and update the content at the end of the
short procedure.
Select an Adobe Connect Server
The first step in publishing a presentation to a Adobe Connect Server is to select a server from the publishing list.
1 In PowerPoint, open a presentation (PPT or PPTX file).
2 Click Adobe Presenter, and in the Presentation group, click Publish.
3 On the left side of the Publish dialog box, select Adobe Connect Pro.
4 In the Server list, click the required Adobe Connect server. To edit the URL or the name of the server, click Edit
Servers.
5 (Optional) Check the Project Information area on the right side. If you want to edit any of the options, click Settings
or Slide Manager.
6 (Optional) If you want to publish the presentation source files along with the SWF file, select Upload Source
Presentation With Assets. This option is useful if multiple authors are working on a presentation or if you think the
presentation will need to be updated later and you want to keep all of the files stored in one location. Select Audio,
Video, or Attachments. (Large video files can take some time to upload to the server.)
12
7 Click Publish.
The presentation is created and the Connect Pro Central Login screen appears.
The next section describes how to log in to your Connect Pro account.
Log in to Connect Pro
The next step in publishing a presentation is to log in to your Connect Pro account. You must have an account and the
correct security permissions before publishing a presentation. (To obtain permission to create and update
presentations, contact your Connect Pro administrator.)
1 On the Connect Pro Login screen, enter your login name (usually your account e-mail address).
2 Enter your password.
3 Click Login.
The next section explains how to select a location in which to save a presentation.
Select a location for the presentation
The third step in publishing a presentation is to select a location in your Connect Pro account in which to store the
presentation. After you log in to Connect Pro, your personal user folder in the Content library appears. Select a location
in your Connect Pro Content library for the presentation.
Note: The Content library displays only your presentations. Other Connect Pro content, including SWF files, FLA files, and
JPG files, are not displayed when you view the Content library.
Last updated 9/12/2015
Page 16

Adobe Presenter
Note: If you have already published the presentation to the server, you are prompted to save over the previous version or to
save the presentation to a new location.
1 In the Adobe Connect Publish screen, navigate to a folder within your Connect Pro Content library in which to store
the presentation.
• To open a folder and display its contents, click the name of a folder. The folders and files within that folder are
displayed. The navigation path of links near the top of the browser window is updated to indicate the directory
path to the selected folder.
• To publish changes to a presentation already located in the folder, click Update Existing Presentation. The new
version of the presentation overwrites the existing presentation.
• To create a new folder, navigate to the location where you want to add a new folder, click the New Folder button,
enter a name for the new folder, and click Save.
Note: You can create folders only if you have manage permissions for the parent folder.
• To move up to the parent folder (the folder one level above the current folder), click the Up One Level button in
the navigation bar above the content list.
2 Click Publish To This Folder.
The next section explains how to enter descriptive information for the presentation.
13
Enter presentation information
The fourth step in publishing a presentation is to provide identification information about the presentation. You must
specify a title for the presentation.
1 In the Content Information dialog box, enter a unique name for the presentation in the Title text box.
2 (Optional) In the Custom URL text box, you can create your own URL to view the presentation. This option is useful
if you want to create a URL to view the presentation that can be remembered easily. If you leave this text box blank,
Connect Pro automatically creates a generic, but unique, URL for the presentation.
3 (Optional) In the Summary text box, type a short description of the presentation. (The maximum length of the
summary is 750 characters.)
4 Click Next.
The final step in the publishing process is to set permissions for who can view the presentation.
Set permissions
The final step in the publishing process is to set permissions for the presentation. This establishes who is able to view
the presentation. You have several options available.
1 On the Set Permissions screen, select a permission setting.
• The default permission setting is Same As Parent Folder. If you select this option, the presentation automatically
inherits the same permission profile as the parent folder in which it is publish ed. For examp le, if the parent fol der
has permission for public viewing, the presentation will also have permission for public viewing.
• To change the permission setting, click Customize. To create a public presentation, select Yes next to the Allow
Public Viewing option. To create a private presentation with a custom permission profile that is different from
that of its parent folder, make sure the Allow Public Viewing option is not selected. Then, create a list of users
and groups with specific permission types. In the Available Users And Groups list on the left, select a group or
individual and click Add. The new user or group now appears in the Current Permissions list on the right.
Continue adding or removing users or groups as necessary.
Last updated 9/12/2015
Page 17

Adobe Presenter
2 Click Finish.
3 A dialog box appears and confirms that the project was successfully published to the specified Adobe Connect
Server. Click OK.
The Content Information dialog box appears. This screen lists important information about the presentation,
including the URL for viewing. If you click the URL, the presentation is displayed and begins to play. To share the
presentation with others, you can send them the URL by clicking E-mail Link, or by cutting and pasting the URL
into an e-mail. (For users to view the presentation, the published presentation or the folder containing the
presentation must have the correct permissions set.)
4 Click OK to complete the publishing process.
Add a Adobe Presenter presentation to a Connect Pro meeting
Adobe Presenter lets you create e-learning content and high-quality multimedia presentations containing slides,
streaming audio, synchronized animation, and navigation controls rapidly using Microsoft PowerPoint as a base.
After you have published a Adobe Presenter presentation to Connect Pro, you can add the presentation to a Connect
Pro meeting by bringing the presentation file into a share pod from the Content library or directly from your computer.
When viewing the presentation in a meeting, you have complete control over the screen side, slide navigation, and
audio.
14
Note: Add presentations to a Connect Pro meeting from the Content library. If you have to upload the presentation directly
from your computer, upload the ZIP file that contains the presentation and all the required assets. If you browse and upload
only the PowerPoint file, the assets used in the presentation are not displayed.
Add a presentation from the Content library to a Connect Pro meeting
Adding a presentation to a Connect Pro meeting from the Content library is a good method to use if you publish all of
your presentations to the library and manage them from that location. You also have the option to add a presentation
to a Connect Pro meeting directly from your computer. (For more information, see the Adobe Connect Pro User
Guide.)
1 Log in to your Adobe Connect Server.
2 Click the Meetings tab.
3 Select a meeting from the list.
4 Click Enter Meeting Room.
5 From the Share pod, select Documents > Select From My Computer. (If a Share pod is not open, click the Pods menu
and select Share > Select From My Computer.)
6 Select the presentation and click Open.
The Adobe Presenter presentation appears in the Connect Pro meeting.
Add a zipped presentation from your computer to a Connect Pro meeting
If you have a Adobe Presenter presentation stored on your computer, you can add the presentation directly from that
location into a Connect Pro meeting. This is a good method to use if you need to place a presentation into a Connect
Pro meeting, but the presentation has not been published to the Content library. For example, you might have a
presentation that you have not published because it is incomplete, but you want to show a preliminary version in a
Connect Pro meeting.
Last updated 9/12/2015
Page 18

Adobe Presenter
Note: Adobe recommends adding presentations to Connect Pro meetings from the Content library. Presentations uploaded
directly from your computer to a Connect Pro meeting do not support some Adobe Presenter features. For example, if you
share the presentation PowerPoint (PPT or PPTX) file, audio, video, attachments, Adobe Presenter photos, Adobe Presenter
logos, and the Thumbnail pane are not displayed.
1 In Adobe Presenter, publish your presentation locally and select the Zip package Output Option. (To do this, click
the Adobe Presenter ribbon, select Publish, click My Computer, select the Zip package option, and click Publish.)
2 Open your web browser and navigate to your Adobe Connect Server.
3 Log in using your login name and password.
4 Click the Meetings tab.
5 Select a meeting.
6 Click Enter Meeting Room.
7 From the Share pod, select Documents > Select From My Computer. (If a Share pod is not open, click the Pods menu
and select Share > Select From My Computer.)
8 Navigate to the presentation folder on your computer.
9 Select the presentation Zip file and click Open.
The Adobe Presenter presentation appears in the Connect Pro meeting.
15
Publish project to Adobe Captivate Prime
Adobe Captivate Prime is a Learning Management System (LMS) that you can use to distribute your e-learning course
over the internet to learners.
You can now publish your completed project to Adobe Captivate Prime.
1 Click the Adobe Presenter ribbon from within your Powerpoint presentation, and click Publish.
The Publish Presentation dialog box opens.
2 Customize your presentation and application settings in the Settings dialog box.
Presentation:
• Appearance: Enter the project title and a brief summary
• Playback: Customize the playback options or retain the default playback options
• Quality: Fine-tune the publish quality or retain the default quality options
• Attachments: Add presentation attachments such as documents or spreadsheets
Application:
• Presenters: Add presenter's names, along with a photo, and a brief bio
• Servers: Select or add an Adobe Connect server
• Audio Source: Select an audio source
• Preview: Enter the number of slides you want to preview
3 View and edit each slide's properties in the Slide Manager dialog box.
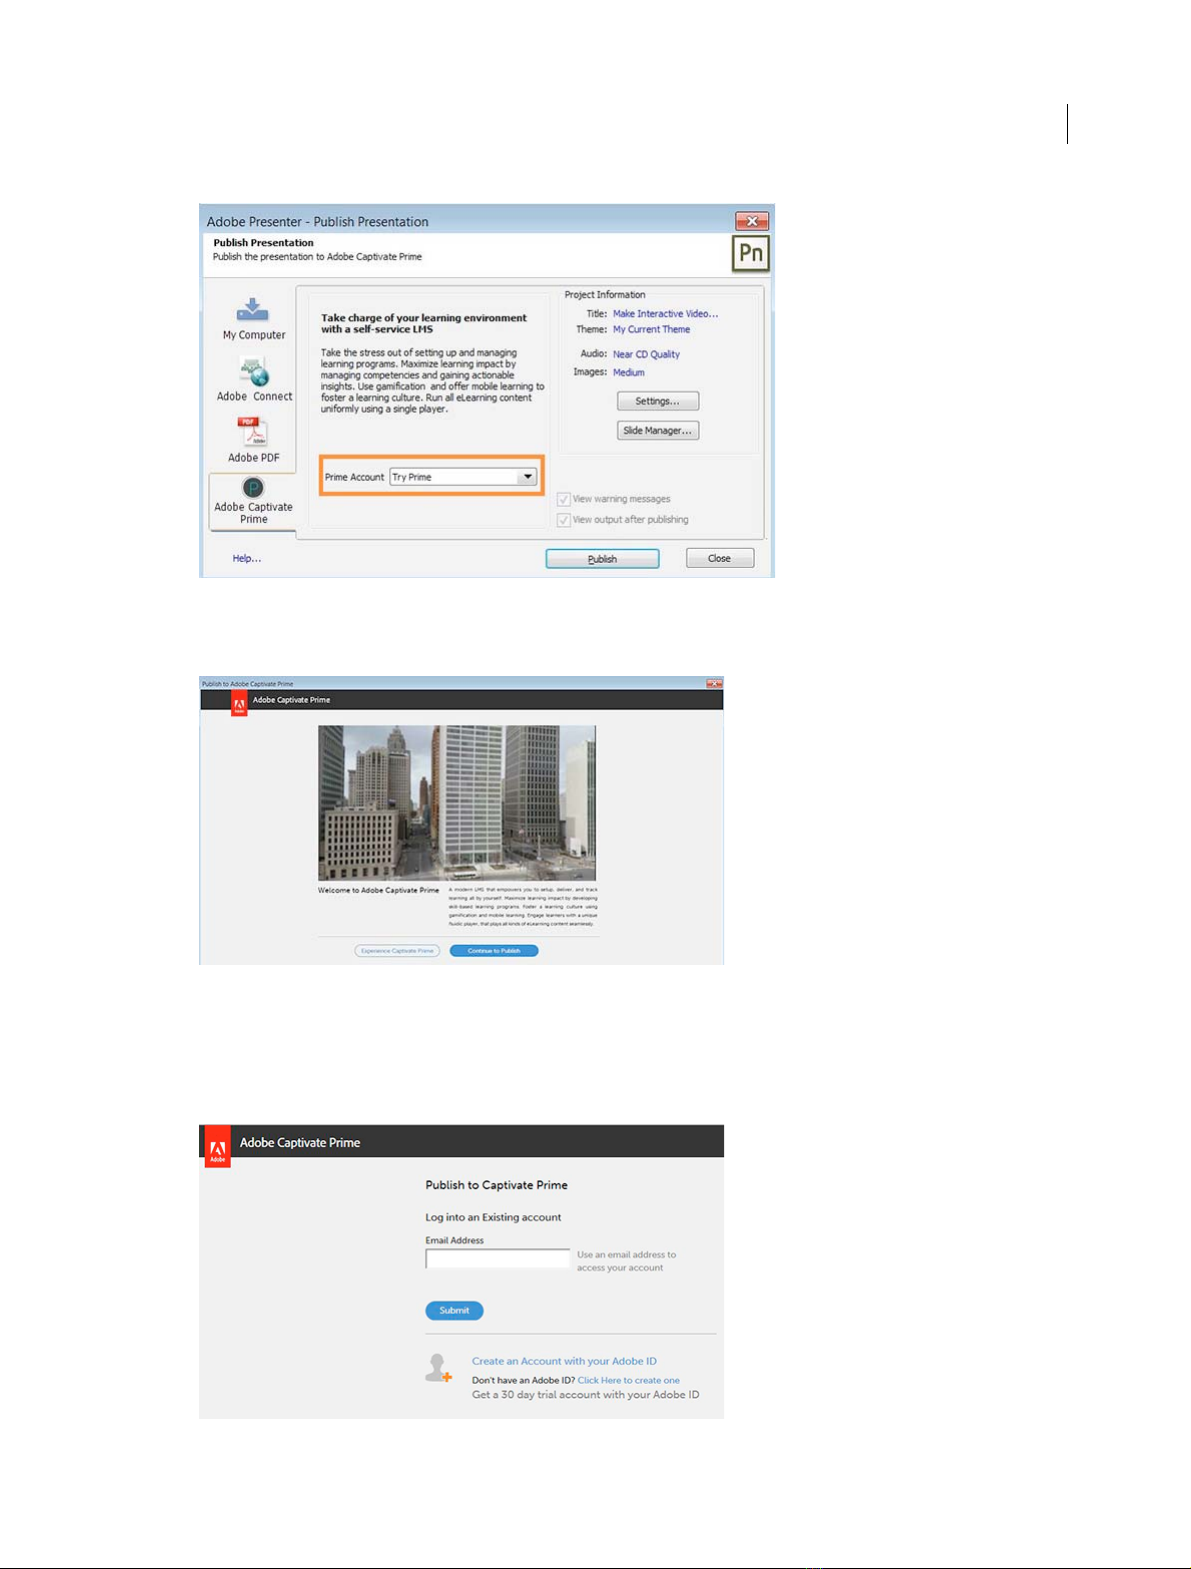
4 If you don't have a Captivate Prime account, the Try Prime option is displayed in the Prime Account dropdown.
Last updated 9/12/2015
Page 19
Adobe Presenter
Select Try Prime, and click Publish. In the Captivate Prime window that opens, click Continue to Publish.
16
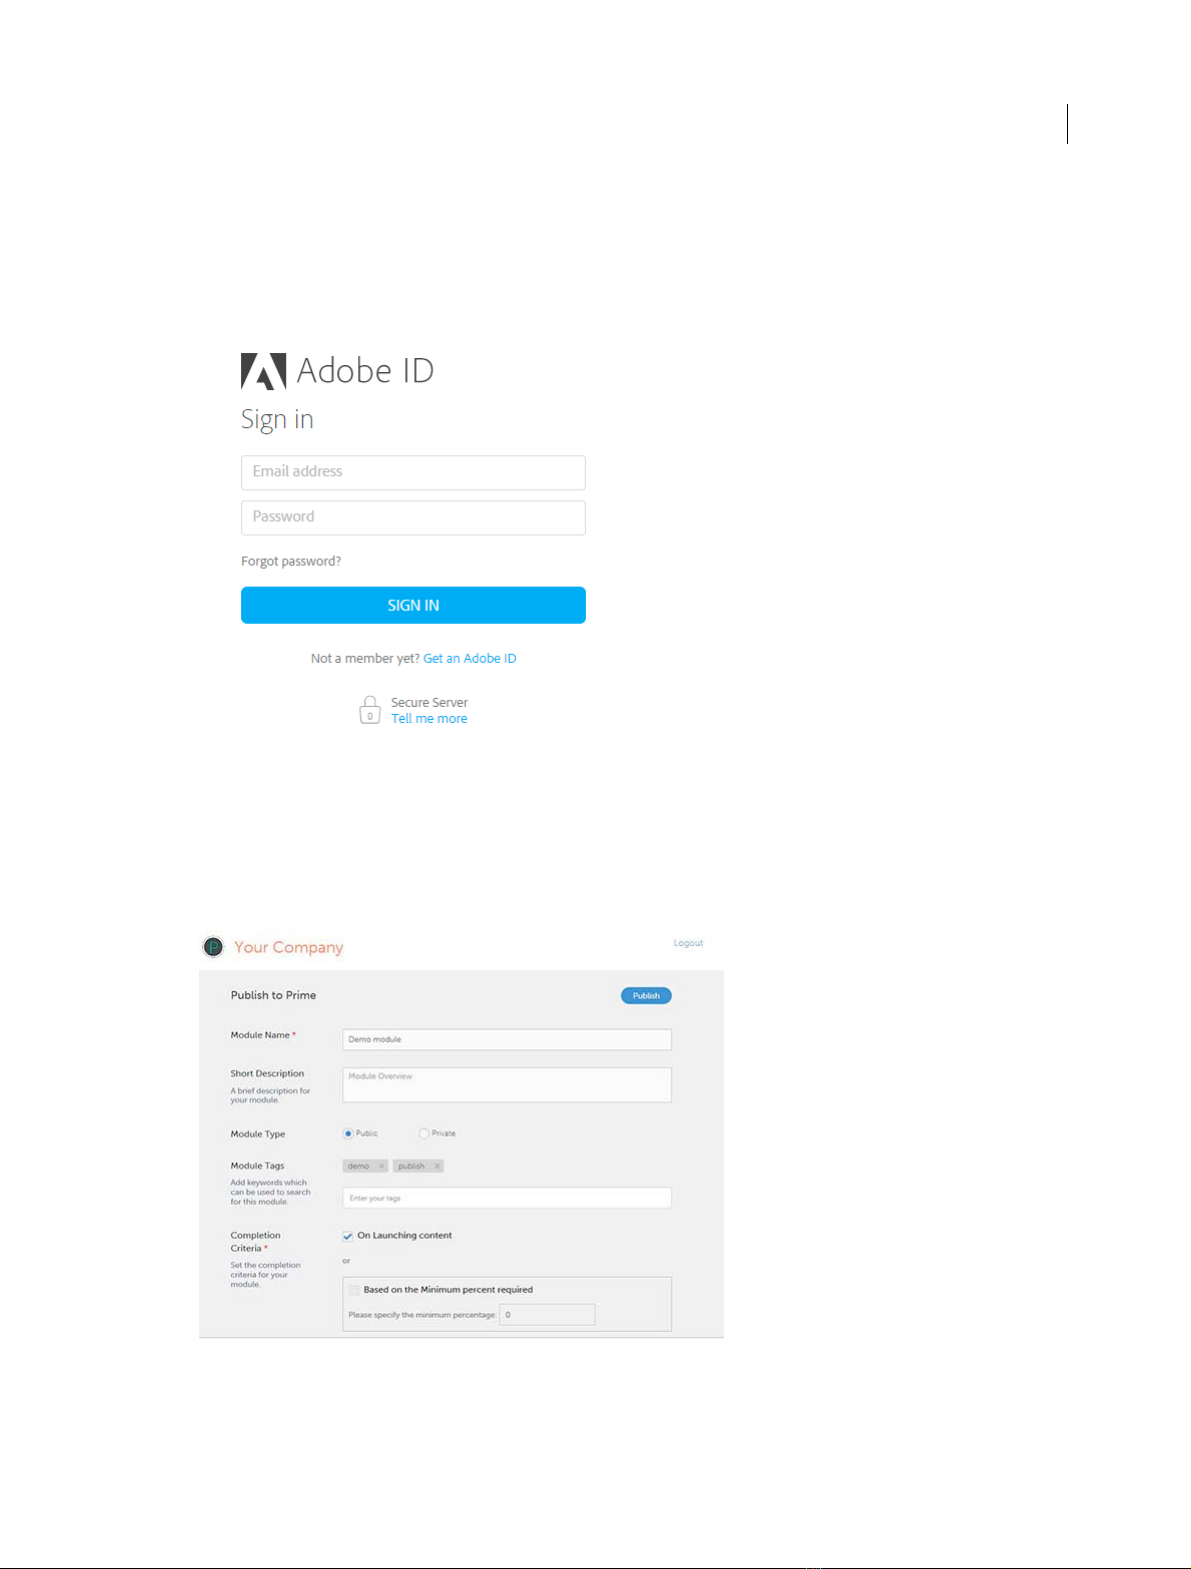
In the Publish to Prime window that opens as shown here, enter your email address that you used during
registration.
All accounts associated with your email address or account name appear.
Last updated 9/12/2015
Page 20
Adobe Presenter
If you don't have an account, you can set up one by clicking Create an Account with your Adobe ID.
Sign in with your Adobe ID and password if prompted.
If you do not have an Adobe ID already, you can create one in the following window. Administrators of an
organization can also login with Adobe ID initially.
17
Enter the module name, description, and time duration in the fields in the dialog box as shown here.
Check whether it is a public module or a private module, and enter tags that make it easier for people to find your
module.
Click Publish to publish your project to Adobe Captivate Prime.
5 If you are an existing user of Captivate Prime, just select your account from the Prime Account drop-down menu.
Last updated 9/12/2015
Page 21

Adobe Presenter
You are directly taken to the Publish to Prime page in Captivate Prime. Check the settings in the Publish to Prime,
tweak them if necessary, and click Publish.
Republishing a project to Adobe Captivate Prime
To update an already published module in Captivate Prime with a new one, complete the following steps:
1 Click the Adobe Presenter ribbon from within your Powerpoint presentation, and click Publish. The Publish
Presentation dialog box opens.
2 Select your Captivate Prime account from the Prime Account drop-down menu.
3 Click Publish
The module in Captivate Prime is updated with the new version.
Add a presentation PowerPoint (PPT or PPTX) file from your computer to a Connect Pro meeting
1 Open your web browser and navigate to your Adobe Connect Server.
2 Log in using your login name and password.
3 Click the Meetings tab.
4 Select a meeting.
5 Click Enter Meeting Room.
6 From the Share pod, select Documents > Select from My Computer. (If a Share pod is not open, click the Pods menu
and select Share > Select From My Computer.)
7 Navigate to the presentation PowerPoint (PPT or PPTX) file.
8 Select the PPT or PPTX file and click Open.
18
View a presentation in a Connect Pro meeting
After you publish a presentation to a Adobe Connect Server and then add the presentation to a Connect Pro meeting,
the presentation is ready to view. All of the features in the presentation, such as audio, synchronized animation, quizzes,
and Adobe Presenter information, appear.
Note: If you upload your presentations directly from your computer to a Connect Pro meeting, some Adobe Presenter
presentation features, such as Adobe Presenter photos and Adobe Presenter logos, are not supported. Adobe recommends
adding presentations to Connect Pro meetings from the Content library.
If the presentation contains quiz or survey questions, user interactions with the questions are fully tracked by the Adobe
Connect Server as part of the meeting’s reports.
The layout of a presentation consists of the following parts:
Presentation The main part of the window, which displays the presentation slides.
Presentation sidebar An area on the right side (default location) of the browser window that shows the name of the
presentation, the Adobe Presenter information, and the Outline, Thumb, Notes, Search, and Quiz panes (if you have
added the panes to your theme) The Presentation sidebar is shown in Normal view; it is hidden in Full Screen view (If
you cannot see the sidebar, click Show/Hide Sidebar
Presentation toolbar A control bar at the bottom of the presentation, which gives you control over the presentation
playback, audio, attachments, and screen size. (You may need to click the Sync button to see the Presentation toolbar.)
.)
Last updated 9/12/2015
Page 22
Adobe Presenter
Viewing the Outline pane
Most presentations have an Outline pane on the sidebar. The Outline pane lists the title and duration of each slide. Use
the Outline pane to display information and to enable users to move to individual slides in the presentation. You can
omit the Outline pane from the sidebar. At this time, it is not possible to show the slide outline in a read-only format;
if the outline is showing, users will be able to click the slides listed.
Note: Quiz slides are not, by default, listed in the Outline pane. If you want quiz slides to appear in the Outline, open the
Quiz Manager, click Edit, and select the Show questions in outline option.
Note: If you have a Windows XP English PC and need to view double-byte unicode characters (for example, Japanese
characters) in the outline pane, you should have the Arial® Unicode MS font installed on your computer.
❖ When viewing an Adobe Presenter presentation in a Connect Pro meeting, click the Outline pane in the sidebar on
the right side.
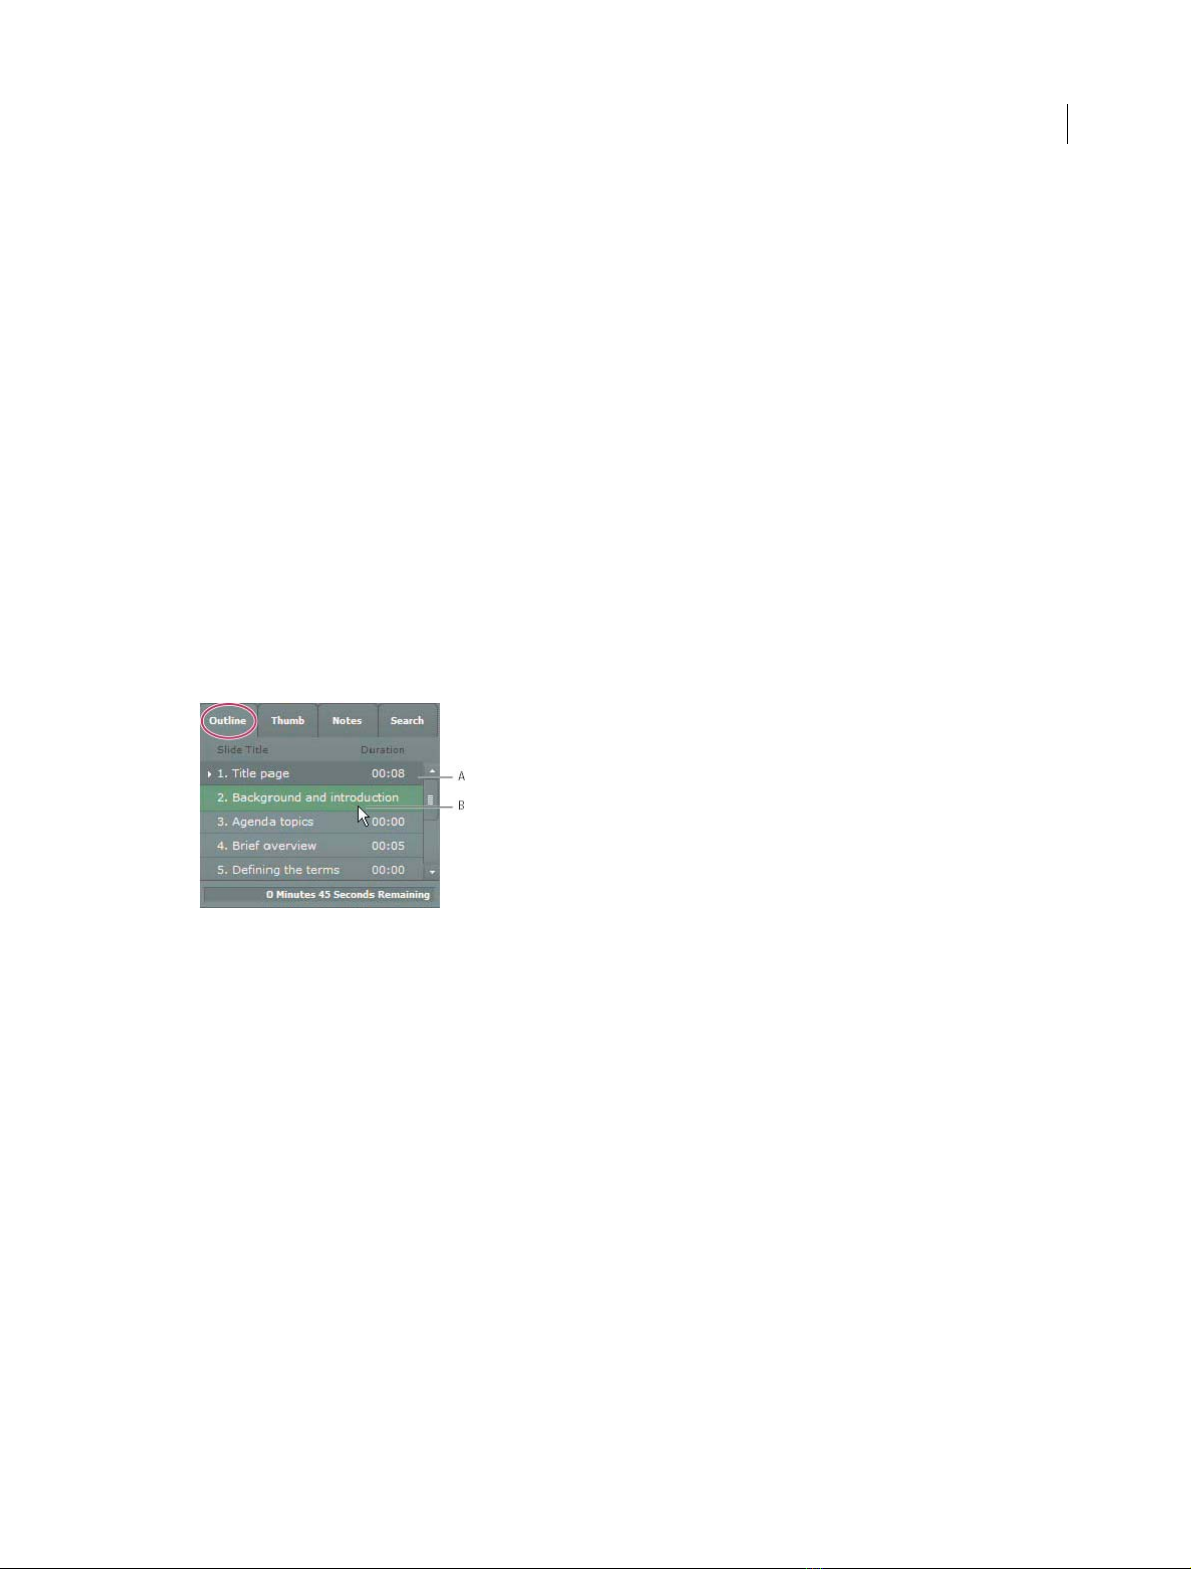
The Outline pane contains the following features:
• The current slide is highlighted with a glow color. (This color can be changed in the theme.)
• The entire slide title appears when the pointer is held over the title.
• The duration of the slide is shown next to each slide.
• You can move to any slide in the presentation by clicking the slide title in the Outline pane.
19
A Selected slide currently previews B Hover cursor over title to see the entire title
View the Thumb pane
Presentations can have a Thumb pane on the sidebar. The Thumb pane shows a small picture of each slide, the slide
title, and the slide duration. You can use the Thumb pane to see the contents each slide quickly and to move to a specific
slide in the presentation.
Note: If you upload your presentations directly from your computer to a Connect Pro meeting, the Thumb pane is not
displayed. Adobe recommends adding presentations to Connect Pro meetings from the Content library.
❖ When viewing an Adobe Presenter presentation in a Connect Pro meeting, click the Thumb pane in the sidebar on
the right side.
The Thumb pane contains the following features:
• The current slide is highlighted with a glow color. (This color can be changed in the theme.)
• The entire slide title appears when the pointer is held over the title.
• You can move to any slide in the presentation by clicking the slide title in the Thumb pane.
View slide notes
When creating a presentation in PowerPoint, you can enter notes for individual slides. If any slide notes exist, they can
be displayed in the presentation.
Last updated 9/12/2015
Page 23
Adobe Presenter
Note: Using slide notes is optional.
When slide notes appear, they are located on the right side of the presentation window. You cannot change the size of
the slide Notes pane.
❖ When viewing an Adobe Presenter presentation in a Connect Pro meeting, click the Notes pane in the sidebar on
the right side.
The complete notes text is displayed. The text is unformatted and cannot be edited directly on the pane. To change the
formatting of slide note text, select Adobe Presenter > Theme, and change Notes Pane Font And Size.
Search for text in a presentation
Users can use the Search pane (if you have included it in your theme) to find specific text in a presentation. For example,
in a presentation that serves as a company human resources handbook, a user might search for the word vacation to
find text about vacation leave policies.
1 When viewing an Adobe Presenter presentation in a Connect Pro meeting, click the Search pane in the sidebar on
the right side.
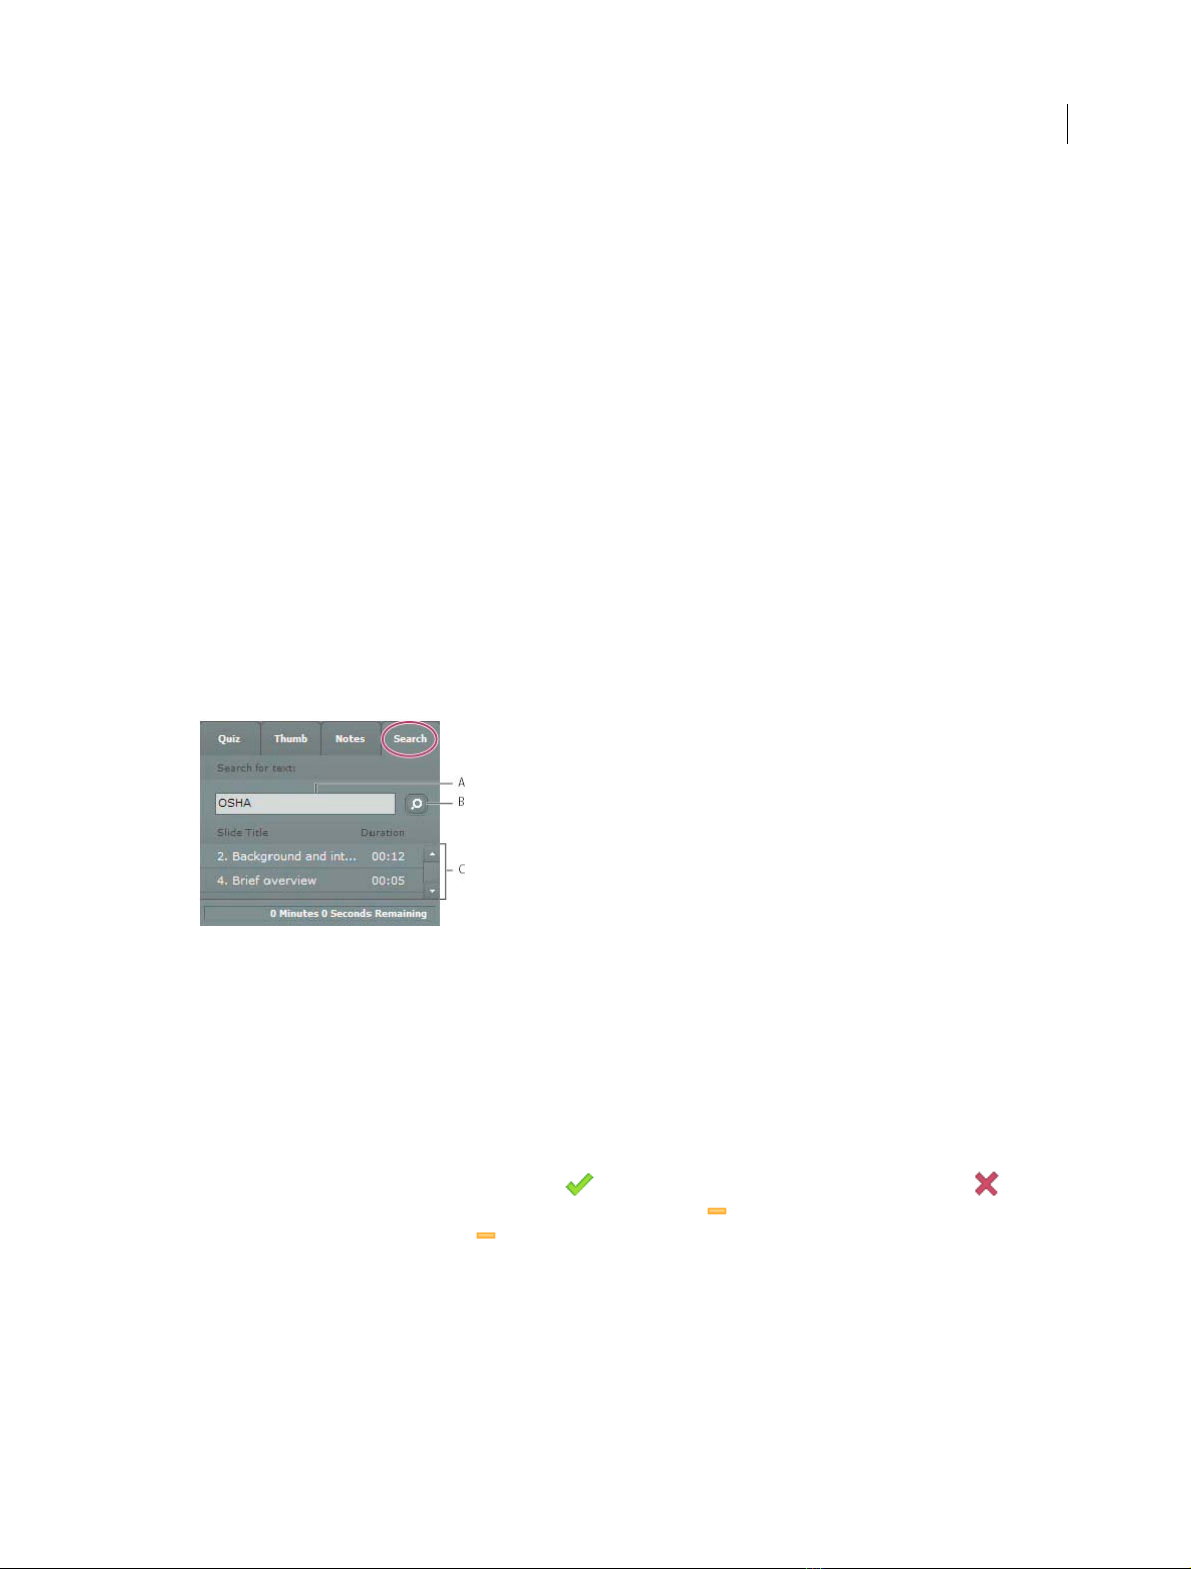
2 Type the text to search for directly in the text box. (Search is not case sensitive.)
3 Click the Search button.
Search results are displayed below the text box. Click any slide title in the results list to display that slide.
20
A Text box B Search button C Results
Viewing the Quiz pane
You can include a Quiz pane in your published presentation. If you designed your presentation so all four panes appear
and the Quiz pane is enabled, then the Quiz pane replaces the Outline pane in the sidebar when a user is within a quiz
boundary. If you designed your presentation with a different arrangement of panes, the Quiz pane appears without
replacing any pane in the sidebar when a user is within a quiz boundary. (For more information, see
❖ When an Adobe Presenter presentation is open in a Connect Pro meeting, view the Quiz pane in the sidebar on the
Quiz boundaries.)
right side (the presentation must be within a quiz boundary for a Quiz pane to appear). For graded questions,
questions answered correctly are marked with a
and those answered incorrectly are shown with a . If
graded question has correct/incorrect feedback messages disabled, is displayed once the question has been
attempted. Survey questions display once the question has been attempted.
Use the presentation toolbar
You can control the presentation appearance and playback by using the toolbar located at the bottom of the
presentation. (You may need to click the Sync button to see the presentation toolbar.)
Last updated 9/12/2015
Page 24

Adobe Presenter
A Play B Back C Forward D Position marker in slide progress bar E Current slide time F Total slide time G Audio volume H Attachments
I
Show/Hide sidebar
❖ When viewing an Adobe Presenter presentation in a Connect Pro meeting, click any of the following buttons and
features on the toolbar.
Play/Pause button Pauses and then resumes play of the current slide.
Back button Moves to the previous slide in the presentation.
Forward button Moves to the next slide in the presentation.
Slide progress bar Shows and controls the playback location within the current slide. The position marker moves
as the slide plays. You can drag the marker arrow forward or back in the c urrent slide to change your location within
the slide playback. You can also click a specific location on the progress bar to move the slide marker position and
slide playback to that position. (If you added a video file, such as a sidebar video file of a person speaking, the slide
progress bar also controls the video.)
Current slide number Shows the number of the currently displayed slide and the total number of slides (for
example, Slide 2 out of 10).
21
Status Shows the status of the current slide, such as Playing, Stopped, No Audio, or Presentation Complete.
Time Shows the current slide time and the total slide time as the slide plays (for example, 00.02/00.05).
Audio volume Shows the volume level that is set for the slide.
Attachments Displays a small window showing any attachments (for example, documents, spreadsheets, images,
URL addresses, and so on) that have been added.
Show/Hide sidebar and toolbar Shows or hides the sidebar and toolbar.
note: The behavior of the Forward button, Back button, and slide outline can be affected by settings in the Quiz
Manager. For example, if a learner must pass a quiz before continuing, clicking the Forward button or a slide in the
outline that is beyond the quiz slide will have no effect unless the learner has passed the quiz. Also, navigation buttons
are disabled for locked slides until the slide has been viewed completely at least one time. (For more information, see
Change slide properties
Switch between viewing modes
You can view Presentations in two modes:
Normal The default viewing mode. It includes the presentation toolbar at the bottom of the browser window and the
presentation sidebar. (You may need to click the Sync button to see the presentation toolbar.)
Full-screen An optional viewing mode in which the presentation toolbar is removed and the size of the presentation
slides increases to fill your browser window.
1 When viewing an Adobe Presenter presentation in a Connect Pro meeting, click the Full Screen button at the
bottom of the Adobe Presenter viewer.
If the presentation sidebar was originally visible, the presentation switches to fullscreen mode with a presentation
sidebar. If a presentation sidebar was not originally visible, the presentation switches to fullscreen mode with no
sidebar.
2 Click the Full Screen button again to return to normal viewing mode.
Last updated 9/12/2015
Page 25

Adobe Presenter
Navigate between slides
You can navigate between slides during playback by using the search pane, the presentation toolbar, or the presentation
Outline or Thumb pane. (You may need to click the Sync button to see the presentation toolbar.)
Note: The Outline pane and Thumb pane are optional. Set panes for presentations using the Theme Editor in Adobe
Presenter.
❖ When viewing an Adobe Presenter presentation in a Connect Pro meeting, do one or more of the following:
• Click Previous or Next in the presentation toolbar.
• Click the title of a slide in the presentation Outline or Thumb pane.
• Use the Search pane to find specific slides.
Navigate within the current slide
❖ When viewing an Adobe Presenter presentation in a Connect Pro meeting, do one or more of the following:
• Click Pause or Play on the presentation toolbar. (You may need to click the Sync button to see the
presentation toolbar.)
• Drag the position marker arrow on the slide progress bar forward or backward to change your location within
the slide’s playback.
22
Adjust the presentation audio
You can turn the presentation audio on and off or control the volume by using the audio button on the presentation
toolbar. (You may need to click the Sync button to see the presentation toolbar.) Examples of presentation audio that
the audio button can control include audio imported into a slide and audio in an embedded SWF file (for example,
sidebar video).
Note: Not all slides or presentations contain audio.
If a slide does not have any audio, the text No audio appears as the slide status on the slide progress bar. The slide still
has an audio length and appears for that period of time before the next slide appears. This time is set by the presentation
speaker.
❖ When viewing an Adobe Presenter presentation in a Connect Pro meeting, click Audio in the presentation
toolbar and move the volume bar up or down to change the audio level. Moving the volume bar all the way to the
bottom mutes the audio completely.
Viewing a presentation in Connect Pro Training
You can use Adobe Presenter presentations within Connect Pro Training courses. This enables you to quickly create
e-learning courses for formal assessments, compliance training, or information sharing. The new curriculum feature
allows you to make your presentations part of a learning path. Quiz and survey results are tracked on a user-by-user
and question-by-question basis. The results data can be viewed in Connect Pro Training reports.
Using presentations with Connect Pro Events
Connect Pro Events is an application that provides tools to manage the full cycle of an event, from registration and
qualification of users, to post-event follow-up. The Connect Event dashboard and reports include user demographic
information, registration, and tracking at the individual user level. Connect Pro generates exportable files in CSV
format for import into customer relationship management systems and other systems.
Last updated 9/12/2015
Page 26

Adobe Presenter
Note: If you want to use an existing Adobe Presenter presentation as an event, it is important to rename the presentation
and republish the presentation to a different location and different folder in the Connect Pro Content library. This ensures
that reporting information for the event does not include reporting information from prior events.
Adobe Presenter Mobile application for tablets
Note: Android based tablets are supported only in Presenter 9 and above.When publishing output to be used in tablets using
Pres ent er Mob ile, make s ure yo ur out put is e ither S WF only or B oth. Only HT ML5 outpu t do not work on Prese nte r Mob ile
Application.
You can now make Adobe Presenter presentations available for your users on tablets (iPads* and Android based tablets)
through the Presenter Mobile application. You can host the presentations or courses on a web server, LMS, or upload
them to an Adobe Connect server, and then distribute the URLs to your users.
* Subject to Apple's current requirements and approval.
Note: Only PPTX files are supported by the Presenter Mobile application. Therefore, save your presentations as PPTX files
only.
Users can download the Presenter Mobile application from Apple iStore or Android Play store and access the
presentations or courses in one of the following ways:
• Type the URL in the application interface, if the presentation or course is hosted on a web server
23
• Click the Adobe Connect URL to automatically open the presentation in the Presenter Mobile application
• Launch the course from an LMS. The course is automatically opened in the Presenter Mobile application. The user
scores are reported back to the LMS just like any course on desktop.
After the presentation is open, users can 'pinch' the screen to view the TOC. Users can tap the screen to view the
following:
• Links to attachments. When users click an attachment such as a document or a spreadsheet, the web browser
appears and prompts the users to download the document. Links that are used as attachments are directly opened
in the web browser.
• Information about the presenter of the presentation.
• Playbar that can be used for navigation or to stop/start/pause the presentation.
Note: Playbar is not displayed on the question slides.
The following features are not supported on Adobe Presenter Mobile for Presenter 9 and above:
• Audio and video inserted using Microsoft PowerPoint options.
• Question types ShortAnswer, Likert, Sequence, and Drag-Drop.
• SCORM
• Sum Total LMS (Adobe Connect and SCORM Cloud (AICC) are supported)
For a list of known issues and limitations with the Presenter Mobile application for Presenter 10, click here.
Using presentations with third-party learning management systems
Adobe Presenter lets you use presentations with any SCORM- or AICC-compliant learning management system
(LMS). Use the Reporting tab in the Adobe Presenter Quiz Manager to choose the correct reporting settings for the
LMS and to create a content package that can be uploaded to the LMS.
Last updated 9/12/2015
Page 27

Adobe Presenter
Known behavior with HTML5 content
• You might observe that imported SWFs and side bar SWFs are being omitted in HTML5 output as they cannot be
rendered.
• The HTML5 output for interactions might appear differently as compared to SWF output.
• Presenter imported videos (FLV) from previous versions are not playable in HTML5 output. You need to re-import
them into the current version.
• If a slide has two videos in any combination like(slide+sidebar, pptx +presenter video on slide, two pptx video on
slide) then a warning message might appear in the publish warning message as it is not supported on iPad.
• Mute slide video and sidebar video might work properly in desktop but it might not work on an iPad
• Application Simulation, video trimming, attachments GIF animations, slide transitions, animations on question
shapes, and audio in interactions do not work in HTML5 output.
Note: If video format in videos does not play, convert to H.264-MP4 to play in HTML5 output. Animations are played
at paragraph level.
More Help topics
Create and edit themes
Change presentation settings
24
Preview a presentation
About quizzes and questions
Set reporting options
What’s new in Adobe Presenter 10
Adobe Presenter 10 software lets you create HD video lectures for classroom teaching, distance learning, flipped
learning and MOOC sessions. Simultaneously capture your screen content along with your webcam video or turn your
Microsoft PowerPoint slides into interactive eLearning with out-of-the-box assets and eye-catching quizzes. Leverage
HTML5 publishing to deliver courses to tablets. Track content consumption and learner performance with the built-in
analytics dashboard or through integration with leading LMSs.
Read on for a quick introduction to these new features and enhancements, and links to resources offering more
information.
HTML5 publishing support
Last updated 9/12/2015
Page 28
Adobe Presenter
Now let your learners have full access to your courses, even on tablets. Deliver eLearning on the go with full support
for scalable HTML5. Send scoring data to leading LMSs and track learner progress.
For more information on publishing HTML 5 output, see Publishing and viewing presentations
Transform slides into interactive eLearning
Convert your PowerPoint presentations to engaging eLearning content. Publish eLearning modules created with
PowerPoint directly to HTML5, keeping text, shapes, audio, and animations intact. Add quizzes, scenarios, and out-ofthe-box assets, and publish as HTML5 for access using desktop and mobile browsers.
Continue to use all the features of Presenter such as quizzes, learner interactions, audio, video, animations and so on,
as before. When publishing, choose whether you want to publish to SWF format, HTML5 format or both. Reporting
to LMS, video analytics and learner dashboard features will also be available when you publish to HTML5, just like the
way they were available for SWF output.
25
For more information on publishing HTML 5 output, see Publishing and viewing presentations
Publishing to tablets
Let your learners access your courses on their tablets. Quickly create interactive eLearning content using the iPad and
iPhone presets. Publish content as HTML5 for easy access with a mobile web browser.
For more information on publishing HTML 5 output, see Publishing and viewing content in Tablets
Gesture support on tablets
Last updated 9/12/2015
Page 29
Adobe Presenter
Use the multi-touch technology embedded in the tablet UI to allow learners to tap, scroll, and swipe their way through
courses. Leverage gesture support to enable more instinctive interaction between the learner and the content.
For more information on publishing HTML 5 output, see Publishing and viewing presentations
HTML5 support for tracking and reporting
Track individual learner progress without investing in an LMS, using the Learner Analytics dashboard. Use
information about basic evaluation criteria, such as videos viewed, average score, and pass or fail, to identify learners
who need course correction and direct them to relevant modules.
For more information on enhanced Learner Analytics dashboard, see Learning Dashboard
26
Quizzing with HTML5
Leverage HTML5 support to deliver eye-catching quizzes on tablets. Choose from a wide range of question types, such
as matching, short answer, and fill-in-the-blank. Export scoring data to leading SCORM-, AICC-, and Tincancompliant LMSs.
For more information on creating Quizzes and questions in your presentations, see Adding quizzes and questions
Pause and resume your work across devices
Make your content more mobile with the ability to pause on one device and resume anywhere, anytime on a tablet using
a web browser.
Last updated 9/12/2015
Page 30
Adobe Presenter
Publish your content as HTML5 and open the content in desktop while you are at work. You can pause the content while
you are going mobile and start resuming the same content using your tablet.
For more information on publishing HTML5 output, see Publishing and viewing presentations
User-friendly installer
Get going quickly with a new, easy installation workflow. Adobe Presenter identifies the Microsoft PowerPoint version
on your computer and installs the appropriate Presenter version. It adds a shortcut to the Windows Start menu, and
default to the Adobe Presenter tab in PowerPoint when you launch the software.
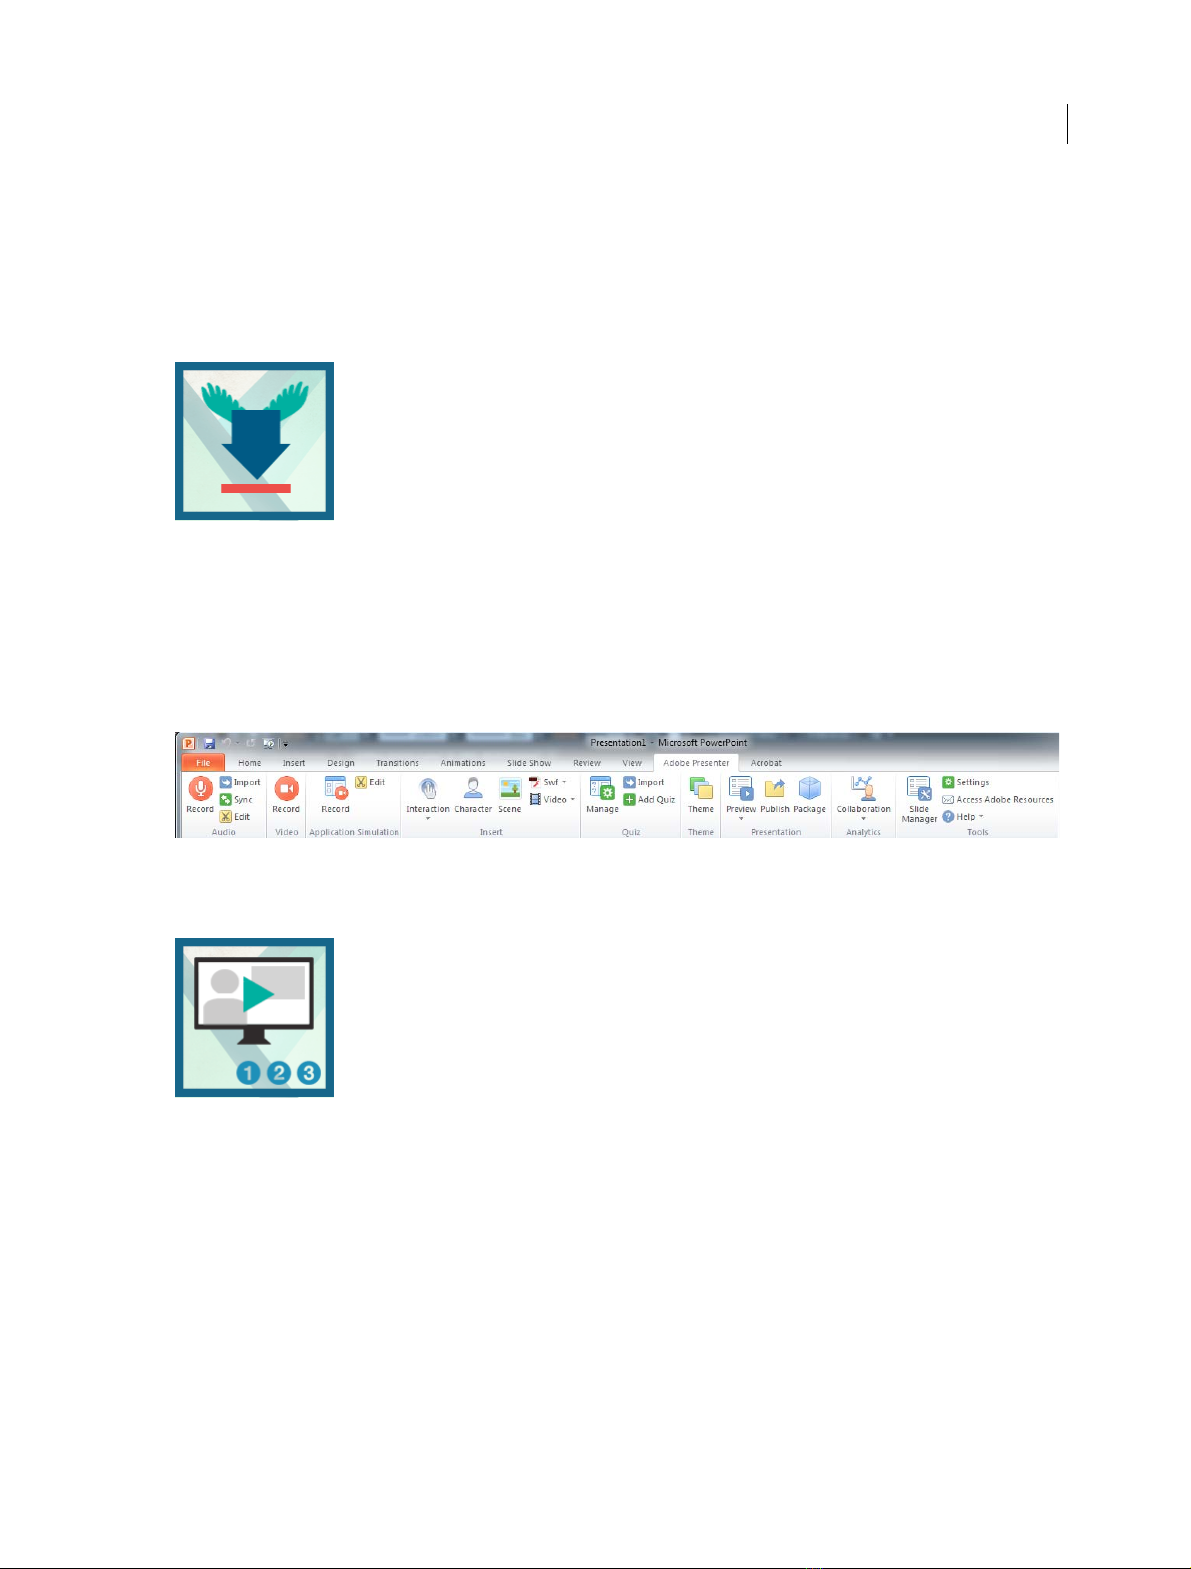
In Adobe Presenter 10, as soon as you open Adobe Presenter 10 software, by default it opens in the Adobe Presenter
tab of Microsoft Powerpoint as shown in the screenshot below:
27
Create video lectures in 3 easy steps
Quickly create studio quality video lectures by capturing your screen content along with your audio or video, right from
your desktop. Use a simple 3-button interface to easily edit and publish your videos.
Sway audiences with HD videos, regardless of the AV capabilities of your computer and without having to invest in
studio equipment. Simultaneously capture your screen and webcam content with just a few clicks. Balance colors,
remove noise, and enhance the overall video quality using just Adobe Presenter.
For more information, see Record videos
Last updated 9/12/2015
Page 31

Adobe Presenter
New intuitive UI for Adobe Presenter Video Express
Edit your videos right within the project timeline. Dynamically mix screen content and webcam video. Easily trim your
clips or pan and zoom, without any additional training. Automatically adjust the brightness and sharpness. Enhance
audio quality by reducing background noise.
For more information, see Adobe Presenter Video Express (Windows & Mac)
Native resolution screen capture
28
Capture your screen at its full resolution without distortion or changes to onscreen elements, taking the guesswork out
of authoring. Leverage enhanced pan-and-zoom scaling to edit videos more easily.
Publish to 1280x720 or 1280x800 resolution always in hd video.
For more information, see Adobe Presenter Video Express (Windows & Mac)
Use analytics for learner intervention
Use built-in analytics to track content consumption and identify learners who need course correction. Track learner
performance in the Learner dashboard by viewing metrics such as time spent on a section, modules taken, and
successful completion. Report key performance metrics without having to invest in an LMS. Gauge the effectiveness of
your videos and identify common drop-out points.
For more information on enhanced Learner Analytics dashboard, see Learning Dashboard
Last updated 9/12/2015
Page 32

Adobe Presenter
SRT file creation
Generate an SRT file from your Adobe Presenter closed captions. Use the SRT file to offer subtitles in video-based
courses published to third-party video websites and players. Localize the SRT file to deliver course subtitles in regional
languages.
For more information, see Add closed captions
29
Other enhancements
Lower third text and branding videos add-ons
Jazz up your video by selecting a theme f rom a wide range of int roductor y and concluding clips. Focus viewer attention
by zooming in on specific content. Easily describe your videos with titles, introduce yourself using the Lower Thirds
option, and add custom videos and logos to meet branding requirements.
For more information, see Adobe Presenter Video Express (Windows & Mac)
More Smart learning interactions
Insert aesthetically designed interactive elements to your content with just one click. Select from a wide range of
stunning interactions, like Hangman, Jigsaw, Process Cycle, Glossary, Accordion, Pyramid, and Animated Rollover, to
customize the content and appearance.
For more information, see Inserting learning interactions
ELearning templates
Last updated 9/12/2015
Page 33

Adobe Presenter
Spend less time and effort to liven up your training content. Choose from attractive, professionally designed themes
that blend backgrounds, styles, fonts, and layouts. Apply them across projects to maintain a consistent look and feel.
Customize templates to suit your requirements.
For more information, see Designing presentationsDesigning presentations
In-course collaboration
Receive feedback from learners by allowing them to comment on specific content within a course or ask questions for
more clarity. Reply to users directly or allow other learners to do so. Rate comments, moderate the discussion, track
participation, and reward active learners.
For more information, see Enable Analytics and Collaboration
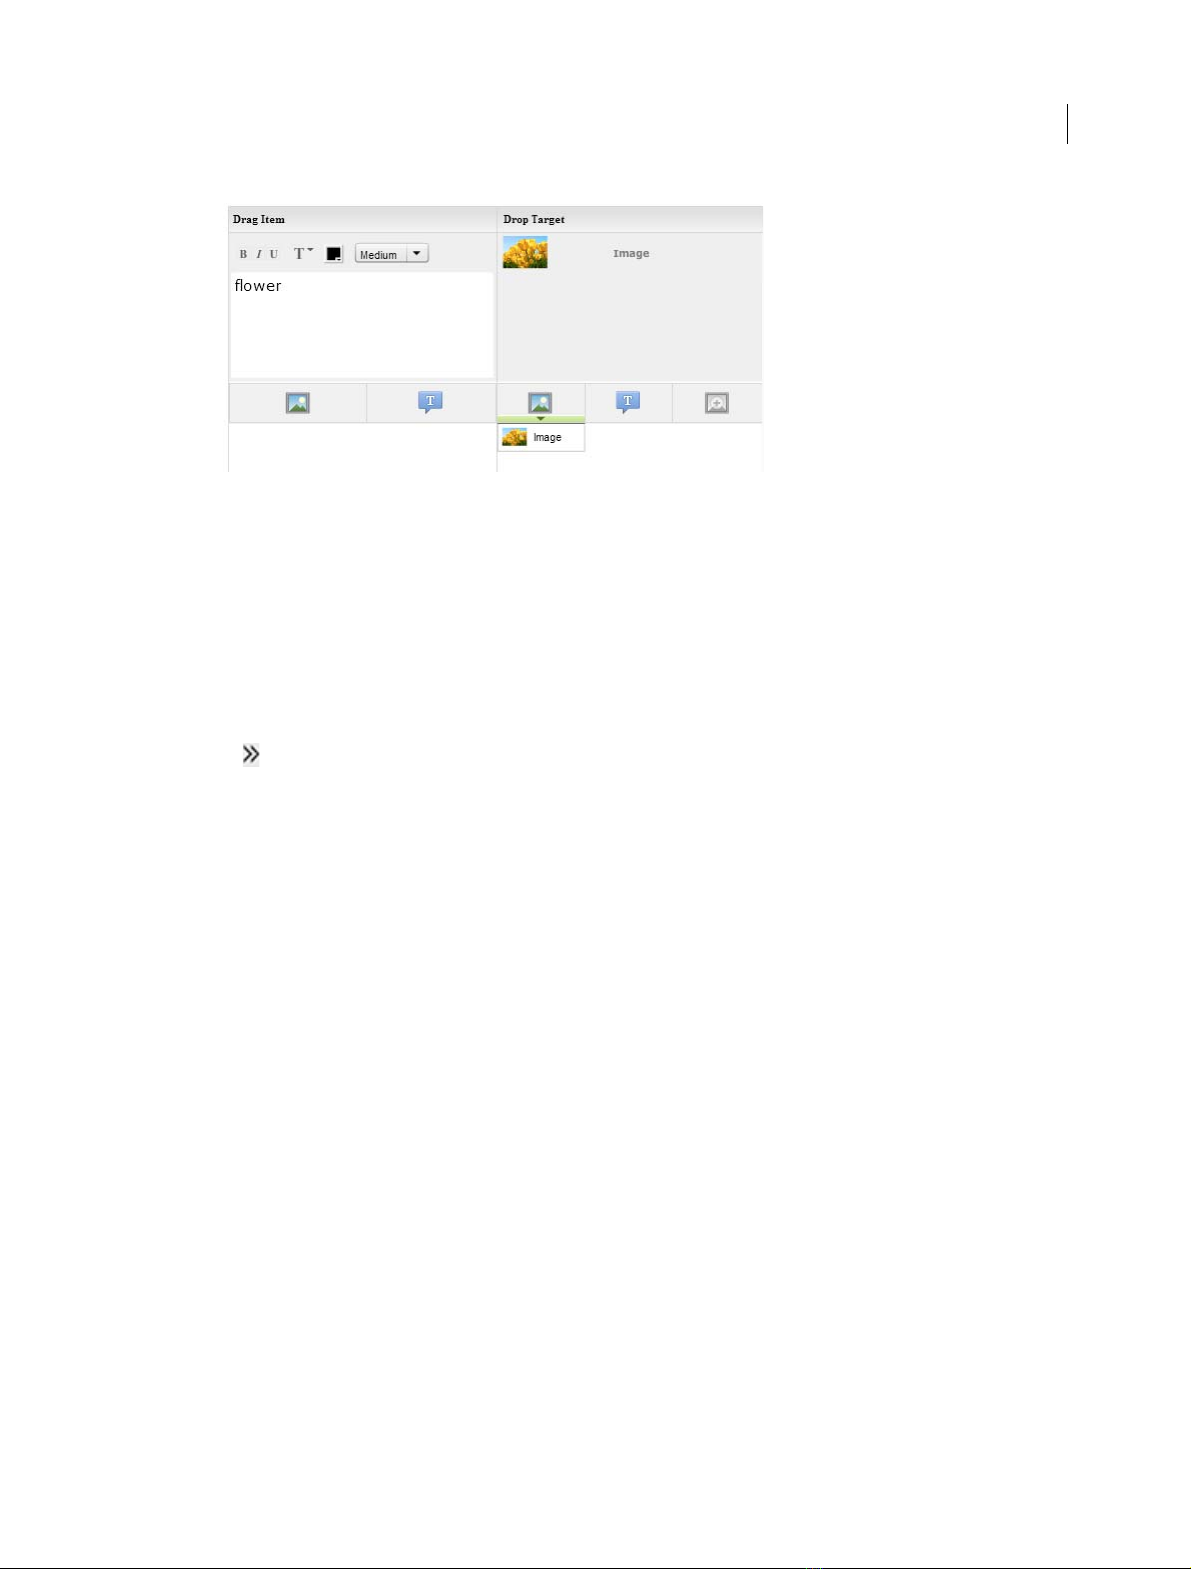
Drag and drop questions
Drag-and-drop interactions provide an interesting and engaging way of assessing your users’ knowledge. This
interaction lets users answer questions by draging and dropping objects in the designated areas or objects.
A drag-and-drop interaction involves a drag source and a drop target. Users drag the drag sources and drop them onto
drop targets.
30
To insert drag and drop questions:
1 Add drag and drop items, and map them to configure correct answers:
Note: Drag-and-drop is supported only in the .pptx file format and not in .ppt file format.
a In the Adobe Presenter ribbon, click Manage > Add Question > Drag drop. To select grade or survey question,
click Create Graded Question or Create Survey Question from the Options tab.
Last updated 9/12/2015
Page 34
Adobe Presenter
31
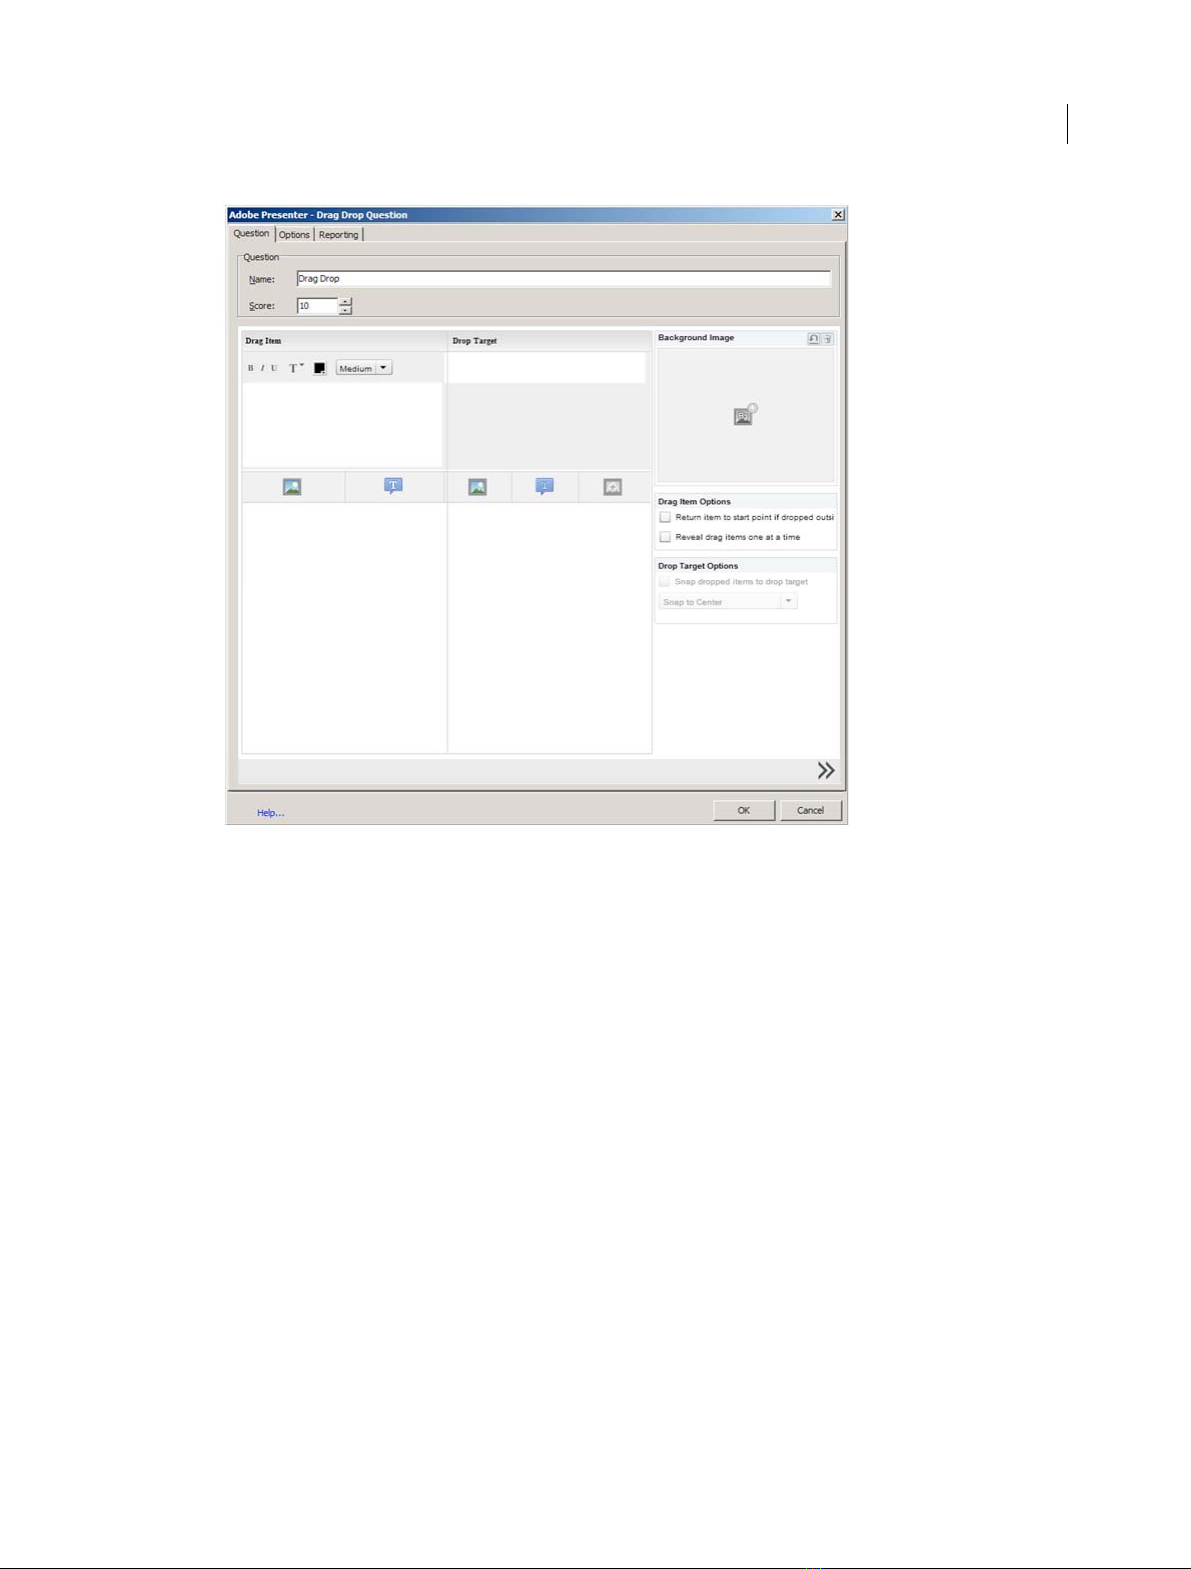
b In the Name field, type the instructions for the drag and drop question. In the Score field, specify the points that
users score when they correctly answer the question.
c In the Drag Item column, do one of the following:
• To insert text, click the Text icon, and type the text.
• To insert an image, click the Image icon, and browse for the image.
d In the corresponding row of the Drop Target column, do one of the following:
• To use text as the drop item, click the Text icon, and type the text.
• To use image as the drop item, click the Image icon, and browse for the image.
• To use a blank drop item, click Blank Drop. This enables you to create a blank spot in the Question slide. For
example, you can add a blank space in between a Fill-in-the-blank type question using the blank drop item.
The drag item in the first row is now mapped as the correct answer for the drop item you specified.
e You can map multiple drag items to a single drop item. However, you have to add a separate row for each drag
item and select the drop item correspondingly. For example, if A and B both have to b e mapped to ‘alphabets’, the
first row contains A (drag item) and ‘alphabets’ (drop item). The second row contains B (drag item) also mapped
to ‘alphabets’ (drop item).
Ti p: Drop items that have already been added appear in the drop-down list for subsequent use.
Last updated 9/12/2015
Page 35
Adobe Presenter
2 Configure the properties for drag and drop items:
Return item to the start point if dropped outside Item is moved back to the start point if it is dropped outside the
frame
Reveal drag items one at a time Only one drag item is displayed and other drag items kept invisible during run
time.
32
3 (Optional) Choose a Presenter background image for the drag-and-drop question. This Presenter background
image overrides the default PPT background for the question slide.
4 Click icon at the bottom of the screen. A grid layout appears using which you can layout the drag and drop items
on the stage exactly like how you want them to appear in the published output.
You can also resize and drag-and-drop images
Inserting scenario interactions
You (the author) can create scenario-based training with easily customizable scenario interactions. Each scenario
template contains the complete question vs answer flow.
For example, if you select the Business scenario, the flow is pre-defined as one question with multiple options. Select
the number of options and select the correct answer number.
On publishing, the learner views the question. The options are displayed logically. The user has to complete answering
the question by selecting the right answer. Otherwise the user cannot navigate to the next slide as the playbar and the
side bar are locked.
Note:
• No score is associated to the scenario-based interactions.
• To create a new interaction, always use the Insert scenario interaction interface. Do not copy and paste the slides
inside the presentation.
• Sce nar io int era cti ons only w ork in . pptx f ile f ormat . In .ppt f ile f orm at, th e inte rac tions work as n orm al PowerePoin t
slides. TOC and playbar lock do not work in .ppt format.
To create scenario-based interactions:
1 Click Adobe Presenter, and in the Insert group, click Interaction > Insert scenario interaction.
Last updated 9/12/2015
Page 36

Adobe Presenter
2 Select the category of interaction you want to insert from the Insert Scenario Interaction drop down list. There are
four templates currently available: Business, Call Center, Medical, and Generic.
3 Select a scenario from the left pane. For example, if it is Business, select Business 1.
4 Select the Number of Options and the Correct Option. Click Preview to preview the interaction.
5 Click Ok.
If you want to change the appearance on the slide, you can:
• Edit the placeholder text.
• Adjust the image position.
• Resize the images by directly increasing/decreasing the size or by right clicking the character and entering a
different size from the resize option.
• Introduce a new character from the Character option.
Adobe Presenter Video Express (Windows & Mac)
Adobe Presenter includes Adobe Presenter Video Express, a tool that lets you combine application or desktop capture
and webcam video. Using this tool, marketing, eLearning, and training professionals or even hobbyists and amateur
video producers can quickly produce video tutorials and related video solutions. The tool also provides effective video
edit options such as layouts, Pan & Zoom, and Trim options.
33
From Adobe Presenter 10 onwards, experience the revamped and intuitive user interface for Adobe Presenter Video
Express.
• You can record HD videos irrespective of the audio/video capabilities of your computer.
• Export your Closed captions as SRT files.
• Include multiple lower third texts in presentations.
• Experience the hassle free and intuitive easy trim options without any additional training.
• No timelag in launching the record screen.
• Capture your screen at its full resolution without distortion or changes to onscreen elements.
• Leverage enhanced pan-and-zoom scaling to edit videos more easily.
• Publish to 1280x720 or 1280x800 resolution always in hd video.
• Utilize new theme options for your videos.
You can launch Adobe Presenter Video Express in one of the following ways:
• From within Adobe Presenter, by clicking Record Video ( ).
• By clicking Adobe Presenter Video Express from the Windows Start menu (Start > All Programs)
The output is an MP4 file that you can save on the disk, export into a Microsoft PowerPoint presentation, or upload to
YouTube, Adobe Connect, or Vimeo.
Adobe Presenter Video Express videos capture the following:
Presentation Actions performed on your monitor screen.
Presenter The web cam capture of the narrator who narrates while presenting the presentation or demonstrating an
application. The audio narration too is captured.
Last updated 9/12/2015
Page 37

Adobe Presenter
Prerequisites
• Intel® Core™2 Duo or AMD Phenom® II processor (Intel Core i3 or better recommended)
• Minimum supported resolution is 1024x720 display.
• Camera and microphone plugged in to the computer and working. For a list of recommended cameras and
microphones, see
Note: If you do not have a camera or a microphone, you can still record videos (your actions on the screen).
However, you cannot add narration or the Presenter to the recorded video later.
• Minimum 5 GB of available hard-disk space
• 2 GB of RAM (4 GB or more recommended)
• One of the following operating systems:
• Windows 7 — 32-bit and 64-bit
• Windows 8.1 - 32-bit and 64-bit
• Mac OS 10.8 or later
Note: From Adobe Presenter 10 onwards, Adobe Presenter Video Express tool works on MAC. Support for Adobe
Presenter Video Express application through App store download is discontinued. We recommend that you use an
external camera for recording. Usage of built-in camera may result in Audio/Video Synchronization issues and do
not produce High Definition videos.
Recommended cameras and microphones.
34
Adobe Presenter Video Express is not supported on Linux.
To End the Recording in Mac, click the Adobe Presenter Video Express icon in the system tray (as Mac does not
have an end key).
Mac shortcut for Pause: Command+Option+P
Mac shortcut for Stop: Command+Option+X
• Microsoft Office 2010 or 2013
• Windows Media player. If your computer does not have Windows Media Player installed, click here to download.
• Internet connectivity to use the Closed Captions feature
Recommended cameras and microphones
• Ye t i Bl u e m i cr op ho ne
• Logitech HD Pro Webcam C910
• Creative Live! Cam inPerson HD
• FREETALK® Everyman HD
Record videos
1 Ensure that the hardware and software requirements are met. See Prerequisitesfor information.
2 Ensure that you have the narration script ready.
Last updated 9/12/2015
Page 38
Adobe Presenter
3 Do one of the following:
• To record a Microsoft PowerPoint presentation as a video, click the Adobe Presenter ribbon in Microsoft
PowerPoint, and click Record Video (
).
• To record any other application simulation or demonstration, open the required application, and then launch
Adobe Presenter Video Express (Start > All Programs > Adobe Presenter Video Express).
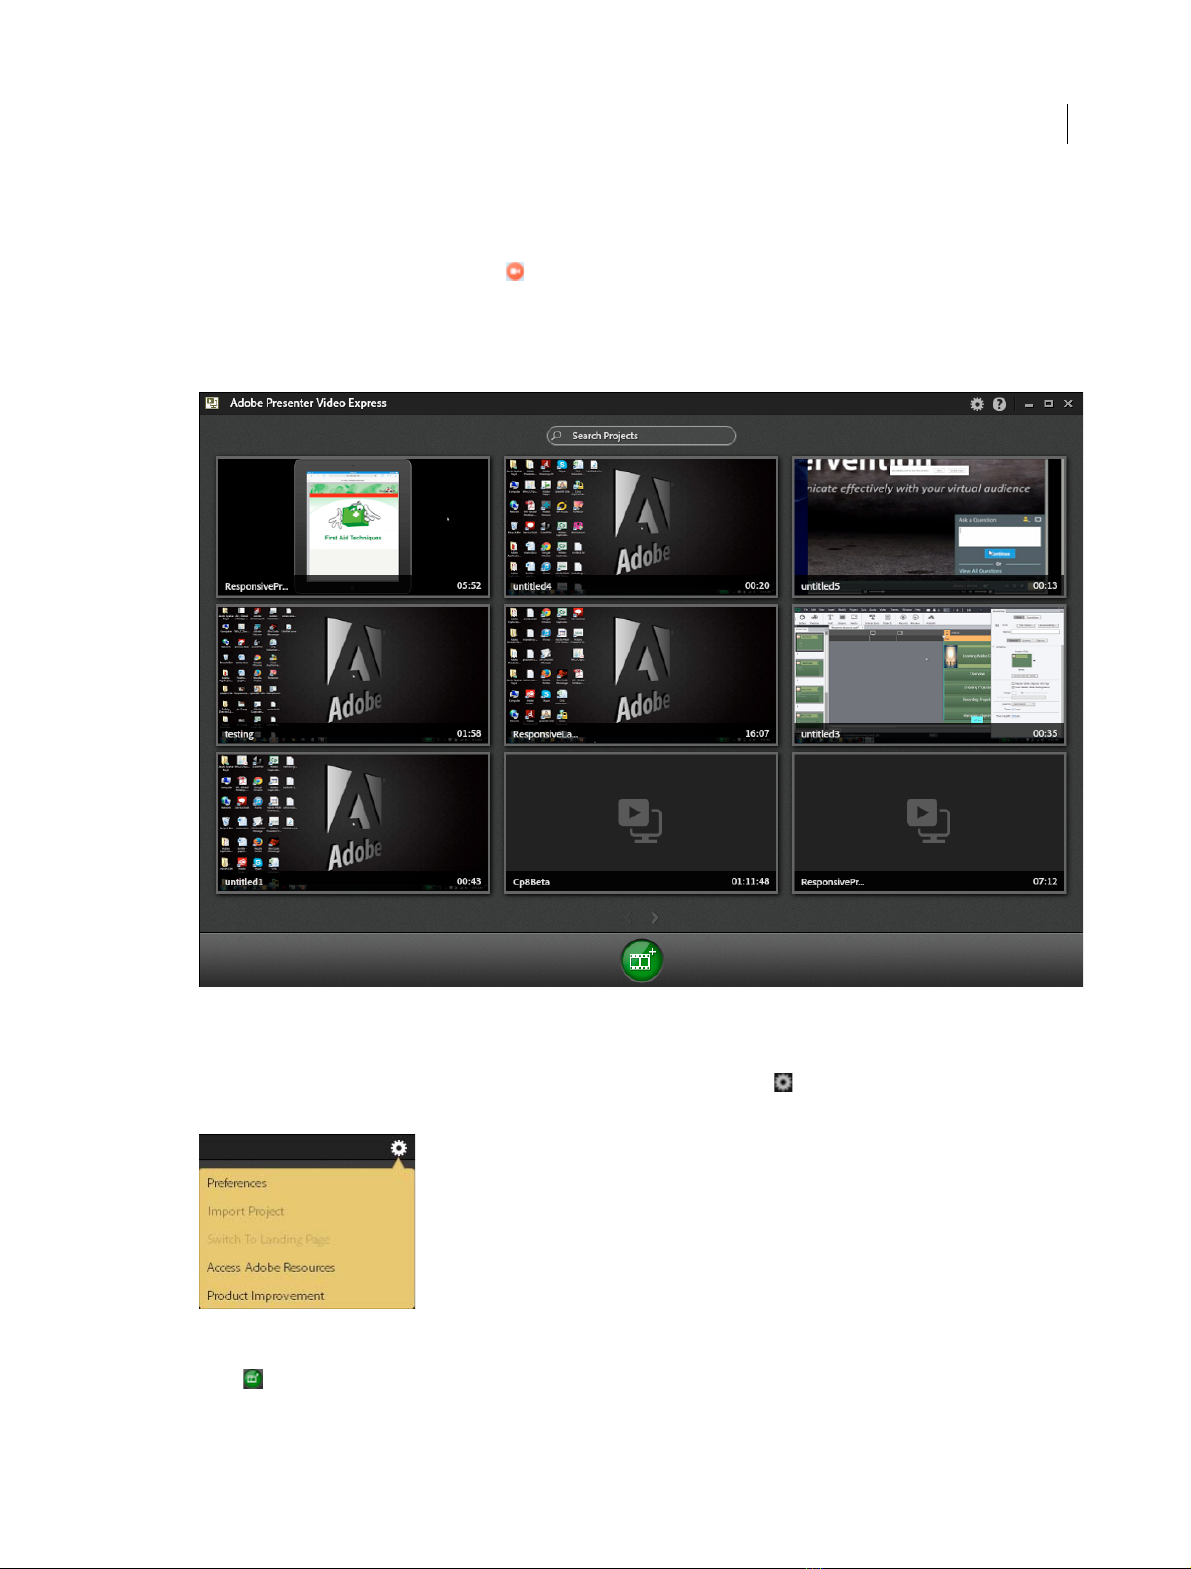
The launch window of Adobe Presenter Video Express appears.
35
Your previously launched projects would appear as thumbnails in launch screen. You can search the existing projects
using Search Projects area. You can also import existing projects by clicking
and choosing Import Project (In
Adobe Presenter 9, this option was Open Projects).
4 Click to create new project.
The new project recording window appears.
Last updated 9/12/2015
Page 39

Adobe Presenter
5 Click .
From Adobe Presenter 10 onwards, Adobe Presenter Video Express records the projects by default, in HD mode.
The recording begins after the countdown (5 seconds).
6 Perform the steps on the computer while you narrate the script.
Adobe Presenter Video Express captures both you (the Presenter) and the full monitor screen simultaneously during
recording. After recording, you can choose to display the Presenter, the presentation, or both in different parts of
the video.
Note: When you launch Adobe Presenter Video Express with webcam connected to your computer, you see two lines on
the webcam capture area. Only the webcam capture between these two lines is displayed in the side by side layouts (Both
Presenter and Presentation layouts).
7 Do one of the following actions:
• To pause the recording, press the Pause key or right-click the Adobe Presenter Video Express icon in the system
tray, and click Pause Recording.
note: When you right-click the Adobe Presenter icon and choose to Pause recording, these actions are recorded
along with your main recording. You can use the trim option to trim this part of the recording.
Adobe Presenter Video Express screen appears and displays the pause icon to indicate that you have paused the
recording. Click the record button to resume recording or click the edit icon (
) to end recording and edit the
video.
36
• To end the recording, press Shift + End, or click the Adobe Presenter Video Express icon in the system tray, and
click End Recording.
Preview the video by clicking Play ( ). The waveform of the audi o that you recorded with t he video is displayed in the
Time li ne .
Ti p: While ed iting, use the audi o wav efor m to quick ly snap to the porti on of the vi deo with h ighest or lowest amplitude.
The first and last parts of the video are the default branding settings. You can change the branding to include your own
brand videos at the beginning and end of the recorded video.
Set recording preferences
Select Camera Click the video camera icon at the bottom of hte create new project window as shown in the snapshot
below.
The names of the cameras that are currently connected to your computer are displayed as popup. Click one of the
options. You can choose None if you do not want to use a camera in the video you want to record.
Select Microphone Click the microphone icon at the bottom of the create new project window as shown in the
snapshot below.
The names of the microphones that are currently available on your computer are displayed as popup. Click one of the
options if you want to record audio along with the video. Click None if you do not want to record audio along with the
video.
Last updated 9/12/2015
Page 40
Adobe Presenter
Resolution From Adobe Presenter 10 onwards, by default HD resolution will be used for recording videos. If there is
no HD support in the computer, the nearest SD resolution will be used.
Change Display Resolution During Recording Click and select Preferences. In Preferences window, select
Miscellaneous Preferences, and click the checkbox next to Change Display Resolution during recording to let Adobe
Presenter Video Express automatically change the resolution of your monitor screen during recording. Adobe Presenter
Video Express will switch resolution to 1280x720 if it is supported, else 1280x800. The resolution changes when you
click
to create new project.
For more information, see Miscellaneous preferences .
Record additional video
1 Click Open Projects to open the project to which you want to record additional video.
Note: If the existing project was recorded using a webcam, you require a webcam to record additional video too.
2 Click Play ( ) and pause (click Play again) the video at the point where you want to insert additional video.
3 Click the record button ( ) in the playbar.
37
4 Perform the steps on your computer.
and press Shift+End when you are done with recording.
5 Press Shift+End to end the recording, or press Pause to pause the recording. You can also right-click the Adobe
Presenter Video Express icon in the system tray, and click Pause Recording to pause recording.
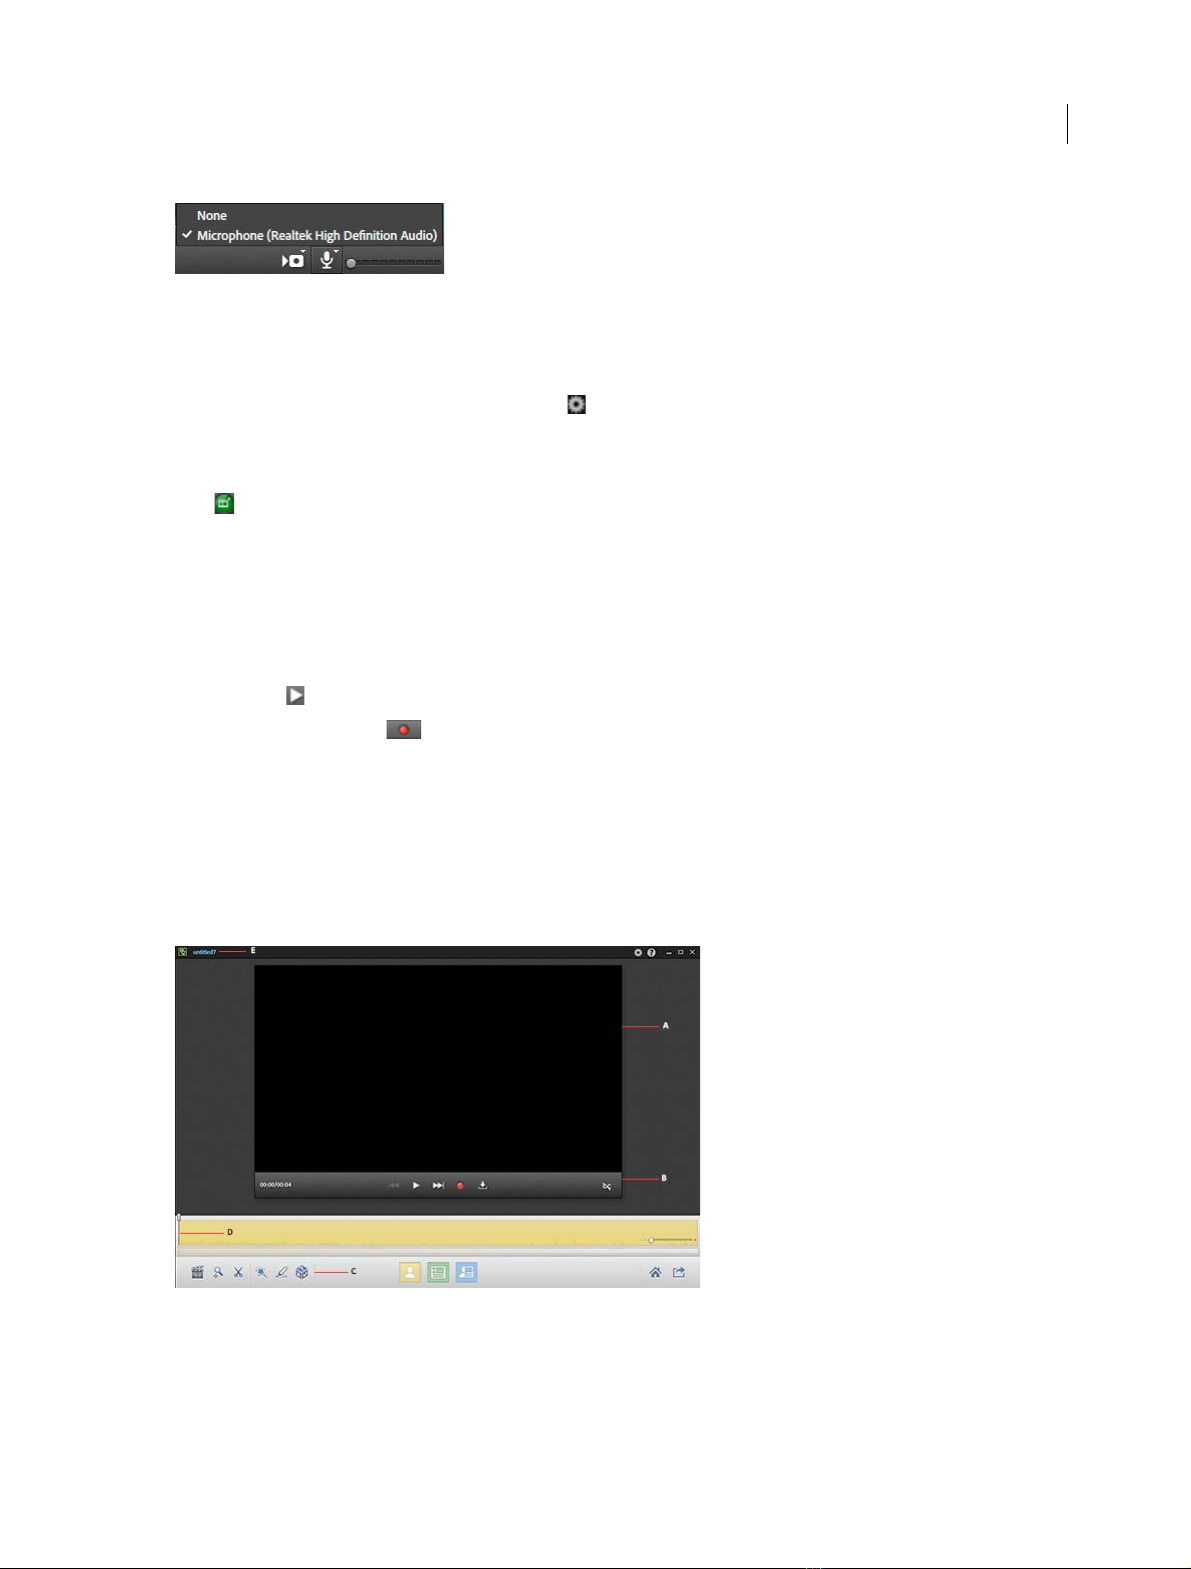
Understanding the editing interface
A Recorded video B Playbar C Editing controls D Timeline E Project name
Last updated 9/12/2015
Page 41
Adobe Presenter
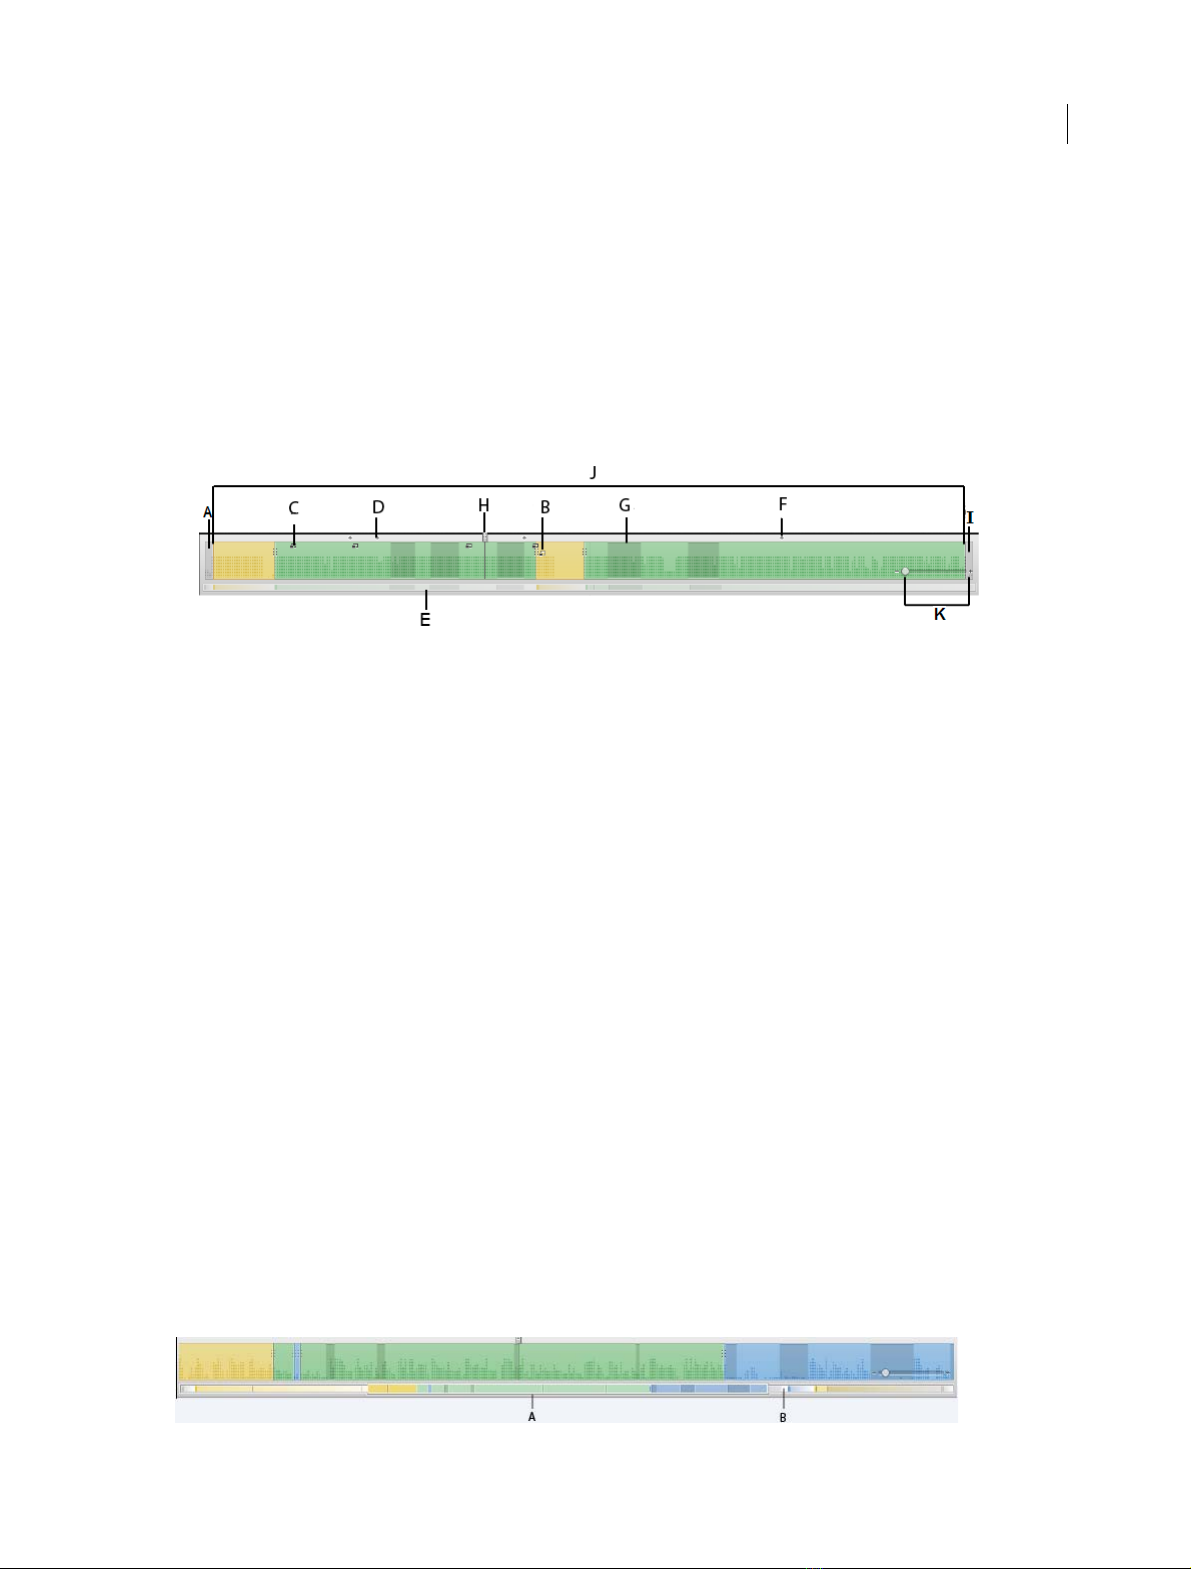
Understanding the timeline
Timeline shows you the entire video clip in the form of a (colored) rectangular bar. If you have used multiple layouts in
the project, this rectangle is divided into many rectangles with different colors. The layouts are color-coded to help you
instantly identify the allocation of the layouts in the video. For information on changing the layouts, see
layout.
The Timeline also shows the audio waveform of the audio clip recorded with the video.
The rectangular bar (video clip) is prefixed and suffixed with the default branding videos. You can remove these videos
or choose different videos using the Branding panel. For more information, see
A Default branding video at the beginning of the video B Green timeline indicating Presentation only mode C Light blue timeline indicating
presenter and presentation mode D
Dark blue timeline indicating an external video is inserted E Yellow timeline indicating presenter only mode
Edit the video theme.
Change the
38
Note: An external video added to the timeline is indicated by a darker shade. If you add an external video in presentation
only mode, then the timeline is a dark green. If you add an external video in presenter and presentation only mode, then
the timeline is a dark blue. And if you add an external video in presenter only mode, the timeline turns dark yellow in color.
In different modes, the timeline contains different indicators showing the different locations where edits are made.
For example, if you are in pan and zoom mode, you can see all the locations on the timeline where you have added pan
and zoom effects. And if you are in annotations mode, you can see on the timeline all the annotations you have added.
However, you cannot see the other type of effects you have added.
Additionally, the right of the timeline has a zoom slider that allows you to magnify the timeline allowing you to edit the
video at very granular levels.
For example, while choosing the Trim region, you can drag the playhead from 5 seconds to 6 seconds at a lower zoom
level. You can drag it from 5 seconds to 5.5 seconds at a higher zoom level.
Navigating using Timeline
Scrollbar and markers on the Timeline help you navigate to specific portions of the video.
Scrollbar, at the bottom of the Timeline, contains a miniature form of the rectangular bar (video clip) and reflects the
color scheme displayed in the Timeline.
Navigating using Timeline
Scrollbar and markers on the Timeline help you navigate to specific portions of the video.
Scrollbar, at the bottom of the Timeline, contains a miniature form of the rectangular bar (video clip) and reflects the
color scheme displayed in the Timeline.
A Thumb (scroller) B Track or the trough of the scrollbar
Last updated 9/12/2015
Page 42

Adobe Presenter
When you magnify the Timeline, the entire video clip does not fit into the Timeline. But, the scrollbar still displays the
entire video clip with the layout allocation. While you can make fine edits using the magnified view of the Timeline,
you can use the scrollbar and the thumb (scroller) to quickly navigate to a specific portion of the video.
Markers are tiny dots ( ) in the Timeline (see the Timeline topic for an illustration) that indicate a lower third text.
Edit videos
Change the project name
By default, the projects are named as untitled <n>. To name your project, click the project name at the top of the Adobe
Presenter Video Express screen, and type the required name.
Change the layout
1 Click Play ( ) to play the video.
2 At the point where you want to change the layout, click one of the following options:
Presenter Only Click to display only the Presenter.
39
Presentation Only Click to display only the Presentation.
Last updated 9/12/2015
Page 43

Adobe Presenter
Both (Presenter On Left) This is a toggle button. Click to display both the Presenter and Presentation side by
side, with Presenter on the left side of the screen.
40
Note: When you click this button, it toggles to display . Whenever you want the Presenter on the right side of the
screen, you can click this button again.
The Timeline displays different color codes for different layouts. See Understanding the timelinefor more information.
In the above example, the green rectangle indicates the duration of the video in which the layout is ‘Presentation Only’.
Note: When you launch Adobe Presenter Video Express with webcam connected to your computer, you see two lines on the
webcam capture area. Only the webcam capture between these two lines is displayed in the side by side layouts (Both
Presenter and Presentation layouts).
Add pan and zoom effects
You can add pan and zoom effects to your project to highlight or emphasize parts of the screen.
Another way you can highlight sections of the screen is through the use of annotations. For more information, see Add
annotations .
1 Click Play ( ) and pause the video (click the Play button again) at the point where you want to add a pan and zoom
effect.
Last updated 9/12/2015
Page 44

Adobe Presenter
2 Click the Add Pan And Zoom icon ( ). The Pan And Zoom panel appears on the right. The panel displays both
the Presentation and the Presenter.
3 Click and drag the handles (highlighted area in red) in the pan and zoom panel to define the pan and zoom region.
A pan and zoom icon appears in the Timeline.
The video is played at the specified pan and zoom level until the next pan and zoom point. This means, if you have
zoomed into the video, you have to zoom out again to display the video in the original size.
Double-click anywhere in the pan and zoom region of the Presentation or the Presenter to display the video in the
original size.
Note: Eac h star ting point of a Pan and Zo om are a of the vide o wi ll b e represe nted by the icons in the timeline. When
you move mouse over these icons, they appear like this icon. To re-position the Pan and Zoom starting points in the
timeline, you can click and drag the existing icons.
41
4 Do one of the following:
• Add more pan and zoom points by repeating the steps.
• Delete a pan and zoom point by selecting the pan and zoom in the timeline and then clicking the corresponding
delete icon
in the Pan And Zoom panel, or pressing the Delete key on the keyboard
• Edit the video further by using the trim option.
• Edit the branding settings.
• Click Publish to publish the video.
Trim videos
You can easily trim unwanted portions of the video using Presenter Video Express's trim features.
1 Click Play ( ) and pause the video (click the Play button again) at the point where you want to start trimming the
video.
2 Click the Trim icon ( ) and then set inpoint by clicking the icon. The start marker appears on the Timeline as
highlighted in yellow and video starts playing from that point.
Last updated 9/12/2015
Page 45

Adobe Presenter
3 You can pause the video to indicate the end point of the trim area. The starting and end points of trim region are
highlighted in yellow with a check mark or tick icon.
4 To set outpoint or to confirm the end point of the trimmed area, click check mark icon.
5 Click and drag the start and end points of trimmed area to increase or decrease the trim region.
Note: You c an d o it in t w o w ays :
• Click the space in timeline at the right or left of the highlighted trimmed region
• Pull the existing trimmed region (yellow highlighted area) to the left or right by dragging the arrows.
To delete a trim region, click the trim region and press delete icon. The playhead can be positioned anywhere.
6 Do one of the following:
• Edit the video further by using the trim option again.
• Add pan and zoom points.
• Edit the branding settings.
• Click Publish to publish the video.
42
Undo and redo edit operations
Press Ctrl + z (Windows) or Command + z (on Mac) to undo the latest operation in Adobe Presenter Video Express.
To redo the operation, press the keys again.
Multiple undo operations are not supported. Ctrl + z and Command + z act as toggle keys and toggle between undo
and redo of the latest edit operation.
The scope of undo and redo operations are limited to edit operations within the following:
• Layout editing options
• Tr im
• Pan and zoom
This means, if you change the layout and click the trim or pan and zoom icon, the undo stack is cleared, and you cannot
undo the change layout operation. Whereas if you switch between the layouts options without clicking trim or pan and
zoom, you can undo the last change in the layout.
Similarly, if you choose a trim region and click pan and zoom or layout icons, the undo stack gets cleared, and you
cannot undo the trim operation.
Edit the video theme
Add brand videos and icons
You can change the theme of your video and "re-brand" it according to your requirements.
1 Click Branding ( ) in Adobe Presenter Video Express.
2 In the Branding panel, click a theme from the Themes list. The edit area displays a preview of the selected theme.
To remove the default branding video, click None from the Branding Video list.
Last updated 9/12/2015
Page 46

Adobe Presenter
Note: From Adobe Presenter 10 onwards, 5 new themes have been added as below:
1 cubes
2 globe-glow
3 globe-linear
4 grassroots
5 yellow2d
6 To create a custom theme, click Custom in the Themes list.
7 Based on whether you want the video at the beginning or end or both, click Start or End or both. Then, click Select
to browse for the video.
Note: Only MP4 videos (of codecs H.264 and AAC) are supported. The resolution of the branding video must be
1280x720 or 1280x800 for Presenter 10 projects. For SD projects recorded in Presenter 9 and before, you need to provide
a 640x360 branding asset.
8 To use an image as the background, select Background and then click Select to browse for the required image.
9 To use a branding icon or a logo, select Left or Right in the Branding Icon section based on where you want the
image. Then, click Select to choose the image.
43
Add title text
1 Click the Branding icon in Adobe Presenter Video Express.
2 In the Branding panel, select Title Text, and type the text.
Note: Multi-line text is not supported; type all the text in a single line.
Add lower-third text
Lower-third text is the text overlay on the video that is used to display your name and designation.
Note: From Adobe Presenter 10 onwards, you have a provision to include multiple lower third titles for your video
presentation.
1 Click the Branding icon in Adobe Presenter Video Express.
2 In the Branding panel, select Lower Third Text.
3 Specify the Presenter name and title.
4 In the Display Duration field, specify the duration for which the text must be displayed.
Note: Repeat the above steps as per your requirement to display multiple lower third texts for your presentation.
The lower third will appear at the current play head. Fine adjustments can be made to the time at which it appears,
by moving the play head within the lower third region and clicking Display at play head. To display lower third text
at the beginning of the presentation, you need to click the play head at the beginning and then follow the steps above.To
delete the existing lower third text, move the mouse over the lower third text marker and click
icon.
Add closed captions
Adobe Presenter Video Express automatically converts audio in your project to closed captions. Generation of closed
captions happens on the cloud and therefore, you must have internet connectivity to use this feature.
Note: Closed captions are currently optimized for American English. There is no support available now for Portuguese
Brazilian closed caption. You can also export closed captions as SRT files.
Last updated 9/12/2015
Page 47

Adobe Presenter
To generate closed captions:
1 Click below the video to open the Closed Captioning dialog box.
44
2 Click Generate to generate the closed captions.
It takes some time for Presenter Video Express to generate and display the closed captions.
To get better quality results, you can copy-paste the audio script into the Closed Caption window and generate it.
Export closed captions
In edit mode, click at the bottom right corner of the Play bar window. Choose External toggle button to export the
closed captions as SRT files in the published folder.
Edit closed captions
To edit closed captions, double-click the text in the right panel and edit it.
Enable or disable closed captions in published output
To enable and disable closed captions in the published output, select the toggle option Yes or No available in the Closed
Captioning panel.
Last updated 9/12/2015
Page 48

Adobe Presenter
Publish videos
You can upload videos to YouTube, Vimeo, or Adobe Connect (Content Library), export the video to Microsoft
PowerPoint, or save the videos as MP4 files on the disk.
Set publishing preferences
Click Settings ( )in Adobe Presenter Video Express.
Publish Quality Use the slider to specify the quality of the published output. The higher the quality, the greater is the
file size.
Note: Publish Quality takes effect only in the published output of the video.
Publish to YouTube
1 Click Publish in Adobe Presenter Video Express, and then click YouTube.
Adobe Presenter Video Express converts your project to an MP4 file at the back end. After the conversion is
completed, the YouTube Login window appears.
2 Specify your YouTube login credentials and select the I’ve Read Adobe Privacy Policy check box.
3 Click Login.
4 In the Upload To YouTube dialog box, specify the title for the project, and type in a description.
5 In the Tags field, type the tags for the project to optimize your users' search for the project. Use commas or
semicolons to separate multiple tags.
Generally, the tags are the search terms that your users use to search for your project on YouTube. Some examples
are the subject of your project, or the key terms in the project, or the title.
45
6 In the Category list, click a category to which your project belongs.
7 Click one of the following options:
• Public: To make your project available for everyone who accesses YouTube.
• Private: To make your project available to only specific set of users. After uploading the file, log on to YouTube,
and provide permissions for such users (or to users with whom you want to share the link). For more
information, see
8 Click Terms and Conditions, review them, and click Back.
9 Select the I have read the terms and conditions check box, and click Upload.
this website.
A message is displayed indicating that the video is uploaded successfully.
10 Click Send Email Now to send the YouTube URL to the required people over mail. The default email application
configured on your machine is loaded, and the URL of the project appears in the default text of the email.
Publish to Vimeo
1 Click Publish in Adobe Presenter Video Express, and then click Vimeo.
Adobe Presenter Video Express converts your project to an MP4 file at the back end. After the conversion is
completed, the Upload to Vimeo window appears.
2 Specify your Vimeo login credentials and select the I’ve Read Adobe Privacy Policy check box.
3 Click Login.
4 Click Allow when prompted to allow or disallow Adobe Presenter from accessing your Vimeo account.
Last updated 9/12/2015
Page 49

Adobe Presenter
5 Specify the title for the project, and type in a description.
6 In the Tags field, type the tags for the project to optimize your users' search for the project. Use commas or
semicolons to separate multiple tags.
Generally, the tags are the search terms that your users use to search for your project on Vimeo. Some examples are
the subject of your project, or the key terms in the project, or the title.
7 Click one of the following options:
• Anyone: To make your video available for everyone who log in to Vimeo.
• Only me: To make your video available only for you. If at later point in time, you want to make the video available
for others, you can do so by configuring the Privacy settings in Vimeo.
8 Click Terms and Conditions, review them, and click Back.
9 Select the I have read the terms and conditions check box, and click Upload.
A message is displayed indicating that the video is uploaded successfully along with the URL at which the video is
hosted.
10 Click Send Email Now to send the URL to the required people over mail. The default email application configured
on your machine is loaded, and the URL of the project appears in the default text of the email.
46
Publish as MP4 files
Click Publish in Adobe Presenter Video Express, and then click Publish to My Computer.
Adobe Presenter Video Express converts your project to an MP4 file at the back end. After the conversion is completed,
the output folder with the MP4 file appears.
The default publish folders:
On Windows: C:\Users\username\My Documents\My Adobe Presenter Video Projects
Published\<project_name>\<project_name.mp4>.
On Mac: /Users/<username>/Documents/My Adobe Presenter Video Projects
Published/<project_name>/<project_name.mp4>
Export to Microsoft PowerPoint
Click Publish in Adobe Presenter Video Express, and then click Export to Microsoft PowerPoint.
The video is placed in a new Microsoft PowerPoint presentation slide as an Adobe Presenter video. You can insert new
slides into the presentation to create a Microsoft PowerPoint project. You can also copy and paste the slide with the
video into an existing presentation.
Note: As these videos are Adobe Presenter videos and not Microsoft PowerPoint videos, you cannot view them in the
slideshow. The video is visible in the video edit mode (Adobe Presenter > Video > Edit), or in the output file published from
Adobe Presenter.
Upload to Adobe Connect
You can upload Adobe Presenter Video Express videos to Adobe Connect to use them in Adobe Connect meetings. The
videos are uploaded as MP4 files.
1 Click Publish in Adobe Presenter Video Express, and then click Upload to Adobe Connect.
2 Specify the Adobe Connect Server URL, Username, and password.
Last updated 9/12/2015
Page 50

Adobe Presenter
3 Click one of the following options to specify who can access the video:
Public To provide access to anyone who has the link to the video.
Private To share the video with specific users.
4 Click Adobe Privacy Policy. Adobe Privacy Center appears in a web browser.
5 Review the policy, and select I’ve Read Adobe Privacy Policy in the Upload To Adobe Connect dialog box.
6 Click Upload.
Adobe Presenter Video Express converts the video to MP4 format and uploads it to the Content Library of the
specified server. After publishing, a message appears with the Adobe Connect URL where the video is hosted.
7 Copy the URL and distribute it to your users.
Troubleshooting Adobe Presenter Video Express
If you encounter errors while using Adobe Presenter Video Express, redo the workflow by launching Adobe Presenter
Video Express in the Diagnostic mode (Start > All Programs > Troubleshoot Adobe Presenter Video Express.
At the end of the recording, the Diagnostic Logs dialog box appears.
Note: For Adobe Presenter Video Express in Mac, click Help> Diagnostic mode menu item to choose Presenter Video
Express in diagnostic mode for troubleshooting. You need to re-launch the software to open Presenter Video Express in
diagnostic mode.
47
• Click Email to send the logs to Adobe for troubleshooting. The default mail client appears with the logs attached.
Note: The above option is available only for Windows. Mac users have to save the logs and email them to Adobe
team.
• Click Save to save the logs on your computer for future use.
Error: Your camera doesn't support the minimum FPS required for Adobe Presenter Video Express...
This error occurs because your camera supports a frame rate lesser than 10 FPS. Adobe Presenter Video Express
produces best quality videos when your camera is High Definition (1280 x 720) and supports at least 10 FPS (frame
rate). Use of cameras that support lesser FPS results in choppy videos (similar to slide-show)
Solution:
Replace your camera with one of the recommended ones. See Recommended cameras and microphonesfor more
information.
Also, ensure that you have installed the native driver for the camera provided by the manufacturer.
The quality of the Adobe Presenter video is low
Adobe Presenter Video Express requires much processing power to record the screen and webcam videos
simultaneously. The presenter video in particular is a lot more difficult to record. When the processing power is not
sufficient, the Presenter video quality will be low. The quality drop can be seen in the drop in the frame rate of the video.
Also, the audio and video may go out of synchronization.
Solution:
Last updated 9/12/2015
Page 51

Adobe Presenter
Close unnecessary applications and free up system resources. If you experience a problem with the quality of your
Presenter video, please check the following:
• Are you capturing an SD video instead of an HD video?
• Are all unnecessary applications closed?
• Do you have sufficient free space on your hard disk? At least 5 GB is needed, but around 15 GB is recommended.
• Are you using a good quality webcam? Check out the webcams recommended by Adobe.
• Are your webcam drivers up to date?
• Are you capturing your video in a well-lit environment? Most webcams perform poorly in bad lighting.
• Are you running Adobe Presenter Video Express in Diagnostic Mode? Use Diagnostic Mode only to report issues
to Adobe.
Adding quizzes and questions
48
About quizzes and questions
You can use Adobe Presenter to create interactive e-learning presentations that are SCORM or AICC compliant for use
with a learning management system. When you create e-learning content for presentations, you can create a
combination of quizzes and questions.
Leverage HTML5 support to deliver eye-catching quizzes on tablets. Choose from a wide range of question types, such
as matching, short answer, and fill-in-the-blank. Export scoring data to leading SCORM-, AICC-, and Tincancompliant LMSs. For more information on publishing HTML5 output, see
Quizzes are the containers that hold questions. You can use the Quiz Manager to create a single quiz for a presentation
or multiple quizzes in a single presentation. Then you add questions to the quiz or quizzes. You can add graded
questions, survey questions, or a combination of both to each quiz.
After adding questions, use question groups to ensure two people taking the same quiz do not see the same questions
in the same order. Quizzes are assigned an Objective ID, a number that specifies an objective set in your learning
management system or Adobe Connect Server. Using quizzes and their default Objective IDs is the best way to
coordinate Adobe Presenter presentations with Adobe Connect Server and existing content.
Publishing and viewing presentations
Last updated 9/12/2015
Page 52

Adobe Presenter
49
A Quiz no 1 B Different types of questions in quiz 1 C Quiz no 2 D A question in quiz 2
You can design the following types of questions in Adobe Presenter:
• Multiple-choice
• Short answer
• Matching
• Tr ue /F al se
• Rating scale (Likert)
• Fill in the blank
• Sequence
• Hot Spot
• Drag and drop questions
Note: Sequence and Hot Spot questions are available only for PPTX files and not on PPT files.
You can grade the questions or use them in surveys to gather information.
Last updated 9/12/2015
Page 53

Adobe Presenter
Branching in quizzes
Branching is an important concept in creating effective e-learning materials and a useful way to customize
presentations. In branched presentations (sometimes called contingency branching), the path that users take through
a quiz or survey is determined by their responses to questions. For example, you can create branches based on correct
answers, incorrect answers, or options selected by the user. Depending on these factors, you can continue the
presentation, jump to a specific slide, open a URL, and so on.
Through branching, you can specify what happens when users answer questions correctly or incorrectly. For example,
you can associate one action (such as “Go to the next slide”) to a correct answer and another (such as “Open URL”) to
an incorrect answer.
Reporting
Reporting lets you track student performance with any type of quiz. You can track the number of attempts, log correct
and incorrect responses, and send pass/fail data to Adobe Connect Server. You can also choose to provide students with
feedback based on correct or incorrect responses.
Quiz boundaries
When you add a quiz to a presentation, an invisible quiz boundary is established. The quiz boundary is from the first
question of a quiz to the last question of a quiz. For example, if you have 10 questions in a quiz, the boundary is from
the first question slide to the tenth question slide. If there are any slides between question slides, those slides are
considered within the quiz boundaries. If you have added an instruction slide, the instruction slide is also within the
quiz boundary. Result slides are also inside quiz boundaries.
50
When users view a presentation, they may move in and out of the quiz boundaries. For example, if a user moves back
a slide from the first question, they have exited the quiz boundary. Also, if the user is on the final question slide and
advances to view the scoring/results slide, they have exited the quiz boundary.
Quiz boundaries are important to several features in Adobe Presenter. You can have Adobe Presenter display a message
to users if they try to leave the quiz boundary without attempting all questions in the quiz. The Quiz pane appears in
the presentation sidebar when a user is within a quiz boundary.
Tips for creating quizzes and questions
Here are a few tricks and tips to try when adding quizzes to your presentation:
• When creating a matching question, drag items between the two columns to establish the correct matches.
• Try customizing feedback messages to accurately communicate with presentation users.
• Experiment with branching to customize presentations for different types of users.
• If you have quizzes in one presentation that would be appropriate for another presentation, import the quiz and save
time.
• Use the shuffle question and shuffle answer options to show users different versions of the same information.
Last updated 9/12/2015
Page 54

Adobe Presenter
• Consider adding custom audio feedback based on how users answer questions. You can select different audio for a
correct answer and an incorrect answer.
• Try editing the settings in the Show Score At End Of Quiz option. You can write custom pass and fail messages,
design the slide using background colors, and choose how to display the score.
• Moving a question from one quiz to another quiz from presentation (.pptx) film strip is not supported. Do it from
Quiz manager.
• Always create questions in the Quiz Manager. For example, while in PowerPoint, do not copy a quiz slide in the left
pane and then paste it to create a “new” quiz slide. This results in two slides with the same interaction ID, which is
not supported by learning management systems.
• If a change is made in the question by editing the slide contents, open the Quiz Manager once before publishing the
presentation. Quiz validation and updating is done only when the Quiz Manager is opened.
• Change the text formatting of quiz questions after the entire quiz is generated. For example, you can create and
generate the quiz and then use the Quiz Manager Appearance tab to change the font size.
Create a quiz
When you open the Quiz Manager for the first time, a default quiz is displayed. You can use the default quiz or add
more quizzes as necessary.
51
Note: If you are creating a quiz that consists of only survey questions, the user has only one chance to take the quiz. Try to
keep the length of survey-only quizzes fairly short, for example, 15–20questions, so users can complete the survey easily.
1 In PowerPoint, open a presentation (PPT or PPTX file).
2 Click Adobe Presenter, and in the Quiz group, click Add Quiz.
If you are using Microsoft Office XP, the quiz is generated after the first slide in the presentation. For presentations
made with versions of Microsoft Office other than XP, the first quiz is created after the first selected slide in the
PowerPoint Slide tab. In all versions of Microsoft Office, quizzes created after a first quiz are placed directly after the
first quiz.
Once quiz slides exist, you can drag the slides in the PowerPoint Slide tab to other locations in the presentation.
(When moving quiz slides, check that the entire quiz is moved; moving a question slide from one quiz to another
quiz is not supported.)
3 In the New Quiz dialog box, accept the default name or enter a new name in the Name text box.
4 From the pop-up menu next to Required, select an option to determine if users must take or pass the quiz. When
selecting an option, consider how the quiz fits in with your e-learning strategy for the presentation. For example,
you can require users to pass the quiz or allow them to skip the quiz.
Optional The learner can attempt the quiz, but is not required to take the quiz.
Required The learner is required to at least attempt the quiz. A quiz attempt is defined as answering (selecting or
typing an answer and pressing Submit) at least one question in the quiz. Simply viewing a question is not considered
an attempt. Until the learners answer at least one question in the quiz, they are not permitted to move forward in
the presentation beyond the last question slide in that quiz. The required option does not, however, limit the learner
from navigating among slides within a given quiz.
Pass Required The learner must pass this quiz to continue. If you select this option, all navigation to any slide past
the end of the quiz is prohibited until the learner achieves a passing score. This restriction affects both learnerinitiated navigation (for example, clicking forward or back buttons in the playbar or clicking on a slide in the Outline
pane) and author-initiated branching (for example, immediate question and quiz feedback). If you select the Pass
Required option, you must show a scoring slide. The scoring slide tells learners why they cannot move past the quiz.
Last updated 9/12/2015
Page 55

Adobe Presenter
If no scoring slide is chosen, the Pass Required option behaves the same as Optional and no navigation restrictions
exist.
Answer All The learner must answer every question. The questions must be answered in order and no questions can
be skipped.
5 Select the options you want to incorporate into the quiz:
Allow Backward Movement (Optional) Enables learners to click the Back button in the playbar to move backward.
If you leave this option unchecked, learners cannot move backward when taking a quiz. (Leaving this option
unchecked prevents learners from seeing quiz questions and then going back to earlier slides to look up correct
answers.)
Allow User To Review Quiz (Optional) Displays a Review Quiz button on the scoring slide. Learners can click the
button and be taken back to the first question slide in the quiz. Learners can see their answer to each question,
whether their answer is correct, and, if the answer is not correct, the correct answer. Reviewing a quiz is strictly
informational; learners cannot change their answers while reviewing.
Include Instructions Slide (Optional) Displays a slide at the beginning of the quiz containing information for users
about how to take the quiz. The slide is added with no text; navigate to the slide in PowerPoint and add your quizlevel, custom instruction text. The slide does contain, by default, a Start Quiz button that users can click to navigate
to the first question of the quiz. When the presentation is viewed, the playbar stops at the instruction slide (just like
any quiz slide) so users can read the text. In the published presentation, the instruction slide is displayed in the
Outline pane, Thumb pane, and, if it was added, the Quiz pane.
52
Show Score At End Of Quiz (Optional) Displays a scoring slide at the end of the quiz. You can write custom pass and
fail messages, design the slide using background colors, and choose how to display the score.
Show Questions In Outline (Optional) Displays the name of the question slide in the outline when users see the
presentation in the Adobe Presenter viewer.
Shuffle Questions (Optional) Changes the order of questions each time the quiz is displayed.
Shuffle Answers (Optional) Randomly changes the order in which possible answers appear.
6 Click the Pass Or Fail Options tab.
7 Select an option in the Pass/Fail Options area. Specify a passing score either as a percentage (for example, 80%
correct) or a number of correct answers (for example, 8 out of 10).
8 Select the actions that take place when users receive a passing grade or a failing grade. For example, use the pop-up
menu next to Action and select Go To Slide to display a specific slide in response to passing or failing.
Note: If you are using the Allow Backward Movement option, it is important to set the correct answering options. If
Allow Backward Movement is not selected (unchecked), set the Quiz Options to Answer All and set the number of
allowable quiz attempts to one. If a quiz is set to any option other than Answer All, select (check) the Allow Backward
Movement option. This prevents the situation where, if a learner is allowed to skip over a question, and the Allow
Backward Movement option is not selected, the learner cannot go back and answer skipped questions. In most cases, it
is better to not select the Allow Backward Movement option.
9 Click OK and then click OK again in the Quiz Manager to edit the presentation.
10 In the Quiz Manager, select the quiz you added, and add questions to the quiz. For more information, see Add
questions to quizzes.
Last updated 9/12/2015
Page 56

Adobe Presenter
Add questions to quizzes
In Adobe Presenter, you can add different types of questions. Each type of question contains different options. Click
the links below for details about adding each of the question types.
• Add multiple-choice questions
• Add true-or-false questions
• Add fill-in-the-blank questions
• Add short-answer questions
• Add matching questions
• Add rating scale questions
• Add sequence questions
• Add Hot Spot questions
Add multiple-choice questions
In Adobe Presenter, you can have multiple-choice questions branch according to user responses. For example, in a
question with three possible answers, you can set up branching in this way: If the user selects the first answer, go to the
next slide; if users select second, jump to a slide later in the quiz; if users select third, open a web page.
53
1 In PowerPoint, open a presentation (PPT or PPTX file).
2 Select the slide before the one in which you want to insert a question. For example, if you want the new question to
be slide 7 in the presentation, click slide 6.
If you are inserting the question into an existing quiz, the question is appended to the quiz.
3 In Quiz Manager (Adobe Presenter > Quiz group > Manager), click the quiz to which you want to add a question
and click Add Question.
4 In the Question Types dialog box, select Multiple Choice and click one of the following options:
Create Graded Question The question is graded.
Create Survey Question The question is not graded.
The New multiple choice question dialog box appears.
5 On the Question tab, accept the default text for the name or enter a new name in the Name text box. The name
appears on the question slide in the presentation.
If you are creating more than one question of the same type (for example, multiple-choice, short answer, and so on.)
in a single presentation, type a unique name for each so that you can distinguish between them.
6 In the Question text box, type the multiple-choice question exactly as you want it to appear on the slide. (The
Question text box cannot be left blank.)
7 In the Score text box, type (or use the up and down arrows to specify) the number of points allocated to this
question. Assigning points signifies the relative importance of a question. By assigning different point values to
different questions, you can give introductory questions a lower value than advanced questions, for example. You
can enter any whole number value. If all questions have the same value (for example, 10 points), they are scored
equally.
8 In the Answers area, click Add and enter possible answers. (A multiple-choice question requires at least two
answers.) If necessary, click Delete to remove an answer from the list.
Last updated 9/12/2015
Page 57

Adobe Presenter
9 (Optional) Click Advanced to set options for individual answers, such as a custom feedback message, a specific
action, or audio. (If you have a long answer, the Advanced Answer Options dialog box gives you more space to type
the answer.)
10 Select the radio button next to the correct answer.
11 From the Type pop-up menu, select whether there are multiple correct responses or a single correct response. If you
select multiple correct responses, be sure to return to step 11 and select the radio buttons next to all correct
responses. Also, the Advanced features described in step 10 are enabled only if you select single correct response.
12 In Numbering, use the pop-up menu to specify how answers are listed on the slide. You can choose from uppercase
letters, lowercase letters, or numbers.
13 Select the Options tab.
14 (Optional) From the Type pop-up menu, select the question type: Graded or Survey.
15 Select Show Clear Button to display a button on the question slide that users can click to clear their answers and start
over.
16 In the If Correct Answer area, set the following options:
Action Select which action should follow a correct response. You can advance to the next slide (Go To Next Slide,
the default action), jump to another slide in the presentation (Go To Slide), or display a web page (Open URL). If
you display a web page, type its address in the Open URL text box, and then specify where to display the web page
(choose Current to have the web page replace the presentation or New to display the web page in another window).
54
Go To Next Slide Depending on the option you selected for Action, this text box lets you specify an exact
destination.
Play Audio Clip Select this option to import an audio file or record a new audio file that should play when the
question is answered correctly. Use the Record, Stop, Remove, and Import buttons as necessary. (If you have already
recorded audio, a Play button replaces the Record button. To rerecord audio, you must first remove the audio, and
then select Record.)
note: If a question has an audio clip and an action, the audio clip plays before the action takes place.
Show Correct Message Select this option to provide a text message to users when they provide a correct answer.
Deselect this option if you don’t want to give any feedback for a correct answer.
17 In the If Wrong Answer area, set the following options:
Allow User [#] Attempts Use the arrows or type directly in the text box to specify how many guesses the user can
make before another action takes place. An attempt is defined as any time a user opens and views the question slide.
(Setting the number of attempts to 1 prevents the presentation from proceeding if the user exits and then attempts
to enter the quiz again. Do not set attempts to 1 if you plan to use your presentation in a meeting or place in an
archive.)
Infinite attempts Select this option to give users an unlimited number of attempts.
Action Click the desired action or destination after the last attempt. You can advance to the next slide (Go To Next
Slide, the default action), jump to another slide in the presentation (Go To Slide), or display a web page (Open URL).
In the Open URL text box, type the address of the web page and then specify where to display the web page (choose
Current to have the web page replace the presentation or New to display the web page in another window).
Go To Next Slide Depending on the option you selected for Action, this text box lets you specify an exact
destination.
Play Audio Clip Select this option to import an audio file or record a new audio file that should play when the
question is answered incorrectly. Use the Record, Stop, Remove, and Import buttons as necessary.
Last updated 9/12/2015
Page 58

Adobe Presenter
Show Error Message Select this option to provide a text message to users when they provide an incorrect answer.
Deselect this option if you don’t want to give any feedback for an incorrect answer.
Show Retry Message Select this option to provide a text message to users who give an incorrect answer but have
remaining attempts (for example, “Please try again”).
Show Incomplete Message Select this option to provide a text message to users who don’t provide an answer (for
example, “Please select an answer before continuing”).
note: You can edit the default text in the Correct, Error, Retry, and Incomplete messages in the Quiz Manager. Select
Adobe Presenter > Quiz group > Manage, and click the Default Labels tab.
18 Select the Reporting tab. You can accept the default settings or, if necessary, modify the following options:
Report Answers Sends answer information to Adobe Connect Server or a learning management system.
Quiz Name of the quiz to which this question is assigned. You can select a different quiz from the pop-up menu.
Objective ID This is a number automatically created when you create a quiz. This number is used to report scores
from Adobe Presenter presentations that will be tracked in Adobe Connect Server or a learning management
system.
Interaction ID Accept the default number or type a new number directly in the text box. The maximum length of
an interaction ID is 64 characters. If you want the Adobe Presenter presentation to send tracking information to
Adobe Connect Server, you must use the Interaction ID specified by Adobe Connect Server.
55
note: If you create a new question by copying and pasting an existing question slide, you must enter a new, unique
Interaction ID so that each individual question is reported properly to Adobe Connect Server. We do not recommend
creating new questions by copying and pasting; always create new questions using the Quiz Manager.
19 When you finish, click OK twice.
Add true-or-false questions
Users answer true-or-false questions by selecting either True or False (or Yes or No) as an answer.
1 In PowerPoint, open a presentation (PPT or PPTX file).
2 Select the slide before the one where you want to insert a question. For example, if you want the new question slide
to be slide 7 in the presentation, click slide 6.
If you are inserting the question into an existing quiz, the question is appended to the quiz.
3 In Quiz Manager (Adobe Presenter > Quiz group > Manager), click the quiz to which you want to add a question
and click Add Question.
4 In the Question Types dialog box, select True/False and click one of the following options:
Create Graded Question The question is graded.
Create Survey Question The question is not graded.
The New true/false question dialog box appears.
5 On the Question tab, accept the default text for the name or enter a new name in the Name text box. The name
appears on the question slide in the presentation.
If you are creating more than one question of the same type (for example, multiple-choice, short answer, and so on.)
in a single presentation, type a unique name for each so that you can distinguish between them.
6 In the Question text box, type the true-or-false question exactly as you want it to appear on the slide. (The Question
text box cannot be left blank.)
Last updated 9/12/2015
Page 59

Adobe Presenter
7 In the Score text box, type (or use the up and down arrows to specify) the number of points allocated to this
question. Assigning points signifies the relative importance of a question. Assigning different point values to
different questions lets you, for example, give introductory questions a lower value and advanced questions a higher
value. You can enter any whole number value. If all questions have the same value (for example, 10 points), they are
scored equally.
8 In the Answers area, establish which answer is correct by selecting either True or False.
9 From the Type pop-up menu, select True or False, or Yes or No. (To customize the answer options, select the existing
text in the Answers area and type a new word. For example, select True and type Valid.)
10 In Numbering, use the pop-up menu to select an option for how answers are listed on the quiz slide. You can choose
from uppercase letters, lowercase letters, or numbers.
11 Select the Options tab.
12 (Optional) From the Type pop-up menu, select the question type: Graded or Survey.
13 Select Show Clear Button to insert a button on the slide that users can click to clear their answers and start over.
14 In the If Correct Answer area, set the following options:
Action Select which action should follow a correct response. You can advance to the next slide (Go To Next Slide,
the default action), jump to another slide in the presentation (Go To Slide), or display a web page (Open URL). If
you display a web page, type its address in the open URL text box, and then specify where to display the web page
(choose Current to have the web page replace the presentation or New to display the web page in another window).
56
Go to Next Slide Depending on the option you selected for Action, this text box lets you specify an exact
destination.
Play Audio Clip Select this option to import an audio file or record a new audio file that should play when the
question is answered correctly. Use the Record, Stop, Remove, and Import buttons as necessary. (If you have already
recorded audio, a Play button replaces the Record button. To rerecord audio, you must first remove the audio, and
then select Record.)
note: If a question has an audio clip and an action, the audio clip plays and then the specified action takes place.
Show Correct Message Select this option to provide a text message to users when they provide a correct answer.
Deselect this option if you don’t want to give any feedback for a correct answer.
15 In the If Wrong Answer area, set the following options:
Allow User [#] Attempts Use the arrows or type directly in the text box to specify how many guesses the user can
make before another action takes place. An attempt is defined as any time a user opens and views the question slide.
(Setting the number of attempts to 1 prevents the presentation from proceeding if the user exits and then attempts
to enter the quiz again. Do not set attempts to 1 if you plan to use your presentation in a meeting or place in an
archive.)
Infinite Attempts Select this option to give users an unlimited number of attempts.
Action Click the desired action or destination after the last attempt. You can advance to the next slide (Go To Next
Slide, the default action), jump to another slide in the presentation (Go To Slide), or display a web page (Open URL).
If you display a web page, type its address in the Open URL text box, and then specify where to display the web page
(choose Current to have the web page replace the presentation or New to display the web page in another window).
Go To Next Slide Depending on the option you selected for Action, this text box lets you specify an exact
destination.
Play Audio Clip Select this option to import an audio file or record a new audio file that should play when the
question is answered incorrectly. Use the Record, Stop, Remove, and Import buttons as necessary.
Last updated 9/12/2015
Page 60

Adobe Presenter
Show Error Message Select this option to provide a text message to users when they provide an incorrect answer.
Deselect this option if you don’t want to give any feedback for an incorrect answer.
Show Retry Message Select this option to provide a text message to users who give an incorrect answer but have
remaining attempts (for example, “Please try again”).
Show Incomplete Message Select this option to provide a text message to users who don’t provide an answer (for
example, “Please select an answer before continuing”).
note: You can edit the default text in the Correct, Error, Retry, and Incomplete messages in the Quiz Manager. Select
Adobe Presenter > Quiz group > Manage, and click the Default Labels tab.
16 Select the Reporting tab. You can accept the default settings or, if necessary, modify the following options:
Report Answers This option sends answer information to Adobe Connect Server or a learning management system.
Quiz Name of the quiz to which this question is assigned. You can select a different quiz from the pop-up menu.
Objective ID This is a number automatically created when you create a quiz. This number is used to report scores
from Adobe Presenter presentations that will be tracked in Adobe Connect Server or a learning management
system.
Interaction ID Accept the default number or type a new number directly in the text box. The maximum length of
an interaction ID is 64 characters. If you want the Adobe Presenter presentation to send tracking information to
Adobe Connect Server, you must use the Interaction ID specified by Adobe Connect Server.
57
note: If you create a new question by copying and pasting an existing question slide, you must enter a new, unique
Interaction ID so that each individual question is reported properly to Adobe Connect Server. We do not recommend
creating new questions by copying and pasting; always create new questions using the Quiz Manager.
17 When you finish, click OK twice.
Add fill-in-the-blank questions
Fill-in-the-blank questions contain a blank space that users fill in by entering text (such as a word or phrase) or
selecting from a list of possible answers.
1 In PowerPoint, open a presentation (PPT or PPTX file).
2 Select the slide before the one where you want to insert a question. For example, if you want the new question slide
to be slide 7 in the presentation, click slide 6.
If you are inserting the question into an existing quiz, the question is appended to the quiz.
3 In Quiz Manager (Adobe Presenter > Quiz group > Manager), click the quiz to which you want to add a question
and click Add Question.
4 In the Question Types dialog box, select Fill-in-the-blank and click one of the following options:
Create Graded Question The question is graded.
Create Survey Question The question is not graded.
The New fill-in-the-blank question dialog box appears.
5 On the Question tab, accept the default text for the name or enter a new name in the Name text box. The name
appears on the question slide in the presentation.
If you are creating more than one question of the same type (for example, multiple-choice, short answer, and so on.)
in a single presentation, type a unique name for each so that you can distinguish between them.
Last updated 9/12/2015
Page 61

Adobe Presenter
6 In the Description text box, accept the default text for Description or enter a new description. The description
appears on the questions slide in the presentation and should give users instructions about how to answer the
question. (The Description field cannot be left blank.)
7 In the Score text box, type (or use the up and down arrows to specify) the number of points allocated to this
question. Assigning points signifies the relative importance of a question. Assigning different point values to
different questions lets you, for example, give introductory questions a lower value and advanced questions a higher
value. You can enter any whole number value. If all questions have the same value (for example, 10 points), they are
scored equally.
8 Select the Shuffle Answers In List option to randomly change the order in which possible answers appear.
9 In the Phrase text box, type the entire sentence or phrase that will contain a blank space to be completed by users or
will contain a blank space with a drop-down list of possible answers for users to select from.
10 Select the word or phrase that you intend to be the blank area and click Add Blank. You can have a maximum of 8
blanks in a question. (When a blank is created, the blank is represented by “<i>” in the dialog box with the “i”
representing the number assigned to the blank. Do not edit the text “<i>” manually. Use the Add blank and Delete
blanks buttons to achieve the desired results.)
11 In the Blank Answer dialog box, specify how users will choose the correct answer:
The User Will Type in the Answer, Which Will Be Compared to the List Below Users type an answer in a text box.
58
The User Will Select an Answer from the List Below Users select an answer from a drop-down list. (The drop-down
list can display answers approximately 22 characters in length. Answers longer than 22 characters may not be fully
visible in the published output.)
12 If necessary, click Add and enter more words or phrases that correctly fill in the blank space in the question. Click
Add and Delete as necessary to create a list of correct answers.
13 (Optional) Select The Answer Is Case-Sensitive to require that users type the correct combination of lowercase and
uppercase letters when filling in the blank. For example, if the answer to the question is “Windows” and you select
the case-sensitive option, an answer of “windows” is incorrect.
14 Click OK.
15 Select the Options tab.
16 (Optional) In Type, use the pop-up menu to change the question type to Graded or Survey.
17 Select Show Clear Button to display a button on the question slide that users can click to clear their answers and start
over.
18 In the If Correct Answer area, set the following options:
Action Select which action should follow a correct response. You can advance to the next slide (Go To Next Slide,
the default action), jump to another slide in the presentation (Go To Slide), or display a web page (Open URL). If
you display a web page, type its address in the Open URL text box, and then specify where to display the web page
(choose Current to have the web page replace the presentation or New to display the web page in another window).
Go To Next Slide Depending on the option you selected for Action, this text box lets you specify an exact
destination.
Play Audio Clip Select this option to import an audio file or record a new audio file that should play when the
question is answered correctly. Use the Record, Stop, Remove, and Import buttons as necessary. (If you have already
recorded audio, the record button will be a Play button. To rerecord audio, you must first remove the audio, and then
select Record.)
note: If a question has an audio clip and an action, the audio clip plays and then the specified action takes place.
Last updated 9/12/2015
Page 62

Adobe Presenter
Show Correct Message Select this option to provide a text message to users when they provide a correct answer.
Deselect this option if you don’t want to give any feedback for a correct answer.
19 In the If Wrong Answer area, set the following options:
Allow User [#] Attempts Use the arrows or type directly in the text box to specify how many guesses the user can
make before another action takes place. An attempt is defined as any time a user opens and views the question slide.
(Setting the number of attempts to 1 prevents the presentation from proceeding if the user exits and then attempts
to enter the quiz again. Do not set attempts to 1 if you plan to use your presentation in a meeting or place in an
archive.)
Infinite Attempts Select this option to give users an unlimited number of attempts.
Action Click the desired action or destination after the last attempt. You can advance to the next slide (Go To Next
Slide, the default action), jump to another slide in the presentation (Go To Slide), or display a web page (Open URL).
If you display a web page, type its address in the Open URL text box, and then specify where to display the web page
(choose Current to have the web page replace the presentation or New to display the web page in another window).
Go To Next Slide Depending on the option you selected for Action, this text box lets you specify an exact
destination.
Play Audio Clip Select this option to import an audio file or record a new audio file that should play when the
question is answered incorrectly. Use the Record, Stop, Remove, and Import buttons as necessary.
59
Show Error Message Select this option to provide a text message to users when they provide an incorrect answer.
Deselect this option if you don’t want to give any feedback for an incorrect answer.
Show Retry Message Select this option to provide a text message to users when they supply an incorrect answer but
there are remaining attempts available (for example, Please try again).
Show Incomplete Message Select this option to provide a text message to users who don’t provide an answer (for
example, “Please select an answer before continuing”).
note: You can edit the default text in the Correct, Error, Retry, and Incomplete messages in the Quiz Manager. Select
Adobe Presenter > Quiz group > Manage, and click the Default Labels tab.
20 Select the Reporting tab. You can accept the default settings or, if necessary, modify the following options:
Report Answers This option sends answer information to Adobe Connect Server or a learning management system.
Quiz Name of the quiz to which this question is assigned. You can select a different quiz from the pop-up menu.
Objective ID This is a number automatically created when you create a quiz. This number is used to report scores
from Adobe Presenter presentations that will be tracked in Adobe Connect Server or a learning management
system.
Interaction ID Accept the default number or type a new number directly in the text box. The maximum length of
an interaction ID is 64 characters. If you want the Adobe Presenter presentation to send tracking information to
Adobe Connect Server, you must use the Interaction ID specified by Adobe Connect Server.
note: If you create a new question by copying and pasting an existing question slide, you must enter a new, unique
Interaction ID so that each individual question is reported properly to Adobe Connect Server. We do not recommend
creating new questions by copying and pasting; always create new questions using the Quiz Manager.
21 When you finish, click OK twice.
Last updated 9/12/2015
Page 63

Adobe Presenter
Add short-answer questions
Users answer short-answer questions by providing a word, phrase, or complete sentence as an answer. You can also use
this as an essay question and grade it or gather extended feedback as a survey question.
1 In PowerPoint, open a presentation (PPT or PPTX file).
2 Select the slide before the one where you want to insert a question. For example, if you want the new question slide
to be slide 7 in the presentation, click slide 6.
If you are inserting the question into an existing quiz, the question is appended to the quiz.
3 In Quiz Manager (Adobe Presenter > Quiz group > Manager), click the quiz to which you want to add a question
and click Add Question.
4 In the Question Types dialog box, select Short answer and click one of the following options:
Create Graded Question The question is graded.
Create Survey Question The question is not graded.
The New short answer question dialog box appears.
5 On the Question tab, accept the default text for Name or type a new name directly into the text box. The name
appears on the question slide in the presentation.
If you are creating more than one question of the same type (for example, multiple-choice, short answer, and so on.)
in a single presentation, type a unique name for each so that you can distinguish between them.
60
6 In the Question text box, type the short-answer question, exactly as you want it to appear on the slide. (The Question
text box cannot be left blank.)
7 In the Score text box, type (or use the up and down arrows to specify) the number of points allocated to this
question. Assigning points signifies the relative importance of a question. Assigning different point values to
different questions lets you, for example, give introductory questions a lower value and advanced questions a higher
value. You can enter any whole number value. If all questions have the same value (for example, 10 points), they are
scored equally.
8 In the Acceptable Answers area, click an empty row or click Add and enter words or phrases that are correct answers
to the question. Click Add and Delete as necessary to write an appropriate list.
9 (Optional) Select The Answer Is Case-Sensitive to require that users type the correct combination of lowercase and
uppercase letters when providing a short answer. For example, if the answer to the question is “Windows” and you
select the case-sensitive option, an answer of “windows” would be incorrect.
10 Select the Options tab.
11 (Optional) In Type, use the pop-up menu to change the question type to Graded or Survey.
12 Select Show Clear Button to display a button on the question slide that users can click to clear their answers and start
over.
13 In the If Correct Answer area, set the following options:
Action Select which action should follow a correct response. You can advance to the next slide (Go To Next Slide,
the default action), jump to another slide in the presentation (Go To Slide), or display a web page (Open URL). If
you display a web page, type its address in the Open URL text box, and then specify where to display the web page
(choose Current to have the web page replace the presentation or New to display the web page in another window).
Go To Next Slide Depending on the option you selected for Action, this text box lets you specify an exact
destination.
Last updated 9/12/2015
Page 64

Adobe Presenter
Play Audio Clip Select this option to import an audio file or record a new audio file that should play when the
question is answered correctly. Use the Record, Stop, Remove, and Import buttons as necessary. (If you have already
recorded audio, a Play button replaces the Record button. To rerecord audio, you must first remove the audio, and
then select Record.)
note: If a question has an audio clip and an action, the audio clip plays and then the specified action takes place.
Show Correct Message Select this option to provide a text message to users when they provide a correct answer.
Deselect this option if you don’t want to give any feedback for a correct answer.
14 In the If Wrong Answer area, set the following options:
Allow User [#] Attempts Use the arrows or type directly in the text box to specify how many guesses the user can
make before another action takes place. An attempt is defined as any time a user opens and views the question slide.
(Setting the number of attempts to 1 prevents the presentation from proceeding if the user exits and then attempts
to enter the quiz again. Do not set attempts to 1 if you plan to use your presentation in a meeting or place in an
archive.)
Infinite Attempts Select this option to give users an unlimited number of attempts.
Action Click the desired action or destination after the last attempt. You can advance to the next slide (Go To Next
Slide, the default action), jump to another slide in the presentation (Go To Slide), or display a web page (Open URL).
If you display a web page, type its address in the Open URL text box, and then specify where to display the web page
(choose Current to have the web page replace the presentation or New to display the web page in another window).
61
Go To Next Slide Depending on the option you selected for Action, this text box lets you specify an exact
destination.
Play Audio Clip Select this option to import an audio file or record a new audio file that should play when the
question is answered incorrectly. Use the Record, Stop, Remove, and Import buttons as necessary.
Show Error Message Select this option to provide a text message to users when they provide an incorrect answer.
Deselect this option if you don’t want to give any feedback for an incorrect answer.
Show Retry Message Select this option to provide a text message to users when they supply an incorrect answer but
there are remaining attempts available (for example, Please try again).
Show Incomplete Message Select this option to provide a text message to users who don’t provide an answer (for
example, “Please select an answer before continuing”).
note: You can edit the default text in the Correct, Error, Retry, and Incomplete messages in the Quiz Manager. Select
Adobe Presenter > Quiz group > Manage, and click the Default Labels tab.
15 Select the Reporting tab. You can accept the default settings or, if necessary, modify the following options:
Report Answers This option sends answer information to Adobe Connect Server or a learning management system.
Quiz Name of the quiz to which this question is assigned. You can select a different quiz from the pop-up menu.
Objective ID This is a number automatically created when you create a quiz. This number is used to report scores
from Adobe Presenter presentations that will be tracked in Adobe Connect Server or a learning management
system.
Interaction ID Accept the default number or type a new number directly in the text box. The maximum length of
an interaction ID is 64 characters. If you want the Adobe Presenter presentation to send tracking information to
Adobe Connect Server, you must use the Interaction ID specified by Adobe Connect Server.
note: If you create a new question by copying and pasting an existing question slide, you must enter a new, unique
Interaction ID so that each individual question is reported properly to Adobe Connect Server. We do not recommend
creating new questions by copying and pasting; always create new questions using the Quiz Manager.
Last updated 9/12/2015
Page 65

Adobe Presenter
16 When you finish, click OK twice.
The new short-answer question slide appears in the designated location in the presentation. If you are using the
short-answer question as a graded essay question, you can grade each answer individually by using the Connect Pro
Central override option. For more information, see the Connect Pro Central User Guide.
Add matching questions
Users answer matching questions by matching items in two different lists.
1 In PowerPoint, open a presentation (PPT or PPTX file).
2 Select the slide before the one where you want to insert a question. For example, if you want the new question slide
to be slide 7 in the presentation, click slide 6.
If you are inserting the question into an existing quiz, the question is appended to the quiz.
3 In Quiz Manager (Adobe Presenter > Quiz group > Manager), click the quiz to which you want to add a question
and click Add Question.
4 In the Question Types dialog box, select Matching and click one of the following options:
Create Graded Question The question is graded.
Create Survey Question The question is not graded.
62
The New matching question dialog box appears.
5 On the Question tab, accept the default text for the Name or type new text directly into the text box. The name
appears on the question slide in the presentation.
If you are creating more than one question of the same type (for example, multiple-choice, short answer, and so on.)
in a single presentation, type a unique name for each so that you can distinguish between them.
6 In the Question text box, type the matching question, exactly as you want it to appear on the slide. For example,
“Match the job titles in column 1 with the correct departments in column 2.” (The Question text box cannot be left
blank.)
7 In the Score text box, type (or use the up and down arrows to specify) the number of points allocated to this
question. Assigning points signifies the relative importance of a question. Assigning different point values to
different questions lets you, for example, give introductory questions a lower value and advanced questions a higher
value. You can enter any whole number value. If all questions have the same value (for example, 10 points), they are
scored equally.
8 Select Shuffle Options to randomly change the order in which possible answers appear.
9 In Answers, click Add under each column and type the words or phrases to match. (You can also click directly in
each column to type words or phrases.) If necessary, click Delete to remove any answers or click the up and down
arrows to move answers up or down a position in the column.
10 (Optional) To change the names of the columns, click the default names (“Column 1” and “Column 2”) and type
new names.
11 To establish the correct matches between answers, click an item in one column, then click an item in the other
column, and click Match. (You can also drag items between the two columns to create correct matches.) A line is
drawn between the two items to show the relationship. All items in Column 1 must have a match in Column 2.
12 If you need to change the order of items in a column, select an item and then click the up or down arrow below the
column to move the item up or down in the list.
Last updated 9/12/2015
Page 66

Adobe Presenter
13 If you make an error while establishing the correct matches between column items, click Clear Matches and start
over.
14 In Numbering, use the pop-up menu and select an option for how answers are listed on the quiz slide. You can
choose from uppercase letters, lowercase letters, or numbers.
15 Select the Options tab.
16 (Optional) In Type, use the pop-up menu to change the question type to Graded or Survey.
17 Select Show Clear Button to display a button on the question slide that users can click to clear their answers and start
over.
18 In the If Correct Answer area, set the following options:
Action Select which action should follow a correct response. You can advance to the next slide (Go To Next Slide,
the default action), jump to another slide in the presentation (Go To Slide), or display a web page (Open URL). If
you display a web page, type its address in the Open URL text box, and then specify where to display the web page
(choose Current to have the web page replace the presentation or New to display the web page in another window).
Go To Next Slide Depending on the option you selected for Action, this text box lets you specify an exact
destination.
Play Audio Clip Select this option to import an audio file or record a new audio file that should play when the
question is answered correctly. Use the Record, Stop, Remove, and Import buttons as necessary. (If you have already
recorded audio, the record button will be a Play button. To rerecord audio, you must first remove the audio, and then
select Record.)
63
note: If a question has an audio clip and an action, the audio clip plays and then the specified action takes place.
Show Correct Message Select this option to provide a text message to users when they provide a correct answer.
Deselect this option if you don’t want to give any feedback for a correct answer.
19 In the If Wrong Answer area, set the following options:
Allow User [#] Attempts Use the arrows or type directly in the text box to specify how many guesses the user can
make before another action takes place. An attempt is defined as any time a user opens and views the question slide.
(Setting the number of attempts to 1 prevents the presentation from proceeding if the user exits and then attempts
to enter the quiz again. Do not set attempts to 1 if you plan to use your presentation in a meeting or place in an
archive.)
Infinite Attempts Select this option to give users an unlimited number of attempts.
Action Select the desired action/destination after the last attempt. You can advance to the next slide (Go To Next
Slide, the default action), jump to another slide in the presentation (Go To Slide), or display a web page (Open URL).
If you display a web page, type its address in the Open URL text box, and then specify where to display the web page
(choose Current to have the web page replace the presentation or New to display the web page in another window).
Go To Next Slide Depending on the option you selected for Action, this text box lets you specify an exact
destination.
Play Audio Clip Select this option to import an audio file or record a new audio file that should play when the
question is answered incorrectly. Use the Record, Stop, Remove, and Import buttons as necessary.
Show Error Message Select this option to provide a text message to users when they provide an incorrect answer.
Deselect this option if you don’t want to give any feedback for an incorrect answer.
Show Retry Message Select this option to provide a text message to users when they supply an incorrect answer but
there are remaining attempts available (for example, Please try again).
Last updated 9/12/2015
Page 67

Adobe Presenter
Show Incomplete Message Select this option to provide a text message to users who don’t provide an answer (for
example, “Please select an answer before continuing”).
note: You can edit the default text in the Correct, Error, Retry, and Incomplete messages in the Quiz Manager. Select
Adobe Presenter > Quiz group > Manage, and click the Default Labels tab.
20 Select the Reporting tab. You can accept the default settings or, if necessary, modify the following options:
Report Answers This option sends answer information to Adobe Connect Server or a learning management system.
Quiz Name of the quiz to which this question is assigned. You can select a different quiz from the pop-up menu.
Objective ID This is a number automatically created when you create a quiz. This number is used to report scores
from Adobe Presenter presentations that will be tracked in Adobe Connect Server or a learning management
system.
Interaction ID Accept the default number or type a new number directly in the text box. The maximum length of
an interaction ID is 64 characters. If you want the Adobe Presenter presentation to send tracking information to
Adobe Connect Server, you must use the Interaction ID specified by Adobe Connect Server.
note: If you create a new question by copying and pasting an existing question slide, you must enter a new, unique
Interaction ID so that each individual question is reported properly to Adobe Connect Server. We do not recommend
creating new questions by copying and pasting; always create new questions using the Quiz Manager.
64
21 When you finish, click OK twice.
Add rating scale questions
Users answer rating scale questions by specifying their level of agreement to a statement. For example, a user may be
given the question, “This presentation provided me with valuable information.” and asked if they disagree, somewhat
disagree, are neutral, somewhat agree, or agree.
Rating scale questions are always survey questions and are therefore not graded. You cannot assign a rating scale
question with a point value, nor can you creating branching for a correct or incorrect answer (since it’s a survey question
and does not have a correct or incorrect answer). You can, however, decide what happens after the user completes the
rating scale question, such as continuing to the next slide or displaying a URL.
1 In PowerPoint, open a presentation (PPT or PPTX file).
2 Select the slide before the one where you want to insert a question slide. For example, if you want the new question
slide to be slide 7 in the presentation, click slide 6.
If you are inserting the question into an existing quiz, the question is appended to the quiz.
3 In Quiz Manager (Adobe Presenter > Quiz group > Manager), click the quiz to which you want to add a question
and click Add Question.
4 In the Question Types dialog box, select Rating Scale (Likert).
5 Click Create Survey Question.
6 On the Question tab, accept the default text for the Name or type new text directly into the text box. The name
appears on the question slide in the presentation.
If you are creating more than one question of the same type (for example, multiple-choice, short answer, and so on.)
in a single presentation, type a unique name for each so that you can distinguish between them.
7 Accept the default text for Description or type a new description directly into the text box. The description appears
on the question slide in the presentation and should provide users with instructions about how to answer the
question. (The description text box cannot be left blank.)
Last updated 9/12/2015
Page 68

Adobe Presenter
8 In the Questions area, click in the first row or click Add and type a Likert question directly into the text box. (You
can add up to five separate Likert questions on a single slide.)
9 In the Answers area, you can accept the default answer text, edit the text, delete a type, and add a new answer type.
To edit the tex t, doubl e-click exist ing text suc h as “Ne utral” and typ e ne w text. To dele te an ans wer type, select a type
and click Delete. To add an answer type, click Add and type new text. (You can have a total of five answer types.)
10 Select the Options tab.
11 Select Show Clear Button to display a button on the question slide that users can click to clear their answers and start
over.
12 In the After Survey question area, set the following options:
Action Click the desired action or destination after the survey is taken. You can advance to the next slide (Go To
Next Slide, the default action), jump to another slide in the presentation (Go To Slide), or display a web page (Open
URL). If you display a web page, type its address in the Open URL text box, and then specify where to display the
web page (choose Current to have the web page replace the presentation or New to display the web page in another
window).
Go To Next Slide Depending on the option you selected for Action, this text box lets you specify an exact
destination.
Play Audio Clip Select this option to import an audio file or record a new audio file that should play when the
question is answered. Use the Re cord, Stop, Remove, and Imp ort buttons as ne cessary. (If you have already recorded
audio, the record button will be a Play button. To rerecord audio, you must first remove the audio, and then select
Record.)
65
note: If a question has an audio clip and an action, the audio clip plays and then the specified action takes place.
13 Select the Reporting tab. You can accept the default settings or, if necessary, modify the following options:
Report Answers This option sends answer information to Adobe Connect Server or a learning management system.
Quiz Name of the quiz to which this question is assigned. You can select a different quiz from the pop-up menu.
Objective ID This is a number automatically created when you create a quiz. This number is used to report scores
from Adobe Presenter presentations that will be tracked in Adobe Connect Server or a learning management
system.
Interaction ID Accept the default number or type a new number directly in the text box. The maximum length of
an interaction ID is 64 characters. If you want the Adobe Presenter presentation to send tracking information to
Adobe Connect Server, you must use the Interaction ID specified by Adobe Connect Server.
note: If you create a new question by copying and pasting an existing question slide, you must enter a new, unique
Interaction ID so that each individual question is reported properly to Adobe Connect Server. We do not recommend
creating new questions by copying and pasting; always create new questions using the Quiz Manager.
14 When you finish, click OK twice.
Add sequence questions
Users answer a sequence question by arranging the answers in the right sequence. They can do so by either clicking and
dragging the answers or by clicking them in a drop-down list.
Note: You cannot insert sequence questions in a PPT file.
1 In PowerPoint, open a presentation (PPTX file).
Last updated 9/12/2015
Page 69

Adobe Presenter
2 Select the slide before the one where you want to insert a question. For example, if you want the new question slide
to be slide 7 in the presentation, click slide 6.
If you are inserting the question into an existing quiz, the question is appended to the quiz.
3 In Quiz Manager (Adobe Presenter > Quiz group > Manager), click the quiz to which you want to add a question
and click Add Question.
4 In the Question Types dialog box, select Sequence and click one of the following options:
Create Graded Question The question is graded.
Create Survey Question The question is not graded.
The New sequence question dialog box appears.
5 On the Question tab, accept the default text for Name or type a new name directly into the text box. The name
appears on the question slide in the presentation.
If you are creating more than one question of the same type (for example, multiple-choice, short answer, and so on.)
in a single presentation, type a unique name for each so that you can distinguish between them.
6 In the Question text box, type the sequence question, exactly as you want it to appear on the slide. (The Question
text box cannot be left blank.)
7 In the Score text box, type (or use the up and down arrows to specify) the number of points allocated to this
question. Assigning points signifies the relative importance of a question. Assigning different point values to
different questions lets you, for example, give introductory questions a lower value and advanced questions a higher
value. You can enter any whole number value. If all questions have the same value (for example, 10 points), they are
scored equally.
8 In the Answers area, click an empty row or click Add and enter words or phrases that are correct answers to the
question. Click Add and Delete as necessary to write an appropriate list.
Note: Type the answers in the correct sequence.
66
9 In the Style list, click Drag Drop if you want the users to click and drag the answers to arrange them in a sequence.
Click Drop Down List to provide them a list from which they can select the answers in the correct sequence.
10 In the Numbering list, click the numbering style for the answers.
11 Select the Options tab.
12 (Optional) In the Type list, click Graded or Survey to change the question type.
13 Select Show Clear Button to display a button on the question slide that users can click to clear their answers and start
over.
14 In the If Correct Answer area, set the following options:
Action Select which action should follow a correct response. You can advance to the next slide (Go To Next Slide,
the default action), jump to another slide in the presentation (Go To Slide), or display a web page (Open URL). If
you display a web page, type its address in the Open URL text box, and then specify where to display the web page
(choose Current to have the web page replace the presentation or New to display the web page in another window).
Go To Next Slide Depending on the option you selected for Action, this text box lets you specify an exact
destination.
Play Audio Clip Select this option to import an audio file or record a new audio file that should play when the
question is answered correctly. Use the Record, Stop, Remove, and Import buttons as necessary. (If you have already
recorded audio, a Play button replaces the Record button. To rerecord audio, you must first remove the audio, and
then select Record.)
Last updated 9/12/2015
Page 70

Adobe Presenter
note: If a question has an audio clip and an action, the audio clip plays and then the specified action takes place.
Show Correct Message Select this option to provide a text message to users when they provide a correct answer.
Deselect this option if you don’t want to give any feedback for a correct answer.
15 In the If Wrong Answer area, set the following options:
Allow User [#] Attempts Use the arrows or type directly in the text box to specify how many guesses the user can
make before another action takes place. An attempt is defined as any time a user opens and views the question slide.
(Setting the number of attempts to 1 prevents the presentation from proceeding if the user exits and then attempts
to enter the quiz again. Do not set attempts to 1 if you plan to use your presentation in a meeting or place in an
archive.)
Infinite Attempts Select this option to give users an unlimited number of attempts.
Action Click the desired action or destination after the last attempt. You can advance to the next slide (Go To Next
Slide, the default action), jump to another slide in the presentation (Go To Slide), or display a web page (Open URL).
If you display a web page, type its address in the Open URL text box, and then specify where to display the web page
(choose Current to have the web page replace the presentation or New to display the web page in another window).
Go To Next Slide Depending on the option you selected for Action, this text box lets you specify an exact
destination.
Play Audio Clip Select this option to import an audio file or record a new audio file that should play when the
question is answered incorrectly. Use the Record, Stop, Remove, and Import buttons as necessary.
67
Show Error Message Select this option to provide a text message to users when they provide an incorrect answer.
Deselect this option if you don’t want to give any feedback for an incorrect answer.
Show Retry Message Select this option to provide a text message to users when they supply an incorrect answer but
there are remaining attempts available (for example, Please try again).
Show Incomplete Message Select this option to provide a text message to users who don’t provide an answer (for
example, “Please select an answer before continuing”).
note: You can edit the default text in the Correct, Error, Retry, and Incomplete messages in the Quiz Manager. Select
Adobe Presenter > Quiz group > Manage, and click the Default Labels tab.
16 Select the Reporting tab. You can accept the default settings or, if necessary, modify the following options:
Report Answers This option sends answer information to Adobe Connect Server or a learning management system.
Quiz Name of the quiz to which this question is assigned. You can select a different quiz from the pop-up menu.
Objective ID This is a number automatically created when you create a quiz. This number is used to report scores
from Adobe Presenter presentations that will be tracked in Adobe Connect Server or a learning management
system.
Interaction ID Accept the default number or type a new number directly in the text box. The maximum length of
an interaction ID is 64 characters. If you want the Adobe Presenter presentation to send tracking information to
Adobe Connect Server, you must use the Interaction ID specified by Adobe Connect Server.
note: If you create a new question by copying and pasting an existing question slide, you must enter a new, unique
Interaction ID so that each individual question is reported properly to Adobe Connect Server. We do not recommend
creating new questions by copying and pasting; always create new questions using the Quiz Manager.
17 When you finish, click OK twice.
The new sequence question slide appears in the designated location in the presentation.
Last updated 9/12/2015
Page 71

Adobe Presenter
Add Hot Spot questions
Hotspot slides contain areas that the user must identify. For example, you can ask the user to identify company products
from images displayed on the slide.Answers to hotspot questions are correct if all the correct hotspots are clicked and
none of the incorrect hotspots are clicked.
Note: You cannot insert hot spot questions in a PPT file.
1 In PowerPoint, open a presentation (PPTX file).
2 Select the slide before the one where you want to insert the question. For example, if you want the new question slide
to be slide 7 in the presentation, click slide 6.
If you are inserting the question into an existing quiz, the question is appended to the quiz.
3 In Quiz Manager (Adobe Presenter > Quiz group > Manager), click the quiz to which you want to add a question
and click Add Question.
4 In the Question Types dialog box, select Hot Spot and click one of the following options:
Create Graded Question The question is graded.
Create Survey Question The question is not graded.
The New hot spot question dialog box appears.
68
5 On the Question tab, accept the default text for Name or type a new name directly into the text box. The name
appears on the question slide in the presentation.
If you are creating more than one question of the same type (for example, multiple-choice, short answer, and so on.)
in a single presentation, type a unique name for each so that you can distinguish between them.
6 In the Q uestion text box, type t he hot spot question, exactly as you want it to appear on t he slide. (The Q uestion text
box cannot be left blank.)
7 In the Score text box, type (or use the up and down arrows to specify) the number of points allocated to this
question. Assigning points signifies the relative importance of a question. Assigning different point values to
different questions lets you, for example, give introductory questions a lower value and advanced questions a higher
value. You can enter any whole number value. If all questions have the same value (for example, 10 points), they are
scored equally.
8 In the Hot Spots text box, specify the total number of hot spot answers (including correct and incorrect) you want
to provide.
9 Click the browse icon in the Choose field to choose an animation for the mouse clicks on the hot spots.
10 Select Allow Clicks On Hot Spots Only to disable mouse clicks outside the hot spot areas.
11 In the Answers area, click each placeholder answer and enter words or phrases that describe the hot spot.
12 Select the check boxes that correspond to the correct answers.
13 Select the Options tab.
14 (Optional) In the Type list, click Graded or Survey to change the question type.
15 Select Show Clear Button to display a button on the question slide that users can click to clear their answers and start
over.
16 In the If Correct Answer area, set the following options:
Action Select which action should follow a correct response. You can advance to the next slide (Go To Next Slide,
the default action), jump to another slide in the presentation (Go To Slide), or display a web page (Open URL). If
Last updated 9/12/2015
Page 72

Adobe Presenter
you display a web page, type its address in the Open URL text box, and then specify where to display the web page
(choose Current to have the web page replace the presentation or New to display the web page in another window).
Go To Next Slide Depending on the option you selected for Action, this text box lets you specify an exact
destination.
Play Audio Clip Select this option to import an audio file or record a new audio file that should play when the
question is answered correctly. Use the Record, Stop, Remove, and Import buttons as necessary. (If you have already
recorded audio, a Play button replaces the Record button. To rerecord audio, you must first remove the audio, and
then select Record.)
note: If a question has an audio clip and an action, the audio clip plays and then the specified action takes place.
Show Correct Message Select this option to provide a text message to users when they provide a correct answer.
Deselect this option if you don’t want to give any feedback for a correct answer.
17 In the If Wrong Answer area, set the following options:
Allow User [#] Attempts Use the arrows or type directly in the text box to specify how many guesses the user can
make before another action takes place. An attempt is defined as any time a user opens and views the question slide.
(Setting the number of attempts to 1 prevents the presentation from proceeding if the user exits and then attempts
to enter the quiz again. Do not set attempts to 1 if you plan to use your presentation in a meeting or place in an
archive.)
69
Infinite Attempts Select this option to give users an unlimited number of attempts.
Action Click the desired action or destination after the last attempt. You can advance to the next slide (Go To Next
Slide, the default action), jump to another slide in the presentation (Go To Slide), or display a web page (Open URL).
If you display a web page, type its address in the Open URL text box, and then specify where to display the web page
(choose Current to have the web page replace the presentation or New to display the web page in another window).
Go To Next Slide Depending on the option you selected for Action, this text box lets you specify an exact
destination.
Play Audio Clip Select this option to import an audio file or record a new audio file that should play when the
question is answered incorrectly. Use the Record, Stop, Remove, and Import buttons as necessary.
Show Error Message Select this option to provide a text message to users when they provide an incorrect answer.
Deselect this option if you don’t want to give any feedback for an incorrect answer.
Show Retry Message Select this option to provide a text message to users when they supply an incorrect answer but
there are remaining attempts available (for example, Please try again).
Show Incomplete Message Select this option to provide a text message to users who don’t provide an answer (for
example, “Please select an answer before continuing”).
note: You can edit the default text in the Correct, Error, Retry, and Incomplete messages in the Quiz Manager. Select
Adobe Presenter > Quiz group > Manage, and click the Default Labels tab.
18 Select the Reporting tab. You can accept the default settings or, if necessary, modify the following options:
Report Answers This option sends answer information to Adobe Connect Server or a learning management system.
Quiz Name of the quiz to which this question is assigned. You can select a different quiz from the pop-up menu.
Objective ID This is a number automatically created when you create a quiz. This number is used to report scores
from Adobe Presenter presentations that will be tracked in Adobe Connect Server or a learning management
system.
Last updated 9/12/2015
Page 73

Adobe Presenter
Interaction ID Accept the default number or type a new number directly in the text box. The maximum length of
an interaction ID is 64 characters. If you want the Adobe Presenter presentation to send tracking information to
Adobe Connect Server, you must use the Interaction ID specified by Adobe Connect Server.
note: If you create a new question by copying and pasting an existing question slide, you must enter a new, unique
Interaction ID so that each individual question is reported properly to Adobe Connect Server. We do not recommend
creating new questions by copying and pasting; always create new questions using the Quiz Manager.
19 When you finish, click OK twice.
The new hot spot question slide appears in the designated location in the presentation. The hot spots are represented
by rectangles with the description that you provided.
20 Insert images or any other shape that you want to use as hot spot in the slide.
21 Click and drag the hot spot rectangles to place over the images. You can use the Drag and drop questionsinteractions
along with other question types.
Note: You can edit the properties of the hot spot rectangles such as the color and thickness using the PowerPoint options.
Importing questions from existing quizzes
If you have existing quizzes and questions in a presentation created with Adobe Presenter 7, you can reuse them by
importing them into other presentations. When you import a quiz, you can select all or some of the questions and
question groups contained in the quiz to be imported as well.
70
Note: If an imported question slide contains audio, video, or SWF files, these multimedia files are imported along with the
question slide.
1 In PowerPoint, open a presentation (PPT or PPTX file).
2 Select Adobe Presenter, and in the Quiz group, click Import.
3 Navigate to the PPT or PPTX file containing the quiz you want to import and click Open.
4 Under Import From, select the quiz or question you want to import.
5 Under Import To, select the slide after the location to which you want to import the quiz or question. For example,
if you want the quiz or question to appear before slide 5, click slide 5.
6 Click Move. (Alternatively, drag the selected questions from the source pane and drop on the destination pane.)
7 (Optional) To edit the imported quiz or question, select Launch Quiz Manager After Import.
8 Click OK.
Note: To see details such as points and mandatory status, hover the mouse over a quiz or question in the Import From
or Import To lists.
Edit quizzes and questions
After you have created question slides in a presentation, you can edit them as required.
Change question slide order
After you have created question slides in a presentation, you can change their order.
1 In PowerPoint, open a presentation (PPT or PPTX file).
2 In the Outline pane, drag the slide icon to a new location, or in the Slides pane, drag a thumbnail to a new
location.
Last updated 9/12/2015
Page 74

Adobe Presenter
Delete a question slide
You can delete a question slide at any time.
1 In PowerPoint, open a presentation (PPT or PPTX file).
2 Do one of the following:
• In the PowerPoint Outline or Slides pane, select a slide and click Delete.
• Click Adobe Presenter, and in the Quiz group, click Manage. Select a question slide and click Delete.
Add a feedback message to a question
Because quizzes are interactive, it’s important to guide users through any question slides you place in projects. An easy
way to communicate with users is through feedback messages. A feedback message can appear, for example, when a
user selects a correct answer or incorrect answer. Feedback messages are set for individual questions, so you can choose
to include messages in some questions or all questions within a quiz.
1 In PowerPoint, open a presentation (PPT or PPTX file).
2 Click Adobe Presenter, and in the Quiz group, click Manage.
3 Select a question and click Edit Question.
4 Click the Options tab.
5 In the If Correct Answer area, select the Show Correct Message option to display a message to users confirming that
they selected the correct answer. Deselect the Show Correct Message option if you do not want to display a message
to users when they select the correct answer.
6 In the If Wrong Answer area, select the Show Error Message option to display a message to users stating that they
selected the incorrect answer. Deselect the Show Error Message option if you do not want to display a message to
users when they select the incorrect answer.
7 In the If Wrong Answer area, select the Show Retry Message option to display a message to users when they select
the incorrect answer, but have remaining answer attempts available. Deselect the Show Retry Message option if you
do not want to display a message to users when they select the incorrect answer but have remaining answer attempts
available.
71
8 In the If Wrong Answer area, select the Show Incomplete Message option to display a message to users who do not
provide an answer to a required question.
Edit feedback message text in a quiz
Adobe Presenter provides default text for feedback messages that are displayed to users, but you can edit the text at any
time. The text is set at the quiz level so that all questions within a quiz display the same feedback messages.
1 In PowerPoint, open a presentation (PPT or PPTX file).
2 Click Adobe Presenter, and in the Quiz group, click Manage.
3 On any quiz, click Edit.
4 Select the Allow User To Review Quiz option and click Question Review Messages.
5 Type new text directly in the text boxes for Correct, Incomplete, and Incorrect feedback messages.
6 Click OK three times to close all of the dialog boxes.
Note: If you change the default labels, the question feedback messages also change for questions that have already been
created.
Last updated 9/12/2015
Page 75

Adobe Presenter
Change default labels
You can change the default labels on question buttons and question feedback messages. Default labels are an easy way
to customize communications with users taking quizzes.
1 In PowerPoint, open a presentation (PPT or PPTX file).
2 Click Adobe Presenter, and in the Quiz group, click Manage.
3 Click Default Labels.
4 Under Default question button labels, change any of the following options:
Submit Button Text Enter the text for the question Submit button. (For example, you could change the text to OK
or Enter.)
Clear Button Text Enter the text for the question Clear button. (For example, you could change the text to Start Over
or Restart.)
5 Under Default question feedback, change any of the following options:
Correct Message Enter the text message for a correct answer.
Incorrect Message Enter the text message for an incorrect answer.
Retry Message Enter the text message for an incorrect answer when there are more question attempts available.
72
Incomplete Message Enter the text message for users failing to answer a required question.
6 Click OK.
About question groups
A question group is simply a set of, for example, 10 questions. You decide how many of the questions are formed into
a subset when the quiz containing the questions appears in the presentation. For example, five out of the 10 questions
appear. (All of the questions in the quiz are included in the final, published presentation, but when the presentation is
viewed, only the number of questions you specified, in this case five, are displayed for the user.) Question groups are
one method you can use to ensure two people taking the same quiz do not see the same questions in the same order
(shuffling questions is another method).
Note: Any non-question (content) slides located within a question group boundary (between the first and last question of
a question group) are not displayed in the published presentation.
When you create question groups, you receive more options including setting mandatory questions, branching based
on percentage scored in a question group, and question shuffling (the order of questions changes each time the quiz is
displayed).
Note: Ensure that questions and question groups in a quiz never branch outside the quiz boundary.
Create question groups
Question groups are sets of questions you can use to create different subsets.
1 In PowerPoint, open a presentation (PPT or PPTX file).
2 Click Adobe Presenter, and in the Quiz group, click Manage.
3 Select the quiz to which you want to add a question group.
Note: A single quiz can have multiple question groups.
4 Click Add Question Group.
Last updated 9/12/2015
Page 76

Adobe Presenter
5 Click the Settings tab.
6 (Optional) Type a unique name for the question group. (Different questions groups can have the same name.)
7 Type a number or use the menu to specify a Subset Size. For example, if you have 10 questions, you can enter
five, so five questions are shown each time the quiz appears.
8 Type a number or use the menu to specify a Default Score.
9 (Optional) Select Shuffle Questions to change the order of questions each time the quiz is displayed.
Note: Any non-question (content) slides between shuffled quiz questions are not displayed in the published presentation.
10 (Optional) Click the Navigation tab to add branching. Enter a percentage range for specific actions. For example, if
a user score is between 0–49% correct, then Action 1 takes place, and if the score is between 50–100% correct, then
Action 2 takes place.
11 Click OK.
12 In the Quiz Manager, the new question group is listed. To add questions to the question group, select a question and
drag it to the question group. Alternatively, select the question group in the Quiz Manager and click Add Question
to add any question type.
13 Click OK.
Note: If you have a presentation containing quizzes that was created with an earlier version of PowerPoint, there is a
fast way to add questions to a question group. In the Quiz Manager, select a quiz containing questions, click Edit, click
Group Quiz Questions, choose options, and click OK. A default question group containing all questions in the quiz is
created. (The Group Quiz Questions option is only available for quizzes that do not have any question groups.)
73
Set question shuffling
For a quiz, you can set questions to shuffle so they appear in a different order each time the presentation is opened.
Different users receive the same questions, but in a different order.
Any non-question (content) slides located between shuffled quiz questions are not displayed in the published
presentation.
If a user views a course on a Adobe Connect Server or learning management system, begins a quiz, does not complete
the quiz, and then resumes, the quiz appears in the original order seen without shuffling again.
1 In PowerPoint, open a presentation (PPT or PPTX file).
2 Click Adobe Presenter, and in the Quiz group, click Manage.
3 Select a quiz and click Edit.
4 Select Shuffle Questions.
5 Click OK twice.
Set answer shuffling
For certain question types, the possible answers can be shuffled each time the question is displayed.
If a user views a course on a Adobe Connect Server or learning management system, begins a quiz, does not complete
the quiz, and then resumes, the quiz appears in the original order seen without shuffling again.
1 In PowerPoint, open a presentation (PPT or PPTX file).
2 Click Adobe Presenter, and in the Quiz group, click Manage.
Last updated 9/12/2015
Page 77

Adobe Presenter
3 Do one of the following:
• Select an existing multiple choice, fill-in-the blank, or matching question and click Edit Question.
• Create a new multiple choice, fill-in-the blank, or matching question.
Note: For fill-in-the-blank questions, answer shuffling is applicable only to questions where the user selects an answer
from a list, not where the user writes in their own answer.
4 On the Question tab, select Shuffle Answers.
5 Click OK.
Note: This topic describes how to set answer shuffling for a specific question. To set answer shuffling at the quiz level so all
eligible questions are shuffled, select a quiz in the Quiz Manager, click Edit, click the Quiz Settings tab, and select Shuffle
answers.
Add a Quiz pane to a published presentation
Adobe Presenter contains a feature that enables you to substitute a Quiz pane for the Outline pane in the sidebar of your
published presentation. The Quiz pane can be customized to show different types of information about quizzes.
74
1 In PowerPoint, open a presentation (PPT or PPTX file).
2 Click Adobe Presenter, and in the Quiz group, click Manage.
3 Click the Output Options tab.
4 Select Display Question List In Quiz Pane.
5 (Optional) Select Display Score For Each Question to show the user the number of points they can receive for the
question they are currently answering.
6 (Optional) Select Display Question Attempts As Tooltips to show current attempt number out of total number of
attempts allowed for a question. The information appears as a tooltip when the user hovers the mouse over
individual question names in the Quiz Pane.
7 (Optional) Select Display Current Score to show the user their score as they take the quiz.
Last updated 9/12/2015
Page 78

Adobe Presenter
8 (Optional) Select Display Passing And Maximum Score to show the maximum possible score for the quiz and the
minimum score a user must have to pass the quiz.
9 (Optional) Select Display Quiz Attempts to show the user how many attempts they have made and how many are
allowed.
10 (Optional) Under Navigation, select Show Incomplete Quiz Warning to display a message to users when they
attempt to exit a quiz they have not completed.
11 Click OK.
The Quiz pane must be enabled in the Theme Editor dialog box.
12 Click Adobe Presenter, and then click Theme.
13 In the Theme Editor, select Enable Quiz Pane in the Panes section.
14 Click OK twice.
Adobe Presenter gives you many options for customizing colors, tabs, functionality, graphics, font style, and other
design elements of a theme. For more information, see
Create and edit themes.
Set reporting options
Adobe Presenter offers reporting options for presentations with e-learning elements. For example, you can create
presentations that are SCORM, AICC, or Tin Can compliant for use within a learning management system.
75
Note: Adobe Presenter is Tin Can compliant from Version 9.
Reporting options, such as what data to collect and how the data is reported, are set for a course. You can, however,
select whether to report interaction data to a learning management system at the quiz level.
1 In PowerPoint, open a presentation (PPT or PPTX file).
2 Click Adobe Presenter, and in the Quiz ribbon item, click Manage.
3 In the Quiz Manager dialog box, click the Reporting tab.
4 Select Enable Reporting For This Presentation.
5 Select the main learning management system standard you want to use:
• Adobe Connect Pro
• AICC. If you select AICC, four course structure files are created.
• SCORM. If you select SCORM, click Manifest to set options for creating a manifest file, required by many third-
party learning management systems. In the manifest dialog box, you can also select SCORM version 1.2 or 2004.
• Tin Can
6 Specify how you want the status of the course to be reported to LMS:
Incomplete -- > Complete The status of the course is reported as Incomplete in LMS when users launch the course.
The status changes to Complete when the success criteria is satisfied.
Incomplete -- > Passed/Failed The status of the course is reported as Incomplete when users launch the course. The
status changes to Passed/Failed when the success criteria is satisfied.
Note: Status Representation fields are available only when you choose AICC or SCORM 1.2.
7 Specify the success and completion criteria for your course. The status of the course is decided based on whether or
not the users met these criteria:
User Access The users are considered to have successfully completed the course if they launch the course from LMS.
Last updated 9/12/2015
Page 79

Adobe Presenter
Slide Views The course is considered to be complete or successful if users view the specified number or percentage
of slides.
76
Ti p: For branched quizzes, specify the criterion as percentage of slides.
Quiz Th e course is c onsidered to be complete or success ful based on the users’ per formanc e in quiz . Yo u can cho ose
one of the following criteria:
• Users attempt the quiz: In this case, the status is reported as Complete if users attempt the quiz irrespective of
whether they pass or fail the quiz.
• Users pass the quiz: In this case, the status is reported as Complete only if users pass the quiz.
• Users pass or the attempt limit is reached: In this case, the status is reported as Complete if users pass the quiz or
have taken all the attempts. For example, if the number of attempts set in the course is 2, and:
• Users take the first attempt and pass, then the status is reported as Complete and Passed.
• Users take the first attempt and fail, then the status is reported as Incomplete and Failed as the attempt limit
is still not reached.
• If users retake the quiz and fail, the status is reported as Complete and Failed.
• If users attempt the quiz again and pass, the status is reported as Complete and Passed.
Note: SCORM 2004 supports two types of status: Success and Completion status. You can configure Adobe Presenter to
send these two statuses to a SCORM 2004-based LMS separately. For example, criteria for Completion status can be
‘slide views 100%’ while Success criteria can be ‘quiz is passed’. See
Set advanced learning management system settings,
Step 5, to know about SCORM 2004 and usage of Exit Normally checkbox.
Unlike SCORM 1.2, you can specify separate success and completion criteria for SCORM 2004.
8 Specify how the data is to be reported to LMS:
Quiz Score Report the quiz score as percentage or as points.
Interaction Data Report user interaction data, for example, the question attempted by users, and the answer
provided them.
9 Click OK.
Note: If your presentation includes a SWF file that contain a quiz created in Adobe Captivate, only user interaction data
is reported for such quizzes. Both user interaction data and quiz scores are reported for quizzes that are directly created
in Adobe Presenter.
Set a pass rate for a quiz
When you place quizzes in a presentation, you set a pass rate for users. The pass rate is a percentage or numeric value
that users must reach in order to pass the quizzes. For example, setting a pass of 80% requires users to get 80% of the
questions correct in order to pass.
1 In PowerPoint, open a presentation (PPT or PPTX file).
2 Click Adobe Presenter, and in the Quiz group, click Manage.
3 In the Quiz Manager, select a quiz and click Edit.
4 Click the Pass Or Fail Options tab.
Last updated 9/12/2015
Page 80

Adobe Presenter
5 Select a Pass Or Fail option:
“#” % O r More Of Total Score To Pa ss Enter a percentage value that students must meet in order to pass. For
example, if 100 is the maximum quiz score, then 80% means a score of 80 is required to pass.
“#” Or M o re Of Total Scor e To Pass Enter a numeric value that students must meet in order to pass. For example, if
you enter a value of 50, students must have a score of 50 or above to pass.
6 Click OK.
Set score display
You can set the way the quiz score is reported to users.
1 In PowerPoint, open a presentation (PPT or PPTX file).
2 Click Adobe Presenter, and in the Quiz group, click Manage.
3 In the Quiz Manager dialog box, select a quiz and click Edit.
4 Click the Quiz Settings tab.
5 Select Show Score At End Of Quiz.
6 Click Quiz Result Messages.
77
7 Select a score option:
Display Score Specifies that the numeric score is displayed.
Display Percent Score Specifies that a score as a percentage of total is displayed.
Tally Correct Specifies that a score in tally form (for example, “7 out of 10 correct”) is displayed.
8 Click OK three times to close all of the dialog boxes.
Changing fonts and button placement in quizzes
This feature enables you to change the fonts and button placement in all quizzes in one step.
1 In PowerPoint, open a presentation (PPT or PPTX file).
2 Click Adobe Presenter, and in the Quiz group, click Manage.
3 Click the Appearance tab.
4 Change fonts (question, answer option, button text, and feedback message) and button placement as necessary.
5 (Optional) Select Apply Formatting To All Existing Quizzes to apply the selected formatting to all questions in the
quiz and to any questions added in the future. If this option is not selected, formatting is only applied to new
questions added in the future.
6 (Optional) To return to the original settings, click Restore Defaults.
7 (Optional) After changing settings, click Save As to save the settings as a new Profile. Enter a new profile name and
click OK.
Unanswered questions warning
When you create quizzes, a message appears to users if they try to leave the quiz boundary without attempting all of the
questions.
Last updated 9/12/2015
Page 81

Adobe Presenter
For example, you have a quiz containing five questions that must be answered. If a user tries to navigate to a slide past
the last question slide and they have not attempted all five questions, Adobe Presenter displays the message “There are
unattempted questions in the quiz. Clicking Yes will take you out of the quiz. Click No to continue the quiz.”
Use presentations with a learning management system
Presentations created with Adobe Presenter integrate especially well with the Adobe Connect Server, but you can use
Adobe Presenter presentations with any Learning Management System (LMS). If you are going to use a presentation
with a third-party LMS, the following sections explain how to create a manifest file and how to customize LMS settings.
Note: If you select the Connect Pro Server or AICC option when setting reporting options, four AICC course structure files
are created: presenter.au, presenter.crs, presenter.cst, and presenter.des. The files are created with default values, but the
values can be edited manually. For more information, see the AICC website at
Creating a SCORM manifest file
If you want to package a Adobe Presenter presentation as an e-learning course that can be administered and launched
from a SCORM 1.2 or 2004 compliant learning management system, you may need a manifest file.
Note: If you are publishing to Adobe Connect Server, a manifest file is automatically created named breeze-manifest.xml.
This XML file is used to upload the presentation to the Adobe Connect Server. You do not need to follow the procedure in
this topic to create a SCORM manifest file.
www.aicc.org.
78
The manifest file that Adobe Presenter creates is named imsmanifest.xml and contains references to all content
resources. The XML file uses predefined XML tags to describe the package components, structure, and special
behaviors. The file works behind the scenes to properly integrate presentations with your learning management system
and track quiz data.
1 In PowerPoint, open a presentation (PPT or PPTX file).
2 Click Adobe Presenter, and in the Quiz group, click Manage.
3 Click the Reporting tab.
4 Select Enable Reporting For This Presentation.
5 Under Learning Management System (LMS), select SCORM.
6 Click Manifest.
7 Set the SCORM Version by selecting 1.2 or 2004 from the pop-up menu.
8 Set the following manifest options:
Identifier (Required) The LMS uses the identifier to identify different manifests. A default identifier based on the
name of your Adobe Presenter presentation is automatically added to this text box. You can change the identifier at
any time by selecting the text and typing in new text.
Title (Required) Students using the LMS can see the title. You can change the title at any time by selecting the text
and typing in new text.
Description (Required) Text used by the LMS to describe different courses to users. You can edit the description at
any time.
Ver sion (Optional) The version specifies a number that can be used to differentiate manifests with the same
identifier.
Duration (Optional) Select this option to specify the approximate time it takes to work with this particular Adobe
Presenter presentation. Set the time in the following format: hh:mm:ss.
Last updated 9/12/2015
Page 82

Adobe Presenter
Subject (Optional) Select this option to write a short description of the Adobe Presenter presentation using
keywords or phrases.
SCO Identifier (Required) The LMS uses the identifier to identify different shareable content objects (SCO). You can
change the identifier at any time by selecting the text and typing in new text. (If you type the name of a new
identifier, do not use any spaces in the name.)
Title (Required) A title for the SCO. You can change the title at any time by selecting the text and typing in new text.
9 Click OK.
To see the manifest file, publish your Adobe Presenter presentation locally to create a SWF file and a manifest file.
If you used the default save location, you can use Windows Explorer to navigate to the SWF file and imsmanifest.xml
fi le in My Doc ume nts \My Prese ntati ons \Name of Presentation folder. If you published the presentation to a different
folder, navigate to that location to see the manifest file.
Set advanced learning management system settings
Adobe Presenter offers several advanced settings for how presentations integrate with learning management systems
(LMS). The settings let you specify what data is sent to the LMS and how the data is formatted. Typically, LMS
administrators or advanced LMS users require the advanced settings.
Note: Third-party learning management systems use the advanced settings; any advanced options set using this procedure
do not affect the data sent from Adobe Presenter to Adobe Connect Server.
79
1 In PowerPoint, open a presentation (PPT or PPTX file).
2 Click Adobe Presenter, and in the Quiz group, click Manage.
3 Click the Reporting tab.
4 Click AICC or SCORM, and then click Settings.
5 In the LMS Customization Settings area, set the following options:
Exit Normally Restarts the course from the first slide when users launch it again after successfully completing it
once. If you select this option, the cmi.exit value is set to ‘Normal’ when the status changes to ‘Completed’.
note: This behavior is consistent in SCORM 2004-based LMSs. On SCORM 1.2-based LMSs, the behavior may vary.
For such cases, check with your LMS administrator for assistance.
Never Send Resume Data Select this option to send no resume data to your LMS. This might be useful if your LMS
does not support resume data or another mechanism to prevent users from returning to a quiz they started, but did
not finish, across multiple sessions. For example, a user completes four questions out of eight and then closes the
presentation. If you select this option, when the user opens the presentation again, they must provide answers to all
eight questions—their answers from the first session are not remembered in the Adobe Presenter presentation. This
option can be used when publishing and playing back content from any AICC- or SCORM-compliant learning
management system.
note: Presentations that are part of a Adobe Connect Server training course or curriculum are always automatically
resumed. If the presentation is viewed using the Content tab, it is never resumed.
Escape Version and Session ID This option is selected by default. Keep this option selected if you want Adobe
Presenter to URL-encode (escape) the version and session ID when sending data to an AICC-compliant learning
management system. This is useful if your learning management system does not accept URL-encoded information
for these fields. Deselect this option if you do not want to URL-encode (escape) the version and session ID.
Don’t Escape Characters This option specifies that Adobe Presenter should not URL-encode (escape) the value
fields in parameters when data is sent to an AICC-compliant learning management system. In the text box, typ e the
Last updated 9/12/2015
Page 83

Adobe Presenter
characters (without any delimiters such as spaces or commas) that the learning management system does not want
escaped. For example, if the LMS does not want any numbers escaped, type 0123456789.
Send Interval This option specifies how often slide data is sent to the LMS. As a user views a presentation,
information is sent to the LMS. For regular slides, the LMS is notified that the user viewed the slide, and for question
slides, information about the user response is sent to the LMS. Also, each time a slide is viewed, the LMS records the
slide number so that if a user quits and then opens the presentation later, they user returns to the last slide. If you
do not want information sent to the LMS for every slide in the presentation, you can change the Send Interval. For
example, if you change the interval to 10, information is sent to the LMS every 10 slides. note: If you change the Send
Interval to a number higher than 1, users who quit before finishing the presentation may not be able to resume where
they left off. For example, if the Send Inter val i s changed to 10 and a us er quits after vie wing nine slides, when they open
the presentation again, they start over at slide 1.
6 Click OK to finish setting the custom LMS settings and close the Quiz Manager.
More Help topics
Preview a presentation
Enable Analytics and Collaboration
80
Analytics provides deep insights into how your course is being used by learners. For example, how many learners have
completed the course, level of completion, and user engagement with each module.
The Collaboration widget facilitates in-context collaboration between you (the author), your users (learners), and
anonymous users. It helps you simulate a classroom environment in which learners can ask questions to you and colearners in real time.
The analytics and collaboration data is sent to a secure remote server (hosted by Adobe) and you can access the data
using the
Analytics is enabled and collaboration is disabled by default. To obtain analytics for videos created using Adobe
Presenter Video Creator, you need to explicity enable analytics and collaboration while publishing.
One significant aspect of analytics is that you can easily identify students who need your help or intervention. Then,
take appropriate actions such as contacting them over email or collaborating with them using the collaboration
workflow.
Learning Dashboard .
More Help topics
Learning Dashboard
Colloboration workflow
The collaboration workflow starts with you publishing the course with the collaboration widget. The learners use the
widget (accessible through ? mark in the playbar) to ask questions in real-time and converse with you (author) and
other peers.
When you publish a module with the collaboration widget enabled, your users can ask questions from within the
module. The questions appear to you and others in the appropriate context of the module in which they are asked.
Learners can:
• search for questions
Last updated 9/12/2015
Page 84
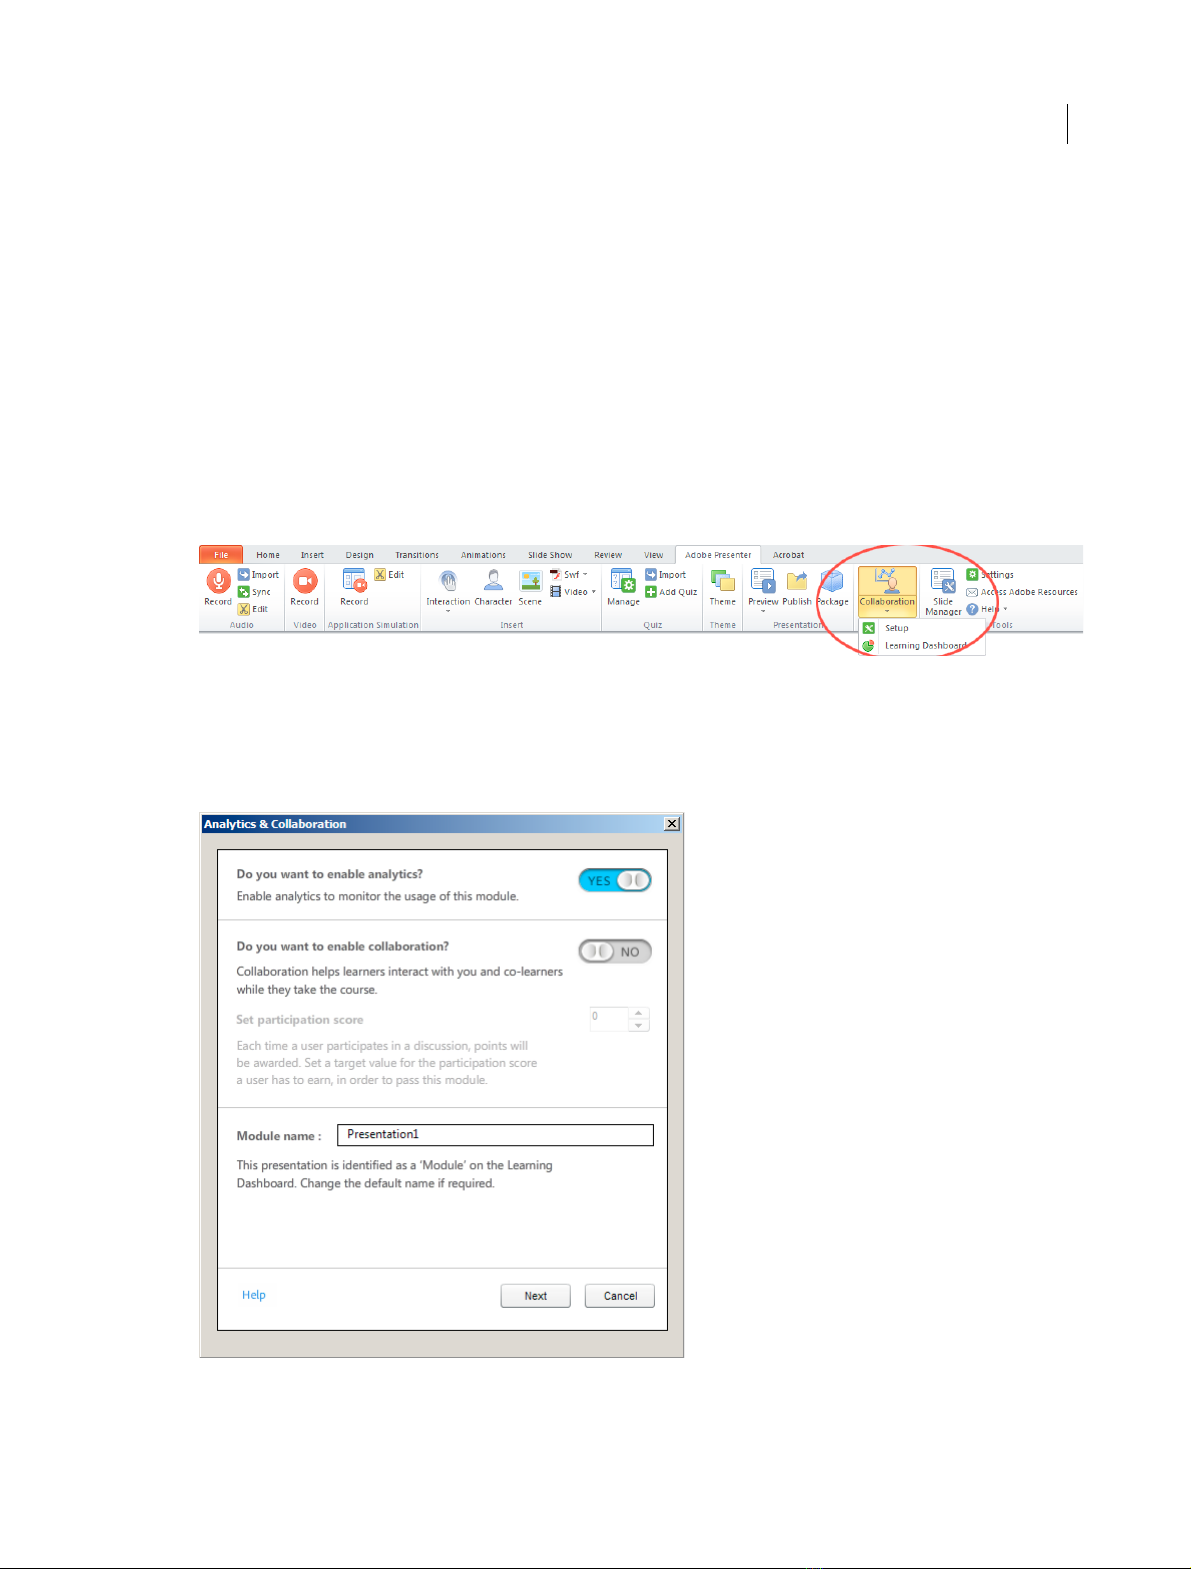
Adobe Presenter
• ask questions
• answer questions
• like an answer if it is helpful
If it is enabled, then the learner has to both a) pass the quiz and b) achieve required participation (collaboration) score
to pass the course.
In short, you can also make collaboration as one of the parameters for successful completion of the course by the
learners.
Note: Collaboration only works in .pptx file format and not in .ppt file format.
Author workflow
1 Open your presentation and from the Adobe Presenter tab, click Collaboration.
81
2 In the Analytics and Collaboration screen, set Do You Want To Enable Collaboration to Yes.
Analytics is enabled by default. You can disable analytics if required by setting Do You Want To Enable Analytics to
No.
Note: You can change the Participation Score, and Module Name at later stage also.
Last updated 9/12/2015
Page 85
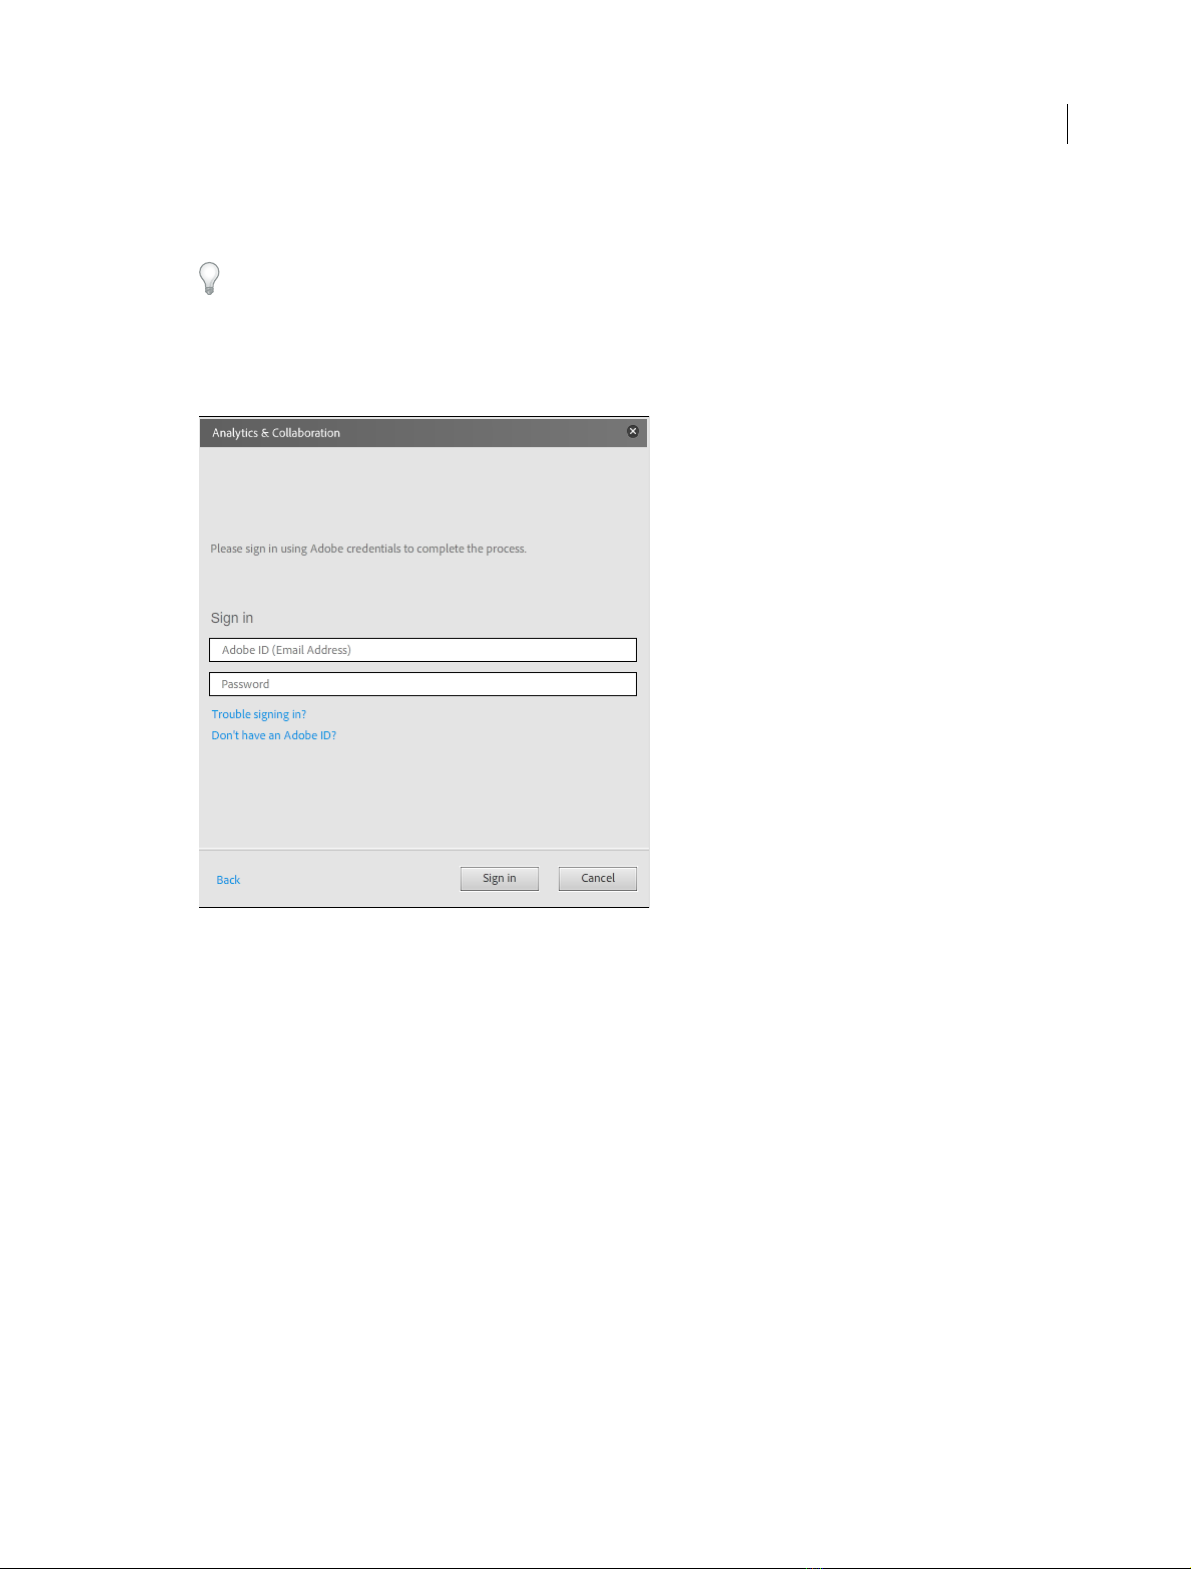
Adobe Presenter
3 Enter the Participation value (0-100 range). Learners scoring above this value are considered as successfully passed.
For example, if you set 50 as the participation value, learners who score above 50 are considered as successful.
A score of "0" denotes that you (the author) do not consider collaboration as the passing criteria.
4 The presentation is identified as a 'module' on the learning dashboard and the default module name is the name of
the presentation. Change the module name if required.
5 Sign in by entering your Adobe ID.
82
After enabling Collaboration, you can publish the module, and then add it to a course on the Learning Dashboard
to begin tracking.
Learner workflow
Learners can collaborate with authors and co-learners through the course presentation screen.
1 The learner clicks the Question Mark icon available at the bottom of the course presentation screen. The Ask a
Question screen appears.
Last updated 9/12/2015
Page 86
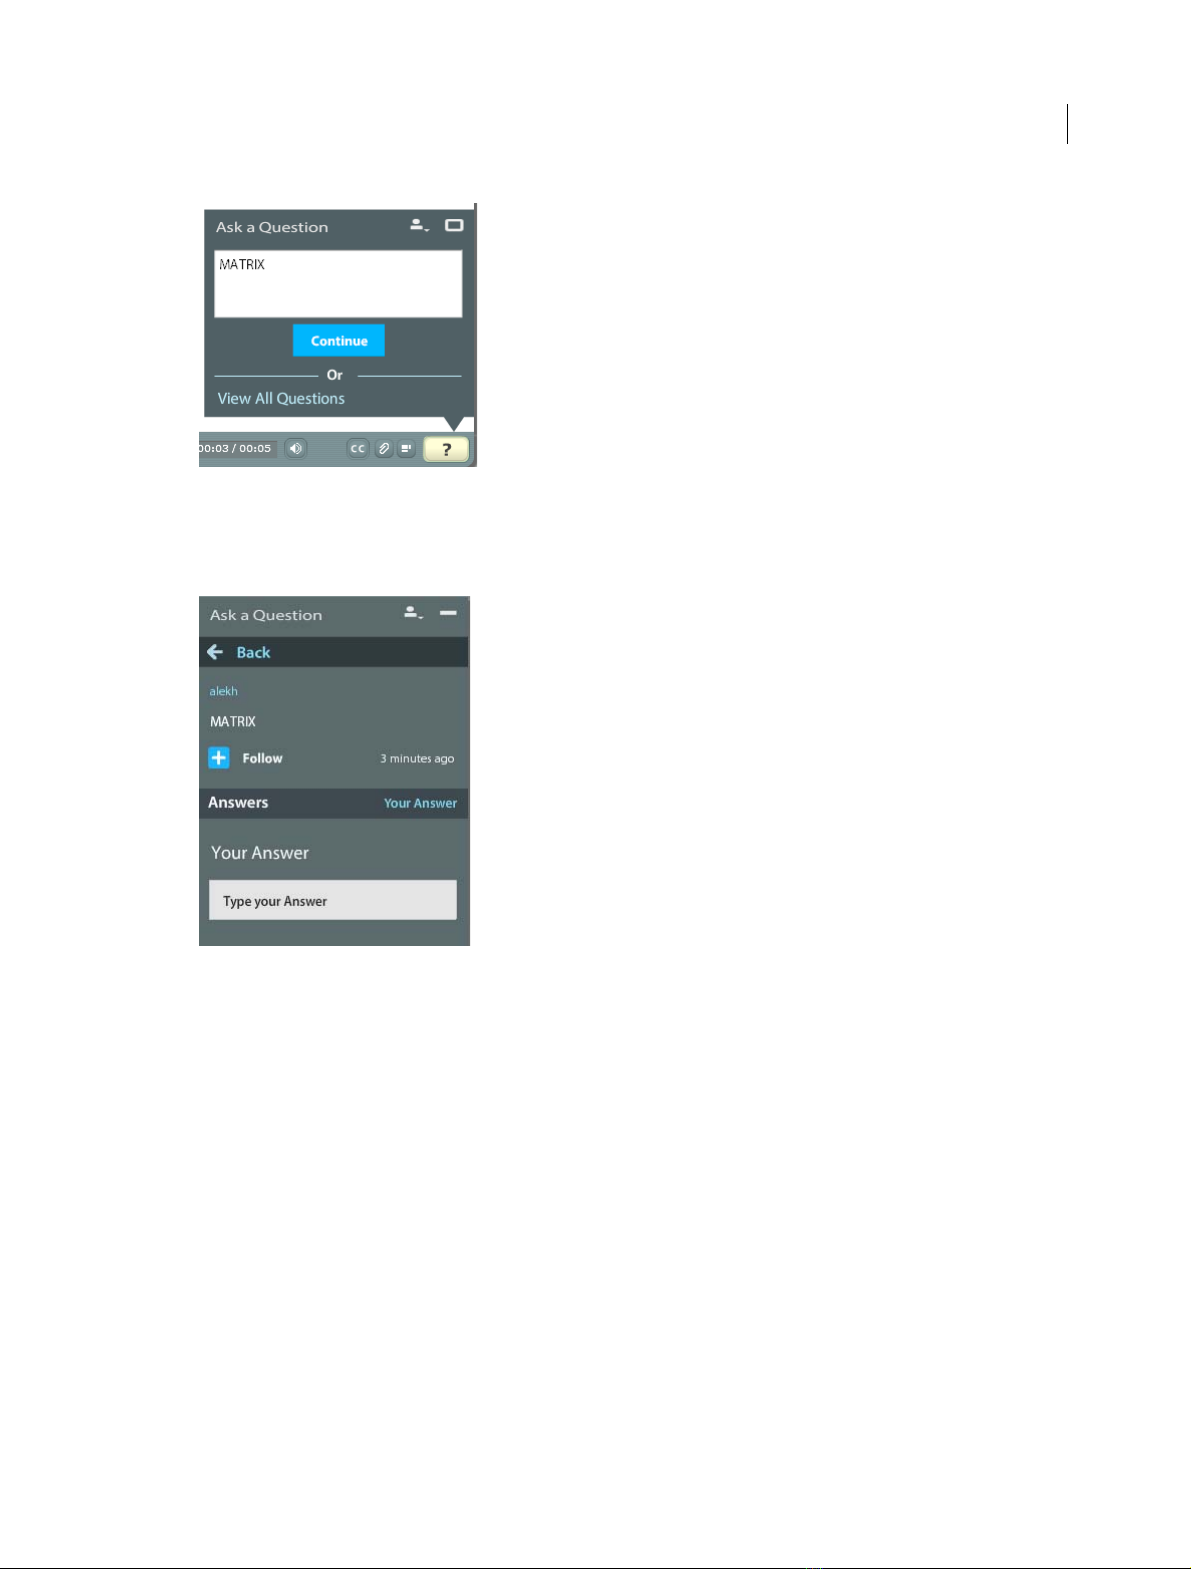
Adobe Presenter
2 The learner enters the question and clicks Continue.
3 The question is displayed in the Ask a Question pane on the right side of the screen.
83
4 Other learners can answer using Type Your Answer text box and Follow the conversation thread.
5 Learners can view the conversation threads by viewing the Ask a Question pane. You can also view all the questions
across slides in one go on the Ask a Question pane.
6 You can search for similar questions before posting them.
Last updated 9/12/2015
Page 87
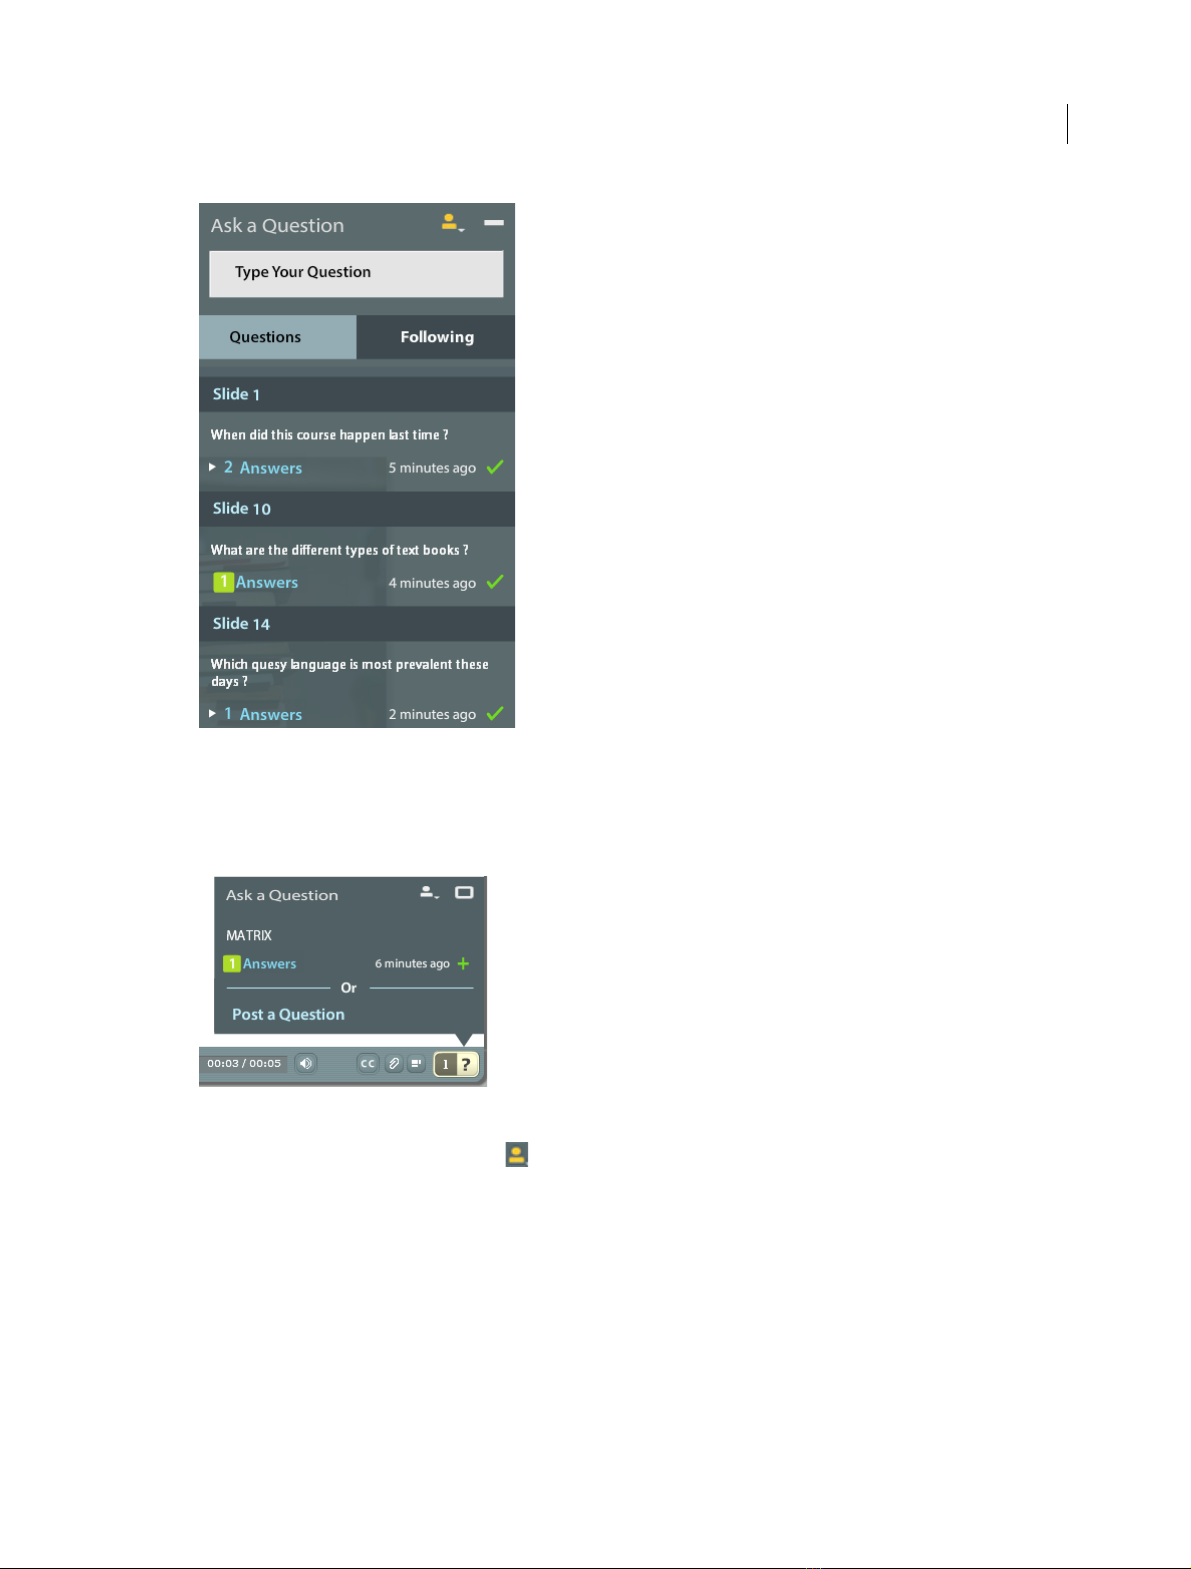
Adobe Presenter
84
All offline conversations are listed and learners can click the listed adjacent to the Question Mark icon view the
conversations. When a new conversation is added offline, the number is appended by +1 value on the icon. This icon
disappears when all the conversations are viewed.
7 The Ask a Question screen also displays icon.
If the learner had not collaborated enough, the icon is displayed in white. On successful completion of the
collaboration work flow, the icon is displayed in gold.
Last updated 9/12/2015
Page 88
Adobe Presenter
What’s new in Adobe Presenter 10
Adobe Presenter 10 software lets you create HD video lectures for classroom teaching, distance learning, flipped
learning and MOOC sessions. Simultaneously capture your screen content along with your webcam video or turn your
Microsoft PowerPoint slides into interactive eLearning with out-of-the-box assets and eye-catching quizzes. Leverage
HTML5 publishing to deliver courses to tablets. Track content consumption and learner performance with the built-in
analytics dashboard or through integration with leading LMSs.
Read on for a quick introduction to these new features and enhancements, and links to resources offering more
information.
HTML5 publishing support
85
Now let your learners have full access to your courses, even on tablets. Deliver eLearning on the go with full support
for scalable HTML5. Send scoring data to leading LMSs and track learner progress.
For more information on publishing HTML 5 output, see Publishing and viewing presentations
Transform slides into interactive eLearning
Convert your PowerPoint presentations to engaging eLearning content. Publish eLearning modules created with
PowerPoint directly to HTML5, keeping text, shapes, audio, and animations intact. Add quizzes, scenarios, and out-ofthe-box assets, and publish as HTML5 for access using desktop and mobile browsers.
Continue to use all the features of Presenter such as quizzes, learner interactions, audio, video, animations and so on,
as before. When publishing, choose whether you want to publish to SWF format, HTML5 format or both. Reporting
to LMS, video analytics and learner dashboard features will also be available when you publish to HTML5, just like the
way they were available for SWF output.
For more information on publishing HTML 5 output, see Publishing and viewing presentations
Last updated 9/12/2015
Page 89
Adobe Presenter
Publishing to tablets
Let your learners access your courses on their tablets. Quickly create interactive eLearning content using the iPad and
iPhone presets. Publish content as HTML5 for easy access with a mobile web browser.
For more information on publishing HTML 5 output, see Publishing and viewing content in Tablets
Gesture support on tablets
86
Use the multi-touch technology embedded in the tablet UI to allow learners to tap, scroll, and swipe their way through
courses. Leverage gesture support to enable more instinctive interaction between the learner and the content.
For more information on publishing HTML 5 output, see Publishing and viewing presentations
HTML5 support for tracking and reporting
Track individual learner progress without investing in an LMS, using the Learner Analytics dashboard. Use
information about basic evaluation criteria, such as videos viewed, average score, and pass or fail, to identify learners
who need course correction and direct them to relevant modules.
For more information on enhanced Learner Analytics dashboard, see Learning Dashboard
Last updated 9/12/2015
Page 90

Adobe Presenter
Quizzing with HTML5
Leverage HTML5 support to deliver eye-catching quizzes on tablets. Choose from a wide range of question types, such
as matching, short answer, and fill-in-the-blank. Export scoring data to leading SCORM-, AICC-, and Tincancompliant LMSs.
For more information on creating Quizzes and questions in your presentations, see Adding quizzes and questions
Pause and resume your work across devices
87
Make your content more mobile with the ability to pause on one device and resume anywhere, anytime on a tablet using
a web browser.
Publish your content as HTML5 and open the content in desktop while you are at work. You can pause the content while
you are going mobile and start resuming the same content using your tablet.
For more information on publishing HTML5 output, see Publishing and viewing presentations
User-friendly installer
Get going quickly with a new, easy installation workflow. Adobe Presenter identifies the Microsoft PowerPoint version
on your computer and installs the appropriate Presenter version. It adds a shortcut to the Windows Start menu, and
default to the Adobe Presenter tab in PowerPoint when you launch the software.
In Adobe Presenter 10, as soon as you open Adobe Presenter 10 software, by default it opens in the Adobe Presenter
tab of Microsoft Powerpoint as shown in the screenshot below:
Last updated 9/12/2015
Page 91
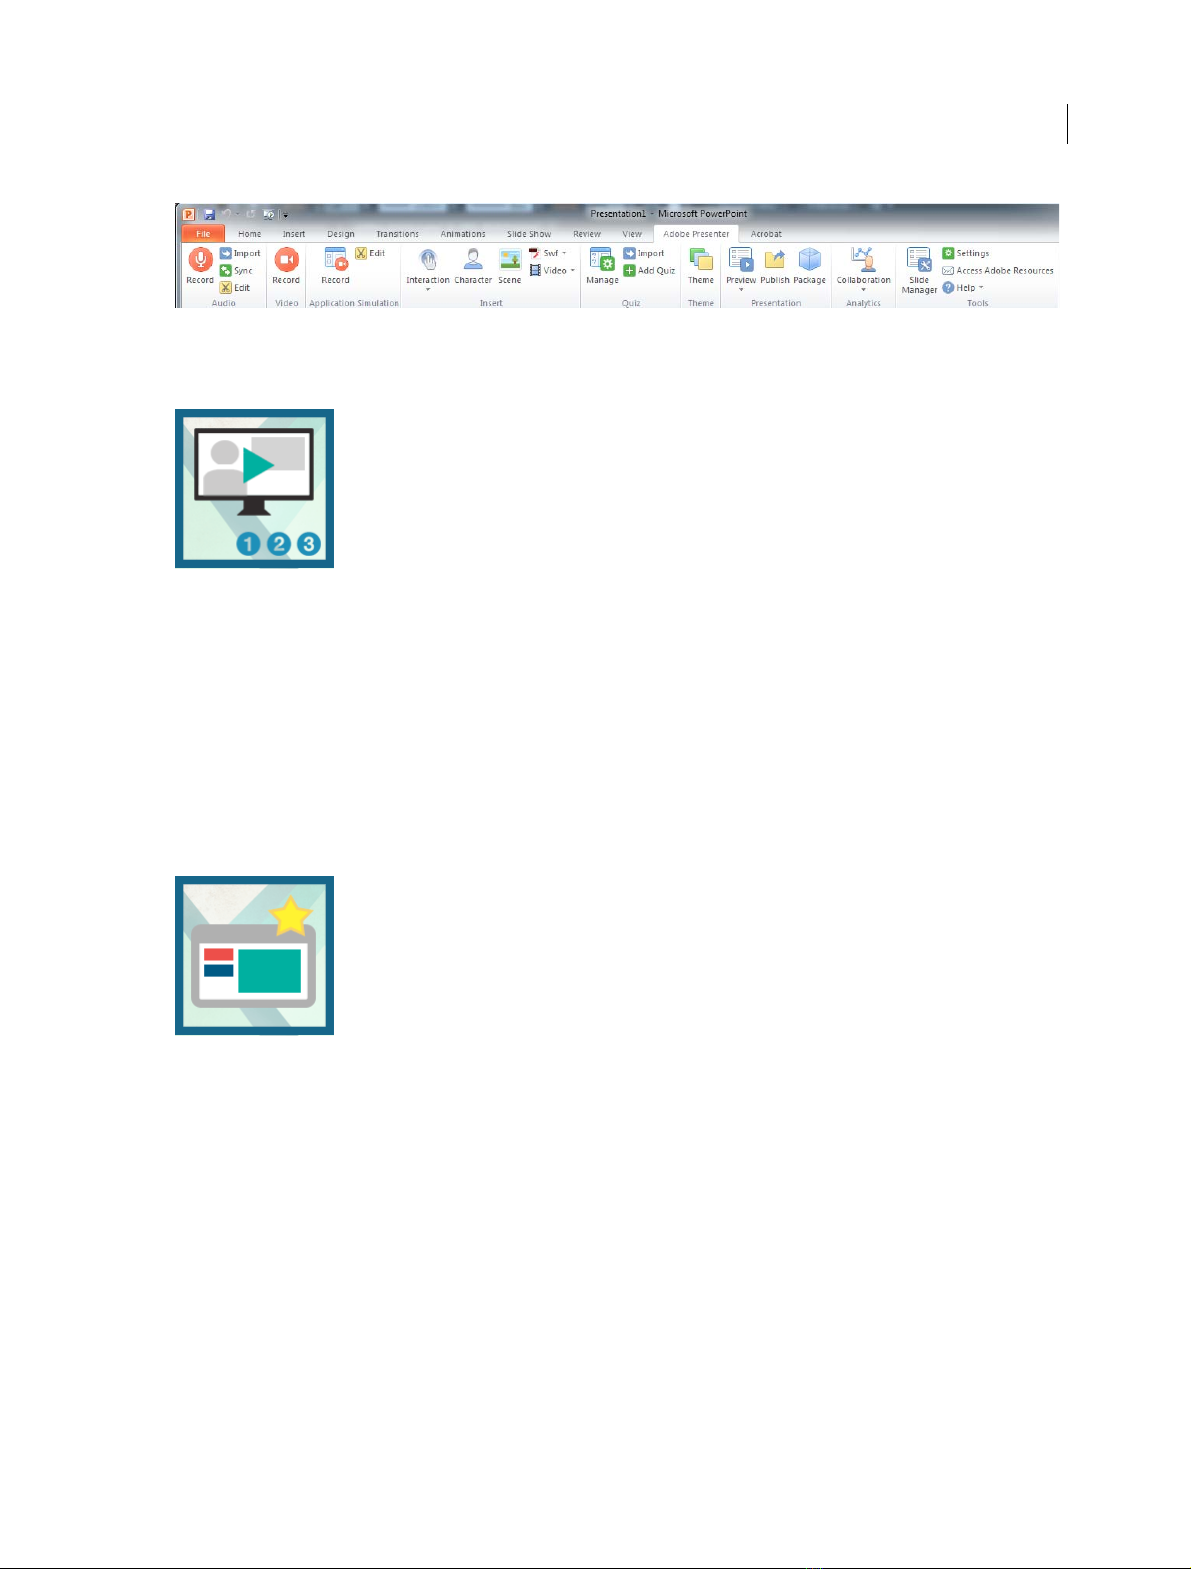
Adobe Presenter
Create video lectures in 3 easy steps
Quickly create studio quality video lectures by capturing your screen content along with your audio or video, right from
your desktop. Use a simple 3-button interface to easily edit and publish your videos.
88
Sway audiences with HD videos, regardless of the AV capabilities of your computer and without having to invest in
studio equipment. Simultaneously capture your screen and webcam content with just a few clicks. Balance colors,
remove noise, and enhance the overall video quality using just Adobe Presenter.
For more information, see Record videos
New intuitive UI for Adobe Presenter Video Express
Edit your videos right within the project timeline. Dynamically mix screen content and webcam video. Easily trim your
clips or pan and zoom, without any additional training. Automatically adjust the brightness and sharpness. Enhance
audio quality by reducing background noise.
For more information, see Adobe Presenter Video Express (Windows & Mac)
Last updated 9/12/2015
Page 92

Adobe Presenter
Native resolution screen capture
Capture your screen at its full resolution without distortion or changes to onscreen elements, taking the guesswork out
of authoring. Leverage enhanced pan-and-zoom scaling to edit videos more easily.
Publish to 1280x720 or 1280x800 resolution always in hd video.
For more information, see Adobe Presenter Video Express (Windows & Mac)
Use analytics for learner intervention
89
Use built-in analytics to track content consumption and identify learners who need course correction. Track learner
performance in the Learner dashboard by viewing metrics such as time spent on a section, modules taken, and
successful completion. Report key performance metrics without having to invest in an LMS. Gauge the effectiveness of
your videos and identify common drop-out points.
For more information on enhanced Learner Analytics dashboard, see Learning Dashboard
SRT file creation
Generate an SRT file from your Adobe Presenter closed captions. Use the SRT file to offer subtitles in video-based
courses published to third-party video websites and players. Localize the SRT file to deliver course subtitles in regional
languages.
For more information, see Add closed captions
Last updated 9/12/2015
Page 93

Adobe Presenter
Other enhancements
Lower third text and branding videos add-ons
90
Jazz up your video by selecting a theme f rom a wide range of int roductor y and concluding clips. Focus viewer attention
by zooming in on specific content. Easily describe your videos with titles, introduce yourself using the Lower Thirds
option, and add custom videos and logos to meet branding requirements.
For more information, see Adobe Presenter Video Express (Windows & Mac)
More Smart learning interactions
Insert aesthetically designed interactive elements to your content with just one click. Select from a wide range of
stunning interactions, like Hangman, Jigsaw, Process Cycle, Glossary, Accordion, Pyramid, and Animated Rollover, to
customize the content and appearance.
For more information, see Inserting learning interactions
ELearning templates
Spend less time and effort to liven up your training content. Choose from attractive, professionally designed themes
that blend backgrounds, styles, fonts, and layouts. Apply them across projects to maintain a consistent look and feel.
Customize templates to suit your requirements.
For more information, see Designing presentationsDesigning presentations
In-course collaboration
Receive feedback from learners by allowing them to comment on specific content within a course or ask questions for
more clarity. Reply to users directly or allow other learners to do so. Rate comments, moderate the discussion, track
participation, and reward active learners.
For more information, see Enable Analytics and Collaboration
Last updated 9/12/2015
Page 94

Adobe Presenter
Closed captions
Note: Additional language support and post production editing features are available only from Presenter 9 onwards.
Adobe Presenter automatically converts voice recording captured during the recording into closed captions text
through the speech to text conversion engine.
You can also enter your own script as the closed caption text and use it.
From Adobe Presenter 10 onwards, you can export your Closed captions as SRT files. For more information, see Export
closed captions as SRT files
Alternatively, you can add/edit closed caption text post production through the editing screen.
The control for enabling and disabling closed captions is available in the Adobe Presenter video recording screen
(through Yes/No toggle buttons) and the video editing screen (through the
When you enable closed captions, the captions appear on the right pane of the Adobe Presenter video editing screen.
The captions are organized based on the timeline of the video that is played.
Supported languages*:
1 English
2 Spanish
3 German
button).
91
4 Japanese
5 French
6 Korean
* Based on the initial Presenter language version chosen by you.
Adding closed caption during video recording
You can use the close caption speech-to-text functionality which automatically converts speech to text format or
optionally enter a script in the form of plain text.
Auto generate close captioning
1 From the Adobe Presenter video recording screen, click No toggle button (turns to display Yes) to enable close
captioning. See the screenshot below.
2 Start your recording.
3 Add your voice track and End your recording.
4 Your speech is converted to text.
Note: On completion, it will take sometime for the text to be displayed on the CC pane.
Generate close captioning from script
1 From the Adobe Presenter video recording screen, click click No toggle button (turns to display Yes) to enable close
captioning. See the screenshot below. Add your script on the right side text pane.
Last updated 9/12/2015
Page 95

Adobe Presenter
2 Start your recording. Press End to complete recording.
3 The text is displayed in the CC pane on the right side of the screen. Adobe Presenter automatically organizes the text
as per the video timeline.
Post production close caption editing
1 From the Adobe Presenter video editing screen, click the CC button.
The CC content panel is displayed.
2 Edit the text by double-clicking the text.
Export closed captions as SRT files
From Adobe Presenter 10 onwards, you can export the closed captions text as SRT files that can be used later for
translation into other languages. You can use SRT files to offer subtitles in video based courses published to third party
video websites and players. You can localize SRT files to deliver course subtitles in regional languages.
92
Note: In edit mode, click CC icon at the bottom right corner of the Play bar window. Choose External toggle button to
export the closed captions as SRT files in the published folder.External/Embed are toggle buttons. You can choose Embed if
you would like to see the text embedded as part of the presentation.
Important points to know:
1 Use >> button in your recording or the editing screen to open or close the CC panel.
2 To disable CC, click CC button and click Yes/No toggle button from the CC panel.
3 To add close captioning to an existing recording, enable CC in the Adobe Presenter video editing screen before
starting the additional recording.
4 Once close captioning is completed, you can only edit the generated CC. Regeneration of close captioning is not
possible.
More Help topics
Accessibility in Adobe Presenter
Closed captions in videos (Adobe Presenter Video Creator)
Last updated 9/12/2015
Page 96

Adobe Presenter
Accessibility and 508-compliance
Project outputs published through Adobe Presenter are 508-compliant for users with visual or hearing impairments,
mobility impairments, or other types of disabilities.
Adobe Presenter supports the screen reader, JAWS (version 13 and 14) that translates onscreen text in the published
output to speech. Use rs mu st instal l JAWS on their comput ers and launch it b efore op ening the publi shed output. JAWS
reads out the control that is in focus. When JAWS is running, objects and shapes in the output screen are highlighted
with a yellow border around it.
Users can change the focus using the tab key. Users can also execute actions on all elements of the PowerPoint project
such as TOC, playbar, and so on, using the spacebar and the enter key.
The following elements of an Adobe Presenter output are accessible through JAWS (in addition to the keyboard):
• Playbar controls including the attachments
• Side panes including Outline, Thumb, Notes, and Search Pane
• Slide notes
• Content on the slides including text, actions, hyperlinks, images, and quizzes
93
More Help topics
Closed captions
Audio in presentations
Using audio in presentations
Adobe Presenter lets you add narration, music, step-by-step instructions, or almost any sound to your projects. You can
use audio to provide instructions or to emphasize key points in the presentation. In general, sound can be as individual
and flexible as any other presentation component.
You can use audio in Adobe Presenter presentations in various ways. For example, Adobe Presenter can help you with
the following tasks:
• Adding sound to an individual slide
• Adding special sounds to quizzes for correct and incorrect answers
Adobe Presenter lets you record your own audio files (using some simple equipment) or import existing files.
Recorded files are saved in mp3 format. Imported files can be in WAV or mp3 format. Stereo files are imported as
stereo, and mono files are imported as mono.
note: Files imported in WAV format are converted to mp3 when a presentation is published. Final published
presentations only play mp3 files.
Audio files included in presentations are saved within the audio assets folder. The PPCX file contains metadata
about audio files. Presentations with a PPC file must be converted to PPCX to enable Adobe Presenter features. If
you move or copy presentation files or the assets folder, be sure to include the audio assets folder. (Moving or
copying the audio assets folder without the PPCX file may lead to problems.)
Last updated 9/12/2015
Page 97

Adobe Presenter
After you add audio to a presentation, you can synchronize the timing with other content, such as animations. For
example, if your presentation contains PowerPoint animations, such as text that “flies in,” you can synchronize the
animations with the audio. (For more information, see
Presenter also contains features that enable you to add silent periods to audio files. You can also normalize audio for
all slides so that the sound level is consistent.
Add animation, image, and Flash (SWF) files.) Adobe
Add audio files to a presentation
You can quickly add existing WAV or mp3 format audio files to a presentation. Simply import the files and use them as
opening music, narration, instructions, or for any other purposes.
1 In PowerPoint, open a presentation (PPT or PPTX file).
2 Click Adobe Presenter, and in the Audio group, click Import.
3 Select the slide to which you want to add the audio file.
4 Click Browse and navigate to the audio file (WAV or mp3) you want to add to the slide.
5 Select the audio file and click Open. (You can add multiple files. If you select more than one, the first audio file is
added to the slide you selected in step 3, the next file to the slide immediately following, and so on.)
Note: Do not exceed 100 minutes of audio per individual slide in a presentation.
94
6 (Optional) Select the Ignore Markers option to ignore any sound markers placed in the audio file.
Recording audio
In addition to adding existing audio files, you can also record your own audio files to use in Adobe Presenter
presentations. Recorded files are saved in mp3 format. Follow these tips to ensure that you are recording the highestquality audio possible.
Setting up audio equipment
Af ter you ha ve acqu ired th e ne ces sar y au dio rec ordin g eq uipme nt, set it up p roperl y. If you are ju st u sing a m icr ophone,
plug the microphone into the computer and start recording. Alternatively, you can plug the microphone into a mixer
or stand-alone preamplifier. And then, plug the output of that device into your computer sound card’s “line in.” Plug
the headphones into your computer. Then, set the volume on the mixer or preamplifier. Begin speaking to test the
volume levels, and carefully raise the volume until it shows just under zero. (Using a preamplifier and line-in socket is
optional.)
Setting sound card options
You can open the software application that controls the sound card. (In most Windows operating systems, you can find
sound settings by clicking Start in the lower-left corner and selecting Settings > Control Panel > Sounds.) When you
select the recording source (line in), you can adjust the volume to 100%. If you are using a mixer or stand-alone
preamplifier, the actual recording level can be controlled from there.
Changing audio recording settings
After starting your audio recording software, you can change the settings as necessary. Mixers and preamplifiers don’t
have sound-level controls, so you rely on the meters when recording. While recording, ensure that you do not exceed
zero on the meters. Else the sound gets distorted.
Placing the microphone
Last updated 9/12/2015
Page 98

Adobe Presenter
Positioning your microphone correctly can make a big difference in the finished audio file. First, get as close as possible
to the microphone (within 4–6 inches) so that you avoid recording any other nearby sounds. Don’t speak down to the
microphone; instead, position it above your nose and pointed down at your mouth. Finally, position the microphone
slightly to the side of your mouth, to help soften the sound of the letters s and p.
Improving microphone techniques
Have a glass of water nearby so you can avoid “dry mouth.” Before recording, turn away from the microphone, take a
deep breath, exhale, take another deep breath, open your mouth, turn back toward the microphone, and start speaking.
By doing so, you can eliminate breathing and lip-smacking sounds frequently recorded at the beginning of audio tracks.
Speak slowly and carefully. You may feel that you are speaking artificially slowly, but you can adjust the speed later by
using your audio recording software. Finally, keep in mind that you don’t have to get everything right the first time. You
can listen and evaluate each recording and rerecord, if necessary.
Editing sound
Editing sound is like editing text. Listen carefully to your recording, delete any extraneous sounds, and then use the
options available in your software to polish the sound. Add any music or sound effects you require, but make sure to
save your audio track in the correct format (mp3 or WAV).
Reviewing the presentation
After you have added the audio to the presentation, listen to it again. Finally, it helps to ask others to preview the
presentation file. If necessary, you can edit the audio again, on a per-slide basis.
95
About audio recording equipment
Having the right audio equipment makes a significant difference in the quality of recorded audio. Surprisingly, basic
audio equipment can be relatively inexpensive; your equipment could include some if not all of the following:
Computer with a sound card The sound card installed in your computer acts as a digital recorder for audio.
Microphone If possible, avoid using the internal microphone that comes with most computers. Use a professional-
quality microphone cable and a stand to hold the microphone while you are recording.
Microphone preamplifier A preamplifier boosts the signal of the microphone. The microphone input of your
computer’s sound card probably includes a preamplifier, but it’s most likely a poor quality one. When purchasing a
preamplifier, you can choose a small mixer or a stand-alone version. Mixers let you connect several microphones and
devices to one location, and you can adjust their volumes independently. Stand-alone preamplifiers can be better than
mixers at filtering out unwanted noises.
Speakers The speakers that came with your computer are probably good enough for listening to any audio you record.
For best results, check the specifications of your speakers and use the highest-quality speakers possible.
In Microsoft Windows operating systems, you can usually find speaker (sound) settings by clicking Start in the lowerleft corner and selecting Settings > Control Panel > Sounds.
Recording software A wide range of recording software is available, including Adobe Audition®. Important software
features include editing capabilities (to fix mistakes), music and sound-effect options, and the capability to create the
file format you require (such as mp3 or WAV).
Recording area You need a quiet place to record. Try closing doors, turning off any unnecessary computer equipment,
turning off or lowering lights that might be making noise, and turning off phone ringers, beepers, and pagers. Also, tell
coworkers that recording is in progress.
Last updated 9/12/2015
Page 99

Adobe Presenter
Set audio recording quality
Audio files present the common challenge of balancing quality against size. The higher the sound quality, the larger the
file size. When working with audio, think of your users’ connection speed. In the best development case, experiment
to find the optimal balance between sound quality and file size for your users.
1 In PowerPoint, open a presentation (PPT or PPTX file).
2 Click Adobe Presenter, and in the Tools group, click Settings.
3 In the Presentation menu on the left, click Quality.
4 Select an audio quality level. Remember that a higher quality level results in a larger audio file size.
CD Quality (stereo or mono) Bit rate of up to 128 Kbps and sampling frequency of 44 Khz
Near CD Quality (stereo or mono) Bit rate of up to 112 Kbps and sampling frequency of 44 Khz
FM Quality (stereo) Bit rate of up to 64 Kbps and sampling frequency of 44 Khz
Low Bandwidth (mono) Bit rate of up to 32 Kbps and sampling frequency of 22 Khz
5 (Optional) If your presentation contains SWF files on consecutive slides, select Disable Preloading Of Embedded
Flash Content. This option prevents a second SWF file from beginning to play before a first SWF file is finished.
Note: To publish a presentation without including any audio files, deselect Publish Audio.
96
6 Click OK.
Change the audio input source
If you are recording audio for a presentation, you can either use a microphone or the line-in option that is usually
included with an external audio device, such as a tape deck or stereo amplifier.
1 In PowerPoint, open a presentation (PPT or PPTX file).
2 Click Adobe Presenter, and in the Tools group, click Settings.
3 In the Application menu on the left, click Audio Source.
4 In the Audio Input Source area, select either Microphone or Line In.
5 (Optional) Select the Always Prompt To Set Microphone Level Before Recording option if you want to calibrate the
microphone before each recording session. Calibrating is useful if you use different microphones or if you record in
different environments (for example, a quiet room versus an area with background noise).
6 Click OK.
Calibrate microphones for recording
If you are recording audio for a presentation, set the microphone or recording device to the correct recording level. This
process is called calibrating the recording device. Adobe Presenter can detect optimal microphone and recording
sensitivity levels automatically.
Adobe Presenter must detect your recording device before calibrating it. Before you calibrate, check that your recording
device is connected to your computer properly and is turned on.
1 In PowerPoint, open a presentation (PPT or PPTX file).
2 Click Adobe Presenter, and in the Audio group, click Record ( ).
3 To set the correct recording device level, say the following sentence into the microphone until the red recording
window becomes green: “I am setting my microphone recording level for use with Adobe Presenter.”
Last updated 9/12/2015
Page 100
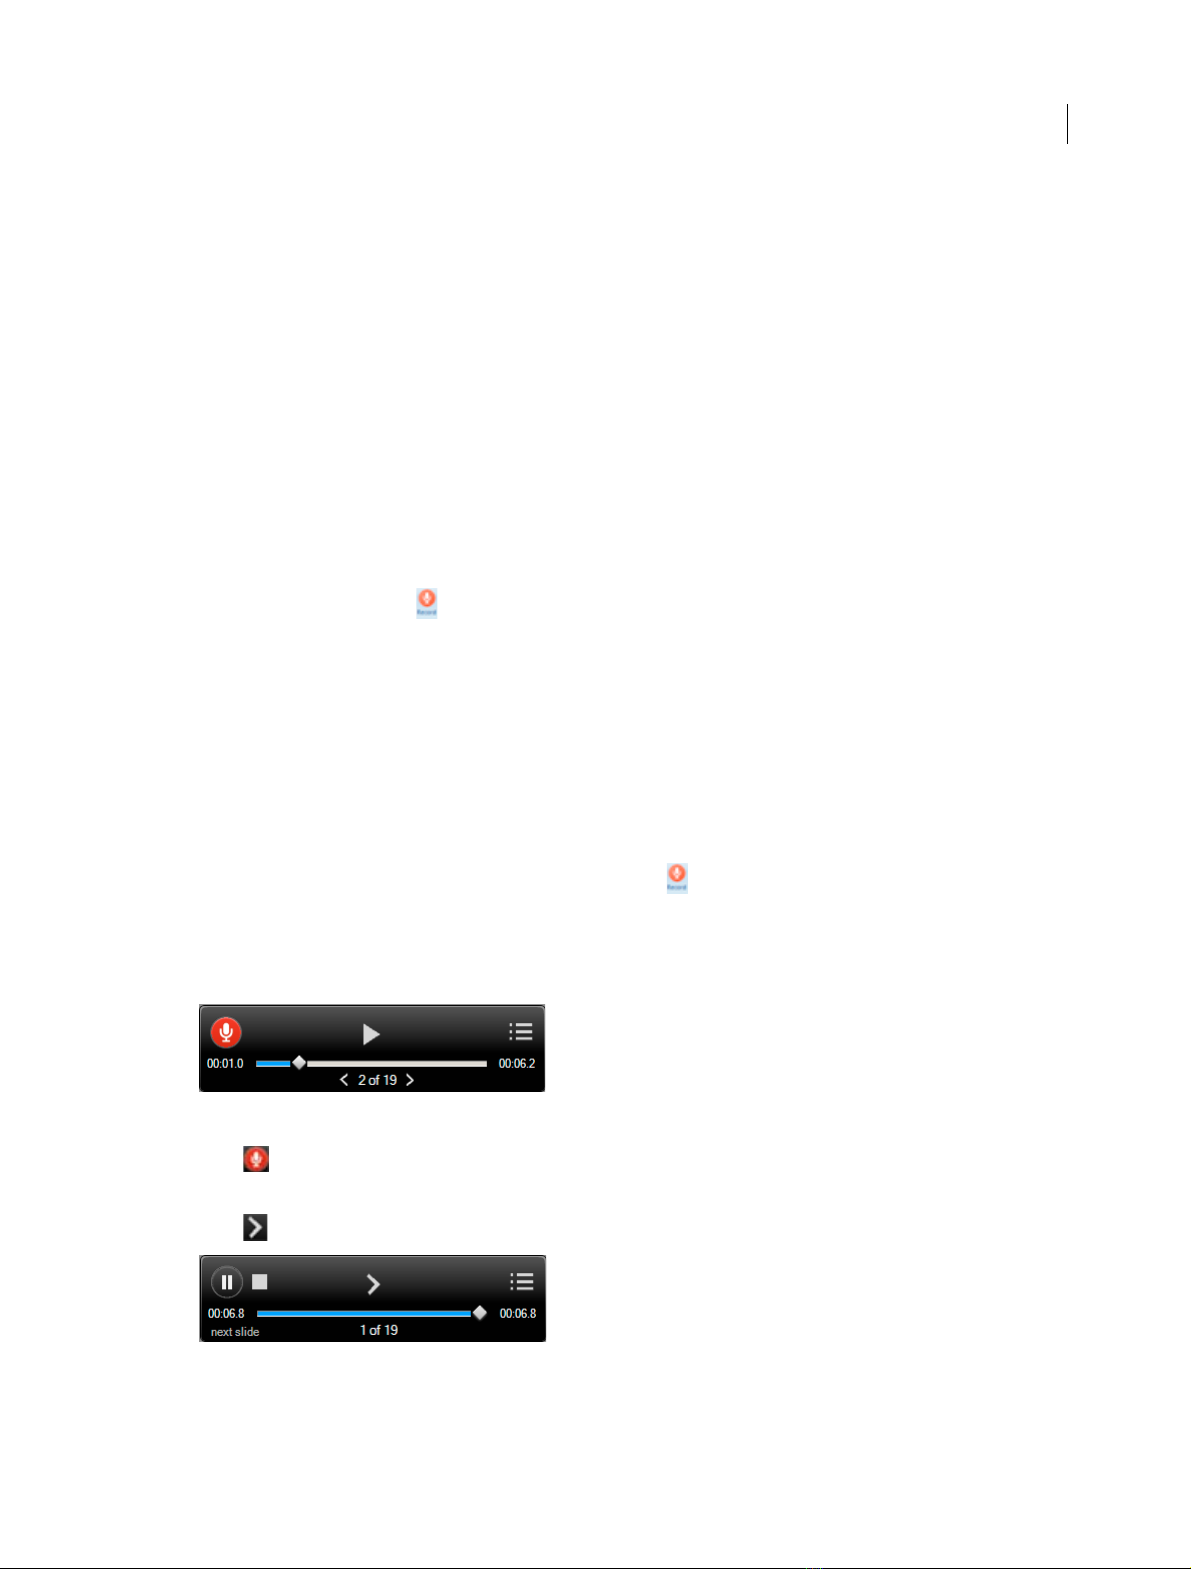
Adobe Presenter
4 When you finish, click OK.
Record audio
If you have a microphone connected to your computer, you can record audio for inclusion in a slide. You can use audio
for many types of narration or instruction.
The user interface and procedure varies in Adobe Presenter 8 and Adobe Presenter 9.
In Adobe Presenter 8, do the following:
1 In PowerPoint, open a presentation (PPT or PPTX file).
2 Click Adobe Presenter, and in the Audio group, click Record.
3 If you have not calibrated your microphone or the recording device earlier, do so by following the on-screen
instructions. To skip the calibration, click Skip.
The Adobe Presenter - Record Audio dialog box appears.
4 Click the record audio icon ( ) to start recording.
5 Speak into the microphone or the recording device.
6 Click Previous or Next to record audio for another slide.
7 When you finish, click Stop Recording. Adobe Presenter converts the audio to mp3 format.
8 Click Play to listen to the recording.
97
9 When you finish, click Save, and then click Close.
In Adobe Presenter 9, do the following:
1 In PowerPoint, open a presentation (PPT or PPTX file).
2 Click Adobe Presenter, and in the Audio group, click Record ( ).
3 If you have not calibrated your microphone or the recording device earlier, do so by following the on-screen
instructions. To skip the calibration, click Skip.
The Adobe Presenter - Record Audio dialog box appears.
4 Click to start recording.
5 Speak into the microphone or the recording device.
6 Click to record audio for the next slide.
If the current slide contains animation, then click to record or synchroize audio with the animation.
Last updated 9/12/2015
 Loading...