

Page 1

Using
ADOBE® PREMIERE® ELEMENTS 10
Page 2

Legal notices
Legal notices
For legal notices, see http://help.adobe.com/en_US/legalnotices/index.html.
Last updated 11/22/2011
Page 3

Contents
Chapter 1: Getting started with Adobe Premiere Elements
Getting started tutorials . . . . . . . . . . . . . . . . . . . . . . . . . . . . . . . . . . . . . . . . . . . . . . . . . . . . . . . . . . . . . . . . . . . . . . . . . . . . . . . . . . . . . . . . . . . . . . . 1
System requirements . . . . . . . . . . . . . . . . . . . . . . . . . . . . . . . . . . . . . . . . . . . . . . . . . . . . . . . . . . . . . . . . . . . . . . . . . . . . . . . . . . . . . . . . . . . . . . . . . . 1
Installing/Uninstalling Adobe Premiere Elements . . . . . . . . . . . . . . . . . . . . . . . . . . . . . . . . . . . . . . . . . . . . . . . . . . . . . . . . . . . . . . . . . . . . . . . 1
Creating an Adobe ID . . . . . . . . . . . . . . . . . . . . . . . . . . . . . . . . . . . . . . . . . . . . . . . . . . . . . . . . . . . . . . . . . . . . . . . . . . . . . . . . . . . . . . . . . . . . . . . . . . 2
Registering your software . . . . . . . . . . . . . . . . . . . . . . . . . . . . . . . . . . . . . . . . . . . . . . . . . . . . . . . . . . . . . . . . . . . . . . . . . . . . . . . . . . . . . . . . . . . . . 2
Purchasing/Benefits of a PLUS account . . . . . . . . . . . . . . . . . . . . . . . . . . . . . . . . . . . . . . . . . . . . . . . . . . . . . . . . . . . . . . . . . . . . . . . . . . . . . . . . . 2
Supported software and hardware . . . . . . . . . . . . . . . . . . . . . . . . . . . . . . . . . . . . . . . . . . . . . . . . . . . . . . . . . . . . . . . . . . . . . . . . . . . . . . . . . . . . . 2
What’s new in Adobe Premiere Elements 10 . . . . . . . . . . . . . . . . . . . . . . . . . . . . . . . . . . . . . . . . . . . . . . . . . . . . . . . . . . . . . . . . . . . . . . . . . . . . 3
Convert a catalog from a previous version . . . . . . . . . . . . . . . . . . . . . . . . . . . . . . . . . . . . . . . . . . . . . . . . . . . . . . . . . . . . . . . . . . . . . . . . . . . . . . 3
Help resources . . . . . . . . . . . . . . . . . . . . . . . . . . . . . . . . . . . . . . . . . . . . . . . . . . . . . . . . . . . . . . . . . . . . . . . . . . . . . . . . . . . . . . . . . . . . . . . . . . . . . . . . 3
Adobe Premiere Elements and Elements Organizer . . . . . . . . . . . . . . . . . . . . . . . . . . . . . . . . . . . . . . . . . . . . . . . . . . . . . . . . . . . . . . . . . . . . . 6
Workspace . . . . . . . . . . . . . . . . . . . . . . . . . . . . . . . . . . . . . . . . . . . . . . . . . . . . . . . . . . . . . . . . . . . . . . . . . . . . . . . . . . . . . . . . . . . . . . . . . . . . . . . . . . . . 7
6 quick steps to get started . . . . . . . . . . . . . . . . . . . . . . . . . . . . . . . . . . . . . . . . . . . . . . . . . . . . . . . . . . . . . . . . . . . . . . . . . . . . . . . . . . . . . . . . . . . . 8
Back up/Synchronize files . . . . . . . . . . . . . . . . . . . . . . . . . . . . . . . . . . . . . . . . . . . . . . . . . . . . . . . . . . . . . . . . . . . . . . . . . . . . . . . . . . . . . . . . . . . . . 11
iii
Chapter 2: Adobe Premiere Elements workspace
Welcome screen . . . . . . . . . . . . . . . . . . . . . . . . . . . . . . . . . . . . . . . . . . . . . . . . . . . . . . . . . . . . . . . . . . . . . . . . . . . . . . . . . . . . . . . . . . . . . . . . . . . . . . 13
Customizing launch options . . . . . . . . . . . . . . . . . . . . . . . . . . . . . . . . . . . . . . . . . . . . . . . . . . . . . . . . . . . . . . . . . . . . . . . . . . . . . . . . . . . . . . . . . . 13
About the workspace . . . . . . . . . . . . . . . . . . . . . . . . . . . . . . . . . . . . . . . . . . . . . . . . . . . . . . . . . . . . . . . . . . . . . . . . . . . . . . . . . . . . . . . . . . . . . . . . 13
Customizing the workspace . . . . . . . . . . . . . . . . . . . . . . . . . . . . . . . . . . . . . . . . . . . . . . . . . . . . . . . . . . . . . . . . . . . . . . . . . . . . . . . . . . . . . . . . . . 18
Examine or remove an alert . . . . . . . . . . . . . . . . . . . . . . . . . . . . . . . . . . . . . . . . . . . . . . . . . . . . . . . . . . . . . . . . . . . . . . . . . . . . . . . . . . . . . . . . . . . 20
Chapter 3: Projects
Creating a new project . . . . . . . . . . . . . . . . . . . . . . . . . . . . . . . . . . . . . . . . . . . . . . . . . . . . . . . . . . . . . . . . . . . . . . . . . . . . . . . . . . . . . . . . . . . . . . . 21
Creating a slide show . . . . . . . . . . . . . . . . . . . . . . . . . . . . . . . . . . . . . . . . . . . . . . . . . . . . . . . . . . . . . . . . . . . . . . . . . . . . . . . . . . . . . . . . . . . . . . . . . 22
Saving and backing up projects . . . . . . . . . . . . . . . . . . . . . . . . . . . . . . . . . . . . . . . . . . . . . . . . . . . . . . . . . . . . . . . . . . . . . . . . . . . . . . . . . . . . . . . 24
Project settings and presets . . . . . . . . . . . . . . . . . . . . . . . . . . . . . . . . . . . . . . . . . . . . . . . . . . . . . . . . . . . . . . . . . . . . . . . . . . . . . . . . . . . . . . . . . . . 25
Creating an InstantMovie project . . . . . . . . . . . . . . . . . . . . . . . . . . . . . . . . . . . . . . . . . . . . . . . . . . . . . . . . . . . . . . . . . . . . . . . . . . . . . . . . . . . . . 29
Viewing a project’s files . . . . . . . . . . . . . . . . . . . . . . . . . . . . . . . . . . . . . . . . . . . . . . . . . . . . . . . . . . . . . . . . . . . . . . . . . . . . . . . . . . . . . . . . . . . . . . . 32
Viewing clip properties . . . . . . . . . . . . . . . . . . . . . . . . . . . . . . . . . . . . . . . . . . . . . . . . . . . . . . . . . . . . . . . . . . . . . . . . . . . . . . . . . . . . . . . . . . . . . . . 36
Undoing changes . . . . . . . . . . . . . . . . . . . . . . . . . . . . . . . . . . . . . . . . . . . . . . . . . . . . . . . . . . . . . . . . . . . . . . . . . . . . . . . . . . . . . . . . . . . . . . . . . . . . 38
Working with scratch disks . . . . . . . . . . . . . . . . . . . . . . . . . . . . . . . . . . . . . . . . . . . . . . . . . . . . . . . . . . . . . . . . . . . . . . . . . . . . . . . . . . . . . . . . . . . . 39
Chapter 4: Capturing video
Getting ready to capture . . . . . . . . . . . . . . . . . . . . . . . . . . . . . . . . . . . . . . . . . . . . . . . . . . . . . . . . . . . . . . . . . . . . . . . . . . . . . . . . . . . . . . . . . . . . . . 42
Capture video . . . . . . . . . . . . . . . . . . . . . . . . . . . . . . . . . . . . . . . . . . . . . . . . . . . . . . . . . . . . . . . . . . . . . . . . . . . . . . . . . . . . . . . . . . . . . . . . . . . . . . . . 45
Capture stop-motion and time-lapse video . . . . . . . . . . . . . . . . . . . . . . . . . . . . . . . . . . . . . . . . . . . . . . . . . . . . . . . . . . . . . . . . . . . . . . . . . . . . 50
Chapter 5: Importing and adding media
Supported devices and file formats . . . . . . . . . . . . . . . . . . . . . . . . . . . . . . . . . . . . . . . . . . . . . . . . . . . . . . . . . . . . . . . . . . . . . . . . . . . . . . . . . . . 53
Import from DVDs, camcorders, phones, and removable drives . . . . . . . . . . . . . . . . . . . . . . . . . . . . . . . . . . . . . . . . . . . . . . . . . . . . . . . . 55
Import photos from your digital camera or mobile phone . . . . . . . . . . . . . . . . . . . . . . . . . . . . . . . . . . . . . . . . . . . . . . . . . . . . . . . . . . . . . . 56
Add files from your hard drive . . . . . . . . . . . . . . . . . . . . . . . . . . . . . . . . . . . . . . . . . . . . . . . . . . . . . . . . . . . . . . . . . . . . . . . . . . . . . . . . . . . . . . . . 58
Last updated 11/22/2011
Page 4

USING ADOBE PREMIERE ELEMENTS 10
Contents
Add numbered still-image files as a single clip . . . . . . . . . . . . . . . . . . . . . . . . . . . . . . . . . . . . . . . . . . . . . . . . . . . . . . . . . . . . . . . . . . . . . . . . . 58
Methods for importing media into your project . . . . . . . . . . . . . . . . . . . . . . . . . . . . . . . . . . . . . . . . . . . . . . . . . . . . . . . . . . . . . . . . . . . . . . . 58
Guidelines for adding files . . . . . . . . . . . . . . . . . . . . . . . . . . . . . . . . . . . . . . . . . . . . . . . . . . . . . . . . . . . . . . . . . . . . . . . . . . . . . . . . . . . . . . . . . . . . 59
Set duration for imported still images . . . . . . . . . . . . . . . . . . . . . . . . . . . . . . . . . . . . . . . . . . . . . . . . . . . . . . . . . . . . . . . . . . . . . . . . . . . . . . . . . 62
Sharing files between Adobe Premiere Elements and Adobe Photoshop Elements . . . . . . . . . . . . . . . . . . . . . . . . . . . . . . . . . . . . . . 63
Creating specialty clips . . . . . . . . . . . . . . . . . . . . . . . . . . . . . . . . . . . . . . . . . . . . . . . . . . . . . . . . . . . . . . . . . . . . . . . . . . . . . . . . . . . . . . . . . . . . . . . 64
Working with offline files . . . . . . . . . . . . . . . . . . . . . . . . . . . . . . . . . . . . . . . . . . . . . . . . . . . . . . . . . . . . . . . . . . . . . . . . . . . . . . . . . . . . . . . . . . . . . 66
Working with aspect ratios and field options . . . . . . . . . . . . . . . . . . . . . . . . . . . . . . . . . . . . . . . . . . . . . . . . . . . . . . . . . . . . . . . . . . . . . . . . . . 66
5.1 audio import . . . . . . . . . . . . . . . . . . . . . . . . . . . . . . . . . . . . . . . . . . . . . . . . . . . . . . . . . . . . . . . . . . . . . . . . . . . . . . . . . . . . . . . . . . . . . . . . . . . . . . 70
Chapter 6: Managing clips using Elements Organizer
Finding files in Elements Organizer . . . . . . . . . . . . . . . . . . . . . . . . . . . . . . . . . . . . . . . . . . . . . . . . . . . . . . . . . . . . . . . . . . . . . . . . . . . . . . . . . . . . 72
Previewing files in Elements Organizer . . . . . . . . . . . . . . . . . . . . . . . . . . . . . . . . . . . . . . . . . . . . . . . . . . . . . . . . . . . . . . . . . . . . . . . . . . . . . . . . 72
Tagging files . . . . . . . . . . . . . . . . . . . . . . . . . . . . . . . . . . . . . . . . . . . . . . . . . . . . . . . . . . . . . . . . . . . . . . . . . . . . . . . . . . . . . . . . . . . . . . . . . . . . . . . . . 72
Grouping files in the Elements Organizer . . . . . . . . . . . . . . . . . . . . . . . . . . . . . . . . . . . . . . . . . . . . . . . . . . . . . . . . . . . . . . . . . . . . . . . . . . . . . . 76
Creating albums . . . . . . . . . . . . . . . . . . . . . . . . . . . . . . . . . . . . . . . . . . . . . . . . . . . . . . . . . . . . . . . . . . . . . . . . . . . . . . . . . . . . . . . . . . . . . . . . . . . . . . 78
Creating and editing smart albums . . . . . . . . . . . . . . . . . . . . . . . . . . . . . . . . . . . . . . . . . . . . . . . . . . . . . . . . . . . . . . . . . . . . . . . . . . . . . . . . . . . 78
Backup and synchronize albums and files . . . . . . . . . . . . . . . . . . . . . . . . . . . . . . . . . . . . . . . . . . . . . . . . . . . . . . . . . . . . . . . . . . . . . . . . . . . . . 79
iv
Chapter 7: Arranging clips in a movie
Arranging clips in the Sceneline . . . . . . . . . . . . . . . . . . . . . . . . . . . . . . . . . . . . . . . . . . . . . . . . . . . . . . . . . . . . . . . . . . . . . . . . . . . . . . . . . . . . . . . 80
Arranging clips in the Timeline . . . . . . . . . . . . . . . . . . . . . . . . . . . . . . . . . . . . . . . . . . . . . . . . . . . . . . . . . . . . . . . . . . . . . . . . . . . . . . . . . . . . . . . . 82
Creating a picture-in-picture overlay . . . . . . . . . . . . . . . . . . . . . . . . . . . . . . . . . . . . . . . . . . . . . . . . . . . . . . . . . . . . . . . . . . . . . . . . . . . . . . . . . . 94
Grouping, linking, and disabling clips . . . . . . . . . . . . . . . . . . . . . . . . . . . . . . . . . . . . . . . . . . . . . . . . . . . . . . . . . . . . . . . . . . . . . . . . . . . . . . . . . 95
Working with clip and timeline markers . . . . . . . . . . . . . . . . . . . . . . . . . . . . . . . . . . . . . . . . . . . . . . . . . . . . . . . . . . . . . . . . . . . . . . . . . . . . . . . 97
Previewing movies . . . . . . . . . . . . . . . . . . . . . . . . . . . . . . . . . . . . . . . . . . . . . . . . . . . . . . . . . . . . . . . . . . . . . . . . . . . . . . . . . . . . . . . . . . . . . . . . . . 101
Chapter 8: Editing clips
Trimming clips . . . . . . . . . . . . . . . . . . . . . . . . . . . . . . . . . . . . . . . . . . . . . . . . . . . . . . . . . . . . . . . . . . . . . . . . . . . . . . . . . . . . . . . . . . . . . . . . . . . . . . 108
Split clips . . . . . . . . . . . . . . . . . . . . . . . . . . . . . . . . . . . . . . . . . . . . . . . . . . . . . . . . . . . . . . . . . . . . . . . . . . . . . . . . . . . . . . . . . . . . . . . . . . . . . . . . . . . 118
Replace footage . . . . . . . . . . . . . . . . . . . . . . . . . . . . . . . . . . . . . . . . . . . . . . . . . . . . . . . . . . . . . . . . . . . . . . . . . . . . . . . . . . . . . . . . . . . . . . . . . . . . . 120
Changing clip speed and duration . . . . . . . . . . . . . . . . . . . . . . . . . . . . . . . . . . . . . . . . . . . . . . . . . . . . . . . . . . . . . . . . . . . . . . . . . . . . . . . . . . . 121
Freezing and holding frames . . . . . . . . . . . . . . . . . . . . . . . . . . . . . . . . . . . . . . . . . . . . . . . . . . . . . . . . . . . . . . . . . . . . . . . . . . . . . . . . . . . . . . . . . 123
Working with source clips . . . . . . . . . . . . . . . . . . . . . . . . . . . . . . . . . . . . . . . . . . . . . . . . . . . . . . . . . . . . . . . . . . . . . . . . . . . . . . . . . . . . . . . . . . . 124
Chapter 9: Applying transitions
Transition basics . . . . . . . . . . . . . . . . . . . . . . . . . . . . . . . . . . . . . . . . . . . . . . . . . . . . . . . . . . . . . . . . . . . . . . . . . . . . . . . . . . . . . . . . . . . . . . . . . . . . 127
Applying transitions to clips . . . . . . . . . . . . . . . . . . . . . . . . . . . . . . . . . . . . . . . . . . . . . . . . . . . . . . . . . . . . . . . . . . . . . . . . . . . . . . . . . . . . . . . . . 128
Create special transitions . . . . . . . . . . . . . . . . . . . . . . . . . . . . . . . . . . . . . . . . . . . . . . . . . . . . . . . . . . . . . . . . . . . . . . . . . . . . . . . . . . . . . . . . . . . . 134
Adjusting transitions . . . . . . . . . . . . . . . . . . . . . . . . . . . . . . . . . . . . . . . . . . . . . . . . . . . . . . . . . . . . . . . . . . . . . . . . . . . . . . . . . . . . . . . . . . . . . . . . 135
Chapter 10: Applying effects
Effects basics . . . . . . . . . . . . . . . . . . . . . . . . . . . . . . . . . . . . . . . . . . . . . . . . . . . . . . . . . . . . . . . . . . . . . . . . . . . . . . . . . . . . . . . . . . . . . . . . . . . . . . . . 138
Finding and organizing effects . . . . . . . . . . . . . . . . . . . . . . . . . . . . . . . . . . . . . . . . . . . . . . . . . . . . . . . . . . . . . . . . . . . . . . . . . . . . . . . . . . . . . . . 139
Applying and removing effects . . . . . . . . . . . . . . . . . . . . . . . . . . . . . . . . . . . . . . . . . . . . . . . . . . . . . . . . . . . . . . . . . . . . . . . . . . . . . . . . . . . . . . 140
Working with effect presets . . . . . . . . . . . . . . . . . . . . . . . . . . . . . . . . . . . . . . . . . . . . . . . . . . . . . . . . . . . . . . . . . . . . . . . . . . . . . . . . . . . . . . . . . . 145
Changing effect properties . . . . . . . . . . . . . . . . . . . . . . . . . . . . . . . . . . . . . . . . . . . . . . . . . . . . . . . . . . . . . . . . . . . . . . . . . . . . . . . . . . . . . . . . . . 147
Pan and zoom to create video-like effect . . . . . . . . . . . . . . . . . . . . . . . . . . . . . . . . . . . . . . . . . . . . . . . . . . . . . . . . . . . . . . . . . . . . . . . . . . . . . 149
Last updated 11/22/2011
Page 5

USING ADOBE PREMIERE ELEMENTS 10
Contents
Reposition, scale, or rotate clips with the Motion effect . . . . . . . . . . . . . . . . . . . . . . . . . . . . . . . . . . . . . . . . . . . . . . . . . . . . . . . . . . . . . . . 153
Superimposing and transparency . . . . . . . . . . . . . . . . . . . . . . . . . . . . . . . . . . . . . . . . . . . . . . . . . . . . . . . . . . . . . . . . . . . . . . . . . . . . . . . . . . . . 155
Selecting colors for effects and mattes . . . . . . . . . . . . . . . . . . . . . . . . . . . . . . . . . . . . . . . . . . . . . . . . . . . . . . . . . . . . . . . . . . . . . . . . . . . . . . . 160
Effects reference . . . . . . . . . . . . . . . . . . . . . . . . . . . . . . . . . . . . . . . . . . . . . . . . . . . . . . . . . . . . . . . . . . . . . . . . . . . . . . . . . . . . . . . . . . . . . . . . . . . . 162
Chapter 11: Animating effects
Effect animation basics . . . . . . . . . . . . . . . . . . . . . . . . . . . . . . . . . . . . . . . . . . . . . . . . . . . . . . . . . . . . . . . . . . . . . . . . . . . . . . . . . . . . . . . . . . . . . . 198
Adding, copying, and removing keyframes . . . . . . . . . . . . . . . . . . . . . . . . . . . . . . . . . . . . . . . . . . . . . . . . . . . . . . . . . . . . . . . . . . . . . . . . . . . 200
Adjusting keyframes . . . . . . . . . . . . . . . . . . . . . . . . . . . . . . . . . . . . . . . . . . . . . . . . . . . . . . . . . . . . . . . . . . . . . . . . . . . . . . . . . . . . . . . . . . . . . . . . . 203
Controlling change between keyframes . . . . . . . . . . . . . . . . . . . . . . . . . . . . . . . . . . . . . . . . . . . . . . . . . . . . . . . . . . . . . . . . . . . . . . . . . . . . . . 205
Animating a clip’s position . . . . . . . . . . . . . . . . . . . . . . . . . . . . . . . . . . . . . . . . . . . . . . . . . . . . . . . . . . . . . . . . . . . . . . . . . . . . . . . . . . . . . . . . . . . 208
Motion tracking effect . . . . . . . . . . . . . . . . . . . . . . . . . . . . . . . . . . . . . . . . . . . . . . . . . . . . . . . . . . . . . . . . . . . . . . . . . . . . . . . . . . . . . . . . . . . . . . . 210
Effects Mask . . . . . . . . . . . . . . . . . . . . . . . . . . . . . . . . . . . . . . . . . . . . . . . . . . . . . . . . . . . . . . . . . . . . . . . . . . . . . . . . . . . . . . . . . . . . . . . . . . . . . . . . . 213
Chapter 12: Creating titles
Creating and trimming titles . . . . . . . . . . . . . . . . . . . . . . . . . . . . . . . . . . . . . . . . . . . . . . . . . . . . . . . . . . . . . . . . . . . . . . . . . . . . . . . . . . . . . . . . . 215
Editing and formatting text . . . . . . . . . . . . . . . . . . . . . . . . . . . . . . . . . . . . . . . . . . . . . . . . . . . . . . . . . . . . . . . . . . . . . . . . . . . . . . . . . . . . . . . . . . 221
Applying styles to text and graphics . . . . . . . . . . . . . . . . . . . . . . . . . . . . . . . . . . . . . . . . . . . . . . . . . . . . . . . . . . . . . . . . . . . . . . . . . . . . . . . . . 225
Adding shapes and images to titles . . . . . . . . . . . . . . . . . . . . . . . . . . . . . . . . . . . . . . . . . . . . . . . . . . . . . . . . . . . . . . . . . . . . . . . . . . . . . . . . . . 226
Arranging objects in titles . . . . . . . . . . . . . . . . . . . . . . . . . . . . . . . . . . . . . . . . . . . . . . . . . . . . . . . . . . . . . . . . . . . . . . . . . . . . . . . . . . . . . . . . . . . 228
Adding color and shadows to titles . . . . . . . . . . . . . . . . . . . . . . . . . . . . . . . . . . . . . . . . . . . . . . . . . . . . . . . . . . . . . . . . . . . . . . . . . . . . . . . . . . 231
Designing titles for TV . . . . . . . . . . . . . . . . . . . . . . . . . . . . . . . . . . . . . . . . . . . . . . . . . . . . . . . . . . . . . . . . . . . . . . . . . . . . . . . . . . . . . . . . . . . . . . . 234
Exporting and importing titles . . . . . . . . . . . . . . . . . . . . . . . . . . . . . . . . . . . . . . . . . . . . . . . . . . . . . . . . . . . . . . . . . . . . . . . . . . . . . . . . . . . . . . . 235
v
Chapter 13: Adding and mixing audio
Using soundtracks . . . . . . . . . . . . . . . . . . . . . . . . . . . . . . . . . . . . . . . . . . . . . . . . . . . . . . . . . . . . . . . . . . . . . . . . . . . . . . . . . . . . . . . . . . . . . . . . . . . 236
Create narrations . . . . . . . . . . . . . . . . . . . . . . . . . . . . . . . . . . . . . . . . . . . . . . . . . . . . . . . . . . . . . . . . . . . . . . . . . . . . . . . . . . . . . . . . . . . . . . . . . . . . 239
Mixing audio and adjusting volume . . . . . . . . . . . . . . . . . . . . . . . . . . . . . . . . . . . . . . . . . . . . . . . . . . . . . . . . . . . . . . . . . . . . . . . . . . . . . . . . . . 241
Chapter 14: Creating disc menus
Types of discs and menu options . . . . . . . . . . . . . . . . . . . . . . . . . . . . . . . . . . . . . . . . . . . . . . . . . . . . . . . . . . . . . . . . . . . . . . . . . . . . . . . . . . . . 247
Working with menu markers . . . . . . . . . . . . . . . . . . . . . . . . . . . . . . . . . . . . . . . . . . . . . . . . . . . . . . . . . . . . . . . . . . . . . . . . . . . . . . . . . . . . . . . . . 248
Creating disc menus . . . . . . . . . . . . . . . . . . . . . . . . . . . . . . . . . . . . . . . . . . . . . . . . . . . . . . . . . . . . . . . . . . . . . . . . . . . . . . . . . . . . . . . . . . . . . . . . . 254
Previewing menus . . . . . . . . . . . . . . . . . . . . . . . . . . . . . . . . . . . . . . . . . . . . . . . . . . . . . . . . . . . . . . . . . . . . . . . . . . . . . . . . . . . . . . . . . . . . . . . . . . . 260
Chapter 15: Saving and sharing your movies
Sharing from the Tasks panel . . . . . . . . . . . . . . . . . . . . . . . . . . . . . . . . . . . . . . . . . . . . . . . . . . . . . . . . . . . . . . . . . . . . . . . . . . . . . . . . . . . . . . . . 261
Create DVD files for web . . . . . . . . . . . . . . . . . . . . . . . . . . . . . . . . . . . . . . . . . . . . . . . . . . . . . . . . . . . . . . . . . . . . . . . . . . . . . . . . . . . . . . . . . . . . . 261
Sharing to DVD or Blu-ray Disc . . . . . . . . . . . . . . . . . . . . . . . . . . . . . . . . . . . . . . . . . . . . . . . . . . . . . . . . . . . . . . . . . . . . . . . . . . . . . . . . . . . . . . . 262
Sharing for PC playback . . . . . . . . . . . . . . . . . . . . . . . . . . . . . . . . . . . . . . . . . . . . . . . . . . . . . . . . . . . . . . . . . . . . . . . . . . . . . . . . . . . . . . . . . . . . . 266
Sharing to the web . . . . . . . . . . . . . . . . . . . . . . . . . . . . . . . . . . . . . . . . . . . . . . . . . . . . . . . . . . . . . . . . . . . . . . . . . . . . . . . . . . . . . . . . . . . . . . . . . . 270
Sharing to mobile phones and players . . . . . . . . . . . . . . . . . . . . . . . . . . . . . . . . . . . . . . . . . . . . . . . . . . . . . . . . . . . . . . . . . . . . . . . . . . . . . . . 272
Sharing to videotape . . . . . . . . . . . . . . . . . . . . . . . . . . . . . . . . . . . . . . . . . . . . . . . . . . . . . . . . . . . . . . . . . . . . . . . . . . . . . . . . . . . . . . . . . . . . . . . . 273
Common settings for Sharing . . . . . . . . . . . . . . . . . . . . . . . . . . . . . . . . . . . . . . . . . . . . . . . . . . . . . . . . . . . . . . . . . . . . . . . . . . . . . . . . . . . . . . . . 276
Supported file types for saving and exporting . . . . . . . . . . . . . . . . . . . . . . . . . . . . . . . . . . . . . . . . . . . . . . . . . . . . . . . . . . . . . . . . . . . . . . . . 280
Compression and data-rate basics . . . . . . . . . . . . . . . . . . . . . . . . . . . . . . . . . . . . . . . . . . . . . . . . . . . . . . . . . . . . . . . . . . . . . . . . . . . . . . . . . . . 281
Archiving projects . . . . . . . . . . . . . . . . . . . . . . . . . . . . . . . . . . . . . . . . . . . . . . . . . . . . . . . . . . . . . . . . . . . . . . . . . . . . . . . . . . . . . . . . . . . . . . . . . . . 283
Last updated 11/22/2011
Page 6

USING ADOBE PREMIERE ELEMENTS 10
Contents
Chapter 16: Adobe Premiere Elements keyboard shortcuts
Using default shortcuts . . . . . . . . . . . . . . . . . . . . . . . . . . . . . . . . . . . . . . . . . . . . . . . . . . . . . . . . . . . . . . . . . . . . . . . . . . . . . . . . . . . . . . . . . . . . . . 285
Customizing shortcuts . . . . . . . . . . . . . . . . . . . . . . . . . . . . . . . . . . . . . . . . . . . . . . . . . . . . . . . . . . . . . . . . . . . . . . . . . . . . . . . . . . . . . . . . . . . . . . . 285
Chapter 17: Troubleshooting
Resources and guidelines . . . . . . . . . . . . . . . . . . . . . . . . . . . . . . . . . . . . . . . . . . . . . . . . . . . . . . . . . . . . . . . . . . . . . . . . . . . . . . . . . . . . . . . . . . . . 287
Capturing . . . . . . . . . . . . . . . . . . . . . . . . . . . . . . . . . . . . . . . . . . . . . . . . . . . . . . . . . . . . . . . . . . . . . . . . . . . . . . . . . . . . . . . . . . . . . . . . . . . . . . . . . . . 288
Importing . . . . . . . . . . . . . . . . . . . . . . . . . . . . . . . . . . . . . . . . . . . . . . . . . . . . . . . . . . . . . . . . . . . . . . . . . . . . . . . . . . . . . . . . . . . . . . . . . . . . . . . . . . . 289
Playing back and previewing . . . . . . . . . . . . . . . . . . . . . . . . . . . . . . . . . . . . . . . . . . . . . . . . . . . . . . . . . . . . . . . . . . . . . . . . . . . . . . . . . . . . . . . . 290
Creating a DVD . . . . . . . . . . . . . . . . . . . . . . . . . . . . . . . . . . . . . . . . . . . . . . . . . . . . . . . . . . . . . . . . . . . . . . . . . . . . . . . . . . . . . . . . . . . . . . . . . . . . . . 292
Chapter 18: Glossary
Digital imaging terms . . . . . . . . . . . . . . . . . . . . . . . . . . . . . . . . . . . . . . . . . . . . . . . . . . . . . . . . . . . . . . . . . . . . . . . . . . . . . . . . . . . . . . . . . . . . . . . 294
vi
Last updated 11/22/2011
Page 7

Chapter 1: Getting started with
1
Adobe
Use the getting started information to install Adobe® Premiere® Elements 10 on your computer and get started with
using the software. The resources provided are designed to help you learn the product at your own pace.
Adobe recommends that you go through the resources in the book before you look for external Help. The resources
help ensure that you feel confident about using the product and also save you valuable time.
Premiere Elements
Getting started tutorials
Guided tutorial on creating a movie
Video tutorial
Free video tutorials
For a complete list of free video tutorials on Adobe Premiere Elements, see Learn Premiere Elements on Adobe TV.
Problems with getting started?
Please use the feedback mechanism on top of this page to tell us about what we could do to help enhance your getting
started experience.
System requirements
To ensure that you have the required hardware and software to run Adobe® Premiere® Elements 10, read the system
requirements in the ReadMe file.
If your computer is connected to the Internet, see http://www.adobe.com/go/learn_readmeprel10_en. This document
contains the latest information on Adobe® Premiere® Elements 10.
If you do not have access to the Internet, open the ReadMe file on the installation disc.
Installing/Uninstalling Adobe Premiere Elements
Install from disc
Ensure that you have a DVD drive (not CD drive) connected to your computer before you begin installation. Insert
the relevant DVD into the drive and follow instructions.
Last updated 11/22/2011
Page 8

USING ADOBE PREMIERE ELEMENTS 10
Getting started with Adobe Premiere Elements
See http://www.adobe.com/go/learn_installprel10_en for comprehensive information on installing
Adobe Premiere Elements.
Install downloaded software
See http://www.adobe.com/go/learn_installonlineprel_en.
Converting a trial version to a licensed (purchased) version
See http://www.adobe.com/go/learn_convertprel_en.
To remove the watermark in movies created in a trial version, open the project created in the trial version in the
licensed version and re-export. Watermarks in exported files from trial versions cannot be removed by running them
in the licensed version.
Can I have more than one version installed?
Installing Adobe Premiere Elements doesn't automatically remove or replace any previous versions installed on your
computer. It's not necessary to uninstall a previous version of Adobe
versions once you are comfortable with the latest version of the software.
Premiere Elements. You can uninstall earlier
2
Uninstall Adobe Premiere Elements
See http://www.adobe.com/go/learn_uninstallpre_en.
Creating an Adobe ID
For information on how to create an Adobe ID, and the advantages of having an Adobe ID, see
http://www.adobe.com/go/learn_adobeid_en.
Registering your software
For information on why you must register your purchased Adobe software, and the benefits of registering, see
http://www.adobe.com/go/learn_regstnfaq_en.
Purchasing/Benefits of a PLUS account
For information on the benefits of upgrading your Photoshop.com account to PLUS, see
http://www.adobe.com/go/learn_plusprel_en.
Supported software and hardware
To ensure that your computer hardware, camera, and files you intend to use work with Adobe Premiere Elements, see
http://www.adobe.com/go/learn_readmeprel10_en.
Last updated 11/22/2011
Page 9

USING ADOBE PREMIERE ELEMENTS 10
Getting started with Adobe Premiere Elements
If you do not have access to the Internet, open the ReadMe file on the installation disc.
What’s new in Adobe Premiere Elements 10
Visit http://www.adobe.com/go/learn_pre_features_en to learn about new and enhanced features.
Video
Convert a catalog from a previous version
If you had a previous version of Adobe Premiere Elements on your computer, you are prompted to convert your
catalog for compatibility with the current version. Converting a catalog is a one time process and once complete, a
converted catalog can no longer be used in previous versions.
Note: Before converting a catalog from a previous version of Adobe Premiere Elements, it is recommended that you back
up the catalog using File > Backup.
3
1 In Elements Organizer, select File > Catalog.
2 Click Convert in the Catalog Manager.
3 In the Convert Catalog dialog, select the catalog you want to convert.
Note: Catalogs saved to a folder in a location other than the default location do not appear in the Convert Catalog
window automatically. Click Find More Catalogs, and then select the folder where your catalog is located. Catalogs
located in that folder are added to the list of catalogs that can be converted.
4 Click Convert.
Show Previously Converted Catalogs
You can view the catalogs that have previously been converted or those catalogs backed up by an earlier version. The
Convert Catalog window does not display these catalogs by default. Select Show Previously Converted Catalogs to view
a list of the previously converted catalogs.
Note: You cannot use the converted catalog with earlier versions. However, when the catalog is converted, it copies the
data into a new catalog file, and the original catalog file remains unchanged. You can continue to use the original catalog
in earlier versions.
Help resources
If you have questions about installing or using Adobe Premiere Elements, Adobe recommends that you use these
resources before contacting Adobe support. These resources contain answers to many common questions.
Last updated 11/22/2011
Page 10
USING ADOBE PREMIERE ELEMENTS 10
Getting started with Adobe Premiere Elements
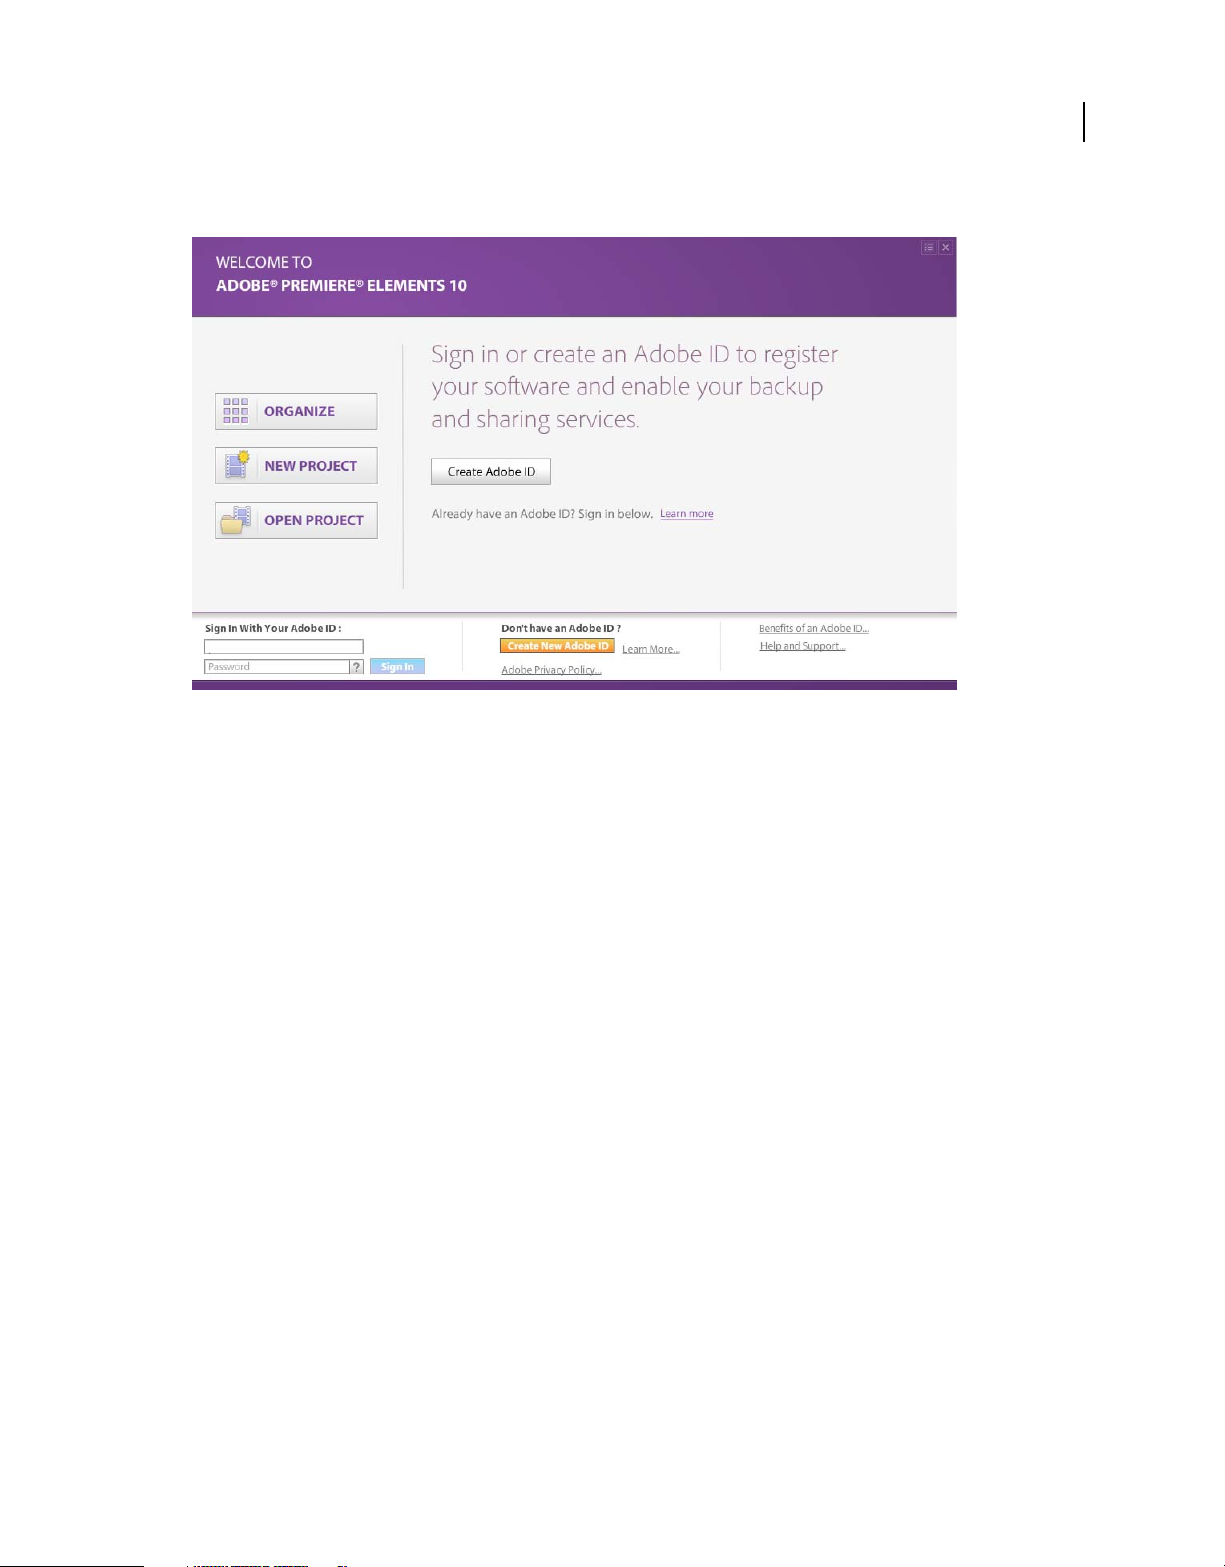
Welcome screen
4
Welcome screen
The Welcome screen appears whenever you first launch the software. Apart from acting as a starting point to create or
open projects, it has resources that help you get started with Adobe
Premiere Elements.
Inspiration browser
The Inspiration Browser lets you access and organize tutorials that contain ideas and creative ways to do more with
your video projects.
In the Adobe Premiere Elements Welcome screen, sign in with your Adobe ID, and then click Tips and Tricks.
Getting started information
If you are new to Adobe Premiere Elements, these resources help you quickly get started with editing and creating
videos.
Getting Started page See http://www.adobe.com/go/learn_pre_gs_en. The Getting Started page contains FAQs,
Help topics, videos, and other resources that help you quickly start using Adobe Premiere Elements.
Help and Support page See http://www.adobe.com/support/premiereelements/ for an overview of all the available
Help content.
Key concepts For a glossary of commonly used terms in movie editing, see
http://www.adobe.com/go/learn_preglos_en.
Adobe Premiere Elements Help
These resources provide you with information on all the features in Adobe Premiere Elements with information on
how to use them.
Online Help (User guide) The online version of the user guide. See http://www.adobe.com/go/learn_usinprel_en.
Last updated 11/22/2011
Page 11
USING ADOBE PREMIERE ELEMENTS 10
Getting started with Adobe Premiere Elements
Download User Guide (PDF) See http://www.adobe.com/go/learn_pdfprel_en.
Using Help within the application Press F1 to launch the Help client. Ensure that you are online at least once to
download the Help content. Thereafter, the Help client uses the downloaded content on your computer or
downloads content from the Internet based on your computer's connection status. For more information on the
community Help client, see
http://www.adobe.com/go/learn_prechc_en.
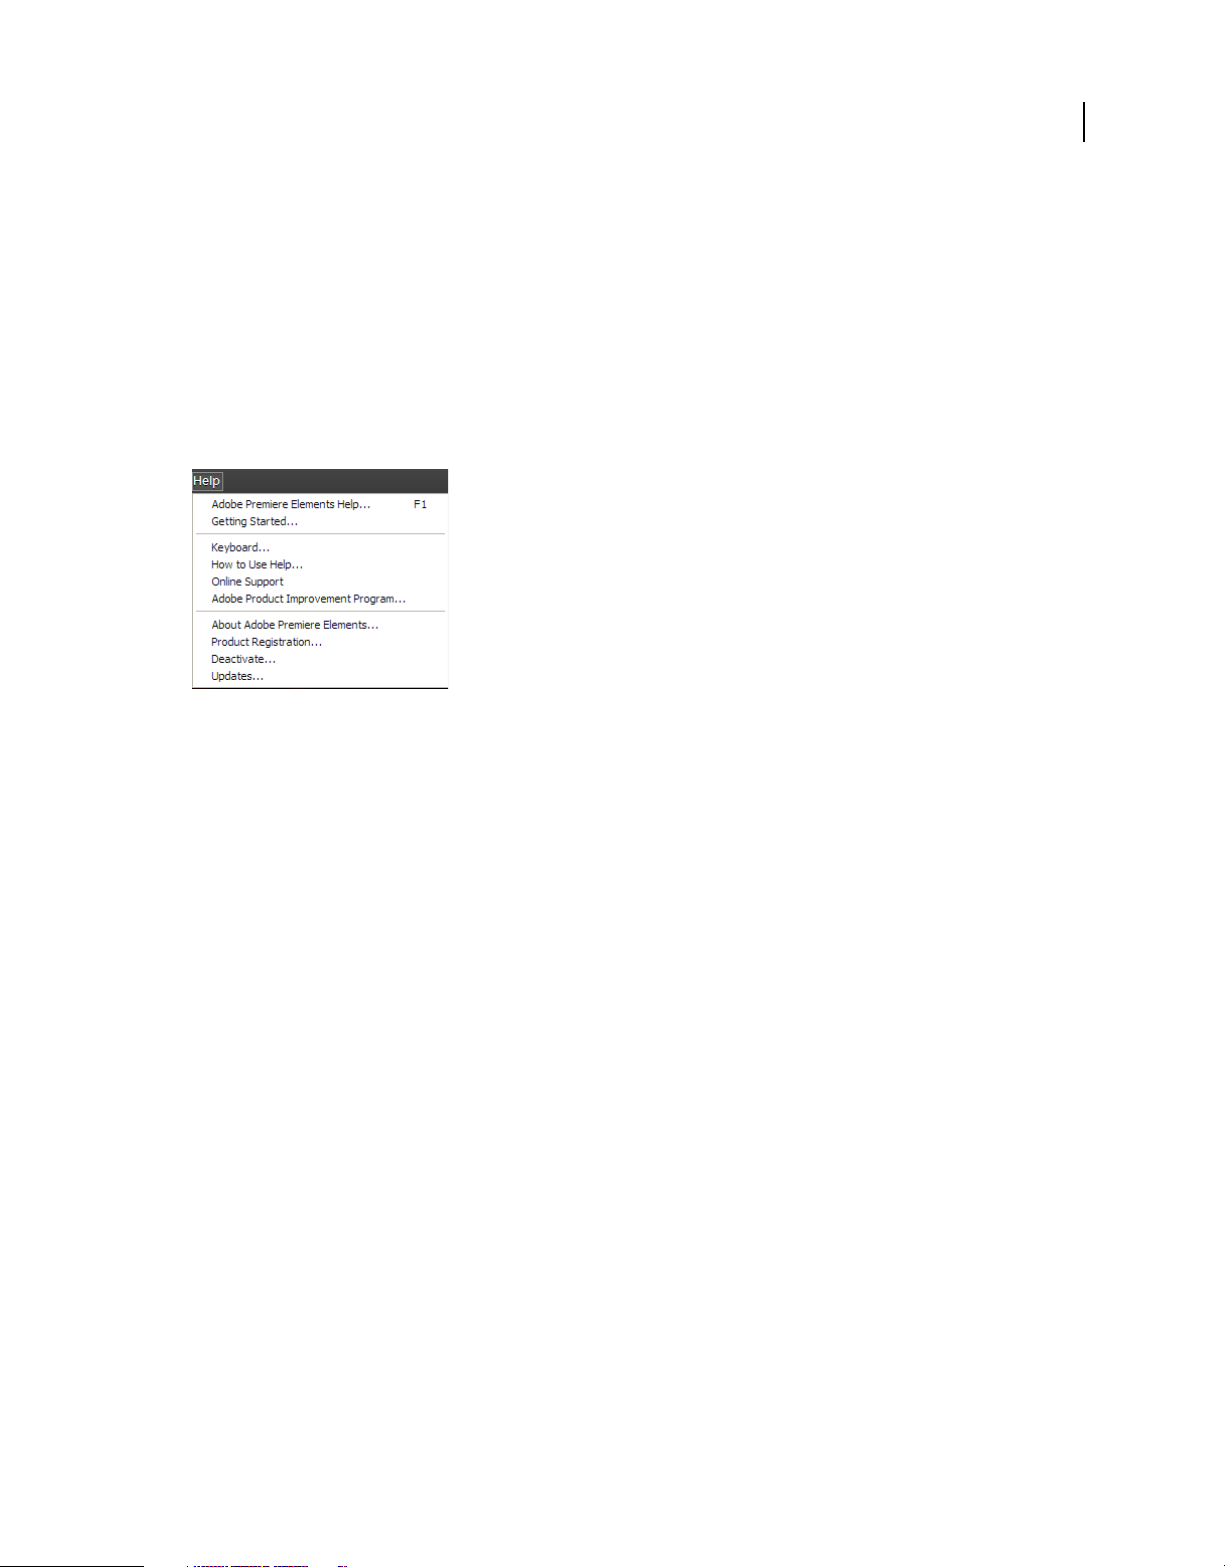
Help menu
Use the Help menu in Adobe Premiere Elements to quickly access a list of resources that help you get started with the
software. You can locate the Help menu in the menu bar at the top of the application.
5
Help menu
Adobe Premiere Elements Help Launches the Help client containing the online version of the user guide. Depending
on whether you are online or offline, the online Help content or the downloaded Help content is loaded.
Getting Started The Getting Started page contains FAQs, Help topics, videos, and other resources that help you
quickly start using Adobe
Keyboard Opens the Help page listing the keyboard shortcuts in Adobe Premiere Elements.
How to Use Help Opens the Help page containing the Getting Started information. Most of that information is similar
Premiere Elements.
to what is contained in this book.
Online Support Opens the Help and Support page containing information on Help and Troubleshooting resources.
Provide feedback on product/post useful tips and tricks
• Visit http://www.adobe.com/go/learn_prefeed_en.
Troubleshooting tips
Troubleshoot yourself - Try these things before you call customer support.
Here are some things to consider when troubleshooting Adobe Premiere Elements.
• Restart Adobe Premiere Elements, or restart your computer.
• Turn off other programs, including anti-virus, firewall, and CD/DVD burning applications that run in the
background. These programs sometimes conflict with Adobe
• Make sure that the computer operating system is up-to-date. Install the latest drivers for your video card, sound
card, printer, and other devices.
Premiere Elements operations.
Last updated 11/22/2011
Page 12

USING ADOBE PREMIERE ELEMENTS 10
Getting started with Adobe Premiere Elements
• If Adobe Premiere Elements was working fine until recently, remove any recent additions to your computer. What
was the last thing you changed on your computer before the problem began? Did you install a new printer, font, or
other software?
• If something in Adobe Premiere Elements doesn’t seem to work properly, check Adobe Premiere Elements Help.
• For issues with opening or editing photos, check if the problem occurs with all photos, or with photos from different
cameras or sources.
Ask experts
To reach out to experts in the Adobe Premiere Elements community that can help you with your problem, visit
http://www.adobe.com/go/learn_forumprel_en.
Support for How-to questions
How-to questions and most issues related to using Adobe Premiere Elements can be best solved using the following
resources:
• Help and Support page (http://www.adobe.com/support/premiereelements/)
• Getting Started page (http://www.adobe.com/go/learn_pre_gs_en)
• Adobe Premiere Elements Forums (http://www.adobe.com/go/learn_forumprel_en)
6
Customer support for product orders, installation, activation
For the most efficient ways to get through to customer support, try the following:
• If you prefer getting answers through email, log in to the customer support portal
http://www.adobe.com/go/learn_cust_por_en. If you do not have a registered Adobe ID, click the Create An
Account button to create your ID.
• If you do need to call, Adobe recommends using the pop-up menus found on the contact page
http://www.adobe.com/go/learn_contact_en. You are given the option of Live Chat (if available) or a phone
support through this contact method.
• If you call and encounter a long hold time, you can request a callback from the first available agent. Alternatively,
you can schedule a callback at a more convenient time.
Adobe Premiere Elements and Elements Organizer
Elements Organizer
Elements Organizer is a part of both Adobe Premiere Elements and Photoshop Elements. You can use Elements
Organizer to import, manage, and view your media files (photos, movie clips, audio, and so on).
Adobe Premiere Elements
Adobe Premiere Elements is an editor that helps you quickly create professional looking movies using your video clips
and images imported from Elements Organizer or other sources. Adobe
professional grade editing effects and transitions which can be applied using a simple drag-and-drop operation.
Premiere Elements provides you with various
After you have completed creating a video, you can export it to DVD or upload to video sharing websites.
Last updated 11/22/2011
Page 13

USING ADOBE PREMIERE ELEMENTS 10
Getting started with Adobe Premiere Elements
Workspace
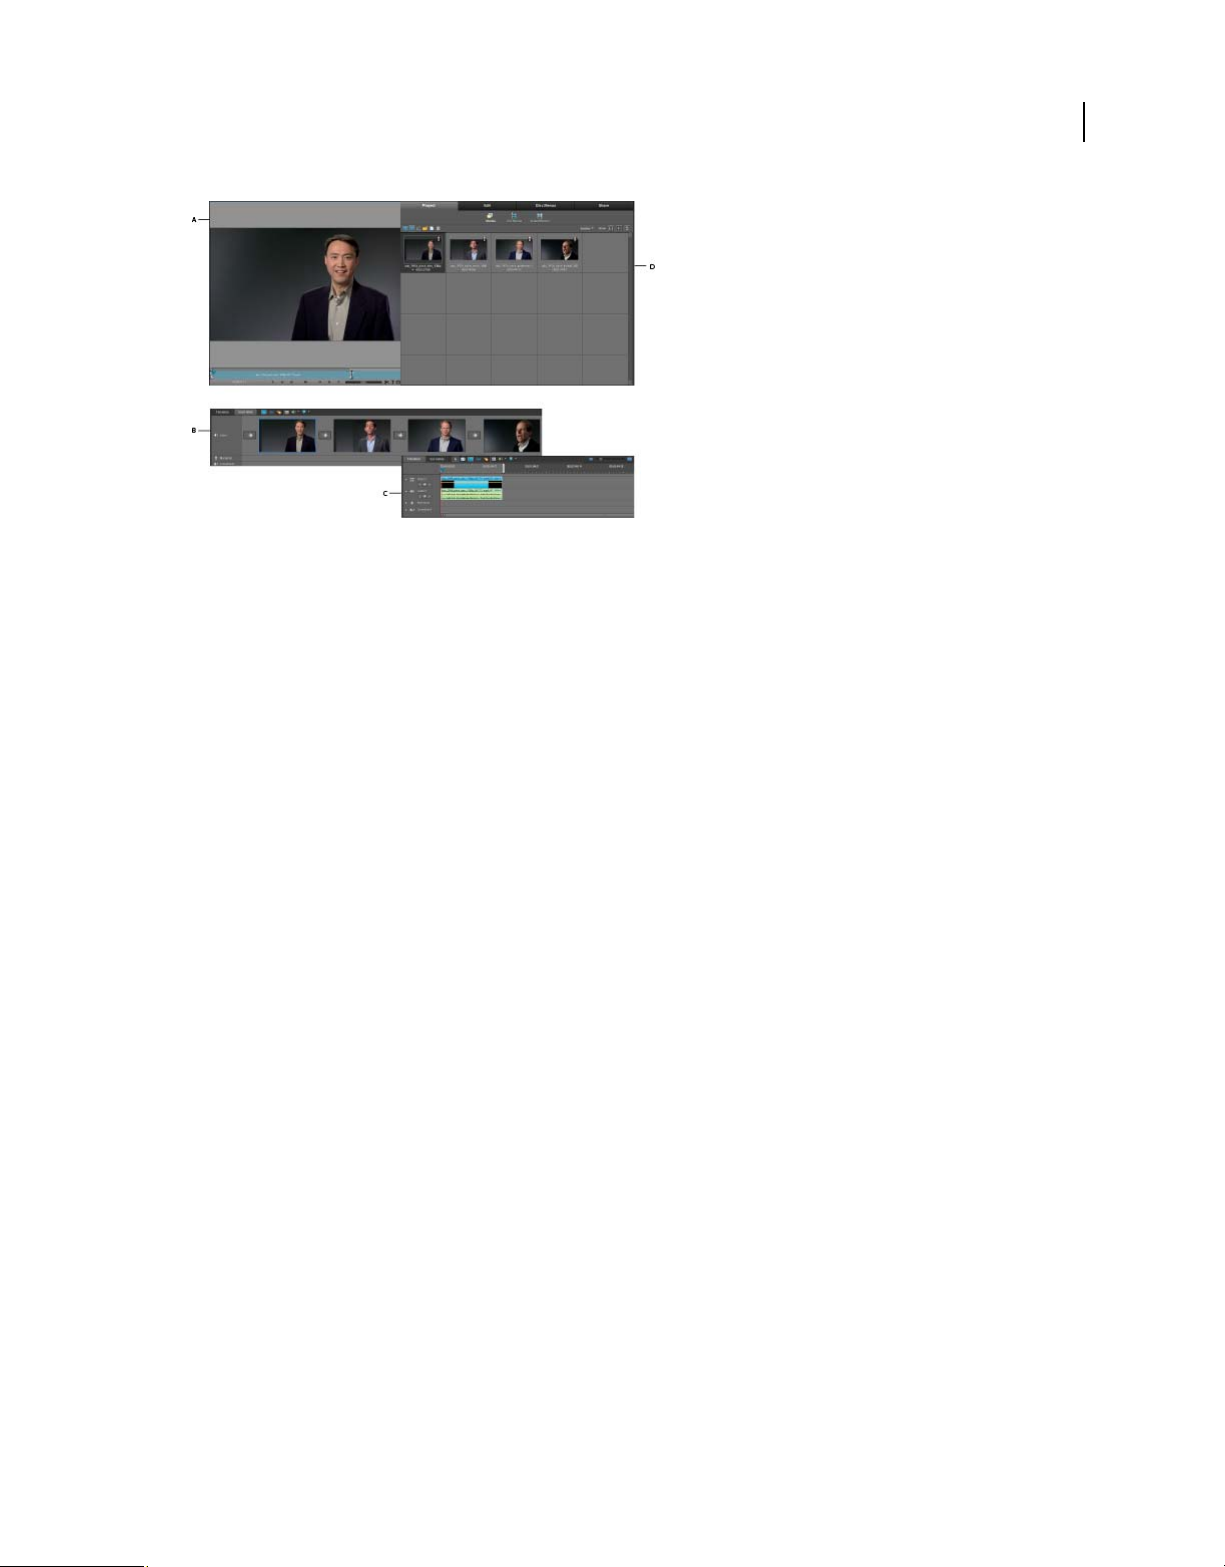
The workspace in Adobe Premiere Elements is designed keeping in mind the capture/import - edit - share workflow.
Adobe Premiere Elements includes three main panels: Tasks panel, Monitor panel, and My Project panel (Timeline
and Sceneline). The Tasks panel includes the Project panel, Edit panel, Disc Menu panel, and Share panel.
A
7
D
B
C
Adobe Premiere Elements workspace
A. Monitor panel B. Sceneline C. Timeline D. Tasks panel
Project panel
Media Contains media that you imported into your project. You can drag assets from this panel to the timeline,
sceneline, or monitor for assembling and editing purposes.
Get Media Contains options for importing media from various storage media such as camcorders, cameras, hard
disks, and Elements Organizer. For Elements Organizer, drag-and-drop media from Elements Organizer to the
Media panel in Adobe Premiere Elements.
InstantMovie Quickly create a movie using assets in the Project view. Select the assets in the Project view, click
InstantMovie, and follow instructions to create your movie.
Edit panel
Use this panel to add special effects, transitions, titles, themes, and clip art to your movie.
Effects Displays effects and presets you can use in your movie. To apply an effect, select a movie clip in the Timeline
or Sceneline. Select an effect and click Apply. To edit an effect after applying it, select it, and click Edit Effects.
Last updated 11/22/2011
Page 14

USING ADOBE PREMIERE ELEMENTS 10
Getting started with Adobe Premiere Elements
Transitions Transitions are effects you apply to phase out one clip and phase in the next. To apply a transition
between two clips in the Timeline the clips must be on the same track, with no space between them. Drag the
transition from the Tasks panel to the cut between two clips in the Timeline, and release the mouse button when
an icon appears.
To edit a transition after applying it, select it in the Timeline or Sceneline, and click Edit Transitions to open
Properties view.
Titles, Themes, Clip art Display titles, themes, and clip art that you could use to enhance the appeal of your movies.
Disc menu panel
Menus help users navigate to specific portions of your movie. Use this panel to create a menu that are displayed at the
beginning of the movie. You can also use menu templates in Adobe
Premiere Elements to add menus to your movie.
Share panel
Use the share view to save and share (export) your finished project. You can save your project for viewing on the web,
a mobile phone, a Computer, DVD, Blu-ray Disc, and more.
web DVD For high-quality video that can be viewed online or on your computer.
8
Disc For copying your movie to DVDs, Blu-ray or AVCHD discs.
Online For video that can be uploaded to video sharing websites.
Computer For video that can be viewed on computers.
Mobile phones and players For video that can be played on mobile phones and other devices.
Tape For video that you want to copy to a connected digital videotape.
6 quick steps to get started
Create a project
The project that you create includes references to the location of all the media you use in your movie. Media refers to
items you use in your movie such as movie clips, audio, still images, and titles. Because a project contains links to assets
and not the assets themselves, ensure that you relink the assets if you change their location on your computer.
For more information on creating a project, see http://www.adobe.com/go/learn_createproj_en.
Select a project preset
Before starting a project, choose a project preset that best suits the following considerations:
• The type of movie clip you plan to edit
• The final output
Last updated 11/22/2011
Page 15
USING ADOBE PREMIERE ELEMENTS 10
Getting started with Adobe Premiere Elements
Project presets
9
For example, if you have a MiniDV camcorder, choose a DV project preset because:
• The preset gives you the best editing experience
• The preset is ideal for exporting your project to DVD
The high definition project presets are meant for editing footage from high definition cameras and ideal for exporting
to Blu-ray.
If you add a movie clip that has different properties (Dimension, FPS, Pixel aspect ratio, Field order) than the project’s
preset to the timeline, a message is displayed. Click Yes in the message to allow Premiere Elements to change the
project’s settings to match the properties of the clip.
Last updated 11/22/2011
Page 16
USING ADOBE PREMIERE ELEMENTS 10
Getting started with Adobe Premiere Elements
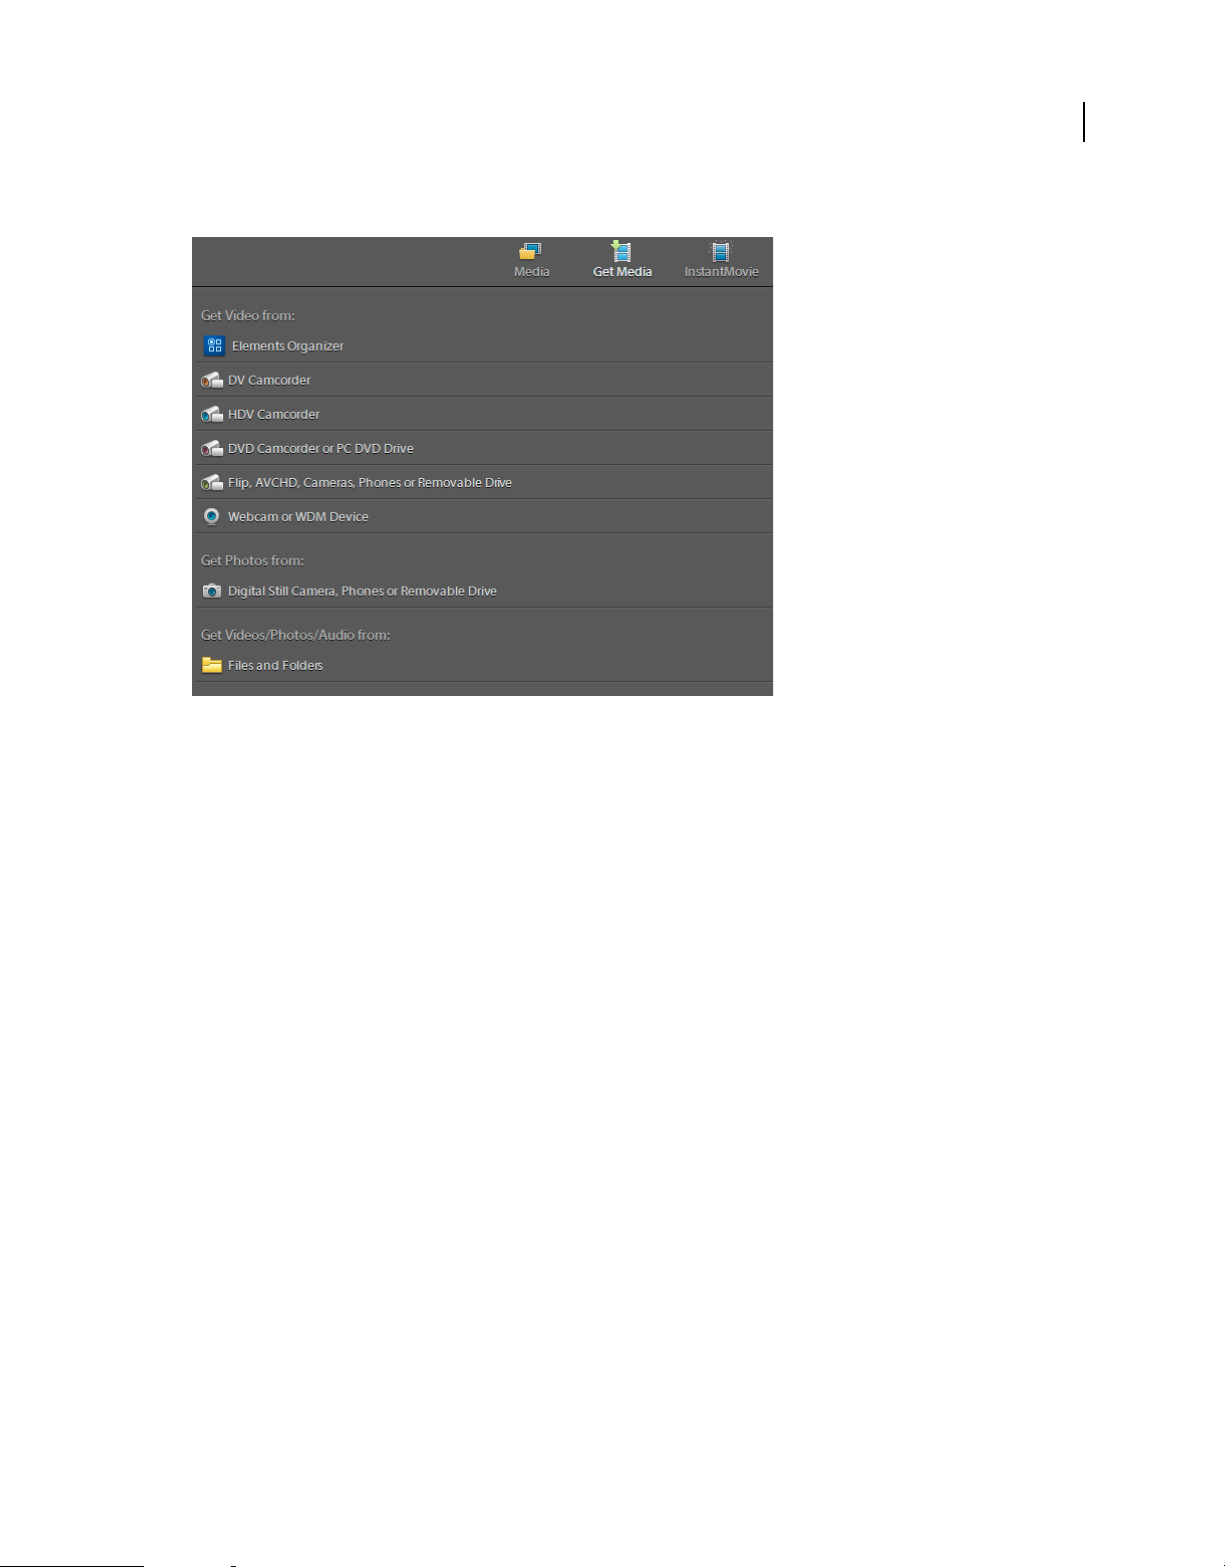
Add media to your project
10
Options to import media into Adobe Premiere Elements
To import media into your project, do one of the following:
• Capture recorded content from a tape device
The process of transferring a video, or portions of it, from a recording device to your hard disk is called capturing.
When you capture a movie using Adobe
format and saved on your hard disk. References to the captured movie clips are created in the project.
Premiere Elements, the captured movie clips are converted to a compatible
• Capture live recording using a webcam or WDM device
• Import from devices such as DVD camcorders, AVCHD, mobile phones, and your hard disk.
• Drag-and-drop files you previously imported into Elements Organizer.
For a video on capturing videos using Adobe Premiere Elements, see
http://www.adobe.com/go/learn_chlvid001_pre10_en.
Assemble movie clips in your project
The quickest way to assemble movie clips in your project is to use the Sceneline. If you want better control and
flexibility in working with movie clips, use the Timeline.
For more information on using the Timeline, see http://www.adobe.com/go/learn_chlvid003_pre10_en.
Edit movie clips
Editing movie clips involves the following tasks:
• Trimming unwanted portions
• Adding and mixing audio
• Adding special effects
Last updated 11/22/2011
Page 17
USING ADOBE PREMIERE ELEMENTS 10
Getting started with Adobe Premiere Elements
• Adding transition effects between movie clips
• Adding text and titles
Adobe Premiere Elements provides you with the required tools to edit your movie according to your requirements.
For a quick tour of creating effects in Adobe Premiere Elements, see
http://www.adobe.com/go/learn_chlvid004_pre10_en.
Copy movies to disc (Blu Ray, DVD)/Share movie
You can export and share movies, stills, and audio in various file types to the web, mobile devices, videotape, and Blu
Ray discs/DVDs. You can also copy and save projects for editing and storage.
Back up/Synchronize files
Note: Adobe Premiere Elements free online benefits and Adobe Premiere Elements Plus are available in the United States
only. Internet access required.
When you sign in with your Adobe ID, you can back up your albums and catalogs to Photoshop.com servers. Backing
up and synchronizing your albums and catalogs is essential for protecting your photos and media files. For example,
if you add keyword tags to media files on your computer, the corresponding photos on Photoshop.com are updated
with the tags.
11
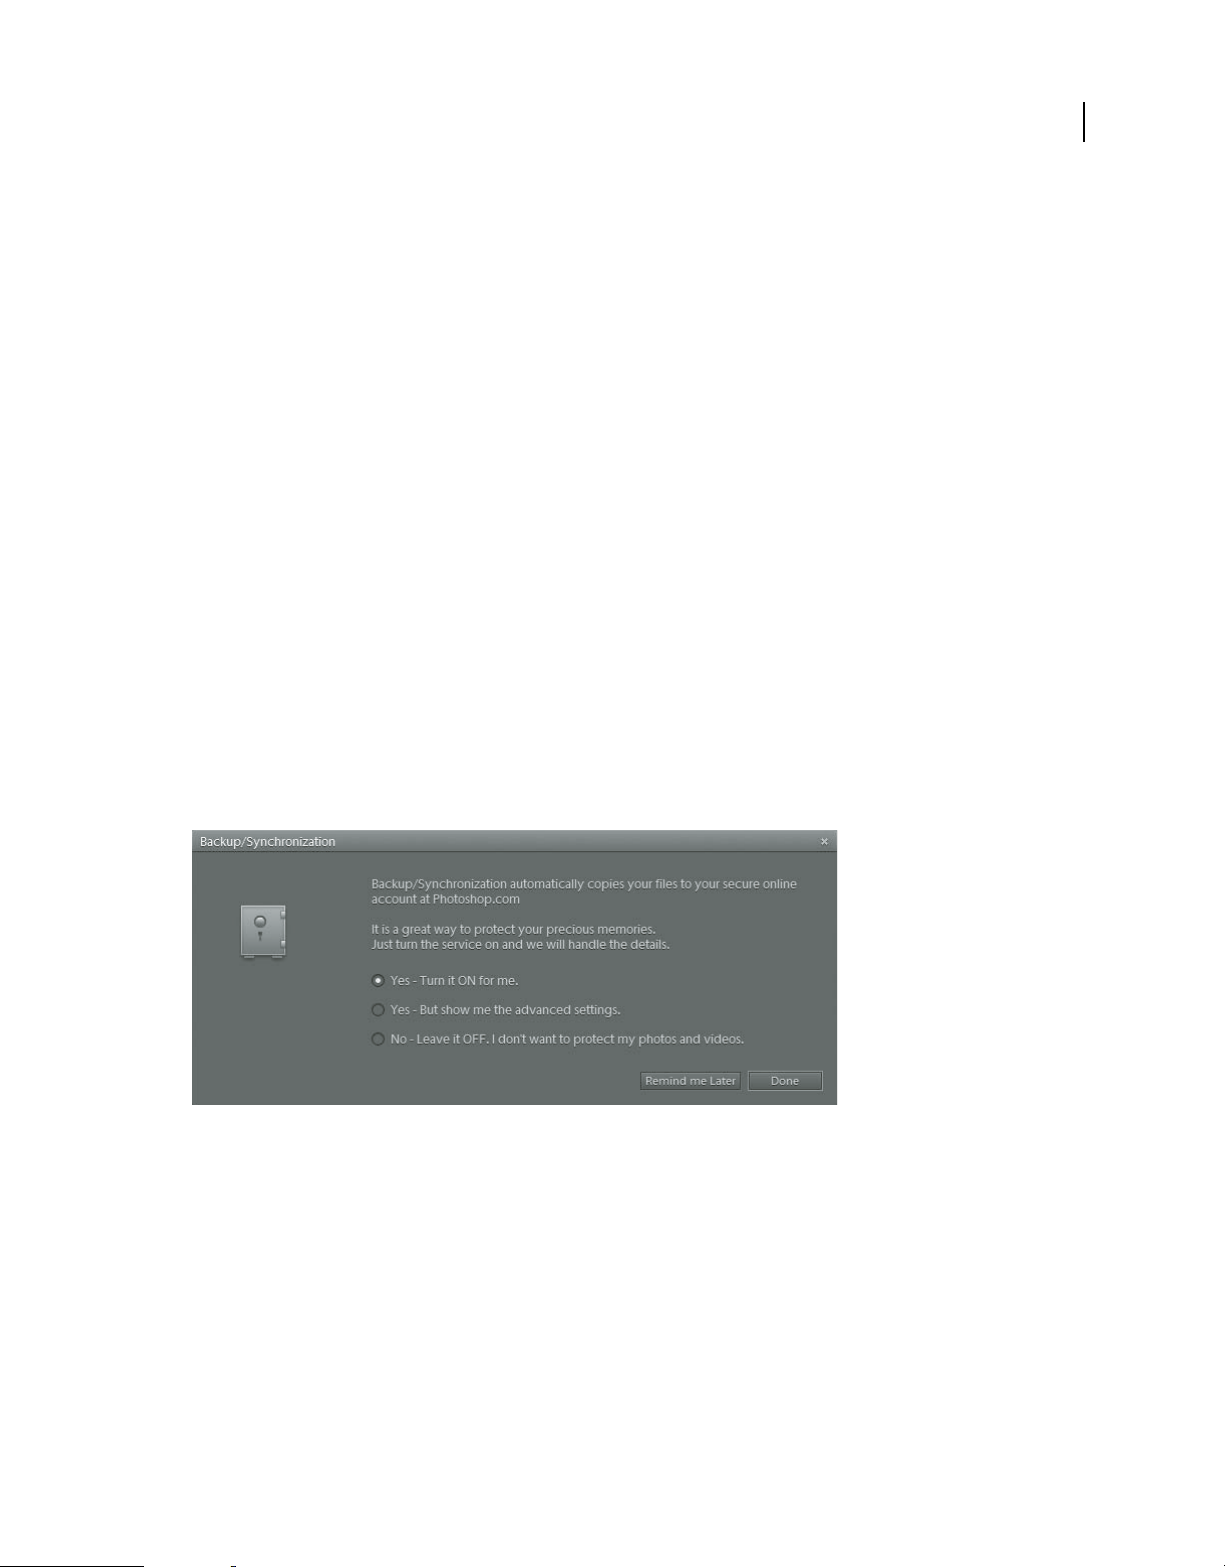
The Backup/Synchronization wizard is automatically launched when the user activates Backup/Synchronization for
the first time.
Backup/Synchronization confirmation window
1 Start Elements Organizer, and then sign in with your Adobe ID.
2 Choose an option from the Backup/Synchronization dialog box.
Yes - Turn It On For Me Enables you to set your entire catalog for Backup/Synchronization. All your videos and photos
securely get uploaded to your online account.
Yes - But Show Me The Advanced Settings Enables you to set advanced Backup/Synchronization settings in the
Preferences dialog box.
No - Leave It Off, I Don’t Want To Protect My Photos And Videos Your videos and photos don’t get backed up and
synchronized online.
3 Select the desired option, and then follow the onscreen instructions to enable Backup/Synchronization.
Last updated 11/22/2011
Page 18
USING ADOBE PREMIERE ELEMENTS 10
Getting started with Adobe Premiere Elements
More Help topics
“Creating an Adobe ID” on page 2
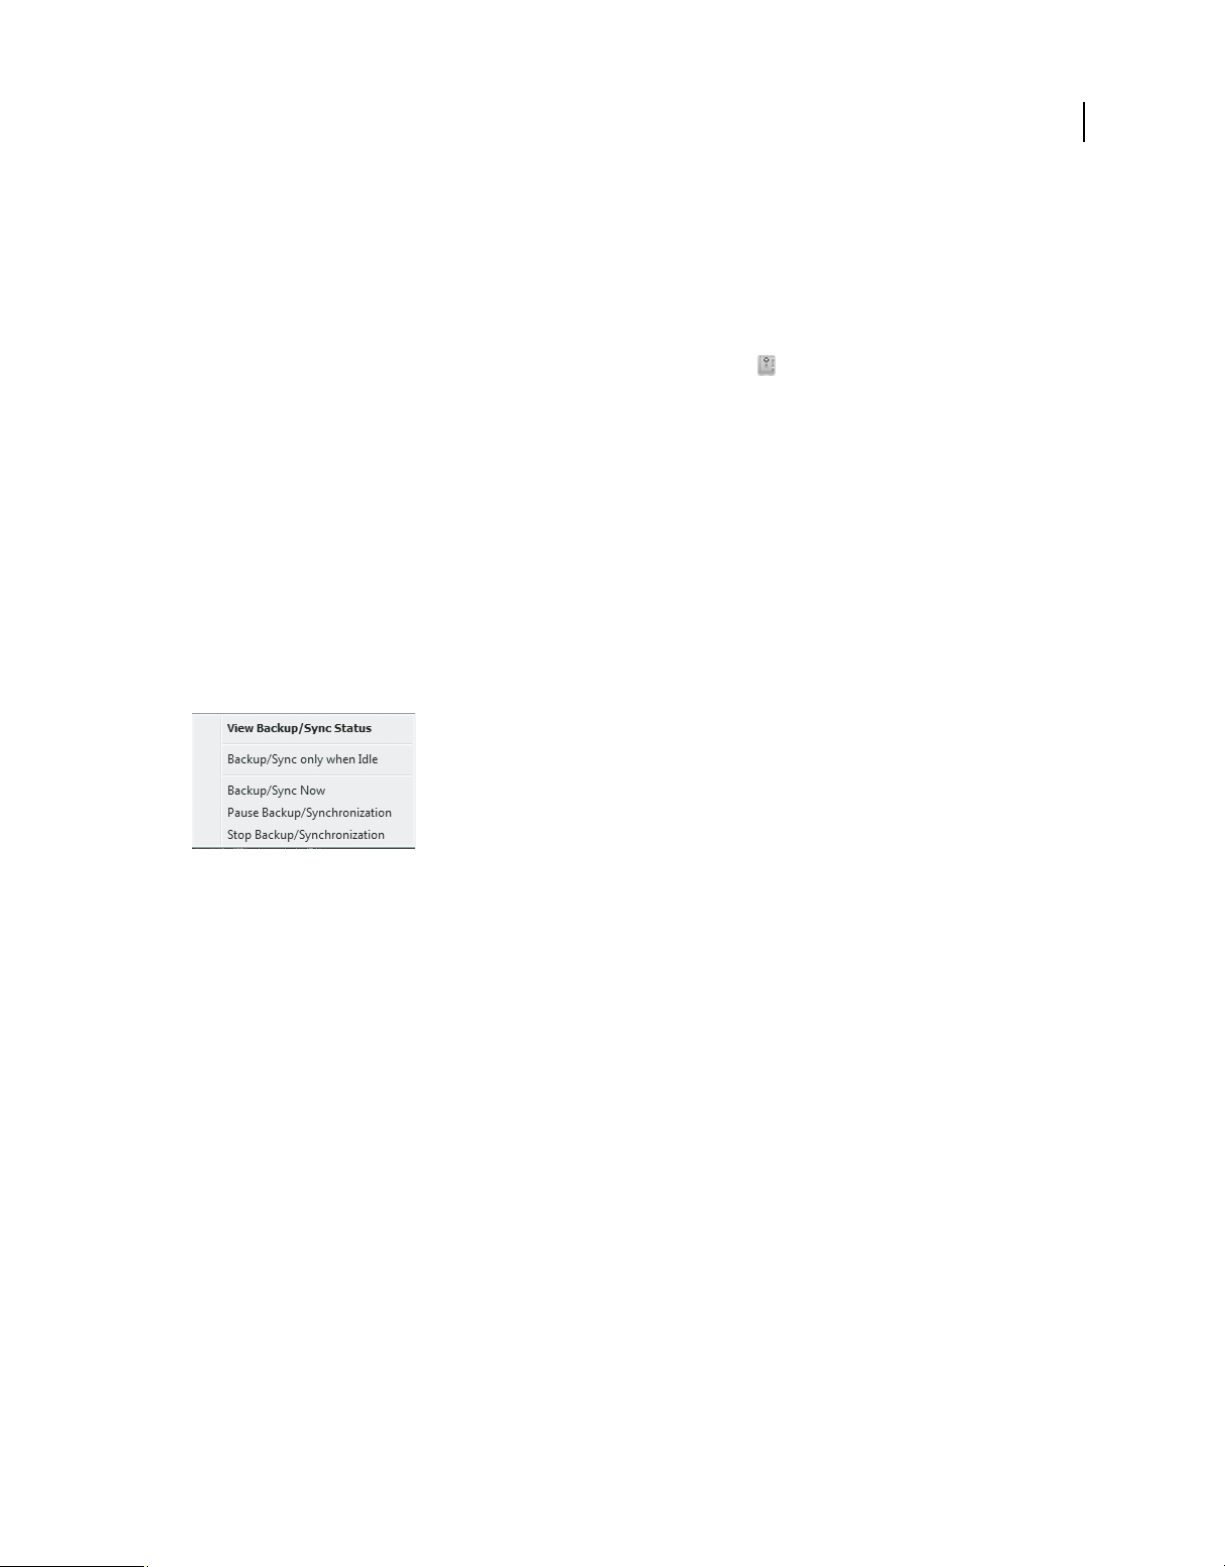
View Backup/Synchronization activity status
❖ Do one of the following:
• Right-click/ctrl-click the Elements Backup/Synchronization Agent icon in the system tray, and then select View
Backup/Synchronization Status.
• Click the Elements Backup/Synchronization Agent icon in the status bar of Elements Organizer, and then select
View Backup/Synchronization Status.
The Elements Backup/Synchronization Status dialog box is displayed. The dialog box displays the following
information:
• The total number of assets that are being synchronized
• The overall progress of the synchronization activity
• The online storage capacity being used
• The asset that is being synchronized
The dialog box also allows you to pause and resume the Backup/Synchronization activity.
12
View Backup/Synchronization activity status
Start backup and synchronization activity manually
Backup/Synchronization is a scheduled activity. The synchronization agent checks for assets to synchronize at regular
intervals. Between these periods of activity, the Elements Backup/Synchronization Agent is idle. To synchronize right
away instead of waiting for the next scheduled synchronization, click Sync Now in the Backup/Synchronization Status
dialog box. The Backup/Synchronization process starts, and any changes that you have made are synced to
Photoshop.com immediately.
View your videos on Photoshop.com
You can view your backed up videos on the Internet from any computer, even one that doesn’t have Adobe Premiere
Elements installed.
1 Make sure that the computer is connected to the Internet, open a web browser, and go to the Photoshop.com
website at
The web browser must have cookies enabled.
2 On the Photoshop.com home page, click Sign In and enter your Adobe ID.
3 After your Photoshop.com page opens, click My Albums.
You can view and navigate through all the videos you’ve backed up to Photoshop.com.
www.photoshop.com.
Last updated 11/22/2011
Page 19

Chapter 2: Adobe Premiere Elements workspace
Welcome screen
When you start Adobe Premiere Elements, the Welcome screen opens by default. In addition to resources that help
you get started with using Adobe
Organize If you want to organize your movies in Elements Organizer before you open them for editing in
Adobe Premiere Elements, click this button.
New Project Click this button to start a new project. After you create a project, you add, organize, and edit media you
add to the project.
Open Project Click this button if you want to open a project that you have created previously in
Premiere Elements.
Adobe
Note: Login with your Adobe ID on the Welcome screen to access free online benefits, Photoshop Elements, and Adobe
Premiere Elements Plus features. Available in the United States only. Internet access required.
Premiere Elements, the Welcome screen has the following options:
13
Customizing launch options
You can choose to customize the window or application that you want displayed when you launch
Premiere Elements. Click the icon on the Welcome screen to open the Launch Settings dialog.
Adobe
Just Show The Welcome Screen Launches the Welcome screen every time you open Adobe Premiere Elements. This
option is enabled by default. The Welcome screen contains options that help you quickly get started. Adobe
recommends that you do not change this option until you are comfortable with using the software.
Always Launch Elements Organizer Only If you frequently use Elements Organizer to organize your media before you
edit them in Adobe
Always Launch Adobe Premiere Elements Only Select this option if you want the editor to open every time you launch
Premiere Elements.
Adobe
Premiere Elements, choose this option.
About the workspace
Workspace overview
The Adobe Premiere Elements workspace is optimized for the four major phases of a project: organizing footage
(video, stills, and audio), editing a movie, creating menus for DVDs and Blu-ray Discs, and sharing movies.
You can customize the workspace to meet your specific needs by adding and arranging panels.
Adobe Premiere Elements includes three main panels: Tasks panel, Monitor panel, and My Project panel (Timeline
and Sceneline). For all your basic tasks, you use these three panels.
Last updated 11/22/2011
Page 20
USING ADOBE PREMIERE ELEMENTS 10
Adobe Premiere Elements workspace
Adobe Premiere Elements workspace
A. Monitor panel B. Sceneline C. Timeline D. Tasks panel
More Help topics
“Media view overview” on page 32
“Find an effect” on page 139
14
Tasks panel overview
The Tasks panel appears by default for all workspaces. It is the central location for adding, organizing and editing
media, creating menus, and sharing finished projects.
The Tasks panel is organized into four main task workspaces: Project, Edit, Disc Menus, and Share.
Last updated 11/22/2011
Page 21
USING ADOBE PREMIERE ELEMENTS 10
Adobe Premiere Elements workspace
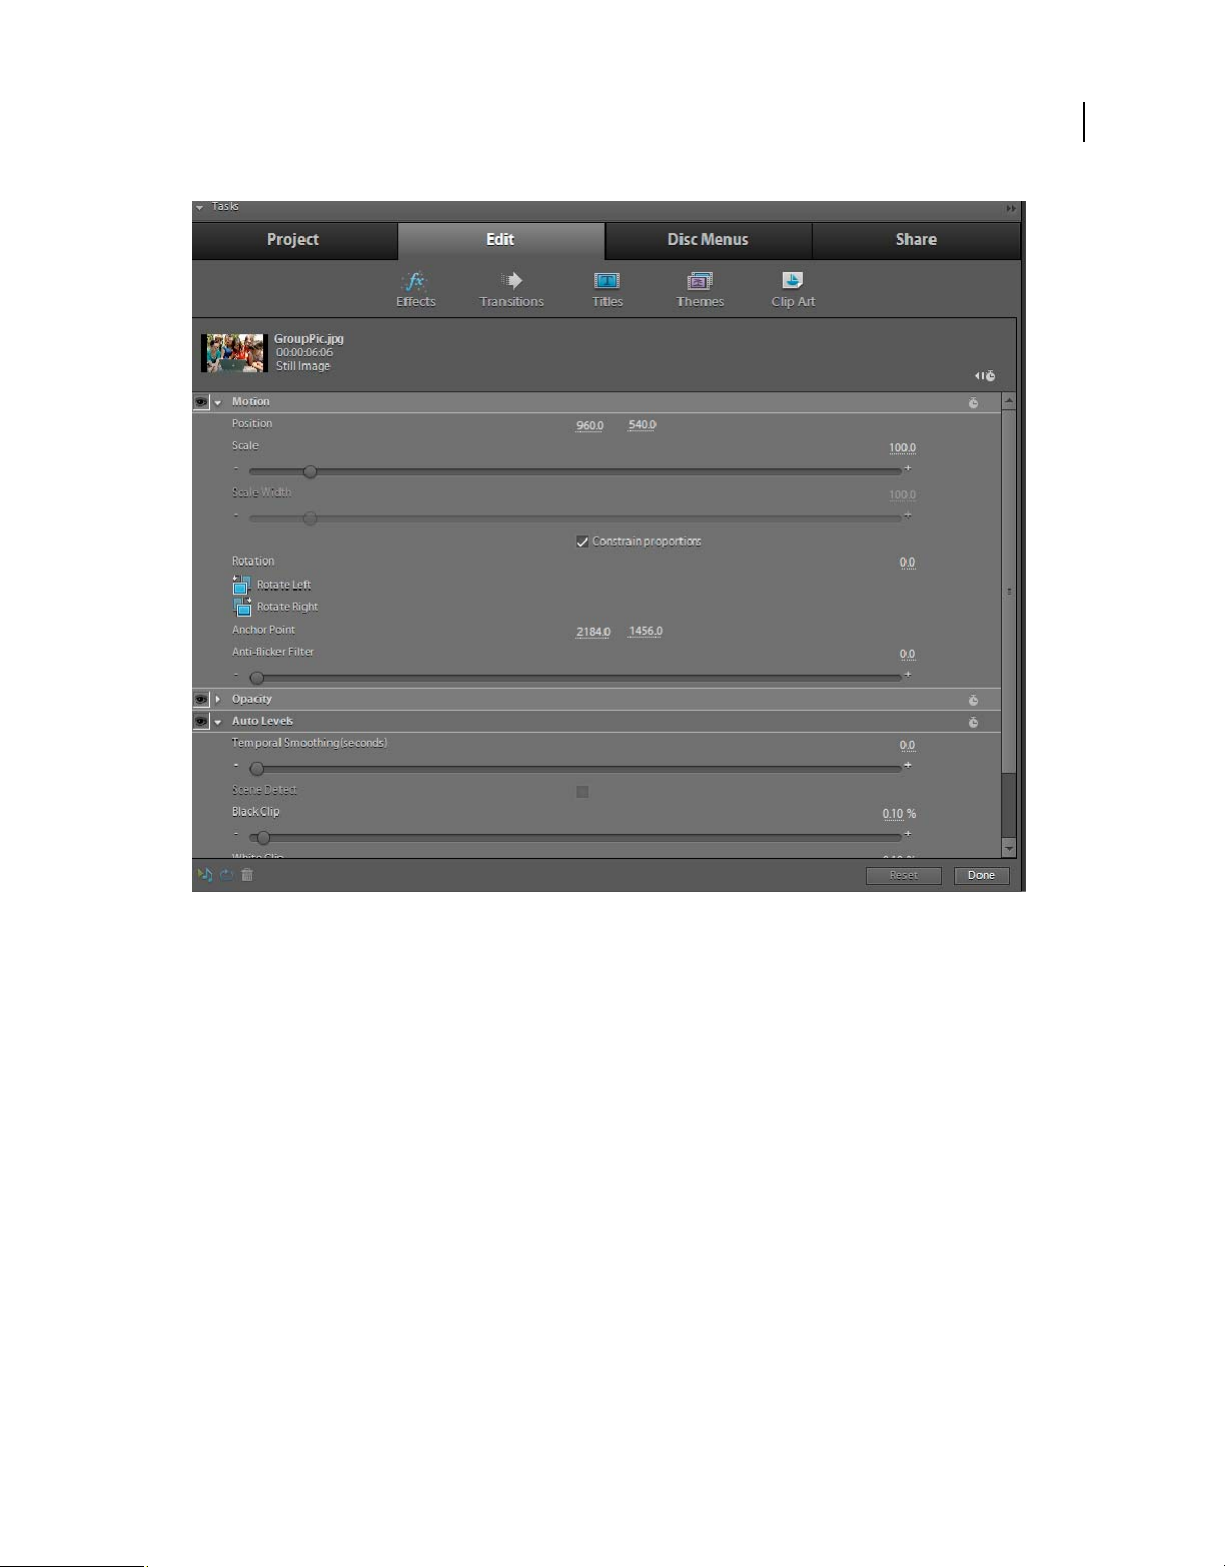
15
Edit workspace displaying Effect Properties view
More Help topics
“Media view overview” on page 32
“Import from DVDs, camcorders, phones, and removable drives” on page 55
“Previewing files in Elements Organizer” on page 72
Project
The Project workspace displays thumbnails of all the media (videos, still images, and audio) that you’ve imported into
Adobe Photoshop® Elements®, or Adobe Premiere Elements.
From the Project workspace in the Tasks panel, you can access the following:
Media Displays the thumbnails of all media files.
Get Media Lets you add files from various sources including video cameras, flip videos, webcams, digital still cameras,
WDM devices, mobile phones, and folders on your hard disk.
Instant Movie Automatically and quickly steps you through the selection and editing portion of movie creation,
adding theme-based effects, titles, transitions, and audio. You can change settings as desired.
Last updated 11/22/2011
Page 22

USING ADOBE PREMIERE ELEMENTS 10
Adobe Premiere Elements workspace
More Help topics
“Media analysis” on page 74
Edit
When you’re ready to arrange or edit your media, click Edit in the Tasks panel. The Edit workspace lets you add movie
themes and templates to your movies, apply effects and transitions, and create and add titles. In addition, the
Properties view appears within the Tasks panel when you choose Window > Properties, or when you edit effects or
transitions.
From the Edit workspace, you can access the following:
Effects Shows effects and presets you can use in your movie. You can search for an effect by typing its name into
the Search field. To see only specific types of effects, choose an option from the first menu: Video Effects, Audio Effects,
or Presets. You can also view specific categories by choosing a category, such as Adjust or Channel, from the second
menu (Show All is the default). To edit an effect after applying it, select it, and click Edit Effects to open Properties view.
Transitions Shows transitions you can use in your movie. You can search for a transition by typing its name into
the Search field. To see only specific types of transitions, choose an option from the first menu: Video Transitions, or
Audio Transitions. You can also view specific categories by choosing a category, such as 3D Motion or Slide, from the
second menu (Show All is the default). To edit a transition after applying it, select it, and click Edit Transitions to open
Properties view.
16
Titles Shows pre-formatted titles you can use in your movie. To see only specific types of titles:
• Choose an option from the first menu such as Entertainment, General, and Happy Birthday.
• If you want to narrow the choices more, choose a specific theme, such as Blue Notes or Ladybug Picnic, from the
second menu.
Show All is the default option.
Themes Enables you to view Themes. Displays InstantMovie themes that instantly and dramatically enhance
your movies. Themes make it easy to create professional-looking movies. They automatically edit your clips and apply
effects, transitions, overlays, title and closing-credit sequences, videos, sound effects, and more. You can apply all the
options in a theme, or choose the options you want.
ClipArt Displays clip art that can be used in your video files.
Disc Menus
When you’re ready to add menus to your movie for DVD, Web DVD, or blu-ray disc, click Disc Menus in the Tasks
panel. From this workspace, you can access your media and the menu templates.
Note: When you click Disc Menus in the Tasks panel, the Monitor panel switches to the Disc Layout view. Drag templates
and media using Disc Layout view to personalize your menus.
From the Disc Menus workspace, you can preview and choose preformatted templates you can use for menus. To see
only specific types of templates, choose an option from the first menu: Entertainment, General, Happy Birthday, and
so on. If you want to narrow the choices, choose a specific theme.
Share
When you’re ready to burn a disc, or save your movie for viewing online or on a mobile phone, PC, videotape, or other
device, click Share in the Tasks panel. This workspace provides all the tools necessary to save your file for sharing with
others.
Last updated 11/22/2011
Page 23
USING ADOBE PREMIERE ELEMENTS 10
Adobe Premiere Elements workspace
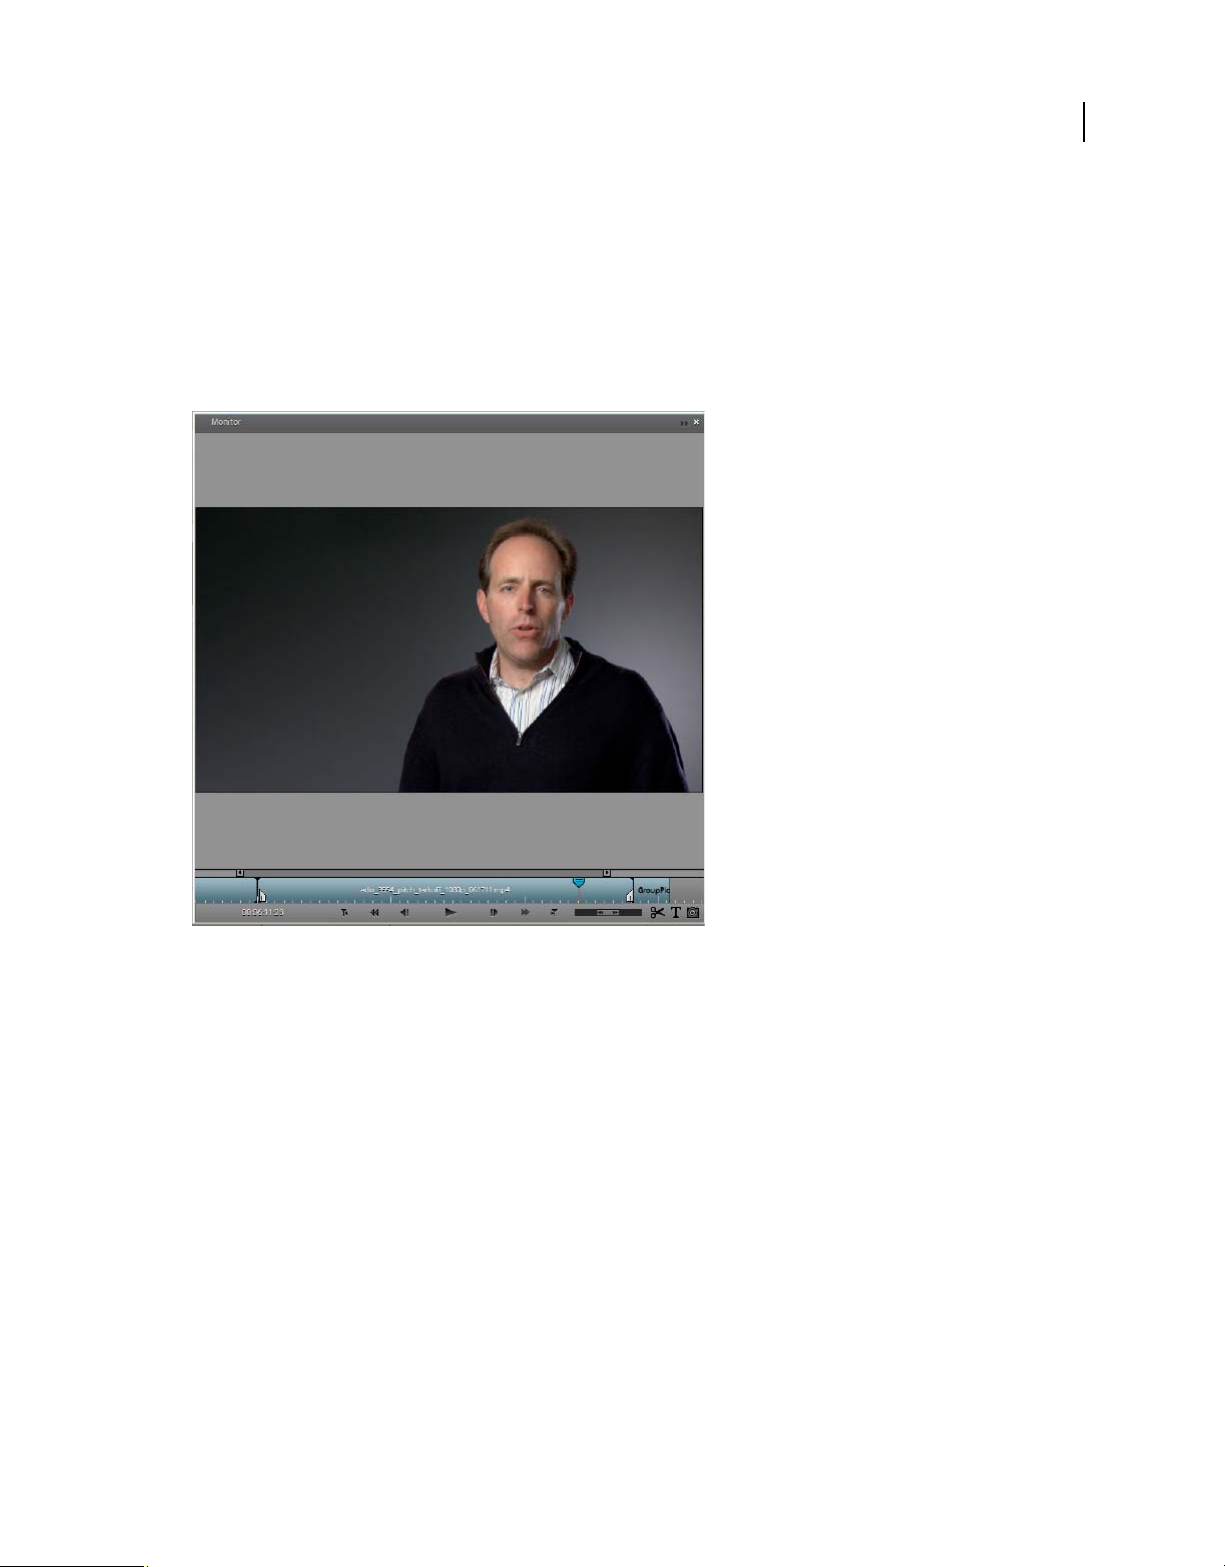
Monitor panel overview
You use the Monitor panel when performing many tasks in Adobe Premiere Elements. For example, you can preview
your files and movies, trim and split clips, apply effects, create titles, and position images and text by viewing safe
zones, along with many other tasks.
The Monitor panel is available in every workspace. While you’re working with menus, the Monitor panel switches to
the Disc Layout panel, which makes it easy to drag and drop images and layout menus. While you’re creating titles, the
Monitor panel displays text tools so that you can easily create and edit text.
17
Monitor panel
Timeline and Sceneline overview
The Timeline and Sceneline let you assemble your media into the desired order and edit clips. You use the Monitor
panel to preview the clips you’ve arranged in either the Timeline or Sceneline.
The Sceneline allows you quickly to arrange your media, adding titles, transitions and effects. The Timeline helps you
trim, layer, and synchronize your media. You can switch back and forth between these two panels at any time.
Note: If you choose to show panel headers (Window > Show Docking Headers), the name of this panel is My Project. The
Timeline and Sceneline are different views of this panel.
Info panel overview
The Info panel (Window > Info) displays information about a selected item in the Project view of the Tasks panel or
the Timeline or Sceneline. For clips, the Info panel displays information such as duration, in point, out point, and the
location of the cursor. The information displayed may vary depending on factors such as the media type and the
current panel. For example, the Info panel displays different sets of information for an empty space in the Timeline, a
rectangle in the Title panel, and a clip in the Tasks panel.
Last updated 11/22/2011
Page 24

USING ADOBE PREMIERE ELEMENTS 10
Adobe Premiere Elements workspace
In the Info panel, the Video entry indicates the frame rate, frame size, dimensions, and pixel aspect ratio; the Audio
entry indicates the sample rate, bit depth, and channels.
Customizing the workspace
The workspace in Adobe Premiere Elements is highly customizable. You can add panels, as well as resize, move, hide,
and group them to suit your working style. Modifications you make to the workspace remain intact until you modify
or restore it to its original configuration. As you customize your workspace, Adobe
changes. When you save the project, the recent layout changes are also saved. The next time you open that project,
Premiere Elements restores the saved layout that you had used.
Adobe
Display and hide docking headers
Drop zones are areas in the workspace onto which you can drop or move panels. As you drag a panel, underlying drop
zones become outlined. The highlighted drop zone shows where the panel will be inserted into the workspace.
Dragging a panel to a drop zone at any of the edges of a panel results in docking.
Note: To see the names of panels in the workspace, choose Window > Show Docking Headers.
Premiere Elements tracks the
18
Each panel has a docking header containing its title, and sometimes, panel menu buttons. You drag the docking
headers to drag panels to new locations. To save space on your screen, you can make the docking headers disappear;
then, make them reappear when you need to use them. By default, docking headers are hidden.
❖ Do one of the following:
• To make docking headers appear, choose Window> Show Docking Headers.
• To make docking headers disappear, choose Window > Hide Docking Headers.
Note: To access any of the commands in the panel menu when docking headers are hidden, right-click/ctrl-click in the
panel.
Display and hide panels
• To display a panel or make it active, choose its name from the Window menu or click its docking header, if visible.
• To expand or collapse a docked panel, click the triangle on its docking header. Only docked panels that are vertically
aligned, sharing right and left borders, with another panel can be expanded or collapsed.
• To close a panel that is not docked, click the Close button at the right of its docking header.
Resize a panel
When one panel is moved or resized, the other panels adjust automatically to accommodate the change.
❖ To resize a panel, drag its border.
Last updated 11/22/2011
Page 25
USING ADOBE PREMIERE ELEMENTS 10
Adobe Premiere Elements workspace
19
A
Drag the divider between panels to resize them.
A. Original panels with divider selected B. Resized panels
B
If you have more than one monitor connected to your system and your system supports a multiple- monitor desktop,
you can drag panels to any monitor.
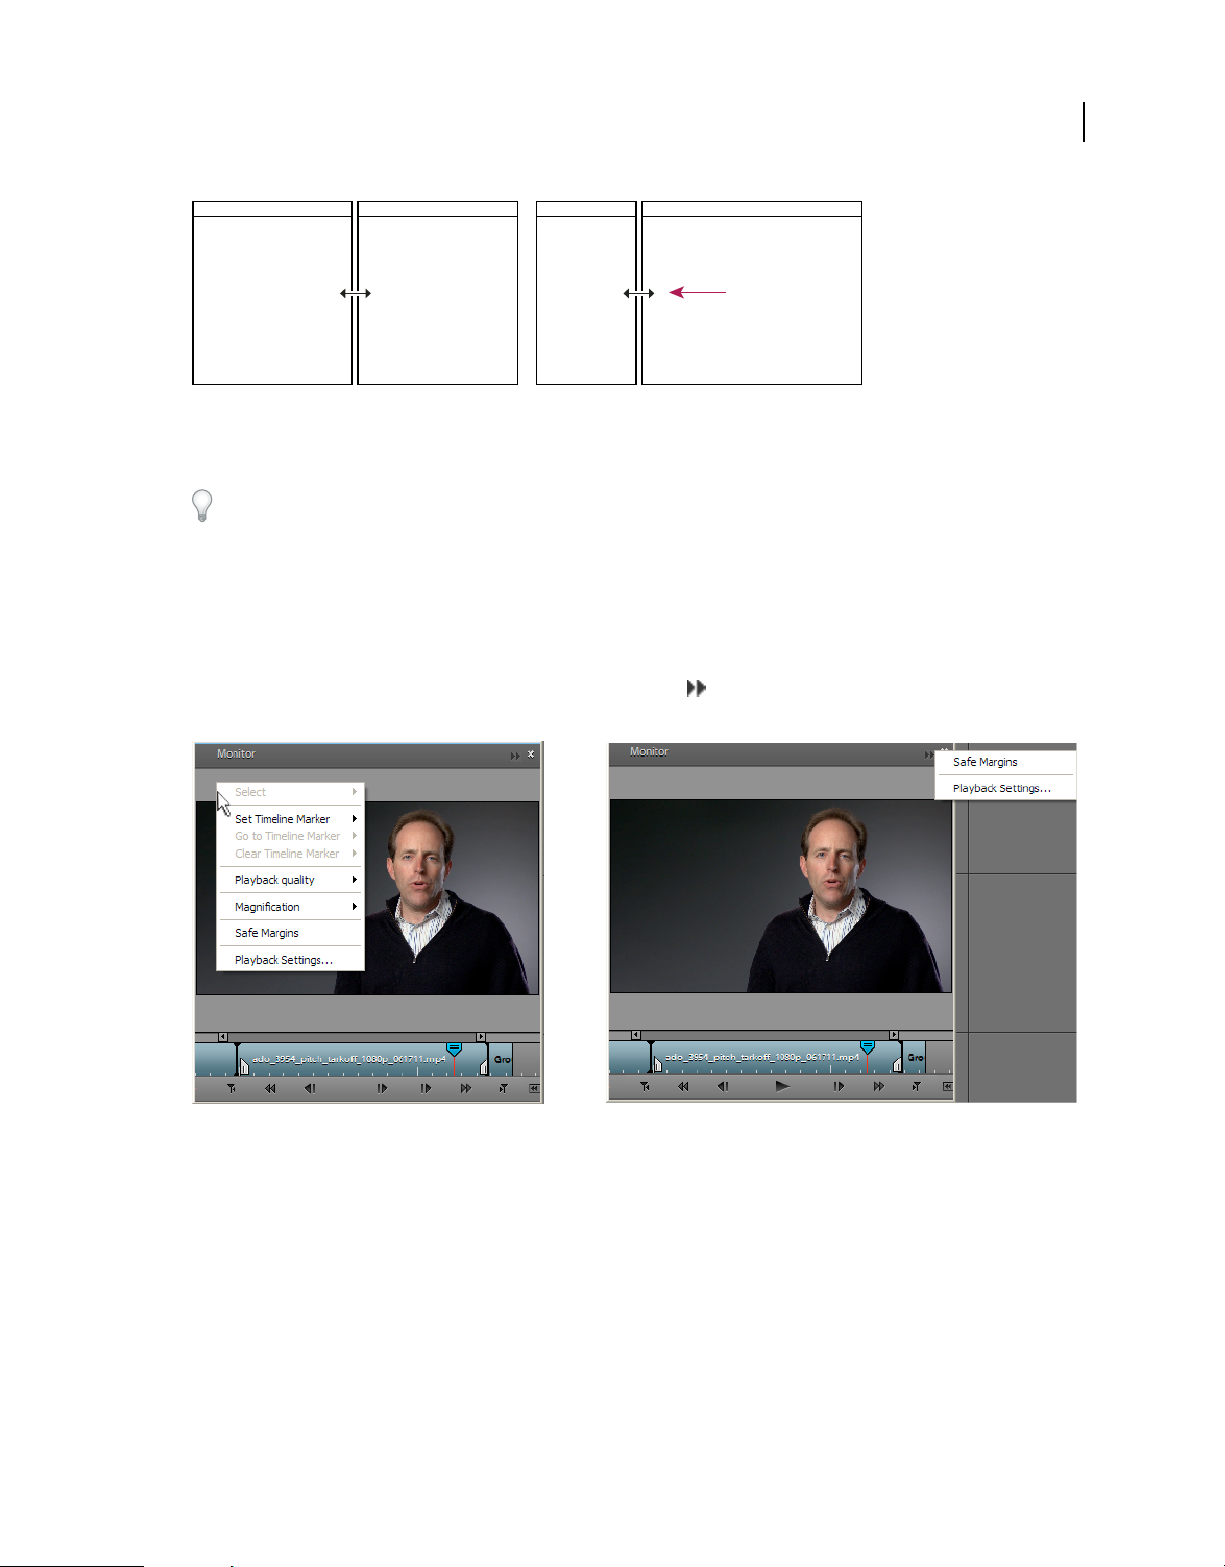
Open panel menus
Most panels include menus with commands that are specific to individual panels.
• If docking headers are hidden (default), right-click/ctrl-click in the panel.
• If docking headers are displayed, click the panel menu button in the upper-right corner of the panel. (To see
docking headers and the panel menu button, choose Window > Show Docking Headers.)
Panel menu
A. right-click/ctrl-click panel to display panel menu B. Click panel menu button to display panel menu
Restore the default workspace
❖ Choose Window > Restore Workspace.
Last updated 11/22/2011
Page 26

USING ADOBE PREMIERE ELEMENTS 10
Adobe Premiere Elements workspace
Examine or remove an alert
Adobe Premiere Elements lists warnings, error messages, and other information you can use to identify and
troubleshoot problems, particularly those associated with plug-ins and other components from third-party
developers. An alert icon
Events panel, and clearing the associated item from the Events panel removes the icon from the status bar.
1 Do either of the following:
• Double-click the alert icon in the status bar.
• Choose Window > Events.
2 Do any of the following:
• To learn more about an item in the list, select it and click Details.
• To clear the events list, click Clear All.
, , on the status bar notifies you of an error. Double-clicking the icon opens the
20
Last updated 11/22/2011
Page 27

Chapter 3: Projects
Creating a new project
Video Tutorial
Projects
Adobe Premiere Elements creates a project file for every new project you start. All the media that you add to a project
including videos, images, titles, themes, and so on are referenced by the project file.
A project file stores only title files and references to the source files that you capture or import, so project files remain
fairly small. Because only references to the source files are stored, avoid moving, renaming, or deleting your source
files so that Adobe
More Help topics
“Workspace overview” on page 13
Premiere Elements can continue to locate them.
21
“Creating an InstantMovie project” on page 29
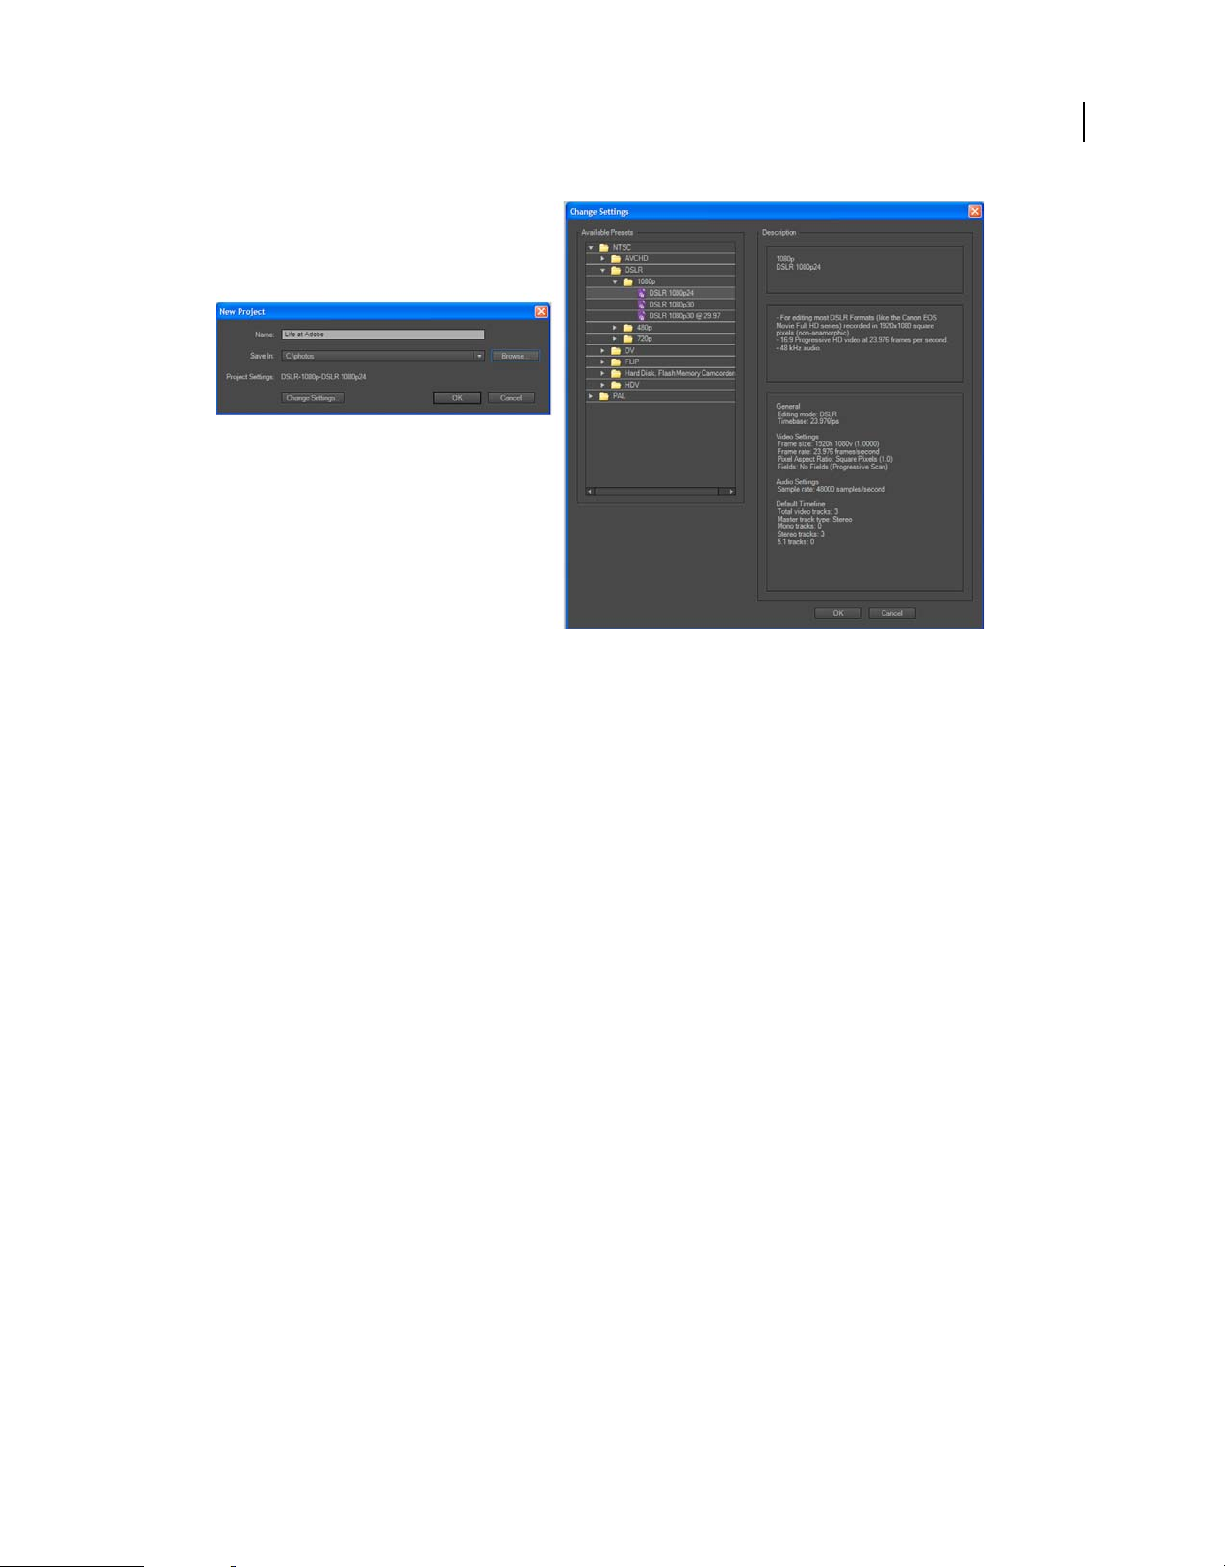
Review project presets and settings
When you start a new project, you can review the default preset and its settings by clicking the Change Settings button
in the New Project dialog.
1 In Adobe Premiere Elements, select File > New > Project.
2 Click Change Settings.
More Help topics
“About project settings and presets” on page 25
“Video Tutorial” on page 25
Start a new project
1 Do one of the following:
• From the Welcome screen, click New Project.
• If Adobe Premiere Elements is open, choose File > New > Project.
2 (Optional) To change the settings used, click Change Settings, select a different preset and click OK.
3 In the New Project dialog box, specify a name and location for the project, and click OK.
By default, the folder for a saved project also stores rendered previews, conformed audio files, and captured audio and
video. These files are very large, so save them to your largest, fastest hard drive. To store these files separately from
projects, choose Edit
> Preferences > Scratch Disks / Adobe Premiere Elements 10 > Preferences > Scratch Disks.
Last updated 11/22/2011
Page 28

USING ADOBE PREMIERE ELEMENTS 10
Projects
More Help topics
“About project settings and presets” on page 25
“Create or change project presets” on page 26
“About scratch disks” on page 39
Open a project
You can open only one project at a time. To ensure that Adobe Premiere Elements can open an existing project, make
sure that both the project file (.prel) and the source files used in it are accessible on your computer.
❖ Do one of the following:
• From the Welcome screen, click Open Project, and then click the project name. (If the project isn’t listed, click
Open, select the project file, and click Open.)
• If Adobe Premiere Elements is open, choose File > Open Project or Open Recent Project; then select the project file,
and click Open.
• In Windows®, double-click the project file.
Note: Adobe Premiere Elements can open projects made in earlier versions of the program, but earlier versions of the
program cannot open projects made in later versions. If you have two or more versions of Adobe
installed, you may need to open a project from within the software, or by right-clicking/ctrl-clicking the file and choosing
the application, rather than by double-clicking the project file.
Premiere Elements
22
More Help topics
“Open a project saved by Auto Save” on page 25
Creating a slide show
You can create a slide show from a collection of still images easily using the Sceneline.
Create a slide show
1 In the Project workspace, click the Show Still Images button, and deselect the Show Video button and Show
Audio button.
2 Ctrl-click/Cmd-click still images in the order in which you want them to appear in the slide show.
3 Drag the selected group to a target area in the Sceneline and choose one of the following:
Add As Individual Stills This option places each still image onto its own target area in the Sceneline.
Add As Grouped Slideshow This option places the entire group onto one target that can be moved as a single clip.
4 When you select Add As A Grouped Slideshow, the Create Slideshow dialog is displayed. In the Create Slideshow
dialog box, select the options desired and click OK.
A grouped slide show clip is created in the selected target area of the Sceneline. A slide show icon appears to the
upper right of the grouped slide show clip.
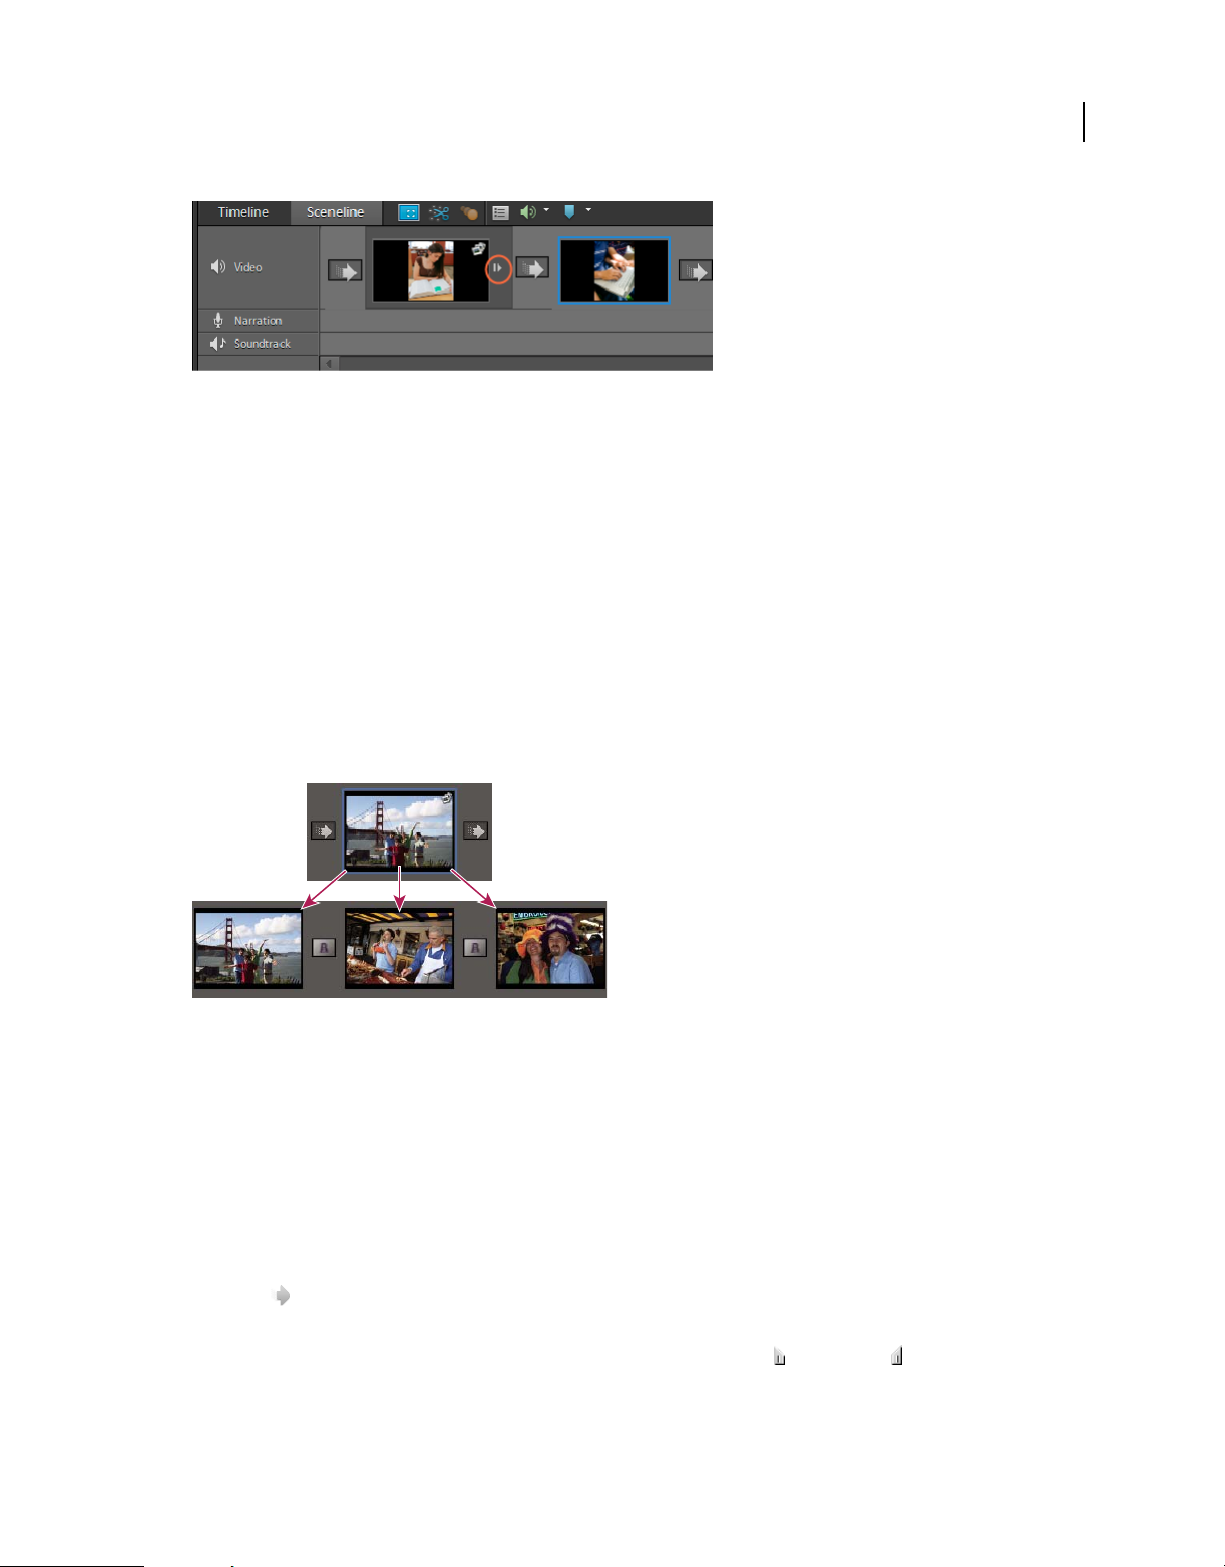
Expand or close grouped slide shows
❖ In the Sceneline, click the Expand/Close strip to the right of the clip.
Last updated 11/22/2011
Page 29
USING ADOBE PREMIERE ELEMENTS 10
Projects
Grouped slide show in the Sceneline. The Expand/Close strip shows or hides all slides in the group.
The grouped slide show either expands to display its still images in sequence, or closes so that it appears as a single clip
with only its first image displayed.
Ungroup a slide show
You can convert a grouped slide show clip into a simple series of still images.
1 Right-click/ctrl-click a grouped slide show clip in the Sceneline.
2 Select Ungroup Scenes.
23
Edit a slide show created in Photoshop Elements (Windows only)
If you created a slide show in Adobe Photoshop Elements, you can easily edit it in Adobe Premiere Elements by
breaking it apart and accessing individual components, such as images, text, and graphics.
Breaking apart a slide show
1 Make sure that the Sceneline is active.
2 In the Elements Organizer, right-click the slide show and choose Edit With Premiere Elements.
The slide show appears in the Sceneline.
3 In the Sceneline, right-click the slide show, and choose Break Apart Elements Organizer Slideshow.
4 Edit the slide show in any of the following ways:
• To edit a transition, select it in the Sceneline, and adjust settings in the Properties view.
• To replace a transition, select it in the Sceneline, click Edit in the Tasks panel and then click the Transitions
. Open the Video Transitions folder, and drag a new transition to the Sceneline. Or, right-click the
button
transition in the Sceneline and choose a new transition from the menu that appears.
• To extend or shorten a clip, select it in the Sceneline, and drag the In point or Out point in the Monitor panel’s
mini timeline.
Last updated 11/22/2011
Page 30

USING ADOBE PREMIERE ELEMENTS 10
Projects
• To change the size or position of text and graphics, select the containing clip in the Sceneline, and adjust text and
graphics in the Monitor panel.
•
To adjust the volume of narration or a soundtrack, select it in the Sceneline, and change settings in the Properties view.
5 Save and share the slide show movie as desired.
More Help topics
“Sharing files between Adobe Premiere Elements and Adobe Photoshop Elements” on page 63
“Saving and sharing your movies” on page 261
Saving and backing up projects
Save a project
Saving a project saves your editing decisions, references to source files, and the most recent arrangement of panels.
Protect your work by saving often.
• To save the currently open project, choose File > Save.
• To save a copy of a project and continue working in the new copy, choose File > Save As, specify a location and
filename, and click Save.
• To save a copy of a project and continue working in the original project, choose File > Save A Copy, specify a
location and filename, and click Save.
To specify where Adobe Premiere Elements stores project-related files, such as captured video and audio, and video
and audio previews, set up a scratch disk.
24
More Help topics
“Set up a scratch disk” on page 40
Back up a project with Auto Save
To more easily revisit editing decisions or recover from a crash, enable the Auto Save option. This option automatically
saves backup project files to the Adobe Premiere Elements Auto-Save folder at a specified time interval. For example,
you can set Adobe
the state of your project at each interval.
Automatic saving serves as an alternative to the Undo command, depending on how much the project changes
between each save. Because project files are quite small compared to source video files, archiving many versions of a
project consumes relatively little disk space.
1 Choose Edit > Preferences > Auto Save / Adobe Premiere Elements 10 > Preferences > Auto Save.
2 Do any of the following, and then click OK:
• Select Automatically Save Projects, and type the number of minutes after which Adobe Premiere Elements will save
the project.
• Type a number for the Maximum Project Versions to specify how many versions of each project file you want to
save. For example, if you type 5, Adobe
Note: Each time you open a project, you must save it at least once before the Auto Save option takes effect.
Premiere Elements to save a backup copy every 15 minutes, producing a series of files that represent
Premiere Elements saves five versions of each project you open.
Last updated 11/22/2011
Page 31

USING ADOBE PREMIERE ELEMENTS 10
Projects
Open a project saved by Auto Save
1 Do either of the following:
• Start Adobe Premiere Elements, and click Open Project in the Welcome Screen.
• In Adobe Premiere Elements, choose File > Open Project.
2 In the project folder, open the file in the Adobe Premiere Elements Auto-Save folder. (If no files are available, the
Auto Save preference may be turned off.)
Note: The first time you start Adobe Premiere Elements after a crash, it returns a prompt asking if you want to open the
last version of your project saved by Auto Save.
More Help topics
“Open a project” on page 22
Project settings and presets
Video Tutorial
25
About project settings and presets
Project settings determine the video and audio format of a project, such as whether your footage is DV, HDV,
AVCHD, or from a hard disk or flash memory camcorder, or whether it is standard or widescreen video. It also
specifies the frame rate, aspect ratio, audio sample rate, upper or lower field first, and bit depth for your project.
When you start a new project, Adobe Premiere Elements applies a project preset to it. A project preset is a collection
of preconfigured project settings. In most cases, you can use the default project preset, which is set for 4:3 DV footage
for the television standard you specified when you installed Adobe
Standards Committee) is the television standard for the Americas, the Caribbean, Japan, South Korea, and Taiwan;
PAL (Phase Alternating Line) is the standard format for Europe, Russia, Africa, the Middle East, India, Australia, New
Zealand, the South Pacific, China, and other parts of Asia.
You can’t change the project preset after starting a project, so verify the format of your source footage before selecting
a project preset. Depending on your source footage, you may need to change the preset or create a new one. If your
footage is widescreen, for example, you need to select a Widescreen preset before you start your project; if it’s HDV,
choose one of the HDV presets. If the project preset does not match the source files, you may get unexpected or
undesirable results.
If you need to specify lower quality settings for output (such as streaming web video), don’t change your project
settings—change your export settings instead.
Premiere Elements. NTSC (National Television
Dynamic sequence preset
When you add a movie clip that has different properties (Dimension, FPS, Pixel aspect ratio, Field order) than the
project’s preset to the timeline, a message is displayed. Click Yes in the message to allow Premiere Elements to change
the project’s settings to match the properties of the clip. To retain the project’s settings, click No.
• The message appears only if the timeline is empty when you drag and drop a movie clip to the Timeline, Sceneline,
or Monitor.
Last updated 11/22/2011
Page 32

USING ADOBE PREMIERE ELEMENTS 10
Projects
• The message does not appear when you drag and drop images, or audio-only clip to the Timeline, Sceneline, or
Monitor.
• The message does not appear if you select multiple clips with different properties and drag and drop them to the
empty Timeline, Sceneline, or Monitor.
• The message does not appear in the capture workflow.
Create or change project presets
Adobe Premiere Elements includes default project presets which are appropriate for most common types of source
media, including video from DV camcorders, cameras, DVD discs, and mobile phones. It is not possible to create
custom project presets or change a project preset after selecting one and starting a project.
To change the project preset when starting a new project, click the Change Settings button in the New Project dialog.
Select the preset that matches the footage type you intend to use.
When you try to add a movie clip whose preset does not match the project’s preset to the timeline, a message appears.
Click Yes in the message to allow Premiere Elements to change the project’s settings to use the closest available preset.
For more information, see Dynamic Sequence Preset.
Select a project preset
By default, Adobe Premiere Elements uses a DV preset for the television standard you specify when you install the
program. You will need to select a new preset to create new projects in a different format (such as HDV), television
standard (such as PAL), or frame aspect ratio (such as widescreen).
26
The preset you select becomes the default, so it’s used for all new projects you create, until you select another preset.
If you want to use a preset temporarily, be sure to change it when you’ve finished using it.
1 Start Adobe Premiere Elements.
2 In the Welcome screen, click New Project. (Or, choose File > New > Project.)
3 In the New Project dialog box, click Change Settings.
4 Select the preset that matches the format and standard of the footage you want to edit. For example, to edit most
HDV footage shot on 1080i camcorders in the American market, choose HDV 1080i 30 or HDV 1080i 25.
5 Click OK.
6 Give the project a name and location, and click OK.
Change the settings of an open project
Only minor changes related to display can be made in project settings after a project is created.
Note: Editing mode and the Preview files file format cannot be changed after a project is created.
1 Choose Edit > Project Settings > General.
2 In the Project Settings dialog box, specify project settings for General, Capture, Video Rendering.
3 Click OK.
Last updated 11/22/2011
Page 33

USING ADOBE PREMIERE ELEMENTS 10
Projects
Check your project’s settings
Project presets consist of settings in three main categories: General, Capture, and Video Rendering. After you start a
project, you can’t change most of the project settings, such as frame rate, size, and aspect ratio. However, you can
review the settings to make sure that the media you want to add to the project is compatible.
❖ Open the project in Adobe Premiere Elements, and choose Edit > Project Settings > [category].
Note: Custom presets may be provided with third-party products, including PCs, capture cards, or hardware bundles.
Refer to the third-party documentation for details.
More Help topics
“Understanding aspect ratios” on page 66
“Prepare a project for video capture” on page 44
“Capture video” on page 45
“Common settings for Sharing” on page 276
NTSC vs PAL presets
NTSC presets conform to the NTSC standard, where each video frame consists of 525 horizontal lines displayed at
29.97 frames per second. The Standard NTSC preset is for footage that has a 4:3 aspect ratio, and the Widescreen NTSC
preset is for footage that has a 16:9 aspect ratio.
27
PAL presets conform to the PAL standard, where each video frame consists of 625 lines displayed at 25 frames per
second.
General settings
General settings (Edit > Project Settings > General) control the fundamental characteristics of a project, including the
editing mode used to process video, frame size, aspect ratios, count time (Display Format), and playback settings
(Timebase). These settings should match the most common source media in your project (for example, if most of your
footage is DV, use the DV Playback editing mode). Changing these settings arbitrarily may result in a loss of quality.
General settings include the following options.
Editing Mode Identifies the television standard and format chosen for the project. The following video preview
settings can’t be changed because they are determined by the editing mode: Timebase, Frame Size, Pixel Aspect Ratio,
Fields, and Sample Rate.
Note: The Editing Mode setting should represent the specifications of the source media, not the final output settings.
Specify output settings when you export a project.
Timebase Specifies the time divisions used to calculate the time position of each edit: 25 for PAL (European standard),
and 29.97 for NTSC (North American and Japanese standard).
Playback Settings This button is available if you use a DV preset, a DV editing mode, or if you install a plug-in that
provides additional playback functions. For a DV editing mode, this option indicates where you want your previews
to play back: on your DV camcorder (or other connected device) or on your desktop. For information on the playback
settings available for third-party plug-ins, see the documentation provided by the manufacturer of the plug-in.
Frame Size Specifies the dimensions, in pixels, for frames when you play back projects. In most cases, the frame size
for your project should match the frame size of your source media. You can’t change the frame size to compensate for
slow playback, but you can adjust the playback settings: Right-click/ctrl-click in the Monitor panel and choose
Playback Settings. You can also adjust the frame size of final output by changing the Export settings.
Last updated 11/22/2011
Page 34

USING ADOBE PREMIERE ELEMENTS 10
Projects
Pixel Aspect Ratio Sets the aspect ratio for individual pixels. This ratio is determined by the video format: PAL or
NTSC. If you use a pixel aspect ratio that is different from your video, the video may play back and render with
distortion. For more information, see
Fields Specifies the field dominance, or the order in which the two interlaced fields of each frame are drawn.
Premiere Elements captures DV footage with fields, even if the footage was recorded as progressive scan.
Adobe
Display Format (video) Specifies the way time appears throughout the project. The time display options correspond to
“Understanding aspect ratios” on page 66.
standards for editing video and motion-picture film. For DV NTSC video, choose 30 fps Drop-Frame Timecode. For
DV PAL video, choose 25 fps Timecode.
Title Safe Area Sets how much of the frame edge to mark as a safe zone for titles, so that titles aren’t cut off by TVs that
zoom the picture slightly to enlarge it (called overscanning). A rectangle with crosshairs marks the title-safe zone when
you click the Safe Zones button in the Monitor panel. Titles are usually assumed to require a wider safe zone than
action.
Action Safe Area Sets how much of the frame edge to mark as a safe zone for action so that action isn’t cut off by TVs
that zoom the picture slightly to enlarge it. A rectangle marks the action-safe zone when you click the Safe Zones
button in the Monitor panel.
Sample Rate Identifies the audio sample rate defined by the project preset. In general, higher rates provide better
audio quality when you play back audio in projects, but they require more disk space and processing. Try to record
audio at a high-quality sample rate, and capture audio at the rate at which it was recorded.
28
Display Format (audio) Specifies whether audio time display is measured by using audio samples or milliseconds. By
default, time is displayed in audio samples, but it can be displayed in milliseconds for sample-level precision when you
are editing audio.
Capture settings
Capture settings (Edit > Project Settings > Capture) control how video and audio are transferred directly from a deck
or DV camcorder. (Other Project Settings panels do not affect capturing.)
Video Rendering settings
Video Rendering settings control the picture quality, compression settings, and color depth that
Premiere Elements uses when you play back video from the Timeline or Sceneline.
Adobe
To access Video Rendering settings, choose Edit > Project Settings > Video Rendering. These settings include the
following options:
Maximum Bit Depth Allows Adobe Premiere Elements to use up to 32-bit processing, even if the project uses a lower
bit depth. Selecting this option increases precision but decreases performance.
File Format Specifies the format of the preview video.
Compressor Identifies the codec (compressor/decompressor) that Adobe Premiere Elements applies when
previewing movies. The codec is defined by the project preset; you cannot change it because it must conform to the
DV standard.
Note: If you use a clip in your video program without applying effects or changing frame or time characteristics, Adobe
Premiere Elements uses the clip’s original codec for playback. If you make changes that require recalculation of each
frame, Adobe Premiere Elements applies the codec identified here.
Optimize Stills Select this option to use still images efficiently in projects. For example, if a still image has a duration
of 2 seconds in a project set to 30 fps, Adobe
Premiere Elements creates one 2-second frame instead of 60 frames at
1/30 second each. Deselect this option if projects exhibit playback problems when displaying still images.
Last updated 11/22/2011
Page 35

USING ADOBE PREMIERE ELEMENTS 10
Projects
Creating an InstantMovie project
Video Tutorial
About InstantMovie projects and themes
InstantMovies let you quickly create a professional-looking, edited movie, complete with titles, soundtrack, effects,
and transitions by using a simple (and quick) step-by-step process. When you create an InstantMovie, Adobe Premiere
Elements analyzes your clips (if they have not already been analyzed) and applies Smart Tags as necessary, edits the
clips, and applies a theme of your choosing. You can personalize the theme by using your own title and ending credits,
and supplying your own music or effects.
The analysis option is enabled by default. If you have disabled analysis, smart tags are not used.
29
Creating an InstantMovie
Movie themes create movies with a specific appearance. For example, the Wedding Doves theme adds an elegant
introduction and conclusion, flying white doves overlay, and wedding background music. And the Comic Book theme
creates a fun kids party video by adding stylish effects, such as Color Emboss, picture-in-picture overlays, and large
artistic fonts in the title. Each theme uses a unique editing style for selecting, trimming, and sequencing clips.
Last updated 11/22/2011
Page 36

USING ADOBE PREMIERE ELEMENTS 10
Projects
The default duration for a theme is approximately 4 to 6 minutes. You can use InstantMovies on all of the clips in your
movie, or on a subset, creating a montage or special feature at the beginning or end of a DVD.
You can choose from a variety of themes. You can apply all of the properties in a theme, or choose to add only a subset.
Likewise, you can add a theme to an entire sequence in the Sceneline/Timeline, or you can choose to add it to only a
single clip.
Important: For access to a variety of fun new themes, sign up for a Plus membership to Photoshop.com. With a Plus
membership, new themes are continually available from the Photoshop.com category of the Themes menu in the Tasks
panel. Adobe Premiere Elements free online benefits and Adobe Premiere Elements Plus are available in the United States
only. Internet access required.
More Help topics
“Media analysis” on page 74
“Creating an Adobe ID” on page 2
Create an InstantMovie
You can start an InstantMovie from the Project workspace.
30
Create an InstantMovie from the Project workspace
1 If Adobe Premiere Elements is open, click InstantMovie in the Project tab .
Adobe Premiere Elements opens in InstantMovie mode of the Project workspace.
2 Follow the prompts in the upper left of the Project workspace. These prompts step you through the process of
creating an InstantMovie:
a Select the clips that you want to include in your movie. Click Next.
b Choose a theme for your movie. To preview a theme, move the mouse cursor over the theme’s thumbnail to see
a description, and click the Play button
to watch a preview. Click Next.
Note: When you select a theme or move your mouse over the preview, a brief description of the theme is displayed.
c Specify properties for your theme. Click Apply.
Note: You can specify a maximum duration of 15 minutes for an Instant Movie.
You can also create Instant movies from Elements Organizer.
Apply a theme to an existing project
If you’ve already created a project and want to use a theme on all or part of it, use the Themes button in the Edit view.
1 Do one of the following:
• To apply the theme to the entire project, leave all clips unselected.
• To apply the theme to only a portion of the project, select the clips you want to use with the theme.
2 In the Tasks panel, click Edit, and then click Themes.
The Themes view of the Tasks panel opens. To preview a theme, move the mouse cursor over the theme’s
thumbnail and click the Play button
that appears.
3 Select a theme and click Next.
4 In the Theme properties view, specify properties as desired, and click Apply.
Last updated 11/22/2011
Page 37

USING ADOBE PREMIERE ELEMENTS 10
Projects
Theme properties
When you add a theme to your project, you can specify which properties of the theme you want to use and how you
want to use them. You access theme properties after selecting a theme and clicking Next in the Tasks panel.
Default options change depending on the theme and how you accessed the theme. For example, when accessing
themes through the InstantMovie button, the Auto-Analyzer option is selected by default; it is not selected when you
add a theme using the Themes button.
You can specify any of the following theme properties.
Opening and Closing Titles Opening and closing titles can be multiple lines; however, for best results, keep the
opening title to one line.
InstantMovie Specifies whether you want to perform an auto edit, which automatically trims the clips and adds them
to the project based on their Smart Tags. And whether to analyze clips and apply Smart Tags to them.
Apply To Specifies whether to apply the theme to the entire project or to only the clips selected in the Sceneline or
Timeline. (This option is not available, if you created your InstantMovie by clicking InstantMovie from the Project
workspace.)
Music Specifies whether to use the theme music, your own music (click Browse to locate and open it), or no music.
You can select multiple music clips (you can select them here or from the Project workspace as part of the original asset
selection), and they are played in the order selected. Drag the slider between Music/Sound FX and My Clips to set the
amount of soundtrack and audio effects used versus the sound from your clips. InstantMovie syncs with the beats of
the music, so changing the song may significantly change the results. In addition, changing the song changes the
duration of the movie to match the duration of the new song.
31
Speed And Intensity Enables you to control the speed of cuts and amount of effects. Click the triangle beside the Speed
And Intensity option and use the slider to adjust the speed of cuts and amount of effects.
Duration Specifies the length of the finished movie. Match Music creates a movie to the length of the theme music.
Specify Duration lets you specify the exact length of time by dragging hours, minutes, and seconds. Use All Clips
ensures all the selected clips are used and bases the length of time on their duration.
Note: If you specify a duration that is longer than the theme music, the music will loop. If the duration is shorter than the
length of the theme music, the music ends with the last clip.
Sequence Specifies whether clips are placed in the Timeline according to the Time/Date stamp on the clip or
according to the theme’s editing rules.
Theme Content Specifies which aspects of the theme are included in the final movie. Select or deselect any of the
options. If some of your clips have effects already applied, you can choose to keep the applied effects, or remove them
and apply the theme’s effects instead.
Render Preview If this option is enabled, the instant movie is rendered after it is created and placed on the timeline.
Rendering helps in better FPS when the movie is played.
Edit an InstantMovie
When you create an InstantMovie, Adobe Premiere Elements combines all the clips into a single clip. You can break
apart this combined clip if you want to edit or replace the individual clips. Once you break apart an InstantMovie clip,
you can use the Replace Clip command to quickly replace one clip with another without having to trim and edit the
new clip to fit, or change the effects or overlays applied to it.
Because Instant Movie is created using beat detect on the added music clip, changing the Audio clip may not produce
a well-synced video.
Last updated 11/22/2011
Page 38

USING ADOBE PREMIERE ELEMENTS 10
Projects
32
Break apart an InstantMovie
❖ Right-click/ctrl-click the InstantMovie clip in the Timeline or Sceneline and choose Break Apart InstantMovie.
Replace a clip in an InstantMovie
1 In either the Project workspace or the Media view, select the clip you want to use.
2 In the Timeline, right-click/ctrl-click the clip you want to replace and choose Replace Clip From Project.
If the incoming clip is longer in duration, it is trimmed from the end to match the existing duration of the outgoing clip.
If the incoming clip is shorter in duration, a warning message appears, giving you the choice to cancel the replace
action or use black frames to fill the excess duration.
Viewing a project’s files
Media view overview
The Media view lets you preview source material for your projects. Select the Project tab and click Media for the Media view.
You can view the contents of a project using the list view or the grid view. Use the corresponding buttons in the Media
panel to switch between the views. The grid view displays a snapshot of the video for the corresponding project. Files
that are being used by the project are indicated with a green icon.
Project view
A. List view B. Grid view C. Up one level D. New folder E. New item F. Delete item G. Hide/Show video files H. Hide/show audio files
I. Hide/show image files J. Icon indicating that the media is being used in the project K. Video clip L. Folder to help classify assets
Last updated 11/22/2011
Page 39

USING ADOBE PREMIERE ELEMENTS 10
Projects
33
Project panel - grid view
A. List view button B. Grid view button C. Icon indicating that the media is being used in the project
More Help topics
“Customize List view properties” on page 37
“Trim in the Preview window” on page 116
Display and arrange media items
In Media view, you can display items in the List view. The List view lets you view more items simultaneously and sort
items by properties such as media type and duration.
Last updated 11/22/2011
Page 40

USING ADOBE PREMIERE ELEMENTS 10
Projects
34
Media view display options. Drag scroll bar (A) to see more column headings.
• To sort items in List view, click the column heading by which you want to sort the items. (For example, click Media
Type to sort items by type.) If folders are expanded, items sort from the top level and down the Media view
hierarchy. To reverse the sort order, click the column heading again.
• To see more of the column headings in List view, drag the right side of the Tasks panel to the right to resize it. Or
drag the scroll bar at the bottom of the panel to the right.
Organize clips in folders
The Media view can include folders, which you can use to organize project contents in much the same way as folders
in Windows Explorer. Folders can contain media or other folders. Consider using folders to organize media types, such
as DV captures, Adobe Photoshop Elements still images, and audio files.
❖ In the Media view, do any of the following:
Note: To access the Media view, select Project > Media.
• To add a folder, click the New Folder icon at the bottom of Media view. In the list view, if you click New Folder
multiple times in a row, each new folder is nested inside the previous new folder.
•
To move an item into a folder, drag the item to the Folder icon. You can move folders into other folders to nest them.
• To display the contents of a folder, double-click the folder. Or, in List view, click the triangle beside the Folder icon
to expand the folder.
• To navigate from nested folders to parent folders, click the Folder Up icon . You can click and hold this button
to see a list of all the folders above the one currently listed. You can also jump to a folder by highlighting it and
releasing the mouse button.
Last updated 11/22/2011
Page 41

USING ADOBE PREMIERE ELEMENTS 10
Projects
Rename a source file in a project
• To rename a clip, select it, choose Clip > Rename, type the new name, and press Enter. (The change affects only
references used in the project; the name of the original source file in the Project workspace and in Windows remains
the same.)
• To rename an original source file, close Adobe Premiere Elements, and rename the file in Windows. The next time
you open the project, Adobe
Premiere Elements asks you to locate the file.
You can also rename a selected clip by clicking its name once to select the text, typing the new name, and pressing
Enter.
Find an item in a project
❖ Right-click an item in the Timeline, and select Reveal In Project.
To find an item on the hard drive, right-click the clip, choose Properties, and note the path at the top of the Properties
panel.
Locate missing files for a project
Adobe Premiere Elements doesn’t store original source files in a project—it references the filename and location of
each source file when you import it. If you later move, rename, or delete a source file in Windows, the Where Is The
File dialog box opens when you next open the project.
35
In addition to source files, a project also references preview files. Preview files allow you to preview effects in real time
without having to render them—a process that can take hours. Preview files can be re-created as often as necessary.
Note: After you create the final movie, you can delete source files if you do not plan to use them in a project again. If you
may need to re-edit the movie in the future, archive the project with the Project Archiver before deleting source files.
❖ In the Where Is The File dialog box, choose one of the following options:
Display Only Exact Name Matches Displays only the files that match the name of the missing file when the project was
last closed. If you know that the filename has changed, deselect this option.
Select Replaces the missing file with the selected original or replacement file.
Find Starts the Windows XP Search feature.
Skip Previews Skips missing preview files so you aren’t asked to find them.
Skip Replaces the missing file with an offline file, a blank placeholder for related clips in the Project view of the Tasks
panel and the Timeline or Sceneline.
Skip All Replaces all missing clips with offline files without asking you for confirmation.
More Help topics
“About archived projects” on page 283
“Previewing movies” on page 101
“Troubleshooting” on page 287
Last updated 11/22/2011
Page 42

USING ADOBE PREMIERE ELEMENTS 10
Projects
Delete a clip
As Adobe Premiere Elements doesn’t store actual media files in the project, deleting a clip from a project removes all
instances from a movie. However, Adobe
desktop. To conserve disk space, delete the source file.
• To delete a media file from a project, select it in the Media view, and press the Delete key.
Note: To access the Media view, select Project > Media.
• To delete a media file from the Project workspace, right-click/ctrl-click it in the Project workspace, and choose
Delete. You can also delete by selecting the file and pressing the Delete key. The file is deleted from the Elements
Organizer, but it is not deleted from your hard disk.
• To delete a media file from both a project and your computer, select it in the Media view, and press Delete. Then,
click OK in the Delete dialog box.
To identify unused items in a project, note the Video Usage and Audio Usage columns in List view. To display these
columns, scroll to the right. A green check mark (list view) and a green dot (grid view) indicates that the asset is being
used in the project.
More Help topics
“Managing clips using Elements Organizer” on page 72
Premiere Elements does not delete the clip’s source file from the Windows
36
“Creating specialty clips” on page 64
“Working with offline files” on page 66
“Working with aspect ratios and field options” on page 66
Viewing clip properties
See an overview of basic clip properties
❖ Choose Project > Media, and either expand the panel or scroll horizontally to view its columns. (Sometimes some
columns are hidden.)
More Help topics
“Customize List view properties” on page 37
View comprehensive file information
Adobe Premiere Elements includes tools that you can use to evaluate a file in any supported format stored inside or
outside a project. For example, you can determine whether a clip you exported has an appropriate data rate for Internet
distribution. Properties for video files can include file size, number of video and audio tracks, duration, average frame
rate, audio sample rate, video data rate, and compression settings, as well as information about dropped frames in
captured clips.
Last updated 11/22/2011
Page 43

USING ADOBE PREMIERE ELEMENTS 10
Projects
Use the Get Properties feature to check for dropped frames in a clip you just captured. Use the Data Rate Analysis
graphs to evaluate how well the output data rate matches the requirements of your delivery medium. The graphs chart
the render keyframe rate, the difference between compression keyframes and differenced frames (frames that exist
between keyframes), and data rate levels at each frame.
❖ Do one of the following:
• If the clip is in the Media view, right-click/ctrl-click the clip and choose Properties.
• If the clip is in the Timeline, select it and choose File > Get Properties For > Selection.
• If the clip is not in the project, choose File > Get Properties For > File, locate and select the clip you want to analyze,
and then click Open.
Customize List view properties
You can customize the List view to display only the information you want to see. You can also rename columns, add
columns of your own, rearrange columns, and change the width of columns.
More Help topics
“Rename a source file in a project” on page 35
“Media view overview” on page 32
37
“Check your project’s settings” on page 27
Specify which properties appear in List view
The Name property appears by default, and displays the clip name on disk. You cannot remove the Name property
using the Edit Columns dialog box. You can change the name the clip uses inside the project.
1 To access the Media view, select Project > Media.
2 Right-click/ctrl-click in the Media view, and choose Edit Columns. Ensure that you click on an area outside the
rows containing the assets.
3 Select any of the following properties you want to appear in Media view, and click OK:
Used Displays a checkmark if the clip is used in the project.
Media Type Media, such as Movie or Still Image.
Frame Rate The frame rate of the clip, such as 29.97 fps.
Media Duration Length of the captured media on disk, expressed in the Display Format specified in the General
section of the Project Settings dialog box.
Note: In Adobe Premiere Elements, all durations in any panel include the frames specified by the In point and Out point.
For example, setting the In point and Out point to the same frame results in a duration of one frame.
Video Duration The duration of the clip as defined by the Video In point and Out point. Incorporating any
adjustments applied in Adobe
Audio Duration The duration of the clip as defined by the Audio In point and Out point. Incorporating any
adjustments applied in Adobe
Premiere Elements, such as changing the clip speed.
Premiere Elements, such as changing the clip speed.
Video Info The frame size and aspect ratio of the clip, and whether an alpha channel is present.
Audio Info The audio specifications of the clip.
Video Usage The number of times the video component of a clip is used in the movie.
Last updated 11/22/2011
Page 44

USING ADOBE PREMIERE ELEMENTS 10
Projects
Audio Usage The number of times the audio component of a clip is used in the movie.
Status Specifies whether a clip is online or offline. If a clip is offline, this option also indicates why.
Client Field for adding a client’s name or other details.
Adjust columns in List view
Use the List view to quickly evaluate, locate, or organize clips based on specific properties.
1 To access the Media view, select Project > Media.
2 Do any of the following:
• To change the width of a column, position the pointer over a dividing line between column headings until the
Column Resize icon
• To create a column, right-click/ctrl-click and choose Edit Columns, click Add and select a column name (after
which the new column appears). Type a name and choose a type for the new column, and click
can contain any text you enter. Boolean columns provide a check box.
• To display a column, right-click/ctrl-click and choose Edit Columns, and then click the box next to the column
name you want to display.
• To sort columns in ascending or descending order, click their heading.
• To rearrange columns, right-click/ctrl-click and choose Edit Columns, select a column name, and click Move Up,
or Move Down.
Note: If you can’t locate or change a column attribute in the Edit Columns dialog box, Adobe Premiere Elements locks
the attribute and cannot be changed. For example, you can change the names of columns you added, but not the names
of columns built in Adobe
appears; then drag horizontally.
OK. Text columns
Premiere Elements.
38
View details about effect properties
1 Select a clip in the Timeline or Sceneline.
2 In the Tasks panel, click Edit, and then click the Effects button.
3 In the Effects view, click Edit Effects at the bottom of the panel, expand the effect, and note the values.
Undoing changes
Undo changes incrementally
If you change your mind about an edit or effect, Adobe Premiere Elements provides several ways to undo your work.
You can undo only those actions that alter video content; for example, you can undo an edit, but you cannot undo
scrolling a panel.
• To undo or redo the most recent change, choose Edit > Undo. (You can sequentially undo a series of recent
changes.)
• To undo a change, and all successive changes that occurred since you last opened a project, delete it from the
History panel.
• To stop a change that Adobe Premiere Elements is processing (for example, when you see a progress bar), press Esc.
• To undo all changes made since you last saved the project, choose File > Revert.
Last updated 11/22/2011
Page 45

USING ADOBE PREMIERE ELEMENTS 10
Projects
To undo changes made before you last saved a project, try opening a previous version in the Premiere Auto-Save
folder. Then choose File > Save As to store the project outside of the Premiere Auto-Save folder. The number of
changes you can undo depends on the Auto Save preference settings.
Undo any previous change
The History panel records the changes you make to a project. For example, each time you add a clip, insert a marker,
or apply an effect, the History panel adds that action to the bottom of its list. The tool or command you used appears
in the panel along with an identifying icon. You can use the panel to quickly undo several changes. When you select a
change in the panel, the project returns to the state of the project at the time of that change. The more recent changes
turn gray and disappear when you make your next change.
The History panel records changes only for the current session. Closing a project or choosing the Revert command
clears the History panel. While the panel lists most changes, it does not list individual changes within some panels, nor
does it list program-wide changes, such as Preferences settings.
• To display the History panel, choose Window > History.
• To select a change in the History panel, click it.
• To delete a selected change, click the Delete icon , and then click OK.
• To move around in the History panel, drag the slider or the scroll bar in the panel. Or, choose Step Forward or Step
Backward from the History panel menu.
• To clear all changes from the History panel, choose Clear History from the History panel menu, and then click OK.
39
C
A
B
List of changes in History panel
A. Selected change B. Later changes that will be replaced by next change C. History panel menu
Working with scratch disks
About scratch disks
When you edit a project, Adobe Premiere Elements uses disk space to store scratch files required by your project, such
as captured video and audio, conformed audio, and preview files. Adobe Premiere Elements uses conformed audio
files and preview files to optimize performance, allowing real-time editing, high processing quality, and efficient
output. All scratch disk files are preserved across work sessions. If you delete conformed audio files,
Premiere Elements automatically recreates them. If you delete preview files, they will not be recreated
Adobe
automatically.
Last updated 11/22/2011
Page 46

USING ADOBE PREMIERE ELEMENTS 10
Projects
By default, scratch files are stored where you save the project. The scratch disk space required increases as your movie
becomes longer or more complex. If your system has access to multiple disks, you can use the Edit
> Preferences >
Scratch Disks / Adobe Premiere Elements 10 > Preferences > Scratch Disks command to specify which disks
Premiere Elements uses for these files. For best results, set up your scratch disks at the very beginning of a
Adobe
project, before capturing or editing.
Types of scratch disks
While performance can be enhanced by setting each scratch disk type to a different disk, you can also specify folders
on the same disk. Select Edit
Disks to set the following scratch disk options.
Captured Video Folder or disk for video files and stop-motion still image files that you capture using the Capture
panel.
Captured Audio Folder or disk for audio files that you capture using the Capture panel.
Video Previews Folder or disk for video preview files, which are created when you use the Timeline > Render Work
Area command, export to a movie file, or export to a DV device. If the previewed area includes effects, the effects are
rendered at full quality in the preview file.
Audio Previews Folder or disk for audio preview files, which are created when you use the Timeline > Render Work
Area command, use the Clip
DV device. If the previewed area includes effects, the effects are rendered at full quality in the preview file.
> Preferences > Scratch Disks / Adobe Premiere Elements 10 > Preferences > Scratch
> Audio Options > Render And Replace command, export to a movie file, or export to a
40
Media Cache Folder or disk for audio peak files, audio conform files, video index files, and other files
Premiere Elements creates to improve performance when reading media files.
Adobe
DVD Encoding Folder or disk for encoded video and audio files that are generated when you create a DVD.
Note: Adobe Premiere Elements places preview files, encoded files, media cache files, and other types within subfolders of
the folders you specify for these types. Each subfolder is named for the type of scratch files it contains.
Set up a scratch disk
You set up scratch disks in the Scratch Disks panel of the Preferences dialog box. Before changing scratch disk settings,
you can verify the amount of free disk space on the selected volume by looking in the box to the right of the path. If
the path is too long to read, position the pointer over the path name, and the full path appears in a tool tip.
1 Choose Edit > Preferences > Scratch Disks / Adobe Premiere Elements 10 > Preferences > Scratch Disks.
2 For each scratch disk type, specify a disk location for Adobe Premiere Elements to store the corresponding files.
Choose one of these options from the pop-up menu:
My Documents Stores scratch files in the My Documents folder.
Same As Project Stores scratch files in the same folder where the project is stored.
Custom Indicates that the current path isn’t in the pop-up menu. The current path isn’t changed until you click
Browse to specify any available disk location.
Maximizing scratch disk performance
• If your computer has only one hard disk, consider leaving all scratch disk options at their default settings.
• If it has more than one, choose large, secondary hard drives for scratch disks and not the main boot drive. In
Premiere Elements, it’s possible to place each type of scratch file onto its own disk (for example, one disk for
Adobe
captured video and another for captured audio).
Last updated 11/22/2011
Page 47

USING ADOBE PREMIERE ELEMENTS 10
Projects
• Defragment scratch disks regularly by using the Disk Defragmenter tool in Windows or a third-party utility. To use
the Disk Defragmenter tool, choose Start
> All Programs > Accessories > System Tools > Disk Defragmenter. For
more instructions, see the documentation provided with Windows or the third-party utility.
• Specify your fastest hard disks for capturing media and storing scratch files. You can use a slower disk for audio
preview files and the project file.
• Specify only disks attached to your computer. The throughput from a hard disk located on a network is usually too
slow. Avoid using removable media as scratch disks because Adobe
Premiere Elements always requires access to
scratch disk files. Scratch disk files are preserved for each project, even when you close the project.
Premiere Elements reuses these files when you reopen the project associated with them. If scratch disk files
Adobe
are stored on removable media and the media is removed from the drive, the scratch disk won’t be available to
Premiere Elements.
Adobe
• Although you can divide a single disk into partitions and set up each partition as a virtual scratch disk, this doesn’t
improve performance because the single drive mechanism becomes a bottleneck. For best results, set up scratch
disk volumes on actual separate drives.
41
Last updated 11/22/2011
Page 48

Chapter 4: Capturing video
Capturing involves recording video and audio directly to a hard drive from a DV or HDV camcorder, webcam, or other
WDM (Windows Driver Model) device. Adobe
and sets all capture settings accordingly. The Capture panel provides controls that let you remotely control your
device, making it easy to play, capture, pause, and stop the video on your device.
More Help topics
“Importing and adding media” on page 53
Getting ready to capture
What you need to capture video
Before you capture video, make sure that your system is set up appropriately for working with digital video by
following these general guidelines:
Premiere Elements automatically detects the attached capture device
42
Important: For an up-to-date list of system requirements, as well as assistance with error messages, see the Support
Knowledgebase at
DV or HDV camcorder, webcam, or WDM device Check your camcorder documentation if you are unsure whether it
is digital or analog.
Note: If you have an analog source (such as VHS recorder), you need to convert it to digital video first, and then import
it to Adobe
Computer connections and cables To connect to your DV or HDV camcorder, your computer must have IEEE 1394
port and cable (also known as FireWire or i.LINK).
EEE 1394 port and cable
Whenever possible, use IEEE 1394. Not all camcorders work with USB. Many computers include onboard IEEE 1394
cards. If your computer does not include one, you can purchase and install one yourself.
Premiere Elements.
DV
www.adobe.com/support.
Hard disk speed DV formatted data is transmitted at a speed of 3.6 MB per second. The data transfer rate (often
shortened to data rate) of your hard disk should meet or exceed this rate if it is to capture DV. To achieve this rate,
your hard disk must be able to operate at 7200 rpm. Most hard disks manufactured in the last five years have this
capability. To confirm the rate or rpm speed of your hard disk, see your computer or hard disk documentation.
Last updated 11/22/2011
Page 49

USING ADOBE PREMIERE ELEMENTS 10
Capturing video
Hard disk space Five minutes of DV-AVI video occupies about 1 GB of hard disk space. Allow enough space, not only
for the source footage you will capture, but also for the preview files and final rendered movie and DVD or Blu-ray
folders, should you choose to make these. A minimum of 4.5 GB is recommended. Periodically defragment your hard
disk. Writing to a fragmented disk can cause disruptions in your hard disk’s write speed, causing you to lose, or drop,
frames as you capture. You can use the defragmentation utility included with Windows.
Note: Before capturing, make certain that you have enough hard disk space for the length of footage you will capture.
Before capture, the Capture panel shows the amount of free disk space remaining. During capture, it shows the duration
of footage that can be captured using the remaining free space.
External hard disks Capturing to an external hard disk is not recommended. If you must use an external hard disk,
make sure the cables can handle the drive’s data rates and rotational speeds, and use large capacity UDMA 133
IDE/SATA drives dedicated to video only.
Note: Videos from other cameras can be imported through the Video Importer that opens when you click Flip, AVCHD,
Cameras and Phones in the Get Media panel. You can download photos using the photo downloader.
More Help topics
“Import from DVDs, camcorders, phones, and removable drives” on page 55
“Methods for importing media into your project” on page 58
43
“Supported file types for import” on page 53
“Troubleshooting” on page 287
“Converting analog video to digital video” on page 49
Connect your camcorder to your computer
From Adobe Premiere Elements, you can capture digital video, audio, or both from several types of devices using an
IEEE 1394 (recommended). Most DV and HDV camcorders and tape decks (and most webcams) have these ports. The
IEEE 1394 port on your camcorder may be marked DV IN/OUT, i.LINK, or IEEE 1394.
DV
AB
Ports and plugs for capture of digital audio, video, and stills
A. IEEE 1394 B. USB
1 Do one of the following, depending on the capture device you are using:
DV camcorder Connect your DV camcorder to your computer’s IEEE 1394 port using an IEEE 1394 cable. If your
camcorder has both an IEEE 1394 port and a USB port, use the IEEE 1394 port for video capture.
Last updated 11/22/2011
Page 50

USING ADOBE PREMIERE ELEMENTS 10
Capturing video
HDV camcorder Connect your HDV camcorder to your computer’s IEEE 1394 port using an IEEE 1394 cable. You
cannot capture HDV using USB ports.
Webcam, or WDM device (Windows only) Connect your webcam or other WDM device to your computer’s USB port
using a USB cable. You can capture video or still images from webcams using USB 1.0 ports.
Analog device Connect your analog device to an AV DV converter or digital camcorder using analog jacks and plugs.
Connect the AV DV converter or digital camcorder to your computer’s IEEE 1394 port using an IEEE 1394 cable.
Note: If your computer does not have a built-in IEEE 1394 port, or if your camcorder does not include the appropriate
cable, you can purchase one at a computer, camera, or consumer electronics store.
2 If required by your camera, use the power adapter to activate the IEEE 1394 port.
Note: Some camcorders may go into sleep or inactive mode if left in camera mode without being activated for a period of
time, even if connected to a power adapter.
More Help topics
“Create a narration” on page 239
“Import from DVDs, camcorders, phones, and removable drives” on page 55
44
Prepare a project for video capture
Before you capture digital video, you need to create a project with a preset that matches the format (DV or HDV),
television standard (NTSC or PAL), and frame aspect ratio (standard 4:3 or widescreen 16:9) that you’ll use to shoot
your footage.
1 Do one of the following:
• From the Welcome Screen, click New Project.
• Choose File > New > Project.
2 In the New Project dialog box, type a name for your project, and then click Change Settings.
3 Select a preset (expand the preset folders to see all presets), and then click OK.
Note: The Hard Disk, Flash Memory Camcorder presets use reverse field order. Make sure to choose these presets if your
footage uses upper field first.
More Help topics
“Start a new project” on page 21
“Create or change project presets” on page 26
“About project settings and presets” on page 25
About timecode
When capturing video, it’s important to understand the basics about timecode. Timecode numbers represent the
location of a frame in a video clip. Many camcorders record timecode as part of the video signal. The timecode format
is based on the number of frames per second (fps) that the camcorder records and the number of frames per second
that the video displays upon playback. Video has a standard frame rate that is either 29.97 fps for NTSC video (the
North American and Japanese TV standard) or 25 fps for PAL video (the European TV standard). Timecode describes
a frame’s location in the format of hours:minutes:seconds:frames. For example, 01:20:15:10 specifies that the displayed
frame is located 1 hour, 20 minutes, 15 seconds, and 10 frames into the scene.
Last updated 11/22/2011
Page 51

USING ADOBE PREMIERE ELEMENTS 10
Capturing video
Capture video
Video tutorial
This video tutorial provides an overview of capturing a movie with Adobe Premiere Elements. We will post the video
for Adobe Premiere Elements 10 as soon as it is available. Because the process for capturing video remains unchanged
between the two versions, this tutorial should serve you well until then.
Capture panel overview
Use the Capture panel to monitor the video and access all of the capture commands. Adobe Premiere Elements
automatically detects the attached capture device and provides an alert in case of a mismatch.
This panel includes a video preview area, recording controls, a disk-space indicator, and a timecode display. On the
right side of the Capture panel, you can specify capture settings.
To open the Capture panel, click Project in the Tasks panel, click Get Media , and select one of the following:
• DV Camcorder
• HDV Camcorder
• Webcam Or WDM Device
Note: WDM Device is supported on Windows only.
45
A
Capture panel
A. Status area B. Capture source menu C. Preview area D. Capture settings E. Capture panel menu
B C D
E
More Help topics
“Troubleshooting” on page 287
Last updated 11/22/2011
Page 52

USING ADOBE PREMIERE ELEMENTS 10
Capturing video
Capture footage using device control
Capturing footage with device control simply means using the controls (Play, Fast Forward, Rewind, Pause, Stop,
Record, and so on) in the Capture panel to control your device, instead of using the controls on the device. Device
control is a convenient way to locate and capture scenes.
C DA B E G HF I
Capture panel controls
A. Previous Scene B. Next Scene C. Rewind D. Step Back E. Play F. Shuttle G. Stop H. Step Forward I. Fast Forward
You can use device control with DV and HDV camcorders and tape decks when you connect them using the IEEE
1394 port (recommended) or the USB port. If you connect using the USB port and do not get device control, use the
IEEE 1394 port instead.
If your device does not use these ports, device control will not be available, and you must capture using the controls
on the device itself.
Capture video
If you are capturing only a portion of a tape, as opposed to capturing an entire tape, capture at least 3 seconds of
additional footage (called handles) at both the beginning and end of the capture to ensure a margin of error during
capture. Handles also allow for cleaner transitions and more flexibility when you trim your clips.
46
1 Connect the DV, HDV, or WDM camcorder, or webcam to your computer.
2 Turn on the camcorder and set it to playback mode, which may be labeled either VTR, VCR, or Play. You can also
keep it in recording mode.
3 Start Adobe Premiere Elements.
4 From the Welcome screen, select New Project or Open Project.
5 Click Project > Get Media, and choose DV Camcorder, HDV Camcorder, or Webcam Or WDM Device.
Adobe Premiere Elements automatically detects your attached device and provides an alter in case of a mismatch. If
you have more than one device attached, select the device from the Capturing Source menu.
6 (Optional) Select or set any of the following in the Capture panel:
Clip Name Specifies the name of the captured clip.
Save To Specifies the folder where the captured clips are saved.
Capture To Timeline Automatically assembles all captured clips in the Timeline, in the order in which they are
captured, providing a quick way to prepare your movie for editing. Deselect this option if you plan to place clips in an
order different from that of the original tape.
Split Scenes Splits clips into separate scenes based on timecode information or video-content information. When you
select this option, scenes are split automatically after capture is complete. Timecode detects scenes based on when the
Record button was pressed during recording. Content detects scenes based on changes in content. You can detect
scenes in HDV or WDM video after you’ve captured footage by using the Scene Detect By Content command.
Capture Settings (Capture panel menu) These are set automatically based on the attached device, but you can change
them if necessary. These settings specify the format of your video source from the Capture Format menu: DV Capture,
HDV Capture, or WDM Capture (use WDM for webcam capture).
Last updated 11/22/2011
Page 53

USING ADOBE PREMIERE ELEMENTS 10
Capturing video
7 Locate the scene you want to capture by doing either of the following:
• Drag the Current Position Timecode display, or click it and enter the timecode you want.
• (Windows only) Advance to the next or previous scenes by clicking Next Scene or Previous Scene .
Note: Activating any application window other than the Capture panel stops the capture. If you want the capture to
continue without interruption, do not access any other panel.
8 Click Capture.
A preview of your video appears in the Capture panel. If for some reason, the video cannot display in the Capture
panel, a default image with the message “Playing on video hardware” appears there, and you can view the playback on
the device itself.
9 To stop the capture before the tape reaches its end, click Pause.
10 (Optional) Do one of the following:
• If you chose Scene Detect, use the Next Scene and Previous Scene buttons to move to the next scene you want to
capture.
• If you didn’t choose Scene Detect and you captured only a segment of your video, repeat this procedure to locate
and capture another segment of video.
11 When you finish capturing, close the Capture panel.
The captured clips appear in the Media view of the Tasks panel, as well as the Project workspace.
47
To operate some Capture panel controls with the keyboard, see the shortcuts in the tool tip for each control button.
(Hold your pointer over a button to see its tool tip.)
More Help topics
“Split scenes by timecode or content change” on page 48
Change device control settings
Device control settings are preset at optimized values. The device information is derived directly from your attached
device (such as DV camcorder or webcam). However, if desired, you can specify a different type of device for
capturing, or change the settings for your device. You can also change the preroll and timecode offset. When project
device settings and camera settings don’t match, a message appears warning that results may not be optimized.
❖ Choose Edit > Preferences > Device Control / Adobe Premiere Elements 10 > Preferences > Device Control, or
choose Device Control from the Capture panel menu and set any of the following:
Devices Specifies the type of device from which you’re capturing footage. If you’re using IEEE 1394 capture, select
DV/HDV Device Control.
Preroll Specifies the number of seconds you want Adobe Premiere Elements to roll the tape before the specified start
time so that the device can attain a constant speed. The tape plays for the specified amount of time before recording
begins.
Timecode Offset Indicates the number of frames to adjust in the timecode embedded in the captured video so that it
corresponds with the same timecode number of the same frame on the source tape.
Last updated 11/22/2011
Page 54

USING ADOBE PREMIERE ELEMENTS 10
Capturing video
Capture footage without device control
If the device holding your source footage does not have an IEEE 1394 port, and if you do not use a serial device
controller to control an analog device, you cannot use the controls in the Capture panel to capture the footage. Instead,
you can operate the device manually for capture. You can also capture live video streams from camcorders in camera
mode and from devices such as webcams.
1 Connect your device to your computer.
2 Click Project > Get Media, and choose DV Camcorder, HDV Camcorder, or Webcam or WDM Device.
3 (Optional) Select or set any of the following in the Capture panel:
Clip Name Specifies the name of the captured clip.
Save To Specifies the folder where the captured clips are saved.
Capture: Video Audio Specifies whether video, audio, or both are captured.
Capture To Timeline Automatically assembles all captured clips in the Timeline, in the order in which they are
captured, providing a quick way to prepare your movie for editing. Deselect this option if you plan to place clips in an
order different from that of the original tape.
Split Scenes Splits clips into separate scenes based on timecode information or video-content information. When you
select this option, scenes are split automatically after capture is complete. Timecode detects scenes based on when the
Record button was pressed during recording. Content detects scenes based on changes in content. You can detect
scenes in HDV or WDM video after you’ve captured footage by using the Scene Detect By Content command.
48
Capture Settings (Capture panel menu) These are set automatically based on the attached device, but you can change
them if necessary. These settings specify the format of your video source from the Capture Format menu: DV Capture,
HDV Capture, or WDM Capture (use WDM for webcam capture).
4 Select Device Control from the Capture panel menu, and then select None from the Devices menu.
5 Do one of the following:
• If the device is a tape-based camcorder or tape deck, use its controls to cue the videotape to a point several seconds
before the frame where you want to begin capturing, and pause the device. Then press the Play button on the device,
and click Capture in the Capture
panel.
• If the device is a live video source, such as a webcam, make sure you can see its video previewed in the Capture
panel. Then click Capture in the Capture panel.
6 When you see the point where you want to stop recording, wait a few seconds to provide room for editing, and then
click Pause to stop recording.
The captured clips appear in the Media view of the Tasks panel, as well as the Project workspace.
More Help topics
“Split scenes by timecode or content change” on page 48
Split scenes by timecode or content change
By default, Adobe Premiere Elements uses scene detection when capturing clips. You can choose between two types of
scene detection: Timecode and Content.
Timecode (Default for DV, not available for HDV and webcam) Detects scene breaks using the tape's time/date stamp.
(DV and HDV camcorders add a time/date stamp to the tape each time you press Record). When you use timecode
scene detection, a separate clip is captured for each scene, and placed in the Media view of the Tasks panel. Timecode
Last updated 11/22/2011
Page 55

USING ADOBE PREMIERE ELEMENTS 10
Capturing video
scene detection does not work with HDV clips, WDM clips, or DV clips that were recorded by copying from another
tape (either DV to DV, or analog to DV). In the Project workspace, each scene appears as a separate clip.
Content (Default for HDV and WDM) Detects breaks using changes in content. This process occurs after capture and
can be used on any video clip in Media view. When you use content scene detection, new instances of the clip are added
to a folder in Media view. Each instance contains the entire content, but is trimmed to a scene. Content scene detection
is project specific. If you run content scene detection on a clip and then import the clip into another project, you’ll have
to run content scene detection on it again. Only the original clip appears in the Project workspace.
Although content scene detection does not occur during capture, you can use it on clips immediately after capturing.
❖ In the Capture panel, do one of the following:
• Choose Split Scenes By > Timecode.
• Choose Split Scenes By > Content.
After the clips are captured and scenes are detected, the trimmed clips appear in a folder in the Media view of the Tasks
panel.
Converting analog video to digital video
Before DV camcorders were widely manufactured, most people used camcorders that recorded analog video onto VHS
or 8-mm tapes, or other analog tape formats. To use video from analog sources in your Adobe
project, you must first convert (digitize) the footage to digital data, because Adobe
Premiere Elements only accepts
direct input from digital sources. To digitize your footage, you can use either your digital camcorder or a stand-alone
device that performs analog-to-digital (AV DV) conversion.
Premiere Elements
49
BA
Analog jacks and plugs
A. RCA analog video and audio plugs for video (yellow), left audio (white), and right audio (red). B. Stereo mini-plug, typically used with stereo
audio devices
You can perform a successful conversion using the following methods:
• Use your digital camcorder to output a digital signal from an analog input. Connect the analog source to input jacks
on your digital camcorder and connect the digital camcorder to the computer. Not all digital camcorders support
this method. See your camcorder documentation for more information.
• Use your digital camcorder to record footage from your analog source. Connect your analog source’s output to the
analog inputs on your digital camcorder. Then, record your analog footage to digital tape. When you are finished
recording, Adobe
Premiere Elements can then capture the footage from the digital camcorder. This is a very
common procedure. See your camcorder documentation for more details on recording from analog sources.
• Use your computer’s sound card, if it has a microphone input, to capture sound from a microphone.
• Use an AV DV converter to bridge the connection between your analog source and the computer. Connect the
analog source to the converter and connect the converter to your computer. Adobe
Premiere Elements then
captures the digitized footage. AV DV converters are available in many larger consumer electronics stores.
Last updated 11/22/2011
Page 56

USING ADOBE PREMIERE ELEMENTS 10
Capturing video
Note: If you capture using an AV DV converter, you might need to capture without using device control.
Capture stop-motion and time-lapse video
About stop-motion and time-lapse video
Using stop-motion and time-lapse video, you can make inanimate objects appear to move, or show a flower grow and
bloom in seconds. In this mode, you capture single video frames at widely spaced time intervals for later playback at
normal frame rates.
You create stop-motion animations or time-lapse videos by using the Stop Motion button in the Capture panel. You
can capture frames either from prerecorded tape or from a live camera feed. Stop-motion capture lets you manually
select the frames you want to capture; Time Lapse capture automatically captures frames at set intervals. Using Time
Lapse mode you can reduce a lengthy event, such as a sunset or a flower blooming, to a very short span.
Note: You cannot capture stop-motion video from an HDV source. For more information about stop-motion video, see
Adobe Premiere Elements Help.
Capture stop-motion video
1 Connect your capture device to your computer and turn it on.
Note: If you are using a WDM device, you may need to turn it on by double-clicking its icon in the Windows® My
Computer folder. Doing so may open a Windows video preview window. Close this preview window before proceeding.
50
2 If it is a tape-based device, do one of the following:
• If capturing live from a camcorder, place the camcorder in Camera mode.
• If capturing from videotape, place the device in Play, VTR, or VCR mode.
3 Click Project > Get Media and select your connected device.
4 In the Capture panel, select Stop Motion.
5 Click Create New Stop Motion. A preview of your live video source appears in the Capture window.
6 To capture from videotape, cue the tape to a point a few seconds before the first frame you want to capture and
pause the device. Use the shuttle controls in the Capture panel if you have device control, or the device’s own
controls if you don’t.
7 (Optional) Select Capture To Timeline from the Capture panel menu if you want each frame added to the Timeline
as it is captured.
8 (Optional - Windows only) Select Onion Skinning in the lower right of the Capture panel to see onion skins—
overlays of previous frames captured. You can use onion skins to line up figures you animate.
9 Do one of the following:
• To capture from videotape, locate the frames you want to capture using the Play and Pause controls in the Capture
panel or on the device itself.
• To capture from a live video source, point the camera at a subject and record.
10 Click Grab Frame each time the Capture panel displays a frame that you want to capture.
Each frame you grab appears in Media view and is saved to your hard drive as a BMP file with a sequential number in
its filename.
Last updated 11/22/2011
Page 57

USING ADOBE PREMIERE ELEMENTS 10
Capturing video
11 Click Close in the upper right of the Capture panel.
12 Save the images by doing one of the following:
• To save the captured images as a single movie file, and as a set of still images, click Yes. Then, give the new movie
a name and location, and click Save.
• To save the captured images only as individual still photos, click No.
Depending on your choice, either the still images, or the still images and movie file, are placed in Media view.
Additionally, if you select Capture To Timeline, the still images, but not the movie file, are placed into the Timeline.
Stop and start a stop-motion capture
If you need to stop work while capturing stop-motion video from videotape, you can continue it at another time, by
matching the first frame of the continuation with the last frame shot in the previous session.
1 Click Project > Get Media, and select your connected device.
2 In the Tasks panel, click Project, and then click Media.
3 Drag the last still image captured in the previous session from Media view into the preview area of the Capture
panel.
The last frame is superimposed on the current video source in the Capture panel, making it easy to align an object with
its last image. When you click Grab Frame to start the new session, the newly captured frame is numbered sequentially
from the number of the last captured frame.
51
Capture time-lapse video
1 Connect your capture device to your computer and turn it on.
Note: If it is a WDM device, you may need to turn it on by double-clicking its icon in the Windows My Computer folder.
Doing so may open a Windows video preview window. Close this before proceeding.
2 If it is a tape-based device, do one of the following:
• If capturing live from a camcorder, place the camcorder in Camera mode.
• If capturing from videotape, place the device in Play, VTR, or VCR mode.
3 Click Project > Get Media and select your connected device.
4 (Optional) Select Capture To Timeline if you want each frame added to the Timeline as it is captured.
5 In the Capture panel, select Stop Motion.
6 Click Create New Stop Motion. A preview of your live video source appears in the Capture window.
7 (Optional-Windows only) Select the Onion Skinning option in the lower-right corner of the Capture panel to see
onion skins—overlays of previous frames captured. You can use onion skins to line up figures you animate.
8 Select Time Lapse in the lower-left corner of the Capture panel.
9 Click Set Time .
10 Under Frequency, drag any of the time controls (Hrs, Min, Sec) to set the interval at which you want the computer
to capture frames. For example, setting Frequency to 1 minute captures one frame every minute.
11 Under Duration, drag any of the time controls to set the length of the capture session. For example, a duration of 5
hours captures frames, at the frequency you set, for a duration of 5 hours.
12 Click OK, and then click the Start Time Lapse button.
Last updated 11/22/2011
Page 58

USING ADOBE PREMIERE ELEMENTS 10
Capturing video
Frames are captured at the rate you specify.
13 When the time-lapse capture is finished, click Close in the upper-right corner of the Capture panel.
14 Save the images by doing one of the following:
• To save the captured images as a single movie file, and as a set of still images, click Yes. Then, give the new movie
a name and location, and click Save.
• To save the captured images only as individual still photos, click No.
Depending on your choice, either the still images, or the still images and movie file, are placed in Media view.
Additionally, if you select Capture To Timeline, the still images, but not the movie file, are placed into the Timeline.
Delete the previous stop-motion or time-lapse frame
While grabbing stop-motion frames, you may occasionally want to delete the last frame you grabbed, for example, after
unintentionally capturing an intrusive hand or object.
❖ Click Delete Frame in the lower-left corner of the Capture panel.
Note: You can delete additional frames, starting with the most recent one and working backward, by clicking the Delete
Frame button repeatedly.
52
Preview a stop-motion or time-lapse movie
You can preview a stop-motion or time-lapse movie at any time while building one. For example, you may want to see
whether you are getting the expected results or whether to delete some frames before proceeding.
1 With the Capture panel in Stop Motion view, select Preview in the lower-right corner of the Capture panel.
2 In the Capture panel, click Play .
The Capture panel shows a preview of the movie made from the stop-motion frames you have grabbed so far.
3 Deselect Preview to return to grabbing frames.
Stop Motion preferences
You can select Stop Motion Preferences from the Capture panel menu.
Opacity Level Sets the level of opacity for the onion skins. Raise this number to make the onion skins less transparent.
Onion Skinning superimposes previously captured frames onto your video source to help you position figures you
want to animate.
Note: Onion skinning is available only on Windows.
Number Of Skins Sets the number of onion skins visible at one time.
Frame Rate Sets the number of frames per second.
Last updated 11/22/2011
Page 59

Chapter 5: Importing and adding media
Adobe Premiere Elements lets you add video, audio, graphics, and still images to your project from numerous sources.
You can import from live or taped sources, and from a wide variety of devices in analog or digital format.
Supported devices and file formats
Verify whether the device from which you are trying to import and the format of the file being imported is supported
by Adobe Premiere Elements.
Supported devices
For a list of supported devices, see http://kb2.adobe.com/cps/873/cpsid_87347.html. If you are facing problems with
importing content from your device into Adobe Premiere Elements, post your query on
http://feedback.photoshop.com or http://forums.adobe.com/community/premiere_elements.
You must be logged in to the site to post your query. Click Sign In, and use your Adobe account details to log into the
site. If you do not have an Adobe account, click Create Account.
53
Supported file types for import
In addition to capturing footage, you can import image, video, and audio files. You can add files from the following:
folders on your computer, accessory hard drives, card readers, mobile phones, DVDs, blu-ray discs, CDs, digital
cameras, other devices, or the Internet. Adobe Premiere Elements 10.0 supports DV, HDV, WDM (Windows only),
and AVCHD formatted video.
Files that you add to a project are visible in the Media view and are automatically added to the Elements Organizer.
Added files can retain a link to the Adobe application in which they were created, if you select Embed Project Link
when saving the file in the original application. This link allows you to open the file's original application from within
Premiere Elements, edit, and immediately see the results.
Adobe
Note: Some file formats require activation of components before you can add them to a project.
More Help topics
“Supported file types for saving and exporting” on page 280
“Locate missing files for a project” on page 35
“Import a title file” on page 235
Supported video formats
• Adobe Flash® (.swf)
• AVI Movie (.avi)
• AVCHD (.m2ts,.mts,.m2t)
• DV Stream (.dv)
Last updated 11/22/2011
Page 60

USING ADOBE PREMIERE ELEMENTS 10
Importing and adding media
• MPEG Movie
(.mpeg,.vob,.mod,.ac3,.mpe,.mpg,.mpd,.m2v,.mpa,.mp2,.m2a,.mpv,.m2p,.m2t,.m1v,.mp4,.m4v,.m4a,.aac,
3gp,.avc,.264)
• QuickTime Movie (.mov,.3gp,.3g2,.mp4,.m4a,.m4v)
• TOD (.tod)
• Windows Media (.wmv,.asf) - Windows only
Note: To import video from mobile phones (.3gp and .mp4), you must have the most recent version of QuickTime
installed on your computer.
Supported still-image formats
• Adobe Photoshop® (.psd)
• Adobe Premiere Elements title (.prtl)
• Bitmap (.bmp,.dib,.rle)
• CompuServe GIF® (.gif)
• Fireworks (.wbm)
• JPEG® (.jpg,.jpe,.jpeg,.jfif)
• Macintosh® PICT (.pct,.pic,.pict)
• Pixar Picture (.pxr)
• Portable Network Graphic (.png)
• RAW (.raw,.raf,.crw,.cr2,.mrw,.nef,.orf,.dng)
54
Supported audio formats
• Advanced Audio Coding (.aac)
• Dolby® AC-3 (.ac3)
• Macintosh® Audio AIFF (.aif,.aiff)
• MP3® Audio (.mp3)
• MPEG® Audio (.mpeg,.mpg,.mpa,.mpe,.m2a)
• QuickTime (.mov,.m4a)
• Windows Media (.wma) - Windows only
• Windows WAVE (.wav)
Note: Dolby AC-3 is imported as a stand-alone .ac3 file or as part of an encoded audio file in a .vob (DVD) or .mod
(JVC® Everio) file, but exported as Dolby Digital Stereo only.
Activate a component for import
Some file formats such as MPEG-2, MPEG4(SP), and AMR require component activation before you can add them to
a project. If you are connected to the Internet, component activation occurs automatically. If you are not connected to
the Internet, the Activating Component dialog box appears.
1 When the Activating Component dialog box appears, connect to the Internet.
2 In the Activating Component dialog box, click Copy to copy the serial number.
3 Click the URL to go to the activation website.
Last updated 11/22/2011
Page 61

USING ADOBE PREMIERE ELEMENTS 10
Importing and adding media
4 Paste the serial number into the ID box on the website.
The website displays a key for unlocking.
5 Copy the key, paste it in the Activating Component dialog box, and then click OK.
6 Download the required installer, and save it in a location of your choice.
Import from DVDs, camcorders, phones, and removable drives
Many types of devices other than DV camcorders record and store video. Using the video importer, you can import
files from tapeless camcorders and mobile devices, and from removable media, such as DVDs, memory cards, and
multimedia cards. These files are copied to the hard drive location you specify and added to the Project workspace and
Media view.
Ensure that the footage you add to a project matches the project preset. In a mismatch, a dialog box appears informing
you of the mismatch. Using the dialog box you can choose to let Adobe Premiere Elements change project settings to
match your clips.
Note: Image files cannot be imported. For photographs, use the Digital Still Camera and Phones option.
55
1 Do one of the following:
• Place the DVD into your computer’s DVD drive.
• Connect your card reader such as SD card, memory stick to your computer.
• Connect the digital camera, mobile phone, or other device to your computer using the USB 2.0 port.
USB 2.0 port
Note: Be sure to install any drivers required by your device. Consult the manual.
2 In the Tasks panel, click Project, and then click Get Media.
3 Click the device from which you want to import:
• DVD camcorder or PC DVD Drive
• Flip, AVCHD, Cameras, and Phones
The Video Importer dialog box appears.
4 In the Source Menu, select the device from which you want to download movie clips.
The contents of the device or disk are displayed in the panel below the Source menu. The number of files, and the size
of the content is displayed at the bottom of the panel containing the content.
Last updated 11/22/2011
Page 62

USING ADOBE PREMIERE ELEMENTS 10
Importing and adding media
5 Do one of the following:
• To import all the content displayed in the panel, click Check All.
• To import a few clips, click deselect All, and select only those clips that you want to import.
Note: To preview the contents of a clip, click the clip. Click the Play button in the Preview panel.
6 To specify a location for the saved files, do one of the following:
• To save files to the default Adobe folder, leave the location as it appears in the dialog box.
• To specify a different location, click Browse (Windows)/Choose (Mac OS) and choose a folder. Alternatively, click
Make New Folder (Windows)/New Folder (Mac OS) to create and name a new folder.
7 Select a naming convention for the downloaded files using the Presets menu.
File Name Retains the filenames assigned by the camcorder.
Folder Name - Number If your folder name is Wedding Pics, the clips are assigned the names Wedding Pics-001,
Wedding Pics-002, and so on.
Date - File name Adds a timestamp to the filename assigned by the camcorder. The timestamp is the current date and
time - the date and time on which the movies were transferred to your computer.
Note: To rename files, delete them from the Project panel, and reimport them.
56
Custom Name - Number Enter a custom name in the Name field. For example, if you enter My Holiday in the field, the
clips are named My Holiday-001, My Holiday-002, and so on.
8 (Optional) If you want to delete the selected files in the camera after import, select the option After Copying Delete
Originals.
9 (Optional) If you do not want the imported clips added to the timeline after import, deselect Add To Timeline. The
imported clips are added only to the Project panel.
10 (Optional) If you want to create an InstantMovie using the selected clips, select Create InstantMovie.
11 Click Get Media. You can click Cancel in the Progress dialog box at any time to stop the process.
Note: If you don’t intend to use all the files you add, you can delete them from the Media view. Deleting files from the
Tasks panel doesn’t delete them from your hard drive. This practice is recommended for large VOB files.
More Help topics
“Prepare a project for video capture” on page 44
“Capture footage using device control” on page 46
“About project settings and presets” on page 25
Import photos from your digital camera or mobile phone
1 Connect the digital camera, or mobile phone to your computer.
Note: Be sure to install any drivers required by your device. Consult the manual.
2 In the Adobe Premiere Elements - Photo Downloader dialog box, click Advanced Dialog.
Last updated 11/22/2011
Page 63

USING ADOBE PREMIERE ELEMENTS 10
Importing and adding media
57
Adobe Premiere Elements - Photo Downloader (Advanced Dialog view)
3 Choose the drive or device from the Get Photos From pop-up menu. Thumbnails of all importable files appear in
the dialog box.
4 To specify a location for the saved files, do one of the following:
• To save files to the default Adobe folder, leave the location as it appears in the dialog box.
• To specify a different location, click Browse (Windows)/Choose (Mac OS) and choose a folder. Alternatively, click
Make New Folder (Windows)/New Folder (Mac OS) to create and name a new folder.
• To create one or more subfolders for grouping files by criteria, click the triangle next to the Create Subfolder(s)
field. Choose one of the options from the pop-up menu for naming the subfolder.
• To rename the files in the folder consistently, click the triangle next to the Rename Files field. Choose an option
from the pop-up menu for naming the files. The filename defaults to the folder name you enter. When the files are
added to the folder and the Media view, the filenames are in increments of 0001. For example, if you enter summer,
the filenames are changed to summer0001.vob, summer0002.vob, and so on.
5 Select files to add to the Media view. A check mark below the file’s thumbnail indicates that the file is selected. By
default, all files are selected. Click an option to remove the check mark and exclude a file. You can also select or
deselect all files by using the Check All button or the Uncheck All button.
6 If you are using metadata, you can select Preserve Current Filename In XMP.
7 Click the triangle next to Apply Metadata, select a template, and fill in the Creator and Copyright fields.
8 Click Get Media. You can click Cancel in the Progress dialog box at any time to stop the process.
Note: If you don’t intend to use all the files you add, you can delete them from the Media view. Deleting files from the
Tasks panel doesn’t delete them from your hard drive.
Last updated 11/22/2011
Page 64

USING ADOBE PREMIERE ELEMENTS 10
Importing and adding media
More Help topics
“Prepare a project for video capture” on page 44
“Capture footage using device control” on page 46
“About project settings and presets” on page 25
Add files from your hard drive
• In the Tasks panel, click Project, click Get Media, and then click Files And Folders. Locate and select the files that
you want, and click Open. To add an entire folder, select it and click Add Folder.
• Drag files or folders from a desktop panel to the Media view.
Note: You can also use the Elements Organizer, or click Media in the Project tab to access files that are stored on your
hard drive. Files that you added to the Elements Organizer from either Adobe
Elements are displayed.
Premiere Elements or Adobe Photoshop
Add numbered still-image files as a single clip
58
1 Make sure that each still-image filename has the correct filename extension. All filenames in the sequence must
contain an equal number of digits before the extension—for example, file000.bmp, file001.bmp, and so on.
2 Do one of the following:
• In the Tasks panel, click Project, and click Get Media; then click Files And Folders.
• Choose File > Get Media From > Files And Folders.
3 Locate and select the first numbered still image in the sequence. From the Files Of Type menu, select Numbered
Stills, and click Open.
Adobe Premiere Elements interprets all of the numbered files as a single sequence.
Note: For information on changing the duration of still images, see “Set duration for imported still images” in Help.
Methods for importing media into your project
There are four basic methods for adding media to your projects:
• capturing from tape or live sources
• importing files from other types of storage
• adding from the Project workspace
• recording narrations from a microphone.
When you add media files to your project, they are added to the Media view and the Project workspace. A thumbnail,
called a clip, represents each file. Clips, whether they contain audio, video, or still images, are the building blocks of
your movies.
Last updated 11/22/2011
Page 65

USING ADOBE PREMIERE ELEMENTS 10
Importing and adding media
To get new media into your project, click Project in the Tasks panel, and then click Get Media. Use any of the following
options to add media:
Elements Organizer Use this button to import assets from Elements Organizer. From the Elements Organizer
application that opens after you click this button, drag-and-drop assets to the Media panel in Adobe Premiere
Elements.
DV Camcorder Captures video from a DV camcorder connected by FireWire (IEEE 1394) or USB. This option
opens the Capture window.
HDV Camcorder Captures video from an HDV camcorder connected by FireWire (IEEE 1394). This option opens
the Capture window.
DVD Camcorder or PC DVD Drive Imports video from your DVD drive, or a DVD in a camcorder connected by
USB. You can import AVCHD from a DVD Camcorder. This option opens the Adobe Premiere Elements - Video
Importer window.
Flip, AVCHD, Cameras, Phones, or Removable Drives Imports media from devices that store video files in flash
memory, or on a disk. Such devices include Flip and other compact video cameras, AVCHD, DVD, DSLR and other
still cameras, and mobile phones.
Webcam Or WDM Device Captures video from a webcam or WDM-compatible capture device. This option opens
the Capture window.
59
Note: The WDM device option is available only on Windows®.
Digital Still Camera, Phones, or Removable Drives Imports photos from a still camera or mobile phone connected
by USB. This option opens the Adobe Premiere Elements - Media Downloader window. Also imports media from
devices that store video files in flash memory, or on a disk
Files And Folders Imports video files, photos, and audio files from your personal computer’s hard drive.
More Help topics
“Capturing video” on page 42
Guidelines for adding files
When you add files to your project, be aware of possible conflicts, and make sure that the files you add are compatible
with your project.
More Help topics
“Understanding aspect ratios” on page 66
“Activate a component for sharing” on page 280
“About superimposing and transparency” on page 155
Guidelines for adding video files
You can add various video file formats to your project. Imported video and sequence files can have frame sizes up to
4096 x 4096 pixels.
Last updated 11/22/2011
Page 66

USING ADOBE PREMIERE ELEMENTS 10
Importing and adding media
Before you add video files that you did not capture yourself, make sure you can view the video outside
Premiere Elements. Usually, double-clicking a video file opens a playback application, such as Windows Media
Adobe
Player and QuickTime player. (Be sure to use the most up-to-date version of Windows Media Player.) If you can play
back your file in the player application, you can usually use that file in Adobe
Premiere Elements.
Note: To play back VOB (Video Object) files, use the DVD player that came with your DVD burner.
When adding video files, consider the following:
MPEG file compatibility An MPEG file can be imported or played in Adobe Premiere Elements if it meets the
following criteria:
• The file must be in a format supported by Adobe Premiere Elements.
• The compressor used to create the file must be compatible with the Adobe Premiere Elements decompressor.
The compatibility requirements for playing compressed files are less stringent than the requirements for editing them.
MPEG files that play in Windows Media Player and QuickTime can be imported or played in
Premiere Elements if they meet the compatibility requirements.
Adobe
Note: The first time you import an MPEG-2 file, Adobe Premiere Elements automatically activates the components if you
are connected to the Internet. If you are not connected to the Internet, you may be asked to activate the MPEG-2
component. The instructions appear in the Activating Component dialog box.
60
Type 1 AVI file render requirements These files must be rendered before you can preview them from your DV
camcorder. To render a Type 1 AVI clip, add it to the Timeline and build a preview file of that section of the Timeline
by pressing Enter. If the clip must be rendered, a red line appears above the clip in the Timeline.
DVD file protection If the DVD is a motion-picture disc that uses copy protection, you cannot add the files.
Guidelines for adding audio files
When you add audio files to a project, they are conformed to the audio sample rate specified in the Project Settings
dialog box. During that process, you’ll see a progress bar in the lower-right corner of the application window. You can
play back conformed audio instantly at high quality because it’s consistent with all other audio in the project.
By default, conformed audio is stored in the same folder as the project. You can change the default location of the
media cache by choosing one of the following options:
• (Windows) Edit > Preferences > Scratch Disks.
• (Mac OS) Adobe Premiere Elements 10 > Preferences > Scratch Disks.
Note: After you conform an audio clip, you don’t have to conform it again unless you delete the corresponding file in the
Media Cache folder. If you delete conformed audio files, Adobe
related projects.
When adding audio files, consider the following:
Stereo and mono files You can add many of the stereo audio files that you can open in another audio player, such as
Windows Media Player, to your project. To create a stereo version of a mono file, the mono channel is copied to both
the left and right channel in the new stereo track. In this case, both channels contain the same information.
Premiere Elements regenerates them when you open
5.1 surround sound files Importing clips containing 5.1 audio adds a 5.1-channel audio track to your project.
mp3 and WMA files Formats such as mp3 and WMA are compressed using a method that reduces some of the original
audio quality. To play back compressed audio, Adobe
Premiere Elements (like most video editing applications) must
decompress and possibly alter the file’s sample rate. Compressing can degrade the audio quality.
Last updated 11/22/2011
Page 67

USING ADOBE PREMIERE ELEMENTS 10
Importing and adding media
CD files If you want to add audio from a CD, copy, or rip, the audio tracks to your hard drive using another
application. Windows Media Player, included with Windows XP, can perform this task. You can also use Adobe®
Audition® to rip the CD at various quality settings and perform complex audio-processing functions on the file. If you
plan to air or distribute your movie, ensure that you own the copyright, or have licensed the copyright to your CD
audio.
Internet files If you download music from the Internet for use in your projects, be aware that some files, notably WMA
(Windows Media Audio) and AAC (QuickTime) files may have pre-encoded settings that don’t allow you to play the
file back in Adobe
Premiere Elements.
Guidelines for adding still image files
By default, Adobe Premiere Elements scales still images to fit the project frame size. You can override this behavior
and instead add your files at the size at which they were created. You can also set the default duration for all still images
that you add by deselecting Default Scale To Frame Size in the General preferences.
You can add still images with frame sizes up to 4096 x 4096 pixels. For best results, create files with a frame size at least
as large as your video frame size so that you don’t have to enlarge, or scale up, the image in Adobe
When you scale up an image, it often becomes pixelated, so you should create it at a larger frame size than the project.
For example, if you plan to scale an image 200%, create the image at double the project frame size before you add it.
(To determine the frame size of your video, right-click in the Media view or the Timeline, and choose Properties; the
Image Size option specifies your frame size. Frame size for a selected clip also appears in the preview area of Media
view. To display the Preview area, right-click/ctrl-click in Media view and choose View > Preview Area.)
Premiere Elements.
61
You can also add animations, which usually are saved as a sequence of numbered still-image files.
When adding still-image files, consider the following:
Photoshop Elements files Adobe Premiere Elements works well with images and video templates you create in
Photoshop Elements.
Or you can create a video graphic using the File > New > Blank File command in Photoshop Elements or the File >
New command in Photoshop CS as a starting point, and then using one of the DV or HDV document presets. These
presets are optimized for video output. (See Photoshop Help for more information.)
JPEG files If you are having trouble importing JPEG files to Adobe Premiere Elements, open them in Photoshop
Elements and resave them. Then try to import them again.
TIFF images You can add files from Photoshop 3.0 or later. However, Adobe Premiere Elements doesn’t support
16-bit TIFF images created in Photoshop or other applications. Empty (transparent) areas of nonflattened Photoshop
files appear transparent in Adobe
RGB mode When you are editing or creating your still images, make sure that you do all of your work in RGB mode.
Premiere Elements because the transparency is stored as an alpha channel.
For more information, consult your product’s user guide about color management. RGB mode produces colors that
are suitable for video.
More Help topics
“Adjust pixel aspect ratio for a still image or source clip” on page 68
Last updated 11/22/2011
Page 68

USING ADOBE PREMIERE ELEMENTS 10
Importing and adding media
Guidelines for adding an animation or still-image sequence
An animation is different from a video in that the frames in an animation are drawn as graphics and, therefore, are
not scenes of live action, as in conventional digital video. Adobe
numbered still-image files and automatically combine them into a single clip; each numbered file represents one
frame. Some applications, such as Adobe
still-image sequence cannot include layers, so you need to flatten images that will be part of a sequence. For
information on layers and flattening, see the documentation for the application that created the file.
Note: Changing the default duration of still images in the Preferences dialog box does not affect the duration of still images
that are part of a sequence.
When creating three-dimensional images or animations for use in Adobe Premiere Elements, use the following
guidelines whenever possible:
After Effects®, can generate a numbered sequence of still images. Images in a
• Use broadcast-safe colors. Most applications that create animations (such as Adobe After Effects) allow you to
check for broadcast-safe colors. Refer to your application’s documentation for more information.
• Use the pixel aspect ratio and frame size specified in the project settings in Adobe Premiere Elements.
• Use the appropriate field settings to match your project.
• If you’re using an Adobe application (such as Photoshop) to generate the sequence, select Embed Project Link so
that you can open the sequence in the application that was used to create it. For example, selecting a PSD file in the
Available Media view of the Media panel in Adobe
file in Photoshop with the original layers intact.
Premiere Elements and choosing Edit > Edit Original opens the
Premiere Elements can also add a sequence of
62
Set duration for imported still images
When you add a still image, you can assign a specific duration to it, which specifies how much time the image occupies
in the Timeline. You can set a default duration for all still images that you add, and you can change their duration in
the Timeline.
The frame rate of your project determines the amount of time that a certain number of frames occupies. For example,
if you specify 30 frames for a 29.97 frame-per-second (fps) NTSC project, each still image in the Timeline has a
duration of about one second. For PAL, if you specify 25 frames for a 25 fps project, each still image in the Timeline
has a duration of one second.
Change the default duration for still images
1 Do one of the following:
• On Windows, select Edit > Preferences > General. On Mac OS, select Adobe Premiere Elements 10 > Preferences
> General.
• Right-click/ctrl-click in the Media view of the Tasks panel and choose Still Image Duration.
2 For Still Image Default Duration, specify the number of frames you want as a default duration.
Note: Changing the default duration of still images does not affect the duration of still images already in the Timeline,
Sceneline, or Media view. To apply the new default length to all still images in your project, delete them from Media view
and reimport them into your project.
Last updated 11/22/2011
Page 69

USING ADOBE PREMIERE ELEMENTS 10
Importing and adding media
Set a unique duration for a still image
❖ Do one of the following:
• Position the Selection tool over either end of the image, and drag.
• Select the clip and choose Clip > Time Stretch. Enter a new duration and click OK.
Sharing files between Adobe Premiere Elements and Adobe Photoshop Elements
You can access all images in a Photoshop Elements catalog directly from the Organizer workspace of
Premiere Elements. You can also add, edit, and manage your images, and then drag them to the
Adobe
Premiere Elements Sceneline or Timeline for use in your project.
Adobe
Adobe Photoshop Elements and Adobe Premiere Elements are designed to work together, whether you purchase the
products separately or bundled in one package. These programs seamlessly combine digital photography and video
editing, letting you create exciting video projects. The two programs support many of the same file types, which makes
the transfer of most files between them easy and efficient. For example, you can catalog PSD files in Photoshop
Elements and then add them to the Sceneline directly from the Elements Organizer in Adobe
Premiere Elements.
63
Note: The Photoshop Elements Organizer shows clips of audio AVI files with broken video thumbnail icons. However,
they will play correctly. The Photoshop Elements Editor can import individual video frames from ASF, AVI, MPEG, and
Windows Media files. (Choose File > Import > Frame From Video.)
Here are a few ways you can share files between Photoshop Elements and Adobe Premiere Elements:
• Organize your photos, video clips, and audio clips in either Adobe Premiere Elements or Photoshop Elements, find
them through the Elements Organizer in either application and add them to a project.
• Capture video in Adobe Premiere Elements and open it from the Elements Organizer and create and edit still
images from the video.
• (Windows only) Create a slide show in Photoshop Elements 6.0 or later with captions, transitions, effects, music,
narration, graphics, and titles, and then bring the slide show into Adobe
to burn to DVD. Or, bring individual photos into Adobe
Note: The Send To Adobe Premiere Elements command in Photoshop Elements works only when you use Photoshop
Elements 6.0 or later with Adobe Premiere Elements 4.0 or later.
Premiere Elements and create the slide show there.
Premiere Elements for further editing or
• Customize menu templates in Photoshop Elements, and then use them in your Adobe Premiere Elements project.
(Menu templates are PSD files stored in the Adobe
Premiere Elements application folder.)
• Create a Photoshop Elements file with your video project’s settings, enhance it in Photoshop Elements, and then
use it in Adobe
Premiere Elements.
More Help topics
“Managing clips using Elements Organizer” on page 72
“Creating a slide show” on page 22
“About menu templates” on page 254
Last updated 11/22/2011
Page 70

USING ADOBE PREMIERE ELEMENTS 10
Importing and adding media
Creating specialty clips
Specialty clips are those that you generate (rather than add) by using commands in the Media view. They reside in the
Tasks panel along with your added clips.
You can create universal counting leaders, color bars, a 1-kHz tone, black video, and colored backgrounds to place in
your project to help with calibration of your video or simply to use as footage.
Create a universal counting leader (Windows only)
A universal counting leader is the countdown graphic that appears at the beginning of some films. The counting leader
helps a projectionist verify that audio and video are working properly and are synchronized. You can customize the
color, appearance, and audio settings of the counting leaders you create in Adobe
seconds long.
Example frames from a counting leader
Premiere Elements. The leader is 11
64
1 In the Tasks panel, click Project, and then click Media.
2 Click the New Item button , and choose Universal Counting Leader.
3 Specify the following options as needed (click the box next to the color options to choose a color), and click OK.
Wipe Color Specifies a color that gets wiped around the number.
Background Color Specifies a color for the area behind the wipe color.
Line Color Specifies a color for the horizontal and vertical lines.
Target Color Specifies a color for the double circles around the numeral.
Numeral Color Specifies a color for the countdown numeral.
Cue Blip On Out Displays a small cue circle in the last frame of the leader.
Cue Blip On 2 Plays a beep at the 2-second mark.
Cue Blip At All Second Starts Plays a beep at each second in the leader’s progression.
Change counting leader options by double-clicking the counting leader in the Media view or the Timeline.
Adobe Premiere Elements places a Universal Counting Leader clip into Media view. If the current-time indicator is
located over an empty area in the Timeline or Sceneline, it also places the Universal Counting Leader at the location
of the current-time indicator. If the current-time indicator is located above a clip, it places the Universal Counting
Leader after that clip.
Add color bars and a 1-kHz tone
You use the color bars and 1-kHz tone clips in tandem at the beginning of a video. Color bars are multicolored vertical
bars at the beginning of broadcast videos that help broadcasters calibrate the color for a video.
Last updated 11/22/2011
Page 71

USING ADOBE PREMIERE ELEMENTS 10
Importing and adding media
The 1-kHz tone is a short tone at the 1-kHz frequency that broadcasters use to adjust audio levels—broadcasters set it
at a specific level for reference, and then decrease or increase their own audio levels to match. Because some audio
workflows must be calibrated at a specific tone level, you can customize the tone level to match your audio workflow.
1 In the Tasks panel, click Project, and then click Get Media.
2 In the Media view, click New Item and choose Bars And Tone.
A Bars And Tone clip is placed in the Media view and in the Sceneline or Timeline.
Create and add a black video clip
You add black video clips to separate multiple movies or to create pauses in a movie. You can also use a black video
clip for a title.
1 In the Tasks panel, click Project, and then click Media.
2 Click New Item and choose Black Video.
Create a colored matte for a background
You can create a clip consisting of a full-frame matte of solid color, which you can use as a solid background for titles
or animated clips.
65
Brightly colored mattes can serve as temporary backgrounds to help you see transparency more clearly while you
adjust a key effect.
1 In the Tasks panel, click Project, and then click Media.
2 Click New Item and choose Color Matte.
3 Choose a color in the Adobe Color Picker dialog box, and click OK.
A color matte clip is placed into both the Media view and the Timeline or Sceneline.
More Help topics
“Create transparency with a keying effect” on page 158
“Select a color with the Adobe Color Picker” on page 160
Change the tone level of clips
1 Select a clip using one of the following methods:
• To set the level for all new clip instances, select the Bars And Tone clip in the Media view.
• To set the level for only one clip instance, select the clip in the Timeline.
2 Choose Clip > Audio Options > Audio Gain.
3 In the Clip Gain dialog box, do one of the following, and click OK:
• Drag the value control left to decrease, or right to increase, volume.
• Highlight the value control and type a number to increase or decrease volume. Positive numbers increase it.
Negative numbers decrease it.
• The Normalize option adjusts the peak amplitude in the selected clips to the user-specified value. For example, a single
clip with a peak amplitude of -6 dB will have its gain adjusted by +6 dB if Normalize All Peaks To is set to 0.0 dB.
Last updated 11/22/2011
Page 72

USING ADOBE PREMIERE ELEMENTS 10
Importing and adding media
Working with offline files
About offline files
An offline file is a placeholder for a source file that Adobe Premiere Elements cannot currently find on your hard drive.
Offline files remember information about the missing source files they represent. If an offline file appears in the
Timeline or Sceneline, a “Media Offline” message appears in the Monitor panel and in the Timeline or Sceneline.
More Help topics
“Open a project” on page 22
Edit an offline file
1 In the Tasks panel, click Project, and then click Media.
2 In the Media view, double-click the offline file. Where Is The File [name of the file] dialog box appears. Locate the
source file, select the file, and click Select.
3 Right-click/Ctrl-click the file and select Edit Original to edit the file.
66
Replace an offline file with a file on your computer
1 In the Tasks panel, click Project, and then click Media.
2 In the Media view, select one or more offline files.
3 Choose Edit > Locate Media.
4 Locate and select the actual source file, and click Select.
Note: If you selected more than one offline file, the Attach Which Media dialog box appears in turn for each file you
selected. Pay attention to the offline filename in the title bar of the dialog box so that you relink the correct source file to
each offline file.
Working with aspect ratios and field options
Understanding aspect ratios
The aspect ratio specifies the ratio of width to height. Video frames have an aspect ratio (frame aspect ratio) as do the
pixels that make up the frame (pixel aspect ratio). Some video camcorders can record a variety of frame aspect ratios,
and the NTSC and PAL video standards use different pixel aspect ratios. If your added files appear distorted—for
example, if an image you know to be a perfect circle appears oval-shaped—you may have a conflict between the image’s
aspect ratio and the aspect ratio of your project.
Adobe Premiere Elements automatically attempts to detect and compensate for the pixel aspect ratio of source clips so
that distortion doesn’t occur. If a clip appears distorted in Adobe
pixel aspect ratio. It's important to reconcile pixel aspect ratios before reconciling frame aspect ratios because an
incorrect frame aspect ratio is often caused by misinterpreting a source clip's pixel aspect ratio.
Premiere Elements, you can manually change its
Last updated 11/22/2011
Page 73

USING ADOBE PREMIERE ELEMENTS 10
Importing and adding media
Frame aspect ratio
Frame aspect ratio describes the ratio of width to height in the dimensions of an image. For example, DV NTSC has a
frame aspect ratio of 4:3 (or 4.0 width by 3.0 height). For comparison, a typical widescreen frame has a frame aspect
ratio of 16:9; many camcorders that have a widescreen mode can record using this aspect ratio. Many films are shot
using even wider aspect ratios.
4 16
67
3
A 4:3 frame aspect ratio (left), and a wider 16:9 frame aspect ratio (right)
9
When you add clips into a project with a different frame aspect ratio, you must decide how to reconcile the different
values. For example, there are two common techniques for showing a widescreen movie with a 16:9 frame aspect ratio
on a standard TV with a 4:3 frame aspect ratio. You can fit the entire width of the 16:9 frame into a black 4:3 frame, a
technique called letterboxing, which results in black bands above and below the widescreen frame. Or, you can fill the
4:3 frame with only a selected area of the 16:9 frame, a technique called pan and scan. Though this technique eliminates
the black bars, it also eliminates part of the action. Adobe
Premiere Elements automatically letterboxes any 16:9
footage that you add into a 4:3 aspect ratio project.
Pixel aspect ratio
Pixel aspect ratio describes the ratio of width to height in a single pixel of a frame. Pixel aspect ratios vary because
different video systems make different assumptions about the number of pixels required to fill a frame. For example,
many computer video standards define a frame that has a 4:3 aspect ratio as 640 x 480 pixels. Pixels that are square,
which have an aspect ratio themselves of 1:1, perfectly fill the horizontal and vertical space defined by that frame.
However, video standards such as DV NTSC, which is the standard followed by most consumer DV camcorders (sold
in the U.S.), define a 4:3 aspect ratio frame as 720 x 480 pixels. Consequently, to fit all of these pixels in the frame, the
pixels must be narrower than the square pixels. These narrow pixels are called rectangular pixels, and they have an
aspect ratio of 0.9:1, or 0.9 as they are commonly called. DV pixels are vertically oriented in systems producing NTSC
video and horizontally oriented in systems producing PAL video. Adobe
aspect ratio next to the clip’s image thumbnail in the Media view.
Premiere Elements displays a clip’s pixel
If you display rectangular pixels on a square-pixel monitor, images appear distorted, for example, circles distort into
ovals. However, when displayed on a broadcast monitor, the images appear correctly proportioned because broadcast
monitors use rectangular pixels. Adobe
Premiere Elements can display and output clips of various pixel aspect ratios
without distortion because it attempts to automatically display them with the pixel aspect ratio of your project. You
may occasionally encounter a distorted clip if Adobe
Premiere Elements interprets pixel aspect ratio incorrectly; if this
happens, you can correct the distortion by manually specifying the source clip’s pixel aspect ratio.
A B C
Pixel and frame aspect ratios
A. Square pixels and 4:3 frame aspect ratio B. Nonsquare pixels and 4:3 frame aspect ratio C. Nonsquare pixels displayed uncorrected on a
square-pixel monitor
Last updated 11/22/2011
Page 74

USING ADOBE PREMIERE ELEMENTS 10
Importing and adding media
Capturing or adding various aspect ratios
Adobe Premiere Elements attempts to automatically compensate for pixel aspect ratios and preserve the frame size of
added images. Images that you add are treated in the following ways:
• When you capture or add video at either the D1 resolution of 720 x 486 or the DV resolution of 720 x 480,
Premiere Elements automatically sets the pixel aspect ratio for that file to D1/DV NTSC (0.9). When you
Adobe
add footage at the D1 or DV resolution of 720 x 576, Adobe
ratio for that file to D1/DV PAL (1.067). However, it is always a good idea to make sure that all files are interpreted
correctly by looking in the Media view or the Interpret Footage dialog box.
Premiere Elements automatically sets the pixel aspect
• Adobe Premiere Elements automatically assigns pixel aspect ratios to files by using the entries in the Interpretation
Rules.txt file, which is located in the Adobe
consistently misinterpreted (distorted) when you add it, you can add or change the entries in the Interpretation
Rules.txt file by using a text editor, such as Notepad. If you want to override the pixel aspect ratio interpretation for
files already in a project, use the Interpret Footage command.
Premiere Elements/Plug-ins folder. If a specific type of image is
• If you want to change the size of a clip in Adobe Premiere Elements and its pixel aspect ratio is correct, select the
clip and change the Scale property of the Motion effect. The Motion effect is available in the Properties view with
the clip selected in the Timeline or Sceneline.
View a project’s aspect ratio
The preset you choose when you start a project sets the pixel aspect ratio for the project. You can’t change the aspect
ratio after it is initially set.
68
❖ Choose Edit > Project Settings > General.
More Help topics
“Start a new project” on page 21
“About project settings and presets” on page 25
Adjust pixel aspect ratio for a still image or source clip
By ensuring that all files are interpreted correctly, you can combine footage with different ratios in the same project
and generate output that doesn’t distort the source images.
Important: When you set the pixel aspect ratio of a file, use its original ratio, not the ratio of the project and final output.
1 In the Tasks panel, click Project, and then click Media.
2 Select the still image or source clip.
3 Choose File > Interpret Footage.
4 In the Pixel Aspect Ratio section, either select Use Pixel Aspect Ratio From File to use the original ratio saved with
the file, or choose one of the following from the Conform To menu:
Square Pixels Uses a 1.0 pixel aspect ratio. Use this setting if your source clip has a 640 x 480 or 648 x 486 frame size,
or if the file was exported from an application that supports only square pixels.
D1/DV NTSC Uses a 0.9 pixel aspect ratio. Use this setting if your source clip has a 720 x 480 or 720 x 486 frame size
and you want it to maintain a 4:3 frame aspect ratio. This setting can also be appropriate for clips that were exported
from an application that works with nonsquare pixels, such as a 3D animation application.
Note: For more information about D1, see the Glossary in Adobe Premiere Elements Help.
Last updated 11/22/2011
Page 75

USING ADOBE PREMIERE ELEMENTS 10
Importing and adding media
D1/DV NTSC Widescreen Uses a 1.2 pixel aspect ratio. Use this setting if your source clip has a 720 x 480 or 720 x 486
frame size and you want it to maintain a 16:9 frame aspect ratio.
D1/DV PAL Uses a 1.0666 pixel aspect ratio. Use this setting if your source clip has a 720 x 576 frame size and you want
it to maintain a 4:3 frame aspect ratio.
D1/DV PAL Widescreen Uses a 1.4222 pixel aspect ratio. Use this setting if your source clip has a 720 x 576 frame size
and you want it to maintain a 16:9 frame aspect ratio.
Anamorphic 2:1 Uses a 2.0 pixel aspect ratio. Use this setting if your source clip was anamorphically transferred from
a film frame with a 2:1 aspect ratio.
HD Anamorphic 1080 Uses a 1.333 pixel aspect ratio.
Use square-pixel files in a D1 or DV project
You can use square-pixel footage in a DV project and generate output that does not appear distorted.
Premiere Elements either “upsamples” (increases) or “downsamples” (decreases) the resolution of a file that
Adobe
does not match the project frame size. Because downsampling results in a higher-quality image, it is best to create files
that are larger than the project’s frame size so that Adobe
the file.
❖ Prepare the file by using one of the following methods, and then capture or add the file to
Premiere Elements:
Adobe
• If your final output is DV (NTSC), create and save it at a 720 x 540 frame size to prevent upsampling or 640 x 480
to prevent field distortion on a field-rendered file (such as a 3D animation).
• If your final output is DV (PAL), create and save it at a 768 x 576 frame size to prevent upsampling and field
distortion on a field-rendered file (such as a 3D animation).
• If your final output is D1 (NTSC), create and save it at a 720 x 540 frame size.
• If your square-pixel file was created and saved at the frame size used by your project (such as 720 x 480), but not at
the pixel aspect ratio of the project, redesign your image using a different frame size (such as 720 x 540). This is
necessary when the application you use to prepare the file doesn’t support nonsquare pixels.
Premiere Elements does not have to upsample and enlarge
69
Set field options for imported interlaced video
In most video, each frame consists of two fields. One field contains the odd-numbered lines in the frame, and the other
contains the even-numbered lines. The fields are interlaced, or combined, to create the complete image. Adobe
Photoshop Elements includes a reverse field order preset for video imported from a hard disk or Flash memory
camcorder that uses upper fields first. If your footage was captured with reverse order fields (upper fields first), make
sure your project uses either the Standard or Widescreen preset from the Hard Disk, Flash Memory Camcorders
presets folder.
Ordinarily, interlacing isn’t apparent to a viewer. But because each field captures the subject at a slightly different
moment in time, playing a clip in slow-motion, creating a freeze frame, or exporting a frame as a still image makes the
two fields discernible. To avoid this, you can deinterlace the image. Deinterlacing eliminates one field and either
duplicates or interpolates the lines of the remaining field.
Reversing the field dominance, the order in which the fields are recorded and displayed, may also cause playback
problems. When the field dominance is reversed, motion appears jerky because the fields no longer appear in
chronological order. Fields can become reversed when the field dominance of the original videotape is the opposite of
the field dominance of either the video-capture card used to capture the clip or the video-editing or animation software
that last rendered the clip. Reversing can also happen when you set an interlaced clip to play backward.
Last updated 11/22/2011
Page 76

USING ADOBE PREMIERE ELEMENTS 10
Importing and adding media
To avoid these complications, you can deinterlace the image. Deinterlacing eliminates one field and either duplicates
or interpolates the lines of the remaining field. You can also set field options for an interlaced clip so that the clip’s
picture and motion quality are preserved in situations such as changing the clip speed, exporting a filmstrip, playing a
clip backward, or freezing a video frame.
1 Select a clip in the Timeline, and choose Clip > Video Options > Field Options.
2 Select Reverse Field Dominance to change the order in which the clip’s fields appear. This option is useful when the
field dominance of the clip doesn’t match your equipment or when you play a clip backward.
3 For Processing Options, select one of the following choices, and click OK.
None Does not process the clip’s fields.
Interlace Consecutive Frames Converts pairs of consecutive progressive-scan (noninterlaced) frames into interlaced
fields. This option is useful for converting 60-fps progressive-scan animations into 30-fps interlaced video because
many animation applications don’t create interlaced frames.
Always Deinterlace Converts interlaced fields into whole progressive-scan frames. Adobe Premiere Elements
deinterlaces by discarding one field and interpolating a new field based on the lines of the remaining field. It keeps the
field specified in the Field Settings option in the Project Settings. If you specified No Fields, Adobe
Premiere Elements
keeps the upper field unless you selected Reverse Field Dominance, in which case it keeps the lower field. This option
is useful when freezing a frame in the clip.
70
Flicker Removal Prevents thin horizontal details in an image from flickering by slightly blurring the two fields
together. An object as thin as one scan line flickers because it can appear only in every other field.
More Help topics
“Create or change project presets” on page 26
5.1 audio import
Adobe® Premiere® Elements 10 facilitates importing and playing clips with 5.1 audio in the same format as the project
preset. You can create movies combining AVCHD video and stereo audio and 5.1 audio and stereo audio. You can
move clips from track to track in the Timeline regardless of whether the audio is 5.1 or stereo. If you import 5.1 audio
file to the stereo channel, it is converted to 5.1 and the other way round. To create a 5.1 channel track, drag a 5.1
channel audio video clip or 5.1 channel audio only clip onto the empty area on the timeline of a stereo project. A 5.1
channel track in a stereo project is created. To create a stereo track in a 5.1 channel project, drag-and-drop a stereo clip
into the empty area on timeline. A stereo track in a 5.1 channel project is created.
1 Do one of the following:
• From the Welcome screen, click New Project.
• If Adobe Premiere Elements is open, choose File > New > Project.
2 Click Change Settings to change the preset used. Select Full HD 1080i 30 5.1 channel from the AVCHD folder, and
click OK.
3 In the New Project dialog box, specify a name and location for the project, and click OK.
In the Timeline view you can see 5.1 beside the Audio tracks. You can now include clips to your project. However, the
audio is mapped to a channel type depending on how you insert the media file.
Last updated 11/22/2011
Page 77

USING ADOBE PREMIERE ELEMENTS 10
Importing and adding media
Drag clips to the Monitor window
When you drag clips onto the Monitor window, the audio is mapped to the channel type of Audio 1 track.
However, when you Shift-drag onto the Monitor window, you are presented with the following additional options. The
audio mappings change depending on the option you select.
Insert After This Scene Audio is mapped to the Audio 1 track, and the clip is inserted in the Video 1/Audio 1 track.
The clip is inserted at the end of the existing clip, indicated currently by CTI.
Split And Insert Audio is mapped to the Audio 1 track, and the clip is inserted in the Video 1/Audio 1 track. The
current clip is split at the point where the CTI is pointing. The clip is inserted at this point.
Place On Top If there is an empty track above Video 1/Audio 1, the selected clip is inserted on that track, and mapped
to the corresponding track's channel type. If there is no empty track, a new track is created matching the channel type
of the selected clip. Adobe Premiere Elements places the video on the CTI, in a track above the existing video. The new
video file overlaps the existing video clip.
Picture In Picture If there is an empty track above Video 1/Audio 1, the selected clip is inserted on that track, and
mapped to the corresponding track's channel type. If there is no empty track, a new track is created matching the
channel type of the selected clip. Adobe Premiere Elements places the existing and the inserted videos simultaneously.
The user can see both the videos.
Place On Top, And Apply Video merge If there is an empty track above Video 1/Audio 1, the selected clip is inserted
on that track and mapped to the corresponding track's channel type. If there is no empty track, a new track is created
matching the channel type of the selected clip. Adobe Premiere Elements places the video on the CTI, in a track above
the existing video and applies videomerge effect on the new video. The underlying and the top videos can be seen.
71
Replace Clip The clip is replaced and the mapping matches the channel type of the replaced clip’s track.
Note: When you drop an audio-only clip into the Monitor window, it is placed on the Soundtrack track and mapped to
stereo.
Insert clips from the Media view
When you right-click/ctrl-click a clip in the Media view and select Insert to Timeline, it is mapped to the Audio 1 track.
The clip is inserted in the Video 1/Audio 1 track.
Last updated 11/22/2011
Page 78

Chapter 6: Managing clips using Elements Organizer
Elements Organizer provides you with many options to classify and manage your assets. This section provides a brief
overview of Elements Organizer. See the Elements Organizer user guide for more information on these topics.
Finding files in Elements Organizer
You can use albums, smart albums, projects, keyword tags, Smart Tags, and star ratings as filters to quickly find specific
files. In addition, you can search for files by date, date range, or media type. You can find files this way in both Elements
Organizer and the Project workspace.
For more information on finding files in Elements Organizer, see the corresponding Help topic in the Elements
Organizer user guide.
72
Previewing files in Elements Organizer
1 In Elements Organizer, double-click the thumbnail image.
2 For video and audio files, click the Play button to preview the file.
Tagging files
Tagging media files using Elements Organizer
You create and work with keyword tags, smart tags, albums, and smart albums when classifying your digital assets in
Elements Organizer.
Last updated 11/22/2011
Page 79

USING ADOBE PREMIERE ELEMENTS 10
Managing clips using Elements Organizer
Tagging window in Elements Organizer
A. Category B. Subcategory C. Keyword tag D. Find box
73
Smart tags help you sort your files, but you cannot edit or add to them. Smart tags are applied automatically using the
Auto-Analyzer option
Using the Elements Organizer, you can perform all the following tasks:
. You can also apply smart tags manually the way you do with keyword tags.
• View, create, edit, and delete keyword tags, tag categories, and tag subcategories.
• Organize keyword tags within the categories and subcategories.
• View, create, edit, and delete albums and smart albums.
• Filter files by type, tags, star rating, date range, album, smart album, and project.
• Preview videos, images, and audio.
• Create stacks of similar still image files.
• View smart tagged clips and clips not yet smart tagged. You can also smart tag-selected videos.
Attach tags to or remove tags from files
You can attach keyword tags or Smart Tags to files associated with the tag. You can attach multiple tags to a file. If you
find a tag does not accurately represent a file, you can remove it from the file.
Attach tags in Elements Organizer
❖ In the Elements Organizer workspace, do any of the following:
• To attach one tag to one file, drag the tag from the Keyword Tags panel onto the file.
• To attach one tag to multiple files, Shift-click or Ctrl-click the files to select them, and then drag the tag from the
Keyword Tags panel onto the files.
• To attach multiple tags to one or more files, Shift-click or Ctrl-click the tags in the Keyword Tags panel, and then
drag them to one of the selected files.
Last updated 11/22/2011
Page 80

USING ADOBE PREMIERE ELEMENTS 10
Managing clips using Elements Organizer
To remove a tag
❖ To remove a tag in Elements Organizer, right-click/ctrl-click the file’s thumbnail, and select Remove Keyword Tag
> [tag name]
Note: To access Elements Organizer, click Organizer in the Adobe Premiere Elements workspace.
Media analysis
Smart tags enable you to easily find footage by quality and content (such as people, and audio). Smart tagging aids you
in finding the best footage while eliminating the bad footage (such as blurry, shaky, and dark). By default, Adobe
Premiere Elements analyzes as a background task on all the data present in the Project workspace. You can turn off
media analysis:
1 In Adobe Premiere Elements, click Organizer to launch the Elements Organizer.
2 (Windows) Select Edit > Preferences > Media-Analysis. (Mac OS) Select Adobe Premiere Elements 10 >
Preferences > Media Analysis.
3 Deselect Analyze Media For Smart Tags Automatically.
You can perform analysis from several different areas of Adobe Premiere Elements. You can analyze content while
creating an InstantMovie.
74
Auto-Analyzer window
More Help topics
“Creating an InstantMovie project” on page 29
“Split scenes by timecode or content change” on page 48
Last updated 11/22/2011
Page 81

USING ADOBE PREMIERE ELEMENTS 10
Managing clips using Elements Organizer
Applying Smart Tags
While analyzing content for smart tags, Adobe Premiere Elements also performs scene detection. Scene detection
separates different scenes within a clip into separate subclips based on content changes.
You can specify which quality and content categories to analyze. Many categories, such as audio and faces, have one
or more layers of subcategories to choose from as well. When an abrupt visual change is detected, Adobe Premiere
Elements creates a subclip.
Smart tags appear in the Smart Tags category in the Elements Organizer. You can view these tags and select them for
sorting purposes, but you cannot delete or edit them. (You can delete them from individual clips.) Click the Smart Tag
button in the Keyword Tags panel in Elements Organizer to view all clips that have or have not been smart tagged.
❖ In the Project workspace, select the clips you want to analyze, right-click/ctrl-click, and select Run Auto-
.
Analyzer
Note: In Elements Organizer, select the clips you want to analyze, right-click/ctrl-click, and select Run Auto-Analyzer. To
access Elements Organizer, click Organizer. In the Elements Organizer Preferences window, you can specify AutoAnalyzer filters.
More Help topics
“Media analysis” on page 74
75
Applying Smart Tags while creating an InstantMovie project
When creating an InstantMovie, Auto-Analyzer is run only on those clips that have not previously been tagged with
Smart Tags.
1 Set up an InstantMovie. (See “Create an InstantMovie” on page 30.)
After you choose a theme, the Customize This Theme view opens.
2 Select Auto-Analyzer. All the Auto-Analyzer categories are analyzed.
Adobe Premiere Elements uses the results of Auto-Analyzer to automatically edit your clips for the InstantMovie.
Create, edit, and delete keyword tags and tag categories
Keyword tags are personalized keywords, such as “Dad” or “Florida,” that you attach to still images, video clips, and
audio clips in the Project workspace so that you can easily organize and find them. You can choose keywords from the
four default categories: People, Places, Events, and Other. Or you can create your own categories and subcategories.
When you use keyword tags, there’s no need to manually organize your files in subject-specific folders or rename files
with content-specific names. Instead, you simply attach one or more keyword tags to each file and then retrieve the
files you want by selecting one or more keyword tags.
For example, you can create a keyword tag called “Anna” and attach it to every video featuring your sister, Anna. You
can then instantly find all of the videos of Anna by selecting the Anna tag, regardless of where the videos are stored on
your computer. When files have multiple keyword tags, you can select a combination of keyword tags to find a
particular person at a particular place or event. For example, you can search for all “Anna” keyword tags and all
“Marie” keyword tags to find all videos of Anna and Marie. Or search for all “Anna” keyword tags and all “Cabo”
keyword tags to find all the videos of Anna vacationing in Cabo San Lucas.
Last updated 11/22/2011
Page 82

USING ADOBE PREMIERE ELEMENTS 10
Managing clips using Elements Organizer
Grouping files in the Elements Organizer
You can use scene groups and stacks in Adobe Premiere Elements to organize your footage. You can view version sets
of still images in the Elements Organizer, but you cannot create or edit them in Elements Organizer.
About multiple scene groups
When you perform Auto-Analyzer or Scene Detection on a clip, Adobe Premiere Elements may create a scene group
for the clip. Scene groups are separate video clips of the different scenes within the original clip, located under the
original clip. Scene groups make it easy to locate and use the different scenes in a video clip.
For example, if you capture video containing footage of a full day at the beach with friends, using Scene Detection at
capture (or later) automatically separates the different scenes from the day into separate clips, and groups them all
under the first scene. You can expand the group to view or use the different scenes.
76
Scene group closed (above) and expanded (below).
About stacks
You can create stacks to group a set of visually similar still images, making them easy to manage. Stacks are useful for
keeping multiple files of the same subject in one place, and they reduce clutter in the Project workspace.
For example, create a stack to group multiple images of your family taken doing similar things, such as playing on a
beach. Stacking the images lets you easily access them all in one place instead of scattered across rows of thumbnails.
You can remove individual files from a stack so that they appear on their own in Elements Organizer.
Stacking image files saves space and keeps related images together.
Last updated 11/22/2011
Page 83

USING ADOBE PREMIERE ELEMENTS 10
Managing clips using Elements Organizer
Remove files from a stack
You can remove individual files from a stack so that they appear on their own in Elements Organizer. You cannot
remove individual files from a scene group.
1 Select a stack in the Elements Organizer.
2 Right-click/ctrl-click and choose Stack (Image Only) > Expand Photos In Stack.
3 Select one or more photos and choose Stack (Image Only) > Remove Photo From Stack. The file is removed from
the stack, but not deleted from Elements Organizer or the computer.
Specify the top photo in a stack
By default, the newest file is placed on top of the stack.
1 After you’ve created the stack, right-click/ctrl-click the stack in the Project workspace and choose Stack (Image
Only) > Expand Photos In Stack to show all the files in the stack.
2 Right-click/ctrl-click the file you want to be on top and choose Stack (Image Only) > Set As Top Photo.
View all files in a scene group or stack
While viewing all files in a scene group or stack, you can remove a file from the group or add tags to the individual files.
77
If you apply a tag to a scene group, the tag is applied to all items in the group. You cannot apply different tags to the
different files within the group.
If you apply a tag to a stack, the tag is applied to all files in the stack. When you search for the tag, all files in the stack
appear individually in the search results. To apply a tag to only one or a few files in a stack, expand the stack, and then
apply the tag to those files.
Expand and collapse scene groups or stacks
1 To expand the stack, do one of the following in the Elements Organizer:
• Click the triangle next to the stack thumbnail.
• Select Edit > Video Scene > Expand Items In The Scene Group.
• Right-click/ctrl-click a stack, and choose Scene Group (Video Only) > Expand Items in Scene Group.
2 To collapse the stack again, do one of the following:
• Click the triangle next to the stack thumbnail.
• Select Edit > Video Scene > Collapse Items In Scene Group.
• Right-click/ctrl-click a stack, and choose Scene Group (Video Only) > Collapse Items in Scene Group.
Last updated 11/22/2011
Page 84

USING ADOBE PREMIERE ELEMENTS 10
Managing clips using Elements Organizer
Creating albums
About albums
Important: Photoshop Elements free online benefits and Adobe Premiere Elements Plus are available in the United States
only. Internet access required. (See
on page 79.)
Albums are like physical photo albums where you can store and organize files in groups of your choosing. For example,
you can create an album called “Ten Best Vacation Videos” and organize the files from tenth best video to the very best
video. You can make a project based on that album. You can create albums through the Elements Organizer. Click
Organizer to launch Elements Organizer.
You can drag the files within an album to arrange them into any order you want. You can add a file to more than one
album. For example, the same file might appear as the first file in one album and the last in another.
You can organize albums in groups. You can create multiple levels of album groups. For example, you can have an
album group titled, “My Asia Trip,” containing the album “Ten Best Japan Videos,” along with another album called
“Ten Best China Videos,” and so on, for each country in Asia you visited.
You can create smart albums by setting criteria for files to be included in them, rather than by manually selecting
specific files. The contents of smart albums are automatically updated as matching criteria are added to files. For
example, if you create a smart album that includes all videos with the keyword tag, “Chiara,” additional videos are
added to that album as you give them that keyword tag.
“Creating an Adobe ID” on page 2 and “Backup and synchronize albums and files”
78
Create an album or an album group
You can create an album or a group of new albums at any time. For example, you can create an album group called
“Vacations” and create separate albums within it, one for each vacation you photograph.
Important: Photoshop Elements free online benefits and Adobe Premiere Elements Plus are available in the United States
only. Internet access required. (See
“Backup and synchronize albums and files” on page 79.)
Creating and editing smart albums
About smart albums
Like albums, smart albums contain files of your choosing. However, instead of selecting individual files or groups of
files, with smart albums, you set the criteria for inclusion. As you add new files to the Elements Organizer, those files
matching the smart album criteria will also appear automatically in the smart album. Smart albums keep themselves
up to date.
A
B
C
A. Albums panel heading B. Smart album C. Album group
Last updated 11/22/2011
Page 85

USING ADOBE PREMIERE ELEMENTS 10
Managing clips using Elements Organizer
Create a smart album
You can create a smart album by selecting the types of files you want included, or you can specify criteria in the New
Smart Album dialog box. Using the New Smart Album dialog box, you can specify a wider range of criteria.
Backup and synchronize albums and files
Backup/synchronize files
Note: Photoshop Elements free online benefits and Photoshop Elements Plus are available in the United States only.
Internet access required.
When you sign in with your Adobe ID, you can back up your albums and catalogs to Photoshop.com servers. Backing
up and synchronizing your albums and catalogs are essential for protecting your photos and media files. For example,
if you add keyword tags to media files on your computer, the corresponding photos on Photoshop.com are updated
with the tags. The albums and catalogs must be marked for Backup/Synchronization on each computer.
More Help topics
“Back up/Synchronize files” on page 11
79
Last updated 11/22/2011
Page 86

Chapter 7: Arranging clips in a movie
After you add media to your project, you are ready to arrange it in an order that tells a story, conveys an impression,
or communicates a thought. You can also create a slide show from still images, set video to a musical beat, or create a
picture-in-picture effect. Once everything is arranged, you can preview your movie.
You can prearrange clips (create a rough cut) by using icons in Media view or by arranging them in an album in the
Elements Organizer. Or you can simply drag them into the Timeline or Sceneline in the order you want them to
appear.
The Sceneline is useful for basic movie editing; the Timeline is best for more advanced editing techniques. You can
switch between the Sceneline and Timeline as you edit. For example, you can arrange your clips into their correct
order, narrate, create titles, place music, and place transitions in the Sceneline; then switch to the Timeline to layer
clips, trim clips, or add more soundtracks.
Arranging clips in the Sceneline
80
The video tutorial provides an overview of using the Sceneline and Timeline in Adobe Premiere Elements 9. We will
post the video for Adobe Premiere Elements 10 as soon as it is available. Because the process for using the Sceneline
and Timeline remains unchanged between the two versions, this tutorial should serve you well until then.
Sceneline overview
The Sceneline provides a stage on which you can arrange your clips into a movie. In the Sceneline, each clip is
represented by its first frame. This display makes it easy to arrange clips into coherent sequences without regard for
clip length. This technique is sometimes referred as storyboard-style editing. The Sceneline shows the following:
• A Scenes video track where you place video clips and other images
• A Narration soundtrack for any narrations you record
• A soundtrack where you can place background music and other sounds
In the Sceneline, you can also add titles, transitions, special effects, and markers. Use the Sceneline to assemble your
movie quickly and easily. For more advanced editing, use the Timeline.
Sceneline
The Sceneline, as well as the Timeline, contains the following tools for easy access to commonly used features:
Properties tool Opens the Properties panel of the Tasks panel for the selected clip.
Pan and zoom tool Opens the Pan and Zoom dialog using which you can apply the pan and zoom effect to the
selected image or movie clip. For more information, see
Last updated 11/22/2011
“Pan and zoom to create video-like effect” on page 149.
Page 87

USING ADOBE PREMIERE ELEMENTS 10
Arranging clips in a movie
Smart Trim tool Enables you to enter the Smart Trim mode and trim clips. For more information, see “About
Smart trimming” on page 109.
Motion Tracking icon Enables you to enter the Motion Tracking mode. For more information, see “Motion
tracking effect” on page 210.
Audio Tools Tools that enable commonly used features related to Audio are grouped under Audio Tools. The options
under Audio Tools are:
• SmartSound Select SmartSound in the Audio Tools menu. The SmartSound window opens. You can select
soundtracks and custom-fit them to your project. (See “Creating SmartSound tracks” on page 238.)
• Detect Beats Detects musical beats in the Soundtrack track of the Timeline and adds unnumbered markers at each
beat. Use this tool when you want to create edits that coordinate with the beat of your music. (See
for a soundtrack” on page 238.)
“Create beat markers
• Audio Mix Opens the Audio Mixer so you can adjust the volume and balance for your different audio tracks. (See
“Adding and mixing audio” on page 236.)
• SmartMix Opens the SmartMixer. SmartMix facilitates automatic adjustment of the volume of the background
music to enable hearing the foreground dialogs. For more information, see
“SmartMix” on page 243.
• Add Narration Opens the Record Voice Narration panel, which holds tools for recording a voice-over. (See
“Adding and mixing audio” on page 236.)
81
Markers tool Adds disc markers into the Timeline at the location of the current-time indicator. (See “Working with
menu markers” on page 248.)
More Help topics
“Workspace overview” on page 13
Adding clips in the Sceneline
Using the Sceneline, you can easily insert a clip before another, after another, or even split it before inserting it. You
can add clips to the Sceneline directly from the Project workspace.
More Help topics
“Timeline overview” on page 83
“Add clips to the Timeline” on page 86
Place a clip in the Sceneline
❖ Drag the clip from the Project workspace to one of the empty clip targets in the Sceneline. When the pointer
changes to the insert icon
Note: If you are dragging the first clip for your project, you can drag it into the Monitor panel or the Sceneline.
Insert a clip before another in the Sceneline
❖ Drag the clip from the Project workspace onto a clip in the Sceneline.
The new clip appears in front of the one on which you dropped it and all subsequent clips shift to the right.
, release the mouse button.
Insert a clip after another in the Sceneline
1 In the Sceneline, select the clip after which you want to insert the new clip.
Last updated 11/22/2011
Page 88

USING ADOBE PREMIERE ELEMENTS 10
Arranging clips in a movie
2 Drag the clip from the Project workspace to the Monitor panel.
The new clip appears to the right of the selected clip, and subsequent clips shift to the right.
Insert one clip into another in the Sceneline
You can quickly split one clip into two pieces and insert another clip into the split.
1 In the Sceneline, select the clip to be split.
2 In the Monitor panel, drag the current-time indicator to the frame where you want to make the split.
3 Shift-drag a clip from the Media view onto the Monitor panel.
4 Select Split And Insert.
Adobe Premiere Elements splits the first clip and inserts the second into the split.
Move a clip in the Sceneline
1 Shift-drag a clip from a location in the Sceneline to another location before or after another clip. A vertical blue line
shows the target area and the pointer changes to the insert icon
2 Release the mouse button.
3 If the clip has an overlay, choose one of the following:
Move Scene And Its Objects Moves the clip with any overlays it has, such as a title.
.
82
Move Just Scene Moves the clip without overlays.
The clip moves to its new location and all subsequent clips shift to the right.
More Help topics
“Move a clip in the Timeline” on page 89
Delete a clip in the Sceneline
1 Select a clip in the Sceneline.
2 Right-click/ctrl-click the clip and choose one of the following:
Delete Scene And Its Objects Deletes the clip and any overlays it has, such as a title.
Delete Just Scene Deletes the clip but leaves overlays.
The clip leaves the Sceneline.
More Help topics
“Delete a clip in the Timeline or Sceneline” on page 90
Arranging clips in the Timeline
The video tutorial provides an overview of using the Sceneline and Timeline in Adobe Premiere Elements 9. We will
post the video for Adobe Premiere Elements 10 as soon as it is available. Because the process for using the Sceneline
and Timeline remains unchanged between the two versions, this tutorial should serve you well until then.
Last updated 11/22/2011
Page 89

USING ADOBE PREMIERE ELEMENTS 10
Arranging clips in a movie
Timeline overview
The Timeline graphically represents your movie project as video and audio clips arranged in vertically stacked tracks.
When you capture video from a digital video device, the clips appear sequentially as they occur. The Timeline uses a
time ruler to display the components of your movie and their relationship to each other over time. You can trim and
add scenes, indicate important frames with markers, add transitions, and control how clips are blended or
superimposed.
The zoom controls in the Timeline allow you to zoom out to see your entire video, or zoom in to see clips in more
detail. You can also change how the clips appear in the tracks, and resize the tracks and the header area.
83
Timeline
A. Current-time indicator B. Time ruler C. Zoom control D. Video track E. Audio track
More Help topics
“Link video and audio clips” on page 95
“Trim in the Timeline” on page 113
“Sceneline overview” on page 80
“Customize how clips display in the Timeline” on page 93
“Resize tracks” on page 92
Timeline tracks
Tracks let you layer video or audio and add compositing effects, picture-in-picture effects, overlay titles, soundtracks,
and more. With multiple audio tracks, you can add a narration to one track and background music to another track.
The final movie combines all the video and audio tracks.
By default, the Timeline contains three tracks for video (or still images) and audio , a narration track , and
a soundtrack track . When you drag linked clips (those that include both audio and video) to a track, the video and
audio components appear together (video directly above audio) in their respective tracks (such as Video1 and Audio1).
To see all of the tracks, you may need to scroll up or down the Timeline.
Note: For more information about working with tracks and arranging clips in the Timeline, see Adobe Premiere Elements Help.
A new track is inserted if you drag and release a clip above the topmost video track. The number of tracks a project can
contain has no limit, and you can add or delete tracks at any time, even before you begin adding clips. A movie must
contain at least one of each type of track (the track can be empty). The video track order is important because any clip
located in Video 2 also overlays the Video 1 track. Audio tracks are combined in playback so the track order is not
relevant.
Last updated 11/22/2011
Page 90

USING ADOBE PREMIERE ELEMENTS 10
Arranging clips in a movie
Default tracks
A. Video 2 track B. Audio track C. Video1 track D. Audio 1 track E. Narration track F. Soundtrack
You can specify the default number and type of tracks in new movies.
84
Timeline tools
Use the tools at the top of the Timeline to do the following:
• Trim clips and change their speed.
• Add markers, detect musical beats, open the Audio Mixer, or add narration.
When you edit in the Timeline, the pointer changes to the currently active tool. If the pointer changes to a red slash,
you cannot use the tool on the clip underneath the pointer.
Selection tool Selects clips for previewing or trimming.
Pan and zoom tool Opens the Pan and Zoom dialog using which you can apply the pan and zoom effect to the
selected image or movie clip. For more information, see
Properties tool Opens the Properties panel of the Tasks panel for the selected clip.
Smart Trim tool Enables you to enter the Smart Trim mode and trim clips. For more information, see “About
Smart trimming” on page 109.
Motion Tracking icon Enables you to enter the Motion Tracking mode. For more information, see “Motion
tracking effect” on page 210.
Time Stretch tool Changes the playback speed and duration of a clip without changing the In or Out points.
Dragging the edge of a clip in one direction lengthens it and slows it down. Dragging it in the other direction shortens
the clip and speeds it up. (See
Zoom Lets you zoom in or out of the Timeline to display more or less detail in each clip. (See “Zoom in or
“Change a clip’s speed by using the Time Stretch tool” on page 121.)
out of the Timeline time ruler” on page 86.)
“Pan and zoom to create video-like effect” on page 149.
Audio Tools Tools that facilitate commonly used features related to Audio are grouped under Audio Tools. The
options under Audio Tools are:
• SmartSound Select SmartSound in the Audio Tools menu. The SmartSound window opens. You can select
soundtracks and custom-fit them to your project. (See
“Creating SmartSound tracks” on page 238.)
Last updated 11/22/2011
Page 91

USING ADOBE PREMIERE ELEMENTS 10
Arranging clips in a movie
• Detect Beats Detects musical beats in the Soundtrack track of the Timeline and adds unnumbered markers at each
beat. Use this tool when you want to create edits that coordinate with the beat of your music. (See
“Create beat markers
for a soundtrack” on page 238.)
• Audio Mix Opens the Audio Mixer so you can adjust the volume and balance for your different audio tracks. (See
“Adding and mixing audio” on page 236.)
• SmartMix Opens the SmartMixer. SmartMix facilitates automatic adjustment of the volume of the background
music to facilitate hearing the foreground dialogs. For more information, see
“SmartMix” on page 243.
• Add Narration Opens the Record Voice Narration panel, which holds tools for recording a voice-over. (See
“Adding and mixing audio” on page 236.)
Markers tool Adds disc markers into the Timeline at the location of the current-time indicator. (See “Working with
menu markers” on page 248
Editing tools in the Timeline
A. Selection B. Time Stretch C. Pan and zoom tool D. Smart Trim mode E. Motion Tracking mode F. Properties G. Audio Tools options
H. Marker Tools options
85
Move through the Timeline
When placing and arranging clips in the Timeline, you need to move the current-time indicator to the proper location.
In the time ruler of the Timeline, the current-time indicator
panel. A vertical line extends from this current-time indicator through all the tracks. Zooming in and out of the
Timeline can help you locate the exact location for placing a clip or performing an edit.
❖ In the Timeline, do any of the following.
• Drag the current-time indicator .
• Click the time ruler where you want to position the current-time indicator.
• Press Shift while dragging the current-time indicator to snap it to the edge of the closest clip or marker.
• Drag the time display (in the lower-left corner of the Monitor panel) to the desired time value.
• Click the time display (in the lower-left corner of the Monitor panel), type a valid time, and then press Enter. (You
don’t need to type leading zeros, colons, or semicolons. However, be aware that Adobe Premiere Elements
interprets numbers under 100 as frames.)
You can use the Home or End keys on the keyboard to skip back to the beginning or ahead to the end of the movie.
The Page Up and Page Down keys go to the previous and next clips. The Right or Left Arrow keys move the
current-time indicator forward or back a frame, while pressing Shift+Right Arrow or Shift+Left Arrow moves it in
increments of five frames.
corresponds to the frame displayed in the Monitor
Last updated 11/22/2011
Page 92

USING ADOBE PREMIERE ELEMENTS 10
Arranging clips in a movie
Zoom in or out of the Timeline time ruler
When you zoom in on the Timeline, the Timeline around the current-time indicator is magnified, letting you examine
smaller increments of media. You can also zoom in as you add a clip to the Timeline, magnifying the location around
the pointer rather than the current-time indicator. This technique lets you see the exact placement of the insertion
point before you release the mouse. In contrast, zooming out shows more of the Timeline, giving you a visual summary
of the movie.
❖ In the Timeline, do one of the following:
• To zoom in or out as you add a clip, drag a clip to the Timeline. Hold down the mouse button, and press the Equals
(=) key to increase the zoom factor or press the Minus (–) key to decrease it.
• To zoom in on the Timeline, drag the Zoom slider to the right, or click the Zoom In button .
• To zoom out of the Timeline, drag the Zoom slider to the left, or click the Zoom Out button .
To toggle between viewing the entire length of the movie in the Timeline and the previous zoom level setting, press the
Backslash (\) key. Make sure that the Timeline is active before pressing the Backslash (\) key. You can also zoom in
and out by pressing the Equals (=) or Minus (-) keys on the keyboard (not the numeric keypad).
More Help topics
“Trim in the Preview window” on page 116
86
“Trim a clip from the Sceneline” on page 111
Add clips to the Timeline
When you insert a clip into the Timeline, adjacent clips on all tracks shift as necessary to accommodate the new clip.
By shifting all clips together, the audio and video of the existing clips remain in sync.
There are times, however, when you don’t want all clips to shift with each insertion; for example, if you’ve added
background music or a video that is to superimpose the entire movie. In such instances, press the Alt key as you insert
to shift the clips on a maximum of two tracks: the track receiving the insertion and the track containing its linked audio
or video (if any). In this way, when you add a clip to a track containing linked audio or video, the affected tracks shift
together, remaining aligned, while clips on other tracks are unaffected.
Clips after default insertion (top), and after Alt-drag insertion to target track (bottom). Notice second audio track unaffected by Alt-drag
insertion.
Last updated 11/22/2011
Page 93

USING ADOBE PREMIERE ELEMENTS 10
Arranging clips in a movie
More Help topics
“Timeline overview” on page 83
“Zoom in or out of the Timeline time ruler” on page 86
Insert a clip, shifting clips on all tracks in the Timeline
❖ Do one of the following:
• Drag the clip from the Project workspace to the desired location in the Timeline. When the pointer changes to the
Insert icon
, release the mouse.
• Move the current-time indicator to the desired location in the Timeline, select the clip in the Project workspace,
and then choose Clip
> Insert.
Insert a clip, shifting clips on only the target and linked tracks in the Timeline
❖ Alt-drag the clip from the Project workspace to the desired location in the Timeline. When the pointer changes to
the Insert icon
If you drag a clip into the blank space above the topmost video track (for video) or below the lowest audio track (for
audio), Adobe Premiere Elements creates a new track for the clip. If the clip contains both audio and video, it creates
both a new video and new audio track.
, release the mouse.
87
Overlay a clip in the Timeline
The easiest way to replace a portion of a video is to overlay it with other footage. When you overlay a clip, the clip you
add replaces any existing frames starting at the location you designate. If the new clip is 40 frames long, it overlays 40
frames of the existing clip. The frames following the overlay, if any, remain in the same location in the track. Overlays
do not change the length of the movie unless the overlay extends beyond the end of the movie.
Clips before an overlay edit (top) and after an overlay edit (bottom)
❖ Do one of the following:
• Ctrl-drag/Cmd-drag the clip from the Project workspace to the first frame you want to overlay. When the pointer
changes to the Overlay icon
, release the mouse.
Last updated 11/22/2011
Page 94

USING ADOBE PREMIERE ELEMENTS 10
Arranging clips in a movie
• Move the current-time indicator to the first frame you want to overlay, select the clip in the Project panel, and then
choose Clip
> Overlay.
More Help topics
“Creating a picture-in-picture overlay” on page 94
Place one clip above another in the Timeline
You can place one clip above another without replacing a section of the lower clip as is done with an overlay. You can
use clips stacked in this way, for example, with various keying effects.
1 In the Timeline, drag the current-time indicator to a location above a video clip where you want to overlay
another clip.
2 Shift-drag a clip from the Project workspace and drop it onto the Monitor panel.
3 Choose Place On Top.
Adobe Premiere Elements drops the second clip into the first available video track at the location of the current-time
indicator.
More Help topics
“Keying out color” on page 157
88
Copy and paste clips in the Timeline
You can rearrange clips in a movie by copying and pasting them within your project. You can copy and paste multiple
clips at a time, and either insert them between existing clips or overlay existing frames. The clips maintain their relative
spacing in time. Adobe®
current-time indicator. However, you can avoid this action by manually copying clips on multiple tracks. When you
paste a clip in the Timeline, the current-time indicator moves to the end of a clip. This feature enables easy and efficient
handling of consecutive paste operations.
Pasting and inserting (middle), pasting and overlaying (below)
1 In the Timeline, select one or more clips in the movie, or to select only the audio or video of linked clips, Alt-click
the desired clip.
2 Choose Edit > Copy.
3 In the Timeline, position the current-time indicator at the point you want to paste, and do one of the following:
• To overlay the clips and replace existing footage on the track, choose Edit > Paste.
• To insert the pasted clips and shift existing footage, choose Edit > Paste Insert.
Premiere® Elements 10 pastes clips to the Video 1 or Audio 1 track at the location of the
Last updated 11/22/2011
Page 95

USING ADOBE PREMIERE ELEMENTS 10
Arranging clips in a movie
You can also copy a clip’s attributes—motion, opacity, volume, and other effects—and paste them into another clip.
Replace a clip in the Timeline
If you want to replace a clip in the middle of the Timeline, without altering the length or changing the effects or
overlays in the movie, use the Replace Clip command. This option is useful when editing expanded InstantMovies.
1 In either the Project workspace or the Media view, select the clip you want to use.
2 In the Timeline, right-click/ctrl-click the clip you want to replace and choose Replace Clip From Project.
If the incoming clip is longer in duration, it is trimmed from the end to match the existing duration of the outgoing clip.
If the incoming clip is shorter in duration, a warning message appears giving you the choice to cancel the replace action
or use black frames to fill the excess duration.
Select, move, align, and delete clips in the Timeline
After you’ve added a clip to your movie, you may need to rearrange clips, copy and paste scenes, and delete other clips.
Several techniques let you select individual clips, a range of clips, or only the audio or video portion of a linked clip.
89
Select clips in the Timeline
❖ Using the Selection tool , do any of the following:
• To select a single clip, click the clip in the Timeline. If the clip is linked or grouped, clicking one clip selects the other
linked or grouped clips.
• To select only the audio or video portion of linked clips, Alt-click the desired clip.
• To select a single clip within a group, Alt-click the desired clip.
• To select multiple clips, Shift-click each clip you want to select. (Shift-click a selected clip to deselect it.)
• To select sequential clips, drag a rectangle (marquee selection) that includes the clips you want to select.
• To add a range of clips to the current selection, Shift-drag a marquee around the clips.
Selecting a range of clips by dragging a marquee
Move a clip in the Timeline
You can easily rearrange clips in the Timeline by dragging. By using the same techniques you use to add a clip, you can
choose to insert or overlay clips when you move them.
• To move a clip and insert it so all tracks shift after insertion, drag the clip to the desired location. When the pointer
changes to the Insert icon
, release the mouse button.
• To move a clip, close the gap behind it, and shift only clips on target tracks, drag the clip to the desired location,
and then press Alt. When the Rearrange icon
appears, release the mouse button.
Last updated 11/22/2011
Page 96

USING ADOBE PREMIERE ELEMENTS 10
Arranging clips in a movie
• To move a clip and overlay another clip in the movie, drag the clip to the first frame you want to overlay, and then
press Ctrl/Cmd. When the pointer changes to the Overlay icon
, release the mouse button.
• To move only one clip of a linked pair, Alt-select the clip you want to move. Drag it to the desired location. If you
want to shift clips only on the target tracks, release the mouse button when the pointer changes to the Insert
. If you want to overlay another clip, press the Ctrl key, and when the pointer changes to the Overlay
icon
icon , release the mouse.
More Help topics
“Move a clip in the Sceneline” on page 82
Align clips by using the Snap option
The Snap option, which is enabled by default, makes it easier to align clips with each other or with particular points in
time. When you move a clip with the Snap option selected, it automatically aligns with, or snaps to, the edge of another
clip, a marker, the start and end of the time ruler, or the current-time indicator. Snapping also helps to ensure that you
don’t inadvertently perform an insert or overlay edit when dragging. As you drag clips, a pop-up window displays the
distance, in frames, that you have moved them (a negative number indicates you’ve moved them toward the beginning
of the movie).
❖ Choose Timeline > Snap. A check mark indicates that the option is enabled.
90
Delete a clip in the Timeline or Sceneline
Deleting a clip from a movie doesn’t delete it from the project. The clip is still available in the Media view.
1 In the Timeline or Sceneline, select one or more clips. (Alt-click to select only the audio or video portion of a clip.)
2 Do one of the following:
• To delete clips and leave a gap of the same duration, called clearing, choose Edit > Clear.
• To delete a clip and close the resulting gap, called a ripple deletion, choose Edit > Delete And Close Gap, or press
the Delete or Backspace key.
Note: When a clip is deleted from the Sceneline, a transition following the clip is also deleted; when deleted from the
Timeline, the preceding and following transitions are deleted.
Ripple deletion removes frames, shifting adjacent clips over to fill in gap (middle). Clearing removes frames, leaving a gap (bottom).
More Help topics
“Apply transitions in the Sceneline” on page 129
Last updated 11/22/2011
Page 97

USING ADOBE PREMIERE ELEMENTS 10
Arranging clips in a movie
Delete empty space between clips in the Timeline
You can quickly delete empty space between clips in the Timeline by using the Delete And Close Gap command, or by
pressing the Delete or Backspace key. Both techniques shift adjacent clips over to fill the gap.
Delete And Close Gap shifts all subsequent clips over.
❖ In the Timeline, do one of the following:
• Right-click the empty space, and choose Delete And Close Gap.
• Select the space you want to delete, and press the Delete or Backspace key.
Note: If the gap is small and difficult to select, move the current-time indicator to the gap and click the Zoom In button.
91
Create a duplicate clip in the Timeline
Each time you drag a source clip from the Tasks panel to the Timeline or Sceneline, you create a clip instance, which
shares the source clip’s default In and Out points. If you delete the source clip in the Tasks panel, all instances of the
clip in the Timeline or Sceneline are deleted.
To create clip instances with different default In and Out points, duplicate the source clip in the Tasks panel. As with
source clips, if you delete a duplicate clip in the Tasks panel, all instances of it in the Timeline or Sceneline are deleted.
1 In the Media view, select a clip and choose Edit > Duplicate.
2 To rename the duplicate clip, select it in the Media view and do one of the following:
• Choose Clip > Rename and type a new name.
• Click the text and type a new name.
You can also create a duplicate clip by copying and pasting, or Ctrl-dragging a clip in the Tasks panel.
View the duration of selected clips in the Timeline
The Info panel shows you the total duration of multiple clips selected in either the Tasks panel, Sceneline, or Timeline.
This information is often useful when editing a movie. For example, you may want to find music to fit a scene or
replace a few clips with different footage. If you select clips in the Tasks panel, the Info panel displays the total duration
of all the clips you select. If you select clips in the Timeline or Sceneline, the Info panel displays the total duration
spanned by the clips, from the In point of the first selected clip to the Out point of the last selected clip. If the clips are
not contiguous in the tracks, the duration may be longer than the total duration of the clips themselves.
Last updated 11/22/2011
Page 98

USING ADOBE PREMIERE ELEMENTS 10
Arranging clips in a movie
Duration of multiple clips in the Timeline includes total time spanned by selected clips.
1 Make sure that the Info panel is visible. If not visible, choose Window > Info.
2 In the Media view, or the Timeline or Sceneline, select the desired clips. The Info panel displays the number of items
selected and the total duration of those items.
You can view the duration of a single clip in a tool tip by positioning the cursor over a clip in the Timeline or Sceneline.
92
Customize Timeline tracks
You can customize Timeline tracks to suit the needs of your project.
Add a track to the Timeline
1 Choose Timeline > Add Tracks.
2 In the Add Tracks dialog box, type the number of tracks you want to add in the Add field for video or audio tracks.
3 To specify the placement of added tracks, choose an option from the Placement pop-up menu for each type of track
added, and click OK.
Resize tracks
Tracks have three preset sizes: Small, Medium, and Large. The Large view is helpful for viewing the clip thumbnails
and adjusting effects such as the opacity or volume of a clip. You can also resize tracks manually and resize the width
of the track header area to accommodate long track names. In addition, if your movie contains more tracks than can
fit on the screen at one time, you can adjust the relative proportion of visible video and audio tracks to favor the tracks
you need to see.
By default, track names are hidden; to view them, resize the track header section.
Resize the height of a track
❖ In the Timeline, do one of the following:
• Right-click/ctrl-click in an empty track of the Timeline and choose Track Size, and then choose either Small,
Medium, or Large.
• In the track header area of the Timeline, position the pointer between two tracks so that the Height Adjustment
appears; then drag up or down to resize the track below (for video) or the track above (for audio).
icon
Last updated 11/22/2011
Page 99

USING ADOBE PREMIERE ELEMENTS 10
Arranging clips in a movie
Changing track height in the Timeline
Resize the track header section of the Timeline
❖ In the Timeline, position the pointer over the right edge of the track header (where track icons are listed) so that
the Resize icon appears, and then drag the right edge. (The icons at the top of the track header limit its minimum
width. The maximum width is about double the minimum width.)
Rename a track
1 In the Timeline, right-click/ctrl-click the track’s name (for example, Video 1) in the Timeline and choose Rename.
2 Type a new name for the track and press Enter, or click outside the box.
Delete empty tracks from the Timeline
❖ Do one of the following:
• Choose Timeline > Delete Empty Tracks.
• Right-click/ctrl-click in an empty track in the Timeline and choose Delete Empty Tracks.
93
Customize how clips display in the Timeline
You can display clips in the Timeline in different ways, depending on your preference or the task at hand. You can
choose to display a thumbnail image at just the beginning of the clip, at the head and tail of the clip, or along the entire
duration of the clip (the default view). For an audio track, you can choose to display or hide the audio waveform of the
audio contents.
Set Display Style buttons let you set how tracks are displayed in the Timeline.
Displaying thumbnail images across the duration of the clip gives you a sense of the progression of the clip. However,
do not confuse the boundary between thumbnails as the actual boundary between frames. Think of the thumbnails as
a storyboard or sketch of the clip’s content.
❖ Click the Set Video Track Display Style button or the Set Audio Track Display Style button at the left corner
of the track. Each time you click, the track’s display style toggles to a different view.
Last updated 11/22/2011
Page 100

USING ADOBE PREMIERE ELEMENTS 10
Arranging clips in a movie
To see more volume detail when viewing an audio waveform in the Timeline, increase the track height.
Creating a picture-in-picture overlay
You can place one video clip in a small frame over a background video clip that covers the entire screen. This effect is
called a picture-in-picture overlay.
94
Picture-in-picture overlay
Note: For information about superimposing one clip over another by creating transparent backgrounds, see “About
superimposing and transparency” on page 155.
More Help topics
“Animating a clip’s position” on page 208
“Overlay a clip in the Timeline” on page 87
Create a picture-in-picture overlay
1 Select the clip in the Sceneline that you want to use as the background clip.
Last updated 11/22/2011
 Loading...