

Page 1

Using
ADOBE® PHOTOSHOP® ELEMENTS
7
Page 2

Copyright
© 2008 Adobe Systems Incorporated. All rights reserved.
Using Adobe® Photoshop® Elements 7.0 for Windows®
If this guide is distributed with software that includes an end user agreement, this guide, as well as the software described in it, is furnished under license and
may be used or copied only in accordance with the terms of such license. Except as permitted by any such license, no part of this guide may be reproduced, stored
in a retrieval system, or transmitted, in any form or by any means, electronic, mechanical, recording, or otherwise, without the prior written permission of Adobe
Systems Incorporated. Please note that the content in this guide is protected under copyright law even if it is not distributed with software that includes an end
user license agreement.
The content of this guide is furnished for informational use only, is subject to change without notice, and should not be construed as a commitment by Adobe
Systems Incorporated. Adobe Systems Incorporated assumes no responsibility or liability for any errors or inaccuracies that may appear in the informational
content contained in this guide.
Please remember that existing artwork or images that you may want to include in your project may be protected under copyright law. The unauthorized
incorporation of such material into your new work could be a violation of the rights of the copyright owner. Please be sure to obtain any permission required
from the copyright owner.
Any references to company names in sample templates are for demonstration purposes only and are not intended to refer to any actual organization.
This work is licensed under the Creative Commons Attribution Non-Commercial 3.0 License. To view a copy of this license, visit
http://creativecommons.org/licenses/by-nc/3.0/us/
Adobe, the Adobe logo, Adobe Premiere, Acrobat, Dreamweaver, Flash, Illustrator, InDesign, Photoshop, PostScript, Reader, and XMP are either registered
trademarks or trademarks of Adobe Systems Incorporated in the United States and/or other countries.
Windows and Windows Vista are either registered trademarks or trademarks of Microsoft Corporation in the United States and/or other countries. Apple,
Macintosh and Mac OS are trademarks of Apple Inc., registered in the United States and other countries. Java is a trademark or registered trademark of Sun
Microsystems, Inc. in the United States and other countries. OS/2 is a trademark of International Business Machines Corporation in the United States, other
countries, or both. Dolby is a trademark of Dolby Laboratories. UNIX is a registered trademark of The Open Group in the US and other countries. SGI is a
trademark of Silicon Graphics, Inc. All other trademarks are the property of their respective owners.
Portions include technology used under license from Autonomy, and are copyrighted.
Portions Copyright © 1998 Gilles Vollant
This product includes software developed by the Apache Software Foundation (http://www.apache.org/).
This Program was written with MacApp®: ©1985-1988 Apple Computer, Inc. The MacApp software is proprietary to Apple Computer, Inc. and is licensed to
Adobe for distribution only for use in combination with Adobe Photoshop Elements.
Portions © Eastman Kodak Company, 2008 and used under license. All rights reserved. Kodak is a registered trademark and Photo CD is a trademark of Eastman
Kodak Company.
Portions of this code are licensed from Focoltone Colour System.
Software is produced under DIC's copyrights of color-data-base derived from Sample Books.
This product includes software developed by the OpenSymphony Group (http://www.opensymphony.com/).
Portions of this code are licensed from Nellymoser (www.nellymoser.com).
Sorenson Spark™ video compression and decompression technology licensed from Sorenson Media, Inc.
Certain Spelling portions of this product is based on Proximity Linguistic Technology. ©Copyright 1990 Merriam-Webster Inc. ©Copyright 1990 All rights
reserved. Proximity Technology A Division of Franklin Electronic Publishers, Inc. Burlington, New Jersey USA. ©Copyright 2003 Franklin Electronic Publishers
Inc.©Copyright 2003 All rights reserved. Proximity Technology A Division of Franklin Electronic Publishers, Inc. Burlington, New Jersey USA. Legal
Supplement ©Copyright 1990/1994 Merriam-Webster Inc./Franklin Electronic Publishers Inc. ©Copyright 1994 All rights reserved. Proximity Technology A
Division of Franklin Electronic Publishers, Inc. Burlington, New Jersey USA. ©Copyright 1990/1994 Merriam-Webster Inc./Franklin Electronic Publishers Inc.
©Copyright 1997All rights reserved. Proximity Technology A Division of Franklin Electronic Publishers, Inc. Burlington, New Jersey USA ©Copyright 1990
Merriam-Webster Inc. ©Copyright 1993 All rights reserved. Proximity Technology A Division of Franklin Electronic Publishers, Inc. Burlington, New Jersey
USA. ©Copyright 2004 Franklin Electronic Publishers Inc. ©Copyright 2004 All rights reserved. Proximity Technology A Division of Franklin Electronic
Publishers, Inc. Burlington, New Jersey USA. ©Copyright 1991 Dr. Lluis de Yzaguirre I Maura ©Copyright 1991 All rights reserved. Proximity Technology A
Division of Franklin Electronic Publishers, Inc. Burlington, New Jersey USA. ©Copyright 1990 Munksgaard International Publishers Ltd. ©Copyright 1990 All
rights reserved. Proximity Technology A Division of Franklin Electronic Publishers, Inc. Burlington, New Jersey USA. ©Copyright 1990 Van Dale Lexicografie
bv ©Copyright 1990 All rights reserved. Proximity Technology A Division of Franklin Electronic Publishers, Inc. Burlington, New Jersey USA. ©Copyright 1995
Van Dale Lexicografie bv ©Copyright 1996 All rights reserved. Proximity Technology A Division of Franklin Electronic Publishers, Inc. Burlington, New Jersey
USA. ©Copyright 1990 IDE a.s. ©Copyright 1990 All rights reserved. Proximity Technology A Division of Franklin Electronic Publishers, Inc. Burlington, New
Jersey USA. ©Copyright 1992 Hachette/Franklin Electronic Publishers Inc. ©Copyright 2004 All rights reserved. Proximity Technology A Division of Franklin
Electronic Publishers, Inc. Burlington, New Jersey USA. ©Copyright 1991 Text & Satz Datentechnik ©Copyright 1991 All rights reserved. Proximity Technology
A Division of Franklin Electronic Publishers, Inc. Burlington, New Jersey USA. ©Copyright 2004 Bertelsmann Lexikon Verlag ©Copyright 2004 All rights
reserved. Proximity Technology A Division of Franklin Electronic Publishers, Inc. Burlington, New Jersey USA. ©Copyright 2004 MorphoLogic Inc.
©Copyright 2004 All rights reserved. Proximity Technology A Division of Franklin Electronic Publishers, Inc. Burlington, New Jersey USA. ©Copyright 1990
William Collins Sons & Co. Ltd. ©Copyright 1990 All rights reserved. Proximity Technology A Division of Franklin Electronic Publishers, Inc. Burlington, New
Jersey USA. ©Copyright 1993-95 Russicon Company Ltd. ©Copyright 1995 All rights reserved. Proximity Technology A Division of Franklin Electronic
Publishers, Inc. Burlington, New Jersey USA. ©Copyright 2004 IDE a.s. ©Copyright 2004 All rights reserved. Proximity Technology A Division of Franklin
Electronic Publishers, Inc. Burlington, New Jersey USA. The Hyphenation portion of this product is based on Proximity Linguistic Technology. ©Copyright
2003 Franklin Electronic Publishers Inc.©Copyright 2003 All rights reserved. Proximity Technology A Division of Franklin Electronic Publishers, Inc.
Burlington, New Jersey USA. ©Copyright 1984 William Collins Sons & Co. Ltd. ©Copyright 1988 All rights reserved. Proximity Technology A Division of
Franklin Electronic Publishers, Inc. Burlington, New Jersey USA. ©Copyright 1990 Munksgaard International Publishers Ltd. ©Copyright 1990 All rights
reserved. Proximity Technology A Division of Franklin Electronic Publishers, Inc. Burlington, New Jersey USA. ©Copyright 1997 Van Dale Lexicografie bv
©Copyright 1997 All rights reserved. Proximity Technology A Division of Franklin Electronic Publishers, Inc. Burlington, New Jersey USA. ©Copyright 1984
Last updated 7/26/2011
Page 3

Editions Fernand Nathan ©Copyright 1989 All rights reserved. Proximity Technology A Division of Franklin Electronic Publishers, Inc. Burlington, New Jersey
USA. ©Copyright 1983 S Fischer Verlag ©Copyright 1997 All rights reserved. Proximity Technology A Division of Franklin Electronic Publishers, Inc.
Burlington, New Jersey USA. ©Copyright 1989 Zanichelli ©Copyright 1989 All rights reserved. Proximity Technology A Division of Franklin Electronic
Publishers, Inc. Burlington, New Jersey USA. ©Copyright 1989 IDE a.s. ©Copyright 1989 All rights reserved. Proximity Technology A Division of Franklin
Electronic Publishers, Inc. Burlington, New Jersey USA. ©Copyright 1990 Espasa-Calpe ©Copyright 1990 All rights reserved. Proximity Technology A Division
of Franklin Electronic Publishers, Inc. Burlington, New Jersey USA. ©Copyright 1989 C.A. Stromberg AB. ©Copyright 1989 All rights reserved. Proximity
Technology A Division of Franklin Electronic Publishers, Inc. Burlington, New Jersey USA.
Adobe Systems Incorporated, 345 Park Avenue, San Jose, California 95110, USA.
Notice to U.S. Government End Users. The Software and Documentation are “Commercial Items,” as that term is defined at 48 C.F.R. §2.101, consisting of
“Commercial Computer Software” and “Commercial Computer Software Documentation,” as such terms are used in 48 C.F.R. §12.212 or 48 C.F.R. §227.7202,
as applicable. Consistent with 48 C.F.R. §12.212 or 48 C.F.R. §§227.7202-1 through 227.7202-4, as applicable, the Commercial Computer Software and
Commercial Computer Software Documentation are being licensed to U.S. Government end users (a) only as Commercial Items and (b) with only those rights
as are granted to all other end users pursuant to the terms and conditions herein. Unpublished-rights reserved under the copyright laws of the United States.
Adobe Systems Incorporated, 345 Park Avenue, San Jose, CA 95110-2704, USA. For U.S. Government End Users, Adobe agrees to comply with all applicable
equal opportunity laws including, if appropriate, the provisions of Executive Order 11246, as amended, Section 402 of the Vietnam Era Veterans Readjustment
Assistance Act of 1974 (38 USC 4212), and Section 503 of the Rehabilitation Act of 1973, as amended, and the regulations at 41 CFR Parts 60-1 through 60-60,
60-250, and 60-741. The affirmative action clause and regulations contained in the preceding sentence shall be incorporated by reference.
Last updated 7/26/2011
Page 4

Contents
Chapter 1: Getting started
What to do first . . . . . . . . . . . . . . . . . . . . . . . . . . . . . . . . . . . . . . . . . . . . . . . . . . . . . . . . . . . . . . . . . . . . . . . . . . . . . . . . . . . . . . . . . . . . . . . . . . . . . . . . 1
Using Help and getting support . . . . . . . . . . . . . . . . . . . . . . . . . . . . . . . . . . . . . . . . . . . . . . . . . . . . . . . . . . . . . . . . . . . . . . . . . . . . . . . . . . . . . . . . 2
Working in Photoshop Elements . . . . . . . . . . . . . . . . . . . . . . . . . . . . . . . . . . . . . . . . . . . . . . . . . . . . . . . . . . . . . . . . . . . . . . . . . . . . . . . . . . . . . . 3
Chapter 2: Photoshop Elements workspace
About workspaces . . . . . . . . . . . . . . . . . . . . . . . . . . . . . . . . . . . . . . . . . . . . . . . . . . . . . . . . . . . . . . . . . . . . . . . . . . . . . . . . . . . . . . . . . . . . . . . . . . . . 13
Context menus . . . . . . . . . . . . . . . . . . . . . . . . . . . . . . . . . . . . . . . . . . . . . . . . . . . . . . . . . . . . . . . . . . . . . . . . . . . . . . . . . . . . . . . . . . . . . . . . . . . . . . . 16
Tools . . . . . . . . . . . . . . . . . . . . . . . . . . . . . . . . . . . . . . . . . . . . . . . . . . . . . . . . . . . . . . . . . . . . . . . . . . . . . . . . . . . . . . . . . . . . . . . . . . . . . . . . . . . . . . . . . 17
Palettes and bins . . . . . . . . . . . . . . . . . . . . . . . . . . . . . . . . . . . . . . . . . . . . . . . . . . . . . . . . . . . . . . . . . . . . . . . . . . . . . . . . . . . . . . . . . . . . . . . . . . . . . 20
Undo, redo, and cancel . . . . . . . . . . . . . . . . . . . . . . . . . . . . . . . . . . . . . . . . . . . . . . . . . . . . . . . . . . . . . . . . . . . . . . . . . . . . . . . . . . . . . . . . . . . . . . . 25
Scratch disks and plug-ins . . . . . . . . . . . . . . . . . . . . . . . . . . . . . . . . . . . . . . . . . . . . . . . . . . . . . . . . . . . . . . . . . . . . . . . . . . . . . . . . . . . . . . . . . . . . 27
Getting started with your Photoshop.com membership . . . . . . . . . . . . . . . . . . . . . . . . . . . . . . . . . . . . . . . . . . . . . . . . . . . . . . . . . . . . . . . 28
Using Photoshop Elements and Adobe Premiere Elements together . . . . . . . . . . . . . . . . . . . . . . . . . . . . . . . . . . . . . . . . . . . . . . . . . . . 30
iv
Chapter 3: Import photos and videos
About getting photos and videos . . . . . . . . . . . . . . . . . . . . . . . . . . . . . . . . . . . . . . . . . . . . . . . . . . . . . . . . . . . . . . . . . . . . . . . . . . . . . . . . . . . . . 32
Cameras and card readers . . . . . . . . . . . . . . . . . . . . . . . . . . . . . . . . . . . . . . . . . . . . . . . . . . . . . . . . . . . . . . . . . . . . . . . . . . . . . . . . . . . . . . . . . . . . 35
Scanners . . . . . . . . . . . . . . . . . . . . . . . . . . . . . . . . . . . . . . . . . . . . . . . . . . . . . . . . . . . . . . . . . . . . . . . . . . . . . . . . . . . . . . . . . . . . . . . . . . . . . . . . . . . . . 39
Local files, CDs, DVDs, and video . . . . . . . . . . . . . . . . . . . . . . . . . . . . . . . . . . . . . . . . . . . . . . . . . . . . . . . . . . . . . . . . . . . . . . . . . . . . . . . . . . . . . . 41
Mobile phone cameras . . . . . . . . . . . . . . . . . . . . . . . . . . . . . . . . . . . . . . . . . . . . . . . . . . . . . . . . . . . . . . . . . . . . . . . . . . . . . . . . . . . . . . . . . . . . . . . 47
Chapter 4: Viewing and fixing photos in the Organizer
Viewing photos in the Organizer . . . . . . . . . . . . . . . . . . . . . . . . . . . . . . . . . . . . . . . . . . . . . . . . . . . . . . . . . . . . . . . . . . . . . . . . . . . . . . . . . . . . . . 48
Viewing video and full-screen images . . . . . . . . . . . . . . . . . . . . . . . . . . . . . . . . . . . . . . . . . . . . . . . . . . . . . . . . . . . . . . . . . . . . . . . . . . . . . . . . . 55
Pinning photos to a map . . . . . . . . . . . . . . . . . . . . . . . . . . . . . . . . . . . . . . . . . . . . . . . . . . . . . . . . . . . . . . . . . . . . . . . . . . . . . . . . . . . . . . . . . . . . . 60
Viewing photos in Date view . . . . . . . . . . . . . . . . . . . . . . . . . . . . . . . . . . . . . . . . . . . . . . . . . . . . . . . . . . . . . . . . . . . . . . . . . . . . . . . . . . . . . . . . . . 62
Fixing photos in the Organizer . . . . . . . . . . . . . . . . . . . . . . . . . . . . . . . . . . . . . . . . . . . . . . . . . . . . . . . . . . . . . . . . . . . . . . . . . . . . . . . . . . . . . . . . 65
Chapter 5: Tagging and organizing photos
Tagging photos . . . . . . . . . . . . . . . . . . . . . . . . . . . . . . . . . . . . . . . . . . . . . . . . . . . . . . . . . . . . . . . . . . . . . . . . . . . . . . . . . . . . . . . . . . . . . . . . . . . . . . 68
Editing keyword tags, categories, and subcategories . . . . . . . . . . . . . . . . . . . . . . . . . . . . . . . . . . . . . . . . . . . . . . . . . . . . . . . . . . . . . . . . . . 76
Creating albums . . . . . . . . . . . . . . . . . . . . . . . . . . . . . . . . . . . . . . . . . . . . . . . . . . . . . . . . . . . . . . . . . . . . . . . . . . . . . . . . . . . . . . . . . . . . . . . . . . . . . . 80
Creating and editing smart albums . . . . . . . . . . . . . . . . . . . . . . . . . . . . . . . . . . . . . . . . . . . . . . . . . . . . . . . . . . . . . . . . . . . . . . . . . . . . . . . . . . . 85
Editing albums and album groups . . . . . . . . . . . . . . . . . . . . . . . . . . . . . . . . . . . . . . . . . . . . . . . . . . . . . . . . . . . . . . . . . . . . . . . . . . . . . . . . . . . . 86
Chapter 6: Finding photos in the Organizer
Searching for photos in the Organizer . . . . . . . . . . . . . . . . . . . . . . . . . . . . . . . . . . . . . . . . . . . . . . . . . . . . . . . . . . . . . . . . . . . . . . . . . . . . . . . . . 90
Finding photos by keyword tags . . . . . . . . . . . . . . . . . . . . . . . . . . . . . . . . . . . . . . . . . . . . . . . . . . . . . . . . . . . . . . . . . . . . . . . . . . . . . . . . . . . . . . 93
Finding photos by content, type, and metadata . . . . . . . . . . . . . . . . . . . . . . . . . . . . . . . . . . . . . . . . . . . . . . . . . . . . . . . . . . . . . . . . . . . . . . . 96
Finding photos using a map . . . . . . . . . . . . . . . . . . . . . . . . . . . . . . . . . . . . . . . . . . . . . . . . . . . . . . . . . . . . . . . . . . . . . . . . . . . . . . . . . . . . . . . . . 100
Last updated 7/26/2011
Page 5

USING PHOTOSHOP ELEMENTS 7
Contents
Chapter 7: Managing files and catalogs
Managing catalogs . . . . . . . . . . . . . . . . . . . . . . . . . . . . . . . . . . . . . . . . . . . . . . . . . . . . . . . . . . . . . . . . . . . . . . . . . . . . . . . . . . . . . . . . . . . . . . . . . . 102
Moving, copying, and renaming files . . . . . . . . . . . . . . . . . . . . . . . . . . . . . . . . . . . . . . . . . . . . . . . . . . . . . . . . . . . . . . . . . . . . . . . . . . . . . . . . . 108
Grouping photos in stacks . . . . . . . . . . . . . . . . . . . . . . . . . . . . . . . . . . . . . . . . . . . . . . . . . . . . . . . . . . . . . . . . . . . . . . . . . . . . . . . . . . . . . . . . . . . 111
Grouping photos in version sets . . . . . . . . . . . . . . . . . . . . . . . . . . . . . . . . . . . . . . . . . . . . . . . . . . . . . . . . . . . . . . . . . . . . . . . . . . . . . . . . . . . . . 115
Filenames and versions . . . . . . . . . . . . . . . . . . . . . . . . . . . . . . . . . . . . . . . . . . . . . . . . . . . . . . . . . . . . . . . . . . . . . . . . . . . . . . . . . . . . . . . . . . . . . . 119
Adding captions and notes . . . . . . . . . . . . . . . . . . . . . . . . . . . . . . . . . . . . . . . . . . . . . . . . . . . . . . . . . . . . . . . . . . . . . . . . . . . . . . . . . . . . . . . . . . 122
File information . . . . . . . . . . . . . . . . . . . . . . . . . . . . . . . . . . . . . . . . . . . . . . . . . . . . . . . . . . . . . . . . . . . . . . . . . . . . . . . . . . . . . . . . . . . . . . . . . . . . . 125
Back up and synchronize albums and files . . . . . . . . . . . . . . . . . . . . . . . . . . . . . . . . . . . . . . . . . . . . . . . . . . . . . . . . . . . . . . . . . . . . . . . . . . . . 129
Reconnecting files . . . . . . . . . . . . . . . . . . . . . . . . . . . . . . . . . . . . . . . . . . . . . . . . . . . . . . . . . . . . . . . . . . . . . . . . . . . . . . . . . . . . . . . . . . . . . . . . . . . 131
Chapter 8: Working in the Editor
Opening files in the Editor . . . . . . . . . . . . . . . . . . . . . . . . . . . . . . . . . . . . . . . . . . . . . . . . . . . . . . . . . . . . . . . . . . . . . . . . . . . . . . . . . . . . . . . . . . . 134
Viewing images in the Editor . . . . . . . . . . . . . . . . . . . . . . . . . . . . . . . . . . . . . . . . . . . . . . . . . . . . . . . . . . . . . . . . . . . . . . . . . . . . . . . . . . . . . . . . . 139
Rulers and the grid . . . . . . . . . . . . . . . . . . . . . . . . . . . . . . . . . . . . . . . . . . . . . . . . . . . . . . . . . . . . . . . . . . . . . . . . . . . . . . . . . . . . . . . . . . . . . . . . . . 142
Saving and exporting images . . . . . . . . . . . . . . . . . . . . . . . . . . . . . . . . . . . . . . . . . . . . . . . . . . . . . . . . . . . . . . . . . . . . . . . . . . . . . . . . . . . . . . . . 143
Guided Edit . . . . . . . . . . . . . . . . . . . . . . . . . . . . . . . . . . . . . . . . . . . . . . . . . . . . . . . . . . . . . . . . . . . . . . . . . . . . . . . . . . . . . . . . . . . . . . . . . . . . . . . . . 150
Chapter 9: Using layers
Creating layers . . . . . . . . . . . . . . . . . . . . . . . . . . . . . . . . . . . . . . . . . . . . . . . . . . . . . . . . . . . . . . . . . . . . . . . . . . . . . . . . . . . . . . . . . . . . . . . . . . . . . . 154
Editing layers . . . . . . . . . . . . . . . . . . . . . . . . . . . . . . . . . . . . . . . . . . . . . . . . . . . . . . . . . . . . . . . . . . . . . . . . . . . . . . . . . . . . . . . . . . . . . . . . . . . . . . . . 158
Copying and arranging layers . . . . . . . . . . . . . . . . . . . . . . . . . . . . . . . . . . . . . . . . . . . . . . . . . . . . . . . . . . . . . . . . . . . . . . . . . . . . . . . . . . . . . . . . 161
Opacity and blending modes . . . . . . . . . . . . . . . . . . . . . . . . . . . . . . . . . . . . . . . . . . . . . . . . . . . . . . . . . . . . . . . . . . . . . . . . . . . . . . . . . . . . . . . . 166
Adjustment and fill layers . . . . . . . . . . . . . . . . . . . . . . . . . . . . . . . . . . . . . . . . . . . . . . . . . . . . . . . . . . . . . . . . . . . . . . . . . . . . . . . . . . . . . . . . . . . . 168
Layer groups . . . . . . . . . . . . . . . . . . . . . . . . . . . . . . . . . . . . . . . . . . . . . . . . . . . . . . . . . . . . . . . . . . . . . . . . . . . . . . . . . . . . . . . . . . . . . . . . . . . . . . . . 172
Layer styles . . . . . . . . . . . . . . . . . . . . . . . . . . . . . . . . . . . . . . . . . . . . . . . . . . . . . . . . . . . . . . . . . . . . . . . . . . . . . . . . . . . . . . . . . . . . . . . . . . . . . . . . . 173
v
Chapter 10: Camera raw files
Processing camera raw image files . . . . . . . . . . . . . . . . . . . . . . . . . . . . . . . . . . . . . . . . . . . . . . . . . . . . . . . . . . . . . . . . . . . . . . . . . . . . . . . . . . . 177
Settings and controls . . . . . . . . . . . . . . . . . . . . . . . . . . . . . . . . . . . . . . . . . . . . . . . . . . . . . . . . . . . . . . . . . . . . . . . . . . . . . . . . . . . . . . . . . . . . . . . . 180
Color and camera raw . . . . . . . . . . . . . . . . . . . . . . . . . . . . . . . . . . . . . . . . . . . . . . . . . . . . . . . . . . . . . . . . . . . . . . . . . . . . . . . . . . . . . . . . . . . . . . . 180
Chapter 11: Selecting parts of an image
Making selections . . . . . . . . . . . . . . . . . . . . . . . . . . . . . . . . . . . . . . . . . . . . . . . . . . . . . . . . . . . . . . . . . . . . . . . . . . . . . . . . . . . . . . . . . . . . . . . . . . . 185
Modifying selections . . . . . . . . . . . . . . . . . . . . . . . . . . . . . . . . . . . . . . . . . . . . . . . . . . . . . . . . . . . . . . . . . . . . . . . . . . . . . . . . . . . . . . . . . . . . . . . . 194
Smoothing selection edges with anti-aliasing and feathering . . . . . . . . . . . . . . . . . . . . . . . . . . . . . . . . . . . . . . . . . . . . . . . . . . . . . . . . . 199
Moving and copying selections . . . . . . . . . . . . . . . . . . . . . . . . . . . . . . . . . . . . . . . . . . . . . . . . . . . . . . . . . . . . . . . . . . . . . . . . . . . . . . . . . . . . . . 200
Saving selections . . . . . . . . . . . . . . . . . . . . . . . . . . . . . . . . . . . . . . . . . . . . . . . . . . . . . . . . . . . . . . . . . . . . . . . . . . . . . . . . . . . . . . . . . . . . . . . . . . . . 202
Chapter 12: Color and tonal correction
Color and tonal correction basics . . . . . . . . . . . . . . . . . . . . . . . . . . . . . . . . . . . . . . . . . . . . . . . . . . . . . . . . . . . . . . . . . . . . . . . . . . . . . . . . . . . . 205
Adjusting shadows and light . . . . . . . . . . . . . . . . . . . . . . . . . . . . . . . . . . . . . . . . . . . . . . . . . . . . . . . . . . . . . . . . . . . . . . . . . . . . . . . . . . . . . . . . . 213
Correcting color casts . . . . . . . . . . . . . . . . . . . . . . . . . . . . . . . . . . . . . . . . . . . . . . . . . . . . . . . . . . . . . . . . . . . . . . . . . . . . . . . . . . . . . . . . . . . . . . . 221
Adjusting color saturation and hue . . . . . . . . . . . . . . . . . . . . . . . . . . . . . . . . . . . . . . . . . . . . . . . . . . . . . . . . . . . . . . . . . . . . . . . . . . . . . . . . . . 224
Adjustment filters . . . . . . . . . . . . . . . . . . . . . . . . . . . . . . . . . . . . . . . . . . . . . . . . . . . . . . . . . . . . . . . . . . . . . . . . . . . . . . . . . . . . . . . . . . . . . . . . . . . 231
Last updated 7/26/2011
Page 6

USING PHOTOSHOP ELEMENTS 7
Contents
Chapter 13: Cropping, resizing, retouching, and transforming photos
Cropping . . . . . . . . . . . . . . . . . . . . . . . . . . . . . . . . . . . . . . . . . . . . . . . . . . . . . . . . . . . . . . . . . . . . . . . . . . . . . . . . . . . . . . . . . . . . . . . . . . . . . . . . . . . . 236
Image size and resolution . . . . . . . . . . . . . . . . . . . . . . . . . . . . . . . . . . . . . . . . . . . . . . . . . . . . . . . . . . . . . . . . . . . . . . . . . . . . . . . . . . . . . . . . . . . . 241
Retouching . . . . . . . . . . . . . . . . . . . . . . . . . . . . . . . . . . . . . . . . . . . . . . . . . . . . . . . . . . . . . . . . . . . . . . . . . . . . . . . . . . . . . . . . . . . . . . . . . . . . . . . . . 245
Sharpening . . . . . . . . . . . . . . . . . . . . . . . . . . . . . . . . . . . . . . . . . . . . . . . . . . . . . . . . . . . . . . . . . . . . . . . . . . . . . . . . . . . . . . . . . . . . . . . . . . . . . . . . . 256
Transforming . . . . . . . . . . . . . . . . . . . . . . . . . . . . . . . . . . . . . . . . . . . . . . . . . . . . . . . . . . . . . . . . . . . . . . . . . . . . . . . . . . . . . . . . . . . . . . . . . . . . . . . . 259
Chapter 14: Understanding color
Understanding color . . . . . . . . . . . . . . . . . . . . . . . . . . . . . . . . . . . . . . . . . . . . . . . . . . . . . . . . . . . . . . . . . . . . . . . . . . . . . . . . . . . . . . . . . . . . . . . . 266
Using image modes and color tables . . . . . . . . . . . . . . . . . . . . . . . . . . . . . . . . . . . . . . . . . . . . . . . . . . . . . . . . . . . . . . . . . . . . . . . . . . . . . . . . . 268
Setting up color management . . . . . . . . . . . . . . . . . . . . . . . . . . . . . . . . . . . . . . . . . . . . . . . . . . . . . . . . . . . . . . . . . . . . . . . . . . . . . . . . . . . . . . . 273
Chapter 15: Filters, effects, styles, and artwork
Effects . . . . . . . . . . . . . . . . . . . . . . . . . . . . . . . . . . . . . . . . . . . . . . . . . . . . . . . . . . . . . . . . . . . . . . . . . . . . . . . . . . . . . . . . . . . . . . . . . . . . . . . . . . . . . . 276
Filters . . . . . . . . . . . . . . . . . . . . . . . . . . . . . . . . . . . . . . . . . . . . . . . . . . . . . . . . . . . . . . . . . . . . . . . . . . . . . . . . . . . . . . . . . . . . . . . . . . . . . . . . . . . . . . . 281
Artistic filters . . . . . . . . . . . . . . . . . . . . . . . . . . . . . . . . . . . . . . . . . . . . . . . . . . . . . . . . . . . . . . . . . . . . . . . . . . . . . . . . . . . . . . . . . . . . . . . . . . . . . . . . 286
Blur filters . . . . . . . . . . . . . . . . . . . . . . . . . . . . . . . . . . . . . . . . . . . . . . . . . . . . . . . . . . . . . . . . . . . . . . . . . . . . . . . . . . . . . . . . . . . . . . . . . . . . . . . . . . . 288
Brush Stroke filters . . . . . . . . . . . . . . . . . . . . . . . . . . . . . . . . . . . . . . . . . . . . . . . . . . . . . . . . . . . . . . . . . . . . . . . . . . . . . . . . . . . . . . . . . . . . . . . . . . 289
Distort filters . . . . . . . . . . . . . . . . . . . . . . . . . . . . . . . . . . . . . . . . . . . . . . . . . . . . . . . . . . . . . . . . . . . . . . . . . . . . . . . . . . . . . . . . . . . . . . . . . . . . . . . . 290
Noise filters . . . . . . . . . . . . . . . . . . . . . . . . . . . . . . . . . . . . . . . . . . . . . . . . . . . . . . . . . . . . . . . . . . . . . . . . . . . . . . . . . . . . . . . . . . . . . . . . . . . . . . . . . 295
Pixelate filters . . . . . . . . . . . . . . . . . . . . . . . . . . . . . . . . . . . . . . . . . . . . . . . . . . . . . . . . . . . . . . . . . . . . . . . . . . . . . . . . . . . . . . . . . . . . . . . . . . . . . . . 296
Render filters . . . . . . . . . . . . . . . . . . . . . . . . . . . . . . . . . . . . . . . . . . . . . . . . . . . . . . . . . . . . . . . . . . . . . . . . . . . . . . . . . . . . . . . . . . . . . . . . . . . . . . . . 297
Sketch filters . . . . . . . . . . . . . . . . . . . . . . . . . . . . . . . . . . . . . . . . . . . . . . . . . . . . . . . . . . . . . . . . . . . . . . . . . . . . . . . . . . . . . . . . . . . . . . . . . . . . . . . . 300
Stylize filters . . . . . . . . . . . . . . . . . . . . . . . . . . . . . . . . . . . . . . . . . . . . . . . . . . . . . . . . . . . . . . . . . . . . . . . . . . . . . . . . . . . . . . . . . . . . . . . . . . . . . . . . 301
Texture filters . . . . . . . . . . . . . . . . . . . . . . . . . . . . . . . . . . . . . . . . . . . . . . . . . . . . . . . . . . . . . . . . . . . . . . . . . . . . . . . . . . . . . . . . . . . . . . . . . . . . . . . 303
Video filters . . . . . . . . . . . . . . . . . . . . . . . . . . . . . . . . . . . . . . . . . . . . . . . . . . . . . . . . . . . . . . . . . . . . . . . . . . . . . . . . . . . . . . . . . . . . . . . . . . . . . . . . . 304
Other filters . . . . . . . . . . . . . . . . . . . . . . . . . . . . . . . . . . . . . . . . . . . . . . . . . . . . . . . . . . . . . . . . . . . . . . . . . . . . . . . . . . . . . . . . . . . . . . . . . . . . . . . . . 304
vi
Chapter 16: Painting
Painting overview . . . . . . . . . . . . . . . . . . . . . . . . . . . . . . . . . . . . . . . . . . . . . . . . . . . . . . . . . . . . . . . . . . . . . . . . . . . . . . . . . . . . . . . . . . . . . . . . . . . 307
Choosing colors . . . . . . . . . . . . . . . . . . . . . . . . . . . . . . . . . . . . . . . . . . . . . . . . . . . . . . . . . . . . . . . . . . . . . . . . . . . . . . . . . . . . . . . . . . . . . . . . . . . . . 311
Painting tools . . . . . . . . . . . . . . . . . . . . . . . . . . . . . . . . . . . . . . . . . . . . . . . . . . . . . . . . . . . . . . . . . . . . . . . . . . . . . . . . . . . . . . . . . . . . . . . . . . . . . . . 315
Setting up brushes . . . . . . . . . . . . . . . . . . . . . . . . . . . . . . . . . . . . . . . . . . . . . . . . . . . . . . . . . . . . . . . . . . . . . . . . . . . . . . . . . . . . . . . . . . . . . . . . . . 322
Fills and strokes . . . . . . . . . . . . . . . . . . . . . . . . . . . . . . . . . . . . . . . . . . . . . . . . . . . . . . . . . . . . . . . . . . . . . . . . . . . . . . . . . . . . . . . . . . . . . . . . . . . . . 326
Patterns . . . . . . . . . . . . . . . . . . . . . . . . . . . . . . . . . . . . . . . . . . . . . . . . . . . . . . . . . . . . . . . . . . . . . . . . . . . . . . . . . . . . . . . . . . . . . . . . . . . . . . . . . . . . . 327
Gradients . . . . . . . . . . . . . . . . . . . . . . . . . . . . . . . . . . . . . . . . . . . . . . . . . . . . . . . . . . . . . . . . . . . . . . . . . . . . . . . . . . . . . . . . . . . . . . . . . . . . . . . . . . . 329
Presets and libraries . . . . . . . . . . . . . . . . . . . . . . . . . . . . . . . . . . . . . . . . . . . . . . . . . . . . . . . . . . . . . . . . . . . . . . . . . . . . . . . . . . . . . . . . . . . . . . . . . 333
Chapter 17: Adding text and shapes
Add and edit text . . . . . . . . . . . . . . . . . . . . . . . . . . . . . . . . . . . . . . . . . . . . . . . . . . . . . . . . . . . . . . . . . . . . . . . . . . . . . . . . . . . . . . . . . . . . . . . . . . . . 337
Work with Asian type . . . . . . . . . . . . . . . . . . . . . . . . . . . . . . . . . . . . . . . . . . . . . . . . . . . . . . . . . . . . . . . . . . . . . . . . . . . . . . . . . . . . . . . . . . . . . . . . 343
Creating shapes . . . . . . . . . . . . . . . . . . . . . . . . . . . . . . . . . . . . . . . . . . . . . . . . . . . . . . . . . . . . . . . . . . . . . . . . . . . . . . . . . . . . . . . . . . . . . . . . . . . . . 344
Editing shapes . . . . . . . . . . . . . . . . . . . . . . . . . . . . . . . . . . . . . . . . . . . . . . . . . . . . . . . . . . . . . . . . . . . . . . . . . . . . . . . . . . . . . . . . . . . . . . . . . . . . . . 348
Chapter 18: Creating projects
Projects overview . . . . . . . . . . . . . . . . . . . . . . . . . . . . . . . . . . . . . . . . . . . . . . . . . . . . . . . . . . . . . . . . . . . . . . . . . . . . . . . . . . . . . . . . . . . . . . . . . . . 350
Making photo projects . . . . . . . . . . . . . . . . . . . . . . . . . . . . . . . . . . . . . . . . . . . . . . . . . . . . . . . . . . . . . . . . . . . . . . . . . . . . . . . . . . . . . . . . . . . . . . 352
Editing photo projects . . . . . . . . . . . . . . . . . . . . . . . . . . . . . . . . . . . . . . . . . . . . . . . . . . . . . . . . . . . . . . . . . . . . . . . . . . . . . . . . . . . . . . . . . . . . . . . 357
Last updated 7/26/2011
Page 7

USING PHOTOSHOP ELEMENTS 7
Contents
Making digital projects . . . . . . . . . . . . . . . . . . . . . . . . . . . . . . . . . . . . . . . . . . . . . . . . . . . . . . . . . . . . . . . . . . . . . . . . . . . . . . . . . . . . . . . . . . . . . . 360
Creating slide shows . . . . . . . . . . . . . . . . . . . . . . . . . . . . . . . . . . . . . . . . . . . . . . . . . . . . . . . . . . . . . . . . . . . . . . . . . . . . . . . . . . . . . . . . . . . . . . . . . 363
Stitching together panoramas . . . . . . . . . . . . . . . . . . . . . . . . . . . . . . . . . . . . . . . . . . . . . . . . . . . . . . . . . . . . . . . . . . . . . . . . . . . . . . . . . . . . . . . 376
Chapter 19: Optimizing for the web
Optimizing images . . . . . . . . . . . . . . . . . . . . . . . . . . . . . . . . . . . . . . . . . . . . . . . . . . . . . . . . . . . . . . . . . . . . . . . . . . . . . . . . . . . . . . . . . . . . . . . . . . 381
Using transparency and mattes . . . . . . . . . . . . . . . . . . . . . . . . . . . . . . . . . . . . . . . . . . . . . . . . . . . . . . . . . . . . . . . . . . . . . . . . . . . . . . . . . . . . . . 389
Dithering in web images . . . . . . . . . . . . . . . . . . . . . . . . . . . . . . . . . . . . . . . . . . . . . . . . . . . . . . . . . . . . . . . . . . . . . . . . . . . . . . . . . . . . . . . . . . . . . 391
Previewing web images . . . . . . . . . . . . . . . . . . . . . . . . . . . . . . . . . . . . . . . . . . . . . . . . . . . . . . . . . . . . . . . . . . . . . . . . . . . . . . . . . . . . . . . . . . . . . 393
Chapter 20: Printing and sharing photos
Printing photos . . . . . . . . . . . . . . . . . . . . . . . . . . . . . . . . . . . . . . . . . . . . . . . . . . . . . . . . . . . . . . . . . . . . . . . . . . . . . . . . . . . . . . . . . . . . . . . . . . . . . 395
Print options . . . . . . . . . . . . . . . . . . . . . . . . . . . . . . . . . . . . . . . . . . . . . . . . . . . . . . . . . . . . . . . . . . . . . . . . . . . . . . . . . . . . . . . . . . . . . . . . . . . . . . . . 404
Sharing through Photoshop.com . . . . . . . . . . . . . . . . . . . . . . . . . . . . . . . . . . . . . . . . . . . . . . . . . . . . . . . . . . . . . . . . . . . . . . . . . . . . . . . . . . . . 405
Sharing photos using online services . . . . . . . . . . . . . . . . . . . . . . . . . . . . . . . . . . . . . . . . . . . . . . . . . . . . . . . . . . . . . . . . . . . . . . . . . . . . . . . . . 407
Sharing maps of photos . . . . . . . . . . . . . . . . . . . . . . . . . . . . . . . . . . . . . . . . . . . . . . . . . . . . . . . . . . . . . . . . . . . . . . . . . . . . . . . . . . . . . . . . . . . . . 413
Sharing photos by e-mail . . . . . . . . . . . . . . . . . . . . . . . . . . . . . . . . . . . . . . . . . . . . . . . . . . . . . . . . . . . . . . . . . . . . . . . . . . . . . . . . . . . . . . . . . . . . 414
Viewing and sharing photos on Media Center computers . . . . . . . . . . . . . . . . . . . . . . . . . . . . . . . . . . . . . . . . . . . . . . . . . . . . . . . . . . . . . 420
Exporting photos . . . . . . . . . . . . . . . . . . . . . . . . . . . . . . . . . . . . . . . . . . . . . . . . . . . . . . . . . . . . . . . . . . . . . . . . . . . . . . . . . . . . . . . . . . . . . . . . . . . . 421
vii
Chapter 21: Keyboard shortcuts
Shortcuts for the Organizer . . . . . . . . . . . . . . . . . . . . . . . . . . . . . . . . . . . . . . . . . . . . . . . . . . . . . . . . . . . . . . . . . . . . . . . . . . . . . . . . . . . . . . . . . . 423
Shortcuts for the Editor . . . . . . . . . . . . . . . . . . . . . . . . . . . . . . . . . . . . . . . . . . . . . . . . . . . . . . . . . . . . . . . . . . . . . . . . . . . . . . . . . . . . . . . . . . . . . . 425
Chapter 22: Glossary
Find definitions for terms . . . . . . . . . . . . . . . . . . . . . . . . . . . . . . . . . . . . . . . . . . . . . . . . . . . . . . . . . . . . . . . . . . . . . . . . . . . . . . . . . . . . . . . . . . . . 434
Digital imaging terms . . . . . . . . . . . . . . . . . . . . . . . . . . . . . . . . . . . . . . . . . . . . . . . . . . . . . . . . . . . . . . . . . . . . . . . . . . . . . . . . . . . . . . . . . . . . . . . 434
Index ...............................................................................................................449
Last updated 7/26/2011
Page 8

Chapter 1: Getting started
Adobe® Photoshop® Elements software combines power and simplicity so you can easily make your photos look their
best, share them in imaginative ways, and easily find and view all your photos and video clips.
To get started with video and PDF tutorials for specific tasks, go to the Photoshop Elements tutorial index. For a
detailed introduction to the complete workflow, see the Quick Tour chapter of the Classroom in a Book.
What to do first
Check the system requirements
If you’re not sure Photoshop Elements can run on your computer, review the complete system requirements and
recommendations for your Adobe® software. See the ReadMe file included on your software CD installation disc.
Install the software
1 Close any other Adobe applications open on your computer.
2 Insert the installation disc into your CD drive, and follow the on-screen instructions.
Do I need to uninstall my previous version of Photoshop Elements? If you’ve installed a trial version of
Photoshop
Photoshop
Elements, it’s a good idea to uninstall it first. However, it’s not necessary to uninstall a previous version of
Elements. But, you can uninstall a previous version if you want to.
1
How do I uninstall a version of Photoshop Elements? In the Windows OS, click the Start menu, and then choose
Control Panel. In the Control Panel dialog box, double-click Add Or Remove Programs. In the Add Or Remove
Programs dialog box, select the version of Photoshop
see a dialog box asking you if you really want to remove the application from your computer. Click “Yes” to uninstall.
Elements you want to uninstall and then click Remove. You’ll
Register
After installing Photoshop Elements, register your software to receive complimentary installation support,
notifications of updates, and other services.
If you postpone registration, you can register at any time by choosing Help > Registration.
ReadMe file
The installation CD contains the ReadMe file for your software. (This file is also copied to the application folder during
product installation.) Open the file to read important information.
Sign up for Photoshop.com membership
Important: Currently, Photoshop.com services are only available in the United States.
Last updated 7/26/2011
Page 9

USING PHOTOSHOP ELEMENTS 7
Getting started
Photoshop Elements users in the United States can sign up for a free Photoshop.com membership. The membership
extends the power of Photoshop
protect your photos by backing up your albums to Photoshop.com servers, and share your photos through online
albums and other creations. As a member, you receive updated tips, art, and templates to keep your projects fresh and
appealing. You can upgrade your free basic membership if you need more storage space or if you want access to special
content. For more information, see
How do I sign up for a Photoshop.com membership?
There’s a link in the Welcome screen for creating a Photoshop.com membership. Once you have a membership, the
Welcome screen displays links to services such as your account information, backup settings, web gallery, and
tutorials. In addition, links are throughout the Photoshop
Don’t worry if you don’t sign up for a Photoshop.com membership in the Welcome screen. Links are in the
Photoshop
Important: Currently, Photoshop.com services are only available in the United States.
Elements workspace for creating a membership anytime you want.
Elements with Internet services such as tutorials and special downloads. You can also
http://www.adobe.com/go/learn_pse_membership_en.
Elements workspace for accessing member services.
New and enhanced features
Visit http://www.adobe.com/go/learn_pse_features_en to learn about the new and enhanced features. Improving your
photos and doing more with them is easier than ever.
2
Using Help and getting support
Using Photoshop Elements Help
Photoshop Elements Help is available several ways. To access Help, choose Help > Photoshop Elements Help (or press
the F1 key on your keyboard). If your computer is connected to the Internet, Photoshop
launches Help on the web.
Help on the web http://www.adobe.com/go/learn_pse_en is the most comprehensive and up-to-date version of
Photoshop Elements Help. Your computer must be connected to the Internet to access Help on the web. Use the
Search field to search within Photoshop Elements Help. Browse all topics in Photoshop Elements Help.
Help in the application Help in the application provides access to key tasks and concepts. If you aren’t connected to
the Internet, Photoshop
Help PDF Help is also available as a PDF that is optimized for printing. Visit
http://www.adobe.com/go/learn_pse_printpdf_en or click the Help PDF link at the top of each Help page. The Help
PDF is the best way to access the most comprehensive Help when you don’t have an Internet connection.
Links in the application Some Help links are within Photoshop Elements. Clicking these links takes you to the
corresponding topic in either Help on the web or Help in the application.
Note: If you try to access a Help topic that only exists in Help on the web, Photoshop Elements displays a message with a
URL and a link to the complete Help on the Internet.
Tips for searching Help
Elements launches Help in the application.
• If you search using a phrase, such as “shape tool,” place quotation marks around the phrase. The search returns only
those topics containing all the words in the phrase.
• Make sure that the search terms are spelled correctly.
Elements automatically
Last updated 7/26/2011
Page 10
USING PHOTOSHOP ELEMENTS 7
Getting started
• If a search term doesn’t yield results, try using a synonym, such as “web” instead of “Internet.”
• If you find a topic you want to view again, bookmark it for easy access later.
Print a Help topic To print a topic from Help, use the Print command in the browser.
How to search for troubleshooting topics You can view top issues and search for common problems and error
messages by going to
Photoshop Elements users at http://www.adobe.com/go/forums.
Look for Photoshop Elements updates If your computer is connected to the Internet, you’ll receive notifications
whenever Photoshop
http://www.adobe.com/downloads/updates.
http://www.adobe.com/support/photoshopelements. You can also ask questions of other
Elements is updated. You can also find out about latest updates by going to
How do I get customer support?
You can get support by contacting Adobe directly or submitting a web case. Visit
http://www.adobe.com/support/contact for contact information. Visit the Adobe Support website at
http://www.adobe.com/go/support. Adobe Support has troubleshooting information and also information about free
and paid technical support options.
3
Working in Photoshop Elements
For video overviews, see www.adobe.com/go/lrvid2309_pse and www.adobe.com/go/lrvid2301_pse
Photoshop Elements has two basic workspaces—the Organizer and the Editor that you switch between depending on
the task you’re performing. You start by importing photos into the Organizer, where you view, manage, and find all of
your photos and video clips. You can also make quick fixes in the Organizer.
The Organizer workspace
Last updated 7/26/2011
Page 11
USING PHOTOSHOP ELEMENTS 7
Getting started
In the Editor workspace, you can refine your photos more fully and you make basic edits, follow step-by-step guided
editing tasks, or use advanced editing tools.
4
Full Edit workspace
After working with your photos in either the Organizer or the Editor, you can create printed and electronic photo
projects such as scrapbook pages, slide shows, photo books, and online albums that you can easily share with family
and friends.
Transferring (importing) photos to your computer
You can import photos from a camera or card reader, a scanner, a folder on a hard disk, or even from a mobile phone.
You can also import photos that already exist on your computer. Photoshop
Downloader that makes importing photos easy.
Photoshop Elements imports your files into a catalog, which is a database that contains information about your photos
and video clips. The database doesn’t contain the actual files but references them at the location on your computer
where you downloaded them. For more information, see
http://www.adobe.com/go/learn_pse_getphotos_en.
Note: If you are upgrading from an earlier version of Photoshop Elements, older catalogs are converted so you can
continue working with them.
Is it necessary to import photos into Photoshop Elements? Importing tells Photoshop Elements what photos and
video clips you want to keep track of. Unlike a file browser that only displays readily accessible photos, the
Photoshop
Elements catalog keeps track of where files are located. It also knows how files are being used, and what
keyword tags (information) have been added to them.
Must I use the Photo Downloader? No. When you connect your camera or card reader to your computer, the
Windows AutoPlay dialog box opens. You can select whatever method you want to download photos. Keep in mind
that the Photo Downloader is very useful for organizing your photos while downloading.
Elements has a built-in Photo
Last updated 7/26/2011
Page 12

USING PHOTOSHOP ELEMENTS 7
Getting started
Use the Photo Downloader to download files
1 Connect your camera or card reader to your computer. (See the documentation that came with your device, if
necessary.)
The Windows AutoPlay dialog box opens with a list of options for getting the photos.
2 In the Windows AutoPlay dialog box, select the Photoshop Elements option and then click OK.
Photoshop Elements launches (if it isn’t already running), and then the Photo Downloader dialog box opens. If
Photoshop
Reader to open the Photo Downloader.
3 In the Photo Downloader dialog box under Source, choose from the Get Photos From menu to specify where to
4 In the Import Settings area, set the following options:
Location Specifies the folder to which images are downloaded. To change the default folder location, click Browse, and
specify a new location.
Create Subfolder(s) Creates a subfolder using the naming scheme chosen from the pop-up menu. If you choose
Custom Name, type a subfolder name in the box.
Rename Files Changes the filenames using the naming scheme selected from the pop-up menu. If you choose Custom
Name, type a base filename and a starting number for assigning sequentially numbered filenames to the photos.
Elements is already running, choose File > Get Photos And Videos > From Camera Or Card
copy/import the photos from.
5
Note: If the name you entered exists, the copied image filename is appended with “-1” or another appropriately numbered
designator.
Preserve Current Filename in XMP Select this option to use the current filename as the filename stored in the metadata
of the photo.
Delete Options Specifies whether to leave the photos on your camera or card, verify and delete the files, or just delete
the files after they are copied. Photos that you do not import into Photoshop
Elements are not deleted from the camera
or card.
Note: In Windows Vista, if your camera is connected in PTP mode, you may not be able to view camera raw or video files
in the Photo Downloader. To view camera raw or video files, connect your camera in USB Mass Storage mode or remove
the card from the camera and use a card reader to connect it to your computer.
5 (Optional) To automatically download photos in Photoshop Elements after a device is connected, select Automatic
Download. Automatic download options are set in the Camera Or Card Reader preferences.
6 (Optional) For more download options, click the Advanced Dialog button. See
http://www.adobe.com/go/learn_pse_advanceddownload_en.
7 Click Get Photos.
The photos are copied to your hard drive.
8 Click OK in the Files Successfully Copied dialog box.
When my files are imported into Photoshop Elements, can I delete them from my hard drive? No! The Organizer
displays thumbnails that reference your photos. If you delete the photos, then the thumbnails lose their connection to
the original files.
Problems getting photos from your camera? Try any of the following suggestions. Plug the camera into a different
USB port. Use a card reader instead of connecting the camera. Try copying the photos to your hard drive first and then
import the files into Photoshop
Elements.
Last updated 7/26/2011
Page 13

USING PHOTOSHOP ELEMENTS 7
Getting started
Review your photos
Immediately after importing photos into Photoshop Elements, you can press the F11 key to use the Full Screen mode
to review them. Viewing large images makes it easier to delete the photos that aren’t worth keeping.
Organizing your photos
After you’ve decided which photos you’re keeping, use the Organizer to manage your files. This is important so you
can find photos, video files, audio clips, and Adobe PDF documents, even if they’re stored in different locations on
your computer.
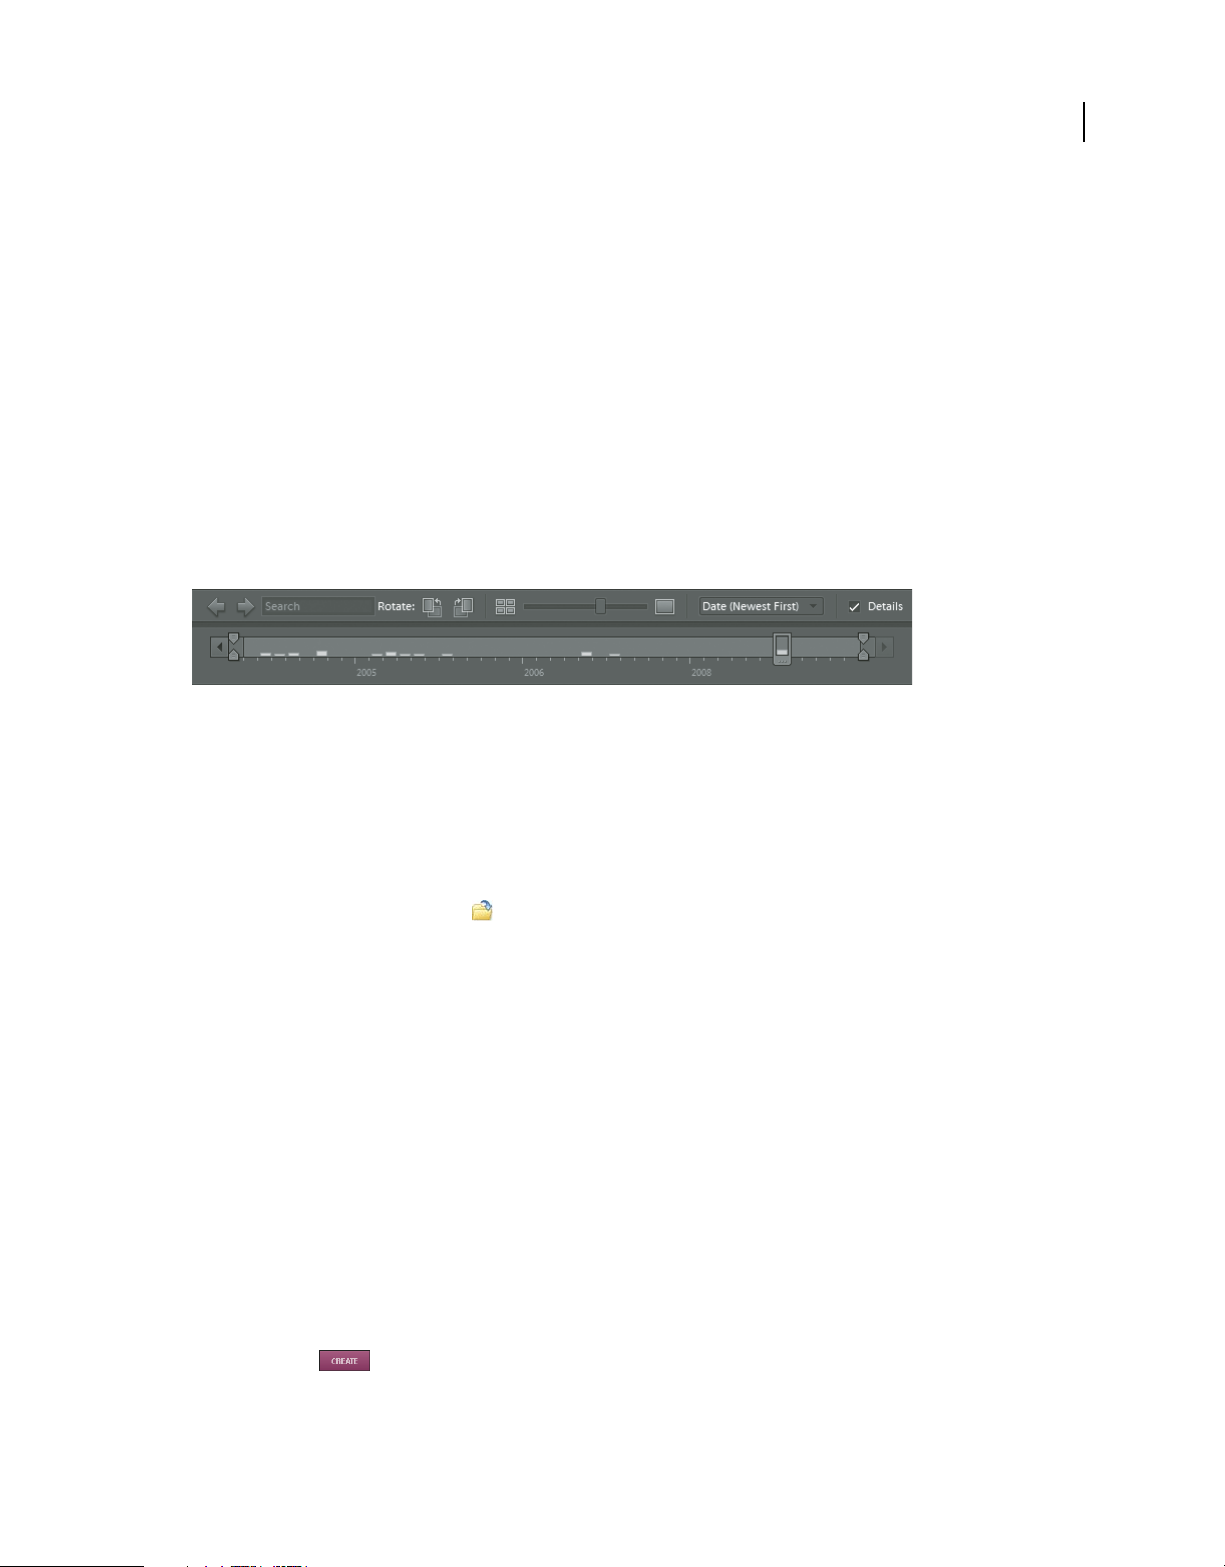
Photoshop Elements automatically organizes photos by date as it downloads. The Organizer has a Timeline (choose
Window > Timeline) and a Date View for finding photos by date. It’s a good idea to put related photos into an album.
Albums are great for sharing photos in projects, creations, online albums, and also makes it easy to find related photos.
You can further sort and categorize photos by adding star ratings, by stacking photos, and by assigning keyword
.
tags
The Organizer lets you specify the way you want to view photos. You can see previously saved versions of a photo,
adjust thumbnail size, view photos in full screen mode, and compare photos side by side.
Do I have to use the Organizer? No. You can just copy photos to your computer and use the Editor to fix your photos.
However, there are lots of great things you can do with your photos in the Organizer. Also, after collecting hundreds
and thousands of photos on your computer, you’ll discover that finding and managing photos with the Organizer is
much easier.
6
Creating albums or an album group
An important way to manage your photos is to use albums. Albums let you keep related photos together. For example,
use an album to hold all of the photos you want to use in a slide show about your family reunion. Simply drag photos
to add or remove them from an album.
You can organize albums in groups and create multiple levels of album groups. For example, you can have an album
group titled, “My Asia Trip,” containing the album “Ten Best Japan Photos,” along with another album called “Ten
Best China Photos,” and so on for each country in Asia you visited.
1 Click the Create New Album Or Album Group button in the Albums palette of the Organize tab and choose
New Album.
2 (Optional) From the Group menu, choose a group into which to place the album.
3 In the Album Name box, type a name for the album.
4 Drag photos into the Items area.
5 Click Done.
The album appears in the Albums palette under the album group you specified.
More Help topics
http://www.adobe.com/go/learn_pse_albums_create_en
Create a smart album
You can also create smart albums based on search criteria. Search for all of the photos you took at beaches over various
Spring breaks, for example, and save the results as a smart album. As you import new photos that meet a smart album’s
criteria, they are automatically added to that smart album. For more information, see
http://www.adobe.com/go/learn_pse_albums_smart_en.
Last updated 7/26/2011
Page 14

USING PHOTOSHOP ELEMENTS 7
Getting started
Back up and synchronize albums
Photoshop Elements users in the United States can sign up for a Photoshop.com membership, which lets you back up
and synchronize albums to Photoshop.com. Backing up and synchronizing the files in your album is essential for
protecting your valuable photos and media clips. Be sure your photos and videos are in albums. Since you can only
back up albums not individual files, be sure photos and FLV files (Flash movies) are in albums.
Note: Currently, Photoshop.com membership and services are only available in the United States. For more information,
“Sign up for Photoshop.com membership” on page 1.
see
Create a keyword tag
Keyword tags are personalized keywords that you attach to photos, video clips, audio clips, PDFs, and photo projects
in the Organizer. Once your files have keyword tags, you can easily organize and find them. When you use keyword
tags, there’s no need to manually organize your photos in subject-specific folders or rename files with content-specific
names. You can create new keyword tags, under any category or subcategory. New keyword tags have a question mark
. For more information, see http://www.adobe.com/go/learn_pse_photos_tag_en.
icon
1 Click the New button in the Keyword Tags palette of the Organize tab and choose New Keyword Tag.
2 In the Create Keyword Tag dialog box, use the Category menu to choose a category or subcategory in which to place
the tag.
3 In the Name box, type a name for the keyword tag.
4 To associate the tag with a place on a map, click Place On Map, type an address, and click Find.
5 In the Note box, type any information you want to add about the tag. (For example, you could write that the tag
represents vacation photos.)
6 Click OK.
The keyword tag appears in the Keyword Tags palette under the category or subcategory you selected.
7
Note: The first time you attach a keyword tag to a photo, that photo becomes the icon for that keyword tag.
Attach keyword tags to photos
After you have created a keyword tag, you can attach it to photos associated with the tag. You can attach multiple
keyword tags to a photo. If you drag multiple photos to a keyword tag, the first photo you selected becomes the icon
for that tag.
1 In the Photo Browser, select the photo or photos to which you want to attach the tag. (To select more than one
photo, Ctrl-click the photos.)
2 To attach one photo to one tag, do one of the following:
• Drag the tag from the Keyword Tags palette onto the selected photos.
• Drag the photos onto the tag in the Keyword Tags palette.
3 To attach keyword tags to multiple photos, do one of the following:
• Drag the tag from the Keyword Tags palette onto any of the selected photos.
• Select one or more keyword tags, and then drag the tags onto any of the selected photos.
• Select one or more keyword tags, and then drag the photos onto any of the selected tags in the Keyword Tags palette.
Last updated 7/26/2011
Page 15
USING PHOTOSHOP ELEMENTS 7
Getting started
How do I find photos?
You can find photos and media files by date, star rating, album, folder location, filename, media type, keyword tag,
text, or other criteria. For more information, see
Here are a few of the features in the Organizer to find photos:
Timeline Click a month or set a range to find photos and media files chronologically by date, import batch, or folder
location.
Find bar Drag a photo, keyword tag, project, or album onto the find bar to find matching or similar photos and media
files.
Albums palette Select an album to view only the media files within it.
Keyword Tags palette Select a keyword tag to see only the files with that tag.
Text box Type text in the Search box to find files with matching text. Matches can include items such as filenames,
metadata, keyword tags, captions, notes, album names, album groups, camera information, dates, folders, or formats.
http://www.adobe.com/go/pse_photos_find_en.
8
The Organizer has many tools and features for finding photos.
How do I find the actual file of a photo or media clip?
Sometimes you need to find the actual file of photos or media. Maybe you’re uploading the file to a server or
embedding it into the layout of a document.
1 In the Organizer, select the photo or media clip whose file you want to find.
2 Press Alt + Enter to open the Properties-General window.
3 Click the Reveal In Explorer icon .
Making things with your photos
You can use your photos in a variety of fun projects that you can share with family and friends. For example, you can
create photo projects, such as albums, scrapbook pages, greeting cards, CD/DVD labels and jackets, and photo collages
that you can print at home or upload to an online printing service. You can also use your photos in digital projects,
such as online photo galleries, photo slide shows, and flipbooks. For more information, see
http://www.adobe.com/go/learn_pse_projects_en.
Give your projects a personal look by customizing the project templates. Adjust layout colors to better complement
your photos and add new graphical elements, text, and effects, such as drop shadows and glows. Use the Artwork
palette to quickly browse hundreds of frames, themes, backgrounds, clip art, and effects to apply to your photos and
photo projects.
Create a slide show
1 In the Organizer, select the photos you want in the slide show. If you’re in the Editor, you can use the photos that
are open in the Project Bin.
2 In the Create tab, click Slide Show to show the Slide Show Preferences.
3 Change any of these options, or just click OK to use the default options.
Last updated 7/26/2011
Page 16

USING PHOTOSHOP ELEMENTS 7
Getting started
All the tools for creating your slide show are in the Slide Show dialog box. The photos you chose to use in the slide
show appear at the bottom of the screen.
4 In the Slide Show Editor, have fun adding effects, text, small graphics, music, or your own narration. The Slide Show
Editor provides lots of possibilities for creativity. Spend some time exploring it. Scroll through the Extras panel to
see the fun you can have here.
5 If you want to reorder your slides, drag the slide’s thumbnail image to a new location. The image thumbnails are at
the bottom of the Slide Show Editor. Drag one forward or back until you see the blue bar, and then release the
mouse button.
6 To preview your slide show with all its effects, use the VCR-style buttons under the slide preview. You can return
to editing slides at any time by pressing the Esc key.
7
Click Save Project (in the upper left of the Slide Show Editor). It’s a good idea to save the slide show regularly as you work.
Share a slide show
When you are done creating the slide show, you can share it in a number of ways.
1 Choose File > Output Slide Show in the Slide Show Editor. Note that the Slide Show Editor has its own set of menus
at the top of its window.
2 In the Slide Show Output dialog box, choose how you want to share your slide show. You can save it as a movie file
or a PDF file. You can burn it to a disc so you can play it on a TV or computer.
9
Sharing photos with others
Once you’ve imported and organized photos on your computer, you’re ready to share them with others.
Photoshop
interactive online album. You can send photos to people via e-mail. You can print photos or order professionally
printed photos. Or, you can put your files or album on CD/DVDs.
You can share photos from either the Organizer or the Editor. In the Organizer, you first select photos you want to
share. In the Editor, you share photos that you’ve edited or have open in the Project Bin. Click the Share tab and then
select the way you want to share photos. For more information, see
Share photos using e-mail
Photoshop Elements streamlines sharing photos by e-mail. You can either attach photos to an e-mail or embed a photo
in an e-mail using Photo Mail.
1 Make sure your e-mail client is specified in the Preferences. In the Organizer, choose Edit > Preferences > Sharing.
2 Do one of the following:
• Select a photo in the Photo Browser or Date view, and then click Share then Photo Mail.
• In Full Edit or Quick Fix, open the photo that you want to e-mail. Click Share in the shortcuts bar, then
3 The first time you e-mail a photo, you are prompted to confirm the e-mail service you want to use. Confirm your
The Attach Selected Items To E-mail dialog box appears. The left side of the dialog box shows the photos you chose to
e-mail.
Elements offers many ways to quickly share your photos. You can let people view your photos through an
http://www.adobe.com/go/learn_pse_share_en.
In Editor, choose Edit > Preferences > Organize & Share, and then select Sharing. Choose Microsoft Outlook®,
Outlook Express®, or Adobe E-mail Service.
Photo Mail.
choice and then click OK.
Last updated 7/26/2011
Page 17

USING PHOTOSHOP ELEMENTS 7
Getting started
4 Select recipients for the e-mail by doing one of the following:
• Select a name from the Select Recipients list (the names you see are from your contact book).
• If you wish, add the recipient to your contact book by selecting the Add To Contact Book option. Click OK; the
recipient will appear selected in the Select Recipients list.
5 In the Stationery & Layouts wizard, choose a stationery style and background. Then click Next Step, and customize
the layout.
6 Click Next.
Photoshop Elements opens your default e-mail application.
What if I use a web-based e-mail service? If you use a web-based e-mail client such as Google Gmail or Yahoo Mail,
you can export your photos and attach them to e-mail messages. Click the Share tab and select E-mail Attachments.
The E-mail Attachments wizard leads you through the steps for creating versions of your photos that are suitable for
e-mail.
Printing photos
You can print photos on your home printer or have photos professionally printed from Photoshop Elements using an
online print provider. Print from either the Organizer or the Editor.
10
Printing from the Editor provides more control. For more information, see
http://www.adobe.com/go/learn_pse_share_en.
Print from the Organizer
1 Select photos or video clips in the Photo Browser or Date view. If you select a video clip, only the first frame of the
clip is printed.
2 Choose File > Print.
3 Specify printing options in the Print Photos dialog box and then click Print.
Print online
1 In the Organizer, select the photos you want to print, or in the Editor, open the photos you want to print.
2 In either the Create or Share tab, click Order Prints. Follow the instructions in the Order Prints dialog box that
opens.
Fixing (editing) photos
Photoshop Elements offers several levels of editing, from simple one-click fixes in the Organizer to advanced color
correction and compositing in the Editor.
For detailed visual examples of each editing workflow, see this excerpt from Advanced Photoshop Elements 7 for
Digital Photographers.
Fix photos in the Organizer
In the Organizer, you can perform a variety of one-click fixes to make basic image adjustments: Auto Smart Fix, Auto
Color, Auto Contrast, and Auto Sharpen, for example. You can even choose Auto Red Eye Fix to remove red eye from
selected shots without having to manually edit the photos. For more information, see
http://www.adobe.com/go/learn_pse_fix_organizer_en.
1 In the Organizer, select the photos you want to fix.
Last updated 7/26/2011
Page 18
USING PHOTOSHOP ELEMENTS 7
Getting started
2 Click the Fix tab and then, click the image adjustment you want.
If you don’t like the results, click Undo or press Ctrl-Z.
Crop a photo
Cropping removes unwanted areas in a photo.
1 In the Organizer, select the photo you want to crop.
2 Click the Fix tab, select Crop, and then follow the instructions in the Crop dialog box.
Fix photos in the Editor
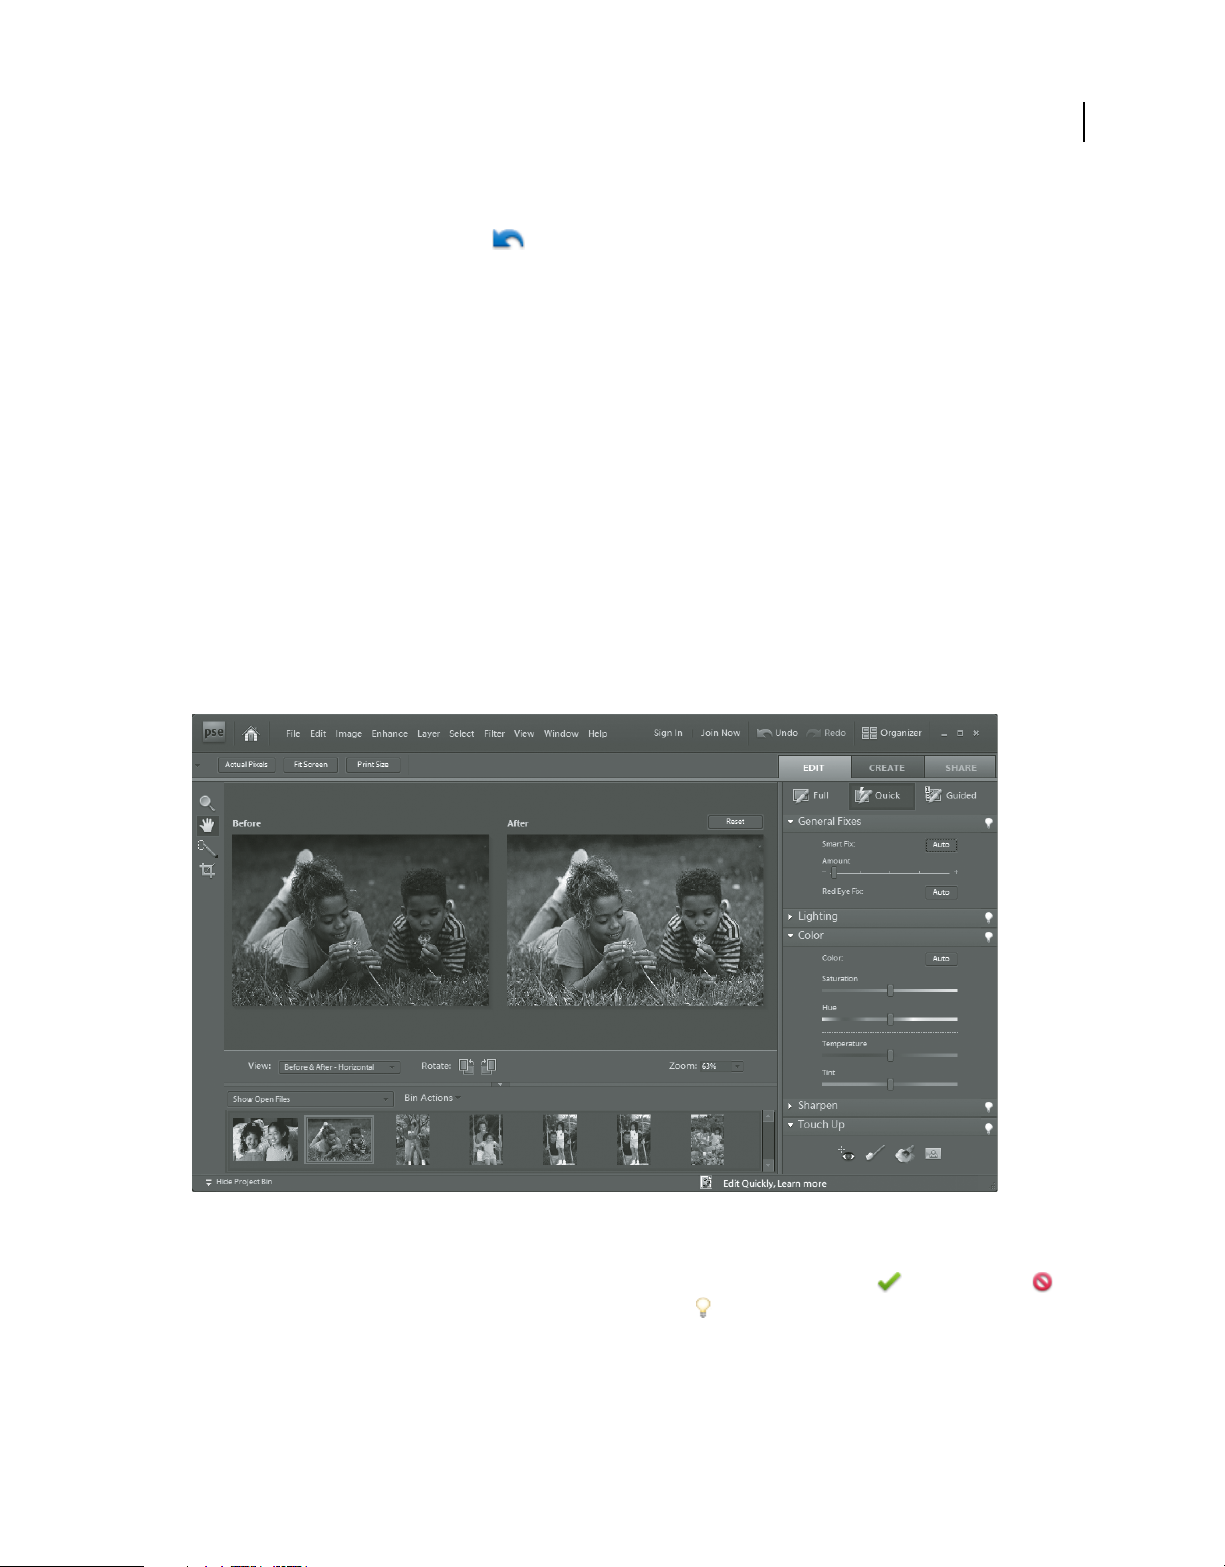
The Editor workspace provides three additional editing modes: Quick Fix, Guided Edit, and Full Edit. The level or your
editing expertise and complexity of the image editing determine which mode is appropriate for your task. For more
information, see
http://www.adobe.com/go/learn_pse_fix_editor_en.
1 In the Organizer, select the photos you want to work with in the Editor.
2 Click the Fix tab, and then click Quick Fix, Guided Edit, or Full Edit (if you have experience editing photos).
In the Editor, photos appear in the Project Bin at the bottom of the Editor workspace. You can move between the
photos you want to fix by double-clicking them in the Project Bin.
http://www.adobe.com/go/learn_pse_photos_fix_en or
11
Quick Fix makes adjustments using simple controls.
If you’re working in Quick Fix mode, click the Auto buttons to adjust lighting and color. Fine-tune adjustments using
the sliders. Experiment all you want until the photo looks right. Then click the checkmark
or reject button to
finalize the adjustment. To get more help, click the light bulb icon .
If you’re not sure how to fix your photo, click the Guided tab. Select one of the corrections and follow the step-by-step
instructions. When you’re happy with adjustment, make sure to click Done at the bottom of the Guided Edit panel.
Last updated 7/26/2011
Page 19

USING PHOTOSHOP ELEMENTS 7
Getting started
If you want full control when fixing your photos, use the Full Edit mode. You have access to a complete editing toolset
and controls. In addition to fixing photos, you can combine photos, paint on photos, or paint on a blank canvas.
Do I have to use the Organizer to open images in the Editor? No. You can open photos from the Editor, too. Choose
File > Open and navigate to the photos you want to open.
What if I switch to the Organizer while fixing photos in the Editor? If you switch to the Organizer while files are open
in the Editor, you’ll see a banner over the thumbnails of the opened files. This lets you know that the files cannot be
changed until they are closed in the Editor.
Saving your edits
After you edit an image in the Editor, you need to save it, or you’ll lose your work. Fixes you make in the Organizer
are saved automatically.
❖ In the Editor, choose File > Save.
Photos saved in the Editor are saved as a version and grouped with other saved versions and the original photo. These
version sets are stacked together in the Organizer with the latest saved version at the top of the stack. For more
information, see
http://www.adobe.com/go/learn_pse_photos_manage_en.
What if I don’t want to save versions of a photo? It’s recommended that you save versions of a photo to preserve the
original file. If for some reason, you don’t want to save a version of a photo, choose File > Save after you’ve finished
editing a photo. Under Save Options in the Save As dialog box, deselect the Save In Version Set With Original option.
By default, Photoshop
http://www.adobe.com/go/learn_pse_photos_save_en or
Elements saves the file in PSD format without a version number appended to the filename.
12
Troubleshooting tips
Here are some things to consider when troubleshooting Photoshop Elements. For more tips, visit
http://www.adobe.com/go/forums.
• Restart Photoshop Elements or restart your computer.
• Reset the Photoshop Elements preferences. Hold down the Ctrl + Alt + Shift keys immediately after starting
Photoshop
• Turn off other programs, including anti-virus, firewall, and CD/DVD burning applications that run in the
background.
• Make sure that the computer operating system is up-to-date. Install the latest drivers for your video card, sound
card, printer, and other devices.
• Remove any recent additions to your computer. What was the last thing you changed on your computer before the
problem began? Did you install a new printer, fonts, or other software?
• If something in Photoshop Elements doesn’t seem to work properly, check Photoshop Elements Help.
• If a problem happens when you open or edit a photo, does the problem happen with all photos? Does it happen
with photos from different cameras or sources?
If you’re unable to complete a task in Photoshop Elements, see these tips from Classroom in a Book.
Elements. Then, choose a task from the Welcome screen.
Last updated 7/26/2011
Page 20

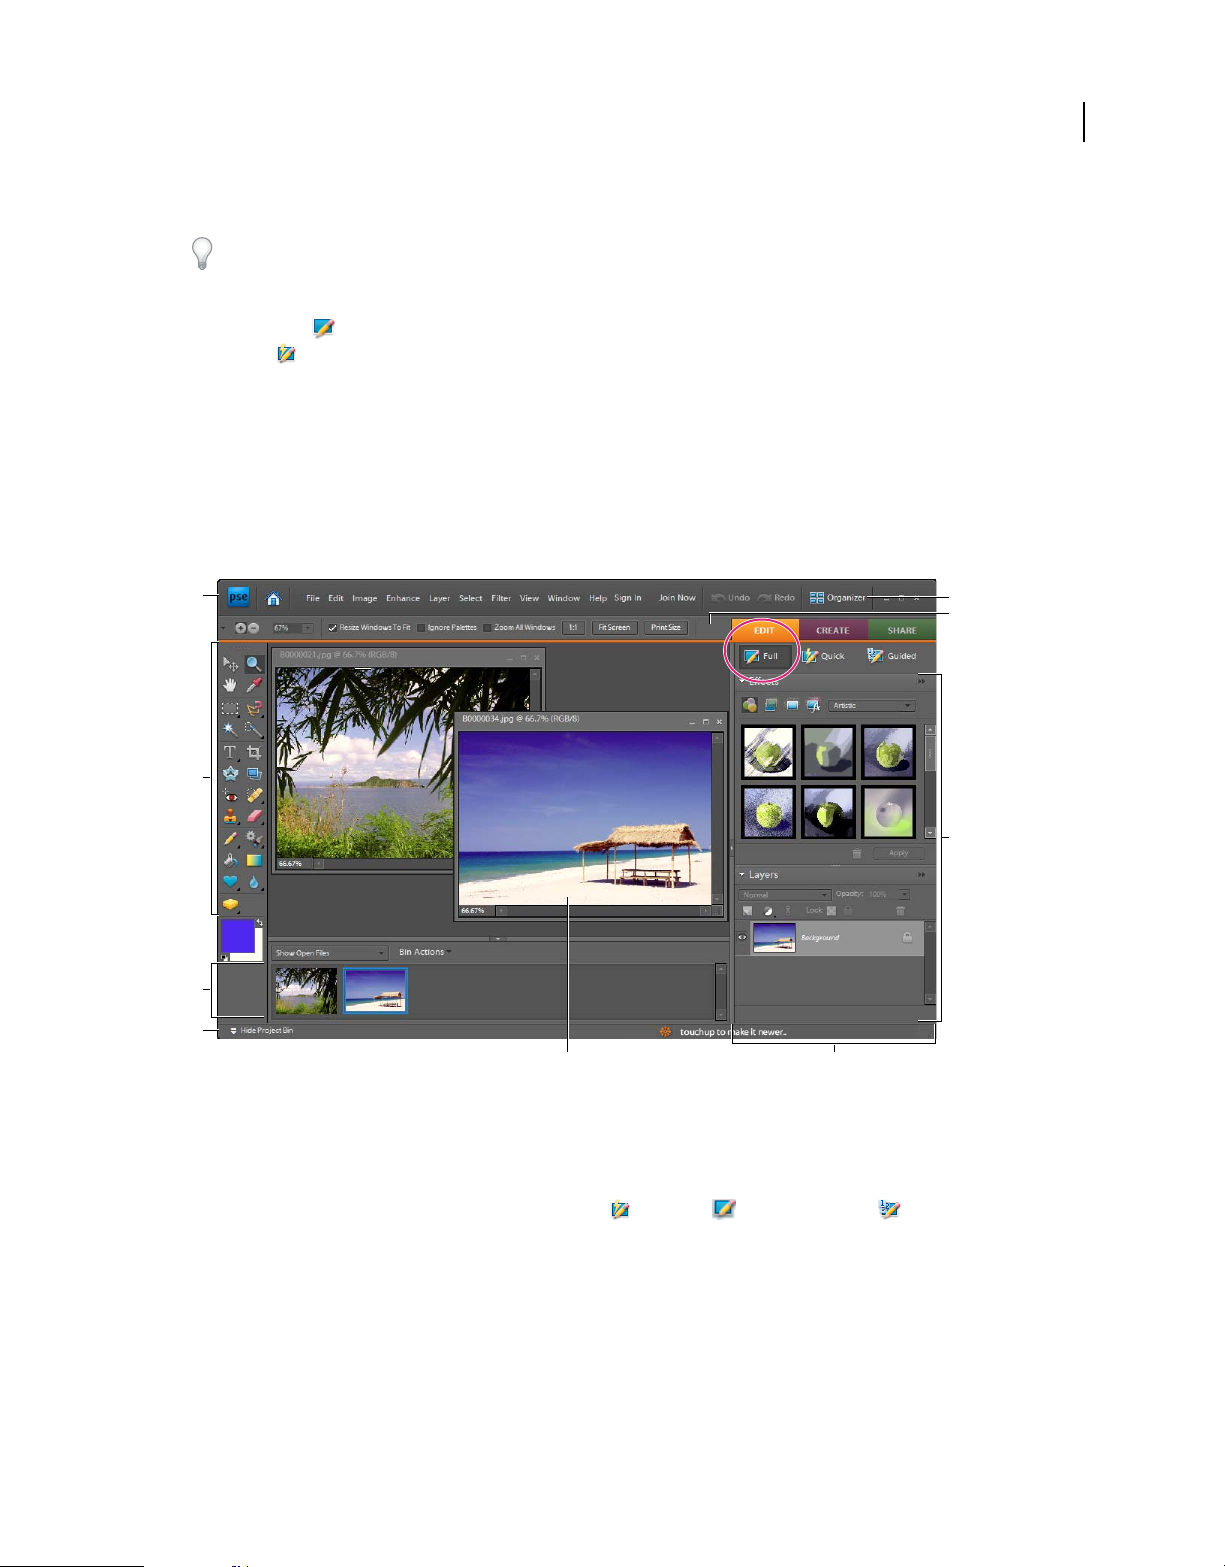
Chapter 2: Photoshop Elements workspace
Adobe® Photoshop® Elements has two main workspaces: the Organizer and the Editor. Use the Organizer for finding,
organizing, and sharing your photos and media files. Use the Editor for creating, editing, and fixing your images. You
can also add functionality with plug-in modules and expand system memory by using scratch disks.
When a photo is selected in the Organizer, clicking the Editor pop-up menu and then choosing Quick Fix, Full
Edit, or Guided Edit opens the photo in the Editor workspace. When you are working in the Editor workspace, clicking
the Organizer
About workspaces
The Welcome screen
When you start Photoshop Elements, the Welcome screen opens by default. The Welcome screen is a convenient
starting place, or hub, for major tasks. You can choose the workspace you want from the Start Up With Welcome
Screen menu at the bottom of the Welcome screen.
button opens the Organizer workspace.
If both the Organizer and the Editor are open, you can move between the two workspaces by clicking the corresponding
button in the Windows® OS task bar.
13
Note: The Welcome screen also provides access to Photoshop.com membership features. Currently, Photoshop.com
membership is only available for Photoshop
“Getting started with your Photoshop.com membership” on page 28.
Click a button to open the workspace you need. For example, click Organize to open the Organizer and import, tag,
or organize your photos. Or, click Edit to open the Editor and enhance your images or add special effects.
You can close or reopen the Welcome screen at any time by clicking the Welcome Screen button . It’s not necessary
to return to the Welcome screen to open other workspaces—you can open different workspaces from within any other
workspace.
Elements users who live in the United States. For more information, see
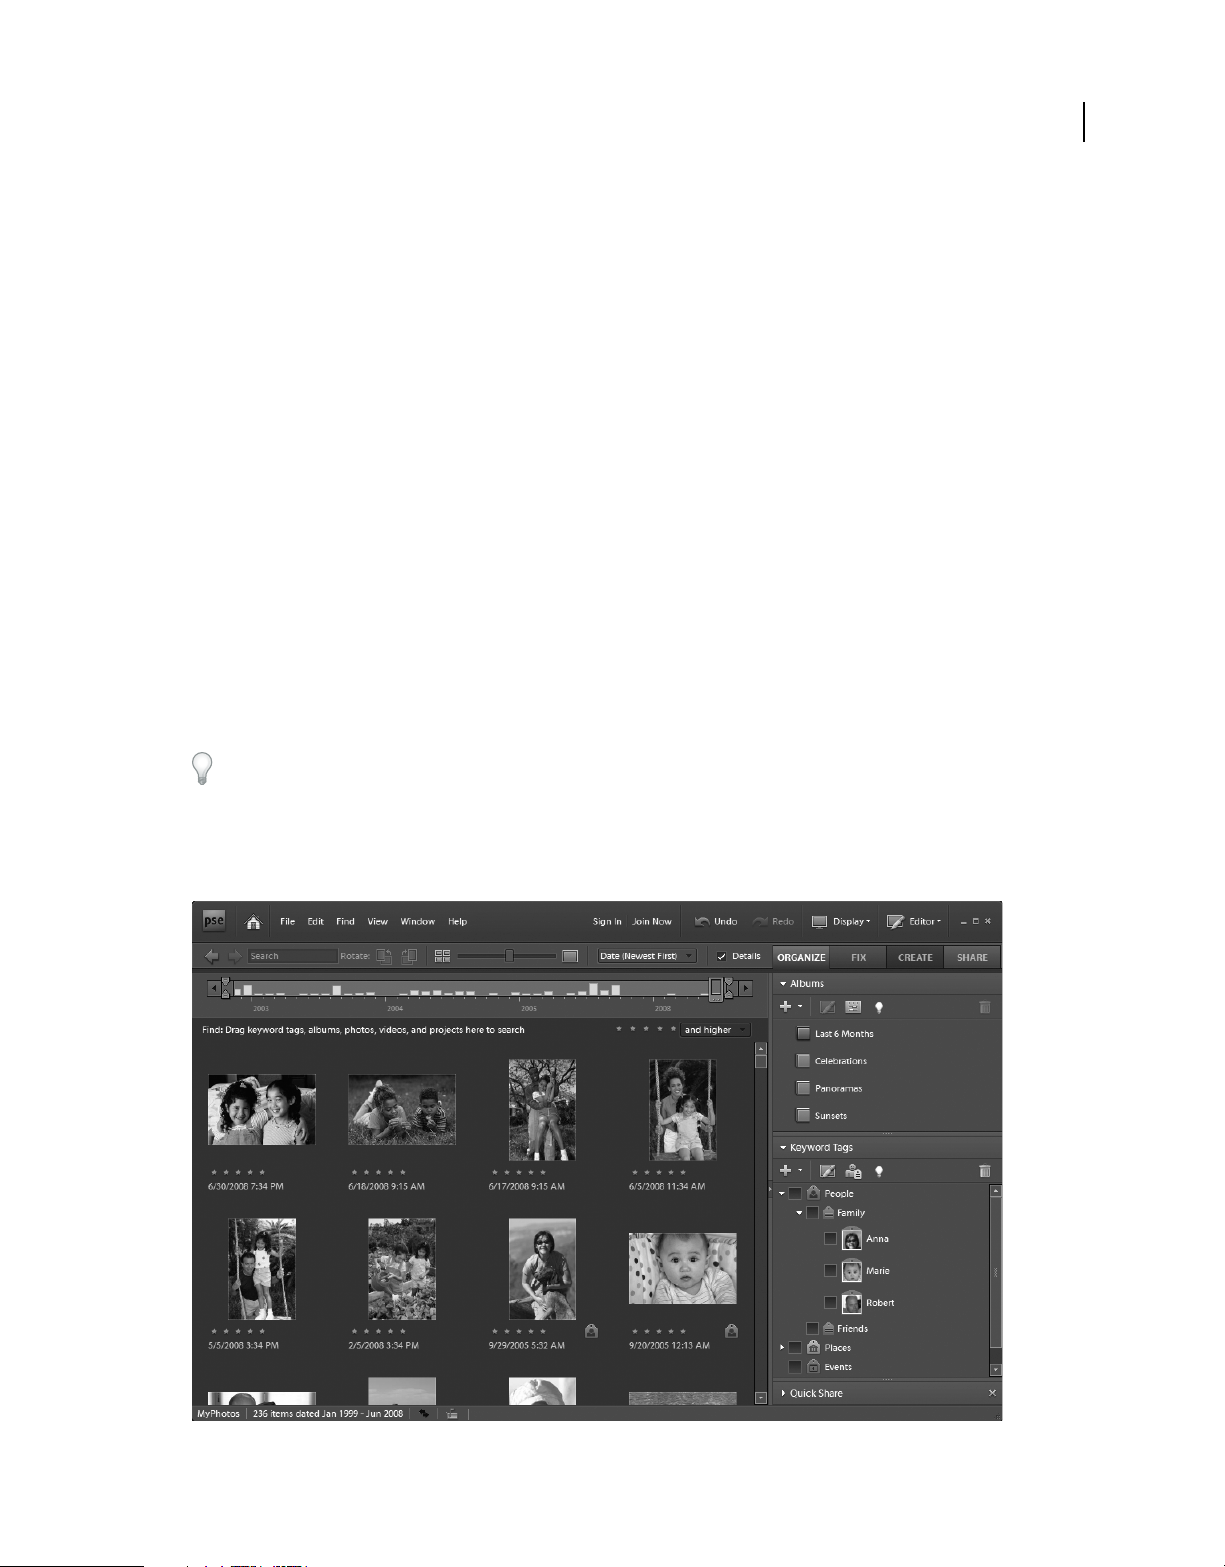
The Organizer workspace
For a video overview, see www.adobe.com/go/lrvid2312_pse
Use the Organizer to find, organize, and share your photos and media files. Use the Photo Browser in the Organizer
to view thumbnails of the photos you’ve imported into Photoshop
photo or smaller thumbnails of many photos. You specify the thumbnail size by using the thumbnail slider. If you
prefer viewing your photos by date, use the Date in the Organizer view to work with your files in a calendar format.
The Photo Browser lists all the photos, as well as videos and PDF files that you’ve imported. Imported items appear in
one comprehensive window that you can easily browse and filter. It can even show thumbnails of files stored remotely,
such as those files that you want to keep on CDs.
You can fix the most common photographic problems by using the tools in the Fix tab of the Task pane. For more
complex editing, you can select a photo in the Organizer, and click
Editor workspace.
Elements. You can view a large thumbnail of a single
Full Edit in the Fix tab. The photo opens in the
You can create projects, from printed photo books to computer slide shows, from the Create tab of the Task pane.
Last updated 7/26/2011
Page 21
USING PHOTOSHOP ELEMENTS 7
Photoshop Elements workspace
Finally, you can share your photos and projects with others, by using any of the tools in the Share tab of the Task pane.
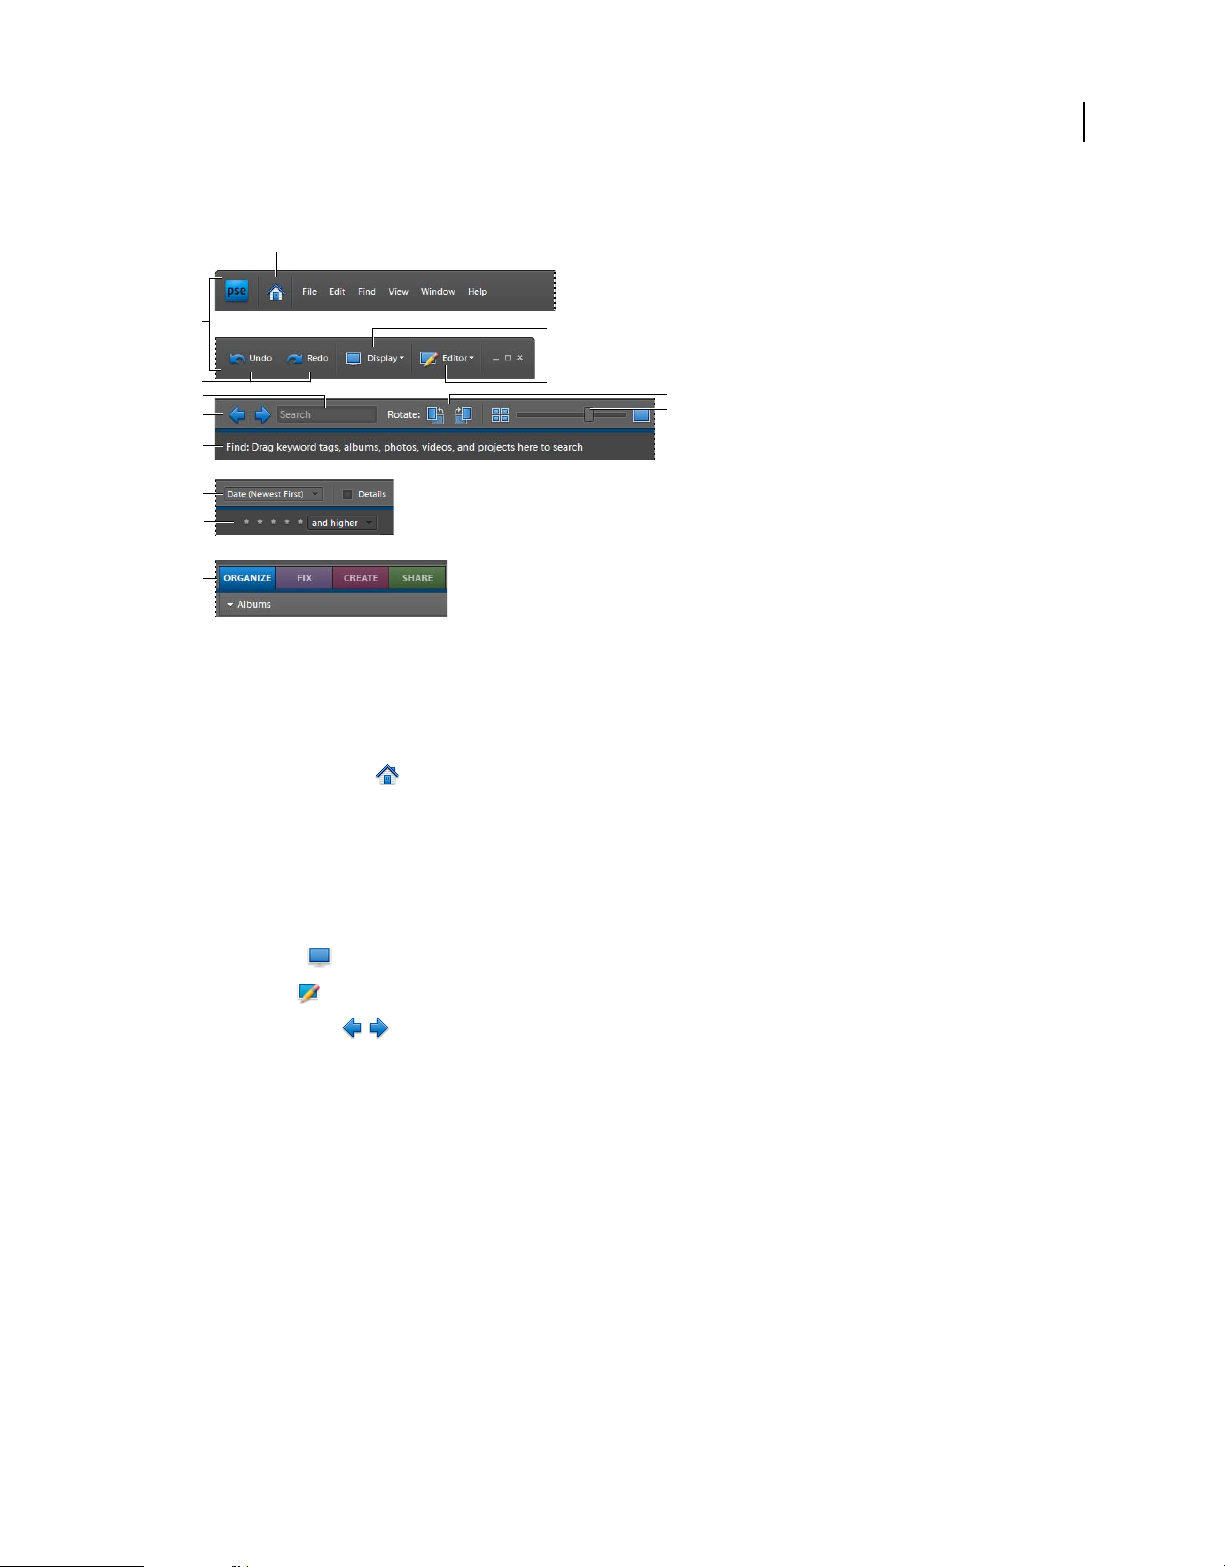
A
14
B
C
D
E
F
G
H
I
J
K
L
M
Organizer buttons and menu bar
A. Welcome screen button B. Left and right side of menu bar C. Undo and Redo buttons D. Text Search E. Back To Previous View and
Forward To Next View buttons F. The Find bar G. Photo Browser Arrangement menu H. Star ratings filter I The four tabs of the Task Pane
J. The Display menu K. Full Edit, Quick Fix, Or Guided Edit menu L. Rotate Left and Rotate Right buttons M. Adjust Size Of Thumbnail slider
The Organizer workspace has the following components:
Welcome Screen button Opens the Welcome screen where select tools for one of the primary tasks: Organize, Edit,
Create, or Share.
Note: Users in the United States can also sign in for Photoshop.com membership services. This service is not available in
countries outside the United States.
Menu bar Contains menus for performing tasks. The menus are organized by topic: File, Edit, Find, View, Window,
and Help.
Display button Opens menu of views of the Photo Browser.
Editor button Opens menu containing Quick Fix, Full Edit, and Guided Edit selections.
Navigation buttons Take you back to the previous view, or forward to the next view, of the Photo Browser.
Find bar Drag a photo, album icon, or keyword tag icon here to search for photos.
Photo Browser Displays your photos, video clips, audio files, and projects in the Organizer, either one at a time or in
a grid of thumbnails.
Task pane Contains the Organize, Fix, Create, and Share tabs, and the palettes or buttons for each tab.
Status bar In the Photo Browser, the status bar displays the number of items selected and the number of items
contained in the Photo Browser arrangement.
Note: If you change your Windows theme while the Organizer is open, the Organizer workspace could appear distorted
after the change. Close the Organizer and relaunch it to return it to its normal appearance.
More Help topics
“View and find photos in Date view” on page 62
Last updated 7/26/2011
Page 22
USING PHOTOSHOP ELEMENTS 7
Photoshop Elements workspace
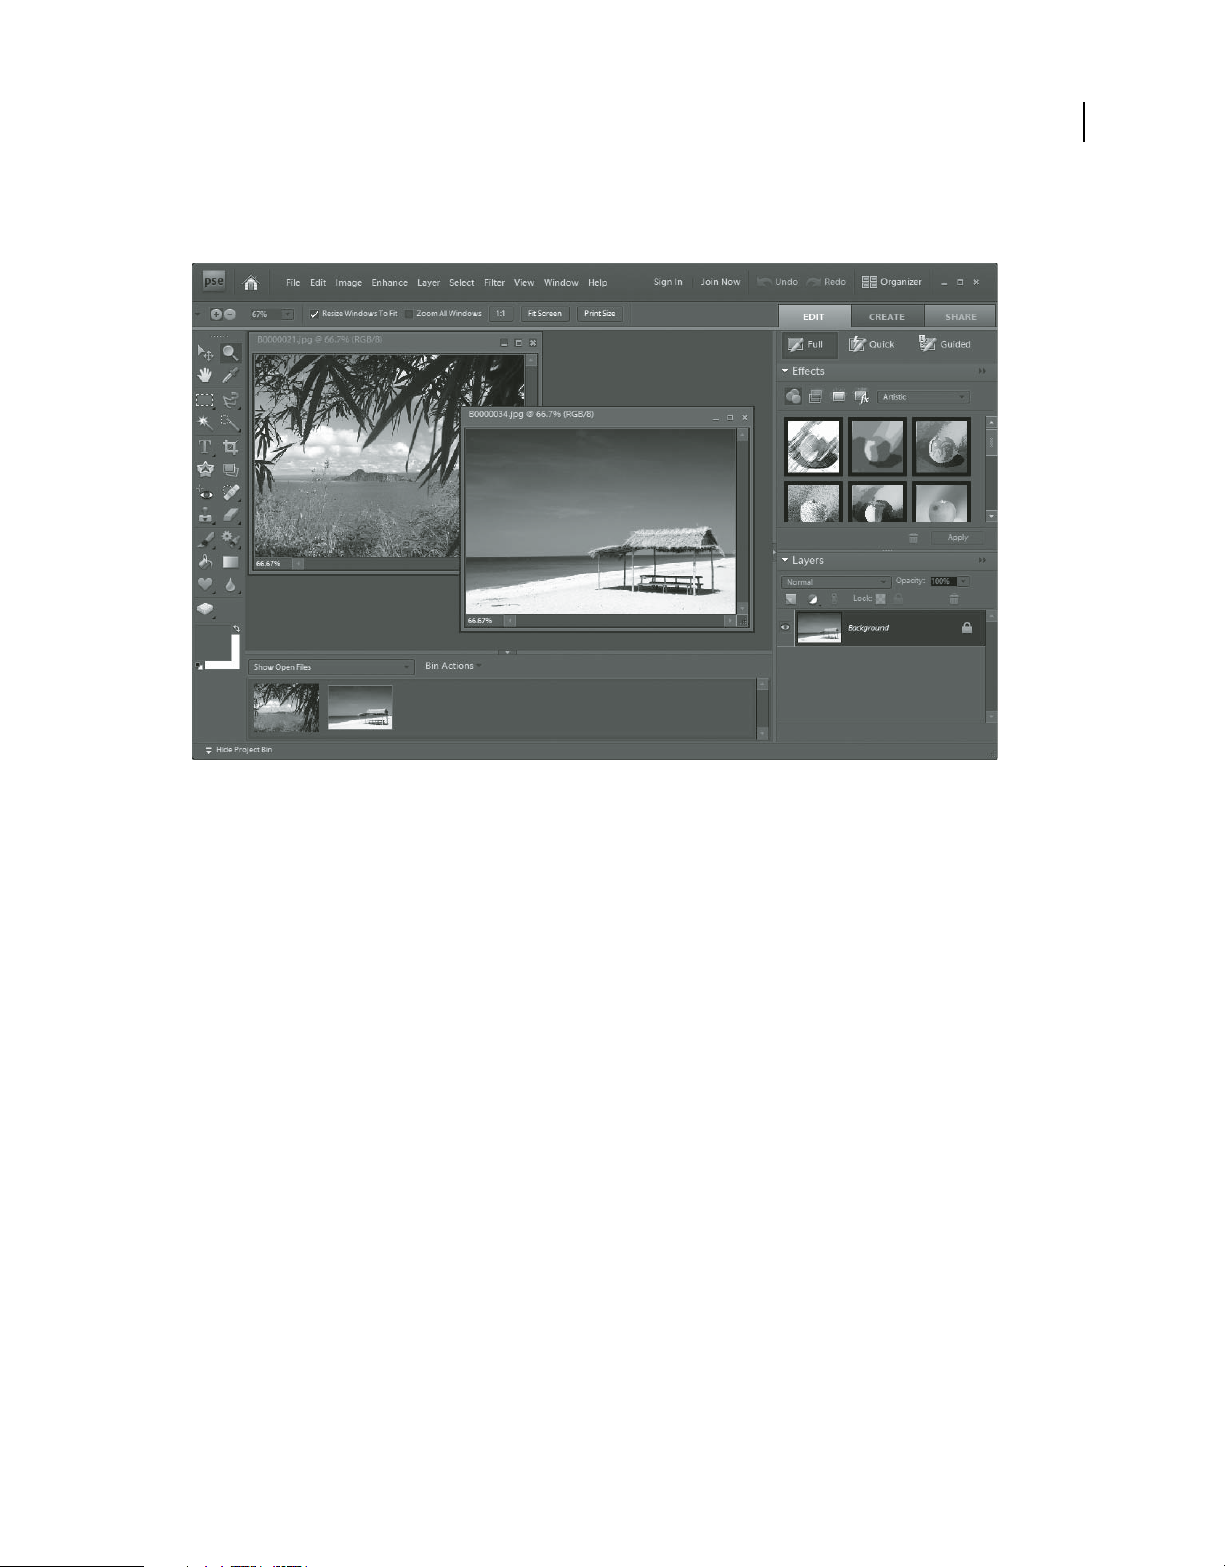
The Editor workspace
For videos about the Full Edit and Guided Edit modes, see www.adobe.com/go/lrvid2319_pse and
www.adobe.com/go/lrvid2318_pse
The Editor workspace provides three ways to create and edit images: Full Edit, Quick Fix, and Guided Edit. The Full
Edit workspace
workspace contains simple tools for correcting color and lighting, and commands to quickly fix common problems
like red eye. If you are new to digital imaging, Quick Fix or Guided Edit is a good place to start fixing photos.
If you’ve worked with image-editing applications before, you’ll find that the Full Edit workspace provides a flexible
and powerful image-correction environment. It has lighting and color-correction commands, along with tools for
fixing image defects, making selections, adding text, and painting on your images. You can rearrange the Full Edit
workspace to best suit your needs. You can move, hide, and show palettes, arrange palettes in the Palette Bin, zoom in
or out of the photo, scroll to a different area of the document window, and create multiple windows and views.
has tools to correct color problems, create special effects, and enhance photos. The Quick Fix
15
A
A
B
C
D
H
Full Edit workspace
A. Menu bar B. Toolbox C. Project Bin D Status bar E Organizer button F. Options bar G. Palettes H. Active image area I. Palette bin
I
E
F
G
Menu bar Contains menus for performing tasks. The menus are organized by topic. For example, the Enhance menu
contains commands for applying adjustments to an image.
Workspace buttons Moves you between the Quick Fix , Full Edit , and Guided Edit workspaces. These
buttons are located at the top of the work area and change according to the current workspace.
Toolbox Holds tools for editing images.
Options bar Provides options for the tool you select.
Project Bin Displays thumbnails of opened images, and lets you easily manage them.
Palettes Help you monitor and modify images.
Palette Bin Helps you organize the palettes in your work area.
Last updated 7/26/2011
Page 23
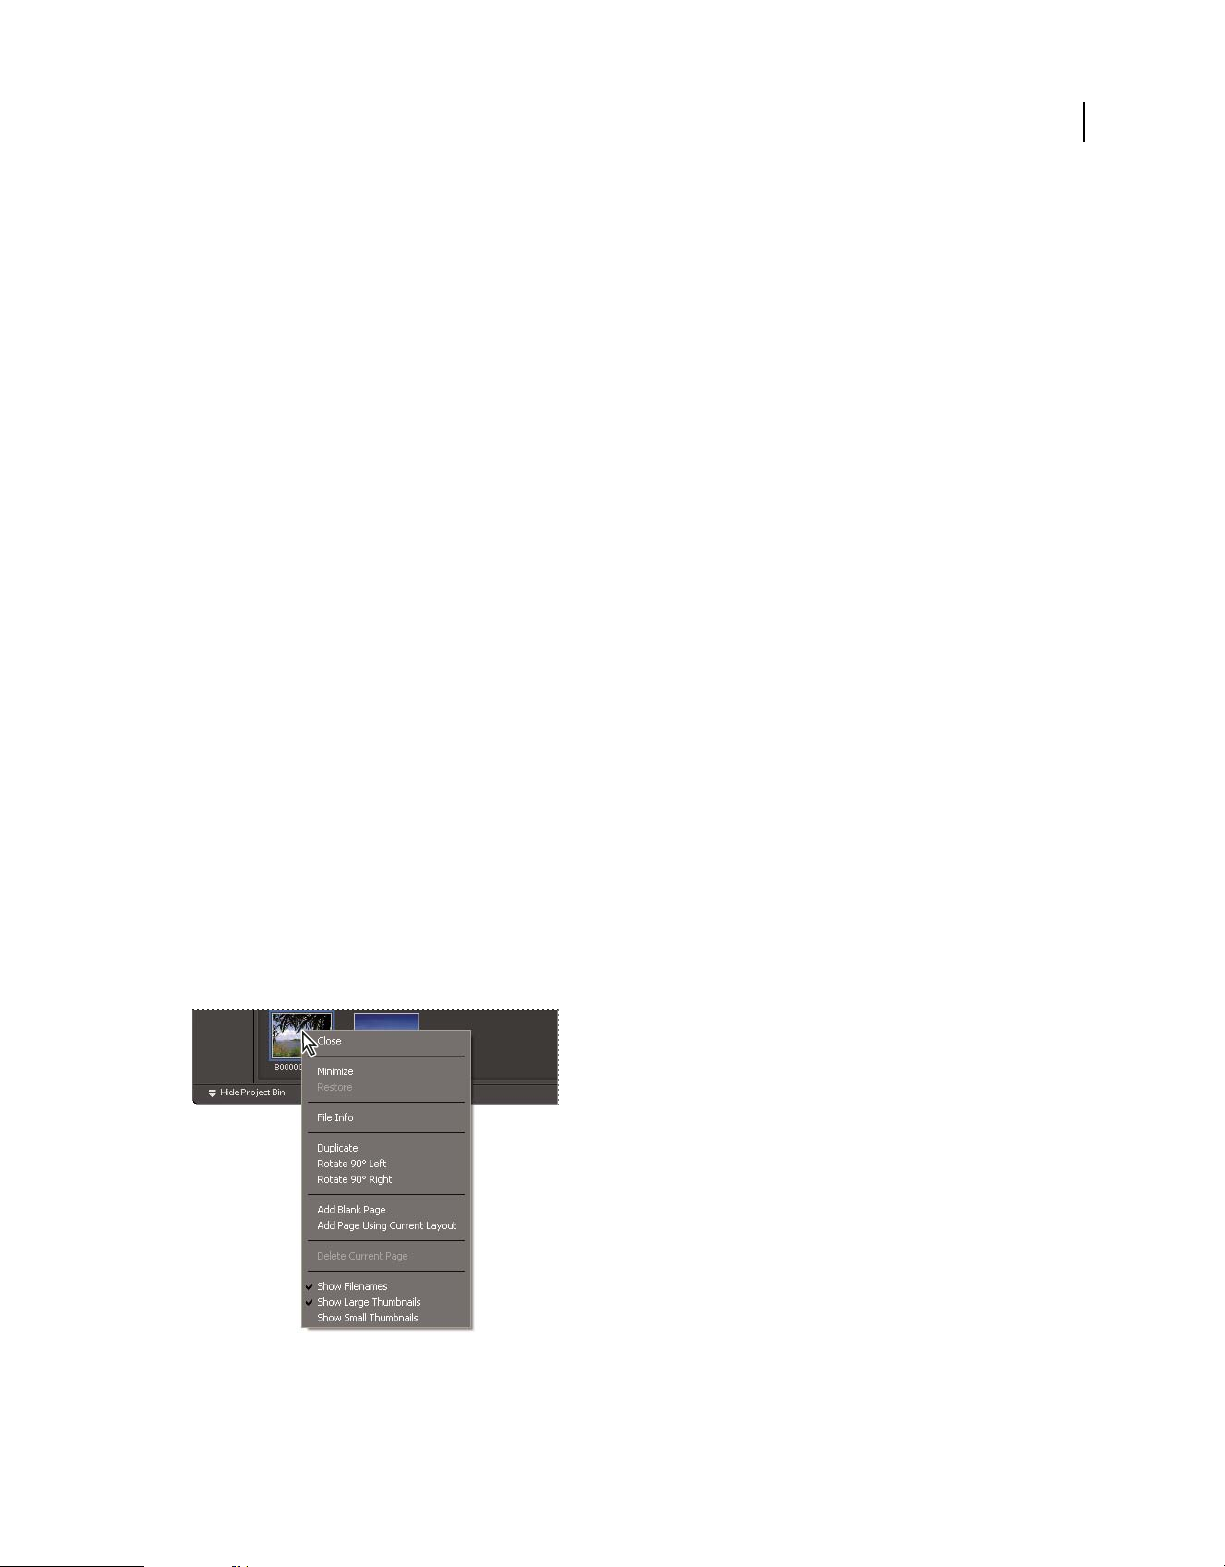
USING PHOTOSHOP ELEMENTS 7
Photoshop Elements workspace
Status bar In the Editor, the status bar has buttons for showing or hiding the Project Bin.
Note: Photoshop Elements users in the United States can also access special services in the status bar. See “Getting started
with your Photoshop.com membership” on page 28.
More Help topics
“Correct color in Quick Fix” on page 206
“Display file information in the Info palette or status bar” on page 128
Exit Photoshop Elements
To exit Photoshop Elements, you need to close both the Editor and the Organizer workspace—closing one does not
automatically close the other.
1 In the Editor, the Organizer, or both workspaces, do one of the following:
• Choose File > Exit.
• Click the Close button (X) in the upper-right corner of the workspace.
2 When closing the Editor, choose whether to save any open files.
16
More Help topics
“Save changes in different file formats” on page 145
Context menus
Use context menus
You can use context menus in both the Editor and Organizer workspaces. Context-sensitive menus display commands
that are relevant to the active tool, selection, or palette. These menus are often another way to access the commands in
the window menus.
Right-click to open a context menu. This menu appears in the Project Bin in Full Edit.
1 Position the pointer over an image or palette item.
Last updated 7/26/2011
Page 24

USING PHOTOSHOP ELEMENTS 7
Photoshop Elements workspace
Note: Not all palettes offer context menus.
2 Right-click and choose a command from the menu.
Using keyboard commands and modifier keys
You can use keyboard shortcuts in both the Editor and Organizer workspaces. Keyboard commands let you quickly
execute commands without using a menu; modifier keys let you alter how a tool operates. When available, the
keyboard command appears to the right of the command name in the menu.
More Help topics
“Keys for navigating” on page 423
“Keys for selecting tools” on page 425
Tools
About the toolbox
You can access tools in the Editor workspace. You use tools in the toolbox to select, edit, and view images; some tools
let you paint, draw, and type. The toolbox appears on the left side of the Full Edit and Quick Fix workspaces. In the
Full Edit workspace, you can move the toolbox by dragging the gripper bar at the top of the box.
17
Select a tool in the toolbox to use it. Once selected, the tool is highlighted in the toolbox. Optional settings for the tool
appear in the options bar, which is located below the shortcuts bar at the top of the Editor workspace. Some tools in
the toolbox have additional tools beneath them. These tools are called hidden tools. A small triangle at the lower right
of the tool icon indicates the presence of hidden tools. When you select a tool, any additional hidden tools appear in
the options bar.
Note: You cannot deselect a tool—once you select a tool, it remains selected until you select a different tool. For example,
if you’ve selected the Lasso tool, and you want to click your image without selecting anything, select the Hand tool.
You can view information about any tool in the toolbox by positioning the pointer over it. The name of the tool appears
below the pointer—this name is called the tool tip. You can click a link in some tool tips to see additional information
about the tool.
Last updated 7/26/2011
Page 25
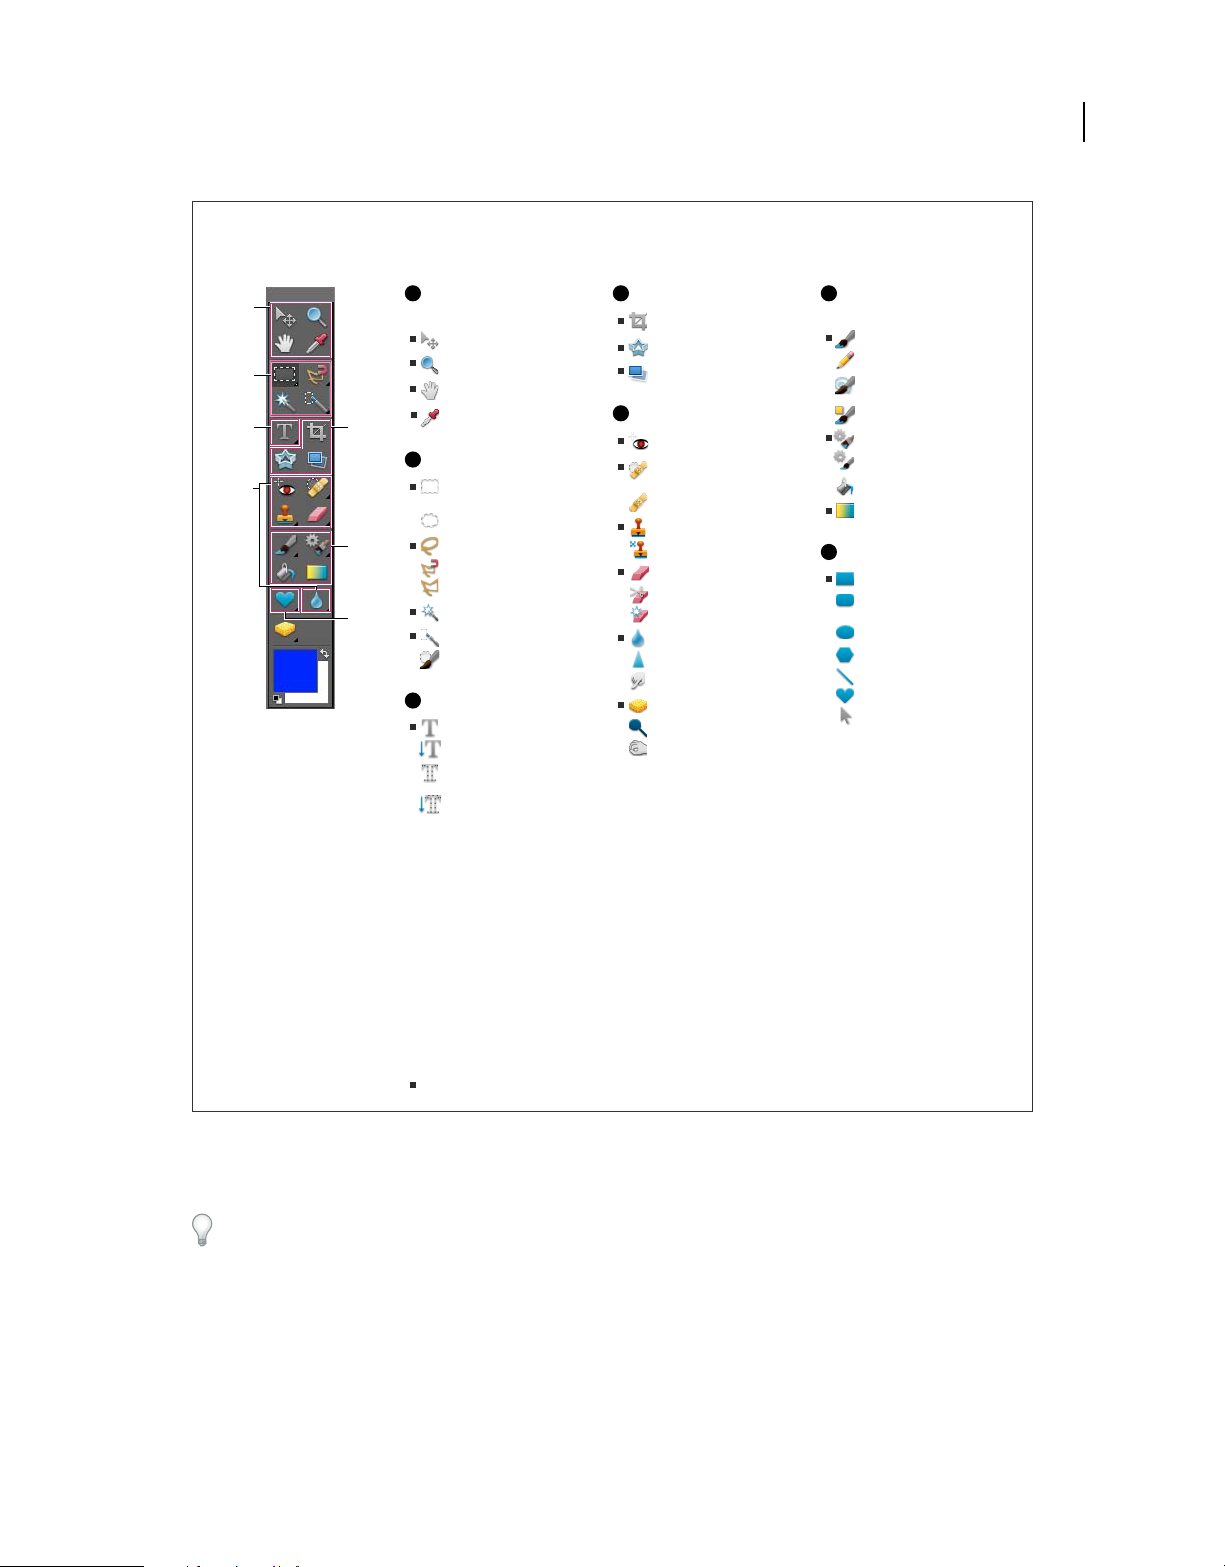
USING PHOTOSHOP ELEMENTS 7
Photoshop Elements workspace
Toolbox overview
A
B
C
E
D
F
G
A D F
Navigation and
measuring tools
Move (V)
Zoom (Z)
Hand (H)
Eyedropper (I)
B
Selection tools
Rectangular
Marquee (M)
Elliptical Marquee (M)
Lasso (L)
Magnetic Lasso (L)
Polygonal Lasso (L)
Magic Wand (W)
Quick Selection (A)
Selection Brush (A)
C
Type tools
Horizontal Type (T)
Vertical Type (T )
Horizontal Type
Mask (T)
Vertical Type
Mask (T)
Crop tools
Crop (C)
Cookie Cutter (Q)
Straighten (P)
E
Retouching tools
Red Eye Removal (Y)
Spot Healing
Brush (J)
Healing Brush (J)
Clone Stamp (S)
Pattern Stamp (S)
Eraser (E)
Background Eraser (E)
Magic Eraser (E)
Blur (R)
Sharpen (R)
Smudge (R)
Sponge (O)
Dodge (O)
Burn (O)
Painting and
drawing tools
Brush (B)
Pencil (N)
Impressionist
Brush (B)
Color Replacement (B)
Smart Brush (F)
Detail Smart Brush (F)
Paint Bucket (K)
Gradient (G)
G
Shape tools
Rectangle (U)
Rounded
Rectangle (U)
Ellipse (U)
Polygon (U)
Line (U)
Custom Shape (U)
Shape Selection (U)
18
Indicates default tool * Keyboard shortcuts appear in parenthesis
Toolbox Overview
Select a tool
For video and text tutorials about selecting tools, see www.adobe.com/go/lrvid2320_pse and
www.adobe.com/designcenter/photoshopelements/articles/interface_options.html
❖ Do one of the following:
• Click a tool in the toolbox. If there is a small triangle in a tool’s lower-right corner, hold down the mouse button to
view the hidden tools nested with the tool. Then click the tool you want to select.
• Press the tool’s keyboard shortcut. The keyboard shortcut is displayed in its tool tip. For example, you can select
the Move tool by pressing the V key.
Last updated 7/26/2011
Page 26
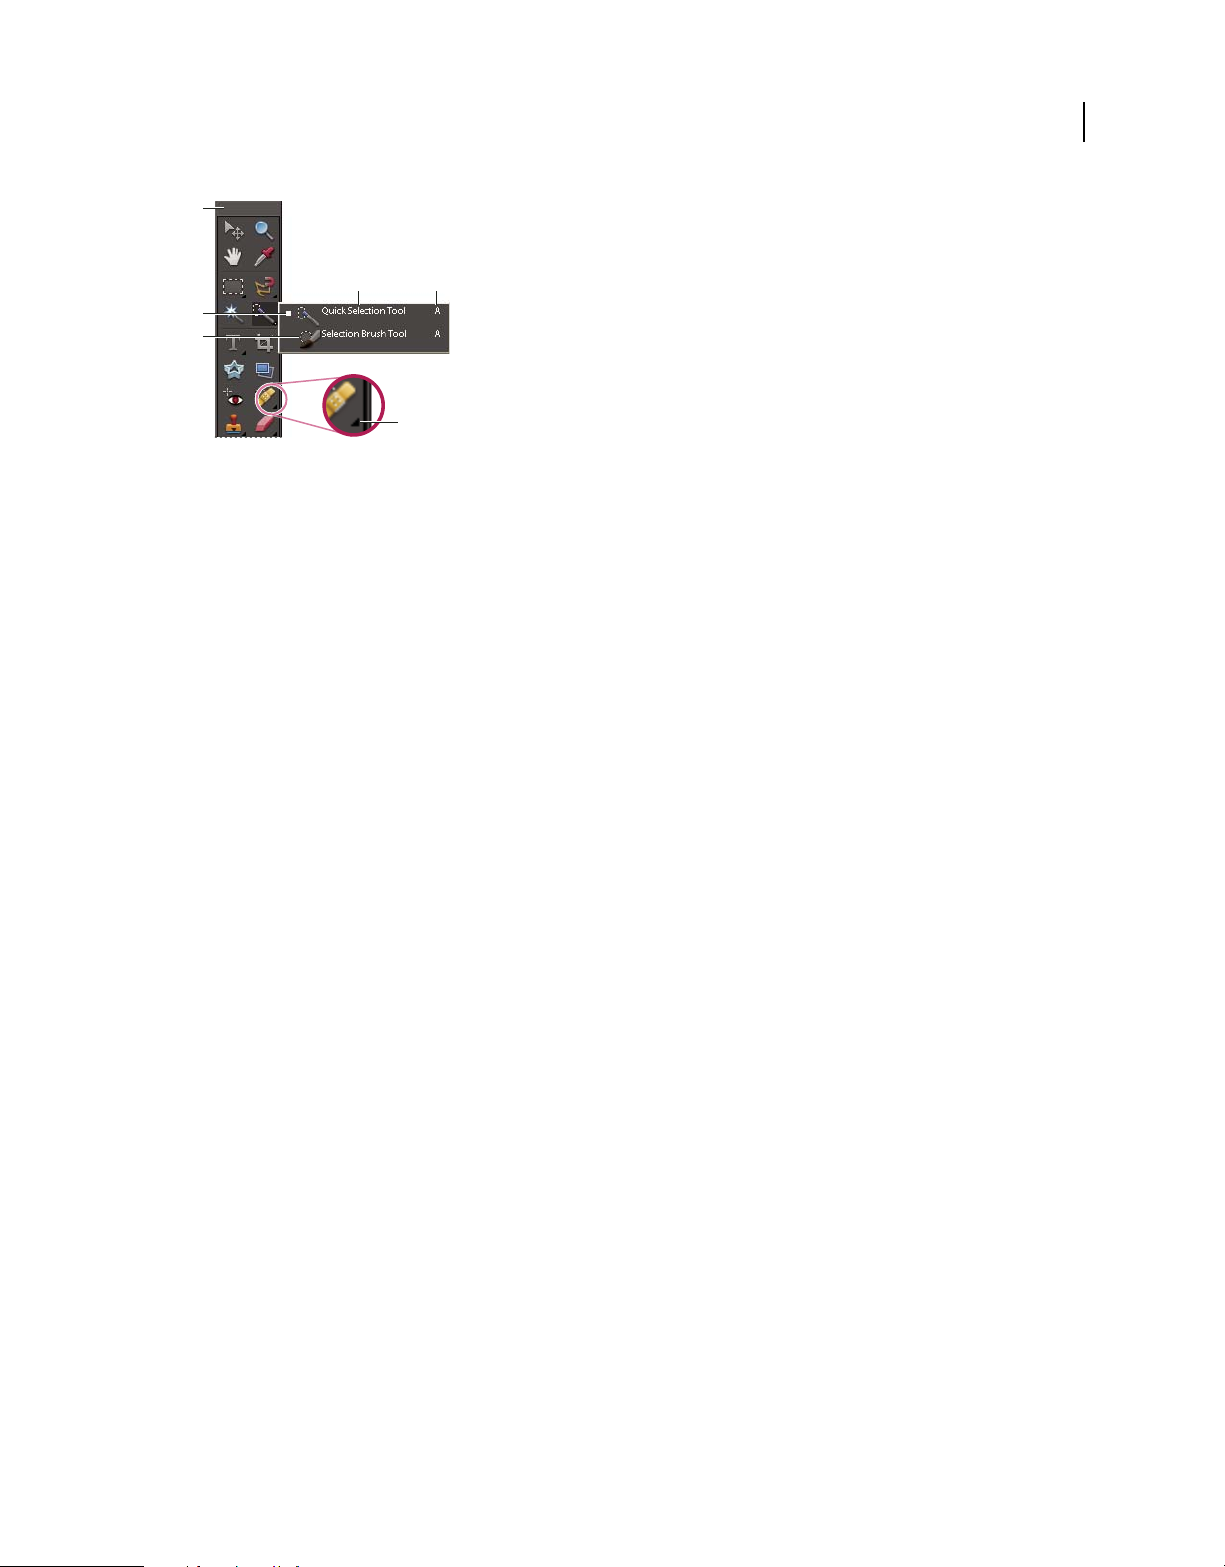
USING PHOTOSHOP ELEMENTS 7
Photoshop Elements workspace
A
D E
B
C
F
Using tools
A. Toolbox B. Active tool C. Hidden tools D. Tool name E. Tool shortcut F. Hidden tool triangle
More Help topics
“Keys for selecting tools” on page 425
Set tool preferences
1 In the Editor, choose Edit > Preferences > General.
2 Set one or more of the following options, and click OK.
• Select Show Tool Tips to show or hide tool tips.
• Select Use Shift Key For Tool Switch to cycle through a set of hidden tools by holding down the Shift key. When
this option is deselected, you can cycle through a set of hidden tools by pressing the shortcut key (without holding
down Shift).
19
Set the appearance of a tool pointer
1 In the Editor, choose Edit > Preferences > Display & Cursors.
2 Select a setting for the Painting Cursors:
Standard Displays pointers as tool icons.
Precise Displays pointers as cross-hairs.
Normal Brush Tip Displays pointers as circles at 50% of the size you specify for the brush.
Full Size Brush Tip Displays pointers as circles at the full size you specify for the brush.
Show Crosshair In Brush Tip Displays cross-hairs in the circles when you choose either Normal Brush Tip or Full Size
Brush Tip.
3 Select a setting for Other Cursors:
Standard Displays pointers as tool icons.
Precise Displays pointers as cross-hairs.
Set tool options
The options bar appears below the shortcuts bar at the top of the Editor workspace. The options bar is context
sensitive—it changes as you select different tools. Some settings in the options bar are common to several tools, and
some are specific to one tool.
Last updated 7/26/2011
Page 27

USING PHOTOSHOP ELEMENTS 7
Photoshop Elements workspace
20
B
A
Lasso options bar
A. Tool icon B. Active tool C. Hidden tools D. Tool options
1 Select a tool.
2 Look in the options bar to see the available options. For more information on setting options for a specific tool,
search for the tool’s name in Photoshop
C
D
Elements Help.
Note: To return a tool or all tools to their default settings, click the tool icon in the options bar, then choose Reset Tool or
Reset All Tools from the context menu.
More Help topics
“Keys for selecting tools” on page 425
Set a completed operations alert
1 In the Editor, choose Edit > Preferences > General.
2 Select Beep When Done, and click OK.
Palettes and bins
About palettes
Palettes are available in both the Editor and Organizer workspaces; however, they behave a little differently in each.
Palettes help you manage, monitor, and modify images. Some palettes have menus that provide additional commands
and options. You can organize palettes in the workspace in many different ways. You can store palettes in the Palette
Bin to keep them out of your way, but easily accessible, or you can keep frequently used palettes open in the workspace.
Another option is to group palettes together or dock one palette at the bottom of another palette.
Note: Drag a palette out of the Palette Bin if you want to remove it from the Palette Bin and keep it open.
Dragging a palette.
Last updated 7/26/2011
Page 28
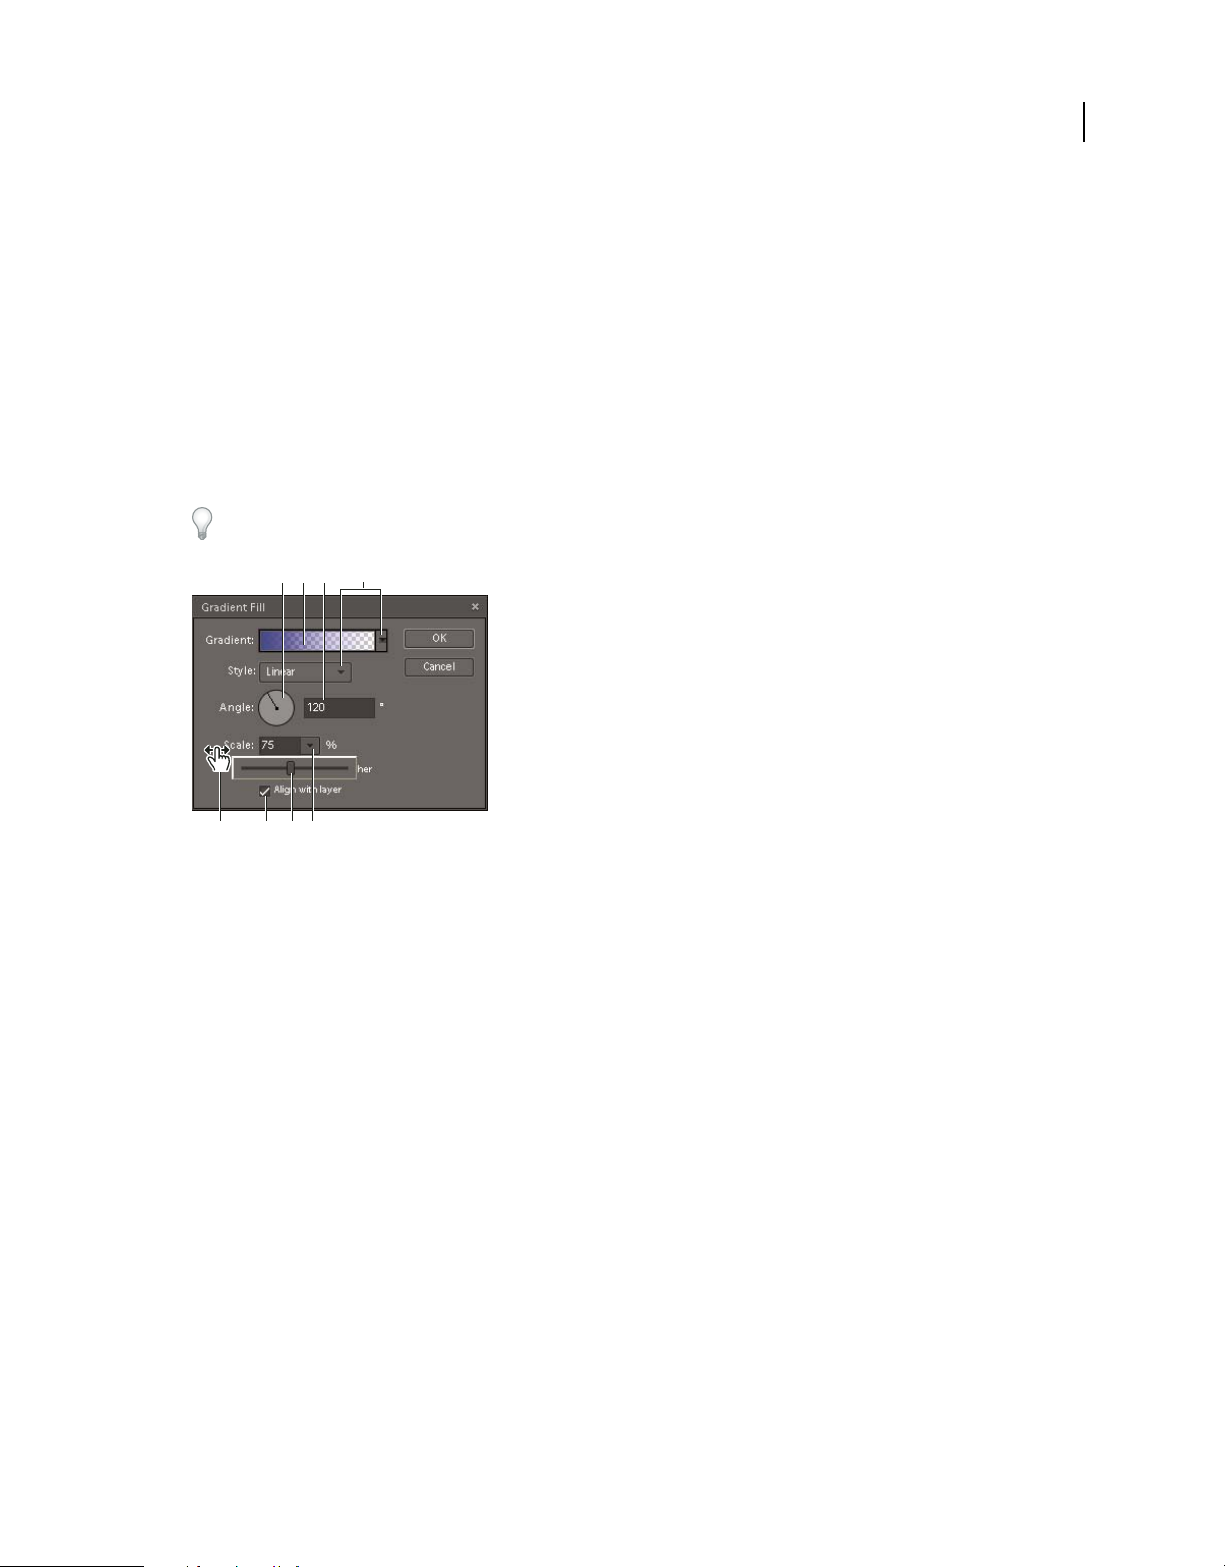
USING PHOTOSHOP ELEMENTS 7
Photoshop Elements workspace
Palette menus
Some commands appear in both the palette menu and the menu bar. Other commands are exclusive to palette menus.
Only those palettes with a More button at the top have a menu. Click More to choose a command from the palette
menu. The location and appearance of the More button depend on whether the palette is located in the Palette Bin or
in a palette group.
Pop-up sliders within palettes
Some palettes and dialog boxes contain settings that use pop-up sliders (for example, the Opacity option in the Layers
palette). If there is a triangle next to the text box, you can activate the pop-up slider by clicking the triangle. Position
the pointer over the triangle next to the setting, hold down the mouse button, and drag the slider or angle radius to the
desired value. Click outside the slider box or press Enter to close the slider box. To cancel changes, press Esc.
To increase or decrease values in 10% increments when the pop-up slider box is open, hold down Shift and press the
Up Arrow or Down Arrow key.
C
A
BD
21
F G H
E
Different ways to enter values
A. Dial B. Click to open window C. Text box D. Menu arrow E. Scrubby slider F. Check box G. Slider H Pop-up slider triangle
Work with palettes in the Editor
The Palette Bin in the Editor lets you store multiple palettes in a single area. You can easily configure, close, or keep
open the Palette Bin for easy and fast access. By default, the Palette Bin appears on the right side of the workspace.
When you adjust palettes, they remain as you leave them until you reset or change them.
Last updated 7/26/2011
Page 29
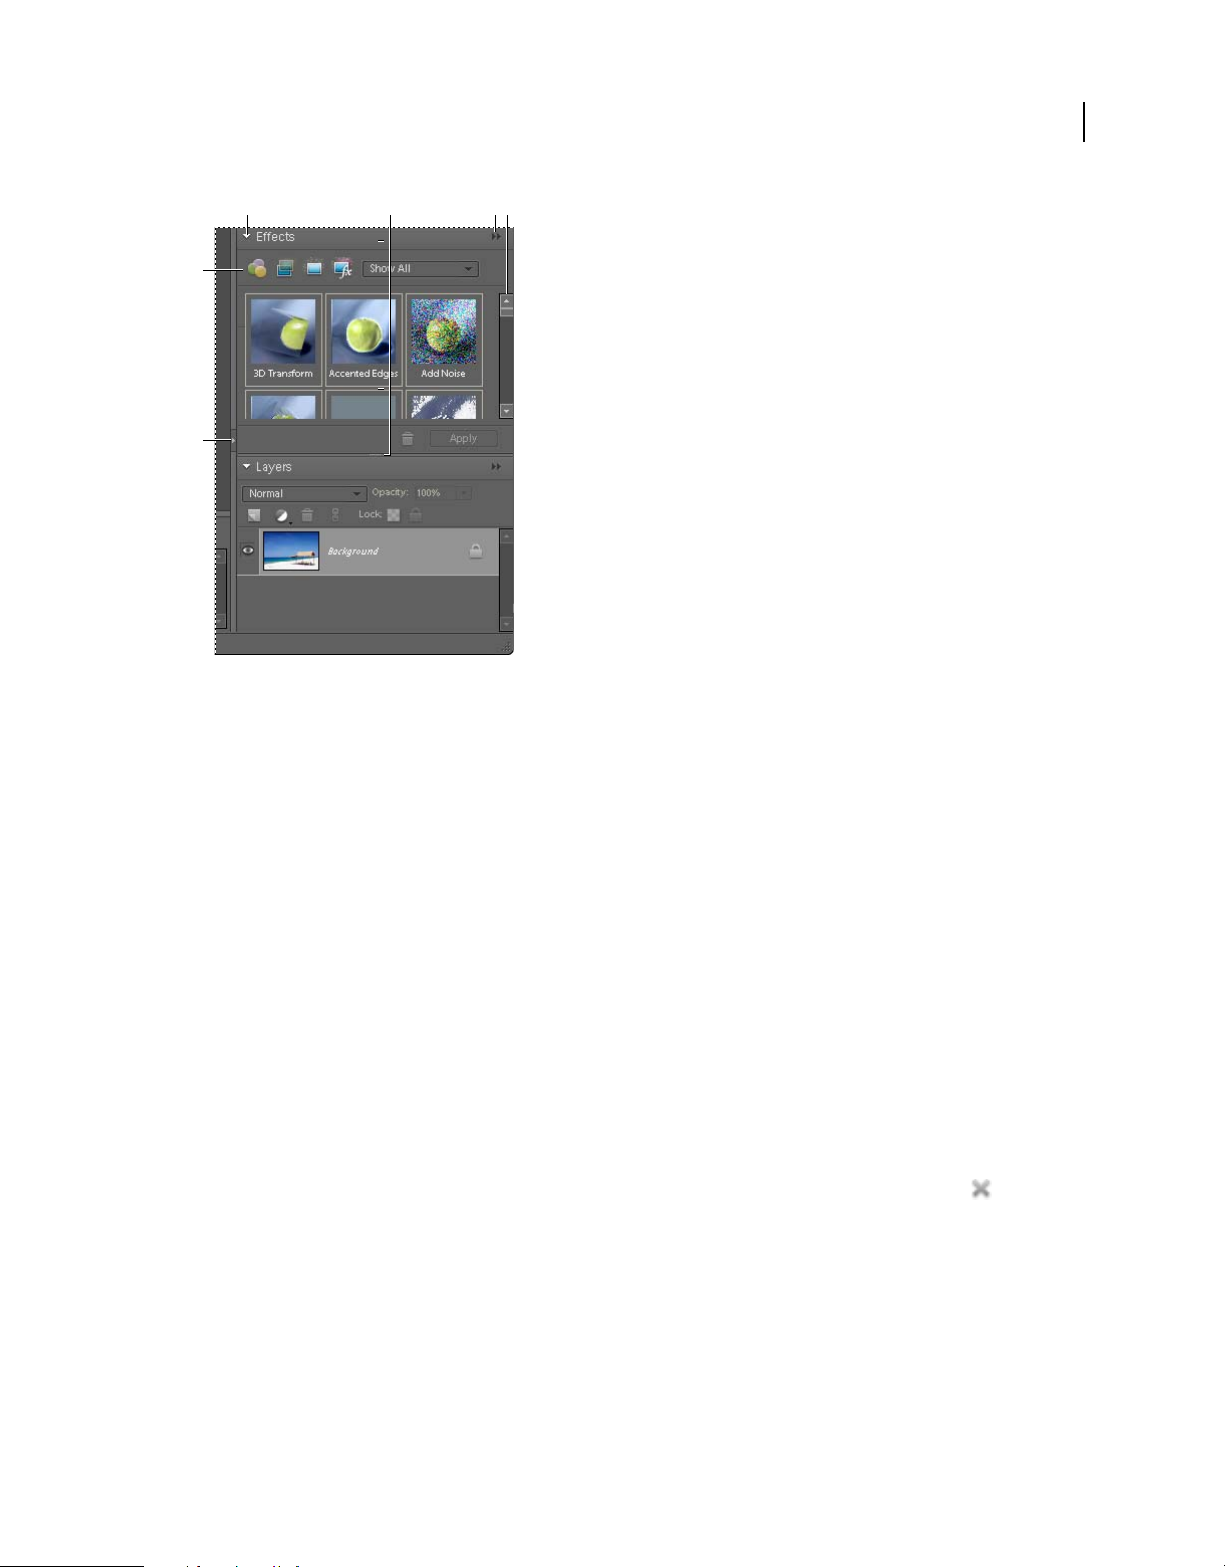
USING PHOTOSHOP ELEMENTS 7
Photoshop Elements workspace
22
A B
E
F
The Palette Bin
A. Collapse or expand a palette B. Adjust palette height C. Palette menu D. Scroll to view rest of palette E. Change palette tools F. Show or
hide Palette Bin
C D
1 To show or hide the Palette Bin, do any of the following:
• Choose Window > Palette Bin.
• Click the dark gray bar on the left edge of the Palette Bin to hide it.
• Click the dark gray bar on the right side of the Editor window to show the Palette Bin.
2 To adjust the height of a palette, drag the dotted-line bar at the bottom.
3 To use palettes in the Palette Bin, do any of the following:
• To remove a palette from the Palette Bin, drag the title bar of the palette out of the Palette Bin.
• To add a palette to the Palette Bin, drag the title bar of the palette into the Palette Bin. Or, click the More button in
the palette, select Place In Palette Bin When Closed, and then close the palette.
• To rearrange palettes in the Palette Bin, drag the title bar of the palette to a new location.
• To expand or collapse palettes in the Palette Bin, click the triangle next to the name of the palette.
4 To use palettes outside the Palette Bin, do any of the following:
• To open a palette, choose the name of the palette from the Window menu.
• To close a palette, choose the name of the palette from the Window menu. Or click the Close button in the title
bar of the palette. (This option works on palettes that you’ve opened from a menu. If you’ve dragged a palette out
of a bin and click the Close button, the palette simply returns to the bin.)
• To change the size of a palette, drag any corner of the palette.
• To group palettes (one palette with multiple tabs), drag the tab of the palette onto the body of the target palette. A
thick line appears around the body of the target palette when the pointer is over the correct area for grouping to
occur. If you want to move a palette to another group, drag the tab of the palette to that group. To separate a palette
from a group, drag the tab of the palette outside the group.
• To move a palette group, drag the title bar.
Last updated 7/26/2011
Page 30
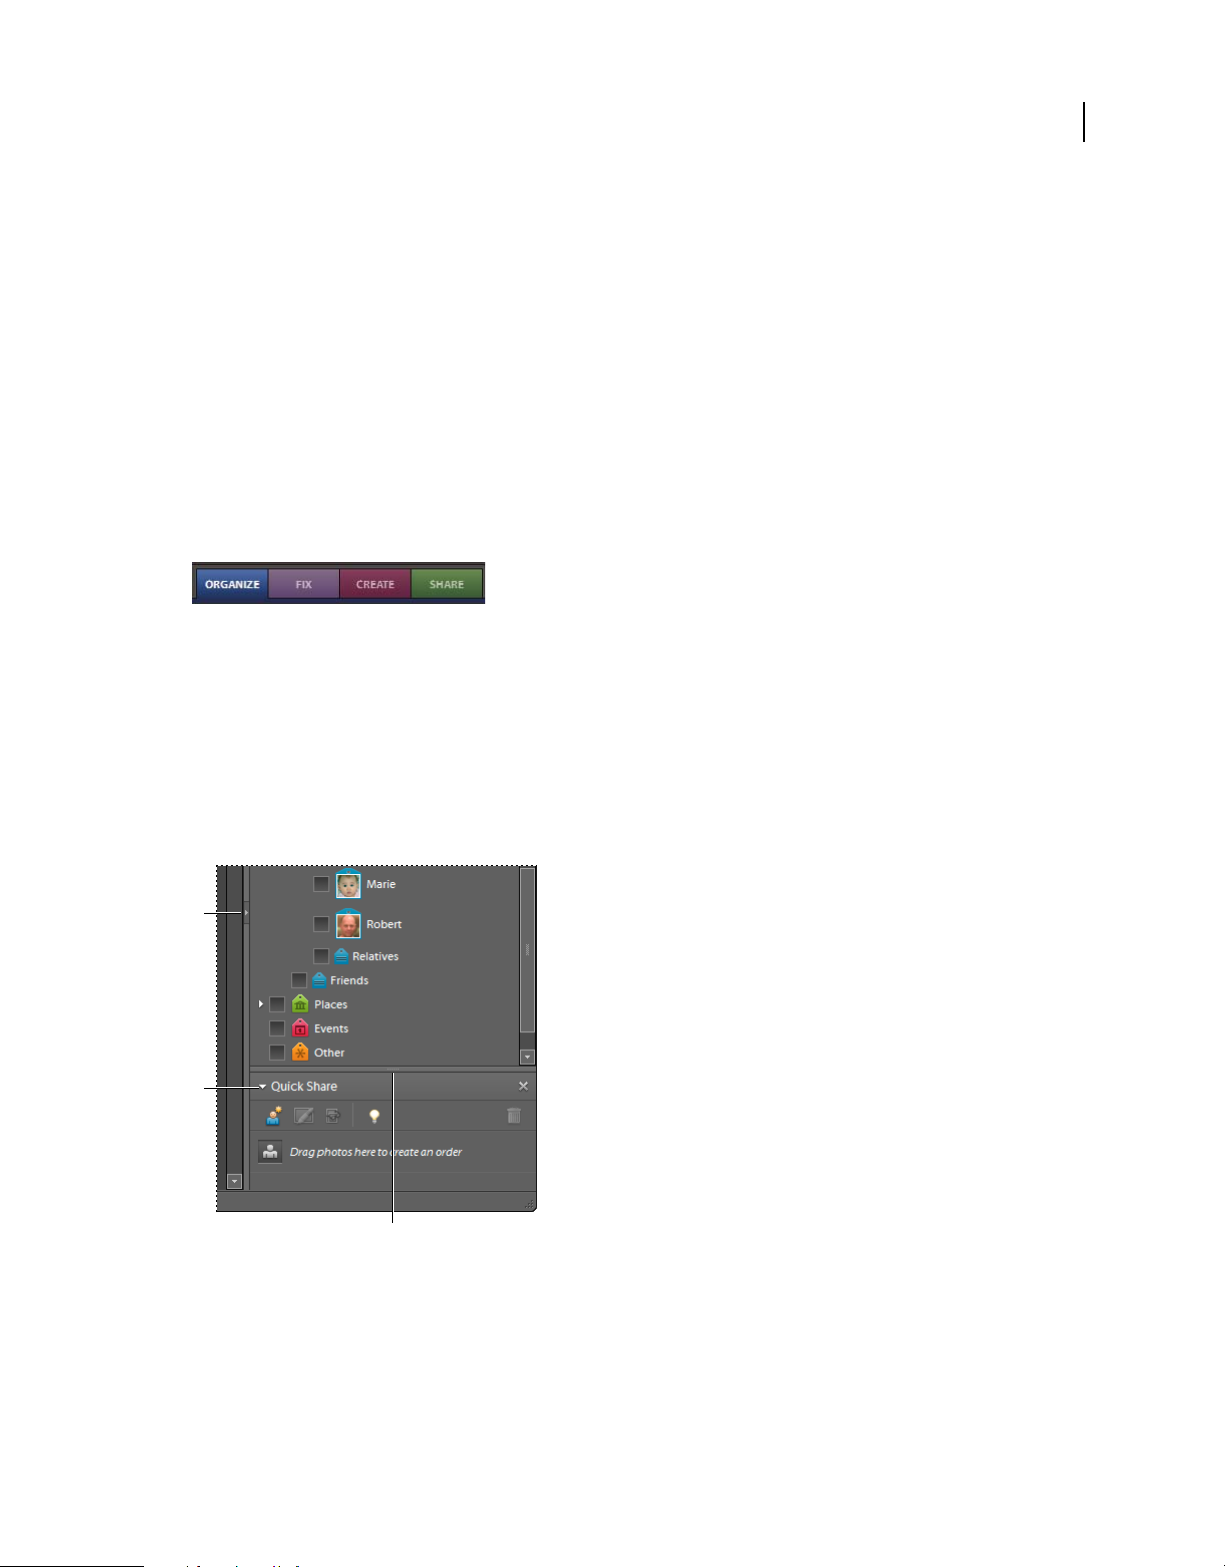
USING PHOTOSHOP ELEMENTS 7
Photoshop Elements workspace
• To expand or collapse a palette or palette group, double-click the tab of the palette or title bar.
• To dock palettes together (stacked palettes), drag a tab of the palette (not title bar) to the bottom of another palette.
A double line appears at the bottom of the target palette when the pointer is over the correct area. You cannot dock
entire palette groups.
• To reset palettes to their default positions, choose Window > Reset Palette Locations.
Note: If you want palettes to always open in their default positions in the Editor, choose Edit > Preferences > General,
and then deselect Save Palette Locations. The change takes effect the next time you start the application.
Work with the Task pane in the Organizer
In the Organizer, the Task pane appears on the right side of the Photo Browser. It contains a tab for each of the basic
steps of photo editing: Organize, Fix, Create, and Share. You can open the Task pane to access the tabs, or close it to
expand the Photo Browser.
Tabs in the Task Pane with the Organize tab selected.
Show or hide the Task pane
❖ Select Window > Show/Hide Task Pane.
23
Use palettes in the Organize tab
The Organize tab stores multiple palettes. The Albums and Keyword Tags palettes cannot be removed from it. You
can, however, choose whether to display the Quick Share or Properties palette, and can undock the Properties palette
from the Organize tab altogether.
A
B
C
The Organize tab
A. Show or hide Task pane B. Collapse or expand palette C. Adjust palette height
❖ Do any of the following:
• To collapse or expand a palette, click the triangle next to the palette’s name in the Organize tab.
• To show or hide the One-Click Share palette, Properties palette, or both, select Window > [name of palette].
• To move the Properties palette into or out of the Task pane, double-click the palette’s title bar.
Last updated 7/26/2011
Page 31

USING PHOTOSHOP ELEMENTS 7
Photoshop Elements workspace
Use tools in the Fix, Create, and Share tabs
1 In the Task pane, click the Fix, Create, or Share tab.
2 Click a button for any of the tools listed on that tab.
Use the Project Bin in the Editor
Located at the bottom of the Full Edit and Quick Fix workspaces, the Project Bin displays thumbnails of open photos.
It’s useful for switching between multiple open photos in your workspace. The Project Bin has controls that let you
open or close images, hide images, navigate through open images, make a specific image the frontmost image,
duplicate an image, rotate an image, or view file information. Because the Project Bin appears in both Full Edit and
Quick Fix, you can easily bring open images into Quick Fix for editing. Multiple-page projects are highlighted by a
gray frame around the page thumbnails. To show or hide the individual pages, click the right edge of the frame.
B CA D
24
E
The Project Bin
A. Selected photo B. Collapsed photo creation C. Click to expand photo creation D. Drag up or down to adjust Project Bin height E. Show or
hide Project Bin F. Project Bin drop-down menu
❖ Do any of the following:
F
• To open an image, drag a file from any location on your computer (including the Photo Browser) or from any
storage device connected to your computer into the Project Bin.
• To bring an opened image forward as the frontmost image, double-click a thumbnail.
• To rearrange photos, drag thumbnails in the Project Bin. The order here does not impact the photo’s order in the
Organizer.
• To close an image, right-click a thumbnail in the Project Bin and choose Close.
• To hide an image, right-click the thumbnail and choose Minimize from the context menu.
Note: To show an image after hiding it, double-click its thumbnail in the Project Bin, or right-click the thumbnail and
choose Restore from the context menu.
• To view a photo’s file information, right-click a thumbnail and choose File Info from the context menu.
• To duplicate an image, right-click a thumbnail, choose Duplicate from the context menu, and name the file.
• To rotate an image, right-click a thumbnail and choose Rotate 90° Left or Rotate 90° Right from the context menu.
• To show filenames, right-click in the Project Bin and choose Show Filenames from the context menu.
• To open or close the Project Bin, choose Window > Project Bin.
• To manually show or hide the Project Bin, click the Project Bin button. To automatically show or hide the Project
Bin, choose Edit
> Preferences > General and select the Project Bin Auto-hide option, or right-click in the Project
Bin and choose Auto-hide from the context menu.
Last updated 7/26/2011
Page 32

USING PHOTOSHOP ELEMENTS 7
Photoshop Elements workspace
Undo, redo, and cancel
Undo, redo, or cancel operations
Many operations in both the Organizer and the Editor can be undone or redone. For instance, you can restore all or
part of an image to its last saved version. Available memory may limit your ability to use these options.
1 To undo or redo an operation, Choose Edit > Undo or choose Edit > Redo.
2 To cancel an operation, hold down the Esc key until the operation in progress has stopped.
Using the Undo History palette (Editor only)
The Undo History palette (Window > Undo History) lets you jump to any recent state of the image created during the
current work session. Each time you apply a change to pixels in an image, the new state of that image is added to the
Undo History palette. You don’t need to save a change in order for the change to appear in the History.
For example, if you select, paint, and rotate part of an image, each of those states is listed separately in the palette. You
can then select any of the states, and the image reverts to how it looked when that change was first applied. You can
then work from that state.
Actions, such as zooming and scrolling, do not affect pixels in the image and do not appear in the Undo History palette.
Nor do program-wide changes, such as changes to palettes, color settings, and preferences.
25
A
B
C
The Undo History palette
A. Original state B. State C. Selected state and state slider
Note the following guidelines when using the Undo History palette:
• By default, the Undo History palette lists 50 previous states. Older states are automatically deleted to free more
memory for Photoshop
Performance Preferences (Edit
Elements. You can change the number of states displayed in the Undo History palette in
> Preferences > Performance). The maximum number of states is 1000.
• The original state of the photo is always displayed at the top of the Undo History palette. You can always revert an
image to its original state by clicking this top state. Clicking the original state is also handy for comparing before
and after versions of your editing.
• When you close and reopen the document, all states from the last working session are cleared from the palette.
• States are added to the bottom of the list. That is, the oldest state is at the top of the list, the most recent one is at
the bottom.
• Each state is listed with the name of the tool or command used to change the image.
• Selecting a state dims those below. This way you can easily see which changes will be discarded if you continue
working from the selected state.
• Selecting a state and then changing the image eliminates all states that came after it. Likewise, deleting a state deletes
that state and those that came after it.
Last updated 7/26/2011
Page 33

USING PHOTOSHOP ELEMENTS 7
Photoshop Elements workspace
Revert to the last saved version
When editing a photo in Full Edit or Quick Fix, you can revert to the last saved version.
❖ Choose Edit > Revert.
Note: Revert is added as a history state in the Undo History palette and can be undone.
Revert to a previous state of an image
❖ In Full Edit or Quick Fix, do any of the following:
• Click the name of the state in the Undo History palette.
• Drag the slider at the left of the state up or down to a different state in the Undo History palette.
• Click the Undo or Redo buttons on the shortcuts bar.
• Choose Undo or Redo from the Undo History palette menu or the Edit menu.
To set the keyboard command for Step Forward and Step Backward, choose Edit > Preferences > General, and choose
from the Step Back/Fwd menu.
Delete one or more states from the Undo History palette
❖ Do one of the following:
• To delete a state, click the name of the state, and choose Delete from the Undo History palette menu. States
following the one you selected are also deleted.
• To delete the list of states from the Undo History palette, without changing the image, choose Clear Undo History
from the palette menu or choose Edit
if you get an alert that Photoshop
Note: Clearing the Undo History palette cannot be undone.
> Clear > Undo History. Clearing is useful for freeing up memory, especially
Elements is low on memory.
26
Clear memory used by the clipboard and the Undo History palette
You can delete items copied to the clipboard or states in the Undo History palette to free up memory.
❖ In Full Edit, do one of the following:
• To clear memory used by the clipboard, choose Edit > Clear > Clipboard Contents.
• To clear memory used by the Undo History palette, choose Edit > Clear > Undo History or choose Clear Undo
History from the Undo History palette menu.
• To clear the memory used in both the clipboard and the Undo History palette simultaneously, choose Edit >
> All.
Clear
Note: Clearing the Undo History palette or clipboard cannot be undone.
Restore default preferences
Preference settings control how Photoshop Elements displays images, cursors, and transparencies, saves files, uses
plug-ins and scratch disks, and so on. If the application exhibits unexpected behavior, the preferences file may be
damaged. You can restore all preferences to their defaults.
❖ Press and hold Alt+Control+Shift immediately after Photoshop Elements begins launching. Click Yes to delete the
Adobe Photoshop Elements settings file.
A new preferences file is created the next time you start Photoshop Elements. For information on a specific preference
option, search for the preference name in Help.
Last updated 7/26/2011
Page 34

USING PHOTOSHOP ELEMENTS 7
Photoshop Elements workspace
Redisplay disabled warning messages
In certain situations, messages containing warnings or prompts are displayed. You can disable the display of these
messages by selecting the Don’t Show Again option in the message, and reset the messages you’ve disabled at a later
time.
1 In the Editor, choose Edit > Preferences > General.
2 Click Reset All Warning Dialogs, and click OK.
Scratch disks and plug-ins
About scratch disks
When your system does not have enough RAM to perform an operation, Photoshop Elements uses scratch disks. A
scratch disk is any drive or partition of a drive with free memory. By default, Photoshop
on which the operating system is installed as its primary scratch disk.
You can change the primary scratch disk or designate a second, third, or fourth scratch disk to be used when the
primary disk is full. Your primary scratch disk should be your fastest hard disk and have plenty of defragmented space
available.
Elements uses the hard drive
27
For best performance, use the following guidelines when assigning scratch disks:
• Scratch disks should not be on the same physical drive as Photoshop Elements or any large files you are editing.
• Scratch disks should be not be on the same physical drive as the one used for the operating system’s virtual memory.
• Scratch disks should be on a local drive. That is, they should not be accessed over a network.
• Scratch disks should be conventional (non-removable) media.
• RAID disks/disk arrays are good choices for dedicated scratch disk volumes.
• Drives with scratch disks should be defragmented regularly. Or better yet, use an empty drive or a drive with plenty
of unused space to avoid fragmentation issues.
Change scratch disks
Photoshop Elements needs contiguous hard drive space to create a scratch disk. For this reason you should frequently
defragment your hard drive. Adobe recommends that you use a disk tool utility, such as Windows Disk Defragmenter,
to defragment your hard drive on a regular basis. See your Windows documentation for information on
defragmentation utilities.
1 In the Editor, choose Edit > Preferences > Performance.
2 Select the desired disks from the Scratch Disks menu (you can assign up to four scratch disks), and click OK.
3 Restart Photoshop Elements for the change to take effect.
About plug-in modules
Plug-in modules are software programs developed by Adobe Systems and other software developers to add
functionality to Photoshop
program; they are inside the Photoshop
to load compatible plug-ins stored with another application. You can also create a shortcut for a plug-in stored in
another folder on your system. You can then add the shortcut or alias to the Plug-ins folder to use that plug-in with
Elements. A number of importing, exporting, and special-effects plug-ins come with your
Elements Plug-ins folder. You can select an additional plug-ins folder in which
Last updated 7/26/2011
Page 35

USING PHOTOSHOP ELEMENTS 7
Photoshop Elements workspace
Photoshop Elements. Once installed, plug-in modules appear as options added to the Import or Export menu, as filters
added to the Filter menu, or as file formats in the Open and Save As dialog boxes. If you install a large number of
plug-ins, Photoshop
appear in the Filter
(~) at the beginning of the plug-in name, folder, or directory. That file (or all files in the folder) is ignored by the
application when you restart it. To view information about installed plug-ins, choose Help
a plug-in from the submenu.
Elements may not be able to list them all in their appropriate menus. If so, newly installed plug-ins
> Other submenu. To prevent a plug-in or folder of plug-ins from loading, add a tilde character
> About Plug-In and select
More Help topics
“Plug-in filters” on page 305
Install plug-in modules
❖ Do one of the following:
• Use the plug-in installer, if provided.
• Follow the installation instructions that came with the plug-in module.
• Make sure the plug-in files are uncompressed, and then copy them to the appropriate Plug-ins folder in the
Photoshop
Elements folder.
28
Select an additional plug-ins folder
You can select an additional plug-ins folder in which to load compatible plug-ins stored with another application.
1 In the Editor, choose Edit > Preferences > Plug-Ins
2 In the Preferences dialog, select Additional Plug-ins Folder, select a folder from the list, and click Choose.
3 To display the contents of a folder, double-click the directory. The path to the folder appears in the preferences
window.
Note: Do not select a location inside the Plug-ins folder for Photoshop Elements.
4 Restart Photoshop Elements to load the plug-ins.
Getting started with your Photoshop.com membership
About your Photoshop.com account
Important: Currently, Photoshop.com services are only available to Photoshop Elements users in the United States.
U.S.-based Photoshop Elements users can sign up for a free Photoshop.com membership. The membership extends
the power of Photoshop
Browser with tutorials that help you get the most out of your photos and creations. You can also protect your photos
with back ups to Photoshop.com servers and share photos via the Internet. As a member, you receive updated tips, art,
and templates to keep your projects fresh and appealing.
Elements with Internet services. Services include special downloads and the Inspiration
Photoshop.com offers you different membership levels. The free version of the Basic membership gives you 2 GB of
storage space. You also have access to some tutorials and other content. You can purchase more storage space at any
time, or upgrade to a Premium membership for additional storage space and access to special content.
To get started, simply create an account and sign in.
Last updated 7/26/2011
Page 36

USING PHOTOSHOP ELEMENTS 7
Photoshop Elements workspace
Create a Photoshop.com membership account
As an owner of Photoshop Elements, you can open a Basic Photoshop.com membership account to gain instant access
to tutorials, content, and many other features. Currently, Photoshop.com membership is only available in the United
States.
1 Start Photoshop Elements.
2 In the Welcome screen, click Join Now and follow the instructions to create your Adobe ID.
Note: If you already have an Adobe ID, then just sign in.
3 Follow the instructions in the e-mail to activate your account.
Important: You don’t have to open a Photoshop.com membership account when the Welcome screen appears. You can
open an account anytime you want. Links are conveniently located throughout the Photoshop
signing up.
Elements workspace for
Sign in to your Photoshop.com account
1 Make sure that your computer is connected to the Internet, and then start Adobe Photoshop Elements.
2 In the Welcome screen, enter your Adobe ID and password, and click Sign In.
The Welcome screen changes and greets you with the message Welcome, [user name]. Generally, Photoshop Elements
remembers that you’re a Photoshop.com member and automatically signs you in if your computer is connected to the
Internet.
29
Important: Currently, Photoshop.com services are only available to Photoshop Elements users in the United States.
View your albums on Photoshop.com
You can view your backed up albums on the Internet from any computer, even one that doesn’t have
Photoshop
1 Make sure that the computer is connected to the Internet, open a web browser, and go to Photoshop.com.
The web browser must have cookies enabled.
2 On the Photoshop Express home page, click Sign In and enter your Adobe ID.
3 After your Photoshop.com page opens, click My Photos.
You can view and navigate through all the photos and albums you’ve backed up to Photoshop.com.
Elements installed.
Launch the Inspiration Browser
The Inspiration Browser lets you access and organize tutorials that contain ideas and ways to do more with your
photos.
❖ To launch the Inspiration Browser, do any of the following:
• In either the Editor or the Organizer, click the icon or words that appear in the lower-right area of the status bar. A
small dialog opens with options.
• Double-click the Photoshop.com Inspiration Browser icon on your computer desktop. You must have
Photoshop Elements running when double-clicking the icon.
If you’re not already signed in to Photoshop.com, a dialog box opens for you to to sign in.
Last updated 7/26/2011
Page 37

USING PHOTOSHOP ELEMENTS 7
Photoshop Elements workspace
Using Photoshop Elements and Adobe Premiere Elements together
About Photoshop Elements and Adobe Premiere Elements
Here are a few ways you can share files between Photoshop Elements and Adobe® Premiere® Elements:
• Organize your photos, video clips, and audio clips in Photoshop Elements, and then drag them into the Adobe
Premiere Elements Media panel.
• Create a slide show in Photoshop Elements with captions, transitions, effects, music, narration, graphics, and titles,
and then bring the slide show into Adobe Premiere Elements for further editing. Or, bring individual photos into
Adobe Premiere Elements and create the slide show there.
• Customize DVD menu templates in Photoshop Elements, and then use them in your Adobe Premiere Elements
project. (DVD templates are PSD files stored in the Adobe Premiere Elements application folder.)
• Create a Photoshop Elements file with your video project’s settings, enhance it in Photoshop Elements, and then
use it in Adobe Premiere Elements.
Arrange your work area
To share files between Photoshop Elements and Adobe Premiere Elements, it’s useful to have both programs open and
accessible on your computer monitor.
30
1 Start Photoshop Elements and Adobe Premiere Elements.
2 If your screen is maximized, click the Restore button in the upper-right corner of each application window.
3 Position the application windows side by side or overlap them slightly.
Differences in file type support
Photoshop Elements and Adobe Premiere Elements support many of the same file types, which makes the transfer of
most files between the two programs easy and efficient. For example, you can catalog Photoshop (PSD) files in the
Organizer and then add them as still images to a project in Adobe Premiere Elements.
However, the following file types are not recognized by both programs:
Photoshop Elements Organizer Photoshop Elements Editor Adobe Premiere Elements
MOD (.mod; JVC Everio)
Adobe PDF (.pdf) Adobe PDF (.pdf)
TIFF with LZW compression (.tif) TIFF with LZW compression (.tif)
Illustrator (.ai) Illustrator (.ai)
AIFF (.aiff) AIFF (.aiff)
ASF (.asf) ASF (.asf)
AVI movie (.avi; only partially
supported)
AVI (.avi; only partially supported)
Dolby audio (.ac3) Dolby audio (.ac3)
DVD (.vob) DVD (.vob)
Last updated 7/26/2011
Page 38

USING PHOTOSHOP ELEMENTS 7
Photoshop Elements workspace
Photoshop Elements Organizer Photoshop Elements Editor Adobe Premiere Elements
Flash video (.flv) Flash video (.flv)
MPEG (.mpg, .mp3, .mp4) MPEG (.mpg, .mp3, .mp4)
QuickTime (.mov) QuickTime (.mov)
WAV (.wav) WAV (.wav)
Windows Media (.wmv, .wma) Windows Media (.wmv, .wma)
Note: The Organizer catalogs video AVI files properly, but audio AVI files are shown as broken video thumbnail icons.
However, they will play correctly. Also, colors created in a file’s spot channels in Photoshop will not be displayed when the
file is imported into Photoshop
Elements.
The Editor can import individual video frames from ASF, AVI, MPEG, and Windows Media files. (Choose
File > Import > Frame From Video.)
31
Last updated 7/26/2011
Page 39

Chapter 3: Import photos and videos
The first step to using Adobe® Photoshop® Elements is getting all your media files into one or more catalogs.
Use the Organizer to bring media files into catalogs from any source, whether a camera, scanner, CD, folder on your
hard disk, or mobile phone. However, if you simply want to start editing a photo on your hard disk, and you know its
filename and location, you can use the Open or Place commands in the Editor to browse to the file.
About getting photos and videos
Bringing photos and videos into the Organizer
Use the Organizer to add photos and videos to a Photoshop Elements catalog. If you choose the File > Import or File >
Open command in the Editor, select the Include In The Organizer option when you save the file to add it to your
catalog.
If you have a system of folders on your computer that you want to continue using for organizational purposes, you can
use the Organizer’s Folder Location view to view your files as they appear on your hard disk. From the Folder Location
view, you can also instantly tag your images with their folder names.
32
When you choose the File > Get Photos And Videos command in the Organizer to bring a photo from your hard
disk into a catalog, Photoshop Elements creates a link to the photo—it does not copy or move the original image unless
you specify it. When you get a photo from a CD, DVD, or device such as a scanner, camera, card reader, or phone,
Photoshop
Important: If you delete the original file from your hard disk, you cannot edit it in Photoshop Elements, even though its
thumbnail may remain in a catalog.
More Help topics
“Open a file” on page 134
“View and manage files by folder location” on page 51
“Create and attach keyword tags based on folder names” on page 75
“Move files in a catalog” on page 108
“Save changes in different file formats” on page 145
Elements first copies the photo into a folder on your hard disk and then creates a link to that copy.
Guideline for getting photos from devices
When downloading image files from a camera, card reader, or mobile phone, it’s recommended that you organize the
photos during the import process. You can divide these photos into Place and Family folders, and then name them
accordingly.
More Help topics
“About cameras and card readers” on page 35
“About scanning” on page 39
Last updated 7/26/2011
Page 40

USING PHOTOSHOP ELEMENTS 7
Import photos and videos
“About catalogs” on page 102
“About keyword tags” on page 68
Set file import preferences
Setting the file import preferences determines how Photoshop Elements manages files brought into the Organizer
from any source.
1 In the Organizer, choose Edit > Preferences > Files.
2 Choose any of the following options, and then click OK:
Use “Last Modified” Date If EXIF Date Is Not Found Uses the modification date to store and organize photos that don’t
contain EXIF (EXchangeable Image Format) data. If deselected, the file is stored with an unknown date.
Import EXIF Caption Imports any caption that was stored with the photo in the camera. Deselect this option if you
want to delete this information, and type your own caption for each photo. (Note that caption data may be stored in
different places in a file. Deselecting this option only blocks EXIF caption data.)
Automatically Search For And Reconnect Missing Files Searches for missing, disconnected files. Select this option to
avoid getting messages about disconnected files.
Automatically Prompt To Back Up Files And Catalog Prompts you to back up files when you open a catalog with more
than 500 transactions, including acquired photos and edits.
33
Enable Multisession Burning To CD/DVD Allows burning (copying) files onto a disc multiple times, enabling you to use
as much free space on the disc as possible. Normally, you can only burn a CD or DVD one time, and any unused space
is lost.
Rotate JPEGs Using Orientation Metadata This option speeds up the rotating of photos in the Photo Browser by using
lower resolution thumbnails. Select this option if you rotate JPEG images regularly. Deselect this option if you want to
view higher resolution thumbnails.
Rotate TIFFs Using Orientation Metadata This option speeds up the rotating of photos in the Photo Browser by using
lower resolution thumbnails. Select this option if you rotate TIFF images regularly. Deselect this option if you want to
view higher resolution thumbnails.
Folders For Saved Files Specifies the default folder location where projects and other saved files are stored. To change
the location, click Browse and navigate to a new location.
Preview File Size Specifies the size of preview files used by the Organizer when storing photos offline.
If you have changed the settings and are having trouble importing your photos, try clicking the Restore Default
Settings button in the Preferences dialog box to restore the original preferences.
More Help topics
“Set the size for preview files” on page 45
“Reconnecting missing files in the Organizer” on page 131
Import tags attached to photos
When you receive photos that contain tags or keyword metadata, you can import them with the photo. You can decide
whether to keep the attached tag, rename the tag, or map it to one of your own tags. If you import a new tag, it appears
in your Keyword Tags palette, and you can use it to tag other photos.
Last updated 7/26/2011
Page 41
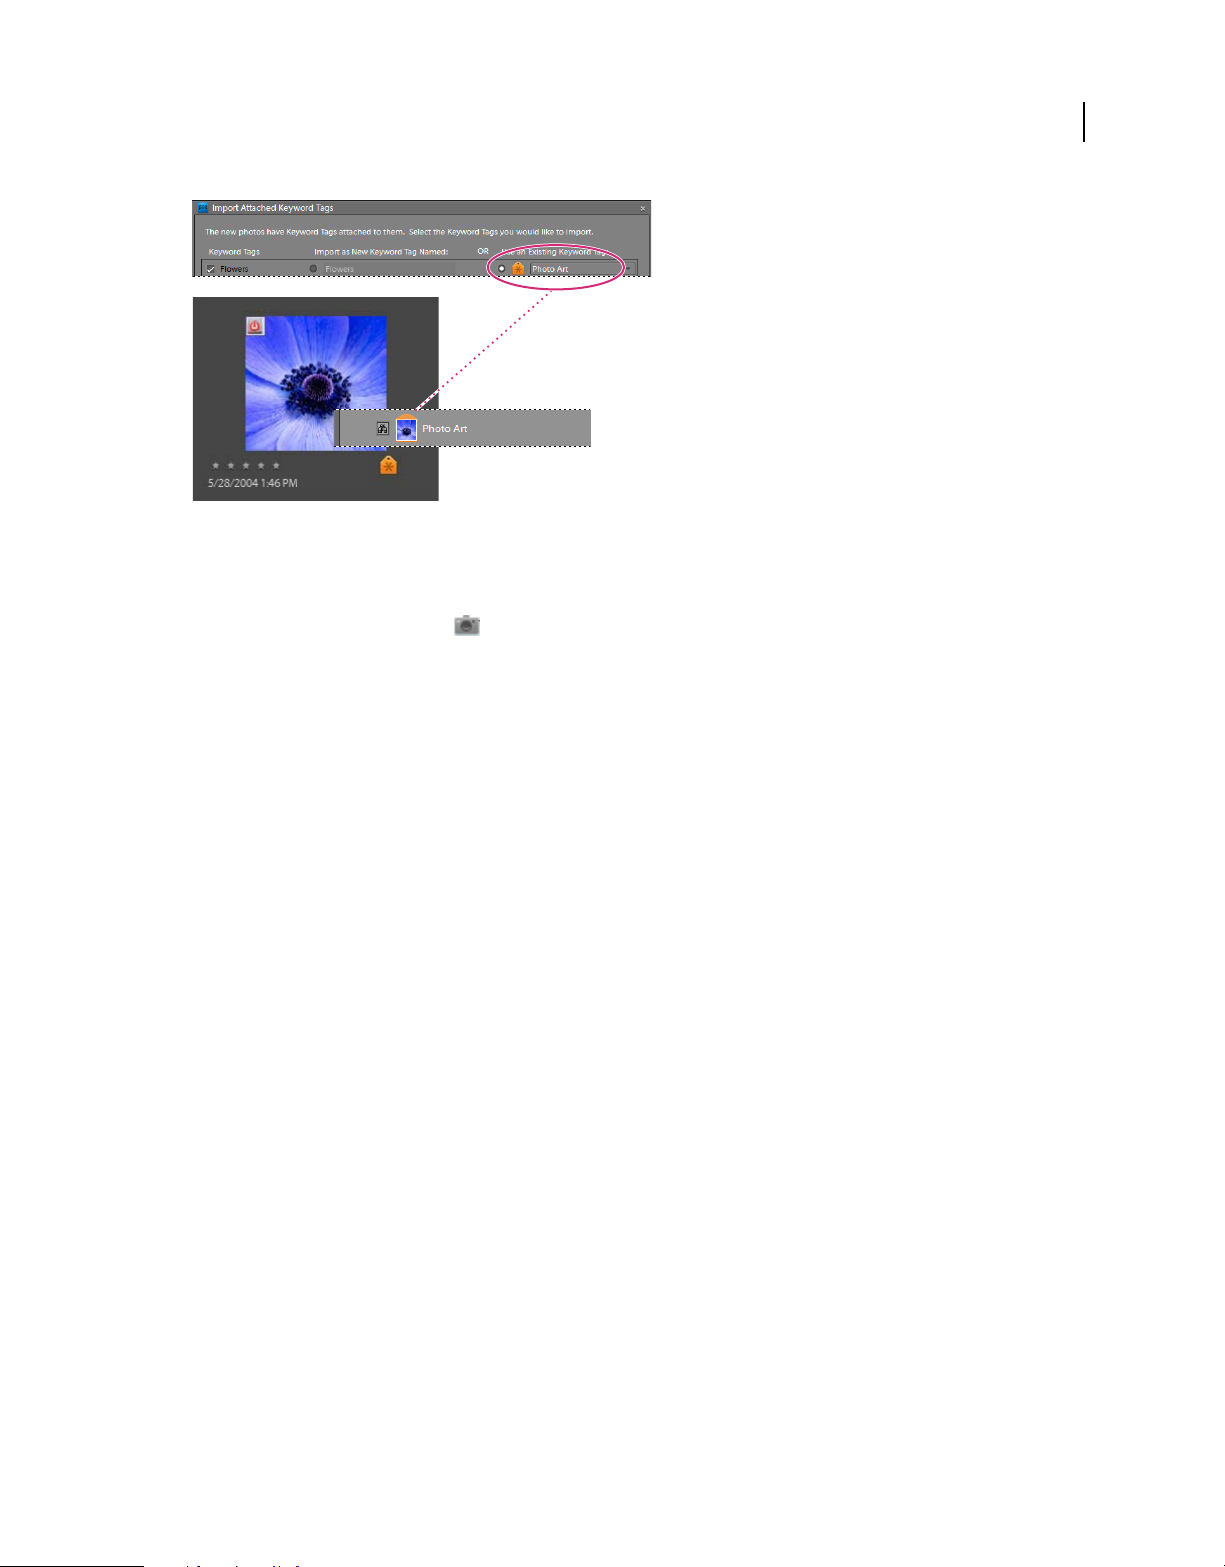
USING PHOTOSHOP ELEMENTS 7
Import photos and videos
An imported tag appears in the Keyword Tags palette.
1 Make sure the camera or card reader is connected to your computer, or the photos you want to import have already
been copied to your computer.
2 In the Organizer, choose File > Get Photos And Videos, and select any method for getting photos and videos.
Note: If the photos include tags or keyword metadata, the Import Attached Tags dialog box appears.
34
3 Do one of the following:
• Select the tags you want to import. The tags you select are added to the Keyword Tags palette when the photos are
imported. If a tag has an asterisk (*), you already have a tag of the same name in your catalog, and that existing tag
is attached to the photos.
• Click Advanced for additional options.
4 If you selected Advanced, do any of the following, and click OK:
• Select the tags you want to import by clicking the boxes next to the tag names. When you select a tag, the options
to the right of the tag become active.
• To rename a tag you are importing, select the tags you want to import by clicking the boxes next to the tag names.
Click the button to the right of the tag under Import As New Tag Named, and type a name in the text box.
Photoshop
Elements adds a tag with the new name to your catalog and attaches the tag to the imported photos.
• To map an imported tag to an existing tag in your catalog, select the tags you want to import by clicking the boxes
next to the tag names. Click the button in the right-hand column under Use An Existing Tag and choose a tag from
the pop-up menu. The tag name you choose gets attached to the imported photos instead of the original tag name.
• Click Reset To Basic to clear your changes and return to the Import Attached Tags dialog box.
Note: If the photos you are importing have a large number of tags attached, a dialog box appears. You can choose to
import all of the tags or none of them. If you prefer to select individual tags to import, close the dialog box and undo the
import by choosing Edit
> Undo Import Items, or select the entire import batch and delete it from the catalog. Then,
reimport the photos in smaller batches.
More Help topics
“About keyword tags” on page 68
Last updated 7/26/2011
Page 42

USING PHOTOSHOP ELEMENTS 7
Import photos and videos
Cameras and card readers
About cameras and card readers
You can download (copy) photos from cameras and card readers in several ways:
• Copy photos from your camera or card reader, and import them directly into the Photoshop Elements Organizer
using the options in the Photo Downloader dialog box. This method is recommended because it is quick and easy,
and lets you organize your photos when importing them.
• Use the software that came with your digital camera to download pictures onto your computer, and then bring
them into Photoshop
command in the Organizer.
• If your camera or card reader displays as a drive in My Computer, you can drag the files from there directly into
the Organizer. Or you can drag them into a folder on your hard drive, and then bring them into
Photoshop
Organizer.
In some cases, you need to install the software driver that came with your camera before you can download pictures
to your computer. You might also need to set the camera and card reader preferences in Photoshop
Elements using the File > Get Photos And Videos > From Files And Folders command in the
Elements using the File > Get Photos And Videos > From Files And Folders
Elements.
35
More Help topics
“Bringing photos and videos into the Organizer” on page 32
“Get photos from files and folders” on page 42
“Set camera and card reader preferences” on page 38
Get photos from a digital camera or card reader
For a video about this process, see www.adobe.com/go/lrvid2311_pse
1 Connect your camera or card reader to your computer. (See the documentation that came with your device, if
necessary.)
The Windows AutoPlay dialog box opens with a list of options for getting the photos.
2 In the Windows AutoPlay dialog box, select the Photoshop Elements option.
The Photo Downloader dialog box opens if Photoshop Elements is running, you can also choose File > Get Photos
And Videos > From Camera Or Card Reader to open the Photo Downloader.
3 In the Photo Downloader dialog box under Source, choose from the Get Photos From menu to specify where to
copy/import the photos from.
4 In the Import Settings area, set the following options:
Location Specifies the folder to which images are downloaded. To change the default folder location, click Browse, and
specify a new location.
Create Subfolder(s) Creates a subfolder using the naming scheme chosen from the pop-up menu. If you choose
Custom Name, type a subfolder name in the box.
If you are using keyboard shortcuts to create subfolders (Alt+C) or rename files (Alt+R), press the spacebar to expand
the menu. Then, use the arrow keys to select an option.
Last updated 7/26/2011
Page 43

USING PHOTOSHOP ELEMENTS 7
Import photos and videos
Rename Files Changes the filenames using the naming scheme selected from the pop-up menu. If you choose Custom
Name, type a base filename and a starting number for assigning sequentially numbered filenames to the photos.
Note: If the name you entered exists, the copied image filename is appended with “-1” or another appropriately numbered
designator.
Preserve Current Filename in XMP Select this option to use the current filename as the filename stored in the metadata
of the photo.
Delete Options Specifies whether to leave the photos on your camera or card, verify and delete the files, or just delete
the files after they are copied. Deleting the files automatically avoids having to delete the photos by using your camera.
Photos that you do not import into Photoshop
Automatic Download Imports your photos instantly the next time Photoshop Elements is selected in the Windows
Elements are not deleted from the device.
AutoPlay dialog box. This option uses the Automatic Download values specified in the Camera or Card Reader
preferences.
5 (Optional) For more download options, click the Advanced Dialog button. See “Set advanced photo downloading
options” on page 36.
6 Click Get Photos.
The photos are copied to your hard drive. If the photos you copied contain keyword metadata, the Import Attached
Tags dialog box appears; specify whether to copy the tags.
36
7 Click OK in the Files Successfully Copied dialog box. You have the option of selecting the option to show only the
new files in the Photo Browser.
Choosing a device in the Photoshop Elements Photo Downloader.
You can change the settings specified here at a later time. In the Organizer, choose Edit > Preferences > Camera or
Card Reader.
Set advanced photo downloading options
The Advanced dialog box of the Adobe Photo Downloader offers all the options in the Standard dialog box plus several
additional options. For example, you can view all of the photos stored on a device or preview videos before importing
them. You can also add copyright metadata, specify an album for the imported photos, and automatically fix red eye
as the images are imported. The settings you specify in this dialog box retain their values until you reset them.
Last updated 7/26/2011
Page 44

USING PHOTOSHOP ELEMENTS 7
Import photos and videos
37
A
C
D
G
Adobe Photoshop Elements Photo Downloader Advanced dialog box
A. Name of connected device B. Options for saving files C. Click the box to download a photo. D. Rotate buttons E. Name for all files F. Selects
metadata templates G. Check All or Uncheck All photos H. Gets the photos
B
E
F
H
1 In the Standard Photo Downloader dialog box, click Advanced Dialog.
Thumbnail images of every file on your device appear.
2 To show or hide different file types, click the Image , Video , or Audio buttons. If the device contains
duplicate files, the Duplicate button is also available.
Note: Duplicate files are files that are already in the Organizer or have already been copied to your hard disk. If you
download duplicate files, they are copied to your hard drive, but are not added to the Organizer.
3 Select photos to download by doing any of the following:
• To select individual photos, click the boxes below each thumbnail.
• To select multiple photos, drag a rectangle around their thumbnails. Then right-click and select Check Selected, or
click a box below one of the selected images to check them all.
• To select all photos, click Check All. To deselect all images, click Uncheck All.
4 To rotate one or more photos, select them by clicking the images (not the check boxes). Then, click the Rotate Left
or the Rotate Right button .
button
5 In the Save Options section, do any of the following:
• Specify a destination to copy the photos. Click Browse and navigate to the location you want.
• Choose an option for naming subfolders from the Create Subfolder(s) menu. The Custom Groups (Advanced)
option creates a subfolder with the group name format you select in the Group Name box. The group tag name
helps you find and distinguish photos within a category.
Last updated 7/26/2011
Page 45

USING PHOTOSHOP ELEMENTS 7
Import photos and videos
Note: If you switch to the Standard dialog box, Custom Groups settings are lost.
• Choose a naming scheme from the Rename Files menu if you want to rename the photos during import. If you
choose Custom Name, type a base filename and a starting number for assigning sequentially numbered filenames
to the photos.
Note: If the name you entered exists, the copied image filename is appended with “-1” or another appropriately numbered
designator.
6 In the Advanced Options section, select any of the following:
Automatically Fix Red Eyes Applies the Fix Red Eye command to all selected photos.
Note: Automatically removing red eye on a large number of image files increases the amount of time required to import
your photos.
Automatically Suggest Photo Stacks Combines selected photos into suggested photo stacks based on visual similarity.
Make Group Custom Name A Tag Applies the custom name tag of the specified group to the selected photos. Use this
option only if you have assigned custom groups. Applying tags while downloading helps you find photos more easily
in the Organizer.
Import Into Album Lets you specify or create an album to import the photos into. Click Settings to select or create an
album and then click OK.
38
7 From the menu at the bottom of the Advanced Options section, choose an option to specify what
Photoshop
Elements should do after copying photos: leave the original files alone, verify that the import was
successful and then delete the original files, or immediately delete the original files.
8 To add metadata, select a template to use and type in the following fields:
Creator Specifies the file creator. Information typed into this field is appended to the creator metadata in the file.
Copyright Specifies the date and other relevant information to protect your photos. Information typed into this field
overwrites any data already in the copyright metadata in the file.
9 (Optional) To automatically download photos in Photoshop Elements after a device is connected, select Automatic
Download. Automatic download options are set in the Camera Or Card Reader preferences. See
“Set camera and
card reader preferences” on page 38
10 Click Get Photos.
More Help topics
“Designate an album during photo download” on page 84
Set camera and card reader preferences
Photoshop Elements lets you set preferences for a device. These preferences apply if you select the
Photoshop
preferences remain intact until you change them. If you use a different camera or card reader, make sure to set
preferences specifically for that device.
Elements option in the Windows Auto Play dialog box that appears when a device is connected. The
Last updated 7/26/2011
Page 46
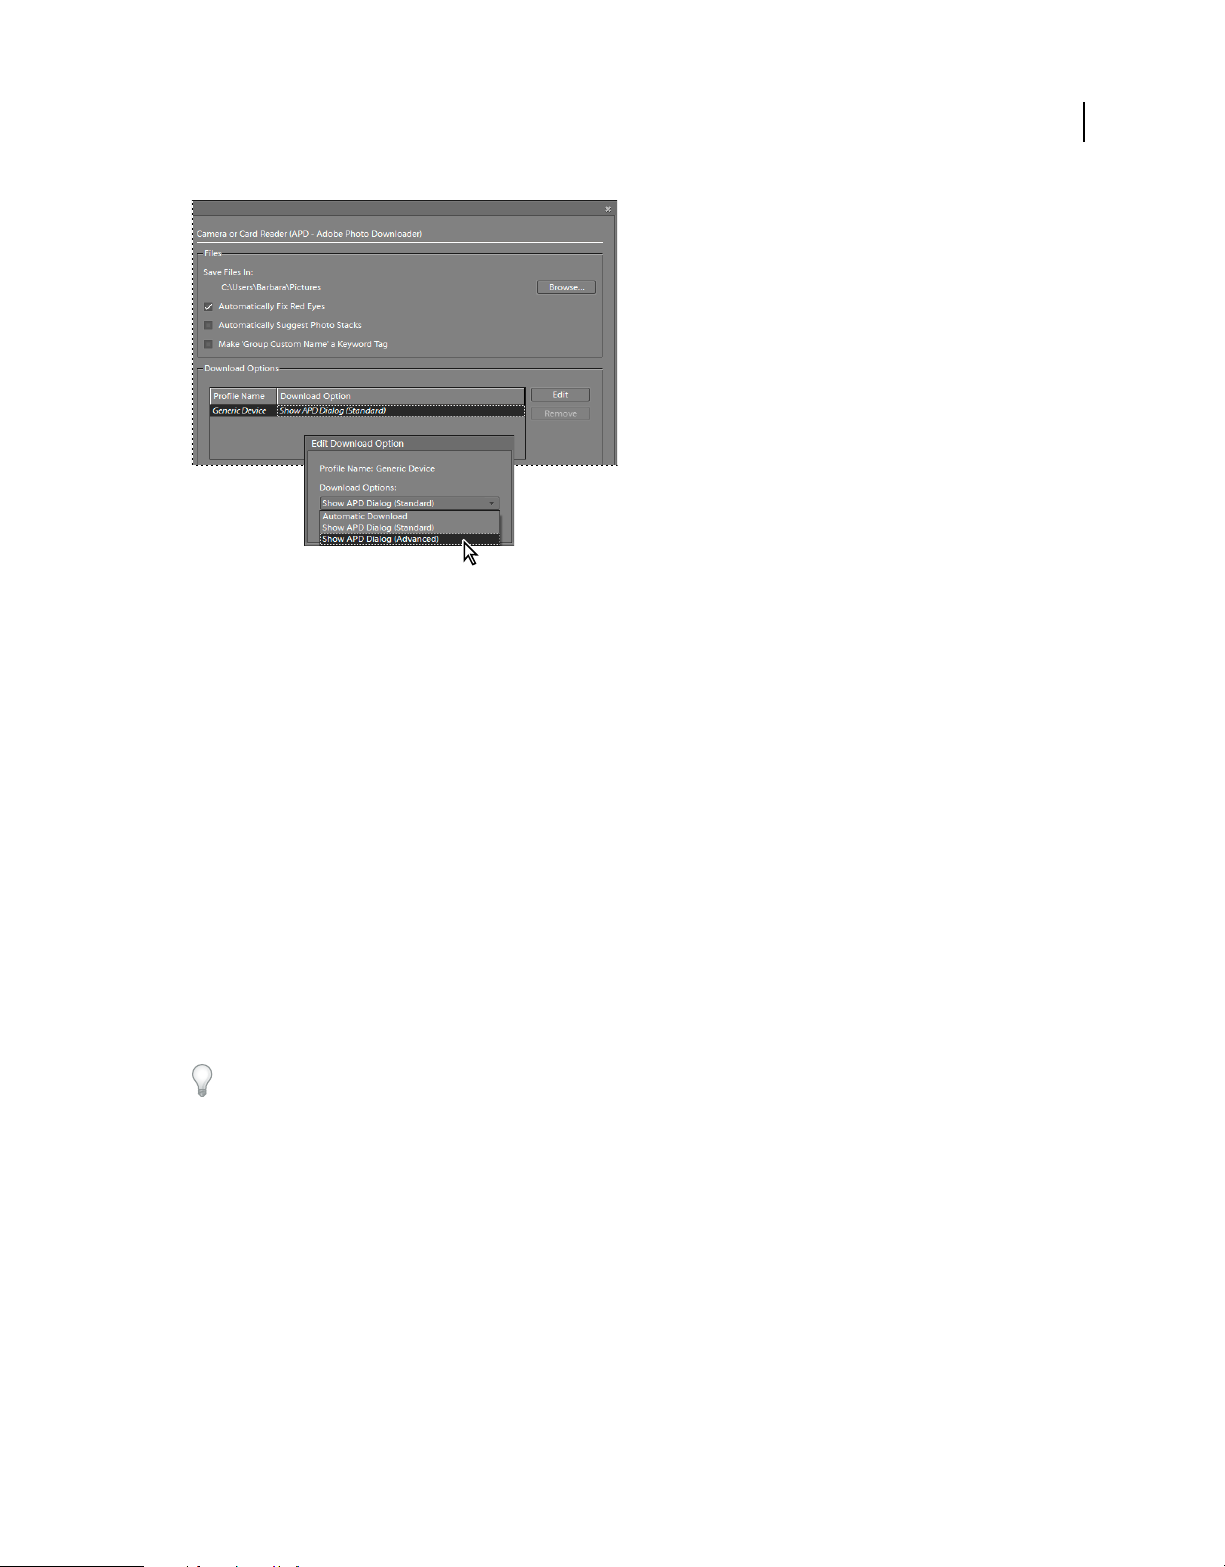
USING PHOTOSHOP ELEMENTS 7
Import photos and videos
Setting preferences for getting photos from digital cameras and card readers.
1 In the Organizer, choose Edit > Preferences > Camera Or Card Reader.
2 Set file-specific import options:
Save Files In Specifies where the files are copied to on your hard drive. Click Browse to specify a new location.
39
Automatically Fix Red Eyes Fixes red eye problems as the files are downloaded.
Automatically Suggest Photo Stacks Suggests photo stacks for you according to date and visual similarity.
3 To edit the options for a specific device, select the device profile, and click Edit. Choose a Download Option from
the menu that appears, and click OK. To delete a device from this list, select it and click Remove.
4 To specify default values for automatic downloads, set any of the following:
Begin Download Specifies when a download begins after a device is connected.
Create Subfolders Using Specifies if and how to separate and name folders containing photos shot on different dates.
Delete Options
Copy New Files Only (Ignore Already Imported Files) Causes the downloader to ignore files that are already on your
Specifies if and how to delete the original photos from your camera after copying them to your hard disk.
hard disk.
If you have changed the settings and are having trouble getting your photos, click Restore Default Settings to restore
the original preferences.
Scanners
About scanning
Photoshop Elements connects to your scanner so that you can get images of your photos, negatives, and slides. You
can get images from scanners in two ways:
• Use the scanner driver plug-in module that came with your scanner. This software is either compatible with
Photoshop
Elements or uses the TWAIN® interface to scan and open images directly in Photoshop Elements.
Last updated 7/26/2011
Page 47

USING PHOTOSHOP ELEMENTS 7
Import photos and videos
• Use the standalone scanning software that came with your scanner to scan and save your images. You can then
bring the images into Photoshop
Elements using the File > Get Photos And Videos > From Files And
Folders command.
In Windows® XP and Windows Vista™, you can set preferences so that Photoshop Elements starts as soon as your
computer detects that your scanner is attached. See Windows Help for more information.
Before you try to scan and open your photos in Photoshop Elements, make sure that you’ve installed all the software
that came with your scanner. Carefully read any documentation that came with your scanner to make sure that it’s
connected properly to your computer. In Windows, if the Preferences dialog box appears on your screen after you
click Get Photos, set your scanner preferences.
Get photos from scanners
1 Make sure that your scanner is connected and switched on.
2 In the Organizer, select File > Get Photos And Videos > From Scanner from the pop-up menu.
Note: You can also get photos from a scanner from within Full Edit.
3 If the Get Photos From Scanner dialog box appears, choose the name of the scanner from the Scanner menu.
Note: If you get a None Detected message in the Scanner menu, make sure that the scanner is on and properly connected
to your computer.
40
4 Click Browse to select a location for saving the photos.
5 Choose a file format from the Save As menu. JPEG, the default format, is usually the best choice. If you choose
JPEG, drag the Quality slider to the setting you want. The higher the quality, the larger the file size.
Drag the Quality slider to increase or decrease the file size and quality.
6 Click OK. If you’re using a scanner with a TWAIN driver, Photoshop Elements launches the driver that came with
your scanner. Follow the instructions that came with the driver software to scan your photo. Typically, you can also
select an area to scan or correct any color issues that you may see.
Note: In Windows XP, Photoshop Elements launches the Windows XP scanning interface if you’re using a WIA
(Windows Imaging Architecture) scanner. You can find instructions in Windows XP online Help. In scanners that
support TWAIN, a vendor-specific user interface is launched.
After the photo is scanned, a preview of the scan is displayed in the Getting Photos dialog box. Photoshop Elements
assigns the import date to the photos.
Last updated 7/26/2011
Page 48

USING PHOTOSHOP ELEMENTS 7
Import photos and videos
More Help topics
“File formats for saving” on page 143
“Change the date and time of files” on page 121
“About image size and resolution” on page 241
Set scanner preferences
1 In the Organizer, choose Edit > Preferences > Scanner.
2 Choose the name of your scanner from the Scanner menu.
Note: Each time you connect to a different scanner, you need to select the device from the list. The connected scanner is
indicated to help you identify it.
3 Choose a file format from the Save As menu. JPEG, the default format, is usually the best choice. If you choose
JPEG, drag the Quality slider to the setting you want. The higher the quality, the larger the file size.
4 Select a location to store your scanned photos, and then click OK.
Scan photos into the Editor using a TWAIN driver
TWAIN is a software driver used for acquiring images captured by certain scanners, digital cameras, and frame
grabbers. For your TWAIN device to work with Photoshop
manager and TWAIN data source.
Elements, the manufacturer must provide a source
41
Before you can use the scanner to bring images into Photoshop Elements, you must install the TWAIN device and its
software, and then restart your computer. (See the documentation provided by your device manufacturer for
installation information.)
❖ In the Organizer, choose File > Get Photos And Videos, and choose the device you want to use from the
submenu.
After the image is scanned, it appears in an untitled Photoshop Elements window.
Note: After pressing the scanning button for the first time on some scanners, such as the Canon MP960, the scanning
progress bar will open behind Photoshop Elements. You can reduce the Photoshop Elements window to bring the progress
bar forward.
More Help topics
“File formats for saving” on page 143
“About image size and resolution” on page 241
Local files, CDs, DVDs, and video
Using watched folders
The Organizer automatically detects photos being added to any of its watch folders. By default, the My Pictures folder
is watched, but you can add additional folders to the Organizer’s watch list.
Last updated 7/26/2011
Page 49

USING PHOTOSHOP ELEMENTS 7
Import photos and videos
You can choose to have photos that are added to a watch folder automatically added to a catalog. Or, you can opt to
be asked before new photos are added to a catalog. When asked, either click Yes to add the photos to your catalog, or
click No to leave them out. Whether or not photo files are brought into the Organizer, they remain in their folders
unless you delete them.
Add folders to the watched folders list
1 Choose File > Watch Folders.
2 Click Add, and then browse to the folder.
3 Select the folder, and then click OK. The folder name appears in the Folders To Watch list.
To quickly add watch folders when the Organizer is in Folder Location view, right-click a folder and choose Add To
Watched Folders.
Change Watch Folders settings
1 Choose File > Watch Folders.
2 Choose one of the following options:
• Notify Me to choose whether files are added to your catalog.
• Automatically Add Files To Organizer to have photos added to your catalog as soon as they are detected.
42
Get photos from files and folders
For a video about this process, see www.adobe.com/go/lrvid2310_pse
You can bring photos into the Organizer from a hard disk or optical disc drive in your computer, either by dragging
them from Windows Explorer into the Organizer Photo Browser, by browsing to them using the File
And Videos > From Files And Folders command, by searching your computer using the File > Get Photos
And Videos > By Searching command, or by selecting the Add Unmanaged Files To Catalog option available in
the Folder Location view of the Photo Browser.
Note: After dragging photos from Windows Explorer into the Photo Browser, Windows Explorer may become
unresponsive until the photos have been imported. You may, however, toggle to any Photoshop Elements dialog box that
opens during the import by pressing Alt-Tab, or by clicking the Organizer icon in the Windows taskbar.
More Help topics
“Move files in a catalog” on page 108
“Import tags attached to photos” on page 33
“Reconnecting missing files in the Organizer” on page 131
“Create and attach keyword tags based on folder names” on page 75
“Import tags attached to photos” on page 33
Browse to files on your computer
1 In the Organizer, choose File > Get Photos And Videos > From Files And Folders from the menu.
2 In the dialog box, navigate to the folder that contains the files you want to bring into the Organizer. Use the Look
In menu and the other navigation controls along the top and left.
3 Hold the pointer over a file to display information about the photo, or select it to display a preview.
> Get Photos
Last updated 7/26/2011
Page 50

USING PHOTOSHOP ELEMENTS 7
Import photos and videos
4 Do one of the following to select photos:
• To get a single photo, select it.
• To get multiple photos, Ctrl-click to select the files you want. Or, click the first file, and then Shift-click the last file
in the list that you want.
• To get all the photos in a folder, navigate up one level from your current level in the Get Photos From Files And
Folders dialog box and select the desired folder. To get photos from subfolders within the folder, select Get Photos
From Subfolders.
You can import a PDF file or a Photoshop Elements project in PDF format. Text in imported PDF files becomes part
of the image (you can’t edit the text).
5 Set file-specific import options:
Automatically Fix Red Eyes Fixes red eye problems as the files are downloaded.
Automatically Suggest Photo Stacks Suggests photo stacks for you according to date and visual similarity.
6 Click Get Photos. The photos appear in the Organizer.
43
Importing photos by using the Look In menu and clicking Get Photos.
Search for files on your computer
1 Choose File > Get Photos And Videos > By Searching.
Last updated 7/26/2011
Page 51

USING PHOTOSHOP ELEMENTS 7
Import photos and videos
44
A
B
C
D
E
F
Searching for photos on your computer
A. Search location B. Search button C. Import selected folder from the Search Results window D. Preview lets you view photo thumbnails.
E. Search Results window F. Folder selected for import G. Thumbnails of photos in selected folder
G
2 Select a search option from the Look In menu.
3 Select options to limit your search:
Exclude System And Program Folders Excludes folders from the search that are unlikely to contain your photos.
Exclude Files Smaller Than Includes files large enough to be full-resolution photos. Enter a minimum file size, in
kilobytes, in the KB text box.
Note: By default, removable media (such as CDs and DVDs) and network drives are not searched.
4 Click Search. The search may take a while. Click Stop Search if you want to stop the search.
The search returns all folders that contain photos and video clips.
5 Click a folder to select it. To select more than one folder, press Ctrl and click another folder name. You can preview
the items in a folder by clicking the folder name in the list.
6 (Optional) Select Automatically Fix Red Eyes to fix photos with red eye problems as they are imported into the
Organizer.
7 Click the Import Folders button. The photos appear in the Photo Browser.
Note: If the photos you import have tags attached to them, the Import Attached Tags dialog box appears.
Add files from specific folders
1 In the Organizer, from the Display menu, select Folder Location.
Last updated 7/26/2011
Page 52

USING PHOTOSHOP ELEMENTS 7
Import photos and videos
The folder hierarchy panel opens on the left side of the Photo Browser.
2 In the folder hierarchy panel, browse to the folder containing the files you want to import.
3 Right click the folder, and choose Add Unmanaged Files To Catalog.
The Getting Photos dialog box will report whether files were imported.
4 Click OK.
If files were imported, the folder’s icon changes from an Unmanaged Folder icon to a Managed Folder icon .
About preview files
When you import photos, you can choose to download to your computer full-resolution copies of the master photos
(default) or low-resolution copies, called preview files. Preview files appear in your catalog as space-saving copies of
the high-resolution originals. When you perform an operation that requires the original photo, you are asked to insert
the disc containing the offline photo. You can then decide whether to use the preview file or bring in a full-resolution
copy of the photo.
If you choose to use preview files, you need to assign an Offline Volume Name to the CD or DVD containing the
master files. Make sure to write the Offline Volume Name on the CD or DVD, so that when Photoshop
requests the master disc (it provides the reference name for you), you can insert the correct disc.
Elements
45
Set the size for preview files
1 In the Organizer, choose Edit > Preferences > Files.
2 Under Offline Volumes, choose the pixel dimensions for the preview files. A 640 x 480 size is good in most cases.
Use a smaller size if you want to conserve space on your computer, or a larger size for better display quality.
Get photos from a CD or DVD
You can copy photos from a CD or DVD onto your hard disk and into the Organizer. You can make full-resolution
copies, as you might for editing purposes, or, to save disk space, low-resolution offline copies called preview files.
1 In the Organizer, select File > Get Photos And Videos > From Files And Folders.
2 Navigate to your CD or DVD drive, and select the photos you want to copy.
3 (Optional) Select either of the following:
Copy files on import Makes a full-resolution copy of the file on your hard disk.
Generate previews Makes a low-resolution copy of the file on your hard disk, saving disk space.
4 (Optional) If you’re keeping a master photo offline, type in a volume name for the CD or DVD on which it resides,
and write this name on the disc itself. This will make it easy for you to find and download the master when
prompted.
5 (Optional) Select Automatically Fix Red Eyes if you would like Photoshop Elements to repair red eyes as soon as
the photos are brought into the Organizer.
Note: This option is not enabled for offline files.
6 (Optional) Select Automatically Suggest Photo Stacks if you would like Photoshop Elements to group visually
similar photos, letting you decide whether to place any such groups into stacks.
7 Click Get Photos to bring your photos into the Organizer.
If the photos contain keyword metadata, the Import Attached Tags dialog box appears.
Last updated 7/26/2011
Page 53

USING PHOTOSHOP ELEMENTS 7
Import photos and videos
Note: A preview file has the CD icon in its thumbnail. Its file location refers to the drive into which the CD containing
its master file was inserted.
History information showing the offline Volume Name for an offline photo in the Organizer.
More Help topics
“Create and attach keyword tags based on folder names” on page 75
“Import tags attached to photos” on page 33
Get photos from a video
You can capture frames from your digital videos if they are saved in a file format that Photoshop Elements can open,
including ASF, AVI, MPEG, MPG, M1V, and WMV. Captured photos are saved with the name of the video file plus
a number (for example, videoclip01, videoclip02, and so forth).
46
Note: To create photos from the broadest range of video formats, install the latest version of standard video software, such
as QuickTime or Windows Media Player.
Getting still photos from a video clip.
1 In the Editor, choose File > Import > Frame From Video.
2 In the Frame From Video dialog box, click the Browse button to navigate to the video from which you want to
acquire still frames, and then click Open.
3 To start the video, click Play .
Last updated 7/26/2011
Page 54

USING PHOTOSHOP ELEMENTS 7
Import photos and videos
4 To get a frame of the video as a still image, click the Grab Frame button or press the spacebar when the frame is
visible on the screen. You can move forward and backward in the video to capture additional frames.
Note: Some video formats don’t support rewinding or fast-forwarding. In these cases, the Rewind and Fast
Forward buttons are not available.
5 When you have all the frames you want, click Done.
6 Select File > Save to save each still file to a folder on your computer.
Mobile phone cameras
About mobile phone cameras
If you have a mobile phone with a built-in camera, you might be able to transfer the photos into your catalog. Make
sure your phone saves photos in a file format you can import into your catalog. To find out what file format your phone
uses, see the instructions that came with the phone.
To get photos into your catalog, use one of the following methods.
Direct transfer If you have a phone compliant with NOKIA® PC Suite 6.5 or higher, or if your phone stores photos on
a removable flash or memory card, you can bring photos from your phone directly into Photoshop
the Adobe Photo Downloader. To determine how your phone stores photos, see the instructions that came with your
phone.
Elements by using
47
Cable or wireless transfer Transfer the images to your hard disk using cable or wireless transfer. For more
information, consult the phone manufacturer or the instructions that came with your phone. After you transfer the
photos to your computer, in the Organizer use the File
into your catalog. For some mobile phone cameras, the Adobe Photo Downloader appears automatically when you
connect via cable or wireless, and you won’t need to select File
Note: Not all phones and carriers allow you to transfer photos to your computer using the methods described above. Your
carrier or phone manufacturer can tell you what options are available to you. You can also refer to the Adobe website for
the latest information.
> Get Photos And Videos command to bring the photos
> Get Photos And Videos.
Last updated 7/26/2011
Page 55

Chapter 4: Viewing and fixing photos in the Organizer
You can use the Organizer to view and sort media clips in various ways and to fix the most common photographic
problems. In the Photo Browser, you can keep track of your photos, video clips, and audio files, with thumbnail icons
that display the creation date, keyword tags, captions, and other information about a clip. For example, different views
let you display only video clips, show photos side by side, show photos by geographical location, or view photos on a map.
The tools in the Fix panel of the Organizer quickly correct the most common problems in photographs. At the click of
a button, for example, you can remove a green tint from a photo, improve its contrast, or remove the red from the
pupils of its subjects.
For tutorials about viewing and cataloging photos in the Organizer, see this excerpt from Classroom in a Book.
Viewing photos in the Organizer
48
About the Photo Browser
For a video overview, see www.adobe.com/go/lrvid2313_pse
The Photo Browser shows thumbnails of your photos in the central area of the Organizer. (To return to the Photo
Browser from Date view, select
of the photos, video clips, and audio files in any of your catalogs. You can select items in the Photo Browser to attach
tags to them, add them to projects, or edit them.
Display > Photo Browser.) You use the Photo Browser to view and find thumbnails
Last updated 7/26/2011
Page 56

USING PHOTOSHOP ELEMENTS 7
Viewing and fixing photos in the Organizer
49
A
C
D
E
F
B
The Photo Browser displays your photos for easy access.
A. Rotate Left and Rotate Right B. Adjust Thumbnail Size slider C. Back To Previous View D. Timeline E. Find bar F. Main window
More Help topics
“The Editor workspace” on page 15
“About keyword tags” on page 68
“About the Timeline” on page 90
“Search using the find bar” on page 92
“Find photos using a text search” on page 96
“Viewing photos in full screen or side by side” on page 56
Open the Photo Browser
❖ To open the Photo Browser from the Date view of the Organizer, do one of the following:
• Select Display > Photo Browser.
• Click Return To Photo Browser toward the bottom of the Organizer.
Set Photo Browser viewing preferences
1 In the Photo Browser, choose Edit > Preferences > General.
2 Specify options as desired, such as the following:
• To order pictures within a day so that the newest pictures appear first, choose Show Newest First Within Each Day.
Last updated 7/26/2011
Page 57

USING PHOTOSHOP ELEMENTS 7
Viewing and fixing photos in the Organizer
• To rescale photos more than 100% of actual size, up to the maximum size of the space available, select Allow Photos
To Resize. Deselect this option to display small images at their actual size even when more space is available for
display.
• To reenable dialog boxes that you had chosen not to display again, click Reset All Warning Dialogs.
Photo Browser icons
Some of the following icons appear only when you select the Details option, and others appear at all times:
Stack icon Indicates that the thumbnail represents a stack of photos.
Version Set icon Indicates that the thumbnail represents a stack of edited versions of a photo.
Video icon Indicates that the thumbnail represents a video clip.
Disc icon Indicates that the thumbnail represents an offline photo.
Audio icon Indicates that the thumbnail includes an audio caption.
Keyword Tag icons , , , Indicate that keyword tags are attached to the photo. Place the pointer over the tag
icon to see the tag name. These icons are the default icons for tags. If the thumbnail is displayed at a small size, multiple
tag icons may be combined into one icon.
Album icon Indicates that the photo is part of an album. Place the pointer over the icon to see the album name.
50
Project icon Indicates that the photo is used in a project.
Photo Project icon Indicates that the photo is part of a multiple page project.
Rating stars Shows the rating of the photo, on a scale of five stars.
Select a Photo Browser view
❖ Choose Display > [display option].
Choose from the following display options:
Thumbnail View Displays thumbnails of your files in the sort order you specify.
Import Batch Displays photos in the batches in which they were imported and shows how the photos were imported.
Folder Location Displays photos by the folders in which they are stored.
Date View Opens Date view from any Photo Browser view. Displays a calendar showing thumbnails on the dates when
the photos were taken.
Photo Browser Opens Photo Browser Thumbnail view from Date view.
Choosing from the Photo Browser Display menu displays different views in the Timeline and Photo Browser.
Last updated 7/26/2011
Page 58

USING PHOTOSHOP ELEMENTS 7
Viewing and fixing photos in the Organizer
Hide and show photos in the Photo Browser
For a video about this process, see www.adobe.com/go/lrvid2316_pse
You can mark photos to hide them from view in the Photo Browser without deleting them from your hard disk.
Alternately, you can make hidden files reappear temporarily, or remove their marks so that the files always remain
visible.
Hide photos by marking them
1 Select the photo or photos you want to hide. Shift-click the first and last photo of a group of adjacent photos to select
the entire group. Ctrl-click nonadjacent photos to select them.
2 Choose Edit > Visibility > Mark As Hidden to mark the photos for hiding.
A Hidden icon appears in the bottom-left corner of each photo selected.
3 To hide the selected photos in the Organizer, choose Edit > Visibility, and then select Hide Hidden Files.
Visibility commands are also available by right-clicking thumbnails and choosing from the context menu.
Show photos marked as hidden
❖ Choose Edit > Visibility, and then choose one of the following:
Show All Files Shows hidden files along with non-hidden files.
51
Show Only Hidden Files Shows only hidden files in the Organizer.
Visibility commands are also available by right-clicking thumbnails and choosing from the context menu.
Remove the Hidden mark from photos
1 In the Photo Browser, show the photos marked as hidden.
2 Select the photos from which you want to remove the Hidden mark . Shift-click the first and last photo of a
group of adjacent photos to select the entire group. Ctrl-click nonadjacent photos to select them.
3 Choose Edit > Visibility > Mark As Visible.
Visibility commands are also available by right-clicking thumbnails and choosing from the context menu.
View and manage files by folder location
The Folder Location view in the Organizer splits the Photo Browser into two sections: a folder hierarchy panel, and an
image thumbnail panel. From this view, you can manage folders, add files to your catalog, automatically tag files using
their folder name as the keyword tag, and add or remove folders from Watched Folder status.
By default, the folder hierarchy panel displays all of the folders on your hard disk. Folders containing managed files
have a Managed folder icon
automatically. Watched folders have a Watched folder icon . Photoshop Elements automatically imports
compatible files saved in watched folders. Folders that are both managed and watched have a Watched And Managed
folder icon
those in the selected folder. You can change this to have it show thumbnails for only the files in the selected folder.
. By default, the image thumbnail panel displays thumbnails for all files on the hard disk, starting with
. Managed files are those you have imported into a catalog, either manually or
Last updated 7/26/2011
Page 59

USING PHOTOSHOP ELEMENTS 7
Viewing and fixing photos in the Organizer
Note: You can change the default view for each panel by choosing Edit > Preferences > Folder Location View and selecting
the options you want.
1 In the Photo Browser, select Folder Location from the Display menu in the upper-right corner of the Organizer.
The Folder hierarchy appears on the left side of the Organizer and the image thumbnails appear in the center.
2 Do one of the following to specify which files appear in the image thumbnail panel:
• To view in the image thumbnail panel only the files in the selected folder, right-click in the folder hierarchy panel
and deselect Show All Files. (It is deselected when a check mark does not appear beside it.)
• To view all of your managed files in the image thumbnail panel, right-click in the folder hierarchy panel and select
Show All Files. (It is selected when a check mark appears beside it.)
If you want to search all of your managed files while in Folder Location view, you need to select Show All Files.
3 To find the folder location of a file, click the file’s thumbnail in the image thumbnail panel. The file’s folder is
highlighted in the left panel.
4 To find files in a specific folder, click the folder in the folder hierarchy panel. Thumbnails for the files in that folder
appear in the image thumbnail panel, grouped under the folder name.
5 To instantly tag files by their folder locations, click the Instant Keyword Tag icon to the upper right of the image
thumbnail panel for each folder group you want to tag. (See “Create and attach keyword tags based on folder
names” on page 75.)
6 To manage files and folders, select a folder and do any of the following:
• To move a file to a different folder, drag the file’s thumbnail from the image thumbnail panel to a folder in the folder
hierarchy panel.
• To view the folder in Explorer, right-click in the folder hierarchy panel and choose Reveal In Explorer.
• To add or remove the folder from watched-folder status, right-click in the left panel, and choose Add To Watched
Folders or Remove From Watched Folders.
• To add files in the folder to your catalog, right-click in the folder hierarchy panel and choose Add Unmanaged Files
To Catalog.
• To rename the folder, right-click in the folder hierarchy panel and choose Rename Folder. Then type a new name.
• To delete the folder, right-click in the folder hierarchy panel and choose Delete Folder.
7 To create a new folder, right-click in the folder hierarchy panel and choose New Folder.
52
More Help topics
“Using watched folders” on page 41
“Get photos from files and folders” on page 42
“About keyword tags” on page 68
Specify media types to view
❖ In the Photo Browser, choose View > Media Types > [type of file].
Note: After you import items, all media types appear in the Photo Browser temporarily.
Last updated 7/26/2011
Page 60
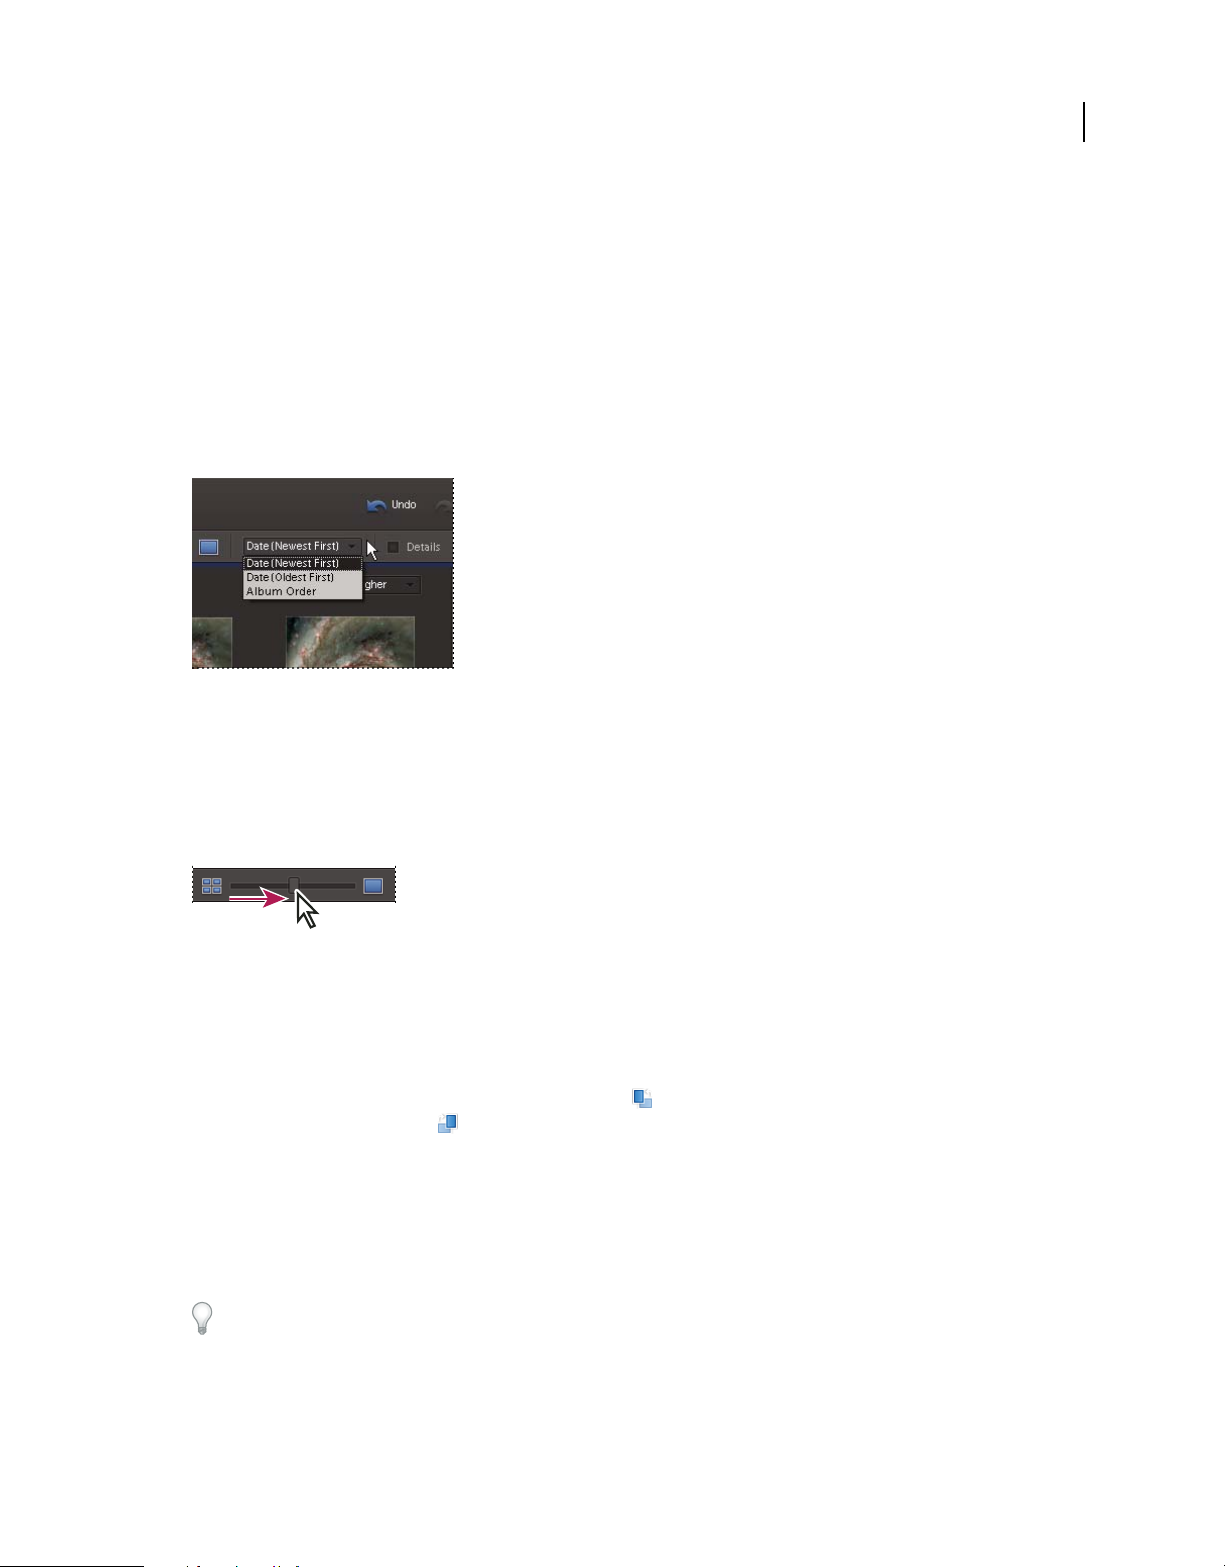
USING PHOTOSHOP ELEMENTS 7
Viewing and fixing photos in the Organizer
Sort files in the Photo Browser
❖ Choose a sort option from the Photo Browser Arrangement menu to the upper-right corner of the Photo Browser.
You can choose from the following sort options:
Date (Newest First) Shows the most recently taken or imported photos first. (Within a given day, the photos are shown
in the order they were taken, oldest first, unless otherwise specified in the General Preferences dialog box.) Newestfirst order is convenient when you need to attach tags to the photos you imported most recently.
Date (Oldest First) Shows all the photos in chronological order.
Album Order Shows photos in the order in which you placed them in an album (available only when an album is
selected).
The Photo Browser Arrangement menu sorts the thumbnails in chronological, reverse-chronological, or album order.
53
Resize, refresh, or hide thumbnails
You can change the size of thumbnails, or refresh them after editing an image in another application. In addition, you
can quickly rotate the thumbnails so they appear correctly in the window.
• To incrementally change the size of the thumbnail, drag the thumbnail slider in the shortcuts bar.
Drag the thumbnail slider to the right to increase thumbnail size.
• To display the smallest thumbnails possible, click the button to the left of the slider.
• To display a single photo, click the button to the right of the slider.
• To refresh the thumbnail view, choose View > Refresh.
• To rotate an image counterclockwise, click Rotate Left at the top of the Photo Browser; to rotate an image
clockwise, click Rotate Right .
More Help topics
“Update an item’s thumbnail” on page 122
Select items in the Photo Browser
For a video about this process, see www.adobe.com/go/lrvid2314_pse
Last updated 7/26/2011
Page 61

USING PHOTOSHOP ELEMENTS 7
Viewing and fixing photos in the Organizer
To work with a photo or other item in the Photo Browser, you first need to select it. A selected photo thumbnail is
highlighted with a dark blue outline.
❖ Do any of the following:
• To select a single item, click its thumbnail.
• To select multiple adjacent items, hold down Shift and click the first and last item you want to select.
• To select multiple nonadjacent items, hold down Ctrl and click the items you want.
• To select or deselect all items in the Photo Browser, choose Edit > Select All or Edit > Deselect.
Display and edit photo details
You can choose whether to display details for each thumbnail and how certain details are displayed in the Photo
Browser. Also, you can add and edit captions, including audio captions, and add and edit date and time information.
More Help topics
“About file information (metadata)” on page 125
“Change the date and time of files” on page 121
54
Specify format of date and details font
1 Select Edit > Preferences > General.
2 In the Display Options area, specify the format of dates and the font used to display details, by selecting any of the
following:
Date Format (This option is not available in all locales.) Select MM/DD/YY or DD/MM/YY format.
Use System Font Choose this option to display details in the system font.
Adjust Date And Time By Clicking On Thumbnail Dates Select this option to edit the date and time details for any
photograph by clicking on them.
View or hide photo details
❖ Select or deselect the Details box to the upper right of the Photo Browser.
Edit photo details
You can edit photo information, such as date, attached tags, filename, caption, and audio caption.
❖ In the Photo Browser, do any of the following:
• To add or edit a text caption, select the Details check box, click the Single Photo View button , and then click
the caption, if there is one, or click Click Here To Add Caption.
• To add, listen to, or edit an audio caption, select the Details check box, click the Single Photo View button, and then
click the Record Audio Caption button
.
Last updated 7/26/2011
Page 62

USING PHOTOSHOP ELEMENTS 7
Viewing and fixing photos in the Organizer
55
A
Photo details
A. Date and time B. Albums to which the photo belongs. C. Keyword Tags attached to the photo D. Scroll to previous or next photo. E. Click
to add or change caption. F. Click to add or play audio caption.
B
E
D
C
F
• To change the date assigned to a photo, select the thumbnail, choose Edit > Adjust Date And Time, and then specify
options from the dialog boxes that appear.
If you want to change dates by simply clicking the date, choose Edit > Preferences > General, and select Adjust Date
And Time By Clicking On Thumbnail Dates.
Viewing video and full-screen images
View video clips
In the Photo Browser, the first frame of a video clip appears as the clip’s thumbnail. The filmstrip icon identifies a
video clip in the Photo Browser.
1 Double-click the video clip in the Photo Browser.
Note: To view QuickTime movies in Photoshop Elements, you must have the QuickTime player installed on your
computer. If it is not already installed, download and run the QuickTime installer from
www.apple.com/quicktime/download.
2 When the Photoshop Elements Media Player appears, click the Play button to start the video. To view it frame-by-
frame, drag the position slider. If you have a long video clip, it may jump over a few frames.
A B C D AE
F
G
Photoshop Elements Media Player
A. Start and End buttons B. Record C. Play button D. Stop button E. Elapsed time F. Drag the position slider through the video clip
G. Volume control
3 When you’re finished viewing, click the Close button to close the Photoshop Elements Media Player.
You can make still shots from the frames of a video clip by choosing File > Import > Frame From Video in the Editor.
Last updated 7/26/2011
Page 63

USING PHOTOSHOP ELEMENTS 7
Viewing and fixing photos in the Organizer
Viewing photos in full screen or side by side
The Full Screen and Side By Side views let you see your images without the distraction of other interface items, such
as windows, menus, and palettes. The control bar, which contains buttons for playing, rotating, zooming, and so on,
disappears from view when you don’t move your mouse for a couple of seconds. (To make it reappear, move the
mouse.)
The View Photos In Full Screen View command displays a set of photos as a full-screen slide show, making it a fun
and efficient way to view a set of photos. You can customize the slide show—for example, you can play an audio file as
you view the images, display thumbnails of the selected files in a filmstrip along the right side of the screen, or add a
fade between pictures. When you’ve decided which photos you want in your slide show, and you’ve made the necessary
edits to them, you can send them directly from this view to the Slide Show Editor by clicking the Create Slide Show
button.
56
Full Screen view with caption circled
The Compare Photos Side By Side command displays two photos simultaneously. Side By Side view is useful when you
need to focus on details and differences between photos. You can select two or more photos to compare. In Side By
Side view, the currently selected photo has a blue border. When you click the Next Photo button
, the selected image
changes to the next image in your selection. If you’ve enabled the filmstrip, you can click on any image in the filmstrip
to view it in place of the selected image (the one with the blue border).
Last updated 7/26/2011
Page 64

USING PHOTOSHOP ELEMENTS 7
Viewing and fixing photos in the Organizer
57
Use Side By Side view to analyze composition and details. Image 1 is marked for printing.
You can switch back and forth between views by clicking the Full Screen View button or the Side By Side View
button . While in either view, you can mark your favorites to print, fix red eye, add a photo to an album, zoom in
on photos, rotate or delete a photo, and apply keyword tags to a photo.
More Help topics
“Creating slide shows” on page 363
Use Full Screen view or Side By Side view
1 Select the photos you want to view by doing one of the following:
• In the Photo Browser, select a keyword tag or individual photos.
• In Date view, select a date containing a photo.
Note: If you select only one photo, the selected photo is the first to display in the Full Screen or Side By Side view; all the
other photos in the Photo Bin appear in the thumbnail filmstrip of the view.
2 Do one of the following:
• Choose View > Compare Photos Side By Side. (This option is not available in all locales.)
• Toward the upper-right of the Organizer, select Display > View Photos In Full Screen.
Once either view is open, you can switch between them by clicking the Full Screen View or Side By Side View
button in the control bar.
Last updated 7/26/2011
Page 65

USING PHOTOSHOP ELEMENTS 7
Viewing and fixing photos in the Organizer
3 (Full Screen view only) In the Full Screen View Options dialog box that appears, specify any of the following
Presentation options, and then click
OK. See “Full-screen display options” on page 59. Alternately, to not apply any
of these options, click Cancel.
4 View photos by doing any of the following:
• (Full Screen view only) To begin the slide show, click Play or press the spacebar.
• To move to the previous or next photo, use the left and right arrow keys, or click Previous Photo or Next
Photo .
C D
A B
Slide show controls
A. Previous Photo B. Play/Pause C. Next Photo D. Exit E. Show all controls
E
Note: The control bar fades away when you don’t move your mouse for a few seconds. To make it reappear, move the
mouse.
• (Full Screen view only) To go directly to a photo, click a thumbnail on the filmstrip on the right side of the screen.
To see the thumbnail filmstrip, select Show Filmstrip in the Full Screen View Options dialog box.
• (Side By Side view only) To change the selected photo, click a thumbnail on the filmstrip on the right side of the
screen.
• (Side By Side view only) To view two photos above and below instead of side by side, click the triangle next to the
Side By Side icon and choose Above And Below.
• To rotate an image, click Rotate 90º Left or Rotate 90º Right. The image remains rotated when you return to
the Photo Browser.
58
A B
Rotation, Action and View controls
A. Rotate 90 degrees left B. Rotate 90 degrees right C. Action Menu D. Full Screen view E. Side By Side view F. Click to switch from Side By
Side to Above and Below
E F
DC
If you don’t see all of the controls, such as Rotate 90º Left, click the triangle on the right side of the control bar.
5 To delete an image from the catalog, click Delete .
Note: Select Delete From Hard Drive only if you’re sure you don’t want the image anymore.
6 To zoom in or out of an image, click Zoom In or Zoom Out, or drag the slider between the two zoom icons. You
can also click Fit In Window or Actual Pixels to view the image in those dimensions.
Note: To map the magnification values to both images in Side By Side view, click Synchronize Pan And Zoom.
A B
Zoom controls
A. Fits image to window B. Displays image at 100% C. Zoom out D. Variable zoom E. Zoom in F. Syncs the zoom and panning of images
G. Rating starts H. Hide button
D E F G H
C
7 To apply a tag, automatically fix a photo, remove red eye, show properties, add to or remove from a collection, or
perform other actions, select an option from the Action menu
.
Last updated 7/26/2011
Page 66

USING PHOTOSHOP ELEMENTS 7
Viewing and fixing photos in the Organizer
8 To print photos, choose Mark For Printing from the Actions menu. A printer icon appears in the thumbnails
of photos you have marked for printing. When you close Full Screen view or Side By Side view, the Print dialog box
appears so you can send the photos to an online printer.
9 To send the images directly to the Slide Show Editor where you can enhance your slide show by adding transitions,
panning and zooming, and adding text and graphics, click Create Slide Show.
When you send images to the Slide Show Editor, certain specifications you made in Full Screen view, such as
background audio, slide duration, and added text and audio captions, are used in the Slide Show Editor.
10 To close either view, press Esc or click Exit .
More Help topics
“Creating slide shows” on page 363
Full-screen display options
Options in the Full Screen View Options dialog box
Background Music Specifies which audio file to play during the slide show. To choose a different file, click Browse and
locate and select the file you want.
59
Play Audio Captions Specifies that audio captions of the selected files will play during the slide show. You can use mp3,
WAV, and WMA files for audio captions.
Page Duration Specifies how long each image displays on-screen before the next image appears or fades in.
Include Captions Displays captions at the bottom of the screen.
Allow Photos/Videos To Resize Resizes photos or video to fit the screen.
Show Filmstrip Displays all of the selected images in a strip of thumbnails on the right side of the screen. To choose
which image is displayed in full screen, click a thumbnail.
Fade Between Photos Adds a fade transition between each image during the slide show.
Start Playing Automatically Starts the slide show as soon as the image appears in Full Screen view. When this is
selected, you don’t need to click the Play button to start the slide show.
Repeat Slide Show Plays the slide show over and over until you stop it.
Rate photos or clear ratings in full-screen mode
1 In the Photo Browser, right-click a photo, and select View Photos In Full Screen.
2 In the Full Screen View Options dialog box, select options for full-screen viewing and click OK, or to simply view
photos full screen, click Cancel. See
The photo appears, full screen, with a control bar superimposed over it.
3 In the control bar, do one of the following:
• Select a star to set a rating for the photo.
• If the photo has a rating you want to clear, click the gold star farthest to the right to clear the rating.
“Full-screen display options” on page 59.
Select up to five stars to rate a photo.
Last updated 7/26/2011
Page 67

USING PHOTOSHOP ELEMENTS 7
Viewing and fixing photos in the Organizer
Fix, tag, add to albums, print, and more in full-screen mode
1 In the Photo Browser, right-click a photo, and select View Photos In Full Screen.
2 In the Full Screen View Options dialog box, select options for full-screen viewing and click OK, or to simply view
photos full screen, click Cancel.
The photo appears, full screen, with a control bar superimposed over it.
3 In the control bar, click the Action Menu button to open a menu of options.
4 Select one of the options from the menu.
Delete photos in full-screen mode
1 In the Photo Browser, right-click a photo, and select View Photos In Full Screen.
2 In the Full Screen View Options dialog box, select options for full screen viewing and click OK, or to simply view
photos full screen, click Cancel.
The photo appears, full screen, with a control bar superimposed over it.
3 In the control bar, click the Delete button .
60
Pinning photos to a map
View photos in Map view
In the Map view of the Organizer, you can arrange photos by geographic location. You can pin photos to points on a
map, with pins that can open photos taken at a location. After your map of photos is complete, you can share it on the
web or from a CD. You can also find photos by navigating to map areas that contain pinned photos.
A
B
G
C
D
E
H
F
Map view
A. Pin generated by dropping a photo onto the map B. Click pin to view associated photos C. The Move tool moves pins D. The Hand tool
moves the map E. Zoom tools F. Limits search to map area G. Drag to enlarge or shrink map H. Share photos I. Display Standard, Satellite,
or Hybrid map view
I
1 In the Organizer, click Display > Show Map.
2 Photos that have been placed on the map are represented by a red pin in Map view. Locations that have pins in close
proximity show a three-pin cluster in Map view.
Last updated 7/26/2011
Page 68

USING PHOTOSHOP ELEMENTS 7
Viewing and fixing photos in the Organizer
3 To change how the Map view looks, do any of the following:
• Click the Zoom In or Zoom Out buttons to zoom in or out by clicking on the map.
• Click the Hand tool to drag the map in any direction.
• Click the Map menu to select the type of view: Map (standard), Satellite (aerial photo), or Hybrid (composite of the
first two options).
4 To view the photos on the map, do any of the following:
• Place the cursor over a pin. If more than one photo displays in the thumbnail viewer, click the Previous button
or Next button to go backward or forward.
• Select Limit Search To Map Area to view (in the Photo Browser) all the photos related to the pins visible on the map.
5 You can also navigate to a particular place on the map by right-clicking a photo or a tag that has a location assigned
to it, and then choosing Show On Map.
More Help topics
“Share maps of photos on a website or in a file” on page 413
“Find photos using a map” on page 100
61
Add a photo to a map
In Map view of the Organizer, you can drag photos from the Photo Browser directly onto the map.
1 In Map View, use the Hand , Zoom In , and Zoom Out tools to navigate to the spot where you want to
place the photo.
2 Select one or more photos in the Photo Browser.
3 Drag the photo to a location on the map. You can also right-click a photo and choose Place On Map. You then enter
an address to look up on the map and place the pin.
Note: Placing or moving a pin for a photo will not change the GPS Latitude or GPS Longitude metadata, if any, originally
embedded in the photo.
More Help topics
“Attach keyword tags to photos” on page 70
“Find photos using a map” on page 100
Remove a pin from a map
1 In Map view, select the pin you want to remove.
2 Right-click and choose Remove From Map.
Change a pin location on a map
1 In Map view, select the Move tool.
2 Drag the pin to a new location.
Note: Placing or moving a pin for a photo will not change the GPS Latitude or GPS Longitude metadata, if any, originally
embedded in the photo.
Last updated 7/26/2011
Page 69

USING PHOTOSHOP ELEMENTS 7
Viewing and fixing photos in the Organizer
Viewing photos in Date view
View and find photos in Date view
In Date view, you can browse through your photos chronologically or find photos from a particular day, month, or
year. When you’ve found the day you’re looking for, you can view that day’s photos as a mini-slide show. You can also
keep track of recurring events, such as holidays and birthdays, and add notes to any day. In Date view, you can do many
of the same operations on photos that you can do from the Photo Browser.
CA B
F
62
D
E
Date view
A. Click to select a month B. Click to select a year. C. Date currently selected D. Click to view previous/next month. E. Click to choose Year,
Month, or Day view. F. Click to select a date. G. Click to view previous/next day. H. Number of photos for selected date. I. Controls for viewing
slide show. J. Add an event. K. Enter a daily note
G
H
I
J
K
Note: You cannot print the Date view calendar. To create a wall calendar, click the Photo Calendar button on the
Create tab.
1 Click Display > Date View on the upper-right side of the Organizer. Date view opens, displaying the month and
day of the currently selected photo in the Photo Browser.
2 Click the Year , Month , or Day button at the bottom of the Date view.
3 Navigate to the month and day you want to view by doing one of the following:
• Click the Previous button or Next button to go forward or backward. Hold down the button to move
rapidly.
• Click the year and choose a year from the list that appears. A photo icon next to a year indicates that the year
contains photos.
• In Month view, click the name of the month and choose a month from the list that appears. A photo icon next
to a month name indicates that the month contains photos.
• Click the date display on the upper-right side, and then select the date you want to find in the Set Date dialog box.
Last updated 7/26/2011
Page 70

USING PHOTOSHOP ELEMENTS 7
Viewing and fixing photos in the Organizer
• In Year or Month view, double-click a day. The calendar switches to Day view and displays the first photo for that day.
4 If there is more than one photo in the day, you can view the day’s photos by doing any of the following:
• In Day view, view a photo by clicking its thumbnail in the column to the right.
• In Day view, select Display > View Photos In Full Screen to view the photos for the selected day in Full
Screen view.
• In Year or Month view, view all the photos for the selected day as a slide show by clicking Play under the image
at the right.
5 In Day view, to view a photo in the Photo Browser, click the Return To Photo Browser button to the lower right
of the photo.
Many of the photo commands you use in the Photo Browser can be used also in Date view. Right-click a photo to see
a menu of commands available.
More Help topics
“Send photos to online printing services” on page 409
“Use Full Screen view or Side By Side view” on page 57
63
Change the photo shown in a calendar date
By default, Date view shows the first photo scanned or shot on a particular date. If the default is not representative of
the group of photos taken that day, you can choose another.
❖ In Date view, do one of the following:
• In Month or Year view, use the slide show controls to find the photo you want to use. Then right-click the photo in
the slide show window and choose Set As Top Of Day.
• In Day view, select the photo in the thumbnail list, and then right-click the large photo or the thumbnail and choose
Set As Top Of Day.
Selecting an image in Day view.
Last updated 7/26/2011
Page 71

USING PHOTOSHOP ELEMENTS 7
Viewing and fixing photos in the Organizer
View photos with unknown dates
You can view photos in Date view if they contain a year. If the year is unknown, the photo will not appear in Date view
at all.
❖ In Date view, do one of the following:
• If the photo contains a year and month, but not a day, click the Unknown Date icon that appears in the upper-
right corner of the month in Month view or year in Year view.
• If the photo contains a year, but not a month or day, click the Unknown Date icon that appears in the upper-right
corner of the year in Year view.
• If the icon represents more than one photo, click it and view the photos in a slide show.
More Help topics
“Change the date and time of files” on page 121
Add a daily note to Date view
In Date view, you can write notes and keep track of a day’s events. You might want to write notes about the photos you
took that day. A daily note is different from a caption because it corresponds to a day in the calendar, rather than to a
particular photo. You can access daily notes only in Date view.
64
1 In Date view, select a day.
2 Type the note in the Daily Note box.
You can add a daily note to any day in Date view, even if it doesn’t have photos. In Month view, a Note icon
appears on each day that has a daily note.
Add an event in Date view
In Date view, you can track your daily events or yearly events, such as birthdays.
Adding an event to the calendar.
1 In Date view, select a day.
2 Do one of the following:
• Click the Event icon .
Last updated 7/26/2011
Page 72

USING PHOTOSHOP ELEMENTS 7
Viewing and fixing photos in the Organizer
• In Month or Year view, right-click a day and choose Add Event from the context menu.
3 Type a name for the event in the Event Name box.
4 If necessary, change the dates shown in the pop-up menus.
5 If the event is annual, select Repeating Event. If desired, type a year indicating when the repeating event ends.
OK.
Click
In the calendar Month and Year views, holidays and events are displayed in special colors.
You can use the Calendar option in the Preferences dialog box to add, remove, and edit events.
Add or change a caption in Date view
1 In Date view, display the photo containing the caption you want to edit.
2 Click the Day button to open Day view.
3 Type text in the Caption box in the lower-right corner.
Set Date view preferences
1 Choose Edit > Preferences > Date View.
2 Select Use Monday As First Day Of The Week to start each week on Monday; otherwise, each week starts on
Sunday.
3 In the Holidays list, select the holidays you want noted in the calendar.
4 Add, delete, and edit events by doing any of the following:
• To add an event, click New and enter information in the Create New Event dialog box.
• To edit an event, select the event and click Edit. Change the information in the Edit Event dialog box.
• To delete an event, select it in the list and click Delete.
5 Click OK to close the Preferences dialog box.
65
Fixing photos in the Organizer
Using the tools in the Fix tab of the Organizer, you can quickly correct the most common problems in photographs.
Customizable versions of some of these tools are also available in the Editor, but the simple versions here are designed
to make corrections quickly and easily.
Note: Use the Photoshop Elements Editor to make more elaborate or subtle changes to photographs. Click Full Edit
in the Fix tab to open the Editor.
Make quick adjustments using Auto Smart Fix
Auto Smart Fix analyzes photos and corrects problems commonly caused by poor exposure, contrast, color balance,
and color saturation.
1 Click the Fix tab to open it.
2 Select one or more photos in the Photo Browser. (Ctrl-click photos to select more than one.)
3 On the Fix tab, click Auto Smart Fix.
Last updated 7/26/2011
Page 73

USING PHOTOSHOP ELEMENTS 7
Viewing and fixing photos in the Organizer
Auto Smart Fix creates copies of the selected photos, makes the adjustments in the copies, and saves the copies to the
version sets of the photos on which they are based.
Correct color with Auto Color
Auto Color analyzes photos and corrects common problems in color balance, such as the greenish tint in photos taken
under fluorescent lamps, or the bluish tint in photos taken outdoors while using indoor-lighting camera settings.
1 Click the Fix tab to open it.
2 Select one or more photos in the Photo Browser. (Ctrl-click photos to select more than one.)
3 On the Fix tab, click Auto Color.
Auto Color creates copies of the selected photos, corrects the color in the copies, and saves the copies to the version
sets of the photos on which they are based.
Set levels with Auto Levels
Auto Levels analyzes photos and corrects common problems in luminance, such as the lack of detail in photos that
were under- or overexposed.
1 Click the Fix tab to open it.
2 Select one or more photos in the Photo Browser. (Ctrl-click photos to select more than one.)
3 On the Fix tab, click Auto Levels.
Auto Levels creates copies of the selected photos, adjusts the luminance levels in the copies, and saves the copies in the
version sets of the photos on which they are based.
66
Improve contrast with Auto Contrast
Auto Contrast analyzes photos and corrects common contrast problems, such as the lack of distinction between bright
and dark areas.
1 Click the Fix tab to open it.
2 Select one or more photos in the Photo Browser. (Ctrl-click photos to select more than one.)
3 On the Fix tab, click Auto Contrast.
Auto Contrast creates copies of the selected photos, adjusts the contrast in the copies, and saves the copies in the
version sets of the photos on which they are based.
Sharpen photos with Auto Sharpen
Auto Sharpen analyzes photos and corrects common focus problems, such as blurriness caused by poor camera focus.
1 Click the Fix tab to open it.
2 Select one or more photos in the Photo Browser. (Ctrl-click photos to select more than one.)
3 On the Fix tab, click Auto Sharpen.
Auto Sharpen creates copies of the selected photos, sharpens the focus in the copies, and saves the copies in the version
sets of the photos on which they are based.
Last updated 7/26/2011
Page 74

USING PHOTOSHOP ELEMENTS 7
Viewing and fixing photos in the Organizer
Remove red eye with Auto Red Eye Fix
Auto Red Eye Fix finds red pupils in photo subjects and changes them to a natural black.
1 Click the Fix tab to open it.
2 In the Photo Browser, select one or more photos in which a subject or subjects have red pupils. (Ctrl-click photos
to select more than one.)
3 On the Fix tab, click Auto Red Eye Fix.
Auto Red Eye Fix creates copies of the selected photos, changes red pupils to black in the copies, and saves the copies
in the version sets of the photos on which they are based.
Rotate photos
For a video about this process, see www.adobe.com/go/lrvid2315_pse
1 In the Photo Browser, select one or more photos. Shift-click to select adjacent photos, or Ctrl-click to select
nonadjacent photos.
2 In the shortcuts bar, do one of the following:
• To rotate the photo counterclockwise 90 degrees, click the Rotate Left button .
• To rotate the photo clockwise 90 degrees, click the Rotate Right button .
67
Last updated 7/26/2011
Page 75

Chapter 5: Tagging and organizing photos
You can use keyword tags to identify photos and clips with keywords and retrieve individual photos or albums of
photos. Like physical photo albums, in Adobe®
files by category and to place them in a desired order.
Tagging photos
About keyword tags
Keyword tags are personalized keywords, such as “Dad” or “Florida,” that you attach to photos, video clips, audio clips,
PDFs, and photo projects in the Photo Browser so that you can easily organize and find them. When you use keyword
tags, there’s no need to manually organize your photos in subject-specific folders or rename files with content-specific
names. Instead, you simply attach one or more keyword tags to each photo and then retrieve the photos you want by
selecting one or more keyword tags in the Keyword Tags palette. You can also find photos with specific keyword tags
when you type a keyword in the Search text box.
Photoshop® Elements albums let you group photos and other media
68
For example, you can create a keyword tag called “Anna” and attach it to every photo featuring your sister, Anna. You
can then instantly find all of the photos of Anna by selecting the Anna tag in the Keyword Tags palette, regardless of
where the photos are stored on your computer.
You can create keyword tags using any keywords you want. For example, you can create keyword tags for individual
people, places, and events. When photos have multiple keyword tags, you can select a combination of keyword tags to
find a particular person at a particular place or event. For example, you can search for all “Anna” keyword tags and all
“Marie” keyword tags to find all pictures of Anna with her daughter, Marie. Or search for all “Anna” keyword tags and
all “Cabo” keyword tags to find all the pictures of Anna vacationing in Cabo San Lucas.
Use keyword tags to organize and find photos by their content. You specify keywords for your tags and choose the photo icon that represents each
tag.
More Help topics
“Find photos by their keyword tags” on page 73
“Find photos using a text search” on page 96
“Attach keyword tags to photos” on page 70
Last updated 7/26/2011
Page 76

USING PHOTOSHOP ELEMENTS 7
Tagging and organizing photos
Using the Keyword Tags palette
You create and work with keyword tags in the Keyword Tags palette of the Organize tab.
A
B
C
D
E
F
The Keyword Tags palette
A. Category B. Subcategory C. Keyword Tag D. Find box E. Selected keyword tag F. Triangle expands or collapses the keyword tags in that
category or subcategory.
69
In the Keyword Tags palette, Photoshop Elements includes four default categories: People, Places, Events, and Other.
In addition, if you import images that already have tags attached, those tags appear under an Imported Tags category.
You can organize tags under these categories and create your own categories and subcategories.
You can perform all of the following tasks in the Keyword Tags palette:
• View all of the keyword tags, tag categories, and tag subcategories. Click the triangle next to a category or
subcategory to expand or collapse the keyword tags under it.
• Create, edit, and delete keyword tags.
• Organize keyword tags within the categories and subcategories.
• Scroll up and down the list of keyword tags.
• Hide all keyword tags by clicking the triangle next to Keyword Tags.
More Help topics
“Set preferences for the Keyword Tags and Albums palettes” on page 80
“Find photos by their keyword tags” on page 73
Create a keyword tag
You can create new keyword tags, under any category or subcategory, to organize photos you’ve recently added to your
catalog. New keyword tags have a question mark icon
.
Last updated 7/26/2011
Page 77

USING PHOTOSHOP ELEMENTS 7
Tagging and organizing photos
The Create Keyword Tag dialog box lets you create keyword tags.
1 Click the New button in the Keyword Tags palette of the Organize tab and choose New Keyword Tag.
2 In the Create Keyword Tag dialog box, use the Category menu to choose a category or subcategory in which to place
the tag.
3 In the Name box, type a name for the keyword tag.
4 To associate the tag with a place on a map, click Place On Map, type an address, and click Find.
5 In the Note box, type any information you want to add about the tag. (For example, you could write that the tag
represents vacation photos.)
6 Click OK.
The keyword tag appears in the Keyword Tags palette under the category or subcategory you selected.
70
Note: The first time you attach a keyword tag to a photo, that photo becomes the icon for that keyword tag. To change
the icon, see
“Change a keyword tag’s icon” on page 76.
Attach keyword tags to photos
Once you have created a keyword tag, you can attach it to photos associated with the tag. You can attach multiple
keyword tags to a photo. The first time you attach a tag to a photo, that photo becomes the icon for that tag. If you drag
multiple photos to a keyword tag, the first photo you selected becomes the icon for that tag.
1 In the Photo Browser, select the photo or photos to which you want to attach the tag. (To select more than one
photo, Ctrl-click the photos.)
2 To attach one photo to one tag, do one of the following:
• Drag the tag from the Keyword Tags palette onto the selected photos.
• Drag the photos onto the tag in the Keyword Tags palette.
3 To attach keyword tags to multiple photos, do one of the following:
• Drag the tag from the Keyword Tags palette onto any of the selected photos.
• Select one or more keyword tags, and then drag the tags onto any of the selected photos.
Last updated 7/26/2011
Page 78

USING PHOTOSHOP ELEMENTS 7
Tagging and organizing photos
Dragging multiple keyword tags to multiple photos.
• Select one or more keyword tags, and then drag the photos onto any of the selected tags in the Keyword Tags palette.
To apply a tag to all of the photos in an album, click the album in the Albums palette. Then click the Keyword Tags
tab, select all of the photos in the Photo Browser, and attach the tag to them.
71
4 To correlate photos in Map view with a tag, do one of the following:
• Double-click a Places tag, and then drag a photo (that has a location tag) from the Photo Browser to a location on
the map.
• Select a photo and drag it to a location on the map.
• Select multiple photos and drag them to a location on the map.
• Drag any tag to a location on the map.
More Help topics
“Remove keyword tags from photos” on page 79
“Change a keyword tag’s icon” on page 76
Automatically find faces for tagging
When you use the Find Faces For Tagging command, Photoshop Elements isolates and displays faces in photos so that
you can quickly tag them. Thumbnails of individual faces appear in the Face Tagging dialog box, in which you can
apply existing keyword tags or create and apply new tags. As you apply tags to faces in the Face Tagging dialog box,
Photoshop
Already Tagged Faces if you want the faces to remain after you tag them.
Elements removes those faces, making it easier to find and tag the remaining faces. You can select Show
Last updated 7/26/2011
Page 79

USING PHOTOSHOP ELEMENTS 7
Tagging and organizing photos
A
B
C
D
FE
The Face Tagging dialog box
A. Select to show faces already tagged or deselect to hide those faces B. Keyword Tags and tag options C. Recently used keyword tags D. Full
context image of the most recently selected face E. Selected face thumbnail F. Find status bar
72
1 In the Photo Browser, select the photos of people you want to tag.
2 Choose Find > Find Faces For Tagging, or click the Find Faces For Tagging icon in the Keyword Tags palette.
If you press Ctrl as you choose Find > Find Faces For Tagging, Photoshop Elements will produce more accurate results
(for example, it will find more faces in the background of a busy photo), but it will take longer for the faces to appear.
Photoshop Elements processes the photos and searches for faces. Thumbnails of the faces display in the Face Tagging
dialog box.
3 In the dialog box, do any of the following:
• To apply a tag to a face, drag the tag onto the face or drag the face onto the tag. You can tag multiple selected photos
at once.
You don’t have to wait until all faces are identified before applying keyword tags.
Applying a tag to selected faces while the search for faces is still in progress.
• To create a new tag, click the New button in the upper-right corner. Choose a category and type a name for the tag.
Last updated 7/26/2011
Page 80

USING PHOTOSHOP ELEMENTS 7
Tagging and organizing photos
• To view the entire photo thumbnail for a face, select the face and view the photo thumbnail in the lower-right
corner of the window.
• To select all the faces associated with a photo, select the photo thumbnail in the lower-right corner.
• To remove a face from the Face Tagging dialog box without tagging it, select it and click Don’t Tag Selected Items.
(If you later decide you want to tag it, select it in the Organizer and choose Find
Removing a thumbnail of an image that is not a real face.
> Find Faces For Tagging again.)
• Select Show Already Tagged Faces to view all the faces you’ve tagged. Deselect this option if you want to
automatically hide faces after you tag them.
If you want to change a tag that you’ve applied to a face, select Show Already Tagged Faces.
73
4 When you’re done tagging faces, click Done.
More Help topics
“Change a keyword tag’s icon” on page 76
Find photos by their keyword tags
❖ In the Keyword Tags palette of the Organize tab, do one of the following:
• Double-click a tag.
• Click the box next to one or more tags.
• Drag one or more tags from the Keyword Tags palette to the find bar near the top of the Photo Browser.
The application finds all photos that have any of those keyword tags attached. If you select a keyword tag category or
subcategory that itself has nested subcategories, the application displays all photos in the hierarchy. For example, if you
have a Wedding subcategory that contains the keyword tags Bride and Groom, and you select the Wedding
subcategory, all photos tagged Bride or Groom are displayed.
You can also find photos with specific keyword tags by typing the keyword in the Search text box.
Last updated 7/26/2011
Page 81

USING PHOTOSHOP ELEMENTS 7
Tagging and organizing photos
74
To start a search, drag a keyword tag to the find bar (top) or click the square next to a keyword tag (bottom). Photos with the tag attached are
displayed.
More Help topics
“Find photos using a text search” on page 96
Create a new keyword tag category or subcategory
1 In the Keyword Tags palette of the Organize tab, click the New button and choose either New Category or New
Sub-Category.
2 Do one of the following:
• To create a new category, type its name in the Category Name box. Click Choose Color and specify the color you
want to appear on the keyword tags in that category. Then click to select an icon from the Category Icon list.
• To create a new subcategory, type its name in the Sub-Category Name box. Then use the Parent Category Or Sub-
Category menu to choose a category in which to place the subcategory.
3 Click OK.
The new category or subcategory appears in the Keyword Tags palette.
Note: You can edit or delete a subcategory. However, its icon always appears as a plain tag; you cannot add a photo to it.
More Help topics
“Using the Keyword Tags palette” on page 69
Last updated 7/26/2011
Page 82
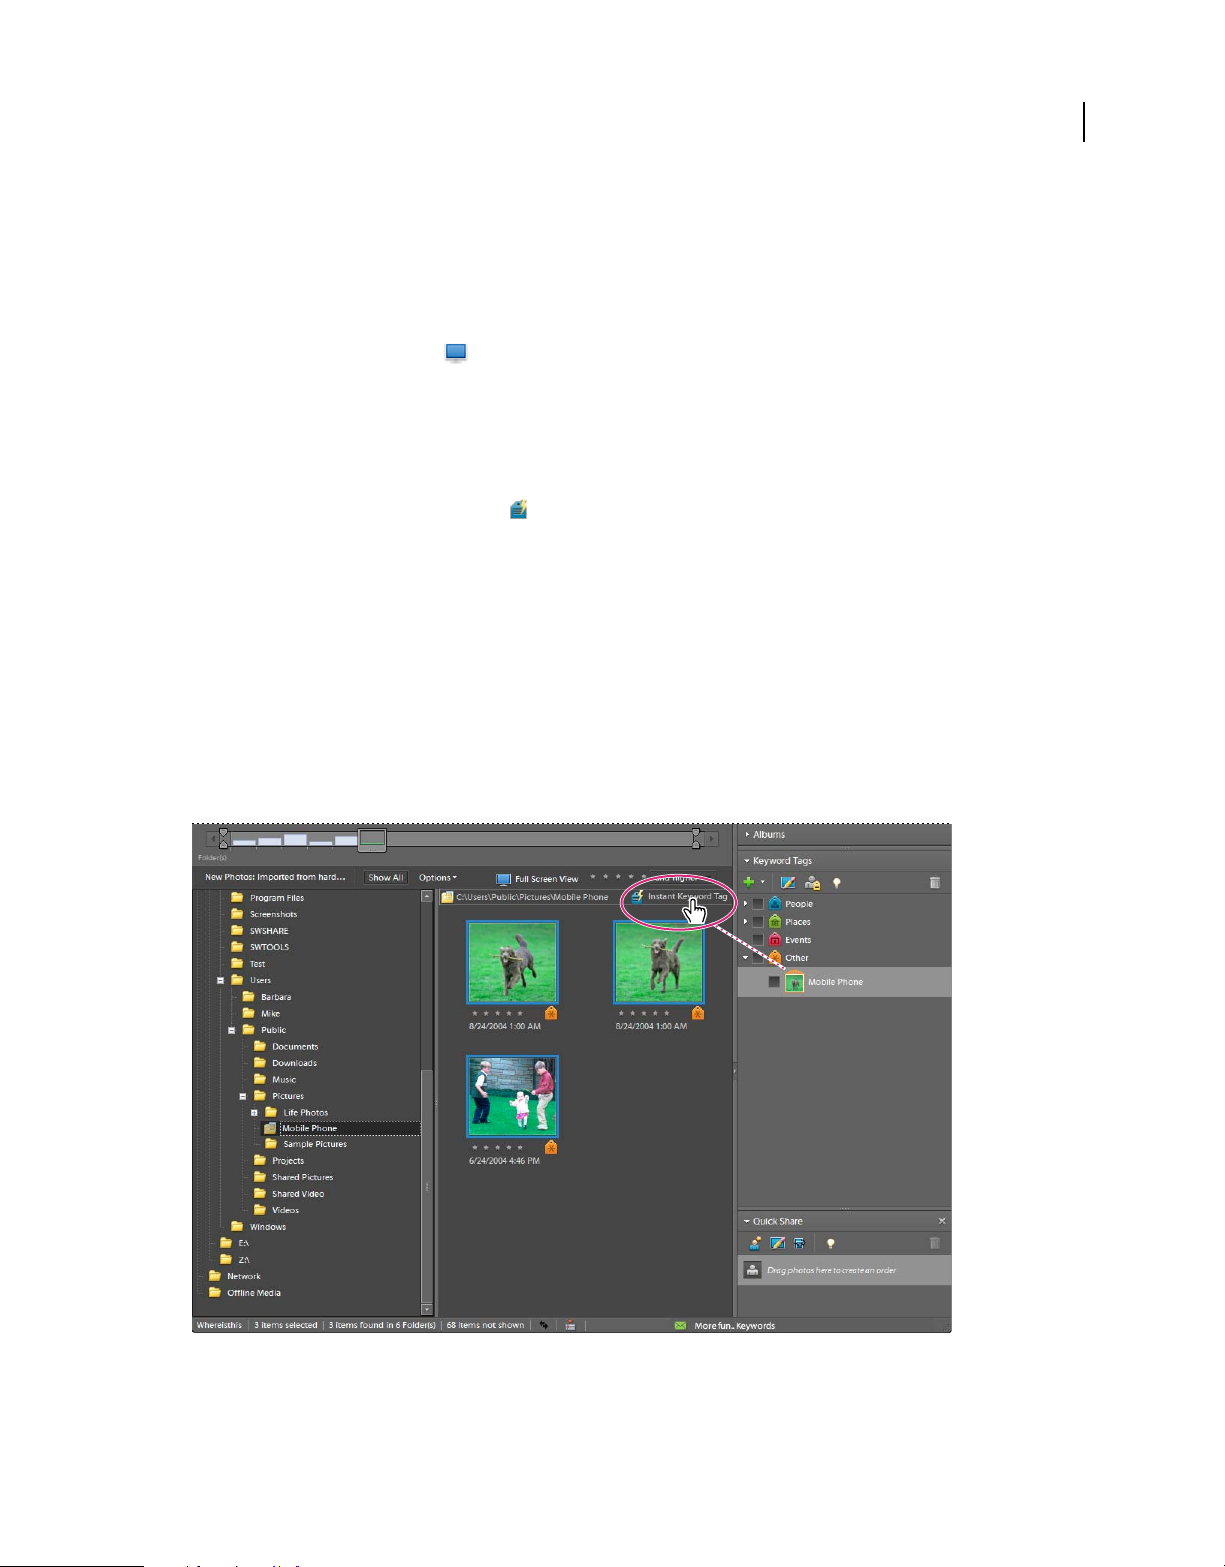
USING PHOTOSHOP ELEMENTS 7
Tagging and organizing photos
Create and attach keyword tags based on folder names
You can automatically create a keyword tag with the same name as a folder on your hard disk and attach that tag to all
the managed files in that folder (managed files are those that you’ve added to your Photoshop
Creating and attaching tags this way is useful when you’ve used descriptive folder names to organize the photos on
your hard disk, and you want to quickly tag your managed photos with those same folder names.
1 In the Photo Browser, choose Display > Folder Location.
The Photo Browser displays managed photos according to which folder they are in, with the folder’s full path listed
above the photos it contains.
2 In the folder tree on the left, select the folder containing the photos you want to tag. Thumbnails of the managed
photos in that folder appear in the Photo Browser.
3 Click the Instant Keyword Tag button on the right side of the separator bar that lists the folder’s path.
All of the items in that folder are selected, and the Create And Apply New Keyword Tag dialog box is filled in with the
name of that folder.
4 Choose a category or subcategory from the Category menu.
5 (Optional) If you want to change the name, type a new name in the Name box.
6 In the Note box, type any information you want to add about the tag. (For example, you could write that the tag
represents photos of your favorite restaurant.)
7 Click OK.
The tag appears in the Keyword Tags palette under the category or subcategory you selected and is applied to all items
in that folder. Notice that the tag uses the first photo in the folder as its icon.
Elements catalog).
75
In Folder Location view, the Photo Browser shows the folder’s path and the photos in the folder. Click the Instant Tag button to quickly create
and apply keyword tags that reflect your photos’ folder organization.
8 Repeat steps 2 through 7 for each folder you want to tag with an instant tag.
Last updated 7/26/2011
Page 83

USING PHOTOSHOP ELEMENTS 7
Tagging and organizing photos
More Help topics
“Using the Keyword Tags palette” on page 69
“Change a keyword tag’s icon” on page 76
“View and manage files by folder location” on page 51
Editing keyword tags, categories, and subcategories
Change a keyword tag’s icon
By default, Photoshop Elements creates an icon for a keyword from the first photo to which you’ve attached the tag.
You can change this icon to one that better represents the tag.
1 Select the tag in the Keyword Tags palette of the Organize tab.
2 Click the Edit button at the top of the palette.
3 Click Edit Icon in the Edit Keyword Tag dialog box.
4 To use a different photo for the icon, do one of the following:
• Click Find to display all the photos with that tag. Select a photo and click OK or use the arrows next to the Find
button to page through and select the photo you want to use.
• Click Import. Then locate and select a photo, and click OK.
Note: An imported photo can be used for the icon, but the tag is not automatically attached to the imported photo. You
can still attach the tag to that photo manually, however.
76
5 To change the portion of the photo included in the icon, resize or move the cropping marquee (the dotted outline):
• To resize, move the pointer to a corner of the marquee; when the pointer changes to a double-headed arrow, drag
the corner. You cannot resize imported tag icons.
• To move the marquee, place the pointer inside it; when the pointer changes to a hand, drag the marquee.
Resizing the cropping marquee (left); moving the cropping marquee (right).
6 Click OK, and then click OK again in the Edit Keyword Tag dialog box.
Last updated 7/26/2011
Page 84

USING PHOTOSHOP ELEMENTS 7
Tagging and organizing photos
More Help topics
“Using the Keyword Tags palette” on page 69
Edit a keyword tag category or subcategory
You can change the name of a category or subcategory, or the location of the category or subcategory.
1 Select the category or subcategory in the Keyword Tags palette and click the Edit button , or right-click a
category and choose Edit <name> Category.
2 Do any of the following, and then click OK:
• To change its name, type a new name in the Category or Sub-category Name box.
• To change the category or subcategory that a subcategory is listed under, choose one from the Parent Category Or
Sub-category menu. Choose None (Convert To Category) to change a subcategory to a category.
You can also drag a category or subcategory into another one.
• (Categories only) To change the color of the keyword tags in a category, click Choose Color and specify a new color
from the Photoshop Elements Color Picker; then click OK.
• (Categories only) To change a category icon, click to select a new icon from the Category Icon list.
77
A
B
C
Editing a category icon starting from a keyword tag
A. Changing a tag to a subcategory B. Changing a subcategory to a category C. Changing the category icon
To add your own category icons to the list, place 20 by 20 pixel images in JPEG or PNG format in the Program
Files\Adobe\Photoshop Elements 7.0\shared_assets\caticons folder.
More Help topics
“Using the Keyword Tags palette” on page 69
Last updated 7/26/2011
Page 85

USING PHOTOSHOP ELEMENTS 7
Tagging and organizing photos
Reorganize keyword tags, categories, and subcategories by dragging
By default, keyword tags and subcategories are listed in alphabetical order. However, you can change their order by
dragging.
1 Choose Edit > Preferences > Keyword Tags and Albums.
2 In the Enable Manual Sorting Option area, select Manual for Categories, Sub-Categories, and Keyword Tags, and
then click OK.
3 In the Keyword Tags palette, select one or more keyword tags, categories, or subcategories.
4 Drag the selected items to a new location by doing one of the following:
• To reorder keyword tags within a category or subcategory, drag the tag until you see a gray line, and then release
the mouse button. The tag will appear directly under the gray line.
• To move a tag to a new category, drag the tag over the category you want to move it to; when the category becomes
highlighted, release the mouse button.
• To reorder categories or subcategories, drag the category or subcategory until you see a gray line. When you release
the mouse button, the category or subcategory will appear directly under the gray line.
• To embed categories or subcategories into other categories, drag them to the category or subcategory you want, and
when the destination category or subcategory becomes highlighted, release the mouse button.
Note: If you make a mistake moving a category or subcategory, making it a subcategory or sub-subcategory, select it and
click the Edit button
category menu.
in the Keyword Tags palette. Then specify the correct location using the Parent Category Or Sub-
78
When you move a category or subcategory, the keyword tags it contains move with it.
Note: You can’t move keyword tags, categories, or subcategories into the Favorites category or move keyword tags from
Favorites into other categories.
More Help topics
“Using the Keyword Tags palette” on page 69
“Set preferences for the Keyword Tags and Albums palettes” on page 80
Change a keyword tag to a subcategory or vice versa
❖ Do one of the following in the Organize tab:
• Right-click a keyword tag in the Keyword Tags palette, and choose Change [name] Keyword Tag To A Sub-
Category.
• Right-click a subcategory in the Keyword Tags palette, and choose Change [name] Sub-Category To A Keyword
Tag. The subcategory cannot have any keyword tags or subcategories under it.
More Help topics
“Using the Keyword Tags palette” on page 69
Delete a category or subcategory
1 Select one or more categories or subcategories in the Keyword Tags palette.
2 Click the Delete button in the Keyword Tags palette, and then click OK to confirm the deletion.
Last updated 7/26/2011
Page 86

USING PHOTOSHOP ELEMENTS 7
Tagging and organizing photos
More Help topics
“Using the Keyword Tags palette” on page 69
Remove keyword tags from photos
❖ Depending on the view in the Photo Browser, do one of the following:
• To remove a keyword tag from one photo in thumbnail view, right-click the photo and choose Remove Keyword
> [tag name].
Tag
• To remove a keyword tag from one photo in larger views, right-click a category icon under the photo and choose
Remove [name] Keyword Tag.
Depending on your view, you can hold the pointer over the category icon to display a list of keyword tags attached to
the photo.
• To remove a keyword tag from multiple photos in any view, Ctrl-click to select the photos. Then right-click one of
the selected photos and choose Remove Keyword Tag from Selected Items
More Help topics
“Using the Keyword Tags palette” on page 69
> [tag name].
79
Write keyword tag information into your files
When you e-mail or export tagged JPEG, TIFF, or PSD files from Photoshop Elements, tag information is
automatically included as an IPTC (International Press Telecommunications Council) keyword in these output files
so that when the recipient imports the photo and is prompted to import the associated tags, the tags are attached in
their version of Photoshop
If you want to e-mail or share a photo without using the Photoshop Elements e-mail or export features, you can
manually write the tag information into the IPTC Keyword section in the header of the file.
❖ In the Photo Browser, select one or more files and choose File > Write Keyword Tag And Properties Info To Photo.
Elements.
Import and export keyword tags
Importing and exporting keyword tags can help you share photos with others of similar interests. For example,
suppose you have created a set of keyword tags for photos related to your hobby. If you save your tag set, your friends
with the same hobby can import those tags into their Keyword Tags palette and apply them to their own photos.
Alternately, you can import your friends’ keyword tags and apply them to your own photos. You and your friends
could then use keywords you have in common to search for photos related to the hobby you share.
More Help topics
“Using the Keyword Tags palette” on page 69
Export keyword tags
You can save your current set of keyword tags, including the entire hierarchy of categories and subcategories in your
Keyword Tags palette and the tag icons, so that you can share it with someone else. The exported tags file is saved as
an XML (Extensible Markup Language) file.
Note: Exporting tags does not export the photos associated with the tags.
1 Click the New button in the Keyword Tags palette and choose Save Keyword Tags To File.
Last updated 7/26/2011
Page 87

USING PHOTOSHOP ELEMENTS 7
Tagging and organizing photos
2 Choose one of the following and click OK:
Export All Keyword Tags Creates a file that contains all of the keyword tags and tag hierarchy.
Export Specified Keyword Tags Creates a file that contains all keyword tags and the tag hierarchy of the category or
subcategory you select from the list.
3 In the Save Keyword Tags To File dialog box that appears, choose a location and enter a name for the file. Then
click Save.
Import keyword tags
You can import an existing set of keyword tags (saved as an XML file using Save Keyword Tags To File), including the
entire hierarchy of categories and subcategories and the icons.
Keyword tags can also be imported by importing images that have other tags in them already. For example, when
photos are e-mailed, exported, and edited, or tag information is added, keyword tags are attached.
Note: Importing keyword tags does not import the photos associated with the tags.
1 In the Keyword Tags palette, click the New button and choose From File.
2 Select the XML (Extensible Markup Language) file in the Import Keyword Tags From File dialog box containing
the keyword tags, categories, and subcategories, and then click Open.
80
Set preferences for the Keyword Tags and Albums palettes
1 In the Organizer, choose Edit > Preferences > Keyword Tags And Albums.
2 Specify how to order keyword tags, categories, subcategories, albums, and album groups: alphabetically or
manually. If you select Manual for a tag type, you can arrange that tag type in the Keyword Tags palette in the order
you want by dragging it.
3 Specify how to display keyword tags: by name only or with a small or large icon in addition to the name. Click OK.
More Help topics
“Using the Keyword Tags palette” on page 69
Creating albums
About albums
Important: U.S. Photoshop Elements users can backup albums to Photoshop.com. Not only does backing up protect the
photos in your albums, but it also lets you conveniently share your photos via the Internet. Currently, this feature is only
available for Photoshop
on page 28 and “Back up and synchronize albums and files” on page 129.
Photoshop Elements Albums are like physical photo albums where you can store and organize photos in groups of
your choosing. For example, you can create an album called “Ten Best Vacation Photos” and organize the photos from
the tenth best photo to the very best photo. You can display the album in Full Screen view or make a project based on
that album.
Elements users in the United States. See “Getting started with your Photoshop.com membership”
Each photo in an album has a number in the upper-left corner, representing its order. You can drag the photos within
an album to arrange them into any order you want. You can add a photo to more than one album. For example, the
same photo might appear as the first photo in one album and the last photo in another.
Last updated 7/26/2011
Page 88

USING PHOTOSHOP ELEMENTS 7
Tagging and organizing photos
You can organize albums in groups. You also can create multiple levels of album groups. For example, you can have
an album group titled, “My Asia Trip,” containing the album “Ten Best Japan Photos,” along with another album
called “Ten Best China Photos,” and so on for each country in Asia you visited.
You can create smart albums by setting criteria for photos to be included in them, rather than by manually selecting
specific photos. The contents of smart albums are automatically updated as matching criteria are added to photos. For
example, if you create a smart album that includes all photos with the keyword tag, “Chiara,” additional photos are
added to that album as you give them that keyword tag.
More Help topics
“Attach keyword tags to photos in an album” on page 89
“Create albums from keyword tags” on page 89
“About keyword tags” on page 68
Using the Albums palette
You create and work with albums in the Albums palette of the Organize tab.
81
A
B
C
D
The Albums palette
A. Album B. Find check area C. Album group D. Triangle expands or collapses the albums in that group
• Create, edit, and delete albums.
• View albums and album groups. Scroll up and down the list of albums, as needed. Click the triangle next to an
album group to expand or collapse the albums under it.
• Organize albums within album groups.
• Display photos in albums.
More Help topics
“Select items in the Photo Browser” on page 53
“Set preferences for the Keyword Tags and Albums palettes” on page 80
Create an album or an album group
For a video about this process, see www.adobe.com/go/lrvid2302_pse
You can create a new album or a group of new albums at any time. For example, you might create an album group
called “Vacations” and create separate albums within it, one for each vacation you photograph.
Last updated 7/26/2011
Page 89

USING PHOTOSHOP ELEMENTS 7
Tagging and organizing photos
Create an album
Note: It’s also possible to create an album when downloading photos into Photoshop Elements. See “Designate an album
during photo download” on page 84.
1 Click the Create New Album Or Album Group button in the Albums palette of the Organize tab and choose
New Album .
2 (Optional) From the Group menu, choose a group into which to place the album.
3 In the Album Name box, type a name for the album.
4 Drag photos into the Items area.
5 Click Done.
The album appears in the Albums palette under the album group you specified.
Create an album group
1 Click the Create New Album Or Album Group button in the Albums palette of the Organize tab, and choose
New Album Group.
2 In the Create Album Group box, type a name for the album group.
3 (Optional) From the Parent Album Group menu, choose a group into which you’d like to nest your album group.
4 Click OK.
The album group appears in the Albums palette under the album group you specified.
82
Add a photo to an album
In the Organizer, you can add photos to albums. You can add multiple photos to one or more albums.
1 In the Organizer, click the Show All button (if it appears in the find bar) to display all photos in the Photo Browser.
2 Do one of the following:
• Drag the photo from the Photo Browser into the album in the Albums palette.
• Drag the album from the Albums palette onto the photo in the Photo Browser.
Note: You can also add photos to an album when copying and importing images to Photoshop Elements. See “Designate
an album during photo download” on page 84.
Last updated 7/26/2011
Page 90

USING PHOTOSHOP ELEMENTS 7
Tagging and organizing photos
Dragging a photo into an album; after dragging, the photo becomes part of the album.
Display photos in an album
Because items in an album are displayed in a custom order, and the same item might be in multiple albums, you can
view only one album at a time.
83
❖ In the Albums palette, do one of the following:
• Click an album.
• Drag the album from the Albums palette to the find bar near the top of the Photo Browser.
Click an album to start a search.
Last updated 7/26/2011
Page 91

USING PHOTOSHOP ELEMENTS 7
Tagging and organizing photos
To see which albums a photo is in, hold the pointer over the album icon under the photo in the Photo Browser or
use the Properties palette.
Change the order of photos in an album
You can place the photos in an album in any order.
1 Select an album from the Albums palette.
2 In the Photo Browser Arrangement menu in the upper-right area of the Photo Browser, select Album Order.
3 Select one or more photos, drag the selection between any two photos in the album. You can also drag the selection
before the first or after the last photo in the album.
Sort photos in an album
You can sort the photos within an album in chronological, reverse-chronological, or album order.
1 Select an album from the Albums palette.
2 In the Photo Browser Arrangement menu in the upper-right area of the Photo Browser, select Date (Newest First),
Date (Oldest First), or Album Order.
84
Add photos to multiple albums
1 In the Photo Browser, click the Show All button (if it appears in the find bar) to display all photos in the Photo
Browser.
2 Select one or more photos. The selected photos are outlined in blue.
3 Select one or more album names in the Albums palette. Shift-click to select adjacent items or Ctrl-click to select
nonadjacent items.
4 Add the photos to the albums by doing one of the following:
• Drag the photos into any of the selected albums in the Albums palette.
• Drag the albums from the Albums palette onto any of the selected photos.
Designate an album during photo download
1 Make sure that the Photo Downloader is in the Advanced Dialog mode. If necessary, click Advanced Dialog.
2 In the Advanced Options section, select Import Into Album.
3 Click Settings and do any of the following in the Select An Album dialog box:
• To import photos into a specific album, select the album in the dialog box.
• To import photos into a new album, click Create New Album and then type a name to overwrite the generic
“New Album” name in the dialog box.
4 Click OK.
Export or import an album structure
You can share album structures with others by exporting yours or importing theirs. For example, suppose you have a
set of albums representing different museums you’ve visited with friends. By saving and exporting your album set,
your friends, who have also visited those museums, can import that album structure (not the photos in it) and use it
for their photos. Alternately, you can import the album structure of one of your friends and apply it to your photos.
Last updated 7/26/2011
Page 92
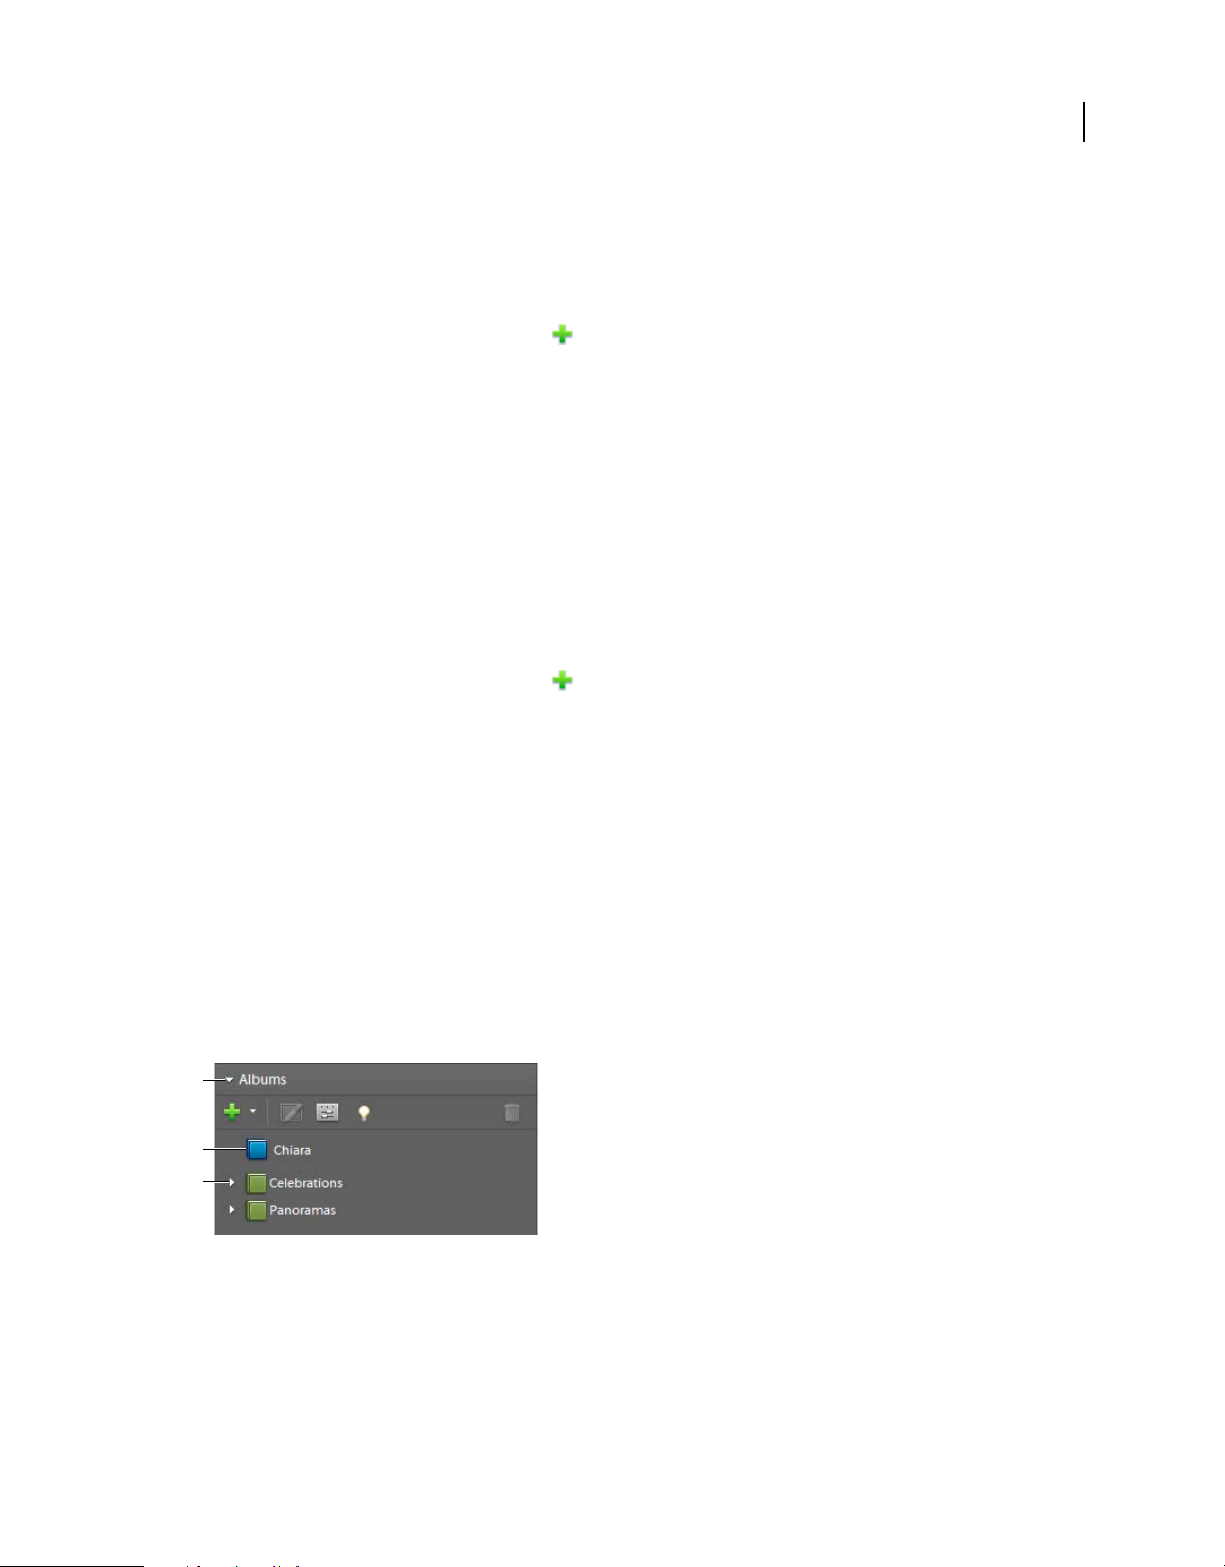
USING PHOTOSHOP ELEMENTS 7
Tagging and organizing photos
Export an album structure
You can save your current set of albums and album group names, including their organization in the Albums palette
and their icons, and then share this structure with someone else.
Note: Exporting an album does not export the photos associated with the album.
1 In the Albums palette, click the New button and choose Save Albums To File.
2 Choose one of the following and click OK:
Export All Albums Creates a file that contains your entire album hierarchy.
Export Specified Album Group Creates a file that contains the hierarchy of the album group you select from the list.
3 In the Save Album to File dialog box that appears, choose a location and enter a name for the file. Then click Save.
The file is saved as an XML file.
Import an album structure
You can import an existing hierarchy of album groups into the Albums palette, where you can use it for your own
photos.
Note: Importing an album does not import the photos associated with the album.
1 In the Albums palette, click the New button and choose From File.
2 Select the exported XML file in the Import Albums From File dialog box containing the album and album group
names, and click Open.
85
Creating and editing smart albums
About smart albums
Like albums, smart albums contain photos of your choosing. However, instead of selecting individual photos or groups
of photos, with smart albums, you set the criteria for inclusion. After you set the criteria, any photo in a catalog that
matches the criteria of a smart album will appear automatically in that smart album. As you add new photos to the
catalog, those photos matching the smart album criteria will also appear automatically in the smart album. Smart
albums keep themselves up-to-date.
A
B
C
A. Albums palette heading B. Smart album C. Album group
Create a smart album
1 Select the types of photos you want in your smart album by doing any of the following:
• If you want the smart album to include only photos with certain keyword tags, select those keyword tags from the
Keyword Tags palette.
Last updated 7/26/2011
Page 93

USING PHOTOSHOP ELEMENTS 7
Tagging and organizing photos
• If you want the smart album to include only photos with certain star ratings, in the star ratings filter menu, click
the desired star, then select And Higher, And Lower, or Only from the menu next to the stars.
• If you want the smart album to include only photos within a certain folder, select Display > Folder Location.
Then, click the icon for the desired folder.
• If you want the smart album to include only photos you place into a certain album, select that album.
Note: You can apply more than one criterion to your selection. For example, you can select a folder or album and one or
more keyword tags.
2 In the Albums palette, click the Create A New Album Or Album Group button . Then, select New Smart Album.
The New Smart Album dialog box opens.
3 Type a name for your smart album and click OK.
More Help topics
“Attach keyword tags to photos” on page 70
“Find items with star ratings attached” on page 94
“View and manage files by folder location” on page 51
“Create an album or an album group” on page 81
86
Edit a smart album
1 In the Albums palette, select the smart album you want to edit.
2 (Optional) To change the name of a smart album, in the Albums palette, click the Edit button . Type a new name
for the smart album, and click OK.
3 Toward the upper left of the Photo Browser, select Options > Modify Search Criteria.
4 Modify the search criteria for the smart album by adding or removing keyword tags, albums, folders, or star ratings.
5 Right-click the smart album in the Albums palette, and select Save Current Search To [name] Album.
Editing albums and album groups
Remove photos from an album
1 In the Photo Browser, select the photos you want to remove from an album.
2 Do one of the following:
• Right-click the photo and choose Remove (Selected Items) From Album > [album name].
• If the album icon associated with the photo is visible, right-click it and choose Remove From [album
name] Album.
More Help topics
“About albums” on page 80
“Add a photo to an album” on page 82
Last updated 7/26/2011
Page 94

USING PHOTOSHOP ELEMENTS 7
Tagging and organizing photos
Merge albums
The Merge Albums command lets you merge multiple albums into a single album. For example, if you create a “Cars”
album, and then later inadvertently create an “Automobiles” album for the same photos, you can merge both albums
into one. When you merge albums, all photos are placed into one album and the other album is removed. Photos are
placed in the order they appear in the Albums palette. You can rearrange the order before or after you merge.
1 In the Albums palette, select the albums you want to merge. Click the album name to select an album, Shift-click
to select contiguous albums, or Control-click to select noncontiguous albums.
2 Right-click and choose Merge Albums.
3 From the list, choose the album into which you want to merge the selected albums, and click OK.
More Help topics
“About albums” on page 80
“Using the Albums palette” on page 81
Change an album’s properties
1 Select the album in the Albums palette of the Organize tab.
2 Click the Edit button at the top of the Albums palette.
3 Do any of the following in the Album Details palette and click OK:
• Choose a new location from the Group menu.
• Type a new name in the Album Name box.
87
More Help topics
“About albums” on page 80
“Using the Albums palette” on page 81
Delete an album or album group
Deleting an album or album group removes the album, group, and any albums in the group, but not the photos in
them. Note that you cannot delete an album group and an album in another group at the same time.
1 In the Albums palette, click the album name to select an album or album group. Shift-click to select multiple albums
or Ctrl-click to select multiple noncontiguous albums.
2 Click the Delete button in the Albums palette.
More Help topics
“About albums” on page 80
“Using the Albums palette” on page 81
Change the order of items in an album
When you change the order of items in an album, you change the viewing order. This is an easy way to reorder the
items in a project you’re planning to make.
1 In the Albums palette, click the album name to select the album.
Last updated 7/26/2011
Page 95

USING PHOTOSHOP ELEMENTS 7
Tagging and organizing photos
2 If necessary, select Album Order from the Photo Browser Arrangement menu in the upper-right corner of the
Photo Browser.
3 In the Photo Browser, do one of the following:
• Drag the photos to their new locations within the album.
Dragging a photo in an album (top). After dragging, the photo appears in its new position and its order number (circled) is changed (bottom).
88
• To reset the order of items to oldest first, select Date (Oldest First) from the Photo Browser Arrangement menu.
More Help topics
“About albums” on page 80
“Using the Albums palette” on page 81
Reorganize albums and album groups
By default, top-level albums are listed in alphabetical order followed by album groups in alphabetical order. You can
change their order, but you can’t place albums after album groups.
1 Choose Edit > Preferences > Keyword Tags And Albums.
2 Under Enable Manual Sorting Option, select Manual for Album Groups and Albums, and then click OK.
3 In the Albums palette, select one or more albums and album groups.
4 Drag the items to their new location in the albums hierarchy.
When you move an album group, the items it contains move with it.
Note: You can’t move a lower-level album or album group to the top level by dragging. Instead, change its group to Top
level in the Edit Album or Edit Album Group dialog box.
More Help topics
“About albums” on page 80
“Using the Albums palette” on page 81
“Set preferences for the Keyword Tags and Albums palettes” on page 80
Last updated 7/26/2011
Page 96

USING PHOTOSHOP ELEMENTS 7
Tagging and organizing photos
Attach keyword tags to photos in an album
Like albums, keyword tags provide a way of organizing photos and other media files. Keyword tags as well as albums
can be associated with the same item. In fact, you can apply a keyword tag to a photo even when you are viewing that
photo in its album.
1 In the Albums palette, click the album name to display the photos in that album.
2 Click the Keyword Tags palette.
3 Choose Edit > Select All to select all the items in the Photo Browser.
4 Select and attach the keyword tags to the photos.
More Help topics
“About albums” on page 80
“Using the Albums palette” on page 81
“Attach keyword tags to photos” on page 70
Create albums from keyword tags
1 In the Organize tab, click the triangle next to Keyword Tags to expand the palette.
2 Click the box to the left of a keyword tag name to select it. The Photo Browser shows all the photos with that tag
attached.
3 Choose Edit > Select All to select all the items in the Photo Browser.
4 On the Organize tab, click the triangle next to Albums to expand the palette.
5 Do one of the following:
• Drag the photos into one or more albums in the Album palette.
• Create a new album and drag the photos into it.
89
More Help topics
“About albums” on page 80
“Using the Albums palette” on page 81
Last updated 7/26/2011
Page 97

Chapter 6: Finding photos in the Organizer
In the Organizer, you can find photos and media files by date, star rating, album, folder location, filename, media type,
keyword tag, text, or other criteria. You can also sort files in any grouping in chronological, reverse-chronological, or
album order.
Note: In addition to using the Organizer to import media files, you can bring them into Adobe® Photoshop® Elements by
using the File
used if you already know the precise path and filename for the file you seek. For more information about finding files in
the Editor, see
Searching for photos in the Organizer
Options for finding photos in the Organizer
In the Organizer, Photoshop Elements lets you find photos several ways:
> Open or File > Place commands in the Editor. These commands allow you to browse to a file and are best
“Open a file” on page 134 and “Place a PDF, Adobe Illustrator, or EPS file in a new layer” on page 137.
90
Timeline Click a month or set a range to find photos and media files chronologically by date, import batch, or folder
location.
find bar Drag a photo, keyword tag, project, or album onto the find bar to find matching or similar photos and media
files.
Find menu Use the commands in this menu to find photos by date, caption or note, filename, history, version, media
type, metadata, or visual similarity. You can even find photos with faces for tagging (see
tagging” on page 71. Commands are also available for finding photos and media files that have unknown dates and
times, no keyword tags, or are not in any album.
View menu Use the commands in this menu to show types of files such as photos, video, audio, projects, and PDFs.
The View menu also has options for showing photos that have been marked as “hidden” (See
as hidden” on page 51).
Albums palette Select an album to view only the media files within it.
Keyword Tags palette Select a keyword tag to see only the media files with that tag.
Star rating filter View only those media files with a star rating greater than, equal to, or less than the number of stars
you specify.
Text box Type text to find photos with matching text whether it’s in the filename, metadata, caption, note, date, or
album name.
“Automatically find faces for
“Show photos marked
About the Timeline
Photoshop Elements automatically organizes all of your photos in the Photo Browser Timeline, even if the photos are
not tagged. The Timeline is divided into months and years—you can view images from a particular month and year
by clicking that month in the Timeline. The height of each bar in the Timeline is proportional to the number of files
in each month, based on date, batch, or location. You can also select a range of time in the Timeline to display photos
taken or scanned within that range. When you hold the pointer over a bar in the Timeline, a tool tip shows its range.
Last updated 7/26/2011
Page 98

USING PHOTOSHOP ELEMENTS 7
Finding photos in the Organizer
A C D E F
B
Using the Timeline
A. Timeline arrow B. Dark area indicating photos out of set range C. End point markers D. Date marker E. Timeline bar F. Partially blank
bar G. Tool tip identifying bar range
G
You can use the Timeline with keyword tags to refine searches. For example, to find pictures of Courtney taken over
a span of time, search using the Courtney keyword tag, and then click any month in the Timeline containing photos
of Courtney.
A partially blank bar in the Timeline indicates that you have photos that are not currently in the search results.
You use the Display menu (in the upper-right corner of the Organizer) to specify whether you want to view and
find photos by thumbnail view, import batch, or folder location.
91
Selecting a view of the Photo Browser with the Display menu.
More Help topics
“Find photos using keyword tags” on page 93
View and find photos using the Timeline
1 Make sure the Timeline is visible in the Photo Browser. If necessary, choose Window > Timeline.
2 Select Display and select either Thumbnail View, Import Batch, or Folder Location.
This sets whether each bar in the Timeline represents a month, batch, or folder.
3 Do one of the following:
• Use the arrows at the ends of the Timeline to navigate to the part of the Timeline that you want to search.
• Click a bar in the Timeline, or drag the date marker to view photos relating to that bar.
• Drag the Timeline end-point markers to view a range.
• (For date-based arrangements only) Choose Find > Set Date Range. Type both a start date and end date to specify
the range you want to view, and then click
Photoshop Elements displays photos within the set range in the Photo Browser. You can drag the end point markers
to refine your range.
OK. To reset the date range, choose Find > Clear Date Range.
Last updated 7/26/2011
Page 99

USING PHOTOSHOP ELEMENTS 7
Finding photos in the Organizer
Using Find > Set Date Range to set a date range.
Search using the find bar
The find bar performs quick searches when you drag keyword tags onto it. When not in use, the find bar is a horizontal
bar above the Photo Browser. When you drag a tag onto it, the find bar automatically expands so that you can see the
keyword tags you’ve added to the search. To refine a search, drag more keyword tags onto the find bar. You can also
use the find bar to search for the photos used in an album or project.
92
Dragging a keyword tag onto the find bar
1 Make sure that the Photo Browser and the Keyword Tags palette are open.
2 Drag a tag onto the find bar. The search starts immediately, and the find bar expands to show the tag it is using to
perform the search.
3 (Optional) Drag more keyword tags onto the find bar to refine your search. You can drag more than one tag to the
find bar at a time. Shift-click to select adjacent keyword tags or Control-click to select nonadjacent tags.
4 To start a new search, right-click a tag, category, or subcategory and choose the New Search Using [tag, category,
or subcategory name] Keyword Tag command from the context menu.
5 To close the find bar, click Show All.
Last updated 7/26/2011
Page 100
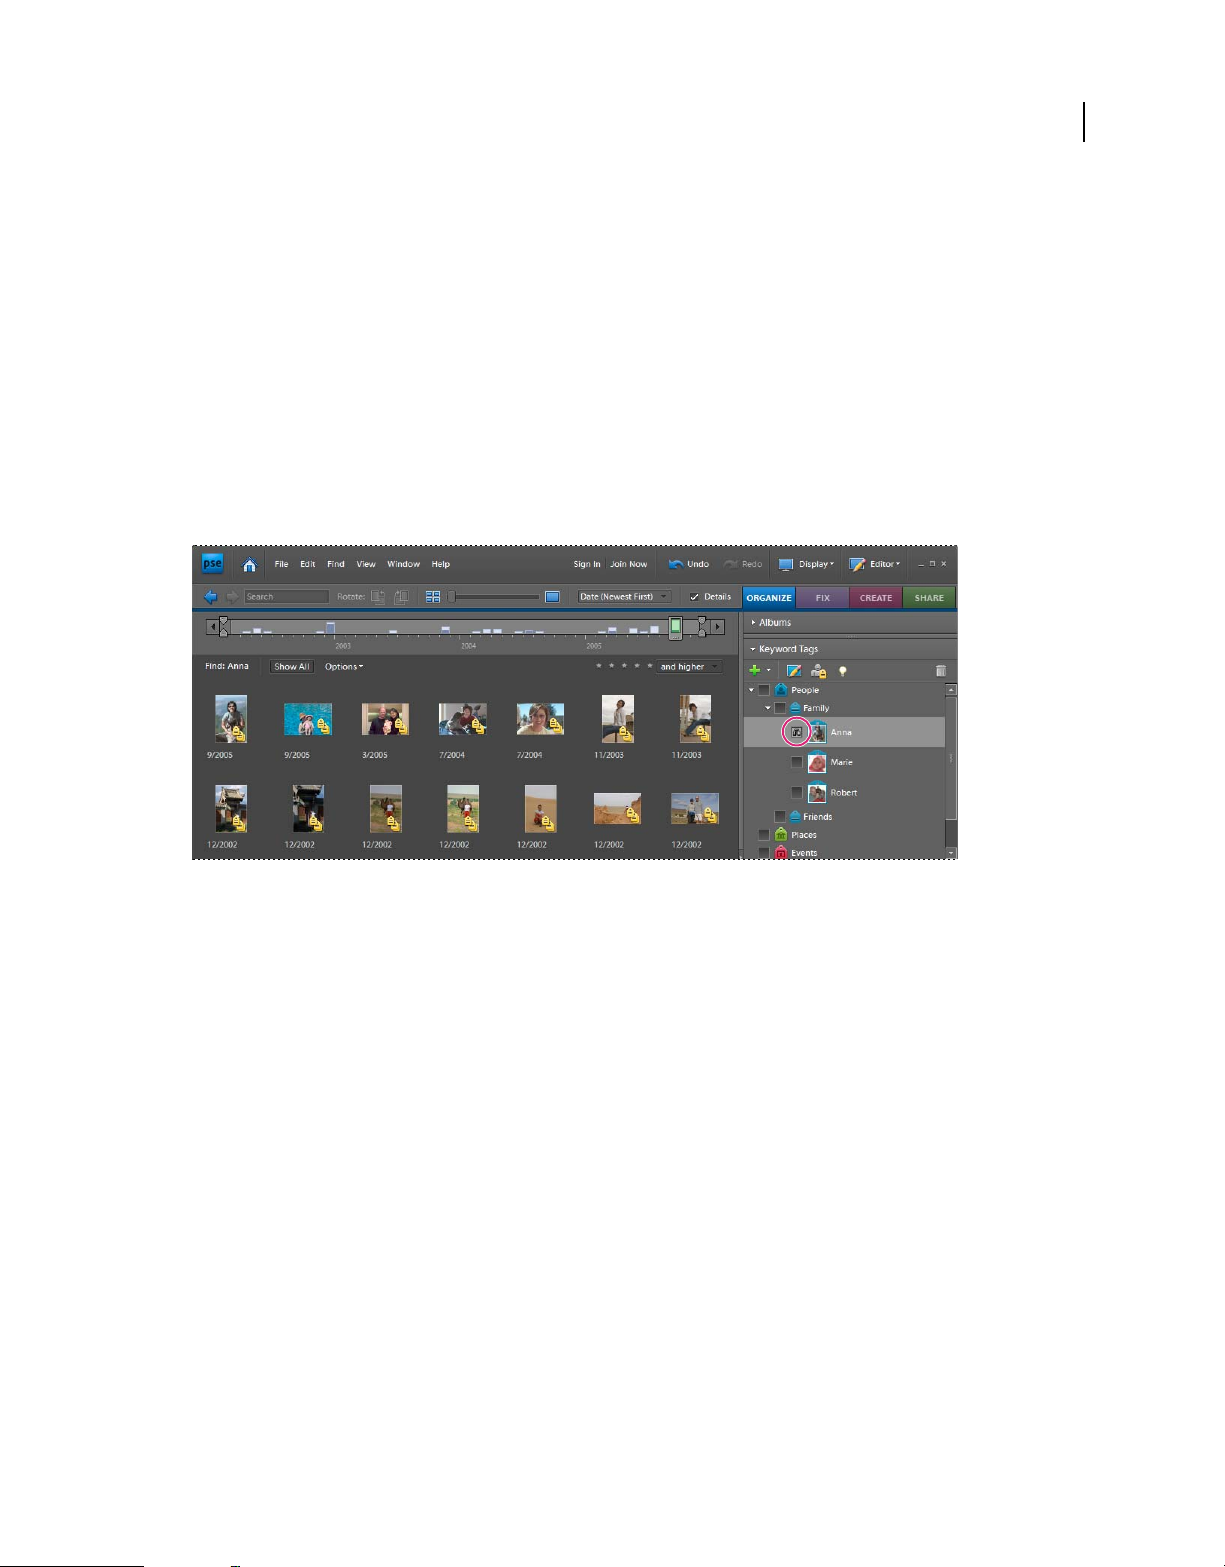
USING PHOTOSHOP ELEMENTS 7
Finding photos in the Organizer
More Help topics
“About keyword tags” on page 68
“Exclude photos from a search” on page 95
Finding photos by keyword tags
Find photos using keyword tags
Keyword tags let you quickly find photos and other files. When you use keyword tags to find photos and media files,
the find bar expands to display the keyword tags you’ve selected. Searches begin as soon as you select the tags in the
Keyword Tags palette.
93
Search for photos with specific keyword tags by clicking the box next to the tag’s name.
• In the Keyword Tags palette, click the square next to the tag’s name, or drag the tag icon to the find bar. You can
include multiple keyword tags in a search.
Photoshop Elements finds photos that have the keyword tags attached. If no photo matches all the tags in your search
criteria, the Photo Browser displays closely matching photos containing a subset of the keyword tags.
• To define a range of time for the search, specify a Date option in the Photo Browser Arrangement menu, and then
drag the Timeline end-point markers to the beginning and end of the range you want.
• To remove a tag from the search, double-click the tag in the find bar. (Or click the Back button in the shortcuts bar
to remove the last tag you added.)
• To exclude photos with certain keyword tags from the search, right-click those tags in the Keyword Tags palette
and choose Exclude Photos With [tag, category, or subcategory name] From Search Results.
Note: Using the Exclude Photos command, you can search for photos that have, for example, only you in them. You do
this by searching for your tag, and then excluding the entire People tag category. The results are photos that have only you
in them and no other people.
More Help topics
“Search using the find bar” on page 92
“About keyword tags” on page 68
“Find photos by details (metadata)” on page 99
Last updated 7/26/2011
 Loading...