

Page 1
2
3
2
3
4
Adobe Photoshop Help Using Help
U
sing Help | Contents | Index Back 1
Using Help
About online Help
Adobe Systems, Inc. provides complete documentation in the Adobe PDF Help system.
The Help system includes information on all the tools, commands, and features for both
Windows and Mac OS. The PDF format is designed for easy navigation online, and support
for third-party screen readers compatible with Windows. The Help can also be printed as a
desktop reference.
Navigating in Help
The Help will open in an Acrobat window with the bookmark pane open. If the bookmark
pane is not open choose Window > Bookmarks. You can also navigate using the
navigation bar, the index, or search the document.
At the top and bottom of each page is a navigation bar. Click Using Help to return to this
introduction. Clicking Contents, or Index will take you to that section.
The Next Page and the Previous Page arrows let you move through the pages
sequentially. Click Back to return to the last page you viewed. You can also use the
navigation arrows in the Acrobat toolbar.
Using bookmarks, the table of contents, the index, and Find
The contents of Help are shown as bookmarks in the bookmark pane. To view subtopics,
click the plus sign next to a bookmark. Each bookmark is a hyperlink to the associated
section of the Help document.
To go to the information, click its bookmark. As the information is displayed in the
document pane, its bookmark is highlighted.
You can turn highlighting on or off by selecting the Highlight Current Bookmark option
from the bookmark pane menu.
To find a topic using the table of contents:
1 Click Contents in the navigation bar at the top or bottom of any page.
Click a topic on the Contents page to move to the first page of that topic.
In the bookmark pane, expand the topic to see its subtopics.
To find a topic using the index:
1 Click Index in the navigation bar at the top or bottom of any page.
Click the appropriate letter at the top of the page.
You can also expand the Index bookmark, and click the letter in the bookmark pane.
Locate your entry, and click the page number link to view the information.
To view multiple entries, click Back to return to the same place in the index.
U
sing Help | Contents | Index Back 1
Page 2

2
3
Adobe Photoshop Help Using Help
U
sing Help | Contents | Index Back 2
To find a topic using the Find command:
1 Choose Edit > Find.
Enter a word or a phrase in the text box, and click OK.
Acrobat will search the document, starting from the current page, and display the first
occurrence of the word or phrase you are searching for.
To find the next occurrence, choose Edit > Find Again.
Printing the Help file
Although the Help has been optimized for on-screen viewing, you can print pages you
select, or the entire file.
To print, choose Print from the File menu, or click the printer icon in the Acrobat toolbar.
U
sing Help | Contents | Index Back 2
Page 3
Adobe Photoshop Help Contents
U
sing Help | Contents | Index Back 3
Contents
In
troduction 4
An Overview of Adobe Photoshop 10
What’s New in Photoshop 7.0 16
Looking at the Work Area 20
Getting Images into Photoshop and ImageReady 61
Working with Color 86
Producing Consistent Color (Photoshop) 102
Making Color and Tonal Adjustments 129
Selecting 157
Transforming and Retouching 177
Drawing 200
Painting 222
Using Channels and Masks 266
Using Layers 284
Applying Filters for Special Effects 321
Using Type 342
Designing Web Pages 368
Creating Rollovers and Animations (ImageReady) 396
Preparing Graphics for the Web 415
Saving and Exporting Images 446
Printing (Photoshop) 470
Automating Tasks 484
Macintosh Shortcuts 505
Windows Shortcuts 510
Legal Notices 515
U
sing Help | Contents | Index Back 3
Page 4
Adobe Photoshop Help Introduction
U
sing Help | Contents | Index Back 4
Introduction
We l c ome
Welcome to Adobe
®
Photoshop
integrated Web tool application, Adobe ImageReady
hensive environment for professional designers and graphics producers to create sophisticated images for print, the Web, wireless devices, and other media. Moreover, Photoshop
provides a consistent work environment with other Adobe applications including Adobe
Illustrator
Adobe Premiere
®
, Adobe InDesign
®
.
®
7.0, the professional image-editing standard. With its
R
, Photoshop delivers a compre-
®
, Adobe GoLive
®
, Adobe LiveMotion
™
, Adobe After Effects
®
, and
Registration
Adobe is confident you will find that its software greatly increases your productivity.
So that Adobe can continue to provide you with the highest quality software, offer
technical support, and inform you about new Photoshop software developments, please
register your application.
When you first start Photoshop or ImageReady, you’re prompted to register online. You
can choose to submit the form directly or fax a printed copy. You can also register by filling
out and returning the registration card included with your software package.
Installing Adobe Photoshop and ImageReady
You must install Photoshop and ImageReady from the Adobe Photoshop CD onto your
hard drive; you cannot run the program from the CD.
Follow the on-screen installation instructions. For more detailed information, see the
HowToInstall file on the CD. The single installer installs both Photoshop and ImageReady.
Getting started
Adobe provides a variety of options for you to learn Photoshop, including printed guides,
online Help, and tool tips. Using the Adobe Online feature, you can easily access a host of
continually updated Web resources for learning Photoshop, from tips and tutorials to tech
support information. Getting up to speed depends on your experience with previous
versions of Photoshop and ImageReady.
If you are new to Photoshop:
•
•
U
sing Help | Contents | Index Back 4
An Overview of Adobe Photoshop” on page 10 to get an introduction to the
See “
software.
Explore the Toolbox Overviews in online Help to get familiar with the basic tools and
their functions. See “
Using online Help” on page 6.
Page 5

Adobe Photoshop Help Introduction
U
sing Help | Contents | Index Back 5
•
Use the tool tips feature to help identify tools, buttons, and palette controls as you work
in Photoshop and ImageReady. See “
•
Go to the Adobe.com Web site and work through some of the Photoshop tutorials for
hands-on lessons. See “
Using Web resources” on page 7.
Using tool tips” on page 6.
If you are an experienced Photoshop user:
See “
•
•
What’s New in Photoshop 7.0” on page 16.
Scan through “
Using the File Browser (Photoshop)” on page 78 to learn how to view,
sort, and organize images without opening the files.
•
•
Working with brushes” on page 228 to explore the powerful new paint engine.
See “
See “
About optimization” on page 415 and “Using the Rollovers palette” on page 398 to
see new Web features such as transparency and simplified authoring.
If you want to focus on Web features:
•
•
•
Create compelling Web designs” on page 12 for an introduction to the powerful
See “
Web tools.
Creating and viewing slices” on page 368 to explore layer-based, user-defined, and
See “
automatic slices.
See “
About optimization” on page 415 to learn how to fine-tune your Web designs by
applying transparency, dithered transparency, or weighted optimization.
See “Using the Rollovers palette” on page 398 to see how easy it is to manage slices,
•
rollovers, image maps, and animations.
•
Creating and editing animations” on page 404 to learn how to create instant GIF
See “
animations from layered Photoshop and Illustrator files.
If you want to concentrate on photo editing and retouching:
See “
•
Edit images with ease” on page 11 for an introduction to the Photoshop image-
editing features.
•
See “
Using the File Browser (Photoshop)” on page 78 to find out how to quickly inspect
files before opening them in Photoshop.
Using the healing brush tool (Photoshop)” on page 189 to learn how to remove
See “
•
flaws effortlessly while preserving tonality and texture.
•
Making color adjustments” on page 132 to learn how to fine-tune the color and
See “
tonality in your photographs.
See “
•
Creating multiple-image layouts (Photoshop)” on page 464 to find out how to
quickly create contact sheets and customized photo pages.
If you want to focus on productivity features:
See “Automate repetitive tasks” on page 13 for an overview of the Photoshop and
•
ImageReady productivity tools.
•
•
Using the File Browser (Photoshop)” on page 78 to learn how to locate and
See “
organize images easily, and how to manage files and folders.
See “
About data-driven graphics” on page 501 to learn how to produce variable designs
such as Web banners or catalog pages automatically.
U
sing Help | Contents | Index Back 5
Page 6

Adobe Photoshop Help Introduction
U
sing Help | Contents | Index Back 6
•
See “Using the Rollovers palette” on page 398 to see how easy it is to get instant access
to all document states.
•
Managing files with WebDAV (Photoshop)” on page 82 to learn about the asset
See “
management features in Photoshop.
Using the printed documentation
In addition to the printed documents included with the application, you will find many
PDF documents on the Photoshop CD; Adobe Acrobat
®
Reader
Photoshop CD, lets you view PDF files.
Two printed documents are included with Photoshop 7.0:
Adobe Photoshop 7.0 User Guide Contains essential information on using Photoshop
and ImageReady commands and features. Complete information on all topics is available
in online Help. The printed guide and help also indicate when a topic, procedure, or
command pertains specifically to Photoshop or ImageReady, e.g., “Choose View > Actual
Pixels (Photoshop) or View > Actual Size (ImageReady).”
®
software, included on the
Adobe Photoshop Quick Reference Card
Contains basic information about the Adobe
Photoshop and ImageReady tools and palettes, and shortcuts for using them. Shortcuts
are also included in the online Help.
Using online Help
Adobe Photoshop and ImageReady include complete documentation in an HTML-based
help system. The help system includes all of the information in the Adobe Photoshop 7.0
User Guide plus information on additional features, keyboard shortcuts, and full-color
illustrations.
Online Help provides three ways of locating information. The Contents and Index tabs let
you find general information, and the Search tab lets you look up specific words or
phrases.
To properly view online Help topics, you need Netscape Communicator 4.0 (or later) or
Microsoft
To start online Help:
Do one of the following:
•
Choose Help > Photoshop Help (Photoshop) or Help > ImageReady Help (ImageReady).
Press F1 (Windows).
•
®
Internet Explorer 4.0 (or later). You must also have JavaScript active.
Using tool tips
The tool tips feature lets you display the name of tools, or buttons and controls in palettes.
To identify a tool or control:
Position the pointer over a tool or control and pause. A tool tip appears showing the name
and keyboard shortcut (if any) for the item.
If tool tips don’t appear, the preference for displaying them may be turned off.
U
sing Help | Contents | Index Back 6
Page 7

2
Adobe Photoshop Help Introduction
U
sing Help | Contents | Index Back 7
To display tool tips:
1 Choose Edit > Preferences > General (Windows and Mac OS 9) or Photoshop >
Preferences > General (Mac OS X).
Select Show Tool Tips, and click OK.
Note: Tool tips are not available in most dialog boxes.
Using Web resources
If you have an Internet connection, you can use the Adobe Online feature to access
additional resources for learning Photoshop and ImageReady located on the Adobe.com
Web site. From the Adobe.com home page, select Products. Then choose Photoshop and
go to Training & Events.
These resources are continually updated and include the following:
Tutorials and Techniques Provide step-by-step instructions on using Photoshop or help
on performing advanced techniques. These tutorials can help you go beyond the
reference information contained in the user guide and show you how to use Photoshop
with other applications.
How Tos and Backgrounders
Photoshop and to detailed reference information on a variety of topics. This information
provides help on everything from common processes to the complex inter-application
tasks necessary to prepare graphics for the Web.
Troubleshooting
Photoshop. You should check out troubleshooting information available through Adobe
Online and the Adobe Web site before you call customer support.
Provides access to solutions to problems you may encounter using
Provide access to procedures for performing tasks in
To access the Adobe home page for your region:
1
Open the Adobe U.S. home page at www.adobe.com.
2
From the Adobe Worldwide menu, choose your geographical region. Adobe’s home
page is customized for 20 different geographical regions.
About Adobe Online
Adobe Online provides access to the latest tutorials, quicktips, and other Web content for
Photoshop and other Adobe products. Using Adobe Online, you can also download and
view the current version of the Photoshop Top Issues document containing the latest
Photoshop technical support solutions. Bookmarks are also included to take you quickly
to noteworthy Adobe- and Photoshop-related sites.
Using Adobe Online
Adobe Online is constantly changing, so you should refresh before you use it. Refreshing
through Adobe Online updates bookmarks and buttons so you can quickly access the
most current content available. You can use preferences to automatically refresh Adobe
Online.
U
sing Help | Contents | Index Back 7
Page 8
2
2
3
Adobe Photoshop Help Introduction
U
sing Help | Contents | Index Back 8
When you set up an Internet connection to Adobe Online, Adobe can either notify you
whenever new information is available through the Updates feature or automatically
download that information to your hard disk. If you choose not to use the automatic
download feature, you can still view and download new files whenever they are available
using the Updates command in the Help menu.
To use Adobe Online:
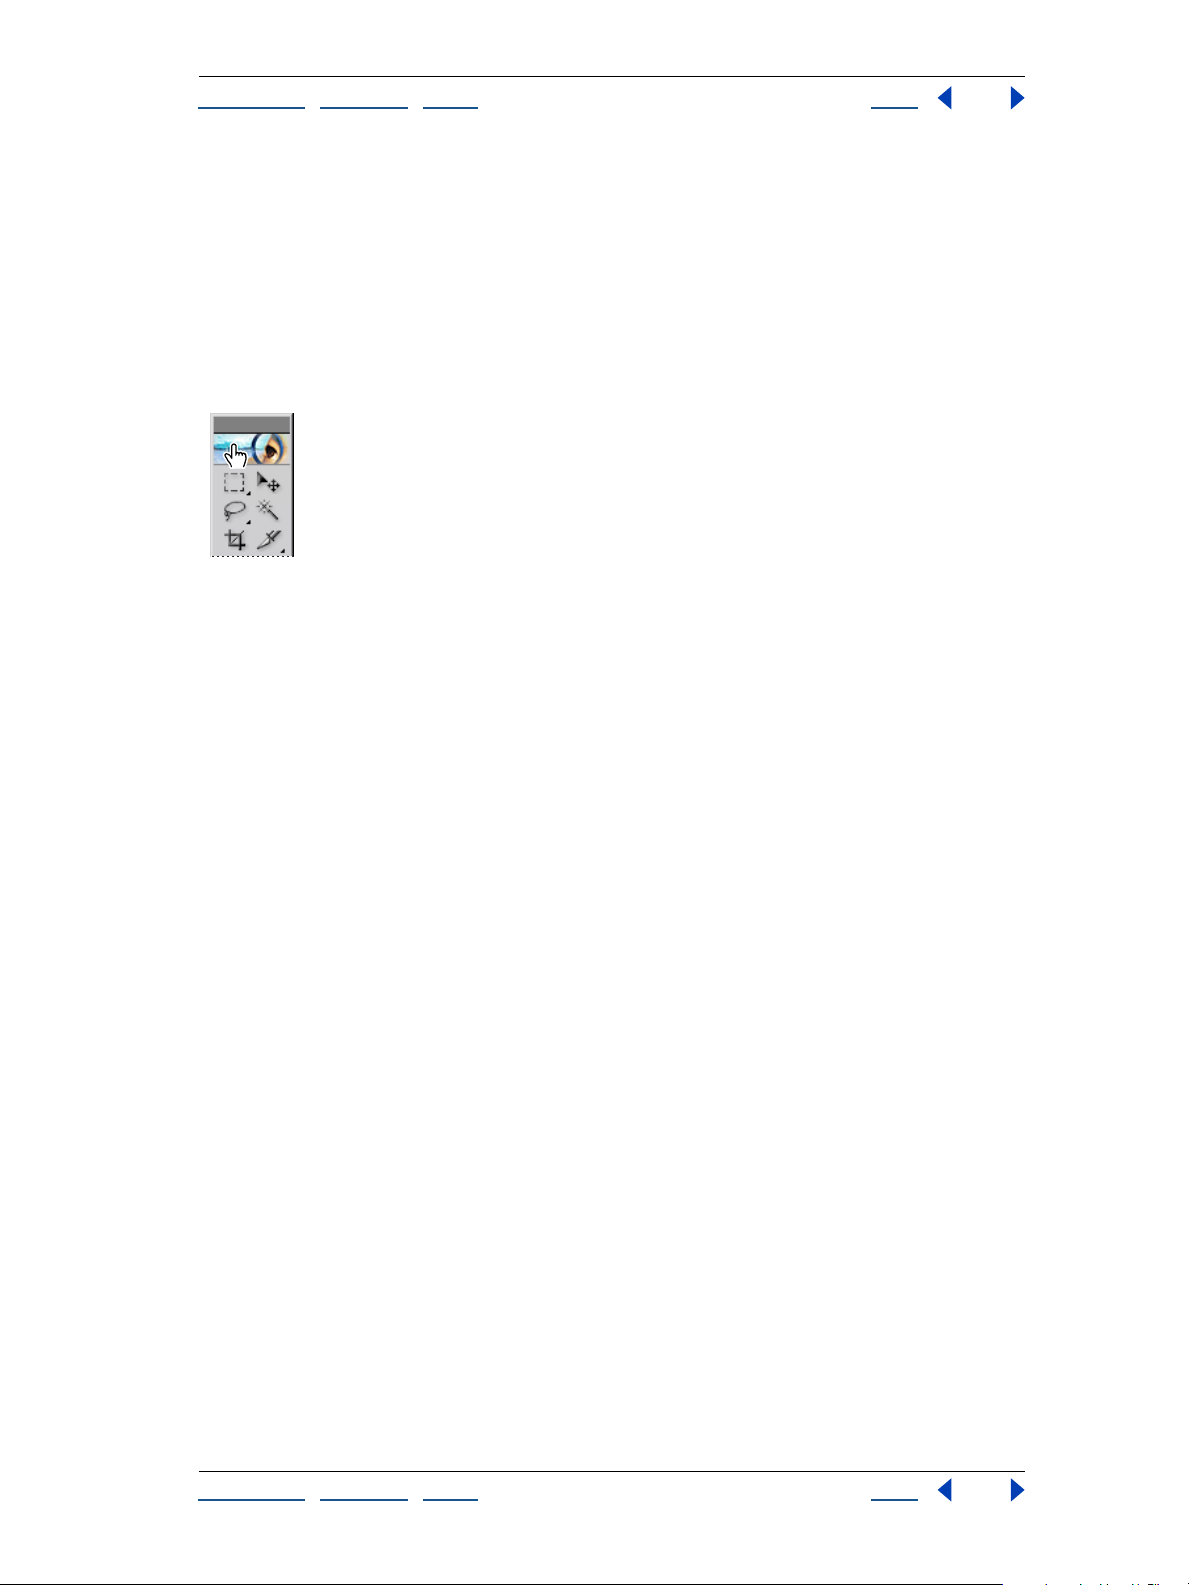
1 In Photoshop or ImageReady, choose Help > Adobe Online, or click the icon at the top
of the toolbox.
Adobe Online icon
Note: You must have an Internet connection to access Adobe Online. Adobe Online will
launch your browser using your default Internet configuration.
If prompted, do any of the following:
•
Click Updates to access updated files.
•
Click Preferences to set up your operating system to enable automatic updates.
Note: You can set Adobe Online preferences by choosing Edit > Preferences > Adobe
Online (Windows and Mac OS 9) or Photoshop > Preferences > Adobe Online (Mac OS X).
Click Go Online to access the Adobe Web site.
•
•
Click Cancel (Windows and Mac OS 9) or Close (Mac OS X) to return to Photoshop or
ImageReady.
Accessing Adobe Online through the Help menu
The Help menu includes options to view and download information from the Adobe Web
site.
To view updated articles or documents:
Click Help and choose the topic you want to view.
To view and download information from the Adobe Web site using the Help menu:
1 In Photoshop or ImageReady, choose Edit > Preferences > Adobe Online (Windows and
Mac OS 9) or Photoshop > Preferences > Adobe Online (Mac OS X).
Choose an item from the Check for Updates pop-up menu to determine how often
Photoshop launches an automatic update.
Choose Help > Updates.
Select a View Option:
•
Select New Updates to view only the files that are new since the last time you viewed
downloadable files or were notified of them.
•
Select All Updates to view all the files on Adobe’s Web site that are currently available.
U
sing Help | Contents | Index Back 8
Page 9

4
5
6
7
Adobe Photoshop Help Introduction
U
sing Help | Contents | Index Back 9
To see a description of a file, click on a filename and view its description in the Item
Description section.
To see the location where a file will be installed if downloaded, select a file and view its
location in the Download Location section. To change the location, click Choose.
To download a file, click the check box and then click Download.
To close the Adobe Product Updates dialog box, click Close.
Other learning resources
Other Adobe learning resources are available but are not included with your application.
Adobe Press Offers a library of books that provide in-depth training in Adobe software,
including the acclaimed Classroom in a Book series developed by experts at Adobe.
For information on purchasing Adobe Press titles, visit the Adobe Web site at
www.adobe.com, or contact your local book distributor.
The Adobe Certification program
opportunity to demonstrate their product proficiency and promote their software skills as
Adobe Certified Experts or Adobe Certified Training Providers. Certification is available
worldwide. Visit the Partnering with Adobe Web site at www.partners.adobe.com to learn
how you can become certified.
Offers users, instructors, and training centers the
Customer support
When you register your product, you may be entitled to technical support. Terms may vary
depending on the country of residence. For more information, refer to the technical
support card provided with the Photoshop documentation.
Customer support on Adobe Online
Adobe Online provides access to the Photoshop Knowledgebase, where you can find
answers to technical questions.
Additional customer support resources
Adobe Systems provides several forms of automated technical support:
•
See the ReadMe and ReadMe First! files installed with the program for information that
became available after this guide went to press.
•
Explore the extensive customer support information on Adobe’s World Wide Web site
(www.adobe.com). To access the Adobe Web site from Photoshop, choose Help >
Adobe Online or click the icon at the top of the toolbox. See “
page 7.
•
Read the Top Issues PDF that is available from the Help menu.
Using Web resources” on
U
sing Help | Contents | Index Back 9
Page 10
Adobe Photoshop Help An Overview of Adobe Photoshop
U
sing Help | Contents | Index Back 10
An Overview of Adobe Photoshop
Explore state-of-the-art tools
With its comprehensive set of retouching, painting, drawing, and Web tools, Photoshop
helps you complete any image-editing task efficiently. And with features like the History
palette and editable layer effects, you can experiment freely without sacrificing efficiency.
Work more efficiently
From file management to workspace controls to editing multiple steps at one time—
Photoshop gives you the tools you need to keep the work on track and bring it in on
deadline.
File Browser Quickly inspect images before opening them in Photoshop. The easy-to-
view File Browser displays thumbnails and metadata such as date modified, dimensions,
and EXIF information from your digital camera. You can also use the File Browser to sort
files and manage folders. See “
Layers With layers, you can work on one element without disturbing others. To rearrange
elements, simply shift the order in the Layers palette. You can lock layers to prevent
accidental changes, hide them to get a clear view of the element you’re working on, and
link layers to move them as a group. The Layers palette also makes it easy to apply instant,
editable effects including blending modes, adjustment layers, and layer effects. See “
the Layers palette” on page 284.
Options bar
you’re using. You can also customize any tool and save the customized version to use
again. See “
on page 27.
History palette Undo or redo multiple steps with the History palette. Or store a
snapshot—a temporary copy of the image—in the palette, and continue experimenting.
If you don’t like the results, simply return to the snapshot. You can also create multiple
snapshots, capturing different effects, to compare them easily. See “
palette” on page 39 and “Making a snapshot of an image (Photoshop)” on page 40.
Customizable workspace Personalize your Photoshop desktop by arranging a layout of
palettes and saving the arrangement as a workspace. Or create task-specific workspaces—
one to provide easy access to painting tools, for example, and another for photo
retouching. See “
The tool options bar gives you instant access to different settings for the tool
Using the tool options bar” on page 26 and “Using tool presets (Photoshop)”
Customizing your workspace” on page 29.
Using the File Browser (Photoshop)” on page 78.
Using
Using the History
Context-sensitive menus Get instant access to commands relevant to the active tool,
palette, or selection by right-clicking (Windows) or Control-clicking (Mac OS). See “
context menus” on page 33.
U
sing Help | Contents | Index Back 10
Using
Page 11

Adobe Photoshop Help An Overview of Adobe Photoshop
Using Help | Contents | Index Back 11
Edit images with ease
Photoshop delivers high-powered image editing, photo retouching, and compositing
tools to help you get professional-quality results.
Color correction Photoshop offers two basic methods for adjusting color in an image.
Use the options in the Image > Adjustments menu—including the Auto Color command,
which analyzes the image to make instant and reliable color corrections—to change the
image permanently. Or use an adjustment layer to apply editable color and tonal corrections. See “
(Photoshop)” on page 151, and “About adjustment layers and fill layers” on page 312.
Healing brush Effortlessly remove dust, scratches, blemishes, and other flaws with a
single tool. The healing brush automatically preserves the shading, lighting, and texture of
the original photo. See “
Selection tools From the click-and-drag marquee tools, to magnetic selection tools that
snap to the edges of an element, to the pen tool that lets you define a shape precisely,
Photoshop offers a range of shape-selection options. You can also select by color, using
the magic wand or the Color Range command. And the Extract command provides a
sophisticated way to isolate a foreground object from the background. See “
tions” on page 157.
Making color adjustments” on page 132, “Using the Auto Color command
Using the healing brush tool (Photoshop)” on page 189.
About selec-
Precision masking Masks let you hide part of an image, or protect and preserve one
section while you apply color changes, filters, or other effects to the rest of the artwork.
You can also use masks to save complex selection borders for reuse. See “
on page 314 and “About masks (Photoshop)” on page 277.
Clipping paths Use a clipping path to cut a foreground element away from the
background—without actually altering the original image. See “
paths to create transparency” on page 466.
Sharpening controls Photoshop’s sharpening tools include the powerful Unsharp Mask
filter, based on traditional film compositing techniques. Use Unsharp Mask after scaling,
rotating, color correcting—any process that affects the pixel structure of an image—to
bring the artwork into crisp focus. See “
Edge smoothing Use the anti-aliasing option to smooth the jagged edges of a selection,
or apply feathering to create soft edges. See “
page 166.
Contact sheet generation Export an entire folder of images on a single page to allow
easy cataloging, previewing, and printing. Or use the Picture Package feature to print
photos of different sizes on the same page. See “
(Photoshop)” on page 464.
Web photo display Showcase your work online by posting a Web photo gallery. You’ll
find a collection of ready-made templates on the Photoshop CD to make the job quick and
easy—and you can stamp each image with copyright text to help protect against illegal
downloads. See “
Creating Web photo galleries (Photoshop)” on page 390.
Sharpening images” on page 155.
Softening the edges of a selection” on
Creating multiple-image layouts
Using image clipping
Masking layers”
Using Help | Contents | Index Back 11
Page 12

Adobe Photoshop Help An Overview of Adobe Photoshop
Using Help | Contents | Index Back 12
Enjoy unlimited creative options
With innovative special-effect options and powerful painting and drawing tools, there’s no
limit to the results you can achieve with Photoshop.
Painting tools The powerful Photoshop paint engine lets you simulate traditional
painting techniques, including charcoal, pastel, and wet or dry brush effects. Choose from
the many preset brush styles on the Photoshop CD, or use the Brushes palette to create
your own unique effects. See “
brushes” on page 228.
Drawing tools Draw resolution-independent vector shapes instantly with the line,
rectangle, ellipse, polygon, and custom shape tools. Or use the pen tool to draw just as
you would in Adobe Illustrator. Because they’re vector shapes, you can edit them easily.
See “
Drawing shapes and paths” on page 200.
Layer effects Shadows, glows, bevels, embossed effects, and more—with the Layer
Styles dialog box, adding three-dimensional effects to a layer is quick and easy. You can
apply any combination of layer effects, then save the combination as a style and apply it to
other layers instantly. To edit or delete the effect, simply open the Layer Styles dialog box
and change the settings. See “
Working with brushes” on page 228 and “Selecting preset
Using layer effects and styles” on page 301.
Color effects Choose solid colors from swatch libraries, define your own colors in Color
palette, or use the gradient tools to create a gradual blend between multiple colors. Use
the Layers palette to change the opacity of an image or to apply a blending mode that
affects the way the color in one layer interacts with the layers below. See “
gradient tool (Photoshop)” on page 244 and “Setting opacity and blending options” on
page 295.
Filters Photoshop includes more than 95 special effect filters—from fine-art effects,
to motion blurs, to lighting effects and distortions.See “
page 321.
Pattern Maker Create seamless patterns automatically. Simply make a selection and
apply the Pattern Maker plug-in to generate textures and background patterns.
Generating patterns” on page 254.
See “
Transformation tools Scale, rotate, distort, or skew images easily. Apply the 3D
Transform filter to simulate three-dimensional effects such as jar labels and boxes. Use the
Liquify command to interactively push, pull, pucker, or bloat an image. See “
objects in two dimensions” on page 181, “Transforming objects in three dimensions” on
page 186, and “Using the Liquify command” on page 194.
Previewing and applying filters” on
Using the
Transforming
Create compelling Web designs
Produce exceptional imagery for the Web and wireless devices with Photoshop and
ImageReady, which ships with Photoshop.
Slicing Use the slice tool to create slices by hand, or generate layer-based slices automatically. Apply slice-by-slice formatting and optimization to keep file size small and image
quality high. See “
Creating and viewing slices” on page 368.
Optimization tools The Photoshop Save for Web dialog box and the ImageReady
Optimization palette display a side-by-side comparison of format and compression
options and let you apply weighted optimization to keep vector edges—type and logos,
for example—crisp and clean. See “
optimization” on page 428.
Using Help | Contents | Index Back 12
Optimizing images” on page 415 and “Using weighted
Page 13

Adobe Photoshop Help An Overview of Adobe Photoshop
Using Help | Contents | Index Back 13
Rollovers palette Use one convenient palette to view the entire set of rollovers, slices,
image maps, and animations in a document, making authoring and navigation easier.
See “
Using the Rollovers palette” on page 398.
Transparency Apply instant transparency to Web page elements by knocking out one or
more colors. Or apply dithered transparency to create edges that blend into any Web
background. See “
Quick GIF animations Start with a layered Photoshop file, and use the Animation palette
in ImageReady to convert individual layers into frames. Then apply the Tween command
to generate additional frames and smooth out the action. See “
animations” on page 404.
Link generation To create a URL link, simply select an Image slice—a slice with image
data or a rollover state—and enter a URL in the Photoshop Slice Options dialog box or the
ImageReady Slice palette. See “
About optimization” on page 415.
Creating and editing
Assigning a URL to an Image slice” on page 379.
Enjoy precise typographic control
Photoshop delivers professional-quality type controls to help you create imagery that
communicates with precision and style.
Editable text Te xt retains its crisp vector edges—and its editability—unless you rasterize
it (by applying a filter, for example, or flattening the layers). You can distort it, warp it, and
apply layer effects and still use the type tool to retype the text. See “
layers” on page 345.
Formatting Use the Character and Paragraph palettes for precise control over individual
letters and paragraph formatting. See “
“
Formatting paragraphs” on page 358.
Spelling checker Avoid misspelled words with the built-in spelling checker, which
includes search-and-replace functionality. You can even check spelling in multiple
languages within the same file—to help you create buttons for multilingual Web sites,
for example. See “
Convert to Shapes Use the Convert to Shapes command to turn type into an instant
vector mask. See “
Checking for spelling errors (Photoshop)” on page 357.
Converting type to shapes (Photoshop)” on page 349.
Formatting characters” on page 349 and
Working with type
Stay ahead of deadlines
Photoshop helps you streamline your workflow and meet any production challenge with
tools like the File Browser that lets you manage files and folders conveniently.
Automate repetitive tasks
Streamline and simplify the production process by turning time-consuming jobs into
automated operations.
Data-driven graphics Automate the production of repetitive artwork—such as business
cards or Web banners—with the Variables feature. Design a template in Photoshop, set
elements in the template as variables, and then generate an unlimited number of unique
variations quickly by using scripts to replace the variable elements. See “
driven graphics” on page 501.
Using Help | Contents | Index Back 13
About data-
Page 14

Adobe Photoshop Help An Overview of Adobe Photoshop
Using Help | Contents | Index Back 14
File browser Use the File Browser to quickly organize and retrieve images from your hard
drive, external drives, CDs, and disks directly. Rotate images before opening them, batch
rename, sort files, and manage image folders—all within the File Browser. The File Browser
also displays image metatada, such as date created, date modified, and Exchangeable
Image File (EXIF) information from digital cameras. See “
(Photoshop)” on page 78.
Actions Automate routine tasks such as batch processing by recording the steps as an
action. Then simply click a button in the Actions palette to apply the action to other
projects. For everyday jobs, turn the action into a droplet. Save the droplet on your
desktop so that you can simply drag-and-drop to apply the action to individual files or
folders of images. See “
Metadata support Repurpose, archive, or automate files in a workflow using XMP
(Extensible Metadata Platform) format to embed metadata into a document. You can also
ensure that image information—such as caption, credits, and copyright—travel with the
file. See “
Adding file information (Photoshop)” on page 459.
About actions” on page 484 and “Using droplets” on page 496.
Using the File Browser
Develop a reliable workflow
Keep files moving efficiently from the beginning of the process to the end.
Cross-platform compatibility Complete cross-platform support ensures a smooth
workflow between Windows and Mac OS systems.
WebDAV support Connect Photoshop to a WebDAV server, and enjoy the benefits of
workgroup management. You can streamline collaboration by making sure the entire
team has access to the files they need—with no fear that anyone will overwrite updates.
Managing files with WebDAV (Photoshop)” on page 82.
See “
Annotation tools Attach non-printing review comments or production notes to your
Photoshop file with the notes tool, or use the audio annotation tool to record a voice
message. See “
PDF security Protect your images by assigning passwords to your Photoshop PDF files.
Use passwords to keep unauthorized people from opening a document or to disable
printing and editing. See “Saving files in Photoshop PDF format (Photoshop)” on
page 450.
Tight integration The familiar Adobe interface makes it easy to use Photoshop in
tandem with other Adobe software. See “
on page 18.
Annotating images (Photoshop)” on page 50.
Take advantage of tighter-than-ever integration”
Maintain color precisely
Keep color consistent across different devices and count on reliable output to any media.
Color management Photoshop simplifies color management by gathering the controls
into the Color Settings dialog box and providing predefined settings for the most
common workflows. See “
color management settings” on page 105, and “Soft-proofing colors” on page 113.
Setting up color management” on page 104, “Using predefined
Using Help | Contents | Index Back 14
Page 15

Adobe Photoshop Help An Overview of Adobe Photoshop
Using Help | Contents | Index Back 15
Color options Whether you’re creating artwork for print or Web, Photoshop lets you
choose the color mode that’s best for the job. When you’re creating imagery for four-color
printing, you can work more efficiently—and use a wider range of filters—by creating the
art in RGB mode. Use the Gamut Warning command to identify colors that can’t be reproduced in CYMK so you won’t be disappointed with the results when you convert the
finished, flattened file to CMYK.See “
About color modes and models (Photoshop)” on
page 86 and “Identifying out-of-gamut colors (Photoshop)” on page 136.
Precision print controls Photoshop gives you precise controls for printing full-color
images, spot colors, duotones, or grayscale and black-and-white art. For high-end
prepress workflows, there are even controls for dot gain, black-plate generation, and
more. See “
“
Printing duotones” on page 479, and “Setting output options” on page 473.
Printing images” on page 470, “Adding spot colors (Photoshop)” on page 272,
Using Help | Contents | Index Back 15
Page 16
Adobe Photoshop Help What’s New in Photoshop 7.0
Using Help | Contents | Index Back 16
What’s New in Photoshop 7.0
Meet every challenge
Photoshop 7.0 rounds out its comprehensive toolset with new capabilities that help you
meet every creative challenge, master every production demand, and handle any imageediting task efficiently.
File Browser Search for images visually and intuitively rather than just by filename. With
the easy-to-view thumbnails in the File Browser window, you can quickly organize and
retrieve images from your hard drive, external drives, CDs, and disks directly within
Photoshop. The File Browser also displays image metatada, such as date created, date
modified, and Exchangeable Image File (EXIF) information from digital cameras. Rotate
images, batch rename, sort files, and manage image folders—all within the File Browser.
See “
Using the File Browser (Photoshop)” on page 78.
Healing brush Effortlessly remove dust, scratches, blemishes, and wrinkles from your
photographs, using only one tool. Unlike other cloning tools, the healing brush preserves
the original shading, tonality, and texture in the retouched area. Use the related patch tool
to work with selections. See “
Web transparency Make Web page elements transparent in Photoshop and ImageReady
by simply clicking on the color you want to knock out. And with the new dithered transparency option, you can apply partial transparency to blend Web graphics seamlessly into
any background—even patterns—without having to select a matte color first. If you need
to edit the transparent effects later, you can remap more than one color at a time and
easily restore colors to their original settings. See “
Enhanced Web output Keep vector art and text looking crisp by letting Photoshop or
ImageReady automatically assign a higher priority to those areas when you optimize an
image for the Web. See “
WBMP support Preview and save for Web in WBMP format, commonly used for
displaying images on PDAs and wireless devices. See “
format” on page 424.
Rollovers palette Use one convenient palette to create, view, and set rollover states.
Add a layer-based rollover to a Web page by simply clicking a button, and use the Selected
state option in the Rollovers palette to add sophisticated interactivity, with no need for
Java scripting. For example, you can create navigation bars that trigger different rollover
effects simultaneously. The Rollovers palette also displays all the slices, rollovers, image
maps, and animations in a file, making it easy to get a quick overview of all the document
states. See “
Using the Rollovers palette” on page 398.
Using the healing brush tool (Photoshop)” on page 189.
About optimization” on page 415.
Using weighted optimization” on page 428.
Optimization options for WBMP
Using Help | Contents | Index Back 16
Page 17

Adobe Photoshop Help What’s New in Photoshop 7.0
Using Help | Contents | Index Back 17
Workspaces Customize your Photoshop working environment by creating a palette
layout and then saving the layout as a workspace. If you share a computer, saving a
workspace lets you instantly access your personalized Photoshop desktop each time you
sit down to work. You can also create workspaces for specific tasks—one for painting and
another for photo retouching or Web work, for example. See “
workspace” on page 29.
To ol presets Customize any tool and save your settings as a new, unique tool. Access
your presets instantly from the options bar or the new tool Presets palette, which lets you
view presets for all your tools in one convenient place. See “
(Photoshop)” on page 27.
Auto Color command With the new Auto Color command, color correction has never
been easier—and Auto Color provides more reliable results than Auto Levels or Auto
Contrast. See “
Data-driven graphics Whether you’re creating corporate business cards, an online
catalog with hundreds of photos and descriptions, or a direct-mail piece with customized
data, the new data-driven graphics features in ImageReady let you combine visual sophistication with automated production. Design a template and use the Layers palette to
designate key elements as variables. Then use scripts, a Web production tool such as
GoLive, or an image server such as Adobe AlterCast® to replace the variables with text or
images pulled from an ODBC-compliant database. See “
page 501.
Using the Auto Color command (Photoshop)” on page 151.
Customizing your
Using tool presets
About data-driven graphics” on
Stay competitive
Photoshop 7.0 delivers new and enhanced tools to help you achieve your creative best.
Experiment with sophisticated painting effects and patterns to turn your ideas into
images that stand out.
New paint engine Create and save custom brushes with a powerful new paint engine
that lets you adjust dozens of different brush settings—including size, shape, tilt, spacing,
scatter, and jitter—to get precisely the effect you want. You can even simulate different
canvas and paper textures. See “
dynamics (Photoshop)” on page 231.
Art studio brushes In addition to the brushes you create yourself, you can use the preset
brushes included on the Photoshop CD to simulate traditional wet and dry brush painting
techniques to duplicate the fine-art effects such as charcoal or pastel. There are also
special brushes for effects such as grass and leaves. See “
page 228.
Pattern Maker Simply make a selection and apply the Pattern Maker plug-in to generate
abstract patterns or realistic textures such as sand or rocks. The plug-in performs a sophisticated analysis of your selection to avoid repetition and seamlessly tile the image. Use the
patterns to create compelling Web backgrounds, enhance printed or on-screen artwork,
or produce unique new imagery in combination with the painting engine. See “
ating patterns” on page 254.
Working with brushes” on page 228 and “About brush
Selecting preset brushes” on
Gener-
Using Help | Contents | Index Back 17
Page 18

Adobe Photoshop Help What’s New in Photoshop 7.0
Using Help | Contents | Index Back 18
Liquify enhancements The enhanced Liquify plug-in gives you greater control over
image warping with zoom, pan, and multiple undo. You can also save your meshes, which
lets you return to an image after experimenting with the Liquify tools and start where you
left off. Or apply the same mesh to different images; experiment on a low-resolution
image, for example, and then apply the mesh to a high-resolution version. Create effects
such as smoke or fire with the new Turbulence brush. Use the new backdrop option to
view individual layers or a flattened version of the file so that you can see your distortions
in context as you create them. See “
Using the Liquify command” on page 194.
Wo rk with confidence
Photoshop 7.0 provides new controls and security settings for superior images, precise
output, and worry-free file sharing.
PDF security Photoshop 7.0 offers complete support for Adobe Acrobat 5.0 security
settings, allowing you to add tighter security to your Photoshop PDF files before sharing
them with others online or adding them to an Adobe PDF workflow. You can set password
protection to keep users who don’t know the password from opening the file. Or set one
password to open the file and another to allow printing or editing. See “
Photoshop PDF format (Photoshop)” on page 450.
Saving files in
Picture Package enhancements Save time and money when printing by using Picture
Package to print multiple images on one page. Enhancements to Photoshop 7.0 let you
print to different page sizes, add labels or text to each image, print more than one image
per page, and output images as one flattened document or to separate layers. See
“
Creating multiple-image layouts (Photoshop)” on page 464.
Web photo gallery enhancements Showcase your work online quickly and easily by
posting a gallery of images. Photoshop 7.0 offers sophisticated new templates to give you
more design flexibility, and a new security option lets you enter text or embed the
filename, caption, or copyright information on the image as a watermark. See “
Web photo galleries (Photoshop)” on page 390.
XMP support XMP (Extensible Metadata Platform) format lets you embed metadata
into a document so that you can easily repurpose, archive, or automate files in a workflow.
You can also ensure that image information—such as caption, credits, and copyright—
travel with the file. See “
Multilingual spelling checker Search and replace text, check spelling in multiple
languages within the same file, and correct spelling on one text layer or across all text
layers in the same document. See “
Adding file information (Photoshop)” on page 459.
Checking for spelling errors (Photoshop)” on page 357.
Creating
Ta ke advantage of tighter-than-ever integration
Work more efficiently, thanks to tight integration between Photoshop and the latest
releases in Adobe’s family of professional graphics software.
Illustrator Move files freely between Photoshop and Adobe Illustrator—layers, masks,
transparency, and compound shapes are preserved. Maintain rollovers and animation
information when you import Photoshop files into Illustrator, and export Illustrator HTML
tables with CSS layers to Photoshop.
Using Help | Contents | Index Back 18
Page 19

Adobe Photoshop Help What’s New in Photoshop 7.0
Using Help | Contents | Index Back 19
InDesign Paste or drop native Photoshop files into Adobe InDesign—even layered
images. Paths, masks, and alpha channels in the Photoshop file can be used to remove
image backgrounds or to create text wraps in the InDesign document.
GoLive Design and slice your Web page in Photoshop and then bring the sliced file
directly into GoLive. Use the GoLive Smart Objects feature to generate variable designs
automatically from Photoshop templates.
LiveMotion Drag and drop layered Photoshop files into a LiveMotion composition and
quickly convert them into animation-ready independent objects, groups, or sequences.
Photoshop blending modes, layer masks, and effects are preserved, and the Photoshop
artwork stays editable as you animate and code.
Acrobat Include transparency information in PDF files saved out of Photoshop, add
password protection to secure your Photoshop PDF files, and use the Include Vector Data
option to preserve text and vector graphics as resolution-independent objects.
AlterCast When you want to automate the production of dynamic data-driven graphics,
Adobe AlterCast is the perfect tool. This new image server software (available only in
English) automatically replaces the variables—both text and graphics—in your
Photoshop templates.
Using Help | Contents | Index Back 19
Page 20
Adobe Photoshop Help Looking at the Work Area
Using Help | Contents | Index Back 20
Looking at the Work Area
Getting familiar with the work area
The Photoshop and ImageReady work area is arranged to help you focus on creating and
editing images.
About the work area
The work area consists of the following components:
Menu bar The menu bar contains menus for performing tasks. The menus are organized
by topic. For example, the Layers menu contains commands for working with layers.
Options bar The options bar provides options for using a tool. (See “
options bar” on page 26.)
To olbox The toolbox holds tools for creating and editing images. (See “
on page 24.)
Using the tool
Using the tools”
Palette well (Photoshop) The palette well helps you organize the palettes in your work
area. (See “
Palettes Palettes help you monitor and modify images. (See “
Using the palette well (Photoshop)” on page 26.)
Using palettes” on page 28.)
Using the toolbox
The first time you start the application, the toolbox appears on the left side of the screen.
Some tools in the toolbox have options that appear in the context-sensitive tool options
bar. (See “
type, select, paint, draw, sample, edit, move, annotate, and view images. Other tools in the
toolbox allow you to change foreground/background colors, go to Adobe Online, work in
different modes, and jump between Photoshop and ImageReady applications.
For more information on the foreground and background color controls, see “
foreground and background colors” on page 257.
Using the tool options bar” on page 26.) These include the tools that let you use
Choosing
Using Help | Contents | Index Back 20
Page 21
Adobe Photoshop Help Looking at the Work Area
Using Help | Contents | Index Back 21
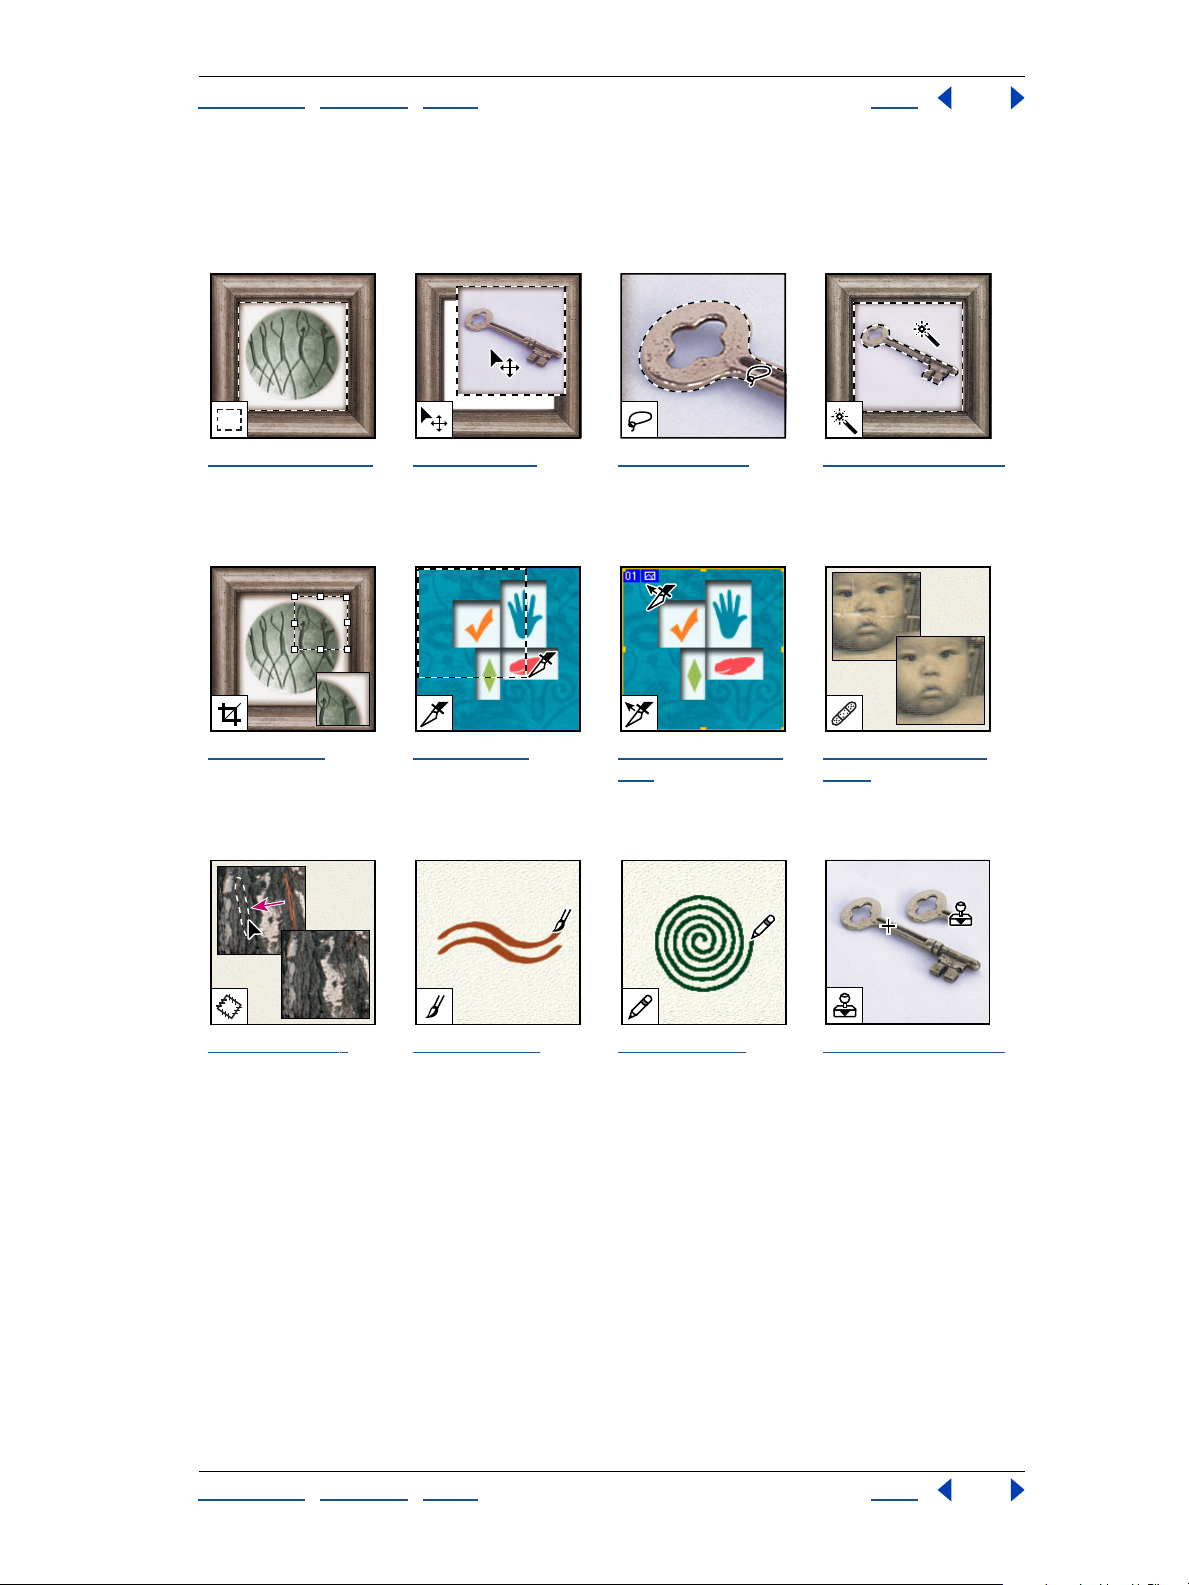
To olbox overview (1 of 3)
* Photoshop only
§
ImageReady only
The marquee tools
make rectangular,
elliptical, single row,
and single column
selections.
The crop tool trims
images.
The move tool moves
selections, layers, and
guides.
The slice tool creates
slices.
The lasso tools make
freehand, polygonal
(straight-edged), and
magnetic * (snap-to)
selections.
The slice selection
tool selects slices.
The magic wand tool
selects similarly
colored areas.
The healing brush
tool * paints with a
sample or pattern to
repairs imperfections
in a image.
The patch tool *
repairs imperfections
in a selected area of an
image using a sample
or pattern.
The brush tool paints
brush strokes.
The pencil tool paints
hard-edged strokes.
The clone stamp tool
paints with a sample
of an image.
Using Help | Contents | Index Back 21
Page 22
Adobe Photoshop Help Looking at the Work Area
Using Help | Contents | Index Back 22
The pattern stamp
tool * paints with part
of an image as a
pattern.
The history brush
tool * paints a copy of
the selected state or
snapshot into the
current image
window.
To olbox overview (2 of 3)
* Photoshop only
§
ImageReady only
The eraser tool
erases pixels and
restores parts of an
image to a previously
saved state.
The background
eraser tool * erases
areas to transparency
by dragging.
The art history brush
tool * paints with
stylized strokes that
simulate the look of
different paint styles,
using a selected state
or snapshot.
The gradient tools
create straight-line,
radial *, angle *,
reflected *, and
diamond *, blends
between colors.
The magic eraser
tool erases solid-
colored areas to transparency with a single
click.
The paint bucket
tool fills similarly
colored areas with the
foreground color.
The blur tool blurs
hard edges in an
image.
The sharpen tool
sharpens soft edges in
an image.
The smudge tool
smudges data in an
image.
The dodge tool
lightens areas in an
image.
Using Help | Contents | Index Back 22
Page 23
Adobe Photoshop Help Looking at the Work Area
Using Help | Contents | Index Back 23
The burn tool
darkens areas in an
image.
The type mask
tools * create a
selection in the shape
of type.
The sponge tool
changes the color
saturation of an area.
The pen tools * let
you draw smoothedged paths.
To olbox overview (3 of 3)
* Photoshop only
§
ImageReady only
The path selection
tools * make shape or
segment selections
showing anchor
points, direction lines,
and direction points.
The custom shape
tool * makes
customized shapes
selected from a
custom shape list.
The type tools create
type on an image.
The annotation
tools * makes notes
and audio annotations that can be
attached to an image.
The eyedropper tool
samples colors in an
image.
The measure tool *
measures distances,
locations, and angles.
The hand tool moves
an image within its
window.
The zoom tool
magnifies and
reduces the view of an
image.
Using Help | Contents | Index Back 23
Page 24
Adobe Photoshop Help Looking at the Work Area
Using Help | Contents | Index Back 24
The image map
tools § define image
map areas in an
image.
The preview
document tool §
previews rollover
effects directly in
ImageReady.
The image map
select tool § selects
image maps.
The preview in
default browser
tool § previews
animations in a Web
browser.
The toggle image
map visibility tool §
toggles between
showing and hiding
image maps.
The toggle slices
visibility tool §
toggles between
showing and hiding
slices in an image.
Using the tools
You select a tool by clicking its icon in the toolbox. A small triangle at the lower right of a
tool icon indicates hidden tools. Positioning the pointer over a tool displays a tool tip with
the tool’s name and keyboard shortcut.
To show or hide the toolbox:
Choose Window > Tools. A check mark indicates the item is showing.
To move the toolbox:
Drag the toolbox by its title bar.
To select a tool:
Do one of the following:
• Click its icon or press its keyboard shortcut. If the icon has a small triangle at its lower
right corner, hold down the mouse button to view the hidden tools. Then, click the tool
you want to select.
• Press the tool’s keyboard shortcut. The keyboard shortcut is displayed in its tool tip.
To cycle through hidden tools:
Hold down Shift and press the tool’s shortcut key.
Using Help | Contents | Index Back 24
Page 25

Adobe Photoshop Help Looking at the Work Area
Using Help | Contents | Index Back 25
To enable or disable cycling through a set of hidden tools (Photoshop):
1 Do one of the following:
• In Windows or Mac OS 9.x, choose Edit > Preferences > General.
• In Mac OS X, choose Photoshop > Preferences > General.
2 Select or deselect Use Shift Key for Tool Switch.
To display or hide tool tips:
1 Do one of the following:
• In Windows or Mac OS 9.x, choose Edit > Preferences > General.
• (Photoshop) In Mac OS X, choose Photoshop > Preferences > General.
• (ImageReady) In Mac OS X, choose ImageReady > Preferences > General.
2 Select or deselect Show Tool Tips.
Using the tool pointers
When you select most tools, the mouse pointer matches the tool’s icon. The marquee
pointer appears by default as cross hairs, the text tool pointer as an I-beam, and painting
tools default to the Brush Size icon.
Each default pointer has a different hotspot, where an effect or action in the image begins.
With all tools except the move tool, annotation tools, and the type tool, you can switch to
precise cursors, which appear as cross hairs centered around the hotspot.
To set the tool pointer appearance:
1 Do one of the following:
• (Photoshop) In Windows or Mac OS 9.x, choose Edit > Preferences > Display & Cursors.
• (Photoshop) In Mac OS X, choose Photoshop > Preferences > Display & Cursors.
• (ImageReady) In Windows or Mac OS 9.x, choose Edit > Preferences > Cursors.
• (ImageReady) In Mac OS X, choose ImageReady > Preferences > Cursors.
2 Choose a tool pointer setting:
• Click Standard under Painting Cursors, Other Cursors, or both to display pointers as
tool icons.
• Click Precise under Painting Cursors, Other Cursors, or both to display pointers as
cross hairs.
• Click Brush Size under Painting Cursors to display the painting tool cursors as brush
shapes representing the size of the current brush. Brush Size cursors may not display for
very large brushes.
3 Click OK.
The Painting Cursors options control the pointers for the following tools:
• (Photoshop) Eraser, pencil, paintbrush, healing brush, rubber stamp, pattern stamp,
smudge, blur, sharpen, dodge, burn, and sponge tools.
• (ImageReady) Paintbrush, pencil, and eraser tools.
Using Help | Contents | Index Back 25
Page 26
Adobe Photoshop Help Looking at the Work Area
Using Help | Contents | Index Back 26
The Other Cursors options control the pointers for the following tools:
• (Photoshop) Marquee, lasso, polygon lasso, magic wand, crop, slice, patch, eyedropper,
pen, gradient, line, paint bucket, magnetic lasso, magnetic pen, measure, and color
sampler tools.
• (ImageReady) Marquee, lasso, magic wand, eyedropper, paint bucket, and slice tools.
To toggle between standard and precise cursors in some tool pointers, press Caps
Lock. Press Caps Lock again to return to your original setting.
Using the tool options bar
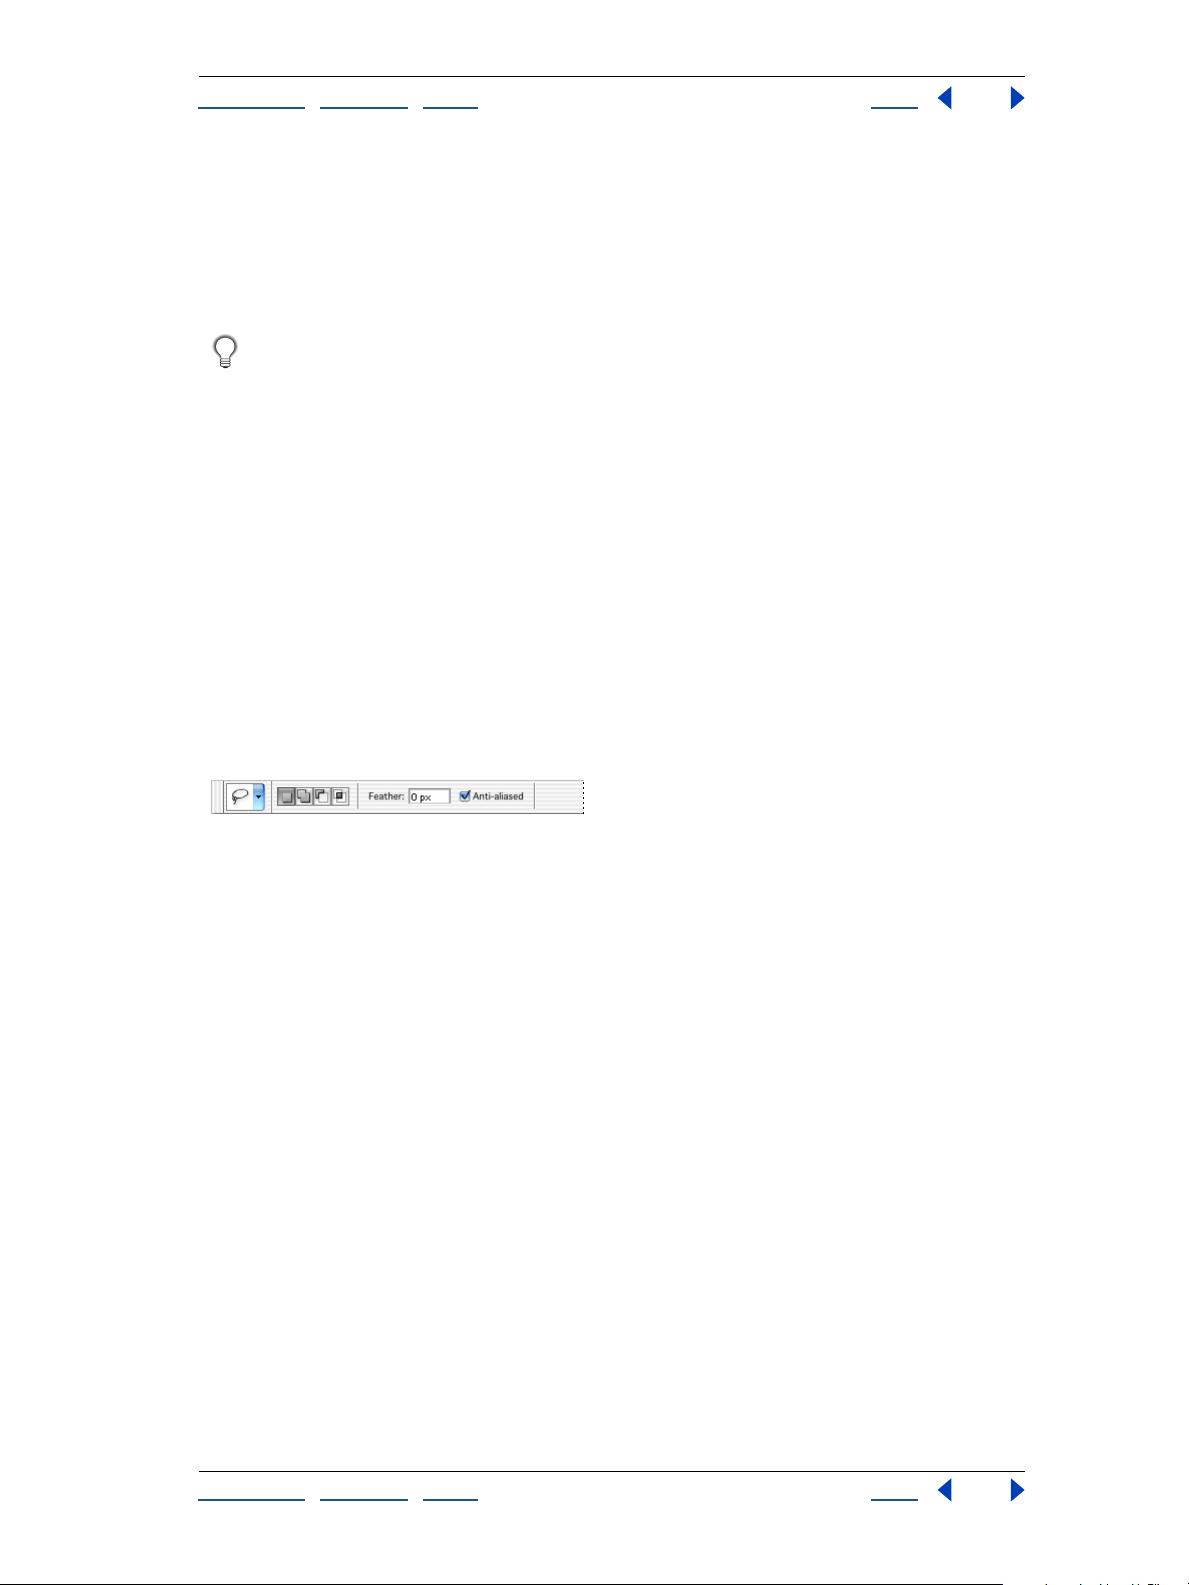
Most tools have options that are displayed in the tool options bar. The options bar is
context sensitive and changes as different tools are selected. Some settings in the options
bar are common to several tools (such as painting modes and opacity), and some are
specific to one tool (such as the Auto Erase setting for the pencil tool).
You can move the options bar anywhere in the work area, and dock it at the top or bottom
of the screen.
To display the tool options bar:
Do one of the following:
• Choose Window > Options.
• Click a tool in the toolbox.
Lasso options bar
To return a tool or all tools to the default settings:
Do one of the following:
• Click the tool icon on the options bar, then choose Reset Tool or Reset All Tools from the
context menu.
• (ImageReady) In Windows or Mac OS 9.x, choose Edit > Preferences > General, then click
Reset All Tools.
• (ImageReady) In Mac OS X, choose ImageReady > Preferences > General, then click
Reset All Tools.
To move the options bar:
Drag the options bar by the gripper bar at its left edge.
Using the palette well (Photoshop)
The Photoshop options bar includes a palette well that helps you organize and manage
palettes. The palette well is only available when using a screen resolution greater than
800 pixels x 600 pixels (a setting of at least 1024 x 768 is recommended).
Palettes are considered hidden when stored in the palette well. Clicking on the title of a
palette stored in the well shows the palette until you click outside the palette.
Using Help | Contents | Index Back 26
Page 27
Adobe Photoshop Help Looking at the Work Area
Using Help | Contents | Index Back 27
To store palettes in the palette well:
Drag the palette’s tab into the palette well so that the palette well is highlighted.
Docking a palette in the tool options bar
To use a palette in the palette well:
Click the palette’s tab. The palette remains open until you click outside it or click in the
palette’s tab.
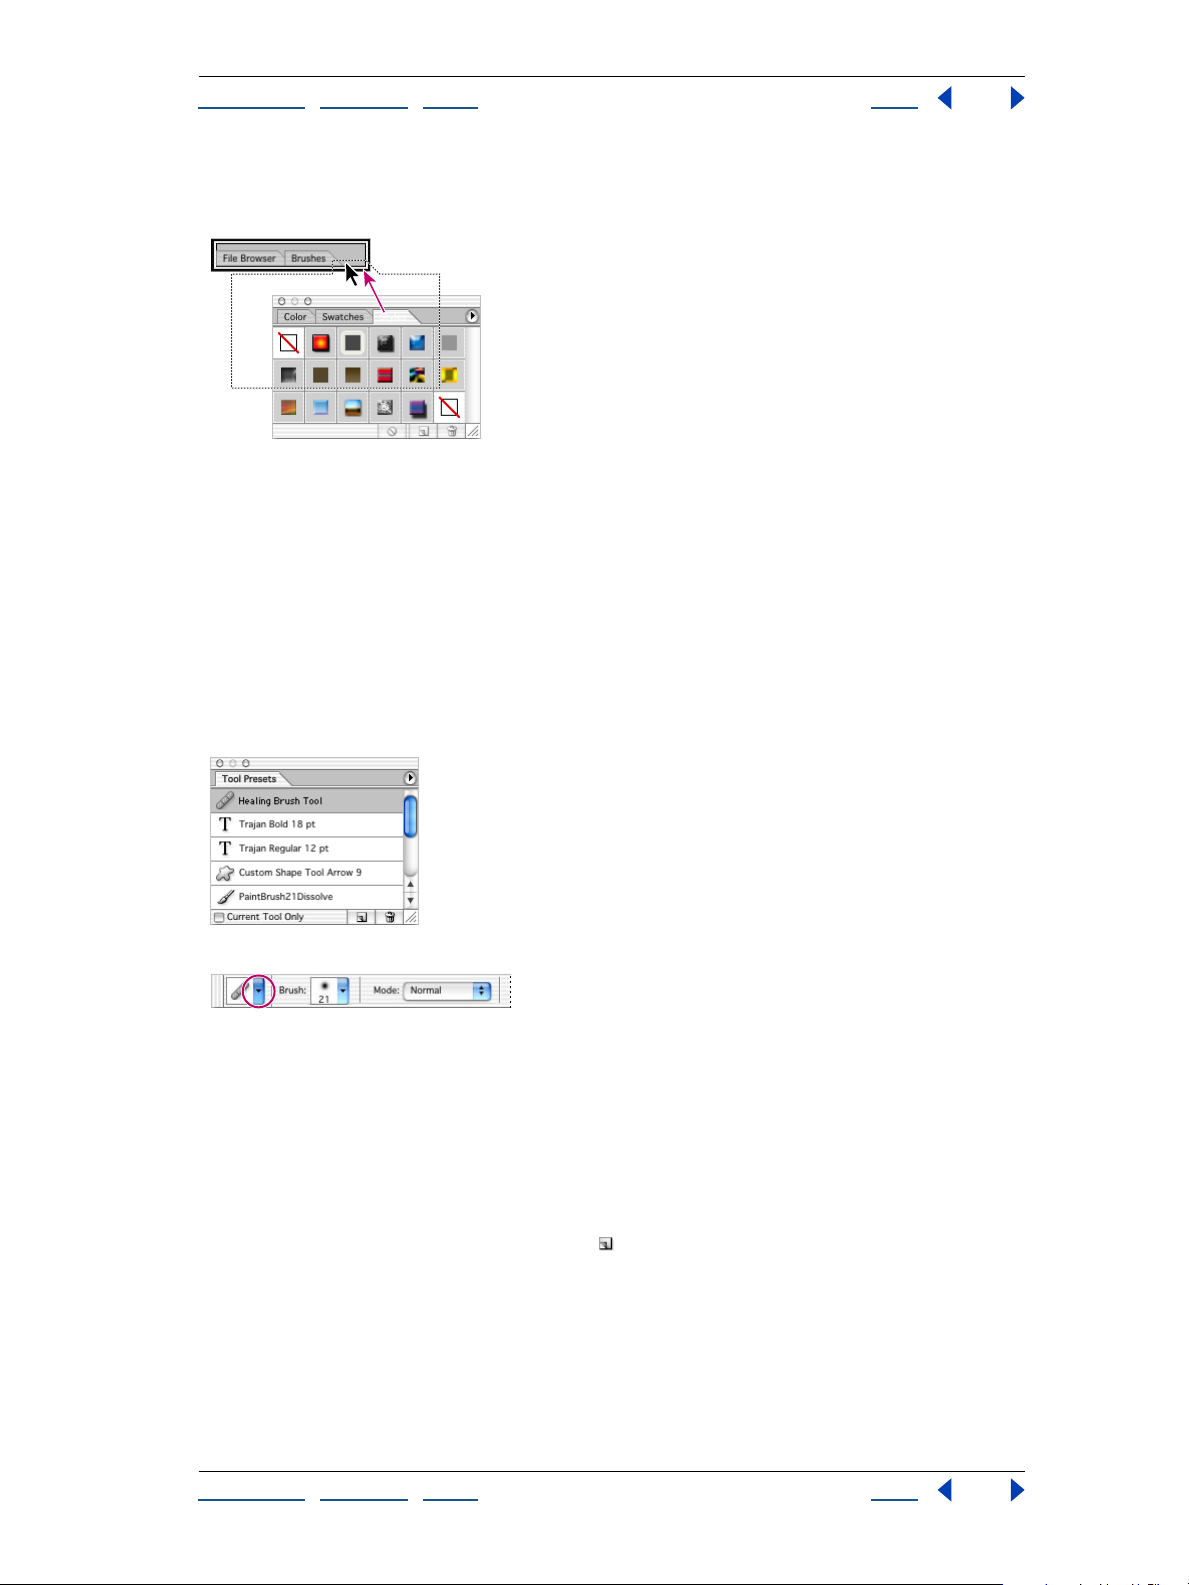
Using tool presets (Photoshop)
Tool presets let you save and reuse tool settings. You can load, edit, and create libraries of
tool presets using the Tool Preset picker in the options bar, the Tool Presets palette, and
the Preset Manager.
Tool Presets palette with All option selected
Tool Preset picker in the options bar
To create a tool preset:
1 Choose a tool, and set the options you want in the options bar.
2 Click the Tool Preset button on the left side of the options bar, or choose Window > Tool
Presets to display the Tool Presets palette.
3 Do one of the following:
• Click the Create New Tool Preset button .
• Choose New Tool Preset from the palette menu.
4 Enter a name for the tool preset, and click OK.
Using Help | Contents | Index Back 27
Page 28

Adobe Photoshop Help Looking at the Work Area
Using Help | Contents | Index Back 28
To choose a tool preset:
Do one of the following:
• Click the Tool Preset button in the options bar, and select a preset from the pop-up
palette.
• Choose Window > Tool Presets, and select a preset.
To change the list of presets in the Tool Preset pop-up palette:
Do one of the following:
• To show all loaded presets, choose Show All Tool Presets from the palette menu.
• To sort the presets by tool, choose Sort By Tool from the palette menu.
• To show only the loaded presets for the active tool, choose Show Current Tool Presets
from the palette menu, or click the Current Tool Only button.
• To create, load, and manage libraries of tool presets, see “Using pop-up palettes” on
page 31 and “Managing libraries with the Preset Manager (Photoshop)” on page 54.
• To change the display of presets in the pop-up palette, choose Text Only, Small Text,
or Large Text from the palette menu.
Using palettes
Palettes help you monitor and modify images. By default, palettes appear stacked
together in groups.
To display one palette:
Choose the palette name in the Window menu.
To show or hide multiple palettes:
Do one of the following:
• To show or hide all open palettes, the options bar, and the toolbox, press Tab.
• To show or hide all palettes, press Shift+Tab.
Changing the palette display
You can rearrange your palettes to make better use of your work area by using the
following techniques:
• To make a palette appear at the front of its group, click the palette’s tab, or choose the
palette name from the Window menu.
• To move an entire palette group, drag its title bar.
• To rearrange or separate a palette group, drag a palette’s tab. Dragging a palette
outside of an existing group creates a new group.
• To move a palette to another group, drag the palette’s tab to that group.
• To display a palette menu, position the pointer on the triangle in the upper right
corner of the palette, and press the mouse button.
• To change the size of a palette, drag any corner of the palette (Windows) or drag the
size box at its lower right corner (Mac OS). Not all palettes can be resized.
Using Help | Contents | Index Back 28
Page 29

Adobe Photoshop Help Looking at the Work Area
Using Help | Contents | Index Back 29
• To c ollapse a group to palette titles only, click the Minimize/Maximize box (Windows) or
the Zoom box (Mac OS), or double-click a palette’s tab. You can still access the menu of
a collapsed palette.
A
B
Click to collapse or expand palette.
A. Windows B. Mac OS X
• (ImageReady) To show or hide options for palettes that include hidden options (the
Optimize, Layer Options, and Slice palettes), click the Show Options button on the
palette tab to cycle through palette displays, or choose Show Options or Hide Options
from the palette menu.
Docking palettes together
Docking palettes together lets you view multiple palettes at the same time and move
them as a group. Entire palette groups cannot be docked together at once, but you can
dock the palettes from one group to another, one at a time.
In Photoshop, docked palettes and their locations are saved when you save a workspace.
In Photoshop, you can also store palettes in the palette well of the tool options bar.
(See “Using the tool options bar” on page 26.)
To dock palettes together:
Drag a palette’s tab to the bottom of another palette so that the bottom of the target
palette is highlighted.
To move an entire docked group, drag its title bar.
Customizing your workspace
The positions of all open palettes and movable dialog boxes are saved when you exit the
application. Alternatively, you can always start with default palette positions or restore
default positions at any time.
In addition to saving the positions of palettes and dialog boxes when you exit the application, you can save multiple layouts as different workspaces.
To save the current workspace layout:
1 Choose Window > Workspace > Save Workspace.
2 Enter a name for the workspace, and click OK.
To choose a workspace:
Choose Window > Workspace, and choose a workspace from the submenu.
Using Help | Contents | Index Back 29
Page 30

Adobe Photoshop Help Looking at the Work Area
Using Help | Contents | Index Back 30
To delete a workspace:
1 Choose Window > Workspace > Delete Workspace.
2 Select the workspace you want to delete, and click Delete.
To reset palettes to the default positions:
Do one of the following:
• In Windows or Mac OS 9.x, choose Edit > Preferences > General, then select Save Palette
Locations.
• (Photoshop) In Mac OS X, choose Photoshop > Preferences > General, then select Save
Palette Locations.
• (ImageReady) In Mac OS X, choose ImageReady > Preferences > General, then select
Save Palette Locations.
• Choose Window > Workspace > Reset Palette Locations.
To always start with the default palette and dialog box positions:
1 Do one of the following:
• In Windows or Mac OS 9.x, choose Edit > Preferences > General.
• (Photoshop) In Mac OS X, choose Photoshop > Preferences > General.
• (ImageReady) In Mac OS X, choose ImageReady > Preferences > General.
2 Deselect Save Palette Locations. The change takes effect the next time you start the
application.
Using pop-up sliders
A number of palettes and dialog boxes contain settings that use pop-up sliders (for
example, the Opacity option in the Layers palette).
To use a pop-up slider:
Do one of the following:
• Position the pointer over the triangle next to the setting, hold down the mouse, and
drag the slider or angle radius to the desired value.
• Click the triangle next to the setting to open the pop-up slider box, and drag the slider
or angle radius to the desired value. Click outside the slider box or press Enter or Return
to close the slider box. To cancel changes, press the Escape key (Esc).
To increase or decrease values in 10% increments when the pop-up slider box is open,
hold down Shift and press the Up or Down arrow key.
Using Help | Contents | Index Back 30
Page 31

Adobe Photoshop Help Looking at the Work Area
Using Help | Contents | Index Back 31
Using pop-up palettes
Pop-up palettes provide easy access to libraries of brushes, swatches, gradients, styles,
patterns, contours, and shapes. You can customize pop-up palettes by renaming and
deleting items and by loading, saving, and replacing libraries. You can also change the
display of a pop-up palette to view items by their names, as thumbnail icons, or with both
names and icons.
The Brush pop-up palette in the options bar
To select an item in a pop-up palette:
1 Click the thumbnail image in the options bar.
2 Click an item in the pop-up palette.
To rename an item in a pop-up palette:
Select an item, click the triangle in the upper right corner of the pop-up palette, and
choose the Rename command from the palette menu. Enter a new name.
To delete an item in a pop-up palette:
Do one of the following:
• Select an item, click the triangle in the upper right corner of the pop-up palette, and
choose the Delete command from the palette menu.
• Hold down Alt (Windows) or Option (Mac OS) and click an item.
To customize the list of items in a pop-up palette:
1 Click the triangle in the upper right corner of the pop-up palette to view the
palette menu.
2 To return to the default library, choose the Reset command. You can either replace the
current list or append the default library to the current list.
3 To load a different library, do one of the following:
• Choose the Load command to add a library to the current list. Then select the library file
you want to use, and click Load.
• Choose the Replace command to replace the current list with a different library. Then
select the library file you want to use, and click Load.
• Choose a library file (displayed at the bottom of the palette menu). Then click OK to
replace the current list, or click Append to append the current list.
Using Help | Contents | Index Back 31
Page 32

Adobe Photoshop Help Looking at the Work Area
Using Help | Contents | Index Back 32
4 To save the current list as a library for later use, choose the Save command. Then enter a
name for the library file, and click Save.
(Mac OS) You can specify that a file extension is always appended to a library file by
setting Append File Extension to Always in the File Handling Preferences. You should
put the extension on a library filename so that you can easily share the libraries across
operating systems.
To change the display of items in a pop-up palette:
1 Click the triangle in the upper right corner of the pop-up palette to view the
palette menu.
2 Select a view option: Text Only, Small Thumbnail, Large Thumbnail, Small List, and
Large List.
Using the Info palette (Photoshop)
The Info palette displays information about the color values beneath the pointer and,
depending on the tool in use, other useful measurements.
To display the Info palette:
Choose Window > Info.
The Info palette displays the following information:
• When displaying CMYK values, the Info palette displays an exclamation point next to
the CMYK values if the color beneath the pointer or color sampler is out of the printable
CMYK color gamut. (See “
• When you use the marquee tool, the Info palette displays the x- and y-coordinates of
Identifying out-of-gamut colors (Photoshop)” on page 136.)
the pointer position and the width (W) and height (H) of the marquee as you drag.
• When you use the crop tool or zoom tool, the Info palette displays the width (W) and
height (H) of the marquee as you drag. The palette also shows the angle of rotation of
the crop marquee.
• When you use the line tool, pen tool, or gradient tool or when you move a selection,
the Info palette displays the x- and y-coordinates of your starting position, the change
in X (DX), the change in Y (DY), the angle (A), and the distance (D) as you drag.
• When you use a two-dimensional transformation command, the Info palette displays
the percentage change in width (W) and height (H), the angle of rotation (A), and the
angle of horizontal skew (H) or vertical skew (V).
• When you use any color adjustment dialog box (for example, Curves), the Info palette
displays the before and after color values of the pixels beneath the pointer and beneath
color samplers. (See “
Seeing the color values of pixels (Photoshop)” on page 133.)
(ImageReady) The Info palette displays the following information:
• The RGB numeric values for the color beneath the pointer.
• The Opacity value for the pixels beneath the pointer.
• The hexadecimal value for the color beneath the pointer.
• The index color table position for the color beneath the pointer.
• The x- and y-coordinates of the pointer.
Using Help | Contents | Index Back 32
Page 33

Adobe Photoshop Help Looking at the Work Area
Using Help | Contents | Index Back 33
• The x- and y-coordinates of your starting position (before you click in the image) and
your ending position (as you drag in the image) when you use the marquee tool, the
shape tools, the crop tool, and the slice tool.
• The width (W) and height (H) of the selection as you drag when you use the crop tool,
the shape tools, the slice tool, or the zoom tool.
• The percentage change in width (W) and height (H), the angle of rotation (A), and the
angle of horizontal skew (H) or vertical skew (V) when you use a Transform or Free
Transform command.
To change the Info palette options:
1 Choose Palette Options from the Info palette menu.
2 For First Color Readout, choose one of the following display options:
• Actual Color to display values in the current color mode of the image.
• Total Ink to display the total percentage of all CMYK ink at the pointer’s current location,
based on the values set in the CMYK Setup dialog box.
• Opacity to display the opacity of the current layer. This option does not apply to the
background.
• Any other option to display the color values in that color mode.
3 For Second Color Readout, choose a display option listed in step 2.
4 For Ruler Units, choose a unit of measurement.
5 Click OK.
To change measurement units, click the cross-hair icon in the Info palette for a menu
of options. To change color readout modes, click the eyedropper icon.
Using context menus
In addition to the menus at the top of your screen, context-sensitive menus display
commands relevant to the active tool, selection, or palette.
To display context menus:
1 Position the pointer over an image or palette item.
2 Click with the right mouse button (Windows) or hold down Control and press the
mouse button (Mac OS).
Viewing images
The hand tool, the zoom tools, the Zoom commands, and the Navigator palette let you
view different areas of an image at different magnifications. You can open additional
windows to display several views at once (such as different magnifications) of an image.
You can also change the screen display mode to change the appearance of the Photoshop
or ImageReady work area.
Changing the screen display mode
The window controls let you change the screen display mode, including menu bar, title
bar, and scroll bar options.
Using Help | Contents | Index Back 33
Page 34

Adobe Photoshop Help Looking at the Work Area
Using Help | Contents | Index Back 34
To change the screen display mode:
Click a screen mode button in the toolbox:
• The left button displays the default window with a menu bar at the top and scroll
bars on the sides.
• The center button displays a full-screen window with a menu bar and a 50% gray
background, but no title bar or scroll bars.
• The right button displays a full-screen window with a black background, but no title
bar, menu bar, or scroll bars.
Using the document window
The document window is where your image appears. Depending on the screen display
mode (see “
include a title bar and scroll bar.
In ImageReady, the document window allows you to switch easily between original and
optimized views of an image using tabs, and to view the original image and multiple
versions of an optimized image simultaneously. For information on changing the view in
the document window, see “
Changing the screen display mode” on page 33), the document window may
Viewing optimized images (ImageReady)” on page 418.
You can open multiple windows to display different views of the same file. A list of open
windows appears in the Window menu. Available memory may limit the number of
windows per image.
To open multiple views of the same image:
Do one of the following:
• Choose Window > Documents > New Window.
• (ImageReady) Drag any tab away from the document window.
To arrange multiple windows:
Do one of the following:
• Choose Window > Documents > Cascade to display windows stacked and cascading
from the upper left to the lower right of the screen.
• Choose Window > Documents > Tile to display windows edge to edge.
To close windows:
Choose a command:
• Choose File > Close to close the active window.
• (Mac OS) Choose File > Close All to close all windows.
• (Windows) Choose Window > Documents > Close All to close all windows.
Navigating the view area
If the entire image is not visible in the document window, you can navigate to bring
another area of the image into view.
In Photoshop, you can also use the Navigator palette to quickly change the view of an
image.
Using Help | Contents | Index Back 34
Page 35

Adobe Photoshop Help Looking at the Work Area
Using Help | Contents | Index Back 35
To view another area of an image:
Do one of the following:
• Use the window scroll bars.
• Select the hand tool and drag to pan over the image.
To use the hand tool while another tool is selected, hold down the spacebar as you
drag in the image.
To move the view of an image using the Navigator palette (Photoshop):
1 Choose Window > Navigator.
2 Do one of the following:
• Drag the view box in the thumbnail of the image, which represents the boundaries of
the image window.
• Click in the thumbnail of the image. The new view includes the area you click.
To change the color of the Navigator palette view box (Photoshop):
1 Choose Palette Options from the Navigator palette menu.
2 Choose a color:
• To use a preset color, choose an option for Color.
• To specify a different color, click the color box, and choose a color. For more information
on choosing colors, see “
Using the Adobe Color Picker” on page 261.
Magnifying and reducing the view
You can magnify or reduce your view using various methods. The window’s title bar
displays the zoom percentage (unless the window is too small for the display to fit), as
does the status bar at the bottom of the window.
Note: The 100% view of an image displays an image as it will appear in a browser (based
on the monitor resolution and the image resolution). (See “
resolution” on page 62.)
To zoom in:
Do one of the following:
• Select the zoom tool . The pointer becomes a magnifying glass with a plus sign in its
center . Click the area you want to magnify. Each click magnifies the image to the
next preset percentage, centering the display around the point you click. When the
image has reached its maximum magnification level of 1600%, the magnifying glass
appears empty.
• Click the Zoom In button in the options bar to magnify to the next preset
percentage. When the image has reached its maximum magnification level, the
command is dimmed.
• Choose View > Zoom In to magnify to the next preset percentage. When the image has
reached its maximum magnification level, the command is dimmed.
• (Photoshop) Enter a magnification level in the Zoom text box at the lower left of the
window.
About image size and
Using Help | Contents | Index Back 35
Page 36

Adobe Photoshop Help Looking at the Work Area
Using Help | Contents | Index Back 36
• (ImageReady) Click on the Zoom Level pop-up menu at the bottom left of the
document window, and choose a zoom level.
To zoom out:
Do one of the following:
• Select the zoom tool. Hold down Alt (Windows) or Option (Mac OS) to activate the
zoom-out tool. The pointer becomes a magnifying glass with a minus sign in its center
. Click the center of the area of the image you want to reduce. Each click reduces the
view to the previous preset percentage. When the file has reached its maximum
reduction level, the magnifying glass appears empty.
• Click the Zoom out button in the options bar to reduce to the previous preset
percentage. When the image has reached its maximum reduction level, the command
is dimmed.
• Choose View > Zoom Out to reduce to the previous preset percentage. When the image
reaches its maximum reduction level, the command is dimmed.
• (Photoshop) Enter a reduction level in the Zoom text box at the lower left of the
window.
• (ImageReady) Click on the Zoom Level pop-up menu at the lower left of the document
window, and choose a zoom level.
To magnify by dragging:
1 Select the zoom tool.
2 Drag over the part of the image you want to magnify.
The area inside the zoom marquee is displayed at the highest possible magnification.
To move the marquee around the artwork in Photoshop, begin dragging a marquee and
then hold down the spacebar while dragging the marquee to a new location.
To display an image at 100%:
Do one of the following:
• Double-click the zoom tool.
• Choose View > Actual Pixels (Photoshop) or View > Actual Size (ImageReady).
To change the view to fit the screen:
Do one of the following:
• Double-click the hand tool.
• Choose View > Fit on Screen.
These options scale both the zoom level and the window size to fit the available screen
space.
To automatically resize the window when magnifying or reducing the view:
With the Zoom tool active, select Resize Windows to Fit in the options bar. The window
resizes when you magnify or reduce the view of the image.
When Resize Windows to Fit is deselected (the default), the window maintains a constant
size regardless of the image’s magnification. This can be helpful when using smaller
monitors or working with tiled views.
Using Help | Contents | Index Back 36
Page 37

Adobe Photoshop Help Looking at the Work Area
Using Help | Contents | Index Back 37
To automatically resize the window when zooming in or out using keyboard
shortcuts (Photoshop):
1 Do one of the following:
• In Windows or Mac OS 9.x, choose Edit > Preferences > General.
• In Mac OS X, choose Photoshop > Preferences > General.
2 Select Keyboard Zoom Resizes Windows.
Correcting mistakes
Most operations can be undone if you make a mistake. Alternatively, you can restore all or
part of an image to its last saved version. But available memory may limit your ability to
use these options.
For information on how to restore your image to how it looked at any point in the current
work session, see “
To undo the last operation:
Choose Edit > Undo.
Reverting to a previous version of an image” on page 38.
If an operation can’t be undone, the command is dimmed and changes to Can’t Undo.
To redo the last operation:
Choose Edit > Redo.
You can set the Redo keystroke preference to be the same for Photoshop and
ImageReady. In the General section of the Preferences dialog box, select a preference
for the Redo key. You can also set the key to toggle between Undo and Redo.
To free memory used by the Undo command, the History palette, or the Clipboard
(Photoshop):
Choose Edit > Purge, and choose the item type or buffer you want to clear. If already
empty, the item type or buffer is dimmed.
Important: The Purge command permanently clears from memory the operation stored
by the command or buffer; it cannot be undone. For example, choosing Edit > Purge >
Histories deletes all history states from the History palette. Use the Purge command when
the amount of information held in memory is so large that Photoshop’s performance is
noticeably diminished.
To revert to the last saved version:
Choose File > Revert.
Note: Revert is added as a history state in the History palette and can be undone.
To restore part of an image to its previously saved version (Photoshop):
Do one of the following:
• Use the history brush tool to paint with the selected state or snapshot on the History
palette. (See “
• Use the eraser tool with the Erase to History option selected. (See “Using the eraser
Painting with a state or snapshot of an image (Photoshop)” on page 42.)
tool” on page 224.)
Using Help | Contents | Index Back 37
Page 38

Adobe Photoshop Help Looking at the Work Area
Using Help | Contents | Index Back 38
• Select the area you want to restore, and choose Edit > Fill. For Use, choose History,
and click OK. (See “
Filling and stroking selections and layers” on page 249.)
Note: To restore the image with a snapshot of the initial state of the document, choose
History Options from the Palette menu and make sure that the Automatically Create First
Snapshot option is on.
Reverting to a previous version of an image
The History palette lets you jump to any recent state of the image created during the
current working session. Each time you apply a change to an image, the new state of that
image is added to the palette.
For example, if you select, paint, and rotate part of an image, each of those states is listed
separately in the palette. You can then select any of the states, and the image will revert to
how it looked when that change was first applied. You can then work from that state.
About the History palette
Note the following guidelines when using the History palette:
• Program-wide changes, such as changes to palettes, color settings, actions, and prefer-
ences, are not changes to a particular image and so are not added to the History
palette.
• By default, the History palette lists the previous 20 states. Older states are automatically
deleted to free more memory for Photoshop. To keep a particular state throughout
your work session, make a snapshot of the state. For more information, see “
Making a
snapshot of an image (Photoshop)” on page 40.
• Once you close and reopen the document, all states and snapshots from the last
working session are cleared from the palette.
• By default, a snapshot of the initial state of the document is displayed at the top of the
palette.
• States are added from the top down. That is, the oldest state is at the top of the list,
the most recent one at the bottom.
• Each state is listed with the name of the tool or command used to change the image.
• By default, selecting a state dims those below. This way you can easily see which
changes will be discarded if you continue working from the selected state. For information on customizing the history options, see “
Setting history options (Photoshop)”
on page 40.
• By default, selecting a state and then changing the image eliminates all states that
come after.
• If you select a state and then change the image, eliminating the states that came after,
you can use the Undo command to undo the last change and restore the eliminated
states.
• By default, deleting a state deletes that state and those that came after it. If you choose
the Allow Non-Linear History option, deleting a state deletes just that state. For more
information, see “
Setting history options (Photoshop)” on page 40.
Using Help | Contents | Index Back 38
Page 39

Adobe Photoshop Help Looking at the Work Area
Using Help | Contents | Index Back 39
Using the History palette
You can use the History palette to revert to a previous state of an image, to delete an
image’s states, and in Photoshop, to create a document from a state or snapshot.
A
B
C
D
Photoshop History palette:
A. Sets the source for the history brush B. Thumbnail of a snapshot C. History state
D. History state slider
To display the History palette:
Choose Window > History, or click the History palette tab.
To revert to a previous state of an image:
Do any of the following:
• Click the name of the state.
• Drag the slider at the left of the state up or down to a different state.
• (Photoshop) Choose Step Forward or Step Backward from the palette menu or the Edit
menu to move to the next or previous state.
To delete one or more states of the image (Photoshop):
Do one of the following:
• Click the name of the state, and choose Delete from the History palette menu to delete
that change and those that came after it.
• Drag the state to the Trash button to delete that change and those that came after it.
• Choose Clear History from the palette menu to delete the list of states from the History
palette, without changing the image. This option doesn’t reduce the amount of
memory used by Photoshop.
• Hold down Alt (Windows) or Option (Mac OS), and choose Clear History from the
palette menu to purge the list of states from the History palette without changing the
image. If you get a message that Photoshop is low on memory, purging states is useful,
since the command deletes the states from the Undo buffer and frees up memory.
Important: This action cannot be undone.
• Choose Edit > Purge > Histories to purge the list of states from the History palette for all
open documents.
Important: This action cannot be undone.
Using Help | Contents | Index Back 39
Page 40

Adobe Photoshop Help Looking at the Work Area
Using Help | Contents | Index Back 40
To delete all of an image’s states (ImageReady):
Choose Clear Undo/Redo History from the History palette menu.
Important: This action cannot be undone.
To create a new document from the selected state or snapshot of the image
(Photoshop):
Do one of the following:
• Drag a state or snapshot onto the New Document button .
• Select a state or snapshot, and click the New Document button.
• Select a state or snapshot, and choose New Document from the History palette menu.
The history list for the newly created document will be empty.
To save one or more snapshots or image states for use in a later editing session, create
a new file for each state you save, and save each in a separate file. When you reopen
your original file, plan to open the other saved files also. You can drag each file’s initial
snapshot to the original image and thus access the snapshots again from the original
image’s History palette.
To replace an existing document with a selected state (Photoshop):
Drag the state onto the document.
Setting history options (Photoshop)
You can specify the maximum number of items to include in the History palette and set
other options that customize the way you work with the palette.
To set history options:
1 Choose History Options from the History palette menu.
2 Select an option:
• Automatically Create First Snapshot to automatically create a snapshot of the initial
state of the image when the document is opened.
• Automatically Create New Snapshot When Saving to generate a snapshot every time
you save.
• Allow Non-Linear History to make changes to a selected state without deleting the
states that come after. Normally, when you select a state and change the image, all
states that come after the selected one are deleted. This enables the History palette to
display a list of the editing steps in the order you made them. By recording states in a
nonlinear way, you can select a state, make a change to the image, and delete just that
state. The change will be appended at the end of the list.
• Show New Snapshot Dialog By Default to force Photoshop to prompt you for snapshot
names even when using the buttons on the palette.
Making a snapshot of an image (Photoshop)
The Snapshot command lets you make a temporary copy (or snapshot) of any state of the
image. The new snapshot is added to the list of snapshots at the top of the History palette.
Selecting a snapshot lets you work from that version of the image.
Using Help | Contents | Index Back 40
Page 41

Adobe Photoshop Help Looking at the Work Area
Using Help | Contents | Index Back 41
Snapshots are similar to the states listed in the History palette, but they offer additional
advantages:
• You can name a snapshot to make it easy to identify.
• Snapshots can be stored for an entire work session.
• You can compare effects easily. For example, you can take a snapshot before and after
applying a filter. Then select the first snapshot, and try the same filter with different
settings. Switch between the snapshots to find the settings you like best.
• With snapshots, you can recover your work easily. When you experiment with a
complex technique or apply an action, take a snapshot first. If you’re not satisfied with
the results, you can select the snapshot to undo all the steps.
Important: Snapshots are not saved with the image—closing an image deletes its
snapshots. Also, unless you select the Allow Non-Linear History option, selecting a
snapshot and changing the image deletes all of the states currently listed in the History
palette.
To create a snapshot:
1 Select a state.
2 To automatically create a snapshot, click the New Snapshot button on the History
palette, or if Automatically Create New Snapshot When Saving is selected in the history
options, choose New Snapshot from the History palette menu.
3 To set options when creating a snapshot, choose New Snapshot from the History
palette menu, or Alt-click (Windows) or Option-click (Mac OS) the New Snapshot button.
4 Enter the name of the Snapshot in the Name text box.
5 For From, select the snapshot contents:
• Full Document to make a snapshot of all layers in the image at that state.
• Merged Layers to make a snapshot that merges all layers in the image at that state.
• Current Layer to make a snapshot of only the currently selected layer at that state.
To select a snapshot:
Do any of the following:
• Click the name of the snapshot.
• Drag the slider at the left of the snapshot up or down to a different snapshot.
To rename a snapshot:
Double-click the snapshot and enter a name.
To delete a snapshot:
Do one of the following:
• Select the snapshot, and choose Delete from the palette menu.
• Select the snapshot, and click the Trash button .
• Drag the snapshot to the Trash button.
Using Help | Contents | Index Back 41
Page 42

Adobe Photoshop Help Looking at the Work Area
Using Help | Contents | Index Back 42
Painting with a state or snapshot of an image (Photoshop)
The history brush tool lets you paint a copy of one state or snapshot of an image into the
current image window. This tool makes a copy, or sample, of the image and then paints
with it.
For example, you might make a snapshot of a change you made with a painting tool or
filter. After undoing the change to the image, you could use the history brush tool to
apply the change selectively to areas of the image. Unless you select a merged snapshot,
the history brush tool paints from a layer in the selected state to the same layer in
another state.
The history brush tool works similarly to the clone stamp tool, but on any state or
snapshot of the image, not just the current one. (See “
page 188.) In Photoshop, you can also paint with the art history brush to create special
effects. (See “
To paint with a state or snapshot of an image:
1 Select the history brush tool .
2 Do one of the following in the options bar:
• Specify the opacity and blending mode. (See “Setting options for painting and editing
tools” on page 241.)
• Choose a brush and set brush options. (See “Working with brushes” on page 228.)
Using the art history brush tool (Photoshop)” on page 226.)
Cloning and repairing images” on
3 In the History palette, click the left column of the state or snapshot to use as the source
for the history brush tool.
4 Drag to paint with the history brush tool.
Duplicating images
You can duplicate an entire image (including all layers, layer masks, and channels) into
available memory without saving to disk. In ImageReady, you can also duplicate optimized
versions of an image.
Using duplicates in ImageReady lets you experiment and then compare several
versions of the optimized image to the original.
To duplicate an image (Photoshop):
1 Open the image you want to duplicate.
2 Choose Image > Duplicate.
3 Enter a name for the duplicated image.
4 To duplicate the image without layers, select Duplicate Merged Layers Only.
5 Click OK.
To duplicate an image in Photoshop and automatically append the name “copy” to its
filename, hold down Alt (Windows) or Option (Mac OS) when you choose Image >
Duplicate.
To duplicate an original image (ImageReady):
1 Open the image you want to duplicate.
Using Help | Contents | Index Back 42
Page 43

Adobe Photoshop Help Looking at the Work Area
Using Help | Contents | Index Back 43
2 Select the Original tab at the top of the image window.
3 Hold down Alt (Windows) or Option (Mac OS), and drag the Original tab from the image
window, or choose Image > Duplicate.
4 Name the duplicate, specify whether to flatten the layers, and click OK.
To duplicate an optimized image (ImageReady):
1 Open the image you want to duplicate.
2 Select the Optimized tab at the top of the image window.
3 Hold down Alt (Windows) or Option (Mac OS), and drag the Optimized tab from the
image window, or choose Image > Duplicate Optimized.
4 Name the duplicate, and click OK.
Note: When you duplicate an image in Optimized, 2-Up, or 4-Up view, the duplicate image
appears in the Original view in the duplicate image window. If you want a duplicate
optimized image to appear in the Optimized, 2-Up, or 4-Up view, duplicate the original
image, and then select the Optimized, 2-Up, or 4-Up tab in the duplicate image window.
Using rulers, columns, the measure tool, guides,
and the grid
Rulers, columns, the measure tool, guides, and the grid help you position images or
elements precisely across the width or length of an image.
Note: You can also align and distribute parts of an image using the Layers palette.
Repositioning the contents of layers” on page 289.)
(See “
Using rulers
When visible, rulers appear along the top and left side of the active window. Markers in the
ruler display the pointer’s position when you move it. Changing the ruler origin (the (0, 0)
mark on the top and left rulers) lets you measure from a specific point on the image. The
ruler origin also determines the grid’s point of origin.
To display or hide rulers:
Choose View > Rulers.
To change the rulers’ zero origin:
1 To snap the ruler origin to guides, slices, or Document bounds, choose View > Snap To,
then choose any combination of options from the submenu. (See “
command” on page 172.)
(Photoshop) You can also snap to a grid in addition to guides, slices, and Document
bounds.
Using the Snap
2 Position the pointer over the intersection of the rulers in the upper left corner of the
window, and drag diagonally down onto the image. A set of cross hairs appears, marking
the new origin on the rulers.
To make the ruler origin snap to the ruler ticks (Photoshop), hold down Shift as you drag.
Note: To reset the ruler origin to its default value, double-click the upper left corner of the
rulers.
Using Help | Contents | Index Back 43
Page 44

Adobe Photoshop Help Looking at the Work Area
Using Help | Contents | Index Back 44
To change the rulers’ settings (Photoshop):
1 Do one of the following:
• Double-click a ruler.
• In Windows or Mac OS 9.x, choose Edit > Preferences > Units & Rulers.
• In Mac OS X, choose Photoshop > Preferences > Units & Rulers.
2 For Rulers, choose a unit of measurement.
Note: Changing the units on the Info palette automatically changes the units on the
rulers.
3 For Point/Pica Size, choose from the following options:
• PostScript (72 points per inch) if you are printing to a PostScript device.
• Traditional to use printer’s 72.27 points per inch.
4 Click OK.
Using columns (Photoshop)
The New, Image Size, and Canvas Size commands let you specify image width in terms of
columns. Using columns is convenient when you plan to import an image into a page
layout program, such as Adobe InDesign, and you want the image to fit exactly within a
certain number of columns.
To specify columns for an image:
1 Do one of the following:
• In Windows and Mac OS 9.x, choose Edit > Preferences > Units & Rulers.
• In Mac OS X, choose Photoshop > Preferences > Units & Rulers.
2 Enter values for Width and Gutter.
Using the measure tool (Photoshop)
The measure tool calculates the distance between any two points in the work area. When
you measure from one point to another, a nonprinting line is drawn and the options bar
and Info palette show the following information:
• The starting location (X and Y).
• The horizontal (W) and vertical (H) distances traveled from the x- and y-axes.
• The angle measured relative to the axis (A).
• The total distance traveled (D1).
• When using a protractor, you can view two distances traveled (D1 and D2).
All measurements except the angle are calculated in the unit of measure currently set in
the Units & Rulers preference dialog box. For information on setting the unit of measure,
Using rulers” on page 43.
see “
To display an existing measuring line:
Select the measure tool .
To measure between two points:
1 Select the measure tool .
Using Help | Contents | Index Back 44
Page 45

Adobe Photoshop Help Looking at the Work Area
Using Help | Contents | Index Back 45
2 Drag from the starting point to the ending point. Hold down the Shift key to constrain
the tool to multiples of 45°.
3 To create a protractor from an existing measuring line, Alt-drag (Windows) or Optiondrag (Mac OS) at an angle from one end of the measuring line, or double-click the line and
drag. Hold down the Shift key to constrain the tool to multiples of 45°.
To edit a measuring line or protractor:
1 Select the measure tool .
2 Do one of the following:
• To resize the line, drag one end of an existing measuring line.
• To move the line, place the pointer on the line away from either endpoint, and drag
the line.
• To remove the line, place the pointer on the line away from either endpoint, and drag
the line out of the image.
Note: You can drag out a measure line on an image feature that should be horizontal
or vertical, then choose Image > Rotate Canvas > Arbitrary and the correct angle of
rotation required to straighten the image will already be entered into the Rotate Canvas
dialog box.
Using guides and the grid
Guides appear as lines that float over the entire image and do not print. You can move,
remove, or lock a guide to avoid accidentally moving it.
In Photoshop, a grid appears by default as nonprinting lines but can also be displayed as
dots. The grid is useful for laying out elements symmetrically.
Guides and grids behave in similar ways:
• Selections, selection borders, and tools snap to a guide or the grid when dragged
within 8 screen (not image) pixels. Guides also snap to the grid when moved. You can
turn this feature on and off.
• Guide spacing, along with guide and grid visibility and snapping, is specific to an image.
• Grid spacing, along with guide and grid color and style, is the same for all images.
To show or hide a grid or guides:
Do one of the following:
• (Photoshop) Choose View > Show > Grid.
• Choose View > Show > Guides.
• Choose View > Extras. This command also shows or hides: (Photoshop) selection edges,
target path, slices, and notes, or (ImageReady) selection edges, slices, image maps, text
bounds, text baseline, and text selection. (See “
Working with Extras” on page 47.)
Using Help | Contents | Index Back 45
Page 46

Adobe Photoshop Help Looking at the Work Area
Using Help | Contents | Index Back 46
To place a guide:
1 If the rulers are not visible, choose View > Rulers.
Note: For the most accurate readings, view the image at 100% magnification or use the
Info palette.
2 Create a guide:
• (Photoshop) Choose View > New Guide. In the dialog box, select Horizontal or Vertical
orientation, enter a position, and click OK.
• (ImageReady) Choose View > Create Guides. In the dialog box, specify guide options
and click OK.
• Drag from the horizontal ruler to create a horizontal guide.
• Hold down Alt (Windows) or Option (Mac OS), and drag from the vertical ruler to create
a horizontal guide.
• Drag from the vertical ruler to create a vertical guide.
• Hold down Alt (Windows) or Option (Mac OS), and drag from the horizontal ruler to
create a vertical guide.
• (Photoshop) Hold down Shift and drag from the horizontal or vertical ruler to create a
guide that snaps to the ruler ticks.
The pointer changes to a double-headed arrow when you drag a guide.
To move a guide:
1 Select the move tool , or hold down Ctrl (Windows) or Command (Mac OS) to
activate the move tool. (This option does not work with the hand or slice tools.)
2 Position the pointer over the guide (the pointer turns into a double-headed arrow).
3 Move the guide:
• Drag the guide to move it.
• Change the guide from horizontal to vertical, or vice versa, by holding down Alt
(Windows) or Option (Mac OS) as you click or drag the guide.
• (Photoshop) Align the guide with the ruler ticks by holding down Shift as you drag the
guide. The guide will snap to the grid if the grid is visible and View > Snap To > Grid is
selected.
To lock all guides:
Choose View > Lock Guides.
To remove guides from the image:
Do one of the following:
• To remove a single guide, drag the guide outside the image window.
• To remove all guides, choose View > Clear Guides.
To turn snapping to guides on or off:
Choose View > Snap To > Guides. (See “
Using the Snap command” on page 172.)
To turn snapping to the grid on or off (Photoshop):
Choose View > Snap To > Grid. (See “
Using the Snap command” on page 172.)
Using Help | Contents | Index Back 46
Page 47

Adobe Photoshop Help Looking at the Work Area
Using Help | Contents | Index Back 47
To set guide and grid preferences (Photoshop):
1 Do one of the following:
• In Windows or Mac OS 9.x, choose Edit > Preferences > Guides, Grid, & Slices.
• In Mac OS X, choose Photoshop > Preferences > Guides, Grid, & Slices.
2 For Color, choose a color for the guides, the grid, or both. If you choose Custom, click
the color box, choose a color, and click OK. (See “
3 For Style, choose a display option for guides or the grid, or both.
4 For Gridline Every, enter a value for the grid spacing. For Subdivisions, enter a value to
subdivide the grid.
If desired, change the units for this option. The Percent option creates a grid that divides
the image into even sections. For example, choosing 25 for the Percent option creates an
evenly divided 4-by-4 grid.
5 Click OK.
Using the Color palette” on page 259.)
Wo r king with Extras
Guides, grid, target paths, selection edges, slices, image maps, text bounds, text baselines,
text selections, and annotations are nonprinting Extras that help you select, move, or edit
images and objects. You can turn on or off an Extra or any combination of Extras without
affecting the image. You can also show or hide Extras by choosing the Extras command in
the View menu.
For a description of using specific Extras, see “
“
Annotating images (Photoshop)” on page 50; “Making pixel selections” on page 157;
“
Using the marquee tools” on page 158; “Selecting paths (Photoshop)” on page 211;
“
Entering paragraph type” on page 343; “Formatting characters” on page 349; “Creating
and viewing slices” on page 368; and “Creating and viewing image maps (ImageReady)”
on page 383.
To show Extras:
Choose View > Extras. A check mark appears next to all shown Extras in the Show
submenu.
Note: Choosing Extras also shows color samplers, even though color samplers are not an
option in the Show submenu.
To hide Extras:
With Extras showing, choose View > Extras. A dot (Windows) or a dash (Mac OS) appears
next to all hidden Extras in the Show submenu.
Note: Hiding only suppresses the display of Extras. It does not turn off these options.
Using guides and the grid” on page 45;
To show one Extra from a list of hidden Extras:
Choose View > Show and choose an Extra from the submenu. Choosing one of the hidden
Extras will cause it to show, and turn off all other Extras.
To turn on and off a group of Extras:
Choose View > Show > All to turn on and show all available Extras. Choose View > Show >
None to turn off all Extras.
Using Help | Contents | Index Back 47
Page 48

Adobe Photoshop Help Looking at the Work Area
Using Help | Contents | Index Back 48
Displaying status information (Photoshop)
The status bar at the bottom of the window displays useful information—such as the
current magnification and file size of the active image, and brief instructions for using the
active tool.
To show or hide the status bar (Windows only):
Choose Window > Status Bar. A check mark indicates the item is showing.
Displaying file and image information
Information about the current file size and other features of the image is displayed at the
bottom of the application window (Windows) or document window (Mac OS).
Note: In ImageReady, if the document window is wide enough, two image information
boxes appear, enabling you to view two different information options for the image at the
same time. For more information about original and optimized images, see “
optimized images (ImageReady)” on page 418.
You can also view copyright and authorship information that has been added to the file.
®
This information includes standard file information and Digimarc
watermarks. Photoshop
automatically scans opened images for watermarks using the Digimarc Detect Watermark
plug-in. If a watermark is detected, Photoshop displays a copyright symbol in the image
window’s title bar and updates the Copyright & URL section of the File Info dialog box.
Viewing
To display file information in the document window (Photoshop):
1 Click the triangle in the bottom border of the application window (Windows) or
document window (Mac OS).
Illustration of file information view options in Photoshop
2 Select a view option:
• Document Size to display information on the amount of data in the image. The number
on the left represents the printing size of the image—approximately the size of the
saved, flattened file in Adobe Photoshop format. The number on the right indicates the
file’s approximate size including layers and channels.
• Document Profile to display the name of the color profile used by the image.
• Document Dimensions to display the dimensions of the image.
• Scratch Sizes to display information on the amount of RAM and scratch disk used to
process the image. The number on the left represents the amount of memory that is
Using Help | Contents | Index Back 48
Page 49

Adobe Photoshop Help Looking at the Work Area
Using Help | Contents | Index Back 49
currently being used by the program to display all open images. The number on the
right represents the total amount of RAM available for processing images.
• Efficiency to display the percentage of time actually doing an operation instead of
reading or writing the scratch disk. If the value is below 100%, Photoshop is using the
scratch disk and, therefore, is operating more slowly.
• Timing to display the amount of time it took to complete the last operation.
• Current Tool to view the name of the active tool.
To display image information in the document window (ImageReady):
1 Click an image information box at the bottom of the document window.
2 Select a view option:
• Original/Optimized File Size to view the original and optimized file size images. The first
value indicates the original image file size. The second value (present if the original
image has been optimized) indicates the optimized image file size and file format
based on the current settings in the Optimize palette.
• Optimized Information to view the file format, file size, number of colors, and dither
percentage for the optimized image.
• Image Dimensions to view the image’s pixel dimensions.
• Watermark Strength to view the strength of the Digimarc digital watermark in the
optimized image, if present.
• Undo/Redo Status to view the number of undos and redos that are available for the
image.
• Original in Bytes to view the size of the original, flattened image expressed in bytes.
• Optimized in Bytes to view the size of the optimized image expressed in bytes.
• Optimized Savings to view the percentage of the optimized image file size reduction,
followed by the difference in bytes between the original and optimized sizes.
• Size/Download Time to view the file size for the optimized image and estimated
download time using the selected modem speed.
Note: Download times may vary based on Internet traffic and modem compression
schemes. The value displayed is an approximation.
To view additional file information:
Choose File > File Info.
To read a Digimarc
watermark:
1 Choose Filter > Digimarc > Read Watermark. If the filter finds a watermark, a dialog box
displays the Creator ID, copyright year (if present), and image attributes.
2 Click OK, or for more information, choose from the following:
• If you have a Web browser installed, click Web Lookup to get more information about
the owner of the image. This option launches the browser and displays the Digimarc
Web site, where contact details appear for the given Creator ID.
• Call the phone number listed in the Watermark Information dialog box to get infor-
mation faxed back to you.
Using Help | Contents | Index Back 49
Page 50

Adobe Photoshop Help Looking at the Work Area
Using Help | Contents | Index Back 50
Annotating images (Photoshop)
You can attach note annotations (notes) and audio annotations to an image in Photoshop.
This is useful for associating review comments, production notes, or other information
with the image. Because Photoshop annotations are compatible with Adobe Acrobat,
you can use them to exchange information with Acrobat users as well as Photoshop users.
To circulate a Photoshop document for review in Acrobat, save the document in
Portable Document Format (PDF) and ask reviewers to use Acrobat to add notes or
audio annotations. Then import the annotations into Photoshop.
Notes and audio annotations appear as small nonprintable icons on the image. They are
associated with a location on the image rather than with a layer. You can hide and show
annotations, open notes to view or edit their contents, and play audio annotations. You
can also add audio annotations to actions, and set them to play during an action or during
a pause in an action. (See “
Adding notes and audio annotations
You can add notes and audio annotations anywhere on a Photoshop image canvas.
When you create a note, a resizable window appears for entering text. When you record an
audio annotation, you must have a microphone plugged into the audio-in port of your
computer.
Setting playback options (Photoshop)” on page 490.)
You can import both kinds of annotations from Photoshop documents saved in PDF or
from Acrobat documents saved in PDF or Form Data Format (FDF).
To create a note:
1 Select the notes tool .
2 Set options as needed:
• Enter an author name. The name appears in the title bar of the notes window.
• Choose a font and size for the note text.
• Select a color for the note icon and the title bar of note windows.
3 Click where you want to place the note, or drag to create a custom-sized window.
4 Click inside the window, and type the text. If you type more text than fits in the note
window, the scroll bar becomes active.
Edit the text as needed:
• You can use the standard editing commands for your system (Undo, Cut, Copy, Paste,
and Select All). In Windows, right-click in the text area and choose the commands from
the context menu. In Mac OS, choose the commands from the Edit and Select menus.
You can also use standard keyboard shortcuts for these editing commands.
• If you have the required software for different script systems (for example, Roman,
Japanese, or Cyrillic) installed on your computer, you can switch between the script
systems. Right-click (Windows) or Control-click (Mac OS) to display the context menu,
and then choose a script system.
5 To close the note to an icon, click the close box.
Using Help | Contents | Index Back 50
Page 51

Adobe Photoshop Help Looking at the Work Area
Using Help | Contents | Index Back 51
To create an audio annotation:
1 Select the audio annotation tool .
2 Set options as needed:
• Enter an author name.
• Select a color for the audio annotation icon.
3 Click where you want to place the annotation icon.
4 Click Start and then speak into the microphone. When you’re finished, click Stop.
To import annotations:
1 Choose File > Import > Annotations.
2 Select a PDF or FDF file that contains annotations, and then click Load. The annotations
appear in the locations where they were saved in the source document.
Opening and editing annotations
A note or audio annotation icon marks the location of an annotation on an image. When
you move the pointer over an annotation icon and pause, a message displays the author
name. You use the icons to open notes or play audio annotations. You can show, hide, or
move the icons, and edit the contents of notes.
Note: Resizing an image does not resize the annotation icons and note windows. The
icons and note windows keep their locations relative to the image. Cropping an image
removes any annotations in the cropped area; you can recover the annotations by
undoing the Crop command.
To open a note or play an audio annotation:
Double-click the icon:
• If you are opening a note, a window appears, displaying the note text.
• If you are playing an audio annotation and have a sound card installed, the audio file
begins to play.
To show or hide annotation icons:
Do one of the following:
• Choose View > Show > Annotations.
• Choose View > Extras. This command also shows or hides grids, guides, selection edges,
target paths, and slices.
To edit annotations:
Do any of the following:
• To move an annotation icon, move the pointer over the icon until it turns into an arrow,
and then drag the icon. You can do this with any tool selected. Moving a note icon does
not move its note window.
• To move a note window, drag it by the title bar.
• To delete a selected annotation, press Delete.
Using Help | Contents | Index Back 51
Page 52

Adobe Photoshop Help Looking at the Work Area
Using Help | Contents | Index Back 52
• To edit the contents of a note, open the note, change any options, and add, delete,
or change the text. You can use the same editing commands that you use when
creating a note. (See “
• To delete all annotations, right-click (Windows) or Control-click (Mac OS) an annotation
icon to display the context menu, and choose Delete All Annotations. You can also
delete all annotations by clicking Clear All in the options bar for notes or audio
annotations.
Adding notes and audio annotations” on page 50.)
Jumping between applications
You can jump between Photoshop and ImageReady to transfer an image between the two
applications for editing without closing or exiting the originating application. In addition,
you can jump from ImageReady to other graphics editing applications and HTML editing
applications installed on your system.
Jumping to an application saves you from having to close the file in one application and
reopen it in another application.
Jumping between Photoshop and ImageReady
You can easily jump between Photoshop and ImageReady to use features in both applications when preparing graphics for the Web or other purposes. Jumping between the
applications allows you to use the full feature sets of both applications while maintaining
a streamlined workflow. Files and documents updated in one application can be automatically updated in the other application.
To jump between Photoshop and ImageReady:
Do one of the following:
• Click the Jump To button in the toolbox.
• Choose File > Jump To > Photoshop or File > Jump To > ImageReady.
When jumping between Photoshop and ImageReady, the applications use a temp file for
transferring changes.
Jumping to other applications (ImageReady)
In addition to jumping to current versions of Photoshop, you can jump to other graphicsediting applications and HTML-editing applications from within ImageReady.
When you install ImageReady, Adobe graphics-editing and HTML-editing applications
currently on your system are added to the Jump To submenu. You can add more applications, including non-Adobe applications, to the Jump To submenu.
When you jump to a graphics-editing application, the original file is opened in the destination application. When you jump to an HTML editor, the optimized file and the HTML file
are saved and opened in the destination application. If the image contains slices, all files
for the full image are included. A preference enables files updated in another application
to be automatically updated in ImageReady, when jumping back to ImageReady.
Using Help | Contents | Index Back 52
Page 53

Adobe Photoshop Help Looking at the Work Area
Using Help | Contents | Index Back 53
To jump to another application from ImageReady:
1 Do one of the following:
• Choose File > Jump To, and choose the desired application from the submenu.
• If the desired application doesn’t appear in the Jump To submenu, choose Other
Graphics Editor or Other HTML Editor to specify the application.
2 If the file has been modified since the last save, choose an option in ImageReady for
saving the file:
• Click Save, and save the file with its current name and location.
• Click Save As, and save the file with a new name, a new location, or both.
To add an application to the Jump To submenu:
1 Create a shortcut (Windows) or an alias (Mac OS) for the application you want to add to
the menu.
2 Drag the icon for the shortcut or alias into the Jump To Graphics Editor or the Jump To
HTML Editor folder in the Helpers folder in the Photoshop program folder.
3 Restart ImageReady to view the application in the Jump To submenu.
To automatically update a file when jumping back to ImageReady from another
application:
1 Do one of the following:
• In Windows and Mac OS 9.x, choose Edit > Preferences > General.
• In Mac OS X, choose ImageReady > Preferences > General.
2 Select Auto-Update Files.
Previewing an image in a browser
You can open a browser and preview an optimized image. You can preview the image in
any browser installed on your system. The browser displays the image with a caption
listing the image’s file type, pixel dimensions, file size, and compression specifications in
the first paragraph, and filename and other HTML information in the second paragraph.
When you install Photoshop and ImageReady, the first Netscape and Internet Explorer
browsers found on your system are added to the Preview In menu. You can add additional
browsers to the menu, and specify which browser will be launched when using a
keyboard shortcut.
To preview an optimized image in a browser:
Do one of the following:
• (Photoshop) Choose File > Save for Web, then select a browser from the Select Browser
Menu at the bottom of the Save for Web window.
• (ImageReady) Choose File > Preview In, then choose an option from the submenu.
(Choose Other to select a browser not listed in the submenu.)
• (ImageReady) Select a browser from the Preview in Browser tool in the toolbox.
Using Help | Contents | Index Back 53
Page 54

Adobe Photoshop Help Looking at the Work Area
Using Help | Contents | Index Back 54
To add a browser to the Preview In menu:
1 Create a shortcut (Windows) or an alias (Mac OS) for the browser you want to add to the
menu.
2 Drag the icon for the shortcut or alias into the Preview In folder, located in the Helpers
folder in the Photoshop program folder.
3 Restart Photoshop and ImageReady to view the browser in the Preview In menu.
(ImageReady) To specify a browser to be launched by the Preview In keyboard
shortcut:
Do one of the following:
• Choose File > Preview In, then choose an option from the submenu.
• Select a browser from the Preview in Default Browser tool in the toolbox.
The shortcut specification takes effect immediately and will persist the next time you
launch ImageReady.
Managing libraries with the Preset Manager (Photoshop)
The Preset Manager centralizes management of brushes, swatches, gradients, styles,
patterns, contours, custom shapes, and preset tools. You can use the Preset Manager to
change the current set of preset items and create new libraries. Once you load a library in
the Preset Manager, you can access the library’s items in all locations that the type of
preset is available, such as the options bar, Styles palette, Gradient Editor dialog box, and
so on.
Illustration of rearranging tool presets in the Preset Manager
To display the Preset Manager:
Choose Edit > Preset Manager.
To switch between preset types:
Choose an option from the Preset Type pop-up menu.
To change how items are displayed:
Choose a display option palette menu:
• Text Only to display the name of each preset item.
• Small Thumbnail or Large Thumbnail to display a thumbnail of each preset item. (These
options are not available for tool presets.)
Using Help | Contents | Index Back 54
Page 55

Adobe Photoshop Help Looking at the Work Area
Using Help | Contents | Index Back 55
• Small List or Large List to display the name and thumbnail of each preset item. (These
options are not available for swatch presets.)
• Stroke Thumbnail to display a sample brush stroke and brush thumbnail of each brush
preset. ( This option is available for brush presets only.)
To load a library of preset items:
Do one of the following:
• Choose a library file from the bottom of the palette menu. Click OK to replace the
current list, or click Append to append the current list.
• To add a library to the current list, click Load, select the library file you want to add, and
click Load.
• To replace the current list with a different library, choose Replace Preset Type from the
palette menu. Select the library file you want to use, and click Load.
Note: Each type of library has its own file extension and default folder in the Presets folder
in the Photoshop program folder.
To rename presets items:
1 Select a preset item. Shift-click to select multiple items:
2 Do one of the following:
• Click Rename, then enter a new name for the brush, swatch, and so on.
• If the Preset Manager is set to display presets as thumbnails, double-click a preset, enter
a new name, and click OK.
• If the Preset Manager is set to display presets as a list or text only, double-click a preset,
enter a new name inline, and press Enter (Windows) or Return (Mac OS).
To rearrange preset items:
Drag an item up or down in the list.
To delete preset items:
Do one of the following:
• Select a preset item, and click Delete.
• Alt-click (Windows) or Options-click (Mac OS) the items you want to delete.
To create a new library of presets:
1 Do one of the following:
• To save all the presets in the list as a library, make sure that no items are selected.
• To save a subset of the current list as a library, hold down Shift, and select the items you
want to save.
2 Click Save Set, choose a location for the library, enter a filename, and click Save.
You can save the library anywhere. However, if you place the library file in the appropriate
Presets folder inside the Photoshop program folder, the library name will appear at the
bottom of the palette menu after you restart Photoshop.
Using Help | Contents | Index Back 55
Page 56

Adobe Photoshop Help Looking at the Work Area
Using Help | Contents | Index Back 56
To return to the default library of preset items:
Choose Reset Preset Type from the palette menu. You can either replace the current list or
append the default library to the current list.
Setting preferences
Numerous program settings are stored in Adobe Photoshop 7.0 Prefs file. Among the
settings stored in this file are general display options, file-saving options, cursor options,
transparency options, and options for plug-ins and scratch disks. Most of these options are
set in the Preferences dialog box. Preference settings are saved each time you exit the
application.
Note: The default location of the Adobe Photoshop 7.0 Prefs file varies by operating
system; use your operating system’s Find command to locate this file.
Unexpected behavior may indicate damaged preferences. By removing damaged preferences, you can restore preferences to their default settings.
To open a preferences dialog box:
1 Do one of the following:
• In Windows or Mac OS 9.x, choose Edit > Preferences and choose the desired preference
set from the submenu.
• (Photoshop) In Mac OS X, choose Photoshop > Preferences and choose the desired
preference set from the submenu.
• (ImageReady) In Mac OS X, choose ImageReady > Preferences and choose the desired
preference set from the submenu.
2 To switch to a different preference set, do one of the following:
• Choose the preference set from the menu at the top of the dialog box.
• Click Next to display the next preference set in the menu list; click Prev to display the
previous preference set.
For information on a specific preference option, see the Index.
To restore all preferences to their default settings:
Do one of the following:
• Press and hold Alt+Control+Shift (Windows) or Option+Command+Shift (Mac OS)
immediately after launching Photoshop or ImageReady. You will be prompted to delete
the current settings.
• In Mac OS, open the Preferences folder in the System Folder (Mac OS 9.x) or Library
folder (Mac OS X), and drag the Adobe Photoshop 7.0 Settings folder to the Trash.
New Preferences files will be created the next time you start Photoshop or ImageReady.
Resetting all warning dialogs
Sometimes messages containing warnings or prompts regarding certain situations are
displayed. You can disable the display of these messages by selecting the Don’t Show
Again option in the message. You can also globally reset the display of all messages that
have been disabled.
Using Help | Contents | Index Back 56
Page 57

Adobe Photoshop Help Looking at the Work Area
Using Help | Contents | Index Back 57
To reset the display of all warning messages (Photoshop):
1 Do one of the following:
• In Windows or Mac OS 9.x, choose Edit > Preferences > General.
• In Mac OS X, choose Photoshop > Preferences > General.
2 Click Reset All Warning Dialogs, and click OK.
To turn on or off warning messages (ImageReady):
1 Do one of the following:
• In Windows or Mac OS 9.x, choose Edit > Preferences > General.
• In Mac OS X, choose Photoshop > Preferences > General.
2 Deselect or select Disable Warnings, and click OK.
Monitoring operations
A progress bar indicates that an operation is in process. You can interrupt the process or
have the program notify you when it has finished.
To cancel operations:
Hold down Esc until the operation in progress has stopped. In Mac OS, you can also press
Command+period.
To set notification for completion of operations:
1 Do one of the following:
• In Windows or Mac OS 9.x, choose Edit > Preferences > General.
• (Photoshop) In Mac OS X, choose Photoshop > Preferences > General.
• (Photoshop) In Mac OS X, choose ImageReady > Preferences > General.
2 Do one of the following:
• (Photoshop) Select Beep When Done.
• (ImageReady) Select Notify When Done and choose (Mac OS only): System Alert to use
your system alert for notification or Text to Speech to use a spoken notification.
3 Click OK.
Closing files and quitting
To close a file:
1 Choose File > Close (Windows and Mac OS) or File > Close All (Mac OS).
2 Choose whether or not to save the file:
• Click Yes (Windows) or Save (Mac OS) to save the file.
• Click No (Windows) or Don’t Save (Mac OS) to close the file without saving it.
Using Help | Contents | Index Back 57
Page 58

Adobe Photoshop Help Looking at the Work Area
Using Help | Contents | Index Back 58
To exit Photoshop or ImageReady:
1 Choose File > Exit (Windows) or File > Quit (Mac OS).
2 Choose whether or not to save any open files:
• Click Yes (Windows) or Save (Mac OS) for each open file to save the file.
• Click No (Windows) or Don’t Save (Mac OS) for each open file to close the file without
saving it.
Using plug-in modules
Plug-in modules are software programs developed by Adobe Systems and by other
software developers in conjunction with Adobe Systems to add features to Photoshop
and ImageReady. A number of importing, exporting, and special-effects plug-ins come
with your program; they are automatically installed in folders inside the Photoshop
Plug-ins folder.
You can select an additional plug-ins folder to use compatible plug-ins stored with
another application. You can also create a shortcut (Windows) or an alias (Mac OS) for a
plug-in stored in another folder on your system. You can then add the shortcut or alias to
the Plug-ins folder to use that plug-in with Photoshop and ImageReady.
Once installed, plug-in modules appear as options added to the Import or Export menu;
as file formats in the Open, Save As, and Export Original (ImageReady) dialog boxes; or as
filters in the Filter submenus. Photoshop and ImageReady can accommodate a large
number of plug-ins. However, if the number of installed plug-in modules becomes great
enough, Photoshop or ImageReady may not be able to list all the plug-ins in their appropriate menus. Newly installed plug-ins will then appear in the Filter > Other submenu.
To install an Adobe Systems plug-in module:
Do one of the following:
• Use the plug-in installer, if provided.
• (Windows) Copy the module into the appropriate Plug-ins folder in the Photoshop
program folder. Make sure that the files are uncompressed.
• (Mac OS) Drag a copy of the module to the appropriate Plug-ins folder in the Photoshop
program folder. Make sure that the files are uncompressed.
Important: For Macintosh, the plug-ins that come with Photoshop 7.0 are compatible
with both Mac OS 9.x and Mac OS X. However, any plug-in originally intended to work on
Mac OS 9, such as plug-ins from previous versions of Photoshop and some third-party
plug-ins, can only be used on Mac OS 9.x or in the Classic environment on Mac OS X. You
can place such plug-ins in the Plug-ins folder for the Mac OS X version of Photoshop, but
they will not appear unless you launch Photoshop in the Classic environment.
To install a third-party plug-in module:
Follow the installation instructions that came with the plug-in module.
If you cannot run a third-party plug-in, the plug-in may require a legacy Photoshop serial
number.
Using Help | Contents | Index Back 58
Page 59

Adobe Photoshop Help Looking at the Work Area
Using Help | Contents | Index Back 59
To specify a legacy serial number (Photoshop):
1 Do one of the following:
• In Windows and Mac OS 9.x, choose Edit > Preferences > Plug-Ins & Scratch Disk.
• In Mac OS X, choose Photoshop > Preferences > Plug-Ins & Scratch Disk.
2 Enter the serial number from Photoshop 6.0 or earlier in the Legacy Photoshop Serial
Number text box.
To select an additional plug-ins folder:
1 Do one of the following:
• In Windows and Mac OS 9.x, choose Edit > Preferences > Plug-Ins & Scratch Disk.
• (Photoshop) In Mac OS X, choose Photoshop > Preferences > Plug-Ins & Scratch Disk.
• (ImageReady) In Mac OS X, choose ImageReady > Preferences > Plug-Ins & Scratch Disk.
2 Select Additional Plug-ins Folder.
3 Click Choose, and select a folder or directory from the list. Make sure that you do not
select a location inside the Plug-ins folder. To display the contents of a folder, double-click
the directory (Windows) or click Open (Mac OS).
4 When you have highlighted the additional plug-ins folder, click OK (Windows), Select
(Mac OS) or Choose (Mac OS 9.0 and later).
5 Restart Photoshop or ImageReady for the plug-ins to take effect.
To suppress the loading of a plug-in or folder of plug-ins:
Add a tilde “~” character at the beginning of the plug-in name, folder, or directory. That file
(or all files in the folder) will be ignored by the application.
To view information about installed plug-ins:
Do one of the following:
• In Windows, choose Help > About Plug-In and select a plug-in from the submenu.
• In Mac OS 9.x, choose Apple menu > About Plug-In and select a plug-in from the
submenu.
• (Photoshop) In Mac OS X, choose Photoshop > About Plug-In and select a plug-in from
the submenu.
• (ImageReady) In Mac OS X, choose ImageReady > About Plug-In and select a plug-in
from the submenu.
To load a plug-in in only Photoshop or ImageReady:
Install the plug-in either the Adobe Photoshop Only folder or the Adobe ImageReady Only
folder inside the Plug-ins folder.
Note: Use this procedure when you want to use a plug-in within only Photoshop or
ImageReady, or when a plug-in may only be compatible with one of the two applications.
Using Help | Contents | Index Back 59
Page 60

Adobe Photoshop Help Looking at the Work Area
Using Help | Contents | Index Back 60
Assigning scratch disks
When your system does not have enough RAM to perform an operation, Photoshop and
ImageReady use a proprietary virtual memory technology, also called scratch disks.
A scratch disk is any drive or a partition of a drive with free memory. By default, Photoshop
and ImageReady use the hard drive that the operating system is installed on as its primary
scratch disk.
You can change the primary scratch disk and, in Photoshop, designate a second, third, or
fourth scratch disk to be used when the primary disk is full. Your primary scratch disk
should be your fastest hard disk, and should have plenty of defragmented space available.
The following guidelines can help you assign scratch disks:
• For best performance, scratch disks should be on a different drive than any large files
you are editing.
• Scratch disks should be on a different drive than the one used for virtual memory.
• Scratch disks should be on a local drive. That is, they should not be accessed over a
network.
• Scratch disks should be conventional (non-removable) media.
• Raid disks/disk arrays are good choices for dedicated scratch disk volumes.
• Drives with scratch disks should be defragmented regularly.
To change the scratch disk assignment:
1 Choose Edit > Preferences > Plug-Ins & Scratch Disks.
2 Do one of the following:
• (Photoshop) Choose the desired disks from the menus. You can assign up to four
scratch disks of any size your file system supports. Photoshop lets you create up to
200 GB of scratch disk space using those scratch disks.
• (ImageReady) Choose a primary scratch disk.
3 Click OK.
4 Restart Photoshop or ImageReady for the change to take effect.
Important: The scratch disk file that is created must be in contiguous hard disk space. For
this reason you should frequently optimize your hard disk. Adobe recommends that you
use a disk tool utility, such as Windows Disk Defragmenter or Norton Speed Disk, to
defragment your hard drive on a regular basis. See your Windows or Mac OS documentation for information on defragmentation utilities.
Using Help | Contents | Index Back 60
Page 61

Adobe Photoshop Help Getting Images into Photoshop and ImageReady
Using Help | Contents | Index Back 61
Getting Images into Photoshop and ImageReady
About bitmap images and vector graphics
Computer graphics fall into two main categories—bitmap and vector. You can work
with both types of graphics in Photoshop and ImageReady; moreover, a Photoshop file
can contain both bitmap and vector data. Understanding the difference between the two
categories helps as you create, edit, and import artwork.
Bitmap images Bitmap images—technically called raster images—use a grid of colors
known as pixels to represent images. Each pixel is assigned a specific location and color
value. For example, a bicycle tire in a bitmap image is made up of a mosaic of pixels in that
location. When working with bitmap images, you edit pixels rather than objects or shapes.
Bitmap images are the most common electronic medium for continuous-tone images,
such as photographs or digital paintings, because they can represent subtle gradations of
shades and color. Bitmap images are resolution-dependent—that is, they contain a fixed
number of pixels. As a result, they can lose detail and appear jagged if they are scaled
on-screen or if they are printed at a lower resolution than they were created for.
3:1
24:1
Example of a bitmap image at different levels of magnification
Vector graphics Vector graphics are made up of lines and curves defined by mathematical objects called vectors. Vectors describe an image according to its geometric
characteristics. For example, a bicycle tire in a vector graphic is made up of a mathematical
definition of a circle drawn with a certain radius, set at a specific location, and filled with a
specific color. You can move, resize, or change the color of the tire without losing the
quality of the graphic.
Using Help | Contents | Index Back 61
Page 62

Adobe Photoshop Help Getting Images into Photoshop and ImageReady
Using Help | Contents | Index Back 62
Vector graphics are resolution-independent—that is, they can be scaled to any size and
printed at any resolution without losing detail or clarity. As a result, vector graphics are the
best choice for representing bold graphics that must retain crisp lines when scaled to
various sizes—for example, logos.
3:1
24:1
Example of a vector graphic at different levels of magnification
Because computer monitors represent images by displaying them on a grid, both vector
and bitmap data is displayed as pixels on-screen.
About image size and resolution
In order to produce high-quality images, it is important to understand how the pixel data
of images is measured and displayed.
Pixel dimensions The number of pixels along the height and width of a bitmap image.
The display size of an image on-screen is determined by the pixel dimensions of the image
plus the size and setting of the monitor.
For example, a 15-inch monitor typically displays 800 pixels horizontally and 600 vertically.
An image with dimensions of 800 pixels by 600 pixels would fill this small screen. On a
larger monitor with an 800-by-600-pixel setting, the same image (with 800-by-600-pixel
dimensions) would still fill the screen, but each pixel would appear larger. Changing the
setting of this larger monitor to 1024-by-768 pixels would display the image at a smaller
size, occupying only part of the screen.
When preparing an image for online display (for example, a Web page that will be viewed
on a variety of monitors), pixel dimensions become especially important. Because your
image may be viewed on a 15-inch monitor, you may want to limit the size of your image
to 800-by-600 pixels to allow room for the Web browser window controls.
20"
15"
832 x 624 / 640 x 480
Example of an image displayed on monitors of various sizes and resolutions
1024 x 768 / 640 x 480
Using Help | Contents | Index Back 62
Page 63

Adobe Photoshop Help Getting Images into Photoshop and ImageReady
Using Help | Contents | Index Back 63
Image resolution The number of pixels displayed per unit of printed length in an image,
usually measured in pixels per inch (ppi). In Photoshop, you can change the resolution of
an image; in ImageReady, the resolution of an image is always 72 ppi. This is because the
ImageReady application is tailored to creating images for online media, not print media.
In Photoshop, image resolution and pixel dimensions are interdependent. The amount of
detail in an image depends on its pixel dimensions, while the image resolution controls
how much space the pixels are printed over. For example, you can modify an image’s
resolution without changing the actual pixel data in the image—all you change is the
printed size of the image. However, if you want to maintain the same output dimensions,
changing the image’s resolution requires a change in the total number of pixels.
Example of an image at 72-ppi and 300-ppi
When printed, an image with a high resolution contains more, and therefore smaller,
pixels than an image with a low resolution. For example, a 1-by-1-inch image with a
resolution of 72 ppi contains a total of 5184 pixels (72 pixels wide x 72 pixels high = 5184).
The same 1-by-1-inch image with a resolution of 300 ppi contains a total of 90,000 pixels.
Higher-resolution images usually reproduce more detail and subtler color transitions than
lower-resolution images. However, increasing the resolution of a low-resolution image
only spreads the original pixel information across a greater number of pixels; it rarely
improves image quality.
Using too low a resolution for a printed image results in pixelation—output with large,
coarse-looking pixels. Using too high a resolution (pixels smaller than the output device
can produce) increases the file size and slows the printing of the image; furthermore, the
device will be unable to reproduce the extra detail provided by the higher resolution
image.
Monitor resolution The number of pixels or dots displayed per unit of length on the
monitor, usually measured in dots per inch (dpi). Monitor resolution depends on the size
of the monitor plus its pixel setting. Most new monitors have a resolution of about 96 dpi,
while older Mac OS monitors have a resolution of 72 dpi.
Using Help | Contents | Index Back 63
Page 64

Adobe Photoshop Help Getting Images into Photoshop and ImageReady
Using Help | Contents | Index Back 64
Understanding monitor resolution helps explain why the display size of an image onscreen often differs from its printed size. Image pixels are translated directly into monitor
pixels. This means that when the image resolution is higher than the monitor resolution,
the image appears larger on-screen than its specified print dimensions. For example,
when you display a 1-by-1 inch, 144-ppi image on a 72-dpi monitor, it appears in a 2-by-2
inch area on-screen. Because the monitor can display only 72 pixels per inch, it needs
2 inches to display the 144 pixels that make up one edge of the image.
Printer resolution The number of ink dots per inch (dpi) produced by all laser printers,
including imagesetters. Most desktop laser printers have a resolution of 600 dpi, and
imagesetters have a resolution of 1200 dpi or higher. To determine the appropriate
resolution for your image when printing to any laser printer, but especially to imagesetters, see “screen frequency.”
Ink jet printers produce a microscopic spray of ink, not actual dots; however, most ink jet
printers have an approximate resolution of 300 to 720 dpi. To determine your printer’s
optimal resolution, check your printer documentation.
Screen frequency The number of printer dots or halftone cells per inch used to print
grayscale images or color separations. Also known as screen ruling or line screen, screen
frequency is measured in lines per inch (lpi)—or lines of cells per inch in a halftone screen.
The relationship between image resolution and screen frequency determines the quality
of detail in the printed image. To produce a halftone image of the highest quality, you
generally use an image resolution that is from 1.5 to at most 2 times the screen frequency.
But with some images and output devices, a lower resolution can produce good results. To
determine your printer’s screen frequency, check your printer documentation or consult
your service provider.
Note: Some imagesetters and 600-dpi laser printers use screening technologies other than
halftoning. If you are printing an image on a nonhalftone printer, consult your service
provider or your printer documentation for the recommended image resolutions.
A B
C D
Screen frequency examples:
A. 65 lpi: Coarse screen typically used to print newsletters and grocery coupons B. 85 lpi: Average
screen typically used to print newspapers C. 133 lpi: High-quality screen typically used to print
four-color magazines D. 177 lpi: Very fine screen typically used for annual reports and images in
art books
Using Help | Contents | Index Back 64
Page 65

Adobe Photoshop Help Getting Images into Photoshop and ImageReady
Using Help | Contents | Index Back 65
File size The digital size of an image, measured in kilobytes (K), megabytes (MB), or
gigabytes (GB). File size is proportional to the pixel dimensions of the image. Images with
more pixels may produce more detail at a given printed size, but they require more disk
space to store and may be slower to edit and print. For instance, a 1-by-1-inch, 200-ppi
image contains four times as many pixels as a 1-by-1-inch, 100-ppi image and so has four
times the file size. Image resolution thus becomes a compromise between image quality
(capturing all the data you need) and file size.
Another factor that affects file size is file format—due to varying compression methods
used by GIF, JPEG, and PNG file formats, file sizes can vary considerably for the same pixel
dimensions. Similarly, color bit-depth and the number of layers and channels in an image
affect file size.
Photoshop supports a maximum file size of 2 GB and maximum pixel dimensions of
30,000 by 30,000 pixels per image. This restriction places limits on the print size and
resolution available to an image.
Changing image size and resolution
Once you have scanned or imported an image, you may want to adjust its size. In
Photoshop, the Image Size command lets you adjust the pixel dimensions, print dimensions, and resolution of an image; in ImageReady, you can only adjust the pixel dimensions of an image.
For assistance with resizing and resampling images in Photoshop, choose Help >
Resize Image. This interactive wizard helps you scale your images for print or online
media.
Keep in mind that bitmap and vector data can produce different results when you resize
an image. Bitmap data is resolution-dependent; therefore, changing the pixel dimensions
of a bitmap image can cause a loss in image quality and sharpness. In contrast, vector data
is resolution-independent; you can resize it without losing its crisp edges.
Displaying image size information
You can display information about the current image size using the information box at the
bottom of the application window (Windows) or the document window (Mac OS).
(See “
Displaying file and image information” on page 48.)
To display the current image size:
Do one of the following:
• (Photoshop) Press Alt (Windows) or Option (Mac OS), position the pointer over the file
information box, and hold down the mouse button. The box displays the width and
height of the image (both in pixels and in the unit of measurement currently selected
for the rulers), the number of channels, and the image resolution.
• (ImageReady) Click an image information box, and select Image Dimensions from the
pop-up menu. The box displays the width and height of the image in pixels.
Using Help | Contents | Index Back 65
Page 66

Adobe Photoshop Help Getting Images into Photoshop and ImageReady
Using Help | Contents | Index Back 66
About resampling
Resampling refers to changing the pixel dimensions (and therefore display size) of an
image. When you downsample (or decrease the number of pixels), information is deleted
from the image. When you resample up (or increase the number of pixels), new pixels are
added based on color values of existing pixels. You specify an interpolation method to
determine how pixels are added or deleted. (See “
page 66.)
Choosing an interpolation method” on
A
Resampling examples:
A. Downsampled B. Original C. Resampled up (Selected pixels displayed for each image)
CB
Keep in mind that resampling can result in poorer image quality. For example, when you
resample an image to larger pixel dimensions, the image will lose some detail and
sharpness. Applying the Unsharp Mask filter to a resampled image can help refocus the
image’s details. (See “
Sharpening images” on page 155.)
You can avoid the need for resampling by scanning or creating the image at a high
enough resolution. If you want to preview the effects of changing pixel dimensions onscreen or print proofs at different resolutions, resample a duplicate of your file.
Choosing an interpolation method
When an image is resampled, an interpolation method is used to assign color values to any
new pixels it creates, based on the color values of existing pixels in the image. The more
sophisticated the method, the more quality and detail from the original image are
preserved.
The General Preferences dialog box lets you specify a default interpolation method to use
whenever images are resampled with the Image Size or transformation commands. The
Image Size command also lets you specify an interpolation method other than the default.
To specify the default interpolation method:
1 Do one of the following:
• In Windows or Mac OS 9.x, choose Edit > Preferences > General.
• (Photoshop) In Mac OS X, choose Photoshop > Preferences > General.
• (ImageReady) In Mac OS X, choose ImageReady > Preferences > General.
2 For Interpolation, choose one of the following options:
• Nearest Neighbor (Jagged) for the fast but less precise method. This method is recom-
mended for use with illustrations containing non-anti-aliased edges, to preserve hard
edges and produce a smaller file. However, this method can result in jagged effects,
which become apparent when distorting or scaling an image or performing multiple
manipulations on a selection.
Using Help | Contents | Index Back 66
Page 67

Adobe Photoshop Help Getting Images into Photoshop and ImageReady
Using Help | Contents | Index Back 67
• (Photoshop) Bilinear for a medium-quality method.
• Bicubic (Smooth) for the slow but more precise method, resulting in the smoothest
tonal gradations.
Changing the pixel dimensions of an image
When preparing images for online distribution, it’s useful to specify image size in terms of
the pixel dimensions. Keep in mind that changing pixel dimensions affects not only the
size of an image on-screen but also its image quality and its printed characteristics—
either its printed dimensions or its image resolution. (See “
resolution” on page 62.)
To change the pixel dimensions of an image (Photoshop):
1 Choose Image > Image Size.
2 Make sure that Resample Image is selected, and choose an interpolation method.
Choosing an interpolation method” on page 66.)
(See “
3 To maintain the current proportions of pixel width to pixel height, select Constrain
Proportions. This option automatically updates the width as you change the height,
and vice versa.
About image size and
4 Under Pixel Dimensions, enter values for Width and Height. To enter values as
percentages of the current dimensions, choose Percent as the unit of measurement.
The new file size for the image appears at the top of the Image Size dialog box, with the
old file size in parentheses.
For best results in producing a smaller image, downsample and apply the Unsharp
Mask filter. To produce a larger image, rescan the image at a higher resolution.
To change the pixel dimensions of an image (ImageReady):
1 Choose Image > Image Size.
2 To maintain the current proportions of pixel width to pixel height, select Constrain
Proportions.
3 Under New Size, enter values for Width, Height, or Percent. The New Size text field
displays the new file size for the image.
4 Select a resampling method from the Quality pop-up menu.
For information on setting action options, see “
(ImageReady)” on page 489.
Recording image size options
Changing the print dimensions and resolution of an image (Photoshop)
When creating an image for print media, it’s useful to specify image size in terms of the
printed dimensions and the image resolution. These two measurements, referred to as the
document size, determine the total pixel count and therefore the file size of the image;
document size also determines the base size at which an image is placed into another
application. You can further manipulate the scale of the printed image using the Print with
Preview command; however, changes you make using the Print with Preview command
affect only the printed image, not the document size of the image file. (See “
and scaling images” on page 472.)
Positioning
Using Help | Contents | Index Back 67
Page 68

Adobe Photoshop Help Getting Images into Photoshop and ImageReady
Using Help | Contents | Index Back 68
If you turn on resampling for the image, you can change print dimensions and resolution
independently (and change the total number of pixels in the image). If you turn resampling off, you can change either the dimensions or the resolution—Photoshop adjusts the
other value automatically to preserve the total pixel count. For the highest print quality,
it’s generally best to change the dimensions and resolution first without resampling. Then
resample only as necessary.
To change the print dimensions and resolution of an image:
1 Choose Image > Image Size.
2 Change the print dimensions, image resolution, or both:
• To change only the print dimensions or only the resolution and adjust the total number
of pixels in the image proportionately, make sure that Resample Image is selected.
Then choose an interpolation method. (See “
Choosing an interpolation method” on
page 66.)
• To change the print dimensions and resolution without changing the total number of
pixels in the image, deselect Resample Image.
3 To maintain the current proportions of image width to image height, select Constrain
Proportions. This option automatically updates the width as you change the height, and
vice versa.
4 Under Document Size, enter new values for the height and width. If desired, choose a
new unit of measurement. Note that for Width, the Columns option uses the width and
gutter sizes specified in the Units & Rulers preferences. For more information, see “Using
columns (Photoshop)” on page 44.
5 For Resolution, enter a new value. If desired, choose a new unit of measurement.
To return to the original values displayed in the Image Size dialog box, hold down
Alt (Windows) or Option (Mac OS), and click Reset.
To view the print size on-screen:
Do one of the following:
• Choose View > Print Size.
• Select the hand tool or zoom tool, and click Print Size in the options bar.
The magnification of the image is adjusted to display its approximate printed size, as
specified in the Document Size section of the Image Size dialog box. Keep in mind that the
size and resolution of your monitor affect the on-screen print size.
Determining a recommended resolution for an image (Photoshop)
If you plan to print your image using a halftone screen, the range of suitable image resolutions depends on the screen frequency of your output device. You can have Photoshop
determine a recommended resolution for your image based on your device’s screen
frequency. (See “
About image size and resolution” on page 62.)
Note: If your image resolution is more than 2.5 times the screen ruling, an alert message
appears when you try to print the image. This means that the image resolution is higher
than necessary for the printer. Save a copy of the file, and then reduce the resolution.
Using Help | Contents | Index Back 68
Page 69

Adobe Photoshop Help Getting Images into Photoshop and ImageReady
Using Help | Contents | Index Back 69
To determine a suggested resolution for an image:
1 Choose Image > Image Size.
2 Click Auto.
3 For Screen, enter the screen frequency for the output device. If desired, choose a new
unit of measurement. Note that the screen value is used only to calculate the image
resolution, not to set the screen for printing.
Important: To specify the halftone screen ruling for printing, you must use the Halftone
Screens dialog box, accessible through the Print with Preview command. (See “
halftone screen attributes” on page 475.)
4 For Quality, select an option:
• Draft to produce a resolution the same as the screen frequency (no lower than 72 pixels
per inch).
• Good to produce a resolution 1.5 times the screen frequency.
• Best to produce a resolution 2 times the screen frequency.
Selecting
Scanning images
Before you scan an image, make sure that the software necessary for your scanner has
been installed. To ensure a high-quality scan, you should predetermine the scanning
resolution and dynamic range your image requires. These preparatory steps can also
prevent unwanted color casts from being introduced by your scanner.
Scanner drivers are provided and supported by the manufacturers of the scanners, not
Adobe Systems Incorporated. If you have problems with scanning, make sure that you are
using the latest version of the appropriate scanner driver.
Importing scanned images
You can import scanned images directly from any scanner that has an Adobe Photoshopcompatible plug-in module or that supports the TWAIN interface. To import the scan using
a plug-in module, choose the scanner name from the File > Import submenu. See your
scanner documentation for instructions on installing the scanner plug-in. For general
plug-in information, see “
If your scanner does not have an Adobe Photoshop-compatible scanner driver, import the
scan using the TWAIN interface. (See “
page 69.)
If you can’t import the scan using the TWAIN interface, use the scanner manufacturer’s
software to scan your images, and save the images as TIFF, PICT, or BMP files. Then open
the files in Photoshop or ImageReady.
Using plug-in modules” on page 58.
Importing an image using the TWAIN interface” on
Importing an image using the TWAIN interface
TWAIN is a cross-platform interface for acquiring images captured by certain scanners,
digital cameras, and frame grabbers. The manufacturer of the TWAIN device must provide
a Source Manager and TWAIN Data source for your device to work with Photoshop and
ImageReady.
Using Help | Contents | Index Back 69
Page 70

Adobe Photoshop Help Getting Images into Photoshop and ImageReady
Using Help | Contents | Index Back 70
You must install the TWAIN device and its software, and restart your computer, before you
can use it to import images into Photoshop and ImageReady. See the documentation
provided by your device manufacturer for installation information.
To import an image using the TWAIN interface (Photoshop):
Choose File > Import, and choose the device you want to use from the submenu.
To import an image using the TWAIN interface (ImageReady):
1 If you’re using the TWAIN device for the first time with ImageReady, choose File >
Import > TWAIN Select. Then select the device you want to use. You do not need to repeat
this step for subsequent use of the TWAIN module.
If more than one TWAIN device is installed in your system and you want to switch devices,
use the TWAIN Select command.
2 To import the image, choose File > Import > TWAIN Acquire.
Importing images using WIA (Windows Image Acquisition) Support
Certain digital cameras and scanners can be used to import images using WIA Support.
When you use WIA Support, Photoshop works with Windows and your digital camera or
scanner software to import images directly into Photoshop.
Note: WIA Support is only available if you are using WindowsME or Windows XP.
To import images from a digital camera using WIA Support:
1 Choose File > Import > WIA Support.
2 Choose a destination on your computer for saving your image files.
3 Make sure Open Acquired Images in Photoshop is checked. If you have a large number
of images to import, or if you want to edit the images at a later time, deselect it.
4 Make sure Unique Subfolder is selected if you want to save the imported images
directly into a folder named with the current date.
5 Click Start.
6 Select the digital camera that you want to import images from.
Note: If the name of your camera does not appear in the submenu, verify that the software
and drivers were properly installed and that the camera is connected.
7 Choose the image or images you want to import:
• Click the image from the list of thumbnails to import the image.
• Hold down Shift and click on multiple images to import them at the same time.
• Click Select All to import all available images.
8 Click Get Picture to import the image.
To import images from a scanner using WIA Support:
1 Choose File > Import > WIA Support.
2 Choose a destination on your computer to save image files to.
3 Click Start.
Using Help | Contents | Index Back 70
Page 71

Adobe Photoshop Help Getting Images into Photoshop and ImageReady
Using Help | Contents | Index Back 71
4 Make sure Open Acquired Images in Photoshop is checked. If you have a large number
of images to import, or if you want to edit the images at a later time, deselect it.
5 Make sure Unique Subfolder is selected if you want to save the imported images
directly into a folder named with the current date.
6 Select the scanner that you want to use.
Note: If the name of your scanner does not appear in the submenu, verify that the
software and drivers were properly installed and that the scanner is connected.
7 Choose the kind of image you want to scan:
• Color picture to use the default settings for scanning color images.
• Grayscale picture to use the default settings for scanning grayscale images.
• Black and White picture or Text to use the default settings.
• Click Adjust the Quality of the Scanned Picture to use custom settings.
8 Click preview to view the scan. Crop the scan if needed by pulling the rectangle so it
surrounds the image.
9 Click Scan.
10 The scanned image will be saved in the .bmp file format.
Scanning using the resolution setting (Photoshop)
You can determine the resolution for your scan using the original and final image dimensions and the resolution of your output device. Scan resolution translates into image
resolution when you open the scanned image in Photoshop.
To estimate scan resolution:
1 Do one of the following:
• For laser printers and imagesetters, multiply the printer’s screen frequency by 2.
To determine your printer’s screen frequency, check your printer documentation or
consult your service provider.
• For ink jet printers, check your printer documentation for the optimal resolution.
Many dye sublimation printers and devices that print directly onto photographic paper
have an optimal resolution of 300 to 400 dpi.
2 Determine the ratio of the final image dimensions to the original image dimensions.
For example, the ratio of a 6-by-9-inch final image to a 2-by-3-inch original image is 3.
3 Multiply the result of step 1 by the result of step 2.
For example, suppose you are printing to an imagesetter with a screen frequency of 85 lpi
and the ratio of the final image to the original is 3. First multiply 85 (the screen frequency)
by 2 to get 170. Then multiply 170 by 3 to get a scan resolution of 510 ppi. If you are
printing to an ink jet printer with an optimal resolution of 300 dpi, multiply 300 by 3 to get
a scan resolution of 900.
Note: Different color separation procedures might require different ratios of image
resolution to screen frequency. It’s a good idea to check with your service provider or print
shop before you scan the image.
Using Help | Contents | Index Back 71
Page 72

Adobe Photoshop Help Getting Images into Photoshop and ImageReady
Using Help | Contents | Index Back 72
Scanning using the file size setting (Photoshop)
You can create a dummy file to predict the file size needed for the final output of
your scan.
To calculate the file size before scanning an image:
1 In Photoshop choose File > New.
2 Enter the width, height, and resolution for your final printed image. The resolution
should be 1.5 to 2 times the screen frequency you will use to print. Make sure that the
mode you plan to scan in is selected. For more information, see “
models (Photoshop)” on page 86. The New dialog box displays the file size.
For example, suppose you want the final image to be 4 inches wide and 5 inches high.
You plan to print it with a 150-line screen using a 2:1 ratio, so you set the resolution to 300.
The resulting file size is 5.15 MB.
To produce the scan, enter the resulting file size in your scanner settings. Don’t worry
about resolution or image dimensions. After you have scanned the image and imported it
into Photoshop, use the Image Size command (with the Resample Image option
deselected) to enter the correct width and height for the image.
About color modes and
Optimizing the dynamic range of the scan (Photoshop)
Keep in mind that the human eye can detect a wider tonal range than can be printed.
If your scanner allows, set the black and white points before scanning a file to produce
the best tonal range and capture the widest dynamic range. Then use Photoshop’s color
adjustment tools to set the white and black points for the scanned image. (See “
the tonal range.” on page 129.)
3. Adjust
Eliminating unwanted color casts (Photoshop)
If your scanned image contains an unwanted color cast, you can perform a simple test to
determine whether the cast was introduced by your scanner. If it was, you can use the
same test file to create a color-cast correction for all images scanned with the scanner.
To identify and correct a color cast introduced by a scanner:
1 Make sure that your monitor has been calibrated. (See “
on page 117.)
2 Open a new Photoshop file, and use the linear gradient tool to create a blend from
pure black to pure white.
3 Choose Image > Adjust > Posterize, and posterize the blend using 11 levels.
4 Print the 11-step gray wedge on a black-and-white printer, and then scan it into
Photoshop.
Note: You can also perform this test using an 18-percent neutral gray card or an 11-step
gray wedge from a photography store.
Creating an ICC monitor profile”
5 Open the Info palette, and read the RGB values on-screen for each of the gray levels.
Uneven R, G, and B values indicate a color cast.
6 Use Levels or Curves to correct the color cast, and then save the dialog box settings.
4. Adjust the color balance.” on page 130.)
(See “
7 Open the scanned image you want to correct, reopen the dialog box you used to
correct the cast in step 6, and load the saved settings.
Using Help | Contents | Index Back 72
Page 73

Adobe Photoshop Help Getting Images into Photoshop and ImageReady
Using Help | Contents | Index Back 73
Creating new images
The New command lets you create a blank image.
To create a new image:
1 Do one of the following:
• To base the image dimensions and resolution (Photoshop) on the Clipboard contents,
choose File > New. If the Clipboard does not contain image data, the image dimensions
and resolution are based on the last image you created.
• (Photoshop) To base the image size on the default dimensions and resolution or the
last entered settings, hold down Alt (Windows) or Option (Mac OS) when you choose
File > New.
2 If desired, type a name for the image, and set the width and height.
(Photoshop) To match the width and height of the new image to that of any open
image, choose a filename from the bottom section of the Windows menu.
3 (Photoshop) Set the resolution and mode. For more information, see “
and resolution” on page 62 and “About color modes and models (Photoshop)” on page 86.
About image size
4 Select an option for the contents of the background layer (Photoshop) or first layer
(ImageReady) of the image:
• White to fill the background or first layer with white, the default background color.
• Background Color to fill the background or first layer with the current background color.
(See “
Choosing foreground and background colors” on page 257.)
• Transparent to make the first layer transparent, with no color values. The resulting
document will have a single, transparent layer as its contents.
Opening and importing images
You can open and import images in various file formats. The available formats appear in
the File Browser, the Open dialog box, the Open As dialog box (Windows), or the Import
submenu. (See “
Note: Photoshop and ImageReady use plug-in modules to open and import many file
formats. If a file format does not appear in the Open dialog box or in the File > Import
submenu, you may need to install the format’s plug-in module. (See “
modules” on page 58.)
Opening files
You can open files using the Open command and Open Recent command. In Photoshop,
you can also open files using the File Browser. For more information, see “
Browser (Photoshop)” on page 78.
About file formats” on page 453.)
Using plug-in
Using the File
There may be instances when Photoshop cannot determine the correct format for a file.
For example, transferring a file between Mac OS and Windows can cause the format to be
mislabeled. In such cases, you must specify the correct format in which to open the file.
To open a file using the Open command:
1 Choose File > Open.
Using Help | Contents | Index Back 73
Page 74

Adobe Photoshop Help Getting Images into Photoshop and ImageReady
Using Help | Contents | Index Back 74
2 Select the name of the file you want to open. If the file does not appear, select the
option for showing all files from the Files of Type (Windows) or Show (Mac OS) pop-up
menu.
3 (Mac OS) Click Show Preview to preview the selected file. This option requires the Apple
QuickTime extension.
Note: Previews display faster if they are saved with the file. In Photoshop, select Always
Save for Image Previews in the Saving Files preferences to always save a preview; select
Ask When Saving to save previews on a file-per-file basis.
4 Click Open. In some cases, a dialog box appears, letting you set format-specific options.
Opening and importing PDF files” on page 74 and “Opening PostScript artwork” on
(See “
page 76.)
Note: If a color profile warning message appears, specify whether to convert the pixels
based on the file’s color profile. (See “
Specifying color management policies” on page 108.)
To open a recently used file:
Choose File > Open Recent, and select a file from the submenu.
To specify the number of files that are available in the Open Recent submenu:
1 Do one of the following:
• (Photoshop) In Windows or Mac OS 9.x, choose Edit > Preferences > File Handling.
• (Photoshop) In Mac OS X, choose Photoshop > Preferences > File Handling.
• (ImageReady) In Windows or Mac OS 9.x, choose Edit > Preferences > General.
• (ImageReady) In Mac OS X, choose ImageReady > Preferences > General.
2 Do one of the following:
• (Photoshop) Enter a number in the Recent File List Contains text box.
• (ImageReady) Enter a number in the Recent Files text box.
To specify the file format in which to open a file (Photoshop):
Do one of the following:
• (Windows) Choose File > Open As, and select the file you want to open. Then choose
the desired format from the Open As pop-up menu, and click Open.
• (Mac OS) Choose File > Open, and choose All Documents from the Show pop-up menu.
Then select the file you want to open, choose the desired file format from the Format
pop-up menu, and click Open.
Important: If the file does not open, then the chosen format may not match the file’s true
format, or the file may be damaged.
Opening and importing PDF files
Portable Document Format (PDF) is a versatile file format that can represent both vector
and bitmap data and can contain electronic document search and navigation features.
PDF is the primary format for Adobe Illustrator and Adobe Acrobat. For more information
on the PDF format, see “
Using Help | Contents | Index Back 74
PDF” on page 456.
Page 75

Adobe Photoshop Help Getting Images into Photoshop and ImageReady
Using Help | Contents | Index Back 75
Some PDF files contain a single image. Other PDF files (called Generic PDF files) may
contain multiple pages and images. When you open a Generic PDF file, you can choose
which page to open and specify rasterization options. If you want to open an image
(versus a page) from a PDF file, you can use the File > Import > PDF Image command.
You can also bring PDF data into Photoshop or ImageReady using the Place command,
the Paste command, and the drag-and-drop feature. (See “
“
Using drag and drop to copy between applications” on page 170, and “Using the
Placing files” on page 80,
Clipboard to copy between applications” on page 171.)
To open a PDF file:
1 Choose File > Open.
2 Select the name of the file, and click Open. You can change which types of files show by
selecting an option from the Files of Type (Windows) or Show (Mac OS) pop-up menu.
3 If you are opening a Generic PDF file, do the following:
• If the file contains multiple pages, select the page you want to open.
• Indicate the desired dimensions, resolution, and mode. If the file has an embedded ICC
profile and Preserve Embedded Profiles is selected for Color Management Policies in
the Color Settings dialog box, you can choose the profile from the mode pop-up menu.
• Select Constrain Proportions to maintain the same height-to-width ratio.
• Select Anti-aliased to minimize the jagged appearance of the artwork’s edges as it is
rasterized.
To import images from a PDF file:
1 Choose File > Import > PDF Image, select the file you want to import images from,
and click Open.
2 Select the image you want to open:
• To open a specific image, select it and click OK. You can use the arrows to scroll through
the images, or click Go to Image to enter an image number.
• To open each image as a separate file, click Import All Images.
Press Esc to cancel the import operation before all images are imported.
To create a new Photoshop file for each page of a multiple-page PDF file
(Photoshop):
1 Choose File > Automate > Multi-Page PDF to PSD.
2 Under Source PDF, click the Choose button, and select the file you want to import
images from.
3 Under Page Range, specify a range of pages to import.
4 Under Output Options, specify a resolution, choose a color mode, and set the Anti-alias
option for rasterizing each page of the PDF file. (To blend edge pixels during rasterization,
select the Anti-alias option. To produce a hard-edged transition between edge pixels
during rasterization, deselect the Anti-alias option.)
Using Help | Contents | Index Back 75
Page 76

Adobe Photoshop Help Getting Images into Photoshop and ImageReady
Using Help | Contents | Index Back 76
5 Under Destination, enter a base name for the generated files. (When Photoshop creates
the new files, the base name is appended with a number that corresponds to the page
number of the PDF file.) Then click the Choose button, and select the location where you
want to save the generated files.
Opening PostScript artwork
Encapsulated PostScript® (EPS) can represent both vector and bitmap data and is
supported by virtually all graphic, illustration, and page-layout programs. Adobe applications that produce PostScript artwork include Adobe Illustrator, Adobe Dimensions, and
Adobe Streamline. When you open an EPS file containing vector art, it is rasterized—the
mathematically defined lines and curves of the vector artwork are converted into the
pixels or bits of a bitmap image.
You can also bring PostScript artwork into Photoshop or ImageReady using the Place
command, the Paste command, and the drag-and-drop feature. (See “
page 80, “Using drag and drop to copy between applications” on page 170, and “Using the
Clipboard to copy between applications” on page 171.)
To open an EPS file:
Placing files” on
1 Choose File > Open.
2 Select the file you want to open, and click Open.
3 Indicate the desired dimensions, resolution, and mode. To maintain the same height-to-
width ratio, select Constrain Proportions.
4 Select Anti-aliased to minimize the jagged appearance of the artwork’s edges as it is
rasterized.
Turning off anti-aliasing for PDF and EPS files (ImageReady)
The Anti-alias PostScript option removes jagged edges from a pasted or placed selection
by making a subtle transition between the edges of the selection and its surrounding
pixels. Turning off this option produces a hard-edged transition between pixels—and
therefore the appearance of jagged edges—when vector artwork is rasterized.
Note: In Photoshop, you can deselect the Anti-alias option when you open or place a PDF
or EPS file.
To turn off the Anti-alias PostScript option:
1 Do one of the following:
• In Windows or Mac OS 9.x, choose Edit > Preferences > General.
• In Mac OS X, choose ImageReady > Preferences > General.
2 Deselect Anti-alias PostScript. Clearing this option can decrease the time it takes to
import the file.
Opening Photo CD files
You can open Kodak® Photo CD™ (PCD) files, including high-resolution files from Pro Photo
CD discs.
Note: You cannot save files in PCD format from Photoshop or ImageReady.
Using Help | Contents | Index Back 76
Page 77

Adobe Photoshop Help Getting Images into Photoshop and ImageReady
Using Help | Contents | Index Back 77
To open a Photo CD file:
1 Choose File > Open.
2 Select the PCD file you want to open, and click Open. If the file does not appear, select
the option for showing all files from the Files of Type (Windows) or Show (Mac OS) menu.
3 Select options for the source image:
• Pixel Size to specify the pixel dimensions of the image. Keep in mind that the on-screen
size of the opened image depends on both the pixel size and resolution you choose.
(See “
About image size and resolution” on page 62.)
• Profile to specify a device profile for color management. (See “About color
management” on page 102.)
4 Select options for the destination image:
• Resolution to specify the resolution of the opened image.
• Color Space to specify a color profile for the opened image. (See “About color
management” on page 102.)
• Landscape or Portrait to specify the orientation of the opened image.
Opening Raw files (Photoshop)
The Raw format is designed to accommodate images saved in undocumented formats,
such as those created by scientific applications. Compressed files, such as PICT and GIF,
cannot be opened using this format.
To open a file using the Raw format:
1 Choose File > Open or File > Open As (Windows).
2 Choose Raw from the file format list, and click Open.
3 For Width and Height, enter values for the dimensions of the file.
4 To reverse the order of the width and height, click Swap.
5 Enter the number of channels.
6 Select Interleaved if the file was saved with an interlaced data option.
7 Select a color depth and, if necessary, a byte order.
8 For Header, enter a value.
9 If you are missing the dimensions or header value, you can have Photoshop estimate
the parameters. Either enter the correct height and width values to estimate the header
size, or enter the correct header size to estimate the height and width, and then click
Guess.
10 To have Photoshop retain the header when you save the file, select Retain When
Saving.
Importing anti-aliased PICT files (Mac OS)
Choose File > Import > Anti-aliased PICT to import object-oriented PICT files (such as
those created with MacDraw and Canvas) as smooth-edged, or anti-aliased, images.
Because the entire PICT file must be held in memory for this module to operate, you may
not be able to use the module with large PICT files.
Using Help | Contents | Index Back 77
Page 78

Adobe Photoshop Help Getting Images into Photoshop and ImageReady
Using Help | Contents | Index Back 78
The Anti-aliased PICT dialog box indicates the current file size and dimensions. To change
the image dimensions, enter new values for Width and Height. The file size is then
updated. To maintain image proportions, select Constrain Proportions.
You can choose Grayscale or RGB color mode for an anti-aliased PICT file.
Importing PICT resources (Mac OS)
The PICT Resource module lets you read PICT resources from a file—for example, from
another application. To open a PICT resource, choose File > Import > PICT Resource.
To preview a resource, click Preview. Click the arrow buttons to step forward and backward
through the resources. Note that the number displayed for Resource refers to the
resource’s position in ascending order in the resource fork and not to the resource’s identification number.
Note: In Photoshop, you can also open a file in the PICT Resource file format by choosing
File > Open, choosing All Documents from the Show pop-up menu, selecting the file you
want to open, choosing PICT Resource from the Format pop-up menu, and clicking Open.
However, the Open command automatically opens the first resource in the file and does
not display any other PICT resources in the file.
Using the File Browser (Photoshop)
File Browser lets you view, sort, and process image files. You can use the File Browser to
perform tasks such as creating new folders; renaming, moving, and deleting files; and
rotating images. You can also view individual file information and data imported from
your digital camera.
A
C
The Photoshop File Browser:
A. File information B. File Browser palette menu C. File information pop-up menu
D. Sort By pop-up menu E. View By pop-up menu
D E
B
Displaying the File Browser Choose File > Browse or Window > File Browser. By default,
the File Browser is displayed in the palette well. To display the File Browser in a separate
window, choose Show in Separate Window from the palette menu. For more information
on using palettes in the palette well, see “
Using the palette well (Photoshop)” on page 26.
Using Help | Contents | Index Back 78
Page 79

Adobe Photoshop Help Getting Images into Photoshop and ImageReady
Using Help | Contents | Index Back 79
Using the File Browser palette menu Click the triangle in the upper right corner of
the palette to access commands for working with layers. If the palette is docked in the
palette well, click the triangle on the palette tab.
Navigating in the File Browser Double-click a folder to view its contents. To show or
hide folders on the right side of the palette, choose the Show Folders from the palette
menu. A check mark indicates that folders are showing.
Changing the display of files Choose a thumbnail display option from the palette menu,
or click the View By pop-up menu at the bottom of the File Browser and choose a display
option.
Sorting files Click the Sort By pop-up menu at the bottom of the File Browser, and
choose a sorting option.
Ranking files Ranking lets you manually control the sort order of files. To specify a rank,
choose the Large Thumbnail with Rank display option, click in the Rank field, type a letter,
and press Enter (Windows) or Return (Mac OS). Alternately, right click (Windows) or
Control-click (Mac OS) a thumbnail and choose a rank from the context menu.
Note: To rank multiple files, select multiple thumbnails and then choose a rank from the
context menu.
Displaying file information Click the File Information pop-up menu at the bottom of the
File Browser, and select one of the following: All to view all image information for a file; or
EXIF to view image information imported from your digital camera. For more information,
Adding file information (Photoshop)” on page 459.
see “
Selecting and deselecting files On the right side of the palette, click a thumbnail to
select the file, or Shift-click to select multiple files. To select all files in the current folder,
choose Select All from the palette menu. To deselect all files, choose Deselect All from the
palette menu.
Opening files Select the file or files you want to open, and do one of the following: select
a file and press Enter (Windows) or Return (Mac OS); double-click a selected file; drag the
selected file or files out of the File Browser; or choose Open from the palette menu.
When the File Browser is docked in the palette well, double-clicking a file or selecting a file
and pressing Enter (Windows) or Return (Mac OS) opens the image and closes the File
Browser. To keep the File Browser open, hold down Alt (Windows) or Option (Mac OS)
when you double-click the file, press Enter (Windows), or press Return (Mac OS).
Renaming files and folders On the right side of the palette, click a filename or folder
name, or select a file or folder and choose Rename from the palette menu. Then type a
new name, and press Enter (Windows) or Return (Mac OS).
Note: To move to the next filename, press Tab. To move to the previous filename, press
Shift+Tab.
Renaming files in batches To rename all the files in a folder, make sure that no files are
selected. To rename a subset of files in a folder, select the files you want to rename. Then
choose Batch Rename from the palette menu, and set the following options:
• For Destination Folder, select where you want to place the renamed files: in the same
folder or in a different folder. If you select Move to New Folder, click Browse to select a
different folder.
Using Help | Contents | Index Back 79
Page 80

Adobe Photoshop Help Getting Images into Photoshop and ImageReady
Using Help | Contents | Index Back 80
• For File Naming, choose elements from the pop-up menus or enter text into the fields.
The specified elements and text will be combined to create the new filename.
• For Compatibility, select the operating systems with which you want renamed files to
be compatible. The current operating system is selected by default, and you cannot
deselect it.
Deleting files Select the file or files you want to delete, and do one of the following: click
the Trash button, drag the files to the Trash button , press the Delete key, or choose
Delete from the palette menu.
Creating new folders Choose New Folder from the palette menu, type a name, and press
Enter (Windows) or Return (Mac OS).
Moving and copying files To move a file, drag it to a different folder; to copy a file, Altdrag (Windows) or Option-drag (Mac OS) it to a different folder.
Rotating images Select one or more files, and do one of the following: choose a rotation
option from the palette menu; click the Rotate button to rotate the images clockwise by
90 degrees; or Alt-click (Windows) or Option-click (Mac OS) the Rotate button to rotate
the images counter-clockwise by 90 degrees.
Refreshing the view When you rename a file, the order of files in the File Browser is not
automatically updated. To refresh the view, choose Refresh Desktop View from the palette
menu. Closing and reopening the File Browser also refreshes the view.
Displaying files in the Windows Explorer or Mac OS Finder Choose Reveal Location in
Explorer (Windows) or Reveal Location in Finder (Mac OS) from the palette menu.
Purging the cache The cache stores thumbnail and file information to make loading
times quicker when you return to a previously viewed folder. To purge the cache and free
disk space, choose Purge Cache from the palette menu.
Note: Purging the cache deletes ranking and thumbnail information.
Exporting the cache Exporting the cache allows you to burn a CD without having to
generate thumbnails. To export the cache, choose Export Cache from the palette menu.
The cache is exported to the current folder in the File Browser.
Placing files
You can use the File > Place command to place artwork into a new layer in an image.
In Photoshop, you can place PDF, Adobe Illustrator, and EPS files; in ImageReady, you can
place files in any supported format, with the exception of Photoshop (PSD) files containing
CMYK images.
When you place a PDF, Adobe Illustrator, or EPS file, it is rasterized; you cannot edit text or
vector data in placed artwork. Keep in mind that artwork is rasterized at the resolution of
the file into which it is placed.
To place a PDF, Adobe Illustrator, or EPS file (Photoshop):
1 Open the Photoshop image into which you want to place the artwork.
2 Choose File > Place, select the file you want to place, and click Place.
3 If you are placing a PDF file that contains multiple pages, select the page you want to
place in the provided dialog box, and click OK.
Using Help | Contents | Index Back 80
Page 81

Adobe Photoshop Help Getting Images into Photoshop and ImageReady
Using Help | Contents | Index Back 81
The placed artwork appears inside a bounding box at the center of the Photoshop image.
The artwork maintains its original aspect ratio; however, if the artwork is larger than the
Photoshop image, it is resized to fit.
4 If desired, reposition the placed artwork by doing one or more of the following:
• Position the pointer inside the bounding box of the placed artwork, and drag.
• In the options bar, enter a value for X to specify the distance between the center point
of the placed artwork and the left edge of the image. Enter a value for Y to specify the
distance between the center point of the placed artwork and the top edge of the
image.
• To adjust the center point of the placed artwork, drag the center point to a new
location, or click a handle on the center point icon in the options bar.
5 If desired, scale the placed artwork by doing one or more of the following:
• Drag one of the handles at the corners or sides of the bounding box. Hold down Shift as
you drag a corner handle to constrain the proportions.
• In the options bar, enter values for W and H to specify the width and height of the
artwork. By default, these options represent scale as a percentage; however, you can
enter another unit of measurement. To constrain the proportions of the artwork, click
the Constrain Proportions icon ; the option is on when the icon has a white
background.
6 If desired, rotate the placed artwork by doing one or more of the following:
• Position the pointer outside the bounding box of the placed artwork (the pointer turns
into a curved arrow), and drag.
• In the options bar, enter a value (in degrees) for the Rotation option .
The artwork rotates around the center point of the placed artwork. To adjust the center
point, drag it to a new location, or click a handle on the Center Point icon in the
options bar.
7 If desired, skew the placed artwork by holding down Ctrl (Windows) or Command
(Mac OS), and dragging a side handle of the bounding box.
8 Set the Anti-alias option in the options bar as desired. To blend edge pixels during
rasterization, select the Anti-alias option. To produce a hard-edged transition between
edge pixels during rasterization, deselect the Anti-alias option.
9 To commit the placed artwork to a new layer, do one of the following:
• Click the OK button in the options bar.
• Press Enter or Return.
To cancel the placement, click the Cancel button in the options bar, or press Esc.
To place a file (ImageReady):
1 Open the ImageReady image into which you want to place the file.
2 Choose File > Place, select the file you want to place, and click Open.
3 Select offset options:
• From the Horizontal pop-up menu, choose an option for placing the file horizontally
with respect to the image. In the Pixels text box, enter the number of pixels to offset the
placed image horizontally.
Using Help | Contents | Index Back 81
Page 82

Adobe Photoshop Help Getting Images into Photoshop and ImageReady
Using Help | Contents | Index Back 82
• From the Vertical pop-up menu, choose an option for placing the file vertically with
respect to the image. In the Pixels text box, enter the number of pixels to offset the
placed image vertically.
Note: To enter a negative number (and offset the placed file to the left or below the
image), type a hyphen (-) before the number.
4 Click OK.
5 If you are placing a PDF file that contains multiple pages, select the page you want to
place, and click OK.
6 If you are placing a PDF or EPS file, select Rasterize options, and click OK:
• Enter Width and Height values for Image Size.
• Select Anti-aliased to minimize the jagged appearance of the artwork’s edges as it is
rasterized.
• Select Constrain Proportions to maintain the same height-to-width ratio.
Managing files with WebDAV (Photoshop)
Photoshop supports the Web Distributed Authoring and Versioning (WebDAV) server
technology. Using this technology, you can connect to a WebDAV server, download and
upload files, lock files so others cannot work on them at the same time as you, and add
additional files (called assets) to the server. Use a WebDAV server to work in a collaborative
environment without fear that files will be accidentally overwritten or updates lost.
About workgroup management
When working in a collaborative environment, users must share files. The process of
passing files from one collaborator to another involves working with a workgroup.
Controlling the hand-off—so that only one person can edit a file at any given time—
is called workgroup management.
A WebDAV server provides workgroup management via the Web. When a file is managed
by a WebDAV server, multiple users can download copies of the file, but only one user at a
time can check out the file. The user who checks out the file can share his or her work with
other users by updating the file on the server; however, other users can’t make changes to
the managed file until it is checked in. This check out/check in system allows multiple
users to access the same file but prevents users from overwriting each other’s work.
Getting started with workgroup management
To use the workgroup management features in Photoshop, you must be able to connect
to a WebDAV server. You can find detailed information and the latest news about WebDAV
at www.webdav.org.
Important: Firewall software can interfere with the process of connecting to a WebDAV
server. Check with your system administrator or refer to your firewall software documentation for information about setting options to access outside servers.
You can also set preferences to determine whether or not the Workgroup pop-up
menu appears and the default behavior for checking out and updating files.
To set up a server for use with Photoshop:
1 Choose File > Workgroup > Workgroup Servers.
Using Help | Contents | Index Back 82
Page 83

Adobe Photoshop Help Getting Images into Photoshop and ImageReady
Using Help | Contents | Index Back 83
2 Specify a folder in which you want to store local copies of managed files. To change the
default location, click Choose, and specify a different folder. Click Show to locate a folder in
the Windows Explorer or the Mac OS Finder.
Note: The path you choose here is used for all servers you want to add. Changing this path
does not change the location of files on existing servers.
3 Select the WebDAV server you want to use, or do one of the following:
• To add a new server to the list, click New Server, specify a unique server nickname and
URL, and click OK.
• To edit a server in the list, click Edit Server. To view the folder where local copies of
managed files are stored, click Advanced Options, then click Show.
• To remove a server from the list, click Remove, and then click OK to the warning
message.
4 Click Done.
To set workgroup management preferences:
1 Do one of the following:
• In Windows and Mac OS 9.x, choose Edit > Preferences > File Handling.
• In Mac OS X, choose Photoshop > Preferences > File Handling.
2 Do one of the following:
• To show the Workgroup pop-up menu at the bottom of the application window
(Windows) or document window (Mac OS), select Enable Workgroup functionality.
• To hide the Workgroup pop-up menu, deselect Enable Workgroup functionality.
3 Select one of the following options for Check Out from Server:
• Never to open the local copy of the file without displaying a dialog box and without
checking it out.
• Always to automatically check out the file when you open it.
• Ask to display a dialog box when you open a file that is not checked out.
4 Select one of the following options for Update from Server:
• Never to open the local copy of the file without displaying a dialog box and without
downloading the latest version of the file from the server.
• Always to automatically download the latest version of the file from the server.
• Ask to display a dialog box asking if you want to download the latest version.
Logging on and off WebDAV servers
Different WebDAV servers have different authentication requirements. Some servers
require you to enter a user name and password for every transaction; other servers require
authentication only once per session. When the Authentication dialog box appears, enter
your user name and password.
To log off all WebDAV servers:
Choose File > Workgroup > Logoff All Servers.
Using Help | Contents | Index Back 83
Page 84

Adobe Photoshop Help Getting Images into Photoshop and ImageReady
Using Help | Contents | Index Back 84
Opening managed files
To view a managed file, open a copy of the file from a WebDAV server. The File >
Workgroup > Open command creates a local copy of the file on your hard drive.
After you have a local copy of a file, you can revert it to the version of the file on the server
(for checked out files) or update it with changes from the file on the server (for nonchecked out files). Reverting and updating permanently discard all changes you’ve made
to the file.
To open a managed file:
1 Choose File > Workgroup > Open.
2 Select a server, a directory, and the file you want to open.
3 Do one of the following:
• Click Check Out if you want to open and check out at the same time. (See “Checking
files out and in” on page 84.)
• Click Open if you want to open a local copy without checking it out.
To revert a checked out file to the version on the server:
1 Open your local copy of the file.
2 Do one of the following:
• Choose File > Workgroup > Revert.
• Choose Revert from the Workgroup pop-up menu at the bottom of the application
window (Windows) or document window (Mac OS).
To update a non-checked out file from the version on the server:
1 Open your local copy of the file.
2 Do one of the following:
• Choose File > Workgroup > Update.
• Choose Update from the Workgroup pop-up menu .
Checking files out and in
Checking out a file prevents other users from making changes to it on the WebDAV server.
When you’re finished making edits, check in the file to update your changes to the server
and release your lock on the managed file.
To check out a file:
Do one of the following:
• To check out the file that you already have open, choose File > Workgroup > Check Out.
Alternately, choose Check Out from the Workgroup pop-up menu at the bottom of
the application window (Windows) or document window (Mac OS).
• To open and check out a file at the same time, choose File > Workgroup > Open. Then,
locate and select the file and click Check Out. (See “
Opening managed files” on
page 84.)
To verify if a local file is available for check out:
1 Open your copy of the file.
Using Help | Contents | Index Back 84
Page 85

Adobe Photoshop Help Getting Images into Photoshop and ImageReady
Using Help | Contents | Index Back 85
2 Choose File > Workgroup > Verify State, or choose Verify State from the Workgroup
pop-up menu.
To check in a file:
Do one of the following:
• To check in the file and update changes to the server, choose File > Workgroup >
Check In. Alternately, choose Check In from the Workgroup pop-up menu.
• To check in the file without updating changes to the server, choose File > Workgroup >
Cancel Check Out. Alternately, choose Cancel Check Out from the Workgroup
pop-up menu.
Saving changes to the server
While you have a file checked out, you can save changes to the managed file on the server.
This allows you to share your work with other users without giving up your lock on the file.
To save changes to the server:
1 Open your local copy of the file.
2 Do one of the following:
• Choose File > Workgroup > Save.
• Choose Save from the Workgroup pop-up menu at the bottom of the application
window (Windows) or document window (Mac OS).
Adding files to the server
Adding a file to a WebDAV server initiates workgroup management for the file; in other
words, you create a managed file by adding it to a server.
To add a file to a WebDAV server:
1 Open the file you want to add to the server.
2 Do one of the following:
• Choose File > Workgroup > Save As.
• Choose Save As from the Workgroup pop-up menu at the bottom of the application
window (Windows) or document window (Mac OS).
3 Choose a server from the pop-up menu; then locate the directory to which you want to
save the file.
4 Type in a filename in the Name text box, and choose a format from the Format pop-up
menu.
Note: Be sure to specify a file extension if the file will be downloaded to a computer
running a Windows operating system.
5 To check out the file, select Keep This File Checked Out for Editing.
6 Click Save.
Using Help | Contents | Index Back 85
Page 86

Adobe Photoshop Help Working with Color
Using Help | Contents | Index Back 86
Wo r king with Color
About color modes and models (Photoshop)
A color mode determines the color model used to display and print images. Photoshop
bases its color modes on established models for describing and reproducing color.
Common models include HSB (hue, saturation, brightness); RGB (red, green, blue); CMYK
(cyan, magenta, yellow, black); and CIE L*a*b*. Photoshop also includes modes for
specialized color output such as Indexed Color and Duotone. ImageReady uses RGB mode
to work with images.
In addition to determining the number of colors that can be displayed in an image, color
modes affect the number of channels and the file size of an image.
You can set up the Info palette so that you can select any tool, position the pointer
over any part of an image, and determine the color value under the pointer. You can
customize the Info palette and color samplers to express color values using HSB, RGB,
CMYK, Lab, or Grayscale modes without changing the mode of the image itself. (See
“
Seeing the color values of pixels (Photoshop)” on page 133 and the procedure to change
Info palette options in “
Using the Info palette (Photoshop)” on page 32.)
HSB model
Based on the human perception of color, the HSB model describes three fundamental
characteristics of color:
• Hue is the color reflected from or transmitted through an object. It is measured as a
location on the standard color wheel, expressed as a degree between 0° and 360°.
In common use, hue is identified by the name of the color such as red, orange, or green.
• Saturation, sometimes called chroma, is the strength or purity of the color. Saturation
represents the amount of gray in proportion to the hue, measured as a percentage
from 0% (gray) to 100% (fully saturated). On the standard color wheel, saturation
increases from the center to the edge.
• Brightness is the relative lightness or darkness of the color, usually measured as a
percentage from 0% (black) to 100% (white).
Using Help | Contents | Index Back 86
Page 87

Adobe Photoshop Help Working with Color
Using Help | Contents | Index Back 87
Although you can use the HSB model in Photoshop to define a color in the Color palette or
Color Picker dialog box, there is no HSB mode available for creating and editing images.
A
HSM model:
A. Saturation B. Hue C. Brightness D. All hues
B
C
D
RGB model
A large percentage of the visible spectrum can be represented by mixing red, green, and
blue (RGB) colored light in various proportions and intensities. Where the colors overlap,
they create cyan, magenta, yellow, and white.
Because the RGB colors combine to create white, they are also called additive colors.
Adding all colors together creates white—that is, all visible wavelengths are transmitted
back to the eye. Additive colors are used for lighting, video, and monitors. Your monitor,
for example, creates color by emitting light through red, green, and blue phosphors.
Additive colors (RGB)
RGB mode
Photoshop’s RGB mode uses the RGB model, assigning an intensity value to each pixel
ranging from 0 (black) to 255 (white) for each of the RGB components in a color image.
For example, a bright red color might have an R value of 246, a G value of 20, and a B value
of 50. When the values of all three components are equal, the result is a shade of neutral
gray. When the value of all components is 255, the result is pure white; when the value is 0,
pure black.
RGB images use three colors, or channels, to reproduce up to 16.7 million colors on-screen;
the three channels translate to 24 (8 x 3) bits of color information per pixel. (In 16-bit-perchannel images, this translates to 48 bits per pixel, with the ability to reproduce many
more colors.) In addition to being the default mode for new Photoshop images, the RGB
model is used by computer monitors to display colors. This means that when working in
color modes other than RGB, such as CMYK, Photoshop uses RGB mode for display
on-screen.
Using Help | Contents | Index Back 87
Page 88

Adobe Photoshop Help Working with Color
Using Help | Contents | Index Back 88
Although RGB is a standard color model, the exact range of colors represented can vary,
depending on the application or display device. Photoshop’s RGB mode varies according
to the working space setting that you have specified in the Color Settings dialog box.
(See “
About working spaces” on page 106.)
CMYK model
The CMYK model is based on the light-absorbing quality of ink printed on paper. As white
light strikes translucent inks, certain visible wavelengths are absorbed while others are
reflected back to your eyes.
In theory, pure cyan (C), magenta (M), and yellow (Y) pigments should combine to absorb
all light and produce black. For this reason these colors are called subtractive colors.
Because all printing inks contain some impurities, these three inks actually produce a
muddy brown and must be combined with black (K) ink to produce a true black. (K is used
instead of B to avoid confusion with blue.) Combining these inks to reproduce color is
called four-color process printing.
The subtractive (CMY) and additive (RGB) colors are complementary colors. Each pair of
subtractive colors creates an additive color, and vice versa.
Subtractive colors (CMYK)
CMYK mode
In Photoshop’s CMYK mode, each pixel is assigned a percentage value for each of the
process inks. The lightest (highlight) colors are assigned small percentages of process ink
colors, the darker (shadow) colors higher percentages. For example, a bright red might
contain 2% cyan, 93% magenta, 90% yellow, and 0% black. In CMYK images, pure white is
generated when all four components have values of 0%.
Use the CMYK mode when preparing an image to be printed using process colors.
Converting an RGB image into CMYK creates a color separation. If you start with an RGB
image, it’s best to edit first and then convert to CMYK. In RGB mode, you can use the Proof
Setup commands to simulate the effects of a CMYK conversion without changing the
actual image data. (See “
to work directly with CMYK images scanned or imported from high-end systems.
Although CMYK is a standard color model, the exact range of colors represented can vary,
depending on the press and printing conditions. Photoshop’s CMYK mode varies
according to the working space setting that you have specified in the Color Settings
dialog box. (See “
About working spaces” on page 106.)
Soft-proofing colors” on page 113.) You can also use CMYK mode
Using Help | Contents | Index Back 88
Page 89

Adobe Photoshop Help Working with Color
Using Help | Contents | Index Back 89
L*a*b model
The L*a*b color model is based on the model proposed by the Commission Internationale
d’Eclairage (CIE) in 1931 as an international standard for color measurement. In 1976, this
model was refined and named CIE L*a*b.
L*a*b color is designed to be device independent, creating consistent color regardless of
the device (such as a monitor, printer, computer, or scanner) used to create or output the
image.
L*a*b color consists of a luminance or lightness component (L) and two chromatic components: the a component (from green to red) and the b component (from blue to yellow).
A
B
C
D
L*a*b* model:
A. Luminance=100 (white) B. Green to red component C. Blue to yellow component
D. Luminance=0 (black)
Lab mode
In Photoshop, Lab mode (the asterisks are dropped from the name) has a lightness
component (L) that can range from 0 to 100. In the color picker, the a component (greenred axis) and the b component (blue-yellow axis) can range from +128 to –128. In the
Color palette, the a component and the b component can range from +120 to –120.
You can use Lab mode to work with Photo CD images, edit the luminance and the color
values in an image independently, move images between systems, and print to PostScript
Level 2 and Level 3 printers. To print Lab images to other color PostScript devices, convert
to CMYK first.
Lab color is the intermediate color model Photoshop uses when converting from one
color mode to another.
Bitmap mode
This mode uses one of two color values (black or white) to represent the pixels in an
image. Images in Bitmap mode are called bitmapped 1-bit images because they have a bit
depth of 1. (See “
Specifying 8-bit color display (Photoshop)” on page 91.)
Grayscale mode
This mode uses up to 256 shades of gray. Every pixel of a grayscale image has a brightness
value ranging from 0 (black) to 255 (white). Grayscale values can also be measured as
percentages of black ink coverage (0% is equal to white, 100% to black). Images produced
using black-and-white or grayscale scanners typically are displayed in Grayscale mode.
Using Help | Contents | Index Back 89
Page 90

Adobe Photoshop Help Working with Color
Using Help | Contents | Index Back 90
Although Grayscale is a standard color model, the exact range of grays represented can
vary, depending on the printing conditions. In Photoshop, Grayscale mode uses the range
defined by the working space setting that you have specified in the Color Settings dialog
box. (See “
About working spaces” on page 106.)
These guidelines apply to converting images to and from Grayscale mode:
• You can convert both Bitmap-mode and color images to grayscale.
• To convert a color image to a high-quality grayscale image, Photoshop discards all color
information in the original image. The gray levels (shades) of the converted pixels
represent the luminosity of the original pixels.
You can mix information from the color channels to create a custom grayscale channel
by using the Channel Mixer command.
• When converting from grayscale to RGB, the color values for a pixel are based on its
previous gray value. A grayscale image can also be converted to a CMYK image (for
creating process-color quadtones without converting to Duotone mode) or to a Lab
color image.
Duotone mode
This mode creates duotone (two-color), tritone (three-color), and quadtone (four-color)
grayscale images using two to four custom inks. (See “
Printing duotones” on page 479.)
Indexed Color mode
This mode uses at most 256 colors. When converting to indexed color, Photoshop builds a
color lookup table (CLUT), which stores and indexes the colors in the image. If a color in
the original image does not appear in the table, the program chooses the closest one or
simulates the color using available colors.
By limiting the palette of colors, indexed color can reduce file size while maintaining visual
quality—for example, for a multimedia animation application or a Web page. Limited
editing is available in this mode. For extensive editing you should convert temporarily to
RGB mode. (See “
Converting to indexed color (Photoshop)” on page 97.)
Multichannel mode
This mode uses 256 levels of gray in each channel. Multichannel images are useful for
specialized printing.
These guidelines apply to converting images to Multichannel mode:
• Channels in the original image become spot color channels in the converted image.
• When you convert a color image to multichannel, the new grayscale information is
based on the color values of the pixels in each channel.
• Converting a CMYK image to multichannel creates cyan, magenta, yellow, and black
spot channels.
• Converting an RGB image to multichannel creates cyan, magenta, and yellow spot
channels.
• Deleting a channel from an RGB, CMYK, or Lab image automatically converts the image
to Multichannel mode. (See “
About color channels” on page 93 for more information on
channels.)
• To export a multichannel image, save it in Photoshop DCS 2.0 format.
Using Help | Contents | Index Back 90
Page 91

Adobe Photoshop Help Working with Color
Using Help | Contents | Index Back 91
Color gamuts (Photoshop)
A gamut is the range of colors that a color system can display or print. The spectrum of
colors seen by the human eye is wider than the gamut available in any color model.
Among the color models used in Photoshop, L*a*b has the largest gamut, encompassing
all colors in the RGB and CMYK gamuts. Typically, RGB gamuts contain the subset of these
colors that can be viewed on a computer or television monitor (which emits red, green,
and blue light). Therefore, some colors, such as pure cyan or pure yellow, can’t be
displayed accurately on a monitor.
CMYK gamuts are smaller, consisting only of colors that can be printed using process-color
inks. When colors that cannot be printed are displayed on-screen, they are referred to as
out-of-gamut colors—that is, outside a CMYK gamut. (See “
colors (Photoshop)” on page 136.)
Important: The gamut for an RGB or CMYK image depends on its document profile.
About color management” on page 102.)
(See “
A
Identifying out-of-gamut
B
C
Color gamuts:
A. A Lab color gamut B. An RGB color gamut C. A CMYK color gamut
Adjusting the monitor display
Although the RGB color model used by computer monitors is capable of displaying much
of the visible spectrum, the video system sending data to a given monitor often limits how
many colors can be displayed at once. By understanding how color data is measured in
digital files and on-screen, you can better adjust color display settings to offset the limitations of your video system.
Specifying 8-bit color display (Photoshop)
When you’re working with a display system that supports 8-bit color, the monitor displays
only 256 different colors at a time. As a result, Adobe Photoshop uses a technique called
dithering to mix pixels of available colors and thus simulate colors not currently available.
Note: Most monitors are capable of displaying 24-bit color. To achieve the best results,
avoid using 8-bit display mode when editing color images.
By default, Adobe Photoshop uses pattern dithering, which can result in a distinctive
pattern of darker or lighter areas in the image. In contrast, diffusion dithering eliminates
this distinctive patterning by using the surrounding pixels in the mix of pixel color. But
diffusion dithering can cause visual inconsistencies when only part of a screen is redrawn
as you scroll, edit, or paint. Keep in mind that dithering effects only appear on-screen, not
in print.
Using Help | Contents | Index Back 91
Page 92

Adobe Photoshop Help Working with Color
Using Help | Contents | Index Back 92
To select a color display option:
1 Do one of the following:
• In Windows or Mac OS 9.x, choose Edit > Preferences > Display & Cursors.
• In Mac OS X, choose Photoshop > Preferences > Display & Cursors.
2 Select Use Diffusion Dither to minimize dither patterns produced by dithering.
Making previews display more quickly (Photoshop)
The Use Pixel Doubling preference option speeds up the preview of a tool or command’s
effects by temporarily doubling the size of the pixels (halving the resolution) in the
preview. This option has no effect on the pixels in the file; it simply provides faster
previews with the tools and commands.
To speed up previews:
1 Do one of the following:
• In Windows or Mac OS 9.x, choose Edit > Preferences > Display & Cursors.
• In Mac OS X, choose Photoshop > Preferences > Display & Cursors.
2 Select Use Pixel Doubling, and click OK.
Adjusting color display for cross-platform variations
RGB color display on a computer monitor varies with the operating system used by the
computer. For example, an image appears darker on a Windows system than on a Mac OS
computer (because the standard RGB color space is darker in Windows than in Mac OS).
The Preview commands in ImageReady enable you to compensate for cross-platform
differences in RGB color display during image preview. In Photoshop, you can simulate
cross-platform differences by using the Macintosh RGB, Windows RGB, and Monitor RGB
commands in the View > Proof Setup menu. (See “
RGB color display can also vary between Photoshop and ImageReady. In Photoshop,
you can select from several RGB color spaces when editing images. As a result, images
created in Photoshop may use an RGB color space that differs from the monitor RGB color
space used by ImageReady. You can adjust the RGB color display during image preview to
compensate for differences between Photoshop and ImageReady.
To adjust RGB color display for cross-platform variations (ImageReady):
Choose View > Preview and choose an option for adjusting the color display:
• Uncompensated Color (the default option) to view the image with no color adjustment.
• Standard Macintosh Color (Windows) to view the image with color adjusted to simulate
a standard Macintosh monitor.
• Standard Windows Color (Mac OS) to view the image with color adjusted to simulate a
standard Windows monitor.
Soft-proofing colors” on page 113.)
Note: These options adjust color display only. No changes are made to pixels in the image.
To adjust RGB color display to match Photoshop color display (ImageReady):
Choose View > Preview > Use Embedded Color Profile.
Note: In order to use the Use Embedded Color Profile command in ImageReady, you must
save the original image, with color profile embedded, in Photoshop.
Using Help | Contents | Index Back 92
Page 93

Adobe Photoshop Help Working with Color
Using Help | Contents | Index Back 93
Channels and bit depth (Photoshop)
A working knowledge of color channels and bit depth is key to understanding how
Photoshop stores and displays color information in images.
About color channels
Every Adobe Photoshop image has one or more channels, each storing information about
color elements in the image. The number of default color channels in an image depends
on its color mode. For example, a CMYK image has at least four channels, one each for
cyan, magenta, yellow, and black information. Think of a channel as analogous to a plate in
the printing process, with a separate plate applying each layer of color.
In addition to these default color channels, extra channels, called alpha channels, can be
added to an image for storing and editing selections as masks, and spot color channels
can be added to add spot color plates for printing. (See “
on page 280 and “Adding spot colors (Photoshop)” on page 272.)
An image can have up to 24 channels. By default, Bitmap-mode, grayscale, duotone, and
indexed-color images have one channel; RGB and Lab images have three; and CMYK
images have four. You can add channels to all image types except Bitmap-mode images.
Storing masks in alpha channels”
About bit depth
Bit depth—also called pixel depth or color depth—measures how much color information
is available to display or print each pixel in an image. Greater bit depth (more bits of information per pixel) means more available colors and more accurate color representation in
the digital image. For example, a pixel with a bit depth of 1 has two possible values: black
and white. A pixel with a bit depth of 8 has 2
depth of 24 has 2
24
, or roughly 16 million, possible values. Common values for bit depth
8
, or 256, possible values. And a pixel with a bit
range from 1 to 64 bits per pixel.
In most cases, Lab, RGB, grayscale, and CMYK images contain 8 bits of data per color
channel. This translates to a 24-bit Lab bit depth (8 bits x 3 channels); a 24-bit RGB bit
depth (8 bits x 3 channels); an 8-bit grayscale bit depth (8 bits x 1 channel); and a 32-bit
CMYK bit depth (8 bits x 4 channels). Photoshop can also read and import Lab, RGB, CMYK,
and grayscale images that contain 16 bits of data per color channel.
Converting between bit depths
A 16-bit-per-channel image provides finer distinctions in color, but it can have twice the
file size of an 8-bit-per-channel image. In addition, only the following Photoshop tools and
commands are available for 16-bit-per-channel images:
• The marquee, lasso, crop, measure, zoom, hand, pen, eyedropper, history brush, slice,
color sampler, clone stamp tools, healing brush tool, and patch tool, as well as the pen
and shape tools (for drawing work paths only).
• The Duplicate, Feather, Modify, Levels, Auto Levels, Auto Contrast, Auto Color, Curves,
Histogram, Hue/Saturation, Brightness/Contrast, Color Balance, Equalize, Invert,
Channel Mixer, Gradient Map, Image Size, Canvas Size, Transform Selection, and Rotate
Canvas commands, and a limited set of filters. (See “
Using filters” on page 321.)
To take full advantage of Photoshop features, you can convert a 16-bit-per-channel image
to an 8-bit-per-channel image.
Using Help | Contents | Index Back 93
Page 94

Adobe Photoshop Help Working with Color
Using Help | Contents | Index Back 94
To convert between 8 bits per channel and 16 bits per channel:
1 To convert to a 16-bit-per-channel image, first flatten the image. (See “
layers” on page 295.)
2 Choose Image > Mode > 16 Bits/Channel or 8 Bits/Channel.
Flattening all
Converting between color modes (Photoshop)
When you choose a different color mode for an image, you permanently change the color
values in the image. For example, when you convert an RGB image to CMYK mode, RGB
color values outside the CMYK gamut (defined by the CMYK working space setting in the
Color Settings dialog box) are adjusted to fall within gamut. Consequently, before
converting images, it’s best to do the following:
• Do as much editing as possible in the image’s original mode (usually RGB from most
scanners, or CMYK from traditional drum scanners or if imported from a Scitex system).
• Save a backup copy before converting. Be sure to save a copy of your image that
includes all layers in order to edit the original version of the image after the conversion.
• Flatten the file before converting it. The interaction of colors between layer blending
modes will change when the mode changes.
To convert an image to another mode:
Choose Image > Mode and the mode you want from the submenu. Modes not available
for the active image appear dimmed in the menu.
Images are flattened when converted to Multichannel, Bitmap, or Indexed Color mode,
because these modes do not support layers.
Converting between Grayscale and Bitmap modes (Photoshop)
Converting an image to Bitmap mode reduces the image to two colors, greatly simplifying
the color information in the image and reducing its file size. To convert an image to Bitmap
mode, you must first convert it to Grayscale mode. This removes the hue and saturation
information from the pixels and leaves just the brightness values. However, because few
editing options are available for Bitmap-mode images, it’s usually best to edit the image in
Grayscale mode and then convert it.
Keep in mind that a Bitmap-mode image edited in Grayscale mode may not look the same
when converted back to Bitmap mode. For example, consider a pixel that is black in
Bitmap mode and then edited to a shade of gray in Grayscale mode. If the gray value of
the pixel is light enough, it will become white when converted back to Bitmap mode.
Using Help | Contents | Index Back 94
Page 95

Adobe Photoshop Help Working with Color
Using Help | Contents | Index Back 95
Making Grayscale and Bitmap mode conversions
Refer to the following instructions for converting images between Grayscale and Bitmap
mode.
To convert an image to Bitmap mode:
1 Do one of the following:
• If the image is in color, choose Image > Mode > Grayscale. Then choose Image > Mode >
Bitmap.
• If the image is grayscale, choose Image > Mode > Bitmap.
2 For Output, enter a value for the output resolution of the Bitmap-mode image, and
choose a unit of measurement. By default, the current image resolution appears as both
the input and the output resolutions.
3 Select one of the following bitmap conversion methods:
• 50% Threshold, Pattern Dither, or Diffusion Dither to use a predefined conversion
method. (See “
• Halftone Screen to simulate the appearance of halftone dots in the converted image.
(See “
Specifying halftone screens for Bitmap-mode images” on page 96.)
• Custom Pattern to simulate the appearance of a custom halftone screen in the
converted image. (See “
on page 97.)
Specifying predefined Bitmap conversion methods” on page 95.)
Specifying custom halftone screens for Bitmap-mode images”
To convert a Bitmap-mode image to grayscale:
1 Choose Image > Mode > Grayscale.
2 Enter a value between 1 and 16 for the size ratio.
The size ratio is the factor for scaling down the image. For example, to reduce a grayscale
image by 50%, enter 2 for the size ratio. If you enter a number greater than 1, the program
averages multiple pixels in the Bitmap-mode image to produce a single pixel in the
grayscale image. This process lets you generate multiple shades of gray from an image
scanned on a 1-bit scanner.
Specifying predefined Bitmap conversion methods
The predefined conversion options in the Bitmap dialog box determine the quality of the
converted image.
50% Threshold Converts pixels with gray values above the middle gray level (128) to
white and below to black. The result is a very high-contrast, black-and-white representation of the image.
Pattern Dither Converts an image by organizing the gray levels into geometric configurations of black and white dots.
Using Help | Contents | Index Back 95
Page 96

Adobe Photoshop Help Working with Color
Using Help | Contents | Index Back 96
Diffusion Dither Converts an image by using an error-diffusion process, starting at the
pixel in the upper left corner of the image. If the pixel’s value is above middle gray (128),
the pixel is changed to white—if below, to black. Because the original pixel is rarely pure
white or pure black, error is inevitably introduced. This error is transferred to surrounding
pixels and diffused throughout the image, resulting in a grainy, filmlike texture. This
option is useful for viewing images on a black-and-white screen.
Original grayscale image, and 50% Threshold conversion method
Pattern Dither conversion method, and Diffusion Dither conversion method
Specifying halftone screens for Bitmap-mode images
The Halftone Screen option in the Bitmap dialog box lets you convert a grayscale image to
simulated halftone dots.
Important: The halftone screen becomes part of the image. If you print the image on a
halftone printer, it will print with the halftone screen you choose here plus that of the
printer. On some printers, the result probably will be a moiré pattern in the image.
To specify the halftone screen for a Bitmap-mode image:
1 Choose Image > Mode > Bitmap.
2 Click Halftone Screen; then click OK.
3 For Frequency, enter a value for the screen frequency, and choose a unit of
measurement. Values can range from 1 to 999 for lines per inch and from 0.400 to 400 for
lines per centimeter. You can enter decimal values.
The screen frequency specifies the ruling of the halftone screen in lines per inch (lpi).
The frequency depends on the paper stock and type of press used for printing.
Newspapers commonly use an 85-line screen. Magazines use higher resolution screens,
such as 133 lpi and 150 lpi. Check with your print shop for correct screen frequencies.
4 Enter a value for the screen angle in degrees from –180 to +180.
The screen angle refers to the orientation of the screen. Continuous-tone and black-andwhite halftone screens commonly use a 45° angle.
Using Help | Contents | Index Back 96
Page 97

Adobe Photoshop Help Working with Color
Using Help | Contents | Index Back 97
5 For Shape, choose the dot shape you want.
Original grayscale image, and Halftone Screen conversion: 53 lpi, 45° angle, round dot
You can save and reuse halftone screen settings by using the Save and Load buttons in the
Halftone Screen dialog box.
Specifying custom halftone screens for Bitmap-mode images
The Custom Pattern option in the Bitmap dialog box simulates the effect of printing a
grayscale image through a custom halftone screen. This method lets you apply a screen
texture, such as a wood grain, to an image. To use this option, you must first define a
pattern. (See “
Filling and stroking selections and layers” on page 249.)
You can create a pattern representing the texture you want and then screen the grayscale
image to apply the texture. To cover the entire image, the pattern must be as large as the
image. Otherwise, the pattern will be tiled. For example, if you apply a 1-inch-by-1-inch
pattern to a 4-inch-by-4-inch image, the pattern appears as 16 squares. Adobe Photoshop
comes with several self-tiling patterns that can be used as halftone screen patterns.
(See the procedure to use a pattern from the PostScript Patterns folder in “
stroking selections and layers” on page 249.)
Because the Custom Pattern option simulates dark and light colors by making the halftone
pattern thicker and thinner, it makes sense to choose a pattern that lends itself to
thickness variations, typically one with a variety of gray shades.
To prepare a black-and-white pattern for conversion, you can first convert the image
to grayscale and then apply the Blur More filter several times. This blurring technique
creates thick lines tapering from dark gray to white.
Filling and
Converting to indexed color (Photoshop)
Converting to indexed color reduces the number of colors in the image to at most 256—
the standard number of colors supported by the GIF and PNG-8 formats and many multimedia applications. This conversion reduces file size by deleting color information from
the image.
To convert to indexed color, you must start with either a grayscale or RGB image.
To convert a grayscale or RGB image to indexed color:
1 Choose Image > Mode > Indexed Color.
Note: All visible layers will be flattened; any hidden layers will be discarded.
For grayscale images, the conversion happens automatically. For RGB images, the Indexed
Color dialog box appears.
2 Select Preview the Indexed Color dialog box to display a preview of the changes.
Using Help | Contents | Index Back 97
Page 98

Adobe Photoshop Help Working with Color
Using Help | Contents | Index Back 98
3 Specify conversion options. (See “Conversion options for indexed-color images
(Photoshop)” on page 98.)
Conversion options for indexed-color images (Photoshop)
When converting an RGB image to indexed color, you can specify a number of conversion
options in the Indexed Color dialog box.
Palette type
A number of palette types are available for converting an image to indexed color.
For the Perceptual, Selective, and Adaptive options, you can choose between using a local
palette based on the current image’s colors or a master palette created in ImageReady.
(See “
Using master palettes (ImageReady)” on page 438.)
Exact Creates a palette using the exact colors appearing in the RGB image—an option
available only if the image uses 256 or fewer colors. Because the image’s palette contains
all colors in the image, there is no dithering.
System (Mac OS) Uses the Mac OS default 8-bit palette, which is based on a uniform
sampling of RGB colors.
System (Windows) Uses the Windows system’s default 8-bit palette, which is based on a
uniform sampling of RGB colors.
Web Uses the 216-color palette that Web browsers, regardless of platform, use to display
images on a monitor limited to 256 colors. This palette is a subset of the Mac OS 8-bit
palette. Use this option to avoid browser dither when viewing images on a monitor
display limited to 256 colors.
Uniform Creates a palette by uniformly sampling colors from the RGB color cube.
For example, if Photoshop takes 6 evenly spaced color levels each of red, green, and blue,
the combination produces a uniform palette of 216 colors (6 cubed = 6 x 6 x 6 = 216).
The total number of colors displayed in an image corresponds to the nearest perfect cube
(8, 27, 64, 125, or 216) that is less than the value in the Colors text box.
Perceptual Creates a custom palette by giving priority to colors for which the human eye
has greater sensitivity.
Selective Creates a color table similar to the Perceptual color table, but favoring broad
areas of color and the preservation of Web colors. This option usually produces images
with the greatest color integrity.
Adaptive Creates a palette by sampling the colors from the spectrum appearing most
commonly in the image. For example, an RGB image with only the colors green and blue
produces a palette made primarily of greens and blues. Most images concentrate colors in
particular areas of the spectrum. To control a palette more precisely, first select a part of
the image containing the colors you want to emphasize. Photoshop weights the
conversion toward these colors.
Custom Creates a custom palette using the Color Table dialog box. Either edit the color
table and save it for later use or click Load to load a previously created color table.
Customizing indexed color tables (Photoshop)” on page 100.) This option also
(See “
displays the current adaptive palette, which is useful for previewing the colors most often
used in the image.
Using Help | Contents | Index Back 98
Page 99

Adobe Photoshop Help Working with Color
Using Help | Contents | Index Back 99
Previous Uses the custom palette from the previous conversion, making it easy to
convert several images with the same custom palette.
Number of colors
For the Uniform, Perceptual, Selective, or Adaptive palette, you can specify the exact
number of colors to be displayed (up to 256) by entering a value for Colors. The Colors text
box controls only how the indexed color table is created. Adobe Photoshop still treats the
image as an 8-bit, 256-color image.
Color inclusion and transparency
To specify colors to be included in the indexed color table or to specify transparency in the
image, choose from the following options:
Forced Provides options to force the inclusion of certain colors in the color table. Black
and White adds a pure black and a pure white to the color table; Primaries adds red, green,
blue, cyan, magenta, yellow, black, and white; Web adds the 216 web-safe colors; and
Custom lets you define custom colors to add.
Transparency Specifies whether to preserve transparent areas of the image during
conversion. Selecting this option adds a special index entry in the color table for transparent colors. Deselecting this option fills transparent areas with the matte color, or with
white if no matte color is chosen.
Matte Specifies the background color used to fill anti-aliased edges that lie adjacent to
transparent areas of the image. With Transparency selected, the matte is applied to edge
areas to help blend the edges with a Web background of the same color. With Transparency deselected, the matte is applied to transparent areas. Choosing None for the
matte creates hard-edged transparency if Transparency is selected; otherwise, all transparent areas are filled with 100% white.
Dithering
Unless you’re using the Exact color table option, the color table may not contain all the
colors used in the image. To simulate colors not in the color table, you can dither the
colors. Dithering mixes the pixels of the available colors to simulate the missing colors.
Choose a dither option from the menu, and enter a value for the dither amount. A higher
amount dithers more colors, but may increase file size. You can choose from the following
dither options:
None Does not dither colors but instead uses the color closest to the missing color. This
tends to result in sharp transitions between shades of color in the image, creating a
posterized effect.
Diffusion Uses an error-diffusion method that produces a less structured dither than the
Pattern option. To protect colors in the image that contain entries in the color table from
being dithered, select Preserve Exact Colors. This is useful for preserving fine lines and text
for Web images.
Pattern Uses a halftone-like square pattern to simulate any colors not in the color table.
Noise Helps to reduce seam patterns along the edges of image slices. Choose this option
if you plan to slice the image for placement in an HTML table.
Using Help | Contents | Index Back 99
Page 100

Adobe Photoshop Help Working with Color
Using Help | Contents | Index Back 100
Customizing indexed color tables (Photoshop)
The Color Table command lets you make changes to the color table of an indexed-color
image. These customization features are particularly useful with pseudocolor images—
images displaying variations in gray levels with color rather than shades of gray, often
used in scientific and medical applications. However, customizing the color table can also
produce special effects with indexed-color images that have a limited number of colors.
Note: To shift colors simply in a pseudocolor image, choose Image > Adjust, and use the
color adjustment commands in the submenu. For a summary description of these
commands, see “
Using the color table to edit colors and assign transparency
You can edit colors in the color table to produce special effects, or assign transparency in
the image to a single color in the table.
To edit colors in the color table:
1 Open the indexed-color image.
2 Choose Image > Mode > Color Table.
Basic steps for correcting images” on page 129.
3 Click or drag in the table to choose the color or range of colors you want to change.
4 Choose a color, as explained in “
click OK.
If you are changing a range of colors, Photoshop creates a gradient in the color table
between the starting and ending colors. The first color you choose in the Color Picker is
the beginning color for the range. When you click OK, the Color Picker reappears so that
you can choose the last color in the range.
The colors you selected in the Color Picker are placed in the range you selected in the
Color Table dialog box.
5 Click OK in the Color Table dialog box to apply the new colors to the indexed-color
image.
To assign transparency to a single color:
1 Choose Image > Mode > Color Table.
2 Select the eyedropper, and click the desired color in the table or in the image. The
sampled color is replaced with transparency in the image.
Using the Adobe Color Picker” on page 261, and
Using predefined color tables
Your indexed color table can be modeled after predefined color tables, which you select
from the Table menu in the Color Table dialog box.
Custom Creates a palette you specify.
Black Body Displays a palette based on the different colors a blackbody radiator emits as
it is heated—from black to red, orange, yellow, and white.
Grayscale Displays a palette based on 256 levels of gray—from black to white.
Spectrum Displays a palette based on the colors produced as white light passes through
a prism— from violet, blue, and green to yellow, orange, and red.
Using Help | Contents | Index Back 100
 Loading...