

Page 1

Breeze Live User Guide
for Meeting Presenters
Page 2

Trademarks
Add Life to the Web, Afterburner, Aftershock, Andromedia, Allaire, Animation PowerPack, Aria, Attain, Authorware,
Authorware Star, Backstage, Bright Tiger, Clustercats, ColdFusion, Design In Motion, Director, Dream Templates,
Dreamweaver, Drumbeat 2000, EDJE, EJIPT, Extreme 3D, Fireworks, Flash, Fontographer, FreeHand, Generator, HomeSite,
JFusion, JRun, Kawa, Know Your Site, Knowledge Objects, Knowledge Stream, Knowledge Track, LikeMinds, Lingo, Live
Effects, MacRecorder Logo and Design, Macromedia, Macromedia Action!, Macromedia Breeze, Macromedia Flash,
Macromedia M Logo and Design, Macromedia Spectra , Macromedia xRes Logo and Design, MacroModel, Made with
Macromedia, Made with Macromedia Logo and Design, MAGIC Logo and Design, Mediamaker, Movie Critic, Open Sesame! ,
Roundtrip, Roundtrip HTML, Shockwave, Sitespring, SoundEdit, Titlemaker, UltraDev, Web Design 101, what the web can be,
Xtra are either registered trademarks or trademarks of Macromedia, Inc. and may be registered in the United States or in other
jurisdictions including internationally. Other product names, logos, designs, titles, words or phrases mentioned within this
publication may be trademarks, servicemarks, or tradenames of Macromedia, Inc. or other entities and may be registered in
certain jurisdictions including internationally.
This guide contains links to third-party Web sites that are not under the control of Macromedia, and Macromedia is not
responsible for the content on any linked site. If you access a third-party Web site mentioned in this guide, then you do so at your
own risk. Macromedia provides these links only as a convenience, and the inclusion of the link does not imply that Macromedia
endorses or accepts any responsibility for the content on those third-party sites.
Copyright Notice
Copyright © 2004 Macromedia, Inc. All rights reserved. This manual may not be copied, photocopied, reproduced,
translated, or converted to any electronic or machine-readable form in whole or in part without prior written approval of
Macromedia, Inc.
Acknowledgments
Director: Erick Vera
Project Management: Stephanie Gowin
Writing: Gina Craig, Leigh Valentine
Editing: Shawn Jackson
Production and Editing Management: Patrice O’Neill
Production: Adam Barnett
First Edition: March 2004
Macromedia, Inc.
600 Townsend St.
San Francisco, CA 94103
Page 3

CONTENTS
INTRODUCTION: Overview of Breeze Live . . . . . . . . . . . . . . . . . . . . . . . . . . . . . . . 7
Breeze meetings. . . . . . . . . . . . . . . . . . . . . . . . . . . . . . . . . . . . . . . . . . . . . . . . . . . . 7
Intended audience . . . . . . . . . . . . . . . . . . . . . . . . . . . . . . . . . . . . . . . . . . . . . . . . . . 8
Displaying content to meeting participants . . . . . . . . . . . . . . . . . . . . . . . . . . . . . . . 8
System requirements . . . . . . . . . . . . . . . . . . . . . . . . . . . . . . . . . . . . . . . . . . . . . . . . 8
Activities that you can perform as a Breeze presenter . . . . . . . . . . . . . . . . . . . . . . . . 9
Breeze documentation . . . . . . . . . . . . . . . . . . . . . . . . . . . . . . . . . . . . . . . . . . . . . . 9
Additional Macromedia resources . . . . . . . . . . . . . . . . . . . . . . . . . . . . . . . . . . . . . 10
CHAPTER 1: Getting Started . . . . . . . . . . . . . . . . . . . . . . . . . . . . . . . . . . . . . . . . . 11
Creating a meeting room. . . . . . . . . . . . . . . . . . . . . . . . . . . . . . . . . . . . . . . . . . . . 11
Entering a meeting room. . . . . . . . . . . . . . . . . . . . . . . . . . . . . . . . . . . . . . . . . . . . 11
Inside a Breeze meeting room . . . . . . . . . . . . . . . . . . . . . . . . . . . . . . . . . . . . . . . . 11
Leaving a meeting room . . . . . . . . . . . . . . . . . . . . . . . . . . . . . . . . . . . . . . . . . . . . 20
CHAPTER 2: Setting Up a Meeting Room . . . . . . . . . . . . . . . . . . . . . . . . . . . . . . . 21
About creating a meeting room . . . . . . . . . . . . . . . . . . . . . . . . . . . . . . . . . . . . . . . 21
Controlling access to a meeting room . . . . . . . . . . . . . . . . . . . . . . . . . . . . . . . . . . 22
Setting meeting room connection properties . . . . . . . . . . . . . . . . . . . . . . . . . . . . . 24
Customizing the meeting room . . . . . . . . . . . . . . . . . . . . . . . . . . . . . . . . . . . . . . 25
CHAPTER 3: The Participants List Pod . . . . . . . . . . . . . . . . . . . . . . . . . . . . . . . . . 27
Participant name . . . . . . . . . . . . . . . . . . . . . . . . . . . . . . . . . . . . . . . . . . . . . . . . . . 27
Participant type . . . . . . . . . . . . . . . . . . . . . . . . . . . . . . . . . . . . . . . . . . . . . . . . . . . 27
Participant status . . . . . . . . . . . . . . . . . . . . . . . . . . . . . . . . . . . . . . . . . . . . . . . . . . 29
Participant bandwidth . . . . . . . . . . . . . . . . . . . . . . . . . . . . . . . . . . . . . . . . . . . . . . 30
Changing participant type . . . . . . . . . . . . . . . . . . . . . . . . . . . . . . . . . . . . . . . . . . . 31
Removing a participant from a meeting. . . . . . . . . . . . . . . . . . . . . . . . . . . . . . . . . 31
Sorting participants for a meeting . . . . . . . . . . . . . . . . . . . . . . . . . . . . . . . . . . . . . 32
CHAPTER 4: Using the Chat Pod . . . . . . . . . . . . . . . . . . . . . . . . . . . . . . . . . . . . . 33
Sending text messages . . . . . . . . . . . . . . . . . . . . . . . . . . . . . . . . . . . . . . . . . . . . . . 33
Receiving a message. . . . . . . . . . . . . . . . . . . . . . . . . . . . . . . . . . . . . . . . . . . . . . . . 33
Clearing messages from Chat pods . . . . . . . . . . . . . . . . . . . . . . . . . . . . . . . . . . . . 34
3
Page 4

CHAPTER 5: Using the Note Pod . . . . . . . . . . . . . . . . . . . . . . . . . . . . . . . . . . . . . 35
Adding note text . . . . . . . . . . . . . . . . . . . . . . . . . . . . . . . . . . . . . . . . . . . . . . . . . . 36
Editing note text . . . . . . . . . . . . . . . . . . . . . . . . . . . . . . . . . . . . . . . . . . . . . . . . . . 36
Creating a Note pod . . . . . . . . . . . . . . . . . . . . . . . . . . . . . . . . . . . . . . . . . . . . . . . 36
Choosing a Note pod for display . . . . . . . . . . . . . . . . . . . . . . . . . . . . . . . . . . . . . . 37
Formatting note text . . . . . . . . . . . . . . . . . . . . . . . . . . . . . . . . . . . . . . . . . . . . . . . 37
Renaming a Note pod . . . . . . . . . . . . . . . . . . . . . . . . . . . . . . . . . . . . . . . . . . . . . . 38
Deleting a Note pod . . . . . . . . . . . . . . . . . . . . . . . . . . . . . . . . . . . . . . . . . . . . . . . 38
CHAPTER 6: Using the Whiteboard Pod . . . . . . . . . . . . . . . . . . . . . . . . . . . . . . . . 39
Creating a new whiteboard . . . . . . . . . . . . . . . . . . . . . . . . . . . . . . . . . . . . . . . . . . 39
Requesting to join a whiteboard . . . . . . . . . . . . . . . . . . . . . . . . . . . . . . . . . . . . . . 39
Accepting and rejecting requests to join a whiteboard . . . . . . . . . . . . . . . . . . . . . . 40
Drawing on a whiteboard . . . . . . . . . . . . . . . . . . . . . . . . . . . . . . . . . . . . . . . . . . . 40
Navigating between multiple whiteboard pages . . . . . . . . . . . . . . . . . . . . . . . . . . . 41
Clearing a whiteboard . . . . . . . . . . . . . . . . . . . . . . . . . . . . . . . . . . . . . . . . . . . . . . 41
CHAPTER 7: The Camera and Voice Pod . . . . . . . . . . . . . . . . . . . . . . . . . . . . . . . 43
Broadcasting audio and video . . . . . . . . . . . . . . . . . . . . . . . . . . . . . . . . . . . . . . . . 43
Enabling broadcasting by participants . . . . . . . . . . . . . . . . . . . . . . . . . . . . . . . . . . 44
Approving an individual participant’s request to broadcast . . . . . . . . . . . . . . . . . . 44
Controlling audio and video broadcasts. . . . . . . . . . . . . . . . . . . . . . . . . . . . . . . . . 44
Setting meeting-wide broadcast characteristics. . . . . . . . . . . . . . . . . . . . . . . . . . . . 46
Microphone and Camera settings . . . . . . . . . . . . . . . . . . . . . . . . . . . . . . . . . . . . . 48
Broadcast permissions by participant type . . . . . . . . . . . . . . . . . . . . . . . . . . . . . . . 49
CHAPTER 8: Using the Content Pod . . . . . . . . . . . . . . . . . . . . . . . . . . . . . . . . . . . 51
Understanding types of meeting room content . . . . . . . . . . . . . . . . . . . . . . . . . . . 52
Adding new content to a Content pod . . . . . . . . . . . . . . . . . . . . . . . . . . . . . . . . . 52
Choosing the content to display . . . . . . . . . . . . . . . . . . . . . . . . . . . . . . . . . . . . . . 54
Working with Breeze presentations . . . . . . . . . . . . . . . . . . . . . . . . . . . . . . . . . . . . 54
Renaming a Content pod . . . . . . . . . . . . . . . . . . . . . . . . . . . . . . . . . . . . . . . . . . . 57
Deleting a Content pod. . . . . . . . . . . . . . . . . . . . . . . . . . . . . . . . . . . . . . . . . . . . . 57
Editing the content in a Content pod . . . . . . . . . . . . . . . . . . . . . . . . . . . . . . . . . . 57
CHAPTER 9: Using the Screen Sharing Pod. . . . . . . . . . . . . . . . . . . . . . . . . . . . . 59
About accessing screen-sharing functionality . . . . . . . . . . . . . . . . . . . . . . . . . . . . . 60
Starting screen sharing. . . . . . . . . . . . . . . . . . . . . . . . . . . . . . . . . . . . . . . . . . . . . . 61
Navigating windows during screen sharing . . . . . . . . . . . . . . . . . . . . . . . . . . . . . . 63
Previewing your shared screen in the meeting room. . . . . . . . . . . . . . . . . . . . . . . . 63
Controlling application sharing . . . . . . . . . . . . . . . . . . . . . . . . . . . . . . . . . . . . . . . 64
Changing the screen-sharing source . . . . . . . . . . . . . . . . . . . . . . . . . . . . . . . . . . . . 65
Stopping screen sharing . . . . . . . . . . . . . . . . . . . . . . . . . . . . . . . . . . . . . . . . . . . . . 65
4 Contents
Page 5

CHAPTER 10: Using the File Sharing Pod . . . . . . . . . . . . . . . . . . . . . . . . . . . . . . . 69
Creating a new File Sharing pod . . . . . . . . . . . . . . . . . . . . . . . . . . . . . . . . . . . . . . 69
Uploading a file. . . . . . . . . . . . . . . . . . . . . . . . . . . . . . . . . . . . . . . . . . . . . . . . . . . 69
Downloading a file . . . . . . . . . . . . . . . . . . . . . . . . . . . . . . . . . . . . . . . . . . . . . . . . 70
Renaming a file . . . . . . . . . . . . . . . . . . . . . . . . . . . . . . . . . . . . . . . . . . . . . . . . . . . 71
Removing a file . . . . . . . . . . . . . . . . . . . . . . . . . . . . . . . . . . . . . . . . . . . . . . . . . . . 71
CHAPTER 11: Using the Polling Pod. . . . . . . . . . . . . . . . . . . . . . . . . . . . . . . . . . . . 73
Creating a new Polling pod . . . . . . . . . . . . . . . . . . . . . . . . . . . . . . . . . . . . . . . . . . 73
Asking participants to respond to a poll. . . . . . . . . . . . . . . . . . . . . . . . . . . . . . . . . 73
Editing a poll. . . . . . . . . . . . . . . . . . . . . . . . . . . . . . . . . . . . . . . . . . . . . . . . . . . . . 73
Closing the answer period for a poll . . . . . . . . . . . . . . . . . . . . . . . . . . . . . . . . . . . 74
Viewing the poll results . . . . . . . . . . . . . . . . . . . . . . . . . . . . . . . . . . . . . . . . . . . . . 74
Navigating between polls. . . . . . . . . . . . . . . . . . . . . . . . . . . . . . . . . . . . . . . . . . . . 74
Showing the poll results to participants . . . . . . . . . . . . . . . . . . . . . . . . . . . . . . . . . 74
Clearing the poll answers. . . . . . . . . . . . . . . . . . . . . . . . . . . . . . . . . . . . . . . . . . . . 74
CHAPTER 12: Recording Meetings . . . . . . . . . . . . . . . . . . . . . . . . . . . . . . . . . . . . 75
Recording a meeting . . . . . . . . . . . . . . . . . . . . . . . . . . . . . . . . . . . . . . . . . . . . . . . 75
Recording a meeting for voice only . . . . . . . . . . . . . . . . . . . . . . . . . . . . . . . . . . . . 76
Replaying a meeting . . . . . . . . . . . . . . . . . . . . . . . . . . . . . . . . . . . . . . . . . . . . . . . 76
Navigating recorded meetings . . . . . . . . . . . . . . . . . . . . . . . . . . . . . . . . . . . . . . . . 78
CHAPTER 13: Customizing the Meeting Room . . . . . . . . . . . . . . . . . . . . . . . . . . . 79
Understanding the structure of a meeting room . . . . . . . . . . . . . . . . . . . . . . . . . . 80
Default room layouts. . . . . . . . . . . . . . . . . . . . . . . . . . . . . . . . . . . . . . . . . . . . . . . 81
Working with meeting room layouts . . . . . . . . . . . . . . . . . . . . . . . . . . . . . . . . . . . 82
Working with meeting room pods . . . . . . . . . . . . . . . . . . . . . . . . . . . . . . . . . . . . . 84
CHAPTER 14: Using the Web Links Pod . . . . . . . . . . . . . . . . . . . . . . . . . . . . . . . . 89
Creating a new Web Link pod. . . . . . . . . . . . . . . . . . . . . . . . . . . . . . . . . . . . . . . . 89
Adding a new web link . . . . . . . . . . . . . . . . . . . . . . . . . . . . . . . . . . . . . . . . . . . . . 89
Forcing all participants to a web link . . . . . . . . . . . . . . . . . . . . . . . . . . . . . . . . . . . 90
Renaming a web link. . . . . . . . . . . . . . . . . . . . . . . . . . . . . . . . . . . . . . . . . . . . . . . 90
Removing a web link. . . . . . . . . . . . . . . . . . . . . . . . . . . . . . . . . . . . . . . . . . . . . . . 90
INDEX . . . . . . . . . . . . . . . . . . . . . . . . . . . . . . . . . . . . . . . . . . . . . . . . . . . . . . . . . . . 91
Contents 5
Page 6

6 Contents
Page 7

INTRODUCTION
Overview of Breeze Live
Macromedia Breeze is a rich web communication system that eliminates the time and cost of
travel and unnecessary meetings. It enables organizations to easily share important information
over the Internet by connecting people to people, and people to information.
Macromedia Breeze includes a set of components that provide an integrated solution for your
communication, collaboration, and training needs. Breeze can be deployed with either some or all
of these components together:
Breeze Presentation Personalize presentations with your own voice-over and easily deliver them
to standard web browsers through the ubiquitous Flash Player.
Breeze Training Rapidly create content and build complete online training systems including
integrated surveys, tracking, analysis, and course management.
Breeze Live Meet and collaborate instantly with colleagues over the Internet.
The underlying Breeze platform provides a flexible central library, administration tools, and more.
Breeze offers flexibility in deployment: a Hosted Service for enabling web communications with
zero setup time, and a Licensed Server for deploying within corporate firewalls for complete
control and security.
Breeze meetings
Breeze Live is unique among web meeting applications in that you use it not only to schedule a
meeting, but to create an online “meeting room” in which the meeting is held. When you create a
Breeze meeting room, you specify the way you want presentation material to appear in
participants’ browsers and you determine the kind of content—for example: audio, video,
PowerPoint, an application running on your computer—that is made available.
A meeting takes place during a given time period and then it is over. A Breeze meeting room exists
before a meeting and continues to exist after the meeting. You can use the same meeting room
(and meeting room setup) from one meeting to the next.
You create a Breeze meeting room using the Breeze Manager web application. For more
information, see the Using the Breeze Manager guide. When you create a Breeze meeting room, it
is assigned a unique URL. Participants attend a meeting by going to the meeting room’s URL
with their browser. The meeting room is a Macromedia Flash application that runs in a browser
window using Macromedia Flash Player.
7
Page 8

Intended audience
This document covers the activities that a presenter can perform in scheduling and conducting a
Breeze meeting. For information on creating and managing Breeze meetings, see the Using the
Breeze Manager guide. For information on participating in a meeting, see Using Breeze Live (for
Participants).
Displaying content to meeting participants
You can display the following types of content to participants:
• Content residing on the Breeze server. Such content includes:
Breeze presentations PowerPoint slides hosted through the Breeze Presentation platform.
If you want to include PowerPoint slides in your meeting, you can upload the slides from the
Content Library (this requires that you have already published the file to the Content Library)
or you can upload the slides from your computer (see “Adding content from your computer”
on page 53).
Macromedia Flash content (SWF files)
Images (JPGs)
Macromedia Flash videos (FLVs)
• Content displayed on your own computer screen (screen sharing). This allows you to
demonstrate any application you can run on your computer and to display content, such as an
Excel spreadsheet, that cannot be displayed from the Breeze server.
You can also display PowerPoint slides from your own computer by using screen sharing, but
the slides look better to participants when they come from the Breeze server, which displays
them as Flash slides.
• Content displayed on a real-time whiteboard. You can choose from a selection of shapes and
tools to create text and drawings for participants. Participants can also request to use the
whiteboard at the same time.
System requirements
To take part in a Breeze meeting, you need the following:
• An Internet connection
• One of the supported operating systems listed on www.macromedia.com/go/breeze_sysreqs
• One of the supported browsers listed on www.macromedia.com/go/breeze_sysreqs
• Macromedia Flash Player 6.0.65 or later as a browser plug-in
Note: Macromedia Flash Player is standard in most browsers. You can find out what version of the
Flash Player you have at the Test Macromedia Web Players page at www.macromedia.com/
software/flash/about/
• (Optional) A sound card and speakers to hear audio broadcasts from other meeting
participants
• (Optional) A microphone to broadcast audio to other meeting participants
• (Optional) A web camera to broadcast video to other meeting participants
8 Introduction: Overview of Breeze Live
Page 9

Activities that you can perform as a Breeze presenter
As a presenter, you can:
Set up the meeting room This includes inviting participants, controlling access to the meeting
room, and setting meeting room connection settings. See Chapter 2, “Setting Up a Meeting
Room,” on page 21.
Promote, demote, or eject users in the meeting room. See Chapter 3, “The Participants List
Pod,” on page 27.
Send text messages to other people in the meeting room. See Chapter 4, “Using the Chat Pod,”
on page 33.
Create text notes for participants that stay visible when and where you want them to. See
Chapter 5, “Using the Note Pod,” on page 35.
Provide context and collaborate in real time with participants on a free-form text and drawing
surface. See Chapter 6, “Using the Whiteboard Pod,” on page 39.
Broadcast audio and video to other meeting participants and enable and approve broadcasts
from other participants. See Chapter 7, “The Camera and Voice Pod,” on page 43.
Present content to participants, including PowerPoint presentations (PPTs), Breeze
presentations, images (JPGs), Flash movies (SWFS), and Flash videos (FLVs). See Chapter 8,
“Using the Content Pod,” on page 51.
Screen share the display or control of applications on your computer to give product demos,
show content, or control applications that are not a PPT, SWF, FLV, or JPG. See Chapter 9,
“Using the Screen Sharing Pod,” on page 59.
Share files with participants and manage the library of files and access to them. See Chapter 10,
“Using the File Sharing Pod,” on page 69.
Poll meeting participants with questions and responses that you create and view the results. See
Chapter 11, “Using the Polling Pod,” on page 73.
Customize the meeting room, creating, reorganizing, adding, and deleting new meeting room
layouts and display areas (called pods). See Chapter 13, “Customizing the Meeting Room,”
on page 79.
Force browsing to web links by adding and pushing selected links. See Chapter 14, “Using the
Web Links Pod,” on page 89.
Breeze documentation
The documentation for Breeze Live consists of four guides:
Using the Breeze Plug-In for PowerPoint This guide is for Breeze users who are publishing
Breeze presentations from PowerPoint. You can access this guide from within PowerPoint by
selecting Breeze > Help.
Using the Breeze Publish Wizard This guide is also for Breeze users who are publishing Breeze
presentations from PowerPoint. You can access this guide from a help link within the Breeze
Publish Wizard web application.
Breeze documentation 9
Page 10

Using the Breeze Manager This guide is for Breeze users who have permission to manage or
administer users, content, courses, or meetings. You can access this guide from a help link within
the Breeze Manager web application.
Breeze Live User Guide This guide is for participants and presenters in a Breeze meeting.
There are two versions: Breeze Live User Guide for Meeting Presenters and Breeze Live User Guide
for Meeting Participants. You can access this guide from within a Breeze meeting by selecting
Meeting > Help.
Note: If you purchase just the Breeze Live module of the Breeze Presentation platform, only the
Breeze Live User Guide applies to you.
Additional Macromedia resources
More information is available at the Breeze Product Center and Breeze Support Center websites.
Breeze Product Center The Breeze Product Center is updated regularly with the latest
information on Breeze, including FAQs, white papers, testimonials, and tips. Check the website
often for the latest news on Breeze at www.macromedia.com/software/breeze.
Breeze Support Center The Breeze Support Center contains the latest support information,
including tech notes, Breeze presentation tutorials, and support program details. Check the
website often for the latest Breeze support information at www.macromedia.com/support/breeze.
10 Introduction: Overview of Breeze Live
Page 11

CHAPTER 1
Getting Started
This chapter describes the components and layout of a Breeze meeting room.
Creating a meeting room
You create a meeting room using the Breeze Manager web application. You specify a meeting
room name, description, and type of meeting access (public or private). A meeting room is then
created for you with a specific URL. Use this URL to enter the meeting room at any time.
For more information on creating meetings, log in to the Breeze Manager web application and
view the help for creating meetings in the Using the Breeze Manager guide.
Entering a meeting room
After you create a meeting room, you can enter it from the Breeze Manager web application or by
either clicking on the URL (for example, in an e-mail or a bookmark) or by entering its URL in
your browser.
To go to a meeting room from the Breeze Manager, do one of the following:
• If the Meeting Information page for a meeting is displayed—for example, immediately after
you have created a meeting—click the Enter Meeting Room button.
• At any other time, click the Meeting tab in Breeze Manager to go to the Meeting Library,
where you can look up your meeting, display the Meeting Information page for it, and then
click the Enter Meeting Room button.
As a presenter of the meeting, you are immediately admitted to the meeting room.
Inside a Breeze meeting room
A meeting room is made up of three main areas: a title bar at the top, a layout navigation bar at
the bottom, and a stage in between. The stage displays content related to the meeting. It consists
of display areas (pods) for showing various types of content, such as slides, video, whiteboards,
shared files, polls, and messages to participants and presenters. Any pods located on the stage are
visible to all meeting room participants. Pods can also be located off stage; these can only be seen,
used, or controlled by presenters and preparing presenters.
There are three types of meeting room participants: presenters, preparing presenters, and
participants who are not presenters.
11
Page 12

Presenters can change the setup, content, and layout of the meeting room, share their screen
(make anything displayed on the presenter’s computer screen appear on the meeting-room stage
of all participants and presenters), and promote other participants to be presenters.
Preparing presenters can create or modify a meeting room layout that is not displayed until it is
activated by a presenter. Preparing presenters can do this while a meeting is in progress.
Participants can view a meeting and send text messages. During a meeting, if granted permission
by a presenter, participants can also broadcast audio or video content. In this guide, “participant”
usually means “participant who is not a presenter.” In some cases, however, “participant” is used
more generally to include presenters. The context determines which usage is in effect.
For more information on participant types, see “Participant type” on page 27.
Meeting room title bar
The meeting room title bar is located at the top of the meeting room window. Every participant
has a personalized version of the meeting room title bar.
Meeting room status
Meeting room name
From left to right, the title bar contains:
12 Chapter 1: Getting Started
Meeting menu button
Present menu button
Customize menu button
Participant type icon
Participant name
Page 13

Meeting room status An oval indicating the connection status of the meeting room. A green
oval means that the room is online. A yellow oval indicates network congestion. A red oval means
that you have been disconnected due to network problems and Breeze Live is in the process of
trying to re-establish your meeting connection. Clicking the connection indicator when it is green
or yellow displays information about your connection (for example, its current data-transmission
rate). Clicking the indicator when it is red initiates an attempt to go back online. This is useful if
you have been disconnected and want to reconnect immediately.
Meeting room name The name specified when creating the meeting room in the Breeze
Manager web application. For more information on creating meeting rooms, see the “Managing
Meetings” chapter in Using the Breeze Manager Help.
Meeting menu button A menu with options for specifying the type of connection you have to
the Internet, for switching between full-screen and a resizable views of the meeting room, for
adjusting your microphone or camera, and for accessing help and troubleshooting. (For more
information, see “Setting meeting room connection properties” on page 24 and “Customizing the
meeting room” on page 25.)
Present menu button A menu visible only to meeting presenters that contains options, such as
recording a meeting or stopping a meeting, that apply only to the current meeting.
Customize menu button A menu visible only to meeting presenters that contains menu
options for customizing the meeting room’s layout (for example, to add, delete, or resize pods).
Participant type icon An icon indicating the user type (participant, presenter, or preparing
presenter).
Participant name A participant’s or presenter’s name—either the Breeze user name or, if a
participant is a guest, the participant’s guest name.
Using the Meeting menu
When you click the Meeting button, it displays the Meeting menu. From the meeting menu you
can set the type and speed of your Internet connection, and you can switch between a full-screen
view of the meeting room and a resizable view of the meeting room.
Layout navigation bar
The meeting room layout navigation bar is located at the bottom of the meeting room window
and is visible only to presenters. It contains the names of various meeting room layouts.
By default, a new meeting room contains three prebuilt meeting room layouts: Slides, Screen
Sharing, and Discussion. Each of these meeting room layouts contains pods of various sizes and
locations for customizing the meeting space for that particular function: to share slides or other
content, to screen-screen, or to have a discussion.
Clicking and dragging a layout tab allows you to re-order the layouts. This enables the layout
navigation bar to be used like a meeting agenda (for example, left to right, one layout for each
phase of the meeting), allowing you to easily customize the meeting to suit your needs.
You can change the displayed meeting room layout by clicking the name of one of the meeting
room layouts in the layout navigation bar. For more information on organizing and creating your
own meeting room layouts, see “Working with meeting room layouts” on page 82.
Inside a Breeze meeting room 13
Page 14

When a presenter navigates to a different meeting room layout on the layout navigation bar, the
new layout selected is displayed on every participants’s screen. In contrast, a preparing presenter
can navigate between meeting room layouts without affecting what the participants see. This
makes it possible for a preparing presenter to edit or “prepare” meeting room layouts while
another presenter is presenting.
Stage
The meeting room stage consists of separate pods for displaying different types of content, such as
slides, video, or the duplication (screen sharing) of whatever appears on the computer screen of a
presenter. The pods that make up the stage are visible to everyone attending a meeting.
Presenter-only area
Presenters can also place pods off the stage—in the area of the screen not contained between the
meeting room title bar and the layout navigation bar. Any pods placed offstage are not seen by
participants, but only by other presenters. This enables presenters to have private pods for notes,
text messages, and so on, that only they can view or share with other presenters. The presenteronly area is also useful if a presenter wants to prepare new content before making it available for
viewing. To show it, they can just drag it on the stage from the presenter-only area.
14 Chapter 1: Getting Started
Page 15

For more information on organizing and creating your own meeting room layouts, see “Working
with meeting room layouts” on page 82.
Meeting room pods
A meeting room usually contains a number of display panels, called pods, each with its own
function. There are several types of pods. When presenters set up a meeting room, they determine
the number and types of pods that participants see. The following types of pods are available:
• Participants List
• Chat
• Note
• Whiteboard
• Camera and Voice
• Content
• Screen Sharing
• File Sharing
• Polling
• Web Links
To create custom pods, see the Developing Pods for Breeze document.
Inside a Breeze meeting room 15
Page 16

About the Participants List pod
The Participants List pod displays the name, type, and status of each participant (including
presenters). An icon identifies each participant’s type—participant, presenter, or preparing
presenter. An additional round icon to the right of each meeting participant identifies the
approximate network capacity that they are experiencing. No color indicates an acceptable
network connection. Orange indicates that the user’s connection is less than the current room
bandwidth, the user's network is experiencing high latency, or the user's network connection is
dropping 5% to 20% of packets. Red indicates that the user's network latency is greater than 4
seconds, the room is on LAN and the user is connected by a modem, or the user’s network
connection is dropping over 20% of packets.
Each participant sets his or her own status by selecting it from a pop-up menu available from the
Participants List pod. The following are examples of the status selections available:
• I am fine
• I have a question
• Speak louder
• Speak softer
• Go faster
Presenters can use the participants list menu to change a participant’s type (for example, promote
a participant to a presenter) and to remove participants from the meeting room, in which case the
meeting room is no longer displayed in the participant’s browser.
For more information, see Chapter 3, “The Participants List Pod,” on page 27.
About the Chat pod
The Chat pod allows you to send text messages to other meeting participants. If you include
URLs, the chat pod automatically creates live links, making link content easy to access. You can
broadcast a message to all meeting participants (including presenters), or you can restrict it to
presenters or to individual participants.
16 Chapter 1: Getting Started
Page 17

For more information, see Chapter 4, “Using the Chat Pod,” on page 33.
About the Note pod
The Note pod displays a text message to all meeting participants. Only presenters can enter or
change a message in the Note pod.
For more information, see Chapter 5, “Using the Note Pod,” on page 35.
About the Whiteboard pod
The Whiteboard pod lets meeting attendees share text and other drawing annotations
collaboratively in real time. Presenters can create new Whiteboard pods, clear the whiteboards,
and grant participants access to draw on the whiteboard. A Whiteboard pod can also be placed on
top of a Content pod for easy access to the whiteboard.
For more information, see Chapter 6, “Using the Whiteboard Pod,” on page 39.
Inside a Breeze meeting room 17
Page 18

About the Camera and Voice pod
The Camera and Voice pod broadcasts live audio and video to meeting participants. Presenters
can always choose to broadcast audio or video (or both) to a meeting, and they can enable
meeting participants who are not presenters to broadcast audio or video.
For more information, see Chapter 7, “The Camera and Voice Pod,” on page 43.
About the Content pod
The Content pod displays PowerPoint presentations, Breeze presentations, Flash SWF files,
images (JPEGs only), Flash videos (FLVs), or FlashPaper documents (those created by Contribute
2.0 and later) to meeting participants. The content pod can display only content that is in the
Breeze Content Library or has been uploaded to the Breeze server. If you have content on your
computer that you want to display in the Content pod, you need to upload it to the Breeze server
(see “Adding content from your computer” on page 53.)
Note: If you use Breeze Live as a stand-alone product, you can upload content only to the meeting
room’s folder. If the meeting room is deleted, the content in its folder is deleted with it. The Content
Library is a feature of the Breeze Presentation platform. It is used as a central repository for storing
content.
For more information, see Chapter 8, “Using the Content Pod,” on page 51.
18 Chapter 1: Getting Started
Page 19

About the Screen Sharing pod
The Screen Sharing pod broadcasts a live display of your desktop or of an application that is open
on your desktop. The Screen Sharing pod also includes application sharing functionality, which,
when enabled, allows participants to control applications that are visible on their screen.
For more information, see Chapter 9, “Using the Screen Sharing Pod,” on page 59.
Note: Screen sharing is supported only on Windows and requires the Presenter Add-In for Breeze.
About the File Sharing pod
The File Sharing pod provides a method for presenters to distribute files to meeting participants.
Participants can download files for shared use.
For more information, see Chapter 10, “Using the File Sharing Pod,” on page 69.
About the Polling pod
The Polling pod provides presenters with the ability to conduct polls or questionnaires of the
participants. Reports track a variety of information for the presenters, including the number of
votes for each response, percentage of votes for each response, each question that was asked, and
the time that each question was asked.
For more information, see Chapter 11, “Using the Polling Pod,” on page 73.
Inside a Breeze meeting room 19
Page 20

About the Web Links pod
With the Web Links pod, presenters can force all meeting participants to automatically browse to
a one or several web links during a meeting.
For more information, see Chapter 14, “Using the Web Links Pod,” on page 89.
Leaving a meeting room
To leave a meeting room:
• Click the Close button in the upper right corner of the meeting room window.
If all the presenters leave a meeting room, it is still open to any remaining participants. If you
want access to the meeting room to end when you leave it, you need to stop the meeting. For
more information on stopping a meeting, see “Controlling access to a meeting room” on page 22.
Note: If your meeting room view is set to full screen, the Close button is not visible. To access the
Close button, resize your meeting room.
20 Chapter 1: Getting Started
Page 21

CHAPTER 2
Setting Up a Meeting Room
This chapter describes the details of setting up a meeting room and includes the following topics:
• “About creating a meeting room” on page 21
• “Inviting meeting participants” on page 21
• “Controlling access to a meeting room” on page 22
• “Setting meeting room connection properties” on page 24
• “Customizing the meeting room” on page 25
About creating a meeting room
You create a meeting room using the Breeze Manager web application. You specify a meeting
room name, description, and type of meeting access (public or private), and a meeting room is
created for you with a specific URL. You can use the URL to enter the meeting room at any time.
Inviting meeting participants
There are two built-in ways to invite participants to a meeting: from the Breeze Manager web
application or from within a Breeze meeting room. You also have the options of inviting meeting
participants by sending the meeting URL in e-mail or by telling them the URL over the phone.
For more information about inviting meeting participants from the Breeze Manager web
application, see
about inviting meeting participants from within a meeting room, see “From within a meeting
room” on page 22.
From the Breeze Manager web application
Use the Breeze Manager web application to invite meeting participants when you create a
meeting room. An e-mail is sent to the Breeze users you specify as participants for the meeting,
along with any other people you specify that are not Breeze users. A benefit of this method is that
from within the Breeze Manager web application, you can assign Breeze users participant or
presenter status for the meeting room on a permanent basis.
For more information, log in to the Breeze Manager web application and see “Sending
notifications” in Using Breeze Manager Help.
“From the Breeze Manager web application” on page 21. For more information
21
Page 22

From within a meeting room
You can also invite meeting participants from within a meeting room. This is convenient if you
want to invite additional participants to join during a meeting or if you need to resend meeting
information to missing participants who have misplaced it.
To invite participants from a meeting room:
1 Click the Present button at the top of the meeting window.
2 From the pop-up menu, select Invite.
This brings up an Invite window containing the meeting URL and two buttons: Send E-Mail
and Done.
3 Do one of the following:
■ Click the Send E-Mail button to bring up your default e-mail application. It displays a
generated message with information about the meeting. All you need to do is enter the
e-mail address or addresses to which you want to send the message.
■ If you do not have a default e-mail application or do not want to use the generated
invitation, start the e-mail application you want to use, and copy the meeting URL from the
Invite window into an e-mail message. Click the Done button to close the Invite Window
and return to the meeting room.
Controlling access to a meeting room
You can control access to a meeting room in two ways:
Make a meeting room public or private From the Breeze Manager, you can set access to a
meeting room as either Anyone (anyone can enter) or Invitees Only (a presenter determines the
individuals or groups that can attend).
Stop a meeting From within a meeting room, you can stop a meeting and reopen it at any
time. Stopping a meeting means that users cannot view the meeting room in their browsers.
Reopening a meeting means that users can view the meeting room. If you stop a meeting before
its scheduled time, you can keep participants from entering the meeting room until you are ready
for them. If you stop a meeting at its scheduled ending time and do not open it until the next
scheduled meeting, you can keep participants from entering a meeting room between meeting
sessions.
Restricting access from the Breeze Manager web application
Use the Breeze Manager web application to restrict access to a meeting room. The meeting room
access type is set when the meeting room is created, but the access type can be edited later. The
two meeting room access settings are:
Invitees Only Only registered Breeze users whom a presenter has listed for the meeting and
specially admitted guests can enter the meeting room.
Anyone Anyone can enter the meeting room.
For more information on designating meeting access as Anyone or Invitees Only, log in to the
Breeze Manager web application and see “Who can attend” under “Entering Meeting
Information” in Using Breeze Manager Help.
22 Chapter 2: Setting Up a Meeting Room
Page 23

Admitting guests to Invitees Only meetings
When a meeting is restricted to Invitees Only, anyone who has the URL to the meeting room can
attempt to log in as a guest. When someone tries this, presenters see an animated icon next to the
Customize button on the meeting-room title bar. The figure is knocking to get into the meeting.
As a presenter, you can accept or refuse to accept a guest login to a private meeting.
To accept or deny a guest login to an Invitees Only meeting:
1 Place the pointer over the icon of a knocking figure.
This displays a pop-up window with the message:
[name of guest] would like to enter the room.
The guest name displayed is the name entered in the login text box for guests. If there is more
than one guest waiting to enter, you can go through the queue by using the < and > buttons in
the notification window. The notifier also tells you how many people are waiting to enter.
2 Click either the Decline or Accept button displayed in the pop-up window.
Stopping a meeting
You can stop a meeting at any time.
• If you stop a meeting before any participants are in the meeting room, you make it temporarily
unavailable to non-presenting participants. This allows you to keep participants out of the
meeting room between meetings and before you are ready for them at the start of a meeting.
When you stop a meeting, a text message (determined by the presenter) such as “The meeting
room is closed until the scheduled meeting time” is displayed to anyone who tries to enter the
room as either a participant or a guest.
• If you stop a meeting while non-presenting participants are in the meeting room, the meeting
room window is closed in their browser and a text message (determined by the presenter) such
as “Meeting is over; the meeting room is now closed” is displayed.
To stop a meeting:
1 Click the Present button at the top of the meeting room.
2 From the pop-up menu, select Stop Meeting.
A Stop Meeting window appears with a Message for Viewers text box. The box initially
displays the message “You will enter automatically when the presenter starts the meeting.” (You
can change this text, if you want.)
3 Change the Message for Viewers text, if you do not want to use the default text.
4 Click the OK button.
A lock icon appears in the title bar of the meeting window. If participants navigate to the
meeting room URL, they are prompted to log in, and then they receive the custom message
you set. They are automatically logged in as soon as you open the meeting. The notification
window will let you know how many participants are waiting to enter the meeting room.
Note: If a user stays in a room for 12 hours, a green screen with the following message appears:
“You have exceeded the time limit in this room. Click Retry to reenter.”
Controlling access to a meeting room 23
Page 24

Finding out the number of participants waiting to enter a meeting room
If you have stopped a meeting, you can find out how many participants are waiting to enter the
meeting room.
To find out how many participants are waiting to enter a meeting room when a meeting has
been stopped:
• Place your mouse over the lock icon at the top of the meeting window.
A pop-up window displays a message containing the number of participants waiting to enter
the room.
Starting a meeting after stopping it
To start a meeting after you have stopped it, do one of the following:
• Click the Present button at the top of the meeting window, and from the pop-up menu, select
Stop Meeting.
This removes the check mark showing that the meeting was stopped. The lock icon disappears
from the top of the window, and the meeting room is now open for participants to enter.
• Move the pointer over the lock icon at the top of the meeting room and click Start Meeting in
the pop-up window that appears.
The lock icon disappears from the top of the meeting room, and the meeting room is now
open for participants to enter.
Setting meeting room connection properties
There are two bandwidth settings you can set to optimize the meeting room experience for
yourself and your participants:
My connection speed The bandwidth at which your computer is connected to the Internet.
Room bandwidth The bandwidth for the meeting room itself, which should correspond to the
average bandwidth of your meeting participants.
Possible bandwidth options for both settings include:
• Modem
• DSL
• LAN
Setting your connection speed
Set the connection speed setting to the bandwidth at which your computer is connected to the
Internet. Setting your connection speed can improve your experience of the meeting room by
alerting the server to how much data your connection can reasonably handle. The server will
respond by tuning the data delivery rate for your connection.
To set your connection speed:
1 Click the Meeting button at the top of the meeting window.
2 From the pop-up menu, select My Connection Speed and the appropriate bandwidth option.
24 Chapter 2: Setting Up a Meeting Room
Page 25

Optimizing the room bandwidth
Set the room bandwidth to the average bandwidth of the meeting participants.
To set the meeting room bandwidth:
1 Click the Present button at the top of the meeting window.
2 From the pop-up menu, select Optimize Room Bandwidth and the appropriate bandwidth
option.
Customizing the meeting room
You can change the size and layout of the meeting room to maximize screen space and customize
it for your particular meeting needs.
Participants can toggle back and forth between a full-screen view of the meeting room and a
resizable view.
New presenters can easily select between various prebuilt meeting room layouts that contain
various types of pods (display panels), including chat, note, content, camera and voice, and so on,
of various sizes and locations.
Experienced presenters can customize the provided meeting room layouts by changing the size
and location of pods, or by adding and deleting pods. They can also create completely new
meeting room layouts. For more information, see
on page 79.
Chapter 13, “Customizing the Meeting Room,”
Setting the meeting room to full-screen size
Each participant has the option to make the meeting room a full screen, thereby maximizing the
meeting room workspace.
To make the meeting room a full screen:
1 Click the Meeting button at the top of the meeting window.
2 From the pop-up menu, select Full Screen.
The meeting room window becomes a full screen.
To return the meeting room from a full-screen view to a resizable view:
1 Click the Meeting button at the top of the window.
2 From the pop-up menu, select Full Screen; this option should have a check mark next to it
because it is currently selected.
Selecting a meeting room layout
Every new meeting room is created with three initial meeting room layouts: Slides, Screen
Sharing, and Discussion. Each meeting room layout contains various types of pods (display
panels; examples are: chat, note, content, camera and voice, and so on) of various sizes and
locations.
The layout navigation bar at the bottom of the meeting window lists all available meeting room
layouts.
Customizing the meeting room 25
Page 26

To select a meeting room layout:
• In the layout navigation bar at the bottom of the meeting window, click the button for the
meeting room layout that you want to use.
The meeting room layout changes and is immediately displayed for all meeting participants.
Customizing the meeting room layout
The meeting room layouts can also be customized. Presenters can change the size and location of
pods contained in a meeting room layout, as well as add and delete pods. They can also create
new meeting room layouts.
For information on customizing meeting room layouts, see Chapter 13, “Customizing the
Meeting Room,” on page 79.
26 Chapter 2: Setting Up a Meeting Room
Page 27

CHAPTER 3
The Participants List Pod
The Participants List pod lists everyone who is logged in to a meeting, and gives the following
information about each participant:
• Participant name (see “Participant name” on page 27)
• Participant type (see “Participant type” on page 27)
• Participant status (see “Participant status” on page 29)
• Participant bandwidth (see “Participant bandwidth” on page 30)
As a presenter, you can change a participant’s type and you can remove participants from
a meeting.
Participant name
If a participant is logged in to a meeting as a guest, the participant’s name is the guest name
entered at login. Otherwise, the name listed is the participant’s full name as registered with the
Breeze Manager. If the Participants List pod is small, the full text of a name might not be visible.
Roll over each name to view the user’s full name.
Participant type
There are three types of meeting participants:
Participant Can view and participate in a meeting.
Presenter Can show slides and content, screen share, broadcast audio and video, change the
meeting setup, and customize the meeting space.
Preparing Presenter Can view and edit meeting room layouts without interfering with the
meeting. Any layout besides the one currently being used in the meeting by the presenter can be
edited by a preparing presenter.
27
Page 28

Participant type is indicated by an icon to the left of a participant’s name, as follows:
Participant Type Icon
Participant
Presenter
Preparing Presenter
The following table lists the capabilities of each participant type.
Feature Participant Preparing
Presenter
Presenter
View participants’ names, types, and statuses
✔✔✔
View connection status ✔✔
Change participant status ✔✔✔
Change participant type
✔
(Participant/Presenter/Preparing Presenter).
Remove participants. ✔
View and send text messages. ✔✔✔
Clear Chat pod. ✔
Create, switch, format, and edit notes from a Note pod. ✔
Broadcast audio and video without approval. ✔✔
Broadcast audio and video with approval from presenter. ✔
Invite participants to broadcast audio and video. ✔
Broadcast audio and video with approval after audience is
✔
invited.
Change audio and video settings (what to allow
✔
broadcast, quality of video broadcast).
View layout navigation bar. ✔✔
Add content from Breeze Content Library, your
computer, or meeting room content.
View presentations. ✔✔✔
View presentation outlines. ✔✔
Change size of presentation outline window. ✔✔
Navigate between presentation slides by using the outline
window or the navigation arrows.
28 Chapter 3: The Participants List Pod
✔✔
✔✔
Page 29

Feature Participant Preparing
Presenter
Broadcast using screen sharing. ✔
Promote yourself to presenter. ✔✔
View presenter-only pods. ✔✔
Change layout displayed to participants. ✔
Presenter
Navigate between scenes without changing what is
broadcast to participants.
Create new layouts. ✔✔
Organize layouts. ✔✔
Move and resize pods on the stage ✔✔
Move and resize pods offstage and on scenes not
displayed to participants.
Create new pods on the stage. ✔✔
Create new pods off the stage for presenters-only. ✔✔
Change stage dimensions. ✔✔
Invite participants. ✔✔
Change meeting broadcast settings. ✔✔
Lock /unlock room. ✔
Enter a locked room. ✔✔
Record a meeting ✔
Playback a recorded meeting ✔✔✔
✔
✔
Participant status
By default, a participant’s status is “I am fine.” However, a participant can change their own
status. If a participant’s status is anything other than “fine,” the status is identified by an icon to
the right of the participant’s name. The following table lists the available statuses and their icons.
Participant Status Icon
I am fine none
I have a question
Speak louder
Speak softer
Participant status 29
Page 30

Participant Status Icon
Go faster
Go slower
Thumbs up
Thumbs down
To change your status:
1 Click the arrow in the bottom right corner of the Participants List pod.
This displays a pop-up menu with a list of the available statuses.
2 Select the status you want displayed to presenters.
Participant bandwidth
There are two colored indicator shapes for participant bandwidth. When bandwidth performance
meets requirements, no symbol will be displayed.
Orange triangle The participant is on a connection that is less than the current room
bandwidth, the participant has high latency (between 0.2 and 4 seconds), or the participant is
dropping between 5% to 20% of packets.
Red square The participant is on a connection that approximates a modem connection, the
participant has high latency (greater than 4 seconds), or the participant is dropping over 20% of
packets.
Rolling over a participant name in the Participants List pod brings up a tooltip that lists
additional information about a participant’s connection and bandwidth; however, participants
will only be able to see the other participants’ names. The tooltip allows presenters to clear a
participant’s status by clicking the Clear Status link if they have it set to anything other than “I am
fine.”
You can configure the network connection status indicators to be on or off anytime during a
meeting. There is also a Promote/Demote button to change user status from participant to
presenter and vice versa.
To show users’ connection status indicators:
1 Click the arrow in the upper left corner of the Participants List pod.
2 From the pop-up menu, click the Show Connection Status option.
The network connection status is now enabled and will display network connection status for
all users in your meeting.
To hide users’ connection status indicators:
1 Click the arrow in the upper left corner of the Participants List pod.
2 From the pop-up menu, click the Show Connection Status option.
30 Chapter 3: The Participants List Pod
Page 31

The network connection status is now disabled and will not display network connection status
for users in your meeting.
Changing participant type
You can change the type of any participant in the Participants List pod. This allows you to
promote and demote other participants as necessary.
You can also change your own participant type. This gives you the ability you to demote yourself
to a participant or preparing presenter, allowing you to either change your role in the meeting or
to check what participants with other roles are seeing in the meeting room. Although you can
demote yourself in the Participants List pod, you cannot promote yourself back from there.
Instead, you must user the Present menu, where you can choose from Make Me a Participant,
Make Me a Preparing Presenter, or Make Me a Presenter.
Note: Use the Present menu to change your own participant type.
To change a participant’s type:
1 In the Participants List pod, click the name of the participant whose type you want to change.
2 Click the arrow in the upper left corner of the Participants List pod.
3 From the pop-up menu, select the option for the participant type you want to make the selected
participant:
■ Make Me a Participant
■ Make Me a Presenter
■ Make Me a Preparing Presenter
The icon of the participant changes on all participants’ screens, and the screen of the
participant whose type you changed displays the new permissions.
To change your own participant type:
1 Click the Present menu button at the top of the meeting room window.
2 From the pop-up menu, select the option for the type of participant you want to make yourself:
■ Make Me a Participant
■ Make Me a Preparing Presenter
■ Make Me a Presenter
Your participant type icon changes on all the participants’ screens, and the screen of the
participant whose type you changed displays the new permissions.
Removing a participant from a meeting
You can remove a participant from a meeting. A guest participant can re-enter a meeting room at
a later time only with the approval of a presenter. A participant that entered the meeting room as
a registered user can re-enter the meeting room without approval. To deny re-entry to a registered
user, you need to remove the user from the list of meeting participants in the Breeze Manager (see
“Changing meeting participants” in Chapter 5 of Using the Breeze Manager).
Removing a participant from a meeting 31
Page 32

To remove a participant from a meeting:
1 Select the name of the participant you want to remove in the Participants List pod.
2 Click the arrow in the upper left corner of the Participants List pod.
3 From the pop-up menu, select Remove Selected.
Note: If you have your own name selected in the Participants List pod, you cannot select this
option.
Sorting participants for a meeting
If a presenter selects this option from the pop-up menu, the ordering of the list will change for all
presenters. The view for participants will not be affected. A participant name will be sorted to the
top when the following scenarios occur:
• A new user enters the meeting room
• The wellness indicator changes to something other than white
• The status indicator changes to something other than white
Note: The Show Active Users First option will be disabled by default and remembered across
meeting sessions.
To enable display of active users first:
1 Click the arrow in the upper left corner of the Participants List pod.
2 From the pop-up menu, click the Show Active Users First option.
The display of users will now change, showing the most recent, active users, first (for example,
a new meeting participant or presenter enters the meeting, or a user’s status or connection
status changes).
To disable display of active users first:
1 Click the arrow in the upper left corner of the Participants List pod.
2 From the pop-up menu, click the Show Active Users First option.
The display of users will no longer change, unless a user leaves the meeting.
32 Chapter 3: The Participants List Pod
Page 33

CHAPTER 4
Using the Chat Pod
You use the Chat pod to send text messages to other meeting participants and to receive messages
from other participants. As a presenter, you can use more than one Chat pod simultaneously. You
can use one pod for all meeting participants and another in the presenters-only area.
Sending text messages
During a meeting, you can use the Chat pod to compose a text message and address it to a specific
participant or to all presenters at the meeting or to all presenters and all participants.
To send a text message:
1 In the pop-up menu at the bottom of the Chat pod, select one of the following addressees:
■ Everyone
■ Presenters
■ The name of a specific participant to whom you want to send a message
2 Click the text box in the Chat pod.
An insertion point appears in the text box.
3 Enter your message.
4 Do one of the following:
■ Click the Enter button next to the text field.
■ Press Enter or Return on your keyboard.
Your name appears in the Chat pod, followed by the addressee you selected and your message.
Receiving a message
When you receive a chat message from a meeting participant, your Chat pod shows the sender’s
name and the message. If the message was addressed to everyone, the sender’s name is followed by
the message. If the message was sent only to you, the sender’s name is followed by “(privately).” If
the message was sent only to presenters, the sender’s name is followed by “(presenters).”
33
Page 34

Clearing messages from Chat pods
While a participant is logged in to a meeting room, all the messages that the participant sends and
receives remain on the participant’s Chat pod and can be viewed. When a participant leaves the
meeting room, all private messages and all messages sent to presenters are cleared from the
participant’s Chat pod. Messages sent to everyone remain in participants’ Chat pods and can be
viewed whenever a participant logs in, unless the messages are cleared by a presenter. A presenter
can clear all messages in the Chat pods of all participants.
To clear all Chat messages:
1 Click the arrow in the upper left corner of the Chat pod.
2 Select Clear Chat.
All text is immediately removed from the Chat pod for all participants.
34 Chapter 4: Using the Chat Pod
Page 35

CHAPTER 5
Using the Note Pod
You can use a Note pod to display text messages to meeting participants. Unlike a text message in
the Chat pod, the note in a note pod is created and made visible only by presenters, and it
remains visible in a Note pod throughout the meeting—or until a presenter removes the note,
displays a different note, removes the note pod from view, or switches to a different room layout
that does not contain that Note pod.
By default, the Slides, Screen Sharing, and Discussion meeting room layouts contain a note pod
called Note. Before you add text to a note pod, the name of the pod is displayed in gray in the
middle of the pod. Be sure to edit this note to display your meeting’s dial-in information. The
Discussion layout also contains a second Note pod, called Discussion Notes, for you to add text
to share with the other participants during the meeting.
Some possible scenarios for using notes are as follows:
• The Note pod contains the same information throughout the entire meeting. This might
include dial-in or presenter information.
• The content in the Note pod changes during a meeting, with a presenter switching between
several preexisting notes. For example, a presenter may want to display dial-in information at
the start of the meeting, reference URLs during the meeting, and provide speaker contact
information at the end of the meeting.
• The content in the Note pod changes during a meeting, with a presenter creating and
displaying a new note. For example, a presenter is asked a question, such as, What is the URL
for that site you just mentioned? Instead of typing the URL in the Chat pod, the presenter
creates a new note containing this information. In this way, the information remains visible
even as participants send more text messages.
• A custom meeting room is created, containing several note pods, each containing unique
content. For example, one note pod displays dial-in information and another contains
presenter information.
• Various notes are displayed in the note pods in various meeting room layouts. For example, the
first meeting presenter uses the Slides room layout, and the note pod contains that presenter’s
contact information. After that presentation is finished, a second presenter takes over and
switches to the Screen Sharing room layout for his demonstration. The Note pod in this room
layout contains the second presenter’s contact information.
35
Page 36

Adding note text
A presenter can add or change text in any Note pod. By default, a note named Note is displayed
in the Note pod. Edit this note to display your meeting’s dial-in information. For information on
editing a Note pod, see
To add text to a note pod:
1 Click anywhere inside the note pod that you want to add text to.
“Editing note text” on page 36.
An insertion point appears.
2 Type the text that you want to appear in the Note pod.
If any other meeting participants are in the room, they immediately see the new text in the
Note pod.
Editing note text
You can edit the text in a Note pod.
To edit the text in a Note pod:
1 Make sure that the Note pod you want to edit is currently displayed.
2 Click anywhere inside the Note pod.
An insertion point appears in the text.
3 Modify the text.
If any other meeting participants are in the room, they immediately see any text modifications
made in the Note pod.
Note: If you delete all the text, the name of the note appears in gray letters in the note pod.
Creating a Note pod
You can create and display multiple Note pods, each with its own text. You can use different note
pods for different layouts and meetings. When you create a Note pod, it is assigned a default
name, such as Note 1, Note 2, and so on. You can rename the Note pod after it is created.
To create a new Note pod:
1 Click the arrow in the upper left corner of the Note pod.
2 Select New.
The current Note pod is replaced by a new Note pod.
3 Click anywhere inside the new Note pod.
An insertion point appears.
4 Type the text that you want to appear in the Note pod.
If any other meeting participants are in the room, they immediately see the new text in the
Note pod.
36 Chapter 5: Using the Note Pod
Page 37

Choosing a Note pod for display
You can change the Note pod on display at any time. Usually, you select the Note pod to display
before a meeting starts, when switching notes during a meeting, and after you create a new Note
pod while customizing a room layout.
To choose a Note pod for display:
1 Click the arrow in the upper left corner of the Note pod.
2 Select the Select Note option.
3 In the pop-up menu, select the name of the Note pod you want to display.
The selected note pod is immediately displayed for all meeting participants.
Note: The name of the currently displayed Note pod is not included in the pop-up menu.
Formatting note text
You can change the size and alignment of a note’s text.
To change the size of note text:
1 Make sure that the note you want to format is displayed in the Note pod.
2 Click the arrow in the upper left corner of the Note pod.
3 Select one of the following options:
■ Text Bi g g e r
■ Text Sm a l l e r
The new text size is immediately displayed in the Note pod for all participants.
To change the alignment of note text:
1 Make sure that the note you want to format is displayed in the Note pod.
2 Click the arrow in the upper left corner of the Note pod.
3 Select one of the following options:
■ Align Left
■ Align Center
■ Align Right
The new alignment is immediately displayed in the Note pod for all participants.
Formatting note text 37
Page 38

Renaming a Note pod
When you create a Note pod, it is assigned a default name, such as Note 1 or Note 2. This is the
name that is used to select and manipulate the Note pod. After a note pod is created, you can
change its name so that it better describes the Note pod’s contents.
To rename a Note pod:
1 Click the Customize button at the top of the meeting window.
2 Select Organize Pods.
The Organize Pods window appears.
3 In the Organize Pods window, select the name of the note pod you want to change.
4 Click the Rename button.
A Rename Pod window appears.
5 In the Rename Pod window, type the new name for the Note pod.
6 Click OK.
7 In the Organize Pods window, click the Done button.
Deleting a Note pod
You can delete a Note pod.
To delete a note:
1 Click the Customize button at the top of the meeting window.
2 Select Organize Pods.
The Organize Pods window appears.
3 In the Organize Pods window, select the name of the Note pod you want to delete.
4 Click the Delete button.
The Note pod’s name is removed from the list in the Organize Pods window.
5 In the Organize Pods window, click the Done button.
38 Chapter 5: Using the Note Pod
Page 39

CHAPTER 6
Using the Whiteboard Pod
The Whiteboard pod can be used as a real-time, interactive location to share text, diagrams, and
free-form drawings with meeting participants. There is a selection of line, text, drawing, and
pointer tools in the Whiteboard pod. Pod features include the ability to rename, delete, move,
and resize whiteboards. Other features include retaining content on the whiteboard between
meeting sessions, scaling the whiteboard as the whiteboard is resized, recording the whiteboard
content, and using multiple whiteboards per meeting. As a meeting participant, you can request
to draw on a whiteboard. For more information about requesting to draw on a whiteboard, see
“Requesting to join a whiteboard” on page 39. For more information about drawing on a
whiteboard, see “Drawing on a whiteboard” on page 40. As a presenter, you can use the
whiteboard overlay option in the Content pod. For more information about the whiteboard
overlay option, see “Navigating a Breeze presentation” on page 56.
Creating a new whiteboard
If you need to create a drawing or diagram quickly while in a Breeze meeting, using the
Whiteboard pod is the best method.
To create a new whiteboard:
1 Click the Customize button at the top of the meeting window.
2 In the pop-up menu, point to New Pod, and then select Whiteboard.
For more information about drawing on a whiteboard, see “Drawing on a whiteboard”
on page 40.
Requesting to join a whiteboard
As a meeting participant, you can request to join a whiteboard to add your input to the
presentation. If this option is available, a tool will be available.
To request to join a whiteboard:
1 Click the Whiteboard Tools button in the lower right corner of the Whiteboard pod.
This displays a pop-up window with the message:
Waiting for approval to use Whiteboard.
2 The selection of drawing and text tools will be displayed after your request is accepted.
39
Page 40

Accepting and rejecting requests to join a whiteboard
You must first grant permission for participants to request to join a whiteboard.
To accept and reject requests to join a whiteboard:
1 Click the arrow in the upper left corner of the Whiteboard pod.
2 In the pop-up menu, select Allow Participants to request to use this Whiteboard.
3 Place the pointer over the icon of a knocking figure.
This displays a pop-up window with the message:
[name of guest] requested to use the Whiteboard.
The guest name displayed is the name entered in the login text box for guests.
4 Click either the Decline or Accept text displayed in the pop-up window.
Drawing on a whiteboard
After you create the whiteboard and process requests to join the whiteboard, you are ready to start
creating text and drawings for the whiteboard. As a meeting participant, you can draw on a
whiteboard after the meeting presenter accepts your request.
To draw on a whiteboard:
1 Click the Whiteboard Tools button in the lower right corner of the Whiteboard pod.
2 Select a text or drawing tool.
3 Click in the whiteboard area to start writing or drawing.
Note: If you (as a participant) collapse the selection of drawing tools during a meeting, you must
re-request to draw on the whiteboard to view the selection again.
The following tools are available to create text and drawings on the whiteboard:
Selection Tool Selects a shape or area of the whiteboard. Click on a shape to select it. Click
and drag on the canvas to create a selection rectangle that selects all the shapes within the
rectangle. The selection rectangle will have eight control points to resize the shape or shapes
selected. Holding down Shift while dragging a corner control point will force resizing to
maintain the aspect ratio. Dragging selected shapes will move them. To add a shape to the
selection, press Shift-click on the shape.
Pencil Tool Creates an array of shapes connected by lines. Stroke color and stroke weight can
be customized by using the color picker and stroke weight pop-up menu at the bottom of the
Whiteboard pod.
Marker Tool Creates an array of shapes connected by lines with a diagonal line stroke. Stroke
color and stroke weight can be customized by using the color picker and stroke weight pop-up
menu at the bottom of the Whiteboard pod.
Line Tool Draws a line between two points. Stroke color and stroke weight can be
customized by using the color picker and line width pop-up menu at the bottom of the
Whiteboard pod. Arrows can be created by using the arrow buttons at the bottom of the
Whiteboard pod. Holding down the Shift key while drawing will make the line snap every 45
degrees.
40 Chapter 6: Using the Whiteboard Pod
Page 41

Rectangle Tool Creates square and rectangle shapes. Stroke color, fill color, and stroke
weight can be customized by using the color picker and the stroke weight pop-up menu. No
fill can be used as a setting for stroke color and fill color; however, you cannot use no fill for
both stroke color and fill color. Click and drag to expand the shape. Holding down the Shift
key while drawing will force the rectangle into a square shape.
Ellipse Tool Creates circle and ellipse shapes. Stroke color, fill color, and stroke color can be
customized by using the color picker and stroke weight pop-up menu. No fill can be used as a
setting for stroke color and fill color; however, you cannot use no fill for both stroke color and
fill color. Click and drag to expand the shape. Holding down the Shift key while drawing will
force the ellipse into a circle shape.
Text Tool Creates a floating multiline text character. Fill color, font face (_sans, _serif,
_typewriter, Arial, Courier New, Times New Roman, and Verdana) and font size (7 point
through 31 point) can be customized by using the color picker, font pop-up menu, and font
size pop-up menu. Click and drag to create a text area to type in.
Stamper Tool Leaves a check mark, right facing arrow, star, or carat image on the screen. A
check mark is the default stamp. You can change the stamp image by clicking the arrow, star,
and carat buttons. Image color and shape size can be customized by using the color picker and
size pop-up menu.
Undo Performs an undo of the previous action. You can undo the following actions: drawing
a shape, moving a shape, resizing a shape, clearing the whiteboard, and changing a property of
a shape. There is no limit to the number of times that you can perform this operation in the
pod.
Navigating between multiple whiteboard pages
A whiteboard is composed of multiple pages. If you need to present multiple whiteboard pages
during a meeting, you can use the forward and backward arrow buttons at the bottom of the
Whiteboard pod to move backward and forward in the stack. If these buttons are not visible, you
can activate them by clicking the button in the lower left corner of the Whiteboard pod.
Clearing a whiteboard
If you need a blank working area during the meeting, you can clear the whiteboard.
To clear a whiteboard:
• Click Control+D.
Clearing a whiteboard 41
Page 42

42 Chapter 6: Using the Whiteboard Pod
Page 43

CHAPTER 7
The Camera and Voice Pod
The Camera and Voice pod is used for displaying video that is broadcast live to meeting
participants, and it provides controls for regulating broadcasts of live audio and video to
participants. Presenters can send and regulate broadcasts, and they can enable broadcasts from
participants who are not presenters. Unless a presenter enables them, participants cannot
broadcast either audio or video. A presenter can specify that both audio and video can be
broadcast, or that only video or only audio can be broadcast.
For broadcasting audio, a microphone must be connected to the broadcaster’s computer.
Similarly, for broadcasting video, a web camera must be connected to the broadcaster’s computer.
The following are two scenarios for the use of broadcasting. In the first, both audio and video are
broadcast. In the second, only video is broadcast:
Virtual classroom The meeting room is a virtual classroom and a presenter functions as the
course instructor. What the instructor says is broadcast to participants. A video camera broadcasts
an image of the instructor as the instructor speaks. Participants in the class are not enabled to use
audio or video. To communicate with the instructor, participants can use the Chat pod (see
Chapter 4, “Using the Chat Pod,” on page 33) and the Participants List pod (see Chapter 3, “The
Participants List Pod,” on page 27).
Virtual meeting The meeting room is used as a virtual meeting place in which geographically
separated colleagues can carry on a discussion. Broadcasting is enabled for all participants. When
a participant speaks, a video image of the participant is broadcast. However, because of limitations
in the way the Internet handles audio material, a conference call is used for spoken
communication between participants, instead of audio broadcasting.
Broadcasting audio and video
1 In the Camera and Voice pod, click the Start Broadcast button.
2 In the Macromedia Flash Player Settings window, click the Allow button to give the Flash
Player access to a video camera, if one is connected to your computer, and to a microphone, if
one is connected to your computer.
Your name appears in the Camera and Voice pod along with buttons for controlling your
broadcast. Audio and video are now sent to all meeting participants (see “Video broadcast
settings” on page 47 and “Audio broadcast settings” on page 46). Audio broadcasting is
indicated by a line under your name. A green line indicates the broadcast volume level.
43
Page 44

Enabling broadcasting by participants
To enable broadcasts by meeting participants:
1 Click the arrow in the upper left corner of the Camera and Voice pod.
2 From the pop-up menu, select Allow Participant Camera and Voice.
Participant broadcasting is now enabled and a Start Broadcast button appears on each
participant’s Camera and Voice pod.
Although participant broadcasting is now enabled, before an individual participant can
broadcast audio or video, a presenter must approve it.
Approving an individual participant’s request to broadcast
When a participant clicks the Start Broadcast button, it sends an approval request to the Camera
and Voice pod of each presenter associated with the meeting. A presenter must approve the
request before the participant can start broadcasting.
To approve a participant’s broadcasting request:
• In the approval request, do one of the following:
■ Click Accept to approve the participant’s request.
After the request is approved, the participant must approve usage of their camera and
microphone by Macromedia Flash. Once approved, the participant’s name, audio bar,
camera image, and media control buttons are displayed in the Camera and Voice pod for all
participants.
■ Click Decline to deny the participant’s request.
No changes are made to any participant’s Camera and Voice pod, and the requesting
participant is notified that you have declined their broadcast request.
Controlling audio and video broadcasts
Depending on whether you are a participant or a presenter, and whether participant broadcasting
has been enabled, you can pause, resume, and stop broadcasts. The following table lists the
capabilities of each meeting participant category.
Functionality Participant
(broadcast
viewing)
Pause broadcasting of your own audio or video
to participants
Select the broadcasts you want to receive
Stop broadcasting of your own audio or video
to participants
Stop the broadcast of an individual participant’s
audio or video to all participants
Change the aspect ratio of videos
✔✔✔✔
Participant
(broadcast
ing)
✔✔✔
✔✔✔
Preparing
Presenter
Presenter
✔
✔
44 Chapter 7: The Camera and Voice Pod
Page 45

Pausing your own broadcasting
You must move your mouse over your name in order for these controls to be displayed properly.
To pause broadcasting of your own audio to participants:
• Click the Microphone icon in the Camera and Voice pod next to your name.
A red line appears over the Microphone icon.
To pause broadcasting of your own video to participants:
• Click the Camera icon in the Camera and Voice pod next to your name.
A red line appears over the Camera icon.
To resume broadcasting of your own audio to participants:
• Click the Microphone icon in the Camera and Voice pod next to your name.
The red line disappears from over the Microphone icon.
Controlling audio and video broadcasts 45
Page 46

To resume broadcasting of your own video to participants:
• Click the Camera icon in the Camera and Voice pod next to your name.
The red line disappears from over the Camera icon.
Selecting the broadcasts you receive
To block audio broadcasts from a participant:
• Click the Microphone icon in the Camera and Voice pod next to the participant’s name.
A red line appears over the participant’s Microphone icon.
To block video broadcasts from a participant:
• Click the Camera icon in the Camera and Voice pod next to the participant’s name.
A red line appears over the participant’s Camera icon.
To unblock audio broadcasts from a participant:
• Click the Microphone icon in the Camera and Voice pod next to the participant’s name.
The red line over the participant’s Microphone icon disappears.
To unblock video broadcasts from a participant:
• Click the Camera icon in the Camera and Voice pod next to the participant’s name.
The red line over the participant’s Camera icon disappears.
Stopping your own broadcast
To stop broadcasting your own audio and video:
• Click the Close icon button in the Camera and Voice pod next to your name.
Your name, image, and media control buttons disappear from all participants’ Camera and
Voice pods.
Stopping a participant from broadcasting
To stop a participant from broadcasting:
• Click the Close icon button in the Camera and Voice pod next to the participant’s name.
The participant’s name, image, and media control buttons disappear from all participants’
Camera and Voice pods.
Setting meeting-wide broadcast characteristics
You can set audio and video broadcasting characteristics that apply to all participants (including
presenters) in a meeting.
Audio broadcast settings
You can set the following broadcasting characteristics for audio:
Voice Off All audio broadcasting is turned off.
46 Chapter 7: The Camera and Voice Pod
Page 47

Voice On Audio broadcasting is turned on. Presenters and can broadcast audio. If participant
broadcasting is enabled (see “Enabling broadcasting by participants” on page 44), participants,
too, can broadcast audio.
Record Voice and Mute Broadcast If the meeting is being recorded (see Chapter 12,
“Recording Meetings,” on page 75), what you say is recorded but is not broadcast to participants.
Use this setting if you are recording a meeting but are not yourself addressing participants.
To change a setting for audio broadcasting:
1 Click the arrow in the upper left corner of the Camera and Voice pod.
2 From the pop-up menu, select the setting you want to change.
Note: If you change a setting while audio is being broadcast, the new setting takes effect
immediately. In some cases, this can mean that media buttons are added to or removed from the
Camera and Voice pod.
Video broadcast settings
You can set the following broadcasting options for video:
Camera Off Video broadcasting is turned off.
Slow Images Samples and transmits the camera image less frequently than the other image
settings. Images tend to be low quality and can shift abruptly. Use this setting if most participants
have low-speed connections or if you are not concerned about image quality.
Fast Images Provides a clear but not high-quality image. Use this setting if participants are
connected at a variety of speeds.
High Quality Images Provides high-quality images. Use this setting if all participants are
connected at high speeds.
High Bandwidth Provides high-quality images in the same method as the high-quality images
setting if the room is not set to LAN. If the room is set to LAN, this option will behave the same
as the high-quality images but with twice as much bandwidth and frame rate allotted.
To set image quality or to turn video broadcasting on or off:
1 Click the arrow in the upper left corner of the Camera and Voice pod.
2 From the pop-up menu, select the setting you want to apply.
Note: If you change a setting while video is being broadcast, the new setting takes effect
immediately.
Changing the aspect ratio of videos
The default setting for the aspect ratio of videos will be the Portrait setting. You can alter the
aspect ratio to resize all videos on the stage.
To change the aspect ratio of videos:
1 Click the arrow in the upper left corner of the Camera and Voice pod.
2 From the pop-up menu, select one of the following options:
■ Portrait Presents a square shape.
■ Standard Approximates 160/120.
■ Landscape Approximates 9/5.
Setting meeting-wide broadcast characteristics 47
Page 48

Note: If you change a setting while video is being broadcast, the new setting takes effect
immediately.
Microphone and Camera settings
Presenters and participants can choose the microphone and microphone settings they want to use
for broadcasting, and they can choose the camera to use for broadcasting.
To select a microphone and set its audio characteristics:
1 Click the Meeting button at the top of the meeting window.
2 From the pop-up menu, select Tune Audio.
A Macromedia Flash Player Settings window opens, with the Microphone tab selected.
3 From the Microphone pop-up menu, select the microphone that you want to use.
4 Speak at a normal level.
The audio level bar in the middle of the Macromedia Flash Player Settings window goes up
and down as the audio level changes.
5 Continue speaking at a normal level, and drag the Record Volume slider to the right or left until
the audio level bar changes from green to red and hits the top of the audio level bar while you
are speaking.
6 To reduce the microphone’s echo, select the Reduce Echo check box.
7 Click the Close button.
The Macromedia Flash Player Settings window closes.
48 Chapter 7: The Camera and Voice Pod
Page 49

To select a camera:
1 Click the Meeting button at the top of the meeting window.
2 From the pop-up menu, select Select Camera.
A Macromedia Flash Player Settings window opens, with the Camera tab selected.
3 From the Camera pop-up menu, select the camera that you want to use.
Note: If no camera is connected, a No camera found message is displayed instead of a Camera
pop-up menu.
4 Click the Close button.
Broadcast permissions by participant type
The following table shows broadcasting permissions by participant type.
Audio and Video Functionality Participant Preparing
Presenter
Broadcast audio and video without approval
Invite participants to broadcast audio and video
Broadcast audio and video with approval after presenter
invites audience
Change broadcast audio and video settings for the
meeting
Change personal camera and microphone setting
Pause broadcast of your individual audio or video to all
participants (using media buttons for your broadcast)
Select which participants’ audio and/or video broadcasts
to receive (using media buttons for their broadcast)
Stop broadcast of your own individual audio or video
broadcast to all participants (using stop button for your
broadcast)
Stop broadcast of any participant’s audio or video
broadcast to all participants (using stop button for your
broadcast)
✔
✔✔✔
✔✔✔
✔✔✔
✔✔✔
Presenter
✔
✔
✔
✔
Broadcast permissions by participant type 49
Page 50

50 Chapter 7: The Camera and Voice Pod
Page 51

CHAPTER 8
Using the Content Pod
A Content pod displays preexisting content (PowerPoint slides, Breeze presentations, SWFs,
JPGs, or FLVs) to meeting participants. You can load content into the meeting room in two ways:
• Load preexisting content from your Macromedia Breeze Content Library (Breeze
presentations, SWFs, JPGs, FLVs, or Macromedia FlashPaper documents created with
Contribute 2.0 and later) into a Content pod.
Note: Information about the Breeze Content Library does not apply to the Breeze Live standalone product.The Content Library is available only with Breeze Presentation.
• Upload content (PowerPoint slides, SWFs, JPGs, or FLVs) from your local computer to the
Breeze server and then display the content in a Content pod. The uploaded content is saved in
the meeting folder in the Meeting Library, not in the Content Library.
Note: A Content pod is used to display preexisting content, in contrast to screen sharing, which
broadcasts a live view of your desktop or an application on your desktop.
Some possible scenarios for displaying content are as follows:
• A Content pod contains a single Breeze presentation that is used for the entire meeting. You
load the room content from the Content Library.
Note: The preceding does not apply when just the Breeze Live module of the Breeze
Presentation platform is purchased.
• A Content pod contains a single presentation that is used for the entire meeting. You load the
room content from your computer as a PowerPoint presentation before the meeting begins. You
load the presentation before the meeting because it takes at least 30 seconds per slide to upload
and convert the presentation to a Macromedia Flash SWF file.
• A Content pod contains a single image (a JPEG file) that is visible throughout the meeting. For
example, the image may be a company logo or a presenter picture.
• The content in a Content pod changes during a meeting, with a presenter switching between
several preexisting items of meeting room content. For example, a presenter may first give one
presentation and then switch to a second presentation after the first is finished.
• The content in a Content pod changes during a meeting, with a presenter creating and
displaying a piece of new meeting room content during the meeting. For example, during a
presentation, a presenter might be asked, “Do you have a picture of that new machine you just
mentioned?” This image was not included in the presentation, so the presenter immediately
creates a new content item containing this image (a JPEG file).
51
Page 52

• A custom meeting room is created and contains several Content pods, each with unique
content. For example, one Content pod displays your company’s logo (a JPEG file) and
another contains a Breeze presentation (a SWF file) to present during the meeting.
• Different Content pods are displayed in different meeting room layouts. For example,
Presenter1 uses the Slides room layout with a Content pod that contains Presenter1’s
presentation (a SWF file). When Presenter1 finishes, Presenter2 takes over and switches to a
second custom Slides room layout. A different Content pod in this layout contains Presenter2’s
presentation (a different SWF file).
Understanding types of meeting room content
Various types of files can be used as the source for meeting room content in a Content pod:
Breeze presentations Breeze presentations from your Content Library. These were created
ahead of time by publishing a presentation from PowerPoint using the Breeze Publish Wizard.
Note: The preceding does not apply to the Breeze Live stand-alone product.The Content Library is
available only with the Breeze Presentation product.
PowerPoint slides (PPTs) PowerPoint presentations from your computer. Your slides are
uploaded to the Breeze server, converted to a Flash SWF file, and then displayed in the meeting
room.
Flash content (SWFs) Flash SWF files from your Breeze Content Library or your local
computer.
Images (JPGs) Images stored as JPG files. These include JPG images from your Breeze
Content Library or your local computer.
Flash videos (FLVs) Flash video files. These include Flash video files from your Breeze
Content Library or your local computer.
Adding new content to a Content pod
You can load multiple files into a meeting room as room content and then switch between them
during a meeting or display them in separate Content pods, room layouts, or meetings. When
you add new content to a pod, the pod is renamed and given the name of the source file, such as
logo.jpg, marketing_preso.swf, or allhands.flv. You can rename a Content pod after it is created.
The content for a Content pod can be loaded from two places:
Breeze Content Library Load Breeze presentations, SWFs, JPGs, and FLVs from the Breeze
server. You can choose any content from any user’s content folder that you have permission to
view.
Note: The preceding does not apply when just the Breeze Live module of the Breeze Presentation
platform is purchased. The Content Library is available only with the Breeze Presentation product.
Your Computer Upload PPT, SWF, JPG, or FLV files located locally on your computer to the
Breeze server. The files can then be displayed in the Flash Player meeting room.
When you load files from your computer, the file is first uploaded to the Breeze server and then
displayed in the Breeze meeting. In order to upload files from your computer to the Breeze server,
you need the Presenter Add-In for Breeze, a special version of the Macromedia Flash Player that
includes file upload and screen-sharing broadcast capabilities. The Presenter Add-In for Breeze is
automatically downloaded and run the first time you try to share screens or upload files.
52 Chapter 8: Using the Content Pod
Page 53

Adding content from the Breeze Content Library
Note: This section does not apply when just the Breeze Live module of the Breeze Presentation
platform is purchased. The Content Library is available only with Breeze Presentation.
You can load Breeze presentations, SWFs, JPGs, FLVs, or FlashPaper documents created with
Contribute 2.0 and later from the Breeze server as content into a Content pod. You can choose
content from any user’s folder in the Breeze Content Library.
To add content from the Breeze Content Library to a Content pod:
1 Click the arrow in the upper left corner of the Content pod.
2 In the pop-up menu, choose Select From Content Library.
A Browse Content window appears.
3 In the Browse Content window, do one of the following:
■ Click the Shared Content button.
The content in the Breeze Content Library’s Shared Content folder is displayed in the
Browse Content window.
■ Click the My Content button.
The content in the Breeze Content Library’s My Content folder is displayed in the Browse
Content window.
■ Click the User Content button.
The content in the Breeze Content Library’s User Content folder is displayed in the Browse
Content window.
4 Navigate to the content you want to display in the Content pod:
To move down a folder Double-click the name of the folder.
To move up a folder Click the name of the folder in the folder bread crumb list located
above the detailed folder and file list.
5 Select the file to display (Breeze presentation, SWF, JPG, FLV, or FlashPaper documents
created with Contribute 2.0 and later) and click the Open button.
The selected content is now displayed in the Content pod, which is renamed based on the
content you selected. For information about creating custom pods, see the Developing Pods for
Breeze document.
Adding content from your computer
You can load PPTs, SWFs, JPGs, or FLVs from your local computer as room content into a
Content pod. The files are uploaded to the server. PPT files are converted to SWFs.
To add content from your computer:
1 Click the arrow in the upper left corner of the Content pod.
2 In the pop-up menu, select Select From Your Computer.
A Browse Content window appears.
3 In the Browse Content window, browse to the file on your computer.
4 Click the Open button.
Adding new content to a Content pod 53
Page 54

The file is uploaded to the server. This may take a few minutes, depending upon the size of the
file. It takes approximately 30 seconds per slide to upload and convert a PowerPoint
presentation (PPT). The selected content is now displayed in the Content pod, which is
renamed based on the content you selected.
Choosing the content to display
Meeting room content consists of Breeze presentations, SWFs, JPGs, and/or FLVs that have
previously been added to a Content pod from either the Breeze Content Library or your
computer.
You can change the Content pod on display at any time. Usually, you select the Content pod to
display before a meeting starts, when switching between Content pods during a meeting, and
after you create a new Content pod while customizing a room layout.
To choose a Content pod for display:
1 Click the arrow in the upper left corner of the Content pod.
2 In the pop-up menu, select Select From Room Content.
3 A pop-up menu appears, containing a list of all Content pods that are not currently displayed.
4 Select a Content pod for display.
The selected Content pod is immediately displayed to all meeting participants.
Working with Breeze presentations
When you load a Breeze presentation from the Breeze Content Library into a Content pod,
participants see separate views of the presentation according to their participant type:
Presenters see the presentation outline, presentation slides, and a slide navigation bar.
Participants see only the presentation slides.
Note: Information about the Breeze Content Library does not apply when just the Breeze Live
module of the Breeze Presentation platform is purchased. The Content Library is available only with
the Breeze Presentation product.
54 Chapter 8: Using the Content Pod
Page 55
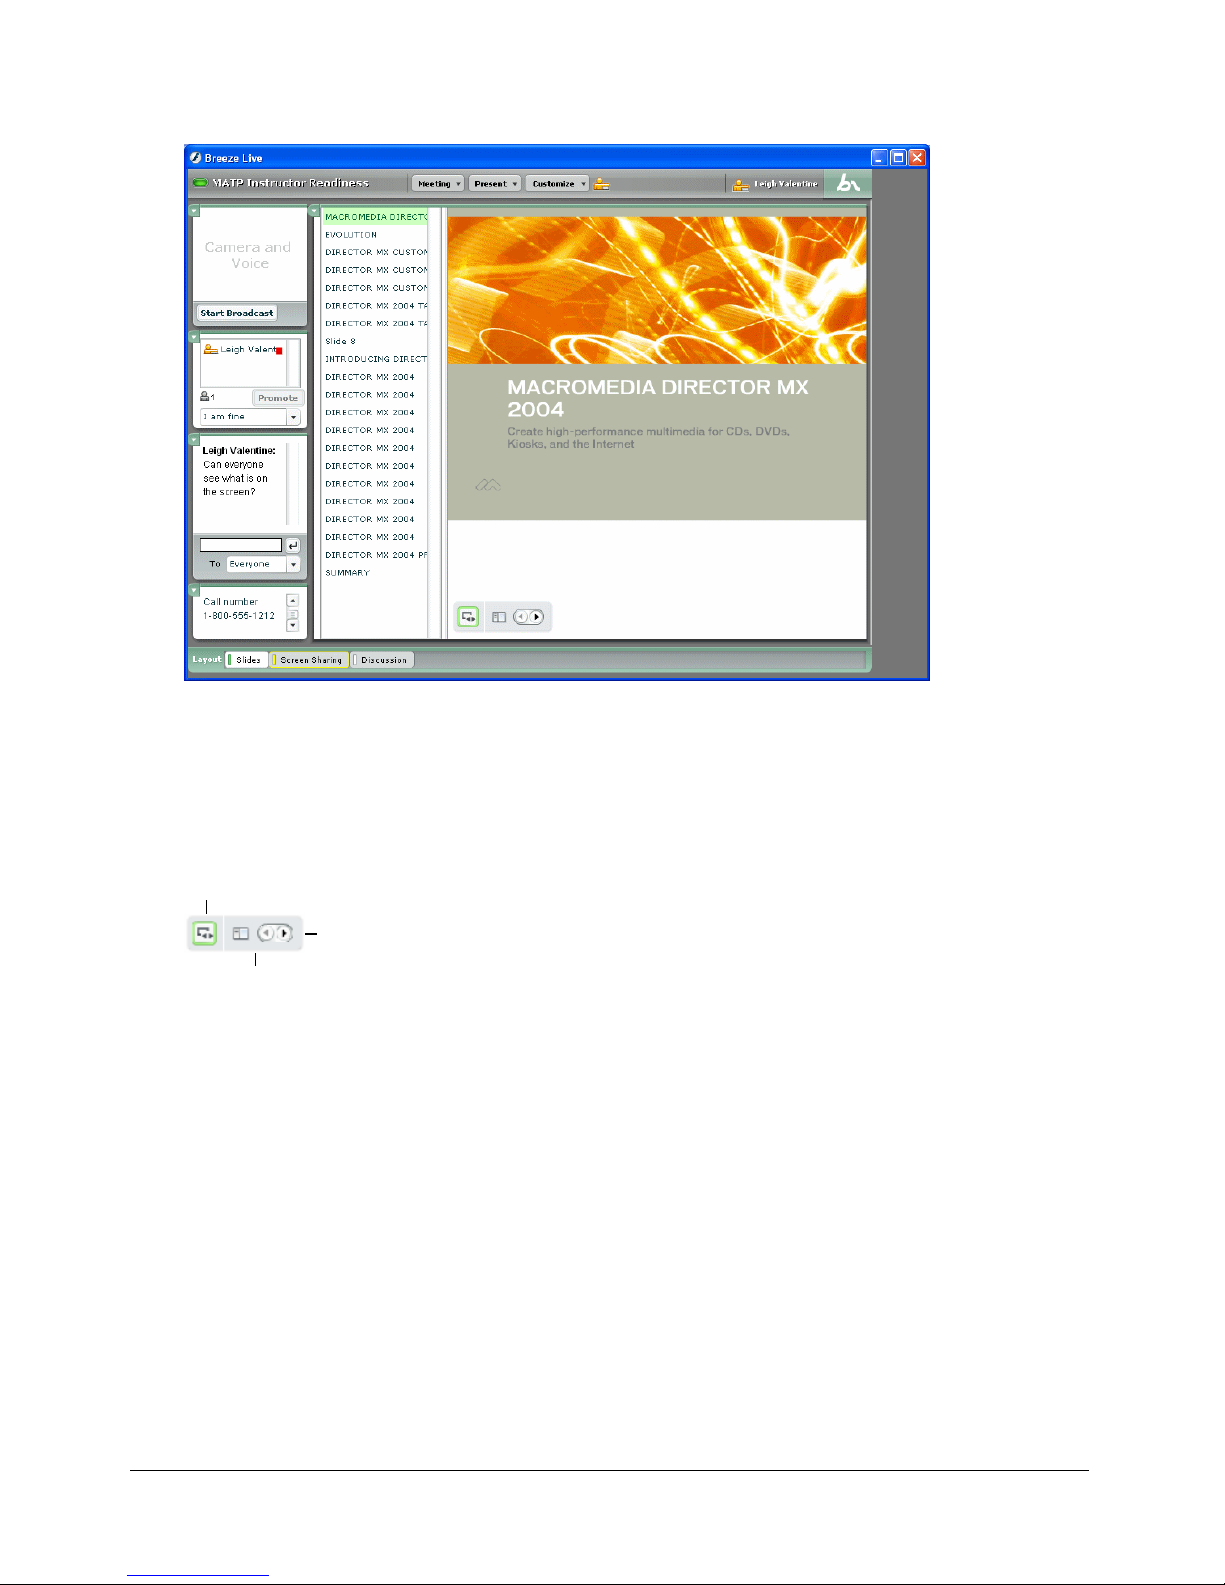
The presenter’s view of a Breeze presentation is shown here:
The navigation bar
A navigation bar is automatically displayed for each Breeze presentation used as room content.
The navigation bar is visible only to meeting room presenters. It contains Previous and Next
buttons to navigate the slides, and a show/hide slide navigation toggle button that allows you to
switch back and forth between displaying or not displaying the presentation outline.
Show/Hide slide navigation
Next slide
Previous slide
The Breeze presentation outline
All Breeze presentations displayed within a Breeze meeting include a presentation outline on the
left side. This outline lists the name of each slide in the presentation. You can use this outline to
see a list of all slides in the presentation, and to move to a specific slide in the presentation.
An outline is displayed for every Breeze presentation. This includes those created by uploading a
PowerPoint presentation to the server from within a meeting (see
“Adding content from your
computer” on page 53) and those created by publishing PowerPoint presentations from
PowerPoint to the Breeze Content Library using the Breeze Publish Wizard (see Using the Breeze
Publish Wizard Help). Even if you chose to not include a presentation outline when publishing
from PowerPoint using the Breeze Publish Wizard, an outline is displayed in the Breeze meeting.
Showing or hiding a Breeze presentation outline
You can change the width of the presentation outline, making it visible or not visible.
Working with Breeze presentations 55
Page 56

To change the width of a Breeze presentation outline:
• Click the vertical gray bar on the left side of the Content pod, and drag it to the right or left.
To show/hide the presentation outline using the show/hide slide navigation toggle button:
• In the navigation bar, click the show/hide slide navigation toggle button to hide or display the
presentation outline.
For a picture of the toggle button, see “The navigation bar” on page 55.
Navigating a Breeze presentation
A Breeze presentation can be navigated only by meeting presenters. If there is more than one
presenter, each presenter can control the presentation. Any change made by any presenter is
immediately viewed by all meeting participants.
You can navigate a Breeze presentation using the navigation buttons or using the presentation
outline.
To navigate a Breeze presentation using the navigation buttons:
• In the navigation bar, click the Forward and Back buttons to navigate between slides.
For a picture of the navigation buttons, see “The navigation bar” on page 55.
If a presentation outline exists for a Breeze presentation, a presenter can use it to navigate between
slides.
To navigate a Breeze presentation using the presentation outline:
1 Make sure that the presentation outline is visible. See “The navigation bar” on page 55 and
“Navigating a Breeze presentation” on page 56.
2 Click the name of the slide you want to navigate to.
The presentation moves to the selected slide.
Note: The Breeze presentation outline and navigation buttons are visible only to presenters.
Using the whiteboard overlay option
A Whiteboard pod can be placed on top of a Content pod for easy access to the whiteboard.
To use the whiteboard overlay:
1 Click the arrow in the upper left corner of the Content pod.
2 In the pop-up menu, select Whiteboard Overlay.
Note: If you are displaying a FlashPaper or SWF file, the whiteboard overlay will be disabled.
To show the pointer:
1 Click the arrow in the upper left corner of the Content pod.
2 In the pop-up menu, select Show Pointer.
Click in the Content pod to activate the pointer.
When using the whiteboard overlay over the Content pod, you can enable participant drawing
from the Content pod.
56 Chapter 8: Using the Content Pod
Page 57

To enable participant drawing:
1 Click the arrow in the upper left corner of the Content pod.
2 In the pop-up menu, select Allow Participant Drawing.
After you respond to the participants’ requests (in a notification window) to draw on the
whiteboard, they will be able to activate the tools and start drawing.
Renaming a Content pod
When you add content from the Breeze Content Library or from your computer to a Content
pod, the Content pod is given the complete name of the file, such as logo.jpg,
marketing_preso.swf, or allhands.flv. This is the name that is used to select and manipulate the
Content pod.
You can change the name of a Content pod to a more descriptive name.
To rename a room Content pod:
1 Click the Customize button at the top of the meeting window.
2 Select Organize Pods.
An Organize Pods window appears.
3 In the Organize Pods window, select the name of the Content pod you want to rename.
4 Click the Rename button.
A Rename Pod window appears.
5 In the Rename Pod window, type the new name for the Content pod.
6 Click OK.
7 In the Organize Pods window, click the Done button.
Deleting a Content pod
You can delete a Content pod.
To delete a Content pod:
1 Click the Customize button at the top of the meeting window.
2 Select Organize Pods.
The Organize Pods window appears.
3 In the Organize Pods window, select the name of the Content pod you want to delete.
4 Click the Delete button.
The Content pod is removed from the list in the Organize Pods window.
5 In the Organize Pods window, click the Done button.
Editing the content in a Content pod
If you want to edit the content in a Content pod, you need to edit the content separate from the
Content pod and then add the edited content to a new Content pod.
Editing the content in a Content pod 57
Page 58

To edit a content item and display it in a Content pod:
1 Delete the content item that you want to edit. For more information, see “Deleting a Content
pod” on page 57.
2 Do one of the following:
■ If the content source file is a PPT, JPG, FLV, or SWF file, edit the source file, recompile as
necessary, and then save the final file locally on your computer.
■ If the source file is a Breeze presentation, edit the presentation locally on your computer and
then republish it as a Breeze presentation to the Breeze server.
3 Re-add the room content item to a Content pod. For more information, see “Adding new
content to a Content pod” on page 52.
58 Chapter 8: Using the Content Pod
Page 59

CHAPTER 9
Using the Screen Sharing Pod
The Screen Sharing pod is used to broadcast a live display of your desktop or an open application
on your computer to the meeting room participants. When displaying an open application, the
Screen Sharing Pod also allows other meeting presenters to request control of the application.
Note: The Screen Sharing pod is different from the content pod, which displays preexisting content
(Macromedia Breeze presentations, SWFs, JPGs, or FLVs).
You can find a Screen Sharing pod on the default Screen Sharing meeting room layout.
Some possible scenarios for screen sharing or application sharing are as follows:
• You want to demonstrate a new software program during a Breeze meeting. You use the Screen
Sharing pod in the Screen Sharing meeting room layout and share the application’s window on
your desktop, or allow other presenters to control the application while reviewing the
application’s functionality.
• You want assistance with your system or an application during a meeting. You use the Screen
Sharing pod in the Screen Sharing meeting room layout and share your desktop or application,
then grant control of your screen or application to another presenter to enable them to make
changes on your system or configure your application correctly.
• You hold a Breeze meeting about a new software program. You start out in the Slides meeting
room layout, giving a Breeze presentation. In the middle of the presentation, you switch over
to the Screen Sharing meeting room layout and share the new software application window
that you want to demonstrate. Afterward, you switch back to the Slides meeting room layout
and finish the Breeze presentation.
• You need to demonstrate a process that requires more than one application window, and both
windows must be visible at the same time. You use the Screen Sharing pod in the Screen
Sharing meeting room layout and share your active desktop in full-screen mode.
• You need to demonstrate a process that requires more than one application window, but the
two application windows do not need to be visible at the same time. Instead of sharing your
desktop, you share one application window first and then use the Breeze system tray icon to
switch to the second application when necessary.
About system requirements for screen or application sharing
There are additional system requirements for both presenters and participants when screen
sharing is used. Participants can view shared screens, but only presenters can enable screen sharing
or application sharing.
59
Page 60
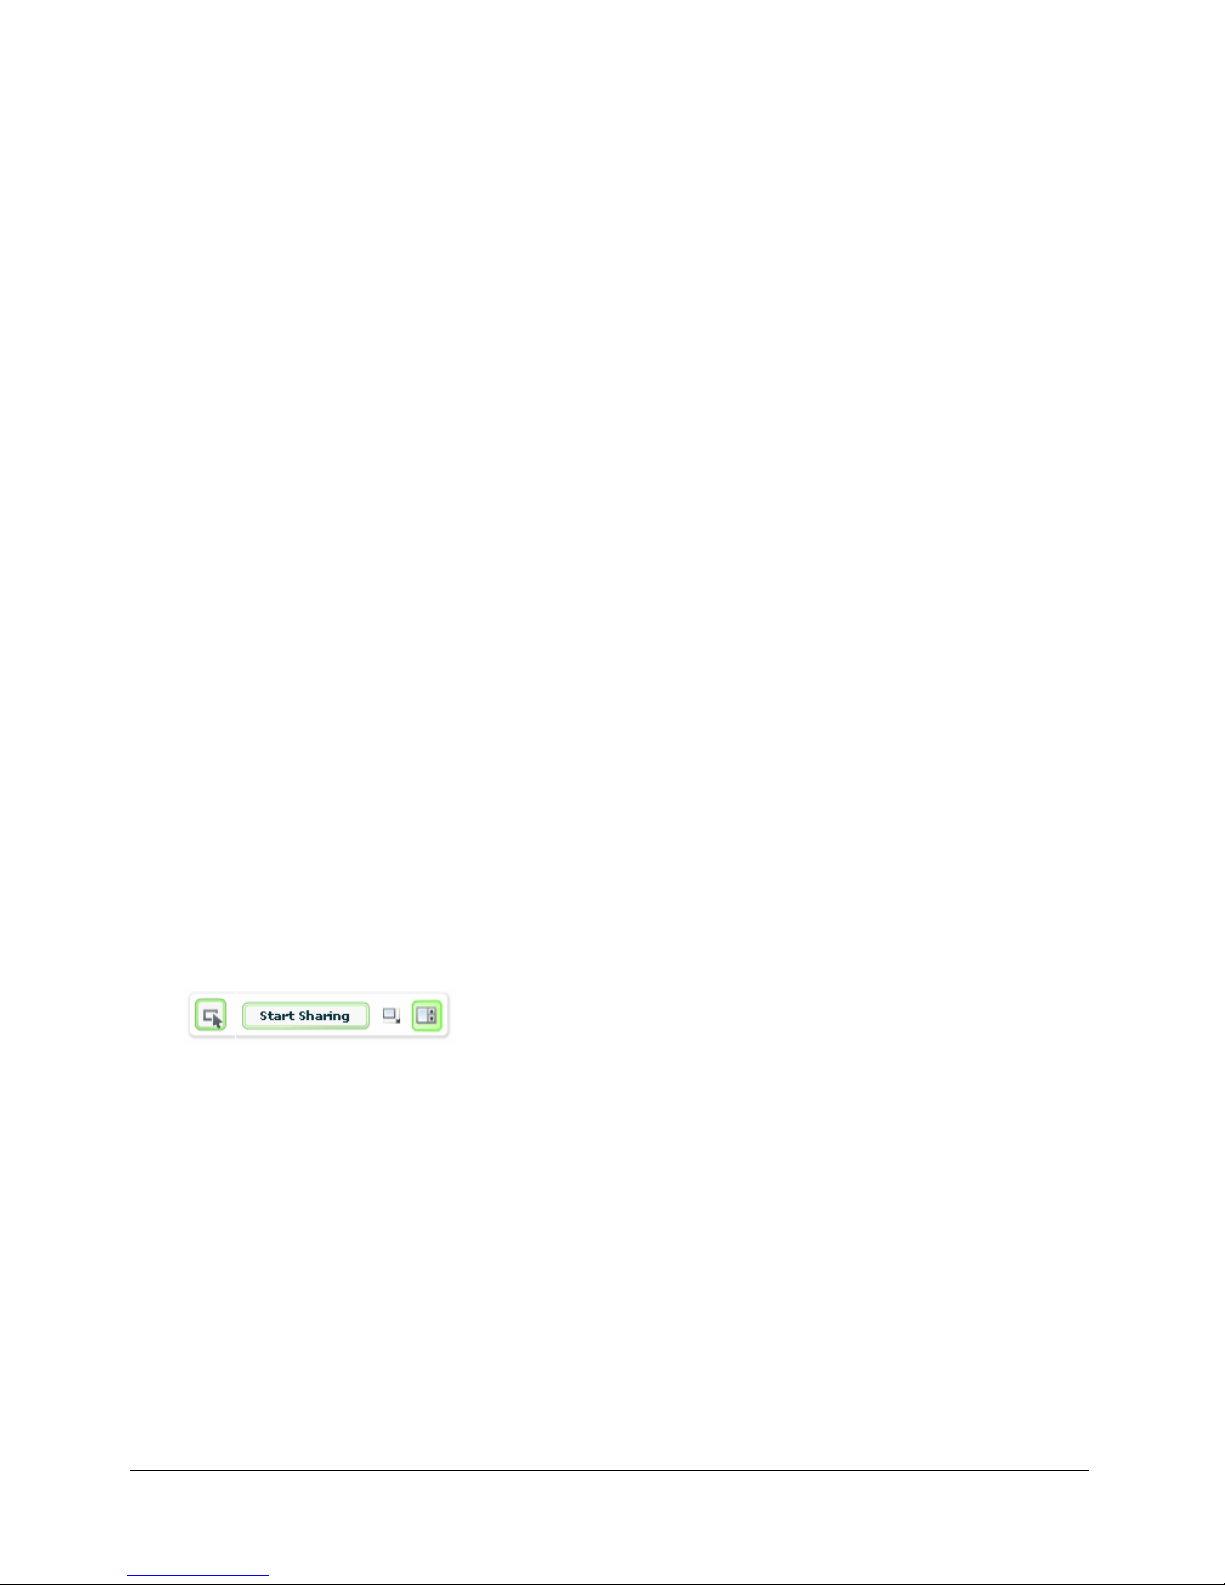
Presenter system requirements
Screen-sharing broadcast (including application sharing) by a presenter requires:
• The Windows platform
• The Presenter Add-In for Breeze, a special version of Macromedia Flash Player that includes
file upload, application sharing, and screen-sharing broadcast capabilities
The Presenter Add-In for Breeze is automatically downloaded and run the first time you try to
share your screen (or control a shared screen) if your system is missing the required Presenter AddIn for Breeze.
Participant system requirements
Application sharing or screen-sharing playback by a participant requires:
• Windows or Macintosh operating system
• Flash Player 6 (version 6.0.79.0 or later)
When a participant attempts to view a screen-share broadcast, the Flash Player version is
automatically detected and the participant is prompted to get the latest version of Flash Player
if
necessary.
About accessing screen-sharing functionality
You can access screen-sharing and application-sharing functionality from either of the following:
• A Screen Sharing pod in a meeting room
• The Breeze system tray icon, which is visible in the system tray when your screen is being
shared
Using the Screen Sharing control strip
You can control the Screen Sharing pod functionality or how the Screen Sharing pod is displayed
on your screen by clicking on the arrow in the upper left corner of the Screen Sharing pod or by
using the Screen Sharing pod control strip.
From left to right, the Screen Sharing control strip includes the following:
Hide/Show A button that allows you to hide the functions of the Screen Sharing pod control
strip. The default mode displays all buttons. Click the + to shrink the control strip, or click the to expand the control strip.
Share My Screen A button that controls screen sharing, allowing you to start or stop screen
sharing. This button also controls application sharing, allowing you to pass control of your screen
or application to other presenters, or stop control of a shared screen or application. Other
presenters viewing your shared screen use this button to request control of a shared screen or
application.
60 Chapter 9: Using the Screen Sharing Pod
Page 61

Scale to Fit A button that controls the display of a shared screen in the Shared Screen pod. The
Shared Screen pod view is automatically set to scale within your Breeze Live display, allowing you
to see the full shared screen. Clearing this option changes the display to scroll mode, allowing the
full resolution of the shared screen to become visible in the Screen Sharing pod. In scroll mode
you may have to use the Scroll button to adjust the display of the shared screen to view obscured
areas of the shared screen.
Scroll Use this button to move the shared screen view. This button is active only when the scale
to fit option is deselected.
The Scale to Fit button allows each viewer of a shared screen to independently control how the
shared screen is displayed on their system. When the Screen Sharing pod is seen in its default
setting (scaled to fit your screen), the complete shared screen is visible in the Screen Sharing pod.
However, since the display resolution of your monitor is independent of the screen resolution of
the system that is generating the shared screen, the display may be too small to view clearly, or to
accurately control when you are controlling the application. In this case you should set the display
to scroll mode and use the scroll bars to move around the shared screen, which is now partially
obscured by the edges of the Shared Screen pod.
Starting screen sharing
You start screen sharing from a Screen Sharing pod in a meeting room. A Screen Sharing pod is
located on the default Screen Sharing meeting room layout. In addition to viewing a shared
screen, if you are a presenter you can request control to the application being viewed. You can
start screen sharing two ways: from the Screen Sharing pod screen itself, or from the Screen
Sharing pod control strip.
To start sharing a screen:
1 Click the arrow in the upper left corner of the Screen Sharing pod.
2 Select Share My Screen.
Note: If you do not have a supported version of Presenter Add-In for Breeze, a dialog box with the
following message is displayed: “To use this application, you need the Presenter Add-In for
Breeze. Would you like to install it from macromedia.com now?” If you click the Yes button in the
dialog box, Presenter Add-In for Breeze is downloaded.
A Macromedia Flash Player Setting window appears, containing a pop-up menu of all open
applications on your local computer.
3 In the Macromedia Flash Player Setting window, do one of the following:
■ Select Full Screen from the pop-up menu to share your desktop.
■ Select the name of an open application to share an individual application.
4 Click the Allow button.
Screen sharing begins.
Note: When you use screen sharing with an open application, only the part of the application
window that is visible on your desktop is broadcast to meeting participants. Any part of your
shared application window that is covered by other windows appears as a blue cross-hatch
pattern to the participants.
Starting screen sharing 61
Page 62

To start sharing a screen using the Screen Sharing pod control strip:
1 Click the Start Sharing button in the Screen Sharing pod control strip (located at the bottom
left of the Screen Sharing pod screen).
Note: If you do not have a supported version of Presenter Add-In for Breeze, a dialog box with the
following message is displayed: “To use this application, you need the Presenter Add-In for
Breeze. Would you like to install it from macromedia.com now?” If you click the Yes button in the
dialog box, Presenter Add-In for Breeze is downloaded.
A Macromedia Flash Player Setting window appears, containing a pop-up menu of all open
applications on your local computer.
2 In the Macromedia Flash Player Setting window, do one of the following:
■ Select Full Screen from the pop-up menu to share your desktop.
■ Select the name of an open application to share an individual application.
3 Click the Allow button.
Screen sharing begins.
Note: When you use screen sharing with an open application, only the part of the application
window that is visible on your desktop is broadcast to meeting participants. Any part of your
shared application window that is covered by other windows appears as a blue cross-hatch
pattern to the participants.
When screen sharing begins, the following occurs:
• If you are sharing an application, it is brought to the front of your desktop. If you are sharing
your desktop, the meeting room application is moved to the back of your desktop’s application
stack and is no longer visible.
• The shared screen appears in the participants’ Screen Sharing pod in the meeting room.
• In your Screen Sharing pod in the meeting room, you get a message similar to the following
(depending on your screen resolution): Your screen is being broadcast to the participants. You
are sending 967 by 776 pixels. Select Preview my Screen when Sharing to display a preview.
• A Macromedia Breeze Flash Player icon appears in the system tray.
Note: Once screen sharing is enabled, other presenters viewing your screen can request control of
the screen being displayed.
To allow application sharing:
1 Start screen sharing. See“Starting screen sharing” on page 61.
Control of your shared screen is immediately available to other meeting presenters, who must
request control from you. When another presenter makes a request to control your shared
screen or application, a request for control message will be visible in your Breeze Live window.
2 Do one of the following:
■ Accept
■ Decline
A notification message is received on the system that is requesting control of your screen or
application. Once you allow control of your screen or application, control of the screen or
application passes to the presenter making the request.
Application sharing begins.
Note: If you are the presenter sharing your screen or application, you can stop application sharing at
any time, either from the Screen Sharing pod window, or from the Screen Sharing pod control strip.
62 Chapter 9: Using the Screen Sharing Pod
Page 63

To stop application sharing:
1 Click the arrow in the upper left corner of the Screen Sharing pod.
2 Select Stop Control.
A notification message is received on the system that is controlling the application. Once the
presenter stops control of their application, control of the application passes to the presenter
that enabled screen sharing.
Note: Stopping application sharing does not disable screen sharing. Your application will still be
visible unless you also stop screen sharing for the shared application.
To stop application sharing using the Screen Sharing pod control strip:
• Click the Stop Control button on the Screen Sharing pod control strip.
A notification message is received on the system that is controlling the application. Once the
presenter stops control of their application, control of the application passes to the presenter
that enabled screen sharing.
Stopping application sharing does not disable screen sharing. Your application will still be visible
unless you also stop screen sharing for the shared application.
Navigating windows during screen sharing
When you use screen sharing (including application sharing) with an application, only the part of
the application window that is visible on your desktop is broadcast to meeting participants.
Here are some tips for navigating windows when using screen sharing:
• If you are using screen sharing for your entire desktop, do not return to the Breeze meeting
room application. If you do, you get an undesirable recursive effect as the application
broadcasts and plays itself back repeatedly. To stop screen sharing before returning to the
meeting, click the Presenter Add-In for Breeze icon in your system tray and select Stop Screen
Sharing.
• If you are using screen sharing in an application window, make sure it is visible on your
desktop, and remember that whenever part of the window is covered by another window, that
part of the screen is not broadcast and the participants see only blue cross-hatches.
Previewing your shared screen in the meeting room
When you screen-share, the shared application window must be visible on your desktop.
Note: If you cannot see the contents of the actual application window for the application you are
sharing, the participants cannot see it in their Screen Sharing pod either. Instead, they see a blue
cross-hatch pattern.
To see what participants are seeing in their Screen Sharing pod, enable the Preview in Screen
Sharing option.
Previewing your shared screen in the meeting room 63
Page 64

To preview your screen sharing in the meeting room:
1 Click the arrow in the upper left corner of the Screen Sharing pod.
2 Select Preview My Screen when Sharing.
If your meeting room application occupies the full screen, your Screen Sharing pod is now full
of blue cross-hatches, because the shared application window is not visible.
If your meeting room application is not full screen, your Screen Sharing pod is now previewing
the screen broadcast, which corresponds to the portion of your shared application window that
is not covered by the meeting room window. The rest of the Screen Sharing pod is filled with
blue cross-hatches.
3 Return to your shared application window.
4 If necessary, change the size of the shared application window so that it is not a full screen.
You now see a preview of the screen-sharing broadcast in your Screen Sharing pod of the
meeting application.
Controlling application sharing
If you are screen-sharing your desktop or an application, other presenters must request control of
your shared screen before they can control your desktop or application. If you are viewing a
shared screen or application provided by another presenter, you can request control of their shared
screen or application two ways: from the Screen Sharing pod itself, or from the Screen Sharing
pod control strip.
To request control of a shared screen:
1 Click the arrow in the upper left corner of the Screen Sharing pod.
2 Select Request Control.
A notification message is received on the system that is providing the shared screen. This
presenter can accept or decline your request. Once the presenter allows control of their screen
or application, control of the shared screen passes to the presenter making the request.
Note: Only one presenter at a time can control a shared screen.
To request control of a shared screen from the Screen Sharing pod control strip:
1 Click the Request Control button in the Screen Sharing pod control strip (located at the bottom
left of the Screen Sharing pod screen).
A notification message is received on the system that is providing the shared screen. This
presenter can accept or decline your request. Once the presenter allows control of their screen
or application, control of the shared screen passes to the presenter making the request.
Only one presenter at a time can control a shared screen
Once you have control of a shared screen or application, you must give up control before another
presenter can share the same screen or application. You can stop application sharing two ways:
from the Screen Sharing pod itself, or from the Screen Sharing pod control strip.
Note: The presenter that initially enabled screen sharing can stop screen sharing at any time, which
terminates your control of their screen or application.
64 Chapter 9: Using the Screen Sharing Pod
Page 65

To stop application sharing:
1 Click the arrow in the upper left corner of the Screen Sharing pod.
2 Select Release Control.
A notification message is received on the system of the presenter that your control of their
screen has ended.
Note: Stopping application sharing does not disable screen sharing. Your screen or application will
still be visible unless you also stop screen sharing for the shared screen or application.
To stop application sharing from the Screen Sharing pod control strip:
• Click the Release Control button in the Screen Sharing pod control strip (located at the
bottom left of the Screen Sharing pod screen)
A notification message is received on the system of the presenter that your control of their
screen has ended.
Note: Stopping application sharing does not disable screen sharing. Your screen or application will
still be visible unless you also stop screen sharing for the shared screen or application.
Changing the screen-sharing source
You can change the source of the screen-sharing broadcast while you are screen sharing, by using
the Breeze system tray icon.
To change the screen-sharing source by using the Breeze system tray icon:
1 Click the Macromedia Breeze icon in the system tray.
2 Select Choose Screen Sharing Source from the pop-up menu.
A Macromedia Flash Player Setting window appears, containing a pop-up menu of all open
applications on your local computer.
3 In the Macromedia Flash Player Setting window, do one of the following:
■ To share your desktop, select Full Screen from the pop-up menu.
■ To share an individual application, select the name of an open application.
4 Click the Allow button.
Screen sharing begins.
Stopping screen sharing
You can stop screen sharing from one of four places:
• The shared application window
• The Macromedia Breeze system tray icon
• The meeting room
• The Screen Sharing pod control strip
If an application sharing session is also in progress, stopping screen sharing ends control of the
application sharing session. When screen sharing stops, participants see a blank window.
Stopping screen sharing 65
Page 66

Stopping screen sharing from the shared application
Closing a shared application window also stops the screen sharing, and ends control of the
application if application sharing was in progress.
Note: You can also stop the screen sharing from the Macromedia Breeze system tray icon, from the
meeting room, or from the Screen Sharing pod control strip. See
the Breeze system tray icon” on page 66, “Stopping screen sharing from the meeting room”
on page 66, and “Stopping screen sharing from the Screen Sharing pod control strip” on page 67.
To stop screen sharing from the shared application:
“Stopping screen sharing by using
• Close the shared application window.
The application closes and screen sharing in the Breeze meeting room stops. Participants see a
blank window.
Stopping screen sharing by using the Breeze system tray icon
You can stop the screen sharing from the Breeze system tray icon. When you stop screen sharing
you also break an application sharing connection, if one existed. Stopping screen sharing of an
application does not close the shared application, which remains open.
Note: You can also stop the screen sharing by closing the shared application window, from the
meeting room, or from the Screen Sharing pod control strip. See
shared application” on page 66, “Stopping screen sharing from the meeting room” on page 66, or
“Stopping screen sharing from the Screen Sharing pod control strip” on page 67.
“Stopping screen sharing from the
To stop screen sharing from the Breeze system tray icon:
1 Click the Macromedia Breeze icon in the system tray.
2 Select Stop Screen Sharing from the pop-up menu.
Screen sharing in the Breeze meeting room stops, but the application is still open.
Stopping screen sharing from the meeting room
You can stop the screen sharing from the meeting room. When you stop screen sharing you also
break an application sharing connection, if one existed. Stopping screen sharing of an application
does not close the shared application, which remains open.
Note: You can also stop the screen sharing by closing the shared application window, from the
Macromedia Breeze system tray icon, or from the Screen Sharing pod control strip.. See
screen sharing from the shared application” on page 66, “Stopping screen sharing by using the
Breeze system tray icon” on page 66, or “Stopping screen sharing from the Screen Sharing pod
control strip” on page 67.
To stop screen sharing from the meeting room:
1 Click the arrow in the upper left corner of the Screen Sharing pod.
2 Select Stop Screen Sharing.
Screen sharing in the Breeze meeting room stops, but the application is still open.
“Stopping
66 Chapter 9: Using the Screen Sharing Pod
Page 67

Stopping screen sharing from the Screen Sharing pod control strip
You can stop the screen sharing from the Screen Sharing pod control strip. When you stop screen
sharing you also break an application sharing connection, if one existed. Stopping screen sharing
of an application does not close the shared application, which remains open.
Note: You can also stop the screen sharing by closing the shared application window, from the
Macromedia Breeze system tray icon, or from the meeting room. See
the shared application” on page 66, “Stopping screen sharing by using the Breeze system tray icon”
on page 66, or “Stopping screen sharing from the meeting room” on page 66.
To stop screen sharing from the Screen Sharing pod control strip:
“Stopping screen sharing from
• Click the Stop Control button on the Screen Sharing pod control strip.
Screen sharing in the Breeze meeting room stops, but the application is still open.
Stopping screen sharing 67
Page 68

68 Chapter 9: Using the Screen Sharing Pod
Page 69

CHAPTER 10
Using the File Sharing Pod
The File Sharing pod can be used when a presenter wants to distribute files to meeting
participants. Files can be uploaded by presenters from your computer or from the Content
Library. Meeting participants are not able to upload files; however, the presenter can change your
participant type to enable you to upload files. You must have the Presenter Add-In for Breeze
installed to upload files. For more information about changing participant type, see “Changing
participant type” on page 31.
Creating a new File Sharing pod
When you are ready to start distributing files to meeting participants, you can create a new File
Sharing pod.
To create a new File Sharing pod:
1 Click the Customize button at the top of the meeting window.
2 In the pop-up menu, point to New Pod, and then select File Share.
You can then start selecting files to upload by using the options in the pop-up menu in the
upper left corner of the File Sharing pod.
Uploading a file
You can start uploading files when you are ready to start sharing files with meeting participants.
The files can be uploaded either from your computer or from your existing Content Library.
Meeting participants cannot upload files; however, you can change a participant’s status to enable
them to upload files. Participants who want to upload files should request a change in participant
status from the presenter.
Adding a file from the Content Library
As a presenter, you can add files from your existing Content Library to share with meeting
participants.
69
Page 70

To add a file from the Content Library:
1 Click the arrow in the upper left corner of the File Sharing pod.
2 In the pop-up menu, select Add from Content Library.
3 Click the appropriate button at the top of the Browse Content dialog box.
4 Select the file and click the Open button.
The file name will appear in the File Sharing pod after it has been updated.
Adding a file from your computer
As a presenter, you can add files from your computer to share with meeting participants.
To upload a file from your computer:
1 Click the arrow in the upper left corner of the File Sharing pod.
2 In the pop-up menu, select Add from My Computer.
A Browse Content window appears.
3 In the Browse Content window, browse to the file on your computer.
4 Click the Open button.
The file is uploaded to the server. This may take a few minutes, depending upon the size of the
file. It takes approximately 30 seconds per slide to upload and convert a PowerPoint
presentation (PPT). The filename will be displayed in the File Sharing pod after it is finished
uploading. Files uploaded by using the Add from My Computer option will be available from
the web application under the Uploaded Content page for the meeting.
Allowing participants to upload files
In order to allow participants to upload files, it is necessary to change the participant type from
participant to presenter in the Participant List pod. If participants are running in the web player
and they click the Add File button, they will be asked to download the Presenter Add-In for
Breeze. For more information about changing participant type, see “Changing participant type”
on page 31.
Downloading a file
Presenters and meeting participants can download files in the File Sharing pod for viewing.
To download a file:
1 Select the file that you want to download in the File Sharing pod.
2 Click the Save To My Computer button in the lower left corner of the File Sharing pod.
3 Click Save in the File Download dialog box.
A Save As dialog box appears.
4 In the Save As dialog box, browse to the desired location.
5 Click the Save button.
70 Chapter 10: Using the File Sharing Pod
Page 71

Renaming a file
There may be times when you will want to rename files before or during a meeting.
To rename a file:
1 Select the file that you want to rename in the File Sharing pod.
2 Click the arrow in the upper left corner of the File Sharing pod.
3 In the pop-up menu, select Rename Selected.
4 Type the new name in the Name text box and click OK.
Note: This operation will change only the label that is displayed in the File Sharing pod, not the actual
filename.
Removing a file
If you no longer want to share a file, you can remove it from the File Sharing pod.
To remove a file:
1 Select the file in the list of files.
2 Click the arrow in the upper left corner of the File Sharing pod.
3 In the pop-up menu, select Remove Selected.
The filename will disappear from the list of files.
Removing a file 71
Page 72

72 Chapter 10: Using the File Sharing Pod
Page 73

CHAPTER 11
Using the Polling Pod
You use the Polling pod to create questions, or polls, for participants and to view the results.
Similar to the Note pod, polls are created by presenters for viewing by participants. Only
presenters control the management of polls and the display of polls to meeting participants, and
there is no limit on the number of answers. Presenters are allowed to cast votes as well.
Creating a new Polling pod
With your poll question in mind, you can proceed to create a new Polling pod.
To create a new Polling pod:
1 Click the Customize button at the top of the meeting window.
2 In the pop-up menu, point to New Pod, and then select Poll.
3 Type the question and selection of responses in the text boxes.
Asking participants to respond to a poll
After you create your poll, you can ask participants to respond.
To ask participants to respond to a poll:
• Click the Open button at the bottom of the Polling pod.
The poll will be displayed to meeting participants.
Note: When you reopen a poll, the previous results are sent to the application server.
Editing a poll
After you create a poll, you may want to make changes to the question or responses.
To edit a poll:
1 Click the Prepare button in the lower left corner of the Polling pod.
2 Click the location for the text and edit the text.
3 Click the Open button at the bottom of the Polling pod.
The updated poll is displayed in the Polling pod.
73
Page 74

Closing the answer period for a poll
After enough time has passed, you will be ready to close the answer period for your poll.
To close the answer period for a poll:
• Click the Close button at the bottom of the Polling pod.
Note: When you click the Close button, the results are sent to the application server.
Viewing the poll results
When you conduct a poll, you will want to view the poll results. As a presenter, you can view poll
results while in Open and Close modes. These results are updated in real time as participants
continue to cast or change their votes.
To view the poll results:
• While in Open or Close mode, click the Show Individual Votes button at the bottom of the
Polling pod.
The participant names and responses will be displayed in the Polling pod.
Poll reports can also be reviewed from the Reports tab in Breeze Manager. For more information,
see the Using the Breeze Manager document.
Navigating between polls
When you create multiple polls, you can navigate between them quickly and easily.
To navigate between polls:
1 Click the arrow in the upper left corner of the Polling pod.
2 In the pop-up menu, point to Select Poll and select the desired poll.
Showing the poll results to participants
At times, you may want to display poll results to participants for their benefit.
To show the poll results to participants:
1 Click the arrow in the upper left corner of the Polling pod.
2 In the pop-up menu, select Broadcast Results.
Alternatively, you can scroll to the bottom of the main area and click the Broadcast Results
option.
The poll responses will be displayed to all meeting participants.
Note: This option is displayed only at times when no presenter is editing the pod.
Clearing the poll answers
When you are ready to clear the results of the poll, you can use this option in the Polling pod.
To clear the poll answers:
1 Click the arrow in the upper left corner of the Polling pod.
2 In the pop-up menu, select Clear all Answers.
The results will be cleared from the main window.
74 Chapter 11: Using the Polling Pod
Page 75

CHAPTER 12
Recording Meetings
Presenters can record any part of a Macromedia Breeze meeting. The recording is saved in the
Recordings section of the meeting folder that is associated with the meeting room. A unique URL
is generated for each recording of a meeting. If a presenter makes the URL available to
participants, they can play the recording outside the meeting room by going to the URL and
logging in to the recording.
An example of a scenario for recording a meeting is as follows:
• Several people cannot attend a scheduled meeting, but they want to see and hear the
presentation and discussion. Participants are given the URL to the recording so that they can
play it back on their own time.
Once a meeting is recorded, you can manipulate it from within the Breeze Manager, as follows:
• Edit the name and summary
• Delete meeting room recordings
• Move recordings to the Content Library (not applicable when just the Breeze Live module of
the Breeze Presentation platform is purchased)
• Filter and search recordings
For more information on deleting or moving recordings, log in to the Breeze Manager web
application and see “Managing meetings” in Using the Breeze Manager Help.
Recording a meeting
A presenter can record any part of any meeting within a meeting room. When you start recording,
you assign the recording a name and summary. The recording is saved in the Recordings section
of the meeting folder associated with the meeting room.
To start recording a meeting:
1 Click the Present button at the top of the meeting window.
2 In the pop-up menu, select Record Meeting.
A Record Meeting dialog box appears.
3 Enter a name and summary of the meeting recording.
75
Page 76

4 Click OK.
A red circle appears in the title bar of the meeting window to the right of the Customize
menu
button.
5 Proceed with your meeting as usual.
To stop recording a meeting:
• Do one of the following:
■ Place the cursor over the red circle in the meeting window title bar, and then click the Stop
Recording link in the pop-up window.
■ Click the Present button at the top of the meeting window, and in the pop-up menu
deselect Record Meeting.
The meeting recording is saved and is available for playback at any time.
Recording a meeting for voice only
There is now an option in the Record Meeting dialog box for presenters to choose to record their
voice without broadcasting it to the meeting participants. You can use this option when using a
speakerphone and want to capture the audio in the meeting recording. The option is included so
that presenters do not always need to have the Camera and Voice pod open in order to capture
audio in the recording. The voice broadcast through the Camera and Voice pod will be disabled
when recording a meeting for voice only.
To record voice only:
1 Click the Present button at the top of the meeting window.
2 In the pop-up menu, select Record Meeting.
A Record Meeting dialog box appears.
3 Select the Record audio via computer microphone but do not broadcast option.
4 Click OK.
Replaying a meeting
Every recording has a unique URL associated with it that is always available to the presenters of a
meeting. Presenters can make the URL available to participants, who can then go to the URL and
log in to play the recording. Only participants who could log in to the meeting room, whether as
guests or as registered Breeze users, can log in to play the recording.
When you play back a meeting room recording, a recording navigation bar is displayed in the
meeting room title bar.
Pause/Play toggle button
Elapsed time
Show index button
back button Status bar
Stop button
You can play back a recording only from the Breeze Manager. For information about using the
Archive Event window, see “Navigating recorded meetings” on page 78.
76 Chapter 12: Recording Meetings
Page 77

To play back a recording if you are currently in the meeting room whose recording you want
to play:
1 Click the Present button at the top of the meeting window.
2 In the pop-up menu, select Manage Meeting.
The Breeze Manager web application opens, displaying the Meeting Information page for
your
meeting.
3 Click the Recordings link.
A Recordings page, listing all the recordings for your meeting, is displayed.
4 Click the name of the recording that you want to play.
The Recording Information page for the recording you selected is displayed.
5 Click the meeting URL.
The recording is played back in all participants’ meeting windows. A recording navigation bar
for controlling playback of the recording is now displayed in your meeting room title bar.
To play back a recording from the Breeze Manager if you are not in the meeting room:
1 In the Breeze Manager, click the Meetings tab to go to the Meeting Library.
2 In the Meeting Library, locate and click the link for your meeting.
The Meeting Information page for your meeting is displayed.
3 Click the Recordings link.
The Recordings page, listing all the recordings for your meeting, is displayed.
4 Click the name of the recording that you want to play.
The Recording Information page for the recording you selected is displayed.
5 Click the meeting URL.
The recording is played back in all participants’ meeting windows. A recording navigation bar
for controlling playback of the recording is now displayed in your meeting room title bar.
To pause playback of a meeting recording:
• Click the Pause button in the title bar of the meeting window.
Playback of the meeting recording pauses, and the word “Paused” appears in the title bar of the
meeting window.
To resume playback of a meeting recording:
• Click the Play button in the title bar of the meeting window.
Playback of the meeting recording is resumed from where it left off, and the word “Playing”
appears in the title bar of the meeting window.
To stop playback of a meeting recording:
• Click the Stop button in the title bar of the meeting window.
Playback of the meeting recording stops, and the active meeting window is redisplayed.
Replaying a meeting 77
Page 78

Navigating recorded meetings
You can filter and search recorded meetings by navigating the archive folders. Each important or
indexible event is represented by an item in the Recording Index and followed by a time stamp.
Currently, layout changes, chat messages, slide changes, and users joining or leaving the stage (i.e.,
Camera and Voice pod) are the only events that are archived.
To navigate the archive folders:
1 Click the Show Index button at the far right of the recording navigation bar.
2 Expand or collapse layout folders to see the events that occurred.
Filtering meeting events
For times when you want to view certain events, you can use the filtering feature in the Recording
Index.
To filter meeting events:
1 Click and hold the View All button at the top of the Recording Index.
2 Select the appropriate option and release the mouse.
A new list of meeting events is displayed in the Recording Index.
Searching for a meeting event
When you need to find a specific meeting event, you can use the search feature in the Recording
Index.
To search for a meeting event:
1 Type a search term in the text box at the top of the Recording Index.
2 Click Find.
A list of items is displayed in the Recording Index.
78 Chapter 12: Recording Meetings
Page 79

CHAPTER 13
Customizing the Meeting Room
A Breeze Live virtual meeting room, like a real meeting room, continues to exist when a meeting
ends. Everything you add to the meeting room and any changes you make to it remain after
everybody leaves it, and your additions and changes are still there when you return to the meeting
room at a later time.
Changes that are made to a meeting room during the normal meeting workflow process include
adding room content, making specific room content visible in the content pod, adding text
messages to the Chat pod, and adding text to the Note pod.
In addition to these meeting room changes, you can also completely customize the meeting room
in the following ways:
Edit the existing meeting room layouts Add, delete, move, or resize individual meeting room
pods in an existing meeting room layout.
Create new meeting room layouts Build layouts from scratch within the various meeting
room pods.
Once you become familiar with the Breeze meeting room, you should customize the meeting
room before any meetings with participants are held. You can add content and customize the
meeting room’s layout. As a presenter, creating custom pods is another option. For more
information about creating custom pods for Breeze Live, see the Developing Pods for Breeze
document. Some possible scenarios for customizing the meeting room are as follows:
• You are not going to broadcast audio or video. To maximize screen space during the meeting,
you customize the Slides meeting room layout before the meeting begins, deleting the camera
and voice pod and increasing the size of the chat pod.
• You plan a demonstration using screen sharing and want to give participants information
about yourself and the product you are demonstrating. You customize the Screen Sharing room
layout before the meeting begins, closing the camera and voice pod and the chat pod. You
create a new Note pod called Speaker info, containing your speaker information. You then
create another new Note pod called Product info, containing the name, price, and URL for the
product you are demonstrating.
79
Page 80

• Several presenters are featured in a meeting. Before the meeting, each presenter creates his or
her own custom meeting room layout. This requires changing the Note pod to display speaker
information, choosing a content or screen-sharing pod as appropriate, loading the room
content if the Content pod is used, deleting the Camera and Voice pod if it is not being used,
and so on. The layout navigation bar displays the names of meeting room layouts. The
presenters give their meeting room layouts their own names so that each presenter’s layout is
easily recognizable in the layout navigation bar. The names in the layout navigation bar are
ordered so that they match the order in which presenters make their presentations. During the
meeting, the presenters click their names in the layout navigation bar when it is their turn to
make a presentation.
• You are going to give a Breeze presentation to customers. Some of the slides contain technical
details with which you are not extremely familiar. You customize the meeting room layout
ahead of time, creating an off-stage chat pod that only presenters can see and that you can use
during the meeting to communicate with other presenters. This layout provides a way for you
to get additional information from technical experts during the discussion without leaving the
meeting room.
Understanding the structure of a meeting room
A meeting room is made up of one or more meeting room layouts. Each meeting room layout
consists of multiple pods with separate functionalities: pods to display text messages, show
content, broadcast a camera image, and so on.
You can use prebuilt meeting room layouts, customize a prebuilt meeting room for your own
needs, or create your own meeting room layout from scratch.
Meeting room The entire meeting room Flash application at a specific URL. It consists of one
or more meeting room layouts.
Meeting room layout A specific arrangement of meeting room pods. A meeting room can have
multiple meeting room layouts that you can switch between during a meeting. Each meeting
room layout shows up as a button in the layout navigation bar.
Meeting room pod A pod within a meeting room layout with a specific functionality. Types of
meeting room pods include:
• Participants List (see Chapter 3, “The Participants List Pod,” on page 27)
• Chat (see Chapter 4, “Using the Chat Pod,” on page 33)
• Note (see Chapter 5, “Using the Note Pod,” on page 35)
• Whiteboard (see Chapter 6, “Using the Whiteboard Pod,” on page 39)
• Camera and Voice (see Chapter 7, “The Camera and Voice Pod,” on page 43)
• Content (see Chapter 8, “Using the Content Pod,” on page 51)
• Screen Sharing (see Chapter 9, “Using the Screen Sharing Pod,” on page 59)
• File Sharing (see Chapter 10, “Using the File Sharing Pod,” on page 69)
• Polling (see Chapter 11, “Using the Polling Pod,” on page 73)
• Web Links (see Chapter 14, “Using the Web Links Pod,” on page 89)
80 Chapter 13: Customizing the Meeting Room
Page 81

Default room layouts
There are three prebuilt meeting room layouts in Breeze Live:
Slides Contains the following meeting room pods: Camera and Voice, Participants List, Chat,
Note, Content, Presenter-Only Chat, and Presenter-Only Notes. The Presenter-Only Chat and
Presenter-Only Notes pods are visible only if “Show Presenter Only Area” is enabled.
Screen Sharing Contains the following meeting room pods: Camera and Voice, Participants
List, Chat, Note, and Screen Sharing. The Presenter-Only Chat and Presenter-Only Notes pods
are visible only if “Show Presenter Only Area” is enabled.
Default room layouts 81
Page 82

Discussion Contains the following meeting room pods: Camera and Voice, Participants List,
Chat, Note, and Discussion Notes. The Presenter-Only Chat and Presenter-Only Notes pods are
visible only if “Show Presenter Only Area” is enabled.
Working with meeting room layouts
In this section, you work with meeting room layouts. This section covers the following topics:
• Reordering the layout navigation bar
• Creating a new meeting room layout
• Renaming a meeting room layout
• Deleting a meeting room layout
Reordering the layout navigation bar
A layout navigation bar is visible to all presenters at the bottom of the meeting room window. The
layout navigation bar contains a list of all the meeting room layouts and allows presenters to
navigate between layouts.
You can change the order in which the meeting room layouts are listed in the layout navigation
bar.
Note: It is a good idea to have the order of your layout navigation bar match the order in which your
layouts are needed during the meeting.
82 Chapter 13: Customizing the Meeting Room
Page 83

To reorder the layout navigation bar:
1 Click the name of a meeting room layout in the layout navigation bar, and hold down the
mouse button until two green arrows appear, one above and one below the navigation bar.
2 Drag to the right or the left.
The green arrows move, pointing to a new location in the layout navigation bar.
3 When the arrows point to the place where you want to move the selected meeting room layout,
release the mouse button.
The layout navigation bar is reordered.
Creating a new meeting room layout
In addition to using the prebuilt meeting room layouts (Slides, Screen Sharing, and Discussion),
you can also create your own meeting room layouts.
You can use one of two options when creating a new meeting room layout:
Create an empty layout for which you create your own meeting room pods.
Copy an existing layout to create a new meeting room layout that already contains various
meeting room pods of certain sizes and locations, but which you can customize. You can create a
copy of any of the meeting room layouts in the layout navigation bar.
To create a new meeting room layout:
1 Click the Customize button at the top of the meeting room window.
2 Select New Layout.
3 From the pop-up menu, select one of the following:
■ The name of one of the existing meeting room layouts, to create a new meeting room layout
as a copy.
■ Blank Layout, to create a blank meeting room layout.
The new meeting room layout is created. It is given a default name, which is displayed in
the layout navigation bar. To rename the layout, see
Chapter 13, “Renaming a meeting
room layout,” on page 83.
Renaming a meeting room layout
You can change the name of any meeting room layout—whether it is prebuilt or whether you
have created it yourself—so that the name better describes its purpose.
To rename a meeting room layout:
1 Click the Customize button at the top of the meeting window.
2 Select Organize Layouts.
The Organize Layouts window appears.
Working with meeting room layouts 83
Page 84

3 In the Organize Layouts window, select the name of the meeting room layout that you want to
change.
4 Click the Rename button.
The Rename Layout window appears.
5 Type the new name for the meeting room layout.
6 Click OK.
The Rename Layout window closes
7 In the Organize Layouts window, click the Done button.
The meeting room layout’s new name is displayed in the layout navigation bar.
Deleting a meeting room layout
You can delete meeting room layouts. If you delete a meeting room layout, it has no effect on
the
pods associated with the layout. They still exist and can be added to other layouts using
Show
Pods.
To delete a meeting room layout:
1 Click the Customize button at the top of the meeting room window.
2 Select Organize Layouts.
The Organize Layouts window appears.
3 In the Organize Layouts window, select the name of the meeting room layout that you want
to
delete.
4 Click the Delete button.
The meeting room layout’s name is removed from the list in the Organize Layouts window.
5 In the Organize Layouts window, click the Done button.
Working with meeting room pods
In this section, you learn to manipulate individual meeting room pods within a meeting room
layout. This section covers the following topics:
• “Adding a new meeting room pod” on page 84
• “Moving or resizing a meeting room pod” on page 85
• “Creating a meeting room pod that is visible only to presenters” on page 86
• “Renaming a meeting room pod” on page 87
• “Closing a meeting room pod” on page 87
• “Showing an existing meeting room pod” on page 88
• “Deleting a meeting room pod” on page 88
Adding a new meeting room pod
You can add new meeting room pods to any meeting room layout. There are eight types of new
meeting room pods that you can add to a meeting room layout:
Chat Allows participants to exchange text messages. See Chapter 4, “Using the Chat Pod,”
on page 33.
84 Chapter 13: Customizing the Meeting Room
Page 85

Content Displays room content (PowerPoint slides, Breeze presentation, SWF, JPG, or FLV)
that is added to the meeting. See
File Share Allows presenters to distribute files to meeting participants. See Chapter 10, “Using
Chapter 8, “Using the Content Pod,” on page 51.
the File Sharing Pod,” on page 69.
Note Displays a static text message created by a presenter. See Chapter 5, “Using the Note Pod,”
on page 35.
Poll Allows presenters to poll meeting participants and to view the results. See Chapter 11,
“Using the Polling Pod,” on page 73.
Screen Displays a screen that the presenter shares. See Chapter 9, “Using the Screen Sharing
Pod,” on page 59.
Web Links Allows presenters to force participant browsing to specific websites. See Chapter 14,
“Using the Web Links Pod,” on page 89.
Whiteboard Displays text and drawings that the presenter and selected participants create. See
Chapter 6, “Using the Whiteboard Pod,” on page 39.
You cannot create new Camera and Voice or Participants List meeting room pods. To insert the
predefined Camera and Voice or Participants List pod in a layout, use Customize > Show Pods.
To create a new meeting room pod:
1 Click the Customize button at the top of the meeting room window.
2 Select New Pod.
3 From the pop-up menu, select the name of the type of meeting room pod you want to create.
The new meeting room pod is created. It is given a default name, which is displayed in the pod
title bar.
Moving or resizing a meeting room pod
You can customize a meeting room layout by moving and resizing meeting room pods. To do this,
select Move and Resize Pods. When you select Move and Resize Pods, the following occurs:
• An Edit icon is displayed in the title bar.
• On the top of all the meeting room pods, a green title bar appears that contains the name of
the meeting room pod and a close icon.
Working with meeting room pods 85
Page 86

To move or resize a meeting room pod:
1 Click the Customize button at the top of the meeting room window.
2 Select Move and Resize Pods.
The meeting room changes to Move and Resize Pods edit mode for the presenter, and the
following occurs:
■ On the top of all the meeting room pods, a green title bar appears that contains the name of
the meeting room pod and a close icon.
■ The Move and Resize Pods icon (a pencil) appears in the meeting room title bar.
3 To move a meeting room pod, click its green title bar and drag the pod to a new location.
4 To resize a meeting room pod, click the lower right corner of the pod and then drag it to a
new
location.
5 To disable Move and Resize Pods mode, do one of the following:
■ Click the Customize button at the top of the meeting room window, and deselect Move and
Resize Pods. This removes the check mark next to the option and disables the Move and
Resize Pods edit mode.
■ Place the pointer over the Move and Resize Pods icon on the meeting room title bar and
click Finish.
Move and Resize Pods edit mode is disabled. The green meeting room pod title bars and the
Move and Resize Pods icon disappear.
Creating a meeting room pod that is visible only to presenters
All pods on the stage are visible to all meeting room participants. You can make certain meeting
room pods visible only to presenters by dragging the pods off the stage.
To create a meeting room pod that is visible only to presenters:
1 Click the Present button at the top of the meeting room window.
2 Select Show Presenter-Only Area.
The screen size changes (only for presenters), showing screen space outside the stage.
3 Click the Customize button at the top of the meeting room window.
4 Select Move and Resize Pods.
The meeting room changes to Move and Resize Pods edit mode, and the following occurs:
■ On the top of all the meeting room pods, a green title bar appears that contains the name of
the meeting room pod and a close icon.
■ The Move and Resize Pods icon (a pencil) appears in the meeting room title bar.
5 To move a meeting room pod off the stage, click its green title bar and drag the pod to a new
location off the stage.
Dragging a pod back to the stage will make it appear.
6 To disable Move and Resize Pods mode, do one of the following:
■ Click the Customize button at the top of the meeting room window, and select Move and
Resize Pods. This removes the check mark next to the option and ends the Move and Resize
Pods edit mode.
■ Place the pointer over the Move and Resize Pods icon on the meeting room title bar and
click Finish.
86 Chapter 13: Customizing the Meeting Room
Page 87

Move and Resize Pods edit mode ends. The green meeting room pod title bars and the Move
and Resize Pods icon disappear.
Renaming a meeting room pod
You can change the name of any meeting room pod—whether it is prebuilt or you created it
yourself—so that the name better describes its content or purpose.
To rename a meeting room pod:
1 Click the Customize button at the top of the meeting window.
2 Select Organize Pods.
The Organize Pods window appears.
3 In the Organize Pods window, select the name of the meeting room pod that you want
to
change.
4 Click the Rename button.
The Rename Pod window appears.
5 In the Rename Pod window, type the new name for the meeting room pod.
6 Click OK.
7 In the Organize Pods window, click the Done button.
Closing a meeting room pod
You can also close meeting room pods. You close pods from the Move and Resize Pods edit mode.
When you close a meeting room pod it is removed from the stage but is not deleted. This means
you can later add it to any meeting room layout.
To close a meeting room pod:
1 Click the Customize button at the top of the meeting room window.
2 Select Move and Resize Pods.
When you select Move and Resize Pods edit mode, the following occurs:
■ On the top of all the meeting room pods, a green title bar appears that contains the name of
the meeting room pod and a close icon.
■ The Move and Resize Pods icon (a pencil) appears in the meeting room title bar.
3 Click the X in its green title bar.
4 Disable Move and Resize Pods mode by doing one of the following:
■ Click the Customize button at the top of the meeting room window, and select Move and
Resize Pods. This removes the check mark next to the option and ends the Move and Resize
Pods edit mode.
■ Place the cursor over the Move and Resize Pods icon on the meeting room title bar and click
Finish.
Move and Resize Pods edit mode is disabled. The green meeting room pod title bars and the
Move and Resize Pods icon disappear.
Working with meeting room pods 87
Page 88

Showing an existing meeting room pod
In addition to adding new meeting room pods to the stage, you can choose to show a meeting
room pod that already exists but is not currently visible in this meeting room layout.
To show an existing meeting room pod:
1 Click the Customize button at the top of the meeting room window.
2 Select Show Pod.
3 From the pop-up menu, select the name of the meeting room pod that you want to show.
The meeting room pod appears in the meeting room layout. It appears on the stage unless you
have Show Present-Only Area selected, in which case it appears initially outside the stage. You
can now move and resize the meeting room pod as appropriate.
Deleting a meeting room pod
You can also delete a meeting room pod. When a meeting room pod is deleted, all its contents are
deleted from the meeting room. When an individual Chat, Note, Poll, File Share, or Whiteboard
pod is deleted, its contents are permanently deleted with it.
To delete a meeting room pod:
1 Click the Customize button at the top of the meeting window.
2 Select Organize Pods.
The Organize Pods window appears.
3 In the Organize Pods window, select the name of the meeting room pod that you want to delete.
4 Click the Delete button.
The meeting room pod’s name is removed from the list in the Organize Pods window.
5 In the Organize Pods window, click the Done button.
88 Chapter 13: Customizing the Meeting Room
Page 89

CHAPTER 14
Using the Web Links Pod
There may be times during meetings when you want meeting participants to view one or several
websites. With the Web Links pod, presenters can force all meeting participants to automatically
browse to a specific web link.
Creating a new Web Link pod
When you decide that you want to force automatic browsing, you can set up a new Web Link
pod.
To create a new Web Link pod:
1 Click the Customize button at the top of the meeting window.
2 In the pop-up menu, point to New Pod, and then select Web Links.
You can then start adding web links by using the Add Link option in the pop-up menu in the
upper left corner of the Web Links pod.
Adding a new web link
When you know the sites that you want to force browsing to, you can add one or several web
links to the pod.
To add a new web link:
1 Click the arrow in the upper left corner of the Web Links pod.
2 In the pop-up menu, select Add Link.
3 Type the URL name and URL path in the text boxes.
4 Click OK.
The URL name is displayed in the Web Links pod.
89
Page 90

Forcing all participants to a web link
When you are ready to force all meeting participants to browse to a specific web link, you can
perform the operation in the Web Link pod.
To force all participants to a web link:
1 Select the appropriate link the Web Links pod.
2 Make sure that the correct path is displayed in the text box at the bottom of the Web Links pod.
3 Click the Browse To button.
Meeting participants will be forced to browse to the link.
Renaming a web link
There may be times when you want to rename a web link for your purposes.
To rename a web link:
1 Select the appropriate URL name in the Web Links pod.
2 Click the arrow in the upper left corner of the Web Links pod.
3 In the pop-up menu, select Rename Selected Link.
4 Type the new name in the URL Name text box.
5 Click OK.
The new URL name is displayed in the Web Links pod.
Removing a web link
If you no longer need a web link, you can remove it from the Web Links pod.
To remove a web link:
1 Select the appropriate link in the Web Links pod.
2 Click the arrow in the upper left corner of the Web Links pod.
3 In the pop-up menu, select Remove Selected Link.
The link will disappear from the Web Links pod.
Note: You can delete more than one link at a time.
90 Chapter 14: Using the Web Links Pod
Page 91

INDEX
A
access, controlling 22
answer period, poll 74
Apple Macintosh system requirements 8
application sharing
controlling 64
starting 62
stopping 63
system requirements 59
archives, meeting recordings 78
audio
blocking 46
broadcasting 43
recording voice only during meetings 76
setting broadcasting characteristics 46
setting microphone characteristics 48
B
bandwidth
settings 24, 25
status 16, 30
video settings 47
blocking a broadcast 46
Breeze Live Module 7
Breeze Presentation platform 7
Breeze Training Module 7
broadcasting
blocking 46
enabling for participants 44
pausing 45
permissions 44, 49
selecting a camera for 49
stopping 46
unblocking 46
C
camera
requirements 43
selecting for broadcasting 49
setting up 43
settings 48
Camera and Voice pod
about 18, 43
blocking broadcasts 46
enabling participant broadcasting 44
microphone settings 48
pausing your own broadcast 45
permissions 44, 49
selecting a camera for broadcasting 49
setting audio broadcasting characteristics 46
setting video broadcasting characteristics 47
stopping a broadcast 46
Chat pod
about 16, 33
clearing text messages 34
receiving text messages 33
sending text messages 33
classroom, virtual 43
closing a pod 87
connection status 16, 30
connection, Internet 24
Content Library
adding files to Fie Sharing pod 69
displaying content from 53
using presentations from 54
Content pod
about 18, 51
adding files 52
changing the content on display 54
deleting 57
displaying Breeze presentations from the Content
Library 54
displaying content from the Content Library 53
displaying content from your computer 53
91
Page 92

editing the content in 57
overlaying Whiteboard pod 56
renaming 57
types of content 52
using 51
content, displaying 8, 51
controlling access 22
customer support 10
customizing a meeting room
about 25, 79
adding a new pod 84
closing a pod 87
creating a presenter-only pod 86
creating new layouts 83
deleting a layout 84
deleting a pod 88
moving or resizing a pod 85
renaming a layout 83
renaming a pod 87
showing an existing pod 88
D
discussion layout 82
documentation 9
downloading files from File Sharing pod 70
drawing on a whiteboard 40
E
editing text in Note pod 36
Ellipse Tool, Whiteboard pod 41
exiting a meeting room 20
F
File Sharing pod
about 19, 69
creating new 69
downloading a file 70
participant permissions 70
removing a file 71
renaming a file 71
uploading a file 69
files, adding to content pod 52
filtering meeting recording archives 78
finding a meeting archive 78
Flash movies 52
Flash Player Settings 43
Flash videos 52
full-screen view 25
G
guest
admitting to private meetings 23
guides, user 9
H
help 9
I
image quality, video 47
images, types of 52
index, recording 78
Internet connection, setting speed and type 24
inviting participants to a meeting 21
J
joining whiteboards 39
JPG files 52
L
Landscape setting, video 47
layouts, meeting room
creating new 83
customizing 79, 80
default 80
deleting 84
navigation bar 13
renaming 83
reordering 82
selecting 25
Line Tool, Whiteboard pod 40
links, web 89
Linux system requirements 8
loading content 52
logging out of a meeting room 20
M
Macintosh system requirements 8
Macromedia Breeze Live Module 7
Macromedia Breeze Presentation platform 7
Macromedia Breeze Training Module 7
Macromedia Flash Player Settings 43
manuals 9
Marker Tool, Whiteboard pod 40
meeting room
adding a new pod 84
adding new content to 52
Camera and Voice pod 18, 43
Chat pod 16, 33
92 Index
Page 93

closing a pod 87
Content pod 18, 51
controlling access to 22
creating 11, 21
creating a new layout 83
customizing 25, 79
defined 7
deleting a layout 84
deleting a pod 88
exiting (logging out) 20
File Sharing pod 19, 69
full-size view 25
layout, selecting 25
layouts, default 80
moving or resizing a pod 85
navigation bar 13
Note pod 17, 35
Participants List pod 16, 27
pods 15
Polling pod 19, 20, 73
presenter-only pods 14, 86
recordings 75
removing participants 31
renaming a layout 83
renaming a pod 87
reordering layouts on the layout navigation bar 82
replaying recordings 76
restarting 24
Screen Sharing pod 19, 59
showing existing 88
Slides layout 81
sorting participants 32
stage 11, 14
status 12
stopping a meeting 22
title bar 11, 12
types of content 52
waiting participants 24
Web Links pod 89
Whiteboard pod 17, 39
meetings
defined 7
guests, admitting 23
private 22
public 22
recording 75
replaying recordings 76
restarting 24
stopping 22, 23
system requirements 8
virtual 43
messages
clearing from all Chat pods 34
displaying in Note pod 35
receiving 33
sending 33
microphone
requirements 43
setting up 43
settings 48
Microsoft Windows system requirements 8
moving a pod 85
N
names
Content pod 57
files in File Sharing pod 71
layouts 83
meeting room 12
Note pods 38
participant 27
pods 87
web links 90
navigation bar
Breeze presentation 55
layout 13
network status 16, 30
non-presenting participants 12
Note pod
about 17
adding text 36
choosing pod to display 37
creating new pods 36
deleting 38
editing text 36
formatting text 37
renaming 38
using 35
O
online help 9
operating systems supported 8
P
packets status 16, 30
participants
bandwidth of 30
blocking broadcasts by 46
broadcasting permissions 44, 49
Index 93
Page 94

enabling broadcasting by 44
file sharing 70
forcing to a web link 90
inviting to a meeting 21
joining whiteboards 39
permissions 28
polling 73
removing from a meeting 31
screen sharing system requirements 60
sorting 32
status of 29
stopping broadcasts 46
title bar 12
type, changing 31
types of 11, 27
unblocking broadcasts 46
waiting 24
Participants List pod
about 16, 27
changing a participant type 31
removing a participant from a meeting 31
sorting participants 32
viewing bandwidth 30
viewing names 27
viewing status 29
viewing types of participants 27
pausing broadcasting 45
Pencil Tool, Whiteboard pod 40
permissions
Camera and Voice pod 49
participant types 28
playing back a meeting 76
pods
adding to a meeting room 84
Camera and Voice 18, 43
Chat 16, 33
closing 87
Content 18, 51
default layouts 80
defined 11
deleting 88
File Sharing 19, 69
moving or resizing 85
Note 17, 35
Participants List 16, 27
Polling 19, 20, 73
presenter-only 14, 86
renaming 87
Screen Sharing 19, 59
showing existing 88
stage 14
types of 15
Web Links 89
Whiteboard 17, 39
Polling pod
about 19, 20, 73
clearing answers 74
closing answer period 74
creating new 73
editing a poll 73
navigating 74
showing results 74
viewing results 74
Portrait setting, video 47
PowerPoint slides 8, 52
preparing presenter 12, 27
presentations, displaying in Content pod 52, 54
presenter
activities 9
customizing meeting room layouts 80
defined 12
participant types 27
presenter-only pods 14, 86
private meeting 22
product support 10
public meeting 22
R
receiving text messages 33
recording a meeting
playing back a recording 76
searching archives 78
starting a recording 75
stopping a recording 76
voice only 76
Recording Index 78
Rectangle Tool, Whiteboard pod 41
removing participants 31
renaming
Content pod 57
files in File Sharing pod 71
layouts 83
Note pods 38
pods 87
web links 90
replaying a meeting 76
request to join a whiteboard 39
resizing a pod 85
restarting a meeting 24
results, poll 74
94 Index
Page 95

S
screen sharing
changing the source 65
defined 8
meeting room layout 81
navigating windows 63
previewing what participants will see 63
starting 61
stopping 65
system requirements 59
Screen Sharing pod
about 19, 59
accessing 60
application sharing controls 64
control strip 62
navigating windows 63
searching meeting recording archives 78
Selection Tool, Whiteboard pod 40
sending text messages 33
Slides layout 81
sorting participants 32
speed, Internet connection 24
stage 11, 14
Stamper Tool, Whiteboard pod 41
Start Broadcast button 43
starting
application sharing 62
meetings 24
recordings 75
screen sharing 61
status
meeting room 12
participants 29
stopping
application sharing 63
broadcasts 46
meetings 22, 23
recordings 76
support 10
system requirements
Breeze meetings 8
broadcasting 43
screen sharing 59
receiving 33
sending 33
Text Tool, Whiteboard pod 41
title bar 11, 12
U
unblocking broadcasts 46
Undo Tool, Whiteboard pod 41
uploading files to File Sharing pod 69
URLs, Web Links pod 89
user guides 9
V
video
blocking 46
broadcasting 43
setting broadcasting characteristics 47
views, meeting room 25
virtual classroom 43
virtual meeting 43
voice recording 76
W
waiting participants 24
web camera
requirements 43
selecting 49
setting up 43
settings 48
Web Links pod 89
websites, support 10
Whiteboard pod
about 17, 39
accepting or rejecting requests 40
clearing 41
creating a new whiteboard 39
drawing on 40
joining whiteboards 39
navigating between pages 41
overlaying Content pod 56
Windows system requirements 8
T
technical support 10
text messages
clearing from all Chat pods 34
displaying in Note pad 35
Index 95
Page 96

96 Index
 Loading...