

Page 1

®
USING ADOBE
®
ACROBAT 9
PRO EXTENDED
Page 2

Copyright
© 2010 Adobe Systems Incorporated. All rights reserved.
Using Adobe® Acrobat® 9 Pro Extended for Windows®
This user guide is protected under copyright law, furnished for informational use only, is subject to change without notice, and should not be construed as a
commitment by Adobe Systems Incorporated. Adobe Systems Incorporated assumes no responsibility or liability for any errors or inaccuracies that may appear
in the informational content contained in this guide.
This user guide is licensed for use under the terms of the Creative Commons Attribution Non-Commercial 3.0 License. This License allows users to copy,
distribute, and transmit the user guide for noncommercial purposes only so long as (1) proper attribution to Adobe is given as the owner of the user guide; and
(2) any reuse or distribution of the user guide contains a notice that use of the user guide is governed by these terms. The best way to provide notice is to include
the following link. To view a copy of this license, visit
http://creativecommons.org/licenses/by-nc-sa/3.0/
Adobe, the Adobe logo, Adobe Garamond, the Adobe PDF logo, Acrobat, ActionScript, Buzzword, Creative Suite, Distiller, Flash, FrameMaker, FreeHand,
Illustrator, InDesign, LiveCycle, Photoshop, PostScript, and Reader are either registered trademarks or trademarks of Adobe Systems Incorporated in the United
States and/or other countries.
Apple, Macintosh, and Mac OS are trademarks of Apple Inc., registered in the United States and other countries. Microsoft, MS-DOS, OpenType, OS/2,
Windows, and Windows Vista are either registered trademarks or trademarks of Microsoft Corporation in the United States and/or other countries. UNIX is a
registered trademark of The Open Group in the US and other countries. Helvetica and Times are trademarks of Heidelberger Druckmaschinen AG exclusively
licensed through Linotype Library GmbH, and may be registered in certain jurisdictions. ITC Zapf Dingbats is a registered trademark of International Typeface
Corporation. All other trademarks are the property of their respective owners.
Updated Information/Additional Third Party Code Information available at http://www.adobe.com/go/thirdparty
The Spelling portion of this product is based on Proximity Linguistic Technology. © Copyright 1989, 2004 All Rights Reserved Proximity Technology A Division
of Franklin Electronic Publishers, Inc. Burlington, New Jersey USA. © Copyright 1990 Merriam-Webster Inc. © Copyright 1990 All Rights Reserved Proximity
Technology A Division of Franklin Electronic Publishers, Inc. Burlington, New Jersey USA. © Copyright 2003, 2004 Franklin Electronic Publishers, Inc. ©
Copyright 2003, 2004 All Rights Reserved Proximity Technology A Division of Franklin Electronic Publishers, Inc. Burlington, New Jersey USA. © Copyright
1991 Dr. Lluis de Yzaguirre I Maura. © Copyright 1991 All Rights Reserved Proximity Technology A Division of Franklin Electronic Publishers, Inc. Burlington,
New Jersey USA. © Copyright 1990 Munksgaard International Publishers Ltd. © Copyright 1990 All Rights Reserved Proximity Technology A Division of
Franklin Electronic Publishers, Inc. Burlington, New Jersey USA. © Copyright 1990, 1995 Van Dale Lexicografie bv © Copyright 1990, 1996 All Rights Reserved
Proximity Technology A Division of Franklin Electronic Publishers, Inc. Burlington, New Jersey USA. © Copyright 1990, 2004 IDE a.s. © Copyright 1990, 2004
All Rights Reserved Proximity Technology A Division of Franklin Electronic Publishers, Inc. Burlington, New Jersey USA. © Copyright 1992 Hachette / Franklin
Electronic Publishers, Inc. © Copyright 2004 All Rights Reserved Proximity Technology A Division of Franklin Electronic Publishers, Inc. Burlington, New
Jersey USA. © Copyright 1991 Text & Satz Datentechnik © Copyright 1991 All Rights Reserved Proximity Technology A Division of Franklin Electronic
Publishers, Inc. Burlington, New Jersey USA. © Copyright 2004 Bertelsmann Lexikon Verlag © Copyright 2004 All Rights Reserved Proximity Technology A
Division of Franklin Electronic Publishers, Inc. Burlington, New Jersey USA. © Copyright 2004 MorphoLogic Inc. © Copyright 2004 All Rights Reserved
Proximity Technology A Division of Franklin Electronic Publishers, Inc. Burlington, New Jersey USA. © Copyright 1990 William Collins Sons & Co. Ltd. ©
Copyright 1990 All Rights Reserved Proximity Technology A Division of Franklin Electronic Publishers, Inc. Burlington, New Jersey USA. © Copyright 1993,
1994, 1995 Russicon Company Ltd. © Copyright 1995 All Rights Reserved Proximity Technology A Division of Franklin Electronic Publishers, Inc. Burlington,
New Jersey USA.
This product contains either BSAFE and/or TIPEM software by RSA Security, Inc.
Portions include technology used under license from Autonomy, and are copyrighted.
This product includes software developed by the Apache Software Foundation (http://www.apache.org/).
Portions © Dainippon Ink and Chemicals, Incorporated 1967, 1988.
Flash CS3 video compression and decompression is powered by On2 TrueMotion video technology. © 1992-2005 On2 Technologies, Inc. All Rights Reserved.
http://www.on2.com.
This product includes software developed by the OpenSymphony Group (http://www.opensymphony.com/).
Speech compression and decompression technology licensed from Nellymoser, Inc. (www.nellymoser.com).
Sorenson Spark™ video compression and decompression technology licensed from Sorenson Media, Inc.
MPEG Layer-3 audio coding technology licensed from Fraunhofer IIS and Thomson.
Portions copyright Focoltone Colour System.
Adobe Systems Incorporated, 345 Park Avenue, San Jose, California 95110, USA.
Notice to U.S. Government End Users. The Software and Documentation are “Commercial Items,” as that term is defined at 48 C.F.R. §2.101, consisting of
“Commercial Computer Software” and “Commercial Computer Software Documentation,” as such terms are used in 48 C.F.R. §12.212 or 48 C.F.R. §227.7202,
as applicable. Consistent with 48 C.F.R. §12.212 or 48 C.F.R. §§227.7202-1 through 227.7202-4, as applicable, the Commercial Computer Software and
Commercial Computer Software Documentation are being licensed to U.S. Government end users (a) only as Commercial Items and (b) with only those rights
as are granted to all other end users pursuant to the terms and conditions herein. Unpublished-rights reserved under the copyright laws of the United States.
Adobe agrees to comply with all applicable equal opportunity laws including, if appropriate, the provisions of Executive Order 11246, as amended, Section 402
of the Vietnam Era Veterans Readjustment Assistance Act of 1974 (38 USC 4212), and Section 503 of the Rehabilitation Act of 1973, as amended, and the
regulations at 41 CFR Parts 60-1 through 60-60, 60-250, and 60-741. The affirmative action clause and regulations contained in the preceding sentence shall be
incorporated by reference.
Last updated 9/30/2011
Page 3

Contents
Chapter 1: Getting started
Activation and registration . . . . . . . . . . . . . . . . . . . . . . . . . . . . . . . . . . . . . . . . . . . . . . . . . . . . . . . . . . . . . . . . . . . . . . . . . . . . . . . . . . . . . . . . . . . . 1
Help and support . . . . . . . . . . . . . . . . . . . . . . . . . . . . . . . . . . . . . . . . . . . . . . . . . . . . . . . . . . . . . . . . . . . . . . . . . . . . . . . . . . . . . . . . . . . . . . . . . . . . . . 2
Services, downloads, and extras . . . . . . . . . . . . . . . . . . . . . . . . . . . . . . . . . . . . . . . . . . . . . . . . . . . . . . . . . . . . . . . . . . . . . . . . . . . . . . . . . . . . . . . . 3
What’s new . . . . . . . . . . . . . . . . . . . . . . . . . . . . . . . . . . . . . . . . . . . . . . . . . . . . . . . . . . . . . . . . . . . . . . . . . . . . . . . . . . . . . . . . . . . . . . . . . . . . . . . . . . . 4
Getting started tutorials . . . . . . . . . . . . . . . . . . . . . . . . . . . . . . . . . . . . . . . . . . . . . . . . . . . . . . . . . . . . . . . . . . . . . . . . . . . . . . . . . . . . . . . . . . . . . . . 7
Chapter 2: Workspace
Work area basics . . . . . . . . . . . . . . . . . . . . . . . . . . . . . . . . . . . . . . . . . . . . . . . . . . . . . . . . . . . . . . . . . . . . . . . . . . . . . . . . . . . . . . . . . . . . . . . . . . . . . 22
Customizing the work area . . . . . . . . . . . . . . . . . . . . . . . . . . . . . . . . . . . . . . . . . . . . . . . . . . . . . . . . . . . . . . . . . . . . . . . . . . . . . . . . . . . . . . . . . . . 25
Viewing PDF pages . . . . . . . . . . . . . . . . . . . . . . . . . . . . . . . . . . . . . . . . . . . . . . . . . . . . . . . . . . . . . . . . . . . . . . . . . . . . . . . . . . . . . . . . . . . . . . . . . . . 30
Playing multimedia . . . . . . . . . . . . . . . . . . . . . . . . . . . . . . . . . . . . . . . . . . . . . . . . . . . . . . . . . . . . . . . . . . . . . . . . . . . . . . . . . . . . . . . . . . . . . . . . . . . 41
Adjusting PDF views . . . . . . . . . . . . . . . . . . . . . . . . . . . . . . . . . . . . . . . . . . . . . . . . . . . . . . . . . . . . . . . . . . . . . . . . . . . . . . . . . . . . . . . . . . . . . . . . . . 43
Grids, guides, and measurements . . . . . . . . . . . . . . . . . . . . . . . . . . . . . . . . . . . . . . . . . . . . . . . . . . . . . . . . . . . . . . . . . . . . . . . . . . . . . . . . . . . . . 48
Organizer . . . . . . . . . . . . . . . . . . . . . . . . . . . . . . . . . . . . . . . . . . . . . . . . . . . . . . . . . . . . . . . . . . . . . . . . . . . . . . . . . . . . . . . . . . . . . . . . . . . . . . . . . . . . 52
Maintaining the software . . . . . . . . . . . . . . . . . . . . . . . . . . . . . . . . . . . . . . . . . . . . . . . . . . . . . . . . . . . . . . . . . . . . . . . . . . . . . . . . . . . . . . . . . . . . . 56
Non-English languages . . . . . . . . . . . . . . . . . . . . . . . . . . . . . . . . . . . . . . . . . . . . . . . . . . . . . . . . . . . . . . . . . . . . . . . . . . . . . . . . . . . . . . . . . . . . . . . 57
Acrobat in Mac OS . . . . . . . . . . . . . . . . . . . . . . . . . . . . . . . . . . . . . . . . . . . . . . . . . . . . . . . . . . . . . . . . . . . . . . . . . . . . . . . . . . . . . . . . . . . . . . . . . . . . 58
iii
Chapter 3: Creating PDFs
Overview of creating PDFs . . . . . . . . . . . . . . . . . . . . . . . . . . . . . . . . . . . . . . . . . . . . . . . . . . . . . . . . . . . . . . . . . . . . . . . . . . . . . . . . . . . . . . . . . . . . 59
Creating simple PDFs with Acrobat . . . . . . . . . . . . . . . . . . . . . . . . . . . . . . . . . . . . . . . . . . . . . . . . . . . . . . . . . . . . . . . . . . . . . . . . . . . . . . . . . . . 61
Scan documents to PDF . . . . . . . . . . . . . . . . . . . . . . . . . . . . . . . . . . . . . . . . . . . . . . . . . . . . . . . . . . . . . . . . . . . . . . . . . . . . . . . . . . . . . . . . . . . . . . 65
Using the Adobe PDF printer . . . . . . . . . . . . . . . . . . . . . . . . . . . . . . . . . . . . . . . . . . . . . . . . . . . . . . . . . . . . . . . . . . . . . . . . . . . . . . . . . . . . . . . . . 70
Creating PDFs with PDFMaker (Windows) . . . . . . . . . . . . . . . . . . . . . . . . . . . . . . . . . . . . . . . . . . . . . . . . . . . . . . . . . . . . . . . . . . . . . . . . . . . . . 74
Converting web pages to PDF . . . . . . . . . . . . . . . . . . . . . . . . . . . . . . . . . . . . . . . . . . . . . . . . . . . . . . . . . . . . . . . . . . . . . . . . . . . . . . . . . . . . . . . . 90
Creating PDFs from Adobe Presenter slide shows . . . . . . . . . . . . . . . . . . . . . . . . . . . . . . . . . . . . . . . . . . . . . . . . . . . . . . . . . . . . . . . . . . . . . . 95
Creating PDFs with Acrobat Distiller . . . . . . . . . . . . . . . . . . . . . . . . . . . . . . . . . . . . . . . . . . . . . . . . . . . . . . . . . . . . . . . . . . . . . . . . . . . . . . . . . . 96
Adobe PDF conversion settings . . . . . . . . . . . . . . . . . . . . . . . . . . . . . . . . . . . . . . . . . . . . . . . . . . . . . . . . . . . . . . . . . . . . . . . . . . . . . . . . . . . . . . . 99
Fonts . . . . . . . . . . . . . . . . . . . . . . . . . . . . . . . . . . . . . . . . . . . . . . . . . . . . . . . . . . . . . . . . . . . . . . . . . . . . . . . . . . . . . . . . . . . . . . . . . . . . . . . . . . . . . . . 113
Chapter 4: PDF Portfolios and combined PDFs
Combining files into a PDF Portfolio . . . . . . . . . . . . . . . . . . . . . . . . . . . . . . . . . . . . . . . . . . . . . . . . . . . . . . . . . . . . . . . . . . . . . . . . . . . . . . . . . . 115
Other options for combining files . . . . . . . . . . . . . . . . . . . . . . . . . . . . . . . . . . . . . . . . . . . . . . . . . . . . . . . . . . . . . . . . . . . . . . . . . . . . . . . . . . . . 122
Adding unifying page elements . . . . . . . . . . . . . . . . . . . . . . . . . . . . . . . . . . . . . . . . . . . . . . . . . . . . . . . . . . . . . . . . . . . . . . . . . . . . . . . . . . . . . . 124
Rearranging pages in a PDF . . . . . . . . . . . . . . . . . . . . . . . . . . . . . . . . . . . . . . . . . . . . . . . . . . . . . . . . . . . . . . . . . . . . . . . . . . . . . . . . . . . . . . . . . . 133
Chapter 5: Saving and exporting PDFs
Saving PDFs . . . . . . . . . . . . . . . . . . . . . . . . . . . . . . . . . . . . . . . . . . . . . . . . . . . . . . . . . . . . . . . . . . . . . . . . . . . . . . . . . . . . . . . . . . . . . . . . . . . . . . . . . 138
Exporting PDFs to other file formats . . . . . . . . . . . . . . . . . . . . . . . . . . . . . . . . . . . . . . . . . . . . . . . . . . . . . . . . . . . . . . . . . . . . . . . . . . . . . . . . . . 140
Reusing PDF content . . . . . . . . . . . . . . . . . . . . . . . . . . . . . . . . . . . . . . . . . . . . . . . . . . . . . . . . . . . . . . . . . . . . . . . . . . . . . . . . . . . . . . . . . . . . . . . . 145
Last updated 9/30/2011
Page 4

USING ACROBAT 9 PRO EXTENDED
Contents
Chapter 6: Collaboration
File sharing and real-time collaboration . . . . . . . . . . . . . . . . . . . . . . . . . . . . . . . . . . . . . . . . . . . . . . . . . . . . . . . . . . . . . . . . . . . . . . . . . . . . . . 148
Preparing for a PDF review . . . . . . . . . . . . . . . . . . . . . . . . . . . . . . . . . . . . . . . . . . . . . . . . . . . . . . . . . . . . . . . . . . . . . . . . . . . . . . . . . . . . . . . . . . . 151
Starting a review . . . . . . . . . . . . . . . . . . . . . . . . . . . . . . . . . . . . . . . . . . . . . . . . . . . . . . . . . . . . . . . . . . . . . . . . . . . . . . . . . . . . . . . . . . . . . . . . . . . . 154
Participating in a PDF review . . . . . . . . . . . . . . . . . . . . . . . . . . . . . . . . . . . . . . . . . . . . . . . . . . . . . . . . . . . . . . . . . . . . . . . . . . . . . . . . . . . . . . . . 156
Tracking and managing PDF reviews . . . . . . . . . . . . . . . . . . . . . . . . . . . . . . . . . . . . . . . . . . . . . . . . . . . . . . . . . . . . . . . . . . . . . . . . . . . . . . . . . 159
Commenting . . . . . . . . . . . . . . . . . . . . . . . . . . . . . . . . . . . . . . . . . . . . . . . . . . . . . . . . . . . . . . . . . . . . . . . . . . . . . . . . . . . . . . . . . . . . . . . . . . . . . . . . 163
Managing comments . . . . . . . . . . . . . . . . . . . . . . . . . . . . . . . . . . . . . . . . . . . . . . . . . . . . . . . . . . . . . . . . . . . . . . . . . . . . . . . . . . . . . . . . . . . . . . . . 176
Importing and exporting comments . . . . . . . . . . . . . . . . . . . . . . . . . . . . . . . . . . . . . . . . . . . . . . . . . . . . . . . . . . . . . . . . . . . . . . . . . . . . . . . . . 180
Approval workflows . . . . . . . . . . . . . . . . . . . . . . . . . . . . . . . . . . . . . . . . . . . . . . . . . . . . . . . . . . . . . . . . . . . . . . . . . . . . . . . . . . . . . . . . . . . . . . . . . 184
Chapter 7: Forms
Forms basics . . . . . . . . . . . . . . . . . . . . . . . . . . . . . . . . . . . . . . . . . . . . . . . . . . . . . . . . . . . . . . . . . . . . . . . . . . . . . . . . . . . . . . . . . . . . . . . . . . . . . . . . 186
Creating and distributing forms . . . . . . . . . . . . . . . . . . . . . . . . . . . . . . . . . . . . . . . . . . . . . . . . . . . . . . . . . . . . . . . . . . . . . . . . . . . . . . . . . . . . . . 188
Form fields behavior . . . . . . . . . . . . . . . . . . . . . . . . . . . . . . . . . . . . . . . . . . . . . . . . . . . . . . . . . . . . . . . . . . . . . . . . . . . . . . . . . . . . . . . . . . . . . . . . . 200
Setting action buttons . . . . . . . . . . . . . . . . . . . . . . . . . . . . . . . . . . . . . . . . . . . . . . . . . . . . . . . . . . . . . . . . . . . . . . . . . . . . . . . . . . . . . . . . . . . . . . . 210
Publishing interactive web forms . . . . . . . . . . . . . . . . . . . . . . . . . . . . . . . . . . . . . . . . . . . . . . . . . . . . . . . . . . . . . . . . . . . . . . . . . . . . . . . . . . . . 214
Using QuickBooks data in forms (Windows) . . . . . . . . . . . . . . . . . . . . . . . . . . . . . . . . . . . . . . . . . . . . . . . . . . . . . . . . . . . . . . . . . . . . . . . . . . 217
Collecting and managing form data . . . . . . . . . . . . . . . . . . . . . . . . . . . . . . . . . . . . . . . . . . . . . . . . . . . . . . . . . . . . . . . . . . . . . . . . . . . . . . . . . . 218
Filling in forms . . . . . . . . . . . . . . . . . . . . . . . . . . . . . . . . . . . . . . . . . . . . . . . . . . . . . . . . . . . . . . . . . . . . . . . . . . . . . . . . . . . . . . . . . . . . . . . . . . . . . . 221
iv
Chapter 8: Security
Opening secured documents . . . . . . . . . . . . . . . . . . . . . . . . . . . . . . . . . . . . . . . . . . . . . . . . . . . . . . . . . . . . . . . . . . . . . . . . . . . . . . . . . . . . . . . . 226
Choosing a security method . . . . . . . . . . . . . . . . . . . . . . . . . . . . . . . . . . . . . . . . . . . . . . . . . . . . . . . . . . . . . . . . . . . . . . . . . . . . . . . . . . . . . . . . . 232
Securing documents with passwords . . . . . . . . . . . . . . . . . . . . . . . . . . . . . . . . . . . . . . . . . . . . . . . . . . . . . . . . . . . . . . . . . . . . . . . . . . . . . . . . 234
Securing documents with certificates . . . . . . . . . . . . . . . . . . . . . . . . . . . . . . . . . . . . . . . . . . . . . . . . . . . . . . . . . . . . . . . . . . . . . . . . . . . . . . . . 236
Securing documents with Adobe LiveCycle Rights Management ES . . . . . . . . . . . . . . . . . . . . . . . . . . . . . . . . . . . . . . . . . . . . . . . . . . . 243
Setting up security policies . . . . . . . . . . . . . . . . . . . . . . . . . . . . . . . . . . . . . . . . . . . . . . . . . . . . . . . . . . . . . . . . . . . . . . . . . . . . . . . . . . . . . . . . . . 244
Creating or obtaining digital IDs . . . . . . . . . . . . . . . . . . . . . . . . . . . . . . . . . . . . . . . . . . . . . . . . . . . . . . . . . . . . . . . . . . . . . . . . . . . . . . . . . . . . . 250
Removing sensitive content . . . . . . . . . . . . . . . . . . . . . . . . . . . . . . . . . . . . . . . . . . . . . . . . . . . . . . . . . . . . . . . . . . . . . . . . . . . . . . . . . . . . . . . . . 255
Chapter 9: Digital signatures
Digital signatures . . . . . . . . . . . . . . . . . . . . . . . . . . . . . . . . . . . . . . . . . . . . . . . . . . . . . . . . . . . . . . . . . . . . . . . . . . . . . . . . . . . . . . . . . . . . . . . . . . . . 260
Signing PDFs . . . . . . . . . . . . . . . . . . . . . . . . . . . . . . . . . . . . . . . . . . . . . . . . . . . . . . . . . . . . . . . . . . . . . . . . . . . . . . . . . . . . . . . . . . . . . . . . . . . . . . . . 263
Validating signatures . . . . . . . . . . . . . . . . . . . . . . . . . . . . . . . . . . . . . . . . . . . . . . . . . . . . . . . . . . . . . . . . . . . . . . . . . . . . . . . . . . . . . . . . . . . . . . . . 268
Chapter 10: Accessibility, tags, and reflow
Accessibility features . . . . . . . . . . . . . . . . . . . . . . . . . . . . . . . . . . . . . . . . . . . . . . . . . . . . . . . . . . . . . . . . . . . . . . . . . . . . . . . . . . . . . . . . . . . . . . . . 273
Checking the accessibility of PDFs . . . . . . . . . . . . . . . . . . . . . . . . . . . . . . . . . . . . . . . . . . . . . . . . . . . . . . . . . . . . . . . . . . . . . . . . . . . . . . . . . . . 276
Reading PDFs with reflow and accessibility features . . . . . . . . . . . . . . . . . . . . . . . . . . . . . . . . . . . . . . . . . . . . . . . . . . . . . . . . . . . . . . . . . . 279
Creating accessible PDFs . . . . . . . . . . . . . . . . . . . . . . . . . . . . . . . . . . . . . . . . . . . . . . . . . . . . . . . . . . . . . . . . . . . . . . . . . . . . . . . . . . . . . . . . . . . . 285
Making existing PDFs accessible . . . . . . . . . . . . . . . . . . . . . . . . . . . . . . . . . . . . . . . . . . . . . . . . . . . . . . . . . . . . . . . . . . . . . . . . . . . . . . . . . . . . . 290
Editing document structure with the Content and Tags tabs . . . . . . . . . . . . . . . . . . . . . . . . . . . . . . . . . . . . . . . . . . . . . . . . . . . . . . . . . . 300
Chapter 11: Editing PDFs
Page thumbnails and bookmarks . . . . . . . . . . . . . . . . . . . . . . . . . . . . . . . . . . . . . . . . . . . . . . . . . . . . . . . . . . . . . . . . . . . . . . . . . . . . . . . . . . . . 308
Links and attachments . . . . . . . . . . . . . . . . . . . . . . . . . . . . . . . . . . . . . . . . . . . . . . . . . . . . . . . . . . . . . . . . . . . . . . . . . . . . . . . . . . . . . . . . . . . . . . . 313
Actions and scripting . . . . . . . . . . . . . . . . . . . . . . . . . . . . . . . . . . . . . . . . . . . . . . . . . . . . . . . . . . . . . . . . . . . . . . . . . . . . . . . . . . . . . . . . . . . . . . . . 318
Last updated 9/30/2011
Page 5

USING ACROBAT 9 PRO EXTENDED
Contents
Converted web pages . . . . . . . . . . . . . . . . . . . . . . . . . . . . . . . . . . . . . . . . . . . . . . . . . . . . . . . . . . . . . . . . . . . . . . . . . . . . . . . . . . . . . . . . . . . . . . . 321
Articles . . . . . . . . . . . . . . . . . . . . . . . . . . . . . . . . . . . . . . . . . . . . . . . . . . . . . . . . . . . . . . . . . . . . . . . . . . . . . . . . . . . . . . . . . . . . . . . . . . . . . . . . . . . . . . 322
Optimizing . . . . . . . . . . . . . . . . . . . . . . . . . . . . . . . . . . . . . . . . . . . . . . . . . . . . . . . . . . . . . . . . . . . . . . . . . . . . . . . . . . . . . . . . . . . . . . . . . . . . . . . . . . 324
Editing text and objects . . . . . . . . . . . . . . . . . . . . . . . . . . . . . . . . . . . . . . . . . . . . . . . . . . . . . . . . . . . . . . . . . . . . . . . . . . . . . . . . . . . . . . . . . . . . . 329
Setting up a presentation . . . . . . . . . . . . . . . . . . . . . . . . . . . . . . . . . . . . . . . . . . . . . . . . . . . . . . . . . . . . . . . . . . . . . . . . . . . . . . . . . . . . . . . . . . . . 336
Adding multimedia . . . . . . . . . . . . . . . . . . . . . . . . . . . . . . . . . . . . . . . . . . . . . . . . . . . . . . . . . . . . . . . . . . . . . . . . . . . . . . . . . . . . . . . . . . . . . . . . . . 339
Document properties and metadata . . . . . . . . . . . . . . . . . . . . . . . . . . . . . . . . . . . . . . . . . . . . . . . . . . . . . . . . . . . . . . . . . . . . . . . . . . . . . . . . . 347
Layers . . . . . . . . . . . . . . . . . . . . . . . . . . . . . . . . . . . . . . . . . . . . . . . . . . . . . . . . . . . . . . . . . . . . . . . . . . . . . . . . . . . . . . . . . . . . . . . . . . . . . . . . . . . . . . . 351
Processing in batches . . . . . . . . . . . . . . . . . . . . . . . . . . . . . . . . . . . . . . . . . . . . . . . . . . . . . . . . . . . . . . . . . . . . . . . . . . . . . . . . . . . . . . . . . . . . . . . 355
Chapter 12: Searching and indexing
Searching PDFs . . . . . . . . . . . . . . . . . . . . . . . . . . . . . . . . . . . . . . . . . . . . . . . . . . . . . . . . . . . . . . . . . . . . . . . . . . . . . . . . . . . . . . . . . . . . . . . . . . . . . . 360
Creating PDF indexes . . . . . . . . . . . . . . . . . . . . . . . . . . . . . . . . . . . . . . . . . . . . . . . . . . . . . . . . . . . . . . . . . . . . . . . . . . . . . . . . . . . . . . . . . . . . . . . . 366
Chapter 13: 3D models and geospatial PDFs
Converting 3D models . . . . . . . . . . . . . . . . . . . . . . . . . . . . . . . . . . . . . . . . . . . . . . . . . . . . . . . . . . . . . . . . . . . . . . . . . . . . . . . . . . . . . . . . . . . . . . . 372
Capturing 3D models . . . . . . . . . . . . . . . . . . . . . . . . . . . . . . . . . . . . . . . . . . . . . . . . . . . . . . . . . . . . . . . . . . . . . . . . . . . . . . . . . . . . . . . . . . . . . . . . 380
Adding 3D models to PDFs . . . . . . . . . . . . . . . . . . . . . . . . . . . . . . . . . . . . . . . . . . . . . . . . . . . . . . . . . . . . . . . . . . . . . . . . . . . . . . . . . . . . . . . . . . 382
Inserting 3D models in Word, Excel, and PowerPoint files . . . . . . . . . . . . . . . . . . . . . . . . . . . . . . . . . . . . . . . . . . . . . . . . . . . . . . . . . . . . . 385
Interacting with 3D models . . . . . . . . . . . . . . . . . . . . . . . . . . . . . . . . . . . . . . . . . . . . . . . . . . . . . . . . . . . . . . . . . . . . . . . . . . . . . . . . . . . . . . . . . . 386
Exporting geometry from 3D models . . . . . . . . . . . . . . . . . . . . . . . . . . . . . . . . . . . . . . . . . . . . . . . . . . . . . . . . . . . . . . . . . . . . . . . . . . . . . . . . . 404
Adding functionality to 3D designs with JavaScript . . . . . . . . . . . . . . . . . . . . . . . . . . . . . . . . . . . . . . . . . . . . . . . . . . . . . . . . . . . . . . . . . . . 405
Creating and using geospatial PDFs . . . . . . . . . . . . . . . . . . . . . . . . . . . . . . . . . . . . . . . . . . . . . . . . . . . . . . . . . . . . . . . . . . . . . . . . . . . . . . . . . . 406
v
Chapter 14: Color management
Understanding color management . . . . . . . . . . . . . . . . . . . . . . . . . . . . . . . . . . . . . . . . . . . . . . . . . . . . . . . . . . . . . . . . . . . . . . . . . . . . . . . . . . 412
Keeping colors consistent . . . . . . . . . . . . . . . . . . . . . . . . . . . . . . . . . . . . . . . . . . . . . . . . . . . . . . . . . . . . . . . . . . . . . . . . . . . . . . . . . . . . . . . . . . . 414
Color-managing imported images . . . . . . . . . . . . . . . . . . . . . . . . . . . . . . . . . . . . . . . . . . . . . . . . . . . . . . . . . . . . . . . . . . . . . . . . . . . . . . . . . . . 417
Color-managing documents for online viewing . . . . . . . . . . . . . . . . . . . . . . . . . . . . . . . . . . . . . . . . . . . . . . . . . . . . . . . . . . . . . . . . . . . . . . 419
Proofing colors . . . . . . . . . . . . . . . . . . . . . . . . . . . . . . . . . . . . . . . . . . . . . . . . . . . . . . . . . . . . . . . . . . . . . . . . . . . . . . . . . . . . . . . . . . . . . . . . . . . . . . 420
Color-managing documents when printing . . . . . . . . . . . . . . . . . . . . . . . . . . . . . . . . . . . . . . . . . . . . . . . . . . . . . . . . . . . . . . . . . . . . . . . . . . 422
Working with color profiles . . . . . . . . . . . . . . . . . . . . . . . . . . . . . . . . . . . . . . . . . . . . . . . . . . . . . . . . . . . . . . . . . . . . . . . . . . . . . . . . . . . . . . . . . . 424
Color settings . . . . . . . . . . . . . . . . . . . . . . . . . . . . . . . . . . . . . . . . . . . . . . . . . . . . . . . . . . . . . . . . . . . . . . . . . . . . . . . . . . . . . . . . . . . . . . . . . . . . . . . 429
Chapter 15: Printing
Basic printing tasks . . . . . . . . . . . . . . . . . . . . . . . . . . . . . . . . . . . . . . . . . . . . . . . . . . . . . . . . . . . . . . . . . . . . . . . . . . . . . . . . . . . . . . . . . . . . . . . . . . 434
Other ways to print PDFs . . . . . . . . . . . . . . . . . . . . . . . . . . . . . . . . . . . . . . . . . . . . . . . . . . . . . . . . . . . . . . . . . . . . . . . . . . . . . . . . . . . . . . . . . . . . 438
Printing custom sizes . . . . . . . . . . . . . . . . . . . . . . . . . . . . . . . . . . . . . . . . . . . . . . . . . . . . . . . . . . . . . . . . . . . . . . . . . . . . . . . . . . . . . . . . . . . . . . . . 440
Advanced print settings . . . . . . . . . . . . . . . . . . . . . . . . . . . . . . . . . . . . . . . . . . . . . . . . . . . . . . . . . . . . . . . . . . . . . . . . . . . . . . . . . . . . . . . . . . . . . 441
Printing color . . . . . . . . . . . . . . . . . . . . . . . . . . . . . . . . . . . . . . . . . . . . . . . . . . . . . . . . . . . . . . . . . . . . . . . . . . . . . . . . . . . . . . . . . . . . . . . . . . . . . . . 448
Chapter 16: Print production tools
Tools for high-end output . . . . . . . . . . . . . . . . . . . . . . . . . . . . . . . . . . . . . . . . . . . . . . . . . . . . . . . . . . . . . . . . . . . . . . . . . . . . . . . . . . . . . . . . . . . 453
Trapping color . . . . . . . . . . . . . . . . . . . . . . . . . . . . . . . . . . . . . . . . . . . . . . . . . . . . . . . . . . . . . . . . . . . . . . . . . . . . . . . . . . . . . . . . . . . . . . . . . . . . . . 454
Previewing output . . . . . . . . . . . . . . . . . . . . . . . . . . . . . . . . . . . . . . . . . . . . . . . . . . . . . . . . . . . . . . . . . . . . . . . . . . . . . . . . . . . . . . . . . . . . . . . . . . 462
Color conversion and ink management . . . . . . . . . . . . . . . . . . . . . . . . . . . . . . . . . . . . . . . . . . . . . . . . . . . . . . . . . . . . . . . . . . . . . . . . . . . . . . 465
Printer marks and hairlines . . . . . . . . . . . . . . . . . . . . . . . . . . . . . . . . . . . . . . . . . . . . . . . . . . . . . . . . . . . . . . . . . . . . . . . . . . . . . . . . . . . . . . . . . . . 470
Transparency flattening . . . . . . . . . . . . . . . . . . . . . . . . . . . . . . . . . . . . . . . . . . . . . . . . . . . . . . . . . . . . . . . . . . . . . . . . . . . . . . . . . . . . . . . . . . . . . 472
Last updated 9/30/2011
Page 6

USING ACROBAT 9 PRO EXTENDED
Contents
Chapter 17: Preflight
Analyzing documents . . . . . . . . . . . . . . . . . . . . . . . . . . . . . . . . . . . . . . . . . . . . . . . . . . . . . . . . . . . . . . . . . . . . . . . . . . . . . . . . . . . . . . . . . . . . . . . 479
Viewing preflight results, objects, and resources . . . . . . . . . . . . . . . . . . . . . . . . . . . . . . . . . . . . . . . . . . . . . . . . . . . . . . . . . . . . . . . . . . . . . . 482
Preflight reports . . . . . . . . . . . . . . . . . . . . . . . . . . . . . . . . . . . . . . . . . . . . . . . . . . . . . . . . . . . . . . . . . . . . . . . . . . . . . . . . . . . . . . . . . . . . . . . . . . . . . 486
Advanced inspections . . . . . . . . . . . . . . . . . . . . . . . . . . . . . . . . . . . . . . . . . . . . . . . . . . . . . . . . . . . . . . . . . . . . . . . . . . . . . . . . . . . . . . . . . . . . . . . 488
Preflight profiles . . . . . . . . . . . . . . . . . . . . . . . . . . . . . . . . . . . . . . . . . . . . . . . . . . . . . . . . . . . . . . . . . . . . . . . . . . . . . . . . . . . . . . . . . . . . . . . . . . . . . 489
Additional checks . . . . . . . . . . . . . . . . . . . . . . . . . . . . . . . . . . . . . . . . . . . . . . . . . . . . . . . . . . . . . . . . . . . . . . . . . . . . . . . . . . . . . . . . . . . . . . . . . . . 495
Correcting problem areas . . . . . . . . . . . . . . . . . . . . . . . . . . . . . . . . . . . . . . . . . . . . . . . . . . . . . . . . . . . . . . . . . . . . . . . . . . . . . . . . . . . . . . . . . . . . 500
PDF/X-, PDF/A-, and PDF/E-compliant files . . . . . . . . . . . . . . . . . . . . . . . . . . . . . . . . . . . . . . . . . . . . . . . . . . . . . . . . . . . . . . . . . . . . . . . . . . . 504
Automating document analysis . . . . . . . . . . . . . . . . . . . . . . . . . . . . . . . . . . . . . . . . . . . . . . . . . . . . . . . . . . . . . . . . . . . . . . . . . . . . . . . . . . . . . . 505
Output intents . . . . . . . . . . . . . . . . . . . . . . . . . . . . . . . . . . . . . . . . . . . . . . . . . . . . . . . . . . . . . . . . . . . . . . . . . . . . . . . . . . . . . . . . . . . . . . . . . . . . . . 507
Chapter 18: Job Definition Format
About JDF files . . . . . . . . . . . . . . . . . . . . . . . . . . . . . . . . . . . . . . . . . . . . . . . . . . . . . . . . . . . . . . . . . . . . . . . . . . . . . . . . . . . . . . . . . . . . . . . . . . . . . . 509
View JDF job definitions . . . . . . . . . . . . . . . . . . . . . . . . . . . . . . . . . . . . . . . . . . . . . . . . . . . . . . . . . . . . . . . . . . . . . . . . . . . . . . . . . . . . . . . . . . . . . 510
Create JDF job definitions . . . . . . . . . . . . . . . . . . . . . . . . . . . . . . . . . . . . . . . . . . . . . . . . . . . . . . . . . . . . . . . . . . . . . . . . . . . . . . . . . . . . . . . . . . . 510
Edit JDF job definitions . . . . . . . . . . . . . . . . . . . . . . . . . . . . . . . . . . . . . . . . . . . . . . . . . . . . . . . . . . . . . . . . . . . . . . . . . . . . . . . . . . . . . . . . . . . . . . 511
Specify contact information for a print job . . . . . . . . . . . . . . . . . . . . . . . . . . . . . . . . . . . . . . . . . . . . . . . . . . . . . . . . . . . . . . . . . . . . . . . . . . . 512
Define media specifications for a print job . . . . . . . . . . . . . . . . . . . . . . . . . . . . . . . . . . . . . . . . . . . . . . . . . . . . . . . . . . . . . . . . . . . . . . . . . . . . 513
Add and remove JDF job definitions . . . . . . . . . . . . . . . . . . . . . . . . . . . . . . . . . . . . . . . . . . . . . . . . . . . . . . . . . . . . . . . . . . . . . . . . . . . . . . . . . 514
Converting job definition files to HTML . . . . . . . . . . . . . . . . . . . . . . . . . . . . . . . . . . . . . . . . . . . . . . . . . . . . . . . . . . . . . . . . . . . . . . . . . . . . . . . 515
Submitting print jobs . . . . . . . . . . . . . . . . . . . . . . . . . . . . . . . . . . . . . . . . . . . . . . . . . . . . . . . . . . . . . . . . . . . . . . . . . . . . . . . . . . . . . . . . . . . . . . . . 515
vi
Chapter 19: Keyboard shortcuts
Keyboard shortcuts . . . . . . . . . . . . . . . . . . . . . . . . . . . . . . . . . . . . . . . . . . . . . . . . . . . . . . . . . . . . . . . . . . . . . . . . . . . . . . . . . . . . . . . . . . . . . . . . . . 518
Index ...............................................................................................................523
Last updated 9/30/2011
Page 7

Chapter 1: Getting started
Before you begin working with your software, take a few moments to read an overview of activation and the many
resources available to you. You have access to instructional videos, plug-ins, templates, user communities, seminars,
tutorials, RSS feeds, and much more.
Activation and registration
License activation (Windows)
During the installation process, your Adobe software may attempt to contact Adobe to complete the license activation
process. No personal data is transmitted. For more information on product activation, visit the Adobe website at
www.adobe.com/go/activation.
A single-user retail license activation supports two computers. For example, you can install the product on a desktop
computer at work and on a laptop computer at home. If you want to install the software on a third computer, you must
first deactivate it on one of the other two computers. Choose Help
> Deactivate.
1
If you are using Acrobat with Creative Suite 4 and you get an error message about expired licensing, see the technote
http://kb2.adobe.com/cps/405/kb405970.html.
For more information about activation and deactivation, see the service note
http://kb2.adobe.com/cps/100/1008779.html.
Register
Register your product to receive complimentary installation support, notifications of updates, and other services.
❖ To register, follow the onscreen instructions in the Registration dialog box, which appears after you install and
activate the software.
If you postpone registration, you can register at any time by choosing Help > Registration.
Adobe Product Improvement Program (Windows)
After you have used your Adobe software a certain number of times, a dialog box will appear, asking you whether you
would like to participate in the Adobe Product Improvement Program.
If you choose to participate, data about your use of Adobe software will be sent to Adobe. No personal information is
recorded or sent. The Adobe Product Improvement Program only collects information about the features and tools
you use in the software and how often.
You can opt in to or opt out of the program at any time:
• To participate, choose Help > Improvement Program Options and click Yes.
• To stop participating, choose Help > Improvement Program Options and click No, Thank You.
Last updated 9/30/2011
Page 8

USING ACROBAT 9 PRO EXTENDED
Getting started
Adobe Customization Wizard
Adobe Customization Wizard 9 helps IT professionals take greater control of enterprise-wide deployments of Adobe®
Acrobat® 9 Pro Extended and Adobe Reader®. With it, you can customize the installer and application features before
deployment. The Customization Wizard is a free downloadable utility. Providing a graphical interface to the Windows
Installer for Acrobat, the Customization Wizard enables IT administrators to:
• Optimize the behavior of the installer by including silent installation, pre-serialization, restart, multilingual, and
custom setup choices.
• Customize key application preferences—turn off automatic updates, add and set default job options, and customize
collaboration and security settings.
• Help prevent users from modifying certain preferences.
Read Me
The installation disc may contain a Read Me file for your software. Open the file to read important information about
topics such as the following:
• System requirements
• Installation (including uninstalling the software)
• Activation and registration
• Customer support
• Legal notices
2
Help and support
Community Help
Community Help is an integrated environment on adobe.com that gives you access to community-generated content
moderated by Adobe and industry experts. Comments from users help guide you to an answer.
Community Help draws on a number of resources, including:
• Videos, tutorials, tips and techniques, blogs, articles, and examples for designers and developers.
• Complete online product Help, which is updated regularly by the Adobe documentation team.
• All other content on Adobe.com, including knowledgebase articles, downloads and updates, Developer
Connection, and more.
Use the help search field in your product’s Help interface to access Community Help directly, or go to
www.adobe.com/support/acrobat to access the product Help and Support page, a portal to all of the Community Help
content for your product.
The sites searched by the default Community Help search engine are hand-selected and reviewed for quality by Adobe
and Adobe Community Experts. Adobe experts also work to ensure that the top search results include a mixture of
different kinds of content, including results from online product Help.
For more information on using Community Help, see http://help.adobe.com/en_US/CommunityHelp/.
For a video overview of Community Help, see www.adobe.com/go/lrvid4117_xp.
Last updated 9/30/2011
Page 9

USING ACROBAT 9 PRO EXTENDED
Getting started
Product Help
Adobe provides a comprehensive user guide for Acrobat as online product Help and PDF. Topics from online product
Help are included in your results whenever you search Community Help.
If you want to consult or search online product Help only, you can access it by clicking the product Help link in the
upper-right corner of the Help and Support page. Be sure to select the This Help System Only option on the Help page
before you do your search.
The Help menu within the product opens local Help, a subset of the content available in online product Help. Because
local Help is not as complete or up-to-date as online product Help, Adobe recommends that you use the PDF version
of product Help if you want to stay off-line. A downloadable PDF of complete product Help is available from two
places:
• The product’s Help and Support page (upper-right corner of the page)
• Web Help (top of the Help interface)
For more information on accessing product help, see http://help.adobe.com/en_US/CommunityHelp/.
Support resources
Visit the Adobe Support website at www.adobe.com/support to learn about free and paid technical support options.
3
Services, downloads, and extras
You can enhance your product by integrating a variety of services, plug-ins, and extensions in your product. You can
also download samples and other assets to help you get your work done.
Adobe creative online services
Adobe® Creative Suite® 4 includes new online features that bring the power of the web to your desktop. Use these
features to connect with the community, collaborate, and get more from your Adobe tools. Powerful creative online
services let you complete tasks ranging from color matching to data conferencing. The services seamlessly integrate
with desktop applications so you can quickly enhance existing workflows. Some services offer full or partial
functionality when you’re offline too.
Visit Adobe.com to learn more about available services. Some Creative Suite 4 applications include these initial
offerings:
Kuler™ panel Quickly create, share, and explore color themes online.
Adobe® ConnectNow Collaborate with dispersed working teams over the web, sharing voice, data, and multimedia.
Resource Central Instantly access tutorials, sample files, and extensions for Adobe digital video applications.
Adobe Exchange
Visit the Adobe Exchange at www.adobe.com/go/exchange to download samples as well as thousands of plug-ins and
extensions from Adobe and third-party developers. The plug-ins and extensions can help you automate tasks,
customize workflows, create specialized professional effects, and more.
Last updated 9/30/2011
Page 10

USING ACROBAT 9 PRO EXTENDED
Getting started
Adobe downloads
Visit www.adobe.com/go/downloads to find free updates, tryouts, and other useful software.
Adobe Labs
Adobe Labs at www.adobe.com/go/labs gives you the opportunity to experience and evaluate new and emerging
technologies and products from Adobe. At Adobe Labs, you have access to resources such as these:
• Prerelease software and technologies
• Code samples and best practices to accelerate your learning
• Early versions of product and technical documentation
• Forums, wiki-based content, and other collaborative resources to help you interact with like-minded users.
Adobe Labs fosters a collaborative software development process. In this environment, customers quickly become
productive with new products and technologies. Adobe Labs is also a forum for early feedback. The Adobe
development teams use this feedback to create software that meets the needs and expectations of the community.
Adobe TV
Visit Adobe TV at http://tv.adobe.com to view instructional and inspirational videos.
4
Extras
The installation disc contains a variety of extras to help you make the most of your Adobe software. Some extras are
installed on your computer during the setup process; others are located on the disc.
To view the extras installed during the setup process, navigate to the application folder on your computer.
• Windows®: [startup drive]\Program Files\Adobe\[Adobe application]
• Mac OS®: [startup drive]/Applications/[Adobe application]
To view the extras on the disc, navigate to the Goodies folder in your language folder on the disc. Example:
• /English/Goodies/
What’s new
PDF creation, editing, and searching
Unify a wide range of content into a PDF Portfolio Combine documents, drawings, email, and spreadsheets into a
single, compressed PDF Portfolio. Use professionally designed templates that can be branded with your logo and
include descriptions to guide recipients through the contents.
Convert paper documents to PDF New optical character recognition (OCR) technology and support for a broader
range of scanners improves searchability and appearance of the scanned documents. See
PDF” on page 65.
“Scan a paper document to
Convert web pages to PDF Improved web capture allows you to convert complete web pages or just the portions you
want, including or excluding rich and interactive media. PDF versions of web pages are easy to print, archive, mark
up, and share. See
“Converting web pages to PDF” on page 90.
Last updated 9/30/2011
Page 11

USING ACROBAT 9 PRO EXTENDED
Getting started
Convert documents from new versions of Lotus Notes and AutoCAD Acrobat now supports Lotus Notes 8.5. Acrobat
Pro and Acrobat Pro Extended now support Autodesk AutoCAD 2009.
Compare PDF documents Acrobat Automatically highlights the differences between two versions of a PDF document,
including text and images, so you can quickly and easily identify what has changed. See
“Compare a revised PDF to an
earlier version” on page 36.
Search across multiple PDFs Enhanced functionality enables you to search multiple PDF files in the same folder to
help you quickly find the information you need.
Collaboration
Use Acrobat.com for shared reviews Participants download the file from Acrobat.com, and add comments or data
using Acrobat or Adobe Reader. When finished, participants publish comments or submit responses to Acrobat.com.
When using Acrobat.com for shared reviews, you can also allow reviewers to open and share the PDF in a live chat
session. See
Collaborating in online meetings Use Adobe ConnectNow, a personal web-conference tool, to conduct real-time
meetings on your desktop. Attendees join the meeting by logging into a web-based meeting space from their own
computers. In a ConnectNow online meeting, you can share your desktop, use live chat, share online whiteboards, and
use many other collaboration features. See
“Starting a review” on page 154.
“Collaborate in online meetings” on page 150.
5
Use Acrobat.com to upload and share large documents From Acrobat or Reader, you can create your own user
account on Acrobat.com. Use Acrobat.com to upload and share most document types, and to share PDFs or your
desktop in online meetings. See
Synchronize document views Ensure colleagues, clients, and partners are on the same page at the same time with the
“Share documents with others” on page 148.
ability to co-navigate documents. Use Collaborate Live to provide clarity, enhance discussion, and walk recipients
through a document in real time. See
“Collaborate with others in a PDF” on page 149.
Forms
Easily create and edit electronic forms (Windows) Use the new Forms Wizard to convert Microsoft® Word and Excel
documents or scanned paper into PDF forms. Form fields are automatically recognized and converted to fillable fields.
Quickly add, edit, and name form fields. Use the Tracker to see when forms have been completed and who has
completed them. See
Collect and export form data Easily collect user data and export the data to a spreadsheet for analysis and reporting.
“Collecting and managing form data” on page 218.
See
Track forms Use the Tracker to see when forms have been completed and who has completed them. See “About Forms
Tracker” on page 220.
Use QuickBooks data in forms (Windows English only) Import and export Intuit QuickBooks data using custom
templates. See
Create and distribute online forms Create and distribute online forms using your web browser and the Adobe
FormsCentral service. Recipients fill out these forms using any Internet-connected device. See
using FormsCentral” on page 190.
“Create forms using Acrobat” on page 190.
“Using QuickBooks data in forms (Windows)” on page 217.
“Create online forms
Multimedia and 3D models
Isolate parts in an assembly Display the geometry, PMI, and PMI views for an isolated part, and hide or deselect these
elements for all other parts. See
“Hide, isolate, and change the appearance of parts” on page 392.
Last updated 9/30/2011
Page 12

USING ACROBAT 9 PRO EXTENDED
Getting started
Include Flash content in PDFs Add Flash® videos and animations to your PDF documents. Native support for Flash
enables reliable cross-platform playback. No additional media player is necessary. See
“Add multimedia to PDFs” on
page 339.
Add comments to videos Add comments to a video as you are watching it. Each comment is attached to a specific
frame, so that when you view the comments, they appear in the context in which they were made. You can also enable
Acrobat Standard and Adobe Reader users to add comments to videos. See
Create interactive presentations Use Adobe Presenter to liven up your slides with video, voice-over, demos, and
interactive quizzes, then convert to PDF for easy sharing. See
“Creating PDFs from Adobe Presenter slide shows” on
“Add comments to videos” on page 343.
page 95.
Expanded 3D features Use the new Adobe 3D Reviewer to combine multiple CAD formats into one assembly,
compare a revised design to an earlier version, measure and section on precise geometry, and create exploded views,
animations, and balloons. Export your work to 2D vector or raster files, or save as PDF. See
“About Adobe 3D
Reviewer” on page 389.
View and interact with PDF maps Import, measure, and mark up geospatially enabled PDF maps. Discover the
longitude and latitude by placing your cursor over a location. Measure PDF maps in kilometers or miles. Navigate 3D
PDF map content in 3D with the Fly tool for better relational map viewing. Georegister PDF maps. See
“Creating and
using geospatial PDFs” on page 406.
6
Digital signatures
Long-term signature validation enhancements Embed the certificate chain, revocation status, and timestamp after
signature creation. Allow valid, but expired timestamps to be used. See
“Establish long-term signature validation” on
page 269.
Create ink signatures Add a simple handwritten signature on a page. See “Sign a PDF” on page 264.
Legal
Search and redact Search and redact a list of words or phrases or a specific text pattern (for example, phone numbers,
credit card numbers, email addresses, or dates). See
Bates numbering for PDF Portfolios When designating documents for Bates numbering, you can add PDFs, PDF
“Search and redact words” on page 257.
Portfolios, and any non-PDF files that can be converted to PDF. The process converts non-PDF file types to PDF, and
then adds Bates numbers to the resulting PDF. If you add Bates numbering to a PDF Portfolio, any non-PDF files in
the PDF Portfolio are replaced with the converted and numbered PDFs. See
“Add a Bates numbering header or footer”
on page 126.
Creative professional
Output preview enhancements Use the Object Inspector to quickly inspect content in a document. The information
displayed is for all content that is directly underneath where the cursor is clicked.
Preflight enhancements Validate PDF/E compliance and save documents as PDF/E. Run checks and fixups on
selected objects. View improved reports.
Color conversion enhancements Set the transparency blending space. Remap spot colors using the Pantone library.
Easily convert colors using the new design.
Last updated 9/30/2011
Page 13
USING ACROBAT 9 PRO EXTENDED
Getting started
Getting started tutorials
The step-by-step tutorials in this section help you get started with Acrobat 9. You’ll learn how to create PDFs using
PDFMaker; share documents with colleagues for review and discussion; create interactive, electronic forms; assemble
documents of various formats into a single PDF Portfolio; and securely sign documents digitally.
For more tutorials and videos about all that you can do with Acrobat, see the following online resources:
• Exploring key features of Acrobat 9: www.adobe.com/go/learn_acr_portfolio_prox_en
• What is Acrobat?: www.adobe.com/go/lrvid4200_a9
• Introducing Acrobat 9: www.adobe.com/go/lrvid4081_a9
• Using multiple applications in a creative workflow: www.adobe.com/go/lrvid4205_a9
• Using multiple applications in a business workflow: www.adobe.com/go/lrvid4204_a9
Create PDF
Creating PDFs using Acrobat PDFMaker (Windows)
Convert your business documents to Adobe PDF with a single click. Acrobat PDFMaker simplifies the process of
converting documents to PDF in several business applications, including Microsoft Office applications and Lotus
Notes. When you install Acrobat, it adds PDFMaker controls to compatible applications automatically.
7
1 Create your document.
Create and finalize the document in the authoring application that supports PDFMaker. Save the document.
Document in an application that converts to Adobe PDF
2 Select PDF conversion settings.
In the authoring application, choose Adobe PDF > Change Conversion Settings. If you’re using Lotus Notes, choose
Actions > Change Adobe PDF Conversion Settings. If you’re using a Microsoft Office 2007 application, click
Preferences in the Acrobat ribbon.
Last updated 9/30/2011
Page 14

USING ACROBAT 9 PRO EXTENDED
Getting started
In the PDFMaker Settings area of the Acrobat PDFMaker dialog box, choose the appropriate PDF preset from the
Conversion Settings menu. The PDF preset determines file compression, image resolution, whether fonts are
embedded, and other PDF conversion settings. If you are preparing a document for professional printing, use the
High Quality Print or Press Quality preset. If you are preparing a document for online viewing, choose Small File
Size. The Standard default setting is appropriate for many business uses and desktop printing.
Settings for creating PDFs
8
Once you’ve selected conversion settings, those settings are used every time you create a PDF from that application
until you change the settings.
3 Select application settings.
In the Application Settings area of the dialog box, select whether to include bookmarks, hyperlinks, accessibility
features, and other options. Click the application tab (for example, the Word tab) to see options that are specific to
your application. In Word, for example, you can convert footnotes and links. In Visio (supported in Acrobat 9 Pro
Extended and Acrobat 9 Pro), you can flatten layers. Click OK to close the Acrobat PDFMaker dialog box.
Application-specific settings for creating PDFs
4 Create the PDF.
Click the Convert To Adobe PDF button on the Acrobat PDFMaker toolbar or, in Microsoft Office 2007, click the
Create PDF button on the Acrobat ribbon. You can automatically email the PDF or send it out for a review, using
other commands in the Adobe PDF menu.
When prompted, enter a name and location for the PDF. Depending on the application you’re using and your
settings, prompts may appear allowing you to select other options when you create the PDF.
Last updated 9/30/2011
Page 15
USING ACROBAT 9 PRO EXTENDED
Getting started
You can also convert web pages to PDF directly using Internet Explorer. To convert, visit a website in the Internet
Explorer browser, and then click the Convert button in the toolbar.
Collaborate
Initiating a shared review
In a shared review, all participants can view and respond to comments. It’s a great way to let reviewers resolve
conflicting opinions, identify areas for research, and develop creative solutions during the review process. You can
host a shared review on a network folder, WebDAV folder, SharePoint workspace, or on Acrobat.com, a new secure
web-based service. All you need is Acrobat, a PDF, and a free Adobe ID to get started.
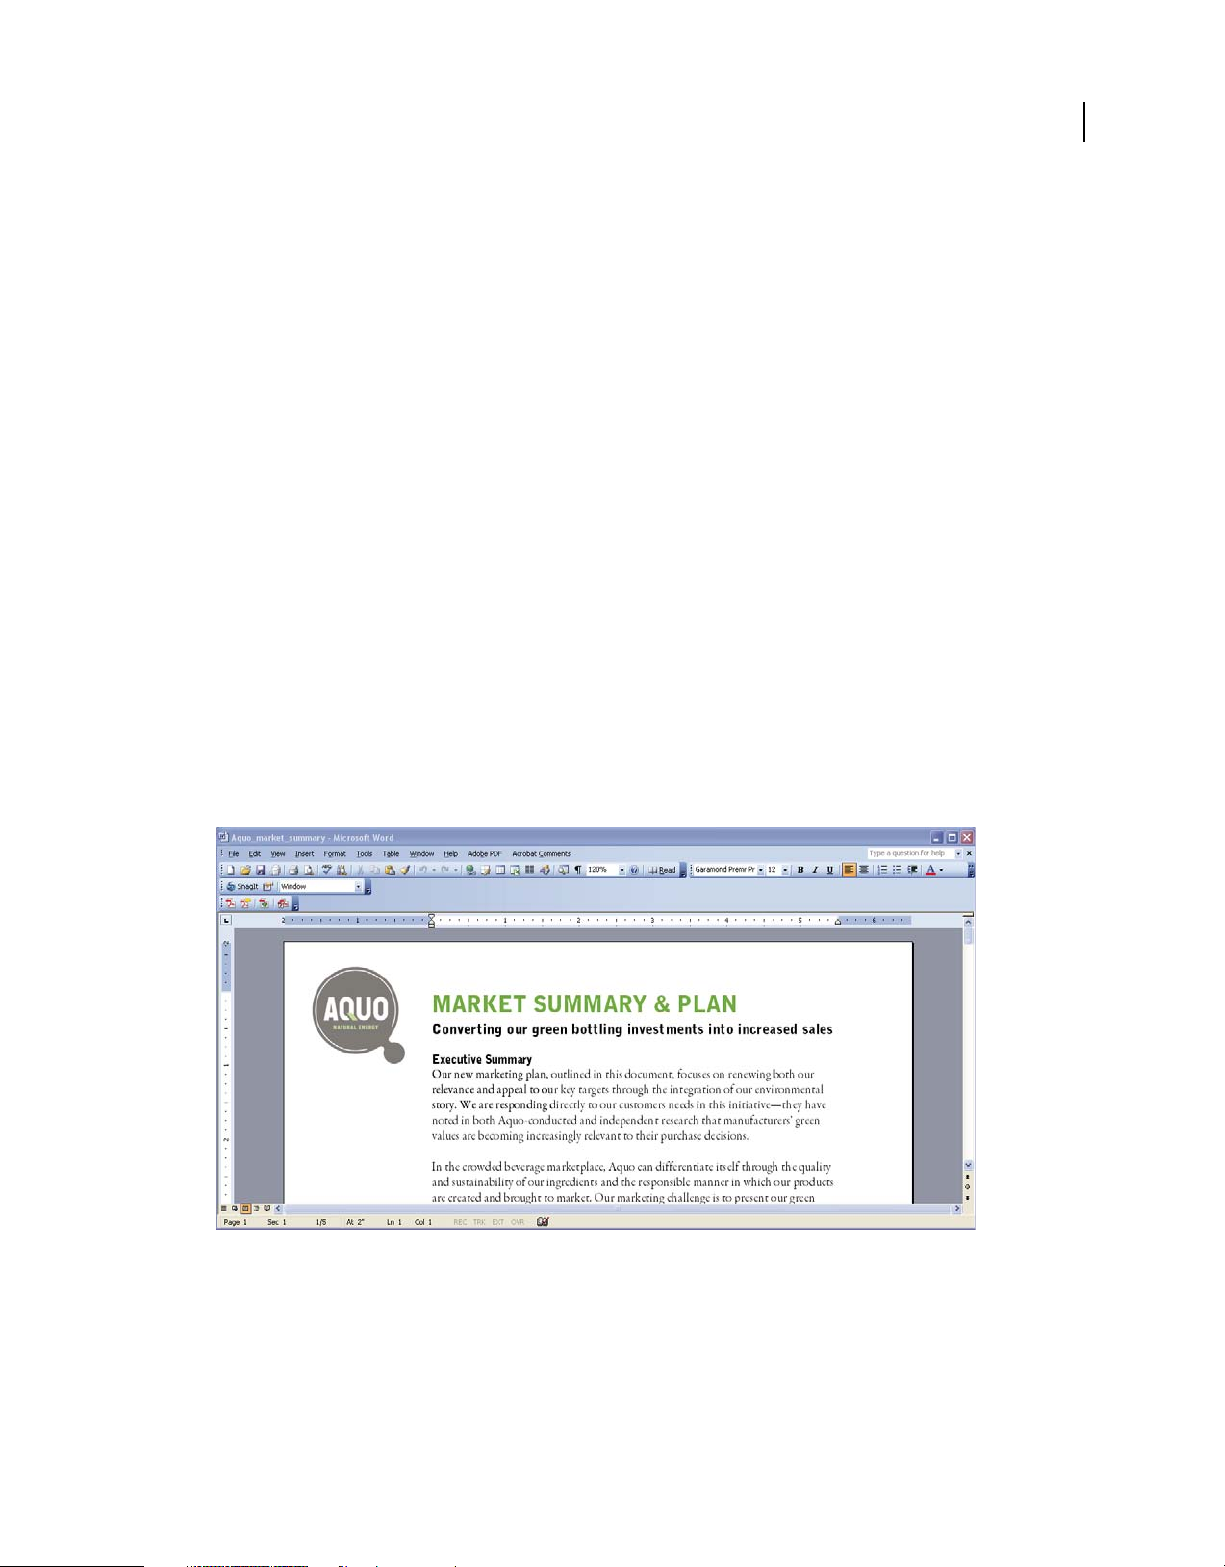
1 Prepare the PDF.
Save the PDF you want participants to review. If you want to call attention to particular questions or topics for
discussion, add comments to the PDF.
2 Send the PDF for a shared review.
Choose Comments > Send For Shared Review. Acrobat opens the Send For Shared Review wizard. You can share
any document that can be modified with comments. If a document has security settings that do not allow
comments, Acrobat notifies you.
9
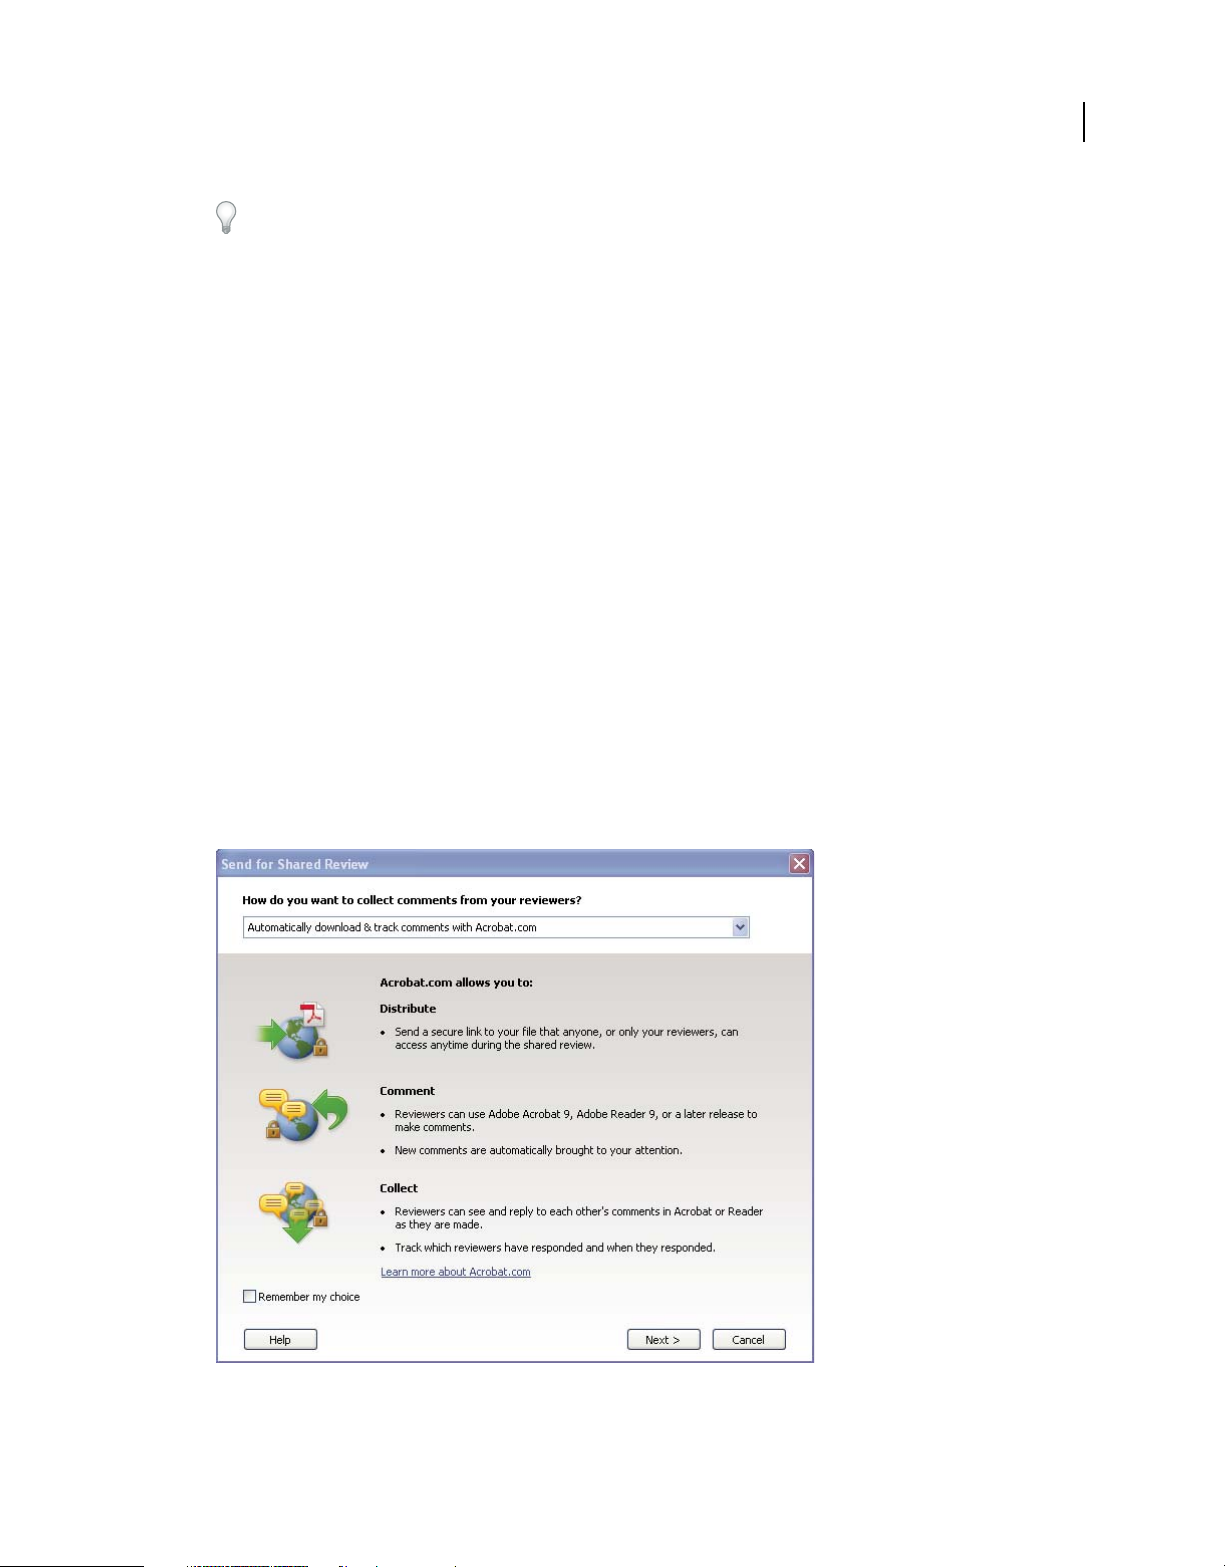
3 Select a method for collecting comments.
Choose how you want to post the PDF and collect comments from reviewers. Choose Automatically Download &
Track Comments With Acrobat.com if you want to use Acrobat.com to share the review. Choose Automatically
Collect Comments On My Own Internal Server to use a network server, a WebDAV server, or a SharePoint
workspace.
The Send For Shared Review wizard guides you through different ways to manage comments.
Last updated 9/30/2011
Page 16
USING ACROBAT 9 PRO EXTENDED
Getting started
If you’re hosting the PDF on your own server, select the type of server and enter its path. If you’re hosting the PDF
on Acrobat.com, enter your Adobe ID. If you don’t have an Adobe ID, click Create Adobe ID to create one within
Acrobat.
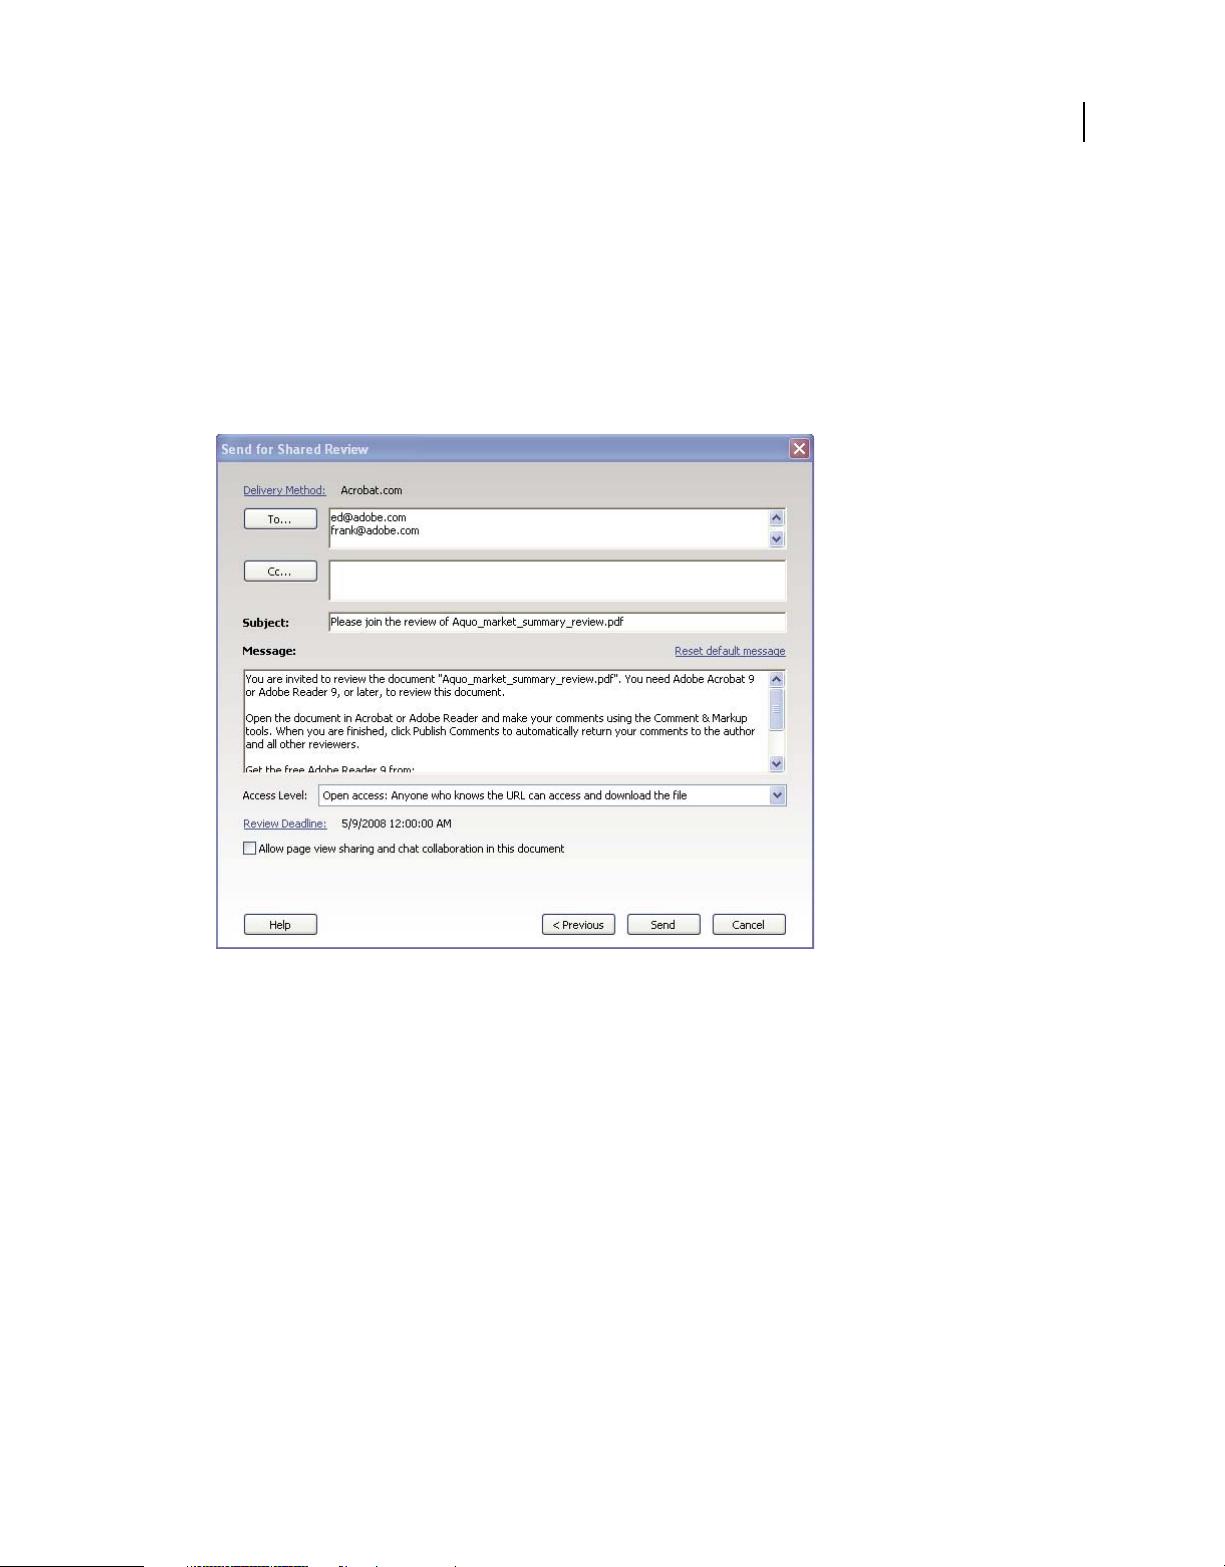
4 Invite reviewers.
Enter the email addresses for the people you want to invite to the review, or select the addresses from your email
address book. Then, customize the message for reviewers. Set a review deadline. After the deadline, commenting
tools will no longer be available on the shared review server. If you’re using Acrobat 9 Pro Extended or Acrobat 9
Pro, then Adobe Reader users can participate in the shared review.
10
Preparing the review invitation
5 Send the PDF.
Click Send to post the PDF to the server and send email invitations to the review participants. Acrobat saves a copy
of the shared review file in the same location, with the word “_review” appended to it.
Once you’ve started a shared review, you can read and reply to comments on the shared review server. You can also
read all the comments after the review is over. Use Tracker, within Acrobat, to see who has commented, send email
reminders to reviewers, or change the deadline.
Enabling live collaboration
You can review a PDF live, online, with one or more colleagues using Acrobat.com. The live collaboration feature lets
you share pages, so that all viewers are seeing the same thing at the same time. Use the live chat window to discuss the
document you’re viewing. You can invite anyone with Acrobat 9 or Reader 9 to participate in live collaboration.
Last updated 9/30/2011
Page 17
USING ACROBAT 9 PRO EXTENDED
Getting started
Note: The live collaboration feature is not available in all languages.
1 Prepare the document.
Create and save the document you want to discuss in live collaboration. If it’s not already a PDF, convert it to PDF
using Adobe PDF printer, Acrobat PDFMaker (Windows), or the Create PDF commands in Acrobat.
Open the PDF you want to discuss in Acrobat.
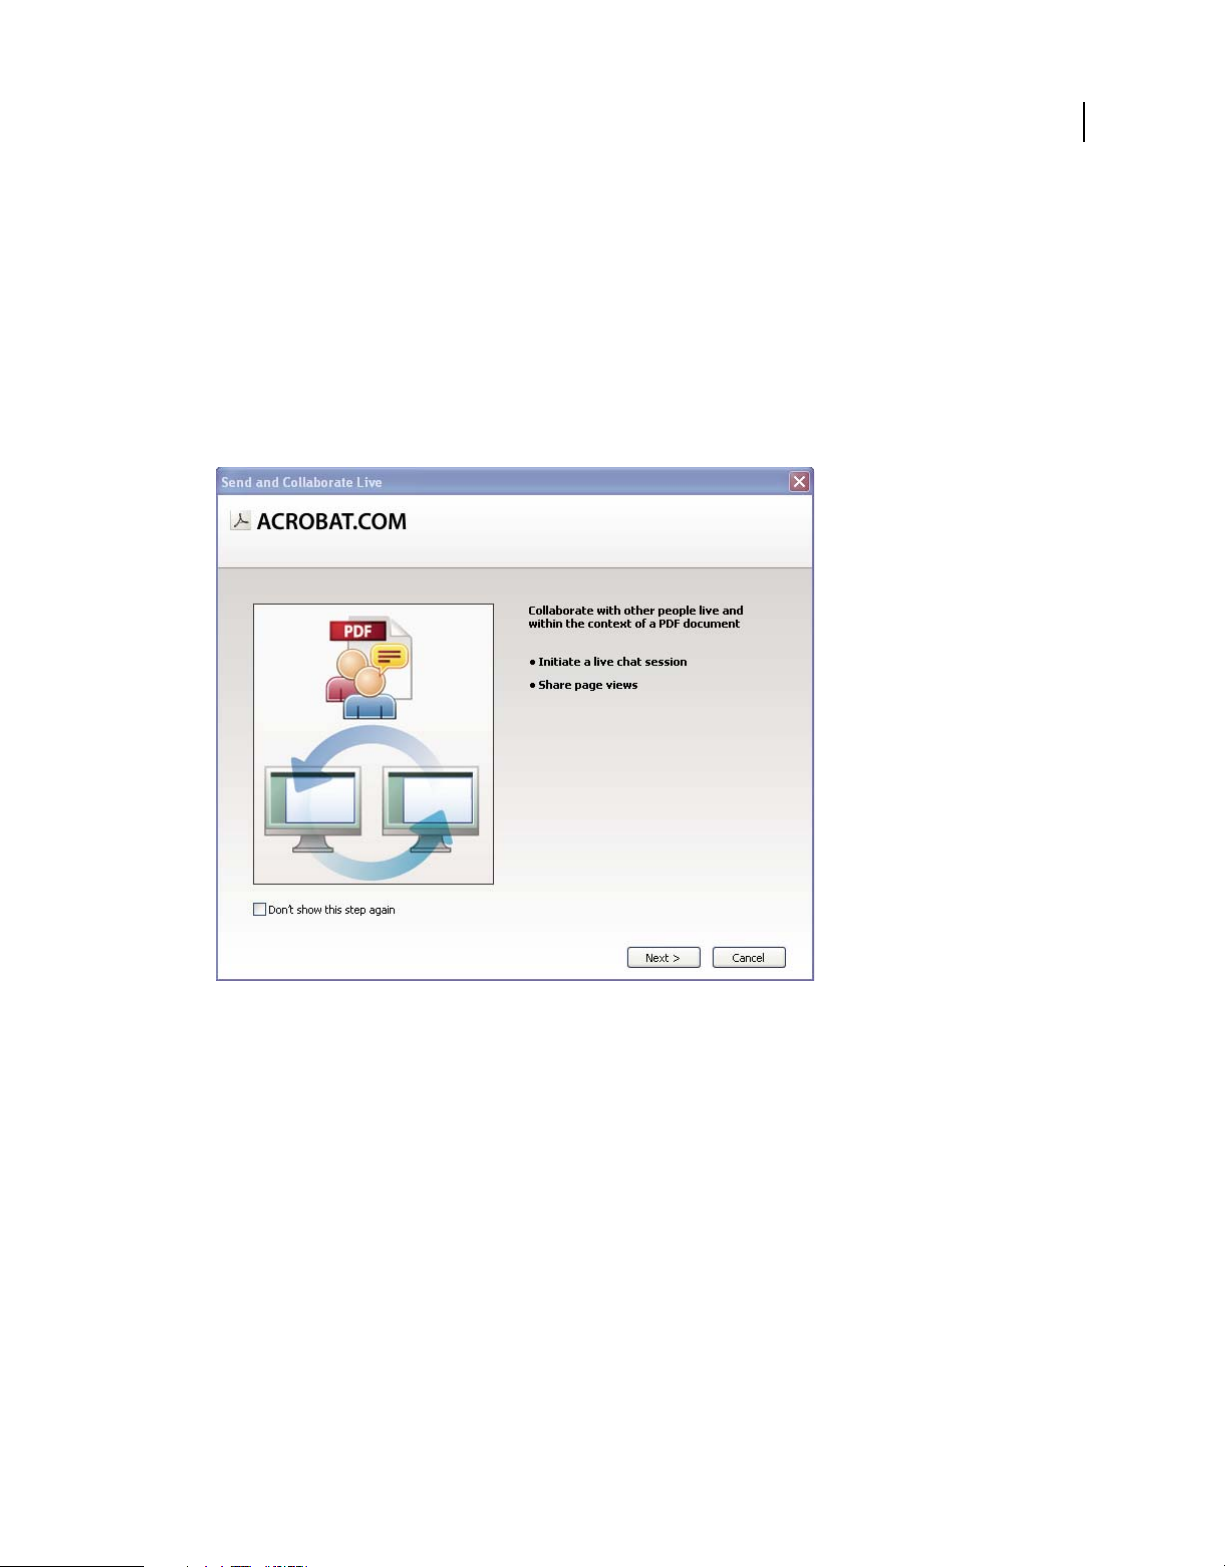
2 Start collaboration.
Choose File > Collaborate > Send & Collaborate Live. Log on to Acrobat.com, if prompted. If you don’t have an
Adobe ID, create one.
11
Use the Send and Collaborate Live wizard to start a live chat session.
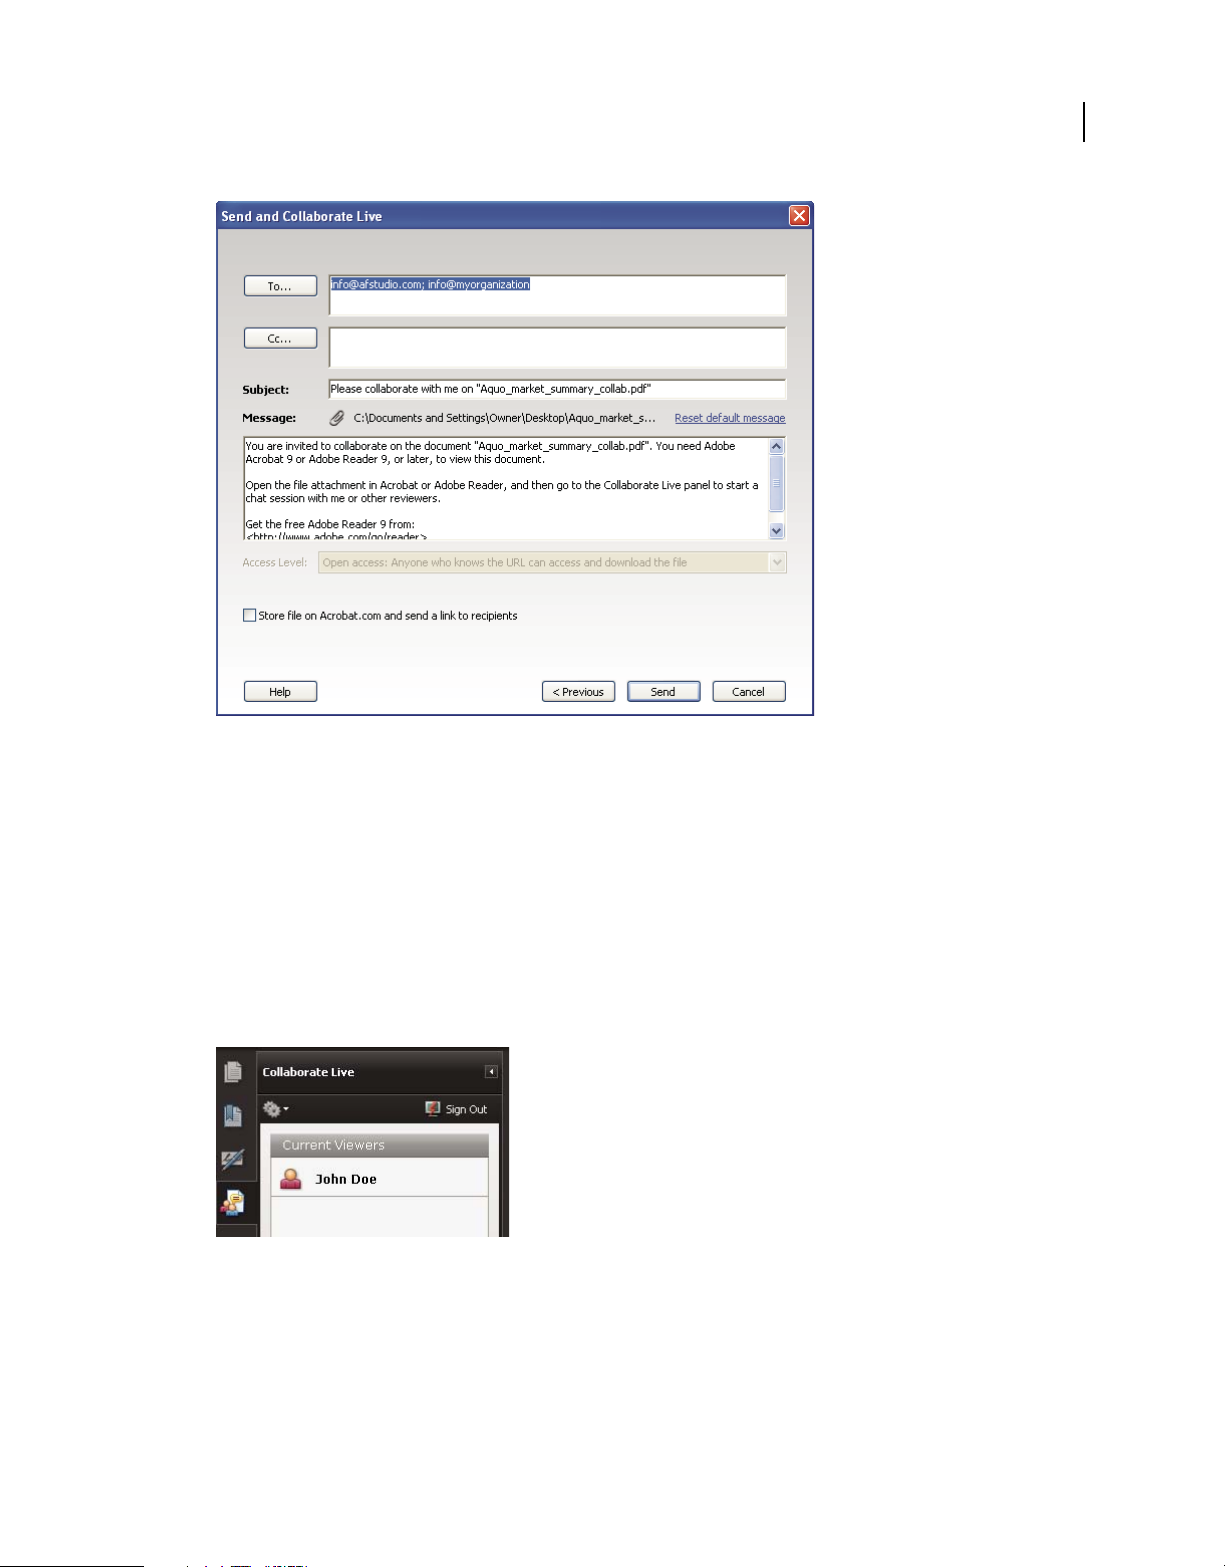
3 Invite participants.
Enter the email addresses of the colleagues you want to collaborate with, placing a semicolon or return between
addresses. You can also add email addresses from the address book of your email application, such as Microsoft
Outlook.
Last updated 9/30/2011
Page 18
USING ACROBAT 9 PRO EXTENDED
Getting started
12
Preparing the collaboration invitation
Edit the subject and message to customize the email invitation for your collaboration. To post the document to
Acrobat.com, select Store File On Acrobat.com And Send A Link To Recipients. Select a level of access to determine
who can access the document from Acrobat.com. If you don’t select Store File On Acrobat.com, Acrobat sends the
document to participants as an attachment.
The Collaborate Live navigation pane opens in the document.
4 Wait for other participants.
To share pages or chat online, at least one other person must join you. Using Acrobat 9 or Reader 9, participants
can join by clicking the PDF attachment or clicking the URL in the invitation. After participants log in with their
Adobe ID and password or join as a guest, they can double-click the PDF to open it.
Watching participants join the session
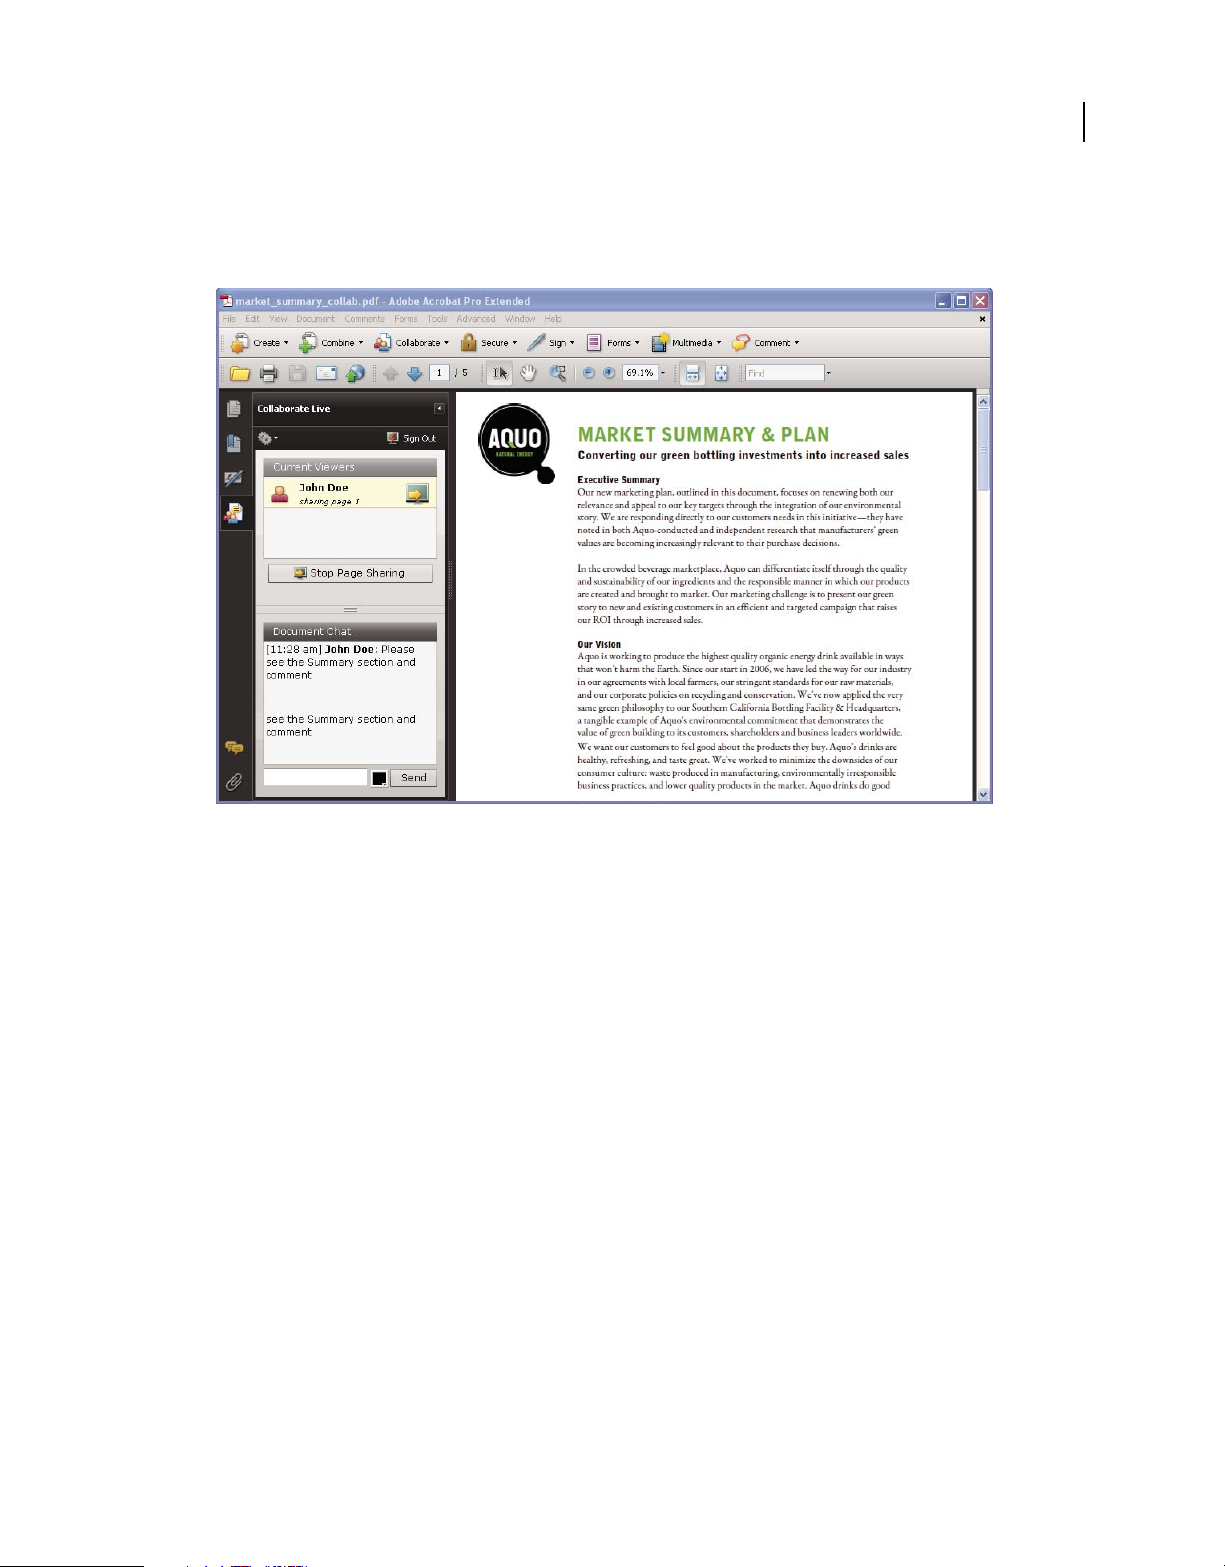
5 Share pages.
After at least one other person joins the live collaboration session, you can synchronize page views so that everyone
participating sees the same page view. To share pages, click the Start Page Sharing button. When you want to stop
page sharing, click Stop Page Sharing.
6 Chat online.
Last updated 9/30/2011
Page 19
USING ACROBAT 9 PRO EXTENDED
Getting started
To discuss the document, type chat messages in the box at the bottom of the Collaborate Live navigation pane. Click
the color box to choose a color for your chat text. To save the chat history, choose Save Chat from the options menu
in the navigation pane.
13
Send instant messages to attendees.
Forms
Creating an interactive form
You can convert any form into an interactive form that users can fill out and return electronically. Start with a paper
form you’ve scanned or a form document you’ve created in any application.
1 Create the PDF.
You can scan a paper form directly into Acrobat (choose File > Create PDF > From Scanner). You can also convert
any electronic document to PDF using Acrobat PDFMaker, the Adobe PDF printer, or the Create PDF commands
in Acrobat.
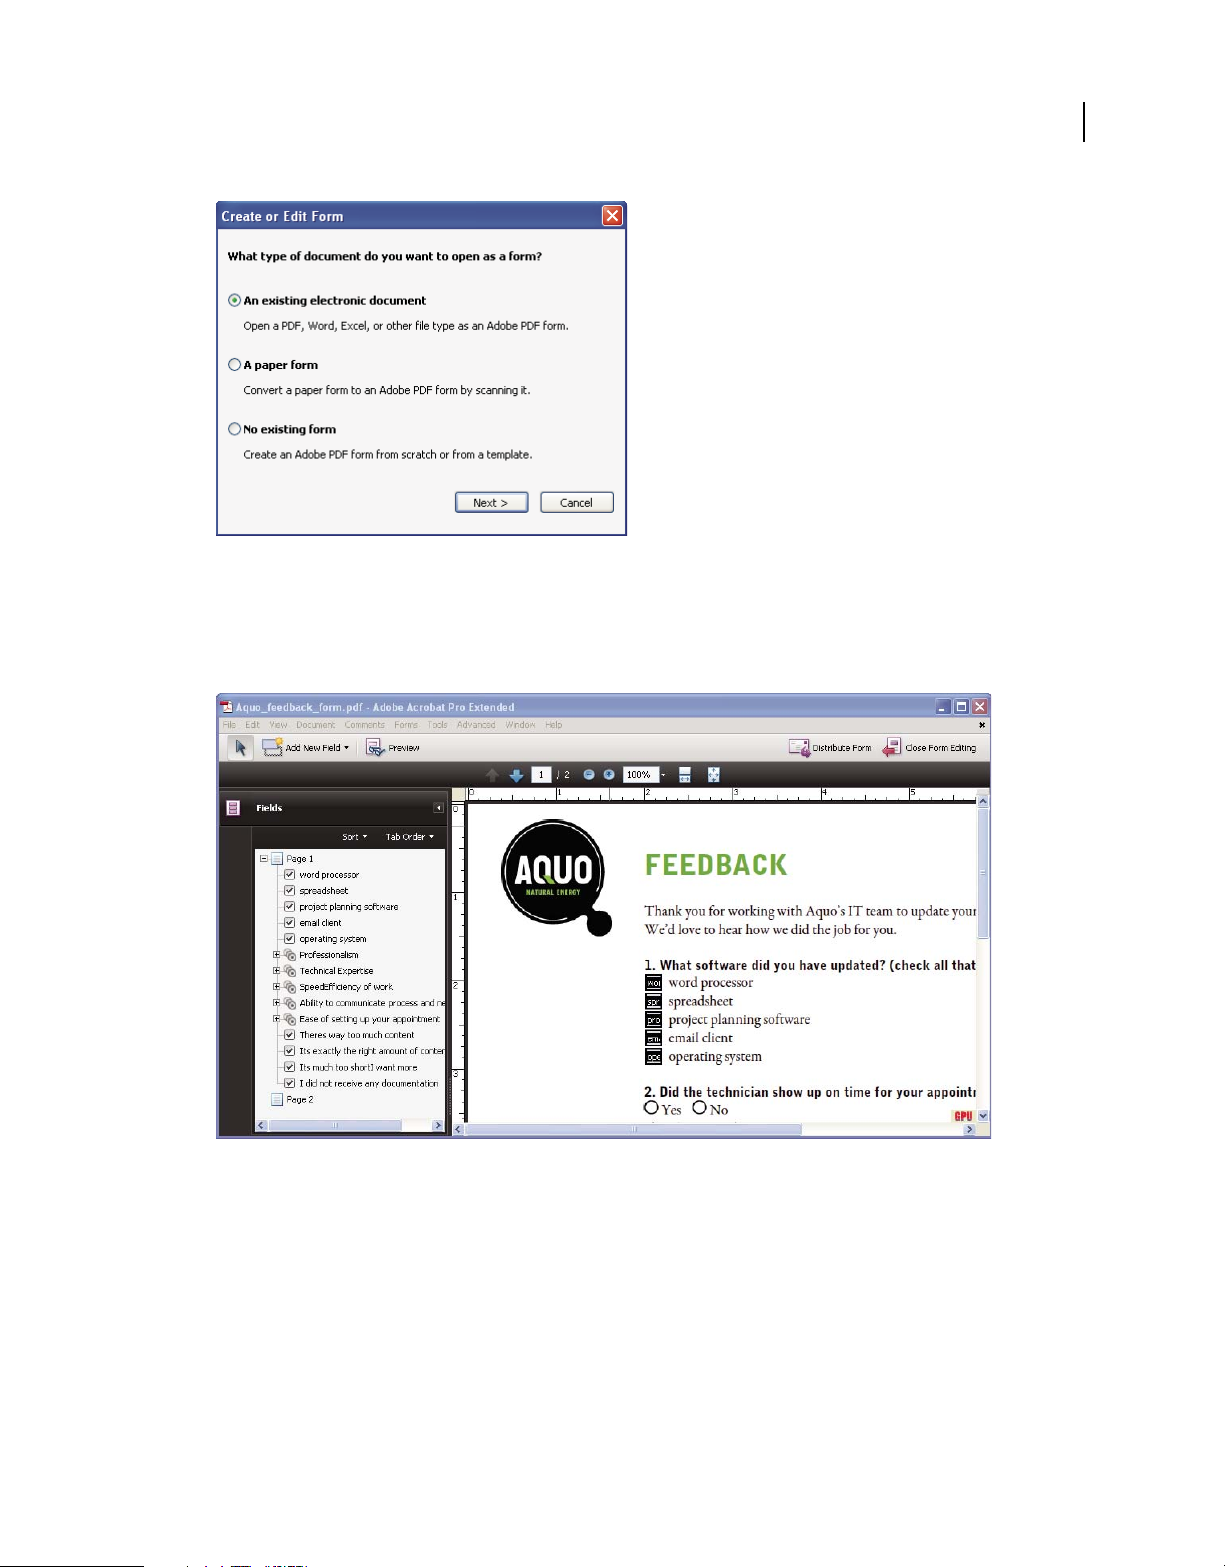
2 Use the Form wizard to automatically create form fields.
Choose Forms > Start Form Wizard. Follow the onscreen instructions in the wizard, and click OK to close the
Welcome To Form Editing Mode dialog box. When you run the wizard, Acrobat analyzes the document and
automatically creates electronic form fields.
Last updated 9/30/2011
Page 20
USING ACROBAT 9 PRO EXTENDED
Getting started
The Create Or Edit Form wizard creates form fields automatically.
3 Evaluate the form fields Acrobat created.
Acrobat lists the form fields it created in the Fields pane. Scroll through the document to see whether Acrobat
missed any fields or created any extra fields. To delete a field, select it in the Fields pane and press Delete.
14
Acrobat missed fields for the Yes and No radio buttons.
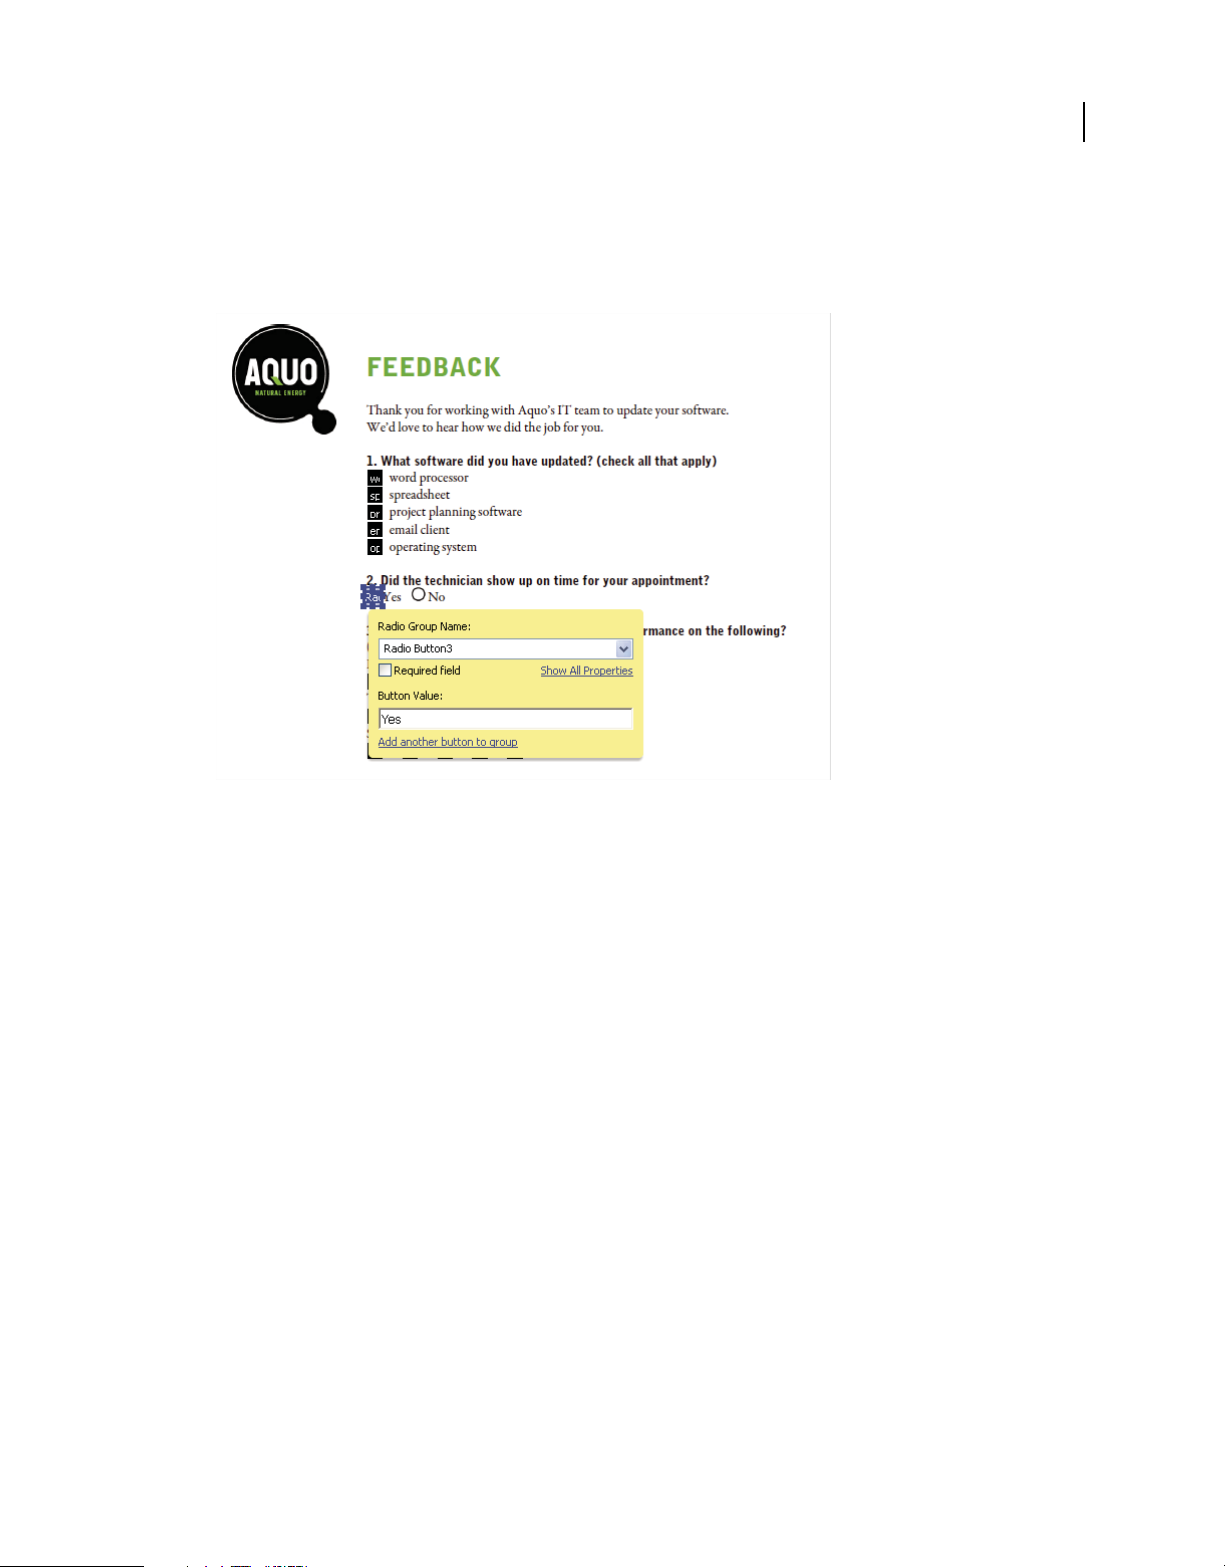
4 Add and edit form fields as needed.
Add form fields where you need them. You can add text fields, check boxes, list boxes, combo boxes, radio buttons,
action buttons, digital signature fields, and even barcodes to the PDF. Select the type of form field from the Add
New Field list in the Forms toolbar, and then click where you want the field to appear. Give each new field a unique
and descriptive name. The name doesn’t appear on the form that users see, but it identifies the field if you work
with the data in databases or spreadsheets.
Last updated 9/30/2011
Page 21
USING ACROBAT 9 PRO EXTENDED
Getting started
Click Show All Properties in the field name dialog box if you want to make other changes. You can change the field
appearance, set a text field to accept multiple lines of text, create a label for users, or set other properties. To edit a
field, make sure you’re in Form mode, and then double-click the field. (To switch to Form mode, choose Forms >
Add Or Edit Fields.) To preview the form, click Preview in the Forms toolbar.
15
Editing form fields
5 Save the form.
Be sure to save the form with all the fields you’ve added. Choose File > Save As to save the form with a different
name, so that your original static document remains intact.
PDF Portfolios
Creating a PDF Portfolio
Quickly pull together all the files for a project into a single, coherent PDF Portfolio. These files can include text
documents, email messages, spreadsheets, CAD drawings, PowerPoint presentations, videos, PDFs, and more. You
don’t have to convert the component documents to PDF, and you can edit each component independently without
affecting anything else in the PDF Portfolio.
1 Create the PDF Portfolio file.
In Acrobat, choose File > Create PDF Portfolio. The PDF Portfolio toolbar appears below the menu bar; Acrobat
displays this toolbar whenever you open a PDF Portfolio. In Acrobat 9 Pro and Acrobat 9 Pro Extended, the Edit
PDF Portfolio pane is open on the right side of the window.
2 Add files to the PDF Portfolio.
Choose Modify > Add Files in the PDF Portfolio toolbar. Navigate to the files you want to include. Select a file, and
click Open. Shift-select to add multiple contiguous files; press Ctrl to select multiple files in any order.
Last updated 9/30/2011
Page 22

USING ACROBAT 9 PRO EXTENDED
Getting started
Selecting files for a PDF Portfolio
When you add a file to the PDF Portfolio, a copy of the original document is included. If the document isn’t a PDF,
anyone who receives the PDF Portfolio may have to install the native application to preview that particular
document. For example, if you include a PowerPoint presentation, someone viewing your PDF Portfolio must have
Office installed to view that component.
3 Select a layout.
Click Choose A Layout in the Edit PDF Portfolio pane. Select a category, such as Basic Layouts, from the pop-up
menu, and then select a layout.
16
Layout options
The layout provides navigational aids and determines how component documents are displayed on the home page
of the PDF Portfolio. By default, the Basic Grid layout is applied when you first create a PDF Portfolio, but you can
use any layout.
4 Add a header.
You can give a PDF Portfolio a consistent look by applying a header to the top of the page. A header can include
text and graphics, such as a logo, company name, or contact information.
Last updated 9/30/2011
Page 23

USING ACROBAT 9 PRO EXTENDED
Getting started
To add a header, click Add Welcome & Header in the Edit PDF Portfolio pane, click Header, and then select a
template. Each template contains an image placeholder, a text placeholder, or both. Click an image placeholder to
replace it with a GIF, JPEG, or PNG file. Click a text placeholder to type and format text.
17
A header unifies the PDF Portfolio contents.
5 Add a welcome page.
A welcome page appears when the PDF Portfolio is opened. A welcome page can include text, images, or a Flash
animation (SWF file or FLV file).
A welcome page introduces the PDF Portfolio.
Last updated 9/30/2011
Page 24

USING ACROBAT 9 PRO EXTENDED
Getting started
To add a welcome page, click Welcome Page in the Edit PDF Portfolio pane. Select a template, and then click a
placeholder to replace it with your text, image, or SWF file.
6 Select a color scheme.
You can further customize a PDF Portfolio by selecting which colors to use for text, backgrounds, and the cards
that display component data. Click Select A Color Scheme in the Edit PDF Portfolio pane. Click the color swatch
that represents the scheme you want to use, or click Customize Color Scheme to develop your own. To create a
custom color scheme, select a color for each of the categories, such as Primary Text Color.
18
Color scheme options
7 Publish the PDF Portfolio.
When you’ve completed your PDF Portfolio, you can share it through email or on Acrobat.com, a secure web-based
service. You can burn it to a CD or DVD, or distribute it as you would share any other PDF.
First, choose File > Save Portfolio. From the share menu in the PDF Portfolio toolbar, choose Email to send the
PDF Portfolio as an email attachment. You can also share it on Acrobat.com, which is especially useful if the PDF
Portfolio file size is too large for many email servers. From the share menu, choose Share Portfolio On Acrobat.com,
and then log on to Acrobat.com.
Last updated 9/30/2011
Page 25
USING ACROBAT 9 PRO EXTENDED
Getting started
Security
Signing a document electronically
Like a handwritten signature, a digital signature is uniquely yours. Acrobat includes features to keep your digital
signature secure. Unlike traditional signatures, digital signatures can contain additional information, such as the date
and time of signature and the reason for signing. Just as you developed your own signature style early in life, you can
add your own flair to your signature appearance, as well.
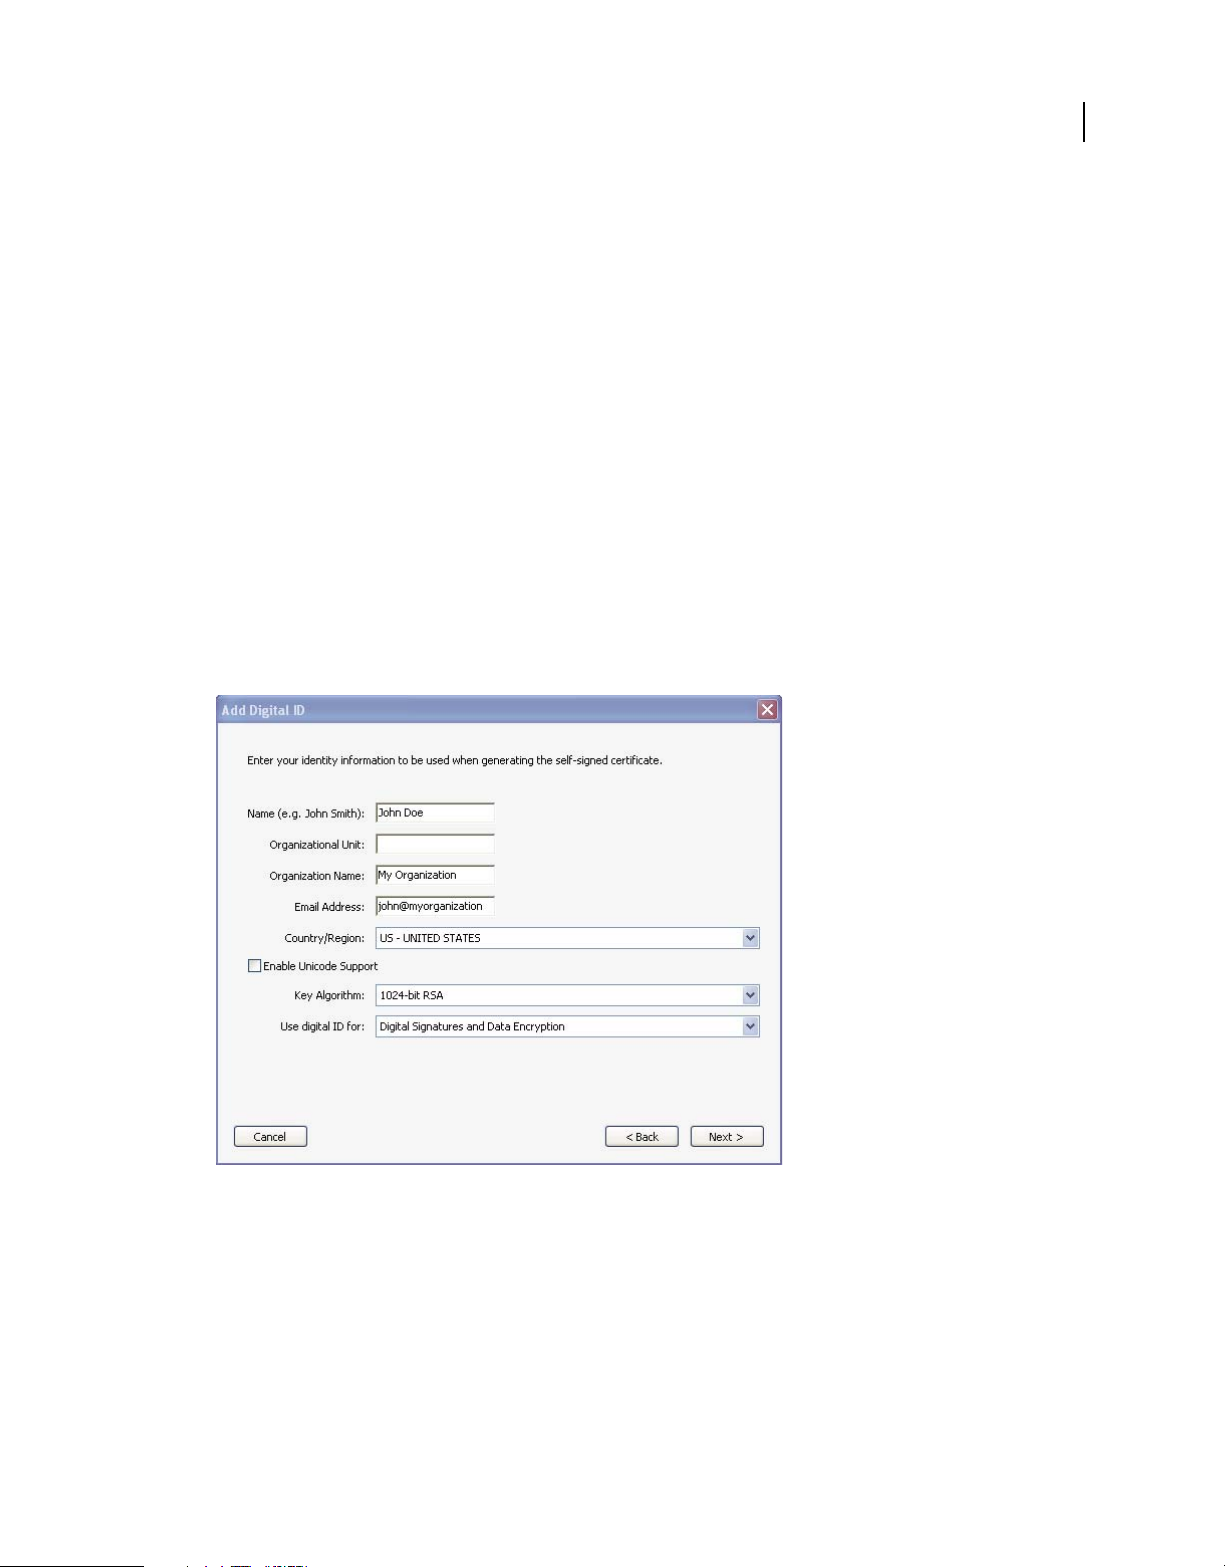
1 Obtain a digital ID.
If you don’t already have a digital ID, create a self-signed digital ID in Acrobat. A self-signed digital ID includes an
encrypted private key for signing or decrypting documents. It also includes a public key in a certificate used to
validate signatures and encrypt documents.
To create a self-signed digital ID, choose Advanced > Security Settings. Select Digital IDs on the left, and then click
the Add ID button in the toolbar. Select A New Digital ID I Want To Create Now, and continue through the wizard.
Type the personal information for your digital ID, including your name. When you certify or sign a document, the
name appears in the Signatures panel and in the signature field. Name your digital ID and create a password for it
that contains at least six characters, with no punctuation marks or special characters. Click Finish. Make a backup
copy of your digital ID file, in case the original is lost or damaged.
19
Personal information for the digital ID
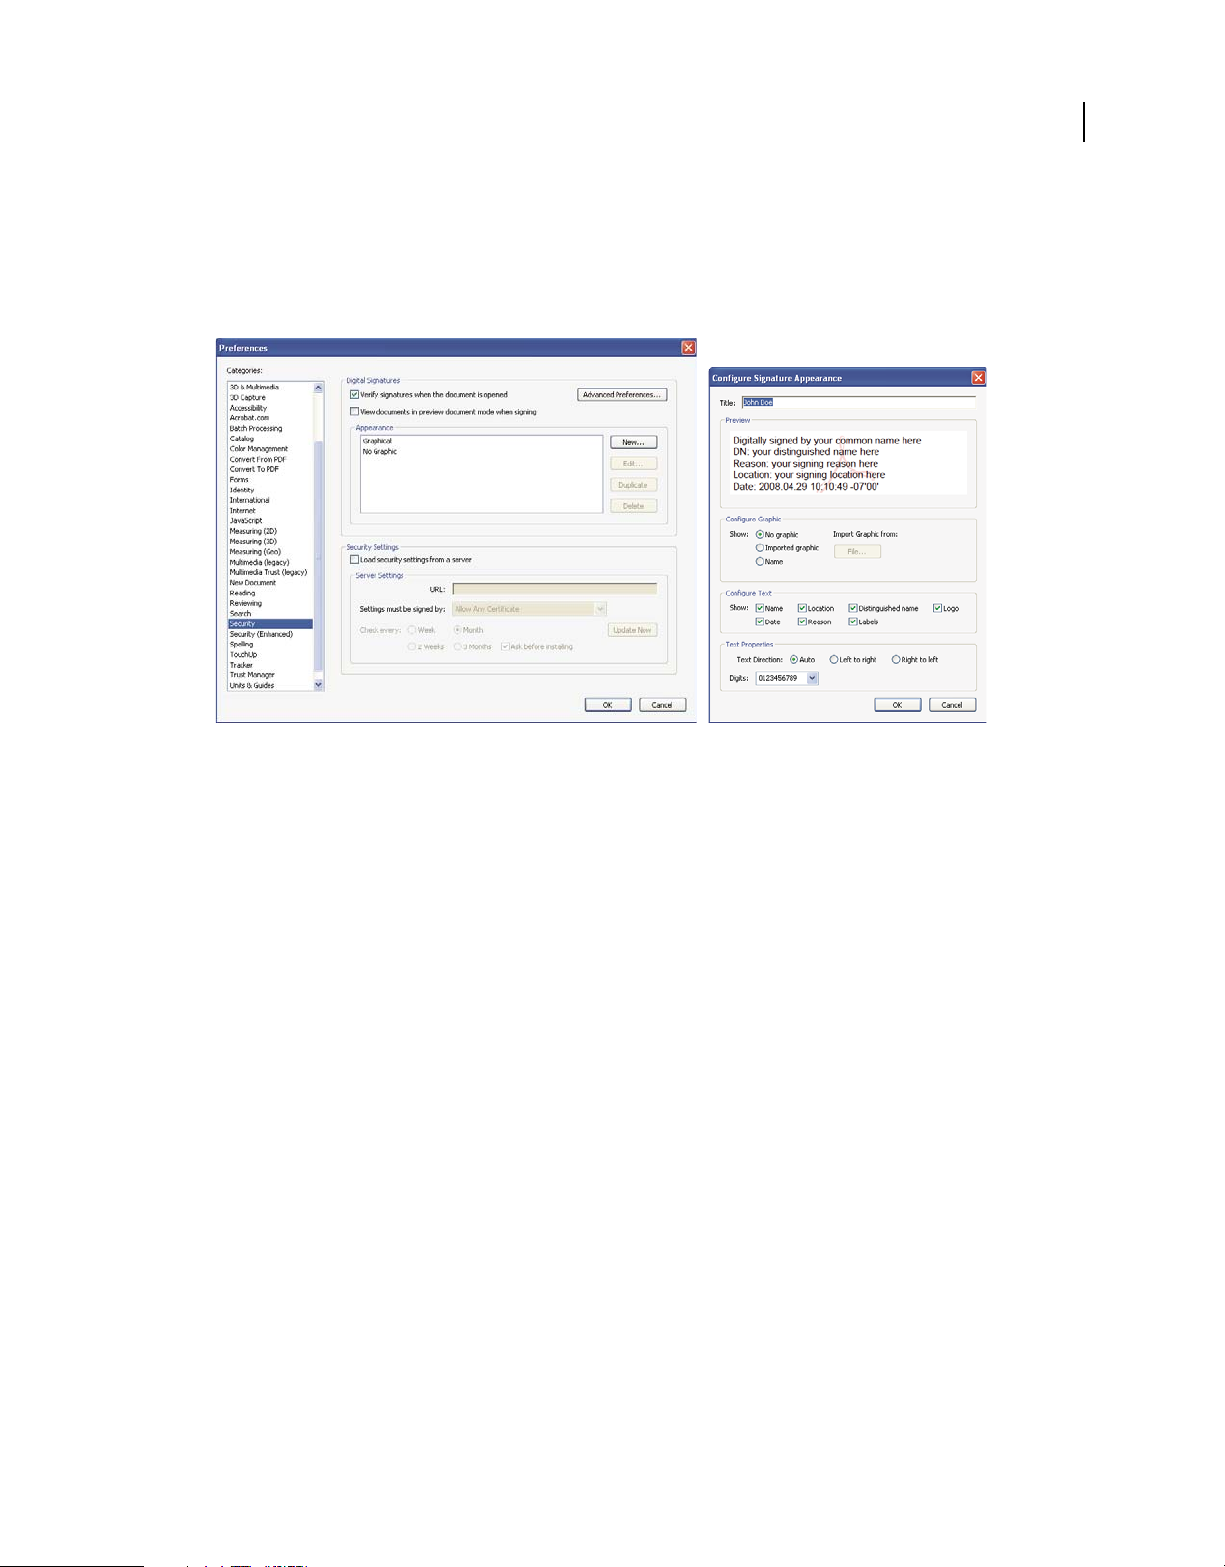
2 Create an appearance for your digital signature.
Your digital signature can be simple or complex. It can look like a handwritten signature or a typed name. It can
contain a company logo, include the date and time you signed, and state a reason for signing. You can create
multiple signature appearances for different uses; select one each time you sign a document. If you want to include
an image of your signature, scan your signature and save it as a PDF.
Last updated 9/30/2011
Page 26
USING ACROBAT 9 PRO EXTENDED
Getting started
To create an appearance, choose Edit > Preferences (Windows) or Acrobat > Preferences (Mac OS). Select Security
on the left, and then click New in the Digital Signatures section. Give the signature appearance a short, descriptive
title that you’ll recognize when you’re signing a document. Select options, including whether you want to include
an imported graphic, such as a scanned signature. As you make changes, your edited signature appears in the
preview window. Click OK.
20
Use Security preferences to customize how your signature appears.
If you selected Reason, click Advanced Preferences, and, in the Creation pane, select Show Reasons When Signing.
If you selected Location, select Show Location And Contact Information When Signing.
3 Review the document carefully.
Before you sign any document, physically or electronically, make sure that you know what you are signing and
where all the signature fields are. Because dynamic content might alter the appearance of the PDF and mislead you,
view the document in Preview Document mode before signing. To use Preview Document mode, open the
Preferences dialog box and select Security on the left; then, select View Documents In Preview Document Mode
When Signing.
Check each page of a document for signature fields. You may need to sign a document in more than one place. Each
signature field is unique, so your signature won’t automatically be copied from one field to the other signature fields
in the document.
4 Sign the PDF.
To sign the document, click the signature field. If no signature field exists, choose Sign > Place Signature from the
Tasks toolbar and draw a signature field on the page.
If you’ve set Acrobat to display documents in Preview Document mode before signing, a document message bar
reports whether any dynamic content exists in the document. When you’ve reviewed the document, click Sign
Document in the document message bar to proceed.
Last updated 9/30/2011
Page 27

USING ACROBAT 9 PRO EXTENDED
Getting started
Choose a signature appearance when signing a document.
In the Sign Document dialog box, select an appearance, and then add any information it requires, such as the
location or the reason for signing. Enter a password if your digital ID requires it. Click Sign. Give the document a
new name so that you can change the original PDF without invalidating the signature, and click Save.
21
When you apply a digital signature, Acrobat embeds an encrypted message digest in the PDF. Acrobat also embeds
the details from your certificate and a version of the document at the time it was signed.
5 Distribute your certificate.
To verify your digital ID, others who view your document must have the public certificate from your digital ID. To
send your certificate, choose Advanced > Security Settings, and select Digital IDs on the left. Expand the list, select
the digital ID you want to share, and click Export. Follow the onscreen instructions to email your certificate as an
FDF file to someone or to save the certificate as a different file type.
Last updated 9/30/2011
Page 28

Chapter 2: Workspace
As you get acquainted with your product, make setting up your work environment a priority. The more you learn
about its potential, the better you can take advantage of its features, tools, and options.
There’s much more to the application than you see at first glance. Various hidden tools, preferences, and options can
enhance your experience and give you greater control over how your work area is arranged and displayed.
Work area basics
View the work area
Adobe® Acrobat® 9 Pro Extended opens in two different ways: as a stand-alone application, and in a web browser. The
associated work areas differ in small but important ways.
The work area for the stand-alone application includes a document pane and a navigation pane. The document pane
displays Adobe® PDFs. The navigation pane on the left side helps you browse through the PDF. Toolbars near the top
of the window provide other controls that you can use to work with PDFs.
22
A
B
C
Work area as it appears in Acrobat
A. Menu bar B. Toolbars C. Navigation pane (Bookmarks panel displayed) D. Document pane
When you open a PDF inside a web browser, the toolbars, navigation pane, and document pane are available. To access
commands in the menu bar, download the PDF and open it in Acrobat or Adobe Reader.
D
Note: Some, but not all, PDFs appear with a document message bar. PDF Portfolios appear with a specialized work area.
Last updated 9/30/2011
Page 29

USING ACROBAT 9 PRO EXTENDED
Workspace
More Help topics
“View the PDF Portfolio work area” on page 116
“Document message bar” on page 24
Opening PDFs
You can open a PDF in many ways: from within the Acrobat application, from your email application, from your file
system, or on a network from within a web browser. The initial view of the PDF depends on how its creator set the
document properties. For example, a document may open at a particular page or magnification.
Some PDFs are restricted and open only after you enter a password provided to you by the PDF owner. If a document
is encrypted, you may need the permission of its creator to open it. In the case of some restricted or certified
documents, you may be prevented from printing a file or copying information to another application. If you have
trouble opening a PDF or can’t use certain features, contact its author or owner.
If a document is set to open in Full Screen mode, the toolbar, command bar, menu bar, and window controls are not
visible. You can quit Full Screen mode by pressing Ctrl+L.
More Help topics
“Defining initial view as Full Screen mode” on page 336
23
“View the PDF Portfolio work area” on page 116
“Opening secured documents” on page 226
Select another tool
By default, the Select tool is active when Acrobat opens, because it is the most versatile tool.
Specialized tools, such as those for zooming in or adding review comments, are available in toolbars and in the Tools
menus.
More Help topics
“Keys for selecting tools” on page 518
Select a tool
❖ Do one of the following:
• Select a tool in a toolbar.
• Choose Tools > [toolbar name] > [tool].
Switch temporarily to the Zoom In or Hand tool
You can use these tools temporarily, without deselecting the current tool.
• To select the Hand tool temporarily, hold down the spacebar.
• To select the Zoom In tool temporarily, hold down Ctrl+spacebar.
When you release the keys, Acrobat reverts to the previously active tool.
Last updated 9/30/2011
Page 30
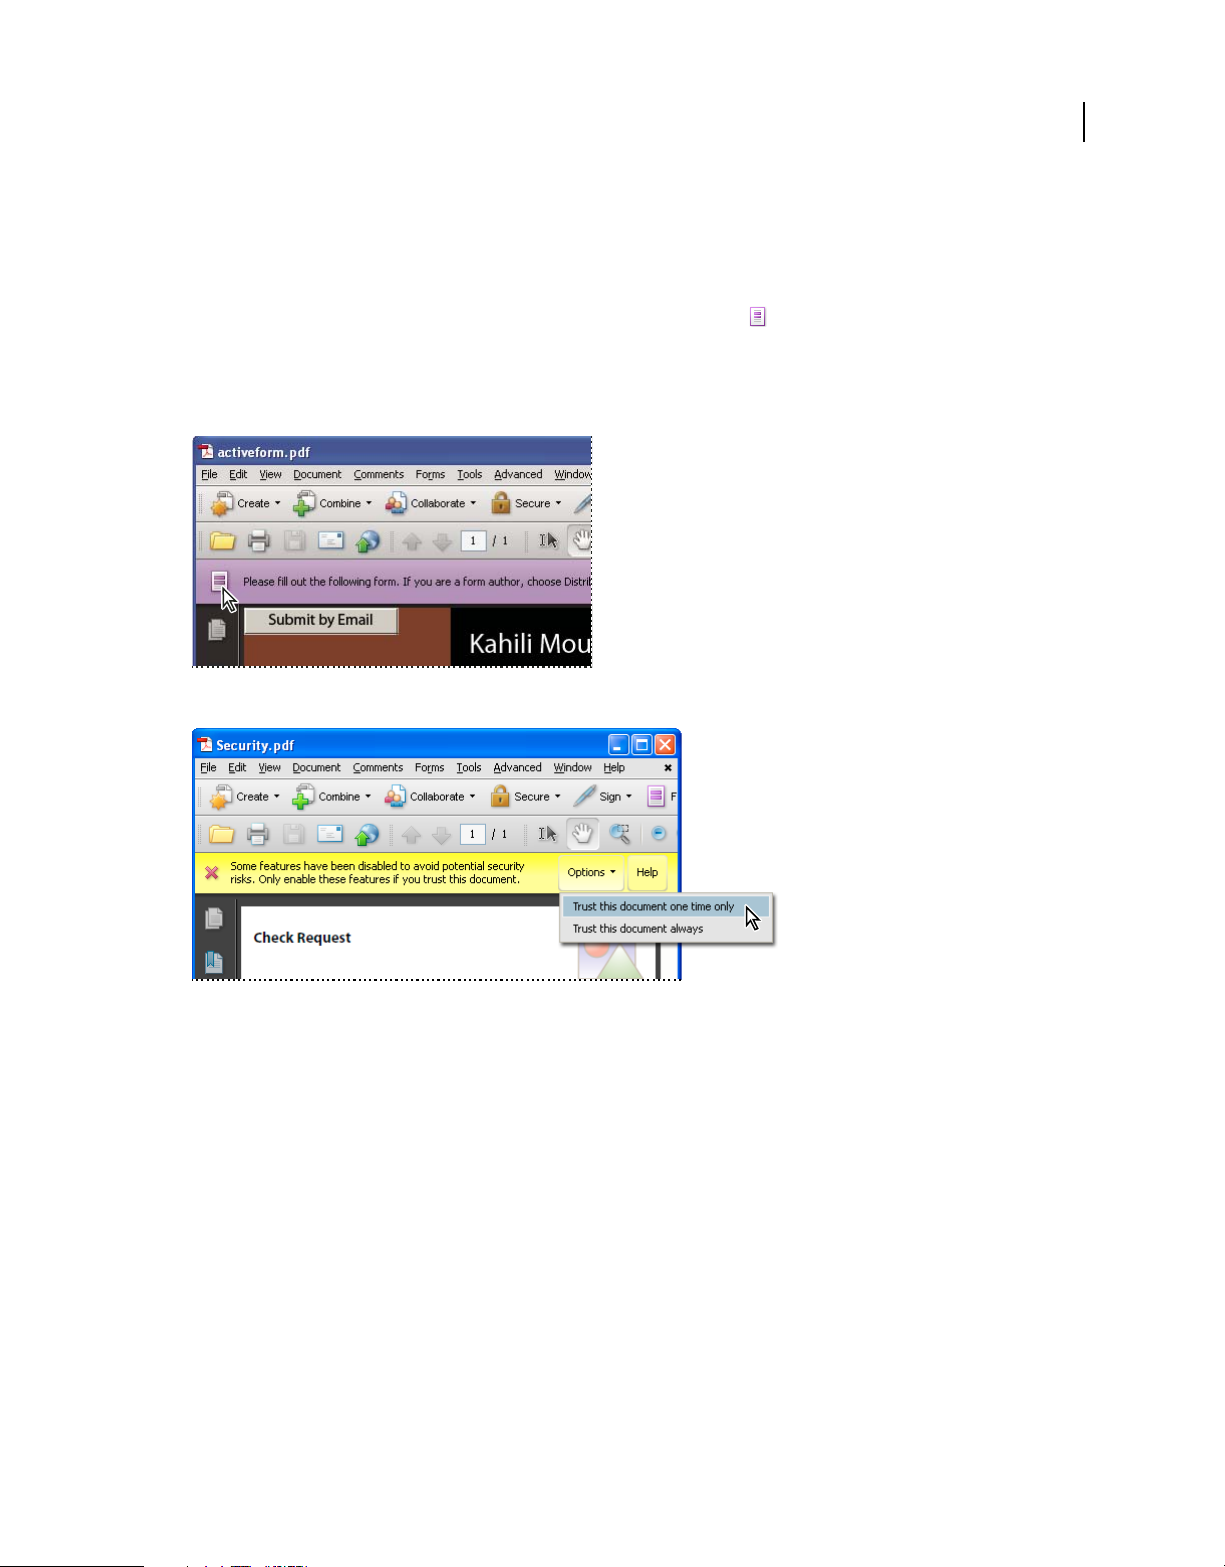
USING ACROBAT 9 PRO EXTENDED
Workspace
Document message bar
The document message bar appears only in certain types of PDFs. Typically, you see this area when you open a PDF
form, a PDF that has been sent to you for review, a PDF with special rights or security restrictions, or a PDF that is
compliant with PDF/A, PDF/E, or PDF/X standards. The document message bar appears immediately below the
toolbar area. To show or hide the document message bar, click its button
Look on the document message bar for instructions on how to proceed and for any special buttons associated with the
task. The bar is color coded: purple for forms, yellow for reviews or security alerts, and blue for certified PDFs or PDFs
with password security or document restrictions.
Document message bar for a form
on the left side of the work area.
24
Document message bar for a security alert
More Help topics
“Security alerts” on page 226
“Enhanced security” on page 228
“Filling in forms” on page 221
“Commenting” on page 163
Set preferences
Many program settings are specified in the Preferences dialog box, including settings for display, tools, conversion,
and performance. Once you set preferences, they remain in effect until you change them.
1 Choose Edit > Preferences (Windows) or Acrobat > Preferences (Mac OS).
2 Under Categories, select the type of preference you want to change.
Last updated 9/30/2011
Page 31

USING ACROBAT 9 PRO EXTENDED
Workspace
Re-create preferences
Re-create the Acrobat Preferences folder (Windows)
Re-create the Acrobat Preferences folder to eliminate problems that damaged preferences cause. Most preference
problems are caused by these file-based preferences, although most Acrobat preferences are stored within the registry.
Note: This solution removes custom settings for Collaboration, JavaScripts, Security, Stamps, Color Management, Auto
Fill, Web Capture, and Updater.
1 Quit Acrobat.
2 In Windows Explorer, go to the folder C:\Users\Username\AppData\Local\Adobe\Acrobat\[version], and move
the Preferences folder to another location (for example, C:\Temp).
3 Restart Acrobat.
If the problem recurs after you re-create the Acrobat Preferences folder, then the problem isn’t related to the
Preferences folder. To restore custom settings, drag the folder you moved in step 2 back to its original location. Then
click Yes To All to replace the new Preferences folder.
Re-create the Acrobat preferences files (Mac OS)
You can re-create the Acrobat preferences files to eliminate problems caused by a damaged preferences file.
25
Note: Re-creating the Acrobat preferences files restores settings to their defaults.
1 Quit Acrobat.
2 Drag the following files from the Users/[Username]/Library/Preferences folder to the Desktop:
• Acrobat WebCapture Cookies
• com.adobe.Acrobat.Pro.plist or com.adobe.Acrobat.Pro_x86_9.0.plist
• Acrobat Distiller Prefs and com.adobe.Acrobat.Pro.plist (if you are troubleshooting an issue with Distiller)
• The Acrobat folder, which contains preferences for forms (MRUFormsList), collaboration (OfflineDocs), and
color settings (AcrobatColor Settings.csf)
3 Restart Acrobat
If the problem recurs after you re-create the Acrobat preferences files, then the problem isn’t related to preferences
files. To restore custom settings, drag the files you moved in step 2 back to their original location. Then click OK to the
alert “A newer item named ‘[filename]’ already exists in this location. Do you want to replace it with the older one
you're moving?”
Customizing the work area
Displaying menus
Ordinarily, it’s a good idea to keep the Acrobat menus visible so that they are available as you work. It is possible to
hide them, using the View > Menu Bar command. However, the only way to display and use them again is by pressing
F9/Shift+Command+M.
Last updated 9/30/2011
Page 32

USING ACROBAT 9 PRO EXTENDED
Workspace
Acrobat also has numerous context-sensitive menus. These menus appear when you right-click an element in the work
area or PDF that has such a menu associated with it. A context menu displays commands that relate to the item or area
that you clicked. For example, when you right-click the toolbar area, that context menu displays the same commands
as the View > Toolbars menu.
Note: The menu bar appears only if Acrobat is open as a stand-alone application. If Acrobat is open within the browser,
only the browser application menu appears at the top of the window. However, context menus are available in both cases.
About toolbars
Toolbars reduce clutter in the work area by arranging tools in task-related groups. For example, the Page Display
toolbar includes buttons for changing how many pages you can see at a time in the document window. The Comment
& Markup toolbar contains tools for reviewing and annotating a PDF.
Any toolbar can float or be docked. Docked toolbars appear in the toolbar area. Floating toolbars appear as
independent panels that you can move anywhere in the work area.
Each toolbar has a grabber bar, which is a vertical gray stripe at the left end of the toolbar.
• When you position the pointer over a grabber bar, a tool tip displays the name of the associated toolbar.
• When you drag a grabber bar, the toolbar moves. You can drag toolbars off the toolbar area (so that they float), dock
them in the toolbar area, or rearrange them in the toolbar area.
Some toolbars appear by default and some are hidden.
26
A
B
C D E
Toolbars open by default
A. Tasks toolbar B. File toolbar C. Page Navigation toolbar D. Select & Zoom toolbar E. Page Display toolbar F. Find toolbar
F
Each of the buttons in the Tasks toolbar is associated with a menu of commands. Click the arrow to the right of
the button name to open the menu. For example, click the arrow next to the Collaborate button to display a menu
of commands related to collaboration tasks.
Position the pointer over a tool to see a description of the tool. Position the pointer over the grabber bar on the left edge
of a toolbar to see its name. All tools are identified by name in the More Tools dialog box (Tools > Customize
Toolbars).
More Help topics
“Customizing the work area” on page 25
“Displaying menus” on page 25
Display and arrange toolbars
When your work does not involve using the tools in a toolbar, you can close the toolbar to tidy up the work area. For
example, if you are not adding review comments to a PDF, there’s no need to have the Comment & Markup toolbar open.
When you need easy access to a toolbar that is hidden by default, you can open it. This toolbar appears as a floating
panel, which you can move or dock in the toolbar area.
Last updated 9/30/2011
Page 33

USING ACROBAT 9 PRO EXTENDED
Workspace
Note: If several PDFs are open, you can customize the toolbars for each PDF independently. The different customized
states persist as you switch between PDFs.
More Help topics
“Open or close reading mode” on page 34
Show or hide toolbars
• To open a toolbar, choose View > Toolbars > [toolbar name]. A check mark next to the toolbar name indicates that
the toolbar is displayed.
• To hide all toolbars, choose View > Toolbars > Hide Toolbars.
• To change a toolbar that is either shown or hidden, right-click the toolbar area, and choose the toolbar you want to
show or hide.
• To change the visibility of several toolbars, choose Tools > Customize Toolbars or View > Toolbars > More Tools.
Then, select and deselect toolbars. (Check marks by the toolbar names indicate which ones are currently visible.)
Note: Whether a new toolbar opens as a floating toolbar or docked in the toolbar area depends on its default position or
where it appeared in your previous configuration of the work area, if any.
27
Move toolbars
• To rearrange the docked toolbars, use the toolbar grabber bars to drag them from one position to another.
• To move a floating toolbar, drag it by its title bar or grabber bar to another location in the work area.
• To float a docked toolbar, drag it by its grabber bar from the toolbar area.
Use the title bar to move a section of tools from the toolbar area.
• To dock a floating toolbar, drag it by its title bar or grabber bar to the toolbar area.
• To move all floating toolbars to the toolbar area, choose View > Toolbars > Dock Toolbars.
Rows may be added to or removed from the toolbar area as you move the toolbars in and out.
Return toolbars to their default configuration
❖ Choose View > Toolbars > Reset Toolbars.
Last updated 9/30/2011
Page 34

USING ACROBAT 9 PRO EXTENDED
Workspace
Lock or unlock the toolbar area
Locking the toolbars prevents any rearrangement of the toolbar area, so all grabber bars disappear when the toolbar
area is locked. Locking does not affect the positions of any floating toolbars.
❖ Choose View > Toolbars > Lock Toolbars.
Select the command a second time to unlock the toolbar area.
Note: When the toolbar area is locked, you can still move floating toolbars by dragging them by their title bars. However,
you can’t dock them unless you unlock the toolbar area.
Show and hide toolbar elements
You can alter the display within an individual toolbar to keep just the tools you need available with a minimum of
wasted space. You can also show and hide tool labels.
Show or hide individual tools
Acrobat includes more tools and more toolbars than the set that appears by default. You can customize the toolbars so
that the tools you use most often appear in the toolbar area.
❖ Do any of the following:
• Right-click the toolbar, and select a tool that you want to display or deselect a tool that is already displayed if you
want to hide it.
• Right-click any toolbar and choose More Tools. Then select individual tools and toolbars that you want to display,
and deselect those that you want to hide.
Note: A selected tool appears in the toolbar area only if its toolbar is also selected in the More Tools dialog box.
28
Show or hide tool labels
The default view shows labels for some toolbar buttons. You can show labels for all buttons to help you as you learn to
use Acrobat, or you can hide all tool labels to save space in the toolbar area.
❖ Choose View > Toolbars > Button Labels > [option].
Note: Tool labels are turned off selectively when space in the toolbar area becomes limited.
Review properties for tools and objects
The Properties toolbar provides easy access to the properties for many tools and objects such as links, comments, form
fields, media clips, and bookmarks. For example, if you select the Note tool, the Properties toolbar displays the current
default properties for that tool. If you select a note in the document, the Properties toolbar displays properties for that note.
You can use the Properties toolbar to change many of the settings that appear there. A few items only provide
information and cannot be edited.
Like all toolbars, the Properties toolbar can float or be docked in the toolbar area. The Properties toolbar is different
in that it doesn’t contain tools and can’t be customized to hide options.
1 Choose View > Toolbars > Properties Bar.
2 Select the object or tool that you want to review.
3 Change properties for the selected item, as desired.
If you want to change object properties other than those listed in the Properties toolbar, right-click the object, and
choose Properties.
Last updated 9/30/2011
Page 35

USING ACROBAT 9 PRO EXTENDED
Workspace
Show or hide the navigation pane
The navigation pane is an area of the work space that can display different navigation panels. Typically, these panels
act like a table of contents, with items you can click to jump to a specific place in the document. For example, the Pages
panel contains thumbnail images of each page; clicking a thumbnail opens that page in the document.
When you open a PDF, the navigation pane is closed by default, but buttons along the left side of the work area provide
easy access to various panels, such as the Pages panel button
is open but empty (no PDF is open), the navigation pane is unavailable.
1 To open the navigation pane, do one of the following:
and the Bookmarks panel button . When Acrobat
• Click any panel button on the left side of the work area to open that panel.
• Choose View > Navigation Panels > Show Navigation Pane.
2 To close the navigation pane, do one of the following:
• Click the button for the currently open panel in the navigation pane.
• Choose View > Navigation Panels > Hide Navigation Pane.
Note: The creator of the PDF can control the contents of some navigation panels and may make them empty.
Adjust navigation panels
Like toolbars, navigation panels can be docked in the navigation pane, or they can float anywhere in the work area. You
can hide or close panels you don’t need and open the ones you do. You can also adjust the width of the navigation pane.
29
Change the display area for navigation panels
• To change the width of the navigation pane, drag its right border.
• To collapse a floating panel without closing it, click the tab name at the top of the window. Click the tab name again
to restore the panel to its full size.
Change the orientation of a docked navigation panel
By default, some panels, such as Bookmarks, appear in a column on the left side of the work area. Others, such as the
Comments panel, appear horizontally across the bottom of the document pane. You can change the orientation of any
panel to either vertical or horizontal by dragging the button for that panel, which appears on the left side of the work area.
• To orient the panel vertically, drag its button to the upper part of the navigation pane, near the buttons of other
vertically oriented panels.
• To orient the panel horizontally, drag its button to the lower part of the navigation pane, near the buttons of other
horizontally oriented panels.
In either case, a gray frame highlights the entire panel buttons area. If you release the mouse button before the area is
highlighted, the panel will float above the work area. If that happens, try again by dragging the panel tab into the upper
or lower part of the button area.
View a different panel in the navigation pane
By default, only a selected set of panel buttons appears on the left side of the work area. Other panels are included in
the View menu and may open as floating panels rather than in the navigation pane. However, you can dock the panel
in the navigation pane later.
❖ Do one of the following:
• On the left side of the navigation pane, select the button for the panel.
Last updated 9/30/2011
Page 36

USING ACROBAT 9 PRO EXTENDED
Workspace
• Choose View > Navigation Panels > [panel name].
Dock or float navigation panels
• To float a panel that is docked in the navigation pane, drag the panel button into the document pane.
• To dock a floating panel, drag the tab to the navigation pane.
• To group two floating panels, drag the tab of one panel into the other floating panel.
Options in a navigation panel
All navigation panels have an options menu in the upper-left corner. The commands available in these menus vary.
Some panels also contain other buttons that affect the items in the panel. Again, these vary among the different panels,
and some panels have none.
30
Viewing PDF pages
Open a PDF
You can open a PDF from within the Acrobat application, from the desktop, or from within certain other applications.
Open a PDF in the application
❖ Start Acrobat and do one of the following:
• Choose File > Open, or click the Open button in the toolbar. In the Open dialog box, select one or more
filenames, and click Open. PDF documents usually have the extension .pdf.
• Choose File > Organizer > [collection name] > [PDF filename].
• Choose File > History > [time period] > [PDF filename].
If more than one document is open, you can switch between documents by choosing the document name from the
Window menu. In Windows, a button for each open document appears in the Windows taskbar. Click this button to
move between open documents.
Last updated 9/30/2011
Page 37

USING ACROBAT 9 PRO EXTENDED
Workspace
Open a PDF from the desktop or within another application
❖ Do one of the following:
• To open a PDF attached to an email message, open the message and double-click the PDF icon.
• To open a PDF linked to an open web page, click the PDF file link. The PDF usually opens in the web browser.
• Double-click the PDF File icon in your file system.
Note: In Mac OS, you may not be able to open a PDF created in Windows by double-clicking the icon. Instead, choose
File > Open With > Acrobat.
Opening pages in a PDF
Depending on the PDF you open, you may need to move forward through multiple pages, see different parts of the
page, or change the magnification. There are many ways to navigate, but the following items are commonly used:
Note: If you do not see these items, choose View > Toolbars > Reset Toolbars.
Next and Previous The Next Page and Previous Page buttons appear in the Page Navigation toolbar. The text
box next to them is also interactive, so you can type a page number and press Enter to go directly to that page.
Scroll bars Vertical and horizontal scroll bars appear to the right and bottom of the document pane whenever the view
does not show the entire document. Click the arrows or drag to view other pages or different areas of the page.
31
Select & Zoom toolbar This toolbar contains buttons and controls for changing the page magnification.
Pages panel The Pages button on the left side of the work area opens the navigation pane to the Pages panel, which
displays thumbnail images of each page. Click a page thumbnail to open that page in the document pane.
More Help topics
“Retrace your viewing path” on page 33
“Adjust page magnification” on page 43
Page through a document
There are many ways to turn pages in a PDF. Many people use the buttons on the Page Navigation toolbar, but you
can also use arrow keys, scroll bars, and other features to move forward and backward through a multipage PDF.
The Page Navigation toolbar opens by default. The default toolbar contains frequently used tools: the Next Page ,
Previous Page , and Page Number. Like all toolbars, the Page Navigation toolbar can be hidden and reopened by
choosing it in the Toolbars menu under the View menu. You can display additional tools on the Page Navigation
toolbar by right-clicking the toolbar and choosing an individual tool, Show All Tools, or More Tools and then selecting
and deselecting tools in the dialog box.
More Help topics
“About bookmarks” on page 309
“About page thumbnails” on page 308
“Set the page layout and orientation” on page 46
Move through a PDF
❖ Do one of the following:
• Click the Previous Page or Next Page button on the toolbar.
Last updated 9/30/2011
Page 38

USING ACROBAT 9 PRO EXTENDED
Workspace
• Choose View > Go To > [location].
• Choose View > Go To > Page, type the page number in the Go To Page dialog box and then click OK.
• Press the Page Up and Page Down keys on the keyboard.
Jump to a specific page
❖ Do one of the following:
• From Single Page or Two-Up page display view, drag the vertical scroll bar until the page appears in the small pop-
up display.
• Type the page number to replace the one currently displayed in the Page Navigation toolbar, and press Enter.
Note: If the document page numbers are different from the actual page position in the PDF file, the page’s position within
the file appears in parentheses after the assigned page number in the Page Navigation toolbar. For example, if you assign
numbering for a file that is an 18-page chapter to begin with page 223, the number shown when the first page is active is
(1 of 18). You can turn off logical page numbers in the Page Display preferences. See “Renumber pages” on page 137
223
(Acrobat only) and “Preferences for viewing PDFs” on page 37.
Jump to bookmarked pages
Bookmarks provide a table of contents and usually represent the chapters and sections in a document. Bookmarks
appear in the navigation pane.
32
B
A
C
Bookmarks panel
A. Bookmarks button B. Click to display bookmark options menu. C. Expanded bookmark
1 Click the Bookmarks button, or choose View > Navigation Panels > Bookmarks.
2 To jump to a topic, click the bookmark. Expand or collapse bookmark contents, as needed.
Note: Depending on how the bookmark was defined, clicking it may not take you to that location but perform some other
action instead.
If the list of bookmarks disappears when you click a bookmark, click the Bookmarks button to display the list again. If
you want to hide the Bookmarks button after you click a bookmark, select Hide After Use from the options menu.
Last updated 9/30/2011
Page 39

USING ACROBAT 9 PRO EXTENDED
Workspace
Use page thumbnails to jump to specific pages
Page thumbnails provide miniature previews of document pages. You can use thumbnails in the Pages panel to change
the display of pages and to go to other pages. The red page-view box in the page thumbnail indicates which area of the
page appears. You can resize this box to change the zoom percentage.
1 Click the Pages button or choose View > Navigation Panels > Pages to display the Pages panel.
2 To jump to another page, click its thumbnail.
Automatically scroll through a document
Automatic scrolling advances your view of the PDF at a steady rate, moving vertically down the document. If you
interrupt the process by using the scroll bars to move back or forward to another page or position, automatic scrolling
continues from that point forward. At the end of the PDF, automatic scrolling stops and does not begin again until you
choose automatic scrolling again.
1 Choose View > Automatically Scroll.
2 Press Esc to stop scrolling.
Retrace your viewing path
You can find PDF pages that you viewed earlier by retracing your viewing path. It’s helpful to understand the
difference between previous and next pages and previous and next views. In the case of pages, previous and next refer
to the two adjacent pages, before and after the currently active page. In the case of views, previous and next refer to
your viewing history. For example, if you jump forward and backward in a document, your viewing history retraces
those steps, showing you the pages you viewed in the reverse order that you viewed them.
33
1 Choose View > Go To > Previous View.
2 To continue seeing another part of your path, do either of the following:
• Repeat step 1.
• Choose View > Go To > Next View.
Note: You can make the Previous View button and Go To Next View button available in the toolbar area by
right-clicking the Page Navigation toolbar and choosing them on the context menu, or choosing Show All Tools.
Change the PDF/A viewing mode
PDF/A is an ISO standard for PDFs. Documents you scan to PDF are PDF/A-compliant. You can specify whether you
want to view documents in this viewing mode.
1 In the Preferences dialog box under Categories, select Documents.
2 Choose an option for View Documents In PDF/A Mode: Never, or Only For PDF/A Documents.
You can switch in or out of PDF/A viewing mode by changing this preference setting again.
Navigate with links
Links can take you to another location in the current document, to other PDF documents, or to websites. Clicking a
link can also open file attachments and play 3D content, movies, and sound clips. To play these media clips, you must
have the appropriate hardware and software installed.
The person who created the PDF document determines what links look like in the PDF.
Last updated 9/30/2011
Page 40

USING ACROBAT 9 PRO EXTENDED
Workspace
Note: Unless a link was created in Acrobat using the Link tool, you must have the Create Links From URLs option selected
in the General preferences for a link to work correctly.
1 Choose the Select tool .
2 Position the pointer over the linked area on the page until the pointer changes to the hand with a pointing finger.
A plus sign (+) or a w appears within the hand if the link points to the web. Then click the link.
More Help topics
“Links and attachments” on page 313
“Multimedia preferences” on page 42
PDFs with file attachments
If you open a PDF that has one or more attached files, the Attachments panel automatically opens, listing the attached
files. You can open these files for viewing, edit the attachments, and save your changes, as permitted by the document
authors.
If you move the PDF to a new location, the attachments automatically move with it.
34
More Help topics
“Open, save, or delete an attachment” on page 317
Open or close reading mode
The reading mode view hides everything in the work area except the document and the menu bar.
❖ Choose View > Reading Mode.
Choosing Reading Mode again restores the work area to its previous view, with the same navigation buttons and
toolbar displays.
View PDFs in Full Screen mode
In Full Screen mode, PDF pages fill the entire screen; the menu bar, toolbars, and window controls are hidden. A PDF
creator can set a PDF to open in Full Screen mode, or you can set the view yourself. Full Screen mode is often used for
presentations, sometimes with automatic page advancement and transitions.
The pointer remains active in Full Screen mode so that you can click links and open notes. There are two ways to
advance through a PDF in Full Screen mode: You can use keyboard shortcuts for navigational and magnification
commands, and you can set a Full Screen preference to display Full Screen navigation buttons that you click to change
pages or exit Full Screen mode.
More Help topics
“Preferences for viewing PDFs” on page 37
“Setting up a presentation” on page 336
Set the Full Screen navigation bar preference
1 In the Preferences dialog box under Categories, select Full Screen.
2 Select Show Navigation Bar, then click OK.
Last updated 9/30/2011
Page 41

USING ACROBAT 9 PRO EXTENDED
Workspace
3 Select View > Full Screen Mode.
The Full Screen navigation bar contains Previous Page , Next Page , and Close Full Screen View buttons.
These buttons appear in the lower-left corner of the work area.
Read a document in Full Screen mode
If the Full Screen navigation bar is not shown, you can use keyboard shortcuts to navigate through a PDF.
Note: If you have two monitors installed, the Full Screen mode of a page sometimes appears on only one of the monitors.
To page through the document, click the screen displaying the page in Full Screen mode.
1 Choose View > Full Screen Mode.
2 Do any of the following:
• To go to the next page, press the Enter, Page Down, or Right Arrow key.
• To go to the previous page, press Shift+Enter, Page Up, or the Left Arrow key.
3 To close Full Screen mode, press Ctrl+L or Esc. (Escape Key Exits must be selected in the Full Screen preferences.)
To show a Full Screen tool in the Page Display toolbar, right-click the Page Display toolbar and choose Full Screen
Mode. Then click the Full Screen tool to switch to Full Screen mode.
35
Viewing PDFs in a web browser
You can view PDFs in a supported web browser, or you can set your Internet preferences to open linked or downloaded
PDF files in a separate Acrobat window. If you open PDFs in Acrobat outside the browser, you cannot use Fast Web
Viewing, form submittal in a browser, or search highlighting on the web.
Because keyboard commands may be mapped to the web browser, some Acrobat shortcuts may not be available.
Similarly, you may need to use the tools and commands in the Acrobat toolbar rather than the browser toolbar or
menu bar. For example, to print a PDF document, use the Print button in the Acrobat toolbar rather than the Print
command in the browser. (In Microsoft Internet Explorer, you can choose File > Print, Edit > Copy, and Edit > Find
on the Internet Explorer toolbar.)
Note: Having multiple versions of Acrobat or Adobe Reader installed on the same computer can prevent you from viewing
PDFs in a web browser. Examples include Acrobat 8 with Adobe Reader 9, or Acrobat 7 with Reader 8, and so on. Try
deselecting the Display PDF In Browser option in Internet Preferences in one program, and selecting the option in the
other program. For more information about coexisting installations, see the Tech Note at
http://kb2.adobe.com/cps/333/333223.html.
Internet preferences
Display PDF In Browser Displays any PDF opened from the web in the browser window. If this option is not selected,
PDFs open in a separate Acrobat window. On Mac OS, if you have installed both Reader and Acrobat, you can select
which application and which version to use.
Note: If Reader is installed on your system and you subsequently install Acrobat, Safari continues to use Reader to open
PDFs in your browser. Use this option to configure Safari to use Acrobat.
Allow Fast Web View Downloads PDFs for viewing on the web one page at a time. If this option is not selected, the
entire PDF downloads before it is displayed. If you want the entire PDF to continue downloading in the background
while you view the first page of requested information, also select Allow Speculative Downloading In The Background.
Allow Speculative Downloading In The Background Allows a PDF to continue downloading from the web, even after
the first requested page appears. Downloading in the background stops when any other task, such as paging through
the document, is initiated in Acrobat.
Last updated 9/30/2011
Page 42

USING ACROBAT 9 PRO EXTENDED
Workspace
Connection Speed Choose a connection speed from the menu. This setting is also used by the multimedia plug-in.
Internet Settings [or Network Settings] Click to open the Internet or network connection dialog box or panel for your
computer. For more information, consult your operating system Help, your Internet service provider, or your local
network administrator.
Read articles
In PDFs, articles are optional electronic threads that the PDF author may define within that PDF. Articles lead readers
through the PDF content, jumping over pages or areas of the page that are not included in the article, in the same way
that you might skim through a traditional newspaper or magazine, following one specific story and ignoring the rest.
When you read an article, the page view may zoom in or out so that the current part of the article fills the screen.
More Help topics
“Articles” on page 322
Open and navigate an article thread
1 Choose Tools > Select & Zoom > Hand Tool, or click the Hand Tool on the Select & Zoom toolbar.
2 Choose View > Navigation Panels > Articles to open the Articles panel.
Note: You cannot open the Articles panel if you are viewing the PDF inside a browser. You must open the PDF in Acrobat.
36
3 Double-click the article icon to go to the beginning of that article. The icon changes to the follow-article pointer .
Note: If the Articles panel is blank, then the author has not defined any article threads for this PDF.
4 With the article thread open, do any of the following:
• To scroll through the article one pane at a time, press Enter or click in the article.
• To scroll backward through the article one pane at a time, Shift-click in the article, or press Shift+Enter.
• To go to the beginning of the article, Ctrl-click within the article.
5 At the end of the article, click in the article again.
The previous page view is restored, and the pointer changes to the end-article pointer .
Exit a thread before the end of the article
1 Make sure that the Hand tool is selected.
2 Shift+Ctrl-click the page.
The previous page view is restored.
Compare a revised PDF to an earlier version
Use the Compare Documents feature to show the differences between two versions of a PDF. You can customize many
options for displaying the compare results.
1 Choose Document > Compare Documents.
2 Specify the two documents to compare. If one or both of the documents is in a PDF package, select the package,
then under Package Item, select the component PDF.
Note: The Document Compare feature isn’t available for PDF Portfolios created in Acrobat 9.
3 As needed, specify the page ranges in the documents to compare in the First Page and Last Page boxes.
Last updated 9/30/2011
Page 43

USING ACROBAT 9 PRO EXTENDED
Workspace
4 Select the Document Description that best describes the documents you are comparing, and click OK.
Once the two documents are analyzed, a results document appears with the Compare panel open. The new document
is shown with annotations indicating the changes. The first page shows a summary of the comparison results.
5 From the Compare pane, do any of the following, as needed:
• To hide the annotations that display changes, click Hide Results.
• To specify the display options for compare results, click Show Options. You can specify the type of changes to
display, and the color scheme and opacity of the annotations. To return to the page thumbnails, click Hide Options.
• To show each of the documents in its own window, from the options menu , choose Show Documents Tiled or
Show Documents Side By Side. To synchronize the relevant pages while showing the documents in their own
windows, from the options menu
, choose Synchronize Pages.
• Click a page thumbnail to go directly to that page. To change the size of the page thumbnails, from the options
menu
, choose Thumbnail Size > [option].
• Drag the splitter bar at the bottom of the Compare pane up to show thumbnails of the old document. Click a
thumbnail from the old document to open it in a new window.
Preferences for viewing PDFs
The Preferences dialog box defines a default page layout and customizes your application in many other ways. For
viewing PDFs, examine the preferences options for Documents, General, Multimedia, and Page Display.
37
The preferences settings control how the application behaves whenever you use it; they are not associated with any
particular PDF document.
Note: If you install any third-party plug-ins, set these preferences using the Third-Party Preferences menu item.
More Help topics
“3D preferences” on page 400
“Multimedia preferences” on page 42
“Setting accessibility preferences” on page 279
Documents preferences
Open Settings
Restore Last View Settings When Reopening Documents Determines whether documents open automatically to the
last viewed page within a work session.
Open Cross-document Links In Same Window Closes the current document and opens the document being linked to
in the same window, minimizing the number of windows open. If the document being linked to is already open in
another window, the current document is not closed when you click a link to the open document. If you do not select
this option, a new window opens each time you click a link to a different document.
Allow Layer State To Be Set By User Information Allows the author of a layered PDF document to specify layer
visibility based on user information.
Allow Documents To Hide The Menu Bar, Toolbars, And Window Controls Allows the PDF to determine whether the
menu bar, toolbar, and window controls are hidden when the PDF is opened.
Documents In Recently Used List Sets the maximum number of documents listed in the File menu.
Last updated 9/30/2011
Page 44

USING ACROBAT 9 PRO EXTENDED
Workspace
Remember Files In Organizer History For Specifies how long PDF files remain in the History list.
Save Settings
Automatically Save Document Changes To Temporary File Every _ Minutes Determines how often Acrobat
automatically saves changes to an open document.
Save As Optimizes For Fast Web View Restructures a PDF document for page-at-a-time downloading from web
servers.
PDF/A View Mode
View Documents In PDF/A Mode Specifies when to use this viewing mode: Never, or Only For PDF/A Documents.
Examine Document
Examine Document Examines the PDF for items that may not be apparent, such as metadata, file attachments,
comments, and hidden text and layers. The examination results appear in a dialog box, and you can remove any type
of item that appears there.
• Examine Document When Closing Document (Not selected by default.)
• Examine Document When Sending Document By Email (Not selected by default.)
Adjust Filename When Applying Redaction Marks Specifies a prefix or suffix to use when saving a file to which
redaction marks have been applied.
38
Full Screen preferences
Full Screen Setup
Current Document Only Specifies whether or not the display is limited to a single PDF.
Fill Screen With One Page At A Time Sets the page view to the maximum screen coverage by a single page.
Alert When Document Requests Full Screen Displays a message before going into Full Screen mode. Selecting this
option overrides a previous selection of Do Not Show This Message Again in that message.
Which Monitor To Use Specifies the monitor on which full-screen display appears (for users with multiple-monitor
configurations).
Full Screen Navigation
Escape Key Exits Lets you exit Full Screen mode by pressing the Esc key. If this option is not selected, you can exit by
pressing Ctrl+L.
Show Navigation Bar Shows a minimal navigation toolbar regardless of the document settings.
Left Click To Go Forward One Page; Right Click To Go Back One Page Lets you page through an Adobe PDF document
by clicking the mouse. You can also page through a document by pressing Return, Shift-Return (to go backward), or
the arrow keys.
Loop After Last Page Lets you page through a PDF document continuously, returning to the first page after the last.
This option is typically used for setting up kiosk displays.
Advance Every _ Seconds Specifies whether to advance automatically from page to page every set number of seconds.
You can page through a document using mouse or keyboard commands even if automatic paging is selected.
Last updated 9/30/2011
Page 45

USING ACROBAT 9 PRO EXTENDED
Workspace
Full Screen Appearance
Background Color Specifies the window’s background color in Full Screen mode. You can select a color from the color
palette to customize the background color.
Mouse Cursor Specifies whether to show or hide the pointer when Full Screen mode is in operation.
Full Screen Transitions
Ignore All Transitions Removes transition effects from presentations that you view in Full Screen mode.
Default Transition Specifies the transition effect to display when you switch pages in Full Screen mode and no
transition effect has been set for the document.
Direction Determines the flow of the selected default transition on the screen, such as Down, Left, Horizontal, and so
forth. The available options vary according to the transition. If no directional options affect the selected default
transition, this option is not available.
Navigation Controls Direction Mimics the user’s progress through the presentation, such as transitioning from top to
bottom when the user proceeds to the next page and from bottom to top when the user backtracks to the previous page.
Available only for transitions with directional options.
General preferences
39
Basic Tools
Use Single Key Accelerators To Access Tools Enables you to select tools with a single keystroke. This option is
unselected by default.
Create Links From URLs Specifies whether links that weren’t created with Acrobat are automatically identified in the
PDF document and become clickable links.
Make Hand Tool Select Text & Images Enables the Hand tool to function as the Select tool when it hovers over text in
an Adobe PDF.
Make Hand Tool Read Articles Changes the appearance of the Hand tool pointer when over an article thread. Upon the
first click, the article zooms to fill the document pane horizontally; subsequent clicks follow the thread of the article.
Make Hand Tool Use Mouse-wheel Zooming Changes the action of the mouse wheel from scrolling to zooming.
Make Select Tool Select Images Before Text Changes the order in which the Select tool selects.
Use Fixed Resolution For Snapshot Tool Images Sets the resolution used to copy an image captured with the Snapshot
tool.
Warnings
Do Not Show Edit Warnings Disables warning boxes that would normally appear when you delete items such as links,
pages, page thumbnails, and bookmarks.
Reset All Warnings Restores default settings for warnings.
Print
Show Page Thumbnails In Print Dialog Controls the print preview display in the Print dialog box. Deselecting this
option speeds up the preview.
Emit Passthrough PostScript When Printing Enables Adobe® PostScript® XObjects in the PDF file to be emitted when
that PDF file is printed to a PostScript printer.
Last updated 9/30/2011
Page 46

USING ACROBAT 9 PRO EXTENDED
Workspace
Application Startup
Show Splash Screen Determines whether the application startup screen appears each time the application starts.
Use Only Certified Plug-Ins Ensures that only Adobe-certified third-party plug-ins are loaded. The notation Currently
in Certified Mode indicates either Yes or No depending on its status.
Check 2D Graphics Accelerator (Windows only) (Appears only if your computer hardware supports 2D graphics
acceleration.) When selected, allows hardware acceleration usage when the first document is opened. When
deselected, hardware acceleration usage starts after the first document is opened. This option can slow startup time, so
it is unselected by default.
Note: This option is available only when the option Use 2D Graphics Acceleration in the Page Display preferences is
selected.
More Help topics
“Change updating preferences” on page 56
Page Display preferences
Default Layout And Zoom
Page Layout Sets the page layout used for scrolling when you first open a document. The default setting is Automatic.
The page layout setting in File > Properties > Initial View overrides the page layout setting in Preferences.
40
Zoom Sets the magnification level for PDF documents when they are first opened. This value overrides document
settings. The default setting is Automatic.
Resolution
Use System Setting Uses the system settings for monitor resolution.
Custom Resolution Sets the monitor resolution.
Rendering
Smooth Text Specifies the type of text-smoothing to apply.
Smooth Line Art Applies smoothing to remove abrupt angles in lines.
Smooth Images Applies smoothing to minimize abrupt changes in images.
Use Local Fonts Specifies whether the application uses or ignores local fonts installed on your system. When
deselected, substitute fonts are used for any font not embedded in the PDF. If a font cannot be substituted, the text
appears as bullets and an error message appears.
Enhance Thin Lines When selected, clarifies thin lines in the display to make them more visible.
Use Page Cache Places the next page in a buffer before the current page is viewed to reduce the time required to page
through a document.
Use 2D Graphics Acceleration (Windows only) (Appears only if your computer hardware supports 2D graphics
acceleration.) Speeds up zooming, scrolling, and redrawing of page content, and speeds the rendering and
manipulation of 2D PDF content. This option is selected by default.
Note: If this option is not available in the Page Display preferences, you may need to update your GPU card driver to
enable this hardware feature. Contact your card vendor or computer manufacturer for an updated driver.
Last updated 9/30/2011
Page 47

USING ACROBAT 9 PRO EXTENDED
Workspace
Page Content And Information
Show Large Images Displays large images. If your system is slow to display image-intensive pages, deselect this option.
Use Smooth Zooming (Windows only) When deselected, turns off animation effects, which improves performance.
Show Art, Trim, & Bleed Boxes Displays any art, trim, or bleed boxes defined for a document.
Show Transparency Grid Displays the grid behind transparent objects.
Use Logical Page Numbers Enables the Number Pages command for matching the position of the page in the PDF to
the number printed on the page. A page number, followed by the page position in parentheses, appears in the Page
Navigation toolbar and in the Go To Page and Print dialog boxes. For example, i (1 of 1) if the printed number of the
first page is i. If this option is not selected, pages are numbered with arabic numbers starting at 1. Selecting this option
helps prevent unexpected behavior when clicking Back or Go Back in your web browser.
Always Show Document Page Size Displays the page measurements beside the horizontal scroll bar.
Use Overprint Preview Specifies whether Overprint Preview mode is on only for PDF/X files, never on, always on, or
set automatically. When set to Automatic, if a document contains overprints, then Overprint Preview mode is
activated. The Overprint Preview mode lets you see (on-screen) the effects of ink aliasing in the printed output. For
example, a printer or service provider could create an ink alias if a document contains two similar spot colors and only
one is required.
41
Reference XObjects View Mode
Show Reference XObject Targets Specifies the type of documents in which reference XObjects can be viewed.
Location Of Referenced Files (Optional) Specifies a location for the referenced documents.
Playing multimedia
Play multimedia
PDFs can include many types of multimedia files, including (but not limited to) Flash®, QuickTime, mp3, MPEG, and
Windows® Media files. You can play these files on a page or activate them from a link, bookmark, form field, or page
action. Each multimedia file includes a play area from which the media can be activated. The play area typically appears
on the PDF page as an image or a rectangle, but can also be invisible.
Any computer that has Adobe Reader® can play these files.
• Media files created in Flash (FLV format)
• Media files that comply with the H.264 standard for video compression
Media files in other formats require the necessary hardware and software to play.
To help protect your computer from viruses, Acrobat asks you if you want to play multimedia files from unverified
sources. You can change this default behavior in the Multimedia Trust preferences.
❖ Using the Hand tool or the Select tool, click the play area of the video or sound file. When the pointer is positioned
over the play area, it changes to the play mode icon
.
More Help topics
“Security alerts” on page 226
Last updated 9/30/2011
Page 48

USING ACROBAT 9 PRO EXTENDED
Workspace
Multimedia preferences
Two types of PDF files require you to set multimedia preferences:
• PDF files created in Acrobat 8 and earlier
• PDF files created in Acrobat 9 and later in which the multimedia files were added by using the legacy placement
method
These files require you to identify an additional media player with which to run the multimedia.
Open the Preferences dialog box, and then select Multimedia (Legacy) from the left side of the dialog box.
Player Options Choose the format in which you want to run legacy media content: QuickTime, Flash, Windows
Media, or Windows built-in player.
Accessibility Options Specify if you want special features (if available) to appear when media plays, such as subtitles
and dubbed audio. Specify the preferred language for the media, in case multiple languages are available.
Multimedia Trust preferences
Multimedia files within PDFs sometimes need additional resources to play. For example, some files require resources
from the Internet, such as a multimedia player. You can set trust settings to determine whether multimedia content is
allowed to use external resources.
42
• To set trust settings for playing content created with Acrobat 9, use Trust Manager preferences.
• To set trust settings for playing content created with earlier versions of Acrobat, use Multimedia Trust (Legacy)
preferences.
Both of these settings are available in the Preferences dialog box.
More Help topics
“Restrict URLs and attachments in PDFs” on page 229
Multimedia Trust (Legacy)
In Multimedia Trust preferences, you can specify whether to play embedded multimedia files in trusted or nontrusted
PDF documents. A trusted document is a document that you or an author you trust has approved. By setting your
permissions to play multimedia only in trusted documents, you can prevent programs, macros, and viruses from
potentially damaging your computer.
The list of trusted documents and authors is stored internally and can’t be viewed. If you add a certified document to
the list, both the document and the certificate of the author are added to the list of trusted documents. All documents
that this author certified are trusted. (Trusted documents also include PDFs from authors in your list of trusted
identities.)
In the Preferences dialog box, select Multimedia Trust (Legacy) from the Categories.
Display Permissions For Choose to set permissions for either trusted documents or other (nontrusted) documents.
Allow Multimedia Operations Select this option to allow media clips to be played. When selected, you can change the
permission settings for a particular player and enable options that determine the appearance of the media during
playback.
Change Permission For Selected Multimedia Player To Select the player from the list, and then choose one of the
following options from the menu:
• Always Allows the player to be used without prompting.
Last updated 9/30/2011
Page 49

USING ACROBAT 9 PRO EXTENDED
Workspace
• Never Prevents the player from being used.
• Prompt Asks the user whether the player can be used. If you select this option and allow the player to play the
media in a particular document, that document becomes trusted.
Allow Playback Options Three playback options enable you to control how the video is displayed.
• Allow Playback In A Floating Window With No Title Bars Select this option to run the video without a title bar. The
result is that no title or close buttons are displayed.
• Allow Document To Set Title Text In A Floating Playback Window Select this option to display a title bar when the
video plays back in a floating window. To edit the text in the title bar, double-click the video with the Select Object
Tool (Tools > Advanced Editing > Select Object Tool). Select Edit Rendition, and then on the Playback Location tab,
select Show Title Bar. Add the title bar text in the Title text field.
• Allow Playback In Full-Screen Window This option automatically plays the video in full screen mode when it is
played back. Full screen display can conflict with end-user security settings.
Clear Your List Of Trusted Documents Deletes the current list of trusted documents and authors. Use this option to
prevent media from playing in documents that were previously trusted documents or created by trusted authors. This
option is available only when a PDF that contains multimedia is open.
43
Adjusting PDF views
Adjust page magnification
Tools on the Select & Zoom toolbar can change the magnification of PDF documents. Only some of these tools appear
on the default view of the toolbar. You can see all the tools by right-clicking the Select & Zoom toolbar and choosing
either individual tools, Show All Tools, or More Tools and then selecting individual tools.
A B C D FE G H I J
All zoom tools
A. Marquee Zoom tool B. Dynamic Zoom tool C. Zoom Out button D. Zoom In button E. Zoom Value menu button F. Actual Size button
G. Fit Width button H. Fit Page button I. Pan & Zoom Window tool J. Loupe tool
• The Marquee Zoom tool works in a few different ways. You can use it to drag a rectangle around a portion of the
page that you want to fill the viewing area. Or, simply clicking the Marquee Zoom tool increases the magnification
by one preset level, centering on the point where you clicked. To decrease the magnification by one preset level,
Ctrl-click the Marquee Zoom tool.
• The Dynamic Zoom tool zooms in when you drag it up the page and it zooms out when you drag down. If you use
a mouse wheel, this tool zooms in when you roll forward and zooms out when you roll backward.
• Zoom In and Zoom Out buttons change the document magnification by preset levels.
• The Zoom Value option changes the page view according to a percentage you type in or select from a pop-up menu.
• Actual Size displays the page at 100% magnification.
• Fit Width adjusts the magnification so that the PDF fills the document pane horizontally.
• Fit Page adjusts the magnification so that one page fills the document pane vertically.
Last updated 9/30/2011
Page 50

USING ACROBAT 9 PRO EXTENDED
Workspace
• The Pan & Zoom Window tool adjusts the magnification and position of the view area to match the area in an
adjustable rectangle in the Pan & Zoom window’s thumbnail view of the page.
• The Loupe Tool window displays a magnified portion of the PDF that matches the area in an adjustable rectangle
on the document pane.
Resize a page to fit the window
• To resize the page to fit entirely in the document pane, choose View > Zoom > Fit Page.
• To resize the page to fit the width of the window, choose View > Zoom > Fit Width. Part of the page may be out of
view.
• To resize the page to fit the height of the window, choose View > Zoom > Fit Height. Part of the page may be out
of view.
• To resize the page so that its text and images fit the width of the window, choose View > Zoom > Fit Visible. Part
of the page may be out of view.
To see keyboard shortcuts for resizing the document, open the View menu.
Show a page at actual size
❖ Choose View > Zoom > Actual Size.
The actual size for a PDF page is typically 100%, but the document may have been set to another magnification level
when it was created.
44
Change the magnification with zoom tools
❖ Do one of the following:
• Click the Zoom In button or the Zoom Out button in the toolbar.
• Enter a magnification percentage in the Select & Zoom toolbar, either by typing or choosing from the pop-up
menu.
• Drag the Marquee Zoom tool to define the area of the page that you want to fill the document pane.
• Drag the Dynamic Zoom tool up to increase the magnification and down to decrease magnification.
When the Marquee Zoom tool is selected, you can Ctrl-click or Ctrl-drag to zoom out. Holding down Shift switches
temporarily from the Marquee Zoom tool to the Dynamic Zoom tool.
Change the magnification with the Pan & Zoom Window tool
1 Choose Tools > Select & Zoom > Pan & Zoom Window, or select the Pan & Zoom Window tool on the Select
& Zoom toolbar.
2 Do any of the following:
• Drag the handles of the box in the Pan & Zoom window to change the document magnification.
• Drag the center of the box to pan across the area you want to see.
• Click the navigation buttons to move to a different page.
• Enter a value in the zoom text box, or click the plus or minus buttons to increase or decrease the
magnification by preset levels.
Last updated 9/30/2011
Page 51

USING ACROBAT 9 PRO EXTENDED
Workspace
Change the magnification with the Loupe tool
1 Choose Tools > Select & Zoom> Loupe, or select the Loupe tool on the Select & Zoom toolbar, if it is displayed.
2 Click the area of the document you want to view in closer detail. A rectangle appears in the document,
corresponding to the area shown in the Loupe Tool window. You can drag or resize the rectangle to change the
Loupe tool view.
3 To change the magnification of the Loupe tool, do any of the following:
• Drag the slider.
• Click the plus or minus buttons.
• Enter a value in the zoom text box.
45
Use the Loupe tool to view a magnified area of the document.
Note: You can change the color of the Loupe tool rectangle, click the Line Color pop-up menu in the lower-right corner of
the Loupe Tool window, and select a new color.
Change the magnification by using a page thumbnail
1 Click the Pages button on the left side of the window to view the page thumbnails.
2 Locate the thumbnail for the current page. Then position the pointer over the lower-right corner of the page-view
box until the pointer changes into a double-headed arrow.
3 Drag the corner of the box to reduce or expand the view of the page.
4 As needed, move the pointer over the zoom box frame within the thumbnail until it changes into a Hand icon. Then
drag the frame to see a different area of the page in the document pane.
A page-view box in a page thumbnail indicates the area of the page currently showing in the document pane.
Last updated 9/30/2011
Page 52

USING ACROBAT 9 PRO EXTENDED
Workspace
Change the default magnification
1 In the Preferences dialog box under Categories, select Page Display.
2 Open the Zoom pop-up menu and choose a default magnification level.
Display off-screen areas of a magnified page
When you zoom in to a high magnification, you may be able to see only part of a page. You can shift the view to show
other areas of the page without changing the magnification level.
❖ Do either of the following:
• Use the vertical scroll bars to move up and down the pages or the horizontal scroll bars to move across the page.
• Select the Hand tool in the Select & Zoom toolbar, or choose Tools > Select & Zoom > Hand Tool, and drag to move
the page, as if moving a piece of paper on a table.
More Help topics
“About PDF layers” on page 351
Set the page layout and orientation
Changing the page layout is especially useful when you want to zoom out to get an overview of the document layout.
You can use the following page layouts when viewing PDF documents:
46
Single Page Displays one page at a time, with no portion on other pages visible.
Single Page Continuous Displays pages in a continuous vertical column that is one page wide.
Two-Up Displays each two-page spread with no portion of other pages visible.
Two-Up Continuous Displays facing pages side by side in a continuous vertical column.
If a document has more than two pages, you can ensure that the first page appears alone on the right side of the
document pane. Select either Two-Up or Two-Up Continuous. Also select View > Page Display > Show Cover Page
During Two-Up.
Single Page, Single Page Continuous, Two-Up, Two-Up Continuous page layouts
Set the page layout of an open PDF
• To see only one page at a time, choose View > Page Display > Single Page.
• To see two pages at a time, side by side, choose View > Page Display > Two-Up.
• To scroll down continuously through one page after another, choose View > Page Display > Single Page
Continuous.
• To scroll down continuously through two pages at a time, choose View > Page Display > Two-Up Continuous.
• To display the first page of a multipage document alone on the right side, first specify either the Two-Up or Two-
Up Continuous option. Then choose View > Page Display > Show Cover Page During Two-Up.
Last updated 9/30/2011
Page 53

USING ACROBAT 9 PRO EXTENDED
Workspace
You can also display buttons for each of these options in the Display Pages toolbar by choosing View > Toolbars >
More Tools, and selecting them in the More Tools dialog box.
Note: In Single Page layout, choosing Edit > Select All selects all text on the current page. In other layouts, Select All selects
all text in the PDF.
Rotate the page view
You can change the view of a page in 90° increments. This changes the view of the page, not its actual orientation. You
can’t save this change.
❖ Choose View > Rotate View > Clockwise or Counterclockwise, or click the Rotate Clockwise button or the
Rotate Counterclockwise button in the toolbar.
Note: To save the rotation with the document, choose Document > Rotate Pages.
Change the default page layout (initial view)
You specify the default initial view settings in the Preferences dialog box. (See “Set preferences” on page 24.)
1 In the Preferences dialog box under Categories, select Page Display.
2 Open the Page Layout menu and choose Automatic, Single Page, Single Page Continuous, Two-Up, or Two-Up
Continuous.
Note: The PDF opens with the page layout specified in Preferences unless a different page layout is specified in Document
Properties (File > Properties > Initial View). The Document Properties setting overrides the Preferences setting. If using
Document Properties, be sure to save and close the document for the change to take effect. Acrobat users can change the
initial view, unless security settings prevent changes. Reader users cannot change the initial view.
47
More Help topics
“Opening PDFs” on page 23
“View document properties” on page 347
Use split-window view
You can view a PDF with the document pane divided into two panes (Split command) or four panes (Spreadsheet Split
command).
With Split view, you can scroll, change the magnification level, or turn to a different page in the active pane without
affecting the other pane.
The Spreadsheet Split view is useful if you want to keep column headings and row labels visible while scrolling through
a large spreadsheet or table. In this mode, changing the magnification in one pane changes the magnification in all
panes. Also, scrolling is coordinated between the panes: scrolling a pane horizontally also scrolls the pane above or
below it; scrolling vertically also scrolls the pane to the left or right of that pane.
1 Start creating the type of split view you want:
• To split the view into two panes, choose Window > Split, or drag the gray box above the vertical scroll bar.
• To split the view into four panes with synchronized scrolling and zoom levels, choose Window > Spreadsheet Split.
2 Drag the splitter bars up, down, left, or right to resize the panes, as needed.
3 Adjust the zoom level, as needed:
• In Split view, click a pane to make it active, and change the zoom level for that pane only.
Last updated 9/30/2011
Page 54

USING ACROBAT 9 PRO EXTENDED
Workspace
• In Spreadsheet Split view, adjust the zoom level to change the displays in all four panes.
4 Scroll, as needed:
• In Split view, click a pane to make it active, and scroll to change that pane only.
• In Spreadsheet Split view, click a pane, and scroll vertically to change the views in the active pane and the pane
beside it. Scroll horizontally to change the views in the active pane and the pane above or below it.
5 To restore single-pane view, choose Window > Remove Split.
View a document in multiple windows
You can create multiple windows for the same document using the New Window command. New windows have the
same size, magnification, and layout as the original window and open at the same page and on top of the original
window. When you open a new window, Acrobat adds the suffix 1 to the original filename and assigns the suffix 2 to
the new window. You can open multiple windows with the suffix incrementing with each new window. Closing a
window causes the remaining open windows to be renumbered sequentially; that is, if you have five windows open and
you close the third window that you opened, the windows are renumbered with the suffixes 1 to 4.
Note: This feature is not available when PDFs are viewed in a browser.
Open a new window
❖ Select Window > New Window.
48
Close a window
❖ Click the close box in the window. You are prompted to save any changes. Closing a window does not close a
document if more than one window is open.
Close all windows for a document
❖ Choose File > Close. You are prompted to save any changes before each window is closed.
Display PDFs in Line Weights view
The Line Weights view displays lines with the weights defined in the PDF. When Line Weights view is off, it applies a
constant stroke width (1 pixel) to lines, regardless of zoom. When you print the document, the stroke will print at the
true width.
❖ Choose View > Line Weights. To turn off Line Weights view, choose View > Line Weights again.
Note: You cannot turn off Line Weights view when viewing PDFs within a web browser.
Grids, guides, and measurements
View grids
Use grids to accurately line up text and objects in a document. When turned on, the grid is visible over the document.
The Snap To Grid option aligns an object with the nearest grid line when you move the object.
View or hide the grid
❖ Choose View > Grid. A check mark appears next to the command name when the grid is displayed.
Last updated 9/30/2011
Page 55

USING ACROBAT 9 PRO EXTENDED
Workspace
Turn the Snap To Grid option on or off
❖ Choose View > Snap To Grid. A check mark appears next to the command name when the option is turned on.
Change the grid appearance
1 In the Preferences dialog box under Categories, select Units & Guides.
2 To change grid settings, do any of the following:
• To change the spacing between grid lines, enter a value for Width Between Lines and Height Between Lines.
• To change the origin of the grid, enter a value for Grid Offset From Left Edge and Grid Offset From Top Edge.
• To change the number of subdivisions within each grid square, enter a value for Subdivisions. Subdivision lines are
lighter than grid lines.
• To change the color of the grid lines, click the Grid Line Color square and choose a new color from the Color panel.
Create ruler guides
Horizontal and vertical rulers let you check the size of objects in your documents. You can also create guides in your
document, which are especially useful for lining up objects, such as form fields. You can change the unit of
measurement and color used in the ruler.
49
Create new ruler guides
1 Choose View > Rulers.
2 Do one of the following:
• Drag down from the horizontal ruler to create a horizontal guide, or drag to the right of the vertical ruler to create
a vertical guide.
• Double-click a location on the horizontal ruler to create a vertical guide, or double-click a location on the vertical
ruler to create a horizontal guide.
Show or hide guides
❖ Choose View > Guides.
Move or delete ruler guides
❖ Click the guide to select it, and then drag it to a new location, or press Delete. To delete all guides, right-click in the
ruler area and choose Clear All Guides or Clear Guides On Page.
Change guide colors
1 In the Preferences dialog box under Categories, select Units & Guides.
2 Click the Guide Color square and choose a new color from the Color pop-up menu.
Measure the height, width, or area of objects
Use the measuring tools to measure distances and areas of objects in PDF documents. The measuring tools are useful
for showing the distances and areas associated with objects in a form or computer-aided design (CAD) drawing. You
can also use these tools to measure certain areas of a document before sending it to a professional printer. The
measuring tools are available to Reader users only if the PDF creator enables measuring functionality.
Last updated 9/30/2011
Page 56

USING ACROBAT 9 PRO EXTENDED
Workspace
When you use a measuring tool, the Measurement Info panel shows information about the measurement, such as
current measurement, delta values, and scale ratio.
A
B
C
Measuring tools
A. Measuring toolbar B. Object being measured C. Measurement Info panel
1 Choose Tools > Analysis > Measuring Tool.
2 To measure areas of your PDF document, select any of the following measurement types:
• Select the Distance tool to measure the distance between two points. Click the first point, move the pointer to
the second point, and click again.
• Select the Perimeter tool to measure a set of distances between multiple points. Click each point you want to
measure. Then, double-click the last point.
• Select the Area tool to measure the area within the line segments that you draw. Click each point you want to
measure. After you have clicked at least two points, click the first point to complete the area measurement.
3 While measuring objects, do any of the following:
• To snap the measurement to the end of a line, select Snap To Paths .
• To snap the measurement to the endpoint of a line, select Snap To Endpoints .
• To snap the measurement to the midpoint of a line, select Snap To Midpoints .
• To snap the measurement to the intersection of multiple lines, select Snap To Intersections .
• To constrain the measurement lines to increments of 45º, hold down the Shift key.
• To discontinue a measurement, right-click and choose Cancel Measurement.
• To delete a measurement markup, click it with the Measurement Tool and press Delete.
50
More Help topics
“Change the look of your comments” on page 165
Measuring tool options
Use the right-click menu to set measuring tool options.
Change Scale Ratio Change the scaling ratio (such as 3:2) and unit of measurement on the drawing areas.
Change Markup Label Add or change text that appears with the measurement.
Last updated 9/30/2011
Page 57

USING ACROBAT 9 PRO EXTENDED
Workspace
Disable/Enable Measurement Markup When enabled, the measurement lines you draw are added to the PDF. When
disabled, the measurement lines disappear when you measure another object or select another tool.
Turn Ortho On/Off When enabled, measurement lines are orthographic only.
Show/Hide Rulers Show or hide vertical and horizontal rulers on the page. (Has the same effect as choosing View >
Rulers.)
Snap To Page Content/Don’t Snap To Page Content Turn all Snap Enables on or off.
Export Measurement Markup To Excel Save the information for all the measurements in your PDF to a CSV file.
Preferences Open the Measurement (2D) preferences.
Measuring preferences
Change the 2D Measuring preferences to determine how 2D data is measured.
Note: In Reader, Measuring preferences apply to PDFs that have commenting enabled.
Use Scales And Units From Document (When Present) When enabled, measurements based on the units generated
from the original document, if present, are used. Deselect this option to specify the units of measurements manually.
Use Orthographic Lines When enabled, measurement lines are orthographic only.
Measuring Line Color Specifies the color or the line that appears while drawing.
51
Enable Measurement Markup When enabled, the measurement lines you draw are added to the PDF. When disabled,
the measurement lines disappear when you measure another object or select another tool. You can use the default
measurement labels or specify your own label.
Use Default Leader Length (Distance Tool only) When deselected, each time you draw a distance measurement, you
move the mouse to determine the leader length.
Default Line Ending (Distance Tool only) Specifies the appearance of the line endings in distance measurements.
Caption Style (Distance Tool only) Specifies whether the distance measurement caption is Inside or on Top of the
measurement line.
Default Leader Length (Distance Tool only) Specifies the length of the line leader that appears on one side of the
measurement points.
Default Leader Extension Above Line (Distance Tool only) Specifies the length of the leader extension that appears
above the measurement line.
Default Leader Offset From Line Points (Distance Tool only) Specifies the amount of blank space that appears between
the measurement points and the leader.
2D Snap Settings Specify snap behavior. Sensitivity indicates how close the pointer must be to the item being snapped
to. Snap Hint Color specifies the color of the snap line that appears when you hold the pointer over the object.
View cursor coordinates
The Cursor Coordinates show the coordinate position of the pointer within the document pane. The position
numbering begins in the upper-left corner of the document. Cursor Coordinates also shows the width and height of a
selected object as you resize it.
View x and y coordinates
1 Choose View > Cursor Coordinates.
2 Move the mouse pointer to view x and y coordinates.
Last updated 9/30/2011
Page 58
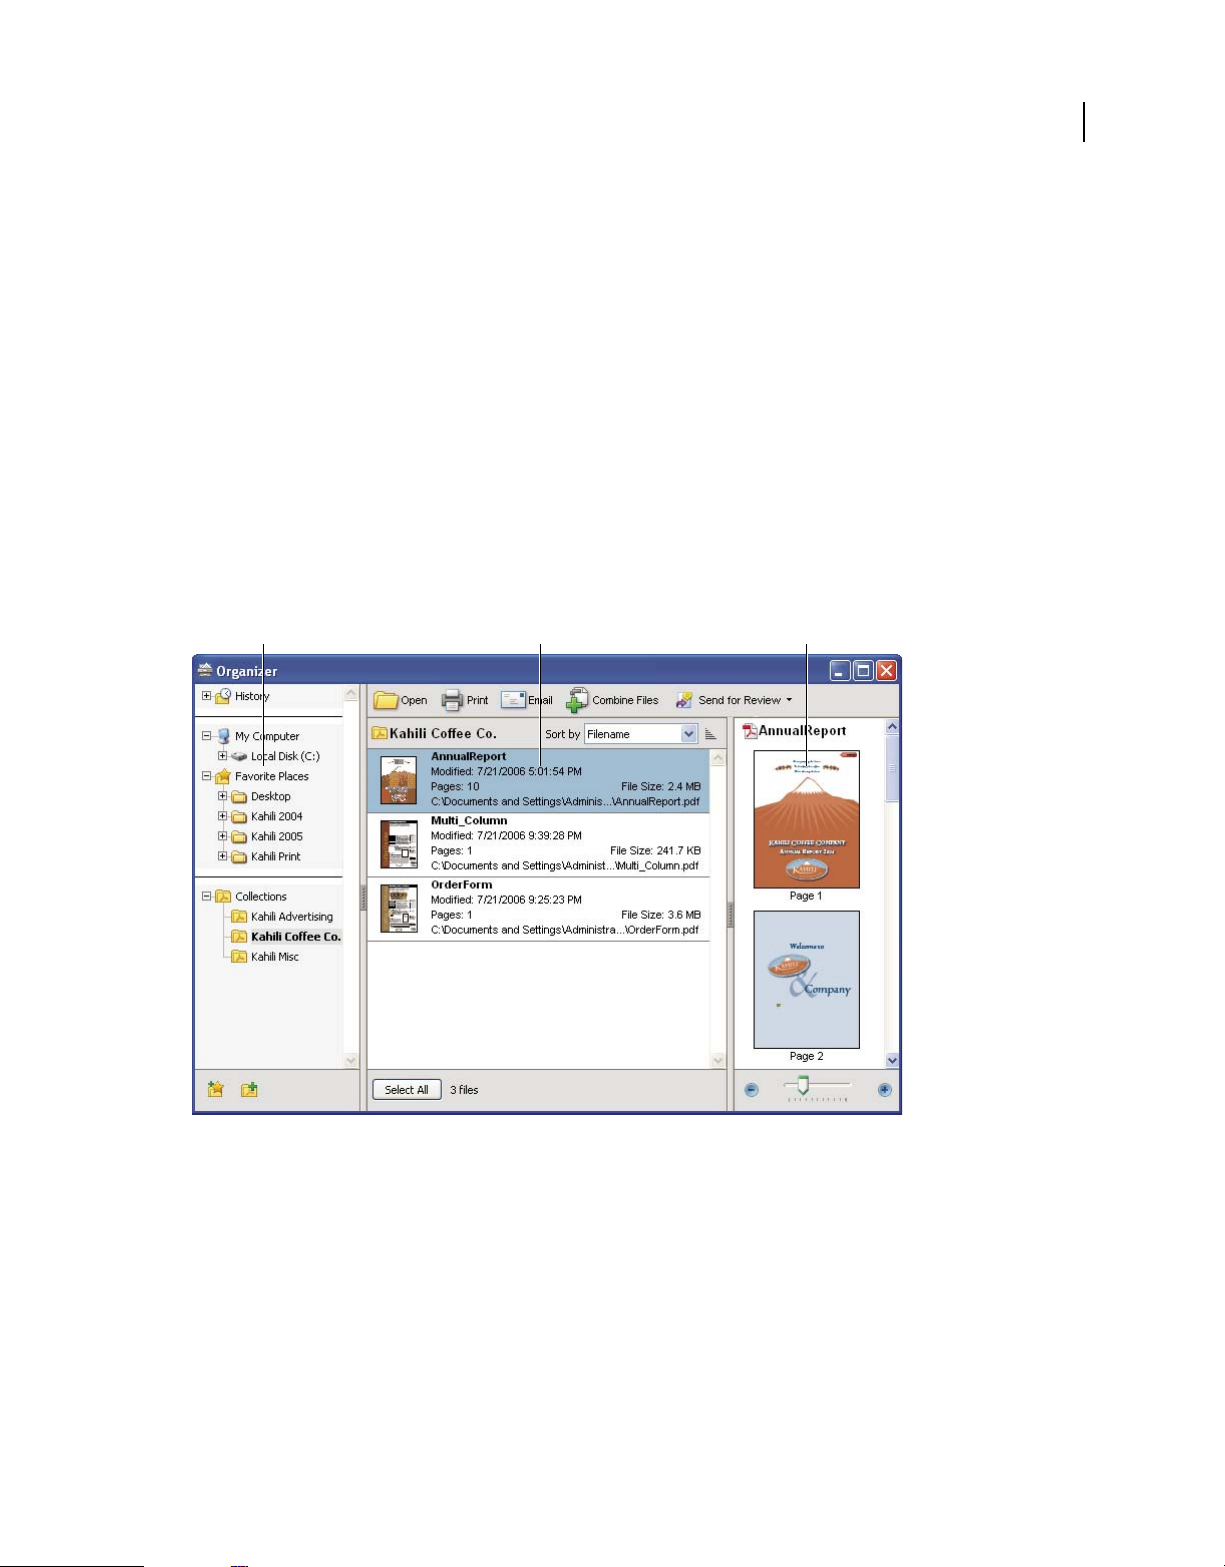
USING ACROBAT 9 PRO EXTENDED
Workspace
Change the Cursor Coordinates measurement units
1 In the Preferences dialog box under Categories, select Units & Guides.
2 Choose a different unit of measurement from the Page & Ruler Units menu.
Organizer
Organizer window overview
Organizer helps you find PDFs that you’ve previously opened and PDFs that you’ve organized into collections and
favorites. With Organizer, you can see thumbnail images of PDF pages to quickly identify files. Use Organizer to
organize related PDFs without changing their location in your file structure. You can also use Organizer to quickly
browse, find, and sort PDFs that you recently viewed.
The Organizer and Organizer-related commands are available in the File menu. After you select one or more files
within the Organizer, you can start one of several different tasks using the buttons above the file list.
ABC
52
Organizer window in Windows
A. Categories pane B. Files pane C. Pages pane
Categories pane
The categories pane of the Organizer window is divided vertically into sections that contain categories. These items
can help you locate and organize PDFs that reside on your computer, on a network, and on the web.
History Contains subcategories that list all the PDFs that you’ve opened during a specified period of time. You can’t
change the subcategory names or manually add PDFs to the History, which is updated each time you open a PDF and
as time passes. You can, however, clear the entire history by using the Clear History button in the files pane. You can
also specify the maximum length of the file history or turn it off. Open the Preferences dialog box and under
Documents, select a value for Remember Files In Organizer History For.
Last updated 9/30/2011
Page 59
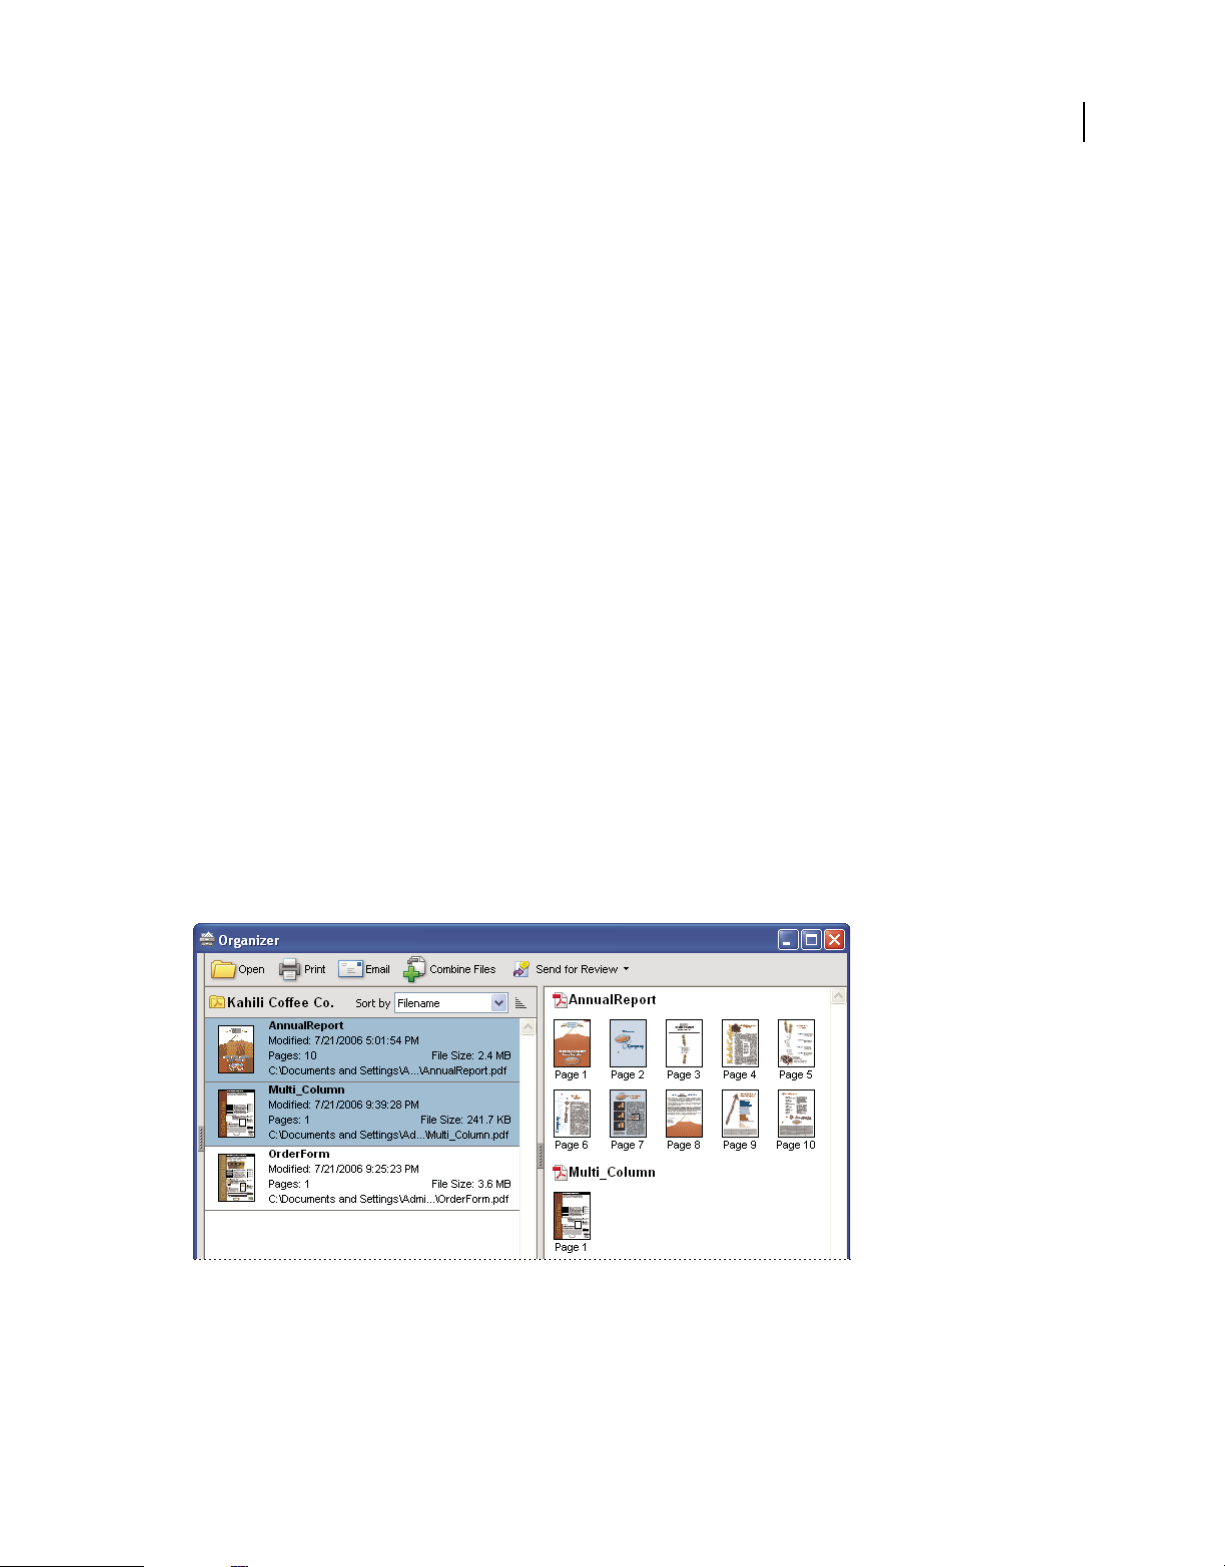
USING ACROBAT 9 PRO EXTENDED
Workspace
My Computer Lists the hard drives and folders in their current hierarchy. This category is especially useful if you know
where a particular PDF resides.
Favorite Places Lists any folders, network locations, and web directories that you’ve specified as favorite destinations.
This category functions like bookmarks or favorite destinations used for quick access in a web browser. In this case,
however, the destinations are folders or hard drives that contain PDFs. You can add or remove destinations from the
Favorite Places list, but you can’t edit the destination names.
Collections Contains collection folders that list all PDFs that you’ve associated with each particular collection folder.
Each collection folder can point to multiple PDFs no matter where each PDF is located. For example, a single collection
folder can list PDFs that are located in different folders on your computer, on a network, and on the web. You can
change each collection folder name, add new collection folders, and add PDFs to each collection folder.
Note: Collections and PDF Portfolios both involve multiple PDFs, but in different ways. A PDF Portfolio is itself a PDF
file that can be composed of multiple files and that exists in a folder on your computer. For example, you can attach a
PDF Portfolio to an email message. Collections are more like reminders that help you find related files that are stored in
different locations on your computer.
Files pane
The files pane in the Organizer window lists the PDFs that are within the subcategory or folder selected in the
categories pane; each PDF listing shows the filename, modification date, page number, file size, location, and a
thumbnail image of the first page. You can sort the list by filename, metadata information, number of pages, file size,
modification date, and date last opened.
53
Use the buttons at the top of the Organizer window to open, print, email, or combine one or more selected PDFs; in
addition, you can send a selected PDF for review or approval.
Pages pane
The pages pane of the Organizer window displays thumbnails for every page of all PDF files that are selected in the files
pane. The Zoom slider and buttons at the bottom of the pages pane let you adjust the size of the page thumbnails.
Selecting a PDF (left) reveals a thumbnail for each page in the pages pane (right).
Adjust the Organizer window
You can make changes to your view of the Organizer.
Last updated 9/30/2011
Page 60

USING ACROBAT 9 PRO EXTENDED
Workspace
More Help topics
“Other options for combining files” on page 122
“Starting a review” on page 154
Display the Organizer window
❖ Choose File > Organizer > Open Organizer.
It isn’t necessary to open the Organizer window if you want to open a PDF in a collection, create a new collection, add
an open PDF to a collection, or open a PDF from your history of opened PDFs. Choose File > Organizer or File >
History to access commands that let you do all of these things.
Resize the Organizer and its panes
• To resize a pane relative to the other panes, drag the vertical bar that separates two panes.
• To resize the Organizer window, drag the left, right, or bottom edge of the window.
Sort the files pane list
1 If necessary, select a subcategory or folder in the categories pane to display PDFs in the files pane.
2 In the files pane, do any of the following:
• To sort the list of PDF files according to a particular property, choose a property from the Sort By menu.
• To change the sorting direction, click the Ascending Sort Order button or the Descending Sort Order button
to the right of the Sort By menu.
• To view the location of the selected PDFs, right-click, and choose Show In Windows Explorer.
54
Organize PDF collections
You can manage PDF collections in the Organizer window.
Add a PDF to a collection
❖ Do any of the following:
• Right-click the collection, choose Add Files, select one or more PDFs, and click Add.
• Right-click the PDF in the files pane, and choose Add To A Collection > [collection name].
• Drag a PDF from the Desktop or a folder to the collection in the categories pane.
• After selecting a subcategory in the History, My Computer, or Favorite Places category, drag a PDF from the files
pane to the desired collection.
• In Acrobat, open the PDF and choose File > Organizer > Add To A Collection. Then either select the collection to
which you want to add the PDF or click New Collection, type a name, and click Create.
You can open any PDF from a collection by using the Open button in the Organizer window or by choosing the
PDF filename from a submenu directly in Acrobat. To open a PDF from a collection in Acrobat, choose Collections >
[collection name] > [PDF filename] from either the File > Organizer submenu or the Organizer menu
toolbar.
Edit the collection folders
• To rename a collection, right-click the collection name, choose Rename Collection, and then type the new name.
in the File
Last updated 9/30/2011
Page 61

USING ACROBAT 9 PRO EXTENDED
Workspace
• To delete a collection, right-click the collection name, choose Delete Collection, and then click Yes in the
confirmation dialog box. The PDF files within the collection aren’t deleted from their original locations.
• To create a new collection, click the Create A New Collection button in the Organizer window. Or, in Acrobat,
choose File > Organizer > Create A New Collection. Type a name for the collection.
Move a PDF to a different collection
❖ To move a PDF from one collection to another, select the collection that contains the PDF, right-click the PDF file
in the files pane, and choose Move To Collection > [collection name].
Remove a PDF from a collection
❖ To remove a PDF from a collection, select the collection, click the PDF in the files pane, and press Delete.
Organize PDFs with the Favorite Places category
1 To add an existing folder or hard drive to the category, click the Add A Favorite Place button , select a folder or
hard drive, and click OK.
2 To remove a folder or hard drive from the list of Favorite Places, right-click the item, and choose Remove [folder
name] From Favorite Places.
55
Expand views in the Categories pane
Items in the Categories pane can be expanded and collapsed so that you can see more of the structure. When you select
a date category, folder, or collection, all PDFs in that item are listed in the pages pane.
Expand an Organizer category
1 Click the icon to the left of the category or folder.
2 Select a subcategory or folder under a main category.
Expand the file structure
❖ Select a folder in the My Computer category. All PDFs in that folder are listed in the files pane.
Start a task from the Organizer files pane
1 Select a subcategory or folder under a main category in the categories pane to display PDFs in the files pane.
2 Select one or more files.
3 To perform an action on the selected PDF files, click one of the task buttons at the top of the Organizer window:
• To open, print, or email the PDF files, use the buttons above the files pane.
• To start combining PDF files into a single PDF file, click the Combine Files button and follow the instructions in
the wizard.
• To start a review, select the PDF and choose Send For Review > Send For Shared Review or Send For Review >
Attach For Email Review.
More Help topics
“Other options for combining files” on page 122
“Starting a review” on page 154
Last updated 9/30/2011
Page 62

USING ACROBAT 9 PRO EXTENDED
Workspace
Erase the history of opened PDFs
1 Select a History subcategory in the categories pane.
2 Click Clear History in the files pane.
Maintaining the software
Updating the software
Acrobat application files and components can be updated in a variety of ways. Some updates are available when you
open a PDF that triggers the updating process automatically. For example, if you open a form that uses Asian-language
fonts, you are asked whether you want to download the fonts. Other updates are available only from the Help menu,
and must be installed manually. Some updates are available both automatically and manually.
Depending on your preferences settings, updates are downloaded in the background.
Manually update the software
❖ Choose Help > Check For Updates, and follow any on-screen instructions.
56
Change updating preferences
1 In the Preferences dialog box under Categories, select Updater.
2 In the Check For Updates section, select an option for installing updates.
Manage security settings
If your organization uses server-based security policies, you can set up Acrobat to regularly check for updates to these
policies. Server-based security is set up by an administrator who provides the URL from which to get security updates.
1 In the Preferences dialog box under Categories, select Security.
2 In the Security Settings, select Load Security Settings From A Server.
3 Type the server address in the URL field.
4 Select how often you want to check for security updates.
5 Select Ask Before Installing to receive notification before the server is checked for policy updates.
Adobe Digital Editions
Use the free Adobe® Digital Editions software to read and organize eBooks and other publications. Digital Editions is
a separate web-based rich internet application (RIA) that replaces the eBooks features in previous versions of Acrobat.
When you install Digital Editions, your existing bookshelf items are automatically imported and available within the
new Digital Editions bookshelf experience. You can also manually import individual PDFs into your Digital Editions
bookshelf.
Note: When you open an eBook for the first time, the Digital Editions software is automatically installed on your
computer.
For more information about Adobe Digital Editions and to download the software, see
www.adobe.com/go/learn_acr_digital_en.
Last updated 9/30/2011
Page 63

USING ACROBAT 9 PRO EXTENDED
Workspace
Non-English languages
Asian language PDFs
You can use Acrobat to view, search, and print PDF documents that contain Asian text (Traditional and Simplified
Chinese, Japanese, and Korean). You can also use these languages when you fill in forms, add comments, and apply
digital signatures.
Almost all of the Acrobat features are supported for Traditional and Simplified Chinese, Japanese, and Korean text if
you install the respective Asian language font packs.
In Acrobat in Windows, you must install the Asian language support files by using the custom installation and
selecting the Asian Language Support options under Create Adobe PDF and View Adobe PDF.
PDFMaker and the Adobe PDF printer automatically embed most Asian fonts in your file when creating PDF files.
You can control whether Asian fonts are embedded.
In Windows, you may be able to view and print files that contain Asian languages without having the necessary Asian
language support installed on your system. If you try to open a PDF file for which language support is required, you
are automatically prompted to install the required fonts.
57
Cyrillic, Central European, and Eastern European language PDFs
You can work with Adobe PDF files that contain Cyrillic text (including Bulgarian and Russian), Central European
text, and Eastern European text (including Czech, Hungarian, and Polish) if the fonts are embedded in the PDF files.
If the fonts are embedded, you can view and print the files on any system. Fonts do not need to be embedded to use
the Search feature.
Note: If you open a PDF file in which form fields or text boxes contain these languages but the fonts are not embedded
and are not installed on your system, choosing Help > Check For Updates Now automatically prompts you to download
and install the necessary fonts.
Hebrew, Arabic, Thai, and Vietnamese language PDFs
Acrobat supports the entry and display of Thai and Vietnamese text. In Windows only, Arabic and Hebrew are also
supported. By default, Right-To-Left Language Options is enabled under Arabic and Hebrew regional settings (in
Windows).
Enable right-to-left languages
Enabling right-to-left language options displays the user interface elements for controlling paragraph direction, digit
style, and ligature. When this option is selected, you can specify the writing direction (left-to-right or right-to-left) and
type of digits (Western or Arabic-Indic) used for creating and filling out certain form fields, adding digital signatures,
and creating text box markups.
Enable Right-To-Left Language Options is enabled by default under Arabic and Hebrew regional settings.
1 In the Preferences dialog box under Categories, select International.
2 Select Enable Right-To-Left Language Options.
Last updated 9/30/2011
Page 64

USING ACROBAT 9 PRO EXTENDED
Workspace
Acrobat in Mac OS
Generally, Acrobat works the same for Windows and Mac OS. Some exceptions are noted throughout Help. In
addition, be aware of the following differences:
Common keyboard actions and functions
Windows Mac OS
Right-click Control-click
Alt Option
Ctrl+[character] Command+[character]
Ctrl-click Option-click
Ctrl-drag Option-drag
My Computer [disk name]
Windows Explorer Finder
Open the Preferences dialog box
To open the Preferences dialog box in Mac OS, choose Acrobat > Preferences.
58
Expand a nested list
Items such as bookmarks sometimes appear in nested lists that can be expanded or collapsed. To expand a list in Mac
OS, click the right-pointing triangle to the left of the icon. Click the down-pointing triangle to collapse the list. To
expand or collapse all items in a multilevel list, Option-click the triangle.
PDFMaker
PDFMaker is not available for Mac OS. However, you can still create PDFs from many business applications using the
File > Print command. In the Print dialog box, choose Adobe PDF from the Printer menu.
More Help topics
“Keyboard shortcuts” on page 518
Last updated 9/30/2011
Page 65

Chapter 3: Creating PDFs
Adobe® PDF is the solution of choice for capturing robust information from any application on any computer system.
You can create PDFs from blank pages, document files, websites, scanned paper documents, and clipboard content.
Overview of creating PDFs
What’s the best way to create a PDF?
You create a PDF by converting other documents and resources to Portable Document Format. You can usually choose
from several PDF creation methods, depending on the type of file you start with and your requirements for the PDF.
You can create PDFs from documents printed on paper, Microsoft Word documents, InDesign® files, and digital
images, to name just a few examples. Different types of sources have different tools available for PDF conversion. In
many applications, you can create PDFs by selecting the Adobe PDF printer in the Print dialog box.
If a file is open in its authoring application (such as a spreadsheet that is open in Microsoft Excel), you can usually
convert the file to PDF without opening Adobe® Acrobat® 9 Pro Extended. Similarly, if Acrobat is already open, you
don’t have to open the authoring application to convert a file to PDF.
59
Every PDF strikes a balance between efficiency (small file size) and quality (such as resolution and color). When that
balance is critical to your task, you’ll want to use a method that includes access to various conversion options.
For example, you can drag and drop files on the Acrobat icon to create PDFs. In this case, Acrobat applies the most
recently used conversion settings without providing access to those settings. If you want more control over the process,
you’ll want to use another method.
For more information about creating PDFs, see these resources:
• Acrobat user community forums: acrobatusers.com/forums/aucbb/.
• Creating cohesive PDFs: www.adobe.com/cfusion/designcenter/search.cfm?product=Acrobat&go=Go.
• Creating PDFs on a Mac or Windows: www.performancegraphics.com/Pages/howtof.html.
• Adobe PDF in Creative Workflows: www.adobe.com/designcenter/creativesuite/articles/cs3ip_pdfworkflows.pdf.
More Help topics
“Create a PDF from a blank page” on page 63
PDF creation methods by file type
Refer to the following lists to determine the methods available for the different types of files.
Most files
These methods can be used for documents and images in almost all file formats.
Create PDF menu Within Acrobat, by choosing From File.
Adobe PDF printer Within most applications, in the Print dialog box.
Drag and drop On the desktop or from a folder.
Last updated 9/30/2011
Page 66

USING ACROBAT 9 PRO EXTENDED
Creating PDFs
Context menu On the desktop or in a folder, by right-clicking.
Paper documents
Requires a scanner and a hard copy of the document.
Create PDF menu Within Acrobat, by choosing From Scanner. Or, for previously scanned paper documents, by
choosing From File.
Document menu Within Acrobat, by choosing Scan To PDF.
Microsoft Office documents
PDFMaker (Windows only) Within the authoring application, in the Acrobat PDFMaker toolbar and on the Adobe
PDF menu. For Microsoft Office 2007 applications, in the Acrobat ribbon.
Adobe PDF printer Within the authoring application, in the Print dialog box.
Drag and drop (Windows only) On the desktop or from a folder.
Context menu (Windows only) On the desktop or in a folder, by right-clicking.
Email messages
PDFMaker (Windows only) Within Microsoft Outlook or Lotus Notes, by clicking Acrobat PDFMaker toolbar buttons.
Or by choosing commands in the Adobe PDF menu (Outlook) or the Actions menu (Lotus Notes).
60
Adobe PDF printer Within the email application, in the Print dialog box. Creates a PDF (not a PDF Portfolio).
Context menu (Outlook 2007 only) On an email folder or selection of messages, by right-clicking.
Web pages
Create PDF menu Within Acrobat, by choosing From Web Page.
PDFMaker (Windows only) Within Internet Explorer or when editing in a web-authoring application that supports
PDFMaker, such as Word. Also, in the Acrobat PDFMaker toolbar and on the Adobe PDF menu.
Adobe PDF printer Within Internet Explorer or when editing in a web-authoring application, such as Word; in the
Print dialog box.
Drag and drop On the desktop or from a folder, dragging the HTML file.
Context menu (HTML files) On the desktop or in a folder, by right-clicking the HTML file.
Content copied on the clipboard
Create PDF menu Within Acrobat, by choosing From Clipboard (Windows, all content) or From Clipboard Image
(Mac OS, screen shots only).
AutoCAD files (Windows only)
Create PDF menu Within Acrobat, by choosing From File.
PDFMaker Within AutoCAD, in the Acrobat PDFMaker toolbar or in the Adobe PDF menu.
Adobe PDF printer Within AutoCAD, in the Print dialog box.
Drag and drop On the desktop or from a folder.
Context menu On the desktop or in a folder, by right-clicking.
Last updated 9/30/2011
Page 67

USING ACROBAT 9 PRO EXTENDED
Creating PDFs
PostScript and EPS files
Drag and drop On the desktop or from a folder, by dragging to the Acrobat Distiller icon or into the Acrobat Distiller®
window.
Double-clicking (PostScript® files only) On the desktop or in a folder.
Open command Within Acrobat Distiller, in the File menu.
Create PDF menu Within Acrobat, by choosing From File.
Adobe PDF printer Within the authoring application, in the Print dialog box.
Context menu On the desktop or in a folder, by right-clicking.
3D files
Create PDF menu Within Acrobat Pro Extended, by choosing From File or From 3D Capture.
Adobe PDF printer Within the authoring application, in the Print dialog box.
Drag and drop On the desktop or from a folder.
Context menu On the desktop or in a folder, by right-clicking.
Adobe Presenter slide shows
Adobe PDF Within Microsoft PowerPoint, choose Adobe Presenter > Publish.
61
Balancing PDF file size and quality
You can select various settings to ensure that your PDF has the best balance between file size, resolution, conformity
to specific standards, and other factors. Which settings you select depends on your goals for the PDF that you are
creating. For example, a PDF intended for high-quality commercial printing requires different settings than a PDF
intended only for on-screen viewing and quick downloading over the Internet.
Once selected, these settings apply across PDFMaker, Acrobat, and Acrobat Distiller. However, some settings are
limited to specific contexts or file types. For example, PDFMaker options can vary among the different types of
Microsoft Office applications.
For convenience, you can select one of the conversion presets available in Acrobat. You can also create, define, save,
and reuse custom presets that are uniquely suited to your purposes.
For scanned documents, you can choose from several scanning presets that are optimized for scanning documents and
images in color or black and white. You can modify these presets, or use your own custom scanning settings.
More Help topics
“Adobe PDF conversion settings” on page 99
Creating simple PDFs with Acrobat
Convert a file to PDF using Acrobat
1 In Acrobat, do one of the following:
• Choose File > Create PDF > From File.
Last updated 9/30/2011
Page 68

USING ACROBAT 9 PRO EXTENDED
Creating PDFs
• In the toolbar, click the Create button and choose PDF From File.
2
In the Open dialog box, select the file. You can browse all file types or select a specific type from the Files Of Type menu.
3 Optionally, click Settings to change the conversion options. The options available vary depending on the file type.
Note: The Settings button is unavailable if you choose All Files as the file type or if no conversion settings are available
for the selected file type.
4 Click Open to convert the file to a PDF.
Depending on the type of file being converted, the authoring application opens automatically or a progress dialog box
appears. If the file is in an unsupported format, a message appears, telling you that the file cannot be converted to PDF.
5 When the new PDF opens, choose File > Save or File > Save As; then select a name and location for the PDF.
When naming a PDF that’s intended for electronic distribution, limit the filename to eight characters (with no spaces)
and include the .pdf extension. This action ensures that email programs or network servers don’t truncate the filename
and that the PDF opens as expected.
More Help topics
“View PDFMaker conversion settings” on page 76
“PDF Portfolios and combined PDFs” on page 115
62
Drag and drop to create PDFs
This method is best reserved for small, simple files, such as small image files and plain text files, when the balance
between file size and output quality is not important. You can use this technique with many other types of files, but
you won’t have the opportunity to adjust any conversion settings during the process.
1 Select the icons of one or more files.
2 Drag the file icons onto the Acrobat application icon. Or (Windows only) drag the files into the open Acrobat
window.
If a message appears saying that the file could not be opened in Acrobat, then that file type cannot be converted to PDF
by the drag-and-drop method. Use one of the other conversion methods for that file.
Note: You can also convert PostScript and EPS files to PDF by dragging them onto the Acrobat Distiller window or the
Distiller application icon.
3 Save the PDF.
(Windows only) You can also right-click a file in Windows Explorer and choose Create PDF.
Convert clipboard content to PDF (Windows)
You can create PDFs from text and images that you copy from any application.
1 Capture content in the Clipboard, either by using the Copy command in any application, or by pressing the
PrintScreen key.
2 In Acrobat, choose File > Create PDF > From Clipboard.
Note: The From Clipboard command appears only when content is copied to the Clipboard. If the Clipboard is empty,
the command does not appear.
Last updated 9/30/2011
Page 69

USING ACROBAT 9 PRO EXTENDED
Creating PDFs
Convert screen captures to PDF (Mac OS)
In Mac OS, you can create PDFs from screen captures.
❖ Do one of the following:
• In Acrobat choose File > Create PDF > [From Screen Capture, From Window Capture, or From Selection Capture].
• Use the Grab utility (Applications > Utilities > Grab) to capture a screen image, and choose Edit > Copy to copy
the image to the clipboard. Then start Acrobat and choose File > Create PDF > From Clipboard Image.
Note: The From Clipboard Image command appears only when an image is copied to the clipboard. If the clipboard is
empty or if you have copied text to the clipboard, the command does not appear.
Create a PDF from a blank page
With the PDF Editor feature, you can create a PDF from a blank page rather than beginning with a file, a clipboard
image, or scanning.
This process can be useful for creating relatively small PDFs of up to about 20 pages. For longer, more complex, or
heavily formatted documents, it’s better to create the source document in an application that offers more layout and
formatting options, such as Adobe InDesign or Microsoft Word.
Note: The PDF Editor can make changes in text only with PDFs created from blank pages. To add a blank page to a PDF
created by another method, create a blank document in another application and convert that file to PDF. Then import
the blank file into the existing PDF.
63
Create and add text to a new, blank PDF
1 Choose File > Create PDF > From Blank Page.
2 Begin typing text to add to the page.
3 Add any formatting to the text by selecting it and selecting options in the New Document toolbar.
4 As needed, select other tools and options.
5 Choose File > Save, and select a name and location for the PDF file.
Note: When the page is filled with text, the PDF Editor automatically adds a new blank page to the document.
Edit text in a PDF created from a blank page
1 Choose File > Open, and locate and select a PDF created with PDF Editor (that is, one created from a blank page).
2 Choose Document > Resume Editing.
3 Add text and formatting as needed.
Prevent changes in PDF Editor
You can freeze the text you have added to PDFs created from a blank page. This prevents anyone from adding or
changing the text. There is no Undo for this process.
1 Choose Document > Prevent Further Edits.
2 In the message that appears, click Prevent Further Edits to confirm your choice. Or, click Keep Text Editable if you
want to continue adding or editing text with the PDF Editor.
3 In the Save As dialog box, select a new name and location for the file, or leave the original name and location
selected to replace the original file with the uneditable version.
Last updated 9/30/2011
Page 70

USING ACROBAT 9 PRO EXTENDED
Creating PDFs
Preferences for the PDF Editor
The PDF Editor preferences are available in the Preferences dialog box under New Document.
Font Specifies the font family to use by default for typing on a new, blank page.
Size Specifies the size of the default font.
Default Margins Specifies the measurements of the insets from the edges of the page: Left, Right, Top, and Bottom.
Size (under Default Page) Specifies the standard paper size, such as Letter, Tabloid, A4, and so on.
Orientation Specifies whether the longer side of the page runs horizontally (Landscape) or vertically (Portrait).
Create multiple PDFs from multiple files
You can create multiple PDFs from multiple native files, including files of different supported formats, in one
operation. This method is useful when you must convert a large number of files to PDF.
Note: When you use this method, Acrobat applies the most recently used conversion settings without offering you access
to those settings. If you want to adjust the conversion settings, do so before using this method.
1 Choose File > Create PDF > Batch Create Multiple Files.
2 Choose Add Files > Add Files or Add Folders, and then select the files or folder.
3 Click OK.
4 In the Output Options dialog box, specify your target folder and filename preferences, and then click OK.
64
Enable Fast Web View in a PDF
Fast Web View restructures a PDF document for page-at-a-time downloading (byte-serving) from web servers. With
Fast Web View, the web server sends only the requested page, rather than the entire PDF. This option is especially
important with large documents that can take a long time to download from a server.
Check with your webmaster to make sure that the web server software you use supports page-at-a-time downloading.
To ensure that the PDF documents on your website appear in older browsers, you can also create HTML links (versus
ASP scripts or the POST method) to the PDF documents and use relatively short path names (256 characters or fewer).
Verify that an existing PDF is enabled for Fast Web View
❖ Do one of the following:
• Open the PDF in Acrobat, and choose File > Properties. Look in the lower right area of the Description panel of the
dialog box for the Fast Web View setting (Yes or No).
• (Windows only) Right-click the PDF file icon and choose Properties. Click the PDF tab and look near the bottom
of the panel for the Fast Web View setting (Yes or No).
Verify the Fast Web View Preferences setting
Follow this procedure to make sure that you have Acrobat set up to enable Fast Web View during the PDF creation
process.
1 In the Preferences dialog box under Categories, select Documents.
2 On the right side of the dialog box, under Save Settings, make sure that Save As Optimizes For Fast Web View is
selected, and click OK.
Last updated 9/30/2011
Page 71

USING ACROBAT 9 PRO EXTENDED
Creating PDFs
Enable Fast Web View for an existing PDF
Use this procedure after you have verified your Fast Web View Preferences setting and checked the PDF properties to
be sure that the file is not already enabled for Fast Web View.
1 Open the PDF.
2 Choose File > Save As. Select the same filename and location.
3 When a message appears asking if you want to overwrite the existing file, click OK.
You can also quickly enable Fast Web View in entire folders of Adobe PDF files by using a batch sequence. See “Run
a predefined batch sequence” on page 356.
Scan documents to PDF
Scan a paper document to PDF
You can create a PDF file directly from a paper document, using your scanner and Acrobat. In Windows XP and
Windows Vista, Acrobat supports TWAIN scanner drivers and Windows Image Acquisition (WIA) drivers. You can
also scan paper forms in a way that converts them into interactive PDF forms. .
65
In Windows, when you create a PDF from a scanner, you can choose a scanning preset that best matches the type of
document you are scanning. (The available presets are Black & White Document, Grayscale Document, Color
Document, and Color Image). You can also scan using custom settings, and you can adjust the settings in the scanning
presets.
Note: Preset scanning is available only for scanner drivers that support Hide Scanner’s Native Interface mode. The
scanning presets are not available in Mac OS.
In Windows, if a WIA driver is installed for your scanner, you can use the Scan button on your scanner to create a
PDF. Press the Scan button, and then in Windows, choose Adobe Acrobat from the list of registered applications.
Then, in the Acrobat Scan dialog box, select a scanner and a document preset or Custom Scan.
After you scan a document to PDF, you can apply security settings using one of the security or batch processing
methods in Acrobat, or using JavaScript. For more information on using JavaScript, see the documents at
www.learn.adobe.com/wiki/display/security/Document+Library.
For more information on scanning, see these resources:
• Troubelshooting scanning and OCR: www.acrobatusers.com/tutorials/troubleshoot-scanning-and-ocr
• Scanning and OCR: /www.acrobatusers.com/monthly_topic/2009/01
• How to extract active text from an image: www.peachpit.com/articles/article.aspx?p=1272051
More Help topics
“Choosing a security method” on page 232
“About batch sequences” on page 355
“Creating and distributing forms” on page 188
Scan a paper document to PDF using a preset (Windows)
1 Choose File > Create PDF > From Scanner > [document preset].
Last updated 9/30/2011
Page 72

USING ACROBAT 9 PRO EXTENDED
Creating PDFs
2 If prompted to scan more pages, select Scan More Pages or Scan Is Complete, and click OK.
Scan a paper document to PDF without presets
1 In Acrobat, do one of the following:
• (Windows) Choose File > Create PDF > From Scanner > Custom Scan.
• (Mac OS) Choose File > Create PDF > From Scanner.
2 Select scanning options in the Scan dialog box, as needed, and then click Scan.
Note: If you specify that you want to use the native scanner user interface instead of the Acrobat user interface, other
windows or dialog boxes appear. Consult the scanner documentation information on available options. In Mac OS, the
scanner user interface is always shown.
3 If prompted to scan more pages, select Scan More Pages or Scan Is Complete, and click OK.
Optimize a scanned PDF
1 Open a PDF created from a scanned document.
2 Choose Document > Optimize Scanned PDF.
3 Select options in the dialog box, and click OK.
The options available in the Optimized Scanned PDF dialog box also appear in the Optimization Options dialog box,
which are described in detail under that heading in this topic.
66
Configure scanning presets (Windows)
1 Choose File > Create PDF > From Scanner > Configure Presets.
2 In the Configure Presets dialog box, select a preset: Black & White Document, Grayscale Document, Color
Document, or Color Image.
3 Adjust the settings as needed.
4 Click Save to save the preset, and then click OK.
Scanning options
Scanner Select an installed scanner. You must have the manufacturer scanning software installed on your computer.
In Windows only, click the Options button to specify scanner options.
Sides Specify single or double-sided scanning. If you select Both Sides and the settings of the scanner are for only one
side, the scanner setting overrides the Acrobat settings.
Note: You can scan both sides of pages even on scanners that do not themselves support two-sided scanning. When Both
Sides is selected, a dialog box appears after the first sides are scanned. You can then reverse the original paper documents
in the tray, and select the Scan Reverse Side (Put Reverse Of Sheets) option in that dialog box. This method produces a
PDF with all pages in the proper sequence.
Color Mode (Windows only) Select a basic color mode (Color, Black and White, or Grayscale) supported by your
scanner. This option is enabled if your Scanner Options are set to use the Acrobat scanning dialog box instead of the
scanner application.
Resolution (Windows only) Select a resolution supported by your scanner. This option is enabled if your Scanner
Options are set to use the Acrobat scanning dialog box instead of the scanner application.
Note: If you select a Color Mode or Resolution option not supported by your scanner, a message appears and your scanner
application window opens. Select different options in the scanner application window.
Last updated 9/30/2011
Page 73

USING ACROBAT 9 PRO EXTENDED
Creating PDFs
Paper Size (Windows only) Select a paper size or specify a custom width and height.
Prompt For Scanning More Pages When selected, a dialog box prompting you to scan additional pages appears after
scanning every page.
New PDF Document Creates a new PDF. This option is not available in the Configure Presets dialog box.
Multiple Files Creates multiple files from multiple paper documents. Click More Options, and specify whether to
create a PDF Portfolio of the files, the number of pages for each file, and a filename prefix. These options are not
available in the Configure Presets dialog box.
Append To Existing File Or Portfolio Adds the converted scan to an existing PDF or PDF Portfolio. This option is not
available in the Configure Presets dialog box.
Small Size/High Quality Drag the slider to set the balance point between file size and quality. Click Options to
customize optimization with specific settings for file compression and filtering.
Make Searchable (Run OCR) Select this option to convert text images in the PDF to searchable and selectable text. This
option applies optical character recognition (OCR) and font and page recognition to the text images and converts them
to normal text. When selected, this option also adds tags to the document, which improves accessibility for disabled
users. Click Options to specify settings in the Recognize Text - Settings dialog box. See
“Recognize text in scanned
documents” on page 69.
Make PDF/A Compliant Select this option to make the PDF conform to ISO standards for PDF/A-1b. When selected,
only Searchable Image (Exact) is available in the Recognize Text - Settings dialog box for the PDF Output Style option.
67
Add Metadata When selected, the Document Properties dialog box appears after scanning. In the Document
Properties dialog box, you can add metadata, or information about the scanned document, to the PDF file. If you are
creating multiple files, you can enter common metadata for all of the files.
Scanner Options dialog box
Data Transfer Method Native Mode transfers in the default mode for your scanner. Memory Mode is automatically
selected for scanning in resolutions over 600 dots per inch (dpi).
User Interface The Hide Scanner’s Native Interface option bypasses the windows and dialog boxes provided by the
scanner manufacturer. Instead, scanning from Acrobat opens the Custom Scan dialog box.
Invert Black And White Images This option creates positive images from black-and-white negatives, for example.
Optimization Options dialog box
The Optimization Options dialog box for image settings controls how scanned images are filtered and compressed for
the PDF. Default settings are suitable for a wide range of document pages, but you may want to customize settings for
higher-quality images, smaller file sizes, or scanning issues.
Automatic Applies default settings to balance file size and quality at a moderate level.
• Aggressive Applies settings that minimize file size. In some cases, selecting this option may visibly affect the quality
of the scanned PDF.
Custom Settings Makes additional settings available under Compression and Filtering and disables the Aggressive
setting under Automatic. If you select Custom Settings, the Color/Grayscale or Monochrome settings are available,
depending on the option you selected in the Acrobat Scan dialog box.
Color/Grayscale settings When scanning color or grayscale pages, select one of the following:
• Lossless Does not apply compression or filters—such as Deskew, Background Removal, and so forth—to scanned
pages.
Last updated 9/30/2011
Page 74

USING ACROBAT 9 PRO EXTENDED
Creating PDFs
• Adaptive Divides each page into black-and-white, grayscale, and color regions and chooses a representation that
preserves appearance while highly compressing each type of content. The recommended scanning resolutions are 300
dots per inch (dpi) for grayscale and RGB input, or 600 dpi for black-and-white input.
• JPEG Applies JPEG compression to the entire grayscale or RGB input page.
Note: The scanner uses either the selected Color/Grayscale option or the selected Monochrome option. Which one is used
depends on the settings you select in the Acrobat Scan dialog box or in the scanner’s TWAIN interface, which may open
after you click Scan in the Acrobat Scan dialog box. (By default, the scanner application dialog box does not open.)
Monochrome When scanning black-and-white or monotone images, select one of the following:
• JBIG2 Applies the JBIG2 compression method to black-and-white input pages. Settings of 0.95 or higher use the
lossless method; at lower settings, text is highly compressed. Text pages typically are 60% smaller than CCITT Group
4 compressed pages, but processing is slow. Compatible with Acrobat 5.0 (PDF 1.4) and later.
Note: For compatibility with Acrobat 4.0, use a compression method other than JBIG2.
• Adaptive (As described under Color/Grayscale settings.)
• CCITT Group 4 Applies CCITT Group 4 compression to black-and-white input page images. This fast, lossless
compression method is compatible with Acrobat 3.0 (PDF 1.2) and later.
Deskew Rotates any page that is not square with the sides of the scanner bed, to make the PDF page align vertically.
Choose Automatic or Off.
68
Background Removal Whitens nearly white areas of grayscale and color input (not black-and-white input).
For best results, calibrate your scanner’s contrast and brightness settings so that a scan of a normal black-and-white
page has dark gray or black text and a white background. Then, Off or Low should produce good results. If scanning
off-white paper or newsprint, use Medium or High to clean up the page.
Edge Shadow Removal Removes dark streaks that occur at the edges of scanned pages, where the paper edge shadows
the scanner light. Choose Off, Cautious, or Aggressive.
Despeckle Removes isolated black marks in black-and-white page content. Low uses a basic peephole filter. Medium
and High use both a peephole filter and a large area filter that removes larger spots farther from nearby features.
Descreen Removes halftone dot structure, which can reduce JPEG compression, cause moire patterns, and make text
difficult to recognize. Suitable for 200–400-dpi grayscale or RGB input or, for Adaptive compression, 400–600-dpi
black-and-white input. The Automatic setting (recommended) applies the filter for 300 dpi or higher grayscale and
RGB input. Select Off when scanning a page with no pictures or filled areas, or when scanning at a resolution higher
than the effective range.
Halo Removal When On (recommended), removes excess color at high-contrast edges, which may have been
introduced during either printing or scanning. This filter is used only on color input pages.
Scanning tips
• Acrobat scanning accepts images between 10 dpi and 3000 dpi. If you select Searchable Image or ClearScan for PDF
Output Style, input resolution of 72 dpi or higher is required, and input resolution higher than 600 dpi is
downsampled to 600 dpi or lower.
• To apply lossless compression to a scanned image, select one of these options under the Compression section in the
Optimization Options dialog box: CCITT Group 4 for monochrome images, or Lossless for color or grayscale
images. If this image is appended to a PDF document, and the file is saved by Save, the scanned image remains
uncompressed. If the PDF document is saved using Save As, the scanned image may be compressed.
Last updated 9/30/2011
Page 75

USING ACROBAT 9 PRO EXTENDED
Creating PDFs
• For most pages, black-and-white scanning at 300 dpi produces text best suited for conversion. At 150 dpi, OCR
accuracy is slightly lower, and more font-recognition errors occur; at 400 dpi and higher resolution, processing
slows and compressed pages are bigger. If a page has many unrecognized words or very small text (9 points or
smaller), try scanning at higher resolution. Scan in black and white whenever possible.
• When Recognize Text Using OCR is disabled, full 10-to-3000 dpi resolution range may be used, but the
recommended resolution is 72 and higher dpi. For Adaptive compression, 300 dpi is recommended for grayscale
or RGB input, or 600 dpi for black-and-white input.
• Pages scanned in 24-bit color, 300 dpi, at 8-1/2–by-11 in. (21.59-by-27.94 cm) result in large images (25 MB) before
compression. Your system may require 50 MB of virtual memory or more to scan the image. At 600 dpi, both
scanning and processing typically are about four times slower than at 300 dpi.
• Avoid dithering or halftone scanner settings. These settings can improve the appearance of photographs, but they
make it difficult to recognize text.
• For text printed on colored paper, try increasing the brightness and contrast by about 10%. If your scanner has
color-filtering capability, consider using a filter or lamp that drops out the background color. Or if the text isn’t
crisp or drops out, try adjusting scanner contrast and brightness to clarify the scan.
• If your scanner has a manual brightness control, adjust it so that characters are clean and well formed. If characters
are touching, use a higher (brighter) setting. If characters are separated, use a lower (darker) setting.
69
Recognize text in scanned documents
You can use Acrobat to recognize text in previously scanned documents that have already been converted to PDF.
Optical character recognition (OCR) software enables you to search, correct, and copy the text in a scanned PDF. To
apply OCR to a PDF, the original scanner resolution must have been set at 72 dpi or higher.
Note: Scanning at 300 dpi produces the best text for conversion. At 150 dpi, OCR accuracy is slightly lower.
More Help topics
“Adding unifying page elements” on page 124
Recognize text in a single document
1 Open the scanned PDF.
2 Choose Document > OCR Text Recognition > Recognize Text Using OCR.
3 In the Recognize Text dialog box, select an option under Pages.
4 Optionally, click Edit to open the Recognize Text - Settings dialog box, and specify the options as needed.
Recognize text in multiple documents
1 In Acrobat, choose Document > OCR Text Recognition > Recognize Text In Multiple Files Using OCR.
2 In the Paper Capture Multiple Files dialog box, click Add Files, and choose Add Files, Add Folders, or Add Open
Files. Then select the files or folder.
3 In the Output Options dialog box, specify a target folder for output files, filename preferences, and an output
format.
4 In the Recognize Text - Settings dialog box, specify the options, and then click OK.
Recognize text in component PDFs in a PDF Portfolio
1 Select one or more scanned PDFs in a PDF Portfolio.
Last updated 9/30/2011
Page 76

USING ACROBAT 9 PRO EXTENDED
Creating PDFs
2 Choose Document > OCR Text Recognition > Recognize Text Using OCR.
3 Specify the options in the Recognize Text - Settings dialog box.
Recognize Text - Settings dialog box
Primary OCR Language Specifies the language for the OCR engine to use to identify the characters.
70
PDF Output Style
(recommended). All formats apply OCR and font and page recognition to the text images and convert them to normal text.
Determines the type of PDF to produce. All options require an input resolution of 72 dpi or higher
• Searchable Image Ensures that text is searchable and selectable. This option keeps the original image, deskews it as
needed, and places an invisible text layer over it. The selection for Downsample Images in this same dialog box
determines whether the image is downsampled and to what extent.
• Searchable Image (Exact) Ensures that text is searchable and selectable. This option keeps the original image and
places an invisible text layer over it. Recommended for cases requiring maximum fidelity to the original image.
• ClearScan Converts the fonts in the document to custom fonts that closely approximate the original. These fonts
preserve the page background using a low-resolution copy. To be able to edit text in PDFs created using ClearScan,
replace the custom fonts with fonts that you have on your computer. For more information, see
with local fonts” on page 330.
Downsample Images Decreases the number of pixels in color, grayscale, and monochrome images after OCR is
complete. Choose the degree of downsampling to apply. Higher-numbered options do less downsampling, producing
higher-resolution PDFs.
“Replace custom fonts
More Help topics
“Replace custom fonts with local fonts” on page 330
Using the Adobe PDF printer
Create PDFs by printing to file
In many authoring applications, you can use the Print command with the Adobe PDF printer to convert your file to
PDF. Your source document is converted to PostScript and fed directly to Distiller for conversion to PDF, without
manually starting Distiller. The current Distiller preference settings and Adobe PDF settings are used to convert the
file. If you’re working with nonstandard page sizes, create a custom page size.
Note: (Windows) For Microsoft Office documents, the Adobe PDF printer does not include some of the features that are
available from PDFMaker. For example, you cannot create bookmarks and hyperlinks using the Adobe PDF printer. If
you’re creating a PDF from a Microsoft Office document and you want to use these features, use PDFMaker.
Note: The Adobe PDF printer creates untagged PDFs. A tagged structure is required for reflowing content to a handheld
device and is preferable for producing reliable results with a screen reader.
More Help topics
“Creating accessible PDFs” on page 285
“Creating PDFs with PDFMaker (Windows)” on page 74
Create a PDF using the Print command (Windows)
1 Open the file in its authoring application, and choose File > Print.
Last updated 9/30/2011
Page 77

USING ACROBAT 9 PRO EXTENDED
Creating PDFs
2 Choose Adobe PDF from the printers menu.
3 Click the Properties (or Preferences) button to customize the Adobe PDF printer setting. (In some applications,
you may need to click Setup in the Print dialog box to open the list of printers, and then click Properties or
Preferences.)
4 In the Print dialog box, click OK.
Note: By default, your PDF is saved in the folder specified in the printer port. The default location is My Documents. The
filename and destination are controlled by the Prompt For Adobe PDF Filename setting in the dialog box.
Create a PDF using the Print command (Mac OS X)
The method for creating PDFs using the Print command changed in Mac OS v10.6 Snow Leopard with Acrobat 9.1
and later. The following procedure describes the method in both Snow Leopard and earlier versions of Mac OS X.
1 Open the file in its authoring application, and choose File > Print.
2 Do one of the following, depending on which version of Mac OS X you are using:
• (Mac OS X v10.6 Snow Leopard) Choose Save As Adobe PDF from the PDF menu at the bottom of the dialog box.
• (Mac OS X v10.5 and earlier) Choose Adobe PDF from the Printer menu. Then choose PDF Options from the pop-
up menu beneath the Presets menu (it may show Copies & Pages by default).
3 For Adobe PDF Settings, choose one of the default settings, or customize the settings using Distiller. Any custom
settings that you have defined are listed.
For most users, the default Adobe PDF conversion settings are adequate.
71
4 For After PDF Creation, specify whether to open the PDF.
5 Click Print.
6 Select a name and location for your PDF, and click Save.
Note: By default, your PDF is saved with the same filename and a .pdf extension.
For more information on Save As Adobe PDF in Snow Leopard, see the TechNote at
http://kb2.adobe.com/cps/509/cpsid_50981.html. This TechNote also includes how to remove the Adobe PDF printer
from the Printer list.
Adobe PDF printing preferences (Windows)
Printing preferences apply to all applications that use the Adobe PDF printer, unless you change the settings in an
authoring application by using the Page Setup, Document Setup, or Print menu.
Note: The dialog box for setting printing preferences is named Adobe PDF Printing Preferences, Adobe PDF Printing
Defaults, or Adobe PDF Document Properties, depending on how you access it.
To access printing preferences:
• Open the Printers window from the Start menu. Right-click the Adobe PDF printer, and choose Printing
Preferences.
• In an authoring application such as Adobe InDesign, choose File > Print. Select Adobe PDF as the printer, and click
the Properties (or Preferences) button. (In some applications, you may need to click Setup in the Print dialog box
to access the list of printers, and then click Properties or Preferences to customize the Adobe PDF settings.)
PDF-specific options appear on the Adobe PDF Settings tab. The Paper Quality tab and Layout tab contain other
familiar options for the paper source, printer ink, page orientation, and number of pages per sheet.
Last updated 9/30/2011
Page 78

USING ACROBAT 9 PRO EXTENDED
Creating PDFs
Note: Printing Preferences are different from printer Properties. The Preferences include Adobe PDF-specific options for
the conversion process; the Properties dialog box contains tabs of options that are available for any type of printer.
Adobe PDF Conversion Settings Select a predefined set of options from the Default Settings menu or click Edit to view
or change the settings in the Adobe PDF Settings dialog box.
Adobe PDF Security To add security to the PDF, choose one of the following options, or click Edit to view or change
the security settings:
• Reconfirm Security For Each Job Opens the Adobe PDF - Security dialog box each time you create a PDF using the
Adobe PDF printer. Specify settings in the dialog box.
• Use The Last Known Security Settings Uses the same security settings that were used the last time a PDF was
created using the Adobe PDF printer on your computer.
Adobe PDF Output Folder Choose an output folder for the converted PDF, or click Browse to add or change the output
folder. Choose Prompt For Adobe PDF Filename to specify a location and filename at conversion time.
Adobe PDF Page Size menu Select a custom page size that you have defined.
View Adobe PDF Results Automatically starts Acrobat and displays the converted document immediately.
Add Document Information Includes information such as the filename and date and time of creation.
Rely On System Fonts Only; Do Not Use Document Fonts Deselect this option to download fonts when creating the
PDF. All your fonts will be available in the PDF, but it will take longer to create it. Leave this option selected if you are
working with Asian-language documents.
72
Delete Log Files For Successful Jobs Automatically deletes the log files unless the job fails.
Ask To Replace Existing PDF File
Warns you when you are about to overwrite an existing PDF with a file of the same name.
More Help topics
“Create and use a custom page size” on page 73
Set Adobe PDF printer properties (Windows)
In Windows, you can usually leave the Adobe PDF printer properties unchanged, unless you have configured printer
sharing or set security.
Note: Printing Properties are different from printer Preferences. The Properties dialog box contains tabs of options that
apply to any type of printer; the Preferences include conversion options specifically for the Adobe PDF printer.
Set Adobe PDF printer properties
1 Open the Printers window from the Start menu, and right-click the Adobe PDF printer.
2 Choose Properties.
3 Click the tabs, and select options as needed.
Reassign the port that the Adobe PDF printer uses
1 Quit Distiller if it is running, and allow all queued jobs to the Adobe PDF printer to complete.
2 Open the Printers window from the Start menu.
3 Right-click the Adobe PDF printer, and choose Properties.
4 Click the Ports tab, and then click Add Port.
Last updated 9/30/2011
Page 79

USING ACROBAT 9 PRO EXTENDED
Creating PDFs
5 Select Adobe PDF Port from the list of available port types, and click New Port.
6 Select a local folder for PDF output files, and click OK. Then click Close to quit the Printer Ports dialog box.
7 In the Adobe PDF Properties dialog box, click Apply, and then click OK.
For best results, select a folder on the same system where Distiller is installed. Although remote or network folders are
supported, they have limited user access and security issues.
Delete a folder and reassign the Adobe PDF printer to the default port
1 Quit Distiller if it is running, and allow a few minutes for all queued jobs to Adobe PDF to complete.
2 Open the Printers window from the Start menu.
3 Right-click the Adobe PDF printer, and choose Properties.
4 Click the Ports tab.
5 Select the default port, Documents, and click Apply.
6 Select the port to delete, click Delete Port, and then click Yes to confirm the deletion.
7 Select the Documents port again and click Close.
Configure the Adobe PDF printer (Mac OS v10.5 and earlier)
In Mac OS, you must configure the Adobe PDF printer in three places: Distiller, your authoring application’s Page
Setup menu, and your authoring application’s Print dialog box.
73
1 In Distiller, specify the Adobe PDF settings, font locations, and security.
2 In an authoring application such as Adobe InDesign, choose File > Page Setup.
3 Select Adobe PDF 9.0 from the Format For menu.
4 Specify the paper size, orientation, and scale as necessary.
5 In your authoring application, choose File > Print, and select Adobe PDF 9.0 from the Printer menu.
6 In the pop-up menu below the Presets menu, choose PDF Options, and set any of the following options:
• Select a set of predefined conversion settings from the Adobe PDF Settings menu if you want to override default
settings. Default settings are the settings currently defined in Distiller.
• Specify whether to open the converted files in Acrobat in the After PDF Creation menu.
7 Specify print settings as desired in the other menus available in the pop-up menu below the Presets menu.
Create and use a custom page size
It’s important to distinguish between page size (as defined in the source application’s Document Setup dialog box for
your document) and paper size (the sheet of paper, piece of film, or area of the printing plate you’ll print on). Your
page size might be U.S. Letter (8-1/2-by-11 in. or 21.59-by-27.94 cm), but you might need to print on a larger piece of
paper or film to accommodate any printer’s marks or the bleed area. To ensure that your document prints as expected,
set up your page size in both the source application and the printer.
The list of paper sizes available to Acrobat comes from the PPD file (PostScript printers) or from the printer driver
(non-PostScript printers). If the printer and PPD file you’ve chosen for PostScript printing support custom paper sizes,
you see a Custom option in the Paper Size menu. For printers capable of producing very large print areas, Acrobat
supports pages as large as 15,000,000 in. (38,100,000 cm) by 15,000,000 in. (38,100,000 cm).
Last updated 9/30/2011
Page 80

USING ACROBAT 9 PRO EXTENDED
Creating PDFs
Create a custom page size (Windows)
1 Do one of the following:
• Open the Printers or Printer And Faxes window from the Start menu. Right-click the Adobe PDF printer, and
choose Printing Preferences.
• In an authoring application such as Adobe InDesign, choose File > Print. Select Adobe PDF as the printer, and click
the Properties button. (In some applications, you may need to click Setup in the Print dialog box to open the list of
printers, and then click Properties or Preferences to customize the Adobe PDF settings.)
2 In the Adobe PDF Settings tab, click the Add button next to the Adobe PDF Page Size menu.
3 Specify the name, width, height, and unit of measurement. Click Add/Modify to add the custom page size name to
the Adobe PDF Page Size menu.
Create a custom page size (Mac OS)
1 In an authoring application such as Adobe InDesign, choose File > Page Setup.
2 In the Paper Size pop-up menu, select Manage Custom Sizes.
3 Click the + button.
4 Specify the name, height, width, and margins. The unit of measurement depends on the system language.
74
Use the custom page size
1 Choose File > Print Setup.
2 Select the new custom page size from the Paper Size menu.
Creating PDFs with PDFMaker (Windows)
About Acrobat PDFMaker
PDFMaker is an Acrobat feature that operates within many business applications, such as Microsoft Office
applications, AutoCAD, and Lotus Notes. When you install Acrobat, PDFMaker controls appear in the work area of
the authoring application.
Note: Some PDFMaker features are not available in certain versions of the authoring applications. For a comparison
chart, see
Using PDFMaker within an authoring application is a simple, one-click procedure. It involves clicking an Acrobat
PDFMaker toolbar button or choosing a command on the Adobe PDF menu. It is not necessary to open Acrobat.
Convert a file to PDF using PDFMaker
In Windows, Acrobat installs both an Acrobat PDFMaker toolbar and an Adobe PDF menu in many popular
authoring applications. You can use either the toolbar buttons or the Adobe PDF menu (the Action menu in Lotus
Notes) to create PDFs, but the menu also provides access to conversion settings. Although many of the conversion
options are common to all authoring applications, a few are application-specific.
Version Compatibility of Acrobat PDFMakers.
For Microsoft Office 2007 applications such as Word, Excel, PowerPoint, and Access, the options for creating PDFs
are available from the Acrobat ribbon.
Note: If you don’t see the PDF toolbar buttons in an application, you must show or activate the PDF toolbar. For other
troubleshooting issues, see the TechNote
http://kb2.adobe.com/cps/333/333235.html.
Last updated 9/30/2011
Page 81

USING ACROBAT 9 PRO EXTENDED
Creating PDFs
More Help topics
“Customize Adobe PDF settings” on page 101
“Create PDFs from Word mail merges” on page 82
Show or activate PDFMaker in Microsoft Office and Lotus Notes
If the PDF toolbar buttons don’t appear in your Microsoft Office or Lotus Notes application, use one of the following
methods to show or activate PDFMaker.
For Lotus Notes 7 or earlier, choose File > Preferences > Toolbar Preferences, click Toolbars, and select the Visible
option for Acrobat PDFMaker 9.0.
For Lotus Notes 8 or later, choose File > Preferences. In the dialog box that appears, choose Toolbar > Toolbars, and
select the Visible option for Acrobat PDFMaker 9.0.
For Office 2003 or earlier, choose View > Toolbars > Acrobat PDFMaker 9.0.
For Office 2007, follow these steps:
1 Do one of the following:
• (Outlook) Choose Tools > Trust Center.
• (Other Office applications) Click the Office button, and then click the [Application] Options button, where
[Application] is the Office application name. For example, in Word, the button name is Word Options.
2 Click Add-Ins on the left side of the dialog box.
3 Do one of the following:
• If PDFMOutlook or Acrobat PDFMaker Office COM Addin is not listed, choose COM Add-Ins from the Manage
pop-up menu and click Go.
• If PDFMOutlook or Acrobat PDFMaker Office COM Addin is listed under Disabled Application Add-ins, select
Disabled Items from the Manage pop-up menu and click Go.
4 Select PDFMOutlook or Acrobat PDFMaker Office COM Addin and click OK.
5 Restart the Office application.
75
Convert a file to PDF
If you also want to send the PDF for review, see Donna Baker’s One-Step Convert and Send for Review.
1 Open the file in the application used to create it.
2 Click the Convert To Adobe PDF button on the Acrobat PDFMaker toolbar.
For Microsoft Office 2007 applications, such as Word, Excel, PowerPoint, and Access, click the Create PDF button
on the Acrobat ribbon.
3 Enter a filename and location for the PDF, and click Save.
Create a PDF as an email attachment
1 Open the file in the application used to create it.
2 Choose Adobe PDF > Convert To Adobe PDF And Email.
For Microsoft Office 2007 applications, such as Word, Excel, PowerPoint, and Access, click the Create And Attach To
Email button
on the Acrobat ribbon.
Last updated 9/30/2011
Page 82

USING ACROBAT 9 PRO EXTENDED
Creating PDFs
When the conversion is finished, a blank message with the new PDF included as an attachment automatically opens
in your default email application. You can then address and complete the message and either send it or save it as a draft.
Attach a file as PDF (Outlook)
1 In the Outlook email Message window, click the Attach As Adobe PDF button.
Note: If the Attach As PDF button isn’t visible, choose Adobe PDF > Change Conversion Settings, and then select Show
Attach As Adobe PDF Buttons. This option is not available in Outlook 2007.
2 Select a file to attach, and click Open.
Convert files to a secured PDF and attach it to an email message (Outlook)
1 In the Outlook email Message window, click the Attach As Secured Adobe PDF button .
Note: The Attach As Secured Adobe PDF button appears only after you’ve configured an Adobe LiveCycle® Rights
Management Server using the Advanced > Security Settings menu.
2 Click Browse, select a file to convert, and click Open.
3 Specify the users that can open the PDF, and then click OK:
• To specify only users that receive the PDF, select Restrict Access Only To People In This Message’s To:, Cc:, And
Bcc: List. In this case, the PDF isn’t secured until you send the email message.
• To specify only users that are specified by a security policy, select Restrict Access By Applying The Following
Security Policy, and then select a security policy in the list. In this case, the PDF is secured before it is attached to
the email message.
4 If prompted, enter your user name and password to log in to the Adobe LiveCycle Rights Management Server.
76
Create a PDF and send it for review
1 Open the file in the application used to create it.
2 Click the Convert To Adobe PDF And Send For Review button on the Acrobat PDFMaker toolbar, or (if
available) choose Adobe PDF > Convert To Adobe PDF And Send For Review.
For Microsoft Office 2007 applications such as Word, Excel, PowerPoint, and Access, click the Create And Send For
Review button
3 When the Identity Setup dialog box appears, enter the appropriate information about yourself, and click Complete.
4 Follow the directions in the wizard that appears, as described in “Start an email-based review” on page 155.
on the Acrobat ribbon.
View PDFMaker conversion settings
PDFMaker conversion settings vary according to file types. For example, the options available for PowerPoint files
aren’t the same as the options available for Outlook files. Once you’ve selected conversion settings, those choices apply
to all subsequent PDFs you create from that file type. It’s a good idea to review the settings occasionally.
1 Open a PDFMaker-enabled application (such as Word or Excel).
2 Do one of the following:
• (Lotus Notes) Choose Actions > Change Adobe PDF Conversion Settings.
• (Office 2007 applications) In the Acrobat ribbon, click Preferences.
• (All other applications) Choose Adobe PDF > Change Conversion Settings.
3 (Optional) To revert to the original default settings, click Restore Defaults on the Settings tab.
Last updated 9/30/2011
Page 83

USING ACROBAT 9 PRO EXTENDED
Creating PDFs
More Help topics
“Adobe PDF conversion settings” on page 99
“Application-specific PDFMaker settings” on page 87
Settings tab of the Conversion Settings
The settings available for PDFMaker depend on the application in which you’re using PDFMaker.
Conversion Settings Specifies the standard by which the PDF will be optimized. When you choose an item in the
menu, a description of that preset appears immediately below it.
View Adobe PDF Result Opens the converted document directly into Acrobat. (Exception: when you choose Convert
To Adobe PDF And Email.)
Prompt For Adobe PDF File Name Lets you enter a custom filename for the resulting PDF. Deselect this option to save
the file in the same folder as the source file, using the same name but with a .pdf extension.
Convert Document Information Adds document information from the Properties dialog box of the source file. This
setting overrides the printer preferences and settings in the Advanced panel of the Adobe PDF Settings dialog box.
Note: The Advanced Settings button opens the Adobe PDF Settings dialog box, which contains many additional
conversion options. These conversion settings apply to all Acrobat features that create PDFs, such as Acrobat Distiller,
PDFMaker, and the Acrobat application itself.
77
Create PDF/A Compliant PDF File Creates the PDF so that it conforms to this ISO standard for long-term preservation
of electronic documents. (In the Microsoft Publisher application alone, PDFMaker does not support the PDF/A
standard.)
Note: When Conversion Settings are opened from within Word, Excel, or PowerPoint, this option specifies PDF/A 1a:2005. When opened from within Microsoft Visio, Access, Microsoft Project, or AutoCAD, it specifies PDF/A 1-b:2005.
Security tab of the Conversion Settings
The settings available for PDFMaker depend on the application in which you’re using PDFMaker.
Require A Password To Open The Document When selected, makes the Document Open Password option available,
where you enter a password that users must use to open the document.
Restrict Editing And Printing Of The Document When selected, makes the other Permissions options available.
Change Permissions Password Specifies a password you set that users must use in order to do any allowable printing
or editing.
Printing Allowed Specifies whether users who use the Permissions Password can print the document and at what
resolution.
Changes Allowed Specifies what kind of changes users who use the Permissions Password can make.
Enable Copying Of Text, Images, And Other Contents Prevents or allows users from copying from the PDF.
Enable Text Access For Screen Reader Devices For The Visually Impaired Prevents or allows screen reader devices to
read text. (Selected by default.)
Enable Plaintext Metadata Specifies whether the search engine can read the document metadata. Available only when
the PDF-compatibility is set to Acrobat 6.0 (PDF 1.5) or later.
Last updated 9/30/2011
Page 84

USING ACROBAT 9 PRO EXTENDED
Creating PDFs
Convert Microsoft Word, PowerPoint, and Excel files to PDF
When creating a PDF from Microsoft Word, PowerPoint, or Excel, you can set conversion options for the current file.
You can also select a range of content in the file to convert. The conversion options that you can set in the following
steps are some of the most commonly used settings from the Acrobat PDFMaker dialog box. Any changes you make
to the conversion options apply to the current conversion only.
PDFMaker includes an option to embed many types of multimedia files in Microsoft Word and PowerPoint files. The
files are converted to FLV format files. When you convert the document to PDF, the PDF includes a playable FLV file.
For tips on converting Word documents to PDFs, see Troubleshooting PDF-creation issues in Microsoft Word at
www.acrobatusers.com/tutorials/troubleshooting-pdf-creation-issues-microsoft-word.
More Help topics
“View PDFMaker conversion settings” on page 76
“Application-specific PDFMaker settings” on page 87
Convert Excel files to PDF
1 Open a file in Excel.
2 Optionally, select the cells to convert.
3 Do one of the following:
• (Office 2003 or earlier) From the Adobe PDF menu, select one of the Convert To Adobe PDF options.
• (Office 2007) From the Acrobat ribbon, select one of the Create options.
4 In the Acrobat PDFMaker dialog box, select a Conversion Range, then click Convert To PDF.
5 In the Save Adobe PDF File As dialog box, specify a filename and location for the PDF.
6 Optionally, click the Options button to change the conversion settings.
7 Click Save to create the PDF.
78
Convert Word and PowerPoint files to PDF
1 Open a file in Word or PowerPoint.
2 Optionally, select objects and text (Word) or slides (PowerPoint), as needed.
3 Do one of the following:
• (Office 2003 or earlier) From the Adobe PDF menu, select one of the Convert To Adobe PDF options.
• (Office 2007) From the Acrobat ribbon, select Create PDF, Create And Attach to Email, or Create And Send For
Review.
4 In the Save Adobe PDF File As dialog box, specify a filename and location for the PDF.
5 Optionally, click the Options button to change the conversion settings.
6 Select a Page Range (Word) or Slide Range (PowerPoint). The Selection option is available only if you have selected
content in the file.
7 Click OK, then click Save to create the PDF.
Last updated 9/30/2011
Page 85

USING ACROBAT 9 PRO EXTENDED
Creating PDFs
Embed multimedia files into Word and PowerPoint documents
1 Do one of the following:
• (Office 2003 or earlier) Choose Adobe PDF > Embed Video And Convert To Flash Format
• (Office 2007) In the Acrobat ribbon, click Embed Video.
2 Choose a multimedia file from the menu, or click Browse to locate and select the file.
3 (Optional) To select a video frame to use as a poster, drag the slider to the frame and click Set Poster Image From
Current Frame.
4 Choose a media player skin from the menu.
5 (Optional) Select Resize Video and specify the width and height. Select Respect Aspect Ratio to preserve the aspect
ratio.
6 Click OK. Acrobat converts the file to FLV format and inserts it into the document.
7 When you are ready to create a PDF, follow the steps to create a PDF as usual. (PowerPoint only) In the Save Adobe
PDF File As dialog box, click Options and make sure that the Convert Multimedia option is selected.
Convert email messages to PDFs
You can use PDFMaker to convert one or more Microsoft Outlook or Lotus Notes email messages or entire folders of
messages to a merged PDF or PDF Portfolio. Within a PDF Portfolio, each email message appears as a separate PDF
file.
79
The Acrobat PDFMaker Conversion Settings dialog box contains the option that determines whether email messages
are merged into one continuous PDF or assembled into a PDF Portfolio.
The controls that activate an email conversion to PDF appear in two places within the email application: on the
Acrobat PDFMaker toolbar and on a menu. In Outlook, the menu is called Adobe PDF and appears to the right of the
Outlook Help menu. In Lotus Notes, PDF commands appear under the Actions menu.
You can convert one currently open email message to PDF (not to a PDF Portfolio) by choosing File > Print, and
selecting Adobe PDF as the printer in the Print dialog box. The PDFMaker conversion settings do not affect this
process.
For a video on archiving emails as PDFs in a PDF Portfolio, see http://www.acrobatusers.com/tutorials/archiving-
emails-pdf-microsoft-outlook.
More Help topics
“Application-specific PDFMaker settings” on page 87
“Create and manage an index in a PDF” on page 366
Specify whether email messages become merged PDFs or PDF Portfolios
1 Do one of the following:
• (Outlook) Choose Adobe PDF > Change Conversion Settings.
• (Lotus Notes) Choose Actions > Change Adobe PDF Conversion Settings.
2 Do one of the following:
• To convert and merge email messages into a PDF as sequential pages of one document, deselect Output Adobe PDF
Portfolio When Creating A New PDF File.
Last updated 9/30/2011
Page 86

USING ACROBAT 9 PRO EXTENDED
Creating PDFs
• To assemble converted email messages as components of a PDF Portfolio, select Output Adobe PDF Portfolio
When Creating A New PDF File.
Convert an open email message to PDF (Outlook)
❖ Choose Adobe PDF > Convert To Adobe PDF.
You can also convert a different file to PDF from within an open Outlook email message if the Attach As Adobe PDF
toolbar is shown. Clicking this button opens a series of dialog boxes for selecting and saving the new PDF and also
starts Acrobat, if it is not already running. The resulting PDF is attached to the open email message.
Convert email messages to a new PDF
1 In Outlook or Lotus Notes, select the individual email messages.
2 Do one of the following:
• (Outlook) Choose Adobe PDF > Convert Selected Messages > Create New PDF.
• (Lotus Notes) Choose Actions > Convert Selected Messages To Adobe PDF.
3 In the Save Adobe PDF As dialog box, select a location, type a filename, and click Save.
Add email messages or folders to an existing PDF
1 In Outlook or Lotus Notes, select the individual email messages or folders.
2 Do one of the following:
• (Outlook) Choose Adobe PDF > Convert Selected Messages > Append To Existing PDF, or Adobe PDF > Convert
Selected Folders > Append To Existing PDF.
Note: If you have already created one or more PDF Portfolios, you can choose from recently created PDF Portfolios in
addition to the Append To Existing PDF option.
80
• (Lotus Notes) Choose Actions > Append Selected Message(s) To Existing Adobe PDF, or Actions > Append
Selected Folder(s) To Existing Adobe PDF.
3 Locate and select the PDF or PDF Portfolio to which you want to add the converted emails, and click Open.
Important: Do not type a new name for the PDF. If you do, a warning message appears telling you that the PDF was not
found. Click OK, and select a PDF without changing its name.
4 (Outlook only) If a message appears, alerting you that the existing PDF was created using an earlier version of
PDFMaker, do one of the following:
• To create a PDF Portfolio from the original PDF archive, click Yes, and select a name and location for the new
archive. (The default name adds _Portfolio to the original PDF filename.) When the conversion is complete and the
Creating Adobe PDF dialog box closes, the new archive opens in Acrobat.
• Click No to cancel the process.
Note: For PDF Portfolios of email converted or migrated in Acrobat 8 or later, only new messages—that is, messages that
are not already part of the PDF Portfolio—are appended.
Convert email folders to a new PDF
PDFMaker can convert multiple folders to PDF in one procedure. It is not necessary to select the folders at the
beginning of the process because you can select them in a dialog box that appears automatically.
1 Do one of the following:
• (Outlook) Choose Adobe PDF > Convert Selected Folders > Create New PDF.
Last updated 9/30/2011
Page 87

USING ACROBAT 9 PRO EXTENDED
Creating PDFs
• (Lotus Notes) Choose Actions > Convert Selected Folder(s) To Adobe PDF.
2 In the Convert Folder(s) To PDF dialog box, select the folders. Then select or deselect the Convert This Folder And
All Sub Folders option.
3 In the Save Adobe PDF File As, select a location and name for the PDF Portfolio.
When the conversion is complete, the new PDF opens in Acrobat.
Migrate old Outlook PDF archives to PDF Portfolios
It’s a good idea to migrate old PDF email archives to PDF Portfolios for the following reasons: to facilitate sorting and
other functions, and to make it possible to add new email messages to those archives.
In PDF Portfolios, each email message is converted as a component PDF. You can then sort the messages by message
folder, sender, subject line, date, size, or attachments. Also, you can create custom categories and sort by those
categories.
If you open email archives created with Acrobat 7.0 or earlier, you must create an archive and append the selected
messages to the new archive. A wizard guides you through the process.
1 Open Outlook.
2 Choose Adobe PDF > Upgrade Acrobat 7 PDF Archive.
3 If a message appears, click Yes to continue the migration process.
4 Locate and select the old PDF archive, and click Open.
5 Select a location and name for the migrated PDF Portfolio, and click Save. (The default naming adds _Portfolio to
the existing filename, such as renaming an archive called Inbox.pdf as Inbox_Portfolio.pdf.)
When the conversion process is complete and the Creating Adobe PDF dialog box closes, the new archive opens in
Acrobat.
81
Set up automatic email archiving
1 Do one of the following:
• (Outlook) Choose Adobe PDF > Setup Automatic Archival.
• (Lotus Notes) Choose Actions > Setup Automatic Archival.
2 On the Automatic Archival tab of the Acrobat PDFMaker dialog box, select Enable Automatic Archival. Then select
options for Frequency and the time of day at which automatic archiving occurs.
3 Select other options, according to your needs:
Maintain Log Of Archival Creates a record of each archiving session.
Choose File Specifies the name and location of the archiving log.
Embed Index For Faster Search Creates an index that you can search to find specific words or characters instead of
having to search each individual document.
4 Click Add, and select the email folders and subfolders. Then select or deselect the Convert This Folder And All Sub
Folders option, as preferred, and click OK.
5
In the Save PDF Archive File As dialog box, select a name and location for the archived email PDF. Then click Open.
Last updated 9/30/2011
Page 88

USING ACROBAT 9 PRO EXTENDED
Creating PDFs
6 Review the settings and the archive folder names listed in the Acrobat PDFMaker dialog box, and do any of the
following:
• To add other email folders to the list, click Add and select the folder.
• To remove folders from the list, select the folders and click Delete.
• To change an archive file, select any folder name from the list, click Change Archive File, and specify the name and
location.
• To start archiving email immediately, click Run Archival Now.
Create PDFs from Word mail merges
Mail merges from Word generate documents like form letters—for one common example—which are personalized
with information like the names and addresses of the individuals to whom they will be sent. With Acrobat PDFMaker,
you can save steps by using a Word mail merge document and corresponding data file to output mail merges directly
to PDF. You can even set up PDFMaker to attach those PDFs to email messages that are generated during the PDFcreation process.
Note: For information on setting up files for the Word Mail Merge feature, see Microsoft Office Word Help.
1 In Microsoft Word, open the template that you have created as the basis of your mail merge, or create the file using
the Word Mail Merge toolbar and Mail Merge wizard, as needed.
Important: Do not complete the mail merge in Word. Instead, set up and preview the mail merge as usual, so that you
can verify that the merge will work correctly.
82
2 Do one of the following:
• Choose Adobe PDF > Mail Merge To Adobe PDF.
• Click the Mail Merge To Adobe PDF button on the Mail Merge toolbar (View > Toolbars > Mail Merge).
• (Word 2007) From the Acrobat ribbon, click Mail Merge.
3 In the Acrobat PDFMaker - Mail Merge dialog box, select the options you want:
• To specify which records in the data file will be imported into the merged files, select All or Current, or enter a range
of pages by typing in the From and To boxes.
• To name the PDF that will be created, type in the Specify PDF File Name box.
Note: The PDF will be named using this text plus a series of numbers. For example, if you type JulyLetter in the Specify
PDF File Name box, the mail-merged PDFs might appear as JulyLetter_0000123, JulyLetter_0000124, July
Letter_0000125, and so forth.
4 For Automatically Send Adobe PDF Files By Email, do one of the following:
• To create and save merged PDFs for printing or sending later in email, leave the option unselected, and click OK.
• To create merged PDFs and attach each one to an email message to the appropriate recipient, select this check box,
and fill in the other Email options.
5 When the Browse For Folder dialog box appears, navigate to the location you want to use and click OK.
Status indicators appear as PDFMaker generates the individual PDFs, which takes an amount of time that is
proportional to the complexity of the merge and the number of PDFs you create.
6 If you selected Automatically Send Adobe PDF Files By Email, a dialog box appears asking for your email profile.
Enter the appropriate information and click OK.
When the job is finished, a message appears, telling you that the process was successful.
Last updated 9/30/2011
Page 89

USING ACROBAT 9 PRO EXTENDED
Creating PDFs
Email options for PDF mail merges
To Use the pop-up menu to select the field or column in the associated data file that contains the email addresses in
each individual’s record.
Subject Line Type the text that you want to appear in the subject line of each message.
Message Type to add or edit text that you want to appear in the body of the email messages.
PDFs from Microsoft Project, Publisher, and Access
There are specific differences to be aware of when you create PDFs from files authored in these applications:
Microsoft Project You can create PDFs of only the currently selected view. Views designated as nonprintable in Project
cannot be converted to PDF.
Note: Converting Project files requires Acrobat Pro or Acrobat Pro Extended.
Microsoft Publisher PDFs converted from Microsoft Publisher support crop marks, links, bookmarks, spot colors,
transparency, bleed marks, printing bleed marks, and CMYK color conversion.
Microsoft Access When creating PDFs from Access files, the process can involve two additional steps:
• You must select the object in the Access file to be created as a PDF before using the PDFMaker button or command.
• You can choose Adobe PDF > Convert Multiple Reports To Single Adobe PDF. For Access 2007, click Acrobat and
then click Convert Multiple Reports. You can select individual reports that you want to include, and click Add
Report(s). When all of the reports that you want to convert appear in the Reports In Adobe PDF list, click Convert
to start creating the PDF.
Note: When you convert an Access file to PDF, Access tables, queries, forms, and reports are converted.
83
Convert Visio files to PDF
PDFs created from Visio files preserve page sizes and support layers, searchable text, custom properties, links,
bookmarks, and comments, depending on the conversion settings. (Choose Adobe PDF > Change Conversion Settings
to review these settings, if needed.)
When you convert your Visio file, only shapes and guides that are printable and visible in the Visio drawing are
converted and appear in the PDF. Shapes are converted regardless of their protection or behavior. Shape custom
properties can be converted to PDF object data.
When you convert the Visio file to a PDF, you can preserve all or just some layers, or you can flatten all layers. If you
flatten layers, the PDF will look like the original drawing, but won’t contain any layer information. When flattened,
the contents of only visible and printable layers will appear in the converted PDF.
More Help topics
“Adobe PDF conversion settings” on page 99
Convert Visio files
1 If you want to change the PDFMaker conversion settings, open Visio and choose Adobe PDF > Change Conversion
Settings. (For information about a setting, place the pointer over the setting to display a tool tip below.)
2 If you want to convert each page in the Visio file to a bookmarked page in the PDF file, choose Adobe PDF >
Convert All Pages In Drawing. If this option is deselected, only the current page is converted.
Last updated 9/30/2011
Page 90

USING ACROBAT 9 PRO EXTENDED
Creating PDFs
3 Do one of the following:
• Click the Convert To Adobe PDF button in the Adobe PDF toolbar.
• Choose Adobe PDF > Convert To Adobe PDF.
• Choose Adobe PDF > Convert To Adobe PDF And EMail. The PDF file attaches to a new email message in your
default email application.
• Choose Adobe PDF > Convert To Adobe PDF And Send For Review. The file converts to an Adobe PDF file, and
an email-based review process begins.
4 If you want to include the custom properties of shapes, select that option.
5 Click Continue.
6 Select a layers option to retain or flatten layers in the resulting PDF, and click Continue.
Note: If you select Retain Some Layers In The Selected Page, you’ll be prompted to choose which Visio layers to include.
7 Click Convert To Adobe PDF, specify a location and filename, and click Save.
Select Visio layers to convert
You can convert a Visio drawing that contains layers to a PDF and retain some or all of the layers in the resulting PDF,
or you can flatten the layers. You can also organize the Visio layers in layer sets, which are folders in the Acrobat Layers
panel.
84
1 With the multilayered file open in Visio, click a button in the Adobe PDF toolbar, and select Retain Some Layers
In The Selected Page.
Note: If the Retain Some Layers In The Selected Page option is not available, deselect the Convert All Pages In Drawing
option.
2 Select one or more layers in the Layers In Visio Drawing list.
3 To add the selected Visio layers to the list of layers to convert to the PDF file, do one of the following:
• To convert the selected Visio layers to individual PDF layers within a PDF layer set, click Create Layer Set, and
optionally, type a layer name.
• To convert the selected Visio layers to individual layers (but not grouped under a layer set), click the Add Layer(s)
button.
Note: The name of a layer in the Layers In Visio Drawing list is unavailable if that layer is included in the Layers In PDF
list. When you select that layer in the Layers In PDF list, a bullet appears next to the layer’s name in the Layers In Visio
Drawing list.
4 Optionally, do any of the following:
• To reorder the layers in the Layers In PDF list, drag an item up or down in the list.
• To include a visibility property that can be switched on or off in Acrobat, deselect Locked On adjacent to the PDF
layer; to lock the resulting PDF layer’s visibility on, select Locked On.
• To save the current settings of Visio layers selected, click Save PDF Settings, and click OK. These settings are used
the next time you convert the current Visio file to a PDF file.
5 Click Convert To PDF, specify a folder in the Save In box in which to save the PDF file, type a filename, and then
click Save.
Note: Visio layers that were selected for conversion and that have Visio settings for visible, printable, or lock are converted
to PDF layers; the visible and printable properties are included in the resulting PDF layers. If the Visio file contains a
background page, header, or footer, the PDF file automatically has PDF layers named for those items.
Last updated 9/30/2011
Page 91

USING ACROBAT 9 PRO EXTENDED
Creating PDFs
Convert AutoCAD files to PDF (Windows)
Use PDFMaker to convert AutoCAD files from within the AutoCAD application. You can also use the Batch
Conversion feature to convert many AutoCAD files in one operation. Even if you don’t have AutoCAD, you can
convert AutoCAD files to PDF from Acrobat.
Acrobat PDFMaker allows you to preserve selected layers and layouts when converting AutoCAD files to PDF.
More Help topics
“Adobe PDF conversion settings” on page 99
“What’s the best way to create a PDF?” on page 59
“Application-specific PDFMaker settings” on page 87
Convert AutoCAD files when AutoCAD is not installed
The default Acrobat installation installs Autodesk filters. These filters allow you to convert files in DWG, DWF, DST,
DWT, and DXF format into PDF, without the native application installed.
1 In Acrobat, choose File > Create PDF > From File.
2 (Optional) From the Files Of Type menu, select Autodesk AutoCAD, then click the Settings button and change the
conversion settings as needed. The settings are the same as the AutoCAD-specific Acrobat PDFMaker settings, with
the following additions:
Convert Model Space To 3D When selected, the model space layout is converted to a 3D annotation in the PDF. Click
Choose 3D Settings to specify 3D conversion options.
85
Configuration Preferences Click this button to specify resource directories for SHX font files, plot configuration files,
and plot style tables for AutoCAD drawings. If an SHX Font File Search Path is not specified, all SHX fonts are replaced
with MyriadCAD in converted PDFs.
Always Show This Dialog During Conversion When selected, this dialog box appears during the conversion process.
3 Locate and select the AutoCAD file.
4 If the Adobe PDF Settings For Autodesk AutoCAD Documents dialog box appears, specify the settings as needed,
and click OK.
Convert AutoCAD files when AutoCAD is installed
When converting individual AutoCAD files, you don't usually need to change page size and plotting settings.
PDFMaker uses the appropriate layout page size and plotting information to create a correctly sized PDF file.
1 To change the PDF conversion settings, choose Adobe PDF > Change Conversion Settings in AutoCAD.
2 Do one of the following:
• Click a button in the Adobe PDF toolbar: Convert To Adobe PDF or Convert To Adobe PDF And Send For
Review .
• Choose Adobe PDF > Convert To Adobe PDF.
• Choose Adobe PDF > Convert To Adobe PDF And Email.
• Choose Adobe PDF > Convert To Adobe PDF And Send For Review.
3 In the Choose Layouts dialog box, add or remove layouts as needed. To reorder the layouts, select a layout from the
Layouts In PDF list, and click Move Up or Move Down.
Last updated 9/30/2011
Page 92

USING ACROBAT 9 PRO EXTENDED
Creating PDFs
4 To determine how the AutoCAD layers are converted, select one of the following, and then click Continue:
• Flatten All Layers. When layers are flattened, only those entities belonging to layers that are not frozen and are
printable appear in the converted PDF.
• Retain All Or Some Layers. In the next dialog box, specify the layers to include in the resulting PDF.
5 Specify a filename and location in the Save As dialog box, and click Save.
Select AutoCAD layers to convert
If you choose to retain all or some AutoCAD layers when converting to PDF, you can specify which layers are
preserved in the PDF.
1 In AutoCAD, start to convert an AutoCAD file and select the Retain All Or Some Layers option.
2 To show specific AutoCAD layers in the Layers In Drawing list, do any of the following:
• Choose an option from the Named Layer Filters menu to list all layers that fit that criterion.
• Select the Invert option to list all layers except those layers that are described by the selected choice in the Named
Layer Filters menu.
• To change the sort order of the layers, click the headings.
Note: To change the On, Frozen, or Plot properties for a layer, click Cancel, change the properties in the AutoCAD
drawing, and restart the procedure.
86
3 To select the AutoCAD layers to convert, do any of the following:
• Choose a previously saved set of layers from the PDF Layer Settings menu.
• Select one or more layers from the Layers In Drawing List.
• To convert all of the layers in the drawing, click Add All Layers, and go to step 5.
4 To add the selected AutoCAD layers to the Layers In PDF list, do one of the following:
• To convert the selected AutoCAD layers to individual layers within a PDF layer set, click Create Layer Set. This
action creates a folder of layers in the Layers navigation pane in Acrobat.
• To convert the selected AutoCAD layers to individual layers, click Add Layer(s).
5 Optionally, do any of the following in the Layers In PDF list:
• To reorder layers, drag an item up or down in the list.
• To include a visibility property that can be switched on or off in Acrobat, deselect Locked On for the PDF layer. To
lock the resulting PDF layer’s visibility on, select Locked On.
• To save the current list of selected AutoCAD layers, click Add PDF Setting. Later, you can retrieve this list from the
PDF Layer Settings menu.
6 Click Convert, specify a filename and location, and then click Save.
Convert AutoCAD files in batches
1 Choose Adobe PDF > Batch Conversion.
2 Specify your preferences for layers, page size, plot style, and output PDFs. Click Conversion Settings to specify the
Acrobat PDFMaker settings.
3 In the DWG List, do any of the following:
• Click Add Folder or Add Files, and then specify the folder or files.
• To load a previously saved list of files, click Append List, and then specify the list.
Last updated 9/30/2011
Page 93

USING ACROBAT 9 PRO EXTENDED
Creating PDFs
• As needed, expand individual files and select or deselect the items you want, such as model space and layouts. To
exclude or include all model space, click the associated buttons.
• To exclude a file from the conversion, deselect the file box. As needed, select or deselect all of the files in the list,
change the order of the files, remove files, or clear the list.
• To show the complete file paths, select Expand File Name(s).
• To save the DWG list for later use, click Save List. This action saves the list in its current state, including the file
order and file selections. You can retrieve this list at any time by clicking Append List.
4 Click Convert.
5 Once the conversion is finished, you can click Save Details to save a log file of the conversion.
Application-specific PDFMaker settings
The conversion settings available in one PDFMaker-enabled application may be different from those settings you
would encounter within a different application.
Some PDFMaker settings are common to several or most applications. Some options are unique to a specific
application.
87
More Help topics
“Adobe PDF conversion settings” on page 99
“Convert web pages to PDF in Internet Explorer (Windows)” on page 91
“Convert Microsoft Word, PowerPoint, and Excel files to PDF” on page 78
Settings tab options available from within most applications
The following settings appear on the Settings tab available from within most PDFMaker-enabled applications.
Attach Source File Includes the document being converted as an attachment to the PDF.
Create Bookmarks Converts certain elements in original Office documents to PDF bookmarks: Word headings, Excel
worksheet names, or PowerPoint titles. Selecting this option overrides any settings on the Bookmarks tab of the
Conversion Settings dialog box.
Note: In Microsoft Publisher 2003 documents, PDFMaker includes Publisher headings as bookmarks in the PDF.
PDFMaker does not support the conversion of Publisher 2002 bookmarks, links, transparency, or crop marks and bleed
marks.
Add Links Includes active links and hypertext in the PDF.
Note: If this option is deselected, but the recipient of the PDF has the Create Links From URLs preference selected, URLs
in the PDF are still active. For more information, see
Enable Accessibility And Reflow With Tagged Adobe PDF Embeds tags in the PDF.
“Preferences for viewing PDFs” on page 37.
Excel-specific options on the Settings tab
Convert Comments Converts user-created Excel comments to notes and lists them in the Acrobat Comments panel.
Fit Worksheet To A Single Page Adjusts the size of each worksheet so that all the entries on that worksheet appear on
the same page of the PDF.
Fit To Paper Width Adjusts the width of each worksheet so that all the columns on that worksheet appear on one page
in the PDF.
Last updated 9/30/2011
Page 94

USING ACROBAT 9 PRO EXTENDED
Creating PDFs
Prompt For Selecting Excel Sheets Opens a dialog box at the beginning of the file conversion process. In this dialog
box, you can specify which worksheets are included in the PDF and the order in which the sheets appear in the PDF.
PowerPoint-specific options on the Settings tab
Convert Multimedia Converts any linked audio-video file to an FLV file and embeds it in the PDF.
Preserve Animation (PowerPoint 2002 and 2003 only) Converts any animation effects in the PowerPoint file to
equivalent animations in the PDF. This option is not available in PowerPoint 2007.
Preserve Slide Transitions Converts PowerPoint slide transition effects to PDF transition effects.
Convert Hidden Slides To PDF Pages Converts any PowerPoint slides that are not seen in the usual playing of the
presentation to PDF pages.
Convert Speaker Notes Converts any speaker notes for the PowerPoint presentation into Text notes in the PDF.
Use PowerPoint Printer Settings (PowerPoint 2002 and 2003 only) Uses the same printer settings in the PDF as in the
original file. This option is not available in PowerPoint 2007.
Email-specific options on the Settings tab
The following options appear when you open the PDFMaker settings from within Microsoft Outlook or Lotus Notes.
Compatibility Sets the compatibility level of the PDF. Use the most recent version (in this case, version 1.7 ADBE-3)
to include all the latest features and functionality. If you’re creating PDFs that are distributed widely, choose an earlier
level to ensure that all users can view and print the document.
88
Attachments Indicates whether all files attached to email messages are included in the PDF.
Output Adobe PDF Portfolio When Creating A New PDF File When selected, always converts individual messages as
component files of a PDF Portfolio. When deselected, merges individual messages as separate pages of a PDF.
Do Not Include Folder Name Information When selected, excludes mail folder names from PDFs.
Embed Index For Faster Search Creates an embedded index, which speeds up searches, especially when you convert
large numbers of email messages or message folders.
Block Download Of External Content When selected, prevents the downloading of any external Internet content, such
as images, CSS, and JavaScript.
Page Layout options Specifies page properties, like the properties found in the Print dialog box: page dimensions,
orientation, and margins.
Show This Number Of Recent Archives (Outlook only) When converting email messages and folders, the Adobe PDF >
[Convert Selected Messages and Convert Selected Folders] menus can list recently created PDFs to append. This
option specifies the maximum number of PDFs to list in the menus.
Show “Attach As Adobe PDF” Buttons If selected, the Attach As Adobe PDF button appears in the Outlook email
message window.
AutoCAD-specific options on the Settings tab
The following options appear when you open the PDFMaker settings from within Autodesk AutoCAD.
Compliance Standard Specify the PDF/A or PDF/E compliance standard, or none.
Open Layers Pane When Viewed In Acrobat Shows the layers structure when a PDF is opened in Acrobat.
Embed Scale Information Preserves drawing-scale information, which is usable with the Acrobat measurement tools.
Do Not Convert Model Space To 3D
When selected, the model space layout is not converted to a 3D annotation in the PDF.
Last updated 9/30/2011
Page 95

USING ACROBAT 9 PRO EXTENDED
Creating PDFs
Choose Layout Option Specifies whether Current Layout, All Layouts, or Selected Layouts are included in the PDF.
Exclude Model Space (Available only when Convert All Layouts Without Prompting is selected from Choose Layout
Option.) When selected, all layouts except the model space are included in the PDF.
Choose Layer Option Specifies whether All Layers, Selected Layers, or No Layers are included as layers in the PDF.
Visio-specific options on the Settings tab
The following options appear when you open the PDFMaker settings from within Microsoft Visio.
Include Visio Custom Properties As Object Data In The Adobe PDF Indicates whether custom properties of the Visio
image are included as object data in the new PDF.
Exclude Visio Objects With No Custom Properties Indicates whether the new PDF excludes Visio objects without
custom properties.
Convert Comments To Adobe PDF Comments Indicates whether the comments in the Visio file are converted to PDF
comments in the new PDF.
Always Flatten Layers In Adobe PDF Specifies if the layers are flattened. If you flatten layers, the PDF looks like the
original drawing, but doesn’t contain any layer information. All shapes in the Visio drawing are converted, regardless
of their protection or behavior, and shape custom properties can be converted to PDF object data.
Open Layers Pane When Viewed In Acrobat Shows the layers structure when a PDF is opened in Acrobat.
89
Word tab settings (Microsoft Word)
Convert Displayed Comments To Notes In Adobe PDF Changes any Word comment entries to PDF comments. If the
currently open Word document contains comments, more options appear in the Comments list on this tab:
• Reviewer Lists the names of reviewers who have entered comments in the current Word document.
• Include When deselected, does not include the comments in the PDF.
• Notes Open Specifies whether the PDF comment windows automatically open or are closed for that reviewer’s
comments.
• Color Shows the color for that reviewer’s comment icons. Clicking the color icon repeatedly cycles through a
limited set of available colors.
• # Of Comments Shows the number of comments that the reviewer made.
Convert Cross-References And Table Of Contents To Links (Word 2002 and 2003 only) Enables one-click navigation of
these elements in the new PDF. This option is not available in Word 2007.
Convert Footnote And Endnote Links Integrates these into the PDF.
Enable Advanced Tagging Integrates this into the PDF.
For tips on converting Word documents to PDFs, see Troubleshooting PDF-creation issues in Microsoft Word at
www.acrobatusers.com/tutorials/troubleshooting-pdf-creation-issues-microsoft-word.
Bookmarks tab settings (Microsoft Word)
The options you specify on this tab determine which items are converted into PDF bookmarks in the PDF.
Important: To include bookmarks in the conversion process, the Add Bookmarks To Adobe PDF option on the Settings
tab must be selected. If you deselect that option, it overrides any options you select on this tab and no bookmarks are
created.
Convert Word Headings To Bookmarks Selects all the headings in the Elements list for conversion to PDF bookmarks.
Last updated 9/30/2011
Page 96

USING ACROBAT 9 PRO EXTENDED
Creating PDFs
Convert Word Styles To Bookmarks Selects all the text styles in the Elements list for conversion to PDF bookmarks.
(Unselected by default.)
Convert Word Bookmarks Converts any user-created Word bookmarks to PDF bookmarks.
Element list Specifies which Word headings and styles are converted to PDF bookmarks.
• Element Lists the names of all available Word headings and styles. The icons for Headings and Styles
indicate the element types.
• Type Also indicates whether the element is a heading or style in the Word document.
• Bookmark Displays X’s, indicating whether individual elements are converted to PDF bookmarks. Clicking an
individual Bookmark option changes the selection status for that element.
• Level Specifies where the element fits in the hierarchy structure of the PDF Bookmarks panel. Clicking an
individual Level number opens a menu that you can use to change the value.
Note: When some but not all of the available Word headings and styles are selected for conversion to PDF bookmarks,
the marker in the corresponding check boxes at the top of the tab change. If all elements of the type are selected, a check
mark appears. If only some of the elements of that type are selected, a colored square appears. Otherwise, the check box
is empty.
Video tab settings (Microsoft Word and PowerPoint)
The options you specify on this tab determine settings for multimedia files that are converted to FLV format and
inserted into Word or PowerPoint files.
90
Save Video In To save the converted video file in the same folder as the document, select Same As Document Folder.
To save the converted video file in a different folder, select Use This Folder, and click Browse to locate and select a
folder.
Video Quality A higher Video Quality setting results in a larger PDF file size.
Deinterlace Activates the video deinterlacing filter, which can improve video quality.
Encode Audio If unselected, the converted video file does not include audio. If selected, specify the data rate at which
to encode the audio in the FLV file.
Converting web pages to PDF
Web pages and PDFs
The core of a web page is a file written in Hypertext Markup Language (HTML). Typically, the HTML file includes
associations with other files that either appear on the web page or govern how it looks or works.
When you convert a web page to PDF, the HTML file and all associated files—such as JPEG images, Adobe FLA files,
cascading style sheets, text files, image maps, and forms—are included in the conversion process.
The resulting PDF behaves much like the original web page. For example, the images, links, image maps, and most
media files appear and function normally within the PDF. (Animated GIF files appear as still images, showing the last
frame of the animation.)
Also, the PDF functions like any other PDF. For example, you can navigate through the file by scrolling or using
bookmarks; users can add comments to it; you can add security, form fields, and other features that enhance it.
Last updated 9/30/2011
Page 97

USING ACROBAT 9 PRO EXTENDED
Creating PDFs
In preparing to convert web pages to PDF, consider the following factors, which affect how you approach the
conversion process:
• How much do you want to convert?
If you want to convert only selected areas of the currently open web page, use PDFMaker from within Internet
Explorer. If you want to convert several levels or all of a multipage website to PDF, work within Acrobat.
• Do you want to create a new PDF from the web pages or to append the converted pages to an existing PDF?
You can do both in either Acrobat or Internet Explorer, but you choose different buttons or commands to
accomplish these things.
Note: To convert Chinese, Japanese, and Korean (CJK) language web pages to PDF on a Roman (Western) system in
Windows, you must have installed the CJK language support files while installing Acrobat. Also, it is preferable to select
an appropriate encoding from the HTML conversion settings.
Convert web pages to PDF in Internet Explorer (Windows)
When you install Acrobat, Internet Explorer (version 6.0 and later) gains an Adobe PDF toolbar. Using the commands
on this toolbar, you can convert the currently displayed web page to PDF in various ways: You can convert the entire
web page or selected areas of it; you can create a new PDF or append the converted web page to an existing PDF. The
Adobe PDF toolbar menu also contains commands that initiate further actions after conversion, such as attaching the
new PDF to a new email message or printing it.
91
A menu on the PDF toolbar provides easy conversion and print capabilities.
More Help topics
“Web page conversion options” on page 94
Convert a web page to PDF
1 In Internet Explorer, go to the web page.
2 Using the Convert menu on the Adobe PDF toolbar, do one of the following:
Note: If you don’t see the Adobe PDF toolbar in Internet Explorer, choose View > Toolbars > Adobe PDF.
• To create a PDF from the currently open web page, choose Convert Web Page To PDF. Then select a location, type
a filename, and click Save.
• To add a PDF of the currently open web page to another PDF, choose Add Web Page To Existing PDF. Then locate
and select the existing PDF, and click Save.
• To create and print a PDF from the currently open web page, choose Print Web Page. When the conversion is
complete and the Print dialog box opens, specify options and click OK.
Last updated 9/30/2011
Page 98

USING ACROBAT 9 PRO EXTENDED
Creating PDFs
• To create a PDF from the currently open web page and attach it to a blank email message, choose Convert Web
Page And Email. Then specify a location and filename for the PDF, and click Save. Type the appropriate
information in the email message that opens after the conversion is complete.
• For any of these options, to open the output PDF after conversion, select View Adobe PDF Results.
Convert part of a web page to PDF
1 Drag the pointer to select text and images on a web page.
2 Right-click on the selected content and choose one of the following:
• To create a new PDF, choose Convert To Adobe PDF. Then select a name and location for the PDF.
• To append the selected content to another PDF, choose Append To Existing PDF. Then locate and select the PDF
to which the selection will be added.
Convert selected areas in a web page to PDF
You can use the Select option to select specific areas on a web page to convert. You can use this option to convert
meaningful content on a web page and omit unwanted content, such as advertisements.
1 On the Adobe PDF toolbar, click Select .
2 As you move the pointer around the web page, a red dotted line indicates areas of the web page that you can select.
Click the areas to convert. Selected areas appear in blue boxes. To deselect an area, click it again.
3 Proceed with conversion as usual.
4 To deselect all areas and exit Select mode, click Select again.
92
Convert a linked web page to PDF
❖ In the open web page, right-click the linked text and choose one of the following:
• To add the linked web page to an existing PDF, choose Append Link Target To Existing PDF. Then locate and select
the existing PDF, and click Save.
• To convert the linked web page to a new PDF, choose Convert Link Target To Adobe PDF.
Note: The right-click menu also includes the options Append To Existing PDF and Convert To Adobe PDF. If you select
either of these options, the currently open web page, not the selected link, is converted.
Convert web pages to PDF in Acrobat
Although you can convert an open web page to PDF from Internet Explorer, you get additional options when you run
the conversion from Acrobat. For example, you can include an entire website in the PDF or just some levels of a
website.
More Help topics
“Asian language PDFs” on page 57
“Web page conversion options” on page 94
Convert a web page to PDF
1 Choose File > Create PDF > From Web Page.
2 Enter the complete path to the web page, or click Browse and locate an HTML file.
Last updated 9/30/2011
Page 99

USING ACROBAT 9 PRO EXTENDED
Creating PDFs
3 To change the number of levels in the website to convert, expand Capture Multiple Levels. Enter the number of
levels to include, or select Get Entire Site to include all levels from the website.
Note: Some websites have hundreds or even thousands of pages. Converting a large website can make your system slow
and unresponsive, and can even use up available hard drive space and memory, causing a system crash. It’s a good idea
to begin by downloading one level of pages and then go through them to find particular links to download.
4 If Get Only N Level(s) is selected, select one or both of the following options:
Stay On Same Path Downloads only web pages subordinate to the specified URL.
Stay On Same Server Downloads only web pages stored on the same server.
5 Click Settings, change the selected options in the Web Page Conversion Settings dialog box as needed, and click OK.
6 Click Create.
Note: You can view PDF pages while they are downloading; however, you cannot modify a page until the download
process is complete.
7 If you closed the Download Status dialog box, Choose Advanced > Web Capture > Bring Status Dialogs To
Foreground to see the dialog box again.
Add an unlinked web page to an existing PDF
Use this procedure to append pages to a writable PDF. If the original PDF is read-only, the result will be a new PDF
rather than new pages in the existing PDF.
93
1 Open the existing PDF in Acrobat (the PDF to which you want to append a web page).
2 Choose Advanced > Web Capture > Create PDF From/Append Web Page.
3 Enter the URL to the web page you want to append and select options, as described for converting web pages to
PDF, and then click Create.
Add a linked web page to an existing PDF
1 Open the previously converted PDF in Acrobat. If necessary, scroll to the page containing links to the pages you
want to add.
2 Do one of the following:
• Right-click the web link, and choose Append To Document.
• Choose Advanced > Web Capture > View Web Links. The dialog box lists all the links on the current page or on
the tagged bookmark’s pages. Select the linked pages to add. Click Properties to set the download options, as
needed, and then click Download.
• Choose Advanced > Web Capture > Append All Links On Page.
Note: After pages have been converted, links to these pages change to internal links, and clicking a link takes you to the
PDF page, rather than to the original HTML page on the web.
Convert a linked web page to a new PDF
1 Open the previously converted PDF in Acrobat. If necessary, scroll to the page containing a web link you want to
convert.
2 Right-click the web link, and choose Open Weblink As New Document.
Note: In Windows, you can also convert a linked page from a web page displayed in Internet Explorer, using a similar
right-click command.
Last updated 9/30/2011
Page 100

USING ACROBAT 9 PRO EXTENDED
Creating PDFs
Copy the URL of a web link
Use this procedure to copy the path for a web link to the clipboard, to use it for other purposes.
1 Open the previously converted PDF in Acrobat. If necessary, scroll to the page containing links to the pages you
want to copy.
2 Right-click the web link and choose Copy Link Location.
Change web page conversion options
The settings for converting web pages to PDF apply to the conversion process. The settings changes do not affect
existing PDFs.
1 Do one of the following:
• From Internet Explorer, in the Adobe PDF toolbar, choose Convert > Preferences.
• From Acrobat, choose File > Create PDF > From Web Page, and then click Settings.
2 On the General tab, select options under Conversion Settings and PDF Settings, as needed. Click the Settings button
to see additional options for the selected File Type.
3 On the Page Layout tab, select options for page size, orientation, and scaling, as needed.
94
Web page conversion options
The Web Page Conversion Settings dialog box is available from within Internet Explorer and Acrobat.
General tab
Conversion Settings Specifies the conversion settings for HTML and text. Choose a file type and click Settings to select
the font properties and other characteristics.
Create Bookmarks Creates a tagged bookmark for each converted web page using the page title (HTML Title element)
as the bookmark name. If the page has no title, the URL is used as the bookmark name.
Create PDF Tags Stores a structure in the PDF that corresponds to the HTML structure of the web pages. This
structure lets you create tagged bookmarks for paragraphs, list elements, and other items that use HTML elements.
Place Headers And Footers On New Page Places a header and footer on every page. Headers show the web page title,
or if no title is available, the web page URL or file path. Footers show the web page URL or file path, and the date and
time of the download.
Page Layout tab
The Page Layout options specify a selection of page sizes and options for width, height, margin measurements, and
page orientation.
The Scaling options are as follows:
Scale Wide Contents To Fit Page Rescales the contents of a page, if necessary, to fit the width of the page. If this option
is not selected, the paper size adjusts to fit the contents of the page, if necessary.
Switch To Landscape If Scaled Smaller Than Changes the page orientation to landscape if the new version of a page is
less than the specified percentage of the original size. Available only if you selected portrait orientation.
Last updated 9/30/2011
 Loading...