

Page 1
Page 2

Using Help
About the built-in help features
Using Help for vision- and motor-impaired users
Opening the Help documentation
Using the How To pages
Using Acrobat Online
Accessing the Adobe Solutions Network
Using online support
Customer support
Adobe Press
The Adobe Certification program
Page 3

About the built-in help features
Adobe® Acrobat® 7.0 Standard offers many built-in features to assist you while you
work, including the Help window you're using right now:
● Help documentation.
● How To pages. (See Using the How To pages.)
● Tool tips, which identify the various buttons, tools, and controls in the work area by name.
These labels appear when you place the pointer over the item you want to identify. Tool
tips are also available in some dialog boxes.
● Help buttons in some dialog boxes. When you click these Help buttons, the Help window
opens with the related topic.
You can also consult online resources and guides for plug-ins. See Using Acrobat Online
Using online support.
and
Note: There is no printed user manual for this product. Overviews, explanations,
descriptions, and procedures are all included in Help.
Page 4

Using Help for vision- and motor-impaired users
Vision- and motor-impaired users can use the Accessibility Setup Assistant to change how
PDF documents appear on-screen and are handled by a screen reader, screen magnifier, or
other assistive technology. The first time you start Adobe Acrobat 7.0 Standard, the
Accessibility Setup Assistant starts if Acrobat detects assistive technology on your
system. (See Setting accessibility preferences.)
Single-key accelerators and keyboard shortcuts make document navigation simpler. For a
complete list of keyboard shortcuts, see About keyboard shortcuts. For additional
information on how Adobe products enhance electronic document accessibility, visit the
Adobe website at http://access.adobe.com.
To activate single-key accelerators:
1. Choose Edit > Preferences (Windows®) or Acrobat > Preferences (Mac OS), and click
General on the left.
2. Select Use Single-Key Accelerators To Access Tools.
3. Click OK to apply the change.
To open the How To window:
Press Shift+F4.
To close the How To window:
Press Shift+F4 or Esc.
To open or close Complete Help:
Do one of the following:
● To open Help, press F1. In Mac OS, you can also press Command+?.
● To close Help, press Ctrl+W or Alt+F4 (Windows) or Command+W (Mac OS). You can
also click the Close button.
Click the Search or Index tab to use that feature. In Windows, press Ctrl+Tab to cycle
forward through the tabs, or press Shift+Ctrl+Tab to cycle backward through the tabs.
Press F6 to move between the document pane and the navigation pane. In the Index tab,
you can type an entry into the Select Index Entry box. The list scrolls to the first match to
the text string you type. Click a link to go to that topic.
Page 5

Opening the Help documentation
Acrobat 7.0 includes complete, built-in documentation in a fully accessible Help system. The Help
documentation provides extensive explanations about the tools, commands, concepts, processes, and
keyboard shortcuts. You can print individual Help topics as needed. (See Printing Help topics.)
Complete Acrobat 7.0 Help opens in a separate window with two panes: a navigation pane on the
left and a topic pane on the right. You use the tabs in the Help navigation pane to find the topics you
want. For example, you click the Contents tab to show the list of topics available in Help. You click
a title in the list to open that topic in the topic pane. For information on using Contents, Search, and
Index, see Using the Help navigation pane to find topics.
Complete Acrobat 7.0 Help A. Contents, Search, and Index tabs in the Help navigation pane B. Help topic
pane
You can drag the vertical bar between the navigation pane and the topic pane to change their widths.
You can drag the lower right corner to resize the entire window. The Help window remains visible
until you close it.
To open Help:
Do one of the following:
● Choose Help > Complete Acrobat 7.0 Help.
● Click the Help button on the toolbar, and choose Complete Acrobat 7.0 Help.
● Click the Complete Acrobat 7.0 Help link on the home page of the How To window.
To close Help:
Click the Close button.
There are many keyboard shortcuts to help you navigate the Help. (See About keyboard
shortcuts.)
Related Subtopics:
Using the Help navigation pane to find topics
Navigating your Help-session history
Printing Help topics
Using other Help features
Page 6

Using the Help navigation pane to find topics
The Help window opens with the Contents tab selected in the navigation pane.
● Click the Contents tab to view the Help topics organized by subject matter, as in the Table
of Contents of a book. You can click the icons to the left of the topics to collapse or
expand the outline. Click a topic name to show that topic in the topic pane.
● Click the Search tab to find a specific word in Help. Type the word in the text box, and
click Search. The results list shows the titles of all topics in which the search word
appears. Topics are listed in the order that they appear in the Contents tab.
Note: You cannot use Boolean operators (such as AND, OR, NOT, or quotation marks) to
limit or refine your search. If you type more than one word, the search results include
every topic in which at least one of the words appears.
● Click the Index tab to find a linked, alphabetical list of terms for various functions,
features, and concepts. You can browse the index in two ways. You can click the controls
(+ or -) to expand or collapse the entries under a letter of the alphabet, scroll to the term
you want, and click a link. Or you can type an entry into the Select Index Entry text box.
The list scrolls to the first match to the text string you type. Click a link to go to that topic.
Page 7
Navigating your Help-session history
The Help system maintains a history of your Help session so that you can go back and
forth quickly among the topics you open.
Click the Previous Topic button on the Help toolbar to return to topics you opened
earlier in your Help session. Click the Next Topic button
When you close Help, you end your Help session and delete the history.
to move forward again.
Page 8
Printing Help topics
You can print any individual topic from the Help documentation.
From the Help window, each topic must be printed individually. Your Acrobat 7.0
installation CD includes the Complete Acrobat 7.0 Help documentation as an Adobe PDF
file that you can print either in part or as a whole.
To print a Help topic:
1. Open the Help topic.
2. Click the Print Topic button on the Help toolbar.
Page 9

Using other Help features
Choosing Help > Acrobat Online leads to links for software downloads, product
information, support documents, and more. (See Using Acrobat Online.) The Help menu
also contains links to various online resources and references.
Page 10
Using the How To pages
The How To pages supplement the Complete Acrobat 7.0 Help, offering overviews of
some popular topics. The How To window appears on the right side of the document pane
and never blocks the view of your open document. You can position the How To window
to the left of the document pane if you prefer.
There are many keyboard shortcuts to help you navigate the How To pages. (See
About keyboard shortcuts.)
The How To window opens at a How To page. The How To home page contains links to
additional How To pages that categorize topics by type. Links on these pages take you to a
simple overview of the topic or to a related topic in the Help documentation.
To open the How To window to a specific topic:
Do one of the following:
● Choose Help > How To > [topic].
● Click the Help button in the toolbar, and select a How To topic.
● Choose a topic from a How To menu in the toolbar.
To open the How To window to the home page:
1. Open the How To window to a specific topic.
2. Click the How To Home Page button in the upper left of the How To window.
To close the How To window:
Do one of the following:
● Click the Close button.
● Click the Hide button (Windows).
You can control whether the How To window opens automatically when you start
the application. Select Show How To Window At Startup on the How To home page.
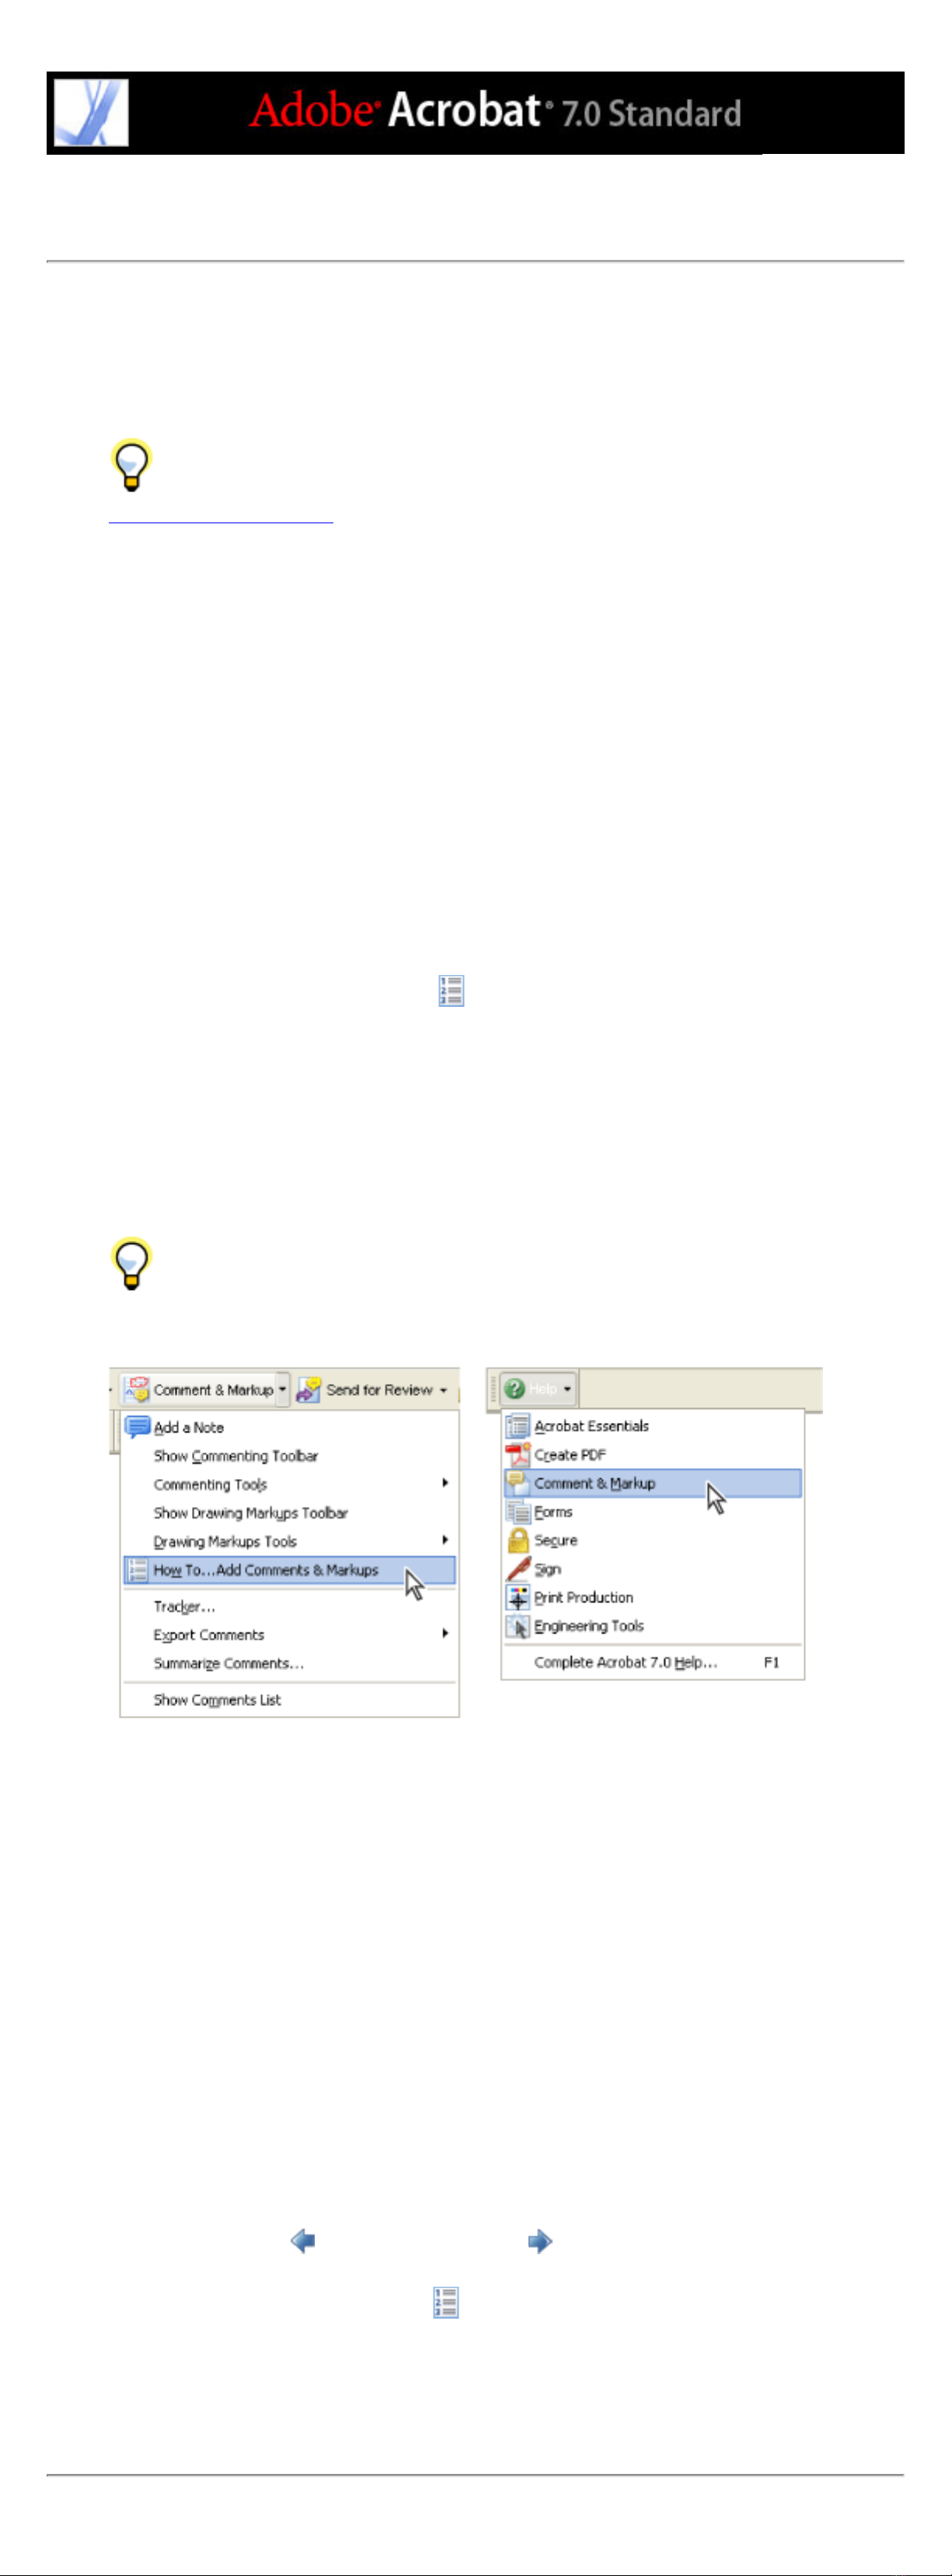
Opening a How To topic page from a toolbar pop-up menu (left) and from the Help menu (right).
To reposition the How To window:
In Windows, right-click the How To title bar, and choose either Docked Left or Docked
Right.
In Mac OS, do any of the following:
● Control-click the How To toolbar (under the title bar), and choose either Docked Left or
Docked Right.
● Drag the title bar of the How To window to the opposite side of the Acrobat window.
You can change the width of the How To window by dragging the separator bar. The
vertical dimension adjusts to match any changes you make to the document pane.
To navigate through the How To pages:
1. Use the Back button and the Forward button in the How To window to navigate
among the pages you've viewed in your current session.
2. Click the How To home page button to return to the home page.
Note: Once you return to the home page, you erase the navigation history of your session.
The Back and Forward buttons are no longer available for navigating until you start a new
session.
Page 11

Using Acrobat Online
Through Acrobat Online, you'll find product information and links for downloading plugins and updates, as well as information on training, support, vertical market solutions, and
Acrobat-related products.
To use Acrobat Online:
1. In Acrobat, Choose Help > Acrobat Online to open the Adobe Acrobat web page.
Note: You must have an Internet connection and a web browser installed. Acrobat Online
starts your browser using your default Internet configuration.
2. Refresh the page to make sure that you have the latest version of the Acrobat Online web
page. (Information is constantly updated, so it is important to refresh the page.)
3. (Optional) Move the pointer over the main categories at the top of the page to view links
to related pages.
4. Click a button or link to open a page.
5. Close or minimize the browser window to return to Acrobat.
Page 12

Accessing the Adobe Solutions Network
The Adobe Solutions Network (ASN) provides various product and technical resources
for developing with Acrobat and Adobe PDF. Here you can find software developer kits
(SDKs), sample libraries, the developer knowledgebase, and technical guides for areas
such as JavaScript, pdfmark, and Distiller
The Adobe Solutions Network for Acrobat is located at http://partners.adobe.com/links/
acrobat (English only).
®
parameters.
Page 13

Using online support
If you have an Internet connection, you can use the Online Support command to access
additional resources for learning Acrobat. These resources are continually updated. The
many useful learning tools available from the Adobe Acrobat support page include stepby-step tutorials, updates and related product downloads, a searchable knowledgebase of
answers to technical questions, links to user forums, and Acrobat Top Issues, containing
the latest Acrobat technical support solutions.
Visit the Adobe® Studio® website at http://studio.adobe.com/ to see a variety of tips and
tutorials to improve your skill set.
Note: You may need to register the first time you go to the Adobe Studio.
To use the Adobe Acrobat online support page:
1. Choose Help > Online Support.
2. Click Refresh to make sure that you have the latest version of the Adobe Acrobat support
page. (Information is constantly updated, so it is important to refresh the page.)
3. Do either of the following:
● Click a link under Top Issues.
● Type a word or phrase in the text box to search for information on Acrobat, all tutorials, or
troubleshooting information.
4. Close or minimize the browser window to return to Acrobat.
Page 14

Customer support
When you register your product, you are eligible for product support. Visit the Adobe
support website for details or refer to the technical support card provided with the Acrobat
documentation.
Adobe Systems also provides automated technical support. See the ReadMe file installed
with the program for additional information. See the Adobe Acrobat online support page
for information on top support issues and troubleshooting information for common
problems. (See Using online support.)
Page 15

Adobe Press
Adobe Press offers books that provide in-depth training on Adobe software, including the
Classroom in a Book
(English only) or visit your local bookstore.
®
series. To purchase Adobe Press titles, visit www.adobepress.com
Page 16

The Adobe Certification program
The Adobe Certification program offers users, instructors, and training centers the
opportunity to demonstrate their product proficiency and promote their software skills as
Adobe
Providers. Certification is available for several geographical regions. Visit the Partnering
with Adobe website at http://partners.adobe.com (English only) to learn how you can
become certified.
®
Certified Experts, Adobe Certified Instructors, or Adobe Authorized Learning
Page 17

ACROBAT ESSENTIALS
What is Adobe PDF?
Why use Adobe PDF?
Working with Adobe Acrobat
Updating Acrobat
Page 18

What is Adobe PDF?
Portable Document Format (PDF) is a universal file format that preserves the fonts,
images, and layout of source documents created on a wide range of applications and
platforms. PDF is the standard for the secure, reliable distribution and exchange of
electronic documents and forms around the world. Adobe PDF files are compact and
complete, and can be shared, viewed, and printed by anyone with free Adobe
software. You can convert any document to Adobe PDF using Adobe Acrobat
products.
(See Why use Adobe PDF?.)
®
Reader®
®
software
Page 19
Why use Adobe PDF?
Governments and enterprises around the world have adopted PDF to streamline document
management and reduce reliance on paper. For example, PDF is the standard format for
the electronic submission of drug approvals to the U.S. Food and Drug Administration
(FDA), and for electronic case filing in U.S. federal courts. PDF is also used by the
governments of the United Kingdom and Germany for electronic document exchange.
Common problem Adobe PDF solution
Recipients can't open files because they
don't have the applications used to create
the files.
Combined paper and electronic archives are
difficult to search, take up space, and
require the application in which a document
was created.
Documents appear incorrect on handheld
devices.
Businesses revert to paper exchange of
documents and forms because of a lack of
verifiable and auditable electronic processes.
Documents with complex formatting are not
accessible to visually impaired readers.
Anyone, anywhere can open a PDF file. All
you need is the free Adobe Reader software.
PDF files are compact and fully searchable,
and can be accessed at any time using
Adobe Reader. Links make PDF files easy
to navigate.
Tagged Adobe PDF allows text to reflow
for display on mobile platforms such as
Palm OS
devices.
PDF documents may have special access
rights and be digitally signed.
Tagged PDF files contain information on
content and structure, which makes them
accessible on screen readers.
®
, Symbian™, and Pocket PC
(See Working with Adobe Acrobat.)
Page 20

Working with Adobe Acrobat
Adobe Acrobat 7.0 Standard software offers robust tools that make it easy to exchange
Adobe PDF files, conduct electronic reviews, fill in forms, and deliver print-ready files.
Browse through these topics to get an overview of Acrobat's capabilities.
Related Subtopics:
If you want to navigate Adobe PDF documents
If you want to select and copy text, tables, or images
If you want to set tool and object properties
If you want to insert, append, or extract pages
If you want to add headers, footers, watermarks, and backgrounds
If you want to create documents that extend features to Adobe Reader users
If you want to create a secure document
If you want to create an accessible document for vision- and motor-impaired users
If you want to manage PDF files
If you want to view an Adobe PDF document on the web
If you want to prepare a document for online viewing
If you want others to review an Adobe PDF file
If you want to control the color in your document
Page 21
If you want to navigate Adobe PDF documents
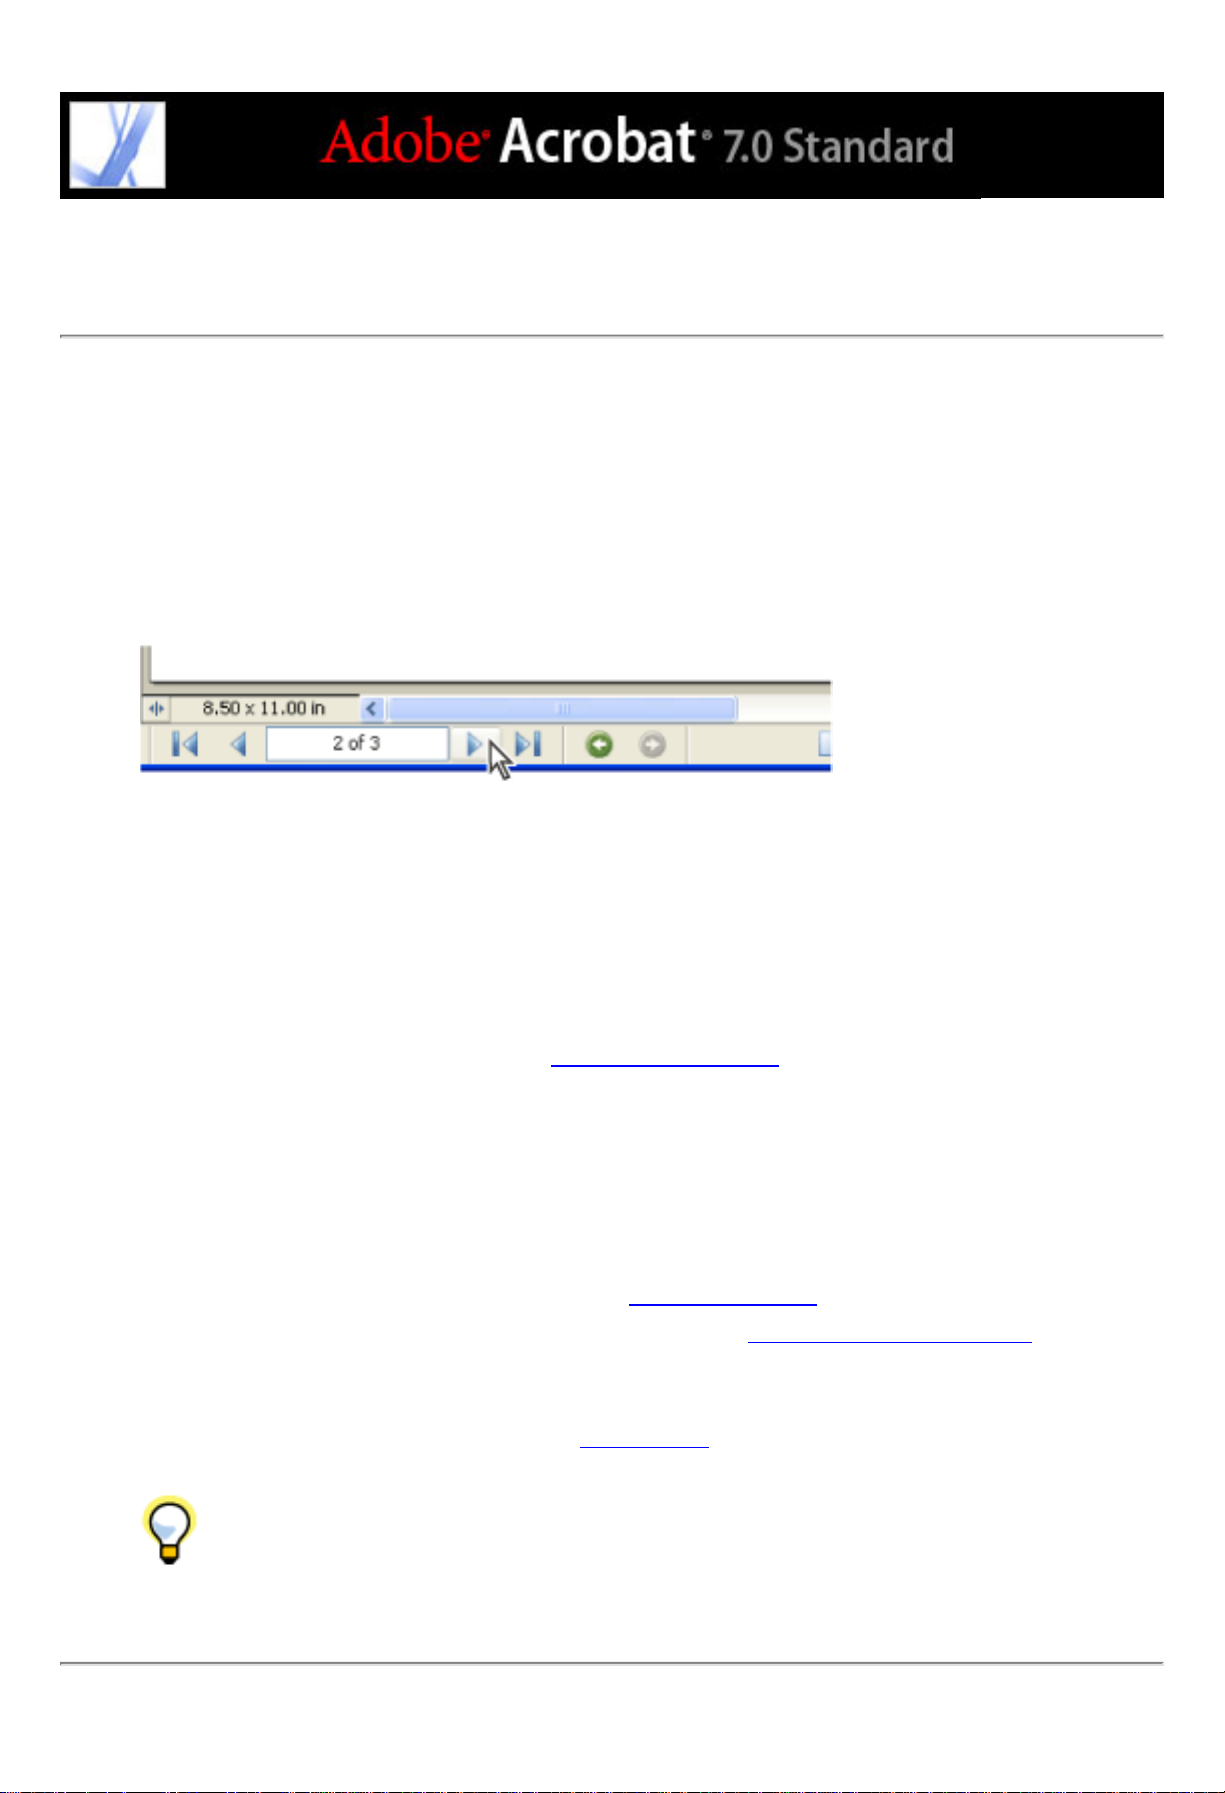
To move through pages of a PDF document, click the navigation buttons on the status bar,
use the up and down arrow keys, use the Page Up and Page Down keys, or drag the
vertical scroll bar. If the PDF document appears in full-screen mode as a slide show, use
the arrow keys to page through the document. (Choose Edit > Preferences (Windows) or
Acrobat > Preferences (Mac OS), select Full Screen, and then select Show Navigation
Bar.)
Navigation buttons
Here are some tips for navigating through a PDF document:
● Use bookmarks. Click bookmarks in the Bookmarks tab of the navigation pane to move
through the PDF document. You can use bookmarks to jump to a destination within an
Adobe PDF document, to another document, or to a web page. You can also add your own
bookmarks to PDF documents. (See Creating bookmarks.)
● Use thumbnails. Click the page thumbnails (or images) in the Pages tab of the navigation
pane to move through the PDF document.
● Use articles. In magazine and newspaper PDF documents, stories flow from column to
column and sometimes across several pages. Authors can link rectangles that connect the
sections of the piece and follow the flow of text. If the pointer includes a down-pointing
arrow when held over text, the text is part of an article. Click an article to jump to the next
section. For details on creating articles, see Defining articles.
● Show and hide layers, if the document has them. (See About Adobe PDF layers.)
● Click links to jump to a specific section. Links are usually underlined and appear in a
different color, but the author of the PDF document can change their appearance. You can
also add links to PDF documents. (See Using links.)
After you click a link or bookmark to jump to a different page, press Alt+Left
Arrow (Windows) or Option+Left Arrow (Mac OS) to return to the previous page.
Page 22
If you want to select and copy text, tables, or images
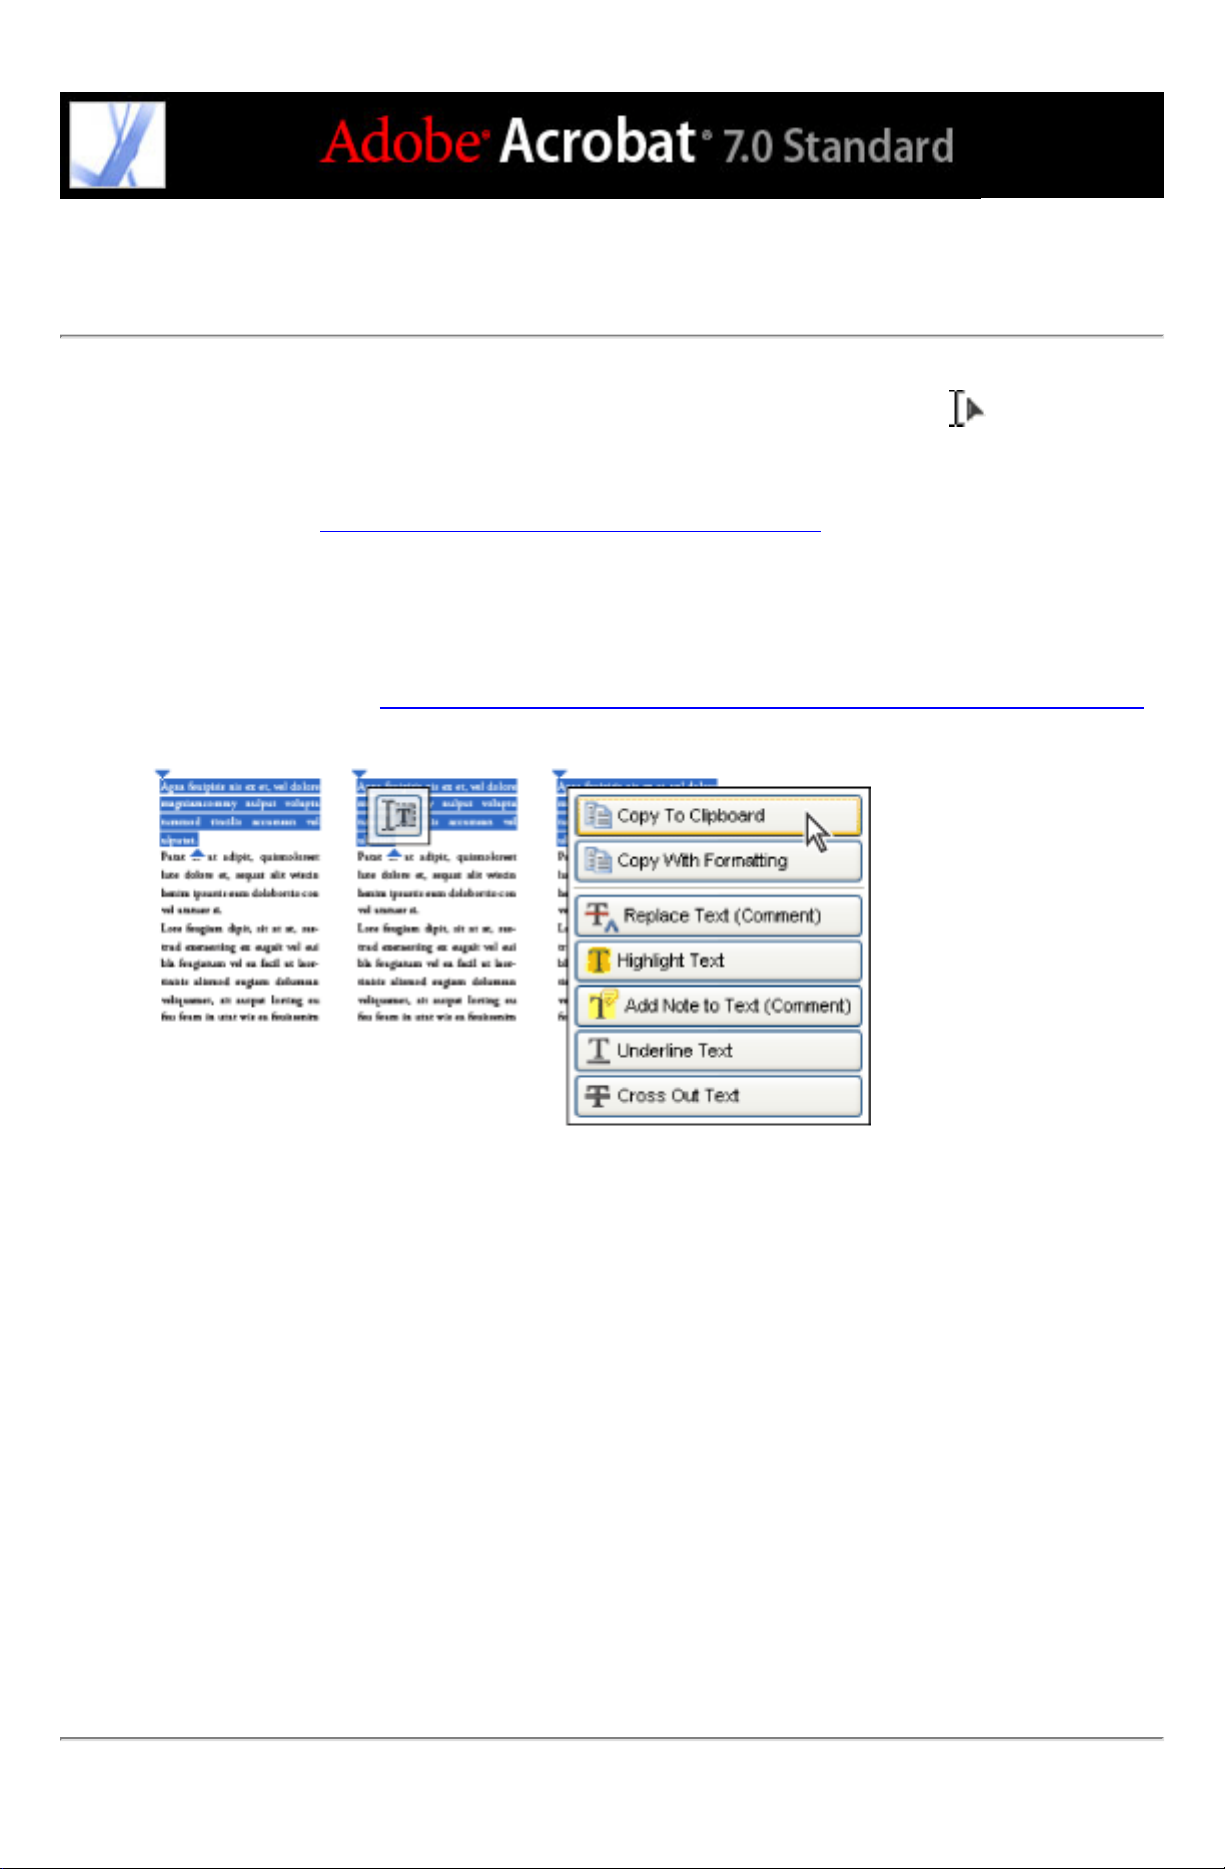
To copy an image, a table, or a small amount of text, use the Select tool . The pointer
in the document pane varies depending on whether the pointer hovers over text, an image,
or a table. To select text or a table, drag across the text or table. To select an image, click
the image. (See Copying and pasting text, tables, and images.)
If you want to extract all the text in a PDF document and retain the text formatting, choose
File > Save As, select Rich Text Format from the pop-up menu, and then save the file. If
you simply want to extract the text, choose File > Save As, and then save the document as
a plain text file. (See Conversion options for Rich Text Format or Microsoft Word format.)
Selecting and copying text
Note the following:
● If the author of the PDF document used a scanner to create the document and didn't make
the text searchable, or if the text is part of an image, you can't select the text or search it.
In these cases, you can use the Recognize Text Using OCR command to convert the
image text to text that can be selected and searched.
● In some PDF documents, authors protect their content by setting restrictions that prevent
editing or printing. For example, the Cut, Copy, and Paste commands may be unavailable
because the author set restrictions against copying text. (Some of these limitations may
also affect a document's accessibility.)
● In some cases, your text selection may have unwanted text. For example, if you select text
that spans multiple pages, the selection may include text from headers or footers if the
author did not tag the document properly. If you accidentally copy extra text, remember to
delete the extra text after you paste it.
Page 23

If you want to set tool and object properties
You can customize many settings in Acrobat by choosing Edit > Preferences (Windows)
or Acrobat > Preferences (Mac OS). For setting properties of some tools and other objects,
you can use the Properties Bar. For example, while adding note comments to a PDF
document, you may want the Note tool to remain selected. To do this, select the Keep
Tool Selected option on the Note Tool Properties toolbar. (If the Properties toolbar isn't
visible, choose View > Toolbars > Properties Bar.) (See Setting Commenting preferences
Changing the appearance of comments.)
and
Page 24

If you want to insert, append, or extract pages
To insert, remove, or use pages in other ways, use the commands on the Document >
Pages menu. You can do any of the following tasks:
● Insert pages. You can insert pages from another PDF document. Choose Document >
Pages > Insert, and then specify the PDF file that you want to insert. This is an easy way
to combine PDF documents.
● Replace pages. You can replace an entire PDF page with another PDF page. When you
replace a page, only the text and images on the original page are replaced. Any interactive
elements associated with the original page, such as links and bookmarks, are not affected.
● Use thumbnails. You can use page thumbnails to copy or move pages within a document
and between documents.
● Delete pages. You can delete pages from an Adobe PDF document with the Delete
command or by deleting the page's page thumbnail or tagged bookmarks. After you have
edited a PDF document, minimize the size of the file by choosing File > Reduce File Size
to save the restructured document under a new name.
● Extract pages. You can extract pages from an Adobe PDF document by using the Extract
command. You can delete the extracted pages or copy them to a separate file. (See
Extracting, moving, and copying pages and Deleting and replacing pages.)
Page 25

If you want to add headers, footers, watermarks, and backgrounds
Choose Document > Add Headers & Footers to add headers and footers. (See Adding
headers and footers.)
If your document in the original application includes page numbering, those page numbers
appear in the PDF document. When you remove pages or combine several PDF
documents, page numbers may be out of sequence. However, you can add headers and
footers to PDF documents, allowing you to add page numbers or other information
specific to the PDF document.
You can also add watermarks and backgrounds. A watermark is text or an image that
appears over existing content when a document is viewed or printed. A background is a
color, texture, or pattern behind text or images. Choose Document > Add Watermark &
Background. (See Adding watermarks and backgrounds.)
Add headers and watermarks to a PDF document after it's created.
Page 26
If you want to create documents that extend features to Adobe Reader users
If you want to create a PDF document that gives Adobe Reader users some of the tools
and features that are normally available only in Acrobat Standard or Acrobat Professional,
you need to include additional usage rights. These additional usage rights can give users
the necessary tools to fill in forms and submit them online or offline, to participate in
email and web-based reviews, to add comments, and to sign documents using Adobe
Reader. To add these additional usage rights, you use a server extension. For more
information on additional usage rights and system requirements, see the Adobe website at
www.adobe.com/products/server/readerextensions/main.html (English only).
Page 27

If you want to create a secure document
Acrobat provides several methods of applying security:
● Use digital signatures to indicate approval of a PDF document or form that you filled out.
(See Signing Adobe PDF documents.)
● Certify documents to disallow subsequent changes. (See Certifying documents.)
● Add passwords and set security options to restrict opening, editing, and printing PDF
documents. (See Adding passwords and setting security options.)
● Encrypt a document so that only a specified set of users have access to it. (See Encrypting
Adobe PDF files using certificates.)
● Apply server-based security policies to PDF documents. Server-based security policies are
especially useful if you want others to have access to PDF documents only for a limited
time. (See Encrypting Adobe PDF files using security policies.)
● Apply the same security settings to a number of PDF documents by creating a custom
security policy. (See Creating user security policies.)
● Add security settings to PDF attachments, and use eEnvelopes. (See Using eEnvelopes to
send secure files.)
Page 28
If you want to create an accessible document for visionand motor-impaired users
Acrobat provides a set of features that let you create accessible documents from new or
existing PDF documents.
● Check your Adobe PDF documents for accessibility before distributing them to users.
(See Checking the accessibility of Adobe PDF documents.)
● Optimize PDF documents for reflow by tagging them. (See Tagging Adobe PDF
documents for accessibility.)
Page 29

If you want to manage PDF files
Acrobat provides a host of features that let you organize and search PDF files:
● Use the Organizer to quickly locate and organize PDF files. (See Using the Organizer
window.)
● Attach PDF or other files to your Adobe PDF document. (See Adding attachments to
Adobe PDF documents.)
● Combine different document types into a single Adobe PDF file by using the Create PDF
From Multiple Files command. (See Creating Adobe PDF files from multiple files.)
● Easily search an Adobe PDF file or a folder of Adobe PDF files for a particular word or
phrase whether that folder is on your computer or on your network. (See About searching
Adobe PDF documents.)
Page 30

If you want to view an Adobe PDF document on the web
PDF documents can be opened either in Acrobat or in a web browser.
In Windows, you may need to configure your web browser to open PDF documents. In
Acrobat, open the Internet panel of the Preferences dialog box. Select the Check Browser
Settings When Starting Acrobat option. Also, make sure that Display PDF In Browser is
selected. Then restart Acrobat. If this procedure doesn't work, you may need to update
your web browser.
Mac OS automatically configures Acrobat to run in the browser (Safari) the first time you
start Acrobat after installation. (See Viewing Adobe PDF documents in a web browser.)
Page 31

If you want to prepare a document for online viewing
● Embed fonts when you create the Adobe PDF document. (See Creating custom Adobe
PDF settings.)
● Add navigational elements, such as bookmarks and links. (See Using bookmarks and
Using links.)
● Create a structured or tagged Adobe PDF file to provide as much viewing flexibility as
possible. (See About accessibility and Adobe PDF documents.)
● Reduce the file size so it's as compact as possible. (See Reducing Adobe PDF file size.)
● Add buttons for submitting data if you are working with a PDF form. You'll also need a
CGI script and values assigned for the form data.
● Allow for page-at-a-time downloading. This can greatly decrease download time if you
have a large PDF document that will be accessed from a web server. (See Enabling Fast
Web View in Adobe PDF files.)
Page 32

If you want others to review an Adobe PDF file
If you want people to review your Adobe PDF document and make comments, you can
start an automated email-based or browser-based review to simplify the reviewing
process. The review features streamline your document reviews by providing a variety of
tools and automated support throughout the review cycle. Even Adobe Reader users can
participate in a review process if additional usage rights are assigned. And training isn't
necessary. Acrobat walks you through the entire process. (See Types of review
workflows.)
Page 33

If you want to control the color in your document
● Adjust color settings when you create the Adobe PDF document. (See Creating custom
Adobe PDF settings.)
● Specify a color management engine, define working spaces, and set other color
management options. (See Managing color in Acrobat.)
Page 34

Updating Acrobat
Acrobat files and components can be updated in a variety of ways. Some updates are
available if you open an Adobe PDF document that triggers the updating process. For
example, if you open a form that uses Asian-language fonts, Acrobat asks if you want to
download the fonts. Other updates are available only from the Help menu, where you
must manually install them. Some updates are available using either method.
You can also use the Updates panel in the Preferences dialog box to determine how to
handle updates. Acrobat can automatically check for critical updates and notifications
once a month. Depending on your preference settings, Acrobat downloads updates in the
background, even while other web transactions are occurring. In Windows, you can
minimize the download dialog box to a status bar icon. When all the components have
been downloaded, a Summary Install Now dialog box lets you choose which updates to
install.
To set updating preference options:
1. Choose Edit > Preferences (Windows) or Acrobat > Preferences (Mac OS), and then
select Updates on the left side of the dialog box.
2. Select an option to determine how to handle updates. If you select Do Not Automatically
Check For Critical Updates, you should periodically check for updates manually by
choosing Help > Check For Updates Now.
3. Click View Notifications to preview any notifications before deciding whether to update.
Click OK to close the dialog box.
4. Click Installed Updates to view the names and descriptions of installed updates. If several
versions of an update have been installed, only the latest version appears in the Installed
Updates dialog box.
5. Deselect Display Notification Dialog At Startup if you don't want to be advised about
available updates when you start Acrobat.
6. Deselect Display Installation Complete Dialog if you don't want to be advised when
updates are successfully installed.
To manually update components:
1. Choose Help > Check For Updates Now.
2. Select updates from the column on the left, and click Add or Reinstall to move them to the
column on the right. Only the updates and components appropriate for your platform and
product are listed.
3. Click Update.
Page 35

What's New in Adobe Acrobat 7.0
New features
Adobe PDF document creation
Additional usage rights
File attachments
Forms authoring and management
Reviewing
Document security
Accessibility
Language support
Additional new features
Page 36

New features
With Adobe® Acrobat® 7.0 Standard, new features and enhancements enable businesses
to simplify all their document processes. Acrobat is a critical component of Adobe
Intelligent Document Platform, designed to make it easier to connect people, processes,
and applications both inside and outside your business. Enhanced security provides
greater control over shared documents. Extended workgroups, including users of Adobe
Reader if you assign additional usage rights, can attach files, save form data, and use the
automated review features and expanded set of commenting tools. Creating Adobe PDF
files is easier than ever, with tighter integration between Acrobat and popular office
application software. And the new Organizer makes it easier than ever to find and
organize your Adobe PDF files.
®
In Acrobat 7.0, language support has been extended, file attachments can be edited,
searched, and saved, a new autosave feature guards against losing your work in case of a
power failure, and new accessibility features make Acrobat even easier to use for visionand motor-impaired users.
Page 37

Adobe PDF document creation
Acrobat 7.0 lets you create Adobe PDF easily from within even more applications than
before. The improved Create PDF From Multiple Files feature lets you create one Adobe
PDF file from different types of files in one quick step.
Single-click PDF creation
In Acrobat Standard, you have the single-click creation of Adobe PDF files without
leaving many of your Microsoft applications, including Office, Access, Internet Explorer,
and Publisher. Word documents convert faster than before. Excel worksheets (Windows
only) can be scaled to fit to a single PDF page. Transparent objects in PowerPoint
presentations (Windows only) convert to PDF transparency. Acrobat also adds Adobe
PDFMaker buttons to the Microsoft Outlook application that allow you to convert single
or multiple email messages or a complete mail folder in the Outlook window. You can
convert your email messages into an easily archived and searchable Adobe PDF file.
Creating a PDF file from multiple files
You can now preview PDF files before combining them, and Acrobat automatically
creates bookmarks for each file combined to make it easier to find material, as well as
print, extract, or delete individual documents.
Adding headers, footers, backgrounds, and watermarks
In Acrobat, headers and footers are easier to create, edit, and remove and don't resize
during printing. You can also protect watermarks or backgrounds from resizing or moving
during printing.
Recovering your original document
You can extract individual documents (in their original file formats) from an Adobe PDF
document created by combining multiple files.
Page 38

Additional usage rights
You can assign special rights to a PDF document, making more tools and features
available to users of Adobe Reader and letting them save the data that they type in a PDF
form, sign documents, participate in online document reviews, and attach files to a PDF
document. If a user opens a document that has these additional usage rights, a yellow
Document Message Bar displays the additional tools required to work with the document,
and Adobe Reader provides instructions.
You add additional usage rights by using a server extension. For more information, see the
Adobe website at www.adobe.com/products/server/readerextensions/main.html (English
only).
Page 39

File attachments
You can attach PDF and other files to your Adobe PDF document. If you move the PDF
document, the attached files automatically move with it. You can search attachments, edit
the attachments, and save the edits in the attached file. A description of each attached file
appears in the Attachments tab of the navigation pane.
You can attach files to an email message by using an eEnvelope that you can encrypt to
protect your files during transit.
Page 40

Forms authoring and management
Acrobat 7.0 supports static forms and interactive forms. Interactive forms created with
Acrobat or with Adobe Designer, which is available with Acrobat Professional 7.0, let you
electronically fill in information, select choices, and digitally sign the document.
Users who have filled in forms created using Designer can then export the form data.
Page 41

Reviewing
Acrobat 7.0 supplies all the tools necessary for participating in email-based or browserbased reviews. (Windows browser-based reviews are supported through Internet Explorer.
Mac OS browser-based reviews are supported through Safari.) Commenting rights are
document-specific; Adobe Reader users can add their comments only to a PDF document
that has additional usage rights. When opened, these documents provide a Commenting
toolbar and--if sent in a managed review-- instructions for opening the document, adding
comments, and returning the document to the review initiator.
Note: You can add commenting rights directly from Acrobat Professional. You add other
usage rights using a server extension. For more information, see the Adobe website at
www.adobe.com/products/server/readerextensions/main.html (English only).
Reviewing also includes these new features:
● Callout tool. The new Callout tool lets you create text box markups that point to specific
areas of a PDF document.
● Group Markups. You can group comments and markups so that your comments function
as a single comment.
● Dimensioning tool. The new Dimensioning tool lets you add a line comment between two
points with your comments.
● Exporting comments and markups. You can export comments and markups directly into
Word documents using Word 2002 and later. You can also export comments and markups
into a PDF document that has already been revised.
● Tracking reviews. You can monitor reviews easily using the Tracker. The Tracker
monitors all Adobe PDF documents that you send and receive, as well as all related
comments, and participants.
● Approving documents. In the Asian (Traditional Chinese, Simplified Chinese, Japanese,
and Korean) version of Acrobat 7.0, an approval workflow is now available for documents
that require approval from multiple branches of an organization. In this type of workflow,
PDF documents are sent to participants in a sequential order.
Page 42

Document security
Acrobat 7.0 offers enhanced security features, including more robust signature validation.
You can create Adobe PDF documents by using security policies that can expire and
revoke documents, as well as maintain accountability by keeping track of who opens
protected documents.
You can bundle attached files into a secure electronic envelope (eEnvelope) designed to
protect documents during transit.
Page 43

Accessibility
For vision- and motor-impaired users, the new Accessibility Setup Assistant makes it easy
to change how PDF documents are read by assistive technology and how PDF documents
appear on-screen. Preferences can be set to have documents automatically open to the last
page viewed.
The Help system has been improved for users with limited visual and motor capabilities.
Page 44

Language support
The extended language support in Acrobat 7.0 allows you to create, view, search, and
print PDF documents that contain Central and Eastern European language fonts. Forms
entry, comments, and digital signatures are supported in these languages. If you open a
document that requires the installation of additional fonts, you are prompted to install the
appropriate language font kit using the Check For Updates Now command.
Page 45

Additional new features
Acrobat 7.0 includes many other new and enhanced features to improve how you work:
Improved search
You can easily search a folder of Adobe PDF files for a particular word or phrase, whether
that folder is on your computer or on your network. Acrobat no longer requires that
documents be indexed first. You can search PDF files on the Internet. In addition, you can
now search more parts of your Adobe PDF files, including bookmarks, comments,
attachments, document structure, object data, and document metadata.
Read forms out loud
You can use the Read Out Loud feature to read form fields out loud as you tab to them.
Recover your work
The Autosave feature guards against losing your work in case of a power failure by
incrementally saving file changes to a specified location. The original file is not modified.
View 3D content
The 3D plug-in allows you to view and navigate embedded 3D content in PDF files. Now,
you can experience high-quality 3D environments with realistic lighting and motion.
Acrobat 7.0 Professional is required to embed 3D content.
Locate and review PDF files
Organizer allows you to quickly locate open PDF files, PDF files that you have used
recently, and PDF files that you have stored in a Favorites folder. You can look at PDF
page thumbnails to quickly find the right file.
Create archivable files
Acrobat supports the creation and validation of PDF/A files.
Scan paper documents into searchable PDF files
During scanning, you can create a searchable Adobe PDF file by applying optical
character recognition (OCR) while scanning.
Look at different pages of the same file at the same time
Acrobat allows you to create multiple windows for the same document by using the New
Window command.
Subscribe to digital periodicals and journals
Periodicals can be obtained in the same way as Digital Editions. When you subscribe to a
digital periodical and download the first issue, Acrobat asks you how often to check for
the availability of subsequent issues.
Keep Acrobat up to date
Depending on your Updates preference settings, Acrobat downloads updates in the
background, even while other web transactions are occurring. In Windows, you can
minimize the download dialog box to a status bar icon. When all the components are
downloaded, a dialog box lets you choose which updates to install.
View PDF documents in the browser (Mac OS)
Acrobat works automatically with Safari to make viewing Adobe PDF documents on the
web easy. The first time you open Acrobat, your system automatically is configured to use
Acrobat to open PDF files in your browser. If you use Windows, you can still configure
Internet Explorer to open PDF files.
Page 46

Looking at the Work Area
About the work area
Selecting tools
Opening documents
Navigating in documents
Viewing documents
Customizing the work area
Setting preferences
Managing plug-ins
Viewing Adobe PDF documents in a web browser
Working with non-English languages in Adobe PDF files
Page 47

About the work area
The Acrobat Standard window includes a document pane that displays Adobe PDF documents and a navigation pane
on the left side that helps you browse through the current PDF document. Toolbars at the top of the window and the
status bar at the bottom of the window provide other controls that you can use to work with PDF documents. You
can also open a How To window on the right side with an overview of common tasks.
Acrobat work area A. Toolbars B. Navigation pane (Bookmarks displayed) C. Status bar D. Document pane E. How To
window
Related Subtopics:
Using the navigation tabs
Using context menus
About toolbars
Page 48

Using the navigation tabs
Tabs display such items as a document's bookmarks, page thumbnails, and articles. Tabs
appear in the navigation pane on the left side of the document pane or in floating panels.
To show or hide tabs in the navigation pane:
Do one of the following:
● Move the pointer over the vertical bar that separates the document pane from the
navigation pane. Click the bar when the pointer icon changes to the Double Arrow icon .
● Choose View > Navigation Tabs > [desired tab].
● Click the tab on the left side of the document pane.
Note: The creator of the Adobe PDF document may set the contents of the navigation
tabs. In some cases, a tab may not contain any content.
To choose a command from a tab Options menu:
Click Options at the top of the tab to open the menu, and choose the command you want.
The commands in each tab vary. To close the menu without choosing a command, click
outside the menu or press Esc.
Click Options to open the menu.
You can also choose commands from the document pane menu. Click the
triangle just above the scroll up arrow to open the menu, and then choose a command.
Page 49

Using context menus
Acrobat provides context-sensitive menus that display commands for the particular item
under the pointer. For example, you can right-click (Windows) or Control-click (Mac OS)
the toolbar area to display a context menu that contains toolbar options and the most
commonly used toolbars.
To choose a command from a context menu:
1. Position the pointer over an item in the work area, such as a comment, toolbar, bookmark,
or document page.
2. Right-click (Windows) or Control-click (Mac OS) to open the context menu, and then
choose the command you want.
Page 50

About toolbars
The Acrobat toolbar area includes a set of toolbars, some of which appear by default and some of which are
hidden.
Toolbars open by default A. File toolbar B. Tasks toolbar C. Basic toolbar D. Zoom toolbar E. Rotate View toolbar F.
Help toolbar
Buttons on the Tasks toolbar behave somewhat differently from other toolbar buttons. Each of these buttons has a
menu of commands associated with it. Click the arrow to the right of the button name to open the menu. For
example, click the arrow next to the Create PDF button
PDF documents.
Hold the pointer over a tool to see the name of the tool. Hold the pointer over the gripper bar on the left
edge of a toolbar to see the name of the toolbar.
To show or hide toolbars:
Do any of the following:
to display a menu of commands related to creating
● Choose View > Toolbars, and then select the toolbar you want to show or hide. A checkmark next to the toolbar
name indicates that the toolbar is displayed.
● Choose Tools, select the appropriate topic, and choose Show [toolbar name] Toolbar.
● Right-click (Windows) or Control-click (Mac OS) the toolbar area, and then select the toolbar you want to show
or hide. (See Using context menus.)
● Click the arrow next to a Tasks toolbar button and select the associated toolbar name. The expanded toolbar
appears as a floating toolbar in the document pane. For example, click the arrow next to the Comment & Markup
button
● To hide all toolbars, choose View > Toolbars > Hide Toolbars. Choose Show Toolbars to display them again.
● Choose View > Toolbars > Reset Toolbars to display the default set of toolbars.
, and then select Commenting Toolbar.
For information on changing the appearance and position of toolbars, see Customizing the work area.
Page 51

Selecting tools
As a general rule, you should use the Hand tool when browsing through PDF
documents. However, you can select a number of other helpful tools from the toolbars.
To select a tool:
Do one of the following:
● From the Tools menu, choose the toolbar name, and then choose the tool.
● To select a visible tool in a toolbar, click the tool, or make the appropriate keystroke.
● To select the Hand tool temporarily, without deselecting the current tool, hold down the
spacebar.
● To select the Zoom In tool temporarily, press Ctrl (Windows) or Command (Mac OS) and
hold down the spacebar.
● To select a hidden tool, hold down the mouse button on either the related tool or the
triangle next to the related tool until the additional tools appear, and then drag to the tool
you want.
● To replace a visible tool with a hidden tool, click the related tool or the triangle next to it
until the additional tools appear, and click the name of the hidden tool.
● To display hidden tools alongside the other tools, click the related tool or the triangle next
to it, and choose Expand This Button. To collapse the hidden tools, click the left-pointing
arrow to the right of the expanded button.
Clicking the triangle next to a tool to open a hidden group of tools
Related Subtopics:
Using the Properties toolbar
Page 52

Using the Properties toolbar
The Properties toolbar provides easy access to the properties for many tools and objects,
including links, comments, form fields, media clips, and bookmarks. The item selected
determines the contents of the Properties toolbar.
When the Properties toolbar is displayed, it appears by default as a floating toolbar. If you
prefer, you can dock it next to the other toolbars.
To show or hide the Properties toolbar:
1. Select the object, such as a note comment, that contains the properties you want to edit.
2. Do one of the following:
● Choose View > Toolbars > Properties Bar.
● Right-click (Windows) or Control-click (Mac OS) the toolbar area, and choose Properties
Bar from the context menu.
If you want to change properties other than those listed on the Properties toolbar,
right-click (Windows) or Control-click (Mac OS) the object, and choose Properties.
Page 53

Opening documents
You can open an Adobe PDF document from your email application, from your file
system, on a network from within a web browser, by choosing File > Open in Acrobat, or
by using the new Organizer window. The initial view of the PDF document depends on
how its creator set the document properties. For example, a document might open to a
particular page or at a particular magnification.
When someone sends you a restricted PDF document, you may need to enter a password
to open it. If a document is encrypted, you may not be able to open it without permission
from the person who created the document. In addition, restricted or certified documents
may prevent you from printing a file or copying information to another application. If
you're having trouble opening a PDF document, or if you're restricted from using certain
features, contact the author of the PDF document. For information on opening documents
to which security has been applied, see About security.
If a document is set to open in Full Screen mode, the toolbar, command bar, menu bar,
and window controls are not visible. You can exit Full Screen mode by pressing the Esc
key if your preferences are set this way, or by pressing Ctrl+L (Windows) or Command+L
(Mac OS). (See Reading documents in Full Screen mode.)
To open a PDF document from within Acrobat:
1. Do one of the following:
● Choose File > Open, or click the Open button in the toolbar. In the Open dialog box,
select one or more file names, and click Open. PDF documents usually have the extension .
pdf.
● (Windows) From the File menu, choose a previously opened document's file name.
● (Mac OS) Choose File > Open Recent File, and then choose the document's file name.
● From either the File > Organizer submenu or the Organizer menu on the File toolbar,
choose Collections > [collection name] > [PDF file name]. For information on using
Organizer, see Using the Organizer window.
● From the File or the Organizer menu on the File toolbar, choose History > [time
period] > [PDF file name].
2. If the Document Message Bar appears when a PDF document is opened, the document has
a special status or special features. For example, it may be certified, or it may be part of a
commenting review. The bottom left corner of the status bar displays icons that represent
these special status icons. You can click any of these to view the document status.
If more than one document is open, you can switch between documents by
choosing the document name from the Window menu. In Windows, Acrobat places a
button for each open document on the Windows taskbar. You can click this button to
move between open documents.
To open a PDF document from outside Acrobat:
Do one of the following:
● Open the PDF attachment from within an email application. In most email applications,
you can double-click the attachment icon to open the document.
● Click the PDF file link in your web browser. The PDF document may open within your
web browser. In this case, use the Acrobat toolbars to print, search, and work on your PDF
documents, because the menu commands may apply to the browser and not to the PDF
document. (See Viewing Adobe PDF documents in a web browser.)
● Double-click the PDF File icon in your file system.
Note: In Mac OS, you might not be able to open a PDF document created in Windows by
double-clicking the icon. If double-clicking the icon in Mac OS does not open the
document, choose File > Open in Acrobat.
Page 54

Navigating in documents
You can navigate in Adobe PDF documents by paging through them or by using
navigational tools such as bookmarks, page thumbnails, and links. You can also retrace
your steps through documents to return to where you started.
Related Subtopics:
Paging through documents
Retracing your viewing path
Navigating with bookmarks
Navigating with page thumbnails
Navigating with links
Viewing layers
Navigating documents with file attachments
Reading article threads
Page 55

Paging through documents
The navigation controls in the status bar at the bottom of the window provide a quick way
to navigate through documents. In addition, you can use menu commands, the Navigation
toolbar, and keyboard shortcuts for paging through a PDF document.
Navigation controls A. First Page button B. Previous Page button C. Current page D. Next Page button E. Last Page button F. Go To Previous View button G. Go To Next View button
To go to another page:
Do one of the following:
● To go to the first or last page, click the First Page button or the Last Page button in
the status bar, or choose View > Go To > First Page or Last Page.
● To go to the next or previous page, click the Next Page button or the Previous Page
button
● If you are in Fit Page view and the page layout is set to single page, press the Up Arrow or
on the status bar, or choose View > Go To > Next Page or Previous Page.
Down Arrow key to move up or down a page. (See Setting the page layout and
orientation.)
To learn shortcut keystroke hints for paging through documents, see Keys for
moving through a document.
To use the Navigation toolbar:
1. If the Navigation toolbar is hidden, either choose View > Toolbars > Navigation or rightclick (Windows) or Control-click (Mac OS) the toolbar area, and then choose Navigation.
2. Click the buttons to move forward or backward through your document.
To jump to a page by its number:
Do one of the following:
● Choose View > Go To > Page, type the page number, and click OK.
● Drag the vertical scroll bar until the number of the page you want to jump to is displayed.
● Select the current page number in the status bar, type the page number to jump to, and
press Enter or Return.
Note: If your document's page numbers are different from the actual page position in the
PDF file, the page position may appear in parentheses in the status bar. For example, if the
first page of an 18-page chapter begins numbering at 223, the numbering might appear as
223 (1 of 18). You can double-click inside the parentheses, change the page-position
number, and press Enter or Return to go to that page. For information on turning on and
off logical page numbers, see Page Display preferences.
To automatically scroll through a document:
1. Choose View > Automatically Scroll.
2. Press Esc to stop scrolling.
Page 56

Retracing your viewing path
After you have navigated through documents, you can retrace your path back to where
you started.
To retrace your viewing path:
Do one of the following:
● To retrace your path within an Adobe PDF document, choose View > Go To > Previous
View or Next View. The Next View command is available only if you have chosen
Previous View.
● If you're viewing the PDF document in a browser, use options on the Navigation toolbar
to move between views. Right-click (Windows) or Control-click (Mac OS) the toolbar
area, and then choose Navigation. Click the Go To Previous View button
To Next View button
. (You can also use the Next View button and the Previous View
or the Go
button in the browser.)
● To retrace your viewing path through other PDF documents, choose View > Go To >
Previous Document or Next Document. These commands open the other PDF documents
if the documents are closed.
Page 57

Navigating with bookmarks
Bookmarks provide a table of contents and usually represent the chapters and sections in a
document. Bookmarks appear in the navigation pane. For information on adding
bookmarks to an Adobe PDF document, see Creating bookmarks.
Bookmarks tab A. Bookmarks tab B. Expanded bookmark C. Click to display bookmark Options menu.
To browse by using a bookmark:
1. Click the Bookmarks tab on the left side of the window, or choose View > Navigation
Tabs > Bookmarks.
2. To jump to a topic by using its bookmark, click the bookmark. Click the plus sign (+) next
to a parent bookmark to expand it. Click the minus sign (-) next to a bookmark to hide its
children.
Note: Clicking a bookmark might perform an action instead of taking you to another
location. It depends on how the bookmark was defined.
If the list of bookmarks disappears when you click a bookmark, click the Bookmarks tab
to display the list again. If you want to hide the Bookmarks tab after you click a
bookmark, click the Options menu at the top of the Bookmarks tab, and select Hide After
Use.
Page 58

Navigating with page thumbnails
Page thumbnails provide miniature previews of document pages. You can use thumbnails
in the Pages tab to change the display of pages and to go to other pages. The red pageview box in the page thumbnail indicates which area of the page is displayed. You can
resize this box to change the zoom percentage. (See Magnifying and reducing the view.)
For information on adding thumbnails to a PDF document, see
To browse by using page thumbnails:
1. Click the Pages tab on the left side of the window, or choose View > Navigation Tabs >
Pages to display the Pages tab.
2. To jump to another page, click the page's thumbnail.
Creating page thumbnails.
Page 59

Navigating with links
Clicking a link in a PDF document is like clicking a link on a website. Links take you to
another location in the current document, to other PDF documents, or to websites. The
PDF document creator determines what links look like in the PDF document. For
information on adding links to a PDF document, see Creating links.
Clicking a link can also open file attachments and play 3D content, movies, and sound
clips. To play these media clips, you must have the appropriate hardware and software
installed. For information on changing multimedia preferences, see Setting Multimedia
preferences.
Note: Unless a link was created in Acrobat using the Link tool, you must have the
Automatically Detect URLs From Text option selected in the General preferences for a
link to work correctly.
To follow a link:
1. Select the Hand tool .
2. Position the pointer over the linked area on the page until the pointer changes to the hand
with a pointing finger. (The hand has a plus sign if the link points to the web.) Then click
the link.
Page 60

Viewing layers
Information can be stored on different layers of an Adobe PDF document. The layers that
appear in the PDF document are based on the layers created in the original application.
You can examine the layers and show or hide the content associated with each layer by
using the Layers tab in the Navigation pane. For more information on working with
layers, see About Adobe PDF layers.
Layers tab A. Eye icon indicates a displayed layer B. Hidden layer
To view layers:
1. Click the Layers tab on the left side of the window, or choose View > Navigation Tabs >
Layers.
2. Click the eye icon to hide a layer's content. Click the empty box to show a hidden
layer's content. A layer is visible when the eye icon is present and hidden when the eye
icon is absent.
Page 61

Navigating documents with file attachments
Acrobat lets you attach any file to an Adobe PDF document so that any user can open it
for viewing. If the PDF document is moved to a new location, your attachment
automatically goes with it. If you open a PDF document that has files attached, the
Attachment icon
the file attachments, and save your changes to the attachment. (See Opening and saving
attachments.)
appears in the Status tray. You can open these files for viewing, edit
Page 62

Reading article threads
Articles are electronic threads that lead you through a document. An article typically
begins on one page and continues on a different page later in the document, in the same
way as articles skip pages in traditional newspapers and magazines. When you read an
article, the page view zooms in or out so that the current part of the article fills the screen.
For information on adding articles to a PDF document, see Working with articles.
To read an article:
1. Do one of the following:
● Choose View > Navigation Tabs > Articles to open the Articles tab. Then double-click the
article's icon to start reading the article.
Note: You cannot open the Articles tab if you are viewing the PDF document inside a
browser. You must open the document in Acrobat.
● Select the Hand tool , and then click anywhere in the article to start reading it at that
point.
2. The pointer changes to the follow-article pointer. Do any of the following to navigate
through the article:
● To scroll through the article one pane at a time, press Enter or Return or click.
● To scroll backward through the article one pane at a time, Shift-click in the article, or
press Shift+Return.
● To go to the beginning of the article, Ctrl-click (Windows) or Option-click (Mac OS) in
the article.
● To exit the article before reaching the end, press Shift+Ctrl (Windows) or Shift+Option
(Mac OS) and click.
3. When you reach the end of the article, the pointer changes to the end-article pointer. Press
Enter or Return or click to return to the view displayed before you started reading the
article.
Page 63

Viewing documents
Acrobat provides tools that help you adjust the view of your Adobe PDF documents,
including simple tools such as Zoom In and Zoom Out, and more advanced tools. You can
also adjust the view by rotating pages and determining whether you'll see one page at a
time or a continuous flow of pages. You can view the same PDF document in different
panes using a split-window view, or you can view copies of the same document in
different windows using the New Window command.
Related Subtopics:
Adjusting the page position
Magnifying and reducing the view
Using the Wireframe view
Setting the page layout and orientation
Using split-window view
Viewing a document in multiple windows
Reading documents in read mode
Reading documents in Full Screen mode
Viewing the Info panel
Page 64

Adjusting the page position
Use the Hand tool to move around the page so that you can view all the areas of it.
Moving an Adobe PDF page with the Hand tool is like moving a piece of paper on a desk
with your hand.
To adjust the page position:
1. Select the Hand tool.
2. Do either of the following:
● Drag the page up or down. Release the mouse button to stop scrolling.
● If the page is zoomed in to a high magnification, drag the page left or right to view a
different area.
Page 65

Magnifying and reducing the view
The toolbar and status bar offer several methods for magnifying the view of PDF
documents:
● The Zoom In and Zoom Out tools let you change the document's magnification.
● The Dynamic Zoom tool lets you zoom in or out by dragging the mouse or mouse wheel
up or down.
Magnification options on toolbar A. Zoom In tools B. Zoom Out button C. Zoom menu D. Zoom
In button
To increase or decrease magnification:
Do one of the following:
● Click the Zoom In button or the Zoom Out button in the toolbar, or select a
magnification percentage from the toolbar menu.
● From the Zoom menu in the toolbar, choose the Zoom In tool or the Zoom Out
tool
, and then click the page. To zoom in on a specific area, use the Zoom In tool to
draw a rectangle. When you're finished zooming, you may want to select the Hand tool.
● Click the magnification percentage area in the toolbar, type a new percentage, and press
Enter or Return.
● From the Zoom menu in the toolbar, select the Dynamic Zoom tool , and then drag up
to zoom in to the area where you begin dragging, or drag down to zoom out from that
location. If your mouse has a mouse wheel, you can roll it forward to zoom in or
backward to zoom out.
When the Zoom In tool is selected, you can hold down Ctrl (Windows) or Option
(Mac OS) while clicking or dragging to zoom out. When the Zoom Out tool is selected,
hold down Ctrl or Command to zoom in. With either zoom tool, hold down Shift to use
the Dynamic Zoom tool.
To change the magnification level by using a page thumbnail:
1. Click the Pages tab on the left side of the window to view the page thumbnails. Each
thumbnail represents a page.
2. Locate the thumbnail for the current page, and then position the pointer over the lower
right corner of the page-view box until the pointer changes.
3. Drag the corner of the box to reduce or expand the view of the page.
A page-view box in a page thumbnail indicates the area of the page currently showing in the
document pane.
To resize a page to fit the window:
Do one of the following:
● To resize the page to fit entirely in the window, choose View > Fit Page, or click the Fit
Page button
● To resize the page to fit the width of the window, choose View > Fit Width, or click the
Fit Width button
● To resize the page so that its text and images fit the width of the window, choose
on the toolbar.
on the toolbar. Part of the page may be out of view.
View > Fit Visible. Part of the page may be out of view.
To see keyboard shortcuts for resizing the document, open the View menu and
notice the shortcuts for each command.
To return a page to its actual size:
Choose View > Actual Size, or click the Actual Size button on the toolbar. The actual
size for a PDF page is typically 100%, but the document may have been set to another
magnification level when it was created.
Page 66

Using the Wireframe view
The Wireframe view applies a constant stroke width (one pixel) to lines, regardless of
zoom. When you print the document, the stroke width will print at the true width.
The Wireframe view is off by default. To use the Wireframe view, choose View >
Wireframe. This feature is not available within your browser.
Page 67

Setting the page layout and orientation
Changing the page layout is especially useful when you want to zoom out to get an overview of the document
layout. You can use the following page layouts when viewing Adobe PDF documents:
● Single Page displays one page in the document pane at a time.
● Continuous arranges the pages in a continuous vertical column.
● Facing arranges the pages side by side, displaying only one or two pages at a time.
● Continuous - Facing arranges the pages side by side in a continuous vertical column. If a document has more than
two pages, the first page is displayed on the right to ensure proper display of two-page spreads.
Single Page, Continuous, Continuous - Facing, and Facing layouts compared
For information on determining how pages are arranged when you use Continuous - Facing layout, see Viewing
document properties.
To set page layout:
1. Do one of the following:
● Choose View > Page Layout, and then choose Single Page, Continuous, Facing, or Continuous - Facing.
● Click the Single Page button , the Continuous button , the Continuous - Facing button , or the Facing
button in the status bar.
2. If necessary, choose View > Fit Page to display the document in the current page layout.
In Single Page layout, choosing Edit > Select All selects all text on the current page. In other layouts, Select
All selects all text in the PDF document.
To rotate the page view:
Choose View > Rotate View > Clockwise or Counterclockwise, or click the Rotate Clockwise button or the
Rotate Counterclockwise button
This changes the view of the page, not its actual orientation, and cannot be saved. If you want the rotation to be
saved with the document, choose Document > Rotate Pages.
on the toolbar. You can change the view of a page in 90-degree increments.
Page 68

Using split-window view
The split-window view divides the document pane into two panes (Split command) or four
panes (Spreadsheet Split command), allowing you to see different views or pages of the
same PDF document at the same time. With the Split command you can scroll, change the
magnification level, or turn to a different page in the active pane without affecting the
other pane. The spreadsheet split-window view is useful if you want to keep column
headings and row labels visible while scrolling through a large spreadsheet or table. In this
mode, changing the magnification in one pane changes the magnification in all panes.
Also, scrolling is coordinated between the panes.
To view a document in a split-window view:
1. Choose Window > Split, or drag the gray box above the scroll bar.
2. Click a pane to make it active, and then scroll or change the magnification to adjust
the view.
3. Drag the splitter bar up or down to resize the panes.
4. Choose Window > Remove Split to restore the document window to a single pane.
To view a document in a spreadsheet split-window view:
1. Choose Window > Spreadsheet Split.
2. Click a pane to make it active, and then scroll or change the magnification to adjust
the view. Note that magnification and scrolling changes are coordinated to ensure that
column headings and row labels are lined up.
3. Drag the horizontal splitter bar up or down and the vertical splitter bar left or right to
resize the panes.
4. Choose Window > Remove Split to restore the document window to a single pane.
Page 69

Viewing a document in multiple windows
You can create multiple windows for the same document using the Window > New
Window command. New windows have the same size, magnification, and layout as the
original window and open at the same page and on top of the original window. When you
open a new window, Acrobat adds the suffix 1 to the original file name and assigns the
suffix 2 to the new window. You can open multiple windows with the suffix incrementing
with each new window. Closing a window causes the remaining open windows to be
renumbered sequentially; that is, if you have five windows open and you close the third
window that you opened, the windows are renumbered with the suffixes 1 to 4.
To open or close a new window:
1. To open a new window, select Window > New Window.
2. To close a window, click the close box on the window. You are prompted to save any
changes. Closing a window does not close a document if more than one window is open.
3. To close all open windows for a document, choose File > Close. You are prompted to save
any changes before each window is closed.
Note: This feature is not available when PDF documents are viewed in a browser.
Page 70

Reading documents in read mode
The read mode is designed to give you a clean work area for when you're simply reading
PDF documents. Click the Hide Toolbars button
navigation pane and move a limited selection of tools to the status bar at the bottom of the
work area. After you click the Hide Toolbars button, a tools menu and zooming features
appear to the right of Hide Toolbars button. Click the tools menu to select a tool. For
information on using the Hand tool, see Adjusting the page position; for the zoom tools,
Magnifying and reducing the view; for the Select tool, see Copying and pasting text,
see
tables, and images.
To exit Read Mode, click the Show Toolbars button.
to retain the menu bar and the
Page 71

Reading documents in Full Screen mode
In Full Screen mode, Adobe PDF pages fill the entire screen; the menu bar, command bar,
toolbar, status bar, and window controls are hidden. A document creator can set a PDF
document to open in Full Screen mode, or you can set the view for yourself. Full Screen
mode is often used for presentations, sometimes with automatic page advancement and
transitions. (See Setting up a presentation.)
The pointer remains active in Full Screen mode so that you can click links and open notes.
You can use keyboard shortcuts for navigational and magnification commands, and the
Full Screen preferences let you display a navigation bar in Full Screen mode. (See Full
Screen preferences.)
To read a document in Full Screen mode:
Click the Full Screen button in the lower left corner of the document window. Press
Enter or Return or the Down Arrow or Right Arrow key to page through the document.
Press Shift-Return or the Up Arrow or Left Arrow key to page backward through the
document.
Note: If you have two monitors installed, the Full Screen mode of a page may appear on
only one of the monitors. To page through the document, click the screen displaying the
page in Full Screen mode.
To exit Full Screen mode:
Press Esc, if Escape Key Exits is selected in the Full Screen preferences, or press Ctrl+L
(Windows) or Command+L (Mac OS). If the full screen navigation bar is showing, you
can also click the Exit Full Screen button
.
Page 72

Viewing the Info panel
The Info panel lets you see the coordinate position of the mouse pointer within the
document pane. The position numbering begins at the upper left corner of the document.
The Info panel also shows the width and height of a selected object as you resize it.
To use the Info panel:
1. Choose View > Navigation Tabs > Info.
2. Move the mouse pointer to view X and Y coordinates.
To change the panel's measurement units:
From the Options menu in the Info panel, choose a different unit of measurement. The
currently selected option has a checkmark next to its name.
Page 73

Customizing the work area
You can change the appearance of the work area to better suit your working style. For
example, you can change the appearance and location of toolbars and the navigation pane
and lock their position on the desktop. The work area that you create becomes the default
work area on your system until you change it.
To show or hide the menu bar:
To hide the menu bar, choose View > Menu Bar. To show it again, press F9.
To change the display of a navigation tab:
Do one of the following:
● To change the width of the navigation pane, drag its right border.
● To move a tab to its own floating panel, drag the tab from the navigation pane to the
document pane.
● To move a tab to an existing floating panel or to the navigation pane, drag the tab to the
floating panel or the navigation pane.
● To collapse a floating panel to show only the tabs, click the tab name at the top of the
window. Click the tab name again to return the panel to its full size.
To show or hide tool labels:
Choose View > Toolbars > Show Button Labels > [option].
Note: Tool labels are turned off selectively when space in the toolbar area becomes
limited.
To move a toolbar:
Do one of the following:
● To move a toolbar in the toolbar area, drag the toolbar by the separator bar, which is
located at the left edge of a toolbar.You can move the toolbar within the toolbar area, or
you can drag the toolbar into the document pane to create a floating toolbar. You can drag
the bar back to its original location.
● To move a floating toolbar in the document pane, drag the toolbar by its title bar.
Moving a section of tools from the toolbar area
To lock or unlock the position of toolbars:
Choose View > Toolbars > Lock Toolbars.
The separator bars disappear when toolbars are locked.
Note: Lock Toolbars locks only the position of toolbars in the toolbar area. Floating
toolbars are not locked in position.
To dock toolbars:
Choose View > Toolbars > Dock All Toolbars to expand and dock all floating toolbars in
their default location in the toolbar area. If necessary, the toolbar area expands to three
lines, and toolbar labels are hidden selectively to save space.
To return toolbars to their default configuration:
Choose View > Toolbars > Reset Toolbars.
Page 74

Setting preferences
You can use the Preferences dialog box in Acrobat Standard to define a default page
layout and customize your application in many other ways. These preferences control the
application on your system; they are not associated with a particular Adobe PDF
document.
Note: If you install any third-party plug-ins, set these preferences using the Third-Party
Preferences menu item.
To set preferences:
1. Do one of the following:
● Choose Edit > Preferences (Windows) or Acrobat > Preferences (Mac OS).
● Choose Preferences from the document pane menu.
2. In the Preferences dialog box, select one of the preference categories from the list at the
left.
3. Select preference options for that feature, and then click OK. Click Cancel to leave the
settings unchanged.
Related Subtopics:
Preference categories
Startup preferences
Page Display preferences
General preferences
Full Screen preferences
Page 75

Preference categories
You set the preference options by category:
Accessibility
Sets preferences for making Adobe PDF documents easier to access for vision- and
motion-challenged users. (See Setting accessibility preferences.)
Color Management
Sets preferences for interpreting color accurately across devices. (See Managing color in
Acrobat.)
Commenting
Sets preferences for the appearance and functionality of document comments. (See Setting
Commenting preferences.)
Convert From PDF
Sets options for converting Adobe PDF content to various file types using the Save As
command. Any changes you make in the conversion options accessed through the Save As
command are reflected in this preferences panel. (See Converting Adobe PDF documents
to other file formats.)
Note: These settings are not the conversion settings used in the Export All Images
command.
Convert To PDF
Sets options for converting various file types to Adobe PDF files using the Open
command.
Forms
Sets preferences for the appearance and functionality of forms. (See Setting Forms
preferences.)
Full Screen
Sets preferences for navigation, transitions, and mouse behavior when documents are
viewed in full screen mode. (See Full Screen preferences.)
General
Sets miscellaneous preferences, including display, text, and image selection preferences.
(See General preferences.)
Identity
Sets preferences for personal information used for authorship and digital signatures.
International
Sets the language used in Acrobat or lets you choose the language each time you start
Acrobat. You can control the default paragraph direction and turn on options for right-toleft languages.
Internet
Sets web browser and Internet connection options. You can set preferences to check your
default browser settings for compatibility with the application each time the application
starts, and you can choose a connection speed that is used by the multimedia plug in. This
is also where you set your Internet connection setting. (For more information on setting up
Acrobat as a helper application in Windows, see Viewing Adobe PDF documents in a web
browser.)
JavaScript
Sets preferences for enabling JavaScript. To access the JavaScript Reference Guide for
Acrobat, go to http://partners.adobe.com/links/acrobat (English only) on the Adobe
website.
Multimedia
Sets the preferred media player to play 3D content, movies, and sound clips, as well other
multimedia options. (See Setting Multimedia preferences.)
Page Display
Sets options that define the page display. (See Page Display preferences.)
Reading
Sets reading order and screen reader options, as well as read-out-loud options, such as
pitch, volume, and speed, for speech used in voice delivery. (See Setting Reading
preferences.)
Reviewing
Sets server type and server settings for online reviewing.
Search
Sets preferences for searches and fast find. (See Setting Search preferences.)
Security
Sets the preferred security handler and the preferences for creating and managing digital
signatures and their appearance. (See Setting Digital Signature preferences.)
Spelling
Sets preferences for the spell checker and determines whether spelling will be checked
during typing. (See Setting Spelling preferences.)
Startup
Sets preferences for opening the application and opening documents. (See Startup
preferences.)
Trust Manager
Sets permissions for trusted entities. (See Setting Trust Manager preferences.)
Units & Guides
Defines the measurement units and appearance for rulers and grids.
Updates
Defines how to check for software updates. (See Updating Acrobat.)
Web Capture
Sets preferences for downloading HTML pages from the World Wide Web or an intranet
and converting them to Adobe PDF documents. (See Setting Web Capture preferences.)
Page 76

Startup preferences
The Startup panel of the Preferences dialog box defines how documents open and how the
application starts. It includes the following options:
Maximum Documents In Most-Recently Used List
Sets the maximum number of documents listed in the File menu (Windows) or when you
choose File > Open Recent File (Mac OS). The default is five for Windows and nine for
Mac OS.
Remember Files In Organizer History For
Sets the maximum period of time for PDF files to be included in the History list.
Reopen Documents To Last Viewed Page
Determines whether documents open automatically to the last viewed page within a work
session.
Use Page Cache
Places the next page in a buffer even before the current page is viewed to reduce the
amount of time required to page through a document.
Allow Layer State To Be Set By User Information
Allows the author of a layered PDF document to specify layer visibility based on user
information.
Display The Document Status Dialog When These Status Items Appear
Determines which documents automatically show a status dialog box when they are
opened.
Display Splash Screen
Determines whether the application splash screen appears each time the application starts.
Use Only Certified Plug-Ins
Ensures that only Adobe-certified third-party plug-ins are loaded.
Page 77

Page Display preferences
The Page Display panel of the Preferences dialog box includes the following options for
the appearance of pages:
Default Page Layout
Sets the page layout used for scrolling when you first open a document.
Display Art, Trim, and Bleed Boxes
Displays any art, trim, or bleed boxes defined for a document.
Display Large Images
Displays large images. If your system is slow to display image-intensive pages, you may
want to not select this option.
Display Page To Edge
Eliminates the thin white border that is displayed around the edge of Adobe PDF pages
created by some applications. If you do not select this option, pages are printed with a
white border, as defined by the printer driver.
Display Transparency Grid
Displays the grid behind transparent objects.
Use Logical Page Numbers
Enables you to use the Number Pages command to display Adobe PDF page numbering
that matches the numbering printed on the pages. A page's number, followed by the page
position in parentheses, appears in the status bar and in the Go To Page and Print dialog
boxes. For example, if the first page in a document is numbered "i", it might appear as "i
(1 of 10)". If this option is not selected, page numbering information in documents is
ignored and pages are numbered with arabic numbers starting at 1. Selecting this option
should alleviate most cases of unexpected Go Back behavior in your web browser. For
additional information on logical page numbering, see Numbering pages.
Use CoolType
Adjusts text display to work optimally with your monitor.
Overprint Preview
Turns overprint preview on or off. The Overprint Preview mode lets you see (on-screen)
the effects of ink aliasing in the printed output. A printer or service provider may create an
ink alias if a document contains two similar spot colors and only one is required, for
example.
Smooth Text, Line Art, and Images
Select whether to smooth text, line art, or images. The default is to smooth both text and
images.
Use Greek Text Below
Displays text below the designated point size as gray lines (or greeked text) to speed
display time.
Use System Setting
Uses the system settings for monitor resolution.
Custom Resolution
Sets the monitor resolution.
Default Zoom
Sets the magnification level for PDF documents when they are first opened. This value
overrides document settings.
Max Fit Visible Zoom
Sets the maximum magnification level for the fit visible view and for viewing articles.
Page 78

General preferences
The General panel of the Preferences dialog box provides the following preference
options:
Automatically Save Document Changes To Temporary File Every
Determines how often Acrobat automatically saves changes to an open document.
Automatically Detect URLs From Text
Specifies whether web links that weren't created with Acrobat are automatically identified
in the PDF document and become clickable links.
Open Cross-Document Links In Same Window
Closes the current document and opens the document being linked to in the same window,
minimizing the number of windows open. If the document being linked to is already open
in another window, the current document is not closed when you click a link to the open
document. If you do not select this option, a new window opens each time you click a link
to a different document.
Note: To override this setting, whether selected or deselected, press Ctrl (Windows) or
Option (Mac OS), and choose Open Link In New Window.
Save As Optimizes For Fast Web View
Restructures a PDF document for page-at-a-time downloading from web servers.
Emit Passthrough PostScript When Printing
Enables PostScript XObjects in the PDF file to be emitted when that PDF file is printed to
PostScript printer.
Enable Print Preview
Controls the display window in the Print dialog box that shows how the PDF will print.
Turning this off speeds up the Print dialog box display.
Use Single Key Accelerators To Access Tools
Enables you to select tools with a single keystroke. This is off by default.
Enable Text Selection For The Hand Tool
Enables the Hand tool to automatically function as the Select tool when it hovers over text
in an Adobe PDF document.
Disable Edit Warnings
Disables warning boxes that would normally open when you delete items such as links,
pages, page thumbnails, and bookmarks, for example.
Show Documents in Taskbar
Turns on or off the feature that adds a button to the Windows taskbar for each document
open in Acrobat. You can click this button to move between open documents.
Select Tool Options
Determines the selection order of text and images.
Text Selection Margin Size
Sets the distance, in pixels, that the Select tool has to be from text before it changes to a
text selection pointer. You can set the value from zero to twenty pixels.
Column Selection Margin Size
Sets the distance, in pixels, that the Select tool has to be from the text selection margin
before it switches from text selection to column selection.You can set the value from zero
to twenty pixels. If you set the value at zero pixels, you cannot select columns, only text.
Use Fixed Resolution For Snapshots
Sets the resolution used to copy the image captured with the Snapshot tool.
Enable Version Cue Workgroup File Management
Turns on Version Cue™ and adds the Save A Version command and the Versions
command to the File menu.
Note: To use Version Cue in Acrobat, you must be able to access a Version Cue
Workspace in Adobe Creative Suite.
Page 79

Full Screen preferences
The Full Screen panel of the Preferences dialog box provides the following navigation and
appearance options when an Adobe PDF document is being viewed in Full Screen mode.
Advance Every
Specifies whether to advance automatically from page to page every set number of
seconds. You can page through a document using mouse or keyboard commands even if
automatic paging is selected.
Loop After Last Page
Lets you page through a PDF document continuously, returning to the first page after the
last. This option is typically used for setting up kiosk displays.
Escape Key Exits
Lets you exit Full Screen mode by pressing the Escape key. If this option is not selected,
you can exit by pressing Ctrl+L (Windows) or Command+L (Mac OS).
Left Click To Go Forward One Page; Right Click To Go Back One Page
Lets you page through an Adobe PDF document by clicking the mouse. You can also page
through a document by pressing Return, Shift-Return (to go backward), or the arrow keys.
Show Navigation Bar
Shows a minimal navigation toolbar regardless of the document settings.
Ignore All Transitions
Removes transition effects from presentations that you view in Full Screen mode.
Default Transition
Specifies the transition effect to display when you switch pages in Full Screen mode and
no transition effect has been set for the document being viewed.
Mouse Cursor
Specifies whether to show or hide the pointer.
Background Color
Specifies the window's background color in Full Screen mode. If you choose Custom, you
can select a color from the system color palette.
Page 80

Managing plug-ins
Plug-ins add more functionality, but they also increase the required amount of memory
needed. To minimize that memory, you may want to install only the plug-ins that you use.
A plug-in must be located in the plug-ins folder to load correctly. You can temporarily
disable plug-ins when starting your software.
To disable a plug-in:
1. On Windows, open the plug_ins folder inside the Acrobat folder within the Acrobat 7.0
application folder. On Mac OS, Control-click the application icon, and choose Show
Package Contents. Then double-click the Contents folder and open the Plug-ins folder.
2. Select the plug-ins you do not want to load, and move them out of the folder. Some of the
plug-ins may be in folders within the plug-ins folder.
To temporarily disable all plug-ins:
Press the Shift key immediately after starting Acrobat.
Page 81

Viewing Adobe PDF documents in a web browser
Acrobat makes viewing Adobe PDF documents on the web easy. You can view PDF
documents in your browser, or you can set up Acrobat to work as a separate helper
application so that when you open or download PDF documents from the web, they open
in a separate Acrobat window. If you set your preferences to start Acrobat as a separate
application outside your browser and automatically open linked PDF documents in
Acrobat, you cannot use Fast Web Viewing, form submittal in a browser, or search
highlighting on the web.
To use Acrobat as a helper application:
1. Choose Edit > Preferences (Windows) or Acrobat > Preferences (Mac OS), and select
Internet on the left.
2. Deselect Display PDF In Browser, and click OK.
To set browser and Internet preferences:
1. Choose Edit > Preferences (Windows) or Acrobat > Preferences (Mac OS), and select
Internet on the left.
2. Set the following options, and then click OK.
Display PDF In Browser
Displays any PDF document opened from the web inside the browser window. If this
option is not selected, PDF documents open in a separate Acrobat window.
Check Browser Settings When Starting Acrobat
Checks your default browser settings for compatibility with the application each time the
application starts.
Allow Fast Web View
Downloads PDF documents for viewing on the web one page at a time. If this option is
not selected, the entire PDF file downloads before it is displayed. If you want the entire
PDF document to continue downloading in the background while you view the first page
of requested information, also select Allow Speculative Downloading In The Background.
Allow Speculative Downloading In The Background
Allows a PDF document to continue downloading from the web, even after the first
requested page appears. Downloading in the background stops when any other task, such
as paging through the document, is initiated in Acrobat.
Connection Speed
Choose a connection speed from the menu. This setting is also used by the multimedia
plug in.
Internet Settings
Click to set up your Internet connection. Follow the prompts, or consult your ISP if you
need help.
Related Subtopics:
Viewing in a browser in Windows
Viewing in a browser in Mac OS
Page 82

Viewing in a browser in Windows
You can view the PDF document in the web browser if you are using Internet Explorer 5.5
or later, Netscape Navigator 7.1 or later, or America Online 9.0 or later. Because keyboard
commands may be mapped to the web browser, some Acrobat shortcuts may not be
available. Similarly, you may need to use the tools and commands in the Acrobat toolbar
rather than the browser toolbar or menu bar. For example, to print a PDF document, you
need to use the Print button in the Acrobat toolbar rather than the Print command in the
browser. (In Internet Explorer, you can choose File > Print, Edit > Copy, and Edit > Find
on the Internet Explorer toolbar.)
Page 83

Viewing in a browser in Mac OS
Acrobat 7.0 works automatically with Safari version 1.2.3 or later and Mac OS 10.3 or
later to make viewing Adobe PDF documents on the web easy. The first time you open
Acrobat 7.0, your system automatically is configured to use Acrobat to open PDF files in
your browser. Acrobat does not add any tools or menus to the Safari toolbar and menu bar.
Note: Be sure that Safari is not running the first time you start Adobe Acrobat.
When you view PDF documents in your browser, some keyboard commands may not be
available because they are mapped to the web browser. Similarly, you may need to use the
tools and commands in the Adobe Acrobat toolbars rather than the browser toolbar or
menu bar. For example, to print a PDF document, you need to use the Print button in the
Adobe Reader toolbar rather than choosing File > Print in the browser.
Important: If you have Adobe Reader installed on your system and subsequently install
Acrobat Standard, Safari continues to use Adobe Reader to open PDF documents in your
browser. To reconfigure Safari to use Acrobat Standard, you must quit Safari and all
versions of Acrobat or Adobe Reader, start Acrobat, and then start Safari while Acrobat is
running.
Page 84

Working with non-English languages in Adobe PDF files
Adobe Acrobat lets you view, search, and print PDF documents that contain Asian
(Traditional and Simplified Chinese, Japanese, and Korean), Central and Eastern
European, and Cyrillic text. You can also use these languages when you fill in forms, add
comments, and apply digital signatures.
Related Subtopics:
About Asian-language Adobe PDF files
About Central and Eastern European-language Adobe PDF files
Page 85

About Asian-language Adobe PDF files
This section covers creating and managing Asian-language PDF files on a non-Asianlanguage system. Almost all of the Acrobat features are supported for Traditional and
Simplified Chinese, Japanese, and Korean text.
In Mac OS, application and system support for Asian text is automatic.
In Windows, you must install the Asian language support files by using the custom
installation and selecting the Asian Language Support options under Create Adobe PDF
and View Adobe PDF. You must also have Asian language support installed for your
system.
PDFMaker and the Adobe PDF printer automatically embed most Asian fonts in your file
when creating PDF files. You can control whether Asian Fonts are embedded.
In Windows, you may be able to view and print files that contain Asian languages without
having the necessary Asian language support installed on your system. If you try to open a
PDF file for which language support is required, you are automatically prompted to install
the required language pack.
Page 86

About Central and Eastern European-language Adobe PDF files
You can work with Adobe PDF files that contain Cyrillic text (including Bulgarian and
Russian), Central European text, and Eastern European text (including Czech, Hungarian,
and Polish), if the fonts are embedded in the PDF files. If the fonts are embedded, you can
view and print the files on any system. Fonts do not need to be embedded to use the
Search feature.
Note: If you open a PDF file in which form fields or text boxes contain these languages
but the fonts are not embedded and are not installed on your system, choosing Help >
Check For Updates Now automatically prompts you to download and install the necessary
language font kits.
Page 87

Finding Adobe PDF Files Using Organizer
Using the Organizer window
Page 88

Using the Organizer window
Organizer helps you find PDF files that you've previously opened and PDF files that you've organized into collections
and favorites. With Organizer, you can see thumbnail images of PDF pages to quickly find files, organize related PDF
files, and quickly browse, find, and sort PDF files that you recently viewed. After you select one or more files, you can
start one of several different tasks using the buttons above the file list.
Organizer window in Windows A. Categories pane displays categories for viewing PDF files B. Files pane lists PDF files
contained in the selected category C. Pages pane displays thumbnails of each page within the selected PDF file
To display the Organizer window:
Click the Organizer button in the File toolbar, or choose File > Organizer > Open Organizer. (To resize a pane
relative to the other panes, drag the vertical line that separates two panes. To resize the entire Organizer window, drag
the left, right, or bottom edge of the window.)
It isn't necessary to open the Organizer window if you want to open a PDF file that's in a collection, to create a
new collection, to add an open PDF document to a collection, or to open a PDF file from your history of opened PDF
files. In Acrobat, click the Organizer button
These items contain commands that let you do all of these things.
Related Subtopics:
in the File toolbar, or choose File > Organizer or File > History.
Using the categories pane of the Organizer window
Using the files pane of the Organizer window
Using the pages pane of the Organizer window
Page 89

Using the categories pane of the Organizer window
The categories pane of the Organizer window contains four categories to help you locate
and organize PDF files that reside on your computer, on a network, and on the web:
● History contains subcategories that list all PDF files that you've opened during a specified
period of time. You can't change the subcategory names or manually add PDF files to the
History, which is automatically updated each time you open a PDF file and as time passes,
but you can clear the entire history by using the Clear History button in the files pane.
You can also control the maximum length of the file history or turn it off with the
Remember Files In Organizer History For option in the Startup preferences.
● My Computer (Windows) or [disk name] (Mac OS) lists the hard drives and folders in
their current hierarchy. This category is especially useful if you know where a particular
PDF file resides.
● Favorite Places lists folders, network locations, and web directories that you've specified
as favorite destinations. This category functions like bookmarks or favorite destinations
that you create for quick access in a web browser, except that the destinations are folders
or drives that contain PDF files. You can add or remove destinations from the Favorite
Places list, but you can't edit the destination names.
● Collections contains collection folders that list all PDF files that you've associated with
each particular collection folder. Each collection folder can point to multiple PDF files no
matter where each PDF file is located; for example, a single collection folder can list PDF
files that are actually located in different folders on your computer, on a network, and also
on the web. You can change each collection folder's name, add new collection folders, and
add PDF files to each collection folder.
To view PDF files in an Organizer category:
1. To expand or collapse a category or folder in the categories pane, click the icon to the left
of the category icon or folder icon.
2. Select a subcategory or folder under a main category. The pages pane lists all PDF files
that are associated with that subcategory or folder.
To organize PDF files with the Collections category:
1. To edit the list of collection folders, do any of the following:
● If you want to rename a collection folder, right-click (Windows) or Control-click (Mac
OS) the collection folder name, choose Rename Folder, and then type the new name.
● If you want to delete a collection folder, right-click (Windows) or Control-click (Mac OS)
the collection folder name, choose Delete Folder, and then click Yes in the confirmation
dialog box. The PDF files within the collection folder aren't deleted from their original
locations.
● If you want to add a new collection folder, click the Create A New Collection button
in the Organizer window. Or, in Acrobat, choose Create A New Collection from the
Organizer menu in the File toolbar, or choose File > Organizer > Collections > Create A
New Collection. Type a name for the collection.
2. If you want to add a PDF file to a collection folder, do one of the following:
● Right-click (Windows) or Control-click (Mac OS) the collection folder name, choose Add
Files, select one or more PDF files, and click Add.
● Select the subcategory or folder that contains the PDF file, right-click (Windows) or
Control-click (Mac OS) the PDF file in the files pane, and choose Add To Folder >
[collection folder name].
● Drag a PDF file from Windows Explorer or Mac OS Finder to the collection folder in the
categories pane.
● After selecting a subcategory in the History, My Computer, or Favorite Places category,
drag a PDF file from the files pane to the desired collection folder.
● In Acrobat, open the PDF file. Choose Add To A Collection from the Organizer menu
in the File toolbar. To add the PDF file to an existing collection, select a collection and
click OK. To add the PDF file to a new collection, click New Collection, type a name for
the collection, and click Create; then click OK.
You can open any PDF file from a collection by using the Open button in the
Organizer window or by simply choosing the PDF file name from a submenu directly in
Acrobat. To open a PDF file from a collection in Acrobat, choose Collections >
[collection name] > [PDF file name] from either the File > Organizer submenu or the
Organizer menu
in the File toolbar.
3. If you want to move a PDF file from one collection folder to another, select the collection
folder that contains the PDF file, right-click (Windows) or Control-click (Mac OS) the
PDF file in the files pane, and choose Move To Folder > [collection folder name].
4. If you want to remove a PDF file from a collection folder, select the collection folder,
right-click (Windows) or Control-click (Mac OS) the PDF file in the files pane, and
choose Remove From [collection folder name].
To organize PDF files with the Favorite Places category:
1. If you want to add an existing folder or hard drive to the category's list, do one of the
following:
● Click the Add A Favorite Place button , select a folder or hard drive, and click OK.
● Right-click (Windows) or Control-click (Mac OS) the desired folder in the My Computer
(Windows) or [disk name] (Mac OS) category, and choose Add [folder name] To Favorite
Places.
● Right-click (Windows) or Control-click (Mac OS) the desired subfolder in the Favorite
Places category, and choose Add [favorite place name] To Favorite Places.
2. If you want to remove a folder or hard drive from the list of Favorite Places, right-click
(Windows) or Control-click (Mac OS) the item, and choose Remove [folder name] From
Favorite Places.
To locate PDF files with the My Computer (Windows) or [disk name] (Mac OS) category:
Select a folder in the My Computer (Windows) or [disk name] (Mac OS) category. All
PDF files within that folder are listed in the files pane.
Page 90

Using the files pane of the Organizer window
The files pane in the Organizer window lists the PDF files that are within the subcategory
or folder selected in the categories pane; each listing of a PDF file displays the file's name,
modification date, page number, file size, location, and a thumbnail image of the first
page. You can sort the list by file name, metadata information, number of pages, file size,
modification date, and date last opened.
The buttons at the top of the Organizer window let you open, print, email, or combine one
or more selected PDF files; in addition, you can send a selected PDF file for review or
approval, or upload it for a browser-based review.
To work with PDF files in the files pane:
1. Select a subcategory or folder under a main category in the categories pane to display PDF
files in the files pane.
2. If you want to sort the list of PDF files according to a particular property, choose a
property from the Sort By menu. To change the sorting direction, click the Ascending Sort
Order button or the Descending Sort Order button to the right of the Sort By menu.
3. Select the file or files you want to work with: To select a listed PDF file, click it; to select
all of the PDF files listed, click Select All; to add or remove noncontiguous PDF files to
the selection, Ctrl-click (Windows) or Control-click (Mac OS) them; to add contiguous
PDF files to the selection, Shift-click.
4. If you want to view the location of the selected PDF files in Windows Explorer or Mac
OS Finder, right-click (Windows) or Control-click (Mac OS), and choose Show In
Explorer (Windows) or Show In Finder (Mac OS).
5. To perform an action on the selected PDF files, do any of the following:
● If you want to open, print, or email the PDF files, click the button for that task above the
files pane.
● If you want to combine the PDF files into a single PDF file, click Create PDF From
Multiple Files, and then see Creating Adobe PDF files from multiple files.
● If you want to start an email-based review of a PDF file or upload a PDF file for a
browser-based review, make sure that only one PDF file is selected, choose the command
for that task from the Send For Review menu, and then see Setting up an email-based
review, or Setting up a browser-based review.
To erase the history of PDF files that you opened:
1. Select a History subcategory in the categories pane.
2. Click Clear History in the files pane.
Page 91

Using the pages pane of the Organizer window
The pages pane of the Organizer window displays thumbnails for every page of all PDF files that are selected in the files
pane. The Zoom slider and buttons at the bottom of the pages pane let you adjust the size of the page thumbnails. If a
selected PDF file contains special document properties, such as layers, attachments, or a digital signature, an icon
appears for each property in the thumbnail's title bar; placing the pointer over the icon displays a tool tip identifying
those properties.
Multiple PDF documents selected (left) and thumbnails of each page within the PDF documents (right)
Page 92

ADOBE PDF CREATION
About creating Adobe PDF files
Creating Adobe PDF files from other applications
Using the Adobe PDF printer
Creating a custom page size
Page 93

About creating Adobe PDF files
You can convert a variety of file formats to Adobe Portable Document Format (PDF), a
universal file format that preserves all the fonts, formatting, images, and color of a source
file, regardless of the application and platform used to create it. Adobe PDF files are
compact and can be exchanged, viewed, navigated, and printed by anyone with free
Adobe Reader software, while maintaining document integrity.
In addition to creating Adobe PDF files from virtually any software application, you can
create PDF files in Adobe Acrobat Standard by scanning and capturing paper documents
and by downloading and converting web pages.
There are many ways to create Adobe PDF files, and the amount of structural information
the PDF files contain depends on how they are created. The more structural information a
PDF document contains the more opportunities you have for successfully reusing the
content and the more reliably a document can be used with screen readers. (See
Understanding how tags affect accessibility.)
For many users, the process for creating Adobe PDF files is almost automatic. Most users
need only be aware that the settings used in the conversion process can be customized
should the quality or size of the Adobe PDF files need to be changed. Other users, because
of their heavy use of images, fonts, and color, for example, routinely prefer to customize
the conversion settings to create the best possible Adobe PDF file for their needs.
Page 94

Creating Adobe PDF files from other applications
You can create Adobe PDF files from applications other than Acrobat using any of three
methods.
Use the Save As or Export command to create an Adobe PDF file from the current file.
This method is available in such authoring applications as Adobe
Photoshop
®
, Adobe® Illustrator®, and Adobe® PageMaker®. All the necessary
components for creating Adobe PDF files are installed and configured automatically when
you perform a typical installation. You are ready to create PDF files right away. See the
documentation that came with your application for information on converting files this
way.
®
InDesign®, Adobe®
Use the Adobe PDF printer. You can create Adobe PDF files from any application that
has a Print command. (See Using the Adobe PDF printer.)
Use PDFMaker, an application in authoring applications that converts documents directly
to PDF. For information on which versions of these applications are supported, visit the
Adobe website (www.adobe.com/acrofamily/main.html).
● To create PDF files from Word, PowerPoint, or Excel files, see Converting Microsoft
Office files (Windows) or Converting Microsoft Office files (Mac OS).
● To create PDF files from Outlook, see Converting Microsoft Outlook email messages
(Windows).
● To create PDF files from Internet Explorer, see Converting web pages in Internet Explorer
(Windows).
● To create PDF files from Access, see Converting Microsoft Access files (Windows).
● To create PDF files from Publisher, see Converting Microsoft Publisher files (Windows).
Page 95

Using the Adobe PDF printer
In an authoring application such as Adobe InDesign, use the Print command with the
Adobe PDF printer to convert your file to Adobe PDF. Your source document is
converted to PostScript and fed directly to Distiller for conversion to PDF, without
manually starting Distiller. The current Distiller preference settings and Adobe PDF
settings are used to convert the file. If you're working with nonstandard page sizes, see
Creating a custom page size.
Note: The Adobe PDF printer creates untagged PDF files. A tagged structure is required
for reflowing content to a handheld device and is preferable for producing reliable results
with a screen reader. (See Creating tagged Adobe PDF from authoring applications.)
To create an Adobe PDF file using the Print command (Windows):
1. Open the file that you want to convert to an Adobe PDF file in its authoring application,
and choose File > Print.
2. Choose Adobe PDF from the list of printers.
3. Click the Properties (or Preferences) button to customize the Adobe PDF printer setting.
(In some applications, you may need to click Setup in the Print dialog box to access the
list of printers, and then click Properties or Preferences.) For information on customizing
the Adobe PDF printer settings, see Setting Adobe PDF printing preferences (Windows).
4. In the Print dialog box, click OK.
By default, your Adobe PDF file is saved in the folder specified in the printer port. The
default location is My Documents. The file name and destination are controlled by the
Prompt For Adobe PDF Filename setting in Printing Preferences.
To create an Adobe PDF file using the Print command (Mac OS):
1. Open the file that you want to convert to an Adobe PDF file in its authoring application,
and choose File > Print.
2. Choose Adobe PDF from the list of printers.
3. Choose PDF Options from the pop-up menu.
4. For Adobe PDF Settings, choose one of the default settings, or customize the settings
using Distiller. Any custom settings that you have defined are listed.
For most users, the default Adobe PDF conversion settings are adequate. For information
on the default conversion settings, see Using default Adobe PDF settings files. For
information on editing these settings and creating new settings, see
Adobe PDF settings.
5. For After PDF Creation, specify whether or not to open the PDF file.
6. Click Print.
7. Select a name and location for your PDF file, and click Save.
By default, your Adobe PDF file is saved with the same file name and a .pdf extension.
Creating custom
Related Subtopics:
Setting Adobe PDF printing preferences (Windows)
Setting Adobe PDF printer properties (Windows)
Configuring the Adobe PDF printer (Mac OS)
Page 96

Setting Adobe PDF printing preferences (Windows)
Printing preferences apply to all applications that use the Adobe PDF printer, unless you
change the settings in an authoring application by using the Page Setup, Document Setup,
or Print menus.
Note: The dialog box for setting printing preferences is named either Adobe PDF Printing
Preferences, Adobe PDF Printing Defaults, or Adobe PDF Document Properties,
depending on how you access it.
Setting preferences for the Adobe PDF printer
To set Adobe PDF printing preferences:
1. Do one of the following to open the dialog box:
● Open the Printers or Printer And Faxes window from the Start menu. Right-click the
Adobe PDF printer, and choose Printing Preferences.
● In an authoring application such as Adobe InDesign, choose File > Print. Select Adobe
PDF as the printer, and click the Properties (or Preferences) button. (In some applications,
you may need to click Setup in the Print dialog box to access the list of printers, and then
click Properties or Preferences to customize the Adobe PDF settings.)
2. In the Adobe PDF Settings tab, specify conversion settings. You can select a predefined
set of options from the Default Settings menu or click Edit to view or change the settings
in the Adobe PDF Settings dialog box. These options match the Distiller default settings.
For more information, see Using default Adobe PDF settings files and Creating custom
Adobe PDF settings.
3. To add security to the PDF file, choose one of the following options from the Adobe PDF
Security menu:
● Reconfirm Security For Each Job opens the Adobe PDF - Security dialog box each time
you create a PDF file using Adobe PDF printer. Specify settings in the dialog box.
● Use The Last Known Security Settings uses the same security settings as the last time a
PDF file was created using Adobe PDF printer on your machine.
To view or change the security settings, click Edit. For information on setting security
options, see Adding passwords and setting security options.
4. Choose an output folder for the converted PDF file using one of the following methods:
● Select a folder from the Adobe PDF Output Folder menu.
● Click Browse to add or change the output folder.
● Choose Prompt For Adobe PDF Filename to specify a location and file name at
conversion time.
5. Choose a page size from the Adobe PDF Page Size menu. Any custom page sizes that you
have defined are listed on this menu. To define a custom page size, see Creating a custom
page size.
6. Select any of the following options:
● View Adobe PDF Results automatically starts Acrobat and displays the converted
document immediately.
● Add Document Information includes information such as the file name and date and time
of creation.
● Do Not Send Fonts To "Adobe PDF." Check this option if you are creating a PostScript
file.
● Delete Log Files For Successful Jobs automatically deletes the log files unless the job
failed.
● Ask To Replace Existing PDF File displays a dialog box that warns you when you are
about to overwrite an existing PDF file with a file of the same name.
7. Set options on the Layout and Paper Quality tabs, as necessary.
Page 97

Setting Adobe PDF printer properties (Windows)
In Windows, you can usually leave the Adobe PDF properties unchanged, unless you have
configured printer sharing or set security.
To set Adobe PDF printing properties:
1. Open the Printers window from the Start menu, and right-click the Adobe PDF printer.
2. Choose Properties.
3. Click the tabs, and select options as needed.
To reassign the port that Adobe PDF uses for printing:
1. Quit Distiller if it is running, and allow all queued jobs to Adobe PDF to complete.
2. Open the Printers window from the Start menu.
3. Right-click the Adobe PDF printer, and choose Properties.
4. Click the Ports tab, and then click Add Port.
5. Select Adobe PDF Port from the list of available port types, and click New Port.
6. Select a local folder for PDF output files, and click OK. Then click Close to quit the
Printer Ports dialog box.
7. In the Adobe PDF Properties dialog box, click Apply, and then click OK.
For best results, select a folder on the same system where Distiller is installed. Although
remote or network folders are supported, they have limited user access and security issues.
To delete a folder and reassign Adobe PDF to the default port:
1. Quit Distiller if it is running, and allow a few minutes for all queued jobs to Adobe PDF to
complete.
2. Open the Printers window from the Start menu.
3. Right-click the Adobe PDF printer, and choose Properties.
4. Click the Ports tab.
5. Select the default port, My Documents, and click Apply.
6. Select the port to delete.
7. Click Delete Port, and then click Yes to confirm the deletion.
8. Select the My Documents port again and click Close.
Page 98

Configuring the Adobe PDF printer (Mac OS)
In Mac OS, you configure the Adobe PDF printer in three places: Distiller, your authoring
application's Page Setup menu, and your authoring application's Print dialog box.
To configure the Adobe PDF printer:
1. In Distiller, specify the Adobe PDF settings, font locations, and security. (See Creating
Adobe PDF files using Acrobat Distiller and Setting Distiller preferences.)
2. In an authoring application such as Adobe InDesign, choose File > Page Setup, and do the
following:
● Select Adobe PDF 7.0 from the Format For menu.
● Specify the paper size, orientation, and scale as necessary. To create custom page sizes,
see Creating a custom page size.
3. In your authoring application, choose File > Print, and select Adobe PDF 7.0 from the
Printer menu.
4. In the pop-up menu below the Presets menu, choose PDF Options, and set any of the
following options:
● Select a set of predefined conversion settings from the Adobe PDF Settings menu if you
want to override default settings. Default settings are the settings currently defined in
Distiller.
● Specify whether to open the converted files in Acrobat in the After PDF Creation menu.
5. Specify print settings as desired in the other menus available in the pop-up menu below
the Presets menu.
Page 99

Creating a custom page size
It's important to distinguish between page size (as defined in the source application's
Document Setup dialog box for your document) and paper size (the sheet of paper, piece
of film, or area of the printing plate you'll print on). Your page size might be U.S. Letter
(8-1/2-by-11 inches), but you might need to print on a larger piece of paper or film to
accommodate any printer's marks or the bleed area. To ensure that your document prints
as expected, set up your page size in both the source application and the printer.
The list of paper sizes available to Acrobat comes from the PPD file (PostScript printers)
or from the printer driver (non-PostScript printers). If the printer and PPD file you've
chosen for PostScript printing support custom paper sizes, you see a Custom option in the
Paper Size menu. Acrobat supports pages as large as 15,000,000 inches (38,100,000cm)
by 15,000,000 inches (38,100,000cm).
To create a custom page size (Windows):
1. Do one of the following:
● Open the Printers or Printer And Faxes window from the Start menu. Right-click the
Adobe PDF printer, and choose Printing Preferences.
● In an authoring application such as Adobe InDesign, choose File > Print. Select Adobe
PDF as the printer, and click the Properties button. (In some applications, you may need to
click Setup in the Print dialog box to access the list of printers, and then click Properties
or Preferences to customize the Adobe PDF settings.)
2. In the Adobe PDF Settings tab, click the Add button next to the Adobe PDF Page Size
menu.
3. Specify the name, width, height, and unit of measurement. Click Add/Modify to add the
custom page size name to the Adobe PDF Page Size menu.
To create a custom page size (Mac OS):
1. In an authoring application such as Adobe InDesign, choose File > Page Setup.
2. In the Settings pop-up menu, select Custom Paper Size.
3. Click the New button.
4. Specify the name, height, width, and margins. The unit of measurement depends on the
system language.
5. Click Save, and then click OK.
To use the custom page size (Mac OS):
1. Choose File > Page Setup.
2. Select the new custom page size from the Paper Size menu, and click OK.
Page 100

Creating Adobe PDF Files Using PDFMaker
About Acrobat PDFMaker
Converting web pages in Internet Explorer (Windows)
Converting Microsoft Office files (Windows)
Converting Microsoft Office files (Mac OS)
Converting Microsoft Outlook email messages (Windows)
Converting Microsoft Access files (Windows)
Converting Microsoft Publisher files (Windows)
Editing PDFMaker conversion settings (Windows)
 Loading...