

Page 1

Outputware
Xprint V7.0
User’s and Administrator’s Guide
Redakteur
Fujitsu Siemens Computers GmbH Paderborn
33094 Paderborn
e-mail: email: manuals@fujitsu-siemens.com
Tel.: (089) 61001-1??
Fax: (++49) 700 / 372 00001
U23841-J-Z915-6-76
Sprachen: En
Edition June 2002
Page 2

Comments… Suggestions… Corrections…
The User Documentation Department would like to
know your opinion of this manual. Your feedback helps
us optimize our documentation to suit your individual
needs.
Fax forms for sending us your comments are included in
the back of the manual.
There you will also find the addresses of the relevant
User Documentation Department.
Certified documentation
according DIN EN ISO 9001:2000
To ensure a consistently high quality standard and
user-friendliness, this documentation was created to
meet the regulations of a quality management system
which complies with the requirements of the standard
DIN EN ISO 9001:2000.
cognitas. Gesellschaft für Technik-Dokumentation mbH
www.cognitas.de
Copyright and Trademarks
Copyright © 2002 Fujitsu Siemens Computers GmbH.
All rights reserved.
Delivery subject to availability; right of technical modifications reserved.
All hardware and software names used are trademarks of their respective manufacturers.
This manual is printed on
paper treated with
chlorine-free bleach.
Page 3

Preface
Introduction to Xprint V7.0
Printing with Xprint V7.0
Managing print jobs
Introduction to administering Xprint V7.0
Configuring Xprint V7.0
Interoperability
Installing Xprint V7.0
Xprint V7.0 for Windows NT
Appendix
Continued
Page 4

Page 5

Glossary
Related publications
Index
Page 6

Page 7

Contents
1 Preface . . . . . . . . . . . . . . . . . . . . . . . . . . . . . . 1
1.1 Target groups . . . . . . . . . . . . . . . . . . . . . . . . . . . 1
1.2 Structure of the manual . . . . . . . . . . . . . . . . . . . . . . 2
1.3 Notational conventions . . . . . . . . . . . . . . . . . . . . . . . 3
1.4 Other publications in this set . . . . . . . . . . . . . . . . . . . . 4
2 Introduction to Xprint V7.0 . . . . . . . . . . . . . . . . . . . . 5
2.1 Xprint V7.0 from the user’s point of view . . . . . . . . . . . . . 5
2.2 Mercator . . . . . . . . . . . . . . . . . . . . . . . . . . . . . . 8
2.3 Xprint V7.0 R/3 kit . . . . . . . . . . . . . . . . . . . . . . . . . 8
2.4 Xprint V7.0 elements . . . . . . . . . . . . . . . . . . . . . . . 8
2.4.1 Xprint V7.0 objects . . . . . . . . . . . . . . . . . . . . . . . . . 9
2.4.2 Options for printing documents . . . . . . . . . . . . . . . . . 13
3 Producing Output with Xprint V7.0 . . . . . . . . . . . . . . 15
3.1 Basic information . . . . . . . . . . . . . . . . . . . . . . . . 15
3.2 Printing files . . . . . . . . . . . . . . . . . . . . . . . . . . . 17
3.3 Selecting a printer . . . . . . . . . . . . . . . . . . . . . . . . 19
3.4 Using Xprint V7.0 options . . . . . . . . . . . . . . . . . . . . 21
3.4.1 Printing parts of a document . . . . . . . . . . . . . . . . . . . 21
3.4.2 Printing files with special content types . . . . . . . . . . . . . 23
3.4.3 Creating printouts with special formats . . . . . . . . . . . . . 24
3.4.4 Using Loadable Resources . . . . . . . . . . . . . . . . . . . 30
3.4.4.1 Using Public Loadable Resources . . . . . . . . . . . . . . . . 31
3.4.4.2 Using Private Loadable Resources . . . . . . . . . . . . . . . 32
3.4.5 Copying print files before printing and deleting them after printing .
33
3.4.6 Defining separator pages . . . . . . . . . . . . . . . . . . . . 34
3.4.7 Printing several copies of a document . . . . . . . . . . . . . . 35
3.4.8 Requesting notification of the result . . . . . . . . . . . . . . . 36
3.4.9 Using further options . . . . . . . . . . . . . . . . . . . . . . 37
3.5 Using other Xprint V7.0 objects . . . . . . . . . . . . . . . . . 40
3.6 Job templates . . . . . . . . . . . . . . . . . . . . . . . . . . 44
3.6.1 Printing a document via a globally defined job template . . . . . 44
3.6.2 Defining customized job templates . . . . . . . . . . . . . . . 46
4 Managing print jobs . . . . . . . . . . . . . . . . . . . . . . 49
4.1 Selecting a print job . . . . . . . . . . . . . . . . . . . . . . . 49
4.2 Displaying print jobs . . . . . . . . . . . . . . . . . . . . . . . 55
4.3 Modifying a submitted print job . . . . . . . . . . . . . . . . . 61
4.4 Redirecting print jobs . . . . . . . . . . . . . . . . . . . . . . 63
U23841-J-Z915-6-76
Page 8

Contents
4.5 Deleting print jobs . . . . . . . . . . . . . . . . . . . . . . . . . 65
5 Introduction to administering Xprint V7.0 . . . . . . . . . . . 67
5.1 Responsibilities . . . . . . . . . . . . . . . . . . . . . . . . . . 67
5.2 Xprint V7.0 architecture . . . . . . . . . . . . . . . . . . . . . . 70
5.2.1 The Xprint V7.0 objects . . . . . . . . . . . . . . . . . . . . . . 71
5.3 Administrative tasks under Xprint . . . . . . . . . . . . . . . . . 79
5.3.1 Configuring Xprint V7.0 objects . . . . . . . . . . . . . . . . . . 79
5.3.2 Deleting Xprint V7.0 objects . . . . . . . . . . . . . . . . . . . 80
5.3.3 Modifying Xprint V7.0 objects . . . . . . . . . . . . . . . . . . . 81
5.3.4 Changing the status of Xprint V7.0 objects . . . . . . . . . . . . 82
5.3.5 Displaying information on Xprint V7.0 objects . . . . . . . . . . 82
5.3.6 Administering Xprint V7.0 . . . . . . . . . . . . . . . . . . . . . 85
5.4 Rules for configuring the system . . . . . . . . . . . . . . . . . 88
5.4.1 Defining an Xprint V7.0 domain . . . . . . . . . . . . . . . . . . 88
5.4.2 Configuring hosts . . . . . . . . . . . . . . . . . . . . . . . . . 89
5.4.3 Configuring printers . . . . . . . . . . . . . . . . . . . . . . . . 89
5.4.4 Configuring gateways . . . . . . . . . . . . . . . . . . . . . . . 92
6 Configuring Xprint V7.0 . . . . . . . . . . . . . . . . . . . . . 95
6.1 Administering hosts . . . . . . . . . . . . . . . . . . . . . . . . 96
6.1.1 Configuring the first host . . . . . . . . . . . . . . . . . . . . . 96
6.1.2 Configuring a new host . . . . . . . . . . . . . . . . . . . . . . 98
6.2 Administering hosts (users only) . . . . . . . . . . . . . . . . 101
6.2.1 Configuring Xprint V7.0 on a stand-alone system . . . . . . . 101
6.2.2 Introducing Xprint V7.0 into a network . . . . . . . . . . . . . 103
6.2.3 Configuring a new host in an existing Xprint V7.0 network . . . 105
6.3 Predefined printers . . . . . . . . . . . . . . . . . . . . . . . 108
6.3.1 Configuring predefined printers . . . . . . . . . . . . . . . . . 109
6.3.2 Extending the list of predefined printers . . . . . . . . . . . . 112
6.4 Administering devices . . . . . . . . . . . . . . . . . . . . . . 114
6.4.1 Adding a printer . . . . . . . . . . . . . . . . . . . . . . . . . 116
6.4.2 Deactivating a printer . . . . . . . . . . . . . . . . . . . . . . 118
6.4.3 Reactivating a printer . . . . . . . . . . . . . . . . . . . . . . 120
6.4.4 Removing a printer . . . . . . . . . . . . . . . . . . . . . . . 121
6.4.5 Reconnecting a printer to another system . . . . . . . . . . . 122
6.4.6 Reconnecting a printer to a different port . . . . . . . . . . . . 122
6.4.7 Replacing an existing printer with a new one . . . . . . . . . . 123
6.4.8 Assigning a security level to a printer . . . . . . . . . . . . . . 124
6.5 Administering printer groups . . . . . . . . . . . . . . . . . . 126
6.5.1 Setting up a new printer group . . . . . . . . . . . . . . . . . 127
6.5.2 Adding a printer to a printer group . . . . . . . . . . . . . . . 129
6.5.3 Removing a printer from a printer group . . . . . . . . . . . . 129
6.5.4 Deactivating a printer group . . . . . . . . . . . . . . . . . . 130
U23841-J-Z915-6-76
Page 9

Contents
6.5.5 Reactivating a printer group . . . . . . . . . . . . . . . . . . . 131
6.5.6 Deleting a printer group . . . . . . . . . . . . . . . . . . . . . 132
6.6 Administering users . . . . . . . . . . . . . . . . . . . . . . . 133
6.6.1 Defining a user . . . . . . . . . . . . . . . . . . . . . . . . . . 133
6.6.2 Entering a defined user for other hosts . . . . . . . . . . . . . 134
6.6.3 Deleting a host from a user’s host list . . . . . . . . . . . . . . 135
6.6.4 Modifying user privileges . . . . . . . . . . . . . . . . . . . . 135
6.6.5 Deleting a user . . . . . . . . . . . . . . . . . . . . . . . . . . 137
6.6.6 Resetting user print quotas . . . . . . . . . . . . . . . . . . . 138
6.6.7 Displaying information on users . . . . . . . . . . . . . . . . . 140
6.6.8 Assigning a security level to a user . . . . . . . . . . . . . . . 141
6.7 Administering permission lists . . . . . . . . . . . . . . . . . . 143
6.7.1 Creating a permission list . . . . . . . . . . . . . . . . . . . . 144
6.7.2 Modifying a permission list . . . . . . . . . . . . . . . . . . . . 146
6.7.3 Deleting a permission list . . . . . . . . . . . . . . . . . . . . 147
6.7.4 Granting or denying specific users access to a printer . . . . . 148
6.7.5 Granting or denying specific users access to a printer group . . 149
6.7.6 Granting or denying specific users access to a form . . . . . . 149
6.7.7 Granting or denying specific printers access to a form . . . . . 150
6.7.8 Allowing or prohibiting administration of supervisors . . . . . . 151
6.8 Administering fonts . . . . . . . . . . . . . . . . . . . . . . . 152
6.8.1 Adding a font . . . . . . . . . . . . . . . . . . . . . . . . . . 152
6.8.2 Deleting a font . . . . . . . . . . . . . . . . . . . . . . . . . . 154
6.8.3 Modifying the attributes of a font . . . . . . . . . . . . . . . . 155
6.9 Administering forms . . . . . . . . . . . . . . . . . . . . . . . 156
6.9.1 Adding a form . . . . . . . . . . . . . . . . . . . . . . . . . . 157
6.9.2 Deleting a form . . . . . . . . . . . . . . . . . . . . . . . . . 158
6.9.3 Modifying the attributes of a form . . . . . . . . . . . . . . . . 160
6.9.4 Default forms for printers . . . . . . . . . . . . . . . . . . . . 160
6.10 Administering filters . . . . . . . . . . . . . . . . . . . . . . . 162
6.10.1 Adding filters . . . . . . . . . . . . . . . . . . . . . . . . . . 162
6.10.2 Deleting filters . . . . . . . . . . . . . . . . . . . . . . . . . . 167
6.10.3 Modifying the attributes of a filter . . . . . . . . . . . . . . . . 168
6.10.4 Assigning a filter to a printer . . . . . . . . . . . . . . . . . . 169
6.10.5 Removing a filter from a printer . . . . . . . . . . . . . . . . . 170
6.11 Administering public loadable resources . . . . . . . . . . . . 171
6.11.1 Defining a loadable resource . . . . . . . . . . . . . . . . . . 171
6.11.2 Deleting a loadable resource . . . . . . . . . . . . . . . . . . 173
6.11.3 Displaying the definition of a loadable resource . . . . . . . . . 173
6.12 Administering global job templates . . . . . . . . . . . . . . . 174
6.12.1 Defining a job template . . . . . . . . . . . . . . . . . . . . . 174
6.12.2 Deleting a job template . . . . . . . . . . . . . . . . . . . . . 177
6.12.3 Customizing job templates . . . . . . . . . . . . . . . . . . . . 177
6.13 Administering PCLs . . . . . . . . . . . . . . . . . . . . . . . 179
U23841-J-Z915-6-76
Page 10

Contents
6.13.1 Adding a PCL . . . . . . . . . . . . . . . . . . . . . . . . . . 180
6.13.2 Deleting a PCL . . . . . . . . . . . . . . . . . . . . . . . . . 181
6.13.3 Assigning a comment to a PCL . . . . . . . . . . . . . . . . 182
6.13.4 Assigning a PCL to a printer . . . . . . . . . . . . . . . . . . 183
6.13.5 Defining a PCL yourself . . . . . . . . . . . . . . . . . . . . . 185
6.14 Administering recovery rules . . . . . . . . . . . . . . . . . . 186
6.14.1 Defining a recovery rule . . . . . . . . . . . . . . . . . . . . . 186
6.14.2 Assigning a recovery rule to a printer . . . . . . . . . . . . . . 190
6.14.3 Canceling the assignment of a recovery rule to a printer . . . . 190
6.14.4 Modifying recovery rules . . . . . . . . . . . . . . . . . . . . 191
6.14.5 Deleting a recovery rule . . . . . . . . . . . . . . . . . . . . . 192
6.15 Administering servers . . . . . . . . . . . . . . . . . . . . . 193
6.15.1 Adding a server . . . . . . . . . . . . . . . . . . . . . . . . 193
6.15.2 Deleting a server . . . . . . . . . . . . . . . . . . . . . . . . 196
6.15.3 Changing the status of a server . . . . . . . . . . . . . . . . . 197
6.15.4 Modifying the attributes of a server . . . . . . . . . . . . . . . 198
6.16 Administering supervisors . . . . . . . . . . . . . . . . . . . 200
6.16.1 Adding a supervisor . . . . . . . . . . . . . . . . . . . . . . . 200
6.16.2 Activating or deactivating supervisors . . . . . . . . . . . . . 203
6.16.3 Modifying the attributes of a supervisor . . . . . . . . . . . . . 204
6.16.4 Deleting a supervisor . . . . . . . . . . . . . . . . . . . . . . 205
7 Interoperability . . . . . . . . . . . . . . . . . . . . . . . . . 207
7.1 Introduction . . . . . . . . . . . . . . . . . . . . . . . . . . . 207
7.2 Accessing BSD printers . . . . . . . . . . . . . . . . . . . . . 209
7.2.1 Basic information . . . . . . . . . . . . . . . . . . . . . . . . 209
7.2.2 Configuring printers for BSD Xprint V7.0 . . . . . . . . . . . . 210
7.3 Gateways . . . . . . . . . . . . . . . . . . . . . . . . . . . . 213
7.3.1 Gateway characteristics . . . . . . . . . . . . . . . . . . . . . 213
7.3.2 Setting up a gateway connection . . . . . . . . . . . . . . . . 213
7.3.3 Gateways to BSD spoolers . . . . . . . . . . . . . . . . . . . 214
7.3.4 Gateways to other Xprint V7.0 domains . . . . . . . . . . . . 219
7.3.5 Gateways to DPRINT spoolers . . . . . . . . . . . . . . . . . 223
7.4 Administering gateways . . . . . . . . . . . . . . . . . . . . . 227
7.4.1 Configuring an additional connection from an existing gateway 227
7.4.2 Deleting a gateway connection . . . . . . . . . . . . . . . . . 229
7.4.3 Deactivating a gateway . . . . . . . . . . . . . . . . . . . . . 230
7.4.4 Activating a gateway . . . . . . . . . . . . . . . . . . . . . . 232
7.4.5 Obtaining information on a gateway . . . . . . . . . . . . . . 233
8 Installing Xprint V7.0 . . . . . . . . . . . . . . . . . . . . . 235
8.1 Considerations . . . . . . . . . . . . . . . . . . . . . . . . . 235
8.2 Configuring the local area network (LAN) . . . . . . . . . . . . 235
8.3 Setting the language for the Xprint V7.0 system . . . . . . . . 236
U23841-J-Z915-6-76
Page 11

Contents
8.4 Installation (new) . . . . . . . . . . . . . . . . . . . . . . . . . 237
8.4.1 Installing with cpio . . . . . . . . . . . . . . . . . . . . . . . . 238
8.4.2 Installing with pkgadd . . . . . . . . . . . . . . . . . . . . . . 238
8.4.3 Installing with sd method . . . . . . . . . . . . . . . . . . . . 239
8.5 Installation (users only) . . . . . . . . . . . . . . . . . . . . . 241
8.5.1 Installation with pkgadd . . . . . . . . . . . . . . . . . . . . . 242
8.5.2 Product licensing . . . . . . . . . . . . . . . . . . . . . . . . 243
8.5.3 Types of licenses . . . . . . . . . . . . . . . . . . . . . . . . 243
8.5.4 Installing a license key . . . . . . . . . . . . . . . . . . . . . . 245
9 Xprint V7.0 for Windows . . . . . . . . . . . . . . . . . . . . 249
9.1 Approach . . . . . . . . . . . . . . . . . . . . . . . . . . . . 249
9.2 Requirements . . . . . . . . . . . . . . . . . . . . . . . . . . 250
9.3 Differences from Xprint V7.0/UNIX . . . . . . . . . . . . . . . 250
9.3.1 Installation and license key . . . . . . . . . . . . . . . . . . . 250
9.3.2 Integration with Wprint . . . . . . . . . . . . . . . . . . . . . . 251
9.3.3 Start-up and shutdown . . . . . . . . . . . . . . . . . . . . . . 252
9.3.4 Responsibilities . . . . . . . . . . . . . . . . . . . . . . . . . 252
9.3.5 Printer support . . . . . . . . . . . . . . . . . . . . . . . . . . 253
9.3.6 Logging . . . . . . . . . . . . . . . . . . . . . . . . . . . . . 254
9.3.7 Interoperability with the BS2000 DPRINT system . . . . . . . . 254
9.3.8 WINDOWS 2000 special files . . . . . . . . . . . . . . . . . . 255
9.4 Limitations and restrictions . . . . . . . . . . . . . . . . . . . 257
10 Appendix . . . . . . . . . . . . . . . . . . . . . . . . . . . . 259
Worksheet . . . . . . . . . . . . . . . . . . . . . . . . . . . . 260
Filling out the worksheet . . . . . . . . . . . . . . . . . . . . . 261
Selection criteria list . . . . . . . . . . . . . . . . . . . . . . . 266
General requirements . . . . . . . . . . . . . . . . . . . . . . 266
Special cases . . . . . . . . . . . . . . . . . . . . . . . . . . 267
SNMP Agent . . . . . . . . . . . . . . . . . . . . . . . . . . . 268
Axis box support . . . . . . . . . . . . . . . . . . . . . . . . . 270
TV-CC integration . . . . . . . . . . . . . . . . . . . . . . . . 270
Fax and mail support . . . . . . . . . . . . . . . . . . . . . . 271
Glossary . . . . . . . . . . . . . . . . . . . . . . . . . . . . . . . . . . 273
Related publications . . . . . . . . . . . . . . . . . . . . . . . . . . . 279
Index . . . . . . . . . . . . . . . . . . . . . . . . . . . . . . . . . . . . 281
U23841-J-Z915-6-76
Page 12

Page 13

1 Preface
Xprint V7.0 is the output management system developed by Océ Software
Laboratories Namur S.A. for use in heterogeneous networks. It is available for
many open system platforms, for Microsoft Windows NT
It can also interact with systems such as MS-DOS
BSD UNIX.
Some limitations exists according to the platform, please refer to chapter 9
“Xprint V7.0 for Windows”.
This manual describes how to install, configure and use Xprint V7.0, the
different chapters being designed to meet the specific requirements of different
groups of users.
1.1 Target groups
This manual is written for the following target groups:
● Users
If you want to print files via Xprint V7.0 as a general user, this manual tells
you what options are available for doing this and how to manage existing
print jobs.
● System administrators
®
®
and Windows 2000®.
/MS Windows, BS2000 and
This manual contains information for the system administrator on how to
install and configure Xprint V7.0 locally on his/her system.
● Xprint V7.0 administrators
If you are responsible for administering Xprint V7.0 in a network, this manual
informs you of the options you have for doing this and how to make the best
use of these to achieve your goals.
U23841-J-Z915-6-76 1
Page 14

Structure of the manual Preface
1.2 Structure of the manual
The individual chapters of this manual deal with various aspects of using and
configuring Xprint V7.0 on UNIX systems. All the special features of Xprint V7.0
on the Windows platforms are presented in a separate chapter. You should read
the following chapters, depending on which tasks you have to perform:
● Chapter 2 - “Introduction to Xprint V7.0” starting on page 5
This chapter describes Xprint V7.0 from the points of view of the user and
the administrator. You should in any case read the sections relevant to you.
These will tell you about the possibilities you have for printing under Xprint
V7.0 and what steps you might have to take when configuring Xprint V7.0.
● Chapter 3 - “Producing Output with Xprint V7.0” starting on page 15
This chapter describes how to print documents using the Xprint V7.0
commands.
● Chapter 4 - “Managing print jobs” starting on page 49
This chapter describes how to manage existing print jobs using the Xprint
V7.0 commands.
● Chapter 5 -“Introduction to administering Xprint V7.0” starting on page 67.
This chapter provides an introduction to managing Xprint V7.0 and
describes the basic aspects of this task.
● Chapter 6 - “Configuring Xprint V7.0” starting on page 95
This chapter describes how to configure Xprint V7.0 on a stand-alone
system or in a network using the Xprint V7.0 commands. Furthermore, it tells
you how to manipulate the various Xprint V7.0 objects in order to achieve
specific goals.
● Chapter 7 -“Interoperability” starting on page 207
This chapter describes the possible ways of having Xprint V7.0 interact with
other spooler systems.
● Chapter 8 - “Installing Xprint V7.0” on page 235
This chapter tells you how to install Xprint V7.0 on your system and what to
consider when doing this.
2 U23841-J-Z915-6-76
Page 15
Preface Notational conventions
!
● Chapter 9 - “Xprint V7.0 for Windows” on page 249
While the other chapters of this manual describe Xprint V7.0 on UNIX
systems, this one presents the differences on the Windows platforms.
● The “Appendix” starting on page 259 contains important tables, summaries
and a worksheet for configuring Xprint V7.0.
● The glossary explains the most important terms in connection with Xprint
V7.0.
● The index helps you to quickly find the information you need.
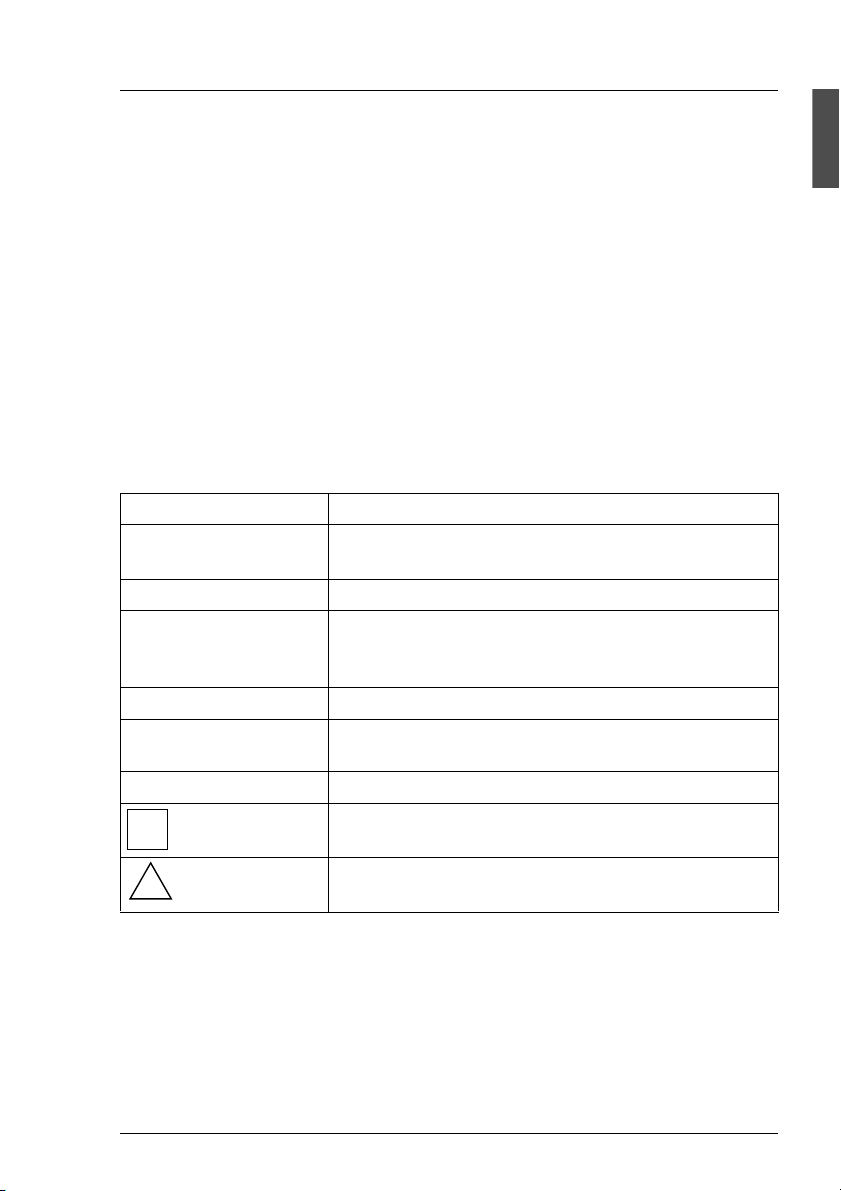
1.3 Notational conventions
The following notational conventions are used throughout this manual:
Convention Use
“double quotes” For references within the manual and to other
manuals.
italics For variable parts of commands.
fixed pitch In continuous text for commands, options, file names,
constants, and screen output and menu texts as well
as invariable parts of examples.
bold For emphasis in continuous text.
fixed pitch and
bold
● Actions you must perform.
i
For your input in sample dialogs.
Refers to important information which you should
note.
Refers to important information which warns of
potential damage.
U23841-J-Z915-6-76 3
Page 16

Other publications in this set Preface
1.4 Other publications in this set
Xprint V7.0 - Application Programming Interface (API)
This manual is written for application programmers with a sound knowledge of
the C programming language who also have a basic knowledge of the administration and general operation of Xprint V7.0 . API (Application Programming
Interface) allows the programmer access to the functions of the Xprint V7.0
system via a programming interface. This manual contains information on the C
functions and C data structures comprising the API.
Xprint V7.0 - Reference Manual
This manual serves primarily as a reference book. It contains detailed information on commands and the corresponding options.
Xprint V7.0 - Graphical User Interface
Mercator is the graphical user interface for Xprint V7.0. This manual gives an
introduction to the product and an overview of the functions available.
4 U23841-J-Z915-6-76
Page 17

2 Introduction to Xprint V7.0
This chapter describes the concepts of Xprint V7.0, which you must be familiar
with in order to use this product. It describes the objects comprising Xprint V7.0
and how these objects interact.
2.1 Xprint V7.0 from the user’s point of view
From the point of view of the user, Xprint V7.0 represents a number of
commands and a graphical interface used for printing files. For the user, the
entire Xprint V7.0 system consists of a number of output devices on which
documents can be produced (see figure below). Output devices can be printers,
fax devices and e-mail addresses. For historical reasons, the word printer is
often used instead of output device in the rest of this manual. Similarly, you
should understand the term printing as producing an output.
Figure 1: The Xprint V7.0 system
As a user, the first things you deal with are the local workstation on which you
are working, and the output devices of the Xprint V7.0 system. You can use any
of the visible output devices for printing your documents. It may however be the
U23841-J-Z915-6-76 5
Page 18
Xprint V7.0 from the user’s point of view Introduction to Xprint V7.0
case that you are unable to access some of the visible output devices because
you have not been granted the necessary rights to use them.
There may also be groups of output devices available. These device groups
combine several output devices to provide quicker spoolout. When printed via a
device group, the print jobs are distributed evenly over the devices in the group
so that jobs can be processed quickly even at times of high print load. In a
network, Xprint V7.0 is completely transparent. This means that it does not
matter whether an output device is connected to your host or to another host in
the network. You can use the output devices just as if they were connected
directly to your host.
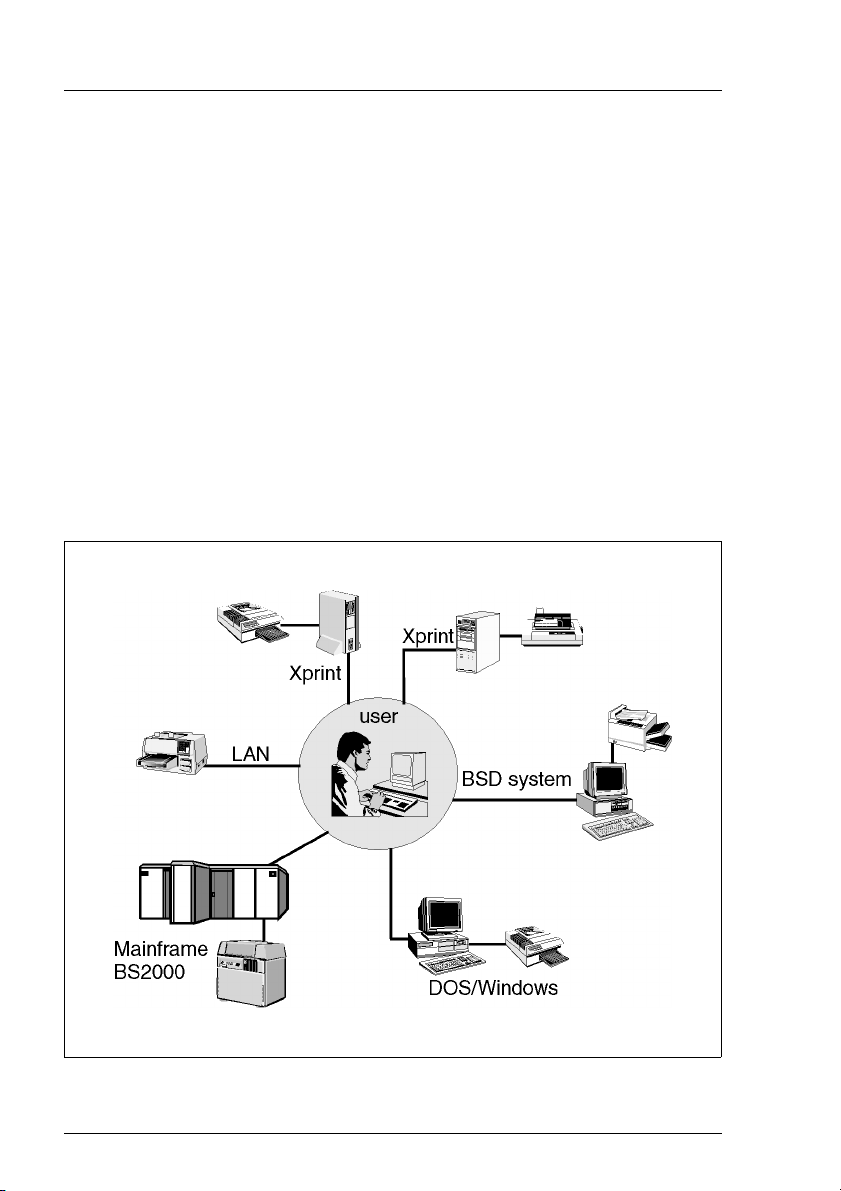
It is even possible to send print jobs to output devices outside your own Xprint
V7.0 domain, provided that the required gateways are configured. In addition to
the devices of other Xprint V7.0 domains, you can also use devices which are
not connected to the Xprint V7.0 of a system but to a computer running BSDUNIX,
MS-DOS/MS-Windows or BS2000 (see the following figure).
Figure 2: Using Xprint V7.0
6 U23841-J-Z915-6-76
Page 19
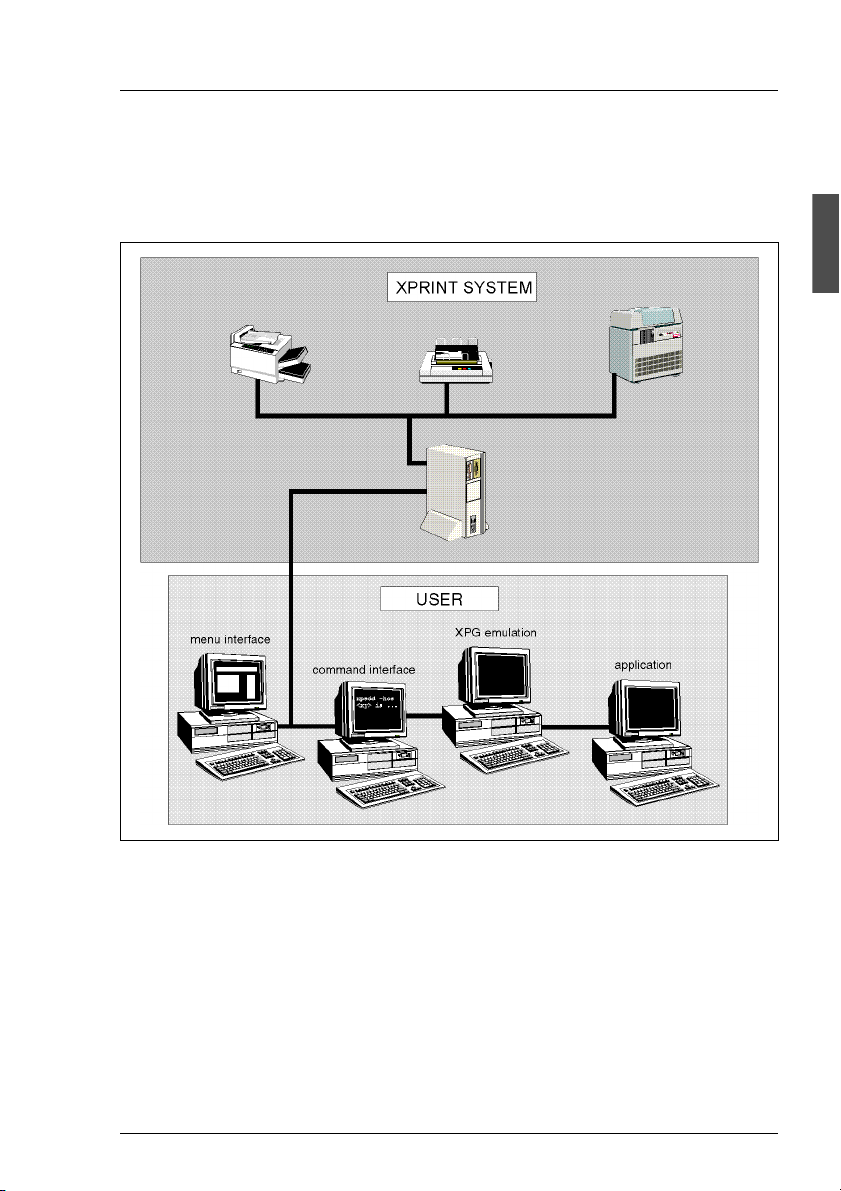
Introduction to Xprint V7.0 Xprint V7.0 from the user’s point of view
As an Xprint V7.0 user you can also decide which interface you want to use on
your system.
See the following figure for your options:
Figure 3: User‘s options
The various interfaces offer you the following options:
● The menu interface allows you to perform all actions via a graphical user
interface.
● Using the command line interface, you can perform all actions by entering
Xprint V7.0 commands.
● The XPG emulation allows the use of the X/Open commands lp, lpstat,
cancel.
U23841-J-Z915-6-76 7
Page 20

Mercator Introduction to Xprint V7.0
● The application programming interface API enables applications to access
the Xprint V7.0 system via C function calls.
2.2 Mercator
Mercator is the graphical user interface for Xprint V7.0. It allows the administrator to have easy access to Host, Devices, Device groups and Job properties.
It also provides a quick overview of what is happening in the whole print domain
or a subset of it.
One can interface Mercator with several third party viewers, in order to preview
the pcl or PostScript files to print (Windows platforms only).
The User Guide gives you an introduction to the product. For more detailed
information, see the online help which is available for each window.
2.3 Xprint V7.0 R/3 kit
Xprint V7.0 can be optimally interfaced with SAP R/3 V4.x, and has been
certified by SAP as an Output Management System (certification BC-XOM).
The Xprint V7.0 R/3 kit offers the following advantages:
– accurate and timely information on the print documents
– real-time asynchronous status feed-back
– tracking of documents
– improved performance
– better support of output devices
You can find more information on the Xprint V7.0 R/3 kit in the Xprint V7.0
Reference Manual.
2.4 Xprint V7.0 elements
This section describes the elements comprising Xprint V7.0 and the possibilities
Xprint V7.0 offers its users.
8 U23841-J-Z915-6-76
Page 21

Introduction to Xprint V7.0 Xprint V7.0 elements
i
2.4.1 Xprint V7.0 objects
Xprint V7.0 is an object-oriented system. This is also reflected in the way Xprint
V7.0 is used. Almost all the Xprint V7.0 commands can be used with the
different object types, which is why the number of Xprint V7.0 commands is
relatively low. The following section provides an overview of the available
objects and their use.
The following objects are defined in Xprint V7.0. The parentheses contain the
short name of the Xprint V7.0 objects for use in Xprint V7.0 commands:
● The Xprint V7.0 system (-sys)
The Xprint V7.0 system refers to all the Xprint V7.0 objects which are
combined in a common administrative unit, what is called an Xprint V7.0
domain. Within the Xprint V7.0 system the Xprint V7.0 administrator is
allowed to perform all the administrative tasks.
● Gateways (-gtw)
Gateways allow you to make a connection from one Xprint V7.0 domain to
another Xprint V7.0 domain or to other spooler systems. Via these gateways
you can use the output devices and device groups of the other system
involved.
Gateways to DPRINT (spooler system for BS2000 systems) or BSD spooler
systems (spooler systems supporting the BSD lpr protocol) allow users of
the local Xprint V7.0 domain to access the output devices and device groups
in these spooler systems. Conversely, it is also possible to access the
printers and printer groups of the local Xprint V7.0 domain from DPRINT and
BSD spooler systems.
Exchanging data with DPRINT requires that the local gateway be
defined on a platform which has openFT installed.
● Hosts (-hos)
Under Xprint V7.0 the term host refers to every computer defined in an
Xprint V7.0 domain. Hosts are divided into different classes: master, slave
and parasite hosts. The difference lies in the way they handle the Xprint V7.0
database.
U23841-J-Z915-6-76 9
Page 22

Xprint V7.0 elements Introduction to Xprint V7.0
The Xprint V7.0 database contains all the data Xprint V7.0 needs to access
Xprint V7.0 resources. This includes information on the defined hosts, users,
devices and device groups as well as on forms and all the other Xprint V7.0
objects. Only the print jobs are stored on the server responsible for their
execution.
● Servers (-srv)
Servers are the Xprint V7.0 objects which administer incoming print jobs and
are responsible for scheduling them. Each server administers its own print
queue which contains all the print jobs for the devices whose supervisors
are controlled by the server.
● Supervisors (-spv)
A supervisor is directly responsible for controlling one or more devices. It
obtains the job data from the superordinate server and forwards it to the
backend program (see the glossary entry “Backend” on page 273). One
supervisor may control several local devices.
● Device groups (-dgr)
Devices can be combined to form what are called device groups to achieve
better loading of all the devices in the group. If a print job is sent to a device
group, it is printed on the first device to become available in this group.
● Devices (-dev)
Xprint V7.0 can use devices of many different types. The devices are
controlled by a supervisor and assigned tools, called backends. Also, a
PCL is assigned to the device.
● Print jobs (-job)
Print jobs are submitted by users and, as described in the previous section,
can be modified. They are administered by the servers responsible for the
respective print queues.
In addition to the normal manipulation options, you can redirect all print jobs
for a given device to another device.
● Forms (-frm)
Forms are a convenient way of influencing the appearance of print jobs.
Forms can be used to define paper and page formats, the layup (portrait or
landscape), font, appearance of the information pages and user privileges.
Xprint V7.0 differentiates between automatic and manual forms. Jobs using
automatic forms can be printed at any time: these forms are mounted on
10 U23841-J-Z915-6-76
Page 23

Introduction to Xprint V7.0 Xprint V7.0 elements
the printer by default and usually only define the hopper or the page format
(margins) or the font. If a specific form requires that special paper be
mounted in the printer manually or that a font cassette be changed, a
manual form makes sure that the job is only printed when the printer has
been prepared.
● PCLs (-pcl)
PCLs (printer capability lists) are used to define what printing options a
device provides. Furthermore, the PCL contains information on how the
options specified when the job is submitted can be converted to device
commands. Xprint V7.0 is supplied with a number of PCLs for the most
common printers, and with one generic PCL which in most cases also allows
printing on unknown devices. A list of all the PCLs supported by Xprint V7.0
is provided in the Reference Manual.
● Users (-usr)
Xprint V7.0 differentiates between two types of user: there are users, who
are not defined in the Xprint V7.0 system, and Xprint V7.0 users, who are
defined in the Xprint V7.0 system. users are all users of the system on
which Xprint V7.0 is running; the default settings for Xprint V7.0 apply to
them. If these settings are not sufficient, the users can be defined in the
Xprint V7.0 system.
The administrator can make more settings for Xprint V7.0 users than for
users:
– Xprint V7.0 users can access their print jobs from all the hosts for which
they are registered.
– They can be assigned a security level and thus be granted access to
devices with a corresponding security level.
– Print quotas can be defined for the number of jobs or print pages
allowed, thus preventing users from making unlimited numbers of
printouts.
● Filters (-flt)
Filters have the function of converting the data sent to the device by the user
into the format required by the device. This makes it possible, for example,
to print normal ASCII files on PostScript printers, as Xprint V7.0 is supplied
with the filter vppost. Two types of filter are distinguished under Xprint V7.0:
slow filters which are executed before the Xprint V7.0 process, and fast
filters which are used to provide a link to objects other than standard components.
U23841-J-Z915-6-76 11
Page 24

Xprint V7.0 elements Introduction to Xprint V7.0
● Fonts (-fnt)
Font types supported by the printers in use can be easily accessed through
the definition of fonts.
● Job templates (-jtp)
Job templates serve to simplify the use of frequent print commands by
allowing the options of the xpadd command, which must normally be
specified individually, to be combined in groups. These can then be specified
via the job template.
● Loadable resources(-lrs)
Loadable resources allow faster printing of jobs that use the same
background, logo, soft font etc. They also improve job recovery. A loadable
resource must be downloaded to the printer before it can be called by a print
job.
Public loadable resources can be created, modified or deleted for the whole
system by the Xprint V7.0 administrator. Individual users can create, modify
or delete private loadable resources, that is loadable resources that are for
their use only.
● Permission lists (-prm)
Permission lists make it possible to define who may use which Xprint V7.0
resources by granting the relevant privileges. The administrator can define
the following privileges for users under Xprint V7.0:
– Which users may/may not use a device or a device group in Xprint V7.0
or other environments.
– Which users may/may not use a specific form.
– Which forms may/may not be used on a specific printer.
● Recovery rules (-rec)
Recovery rules are used to describe how specific device conditions are
handled. The default recovery procedure in the case of a device error can be
overridden by a recovery rule. In the case of the device error “paper_end”,
for example, the default is for the Xprint V7.0 system to continue trying to
print the job until the paper cassette is refilled. You could use a recovery rule
to specify a different procedure (for example, to suspend the print job and
set the device to NOT_ACTIVE until the administrator intervenes).
12 U23841-J-Z915-6-76
Page 25

Introduction to Xprint V7.0 Xprint V7.0 elements
2.4.2 Options for printing documents
In a network as well as on a stand-alone system, Xprint V7.0 provides extensive
functionality for printing documents (see also the Reference Manual):
● Selecting the output device of your choice
You can print your documents on any device in the Xprint V7.0 system which
you are allowed to use. You can choose either an individual device or a
device group as the destination. You can also define your personal default
device to which every print job is sent for which you do not explicitly specify
a destination, and you can access devices which are not available in your
own Xprint V7.0 domain via what are called gateways.
● Automatic adjustment of the document type
Xprint V7.0 allows you to send any document to any device. If the relevant
filters are defined, the document type is automatically adjusted to the device
type. This makes it possible, for example, to print normal ASCII files on
PostScript printers (the filter for this conversion is supplied with Xprint V7.0).
● Printing several copies of a document
For every print job you can specify how many copies of the entire job are to
be printed. Provided the printer supports this option, you can also print
several copies of each individual page. In this case, each page is printed
several times before the next page is printed.
● Printing parts of a document
You can also print parts of a document. Here it is possible to define the part
to be printed by specifying a range of pages or strings (“print from abc to
xyz”).
● Printing at specific times
For every print job, you can specify a time when it is to be printed. This allows
you, for example, to schedule longer print jobs for nighttime printing. In
addition, you can define that print jobs which have not been printed by a
specific time are deleted automatically.
● Printing at a low priority
Xprint V7.0 allows priorities to be assigned to print jobs. These priorities are
user-specific, which enables print jobs of specific users to be given
preference over those of others. Less important jobs can be assigned a
lower priority.
U23841-J-Z915-6-76 13
Page 26

Xprint V7.0 elements Introduction to Xprint V7.0
● Printing confidential documents
Every user and every device under Xprint V7.0 has what is called a “security
level”. This allows you to ensure that confidential jobs are only printed on
those devices which feature a corresponding security level.
● Selecting forms
If there are several forms defined for a device, you can specify which of these
forms you want to use for printing. Forms define the page format and the font
attributes of a printout. However, you can always change the specifications
for an existing form to make it meet your specific needs, for example by
specifying a different typeface for a specific job. This also applies if only the
default form is defined.
● Using resources that are external to the document
Documents can be printed using external resources like logos, soft fonts etc.
Calls to these resources may belong to the document, or they can be
inserted automatically by Xprint V7.0 at the top of the page.
● Notification of the result
Xprint V7.0 allows you to define how you want to be notified of the status of
your print jobs. You can define, for example, that in the event of an error you
want user Brown to be notified by mail.
● Direct printer control
You can also control a specific printer directly and define specific printer
settings, such as the line spacing.
● Defaults for print jobs
Xprint V7.0 allows you to combine all the options mentioned above in what
are called job templates. In this way, you can define frequently recurring
settings once and then simply retrieve them whenever required. These job
templates can be defined by each user.
● Individual, national-language user interface
By default, Xprint V7.0 uses the national language set for you for displaying
messages or menus. You can easily change this language by altering the
setting of the environment variable LANG.
14 U23841-J-Z915-6-76
Page 27
3 Producing Output with Xprint
V7.0
This chapter describes how to print documents using the command line
interface. To begin with, it introduces the basic structure of the Xprint V7.0
commands available to the normal Xprint V7.0 user and describes how and
where you can obtain additional information on the commands. This is followed
by several sections explaining the most important options for printing
documents.
3.1 Basic information
This section provides an introduction to using the Xprint V7.0 commands, their
basic structure, and how you can access the online help for these commands at
any time.
Available Xprint V7.0 commands
Xprint V7.0 provides a number of commands with which you can manipulate the
Xprint V7.0 objects. The following table shows the Xprint V7.0 commands you
can call as a user:
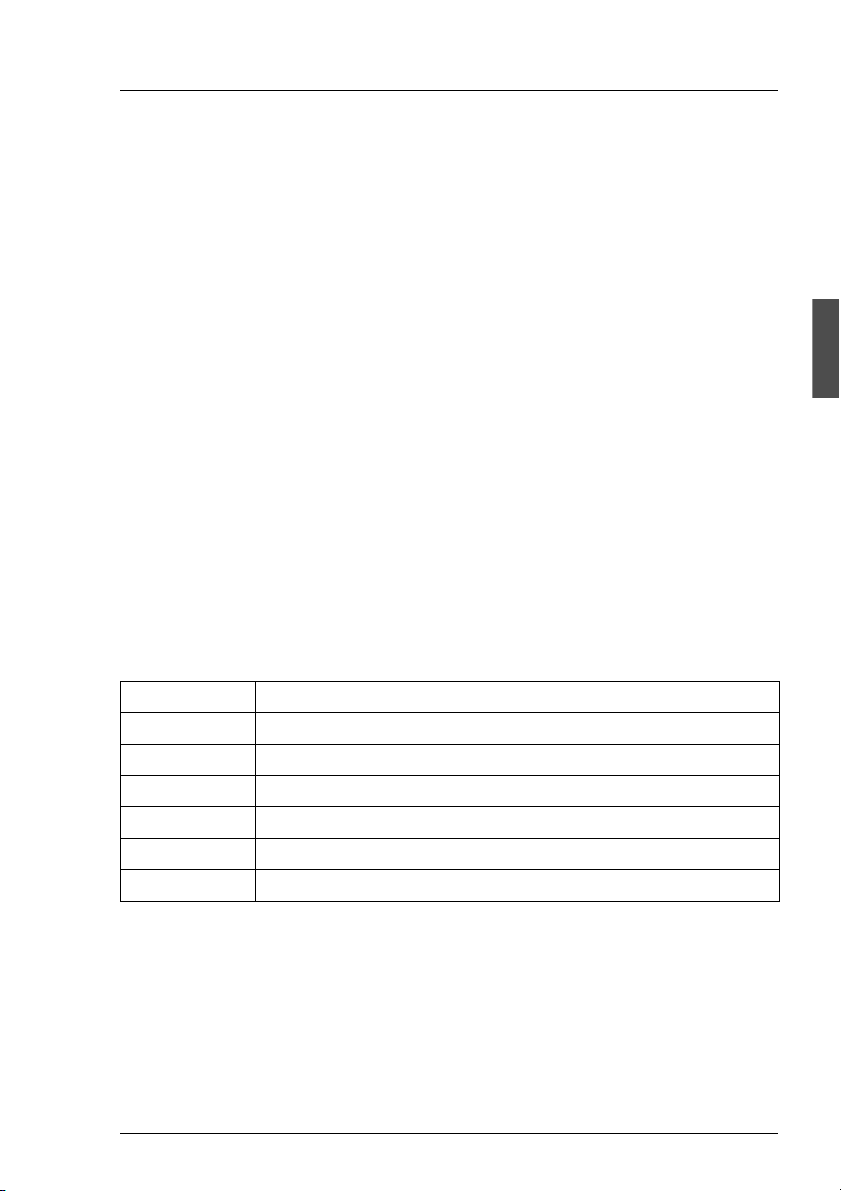
Command Use
xpadd adding print jobs
xpchange changing the job status
xpdel deleting print jobs
xpmod modifying existing print jobs
xpshow displaying information on Xprint V7.0 objects
xpstat displaying the status of Xprint V7.0 objects
Table 1: Xprint V7.0 commands
As an ordinary user, you can only use all these commands for the job object.
For all other objects you can only use the xpstat and xpshow commands. Only
the administrator can also use all the other commands for other objects.
U23841-J-Z915-6-76 15
Page 28

Basic information Producing Output with Xprint V7.0
Structure of Xprint V7.0 commands
This section describes the general structure of the Xprint V7.0 commands.
Command Object type [Selection] Options
---------------------------------------------------xpadd -job -dr file1 -ct SIMPLE
xpshow -job 13 -di LONG
xpdel -job 13
Every Xprint V7.0 command is called using this format. The name of the
command, e.g. xpadd, is followed by the short identifier for the object type
consisting of three characters, e.g. -job. Furthermore, you can select from the
objects available of the selected object type, e.g. in the case of the object type
-job, you can select one or more specific print jobs. Finally, there are a number
of options available for most commands which have an effect on the behavior of
the individual commands. For detailed information on the various Xprint V7.0
commands see the “Xprint V7.0 - Reference Manual”.
Online help
For every command, you can call online help with the -? option. This online help
works on two levels: command and option level.
If you call an Xprint V7.0 command followed by the -? option (e.g. xpadd -?),
command level help will be displayed, providing the general form of this
command. This type of help displays the objects supported by the command. It
also shows the options that are independent of the object type. Not all the
options are displayed, however, because these depend on the use of a
command and an object together.
Option level help displays all the possible options of a specific object type used
with an Xprint V7.0 command. To call the online help at option level, you must
specify the command name as well as the relevant object type before the -?
option (e.g. xpshow -dgr -?).
16 U23841-J-Z915-6-76
Page 29

Producing Output with Xprint V7.0 Printing files
3.2 Printing files
This section describes the simplest way of printing files with Xprint V7.0. This
might be sufficient for some users while other users will require further options.
Use the following basic command to print a complete document on your default
printer:
xpadd [-job] -dr selection
If you want to print a file, you do not have to specify the object type -job for the
xpadd command as this is the default for xpadd. The -dr option (document
reference) is used to select one or more files for printing. After this option, for
selection, specify the names of the files to be printed. The command could have
the following format:
xpadd -dr file
xpadd -dr file1 file2.txt file3.xyz
If you have specified only one file, only this file is sent to the printer; if you have
specified several files, these are sent to the printer as one block. This block of
combined files or the solitary file is called a print job.
Instead of the xpadd command you can also use the X/Open command lp to
submit a print job. As with the other X/Open commands lpstat and cancel, the
lp command is described in the “SINIX - Commands” manual and in the
appendix of the “Xprint V7.0 - Reference Manual”.
In addition to the -dr option, there are numerous possible options for controlling
the printing process. In the following sections many of these options are listed
according to topics. A complete alphabetical overview of all the available options
can be found in the “Xprint V7.0 - Reference Manual” under the command
xpadd -job. The table below serves as a guide through this section.
If you want to ... Read ...
print a document on a specific device section “Selecting a printer” on
page 19
print parts of a document section “Printing parts of a document”
on page 21
print a document with special data not
suitable for the printer
Table 2: Options for controlling the printing process
U23841-J-Z915-6-76 17
section “Printing files with special
content types” on page 23
Page 30

Printing files Producing Output with Xprint V7.0
If you want to ... Read ...
print a document with a specific
appearance
section “Creating printouts with
special formats” on page 24
print the current state of the document section “Copying print files before
printing and deleting them after
printing” on page 33
add separator pages between
documents or files
section “Defining separator pages” on
page 34
print several copies of a document section “Printing several copies of a
document” on page 35
be notified of the completion of your
print job or of other events
print a document using further Xprint
V7.0 options
print a document using predefined
fonts or forms
print a document using loadable
resources
print a document using a predefined
job template
section “Requesting notification of the
result” on page 36
section “Using further options” on
page 37
section “Using other Xprint V7.0
objects” on page 41
section “Using Resources” in the
“Reference Manual”
section “Printing a document via a
globally defined job template” on
page 44
print a document with a private job
template
Table 2: Options for controlling the printing process
section “Defining customized job
templates” on page 46
18 U23841-J-Z915-6-76
Page 31

Producing Output with Xprint V7.0 Selecting a printer
3.3 Selecting a printer
Xprint V7.0 allows you to print documents on any printer within your Xprint V7.0
domain. You can select any printer for your printout for which you have the
required privileges.
There are two possible ways of selecting printers or printer groups for printing
in Xprint V7.0. Firstly, you can specify one specific printer (group) for a print job,
and secondly, you can define one or more printers as your personal default
printers:
If you do not specify a specific printer (group) for your print job, Xprint V7.0 will
select a suitable printer according to the options specified for the print job (e.g.
double-sided printing, landscape format).
Specifying a printer or printer group for a print job
You can select the printer on which you want to print your document according
to various criteria. There are the following options:
-de destination
This option allows you to select a printer or printer group. If you select a
printer group, Xprint V7.0 sends your job to a device which belongs to this
group. Xprint V7.0 has a load balancing procedure which ensures the
jobs will be distributed effectively between the printers in the group. You
can display a list of the available printers via the xpshow -dev command.
The available printer groups can be displayed with the xpshow -dgr
command.
-pc pcl
Instead of selecting a specific printer by its name, you can also use the
printer capability list pcl as a criterion, e.g. POSTSCRIPT, HP-LASERJET or
HP-DESKJET. In this case, Xprint V7.0 sends your job to any available
printer which uses the selected PCL.
Addressing a printer via a gateway
You can also select a printer (group) which is not defined in your Xprint V7.0
domain, provided it can be reached via a gateway. This applies to
printers/printer groups which are available in other Xprint V7.0 domains or
which are connected to computers running the DPRINT printer spooler (for
BS2000 systems) or the BSD printer spooler (for BSD-UNIX systems and other
systems with an lpd print server).
U23841-J-Z915-6-76 19
Page 32

Selecting a printer Producing Output with Xprint V7.0
To address a printer (group) via a gateway, you must specify both the name of
the gateway and the name of the desired destination, separating the names with
the ! character. Only the administrator can find out the name of all the gateways
available using the xpshow -gtw command.
To address a printer via a gateway, specify the combination gateway!printer as
the printer name with the -de option.
Defining a default destination
With the shell variable XP_DESTIN you can define one or more printers of your
Xprint V7.0 domain as the default destination for your print jobs. In this case,
each print job for which you do not explicitly specify a target printer will be
printed on this default destination. If you have defined more than one printer as
the default destination, Xprint V7.0 will select a suitable printer.
To define a default destination, you must set the shell variable XP_DESTIN to the
names of the desired printers and export it before submitting a print job. The
individual printers must be separated by spaces. If you want to define the default
destination for every session with your computer, it is recommended that you set
XP_DESTIN in a file which is processed for every login (e.g., depending on the
shell, the file .profile or .xsession in your HOME directory).
Examples
– To print a document on device printer1:
xpadd -dr file1 -de printer1
– To print a document on printer printer1 via the gateway linuxgtw:
xpadd -dr file1 -de linuxgtw!printer1
– To print a document on any device belonging to the device group SP211:
xpadd -dr file1 -de SP211
– To print a PostScript file on any PostScript printer in the network:
xpadd -dr file2.ps -pc POSTSCRIPT
– To print a document on a device with the PCL HP-LASERJET belonging to the
device group SP211:
xpadd -dr file2 -de SP211 -pc HP-LASERJET
– To configure printer printer2 as the default destination:
XP_DESTIN=printer2; export XP_DESTIN
20 U23841-J-Z915-6-76
Page 33

Producing Output with Xprint V7.0 Using Xprint V7.0 options
To print file1 on printer printer
xpadd -dr file1
– To configure printers printer1 and printer2 as the default destination:
XP_DESTIN=“printer1 printer2"
export XP_DESTIN
To print the file file1 on one of the printers printer1 or printer2:
xpadd -dr file1
2:
3.4 Using Xprint V7.0 options
This section describes further options for printing files with Xprint V7.0. The
individual subsections describe the various possibilities offered by Xprint V7.0
for printing documents.
3.4.1 Printing parts of a document
In raw mode, printing parts of documents is not supported.
i
By default, all pages of a document are printed when xpadd is used. If you want
to print only specific parts of the file, use one of the following options to select
the sections to be printed:
-ps page_select
You can select individual pages or ranges of pages for printing by using one
of the following methods:
You can specify individual page numbers separated by commas, e.g.
1,6,7,16
pages 1, 6, 7, and 16 are printed.
You can specify a range of pages a-b where b must always be larger than a:
18-34
pages 18 through 34 are printed.
3-
all pages from page 3 onward are printed
U23841-J-Z915-6-76 21
Page 34

Using Xprint V7.0 options Producing Output with Xprint V7.0
--23
pages up to page 23 are printed.
You can specify combinations of page ranges:
--15,17-
all pages are printed except for page 16.
--15,27-30,35-
all pages up to page 15, from page 27 through page 30, and from
page 35 onward are printed.
--15,30,35
all pages up to page 15, page 30, and all pages from page 35 onward
are printed.
Finally, you can combine individual pages and page ranges.
The two hyphens are indispensable and must always be specified if
i
you want to print up to a certain page without specifying a start
page.They prevent the minus sign from being interpreted as the
beginning of a new option.
If you do not specify any page numbers after the -ps option, all pages of the
document are printed (exactly as if the -ps option had not been specified).
-fr string
A string in your document where printing is to start. If Xprint V7.0 does
not find the specified string, nothing is printed.
-to string
A string in your document where printing is to stop. If Xprint V7.0 does
not find the specified string in your document, the document is printed up
to the end.
If the -ps option is combined with the -fr and/or -to option, Xprint V7.0
searches the specified strings in the page ranges defined with -ps.
If the print job is sent to a device that does not use a PCL, i.e. prints in
i
raw mode (see section “Using further options” on page 37), the options
-ps, -fr, and -to are ignored.
22 U23841-J-Z915-6-76
Page 35

Producing Output with Xprint V7.0 Using Xprint V7.0 options
Examples
– To print a document from page 5 through page 10:
xpadd -dr file1 -ps 5-10
– To print a document from page 7 to the end:
xpadd -dr file1 -ps 7-
– To print a document from page 1 through 5:
xpadd -dr file1 -ps --5
– To print a document from the string Example 1 up to the string
}/* main */:
xpadd -dr file1 -fr"Example 1" -to"}/* main */"
– To select the page range from page 5 to page 19 and print the section
starting with the string abc up to the string xyz in this range:
xpadd -dr
file1 -ps 5-19 -fr abc -to xyz
3.4.2 Printing files with special content types
The basic print command requires that the contents of the specified files can be
processed by the printer. However, sometimes this is not the case. For example,
a PostScript printer cannot print ASCII files directly. The simple ASCII data in
the file must be converted to PostScript format before printing.
Xprint V7.0 can make such conversions automatically if it knows the content
type of the file and what the printer expects. The administrator specifies the
supported content type when configuring the printer, while the content type of
the print data must be specified by the user when defining the print job.
If the two types match, Xprint V7.0 can send the print job directly to the printer;
if they do not match, Xprint V7.0 will try to convert the print job data into a format
suitable for the printer.
If you do not specify a content type, the following will occur automatically:
● Xprint V7.0 will read the start of the data. If %! are the very first characters,
or the string %!PS occurs in the first 15 characters, then the content type will
be set to POSTSCRIPT.
● If this is not the case and only SIMPLE characters are detected in the first 15
characters, then the content type is set to SIMPLE.
U23841-J-Z915-6-76 23
Page 36

Using Xprint V7.0 options Producing Output with Xprint V7.0
● Otherwise, the content type is set to COMPATIBLE.
If you are printing more than one document, then the content type than is determined for the first document will be used for all the other documents in the job.
3.4.3 Creating printouts with special formats
Usually, a printer is not only capable of printing data on paper but can also do
this in different formats. Therefore Xprint V7.0 also allows you to influence the
formatting by specifying font settings, the page format, and the character set to
be used.
Printing a document with different font settings
The following options allow you to change the default font for a printout. What
you can modify depends on the printer you use. If you use the xpshow -pcl
command and specify the PCL set for the selected printer, you can display a list
of the fonts, styles, character pitches etc. that are supported by the printer, e.g.:
xpshow -pcl HP-LASERJET -di LONG.
A font always consists of several components such as typeface, style or
i
font size. You can override these at any time, for example by modifying
the font size.
If you often want to print with such customized settings, you can also
define a special job template for this purpose. For more detailed information see section “Defining customized job templates” on page 46.
-tp typeface
This option selects the specified typeface for the print job. Printers are
supplied with a number of predefined typefaces. A list of the typefaces
available for your printer under Xprint V7.0 can be displayed using the
command
xpshow -pcl -di LONG.
-cs character_style
You can choose between two character styles: STRAIGHT and ITALICS.
The default is STRAIGHT.
-hm horizontal_motion
The value horizontal_motion specifies the number of characters printed
horizontally per inch.
24 U23841-J-Z915-6-76
Page 37

Producing Output with Xprint V7.0 Using Xprint V7.0 options
-vm vertical_motion
This option is used to specify the number of lines to be printed per inch.
Selecting the layup
Many printers can print in PORTRAIT and in LANDSCAPE format. In most cases the
default is PORTRAIT. The following figure illustrates the possible settings:
Figure 4: Layup settings
The page layup can be changed with the following option:
-ls layup_specification
This option specifies whether a print job is to be printed in PORTRAIT or in
LANDSCAPE format.
U23841-J-Z915-6-76 25
Page 38

Using Xprint V7.0 options Producing Output with Xprint V7.0
Defining the margin settings
When printing under Xprint V7.0, you can also define which part of a page is to
be printed on. The following figure provides an overview of the possible settings
and is followed by a description of the individual options.
-pw
T, B, L and R mark the
printer-dependent nonprintable area.
The values for the nonprintable margin are
-lm
T
-ll
-tm
retrieved from the values
nppl and npll of the
corresponding PCL
object:
T = B = nppl/2
L = R = npll/2
-ph
L
-pl
R
B
Figure 5: Margin settings
26 U23841-J-Z915-6-76
Page 39

Producing Output with Xprint V7.0 Using Xprint V7.0 options
Xprint V7.0 always defines its printable area by means of the logical page
specified with the options -pl (page length) and -ll (line length). The margin
options -tm (top margin) and -lm (left margin) can also be used for defining the
printable area within the physical page. If only the margin settings -tm and -lm
are specified, the bottom and right margin of the logical page are defined via the
non-printable area. If a logical page is not given, the size of the printable area is
calculated from the size of the physical page (-ph for the page height, -pw for the
page width) minus the non-printable margins.
-lm left_margin
This option specifies the width of the left margin in inches (i), centimeters
(c) or millimeters (m) or, if no unit is specified, in characters.
-ll line_length
This option defines the maximum length of a print line, which indirectly
also determines the right margin. This can also be specified in inches (i),
centimeters (c) or millimeters (m). If no measurement is specified and no
left margin is defined, the value is interpreted as the number of
characters per line. If no value is specified, the page width specified with
the -pw option minus the printer-specific non-printable margin widths is
used.
This option is controlled by the option -wm (wrap mode), i.e. the line length
is modified if the printable line length is exceeded. For more information
refer to the “Xprint V7.0 - Reference Manual”.
-tm top_margin
This option is used to specify the width of the top margin in inches (i),
centimeters (c) or millimeters (m) or, if no unit is specified, in characters.
-pl page_length
This option defines the maximum length of a printed page, and thus
indirectly also the bottom margin. This can also be specified in inches (i),
centimeters (c) or millimeters (m). If no measurement is specified, the
value is interpreted as the number of lines per page. If no value is
specified and no top margin is defined, the page height specified with the
-ph option minus the printer-specific non-printable top and bottom
margins is used.
Depending on the printer, the margins on the printout may differ from the
i
set values. Therefore it is advisable to print a sample copy first in order
to adjust the values for the printer. Also bear in mind that the printable
area is controlled by the -wm option (wrap mode) of the xpadd -job
command.
U23841-J-Z915-6-76 27
Page 40

Using Xprint V7.0 options Producing Output with Xprint V7.0
Switching double-sided printing on/off
When printing jobs which comprise several pages, it often makes sense to
change the page settings for even- and odd-numbered pages in such a way that
they face each other as in a book. The margin settings should be set alternately
to result in a symmetrical overall image. The following figure shows the various
options for double-sided printing under Xprint V7.0:
DOUBLE_WIDE & PORTRAIT
SINGLE & PORTRAIT
DOUBLE_NARROW & PORTRAIT
SINGLE & LANDSCAPE
Figure 6: Options for double-sided printing
DOUBLE_WIDE & LANDSCAPE
DOUBLE_NARROW & LANDSCAPE
-sd side _specification
This option is used to specify whether a form is to be printed only on one
side (SINGLE) or on both sides. In the case of double-sided printing you
specify the gutter for the portrait side (DOUBLE_WIDE) or for the landscape
side (DOUBLE_NARROW). By default, single-sided printing (SINGLE) is set.
28 U23841-J-Z915-6-76
Page 41

Producing Output with Xprint V7.0 Using Xprint V7.0 options
Selecting specific character sets
Depending on the PCL, a printer supports a number of special character sets,
e.g. ENGLISH, FRENCH, INTERNATIONAL etc. If you want a job to be printed using a
specific character set table, e.g. the character set INTERNATIONAL, you must
specify this with the option -la character_set.
The supported character sets can be seen in the Language field of the output of
the xpshow -pcl pcl_name -di LONG command.
Examples
– To print the document file1 with a left margin of 5 cm and a top margin of
34 mm:
xpadd -dr file1 -lm 5c -tm 34m
– To print the file file1 double-sided (with a vertical gutter):
xpadd -dr file1 -sd DOUBLE_WIDE
– To print file english (created using the English character set) using the
character set INTERNATIONAL:
xpadd -dr english -la INTERNATIONAL
U23841-J-Z915-6-76 29
Page 42

Using Xprint V7.0 options Producing Output with Xprint V7.0
3.4.4 Using Loadable Resources
The figure below gives a simplified view of how loadable resources work. This
is explained more fully in the following paragraphs.
Loadable ResourcesData (document)
This is sample text. This is
another line. This is sample text.
This is another line of sample
text. This is a further line of sample text. This is one more line of
sample text. This is a further line
of sample text. This is one more
line of... This is sample text. This
is another line of sample text.
This is a further line of sample
Font
mylogo
mylogo
This is sample text. This is
another line. This is sample text.
This is another line of sample
text. This is a further line of sample text. This is one more line
of... of sample text. This is a further line of sample text. This is
one more line of...This is sample
text. This is another line of sample text. This is a further line of
Logo
Font used by text
Text (foreground)
Background
Figure 7: Function of loadable resources
30 U23841-J-Z915-6-76
Page 43

Producing Output with Xprint V7.0 Using Xprint V7.0 options
i
Loadable resources (such as fonts, logos etc.) can be sent to the printer
separately from the document. The printer will merge the data and the loadable
resource to give the required printed output.
The resources external to the document can be defined as Xprint V7.0 objects
called “loadable resources”. They can either be predefined by the administrator
for the entire system and made available to all users, or they can be defined by
each individual user as “private loadable resources”. For further information on
creating and using loadable resources, see Chapter 4 in the “Reference
Manual”.
3.4.4.1 Using Public Loadable Resources
The administrator may have configured loadable resources in the system. To
print a document that uses resources, use the following option:
-lr loadable resources
With this option, you can reference a list of loadable resources.
Examples
– To display the loadable resources available in the system, use the command
xpshow -lrs
The system displays a list of all loadable resources that can be used. For
example, you could use any of the loadable resources listed below.
Name Type Administrator PCL
---- ---- ------------- --------logo Overlay root PJL-PCL5e
font Softfont root PJL-PCL5e
Please note that only those loadable resources are displayed which
have been defined by the Xprint V7.0 administrator. Your own job
loadable resources in the $HOME/.Xprint file are not displayed but can
also be used.
– To print a document with a logo on every page:
xpadd -dr mydocument -lr logo -cr ALL
Xprint V7.0 is only able to insert calls to resources at the top of a page in a
document. Other cases must be dealt with by the user. The user must call
the resource with the appropriate escape sequence (see the printer manual)
and with the identifier known by the printer. This identifier is shown in the
Internal Id field in the xpshow -lrs -di LONG display.
U23841-J-Z915-6-76 31
Page 44

Using Xprint V7.0 options Producing Output with Xprint V7.0
3.4.4.2 Using Private Loadable Resources
Only administrators can create public loadable resources, but users can create
private loadable resources. To do this, create a file named .Xprint in your
home directory. You can insert as many comment lines as you like, which must
start with the “#” character. The definition of a loadable resource starts with its
name followed by any options allowed by xpadd -lrs. If a definition continues
on the next line, the current line must end with a backslash character.
Resources first have to be created with dedicated tools such as FGL or
SIEFONT from Siemens. These tools will generate the data to be downloaded
to the printer. The name of the generated file can be saved in a loadable
resource object. Each resource needs its own identifier in the printer. This
identifier has to be reflected in the resource object as the “printer internal
identifier”. The description of a resource can be registered in a loadable
resource object.
Resources may be called from documents if they include printer commands that
call the resource.
Examples
– The following example shows the definition of several loadable resource
objects.
# Private .Xprint file
#
# Loadable resources
# everypage logo
mylogo -pi 101 -pc HP-LASERJET -tp Overlay -ec
-fi $HOME/lrs/mylogo.hp -cr ALL
mybckgrd -pi 102 -pc HP-LASERJET -tp Overlay -ec
-fi $HOME/lrs/mybckgrd.hp
– Jobs can use the loadable resources as follows:
xpadd -dr mydocument -lr mylogo
xpadd -dr mydocument -lr mylogo mybckgrd
If a private loadable resource has the same name as a predefined
i
(public) loadable resource, the private one is given preference when the
name is selected. This means that first your .Xprint file is searched for
private loadable resoures. If none can be found, or the .Xprint file does
not exist, or the .Xprint file is not readable, then the resource is
assumed to be a public loadable resource.
32 U23841-J-Z915-6-76
Page 45

Producing Output with Xprint V7.0 Using Xprint V7.0 options
For inter-domain printing, resources are assumed to be available in the
remote domain. This restricts resources to public ones.
3.4.5 Copying print files before printing and deleting
them after printing
The basic command xpadd -dr file prints the specified file by adding to the
job queue a reference to the original file. If there is some time between job
submission and the actual printing, any changes made to the document during
this time also affect the printout. This is not always desirable. For this reason,
Xprint V7.0 allows you to make a copy of the data to be printed. This can be
done using the following option:
-cp (cp stands for copy file)
This option causes a copy to be made of the document to be printed. This
way the original file can immediately be edited further or can be deleted
without these modifications affecting the printout.
Another option causes a file to be deleted immediately after printing:
-rm (rm stands for remove file after printing)
This option causes all the specified files to be deleted after the printout.
If the printout is not finished, for example due to an error or because the
job was canceled, the files are not removed from the system. If a
retention period was specified with the -rp retention_period option, this
file is only deleted when this period of time has elapsed. If Xprint V7.0 is
not active on the relevant host system at the scheduled delete time, the
files cannot be removed.
If the options -cp and -rm are used simultaneously, the -rm option is
i
ignored without notice and only -cp is interpreted.
U23841-J-Z915-6-76 33
Page 46

Using Xprint V7.0 options Producing Output with Xprint V7.0
3.4.6 Defining separator pages
With printers which are used by many users at the same time or when listing
paper is used, it can make sense to add separator pages between the different
print jobs. This makes it easier to distinguish the print jobs of the individual users
or two different print jobs. For this purpose, Xprint V7.0 offers the option of
defining print jobs with a start or end sheet. Additionally, individual files of one
job can be separated by adding separator sheets.
job_start_sheet
-js
job_end_sheet
-je
separator_sheet
-sp
With a print job you can specify whether start and end sheets are to be
printed, or in the case of several documents also separator sheets between
the documents. The variables of these options can be set to the following
values: BRIEF, FULL and NONE. The default is NONE.
Example
To insert a start sheet of type BRIEF and separator sheets of type FULL for print
job job1:
xpadd -dr file1 file2 file3 -jt job1 -js BRIEF -sp FULL
34 U23841-J-Z915-6-76
Page 47

Producing Output with Xprint V7.0 Using Xprint V7.0 options
3.4.7 Printing several copies of a document
There are two possible ways of printing several copies of a document. Firstly,
you can print the entire document, and secondly you can print each page of the
document several times. The difference is that in the first case the copies of the
document are sorted while in the second case they are not. The second option,
however, might be faster if the printer itself can print several copies of individual
pages (e.g. HP-LASERJET printers).
You can define the number of copies for the entire document using the following
option:
-fc number
number defines the number of copies of the specified documents to be
printed. If this option is not specified, exactly one copy of each document
is printed.
If you have access to a printer supporting multiple printouts (e.g. an HPLASERJET printer), you can use the following option to print several copies of
each individual page:
-fp number
In this case, number defines how often each page of the job is to be
printed.
This option is not supported by PostScript printers.
i
Examples
– To print three copies of a document:
xpadd -dr file1 -fc 3
– To print five copies of pages 1 through 5 of a document one after the other:
xpadd -dr file1 -ps 1-5 -fp 5
U23841-J-Z915-6-76 35
Page 48

Using Xprint V7.0 options Producing Output with Xprint V7.0
3.4.8 Requesting notification of the result
Xprint V7.0 allows you to have a message about the result of a print job sent to
you. This is particularly useful if the period of time between the job’s submission
and its execution is fairly long (e.g. in the case of scheduled print jobs and jobs
with a low priority). For this purpose, Xprint V7.0 provides several options for the
xpadd command:
-ev events
With this option you can specify the events of which you want to be
notified. Possible events are: ALL, DEVICE_ERROR, MOUNTING and NONE. The
default is NONE for local jobs, or REJECTED_FROM_REMOTE_DOMAIN if the job
was sent via a gateway (or ALL if either of the options -nm or -na is
specified). Further settings are STARTED, COMPLETED, ABORTED, SUSPEND,
RESUMED, DEVICE_ERROR, USER_ERROR, MODIDFIED and
SENT_TO_REMOTE_DOMAIN (a detailed description of these keywords is
given in the “Xprint V7.0 - Reference Manual”).
-nm notification_method
With this option you can specify how you want to be notified. The default
is MAIL, other possible settings are WRITE, COMMAND and FILE (see the
“Xprint V7.0 - Reference Manual” for details).
-na notification_address
With this option you specify where the message is to be delivered.
-nd comment (nd stands for notification descriptor)
Allows you to define a comment that is to be added to the message.
Examples
– To request a message to be sent to yourself via the write command when
the job is completed or aborted:
xpadd -dr file1 -ev COMPLETED ABORTED -nm WRITE
– To log all the events of the print job in the file /home/baxter/print.log:
xpadd -dr file1 -nm FILE -na /home/baxter/print.log
– To notify user smith of every modification of the print job via mail:
xpadd -dr file1 -ev MODIFIED -na smith
– To send a job to a gateway and request information in the event of an error:
xpadd -dr file1 -de gateway1!printer1 \
-ev REJECTED_FROM_REMOTE_DOMAIN
36 U23841-J-Z915-6-76
Page 49

Producing Output with Xprint V7.0 Using Xprint V7.0 options
3.4.9 Using further options
This section describes further useful options of the xpadd command.
Printing in raw mode
Besides printing on predefined forms, Xprint V7.0 allows you to specify
formatting and printer control sequences for the printer yourself. This can be
done with the -rw option (raw mode). Xprint V7.0 sends the document to the
selected printer without making changes to your formatting. This option is
particularly useful if you use the xpadd command as a print command for an
application program which formats the print data itself.
Retention period of print jobs
When the print process is finished, the information which can be displayed with
xpshow and xpstat is also deleted from the spooler system. If you want this
information to still be available, you can specify a period of time in minutes with
the option -rp retention_period. This defines how long the print job is to be
retained in the system after its completion. The default is 0 (remove immediately).
If you specify the keyword INFINITE, the print job remains in the system
i
permanently.
Printing a document directly
To send a document directly to the printer by bypassing the print queue, you can
use the option -dp (stands for direct printing). This option allows quick printing
of a document; you cannot, however, modify the print job (xpmod or xpchange) or
request information on the job (xpshow). You can only select one printer, which
must be disabled for normal Xprint V7.0 spoolout by the Xprint V7.0 administrator. You are only assigned a local rather than a global ID for the print job you
submit. This local ID can be used to delete the job (xpdel) or display its status
(xpstat).
Initial state of a print job
When a print job is transferred to the spooler, it is automatically assigned the
status WAIT (waiting for printout). You can, however, also assign it the status
SUSPEND (to defer it) or TOP (to move it to the top of the print queue) with the -st
option if your Xprint V7.0 administrator has given you the required permission.
U23841-J-Z915-6-76 37
Page 50

Using Xprint V7.0 options Producing Output with Xprint V7.0
The -wa option (wait activation) allows you to assign the status SCHEDULED to the
print job. This means that the print job is added to the print queue and moves in
it according to its priority. When it comes to the top position, the printer to which
the job is assigned is no longer available for other jobs. Only when the print job
is explicitly assigned the status ACTIVE (xpchange -job, option -st ACTIVE), is
printing started. When the print job is completed, the printer is released for use
by other print jobs again.
Figure 8: States of print jobs
Extended options
The –ex flag has been introduced to extend the set of pre-defined object
attributes in a flexible way.
The purpose of this option is twofold:
● adapt product behavior via predefined variables.
● collect and store any interesting information for the user or the administrator
in a structured way.
Example:
– the room number where the printer is located
– the page cost of a printer
38 U23841-J-Z915-6-76
Page 51

Producing Output with Xprint V7.0 Using Xprint V7.0 options
– the e-mail adress of a user
– the operating system of a host...
It consists in a list of strings that can be stored in all Xprint V7.0 objects. Each
string must respect the following format: “<variable>=<value>”.
Example:
<command_name> <object_type> name [...] [operand] [options] ex "variable1=value1" "variable2=value2" [...]
Besides the options mentioned above, there are numerous additional options
for printing files with Xprint V7.0. For a complete overview of all the possible
options see the description of the xpadd -job command in the “Xprint V7.0 Reference Manual”.
U23841-J-Z915-6-76 39
Page 52

Using other Xprint V7.0 objects Producing Output with Xprint V7.0
3.5 Using other Xprint V7.0 objects
The previous section has already mentioned a number of options which are in
some cases closely related to each other. For example, the options for defining
font settings and the options for defining page settings are logically connected.
Xprint V7.0 responds to this fact by providing two objects which combine
logically connected settings. These are the objects font (-fnt) and form (-frm).
With the help of objects of these types, the corresponding settings can be
defined globally and called up for printing.
Instead of specifying several options, e.g. for defining the font settings, you only
need to specify a single option which will activate a predefined font. Here the
following applies:
A font comprises all the options for font settings, a form comprises a font as well
as all the options for page and margin settings for a printout. Fonts are assigned
to forms and these in turn are assigned to printers. By default, every printer is
assigned the GENERIC form which defines the default settings for the printer. An
administrator can define new fonts or forms and assign these to printers. A user
can only assign these objects to his/her print jobs, thus overriding the default
settings.
Selecting a font or form does not mean, however, that all the options defined by
this object must be accepted exactly as they are. Every user can assign to a job
a predefined form and additionally specify single options which will override the
settings defined by the form.
Fonts and forms are selected with the following options:
-ft font_name
If you want to use a predefined font for printing your document, select the
font font_name with the -ft option. You must, however, make sure that the
printer to which your print job is sent supports the selected font. You can
display a list of the defined fonts with the xpshow -fnt command.
-fm form_name
form_name is the name of a predefined form on which you want to print
your document. You can display a list of all the available forms with the
xpshow -frm command.
There are two types of form: AUTOMATIC and MANUAL. This differentiation is due to
the fact that there are forms which require manual intervention at the printer
(e.g. changing paper or font cassettes) and others which do not.
40 U23841-J-Z915-6-76
Page 53

Producing Output with Xprint V7.0 Using other Xprint V7.0 objects
Jobs using forms of the type MANUAL, which require manual intervention
i
at the printer, are only printed when Xprint V7.0 is informed that the
required steps for printing these jobs have been performed. For this
purpose Xprint V7.0 provides the xpmount command which sends this
information to Xprint V7.0.
Printing a document with a MANUAL form
To print a document with a MANUAL form, proceed as follows:
● Submit the print job and select the required form:
xpadd -job -dr file -fm form
● Prepare the target printer accordingly.
● Now tell the system that the form is mounted and printing can thus be
started. Use the following command:
xpmount
By means of menus the system then asks you to specify the mounted form
and target printer (see example). When the required specifications are
made, the system starts printing the document.
The xpmount command also provides the options -f form, -d printer and -s
(silent mode, i.e. the user is not asked for mount confirmation); this allows
you to avoid the menu selection by explicitly specifying the relevant values.
● If you need to print with normal settings again, make the required changes
on the printer.
● Notify the system of this:
xpmount -f- -d printer
where the option -d printer, i.e. the printer from which the form was removed,
must be specified.
U23841-J-Z915-6-76 41
Page 54

Using other Xprint V7.0 objects Producing Output with Xprint V7.0
Examples
– To display all defined forms :
xpshow -frm
A list of all the available forms is displayed, which might read as follows:
Name Default font Layup User perm. Mount method
---- ------------ ----- ---------- -----------GENERIC GENERIC PORTRAIT AUTOMATIC
LETTER COURIER PORTRAIT perm1 AUTOMATIC
A5LAND GENERIC LANDSCAPE MANUAL
MANUAL GENERIC LANDSCAPE MANUAL
Forms with the value MANUAL in the Mount method column require
i
specific manual settings to be made (e.g. mounting the correct paper,
see section “Printing a document with a MANUAL form” on page 41).
– To print a document using the form LETTER:
xpadd -dr file1 -fm LETTER
– To print a document via the form A5LAND, but using the font COURIER:
xpadd -dr file1 -fm A5LAND -ft COURIER
– To print the document file1 on the printer printer1 with the (manual) form
A5LAND:
xpadd -job -dr file1 -de printer1 -fm A5LAND
The user mounts the required form.
xpmount
The following menu query is displayed:
Please select the manual form to mount on the device.
Selection:
0. Unmount the form
1. manual
2. A5LAND
Type number or”?
” for help:
Input: 2
Form”A5LAND” has been selected.
Please select the device where the form”A5LAND
mounted.
” will be
42 U23841-J-Z915-6-76
Page 55

Producing Output with Xprint V7.0 Using other Xprint V7.0 objects
Selection:
1.
2. printer2
3. printer3
Type number or”?” for help:
printer1
Input: 1
Device”printer1" has been selected.
Please mount”A5LAND" on device”printer1".
Type "y" when finished or"?" for help:
Input: y
Form"A5LAND" is now mounted on device"printer1".
The printer now starts printing the document file1. When printing is
finished, the user removes the form from the printer and notifies the system
of this:
xpmount -f- -d printer1
Again the confirmation is displayed on the screen:
Form unmounted for"printer1"
– To print the document file2 on printer printer2 using the form manual:
xpadd -job -dr file2 -de printer2 -fm manual
The user mounts the required form.
Then he/she enters the command xpmount, this time avoiding the query by
specifying the required values explicitly:
xpmount -f manual -d printer2 -s
Xprint V7.0 confirms with the following message:
Form"manual" is now mounted on device"printer2".
The printer starts printing the document file2.
When printing is finished, the user unmounts the form on the printer and
notifies the system of this:
xpmount -f- -d printer2
Again the confirmation is displayed on the screen:
Form unmounted for"printer2"
U23841-J-Z915-6-76 43
Page 56

Job templates Producing Output with Xprint V7.0
3.6 Job templates
Just as different font settings can be combined in the font objects, print job
settings can be combined in an Xprint V7.0 object. This is called a job template
(-jtp). Job templates can either be predefined by the administrator for the entire
system and made available to all users, or they can be defined by each
individual user as private job templates.
In Xprint V7.0, jobs are sent to a device, a device group, or to an unspecified
target. This is different to a number of other print spoolers, where jobs are sent
to a qualified print queue. Sending jobs to a qualified print queue allows administrators to associate print characteristics with each queue (e.g. a form, a print
density etc.). For the users, this means that selecting a queue automatically
selects the characteristics associated with that queue. Using this approach,
each physical printer can be associated with several logical queues, each
logical queue having its own characteristics.
The Xprint V7.0 job templates work in a similar way. Administrators can define
job templates, to which they assign a job destination (device or device group),
with print characteristics. If users submit their jobs by using templates instead
of specifying a destination, this has the same effect as using the qualified
queues of the other spoolers.
3.6.1 Printing a document via a globally defined job
template
The Xprint V7.0 administrator might have configured job templates in the
system. These contain all the options required for frequently submitted print
jobs of a specific type. Users no longer have to enter the individual options but
simply select the appropriate template.
To print a document with a job template use the following option:
-te job_template
With this option you can use exactly one predefined job template or a job
template you have defined yourself for your print job.
44 U23841-J-Z915-6-76
Page 57

Producing Output with Xprint V7.0 Job templates
i
i
Examples
– To display the job templates available in the system:
xpshow -jtp
The system displays a list of all the job templates the Xprint V7.0 administrator has defined. This list can look, for example, as follows:
Name Destination Form Font fc pr
rm
---- ----------- ---- ---- -- -- -letter1 printer1 001 020 RESET
letter2 printer1 001 001 RESET
template1 A5LAND TIMES 001 001 RESET
You can use any of the listed templates for your print jobs.
Please note that only those job templates are displayed which have
been defined by the Xprint V7.0 administrator. Your own job templates
in the $HOME/.Xprint V7.0 file are not displayed but can also be used
(see next page).
– To use the predefined job template template1 and overwrite the template’s
priority, making it 5:
xpadd -dr file1 -te template1 -pr 5
For the printout, the options defined for this template are used instead of the
-te option.
Do not confuse option -te job_template with -jt job_title.
You can modify the options defined in the selected job template by
explicitly specifying the relevant options with the modified values in
the command line:
xpadd -jtp my_job -pr 10
xpadd -dr file_1 -te my_job -pr 15
The job is spooled in with the priority 15.
U23841-J-Z915-6-76 45
Page 58

Job templates Producing Output with Xprint V7.0
3.6.2 Defining customized job templates
Not only the system administrator but also the users themselves can define job
templates. To do this, create a file named .Xprint V7.0 in your home directory.
You can insert as many comment lines as you like. Comment lines must start
with the ’#’ character. The definition of the job template starts with the template
name. This is followed by the options for this template. All xpadd options are
allowed. Strings must be enclosed in inverted commas or quotes, e.g. -jc ’a
comment’. If a definition is to be continued in the next line, the current line must
end with a backslash.
Job templates are a convenient way of combining recurring option
i
sequences to form a template (e.g. if you want to assign a specific font to
a specific paper format). In this way you do not have to specify all your
selected settings for every print job. When defining a customized job
template, you do not necessarily have to define all settings but you can
also modify the settings of an existing template such that it meets your
requirements.
Examples
– The following example shows several simple job templates:
# Private
#
# JOB TEMPLATE
# for letters:
letter -de printer1 -fm form3 -la USA -jt letters -cp
#
# for ASCII files on PostScript printer printer2:
a2ps -de printer2 -ct SIMPLE -cp
#
# with notification of success or failure:
notification -ev COMPLETED ABORTED -nm WRITE\
-nd ’Send message on termination’
– This example shows the templates letter and notification. The
templates are then used as follows:
xpadd -dr file1 -te letter
xpadd -dr file1 -te notification -pr 5
For the printout, the options defined for this template are used instead of the
specified -te option.
46 U23841-J-Z915-6-76
.Xprint file
Page 59

Producing Output with Xprint V7.0 Job templates
If a customized job template has the same name as a predefined job
i
template, the customized one is given preference over the predefined
template when this name is selected. This means that your .Xprint V7.0
file is searched first for the customized job template. If it cannot be found,
the .Xprint V7.0 file does not exist or is not readable, the job template
is assumed to be a globally defined template.
U23841-J-Z915-6-76 47
Page 60

Page 61

4 Managing print jobs
This section shows the possible ways of displaying, modifying or deleting a
submitted print job. The following table serves as a guide through this section:
If you want to ... Read ...
display a print job section “Displaying print jobs” on page 55
modify a submitted print job section “Modifying a submitted print job” on
page 61
delete a print job section “Deleting print jobs” on page 65
Table 3: Managing print jobs
As you have to select submitted print jobs to be able to delete or modify them,
the following section “Selecting a print job” first describes the possible ways of
selecting print jobs.
4.1 Selecting a print job
To manage a submitted print job, you must first select the job. You can only
select print jobs which are still in a print queue.
There are several different ways of doing this. This section describes how to
select individual print jobs via the job’s default identifier or how to select one or
more print jobs via a selection criteria list.
The job identifier
When you submit a print job, it is placed in a print queue. If your print job is
accepted for printing, Xprint V7.0 automatically returns unique IDs by which you
can identify your print job in the print queue. These IDs have the following
formats:
<local ID><global ID>
or
<global ID><permanent ID>
The local ID is a number specifying the serial number of the job for your host. It
can only be used on the host on which the print job was started.
U23841-J-Z915-6-76 49
Page 62

Selecting a print job Managing print jobs
The global ID consists of the name of the server which processes the print job
and a serial job number for this server. This ID can be used from any host on
which you are registered as a user.
The permanent ID is an extension of the local ID, intended to be unique in time,
i.e. never reused for another job. The permanent job ID is made of the client host
name, a counter that garantees the permanence of this identifier and the local
ID.Please refer to page 51 for a complete description of the permanent ID.
A job ID might, for example, read as follows:
<18><se1:97>
In this example, 18 is the local job ID, se1 is the server name and 97 is the serial
job ID on this server.
You should note these IDs in case you need to access the print job before its
execution is completed. If you do not know the ID of the print job you want to
access, you can request a list of all your print jobs (see section “Displaying print
jobs” on page 55).
In addition, the print job is always assigned a job title, which is either the same
as that of the print file (in the case of a job with several files it is the name of the
first file), or which has been specified explicitly with the -jt job_title option.
If you select a print job via its identifier, you can use the number as well as the
job title.
This is illustrated by the following example:
xpadd -dr file1
XP000002: Job <18><se1:97> added
You can select this print job using the following methods:
xpstat 18
xpstat file1
xpstat se1:97
xpstat se1:file1
Note that, unlike the job ID, the job title is not always unique. If there are
i
several jobs with the same title, specifying this title selects all of them.
You can also use the wildcards * and ? when specifying the job title. These have
the same meanings as with UNIX commands. * represents any number of
characters, ? represents exactly one character. The following example selects
all the print jobs at the server se1 whose job title starts with da:
xpstat -job se1:da*
50 U23841-J-Z915-6-76
Page 63

Managing print jobs Selecting a print job
The permanent job identifier
The permanent job identifier
PRISMAnet domain.
A new key has been integrated in the job structure to garantee the permanence
of the job identifier
, which means it will never be assigned to another job.
is usable in the same way as the local job id in the
The permanent job identifier format is: H@C@L
Where
H:is the client host name to make the permanent id single in a domain.
@:is the first separator character.
C:is a counter of 10 digits (it will never be reset).
@:is the second separator character.
L:is the local job id.
It will be possible to select a job with a permanent job id in the following
commands:
- xpchange
- xpdel
- xpmod
- xpshow
- xpstat
When a job is submitted, Xprint V7.0 displays the permanent-id or the local job
id if the value of the extended option of xpadd or whether the environment
variable "XP_SHOW_PERMANENT_ID" is set to "1".
Example:
# xpadd -de device -dr filename -ex "XP_SHOW_PERMANENT_ID=1"
XP000002: Job <d241s081@0000000245@1> (<d241s081:8>) added
Or
# XP_SHOW_PERMANENT_ID=1
# export XP_SHOW_PERMANENT_ID
# xpadd -de device -dr filename
U23841-J-Z915-6-76 51
Page 64

Selecting a print job Managing print jobs
XP000002: Job <d241s081@0000000245@1> (<d241s081:8>) added
The permanent job id is only usable locally on the submission host as it is
the case with the local job id.
Example:
A job with the permanent job id "host1@0000003049@5" has been added
on host1 and the following command is submitted from host2:
# xpshow host1@0000003049@5
L. jid Global jid Originator Destination Form fc pr
------ ---------- ---------- ----------- ---- -- --
XP000093: <host1@0000003049@5> not accessible
Selection criteria lists
You can also access submitted print jobs via what are called selection criteria
lists. In this case you can select print jobs via specific criteria, such as the
printer to which the job was sent, its priority, the scheduled print time, etc.
Selection criteria may be specified for all commands with which you can display,
modify or delete print jobs. Use the following option:
-scl “selection_criteria_list”
This option allows you to select print jobs according to criteria which must
be enclosed in double quotes. The selection criteria are all the options
which were specified when the print job was defined, except for -jt
job_title, -te job_template and -sx (silent execution).
In the case of options without arguments (Boolean options) you can
select the relevant option by means of a following + (set) or - (not set)
sign.
In the case of options which allow for the use of several combined values,
normally those jobs are selected for which at least the specified values
are set. For an exclusive search for print jobs with exactly the specified
values, the option must be followed by the = sign.
The wildcards * and ? are allowed for non-numerical arguments.
Examples
– To delete all print jobs for printer printer1:
xpdel [-job] -scl "-de printer1"
52 U23841-J-Z915-6-76
Page 65

Managing print jobs Selecting a print job
– To display all print jobs with the priority 5 and the content type SIMPLE:
xpshow [-job] -scl "-pr 5 -ct SIMPLE"
– To display all print jobs for which the option -cp was specified:
xpshow [-job] -scl "-cp+"
or
xpshow [-job] -scl "-cp"
– To display all the print jobs for which the option -cp was not specified:
xpshow [-job] -scl "-cp-"
U23841-J-Z915-6-76 53
Page 66

Selecting a print job Managing print jobs
Examples of the output formats SHORT and LONG
– To obtain a SHORT display, enter the following command:
xpshow [-job] -scl "-de printer1" [-di SHORT]
You will obtain the following display:
L.jid Global jid Originator Destination Form fc pr
----- ---------- ---------- ----------- ---- -- -1 si511:7 xprintadm printer1 001 001
– To obtain a LONG display, enter the following command:
xpshow [-job] -scl "-de printer1" -di LONG
You will obtain the following display:
LOCAL JOB ID: 2
Global job id: si511:8 si511:/etc/passwd
Permanent job id.: d241psap@0000000036@2
Document references: etc/passwd
Destination: printer1 pcl: Original job size:2788
Candidate printers: printer1
Form: Font: No validation: RESET
Job priority: 020 File copies: 001 Page copies: 001
Page select:
From string: To string:
Originator: xprintadm Security level: UNCLASSIFIED
Submission time: Wed Aug 30 16:44:04 MET 1995
Submission host: nile
Print after: Wed Aug 30 16:44:04 MET 1995 Retention time:
Retention period: 0 Remove: RESET File(s) copied: RESET
FF mode: Wait activation: RESET
Wrap mode: NONE Tab space: 08 Raw printing: RESET
Hopper number: 00 Output bin: 00 First page behaviour: RESET
Loaded files:
Map table: Content type: COMPATIBLE No filter: RESET
Special print modes:
Notification events: NONE
Delivery method: MAIL Delivery descriptor:
Delivery address:
Slow filters:
Submitted command: xpadd -de printer1 -dr/etc/passwd
Extended options:
Comment:
54 U23841-J-Z915-6-76
Page 67

Managing print jobs Displaying print jobs
4.2 Displaying print jobs
You can display individual or all print jobs in the print queue. Information on your
print jobs can be obtained with the commands xpshow and xpstat which also
allow you to view the status of your print jobs :
The xpshow and xpstat commands can be used to display the attributes
i
of all objects in Xprint V7.0. Therefore the following applies not only to
print jobs but to all Xprint V7.0 objects.
xpshow provides all the static attributes of objects (i.e. those which are not
modified by the Xprint V7.0 system itself), while xpstat provides information on
the dynamic criteria. The two corresponding commands xpmod and xpchange
can be used to modify or change the settings of Xprint V7.0 objects. xpmod
modifies the static settings while xpchange changes the dynamic state.
List of print jobs
You can display a list of print jobs to find out, for example, the names of the
existing print jobs.
● To display a list of all the existing print jobs, use the following command:
xpshow [-job]
This command returns a table with all the print jobs you can access. This
table contains only the most important information.
Detailed information on print jobs
You can output more detailed information on one or more print jobs to find out,
for example, which options are set for the print jobs.
● To display detailed information on a print job, use the following command:
xpshow [-job] [job] -di LONG
For job you can specify either a job identifier or a selection criteria list. Information on the selected print jobs is then displayed job by job. If you omit job,
you receive information on all the existing print jobs.
The output of
here.
U23841-J-Z915-6-76 55
xpshow -job is self-explanatory and therefore not described
Page 68

Displaying print jobs Managing print jobs
Selected information on print jobs
You can also display only specific attributes of print jobs. This is again achieved
by means of parameter lists or templates.
Displaying attributes via parameter list
● If you only want to display specific attributes for print jobs, use the following
command:
xpshow -di "parameter_list"
The selected attributes must be specified for parameter_list, listing the
individual parameters in one string.
In addition to the options of the xpadd -job command, the following options
can be used:
-lj to display the local job ID
-id to display both the local and global job IDs
-gj to display the global job ID
-pj to display the permanent job ID
By default, both the local and the global job identifier are output first in two
separate columns. To override this, you can use the -id- option. If you want
these identifiers to be output at a different position, insert -id at the position you
want in the parameter list.
Furthermore, specifying -lj or -gj also overrides the default output of both
identifiers.
The options -te and -sx of the xpadd -job command cannot be used as
i
they do not correspond to an attribute of the job definition.
Displaying attributes using display templates
If you frequently use specific attributes for the display of print jobs, you can
define a template containing all these attributes. Then, to obtain a display, you
only call the name of this template; i.e. you do not have to specify a list of
attributes each time. The template is stored in the special file .Xprint V7.0 in
your login directory.
● Use the following command to call a display template:
xpshow -di display_template
56 U23841-J-Z915-6-76
Page 69

Managing print jobs Displaying print jobs
where display_template represents the name of the template you want to use.
Defining a display template
To define a display template, proceed as follows:
● Open the .Xprint V7.0 file in your login directory.
● Enter the new display template as follows:
display_template parameter_list
display_template is the name of the template under which the display
template will be called with the xpshow ... -di display_template command.
parameter_list represents a list of options of the xpshow -job command. Here
you use exactly the same options as described under “Displaying attributes
via parameter list” on the previous page.
Your system administrator can also define display templates. These are
i
saved in the .Xprint V7.0 file in the /var/spool/Xprint/config
directory. This file is searched if the template is not found in your private
.Xprint V7.0 file.
Further display settings
By means of environment variables which you set before calling the display
template, you can define various characteristics of the display:
XP_FS:
With this variable you define the character which is to be used to
separate the horizontal fields. If you do not specify a value, a tab space
is set by default.
XP_FW:
This variable defines the field size in characters. If you explicitly specify
a value, e.g. 10 characters, the entries exceeding this length will be
truncated. If you specify 0, the values will not be truncated but displayed
in full. The default is 7 (characters).
XP_LS:
With this variable you define the separator to be used to separate values
within one field. If this variable is not set, the space character is used by
default.
U23841-J-Z915-6-76 57
Page 70

Displaying print jobs Managing print jobs
Basically, there are two ways of setting these variables:
You can define them globally, i.e. the selected settings are used for all invocations of the xpshow command until the variables are modified again:
Variable=value
[Variable2=value]
[Variable3=
export Variable [Variable2 Variable3]
If you only want to use the display settings once, enter the variables, separated
by spaces, in one line together with the command:
Variable=value [Variable2=value Variable3=value] xpshow -job ...
Status of print jobs
● The xpstat command allows you to display the status of a submitted print
job:
xpstat [-job] [job] [-di LONG]
For job you can specify either a job identifier or a selection list. Information
on the selected print jobs is then displayed job by job. If you omit job, you
receive information on all the existing print jobs.
If you do not specify the option -di LONG, the SHORT format will be displayed
by default.
value]
The State field contains information, for example, on the status of the
printout, on error messages, etc.; for a complete list of the messages see the
“Xprint V7.0 - Reference Manual”.
The Rank field contains the print job’s position in the print queue: the lower
the value, the sooner it will be printed.
If a print job is waiting for execution on a printer in a printer group, the
i
Rank field contains its position in the job queue of the printer with the
lowest load in this printer group.
58 U23841-J-Z915-6-76
Page 71

Managing print jobs Displaying print jobs
Display examples
– Job status display (SHORT):
L jid Global jid Destination Rank Percentage State
----- ---------- ----------- ---- ---------- ----1 se1:511 P1 0001 000 WAIT
– Job status display (LONG):
LOCAL JOB ID.: 3
Global job id.: d241s052_006:14
State: SUSPEND
State information:
Destination: hplj4m
Rank: 1
Requested copies: 1
Copies printed: 0
% already printed: 0
Last printed page: 0
Related document:
– To display print job information containing only the attributes Destination
and Release time, use the following command:
xpshow -di "-de -at"
You will obtain a display similar to the following:
1 se1:14 P1 Thu Aug
2 se1:16 P1 Thu Aug
– To define and then apply the display template my_template which is to
include the job ID, local ID, files to be printed, destination printer, form used
and the pages to be printed:
Open the file .Xprint V7.0 and enter the following line:
my_template -id -lj -dr -de -fm -ps
Display information on all print jobs using the display template my_template:
xpshow -job -di my_template
Display:
9 se1:14 9 /tmp/file1 P1
10 se1:16 10 /tmp/file2 P1
– To globally change the display of the xpshow command such that the
individual fields are not truncated and are separated by “...”:
XP_FW=0
U23841-J-Z915-6-76 59
Page 72

Displaying print jobs Managing print jobs
XP_FS=...
export XP_FW XP_FS
– To use the display settings of the previous example only once for a display
with my_template:
XP_FW=0 XP_FS=... xpshow -job -di my_template
60 U23841-J-Z915-6-76
Page 73

Managing print jobs Modifying a submitted print job
4.3 Modifying a submitted print job
When a print job is submitted, you can still modify its attributes as long as the
job has not yet been printed. You can, for example, redirect a print job to another
printer or select a different form. You can also redirect a print job to a remote
domain.
● To change the attributes of a submitted job, you can use the xpmod
command:
xpmod [-job] job [modifications]
For job you can specify either a job identifier or a selection criteria list. If you
omit job, all the existing print jobs are modified.
For modifications you can use all the xpadd options except for -dr, -jt, -cp,
-ct, -rm+, -te, -dp, -st, -nv, -sc, -sm and -nf.
Options can be set or reset to the default by appending the suffixes + or - .
There are two possible ways of redirecting print jobs to another printer. You can
either use the xpmod -job command and the -de printer option or you can use
the xprdir command. Using this command you can specify the required values
(old printer, new printer, jobs etc.) either explicitly or via an Xprint V7.0-driven
menu query. For more information on the xprdir command, refer to the Xprint
V7.0 Reference Manual.
When redirecting a print job to another printer, the new printer must
i
support the data format of the original target printer as no filters can be
specified.
Examples
– A print job with the ID se2:4 is to be redirected to printer1, given priority 15
and printed from string fgh through string str:
xpmod -job se2:4 -de printer1 -pr 15 -fr fgh -to str
– All print jobs you have submitted for printer3 are set to the default priority:
xpmod -job -scl "-de printer3" -pr-
U23841-J-Z915-6-76 61
Page 74

Modifying a submitted print job Managing print jobs
– To redirect a print job:
Spoolin print job job1 on printer printer1, which only supports the data
format POSTSCRIPT; there is a filter available, however, for converting the
format SIMPLE to POSTSCRIPT:
xpadd -job -dr job1 -de printer1 -ct SIMPLE
If the print job is then redirected to the printer printer2, this must be able to
handle the data format POSTSCRIPT, as job1 was automatically converted at
spoolin:
xpmod -job job1 -de printer2
– To redirect a print job to a remote domain, specify the remote printer by
partner_gateway_name!destination name:
xpmod -job job1 -de gtw1!printer31
62 U23841-J-Z915-6-76
Page 75

Managing print jobs Redirecting print jobs
i
4.4 Redirecting print jobs
The xprdir command can be used to redirect print jobs assigned to a specific
printer to another printer, but you can only redirect the entire print queue of a
printer, not individual print jobs. This redirection is permanent, i.e. it also applies
to all subsequent jobs for the original printer, and must be canceled explicitly.
Please note that xprdir is provided for compatibility purpose only. You should
use xpchange -dev -rd instead.
xprdir assigns to the original printer the status NOT_ACTIVE and activates the
printer which is to be the new destination. The active job on the original printer
is handled as specified with the -j option by the user. Then the entire print
queue is redirected from the old printer to the new destination, all the print jobs
keeping their original status.
The xprdir command can be used by every user, no specific privileges
i
are required. If the Xprint V7.0 administrator wants to restrict its use,
he/she can protect the command by means of access rights and user
definitions.
● To redirect the print jobs of one printer to another, enter the following
command:
xprdir -d old_destination -r new_destination [options]
-d old_destination
specifies the printer whose job queue is to be redirected to another
printer.
-r new_destination
specifies the printer to which the job queue of the original printer is to
be redirected.
The device names specified with -d and -r must not be identical.
For options the following options are possible:
-j job_handling
requests Xprint V7.0 to perform an action on the active job on the
original device. The following values can be specified for job_handling:
DELETE
The active job is to be deleted.
U23841-J-Z915-6-76 63
Page 76

Redirecting print jobs Managing print jobs
i
i
RESTART-BEGINNING
When the job has been redirected to the new destination it is
put at the top of the job queue and printed from the beginning.
RESTART-FROM
When the job has been redirected to the new destination it is
put at the top of the job queue and printed starting with the
page specified with option -p.
SUSPEND
When the job has been redirected to the new destination it is
assigned the status SUSPEND.
TERMINATE
The active print job is printed to the end and not redirected to
the new destination.
In this case, the original printer is set to the status SPOOLIN_OFF
until the active job has finished printing. If there is a printer
error, the user must correct it, for example by setting the printer
to the correct physical status. When the job is finished, the
printer is set to the status NOT_ACTIVE.
-p page:
If the value RESTART-FROM is used with the -j option, the number page
specifies the page number from which the active job is to be reprinted.
The -j RESTART-FROM -p page option does not work with print
jobs that are to be printed in PostScript format or raw mode.
-?:
The use of the command and its options is displayed.
If xprdir is used without options and arguments, the command starts a dialog
with the user in which it asks for all the required information using selection
menus.
The xprdir command does not work if Xprint V7.0 is not active on the
i
host on which the new printer is configured. It returns the same error
messages as the commands xpchange and xpmod.
64 U23841-J-Z915-6-76
Page 77

Managing print jobs Deleting print jobs
4.5 Deleting print jobs
You can delete a print job that is in the print queue or is being printed.
● To delete a print job, use the xpdel command:
xpdel selection
For selection you can either specify a list of job identifiers or, with the
option -scl “selection_criteria_list”, define a list of criteria according
to which the jobs to be deleted are to be selected. Every entry in this
list consists of an option of the xpadd -job command with a value
assigned to it. For more information, see the section “Selection
criteria list” on page 266 of the Appendix.
Examples
– To delete the print jobs 1, 3, 7, and 9 (local ID):
xpdel [-job] 1 3 7 9
– To delete the print jobs si_mfs1:2 and si_mfs1:4 (global ID):
xpdel [-job] si_mfs:2 si_mfs:4
– To delete all print jobs with the attributes destination printer3 and form
A5LAND:
xpdel [-job] -scl "-de printer3 -fm A5LAND"
U23841-J-Z915-6-76 65
Page 78

Page 79

5 Introduction to administering
Xprint V7.0
This chapter describes the concepts of Xprint V7.0, which you must be familiar
with in order to use this product. It describes the objects comprising Xprint V7.0
and provides the basic knowledge you require for administering Xprint V7.0.
5.1 Responsibilities
To allow the privileges and tasks within Xprint V7.0 to be clearly delimited,
several types of Xprint V7.0 user are distinguished:
● users / Xprint V7.0 users
Users, whether registered in the Xprint V7.0 database or not, cannot administer any Xprint V7.0 objects besides their own print jobs.
● System administrator
Every system administrator (root) of a system may also perform specific
administrative tasks concerning Xprint V7.0 on his/her system. These
tasks include:
– starting and terminating Xprint V7.0 on the local system (commands
xpstart and xpstop). Only the system administrator can start Xprint
V7.0.
– activating and deactivating local printers, supervisors and servers
(xpchange command).
– setting up local Xprint V7.0 objects other than users and the Xprint V7.0
system (xpadd command).
– administering all local Xprint V7.0 objects (commands xpmod and xpdel).
– defining local Xprint V7.0 administrators, who can perform some of the
tasks of the system administrator for the local host (xpmod -hos
command).
● Local Xprint V7.0 administrator (sub-root)
Every system administrator can define one or more local Xprint V7.0 administrators who are responsible for administering the Xprint V7.0 system
locally.
U23841-J-Z915-6-76 67
Page 80

Responsibilities Introduction to administering Xprint V7.0
A local Xprint V7.0 administrator has the same privileges as the system
administrator (see below), except for starting Xprint V7.0 and defining local
Xprint V7.0 administrators.
● Xprint V7.0 administrator
The Xprint V7.0 administrator has absolute control over the Xprint V7.0
system throughout an entire Xprint V7.0 domain, i.e. over all the systems
defined in the Xprint V7.0 database. He/she can administer Xprint V7.0 from
any of these hosts, provided he/she is registered as a user of this host. The
only exception is starting Xprint V7.0 on a remote system that is exclusively
controlled by the local system administrator of that system.
The following figure illustrates the privileges of the different types of user with
respect to administering Xprint V7.0:
Figure 9: User privileges
This figure shows an example of a configuration of four hosts A to D and the two
printers 1 and 2. The Xprint V7.0 administrator is registered as a user on all
hosts and can therefore control the various objects of the Xprint V7.0 system
from every host. In the figure, the Xprint V7.0 administrator can administer all
the Xprint V7.0 objects in the Xprint V7.0 domain from host A, i.e. say the
printers 1 and 2, the Xprint V7.0 users and also the four hosts themselves.
68 U23841-J-Z915-6-76
Page 81

Introduction to administering Xprint V7.0 Responsibilities
The system administrator of host B can administer all those Xprint V7.0 objects
for which host B is defined as the administration host. Similarly, the local Xprint
V7.0 administrator of host C can only administer those Xprint V7.0 objects for
which host C is defined as the administration host.
However, this also means that, for example on a host which is not interconnected with other hosts via a network, Xprint V7.0 can be administered entirely
by the Xprint V7.0 administrator, the system administrator or a specially
configured local Xprint V7.0 administrator (with the exception of starting Xprint
V7.0 which is restricted to the system administrator).
In this manual, the generic terms user and administrator are used as shown
in the following table, unless a specific type of user is being referred to. In this
case the type is expressly specified.
Term Type of user
user UNIX user
Xprint V7.0 user
administrator local Xprint V7.0 administrator
system administrator
Xprint V7.0 administrator
Table 4: Types of users
Please note that only the Xprint V7.0 administrator is allowed to admin-
i
ister objects on remote hosts. If in the course of this manual an object is
to be manipulated by an administrator, either this must be the Xprint
V7.0 administrator or the object must be local.
U23841-J-Z915-6-76 69
Page 82

Xprint V7.0 architecture Introduction to administering Xprint V7.0
5.2 Xprint V7.0 architecture
Xprint V7.0 is an object-oriented system consisting of various objects. As an
administrator you can define, modify, delete and, if appropriate, activate and
deactivate Xprint V7.0 objects.
The following figure shows the most important Xprint V7.0 components and how
these interact.
Figure 10: Xprint V7.0 architecture
The client (xpadd command or API function) requests the printing of a job. This
job is directly processed by the server (except in the case of what is called
direct printing). The server passes the printout on to a suitable supervisor
which itself communicates with the printer via the backend assigned to the
printer.
The following section provides a more detailed description of the available
objects. Almost all the Xprint V7.0 commands can be used with the different
object types.
70 U23841-J-Z915-6-76
Page 83

Introduction to administering Xprint V7.0 Xprint V7.0 architecture
5.2.1 The Xprint V7.0 objects
The following objects are defined in Xprint V7.0 (the parentheses contain the
short name of the Xprint V7.0 objects for use in Xprint V7.0 commands):
● Filters (-flt)
Filters have the function of converting the data sent to the printer by the user
into the format required by the printer. This makes it possible, for example,
to print normal ASCII files on PostScript printers as Xprint V7.0 is supplied
with the filter vppost.
Figure 11: Filters
Two types of filter are distinguished under Xprint V7.0:
Slow filters are executed before the actual spool process, i.e. after the job
is submitted but before it is printed. They convert data or allow special print
modes such as printing in columns or landscape mode.
Fast filters are used to enhance the print functionality provided by Xprint
V7.0. If used, they are the last link in the chain of Xprint V7.0 objects; they
edit the print job and are in direct contact with the printer. Their main function
is to provide a connection with objects other than the standard components.
They receive the feedback from the printer and forward it to the supervisor
in a form it can understand.
As an administrator you can define and compile, modify or delete your own
filters (fast and slow). For a description of how to define new filters see the
“Xprint V7.0 - Reference Manual”.
U23841-J-Z915-6-76 71
Page 84

Xprint V7.0 architecture Introduction to administering Xprint V7.0
● Fonts (-fnt)
Usually, various fonts are available for printing your documents under Xprint
V7.0. These are composed of the following attributes:
– typeface (e.g. Courier, Helvetica, Times Roman etc.)
– style (straight or italic)
– horizontal character pitch (number of characters per inch/centimeter)
– line spacing (number of lines per inch/centimeter)
– print quality (draft or correspondence quality)
– character set (German, English, International, USA etc.)
So that you do not have to specify the desired attributes for each individual
print job, Xprint V7.0 allows you to predefine various fonts. You select the
desired attributes and store them under a font name. If you want to print a
document using these specific font attributes, you only need to request them
via this font name and Xprint V7.0 will apply them automatically to the print
job.
Xprint V7.0 provides a default font (GENERIC) that has the following attributes:
no specific character type, straight, a character pitch of 10 characters per
inch, line spacing of 6 lines per inch and the character set INTERNATIONAL.
This font must not be modified nor deleted, not even by the Xprint V7.0
administrator.
● Forms (-frm)
Forms are a convenient way of influencing the appearance of print jobs.
Forms can be used to define paper and page formats, the layup (portrait or
landscape), font, appearance of the information pages and user privileges.
Xprint V7.0 differentiates between automatic and manual forms. Jobs using
automatic forms can be printed at any time; these forms are mounted on
the printer by default and usually only define the hopper, page format
(margins) or the font. If a specific form requires that special paper be
mounted in the printer manually or that a font cassette be changed, a
manual form makes sure that the job is only printed when the printer has
been prepared.
You can define, modify or delete forms. Furthermore, you can use
permission lists to restrict the use of a specific form to specific users.
● Gateways (-gtw)
72 U23841-J-Z915-6-76
Page 85

Introduction to administering Xprint V7.0 Xprint V7.0 architecture
i
Gateways allow you to make a connection from one Xprint V7.0 domain to
another Xprint V7.0 domain or to other spooler systems. Via these gateways
you can use the printers and printer groups of the other system involved.
Gateways to other Xprint V7.0 domains simplify the administration of Xprint
V7.0 in very large networks. In this way, the hosts of the entire network can
be distributed over different Xprint V7.0 domains (e.g. by department) so that
there is one Xprint V7.0 administrator for each domain who only has to
administer a reduced number of Xprint V7.0 objects.
Gateways to DPRINT (spooler system for BS2000 systems) or BSD spooler
systems (spooler system of Berkeley BSD UNIX systems) allow users of the
local Xprint V7.0 domain to access the printers and printer groups in these
spooler systems. Vice versa, it is also possible to access the printers and
printer groups of the local Xprint V7.0 domain from DPRINT and BSD
spooler systems. This allows a network spooler system to be configured in
a heterogeneous network.
You can also assign a permission list to a gateway. This makes it possible to
restrict use of remote resources for local users.
Connections to BS2000 systems via gateways require the local
gateway to be defined on a UNIX platform on which openFT is
installed.
As an administrator, you can set up, delete, modify and enable or disable
gateways in both directions.
● Hosts (-hos)
Under Xprint V7.0 the term host refers to every computer defined in an
Xprint V7.0 domain. Hosts are divided into different classes: master, slave
and parasite hosts. The difference lies in the way they handle the Xprint V7.0
database.
The Xprint V7.0 database contains all the data Xprint V7.0 needs to access
Xprint V7.0 resources. This includes information on the defined hosts, users,
printers and printer groups as well on forms, and all other Xprint V7.0
objects. Only the print jobs are stored on the server which is responsible for
their execution.
A master host holds a complete copy of this database. At any one time, one
of the potential master hosts is the active master. When Xprint V7.0 is set
up in a network, the first computer on which it has been installed and started
assumes the function of the active master. If Xprint V7.0 is terminated on the
active master, the next potential master in what is called the host hierarchy
U23841-J-Z915-6-76 73
Page 86

Xprint V7.0 architecture Introduction to administering Xprint V7.0
assumes its function as the active master. The ranks of the potential masters
can be defined by the order of their installation and can later be modified via
specific commands.
Slave hosts are hosts that hold a complete copy of the Xprint V7.0 database
but cannot become the active master host. This is useful, for example, for
computers which are shut down frequently, are not very reliable, or which are
still using an old Xprint V7.0 version.
A parasite host does not have a copy of the Xprint V7.0 database. It
requires Xprint V7.0 to be running on a specific computer which is assigned
to it as the database server, also referred to as the supporting host, if the
parasite host is to access Xprint V7.0. This only makes sense if there is a
permanently running database server available for such computers which
exports its database via a network file system (NFS). The database must
then be mounted into the local file system by the parasite host.
● Job templates (-jtp)
Job templates simplify the use of frequent print commands by allowing the
options of the xpadd -job command, which must normally be specified
individually, to be combined in groups. These can then be specified via the
job template.
Job templates can be defined, modified or deleted for the whole system by
the Xprint V7.0 administrator or user-specifically by each individual user.
● Loadable resources (-lrs)
Loadable resources allow faster printing of jobs that use the same
background, logo, soft font etc. They also improve job recovery. A Loadable
resource must be downloaded to the printer before it can be called by a print
job.
Public loadable resources can be created, modified or deleted for the whole
system by the Xprint V7.0 administrator. Individual users can create, modify
or delete private loadable resources, that is loadable resources that are for
their use only.
● PCLs (-pcl)
PCLs (printer capability lists) are used to define what printing options a
printer provides. Furthermore, the PCL contains information on how the
options specified when the job is submitted can be converted to printer
commands. Xprint V7.0 is supplied with a number of PCLs for the most
74 U23841-J-Z915-6-76
Page 87

Introduction to administering Xprint V7.0 Xprint V7.0 architecture
i
common printers, and with one generic PCL which in most cases also allows
printing on unknown printers. A list of the PCLs supported by Xprint V7.0 is
provided in the Reference Manual.
As an administrator you can define, modify and delete PCLs.
● Permission lists (-prm)
With permission lists, you can define the following privileges under Xprint
V7.0:
– Which users may/may not use a printer, a printer group or a gateway.
– Which administrators may assign a new supervisor to a specific server.
– Which users may/may not use a specific form.
– Which forms may/may not be used on a specific printer.
There are two types of permission list: "allowed lists" and "denied lists".
An allowed list is used to specify which users or forms are allowed to use the
relevant object, while the denied list defines which users or forms are not
allowed to use a specific object. The allowed list of a printer, for example,
restricts use of the printer to the users contained in the list. The denied list
of a printer defines that the printer can be accessed by all users except for
those contained in the list.
The administrator of a specific object (printer, server, form) can
always access the object, irrespective of the contents of the
associated permission list.
Basically, permission lists for objects are handled as follows: if there is an
entry in the allowed list, the denied list is ignored; if the allowed list is empty,
the denied list applies. If both lists are empty, access to the object is
unrestricted.
● Print jobs (-job)
Print jobs are submitted by users and, as described in the previous section,
can be modified. They are administered by the servers responsible for the
respective print queues. Print jobs are not part of the Xprint V7.0 database
like printers, servers etc., but they are stored in the server spoolin directory.
In addition to the normal modification options, as an administrator you can
redirect all print jobs for a printer to another printer.
● Printers (-dev)
Xprint V7.0 can use printers of many different types.
U23841-J-Z915-6-76 75
Page 88

Xprint V7.0 architecture Introduction to administering Xprint V7.0
The printers are controlled by a supervisor and assigned tools, called
backends. A PCL is assigned to the printer.
The process of printing is controlled by a backend using the appropriate
printer’s PCL to provide printer details. Xprint V7.0 provides a general-
purpose backend but additional specific backends can be defined by the
administrator and incorporated into the Xprint V7.0 system. For a description
of how to define new backends refer to the “Xprint V7.0 - Reference
Manual”.
As the backend actually controls the printer, it must interface with both the
supervisor and the printer. The backend initializes the printer port and the
printer. It sets the printer with any specified job options, such as the typeface
and style. Furthermore, it ensures that start, end, and separator sheets are
printed if required. It also makes sure that the requested number of copies
of the document are printed. For this printer-specific information the backend
refers to the PCL assigned to the printer.
Backend programs interpret status messages. Information is taken from the
data passing through the backend. Some printers can respond to special
information requests from backend programs. To enable the user to interact
with the active print job (e.g. to delete or suspend the job) a special
mechanism allows signals to be exchanged between the supervisor and the
backend.
Permission lists enable printer access to be restricted to explicitly defined
users, and you can define which forms can be assigned to this printer. By
means of a security level, printers can be restricted to users with an appropriate security level for printing confidential data.
● Printer groups (-dgr)
Printers can be combined to form what are called printer groups to achieve
better loading of all the printers in the group. If a print job is sent to a printer
group it is printed on the first printer to become available in the printer group.
● Recovery rules (-rec)
Recovery rules are used to describe how specific printer conditions are
handled. Recovery rules are defined in a source file and saved in the Xprint
V7.0 database after compilation. Then they can be assigned to the printers.
The default recovery procedure in the case of a printer error can be
overridden by a recovery rule. In the case of the printer error “paper_end”,
for example, the Xprint V7.0 system tries by default to print the job until the
76 U23841-J-Z915-6-76
Page 89

Introduction to administering Xprint V7.0 Xprint V7.0 architecture
paper supply is refilled. By means of a recovery rule you could define a
different procedure (to suspend the print job and set the printer to
NOT_ACTIVE until the administrator intervenes, for example).
You can define, modify and delete recovery rules.
● Servers (-srv)
Servers are the Xprint V7.0 objects which administer incoming print jobs and
are responsible for scheduling them. Each server administers its own print
queue, which contains all the print jobs for the printers whose supervisors
are controlled by the server.
You can define and delete servers and change their status.
● Supervisors (-spv)
A supervisor is directly responsible for controlling one or more printers. It
obtains the job data from the responsible server and forwards it to the
backend program (see entry “Backend” on page 273 in the glossary). One
supervisor may control several local printers.
As the system or Xprint V7.0 administrator, you can set up and delete supervisors, and change their status.
● Users (-usr)
Xprint V7.0 differentiates between two types of user: UNIX users, who are
not defined in the Xprint V7.0 system, and Xprint V7.0 users, who are
defined in the Xprint V7.0 system. UNIX users are all users of the UNIX
system on which Xprint V7.0 is running; the default settings for Xprint V7.0
apply to them. If these settings are not sufficient, the UNIX users can be
defined in the Xprint V7.0 system.
More settings can be made for Xprint V7.0 users than for UNIX users:
– Xprint V7.0 users can access their print jobs from all the hosts for which
they are registered.
– They can be assigned a security level and thus be granted access to
printers with a corresponding security level.
– Print quotas can be defined for the number of jobs or print pages
allowed, thus preventing users from making unlimited numbers of
printouts.
U23841-J-Z915-6-76 77
Page 90

Xprint V7.0 architecture Introduction to administering Xprint V7.0
● The Xprint V7.0 system (-sys)
The Xprint V7.0 system refers to all the Xprint V7.0 objects which are
combined in a local administrative unit, what is called an Xprint V7.0
domain. Within the Xprint V7.0 system the Xprint V7.0 administrator is
allowed to perform all the administrative tasks.
The only operations that can be executed for the Xprint V7.0 system are
displaying or changing the Xprint V7.0 administrator as well as the Xprint
V7.0 system comments.
78 U23841-J-Z915-6-76
Page 91

Introduction to administering Xprint V7.0 Administrative tasks under Xprint
5.3 Administrative tasks under Xprint
Administering Xprint V7.0 involves a number of tasks which must be performed
by the administrator. This section gives a general description of the different
tasks and describes the basic procedures. For detailed information on administering the individual objects, see the next chapter.
5.3.1 Configuring Xprint V7.0 objects
With the xpadd command you can add Xprint V7.0 objects to the database, thus
making them known in the Xprint V7.0 system. Only print jobs (-job) are not
entered in the database but are added to the print queue administered by the
corresponding server. The xpadd command may be called for all Xprint V7.0
objects with the exception of the Xprint V7.0 system itself (-sys). For a detailed
description of using this command for each object type see the “Xprint V7.0 Reference Manual”.
When you add an object to the database with the xpadd command, the following
rules apply:
– As an Xprint V7.0 administrator you can add any objects you choose and
can define any administration hosts for them by specifying a host other than
the local host with the -ah host option (or, for printers and gateways, with the
-ho host option). The object you add can then be administered by yourself as
well as by the system administrator and the local Xprint V7.0 administrators
of this host. As a system or local Xprint V7.0 administrator you can define
objects only for your local host.
– Every Xprint V7.0 object needs a unique name in the Xprint V7.0 system.
This name should enable users of this object to identify it. For Xprint V7.0internal objects like servers and supervisors it makes sense to use the name
of the host on which these objects are defined. For printers a unique name
indicating their location is a good choice, and for job templates, forms and
fonts it is advisable to use names indicating their purpose.
– To become available to users and administrators, some objects need to be
activated after being added. This applies to the following object types:
printers (-dev), servers (-srv), supervisors (-spv) and gateways (-gtw). For
printers and gateways you can include in their definition that they are
automatically activated on the corresponding host whenever Xprint V7.0 is
started on this host in future (option -aa). Servers are automatically activated
U23841-J-Z915-6-76 79
Page 92

Administrative tasks under Xprint Introduction to administering Xprint V7.0
whenever the host is started. Supervisors are activated automatically when
Xprint V7.0 is started if a printer they administer was configured with the -aa
option.
Objects are always activated using the xpchange command (see section
“Changing the status of Xprint V7.0 objects” on page 82).
5.3.2 Deleting Xprint V7.0 objects
With the xpdel command you can delete Xprint V7.0 objects from the Xprint
V7.0 database. The Xprint V7.0 administrator can delete all objects from the
system with the exception of the Xprint V7.0 system object (-sys), which cannot
be deleted. System and local Xprint V7.0 administrators can only delete those
objects which are administered on the local host. For a detailed description of
using this command for each object type see the “Xprint V7.0 - Reference
Manual”.
The following rules apply for deleting Xprint V7.0 objects:
– Only Xprint V7.0 objects which are no longer used by any other Xprint V7.0
object can be deleted. Before deleting an object you should therefore make
sure that there are no references to the specified object. Any references can
be displayed using the xpshow command with the option -di REFERENCED_BY
(see section “Displaying the attributes of an Xprint V7.0 object” on page 83).
Any objects with references to the object to be deleted must be modified
such that theses references are canceled.
–Printers (-dev), gateways (-gtw), servers (-srv) and supervisors (-spv) must
be deactivated before they can be deleted. If necessary, this can be checked
with the xpstat command (see section “Displaying the status of an Xprint
V7.0 object” on page 82).
If an object to be deleted is still active, it must be deactivated with the
xpchange command used with the option -st NOT_ACTIVE (see section
“Changing the status of Xprint V7.0 objects” on page 82).
– When deleting an object of the type server, you must always make sure that
the print queue assigned to the server does not contain any print jobs as
these will be lost when the server is deleted. For servers you are therefore
advised to deactivate spoolin some time before deleting the server. In this
case, any print jobs in the print queue can still be printed without any more
jobs being added. Another possibility is to redirect the print queues of a
printer assigned to the server to another printer.
80 U23841-J-Z915-6-76
Page 93

Introduction to administering Xprint V7.0 Administrative tasks under Xprint
5.3.3 Modifying Xprint V7.0 objects
With the xpmod command, you can modify the static attributes of all Xprint V7.0
objects. Dynamic attributes such as the printer status or the status of the current
print quotas of a user can be changed with the xpchange command (see the
following section “Changing the status of Xprint V7.0 objects” on page 82). The
Xprint V7.0 administrator can modify all objects in the system, while the system
and local Xprint V7.0 administrators can only modify those objects which are
administered on their local host. For a detailed description of using this
command for each object type see the “Xprint V7.0 - Reference Manual”.
The following rules apply for modifying objects:
– Printers (-dev), gateways (-gtw), servers (-srv) and supervisors (-spv) must
be deactivated before they can be modified. If necessary, this can be
checked with the xpstat command (see section “Displaying the status of an
Xprint V7.0 object” on page 82).
If an object to be deleted is still active, it must be deactivated with the
xpchange command used with the option -st NOT_ACTIVE (see section
“Changing the status of Xprint V7.0 objects” on page 82).
Remember to reactivate the object after modifying it!
– Basically you can use any option which can also be used when adding the
object. However, there are a few special cases, which are described below:
Options representing Boolean values (e.g. the option -aa for printers which
switches on automatic activation) can be removed by specifying a minus
sign - after the option (example: xpmod -dev printer1 -aa-).
Options defining lists (e.g. the -dl option for printer groups which defines the
printers belonging to this group) can be modified in three different ways:
– If a minus sign is specified after the option, the objects specified behind
it are removed from the list (example: xpmod -dgr pgroup1 -dl- printer4
printer5).
– If a plus sign + is specified after the option, the objects specified behind
it are added to the list (example: xpmod -dgr pgroup1 -dl+ printer6).
– If the objects are specified directly after the option, the existing list is
replaced by the specified objects (example: xpmod -dgr pgroup2
-dl printer1 printer2 printer6).
U23841-J-Z915-6-76 81
Page 94

Administrative tasks under Xprint Introduction to administering Xprint V7.0
5.3.4 Changing the status of Xprint V7.0 objects
With the xpchange command, you can change the dynamic data of Xprint V7.0
objects, such as printer states or the states of the current user print quotas. For
a detailed description of using this command for each object type see the “Xprint
V7.0 - Reference Manual”.
With some objects the status can assume several levels, i.e they have a global
status and subordinate substates. A printer, for example, has a global status
which is defined via the -st option. In addition to this, spoolin and spoolout can
be switched on and off individually with the options -si and -so.
If the xpchange command is invoked for an object without options, it always
switches on all states (ACTIVE or ON). Similarly all the states of the object are
switched off when the object is deactivated with the -st NOT_ACTIVE option.
When a substate which has been switched off is switched back on, Xprint V7.0
automatically makes sure that the main status is set to ACTIVE.
5.3.5 Displaying information on Xprint V7.0 objects
With the xpstat and xpshow commands you can display information on each
Xprint V7.0 object you are allowed to use or administer. For a detailed
description of using these commands for each object type see the “Xprint V7.0
- Reference Manual”.
Displaying the status of an Xprint V7.0 object
● To display the status of an Xprint V7.0 object, use the following command:
xpstat object_type [selection] [-di display]
For object_type you specify the object whose status you want to display (e.g.
-dev for printer). If the object type is not specified, the command refers by
default to print jobs (-job).
If selection is not specified, the command refers to all objects of the specified
type in the Xprint V7.0 system. Otherwise you can either specify the name(s)
of the objects whose status you want to display, or you can use the
-scl “selection_criteria_list” option (see section “Selection criteria list” on
page 266 in the Appendix) to define a list of criteria according to which the
relevant objects are selected.
82 U23841-J-Z915-6-76
Page 95

Introduction to administering Xprint V7.0 Administrative tasks under Xprint
With the option -di display you can determine the scope of the display as
described for print jobs in the section “Displaying print jobs” on page 55.
Displaying the attributes of an Xprint V7.0 object
● To obtain more detailed information on the definition of an Xprint V7.0 object,
use the following command:
xpshow object_type [selection] [-di display]
For object_type you specify the object whose attributes you want to display
(e.g. -dev for printer). If the object type is not specified, the command refers
by default to print jobs (-job).
If selection is not specified, the command refers to all the objects of the
specified type in the Xprint V7.0 system. Otherwise you can either specify
the name(s) of the objects whose attributes you want to display, or you can
use the -scl “selection_criteria_list” option (see section “Selection criteria
list” on page 266 in the Appendix) to define a list of criteria according to
which the relevant objects are selected.
To display information on printers or printer groups which can only be
reached via gateways, you must specify the name of the printer or printer
group in the format gateway!printer_name. Which details of the printer or
printer group are displayed in such a case depends on the gateway type.
With the option -di display you can determine the scope of the display as
described for print jobs in the section “Displaying print jobs” on page 55.
Besides the standard values SHORT, LONG and specifying a list of output
parameters as for print jobs, you can also use the keyword REFERENCED_BY
here, which returns a list of the Xprint V7.0 objects referring to the specified
object. If you specify the option -di REFERENCED_BY (short -diR), you must
specify exactly one object of the desired type!
This list is useful if you want to remove an Xprint V7.0 object from the Xprint
V7.0 system as you can only remove an object if it is no longer referenced
by any other object.
U23841-J-Z915-6-76 83
Page 96

Administrative tasks under Xprint Introduction to administering Xprint V7.0
Examples (in this case for printer groups)
– To display the status of the printer group group1:
xpstat -dgr group1
NAME Spoolin
---- -------
group1 ON
Date of last modification: Tue Dec 20 11:37:17 1994
Justification:
– To display the definition of the printer group group1 in a complete list:
xpshow -dgr group1 -di LONG
This returns, for example, the following output:
NAME: group1
Host: colorado
Administrator: xprintadm
Device list: printer1 printer2
User permission:
User comment: The printer group for all users
Administrator comment:
– To display a short list of all the printer groups available:
xpshow -dgr
This could return the following output:
Name User perm. Host Administrator
---- ---------- ---- -------------
group1 missouri xprintadm
group2 delaware xprintadm
– To display all the references to the printer group group1:
xpshow -dgr group1 -di REFERENCED_BY
The output might appear as follows:
Level Name Type
----- ---- ----
1 host1 hos
This output shows that an object of type host, namely the host host1, still
refers to the group group1. The printer group can only be removed when the
object host1 has been modified such that the reference to group1 is
canceled.
84 U23841-J-Z915-6-76
Page 97

Introduction to administering Xprint V7.0 Administrative tasks under Xprint
5.3.6 Administering Xprint V7.0
This section describes a few basic administration tasks concerning Xprint V7.0.
If you want to... Read...
start Xprint V7.0 section “Administering Xprint V7.0” on
page 85
terminate Xprint V7.0 section “Administering Xprint V7.0” on
page 86
reinitialize the Xprint V7.0
database
select a language section “Administering Xprint V7.0” on
enable auditing ( users only) section “Auditing” in the appendix of the
enable logging ( users only) section “Logging” in the appendix of the
Table 5: Basic administration tasks
Starting Xprint V7.0
section “Administering Xprint V7.0” on
page 86
page 87
“Reference Manual”
“Reference Manual”
Only the system administrator (root) can start Xprint V7.0 with the xpstart
command on his/her local host. Every host must be started individually with this
command.
When you start your local host, the following objects are activated automatically:
– all the local servers belonging to this host.
– all the local printers and the associated supervisors belonging to this host. It
must be possible to activate the printers automatically (see the xpadd -dev
-aa command) and they must be controlled by active servers on the local
host.
– all the remote printers and supervisors belonging to this host, provided the
printers can be started automatically and are controlled by active servers on
the local host.
U23841-J-Z915-6-76 85
Page 98

Administrative tasks under Xprint Introduction to administering Xprint V7.0
When starting Xprint V7.0, you can also specify whether jobs which were not
finished in a previous session are to be retained (setting WARM; default) or deleted
(setting COLD). Such a setting is useful, for example, if you shut down your
system while there were still print jobs on it with the status ACTIVE or jobs still in
the print queue. After a WARM start, these print jobs are processed again.
● Start Xprint V7.0 with the following command:
xpstart [-sa system_activation]
For system_activation specify either WARM or COLD. If you do not specify a
value, WARM will be used.
Stopping Xprint V7.0
With the xpstop command the system administrator (root) and the Xprint V7.0
administrator can terminate Xprint V7.0 on his/her local host. Furthermore, the
Xprint V7.0 administrator can shut down Xprint V7.0 on any host in the system.
If Xprint V7.0 is terminated on a local host, the following objects are also deactivated:
– all its servers,
– all its local supervisors, even if controlled by the remote system,
– all its local printers,
– all remote printers and supervisors which are controlled by the local server.
Active print jobs controlled by a server whose host is shut down are inter-
i
rupted. (For more information see the command xpchange -dev -wn NOW.)
● Deactivate the system with the following command:
xpstop [-ho host]
The host option can only be used by the Xprint V7.0 administrator, as only
he/she is allowed to terminate Xprint V7.0 on remote systems.
Reinitializing the Xprint V7.0 database
You might need to reinitialize the Xprint V7.0 database, for example if it could
not be initialized when Xprint V7.0 was installed, or if the system breaks down.
● Call DBinstall:
/var/spool/Xprint/config/bin/DBinstall
● Enter NO when asked if this is a new installation.
86 U23841-J-Z915-6-76
Page 99

Introduction to administering Xprint V7.0 Administrative tasks under Xprint
● Now specify the name of a host on which Xprint V7.0 is running.
Selecting the language
For the language interface Xprint V7.0 uses the value of the NLS environment
variable LANG. The following language environments are available:
Environment definition Language
En English
De German
Table 6: Language environment variables
If the environment variable LANG is incorrectly or not at all defined, Xprint V7.0
uses English as the default.
● Select the language on your local host as follows:
LANG=language_ID; export LANG
For language_ID you enter the abbreviation (see above) of the relevant
language.
U23841-J-Z915-6-76 87
Page 100

Rules for configuring the system Introduction to administering Xprint V7.0
5.4 Rules for configuring the system
This section describes the basic rules which must be observed when configuring the Xprint V7.0 system; it does not cover the actual steps that are
required. You should use these guidelines to check the configuration of your
Xprint V7.0 system at regular intervals in order to maintain its performance.
5.4.1 Defining an Xprint V7.0 domain
The print manager must define the Xprint V7.0 domain with respect to
– the resources to be shared,
– the number of hosts,
– and some administration criteria.
Creating an Xprint V7.0 domain is always a compromise between
– the maximum number of hosts administered to provide a maximum of
print resources,
– the assignment of administrative tasks concerning print resources to a
person or association (e.g. resource locations, company strategy)
– and a high number of hosts which might slow Xprint V7.0 down, so that
there might be, say, a relatively long period of time between the
submission and execution of a print job.
88 U23841-J-Z915-6-76
 Loading...