

Page 1

CLOUD MANAGED
WIFI OUTDOOR
ACCESS POINT 300MPBS
WL-APO2G24-061
USER MANUAL
Page 2

REV.2317
Page 3

3
Thanks
for choosed our product
________________________________
INDEX
CHAPTER 1 Mode instruction
1.1 Router Mode
1.2 HotSpot Mode
1.3 Universal Repeater Mode
1.4 Wireless ISP mode
CHAPTER 2 Launch and login
CHAPTER 3 Wireless connection
CHAPTER 4 Working mode setting
4.1 Quickly set up configure device
4.2 Gateway mode configuration
4.3 Wifi repeater configuration
4.4 AP Mode
4.5 WISP
CHAPTER 4 Advance setting
5.1 System Status
5.2 2.4GHz Wireless
5.3 Network Setting
5.4 Management
5.5 Upgrade firmware
CHAPTER 6 Specification
CHAPTER 7 The Failure phenomenon and solution
Page 4
4
CHAPTER 1
MODE INSTRUCTION
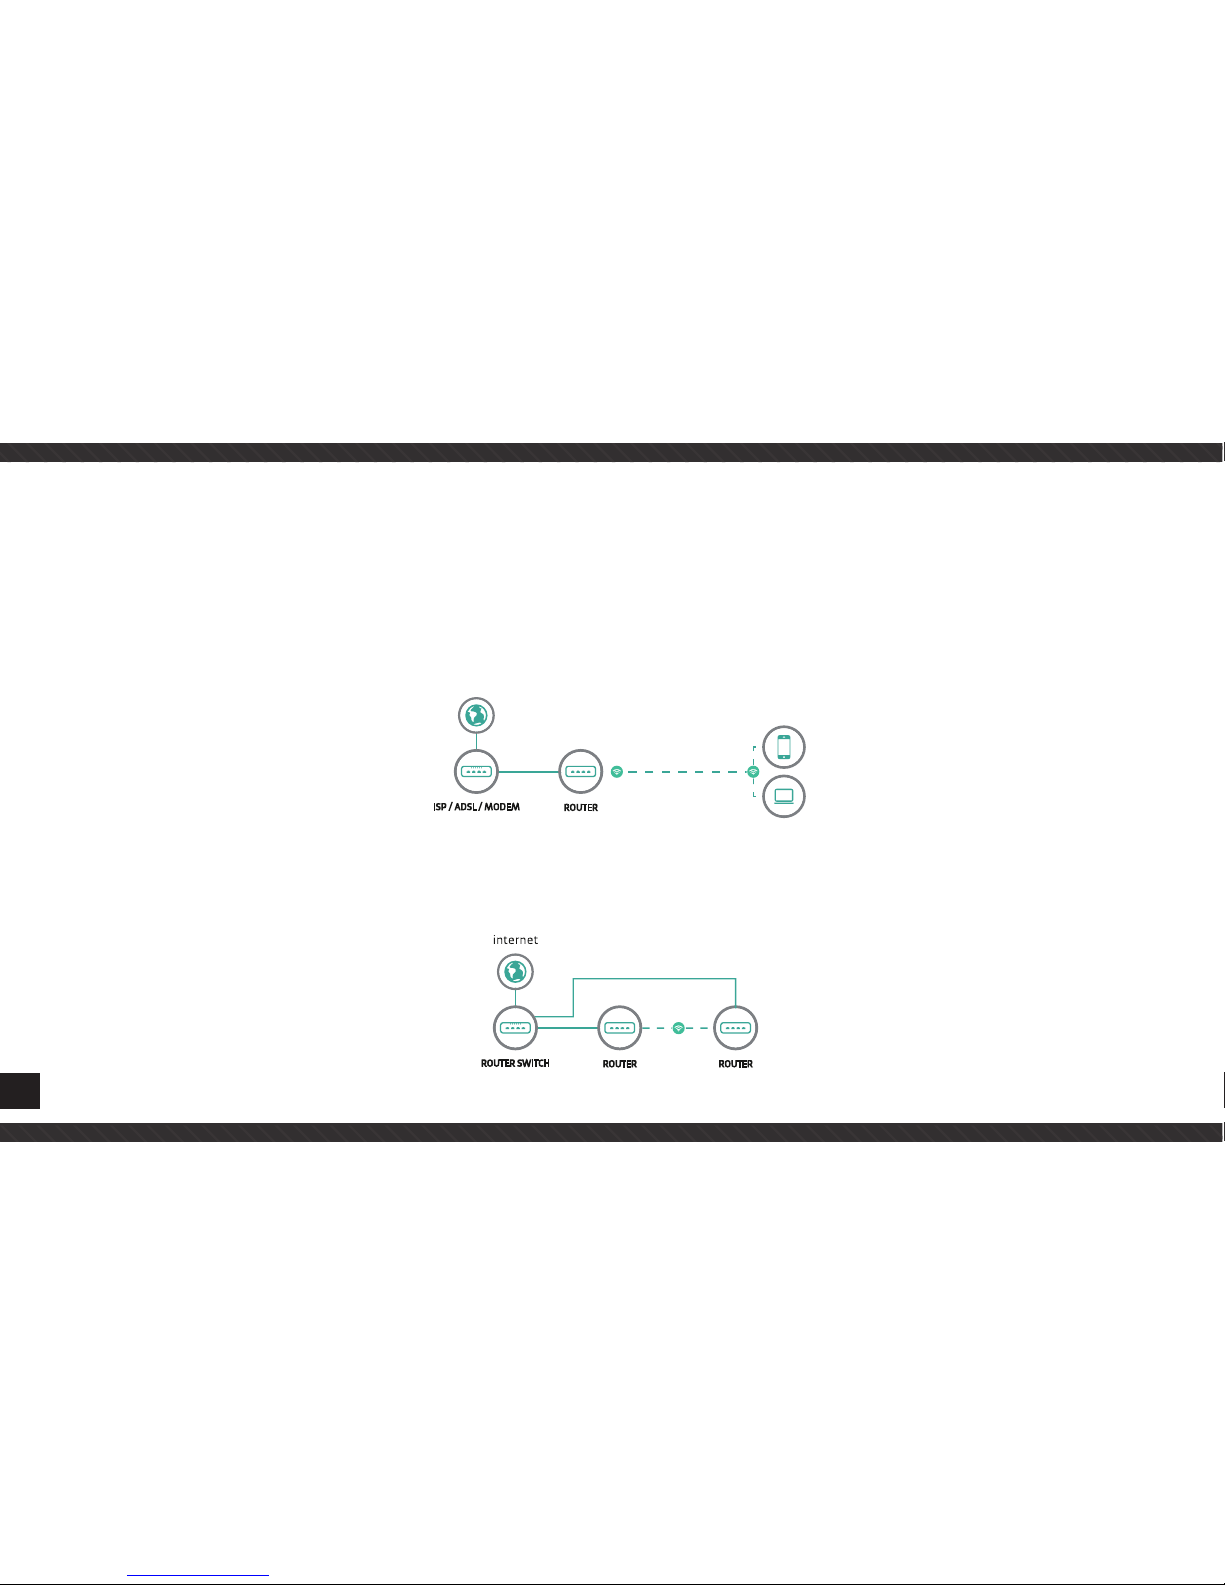
1.1 Router Mode
Device can get through ISP/ADSL modem get wired access to fullfil wifi coverage. Connecting type can be PPPOE,PPTP,Dynamic IP
and Static IP.
ISP / ADSL / MODEM
ROUTER
internet
1.2 HotSpot Mode
Turn PoE switch wired access to wireless network emmission,sharing network,it’s the main mode of hotels,office and tenement layout.
Page 5
5
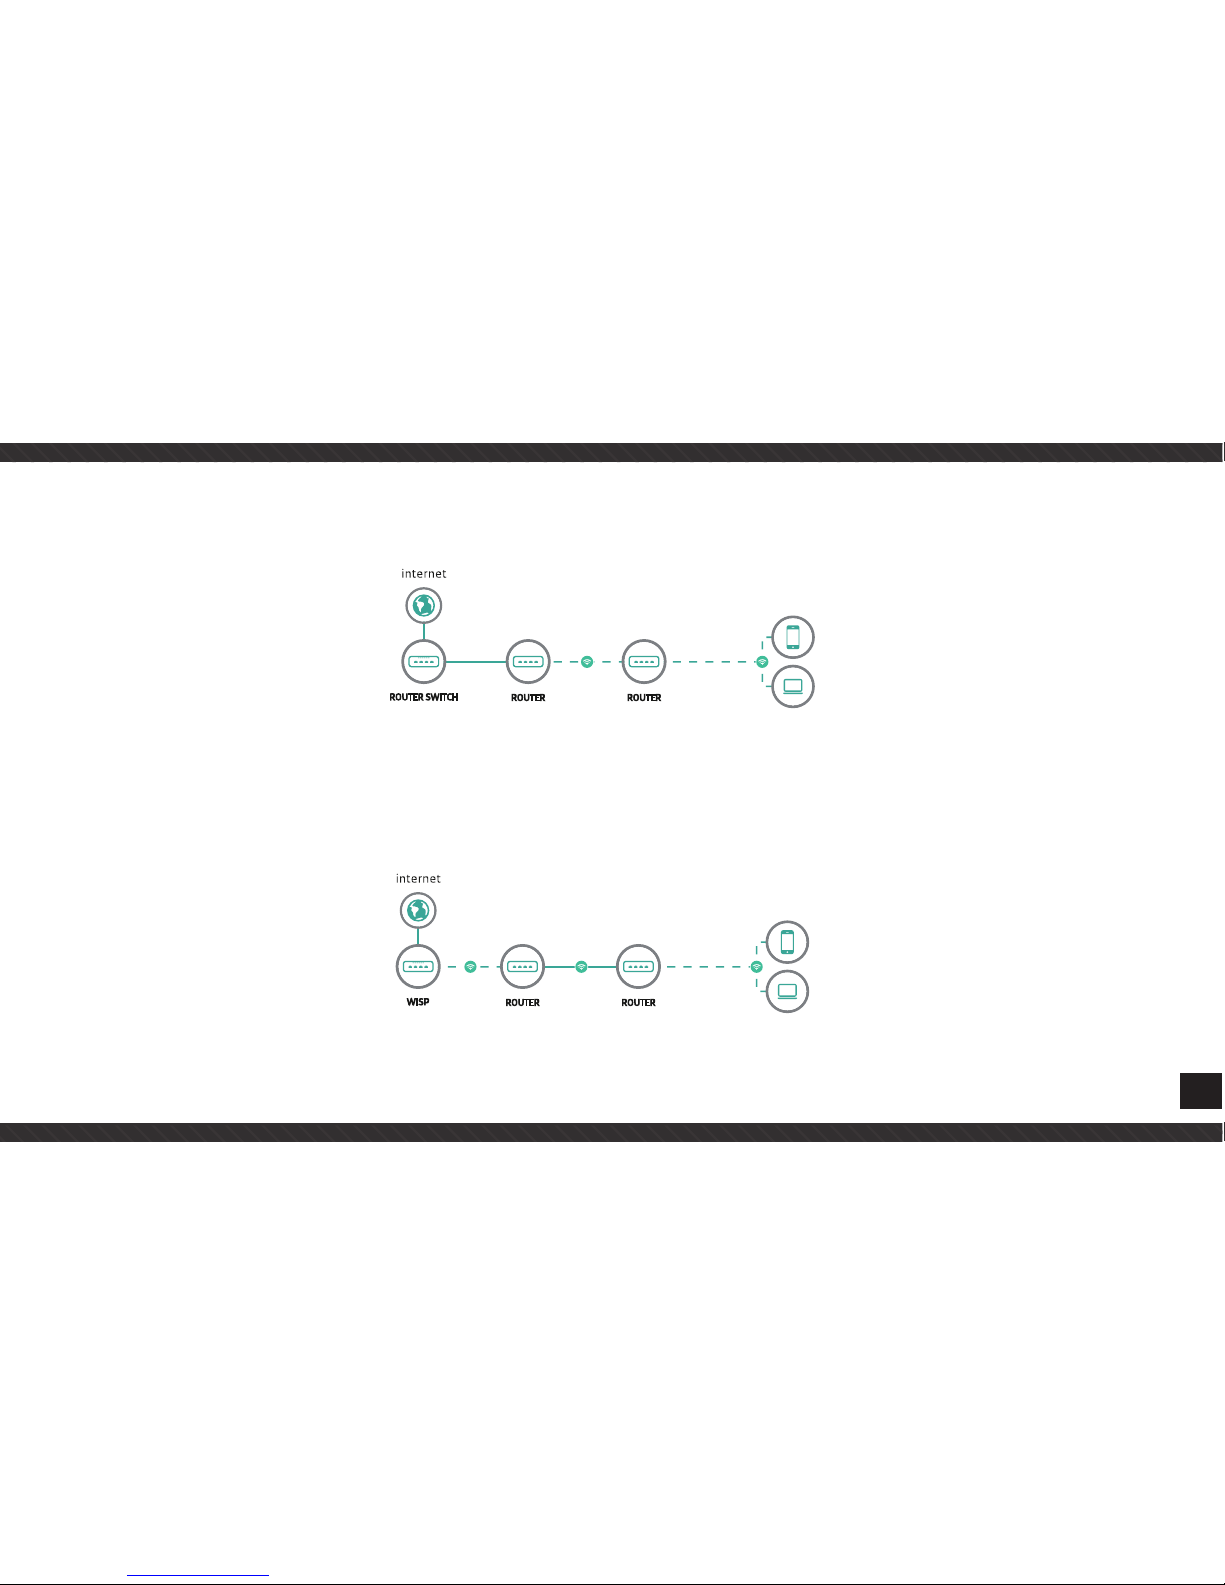
1.3 Universal Repeater Mode
Repeat distal wifi signal,sharing local WLAN. Router/Switch.
1.4 Wireless ISP mode
Wireless ISP client get wireless connecting to wireless base station to fullfil WLAN sharing. The equipment is wireless WAN connection type can be PPPoE,Dynamic IP and Static IP.
Page 6

6
CHAPTER 2
LAUNCH AND LOGIN
1. Choosing power supply mode,choose matched mode based on your local network environment;
2. Computer network IP set as manual setting IP add. or automatically getting IP add. Manual setting IP add. of wireless connecting
as followings: Configuration PC local connecting IP add. is 192.168.188.X(X is 2-252),get outdoor omni AP as same network segment, subnet mask is 255.255.255.0 as newxt image shows:
Page 7

7
CHAPTER 3
WIRELESS CONNECTION
1. If connecting device via wireless,it should do as step 2. As next image shows, click right-hand button to choose applicable wireless
connection,default SSID is Wireless AP,code is 66666666,click top left “refresh network list”,the wireless network that searched out
will be shown at right side like next image shows, choose the network that you want to connect in,input password to fullfil wireless
connecting.
Page 8
8
3. Use IE explorer visit http://192.168.0.254, it will popup the login in entering, default entering
user name: admin
password: admin
CHAPTER 4
WORKING MODE SETTING
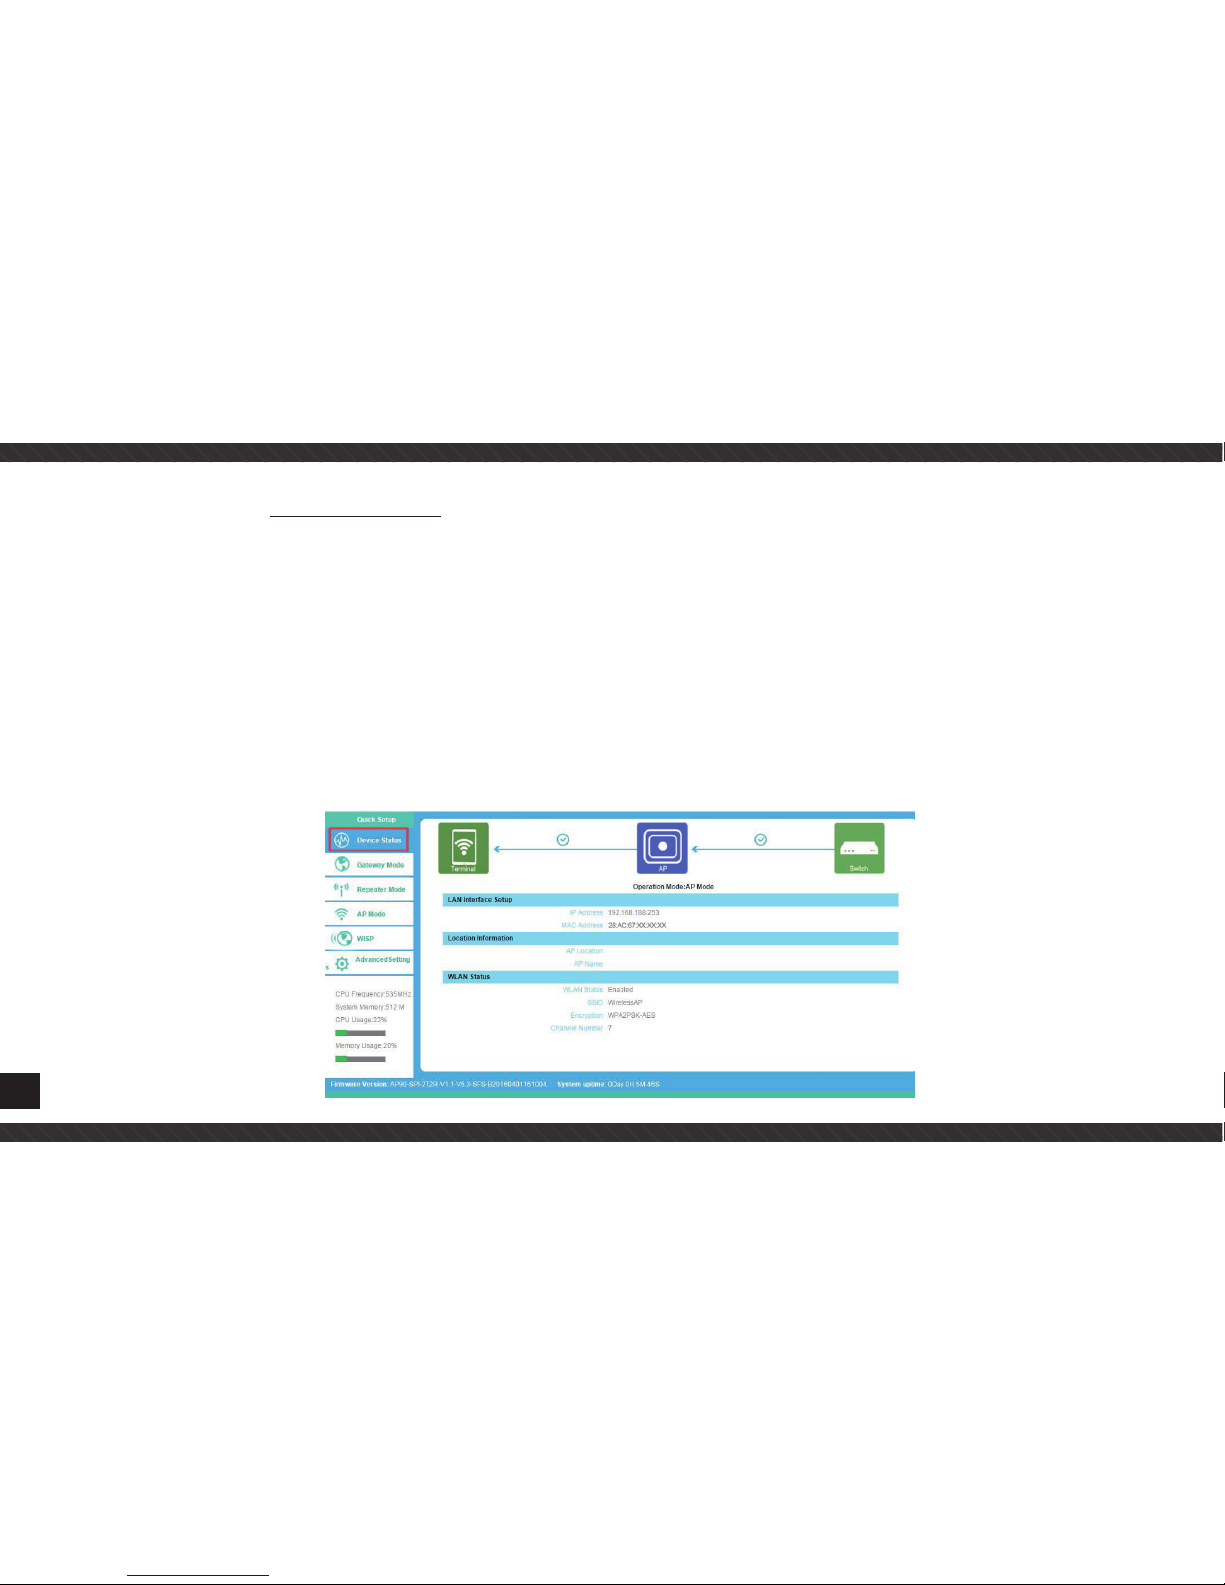
4.1 Quickly set up configure device
Once login web will get as newxt image shows, you will see the basic info. of this device,
such as SSID, working mode, channel, software version, hardware version, systemrunning time, etc. then configuration can be done
by your own. Default mode is AP mode, quickly setting to configure these devices is as followings.
Page 9

9
4.2 Gateway mode configuration
Entering quickly-setting page,then choose ADSL as following next image shows, choosing dynamic IP or PPPOE(ADSL),then you can
change SSID, channel, key, etc.
Dynamic IP customer: In WAN settings choosing dynamic IP, after changing wireless settings and click application, choose to
confirm in the popup interface.
PPPOE user: In WAN settings choose ADSL, then input correct user name and password and apply. After patient waiting for system
restart, set up computer’s IP add. to automatically get, then you can connect in internet.
Page 10
10
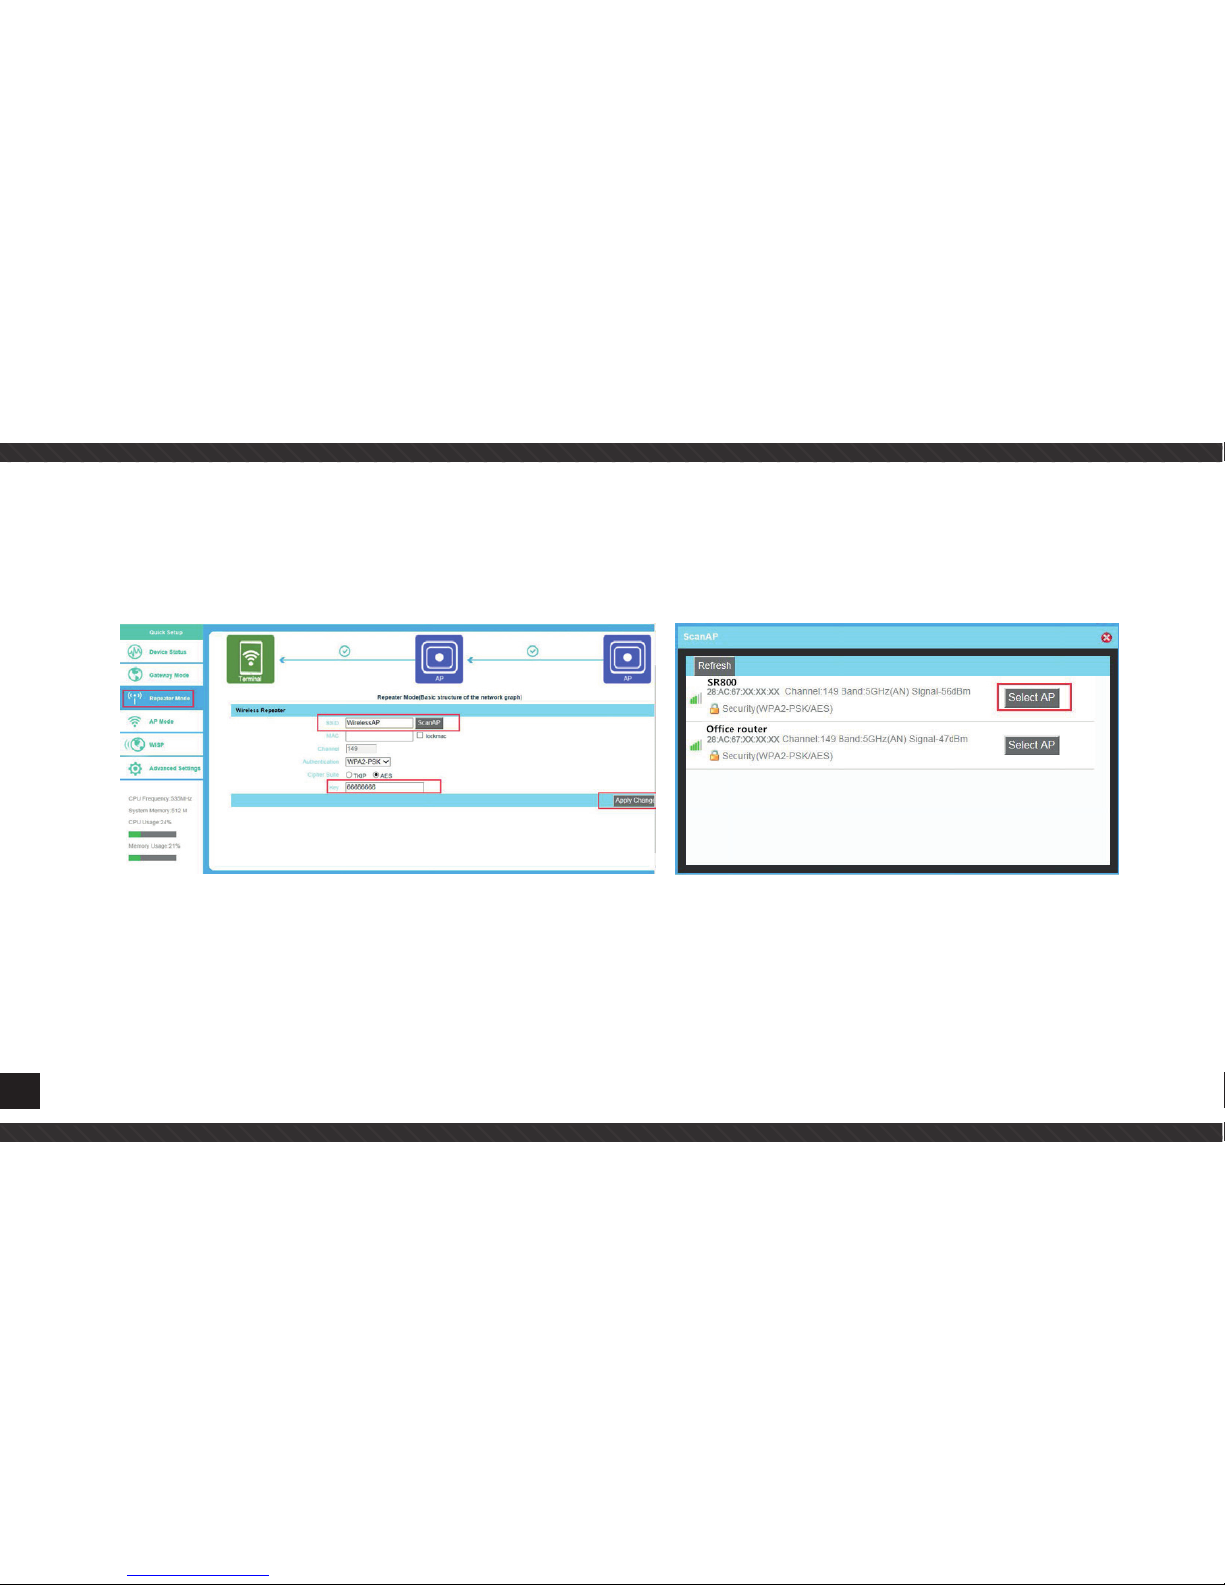
4.3 Wifi repeater configuration
a. Login the Web management page, click “ Repeater Mode”, then “Scan AP”
b. Select the AP’s SSID want to bridge, take SR800-2.4G for example.
c. input the AP’s key, and apply changes
d. In Repeater Mode, the SSID is disable in default setting, it work as Station;if need SSID broadcast in this mode, just manual to
change under Advanced Settings,click sure in this part to finish the repeater operation mode setting After this step, can click the
Device status to check the status of this Wireless AP. And it will show Wireless AP’s LAN Interface, WLAN status and Sigbal Strength.
Page 11

11
4.4 AP Mode
Click wifi coverage as newxt image shows, Plug and Play to transmit wireless signal for wireless end users form wired networking.
In this part,user can mark the AP’s location and name for easy problem checking. Then can change SSID, Key, Channel as request.
Waiting for system reboot,once finished, do as chart 5 shows, set computer’s IP address as automatically get, then you can use
internet normally.
Page 12

12
4.5 WISP
In this operation mode, user should confirm the WAN access type at first, then set the SSID, key, Channel as request.
CHAPTER 5
ADVANCE SETTING
5.1 System Status
Click “ Advance Settings”, will show system status, such as firmware version, System uptime.
Page 13

13
5.2 2.4GHz Wireless
In this part, use can scan AP’s SSID, disable or enable AP’s SSID, modify Channel, Security.
5.3 Network Setting
LAN Interface Setup mainly showed as follow
Page 14

14
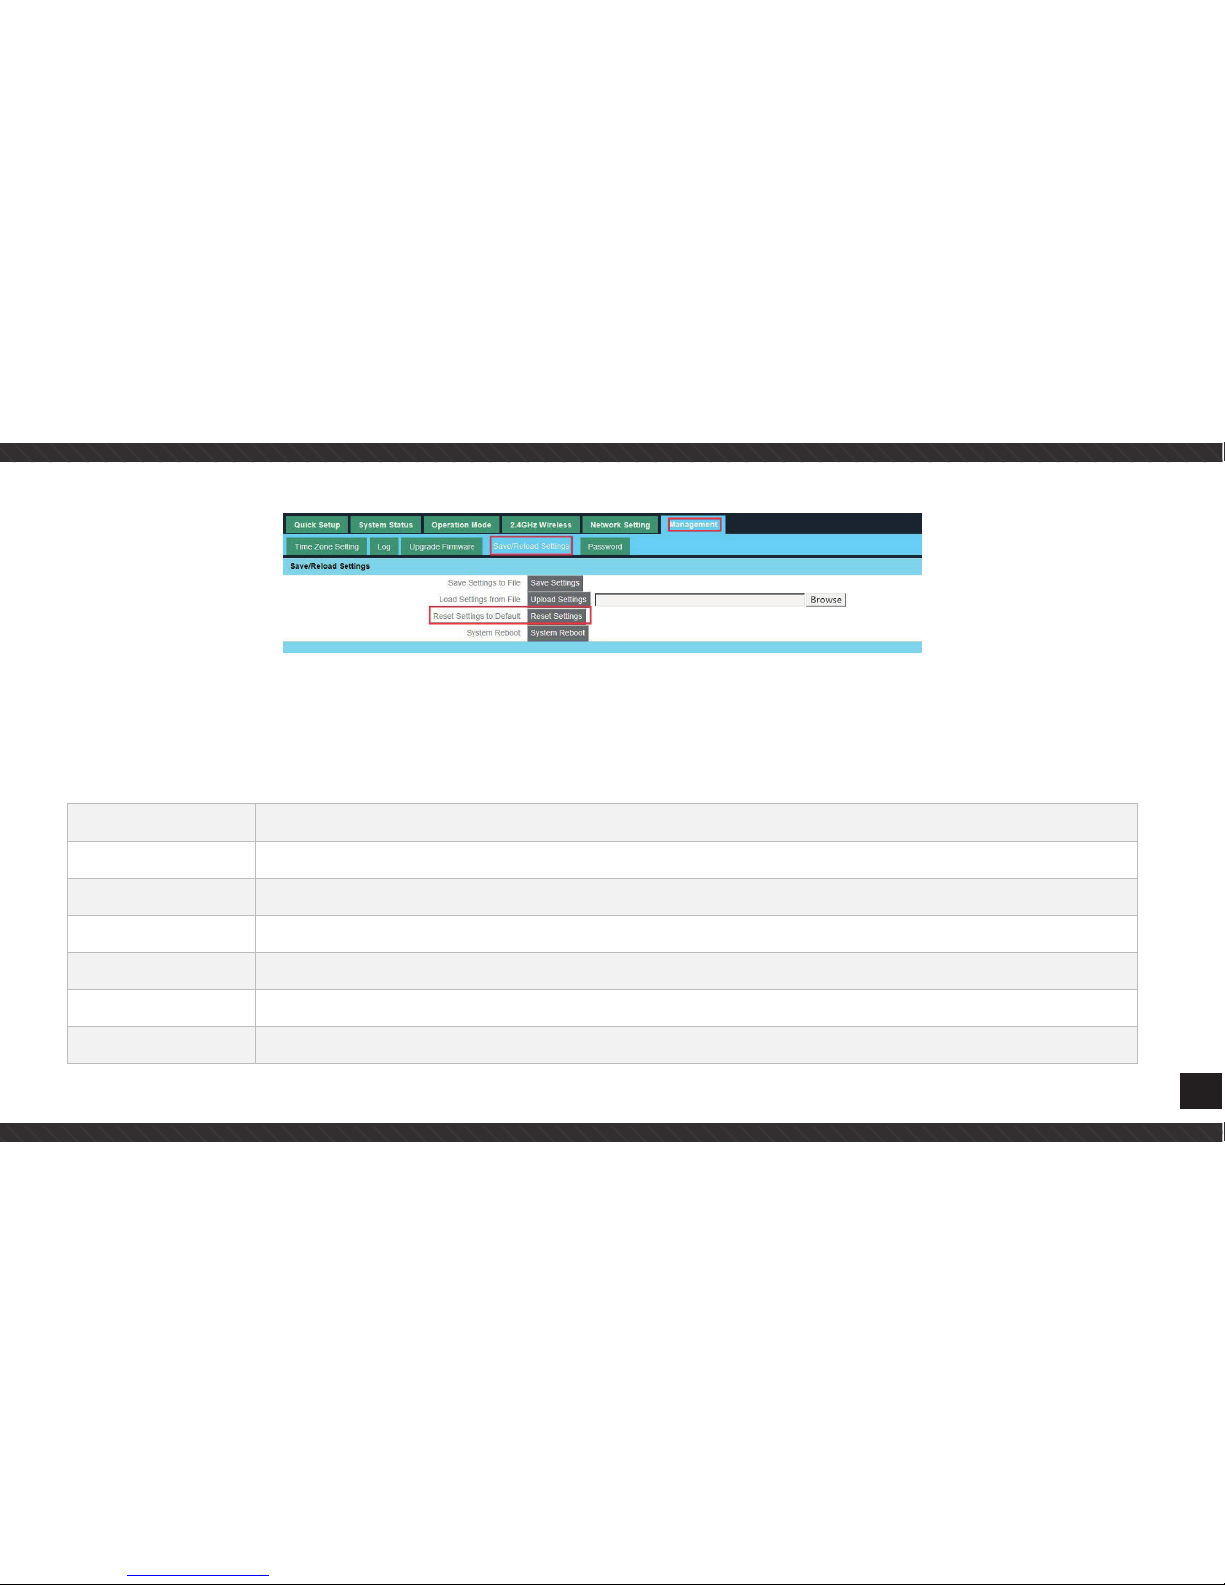
5.4 Management
In this part, user can set Time zone, show Log info, upgrade firmware, change login user name and password;
5.5 Upgrade firmware
After finish firmware upgrade, pls click Save/Reload Settings, then reset settings to default.
Page 15
15
CHAPTER 6
SPECIFICATION
Item Parameters
Transmission rate 300Mbps
Built-in MIMO antenna Built-in 5dbi omni antenna
Function <10W
Power adapter <12V(POE 24V)/1A)
Size (mm) 260L x 87W x 54H
Weight (g) 645
Page 16

16
LED light Power Button: Always light means function well
Wifi simbol: Twinkle means 2.4G signals functions well
LAN: Always light means LAN port connecting well
WAN: Always light means LAN port connecting well
Facility port 2 x 10/100Mbps Rj45 port (support 12-24V POE power supply)
1 x reset button,recover factory defalt using
1 x DC Jack, 12V local power supply
Page 17

17
CHAPTER 7
THE FAILURE PHENOMENON AND SOLUTION
Failure phenomenon Solution
Failure phenomenon Pls make sure the PoE module connection is right. POE Port connect with AP, LAN port connect with computer
Can’t land to Wireless
AP through Web page
Pls check the IP address of computer and Wireless AP to see whether they are in same networking segment, The method is
click “start”-“Run” input“cmd” ping 192.168.188.253 to test the Wireless AP connectivity. Reset Wireless AP and load it again;
Pls make sure the IP address 192.168.188.253 is not occupied by other device in Wireless AP’s networking; Check computer
and cable problem, recommend to use 10/100M UTP unshielded cable; Clean up Arp binding from “Start”-“Run” input“cmd”
arp –d Clean the IE Brower’s temporary files and Cache file
Wireless AP can’t
connect with AP
Try to scan the avaliable wireless networking again, Make sure the Wireless AP’s wireless standard 1b/g/n, 2.4G is correct The
Security and passwords are matched between Wireless AP and AP The signal strength of AP is too weak to connect, should be
more than -75dBm
Can’t scan the wireless APScan it several times more. Make sure there are 5G signal existed. Reset the Wireless AP, scan it again after Wireless AP
restart
The connection of
Wireless AP and AP
is success, but the
computer can’t share
internet
Pls Check the computer’s IP address and DNS setting. If it is dynamin, set the network card as automatically obtain. If it is
static IP, pls contact with ISP for correct IP address and DNS address.
Page 18

18
How to Reset Wireless APPress the “Reset” button more than 15 seconds after power on. The Wireless AP will restore factory default after the Wireless
AP restart.
Page 19

Page 20

For any information and product updates
> visit our website www.machpower.it
Mach Power
®
is a registered trademark
All Right Reserved
 Loading...