

Mace MAS-AWD2PK, alert SoloMAS-AWD2PK User Manual
User Guide | MAS -AWD2 PK
Window & Door Alarm
Please keep these instructions in a safe place
for future reference.
Congratulations on your
purchase of this all-in-one
window & door alarm! This
stand-alone alarm unit is a
simple, easy-to-install security
device which will help you to
protect one door or window
from unwanted intrusion.
This window & door alarm
unit can effectively alert when
a single window (or door) is being opened though it cannot prevent a window from being
broken. Thus, for more complete protection of a window, we suggest using either infrared
alarm or a glass breakage alarm as a backup to the door alarm.
Kit includes:
2 Alarm Siren Units
2 Magnetic Alarm Unit Triggers
2 Sets of Double-Sided Mounting Tape
1 User Guide
IMPORTANT: Read Before Installing
• Do not expose any part of the alarm unit to sudden shocks
(such as being dropped or struck).
• Do not install the alarm unit near devices which generate magnetic fields
(such as microwaves).
• Do not install any the alarm unit in direct sunlight.
• Only use alkaline batteries.
• All components are for indoor use only. Do not install outdoors.
• Replace the batteries in the unit every six months.
• Test the alarm periodically (every 1–2 months and each time you change the batteries)
to ensure it is working properly.

This alarm system is designed to act as a deterrent. It cannot provide complete protection for
your home or business. Like all practical systems, it has limitations and it could be disabled by
a skilled intruder. We suggest that you avoid relying solely on this alarm unit to protect your
property, but use it as part of a comprehensive security solution. You can increase your level
of protection through the use of high-quality locks, stronger doors, guards for your windows
and a security DVR and camera system.
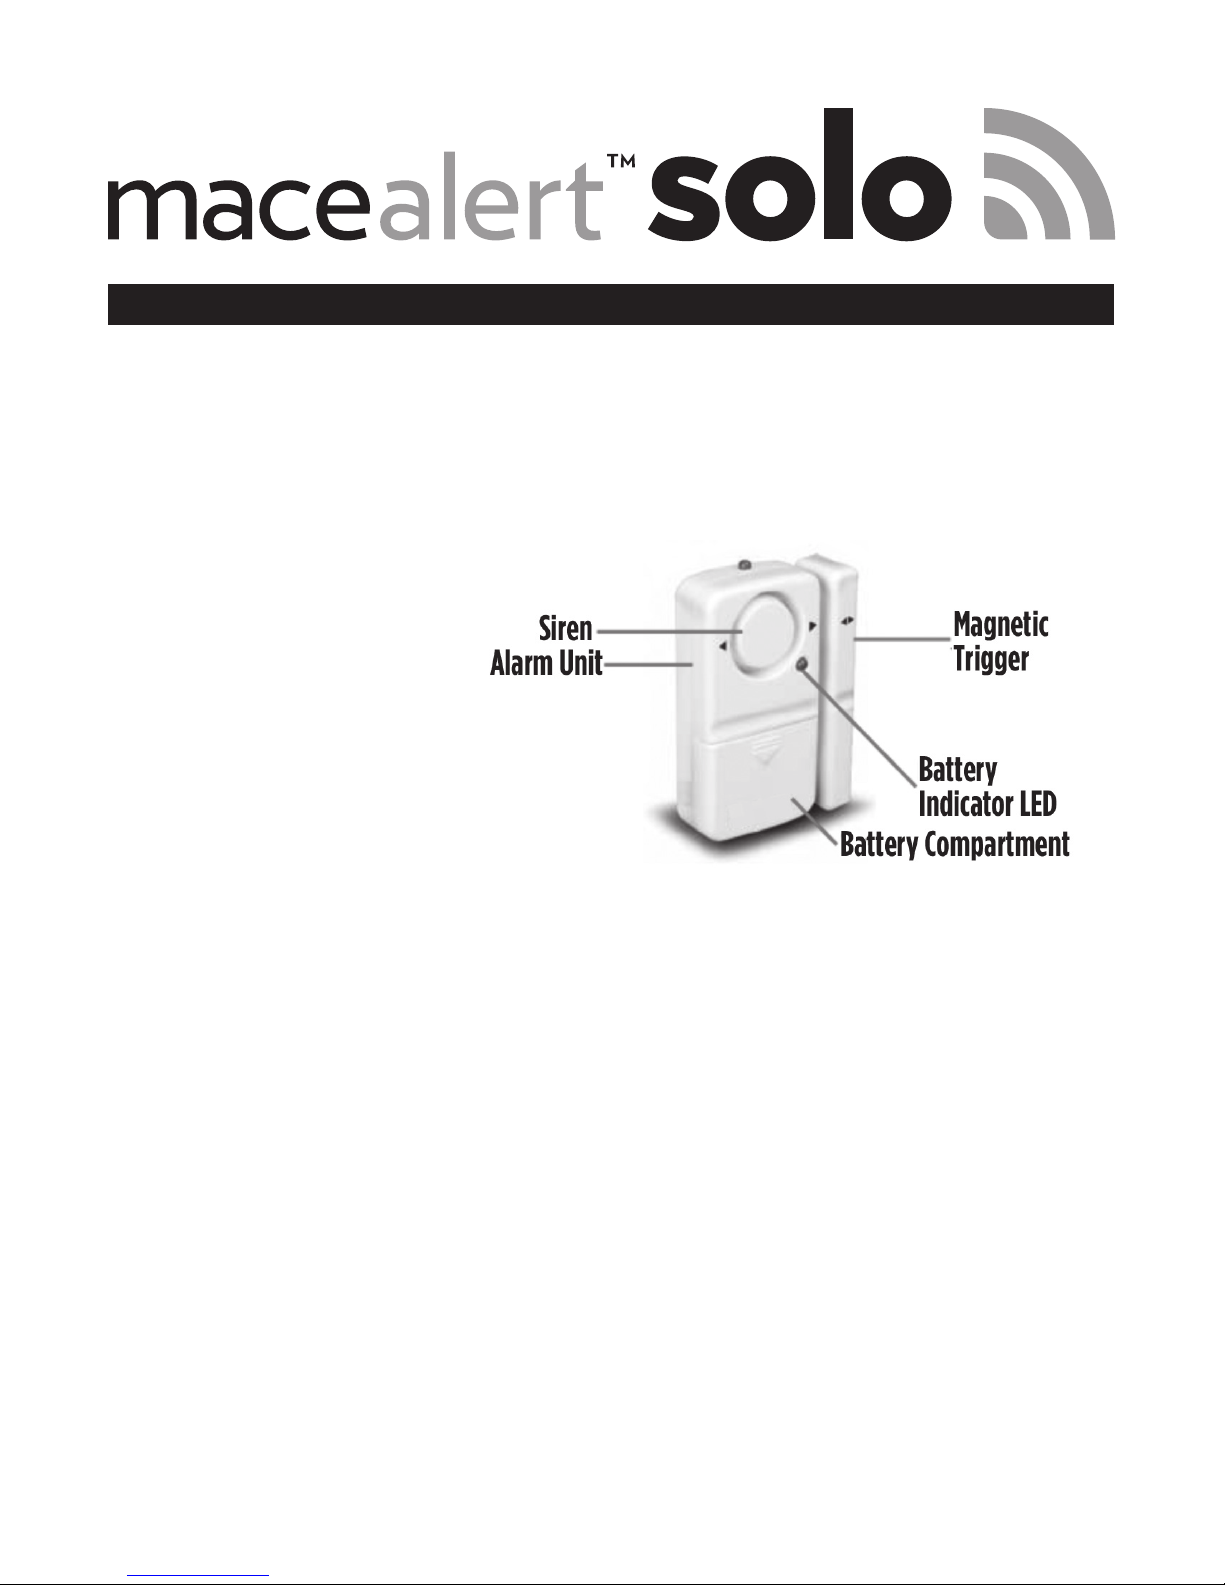
HOW IT WORKS:
The sensor is composed of two separate, equally important parts: the alarm unit itself, and
the trigger. The alarm unit is the larger of the two parts, and is responsible for sounding the
alarm (hence the siren). Inside the transmitter is a magnetically sensitive switch, which is held
in the OFF position by the magnetic trigger.
When the trigger is moved farther than approximately 1/2" (10-15mm) away from the door
sensor, the switch closes to the ON position and the alarm is triggered.
ARMING AND DISARMING
The arming/disarming switch is located underneath the battery compartment, just above the
battery slot. There are only two settings, ON and OFF. When the unit is set to ON, the alarm
will sound whenever the two parts of the alarm are separated. When the unit is OFF, the
alarm will not sound under any circumstances.
— To arm the sensor, simply set this switch to ON.
— To disarm the unit or stop an alarm in progress, set the switch to OFF.
MOUNTING
Included are two portions of double-sided tape, one for both the alarm unit and the magnetic
trigger.
1. Remove the plastic cover from one side of the larger piece of double-sided tape, and
apply the tape to the rear side of the alarm unit.
2. Remove the plastic cover from one side of the smaller piece of mounting tape, and apply
to the rear of the magnetic sensor.
3. Clean the surfaces you want to mount the alarm on using cleaning alcohol or similar.
Ensure the surfaces are completely clean and dry before proceeding.
4. Remove the plastic cover from the other side of the double-sided tape, and apply one
part of the alarm to the door/window you want to monitor, and the other part to the
frame. Ensure that when the door/window is shut, the small black arrows on the sensor
and trigger line up. They don’t need to physically touch, but they should be no more that
1/5" (5mm) apart when the door/window is shut for the sensor to work correctly.
 Loading...