

MABIS/Duro-Med Freedom 501-1026 Series Instruction Manual

Instruction Manual
SERIES
TM
DELUXE ROLLAT O R
Model 501-1026 Series
Freedom of
Freedom of
mobility!
mobility!
CAUTION
This product contains natural
rubber latex which may cause
gic r
aller
eactions
.
and brake
H
nob
K
Retainer
pin
Rear
wheel
and grips
H
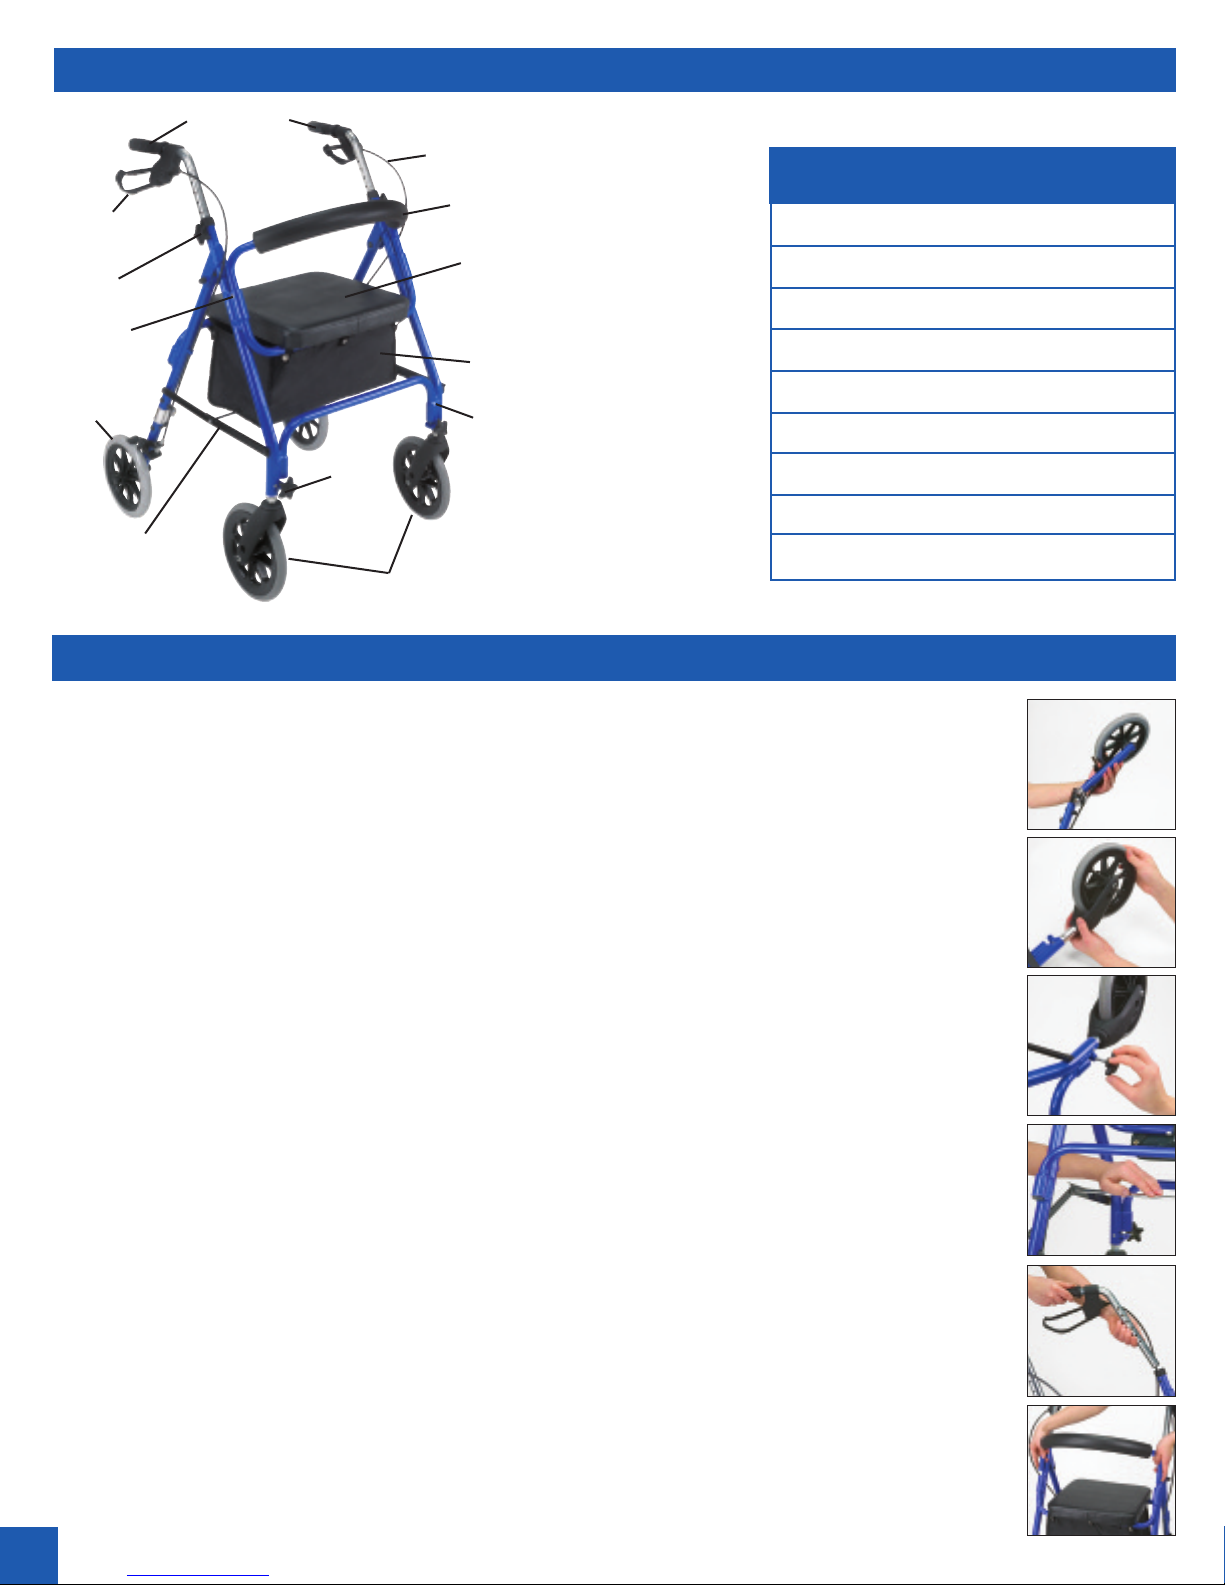
PARTS OF YOUR ROLLATOR AND SPECIFICATIONS
1026-Series
Brake cable
SPECIFICATIONS
Backrest
Overall Width: 28”
Seat
Storage pouch
Pin
Storage Pouch: 15” x 10” x 7”
Wheels: 8”
Handle Height: 33” – 39”
Width Between Handles: 18”
Seat: 14” x 13”
Knob
Seat Height: 22”
Weight: 18 lbs.
Folding hinge
Front wheels
Weight Capacity: 300 lbs.
INSTRUCTIONS FOR TOOL-FREE ASSEMBLY
WARNING! It is very important that you read all instructions before assembly and/or
use of this rollator. Before using the rollator, be sure your weight is within the weight
capacity of the unit. This rollator will require little assembly, which can be performed
without tools.
PARTS FOR ASSEMBLY:
Four (4) wheels; two (2) handlebars with loop-lock brakes; one (1) storage pouch; one
(1) backrest; two (2) washers; two (2) knobs
ASSEMBLY INSTRUCTIONS:
1. Flip down rear wheels until they lock securely into place, Fig. 1.
2. Insert front wheels into frame, locking the brass retainer pins securely into position
through the holes on both sides of the rollator frame,
knob onto bracket and tighten until secure,
Fig. 3.
Fig. 2. Position the star-shaped
Fig. 1
Fig. 2
Fig. 3
3. Place rollator upright with wheels on the floor. Push down on the center folding hinge
until it locks into place,
4. Insert handlebars with pre-assembled hand brakes into rollator frame,
Fig. 4.
Fig. 5. To adjust
height of the handlebars, align the holes in both the frame and handlebars and insert
screw through holes in the rollator bar. Attach washer and star-shaped knob over the
end of the screw and tighten un
til secure. Before use, make sure the handlebars are
level and aligned with the rear wheels.
5. Position the removable backrest onto rollator frame and secure by locking the brass
retainer pins into position through the frame holes on both sides of the rollator frame,
Fig. 6. Lower the padded seat over the pouch.
6. Before use, test and adjust the tension on the braking system to ensure proper and
secure braking.
2
Fig. 4
Fig. 5
Fig. 6
USE OF NEW ROLLATOR
BEFORE USE, PLEASE READ ALL CAUTION AND WARNING LABELS ON THE ROLLATOR
WALKING
This unit is to be used as a mobility aid creating a natural balance.
With hands grasped securely onto handgrips, slowly walk behind
the rollator. Gently push forward using evenly distributed weight
between handlebars.
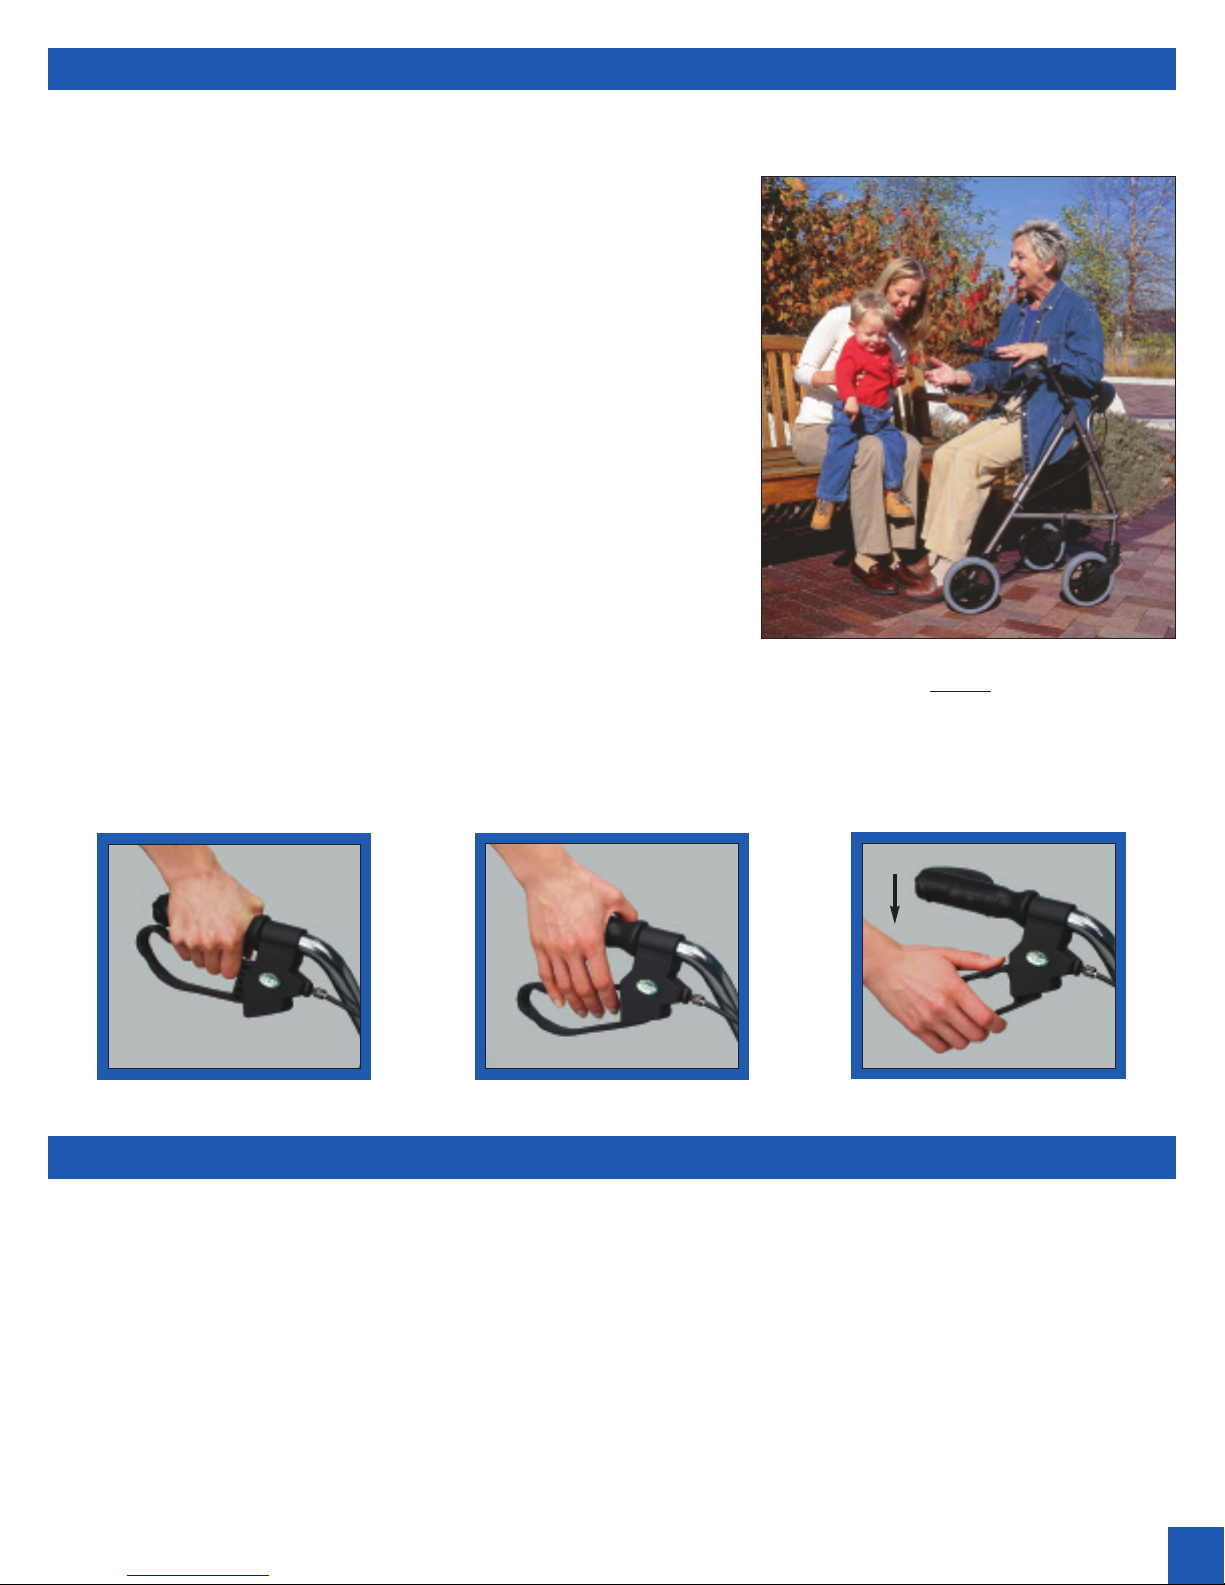
BRAKING
Normal Brake
similar to operating the brakes of a bicycle. This function may be
applied while walking with the rollator to slow down momentum,
to stop for a moment, or to maneuver around obstacles which may
be in your path.
Parking Brake can be activated by pushing the handle down into
the lock position. This function should be activated when the user
stops for a period of time. For safety reasons, the parking brake
should always be engaged before sitting down on the seat. For
example, while shopping it is beneficial to activate the parking
brake while stopped in an aisle to avoid the rollator from advancing
forward. To release the parking brake, gently pull up.
can be activated by squeezing the brake handle,
REMEMBER! ALWAYS ACTIVATE THE PARKING
BRAKE BEFORE SITTING.
The braking system is convenient and easy to operate. People who may have hand disabilities should find the
brake handles wide, comfortable and non-binding. Minimum pressure will need to be applied to activate the
loop-lock brake system.
SQUEEZE TO STOP
RELEASE T
O ROLL
PUSH DOWN TO LOCK
FOLDING AND MAINTENANCE INSTRUCTIONS
FOLDING
It is not necessary to remove the storage pouch before folding the rollator. From the user side of the unit,
grasp the folding strap located inside the storage pouch and lift into the folded position. The rollator will fold
easily for storage or transport.
MAINTENANCE
Always make sure your brakes are operating correctly before use. Keep the brake handles free from dirt, dust
and grime. Build-up of particles could cause your brakes to engage improperly. If the brakes are not functioning, check the cables for looseness. The cables can be tightened at the adjuster screw located where the
cable is connected to the brake handle. If the cable is broken, it will need to be replaced.
Periodically check
and tighten all nuts, bolts, screws and other hardware on rollator.
3
 Loading...