

Märklin 60652 User manual [ml]

60652

2

Deutsch 4 / 6
Technische Hinweise für Mobile Station 38
Anhang 42
Belegungs-Tabelle 58 – 59
English 4 / 10
Technical Information for the Mobile Station 38
Appendix 42
Belegungs-Tabelle 58 – 59
Français 5 / 14
Remarques techniques concernant la Mobile Station 39
Annexe 42
Belegungs-Tabelle 58 – 59
Nederlands 5 / 18
Technische opmerkingen voor het Mobile Station 39
Aanhangsel 42
Belegungs-Tabelle 58 – 59
Español 5 / 22
Indicaciones técnicas para la Mobile Station 40
Véase anexo 42
Belegungs-Tabelle 58 – 59
Italiano 5 / 26
Avvertenze tecniche per Mobile Station 40
Appendice 42
Belegungs-Tabelle 58 – 59
Svenska 5 / 30
Tekniska anvisningar till Mobile Station 41
Bilaga 42
Belegungs-Tabelle 58 – 59
Dansk 5 / 34
Tekniske henvisninger til Mobile Station 41
Tillæg 42
Belegungs-Tabelle 58 – 59
3
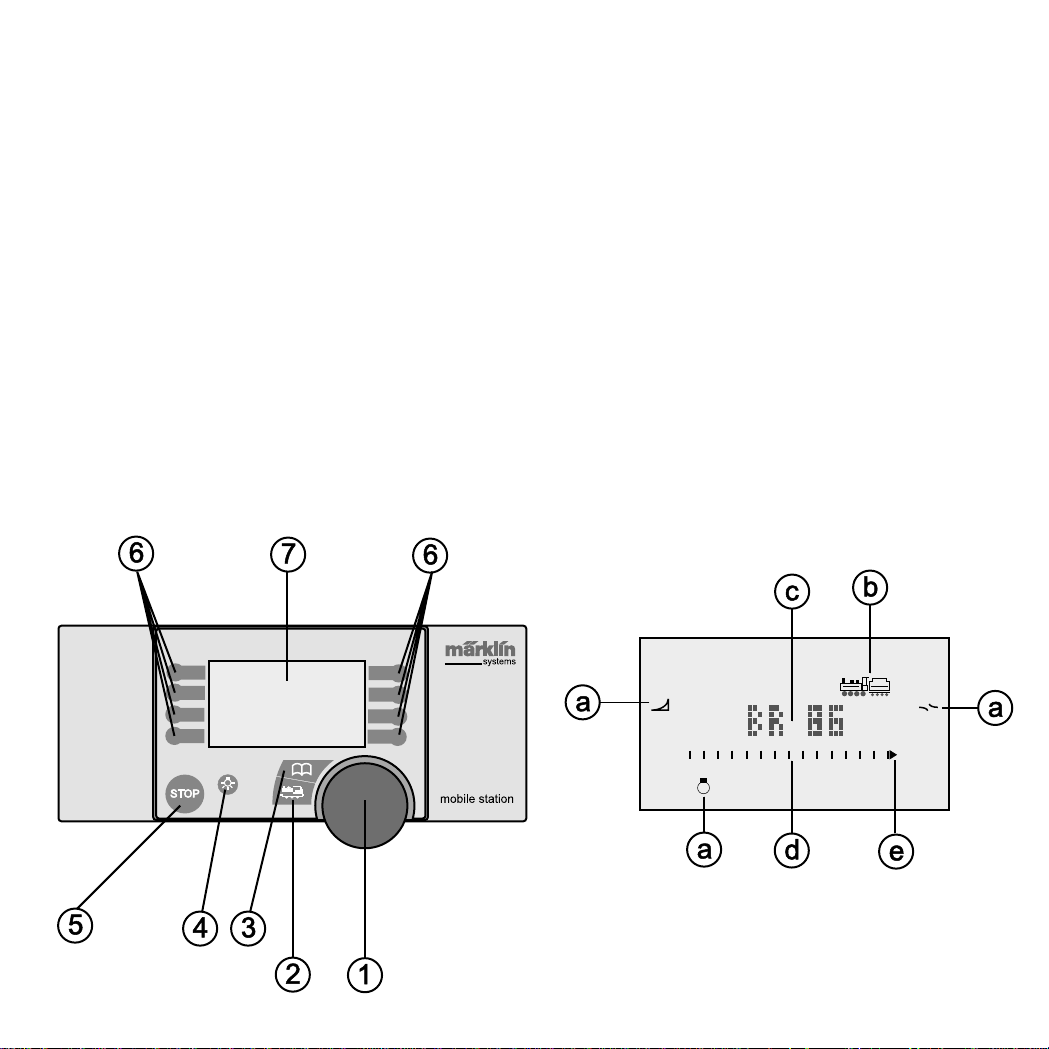
Bedienungsoberfläche
1 – Drehregler
2 – Taste Lok/OK
3 – Taste Menü/ESC
4 – Schalttaste Beleuchtung
5 – STOP-Taste
6 – Funktionstasten
7 – Grafikdisplay mit
a) Funktionsanzeige (bis zu 9 Anzeigen)
b) Darstellung Loktyp
c) Lokbezeichnung
d) Geschwindigkeitsanzeige
e) Fahrtrichtungsanzeige
Upper Surface with Controls
1 – Speed Control Knob
2 – Button Locomotive/OK
3 – Button Menu/ESC
4 – On/Off Button for Headlights
5 – STOP-Button
6 – Auxiliary Function Buttons
7 – Graphic Display with
a) Auxiliary Function Indicator (up to 9 indicators)
b) Representation of the Locomotive Type
c) Locomotive Designation
d) Speed Indicator
e) Direction Indicator
4

Face supérieure
1 – Régulateur
2 – Touche Loc/OK
3 – Touche Menu/ESC
4 – Touche éclairage
5 – Touche STOP
6 – Touches de fonction
7 – Ecran graphique avec
a) Indicateur de fonction (jusqu’à 9 indications)
b) Représentation du type de locomotive
c) Désignation de la locomotive
d) Indicateur de vitesse
e) Indicateur de sens de marche
Bedieningspaneel
1 – Draairegelaar
2 – Toets loc/OK
3 – Toets menu/ESC
4 – Schakeltoets verlichting
5 – STOP-toets
6 – Functietoetsen
7 – Grafischdisplay met
a) Functieweergave (tot 9 weergaven)
b) Weergeven van het locomotieftype
c) Locomotief omschrijving
d) Snelheidsweergave
e) Rijrichtingsweergave
Cuadro de mandos
1 – Regulador de velocidad
2 – Tecla Loc/OK
3 – Tecla menú/ESC
4 – Tecla alumbrados
5 – Tecla STOP
6 – Teclas funciones
7 – Display gráfico con
a) Indicación funciones (hasta 9)
b) Mención tipo de locomotora
c) Nombre de la locomotora
d) Marca velocidad
e) Indica sentido de marcha
Plancia di manovra
1 – Regolatore rotativo
2 – Tasto Lok/OK
3 – Tasto Menü/ESC
4 – Tasto di commutazione illuminazione
5 – Tasto di arresto (STOP)
6 – Tasti funzione
7 – Visore grafico con
a) Indicazione delle funzioni (sino a 9 indicazioni)
b) Raffigurazione del tipo di locomotiva
c) Denominazione della locomotiva
d) Indicazione della velocità
e) Indicazione della direzione di marcia
Användningsyta
1 – Vridreglage
2 – Tangent lok/OK
3 – Tangent Meny/ESC
4 – Kopplingstangent belysning
5 – STOP-tangent
6 – Funktionstangenter
7 – Grafikdisplay med
a) Funktionsdisplay (visar upp till 9)
b) Bild på loktyp
c) Lokbeteckning
d) Visning av hastighet
e) Visning av körriktning
Betjeningsoverflade
1 – Drejeregulator
2 – Tast Lok/OK
3 – Tast Menu/ESC
4 – Tænd-/sluktast til belysning
5 – STOP-tast
6 – Funktionstaster
7- Grafikdisplay med
a) Funktionsdisplay (viser indtil 9 funktioner)
b) Visning af lokomotivtype
c) Lokomotivbetegnelse
d) Hastighedsvisning
e) Visning af køreretning
5
Einsatzmöglichkeit der Mobile Station
Einzelgerät 60652, Gerät aus Spur 1 – Startpackungen:
● Geeignet für Märklin H0 und 1.
● Maximaler Ausgangsstrom: 1,9 A (mit Transformer 60052).
● Anschluss nur über spezielle Anschlussbox.
● Nummer am Geräteboden: „60651“ (!)
Gerät aus Märklin H0-Startpackungen:
● Geeignet für Märklin H0.
● Maximaler Ausgangsstrom: 1,2 A (mit Transformer 60052).
● Anschluss nur über spezielle Anschlussbox.
● Nummer am Geräteboden:„60652“.
Der Ausgangsstrom reicht für 2 – 3 fahrende Lokomotiven.
Durch Wagen mit Innenbeleuchtung, eingeschaltete Rauchgeneratoren, eingeschaltete Geräuschmodule etc. kann sich diese
Anzahl verringern. Für Anlagen mit mehr Verbrauchern ist die
Central Station das geeignete Betriebssystem. Die Mobile Station
kann dort als Fahrgerät verwendet werden.
Mobile Station anschließen
1. Prüfen, ob Netzstecker aus der Steckdose entfernt ist.
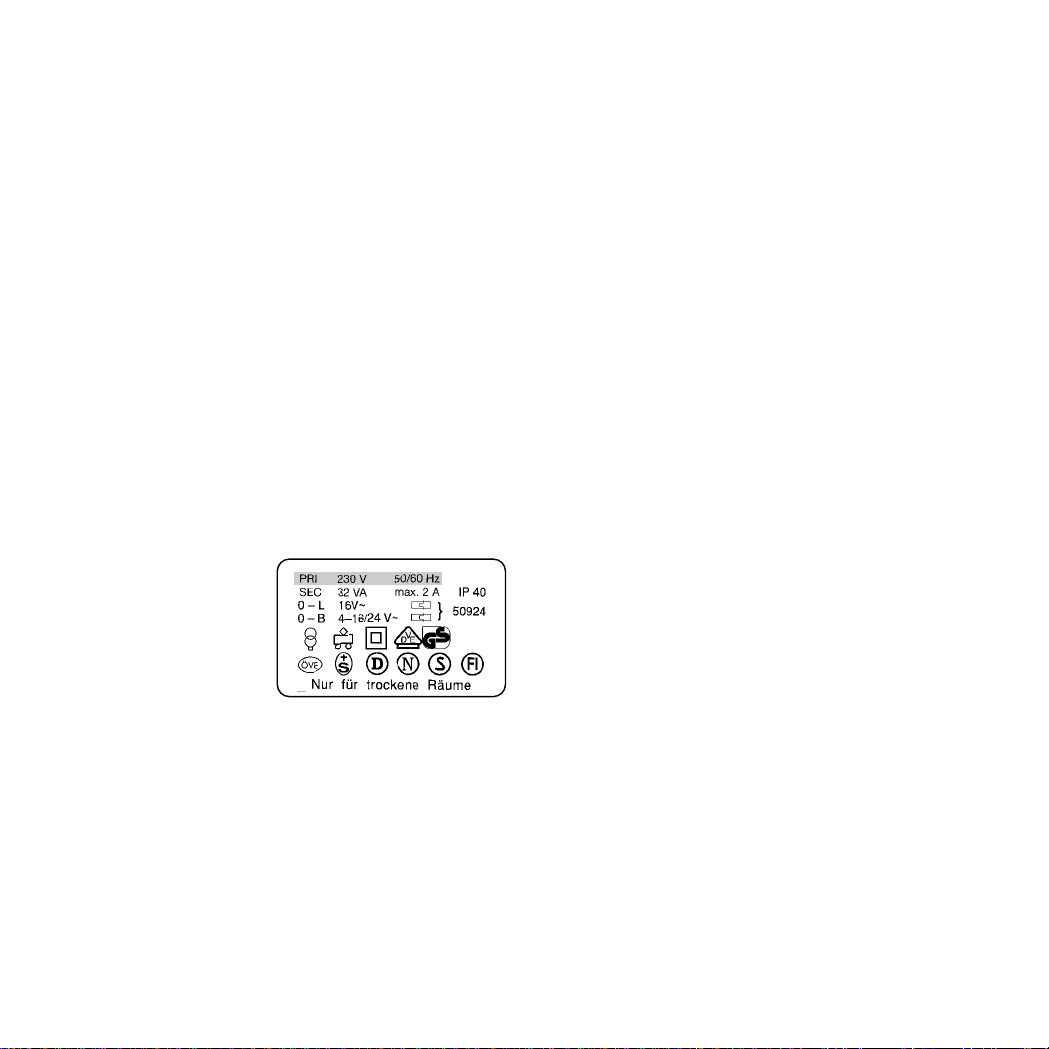
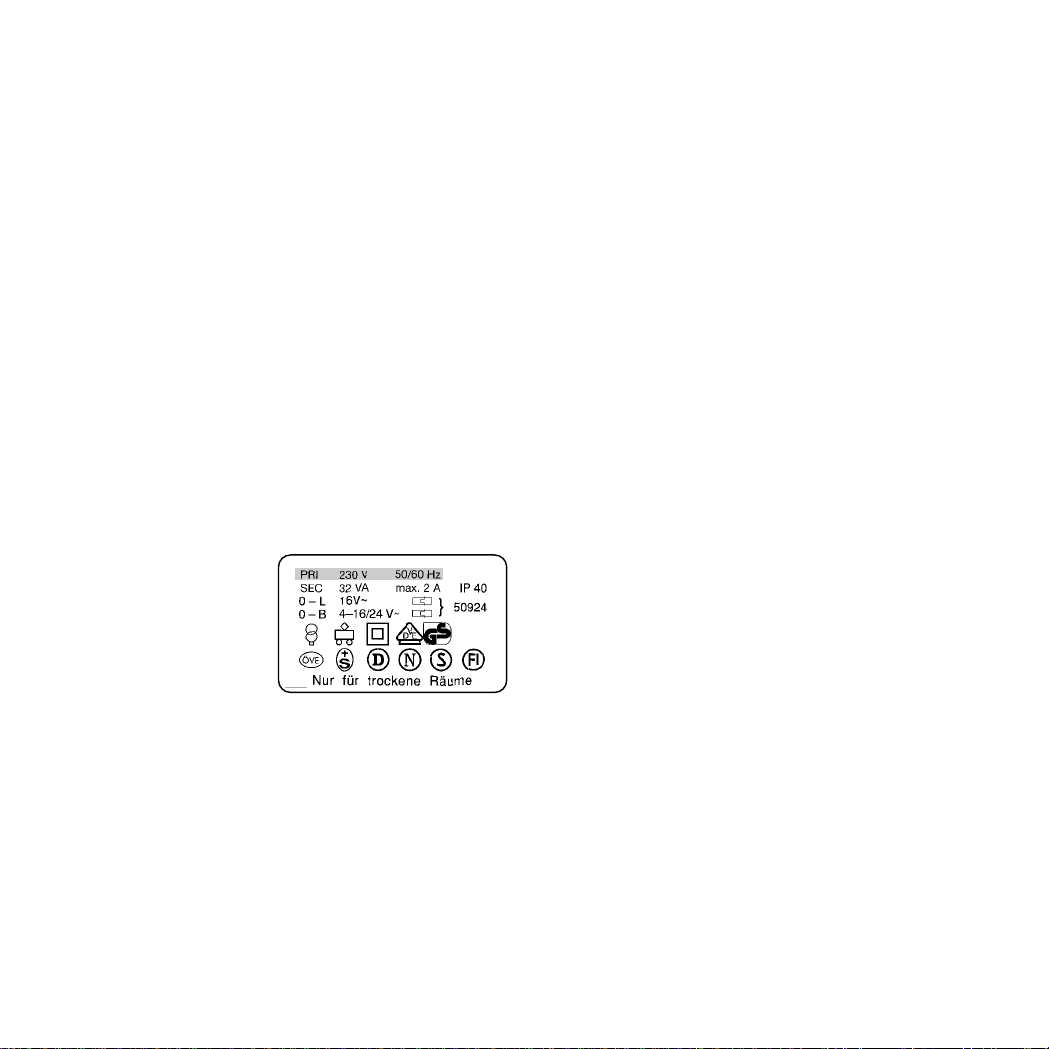
2. Prüfen, ob der Transformator bzw. das Netzgerät für
das gewählte Haushaltsnetz geeignet ist (Wert der
Eingangsspannung, Wert
der Frequenz). Die Daten
befinden sich auf dem
Typenschild des Transformators/Netzgeräts.
3. Mobile Station anstecken. Die erste Mobile Station muss an
die linke 10-polige Buchse der Anschlussbox.
4. Transformator oder Netzgerät an die Anschlussbox anschließen.
(=> Anhang A)
Inbetriebnahme
Mobile Station nach dem Einstecken des Netzsteckers des
Netzgerätes / Transformators in die Steckdose:
1. Kurze Einschaltphase (Schriftzug „MÄRKLIN“ im Display).
2. Mobile Station schaltet direkt in den Betriebsmodus.
(=> Anhang B)
Bei der Mobile Station werden die zu steuernden Lokomotiven
aus einer Lokliste ausgewählt. Da die Mobile Station ab Werk
keine Einträge in der Lokliste besitzt, springt die Anzeige direkt
in die Eingabe von Loks in die Lokliste („NEUE LOK“).
Mobile Station aus den Startpackungen besitzen ab Werk
bereits Eintragungen.
Lok in die Lokliste übernehmen
Möglichkeit A: mfx-Lokomotiven melden sich selbstständig an.
Möglichkeit B: Lok wird aus der Datenbank übernommen.
Möglichkeit C: Lok wird über die Adresse eingestellt.
Möglichkeit A:
Lok mit eingebautem mfx-Decoder vor dem Einschalten der
Anlage auf das Gleis stellen. Während des Einschaltens übermittelt die mfx-Lok ihre Daten an die Mobile Station. Sobald die
Mobile Station betriebsbereit ist, kann diese Lok aus der Lokliste
ausgewählt werden.
(=> Anhang C)
Hinweis: Sollte die Lokliste 10 Einträge besitzen, so kann keine
weitere Lok in die Lokliste aufgenommen werden. In diesem Fall
einen Eintrag löschen (=> S. 8) und danach die mfx-Lokomotive
neu anmelden.
Möglichkeit B:
1. Menü/ESC-Taste drücken.
2. Drehregler drehen, bis „NEUE LOK“ erscheint.
3. Auf den Drehregler drücken.
4. Drehregler drehen bis „DATENBANK“ erscheint.
5. Auf den Drehregler drücken.
6. Drehregler drehen bis Artikelnummer der Lok erscheint.
7. Lok/OK-Taste drücken. Die Anzeige wechselt anschließend
selbsttätig in die Bedienebene zurück.
(=> Anhang D)
Möglichkeit C:
1. Menü/ESC-Taste drücken.
2. Drehregler drehen, bis „NEUE LOK“ erscheint.
3. Auf den Drehregler drücken.
4. Drehregler drehen bis „Adresse“ erscheint.
5. Auf den Drehregler drücken.
6. Drehregler drehen bis Adresse der Lok erscheint.
6

7. Auf den Drehregler drücken.
8. Drehregler drehen, bis gewünschtes Symbol erscheint.
9. Lok/OK-Taste drücken. Die Anzeige wechselt anschließend
selbsttätig in die Bedienebene zurück.
(=> Anhang E)
Tipp: Bei allen Einträgen in der Lokliste kann die Adresse oder
der Name im Display verändert werden (S. 7/8). Einträge aus der
Datenbank können so auch für andere Anwendungen verändert
werden.
Lok steuern
Drehregler nach rechts – Lok fährt schneller.
Drehregler nach links – Lok fährt langsamer.
Der Balken der Geschwindigkeitsanzeige verändert sich mit
der neuen Sollgeschwindigkeit.
Auf den Drehregler drücken – Fahrtrichtung wechselt
Gleichzeitig wechselt die Fahrtrichtungsanzeige und die
Richtung des Balkens der Geschwindigkeitsanzeige.
Funktionstasten betätigen – Zugehörige Funktion wird geschaltet.
Bitte beachten:
● Bei Loks aus der Datenbank werden die Funktionen (falls im
Modell vorhanden) als Grafik im Display angezeigt. Nur diese
Funktionen sind schaltbar.
● Beleuchtung wird meist über die separate Beleuchtungstaste
geschaltet.
● Loks, die über die Adresse in die Lokliste eingerichtet wurden,
besitzen keine Anzeige der Funktionen. In diesem Fall ist die
Beleuchtungstaste für die Funktion „function“ zuständig und
die 4 Funktionstasten links neben dem Display für die Funktionen f1, f2, f3 und f4 (von oben nach unten).
Lok wechseln
1. Taste Lok/OK drücken.
2. Drehregler drehen, bis gewünschte Lok erscheint.
3. Taste Lok/OK drücken.
(=> Anhang F)
Anschließend kann die neugewählte Lok gesteuert werden.
Die vorher aufgerufene Lok fährt mit der zuletzt erhaltenen Fahrinformation weiter!
Nothalt
Drücken der STOP-Taste: Die Anlage wird stromlos geschaltet. Alle
Fahrzeuge halten an. Im Display erscheint der Schriftzug „STOP“.
Durch nochmaliges Drücken der STOP-Taste wird die Versorgung der Anlage wieder eingeschaltet.
Hinweis: Bei einem Kurzschluss oder bei Überlastung schaltet
das System selbsttätig in den STOP-Zustand. Beseitigen Sie in
diesem Fall die Ursache und versuchen Sie danach durch Drükken der STOP-Taste den Betrieb wieder aufzunehmen. Schaltet
das System wieder ab, so ist die Ursache noch nicht beseitigt!
Lokdaten ändern
Voraussetzung: Lok ist in die Lokliste aufgenommen.
Bei Loks mit Adresseinstellung über Mobile Station:
Nur diese Lok darf sich auf dem von der Mobile Station versorgten Bereich befinden.
Bei Lokomotiven mit mfx-Decoder ist keine Adressänderung notwendig. Daher entfällt diese Einstellmöglichkeit
bei diesen Produkten.
Adresse ändern
1. Lok anhalten
2. Menü/ESC-Taste drücken
3. Drehregler drehen, bis „LOKÄNDERN“ erscheint.
4. Auf den Drehregler drücken.
5. Drehregler drehen bis „ADRESSE“ erscheint.
6. Auf den Drehregler drücken.
7. Drehregler drehen bis neue Wunsch-Adresse der Lok erscheint.
8. Auf den Drehregler drücken.
Bei Loks mit Codierschalter muss die neue Wunschadresse am
Decoder eingestellt werden.
(=> Anhang G)
Nur bei Loks, deren Adresse über die Mobile Station eingestellt
werden kann:
9. Im Display erscheint die Frage „PROG LOK?“. Drücken der
Menü/ESC-Taste: Adresse wird nur im Lokeintrag geändert.
Drehregler drücken: Lokadresse wird per Datenübertragung
geändert.
(=> Anhang H)
Hinweis: Punkt 9 funktioniert nur, wenn die Lok dafür vorbereitet
ist, wenn die Lok von der Mobile Station versorgt wird, die Lok
einwandfreien Kontakt besitzt und keine weiteren Loks im versorgten Bereich stehen.
7

Bezeichnung im Display ändern
Voraussetzung: Im Display werden die zu ändernden Lokdaten
angezeigt.
1. Menü/ESC-Taste drücken.
2. Drehregler drehen bis „LOKÄNDERN“ erscheint.
3. Auf den Drehregler drücken.
4. Drehregler drehen bis „NAME“ erscheint.
5. Auf den Drehregler drücken.
6. Drehregler drehen und dabei den ersten Buchstaben verändern.
7. Auf den Drehregler drücken. Jetzt kann durch Drehen des
Drehreglers der 2. Buchstabe verändert werden.
8. Weiter mit folgenden Befehlen:
Drücken auf den Drehregler: Wechsel eine Stelle vor.
Drücken der Menü/ESC-Taste: Wechsel eine Stelle zurück.
Drücken der Lok/OK-Taste: Übernahme der neuen
Bezeichnung.
(=> Anhang I)
Maximal empfohlene Länge der Bezeichnung: 10 Buchstaben.
Tipp: Buchstaben können durch Überschreiben mit einem
anderen Zeichen gelöscht werden. LEER-Zeichen („❚“) am Ende
der Eingabe werden bei der Übernahme des Eintrags entfernt.
Lok aus der Lokliste löschen
Voraussetzung: Fahrstufe = 0 (Lok steht)
1. Lok/OK-Taste drücken.
2. Drehregler drehen bis die zu entfernende Lok erscheint.
3. Lok/OK-Taste drücken.
4. Menü/ESC-Taste drücken.
5. Drehregler drehen bis „LOKLÖSCHEN“ erscheint.
6. Auf den Drehregler drücken. Im Display erscheint die Sicherheitsabfrage „LOKLÖSCHEN?“
7. Quittieren durch Drücken auf die Lok/OK-Taste.
(=> Anhang J)
OPTIONEN
In diesem Bereich kann die Sprachversion eingestellt werden
und die komplette Mobile Station auf den Anfangszustand
zurückgesetzt werden. Das Untermenü „INFO“ ist nur für den
Reparaturbereich und nicht für den Endverbraucher eingerichtet.
Sprachversion
Einstellbare Sprachen:
Deutsch, Englisch, Französisch, Niederländisch
1. Menü/ESC-Taste drücken.
2. Drehregler drehen bis „Optionen“ erscheint.
3. Auf den Drehregler drücken.
4. Drehregler drehen, bis im Display „SPRACHE“ erscheint.
5. Auf den Drehregler drücken.
6. Drehregler drehen, bis im Display gewünschte Sprache erscheint.
7. Taste Lok/OK drücken.
(=> Anhang K)
RESET
Wichtig: Alle Lokdaten in der Liste (inklusive Änderungen/Adresse,
Name) gehen bei einem RESET verloren! Bei einer Mobile Station
aus einer Startpackung werden die Werksdaten der Lokomotive(n) aus der Startpackung beim RESET wieder in die Lokliste
geschrieben.
1. Menü/ESC-Taste drücken.
2. Drehregler drehen bis „OPTIONEN“ erscheint.
3. Auf den Drehregler drücken.
4. Drehregler drehen bis „RESET“ erscheint.
5. Auf den Drehregler drücken.
6. Im Display erscheint Sicherheitsabfrage „RESET?“. Drücken
der Taste Lok/OK: RESET wird ausgeführt. Durch mehrmaliges Drücken der Menü/ESC-Taste wechseln Sie ohne RESET
zurück in die Hauptbedienebene.
Wichtig: Wird beim Einschalten der Versorgungsspannung
der Mobile Station gleichzeitig die STOP-Taste und der
Fahrregler länger als 1 Sekunde gedrückt, so wird ein
RESET ohne Sicherheitsabfrage direkt durchgeführt!
Weitere Lokparameter einstellen
Diese Einstellung funktioniert nur bei mfx-Lokomotiven oder Loks
mit einem per Daten einstellbaren Decoder. Teilweise besitzen die
Decoder auch nur einzelne der folgenden Einstellmöglichkeiten.
Mögliche Einstellmöglichkeiten:
VMAX – Höchstgeschwindigkeit
ACC – Anfahrbeschleunigung
DEC – Bremsverzögerung
VOL – Lautstärke
RESET – Rückstellen des Lokdecoders auf Werksdaten
8
Wichtig: Das „RESET“ des Lokdecoders (Untermenü LOKÄNDERN)
nicht mit dem „RESET“ der Mobile Station (Untermenü OPTIONEN)
verwechseln.
1. Menü/ESC-Taste drücken.
2. Drehregler drehen, bis „LOKÄNDERN“ erscheint.
3. Auf den Drehregler drücken.
4. Drehregler drehen, bis „VMAX“, „ACC“, „DEC“, „VOL“ oder
„RESET“ (je nach gewünschter Änderung) erscheint.
5. Auf den Drehregler drücken.
6. Im Display erscheint der Menübegriff und darunter ein Einstellbalken. Drehen am Drehregler verändert den Einstellbalken.
Kleinerer Balken: niedrigere Höchstgeschwindigkeit, kürzere Verzögerung etc., längerer Balken bedeutet das jeweilige Gegenteil.
7. Drücken auf den Drehregler zur Übernahme der neuen Einstellung. In dem folgenden Zeitabschnitt (Anzeige „PROG“)
Stromversorgung auf keinen Fall unterbrechen.
(=> Anhang M)
Unterschied beim Untermenü RESET ab Schritt 6.
6. Im Display erscheint Sicherheitsabfrage „RESET?“. Drücken
auf den Drehregler: RESET wird ausgeführt. In dem folgenden
Zeitabschnitt (Anzeige „PROG“) Stromversorgung auf keinen
Fall unterbrechen.
Einsatz einer zweiten Mobile Station
Anschluss nur mit Adapterkabel (Nr. 610 479) möglich.
Anschlussbuchse für die zweite Mobile Station ist die mittlere
Buchse an der Anschlussbox.
Hinweis:
Bezeichnung in der Technik für das Hauptgerät
(linke Buchse): Master.
Bezeichnung für das zweite Bediengerät: Slave.
Anschluss: => Anhang N
Nach dem Einschalten:
● Das zweite Gerät erhält Informationen vom Hauptgerät (Lok-
liste). Die eigene Lokliste im Zweitgerät ist ohne Zugriff.
● Durch ein Symbol wird im Display der Zwei-Geräte-Betrieb
angezeigt.
● Eine vom anderen Fahrgerät gerade benutzte Lok kann nicht
aufgerufen werden.
● Ohne Master-Einheit ist kein Betrieb möglich.
● Immer die Mobile Station mit dem größeren Ausgangsstrom
(1,9 A anstatt 1,2 A) als Master-Einheit verwenden.
● Nie mehrere Anschlussgleise 24088 oder Anschluss-
boxen 60115 verwenden.
Vorsicht: An dem Gleis, an dem die Mobile Station angeschlossen ist, darf zu keiner Zeit eine Fremdspannung
anliegen. Daher ist es nicht erlaubt eine Übergangsstelle
zu einem anderen Betriebssystem (Wechselspannung,
Märklin Digital etc.) einzubauen.
(=> Anhang O)
Vorsicht: Der Transformator für die Mobile Station darf
nicht gleichzeitig auch für die Versorgung von Zubehörartikel verwendet werden. Sie benötigen hierfür unbedingt
einen separaten Transformator.
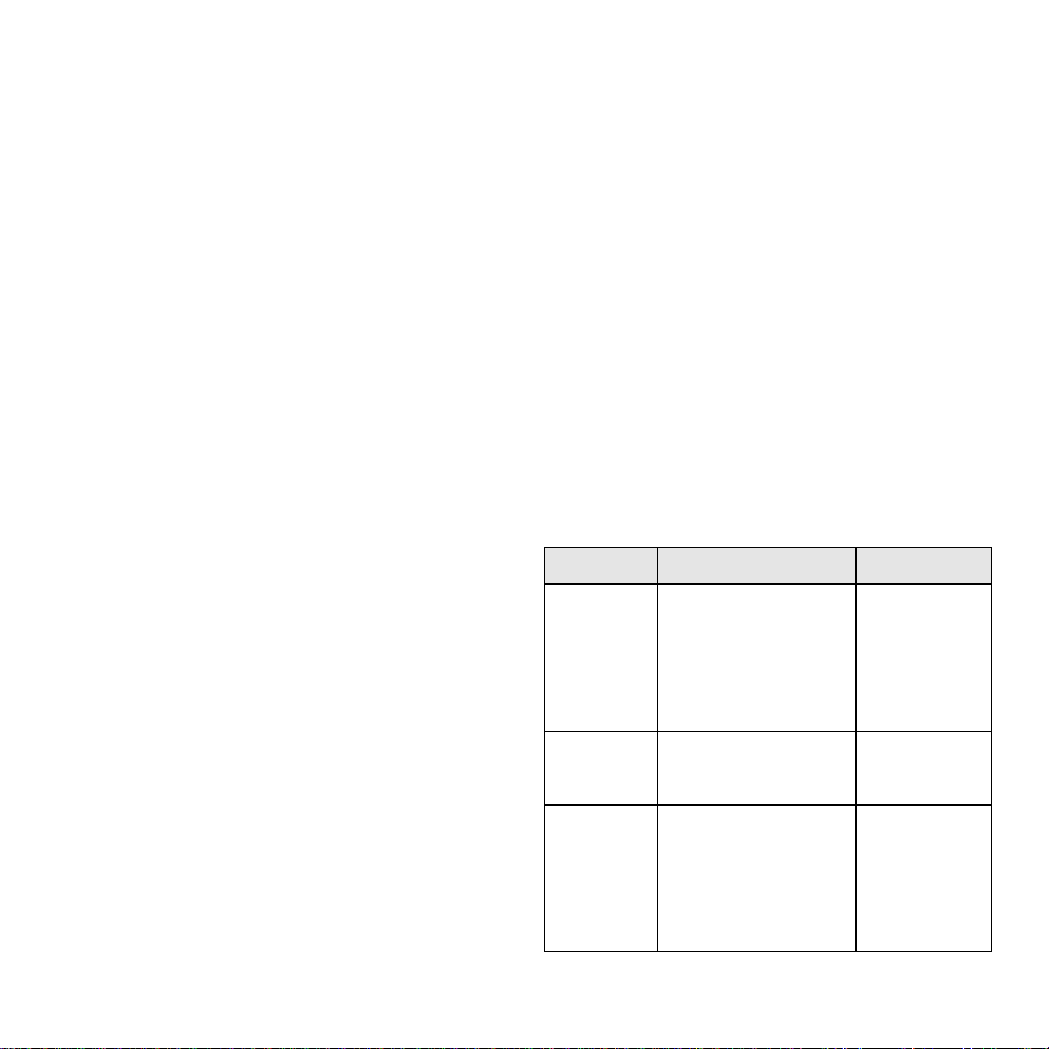
Fehleranzeige
9
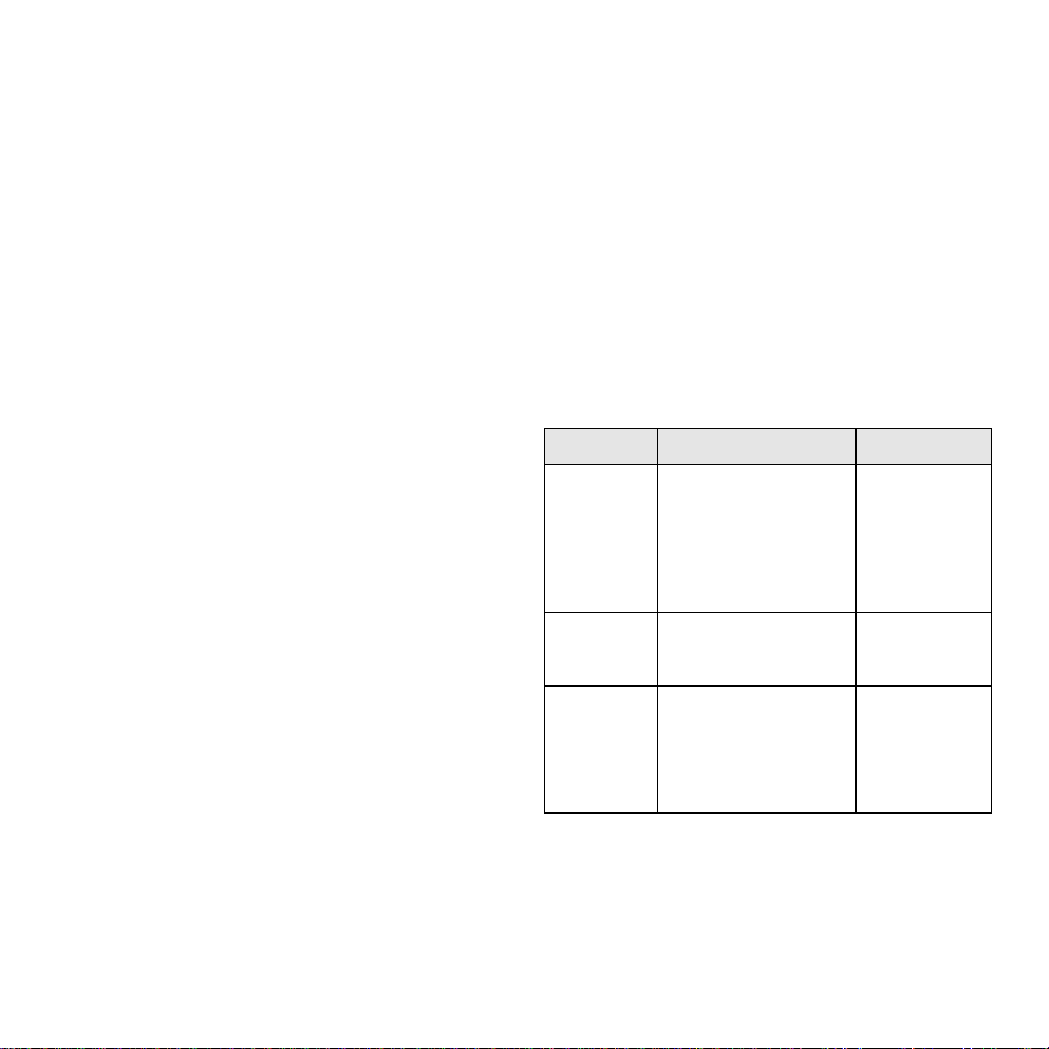
Anzeige Beschreibung Maßnahmen
ADR.FEHLER – Adresse ändern.
– Lok aus der
Lokliste löschen.
LISTE VOLL – Lok(s) aus der
Lokliste löschen.
LOKAKTIV – Zurück in die
Bedienebene
und Lok anhalten.
Lokadresse identisch mit
einem anderen Eintrag
in der Lokliste. In diesem
Fall ist die Lok zwar in
der Lokliste vorhanden
aber ohne Zugriffsmöglichkeit.
Die Lokliste besitzt die
maximale Anzahl an
Einträgen.
Die gewünschte Funktion
(Beispiel Lok aus der
Lokliste löschen) kann
nicht ausgeführt werden,
da die Lok noch einen
Fahrbefehl > 0 besitzt.
Possible Uses for the Mobile Station
60652 individual controller, controller from 1 Gauge starter sets:
● Suitable for Märklin H0 and 1 Gauge.
● Maximum output current:1.9 amps (with 60052 Transformer).
● Connections only by means of special connector box.
● Number on the base of the controller: “60651” (!)
Controller from Märklin H0 starter sets:
● Suitable for Märklin H0.
● Maximum output current: 1.2 amps (with 60052 Transformer).
● Connections only by means of special connector box.
● Number on the base of the controller: “60652”.
The output current is sufficient for 2 – 3 locomotives in operation.
The number of locomotives that can be run may be lower due to
cars with interior lighting, smoke generators that are on, sound
effects modules that are on, etc. The Central Station is the
suitable operating system for layouts with several users. The
Mobile Station can be used here as a locomotive controller.
Connections for the Mobile Station
1. Check to make sure that the power cord(s) for the layout are
unplugged from the wall outlet.
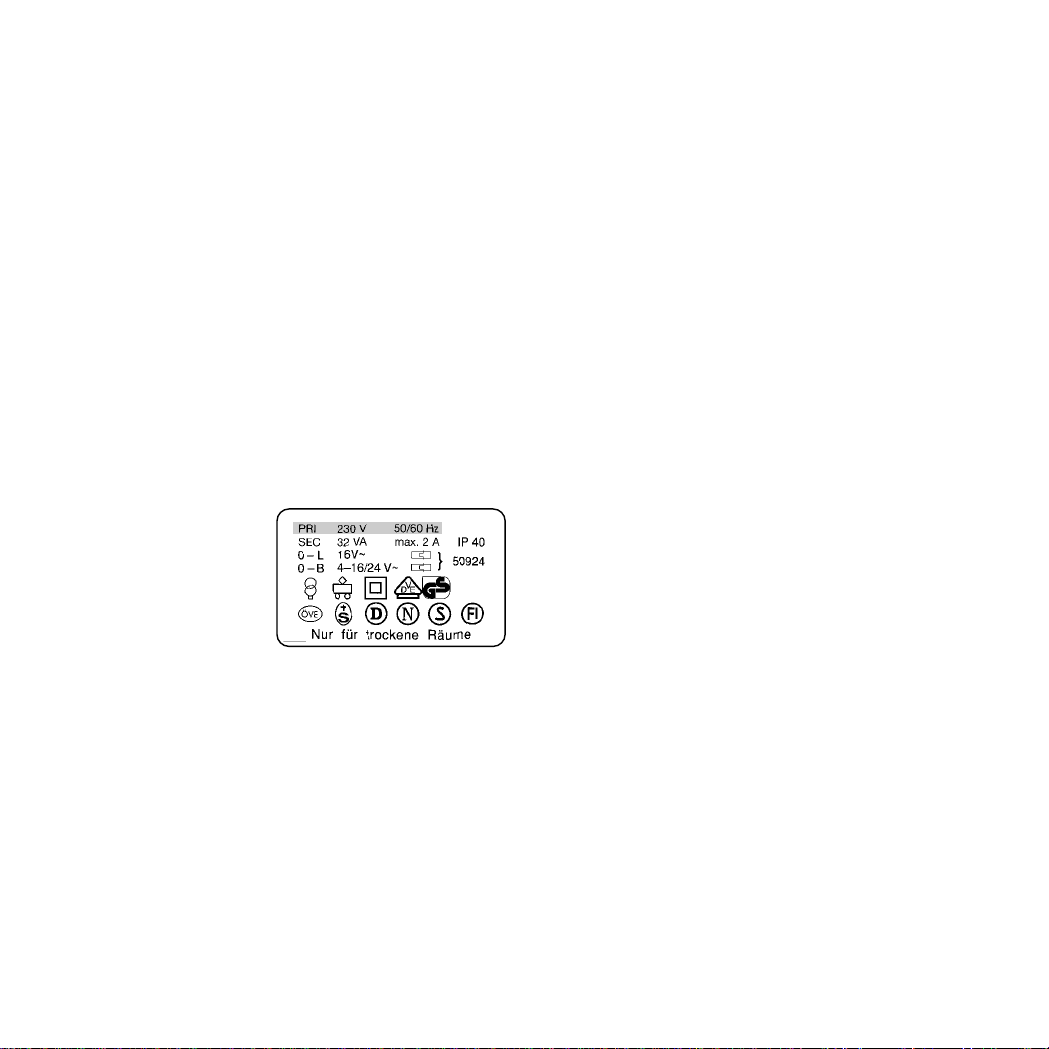
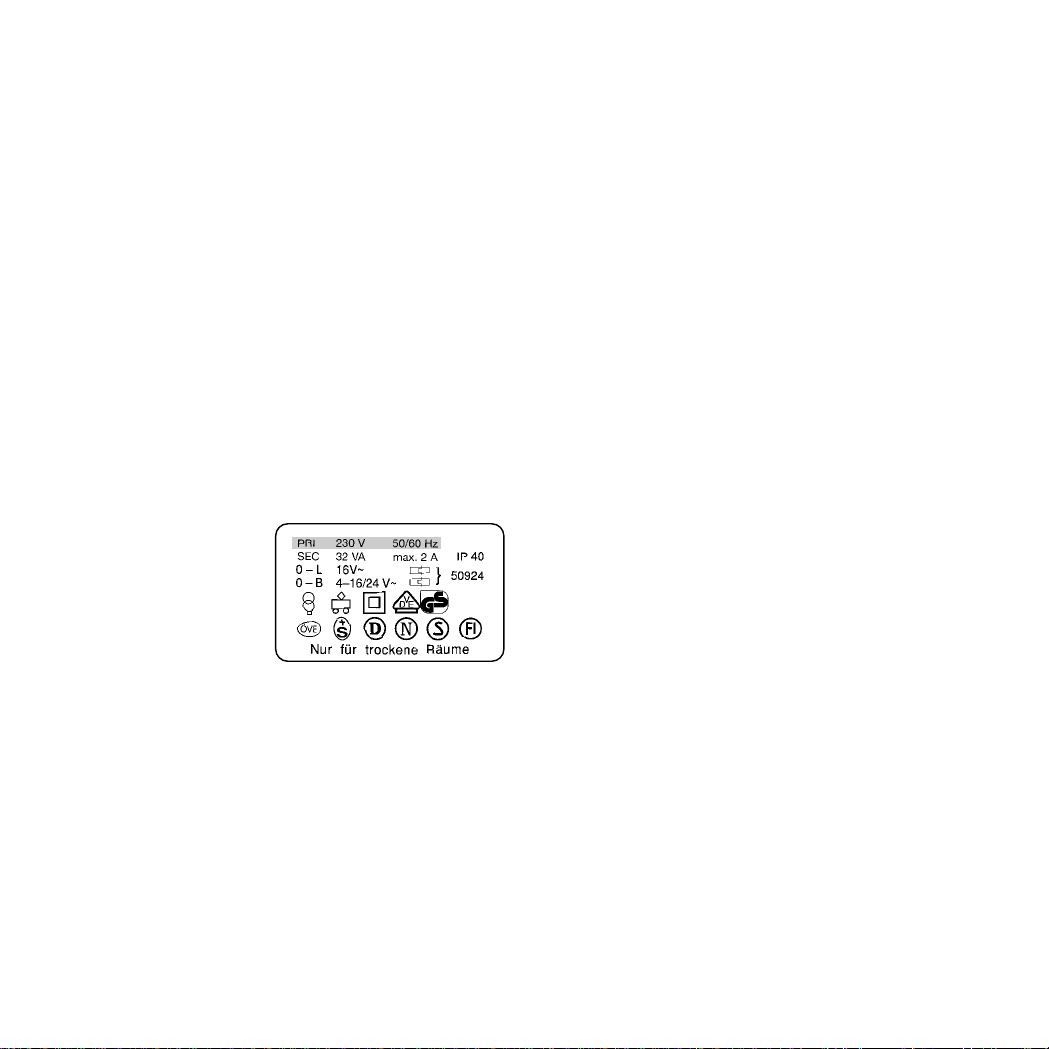
2. Check to make sure that the
transformer or the power
pack is the right one for
your household electrical
current (value of the input
voltage, value of the frequency). This information
can be found on the specification plate for the transformer / power pack.
3. Plug in the Mobile Station. The first Mobile Station must be
connected to the left 10-pin socket on the connector box.
4. Connect the transformer or power pack to the connector box.
(=> Appendix A)
Starting Operation
Mobile Station after the power cord for the power pack / transformer is plugged into the wall outlet:
1. Short phase while the system is being turned on (“MÄRKLIN”
appears in the display).
2. Mobile Station switches directly to the operation mode.
(=> Appendix B)
On the Mobile Station the locomotives to be controlled are
selected from a locomotive list. Since the Mobile Station comes
from the factory with no entries in the locomotive list, the display
goes directly to the entry of locomotives into the locomotive list.
(“NEW LOC”). The Mobile Station that comes with the starter sets
comes from the factory with entries already in its locomotive list.
Putting a Locomotive into the Locomotive List
Possibility A: mfx locomotives automatically register themselves.
Possibility B: The locomotive is taken from the database.
Possibility C: The locomotive is entered by means of its address.
Possibility A:
Place a locomotive with a built-in mfx decoder on the track before
turning the layout on. During the period in which the system is
turning itself on, the mfx locomotive transfers its data to the
Mobile Station. As soon as the Mobile Station is ready for operation, this locomotive can be selected from the locomotive list.
(=> Appendix C)
Important: If the locomotive list has 10 entries, then no other
locomotive can be placed into the locomotive list. In this situation
one entry must be deleted (=> Page 12) and then the mfx locomotive can be registered again.
Possibility B:
1. Press the Menu/ESC button.
2. Tur n the speed control knob until “NEW LOC” appears
in the display.
3. Press on the speed control knob.
4. Tur n the speed control knob until “DATABASE” appears
in the display.
5. Press on the speed control knob.
6. Tur n the speed control knob until the item number for the
locomotive appears in the display.
7. Press the Locomotive/OK button. The display will change
back on its own to the operating level.
(=> Appendix D)
Possibility C:
1. Press the Menu/ESC button .
2. Tur n the speed control knob until “NEW LOC” appears
in the display.
3. Press on the speed control knob.
4. Tur n the speed control knob until “ADDRESS” appears
in the display.
5. Press on the speed control knob.
10

6. Tur n the speed control knob until the address for the locomotive appears in the display.
7. Press on the speed control knob.
8. Tur n the speed control knob until the desired symbol appears
in the display.
9. Press the Locomotive/OK button. The display will change
back on its own to the operating level.
(=> Appendix E)
Tip: The address or the name in the display can be changed for
all entries in the locomotive list (Page 11/12). This means that
you can change entries from the database for other applications.
Controlling the Locomotive
Tur n the speed control knob to the right
– the locomotive goes faster.
Tur n the speed control knob to the left
– the locomotive goes slower.
The bar in the speed indicator changes with the new speed
that has been set.
Press on the speed control knob – the direction of travel changes.
At the same time the direction of travel indicator and the
direction of the bar in the speed indicator changes.
Pressing auxiliary function buttons
– the function assigned to that button is turned on.
Please Note:
● The auxiliary functions (if they are present in the locomotive)
for locomotives from the database are shown as a graphic
symbol in the display. Only these functions can be tur ned on.
● Headlights are mostly turned on with the separate headlight
button.
● Locomotives that are set up in the locomotive list with an
address have no graphic symbol in the display. In this situation
the headlight button is used for the auxiliary function “function”
and the 4 auxiliary function buttons to the left of the display
are used for the auxiliary functions f1, f2, f3, and f4 (from top
to bottom).
Changing the Locomotive
1. Press the LOCOMOTIVE/OK button.
2. Tur n the speed control knob until the desired locomotive
appears in the display.
3. Press the LOCOMOTIVE/OK button.
(=> Appendix F)
Now the newly selected locomotive can be controlled. The last
locomotive called up before th is will continue to run with the last
operating commands sent to it!
Emergency Stop
Press the STOP button: The power is not off to the layout.
All locomotives and trains will come to a halt. “STOP” will appear
in the display.
Pressing the Stop button again will turn the power to the layout
on again.
Important: When there is a short circuit or when the system is
overloaded, the system switches to the STOP status on its own.
Correct the problem in this case and try to resume operation by
pressing the Stop button. If the system shuts down again, then
the problem has not been corrected yet!
Changing Locomotive Data
Requirement:
The locomotive has been entered into the locomotive list.
For locomotives with the address set by means of the Mobile
Station: Only this locomotive may be in the area controlled and
powered by the Mobile Station.
No change of address is required for locomotives with an
mfx decoder. As such, this setting option is not available
for these products.
Changing the Address
1. Stop the locomotive.
2. Press the Menu/ESC button.
3. Tur n the speed control knob until “EDIT LOC” appears
in the display.
4. Press on the speed control knob.
5. Tur n the speed control knob until “ADDRESS” appears
in the display.
6. Press on the speed control knob.
7. Tur n the speed control knob until the new desired address
for the locomotive appears in the display.
8. Press on the speed control knob.
On locomotives with coding switches, the new desired address
must be set on the decoder.
(=> Appendix G)
The following only applies to locomotives, whose address can
be set with the Mobile Station:
9. The question “PROG LOC?” will appear in the display. Press
the Menu/ESC button: The address is only changed in the
locomotive entry. Press on the speed control knob: The locomotive address is changed according to the data transmission.
(=> Appendix H)
11

Important: Point 9 only works if the locomotive is ready for it, when
the locomotive is being powered by the Mobile Station, the locomotive has perfect electrical contact, and no other locomotives
are in the area of track being powered by this Mobile Station.
Changing the Designation in the Display
Requirement: The locomotive data to be changed are shown
in the display.
1. Press the Menu/ESC button.
2. Tur n the speed control knob until “EDIT LOC” appears
in the display.
3. Press on the speed control knob.
4. Turn the speed control knob until “NAME” appears in the display.
5. Press on the speed control knob.
6. Tur n the speed control knob and change the first letter
in the process.
7. A Press on the speed control knob. Now the 2nd letter can
be turned by running the speed control knob.
8. Continue with the following commands:
Pressing on the speed controlknob: Moves one position forward.
Pressing the Menu/ESC button: Moves one position back.
Pressing the LOCOMOTIVE/OK button: Accepts the new
designation.
(=> Appendix I)
Maximum recommended length for a designation: 10 letters.
Tip: Letters can be deleted by overwriting them with another
character. BLANK spaces (“❚”) at the end of the entry are automatically deleted when the entry is applied.
Deleting a Locomotive from the Locomotive List
Requirement: Speed Level = 0 (locomotive stopped)
1. Press the LOCOMOTIVE/OK button.
2. Turn the speed control knob until the locomotive to be deleted
appears in the display.
3. Press the LOCOMOTIVE/OK button.
4. Press the Menu/ESC button.
5. Tur n the speed control knob until “DELETE LOC” appears
in the display.
6. Pressing on the speed control knob. The confirmation question
“DELETE LOC?” will appear in the display.
7. Exit by pressing on the LOCOMOTIVE/OK button.
(=> Appendix J)
OPTIONS
The language version can be set in this area, and the entire
Mobile Station can be returned to the default settings. The submenu “INFO” is only the Märklin Service Department for repairs
and is not set up for end users.
Language Version
Languages that can be set: German, English, French, Dutch
1. Press the Menu/ESC button.
2. Tur n the speed control knob until “SETUP” appears
in the display.
3. Press on the speed control knob.
4. Tur n the speed control knob until “LANGUAGE” appears
in the display.
5. Press on the speed control knob.
6. Tur n the speed control knob until the desired language
appears in the display.
7. Press the LOCOMOTIVE/OK button.
(=> Appendix K)
PRESET
Important: When a PRESET is carried out of all of the locomotive data in the list (including changes / address, name) are lost!
With a Mobile Station from a starter set, the data set at the factory for the locomotive(s) from the starter set are written into the
list again, when a PRESET is carried out.
1. Press the Menu/ESC button.
2. Tur n the speed control knob until “SETUP” appears
in the display.
3. Press on the speed control knob.
4. Tur n the speed control knob until “PRESET” appears
in the display.
5. Press on the speed control knob.
6. The confirmation question “PRESET?” will appear in the display. Pressing the LOCOMOTIVE/OK button: Reset is carried
out. Pressing the Menu/ESC button several times will return
you to the main operation level without the Reset being
carried out.
Important: If you press the STOP button and the speed
control knob simultaneously for longer than 1 second
when turning on the power supply to the Mobile Station,
this will cause a PRESET without a safety inquiry to be
carried out directly!
12
Setting Other Locomotive Parameters
The setting only works with mfx locomotives or locomotives with a
decoder that can be set with data. In some cases, these decoders
only have some of the following possibilities for setting parameters.
Possible Settings:
VMAX – Maximum Speed
ACC – Acceleration
DEC – Braking Delay
VOL – Volume
PRESET – Return the locomotive decoder to the factory
default data
Important: Do not confuse the “PRESET” for the locomotive
decoder (submenu EDIT LOC) with the “PRESET” for the Mobile
Station (submenu OPTIONS).
1. Press the Menu/ESC button.
2. Tur n the speed control knob until “EDIT LOC” appears
in the display.
3. Press on the speed control knob.
4. Tur n the speed control knob until “VMAX”, “ACC”, “DEC”,
“VOL” or “PRESET” (depending on the desired change)
appear in the display.
5. Press on the speed control knob.
6. The menu symbol will appear in the display and a setting bar
beneath it. Tur n the setting bar on the speed control knob
without changes. Small bar: lower maximum speed, shorter
delay, etc.,a longer bar means the opposite of the various values.
7. Press on the speed control knob to accept the new setting.
Under no circumstances is the power supply to be interrupted in
the period of time that comes after this (“PROG” in the display).
(=> Appendix M)
Difference in the submenu RESET starting at Step 6.
6. The confirmation question “PRESET?” will appear in the display. Press on the speed control knob: PRESET is carried out.
Under no circumstances is the power supply to be interrupted in
the period of time that comes after this (“PROG” in the display).
Using a Second Mobile Station
A second Mobile Station can only be connected to the system
with an adapter cable (item no. 610 479). The connection
socket for the second Mobile Station is the center socket on
the connector box.
Important: Technical designation for the main controller
(left socket): Master
Designation for the second controller: Slave
Connections: => Appendix N
After the system is turned on:
● The second controller receives data from the main controller
(locomotive list). The second controller’s locomotive list cannot
be accessed in this situation.
● The second controller is shown in the display with a symbol.
● A locomotive already in use by one controller cannot be called
up on another controller.
● No operation is possible with a Master controller.
● Always use the Mobile Station with the greater output current
(1.9 amps instead of 1.2 amps) as the master controller.
● Never use several 24088 feeder tracks or 60115 con-
nector boxes.
Caution: No external voltage ever must be applied to the
track to which the Mobile Station is connected. As such,
it is not permitted to install a junction point to another
operating system (alternating voltage, Märklin Digital etc.).
(=> Appendix O)
Caution: The transformer for the Mobile Station may not
be used to simultaneously power accessory articles.
These require a separate transformer.
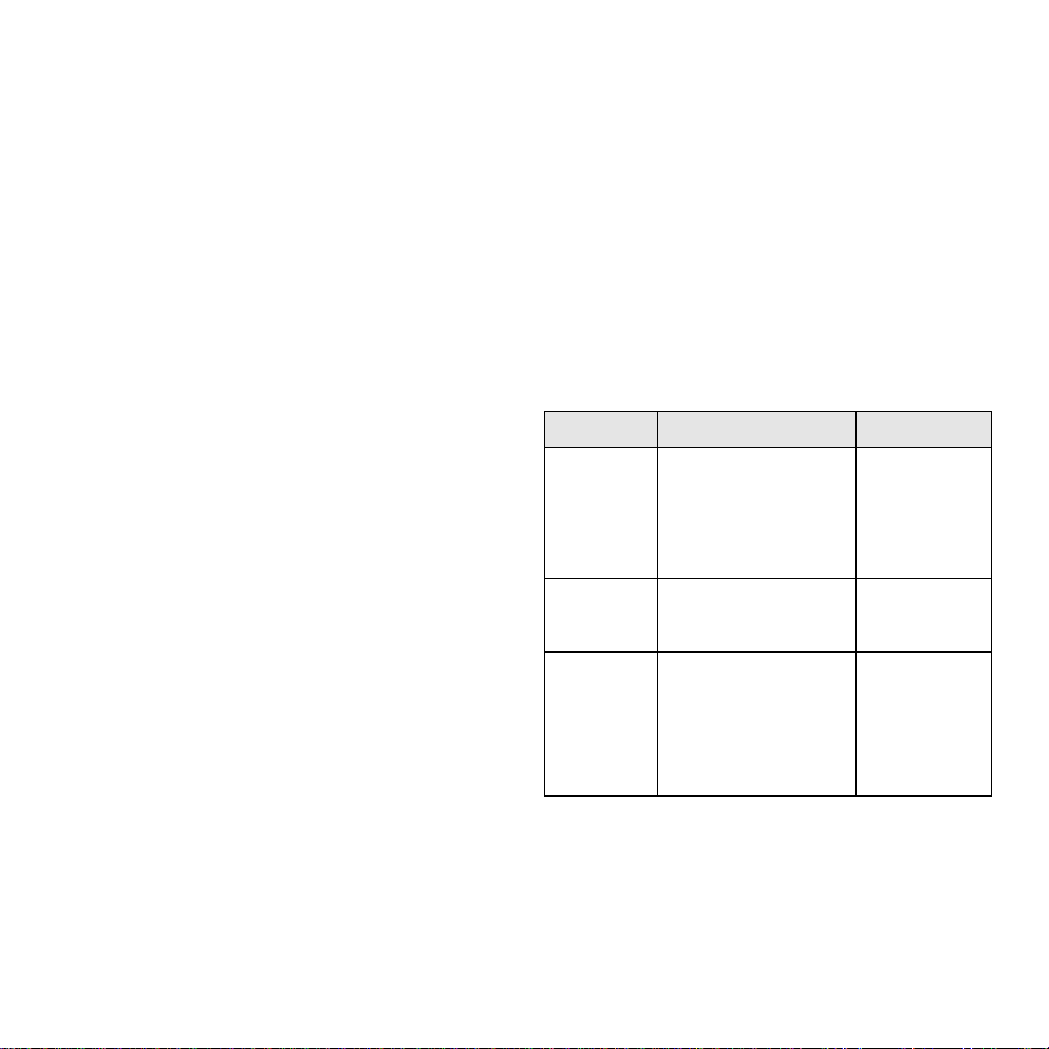
Error Display
13
Indication Description What to do
ADDR.USED – Change address.
– Delete locomo-
tive from the
locomotive list.
LIST FULL – Delete locomo-
tive(s) from the
locomotive list.
LOC USED – Return to the
operating level
and stop the
locomotive.
Locomotive address identical with another entry in
the locomotive list. In this
situation the locomotive is
present in the locomotive
list but without any possibility of accessing it.
The locomotive list has
the maximum number
of entries.
The desired function
(example: deleting a locomotive from the locomotive
list) can not be done,
since the locomotive still
has an operating command greater than 0.
Possibilités d’utilisation de la Mobile Station
Appareil séparé 60652, provenant des coffrets de démarrage
échelle 1:
● Convient pour Märklin H0 et 1.
● Intensité maximale de sortie:1,9A (avec transformateur 60052).
● Connexion uniquement via boîte de connexion spéciale.
● Numéro au dessous de l’appareil: „60651“ (!)
Appareil provenant des coffrets de démarrage Märklin H0:
● Convient à Märklin H0.
● Intensité maximale de sortie:1,2A (avec transformateur 60052).
● Connexion uniquement via boîte de connexion spéciale.
● Numéro au dessous de l’appareil: „60652“.
L’intensité de sortie est suffisante pour alimenter 2 à 3 locomotives
en marche. Ce nombre peut diminuer en cas de générateurs
fumigènes activés, de bruiteurs activés, de rame tractée comprenant des voitures éclairées, etc. La Central Station est l’appareil
idéal pour des réseaux comprenant davantage de consommateurs. La Mobile Station peut dans ce cas être utilisée comme
régulateur auxiliaire.
Raccordement de la Mobile Station
1. Vérifiez si la fiche du câble d’alimentation électrique est retirée
de la prise de courant domestique.
2. Vérifiez si le transformateur
ou éventuellement le blocsecteur est adapté à votre
réseau domestique (tension
d’entrée et fréquence). Les
données techniques sont
inscrites sur la plaque
d’identification du transformateur ou le bloc-secteur.
3. Enfichez la Mobile Station. La première Mobile Station doit être
raccordée à la prise gauche à 10 pôles de la boîte de connexion.
4. Connectez le transformateur ou le bloc-secteur à la boîte de
connexion.
(=> Annexe A)
Mise en service
Mobile Station après enfichage de la fiche du câble d’alimentation
électrique du bloc-secteur / transformateur dans la prise de
courant domestique.
1. Courte phase d’activation (sigle „MÄRKLIN“ sur l’écran).
2. La Mobile Station passe directement en mode d’exploitation.
(=> Annexe B)
La Mobile Station vous permet de sélectionner les locomotives
à piloter dans une liste de locomotives. Etant donné que la
Mobile Station, à sa sortie d’usine, ne comporte aucune entrée
dans sa liste de locos, l’écran affiche directement la commande
„NOUV LOC“ (= entrer une loco dans la liste de locos). A noter
que la Mobile Station contenue dans les coffrets de démarrage
contient déjà des entrées dans la liste des locos.
Prise en charge d’une locomotive
dans la liste des locos
Possibilité A:
Les locomotives avec décodeur mfx s’annoncent d’elles-mêmes.
Possibilité B:
Sélectionner la locomotive dans la banque de données.
Possibilité C:
Sélectionner la locomotive en introduisant son adresse.
Possibilité A:
Avant de mettre le réseau sous tension, posez la locomotive
équipée d’un décodeur mfx sur la voie. Durant la mise sous
tension, la loco mfx transmet ses données à la Mobile Station.
Dès que la Mobile Station est prête à fonctionner, vous pouvez
sélectionner cette loco dans la liste de locos.
(=> Annexe C)
Remarque: Si la liste de locos possède 10 entrées, elle
ne pourra plus accueillir de nouvelles entrées. Dans ce cas,
effacez une entrée (=> page 16) afin de permettre à une nouvelle
loco mfx de s’annoncer.
Possibilité B:
1. Pressez la touche Menu/ESC.
2. Tournez le régulateur jusqu’à ce qu’apparaisse „NOUV LOC“.
3. Pressez le régulateur.
4. Tournez le régulateur jusqu’à ce qu’apparaisse „BANQUE LOC“.
5. Pressez le régulateur.
6. Tournez le régulateur jusqu’à ce qu’apparaisse le numéro
d’article de la loco.
7. Pressez la touche Loc/OK. L’annonce retourne automatiquement en mode pilotage.
(=> Annexe D)
Possibilité C:
1. Pressez la touche Menu/ESC.
2. Tournez le régulateur jusqu’à ce qu’apparaisse „NOUV LOC“.
3. Pressez le régulateur.
14

4. Tournez le régulateur jusqu’à ce qu’apparaisse „ADRESSE“.
5. Pressez le régulateur.
6. Tournez le régulateur jusqu’à ce qu’apparaisse l’adresse
de la loco.
7. Pressez le régulateur.
8. Tournez le régulateur jusqu’à ce qu’apparaisse le symbole
souhaité.
9. Pressez la touche Loc/OK. L’annonce retourne automatiquement en mode pilotage.
(=> Annexe E)
Astuce: L’adresse ou le nom affiché sur l’écran peut être modifié
pour toutes les entrées de la liste de locos (page 15/16).
Les entrées prélevées dans la banque de données peuvent
également être modifiées pour d’autres utilisations.
Pilotage d’une locomotive
Tournez le bouton du régulateur vers la droite
– la loco roule plus vite.
Tournez le bouton du régulateur vers la gauche
– la loco roule plus lentement.
La barre de l’indicateur de vitesse se modifie selon la nouvelle vitesse théorique.
Pressez le régulateur – le sens de marche s’inverse.
Simultanément, l’indicateur de sens de marche et le sens
de la barre de l’indicateur de vitesse se modifient.
Pressez une touche de fonction
– la fonction correspondante est commutée.
Tenez compte de ceci:
● Avec les locos de la banque de données, les fonctions sont
affichées graphiquement (pour autant que ces fonctions correspondent chacune à un dispositif présent dans le modèle
réduit). Seules ces fonctions peuvent être commutées.
● Le plus souvent, l’éclairage des feux peut être commuté
à l’aide de la touche éclairage séparée.
● Les locomotives qui ont été organisées dans la liste de locos
selon l’adresse, ne possèdent aucun affichage des fonctions.
Dans ce cas, la touche éclairage équivaut à la fonction „function“
et les 4 touches de fonction situées à gauche de l’écran équivalent aux fonctions f1, f2, f3 et f4 (du haut vers le bas).
Changement de locomotive
1. Pressez la touche Loc/OK.
2. Tournez le régulateur jusqu’à ce qu’apparaisse la loco souhaitée.
3. Pressez la touche Loc/OK.
(=> Annexe F)
Vous pouvez ensuite piloter la loco nouvellement sélectionnée.
La loco appelée précédemment continue de rouler selon la
dernière information de marche reçue!
Arrêt d’urgence
Pressez la touche „STOP“: le réseau est mis hors tension. Tous
les véhicules sont arrêtés. Sur l’écran apparaît l’annonce „STOP“.
Une nouvelle pression sur la touche „STOP“ remet le réseau
sous tension.
Remarque: En cas de court-circuit ou de surcharge, le système
se met automatiquement en arrêt d’urgence. Eliminez la cause
du court-circuit ou de la surcharge et tentez ensuite de remettre
sous tension le réseau en pressant la touche „STOP“. Si le
système déclenche de nouveau, c’est que vous n’avez pas
encore éliminé la cause!
Modification des données d’une locomotive
Condition:
La loco est reprise dans la liste de locos.
Pour toute loco encodée avec son adresse via la Mobile Station:
seule cette loco peut se trouver dans la zone alimentée par la
Mobile Station.
Aucun changement d’adresse n’est nécessaire sur les
locomotives équipées d’un décodeur mfx. Par conséquent,
il n’y aucune possibilité de réglage pour ces produits.
Modification de l’adresse
1. Arrêtez la loco.
2. Pressez la touche Menu/ESC.
3. Tournez le régulateur jusqu’à ce qu’apparaisse „MODIF LOC“.
4. Pressez le régulateur.
5. Tournez le régulateur jusqu’à ce qu’apparaisse „ADRESSE“.
6. Pressez le régulateur.
7. Tournez le régulateur jusqu’à ce qu’apparaisse la nouvelle
adresse souhaitée.
8. Pressez le régulateur.
En ce qui concerne les locos avec clavier de codage, la nouvelle
adresse doit être encodée à l’aide du clavier du décodeur.
(=> Annexe G)
Uniquement pour les locos dont l’adresse peut être encodée
via la Mobile Station:
9. Sur l’écran apparaît la question „PROG LOC?“.
Pressez la touche Menu/ESC: l’adresse est changée seulement dans l’entrée de loco.
Pressez le régulateur: l’adresse de loco est modifiée par
transfert de données.
(=> Annexe H)
15

Remarque: si la loco est préparée à cela, l’étape 9 ne fonctionne
que si elle est alimentée par la Mobile Station, qu’elle possède
des contacts en bon état et qu’aucune autre loco ne se trouve
dans la zone alimentée.
Modification de la désignation sur l’écran
Condition: L’écran affiche les données de loco à modifier.
1. Pressez la touche Menu/ESC.
2. Tournez le régulateur jusqu’à ce qu’apparaisse „MODIF LOC“.
3. Pressez le régulateur.
4. Tournez le régulateur jusqu’à ce qu’apparaisse „NOM“.
5. Pressez le régulateur.
6. Tournez le régulateur et modifiez la première lettre.
7. Pressez le régulateur. Vous pouvez maintenant modifier la
seconde lettre en tournant le régulateur.
8. Poursuivez avec les ordres suivants:
Presser le régulateur: passage sur la position en avant.
Presser la touche Menu/ESC:passage sur la position en arrière.
Presser la touche Loc/OK: acceptation de la nouvelle
désignation.
(=> Annexe I)
Longueur maximale recommandée de la désignation: 10 lettres.
Conseil: les lettres peuvent être supprimées en les écrasant par
un autre caractère. Les caractères ESPACE (“❚”) figurant après
la saisie sont effacés lors de la reprise de l’entrée.
Effacement d’une locomotive ans la liste de locos
Condition: Cran de vitesse = 0 (loco à l’arrêt).
1. Pressez la touche Loc/OK.
2. Tourner le régulateur jusqu’à ce qu’apparaisse la locomotive
à effacer de la liste.
3. Pressez la touche Loc/OK.
4. Pressez la touche Menu/ESC.
5. Tournez le régulateur jusqu’à ce qu’apparaisse „SUPPR LOC“.
6. Pressez le régulateur. L’écran affiche la question de sécurité
„SUPPR LOC?“
7. Quittez en pressant la touche Loc/OK.
(=> Annexe J)
OPTIONS
Ici, vous pouvez choisir la langue et réintroduire les réglages
d’origine dans la Mobile Station. Le sous-menu „INFO“ est
réservé aux services de réparation et ne peut être utilisé par
l’utilisateur final.
Langue
Langages utilisables: Allemand, anglais, français, néerlandais.
1. Pressez la touche Menu/ESC.
2. Tournez le régulateur jusqu’à ce qu’apparaisse „OPTIONS.
3. Pressez le régulateur.
4. Tournez le régulateur jusqu’à ce qu’apparaisse „LANGUE.
5. Pressez le régulateur.
6. Tournez le régulateur jusqu’à ce qu’apparaisse la langue
souhaitée.
7. Pressez la touche Loc/OK.
(=> Annexe K)
RESET
Important: Toutes les données de locos répertoriées dans la liste
(y compris les modifications, adresses et noms) seront perdues
lors d’un reset! S’il s’agit d’une Mobile Station provenant d’un
coffret de démarrage, les données encodées en usine seront
réintroduites dans la liste de locos.
1. Pressez la touche Menu/ESC.
2. Tournez le régulateur jusqu’à ce qu’apparaisse „OPTIONS“.
3. Pressez le régulateur.
4. Tournez le régulateur jusqu’à ce qu’apparaisse „RESET“.
5. Pressez le régulateur.
6. L’écran affiche la question de sécurité „RESET?“.
Presser la touche Loc/OK: le reset est exécuté. En pressant
plusieurs fois la touche Menu/ESC, vous retournez au menu
précédent sans reset.
Important: Lors de la mise sous tension de la Mobile
Station, si la touche STOP et le régulateur sont simultanément pressés pendant plus d’une seconde, un RESET est
exécuté directement sans la question de sécurité!
Réglage d’autres paramètres
Le réglage d’autres paramètres ne peut être exécuté qu’avec les
décodeurs mfx ou les locos équipées d’un décodeur réglable
par propriété. Les décodeurs possèdent en partie seulement
quelques-unes des propriétés suivantes.
Propriétés réglables possibles:
VMAX – Vitesse maximale
ACC – Accélération
DEC – Freinage
VOL – Haut-parleur
RESET – Réintroduction des paramètres d’usine dans le décodeur
16
Important: Ne pas confondre le „RESET“ du décodeur de loco
(sous-menu „MODIF LOC“) avec le „RESET“ de la Mobile Station
(sous-menu „OPTIONS“).
1. Pressez la touche Menu/ESC.
2. Tournez le régulateur jusqu’à ce qu’apparaisse „MODIF LOC“.
3. Pressez le régulateur.
4. Tour nez le régulateur jusqu’à ce qu’apparaisse „VMAX“, „ACC“,
„DEC“, „VOL“ ou „RESET“ (selon la modification désirée).
5. Pressez le régulateur.
6. Sur l’écran apparaît le menu et au-dessous une barre de
réglage. Le fait de tourner le régulateur modifie la barre de
réglage. Une barre plus petite: vitesse maximale moindre,
temporisation courte, etc.; une barre plus longue signifie
respectivement le contraire.
7. Pressez le régulateur pour accepter le nouveau réglage.
N’interrompez jamais l’alimentation en courant durant le laps
de temps qui suit (Annonce „PROG“).
(=> Annexe M)
Différence avec le sous-menu RESET à partir de l’étape 6.
6. L’écran affiche la question de sécurité „RESET?“.
Pressez le régulateur: le reset est exécuté. N’interrompez
jamais l’alimentation en courant durant le laps de temps qui
suit (Annonce „PROG“).
Mise en service d’une seconde Mobile Station
Raccordement possible uniquement avec câble d’adaptation
(n° 610 479). La prise située au milieu de la boîte de connexion
est réservée à la connexion d’une seconde Mobile Station.
Remarque:
Désignation technique de l’appareil de commande principal
(prise gauche): Master.
Désignation technique du second appareil de commande: Slave.
Connexion: => Annexe N
Après mise sous tension:
● Le second appareil contient des informations provenant de
l’appareil principal (liste de locos). La liste de locos propre au
second appareil de commande ne peut donner lieu à une saisie.
● Le second appareil de commande apparaît sur l’écran sous
forme de symbole.
● Une loco utilisée par d’autres appareils de commande ne
peut pas être appelée.
● Une exploitation est impossible sans unité “Master”.
● Utilisez toujours la Mobile Station comme unité Master avec
le courant de sortie le plus élevé (1,9 A au lieu de 1,2 A).
● N’utilisez jamais le rail d’alimentation 24088 ou la boîte
de connexion 60115.
Attention: à aucun moment, une tension extérieure ne doit
être appliquée sur la voie à laquelle la Mobile Station est
connectée. Par conséquent, il est interdit de réaliser une
liaison avec un autre système d’exploitation (tension alternative, Märklin Digital etc.).
(=> Annexe O)
Attention: le transformateur destiné à la Mobile Station
ne doit pas être utilisé simultanément pour alimenter les
accessoires. Il est impératif d’avoir un autre transformateur.
Annonce d’erreur
17
Annonce Description Remède
ERREUR ADR – Modifiez
l’adresse.
– Effacez la loco
de la liste.
LISTE PLEINE – Effacez une
ou des locos
de la liste.
LOC ACTIVE – Retour en
mode pilotage
et arrêt de la
locomotive.
L’adresse de locomotive
correspond à une autre
entrée dans la liste. Dans
ce cas, la loco figure
déjà dans la liste mais
sans possibilité de saisie.
La liste de locos possède le nombre maximal
d’entrées autorisé.
La fonction souhaitée
(exemple: effacement
d’une loco dans la liste
de locos) ne peut pas
être exécutée, car la loco
a encore un ordre de
marche > 0 à exécuter.
Gebruiksmogelijkheden van het Mobile Station
Los apparaat 60652, apparaat uit Spoor 1 - startsets:
● Geschikt voor Märklin H0 en 1.
● Maximale uitgangstroom: 1,9 A (met Transformer 60052).
● Aansluiten alleen via de speciale aansluitbox.
● Nummer in de bodem van het apparaat: “60651” (!)
Apparaat uit de Märklin H0 - startsets:
● Geschikt voor Märklin H0.
● Maximale uitgangsstroom: 1,2 A (met Transformer 60052).
● Aansluiten alleen via de speciale aansluitbox.
● Nummer in de bodem van het apparaat: “60652”.
De uitgangsstroom is voldoende voor 2-3 rijdende locomotieven.
Door rijtuigen met binnenverlichting, ingeschakelde rookgeneratoren, ingeschakelde geluidsmodules e.d. kan dit aantal verminderen. Voor modelbanen met meerdere verbruikers is het
Central Station beter geschikt. Het Mobile Station kan dan weer
als rijregelaar worden gebruikt.
Mobile Station aansluiten
1. Controleer of de netstekker uit de wandcontactdoos is genomen.
2. Controleer of de transformator resp. de netvoeding
geschikt is voor de
gebruikte netspanning
(waarde van de netspanning, waarde van de frequentie). Deze gegevens
bevinden zich op het typeplaatje op de transformator/
netvoeding.
3. Het Mobile Station aansluiten. Het eerste Mobile Station moet
op de linker 10-polige aansluitbus van de aansluitbox aangesloten worden.
4. Transformator of de netvoeding aan de aansluitbox aansluiten.
(=> Aanhangsel A)
Het in gebruik nemen
Het Mobile Station reageert nadat de stekker van netvoeding/
transformator in de wandcontactdoos is gestoken met:
1. Korte inschakelfase (tekst ”MÄRKLIN” in het display).
2. Mobile Station schakelt direct in de bedrijfsmodus.
(=> Aanhangsel B)
Bij het Mobile Station worden de te besturen locomotieven uit
de loclijst gekozen. Aangezien er vanaf de fabriek geen locomotieven in de loclijst zijn opgenomen, springt de weergave direct
naar de modus voor het invoeren van de locs in de loclijst
(”NIEUWE LOC”). Mobile Stations uit de startsets hebben vanaf
de fabriek al locs in de loclijst.
Loc in de loclijst opnemen
Mogelijkheid A: mfx-locomotieven melden zichzelf aan.
Mogelijkheid B: loc wordt uit de databank overgenomen.
Mogelijkheid C: loc wordt via het adres ingesteld.
Mogelijkheid A:
Loc met ingebouwde mfx-decoder, voor het inschakelen van
de baan, op de rails zetten. Tijdens het inschakelen stuurt de
mfx-loc zijn gegevens naar het Mobile Station. Zodra het
Mobile Station klaar is en in de bedrijfsmodus is gekomen kan
deze loc uit de loclijst gekozen worden.
(=> Aanhangsel C)
Opmerking: als in de loclijst 10 locomotieven zijn opgenomen,
kan er geen nieuwe loc meer in de loclijst opgenomen worden.
In dat geval een locomotief uit de loclijst wissen (=> pag 20)
en daarna de mfx-locomotief weer opnieuw aan laten melden.
Mogelijkheid B:
1. Menu/ESC-toets indrukken.
2. Draairegelaar verdraaien tot ”NIEUWE LOC” verschijnt.
3. Op de draairegelaar drukken.
4. Draairegelaar verdraaien tot ”DATABANK” verschijnt.
5. Op de draairegelaar drukken.
6. Draairegelaar verdraaien tot het artikelnummer van de loc
verschijnt.
7. Lok/OK-toets indrukken. De weergave springt automatisch
terug naar het bedieningsniveau.
(=> Aanhangsel D)
Mogelijkheid C:
1. Menu/ESC-toets indrukken.
2. Draairegelaar verdraaien tot ”NIEUWE LOC” verschijnt.
3. Op de draairegelaar drukken.
4. Draairegelaar verdraaien tot ”ADRES” verschijnt.
5. Op de draairegelaar drukken.
18
 Loading...