

lynx System Developers RadioLynx Quick Start Manual
QUICK START GUIDE
RADIOLYNX WIRELESS START SYSTEM
Lynx System Developers, Inc.
Follow the figures and steps in this guide to connect the RadioLynx components and to configure FinishLynx
If you need additional support, please contact us at: USA (978) 556-9780 or email support@finishlynx.com.
NOTE: Parts 1B and 1C: EtherLynx Vision connections and configurations
Parts 2B and 2C: EtherLynx 2000+, Fusion, and PRO connections and configurations
Parts 3B and 3C: EtherLynx 2000 connections and configurations
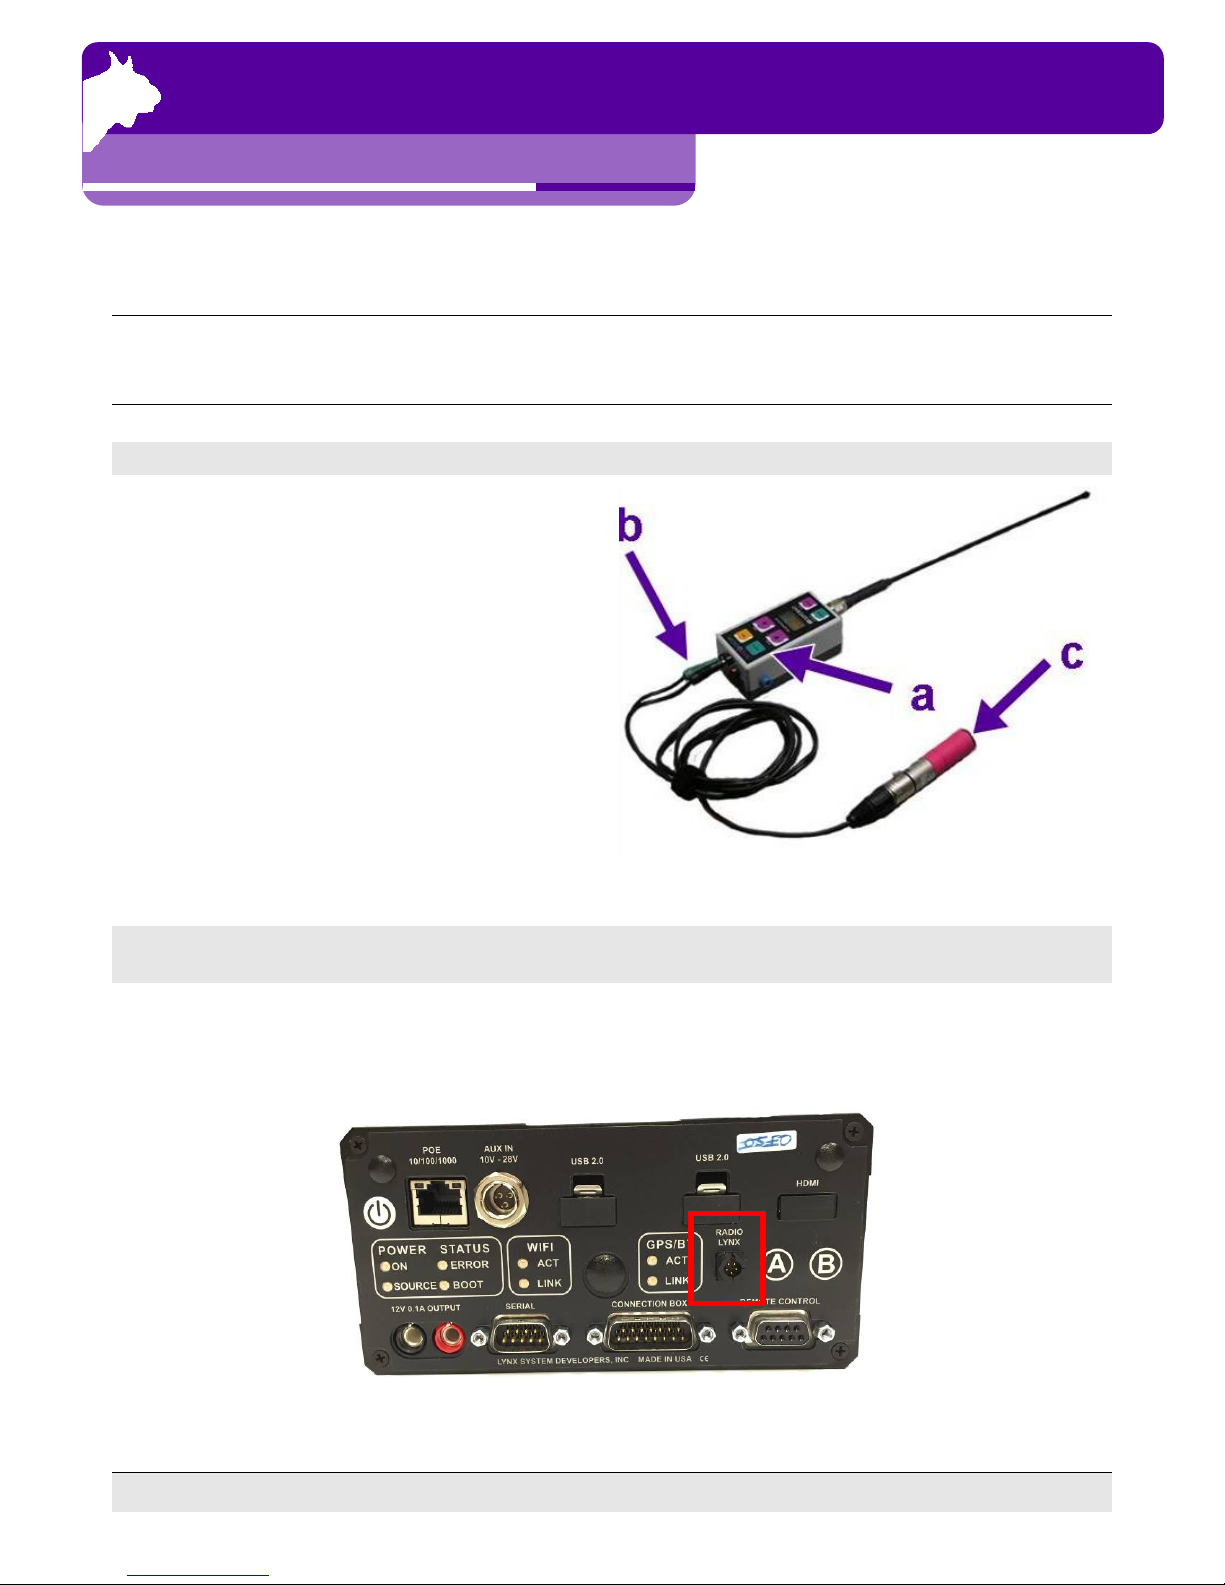
PART 1A: SETTING UP THE RADIOLYNX WIRELESS TRANSMITTER (Starter)
a. ON/OFF button
b. Banana Plug connection: use Green and Black
connectors.
c. Connection to Start Signal Generator: use the
special Normally Open Start Sensor (tipped with
red shrink wrap)
®
.
PART 1B: SETTING UP THE RADIOLYNX WIRELESS RECEIVER
(Vision Camera)
NOTE: For the Vision camera, the Receiver plugs into the RadioLynx Port.
a. Separate the Receiver wire at the black plastic junction.
b. Plug the Radio wire into the RadioLynx Port on the back of the camera.
RadioLynx Wireless Start www.finishlynx.com
support@finishlynx.com 05/2016
1 of 4
a
b
Quick Start Guide
RadioLynx Wireless Start System
PART 1C: CONFIGURING FINISHLYNX
(Vision Camera)
a. With the Ethe rLynx Vision camera set up and
turned on, start FinishLynx. The Hardware
Control screen appears.
b. Click , the information icon. The Camera
Settings dialog box appears.
c. Click the Inputs tab and select the Start Sensor:
None radio button.
d. Click the RadioLynx tab.
e. Select the Port: RadioLynx Port radio button.
f. From the Setup: Id dropdown list, click to select
000.
NOTE: The RadioLynx Transmitter defaults to Channel
0 and Signal Type STA, which corresponds to Id 000
in FinishLynx.
g. Select the Start Sensor radio button.
OPTIONAL: Type a name into the text box provided. If
you're using more than one RadioLynx Transmitter, it
is recommended that you name each one something
different.
e.g. "400 Meter Start," "200 Meter Start," etc.
h. Click Ok.
i. Turn on the RadioLynx Transmitter and confirm
that a start signal is transmitted to FinishLynx by
listening for a beep.
NOTE: Three (3) beeps means the RadioLynx Transmitter batteries need recha rging soon. You have
approximately 50 start signals remaining after the first triple beep. To view the battery level on the LCD, press
the ON/OFF button once.
PART 2B: SETTING UP THE RADIOLYNX WIRELESS RECEIVER
(EtherLynx 2000+, Fusion, PRO Ca meras)
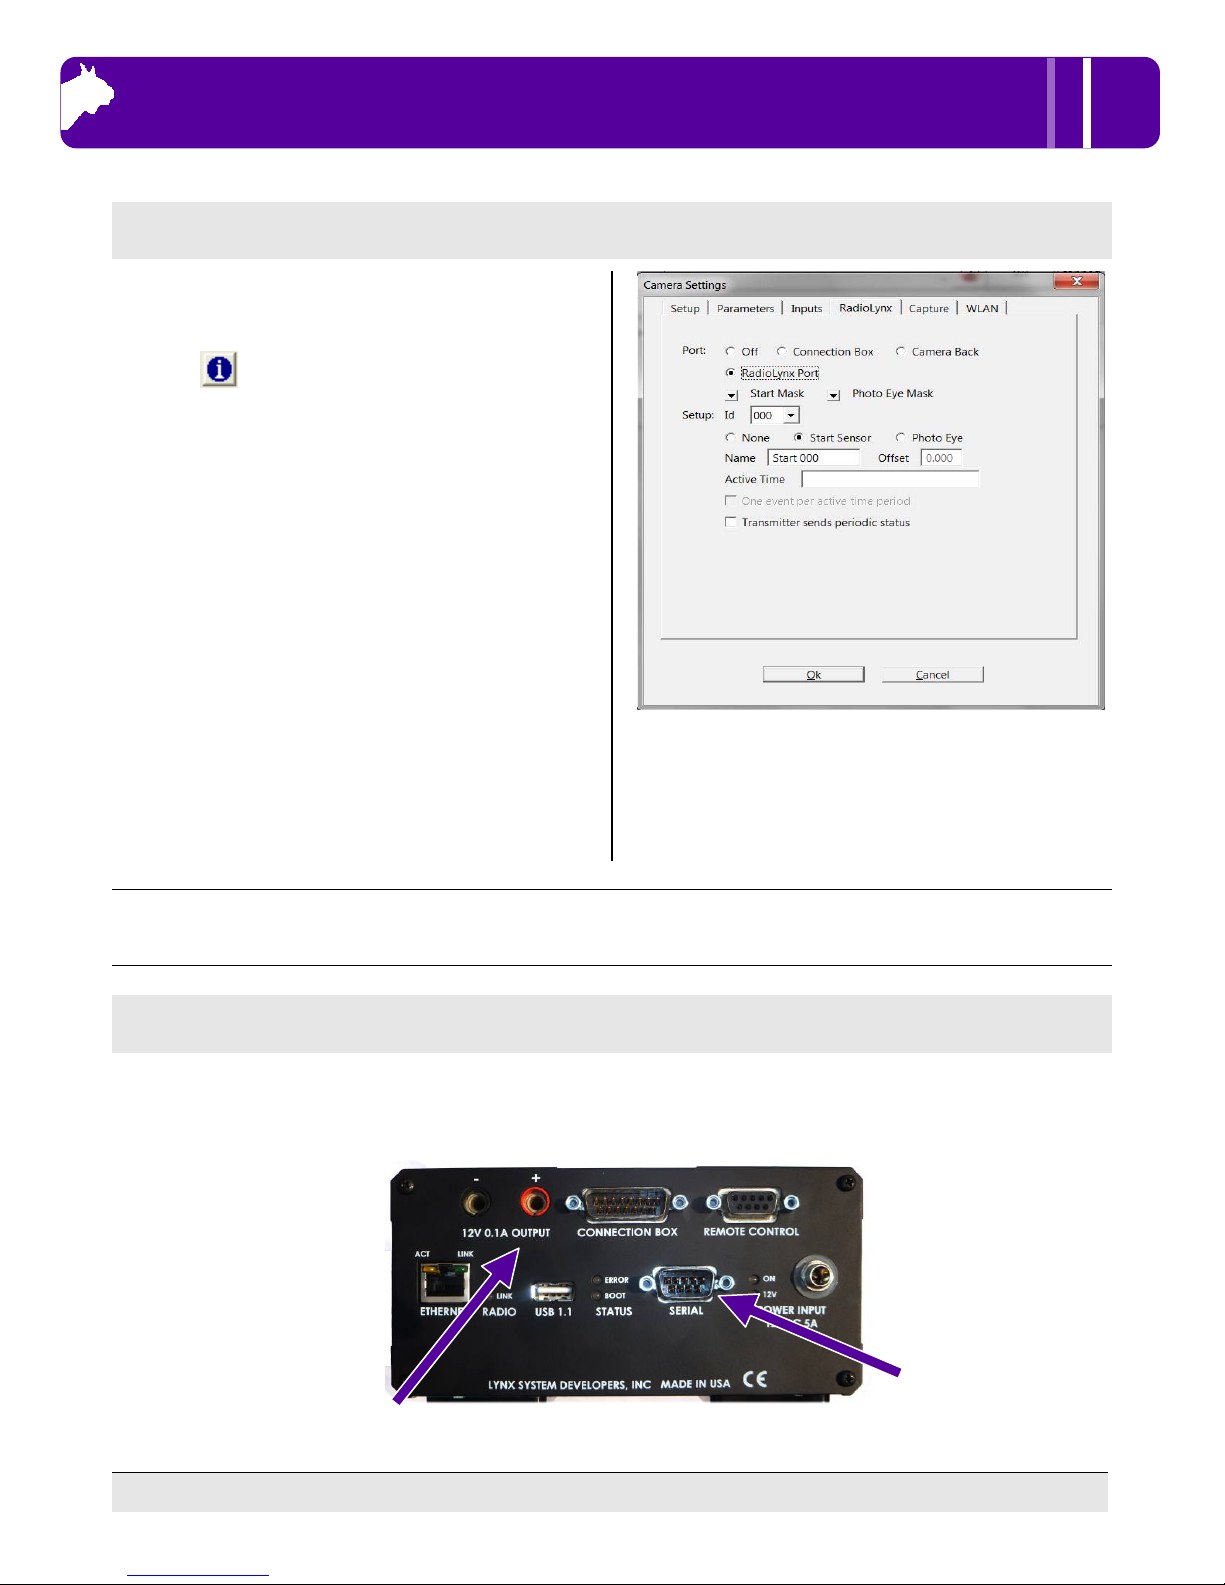
NOTE: For the EtherLynx 2000+, Fusion and PRO cameras, the Receiver connects to the back of the camera.
a. Power Connection: use Red connector only to Red (DC) 12v 0.1A Output.
b. DB9 Serial Data Connector
to port labeled
located on camera back.
RadioLynx Wireless Start www.finishlynx.com
support@finishlynx.com 05/2016
2 of 4
SERIAL
 Loading...