

Page 1
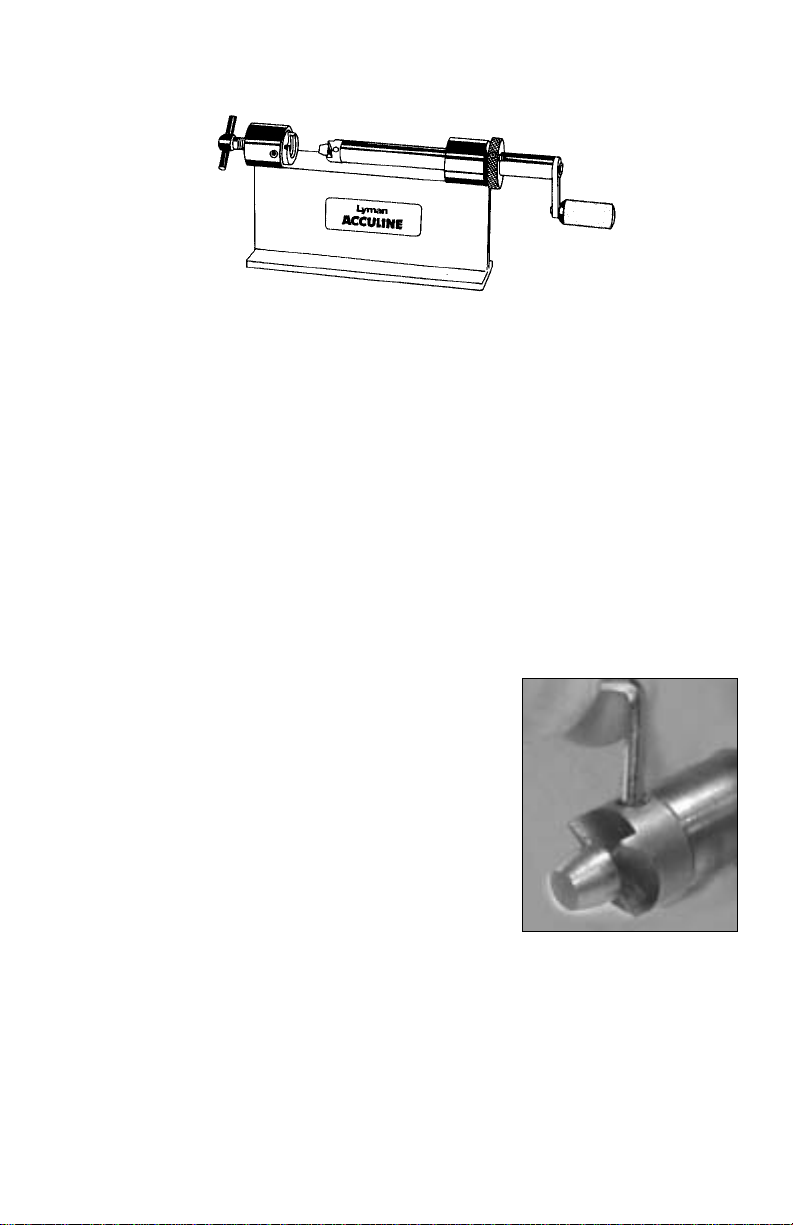
LYMAN ACCUTRIMMER INSTRUCTIONS
A metallic cartridge case will stretch after a number of firings and it then becomes necessary to trim it back to its proper length so it will chamber properly. The Lyman AccuTrimmer
will accept most popular cases.
To convert to another caliber, you need only change to the proper size shellholder and pilot.
Lyman offers a complete line of shellholders and pilots.
Mounting
The base of your trimmer is drilled with offset holes for mounting directly to the top of
your reloading bench without splitting the wood. This is the recommended method of mounting. Some reloaders prefer to clamp their trimmer in a vise when using it. If the trimmer is to
be used in this manner, Lyman recommends that it be fastened to a block of wood. The wooden block can then be held firmly in the vise jaws without damaging the base.
Installing The Cutter And Pilot
Thread the cutter onto the AccuTrimmer shaft until tight to
the shaft. An easy method we use to ensure is to finger tighten
the cutter to the shaft. Insert the hex head wrench into the pilot
set screw and apply clockwise pressure on the handle while
holding the wrench firmly. When tight, the cutter is secure
and ready to use.
The pilot is inserted into the hole at the center of the cutter.
Loosen the set screw with the wrench provided until the pilot
sits flush to the cutter. Tighten the set screw. Use caution, as
the cutter edges are extremely sharp. IMPORTANT: Use the
proper pilot as specified for use with your cartridge case.
Preparing The Cases
Before trimming, cases must be full-length or neck resized and deprimed. Pilots are
designed to be used with sized necks only.
Measuring The Cases
You will need an accurate means of measuring case length. We recommend Lyman precision calipers. When your cases have lengthened to the point where they exceed the maximum
case length allowable for your cartridge, they must be trimmed. For a list of "maximum case
lengths” and suggested “trim to lengths” see your Lyman handbook.
Page 2

Locking The Case In Place
Place the appropriate shellholder into the shellholder retainer slot.
Place your case into the shellholder. Slide the cutter
shaft assembly, with the pilot installed in the cutter
head, towards the case until the pilot enters the case
mouth and push it in flush to the cutter head. Now,
exerting slight pressure on the shaft, from the handle,
tighten the case in place by turning the “T” handle
clockwise until the case is tight. NOTE: Excessive
pressure is not required. You are now ready to trim
your case.
Adjusting The Cut
A knurled lock ring with a set screw through the side provide for both fine and coarse
adjustments.
Advance the lock ring until it is close to the shaft bearing and tighten the set screw against
the shaft with your hex wrench.
To adjust the fine cutting attachment, take your hex wrench and advance or retract the side
set screw until you reach the trimming amount.
Hints
Adjust the cut a little at a time, checking your case length with your caliper after each cut.
When the correct “trim to length” has been reached, you are now ready to begin processing all
your cases.
Processing Your Cases
Once your AccuTrimmer is in adjustment, your entire lot of cases may be processed to
bring them all to the correct length. As you turn the crank handle, keep an inward pressure on
the cutter so that it is always bearing against the case mouth, but do not force it. After trimming, small burrs will be present on the case mouth. These can be easily removed from both
inside and outside the case mouth with Lyman Deburring tools.
Keep a master case
When a reloader is working with several different calibers, it is wise to retain a master case
of the correct length for each cartridge.
This reduces adjustment time since the master case can be snapped into the shellholder and
the cutter quickly brought into adjustment against its mouth.
AccuTrimmer (continued)
Page 3
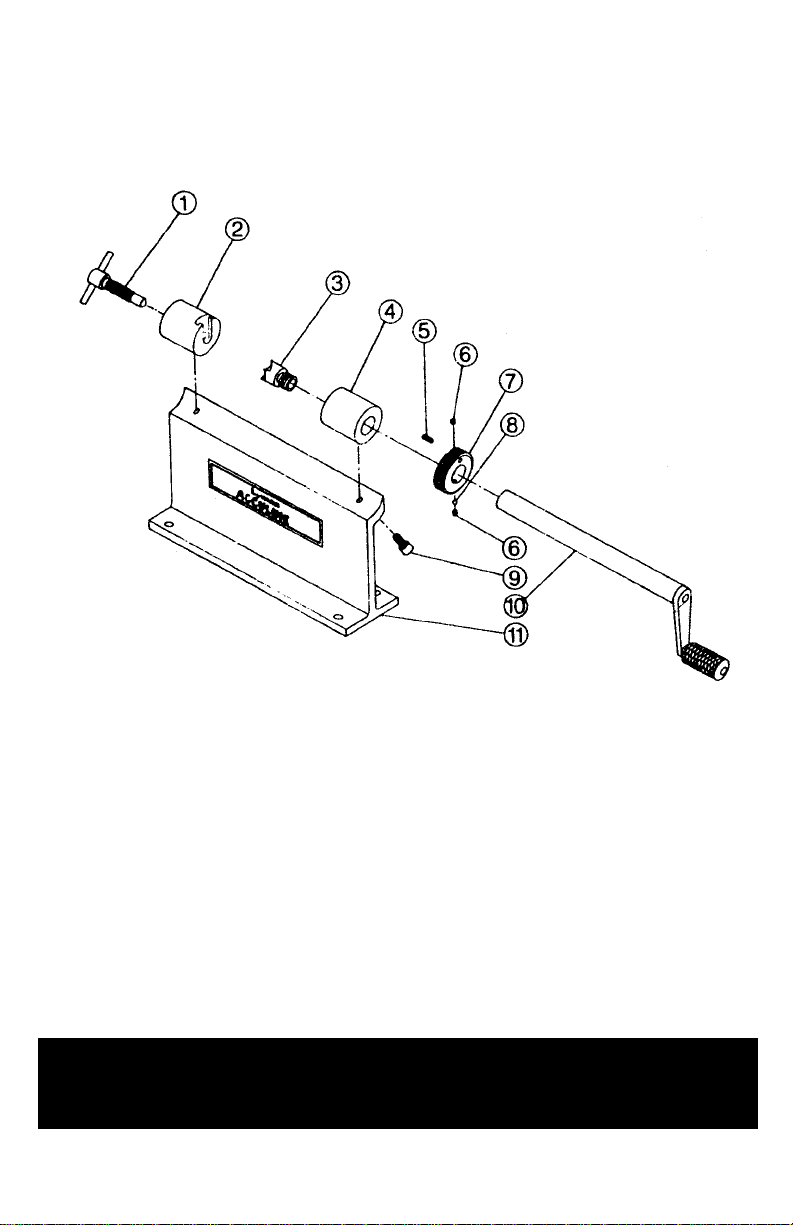
1 T-Handle Assembly 7993013
2 Shell Holder Retainer 7993003
3 Cutter Head Assembly 7822011
4 Cutter Shaft Boss 7993005
5 8-32 x 3/8 Set Screw 7993008
6 8-32 x 1/8 Set Screw (2) 7994418
7 Adjustable Stop Collar 7993020
8 Nylon Ball 7990076
9 10-32 Socket Head
Cap Screw (2) 7993006
10 Cutter Shaft Assembly 7994432
11 AccuTrimmer Base 7993018
Key Part Description Part #Key Part Description Part #
AccuTrimmer (continued)
Visit our complete Lyman website at
www.lymanproducts.com
 Loading...