

LY International HS-60R User Manual
Multi-room Music System
Room Controller
HS-60R
Thank you for using our Multi-room Music
System. For better use of the console, please
carefully read this manual first before using
the equipment.
I. Features
Facilitates home audio control.
Employs touch operation, luxurious
external design and intuitive LCD.
Features all basic operation functions,
including audio source selection, volume
and tone selection, direct MP3 selection,
stored radio station selection, etc.
Directly plays an audio file by
connection to audio units.
Enables a talk with the console and other
terminals.
Receives control operation signals
through IR controller.
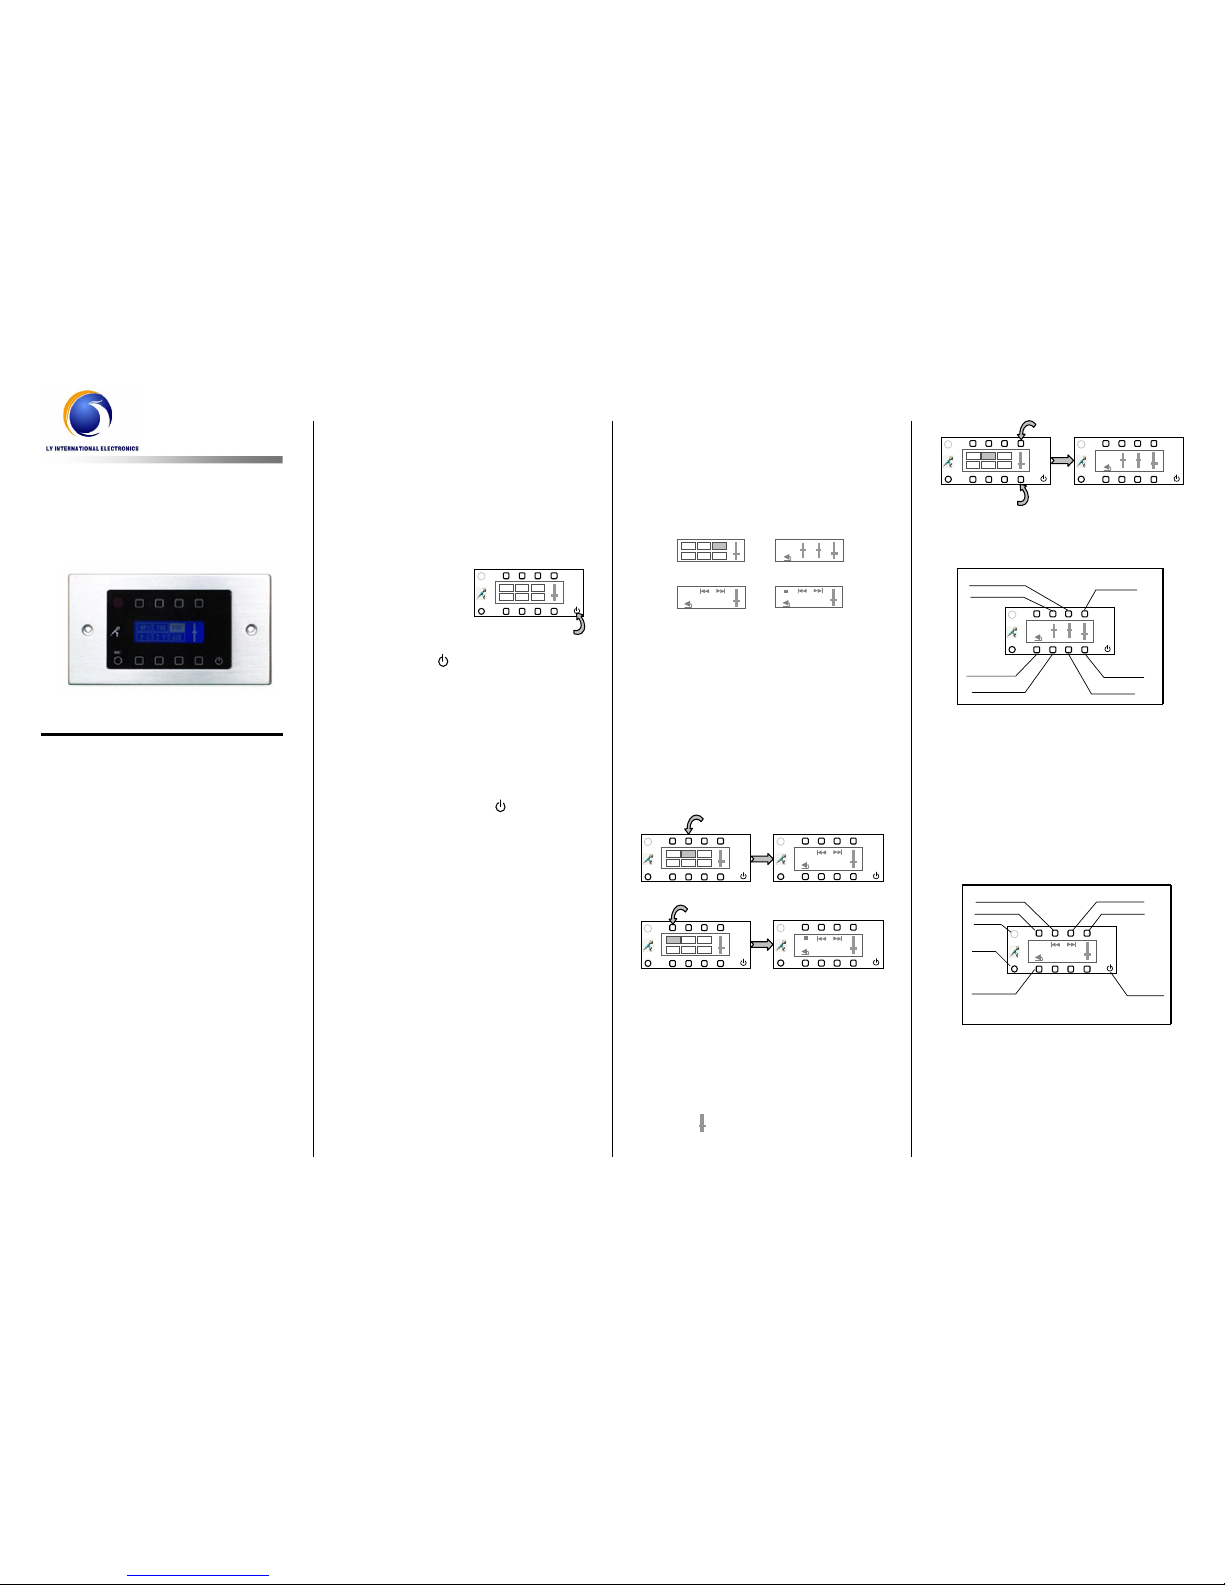
II. Turning On/Off Room Controller
1. Turning on a room controller
When the power supply for the console is
turned on, all room controllers connected
can be controlled to open/close or select
a track. When a room
controller is turned on,
the main interface
shown is as shown
in Fig. 2-1.
When the room controller is turned off,
press the “ ” key to turn on the
controller and access the status
previously applied.
2. Turning off a room controller
When the power supply for the console is
turned off, all room controllers connected
can be turned off.
Press and hold the “ ” key of the
controller (as shown in Fig. 2-1) for more
than 3 seconds to turn off the room
controller.
III. Status Display of Room
Controller
Main interface display (as shown in Fig.
3-1): The interface shows 6 audio
sources and the volume of the controller.
The highlighted item is the audio source
currently played by the controller.
Volume and tone control interface (as
shown in Fig. 3-2): Where the volume
and tone of the controller can be
operated.
Status interface under radio mode (as
shown in Fig. 3-3): Where AM/FM mode
of radio can be switched over and a radio
station stored in the console can be
called.
Status interface under MP3 mode (as
shown in Fig. 3-4): Where MP3
operation like track selection, play and
pause can be performed.
IV. Operation
1. Selection of audio source
As shown in Fig. 2-1, press an operation key
on the interface, and the corresponding audio
source will be highlighted. In case that the
audio source “TNR” or “MP3” is selected,
press the corresponding operation key again to
access the corresponding operation interface
(as shown in Fig. 4-1 or 4-2).
2. Adjustment of volume and tone
Press the volume key as shown in Fig. 4-3 to
access the volume and tone control interface.
(Tip: In case that the interface does not show
the volume and tone control interface, just
press the key corresponding to the volume
indicator “ ” to access the volume and tone
control interface.)
The following figure shows the operation of
volume control and tone adjustment.
3. Operation of radio mode
Press the “TNR” key in the main interface to
access the radio operation interface (as shown
in Fig. 4-1), where FM/AM mode can be
switched over, station can be selected and
volume can be adjusted. The following figure
shows the functions of operation keys.
Tips: 1) Press the “Return to Main Interface”
key in any interface to return to the main
interface as shown in Fig. 3-1.
2) Press the "Audio Control" key to access the
control interface of volume and tone.
4. Operation of MP3 mode
(Fig. 3-2)
b
t
FM
(Fig. 3-3)
CH01 106.
60MH
(Fig. 3-4)
dsppa.
mp3
MP3
TNR DVD
PC TV AUX
(Fig. 3-1)
b
t
MIC
Ba
ss+ key
Vol. + key
Treble+ key
Vol. - key
Bass+ key
Key to return to
Treble- key
(Fig. 4-4)
FM/AM switchover
Audio control key
Key to select the
previous radio station
Key to return to
main interface
(Fig. 4-5)
Key to select the next
radio station
On/Off key
MIC key
Remote control window
FM
CH01 106.60MH
MIC
(Fig. 4-3)
MIC
MP3 TNR
DVD
PC TV AUX
b
t
MIC
(Fig. 2-1)
MIC
MP3 TNR DVD
PC
TV
AUX
(Fig. 4-1)
(Fig. 4-2)
FM
CH01 106.60MH
MIC
MIC
dsppa.
mp3
MIC
MP3
TNR DVD
PC
TV
AUX
MIC
MP3
TNR DVD
PC TV AUX
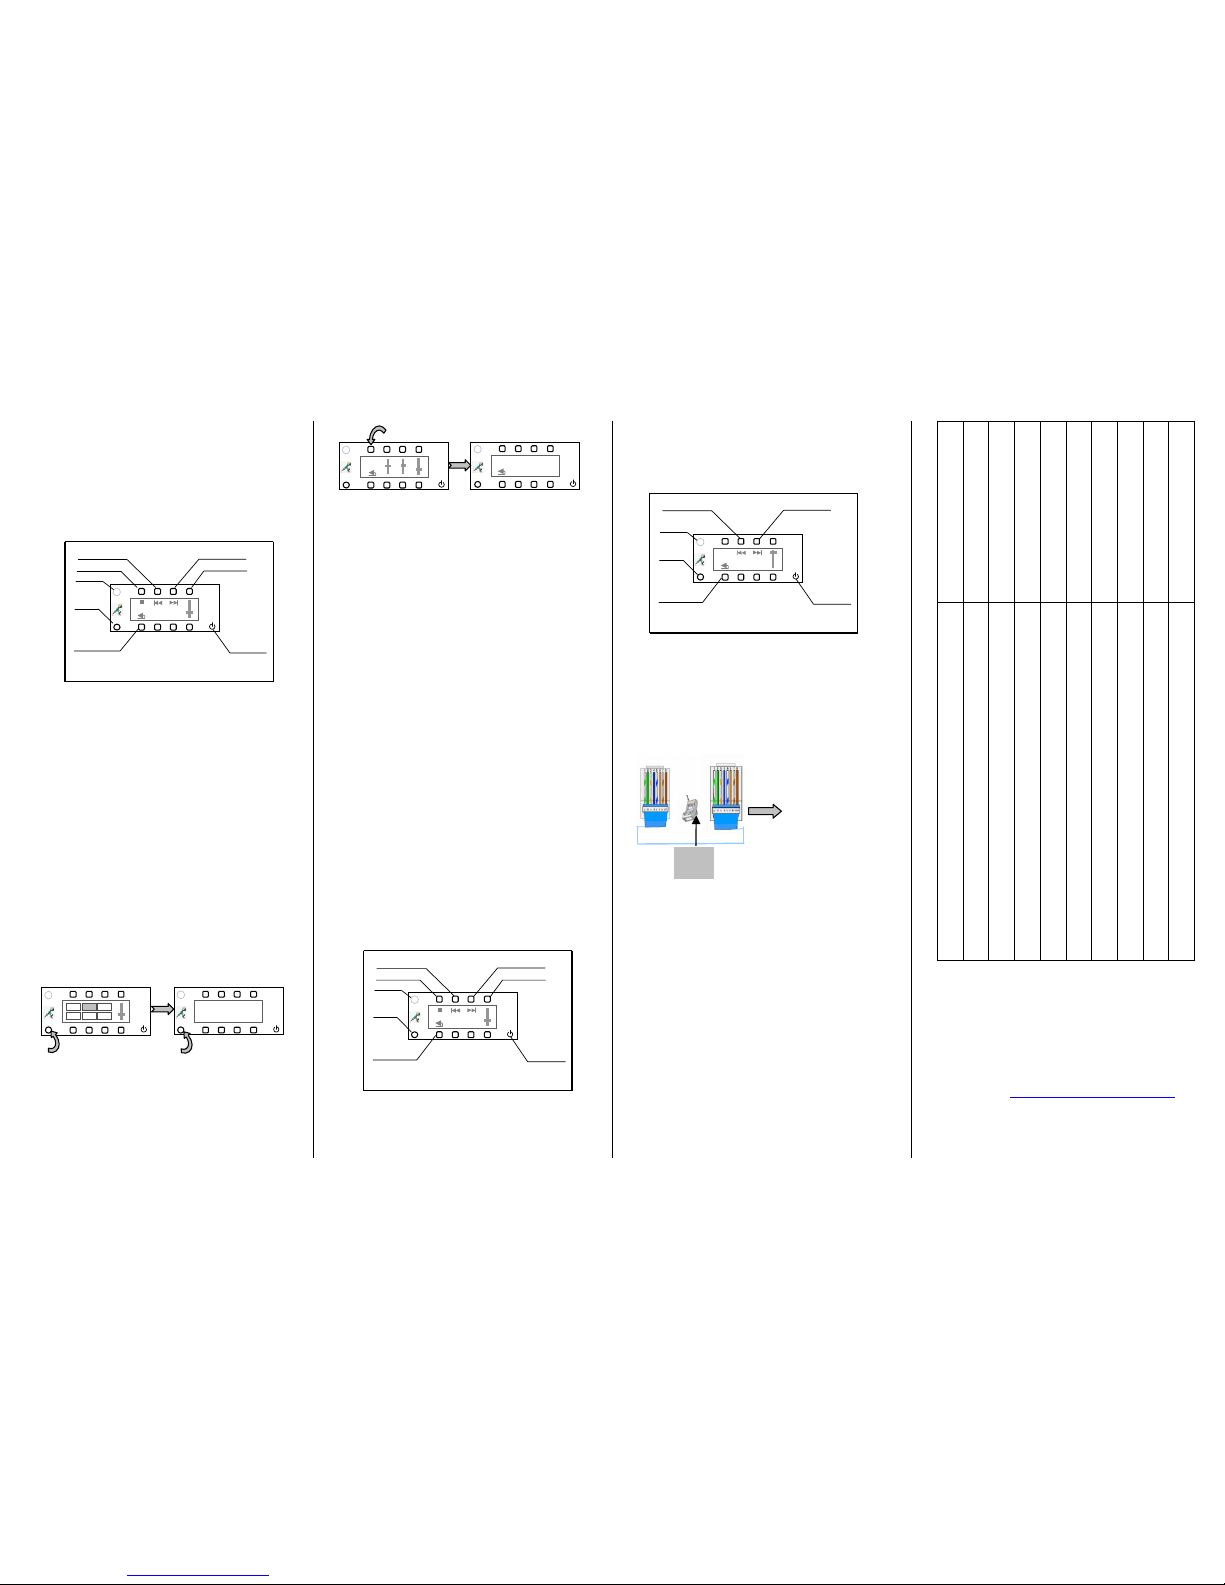
Press the “MP3” key in the main interface to
access the MP3 operation interface (as shown
in Fig. 4-2), where MP3 operation like track
selection, play and pause, and volume and
tone control can be performed. The following
figure shows the functions of operation keys.
5. Operation of talk
Press and hold the MIC key, and the text
“Calling…” will be shown on the controller
display (as shown in Figs. 5-1 and 5-2), where
a talk with the console and other controllers
can be given. To end the talk, release the MIC
key, and the console and controller will
automatically return to the play status
previously applied.
During a talk of a controller, other controllers
and the console automatically accesses the
talk receipt status, and the text “Calling…” is
shown on the controller display (as shown in
Fig. 5-2).
On the volume control interface, press the
“MIC” and turn into the Calling setting
interface with two selections of Call In and
Call Out. (as shown in Fig. 5-3, and Fig. 5-4 ).
On Fig. 5-4, “Call In” sets the status of
calling from outside and press “on” or “off” to
make the selection. “on” means “allow call in”
and will display “Called” when a call is
calling from outside, while “off” means
“forbid call in”.
On Fig. 5-4, “Call out” sets the status of
calling to outside and press “on” or “off” to
make the selection. “on” means “allow call
out”, while “off ” means “forbid call out”.
6. Operation of DVD mode
Press the “DVD” key in the main interface to
access the DVD operation interface, where
DVD operation such as track selection, play
and pause, and volume and tone control can be
performed. The following figures show the
functions of operation keys.
7. Operation of TV mode
Press the “TV” key in the main interface to
access the TV operation interface, where TV
station selection can be performed. The right
figure shows the functions of operation keys.
8. For description of functions and diagram
of receiving angle of IR remote controller,
refer to the operation instructions of
AM8130.
Diagram for making a network cable
connector
V. Dimensions of Mounting Box for
IR Remote Controller
L×W×H (mm): 144×80×45
Note: For installation, route the wire from the
right side of the mounting box.
VI. Packing List
1 HS-60R unit, 1 copy of HS-60R Operation
Instructions, 2 M4×20 cap machine screws, 1
plastic junction box, 1 4P green connector
(2ERJK-5.08) and 1 4P green connector.
VII. Specifications
http://www.lyintlcorp.com/
Net weight
Gross weight
Dimensions
Power consumption
Power amplifier output power
Control functions
IR input
Audio source input
Power supply
Item
0.78kg
1.5kg
(L×W×H) 154mm×46mm×86mm
≤ 20W
20W/8Ω
Audio source selection, volume and tone control, turning on/off the
controller, control of MP3, radio, DVD and TV, and talk
Controllable through IR remote controller
Digital audio source through the console
DC15V-DC48V
Description
(Fig. 4-6)
Play/Pause key Audio control key
Key to select th e
previous track
Key to return to
main interface
Key to select
the
next track
On/Off key
MIC key
Remote control window
MIC
dsppa.
mp3
(Fig. 6-1)
Play/Pause key Audio control key
Key to select the
previous track
Key to return to
main interface
Ke
y to select the
next track
On/Off key
MIC key
Remote control window
MIC
DVD
(Fig. 7-1)
Key to sel ect the
previous station
Key to return to
main interface
Key to select the
next station
On/Off key
MIC key
MIC
TV
RJ45 connector
From left to right:
green-white, green,
orange-white, blue,
blue-white, orange,
brown-white, and brown.
The same for the other end.
With the tab
backwards
Pin 1
(Fig. 5-1)
(Fig. 5-2)
MIC
MP3 TNR
DVD
PC TV AUX
MIC
Calling…
b
t
MIC
MIC
MIC
Call In : on Call
out : off
(图 5-4)
(图 5-3)
 Loading...