

Page 1
LX 16-D
Audio -Variometer system for gliders
Pilots` Manual
LX navigation d.o.o.
Tkalska 10 SLO 3000 Celje
+ 386 3 490 46 70 + 386 3 490 46 71
support@lxnavigation.si http://www.lxnavigation.si
Page 2

1 Introduction
The LX 16-D built in sensor is high quality pressure transducer, to guaranty high
accuracy of vario signal and its zero . A modern low-power microcontroller drives the
LCD vario indicator and supports input controls. All necessary inputs are made by using
of one external rotary switch with a push button.
The unit has no on/off switch, therefore we recommend that you install an external
switch, or just use an avionic master switch. A 1 amp fuse is recomended.
2 Technical data
• 57 mm standard cut out
• 65 x 65 x 98 mm without connector and pressure inlet
• 3 ranges 2.5m/s, 5m/s, 10 m/s, (5kts, 10kts, 20kts,)
• Averager (20s )
• Flight time indicator
• Power consumption is approx. 60 mA/12V, (up to about 90mA depending on
audio volume)
• TE compensation: TE tube
• Weight: apr. 260 gr.
• All cables and external button are included in the delivery
• Power supply: 8-16 V DC
Page 3

3 How to use the unit
with push button
The unit comes with an external rotary switch with push button, and you can access all
the options with that button by either pressing it or turning it left/right.
3.1 Setup
The unit is ready for operation immediately after power on and vario needle is back to
zero. The following settings can be set up on the ground, and also during flight.
• UNITS (selection of m/s or kts)
• RNG for selection of vario needle range ( 2.5, 5 and 10 m/s or 5, 10 and 20
knots)
• FIL for selection of vario signal filter in steps from 0.2 to 5 (damping of response
time)
To enter into Setup menu press the button on the external rotary switch once, and UNIT
item will appear. Press the button again to select RNG, once more for FIL, and another
press will take you back out of the setup. To change value of the selected option, rotate
the switch to the left or to the right. The Setup menu will also close automatically after a
couple of seconds without any new command. All settings will remain after power off.
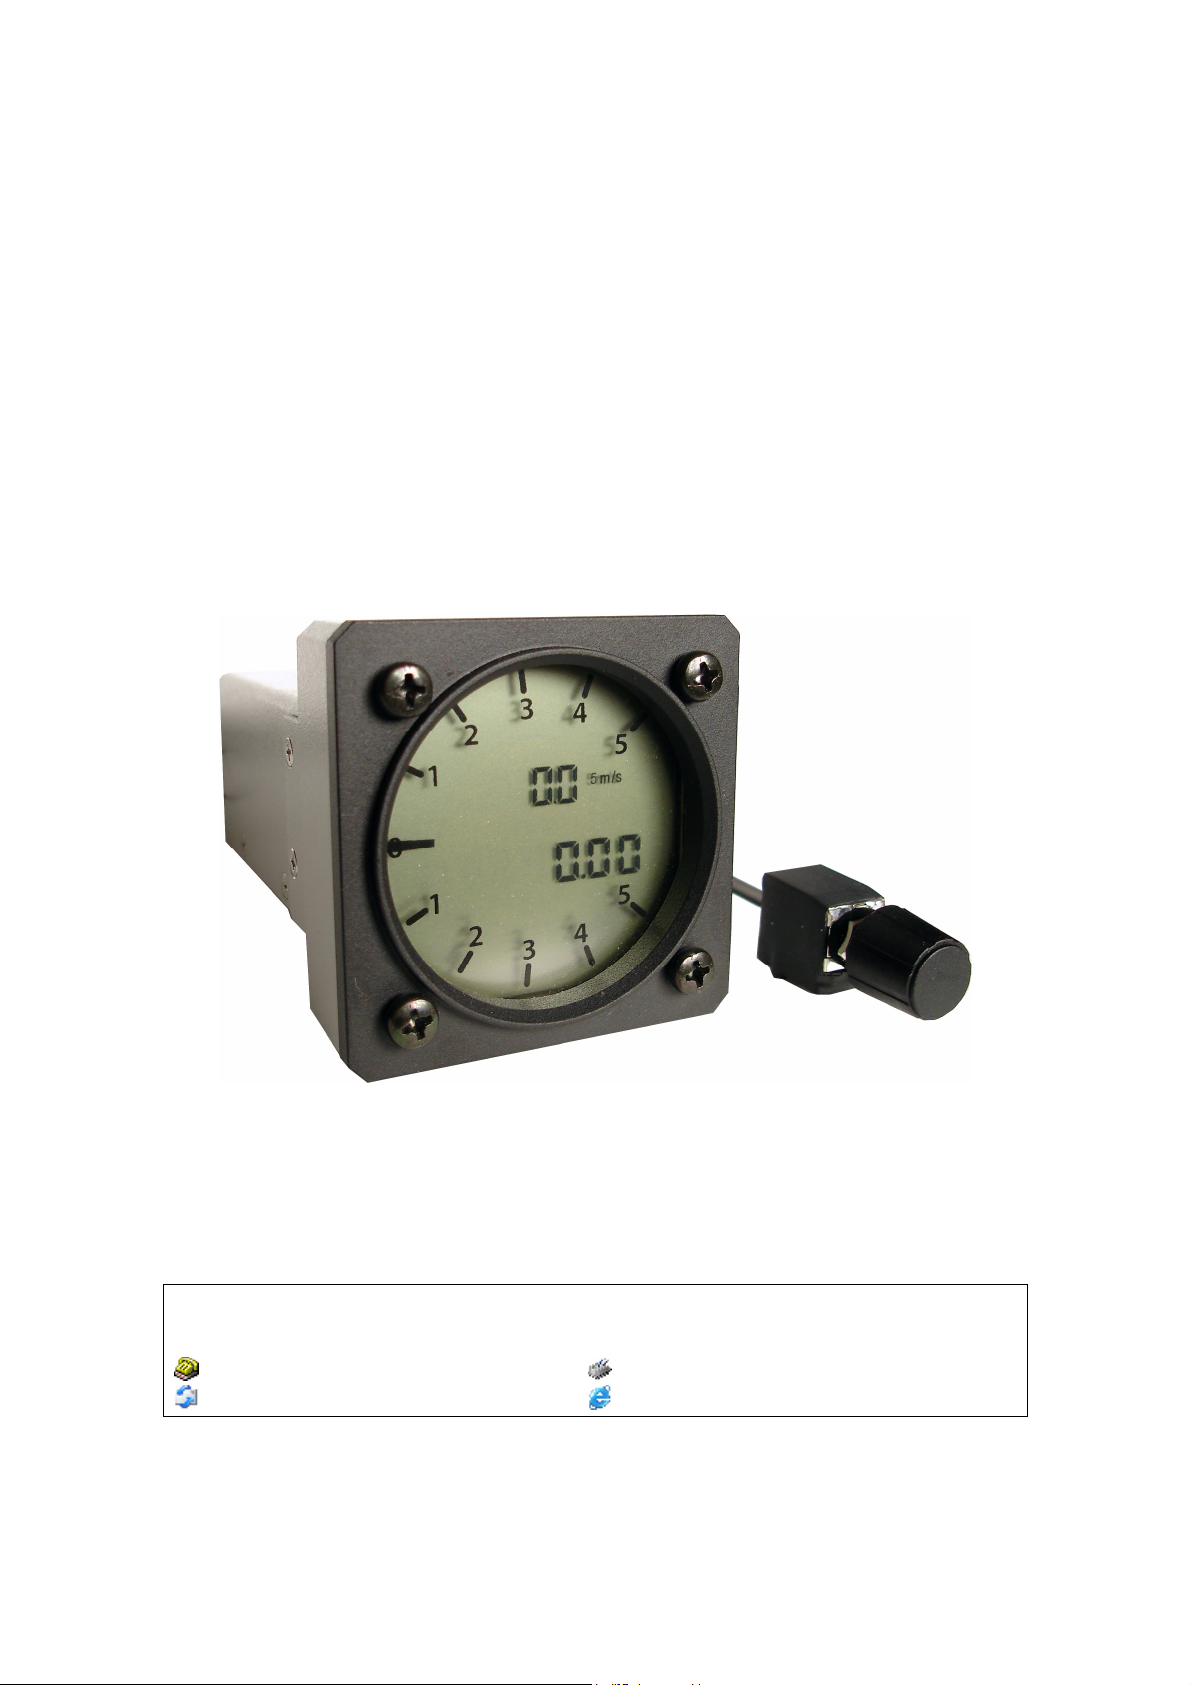
Vario needle
Averager
Vario range/units
Flight time indicator
External rotary switch
Page 4

3.2 Setup Menu
Unit selection:
After press of the button on external rotary switch, the Unit selection option becomes
active.
You can select between m/s and kts (number next to it, is vario range).
Range selection:
On the second push of the button, the option for selecting Vario range will show up.
Here you can then select vario Range between 2.5m/s, 5m/s and 10m/s, or 5kts, 10kts
and 20kts.
Page 5

Filter selection:
On the third push of the button, the option for selecting the vario Filter will show up.
The vario filter range is from 0.2 till 5, in steps of 0.1.
The default value is set to 3.
Changing of audio volume
• Turn the external rotary switch clockwise for volume increase, and vice-versa for
volume decrease. Note, that this will not work while in the setup menu.
3.3 Flight time indicator
The flight time indicator will show flight hours and minutes of the actual flight. The
counter will be activated automatically after climbing will be detected. After landing the
flight time indicator will stop automatically. A blinking decimal dot will indicate that the
flight time indicator is active.
Page 6

4 Installation
φφφφ
57mmh11
φφφφ
4,5mm
4,5mm
4.1 Mechanical installation
LX16-D unit:
One 57mm diameter circular cut out is required but you need to allow for the overall
dimensions of the unit which are as follows:
65mm width
65mm height
115mm length with connectors
The unit is attached by four M4 screws; the positioning of these holes is the same as any
other instrument of this size.
Installation procedure:
• Remove the four screws.
• Insert LX 16-D into the cut out and fix it using the four screws.
2
1/4
“
66.0mm
Page 7

External rotary switch installation:
You will need to drill a 7mm hole into the panel to place the external rotary switch (note
that the hole needs to be in reach of the 50cm connection cable).
The switch maximum dimensions are:
14mm width
17mm height
18mm length
Installation procedure:
• Remove the plastic key (by just puling it off) and the nut
• Insert the external rotary switch into the cut out and fix it with the nut, then put the
plastic key back up
Speaker installation:
The speaker comes with a 1,5m long connection cable, so you can install it anywhere in
the cockpit within the reach of the cable.
Page 8

4.2 Pneumatic connections
There is one pressure inlet on the rear side of the unit:
• TE/Pst - TE tube or Static Pressure inlet
Note!
If there is only static pressure on the inlet, there will be no total energy compensation!
4.3 Electrical connections
The electrical connections are clearly marked (red + 12V, blue GND) and the preassembled cables make it very easy to connect all the components. The unit has no
ON/OFF switch, use avionic master switch or install a separate switch.
Note!
There is no internal fuse in the LX 16-D and you must install an external fuse with a
rating of 1 amp (quick blow).
In the LX 16-D delivery box you will find the following cables and accessories:
main power supply cable
external rotary switch with push button
LX 16-D
the manual
speaker
Page 9

4.4 Wiring
LX 16-D Wiring
USB-D
DB15/F
150cm
1
9
2
10
3
11
4
Speaker
12
5
13
6
14
7
15
8
150cm
GND
30cm
50cm
+12V DC IN
Shield(GND)
Audio Out
Chinch
Green
Blue
White
Brown
Speaker
6
5
4
3
2
1
RJ 6/6
External Rotary Switch
TOP VIEW
Green
Blue
White
Red
Brown
Black
Page 10

LX navigation d.o.o.
Tkalska 10 SLO 3000 Celje
+ 386 3 490 46 70 + 386 3 490 46 71
support@lxnavigation.si http://www.lxnavigation.si
 Loading...