

Page 1
A
Incubator
Incubator
Instruction Manual
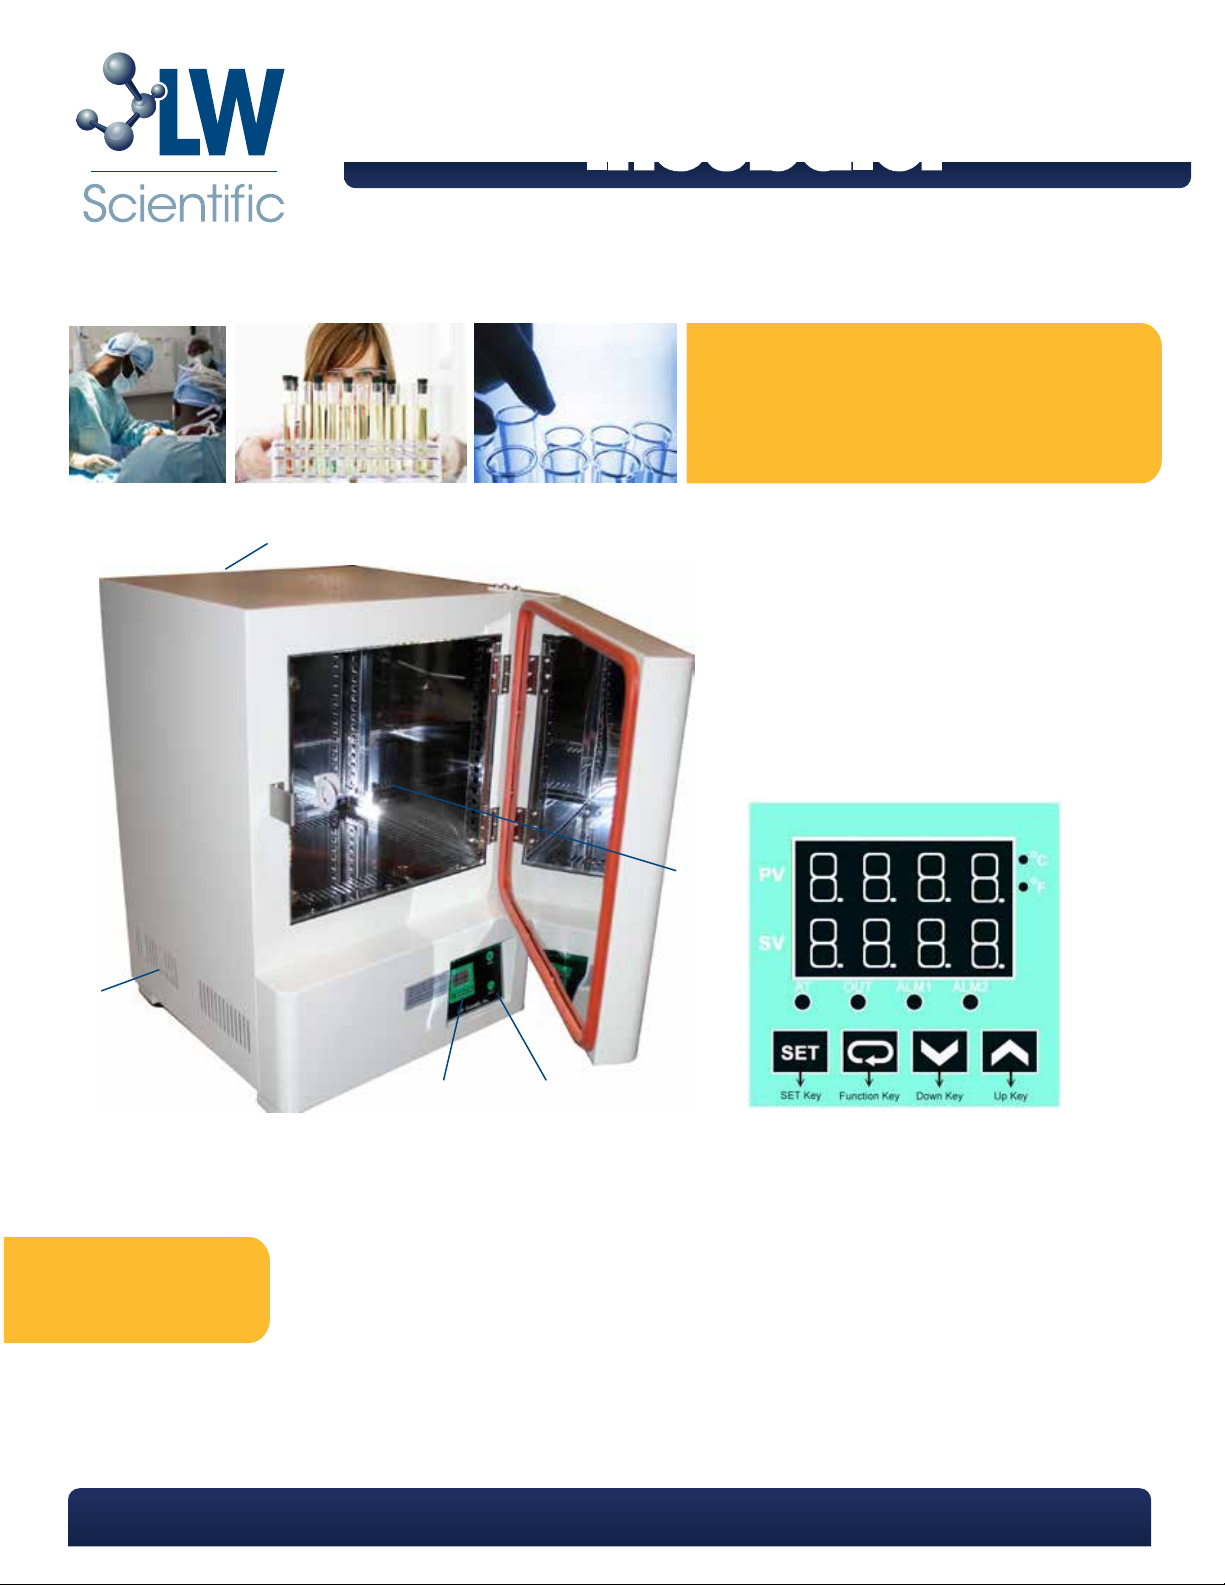
A Used Air Exit Vent
(located in rear)
B Inner Door
C On / Off Button
D PID Control Panel
E Fresh Air Inlet Vent
Model pictured:
Incubator
B
E
D
Introduction
Our line of incubators, which are available in 30-, 50-, 80-, 150-, and 300-liter capacity, are designed for
years of everyday use. With its durable construction and quality design, our incubator is perfect for a
multitude of general purpose laboratory applications.
C
PID Control Panel
P. 770.270.1394 F. 770.270.2389 865 Marathon Parkway Lawrenceville GA 30046
Page 2

Instructions
Connect unit to power. Please ensure the voltage is the same as the voltage listed on the label of the rear of unit.
1
Put your sample in and close the door.
2
Press the ON/OFF Button. The Power Indicator lamp will turn green. Wait for approximately 5 seconds. The PID
3
control panel will show the present temperature value (PV) in upper row and set temperature value (SV) in lower
row.
Press Up Key or Down Key to adjust SV value and then press the SET Key to enter the value.
4
After completing your cycle, please press the ON/OFF Button to turn off the power. The Power Indicator lamp will
5
turn red.
Caution: 1. Make sure door is always closed to prevent heat loss and loss of power.
2. Do not place any object on the top of incubator
3. Please keep area ventilated.
Other Functions
When the “OUT” indicator lamp is illuminated, the PID is in output stage and incubator is heating.
1
Once the PV value reaches the SV value and becomes stable, the “ALM1” Indicator will light up. If the PV value
2
exceeds the SV value by (10ºC), turn the power off, open the door and wait for about 30 minutes, and then
restart.
If PV value is much higher or lower than SV value, you can adjust the “Air vent” to balance the temperature. If the
3
PV value is too high, open the “Air vent”. If PV value is too low, close the “Air vent”.
P. 770.270.1394 F. 770.270.2389 865 Marathon Parkway Lawrenceville GA 30046
Page 3

P. 770.270.1394 F. 770.270.2389 865 Marathon Parkway Lawrenceville GA 30046
Page 4

Troubleshooting
TROUBLE CAUSE REMEDY
Instrument inoperative No power
No power
No power
Power / no heat
PID Controller doesn't properly
control the temperature
PID controller keys non
responsive
Temperature is not stable
Temperature sensor is faulty
Programming
PID keys are locked
The initial setting value is not
suitable for the ambient air
temperature where the machine
is located
Confirm unit is plugged into outlet
Change to different outlet
Check the electrical breaker on the rear of the unit, if
tripped, press to reset
Check heating element, if bad replace or contact
LW Scientific for service
Check temperature sensor, if bad replace or contact
LW Scientific for service
Check that PID setting are correct, if in doubt,
contact LW Scientific service
Please refer to page 2, Other functions 5. (c)
to release the lock status
Please refer to "Other functions" and try auto-tuning
function to solve this problem
PV value is not correct
Calibration thermometer reading
is different from the displayed
temperature
Unit has a temperature offset feature, contact
LW Scientific for specific instructions on setting
MKT-7.5.3-L-029 | Rev 2
P. 770.270.1394 F. 770.270.2389 865 Marathon Parkway Lawrenceville GA 30046
 Loading...