

Page 1
www.allstarlighting.com
LED WALLPACK CUBE
LR40600, LR40610
INSTALLATION GUIDE
CAUTION
1. To avoide electric shock, disconnect power at source prior to installation.
2. The installation should be performed by qualified electricians or lighting
technicians.
3. Before conducting any installation, maintenance, or removal, disable all power to
the luminaires and wait until the fixture has cooled down.
4. Do not touch the fixture while it is in use.
5. If there is any problem with fixture, DO turn off the power and DO NOT attempt to
repair unless you are a qualified electrician.
6. The electrical rating of this product contains a photocell which is 110-277VAC
7. Mounting instructions specify the use of a sealing compound to fully fill the gap
of the fixture and mounting surface.
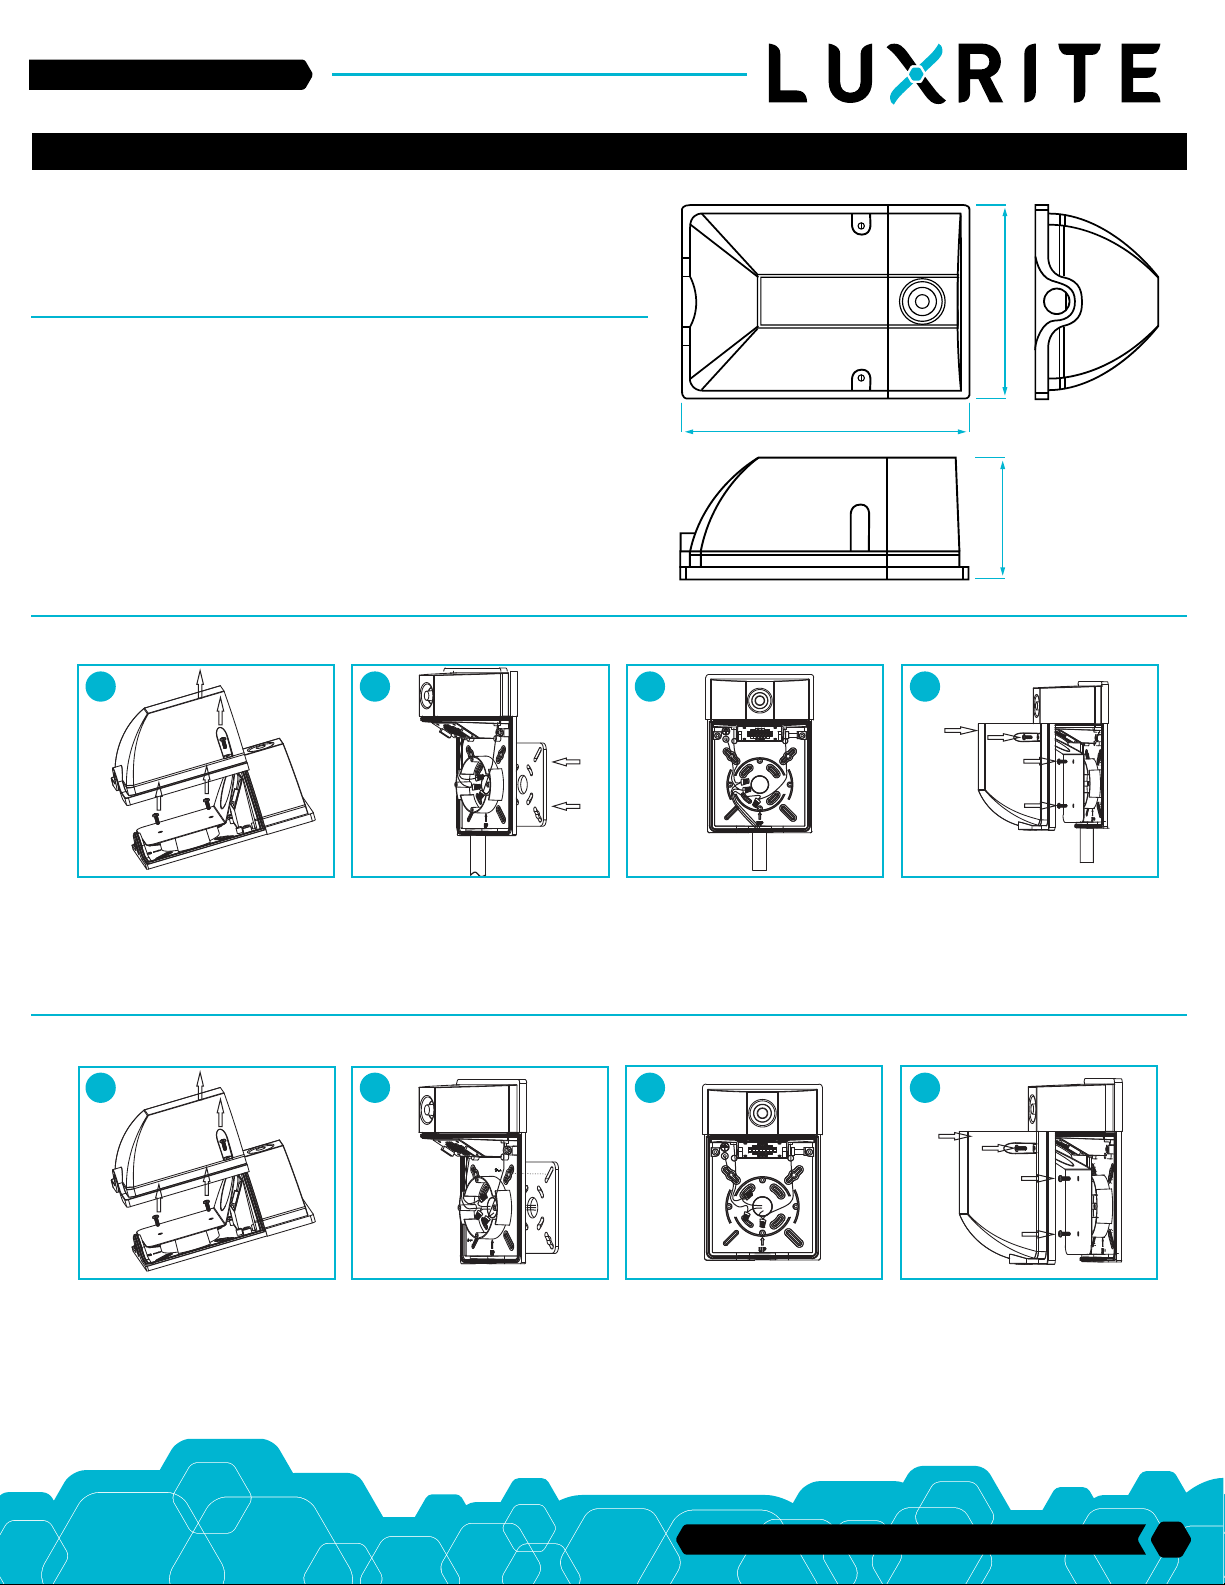
8.2” (208mm)
INSTALLATION
1. MOUNTING WITH A 1/2” CONDUIT AT THE BOTTOM.
1 2 3 4
1. Remove the lens of the wall pack by
loosening the two screws on each side of
the fixture. Remove the reflector by
loosening the two screws.
2. Remove the threaded plug from the
bottom, plug the 1/2” conduit into the
fixture, knock out 2 screw holes on the back
housing and attach the fixture on the wall
with the correct screws. Use the supplied
gasket for a weatherproof tight seal.
3. Connect black for line, white for neutral
and bare wire for ground to complete the
wiring.
5.5” (140mm)
3.5” (88mm)
4. Replace the reflector and lens carefully
by reversing the procedure use to remove
them. (See instruction 1)
2. MOUNTING WITH J-BOX
1 2 3 4
1. Remove the lens of the wall pack by
loosening the two screws on each side of
the fixture. Remove the reflector by
loosening the two screws.
2. Knock out the 2 screw holes and the
holes in the center of the back housing.
Plug the wires from the J-Box into the
fixture through the center hole, and attach
the fixture to the J-Box with proper screws.
Use the supplied gasket for a weatherproof
tight seal.
3. Connect black for line, white for neutral
and bare wire for ground to complete the
wiring.
33 Randolph Ave. • Avenel NJ 07001 | 732-882-1500
4. Replace the reflector and lens carefully
by reversing the procedure use to remove
them. (See instruction 1)
1
 Loading...