

Page 1
www.allstarlighting.com
INSTALLATION GUIDE
3” RECESSED MINI FLAT PANEL ROUND
LR23694, LR23695, LR23696
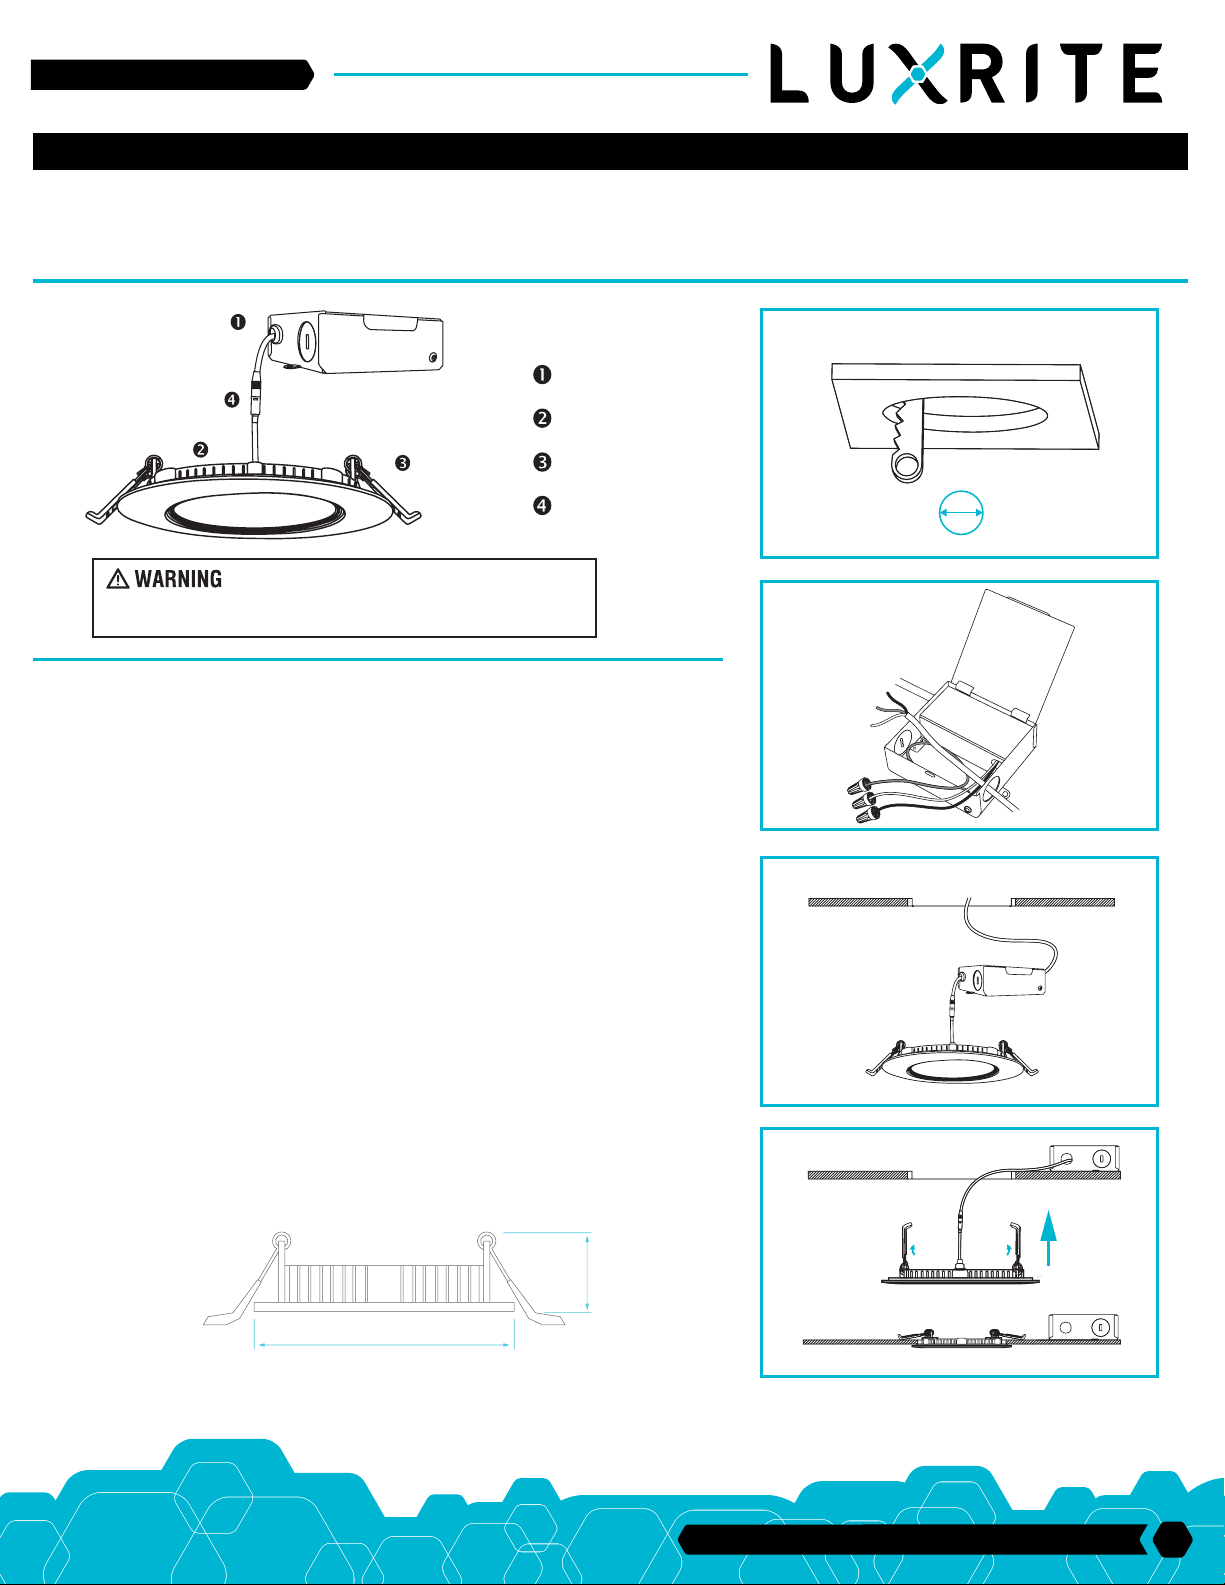
PARTS
JUNCTION BOX
LIGHT FIXTURE
SPRING CLIPS
CONNECTOR
TURN THE POWER OFF FROM ELECTRICAL PANEL BEFORE
INSTALLATION OR MAINTENANCE.
FIXTURE INSTALLATION:
1. Turn power OFF from the electrical panel prior to installation.
2. Determine the location for installation and cut the ceiling hole in accordance with
cut-hole dimensions. Refer to CUTOUT size.
3. Open the junction box cover and remove the appropriate knockout(s) on the side
panel (Fig. 1)
4. Insert the electrical supply cable through the knockout and secure with a cable
connector (sold separately).
5. Using quick-connect push-in terminals, connect the ground wire to the green wire
terminal; black wire to black wire terminal; white wire to white wire terminal. (Fig. 2)
6. Place all wiring and connections back into the box and close the cover. Connect the
driver to the light panel.
7. Insert Junction box through the mounting hole. (Fig. 3)
8. Push spring-loaded clips on the fixture upwards and insert fixture base into the
mounting hole. Release the clips and fixture will be pulled flush to the ceiling. (Fig. 4)
Fig. 1
Cutting Diameter:
2.75 inch
Fig. 2
Fig. 3
• DO NOT MODIFY THIS FIXTURE. ANY MODIFICATIONS MAY RENDER THE
PRODUCT UNSAFE AND VOID WARRANTY.
• THIS PRODUCT IS SUITABLE FOR WET LOCATIONS
LIMITED WARRANTY
The warranty applies to the product from the original date of purchase for five (5) years
against manufacturing defects. The owner must provide a copy of the original proof of
purchase. The manufacturer’s obligation under this warranty is limited to repairing or
replacing the component. It is not related in any way to the cost of the connection, the
installation of the replacement parts or cost of transport.
0.90”
Ø3.34”
Fig. 4
33 Randolph Ave. • Avenel NJ 07001 | 732-882-1500
1
 Loading...