

Page 1
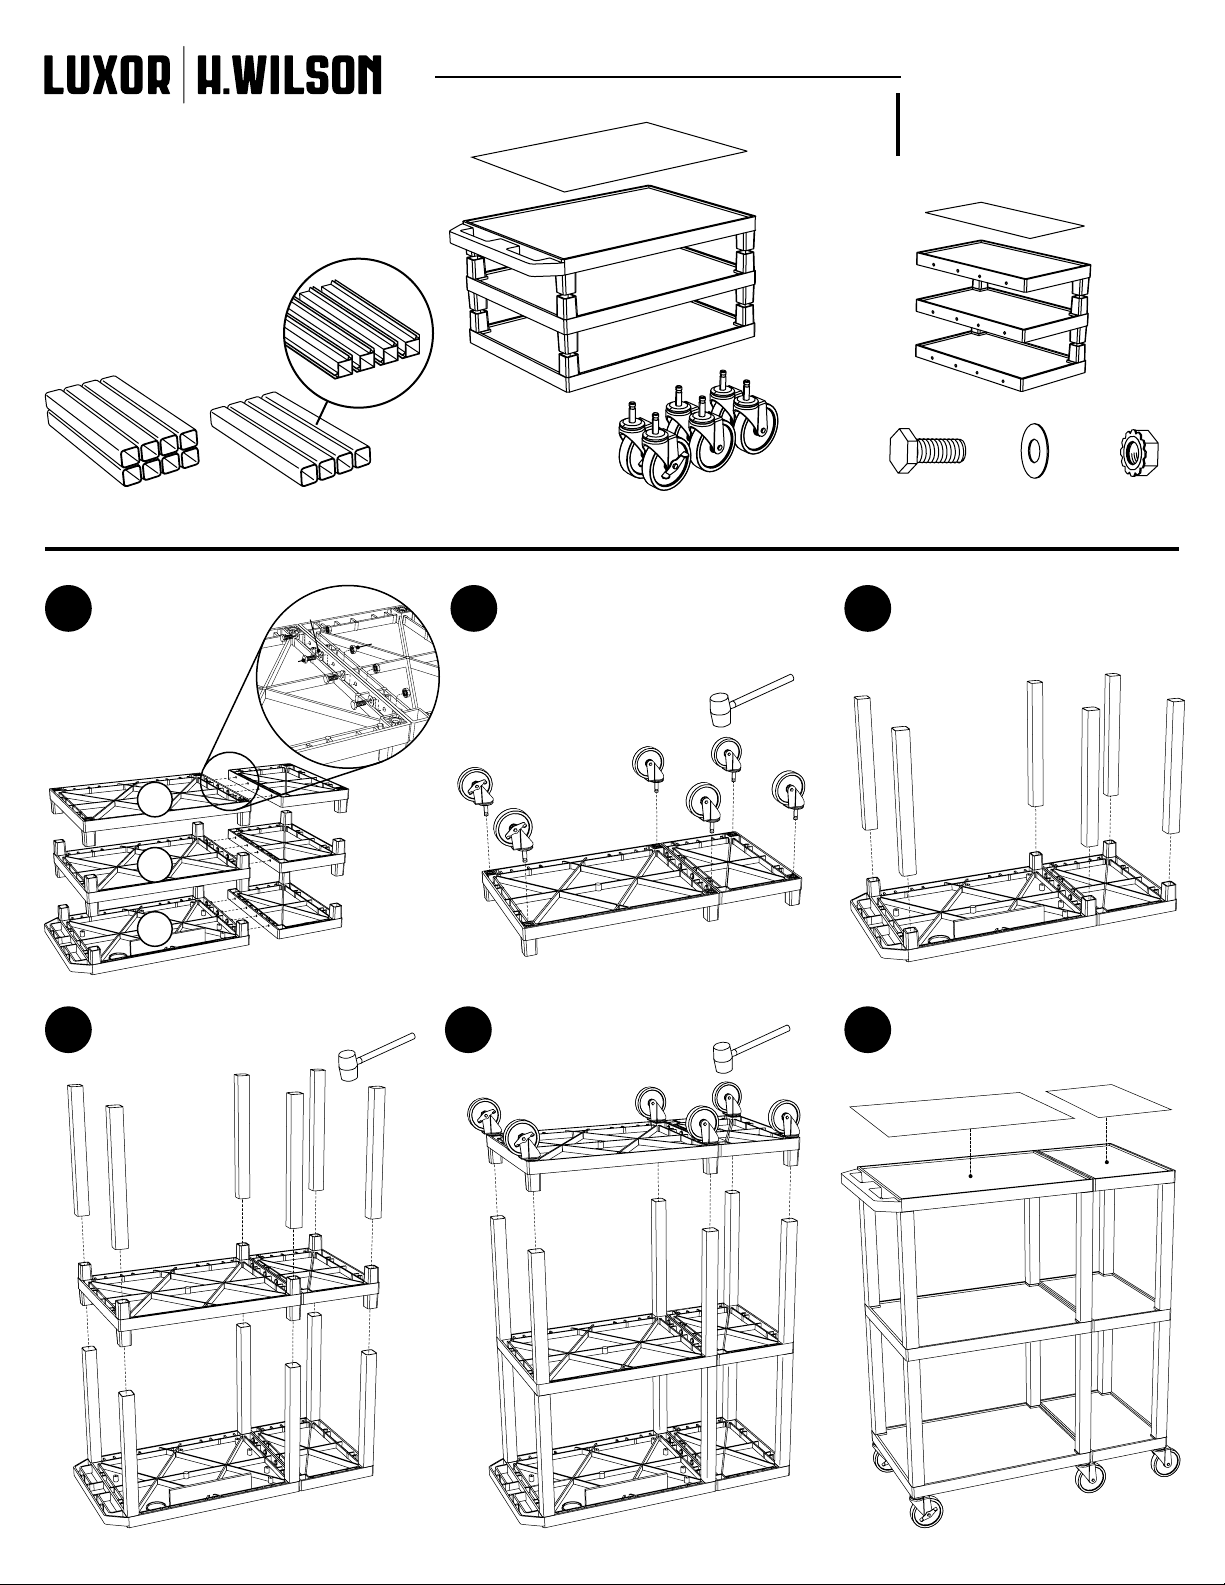
WTPS70 Series Cart Instructions
06/21/13
www.luxorfurn.com
www.hwilson.com
NOTICE:
Leg lengths may
vary by model
E x8 F x4
1
NOTICE:
Use wrench to
tighten bolt Q &
locking nut S
B
Q
x12
Parts List
T x1
A x1
T2 x1
Tools Required
- Rubber Mallet
- Wrench
A2 x1
C x1
C2 x1
B x1
Optional uted
legs for units with
cabinet pack
R
S
B2
2 3
D2
D2 x2 Q x12 R x12 S x12
D1
D1 x4
B2 x1
Install optional cabinet pack /
pullout shelf / locking drawer
assembly after step 2
E
E
E
C
A
C2
A2
B2
B
4 5 6
F
C
F
E
B2
C2
C2
B
C
A2
A
T
T2
A2
A
Page 2
WT-D Pullout Drawer Instructions
01/30/13
www.luxorfurn.com
www.hwilson.com
With a Phillips Screwdriver, attach
1
the drawer assembly to the top
shelf with the 4 screws.
Parts List
H
G x1
H
Tools Required
- Phillips Screwdriver
K x2 H x4
H
H
G
K
A
Page 3

02/01/13
www.luxorfurn.com
www.hwilson.com
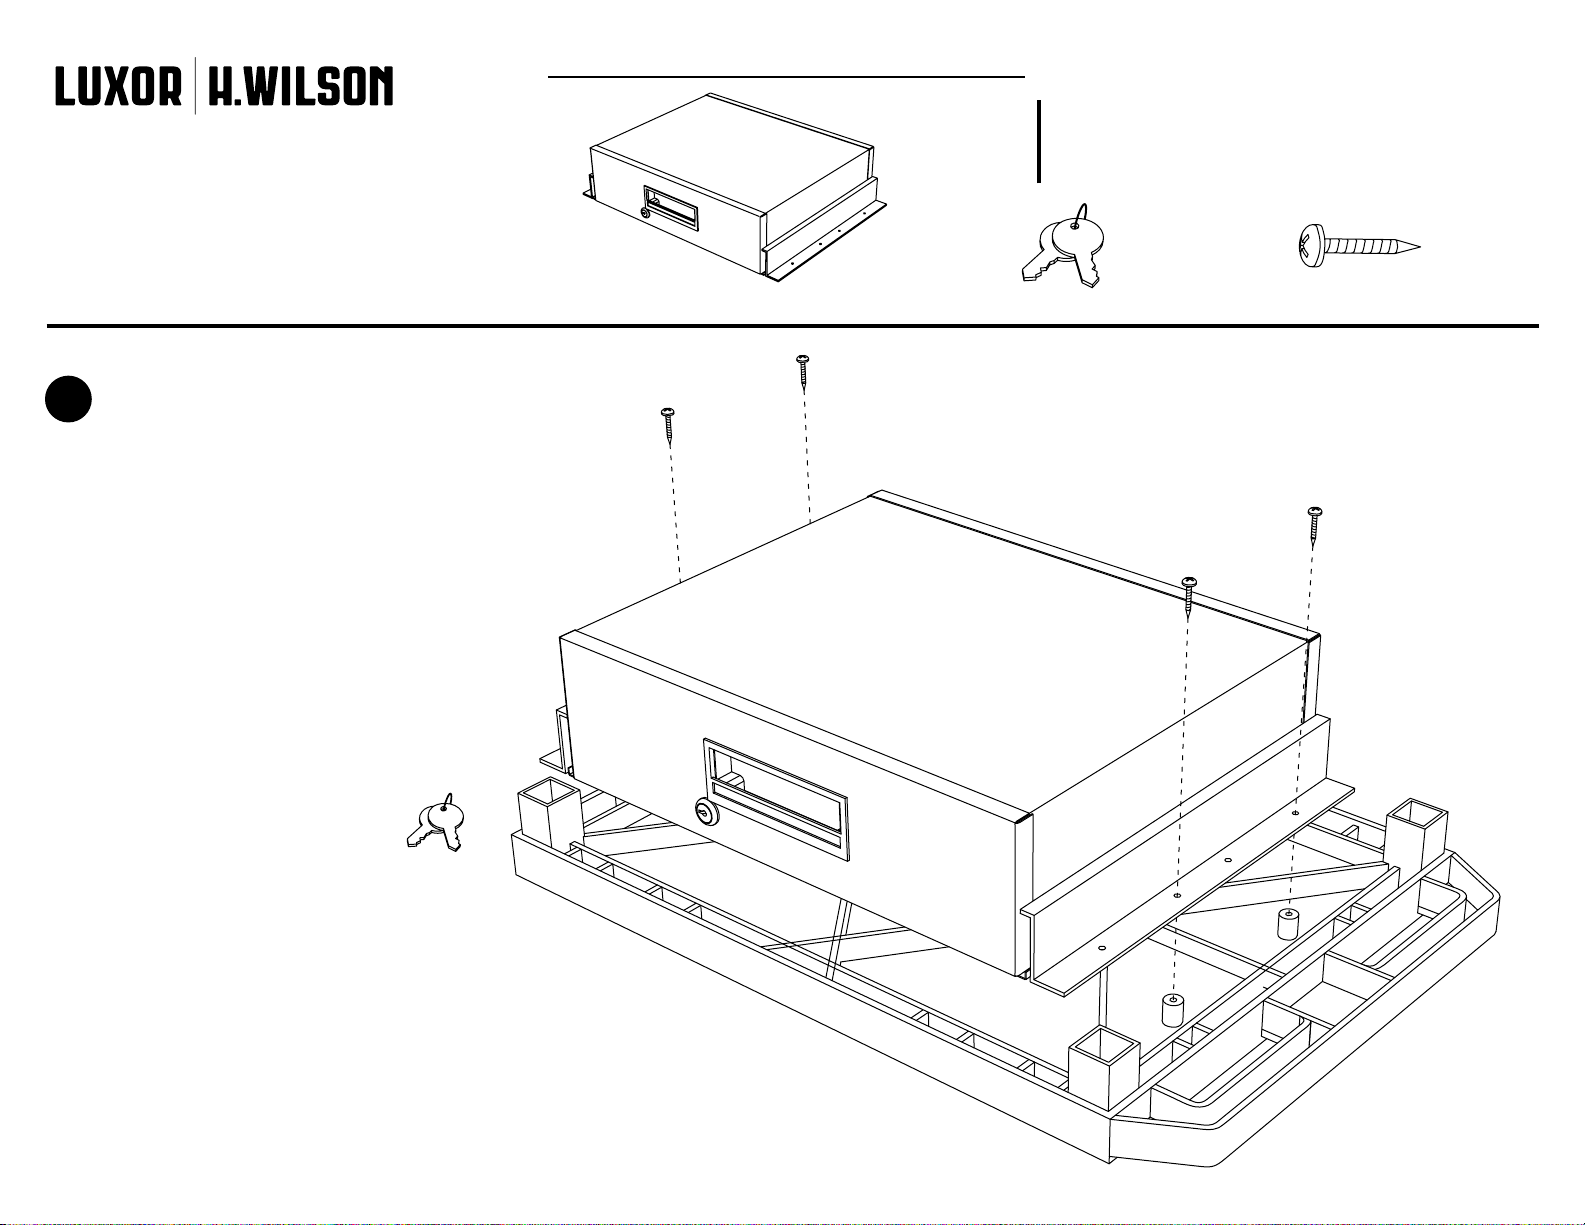
Tuffy Cart Cabinet
Pack Instructions
Please consult your Tuffy cart
base unit instructions before
starting
1
IMPORTANT: Flip shelf B,
and lock the 2 locking casters
D before assembling the unit.
B
Parts List
G x1
2
J x2
F
B
H x1
K x2
Key
3
Tools Required
- Rubber Mallet
J
B
J
4
H
B
D
5
6
A / C
G
B
Page 4

01/16/13
www.luxorfurn.com
www.hwilson.com
Electric Assembly
Instructions
Number of outlets
may vary.
Parts List
Tools Required
- Screwdriver
A x1 B x1 C x2 D x2
D
D
(Plastic or Metal
Mounting Surface)
C
1
Push screw C through electric outlet A. Make sure
the electric outlet A and cord wrap B align with the
mounting surface screw holes. Push screw C through
cord wrap B and the mounting surface screw holes.
Use wing nut D and screwdriver to fasten.
B
A
C
 Loading...