

Page 1
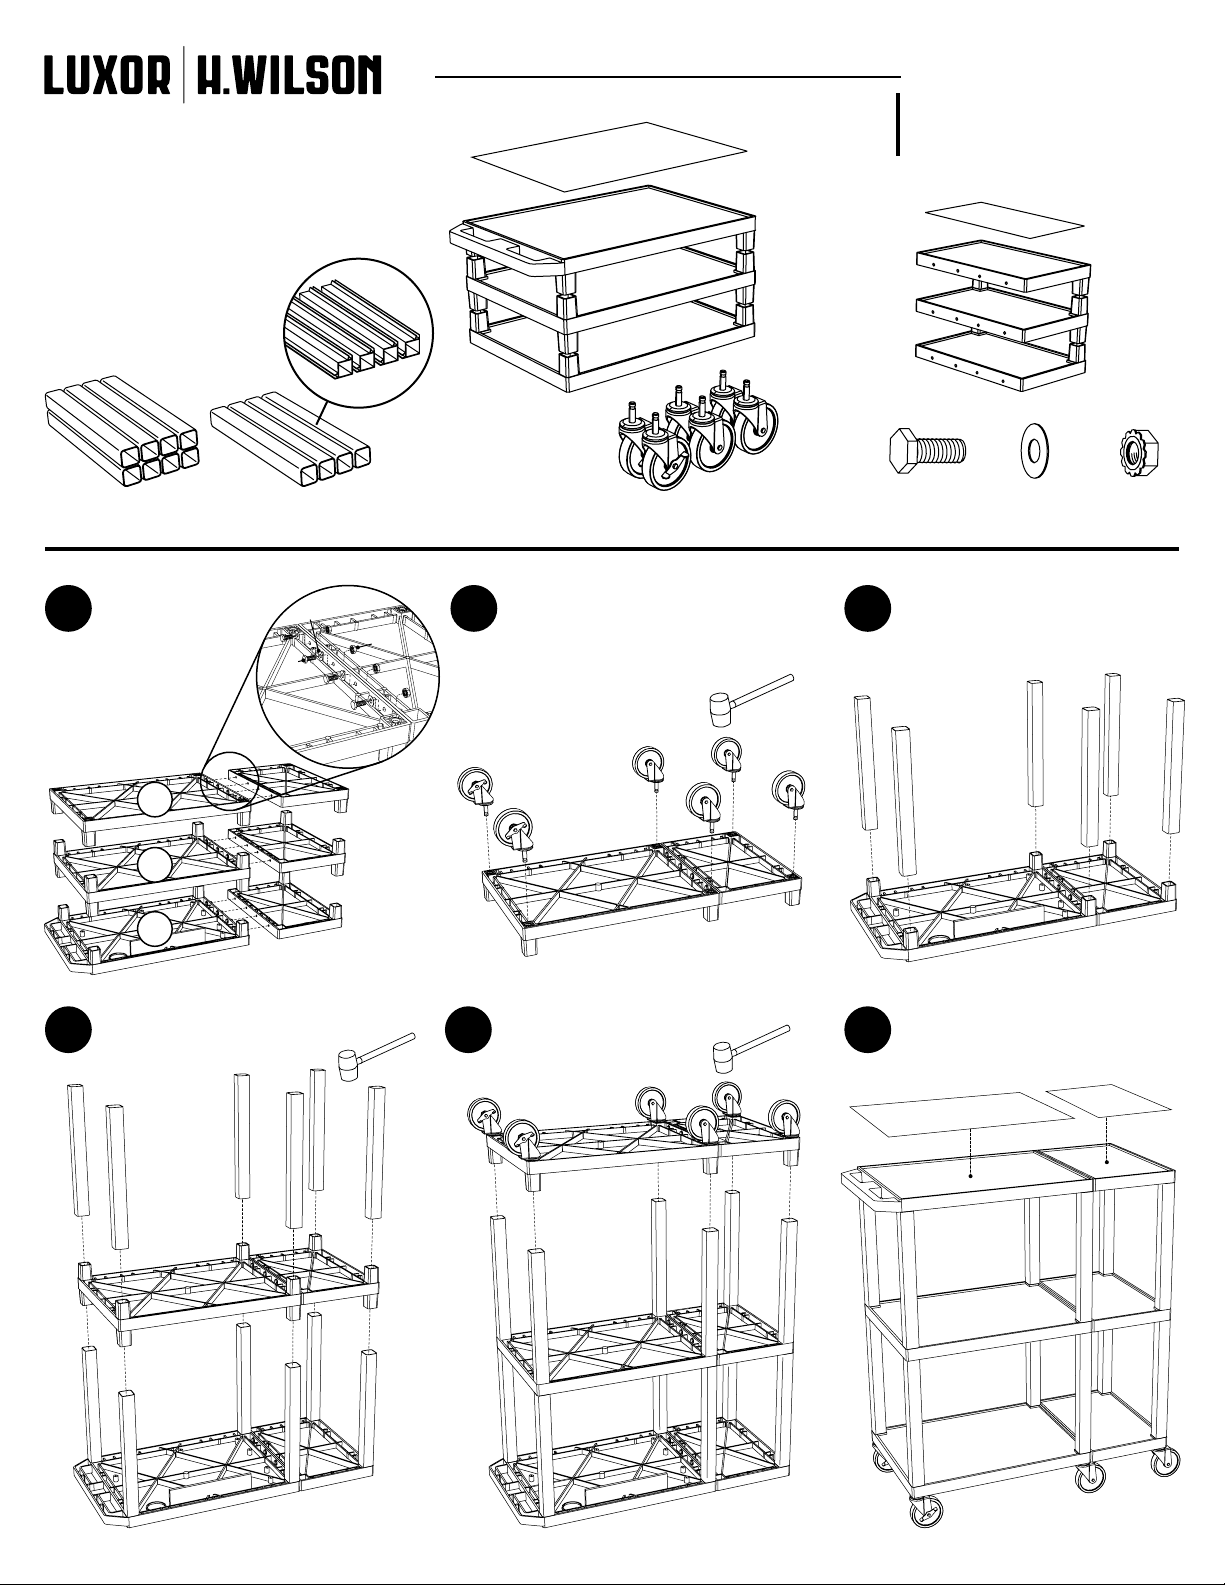
WTPS70 Series Cart Instructions
06/21/13
www.luxorfurn.com
www.hwilson.com
NOTICE:
Leg lengths may
vary by model
E x8 F x4
1
NOTICE:
Use wrench to
tighten bolt Q &
locking nut S
B
Q
x12
Parts List
T x1
A x1
T2 x1
Tools Required
- Rubber Mallet
- Wrench
A2 x1
C x1
C2 x1
B x1
Optional uted
legs for units with
cabinet pack
R
S
B2
2 3
D2
D2 x2 Q x12 R x12 S x12
D1
D1 x4
B2 x1
Install optional cabinet pack /
pullout shelf / locking drawer
assembly after step 2
E
E
E
C
A
C2
A2
B2
B
4 5 6
F
C
F
E
B2
C2
C2
B
C
A2
A
T
T2
A2
A
Page 2
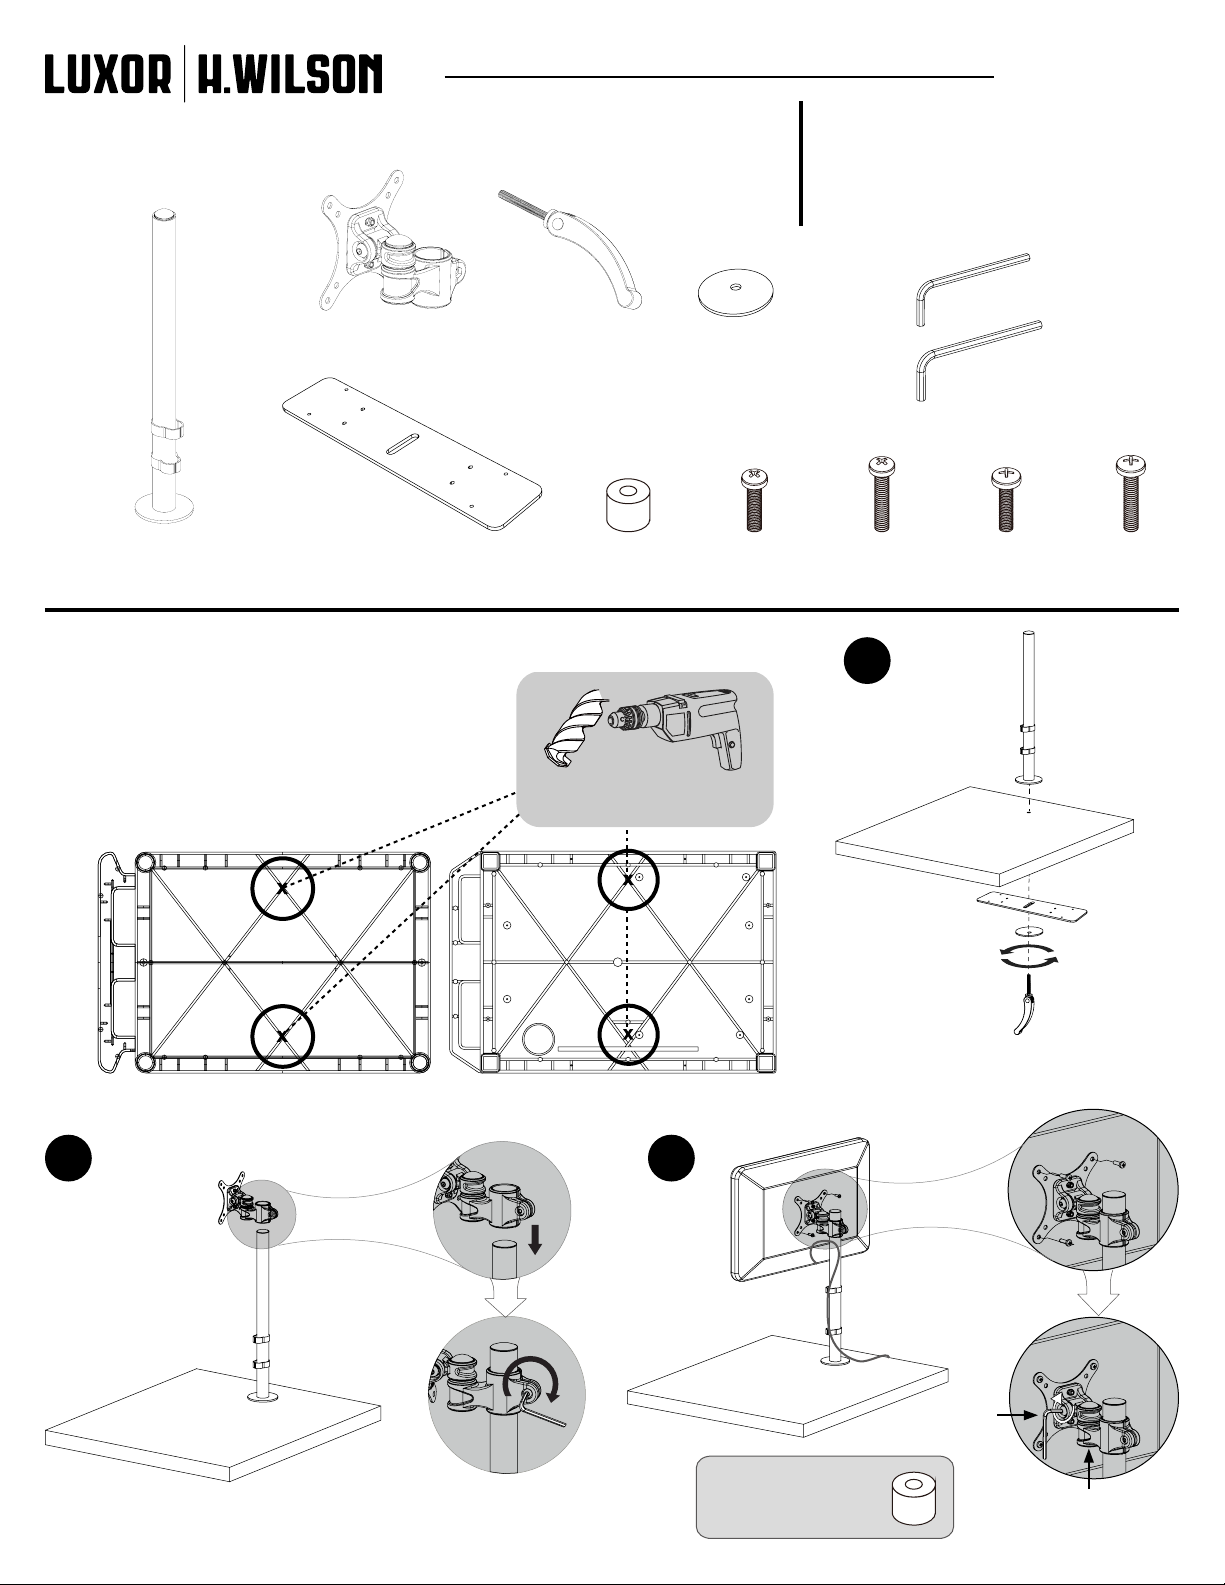
Flat Panel Desktop Mount Instructions
05/14/13
www.luxorfurn.com
www.hwilson.com
A x1
Self Install Instructions:
For plastic ribbed shelf drill into sections
where the cross ribs intersect. For other
surfaces make sure there is 3˝ x 12˝ of
clearance for the mounting plate.
Parts List
B x1
C x1 F x1
D x1 E x4
Tools Required
- Phillips Screwdriver
- 13mm Socket Wrench
- Drill + 3/8˝ or 9mm Drill Bit (Not re-
quired on units with pre-drilled hole)
M4x12
4mm
5mm
M4x20 M5x12 M5x20
G x1
H x1
J x4 K x4 L x4 N x4
1
A
WARNING: Please follow the cautionary
guidelines included with your drill.
Bottom of Luxor Top Shelf
2
B
A
3/8˝ or 9mm Drill Bit x1
Bottom of H.Wilson Top Shelf
B
3
A
Monitor
(Not Included)
Leave some
slack on the cable.
B
Tighten with
allen wrench G
G
Insert spacers E on
screens with counter
sunk hole patterns
Mounting Surface
(Optional)
F
B
Tighten with a
Phillips Screwdriver
Tighten with
allen wrench H
E
Tighten with 13mm
Socket Wrench
D
C
J, K, L, N
B
H
Page 3

Front Pullout Shelf Instructions
Tuffy Cart
05/03/13
www.luxorfurn.com
www.hwilson.com
G x1
H x1
Lay the top shelf of your Tuffy cart upside down
1
and Install the four legs intended for this shelf.
E
Parts List
Tools Required
- Phillips Screwdriver
K x1 L x2
2
Slide and align runner H & G onto the legs
and tighten screw N with a screwdriver.
M x6
H
N x4
N
E
A
Take pullout shelf K and bracket L and screw
3
together into the unnished surface of shelf K
with screw M.
K
G
IMPORTANT:
Install optional side pullout
shelf AFTER step 2
Mount pullout shelf K to runner H & G so that the
4
edge of the shelf snaps into the runner hooks.
K
N
1
L
M
M
L
H
G
2
You have now completed your pullout shelf.
Page 4

02/01/13
www.luxorfurn.com
www.hwilson.com
Tuffy Cart Cabinet
Pack Instructions
Please consult your Tuffy cart
base unit instructions before
starting
1
IMPORTANT: Flip shelf B,
and lock the 2 locking casters
D before assembling the unit.
B
Parts List
G x1
2
J x2
F
B
H x1
K x2
Key
3
Tools Required
- Rubber Mallet
J
B
J
4
H
B
D
5
6
A / C
G
B
Page 5

01/16/13
www.luxorfurn.com
www.hwilson.com
Electric Assembly
Instructions
Number of outlets
may vary.
Parts List
Tools Required
- Screwdriver
A x1 B x1 C x2 D x2
D
D
(Plastic or Metal
Mounting Surface)
C
1
Push screw C through electric outlet A. Make sure
the electric outlet A and cord wrap B align with the
mounting surface screw holes. Push screw C through
cord wrap B and the mounting surface screw holes.
Use wing nut D and screwdriver to fasten.
B
A
C
 Loading...