

Page 1
H. Wilson Company
2245 Delany Road
Waukegan, IL 60087
(800) 245-7224
sales@hwilson.com
WT16, WT26, WT34, WT42 & WT1642
Tuffy Cart Assembly Instructions
Parts List:
(1) Top shelf with handle
(1) Middle shelf with 8 leg bosses
(1) Bottom Shelf with caster inserts
and four bosses
(1) Electrical Assembly if 'E' model was
purchased
(4) 8 1/2" Legs
(8) 16 1/2" legs
(3) Cable Management Clips
(2) 4” Swivel casters with brake
(2) 4” swivel casters
Required Tools
(not included)
Rubber Mallet
TO MAKE A ASSEMBLED HEIGHT USE THESE LEGS USE THESE SHELVES
WT16 16 ½" 8 ½" TOP & BOTTOM
WT26 24 ½" 16 ½" TOP & BOTTOM
WT34 34" 1 SET 8 ½" & 16 ½" TOP, MIDDLE & BOTTOM
WT42 42 ½" 2 SETS OF 16 ½" TOP, MIDDLE & BOTTOM
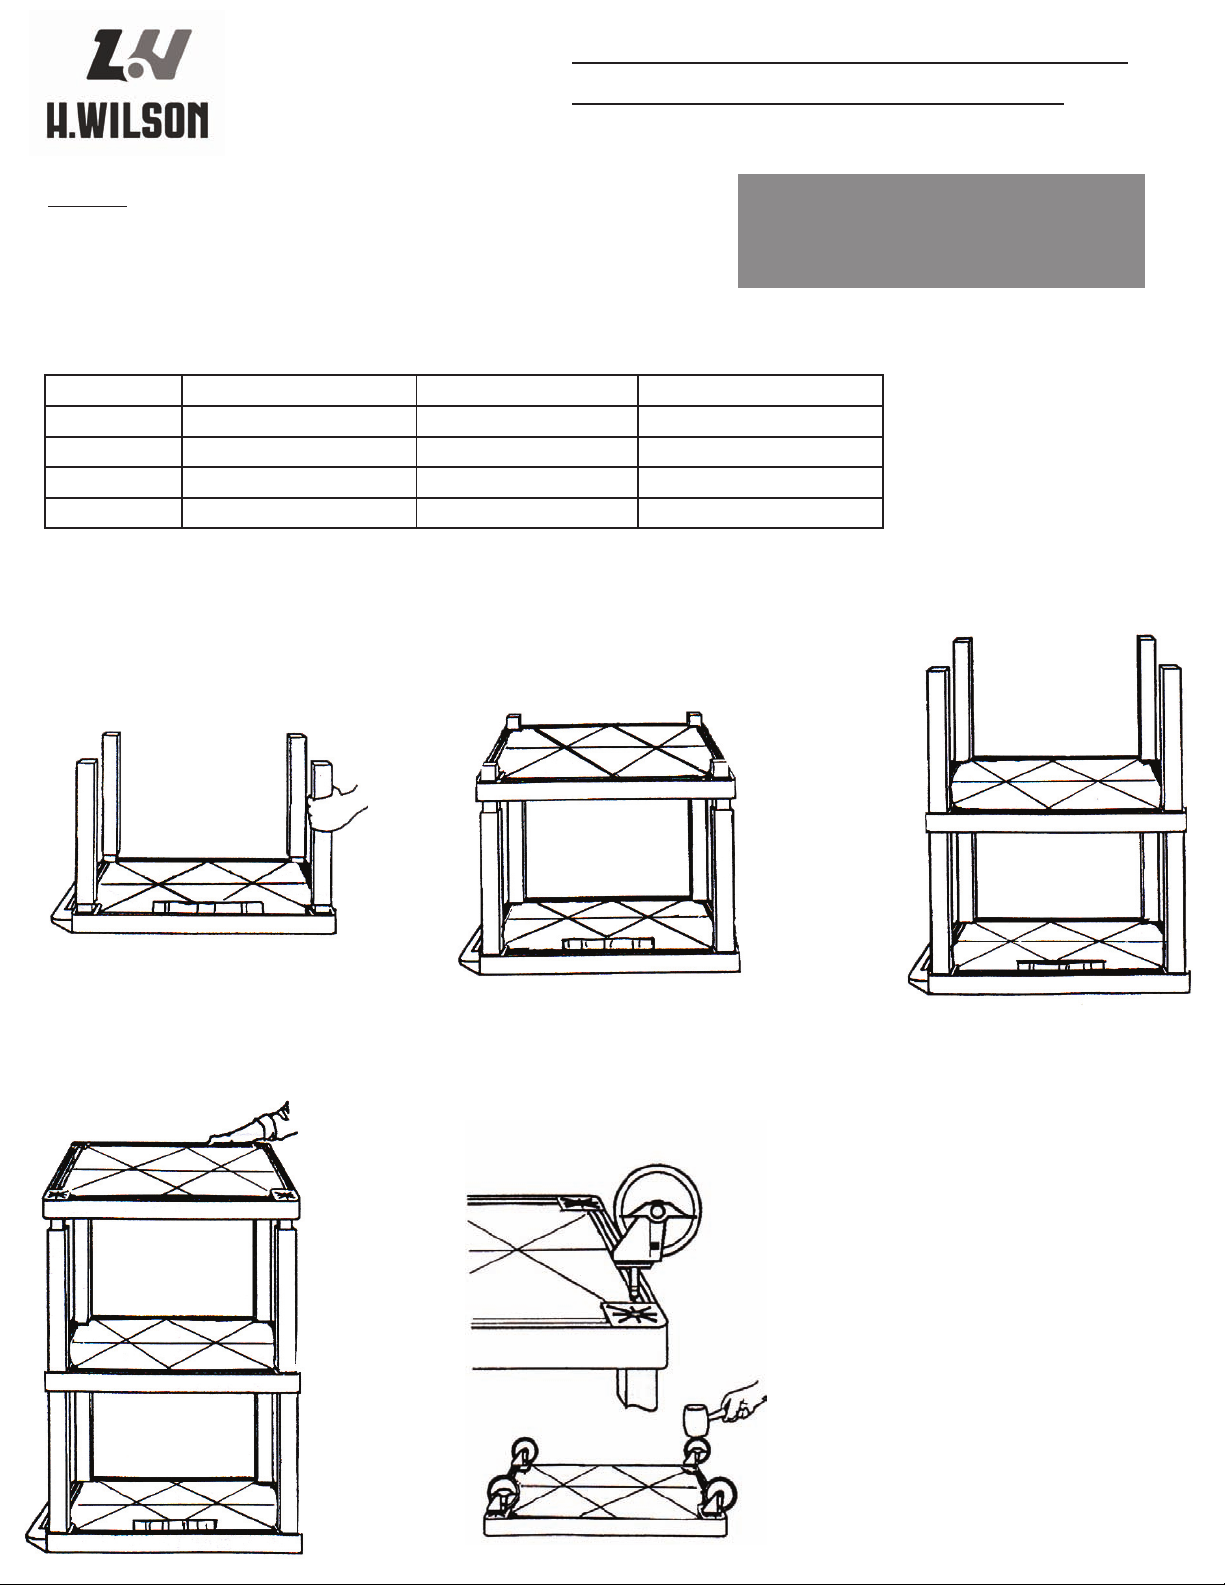
1. Place top shelf on firm surface, underside up. Insert legs onto leg bosses. Press
fit as much as possible with hands. Tap
firmly with rubber mallet if necessary.
For WT16, WT26 & WT34 use 8 ½" legs at
this time. For WT42, use 16½" legs at this
time.
2. If making a WT16 or WT26, your table
has no middle shelf, please proceed
to step 4. Otherwise, postition middle
shelf, underside up, onto legs. Press fit
as much as possible with hands. Using
rubber mallet, firmly seat legs into shelf.
3. FOR WT34 & WT42 ONLY - Place 16½"
legs onto leg bosses. Press fit as much as
possible with hands. Seat firmly with rubber
mallet.
Optional: metal hammer with
block of wood to cushion impact.
4. Position bottom shelf, underside
up, onto legs. Firmly seat shelf onto
legs using rubber mallet.
5. Insert casters into caster sockets,
making sure that you have the two
locking casters in the caster sockets
on the 18" long side of the cart that
has the handle.
To attach the electrical assembly, please see
the instructions included with the assembly.
Note: You may have extra
legs after assembly is finished,
depending on the height you
choose to make your cart.
Updated 12/12/06
Page 2
H. Wilson Company
555 West T
South Holland, IL 60473
(800) 245-7224
sales@hwilson.com
aft Drive
WT26C, WT34C, WT42C & WT2642C
Tuffy Cart Assembly Instructions
Parts List:
(1) Top shelf with handle & 4 bosses
(1) Middle shelf with 8 leg bosses
(1) Bottom Shelf with caster inserts
and four bosses
(1) Electrical Assembly if 'E' model was
purchased
(4) 8 1/2" Legs
(4) 16 1/2" legs
(4) 16 1/2" fluted legs
(3) Cable Management Clips
(2) 4” Swivel casters with brake
(2) 4” swivel casters
(1) Cabinet Pack
Required Tools
(not included)
Rubber Mallet
Optional: metal hammer with
block of wood to cushion impact.
TO MAKE A ASSEMBLED HEIGHT USE THESE LEGS USE THESE SHELVES
WT26C 24 ½" 16 ½" fluted TOP & BOTTOM
WT34C 34" 1 SET 8 ½" & 16 ½" fluted TOP, MIDDLE & BOTTOM
WT42C 42 ½" 1 SET OF 16 ½"/1 SET OF 16 ½" fluted TOP, MIDDLE & BOTTOM
***NOTE: Fluted legs should be placed over bosses with the fluted channels towards each other, facing in.
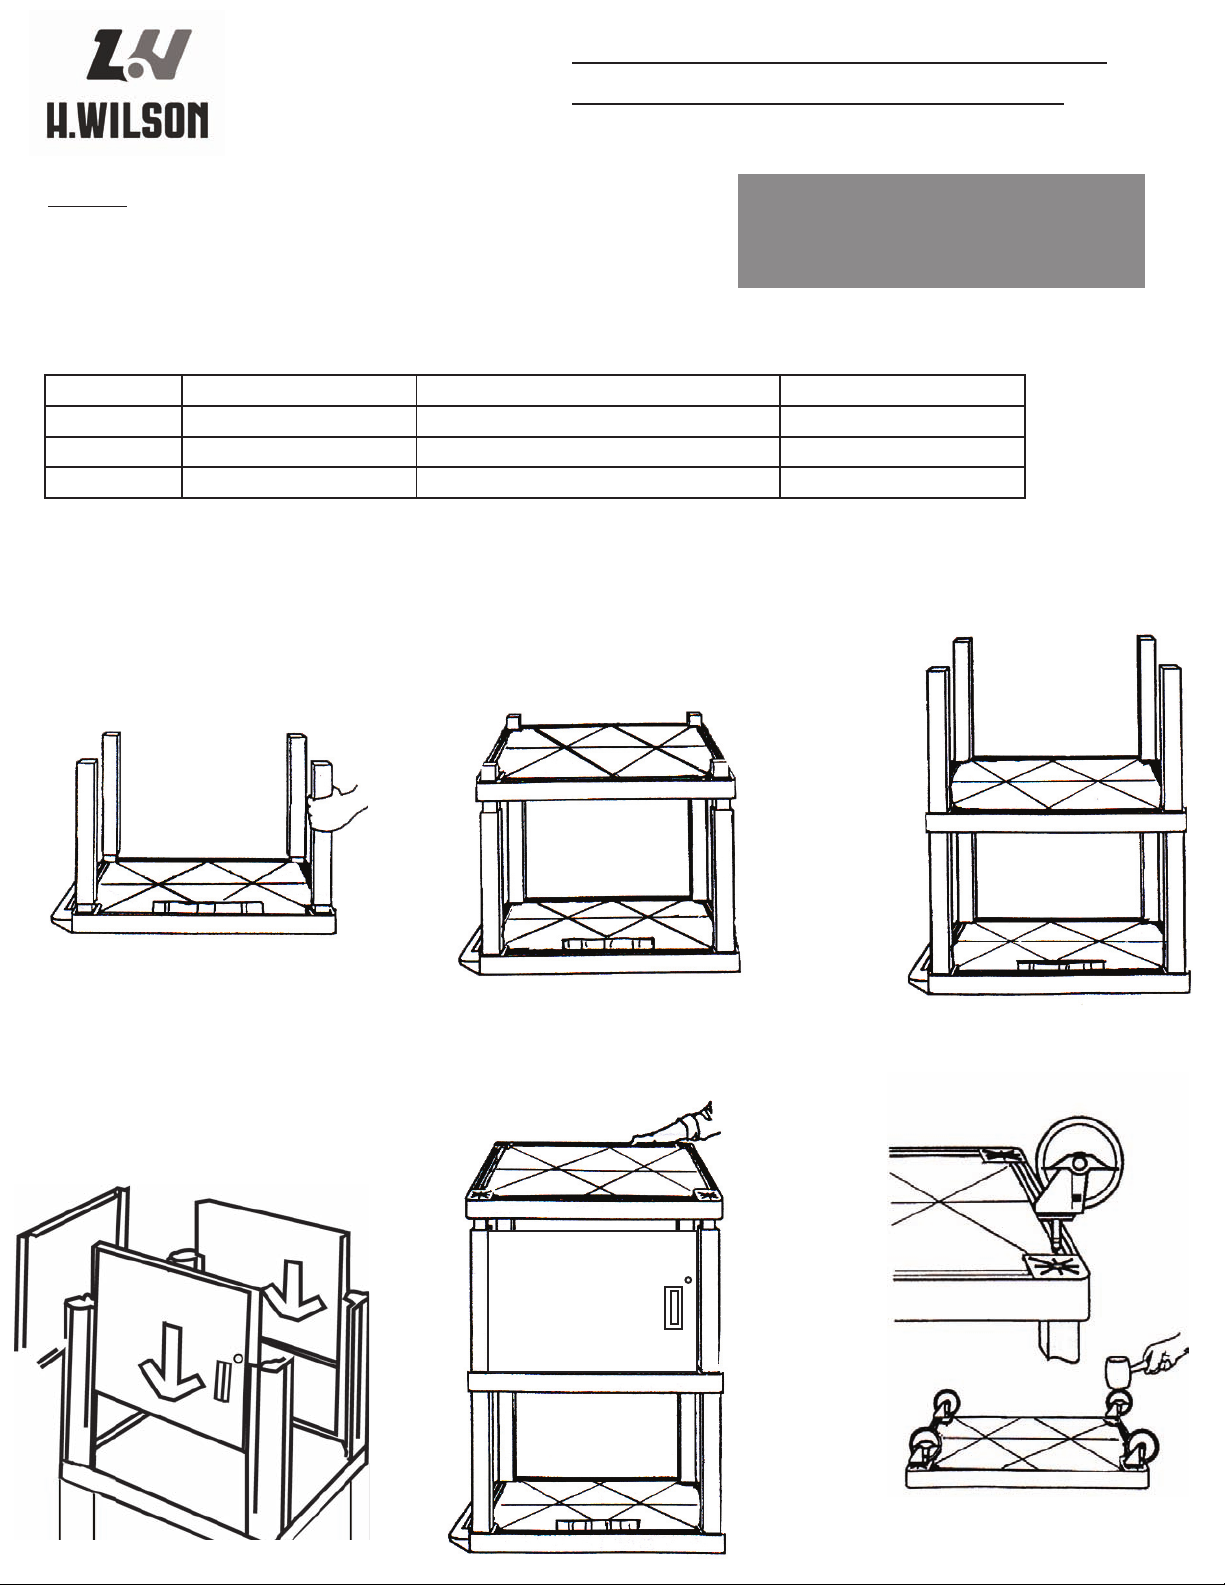
1. Place top shelf on firm surface, underside up. For WT34 use 8 ½" legs at this
time. For WT42, use 16½" legs at this
time. For a WT26, use 16½" fluted legs.
Insert legs onto leg bosses. Press fit as
much as possible with hands. Tap firmly
with rubber mallet if necessary.
2. If making a WT26, your table has no
middle shelf, please proceed to step 4.
Otherwise, postition middle shelf, underside up, onto legs. Press fit as much
as possible with hands. Using rubber
mallet, firmly seat legs into shelf.
3. FOR WT34 & WT42 ONLY - Place 16½"
fluted legs onto leg bosses. Press fit as much
as possible with hands. Seat firmly with rubber mallet.
Step 4: Locate back panel and slide down
into grooves of the 2 back legs (same side as
electrical bracket on top shelf. Take the two
side panels, slide into place. Take front panel
and slide into place positioned so that the
lock will be on the left.
Updated 12/12/06
5. Position bottom shelf, underside
up, onto legs. Firmly seat shelf onto
legs using rubber mallet.
6. Insert casters into caster sockets,
making sure that you have the two
locking casters in the caster sockets
on the 18" long side of the cart that
has the handle.
To attach the electrical assembly, please see
the instructions included with the assembly.
Page 3

Tuy Side Shelf Assembly
1. Place wire bracket on at surface as shown in Figure 1.
2. Fit side shelf, solid surface up, into bracket as shown in Figure 2 & 3.
3. Take assembled shelf unit and hold over shorter side of cart (without handle). See gure 4.
4. Place top of shelf unit onto top of cart shelf as shown in gure 5.
5. Push down until side braces clamp onto legs and top lip is secure on top of cart. See gure 6.
1
3
2
4
5
6
 Loading...