

Page 1
Wall-mounted Glass Board
Instructions
WARNING: Two people are required to
build this Glass Board. Use care when
handling the Glass Board.
Parts List
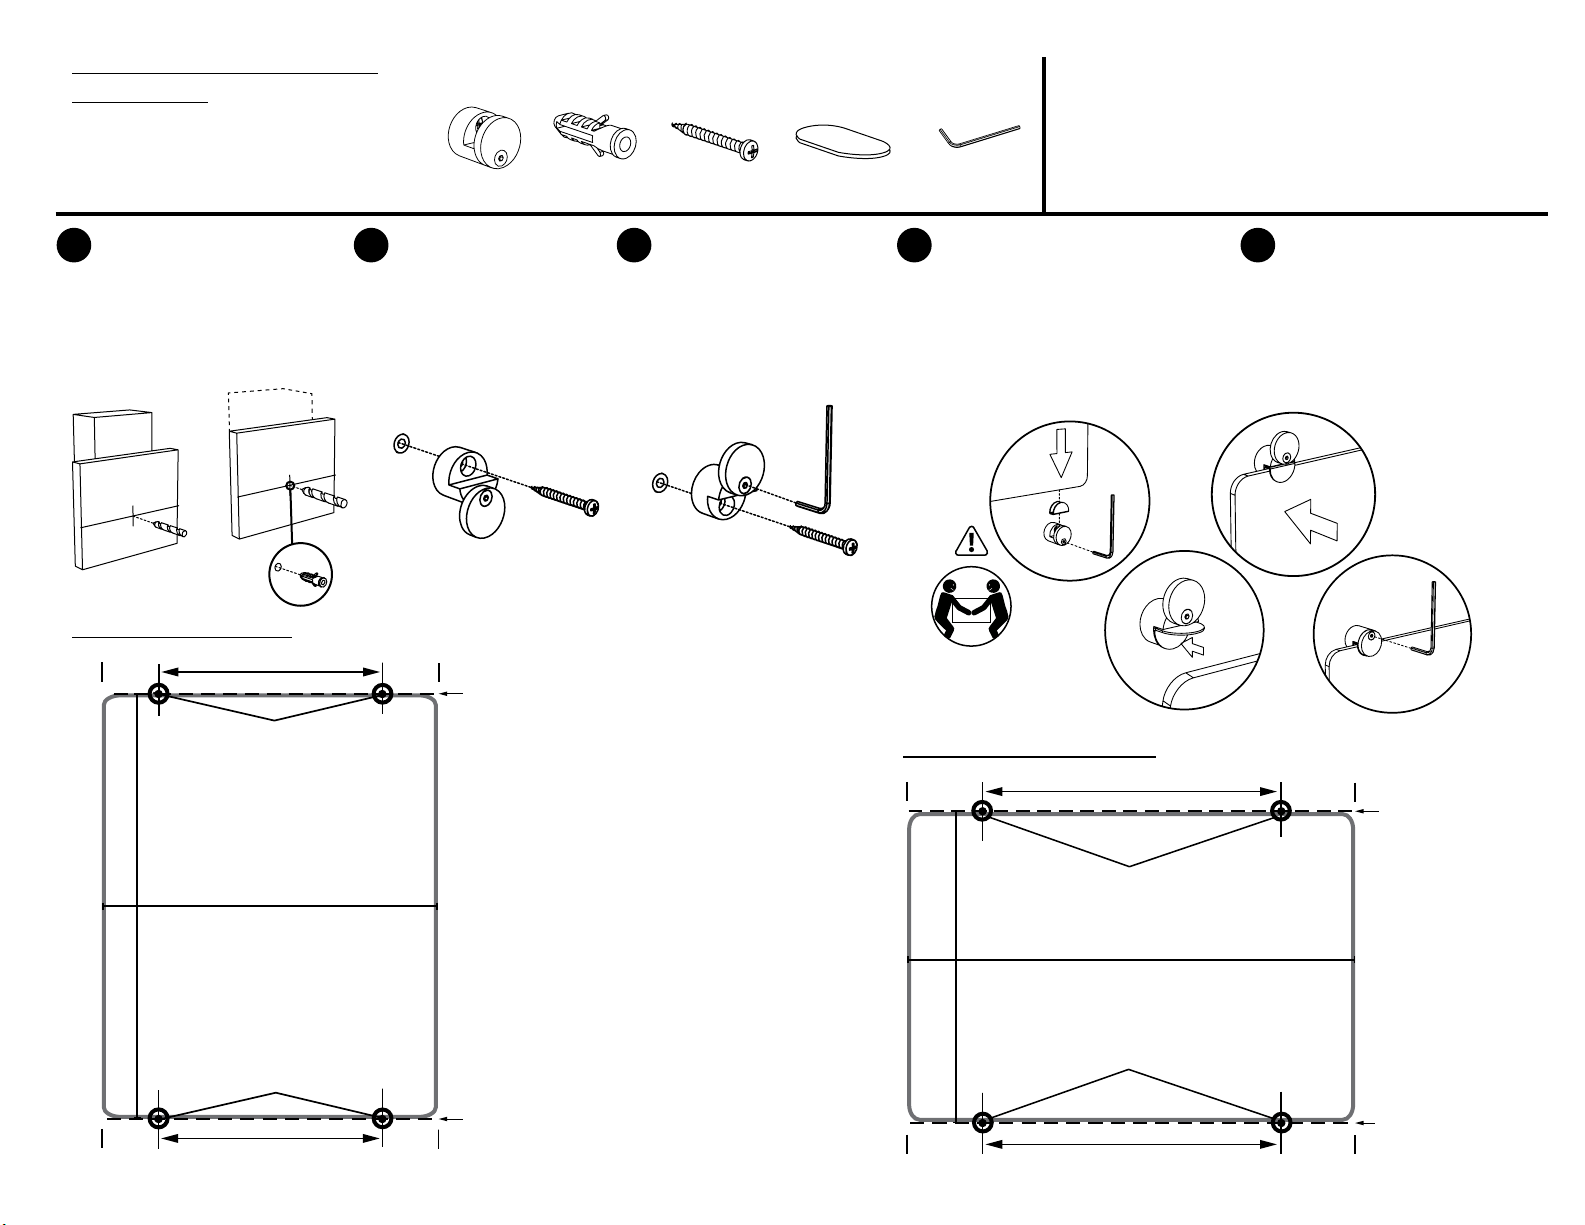
Note: Hardware provided is for drywall installation. If attaching
to other material fasteners are to be furnished by other.
A x4 B x4 C x4 D x4 E x4
Tools Required
- Tape Measure
- Chalk Line
- Drill
- 1/4˝ Drill Bit (No Stud)
- 1/8˝ Drill Bit (Stud)
12/17/13
- Extended Drive Phillips
- Hammer
- Level
- Stud Finder
- Pencil
Snap two horizontal chalk
1 2 3 4 5
lines at the shown height.
Drill four holes as shown
(Stud is recommended). If
there is no stud Hammer
drywall anchors B into holes.
RECOMMENDED:
STUD
DRYWALL
1/8˝ Bit
NO STUD
DRYWALL
1/4˝ Bit
Secure Pucks A at the
bottom like shown with
screw C make sure the
positioning is level and the
notch is facing up, leave
the clamp facing down.
A
B
Secure Pucks A at the top
with screw C make sure
the positioning is level and
the notch is facing down,
Secure the clamp with
wrench E so the clamp is
locked, facing up.
C
E
A
C
Semi-tighten the Puck clamps
A in the up position and place
the silicone inserts D into the
notches. Carefully lift the glass
board so that it rests on top of
the inserts, seated fully into the
notches, then tighten the clamps.
1. 3.
D
A
E
2. 4.
Vertical Orientation
3˝
40˝
24˝
Hole Locations
3˝
Chalk Line
3913⁄16˝ above the
bottom Chalk
Line
Assembly
Requires Two
People
Horizontal Orientation
4˝
30˝
A
32˝
Hole Locations
Wedge the silicone inserts
D into the open notch A.
Carefully push the glass
board into the open notch
and fold the silicone over the
glass and tighten the clamps
fully. Assembly Complete!
Perform the
A
D
D
A
4˝
steps detailed in
unison, having a
person on each
side tighten
adjacent pucks
at the same time.
E
Chalk Line
13
29
⁄16˝ above the
bottom Chalk
Line
30˝
30˝ x 40˝ Board
40˝
Hole Locations
3˝
24˝
3˝
Chalk Line desired
bottom position.
Recommended
3
31
⁄8˝ from oor.
4˝
Hole Locations
32˝
Chalk Line desired
bottom position.
Recommended
1
⁄4˝ from oor.
37
4˝
 Loading...