

Page 1
Wall-mounted Whiteboard
Instructions
Note: After assembly, remove the
protective lm from the board with
a utility knife.
Parts List
Note: Hardware provided is for drywall installation. If attaching
to other material fasteners are to be furnished by other.
A x4 B x4 C x4 D x4
Tools Required
- Tape Measure
- Chalk Line
- Drill
- 1/4˝ Drill Bit
08/22/13
- Extended Drive
Phillips
- Hammer
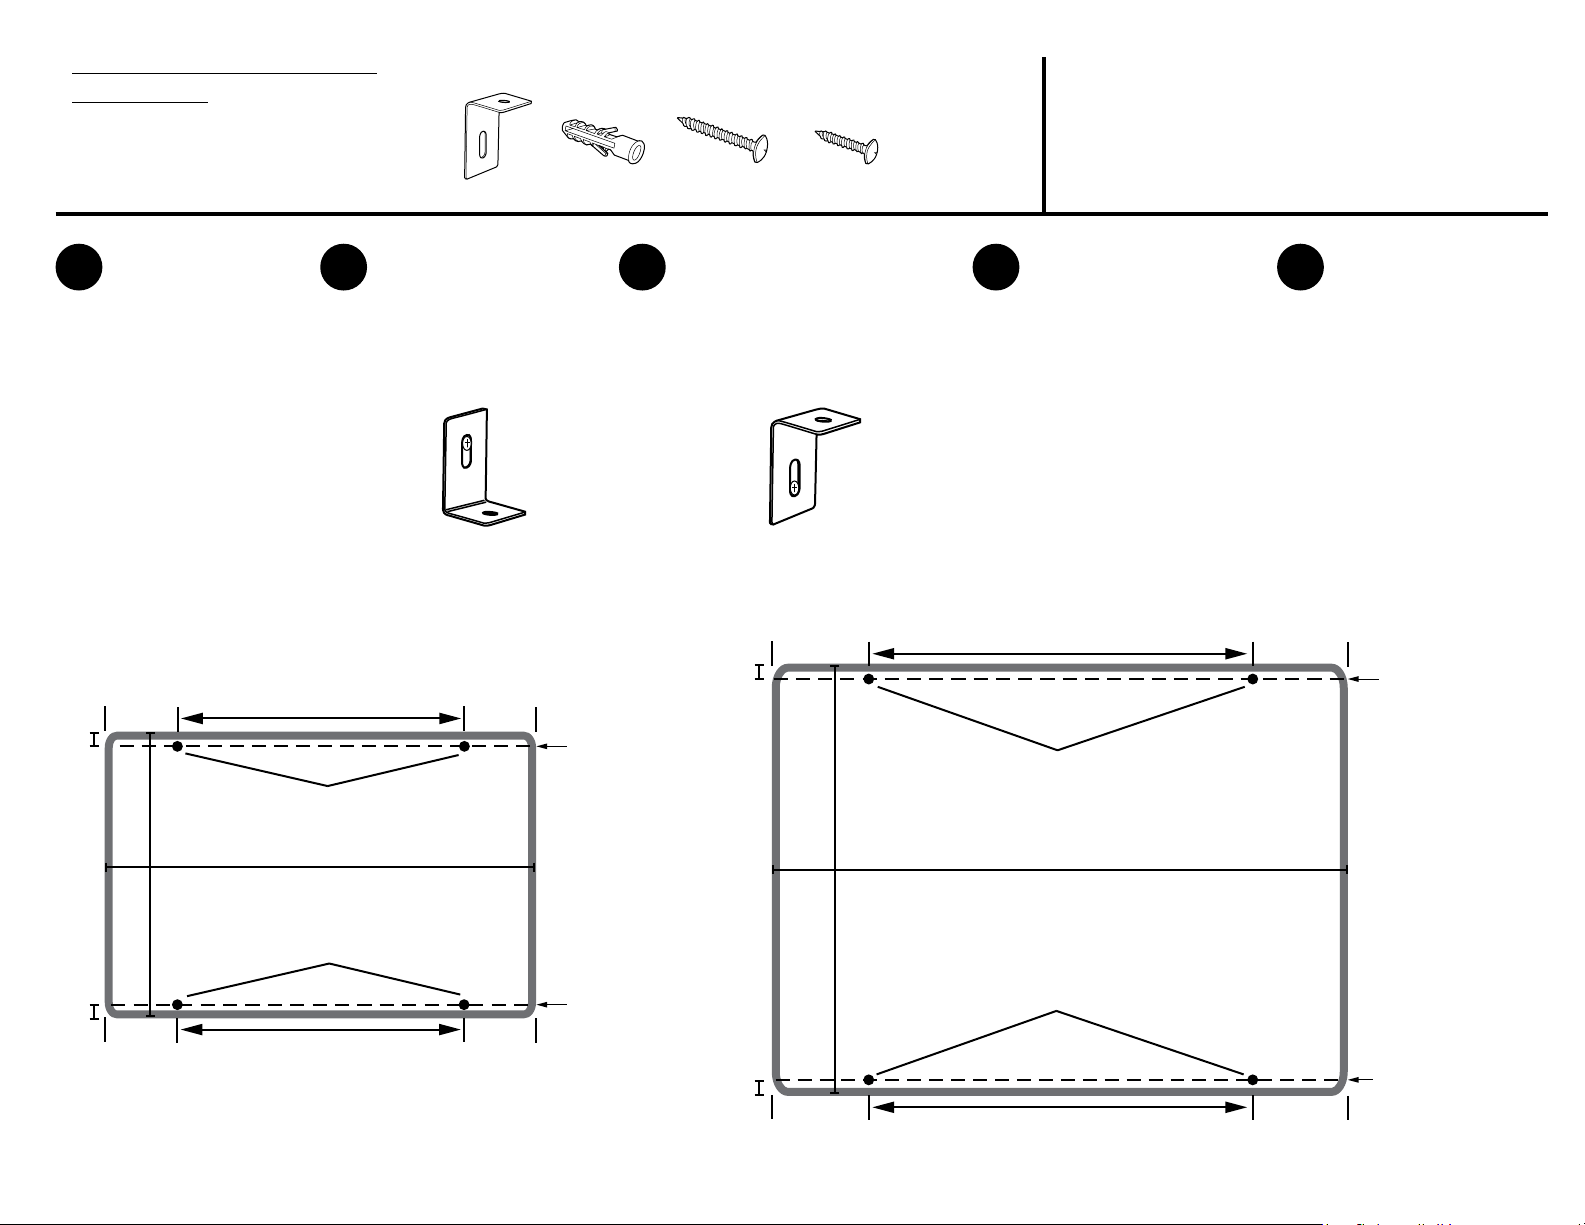
Slide tray into grove
1 2 3 4 5
on bottom of wall
board. Snap two
horizontal chalk
lines at the heights
indicated from the
oor. If attaching to
drywall drill eight
1
⁄4˝
Insert drywall anchors
B into holes then attach
brackets A at the bottom
with screw C making
sure the bracket is in the
lowest position.
Attach brackets A at the top
with screw C making sure
the bracket is in the highest
position. Tighten screw just
enough so that the bracket
can be tapped down with
hammer.
Place white board on
lower brackets making
sure to center it with
middle lower bracket
A. Attach bracket to
wallboard using screw D
starting with the middle
lower bracket.
holes as specied.
1
35
⁄2˝ x 471⁄4˝ Board
235⁄16˝ x 355⁄16˝ Board
75⁄8˝
32˝
75⁄8˝
1˝ space
3
5
⁄4˝
24˝
1˝
5
⁄16˝
23
Drill Holes
3
5
⁄4˝
Chalk Line
215⁄16˝ above the
35
1
⁄2˝
Drill Holes
bottom Chalk
Line
Tap the top brackets
down so they are
touching the top of
the board. Attach
bracket to wallboard
using screw D.
Chalk Line
1
33
⁄2˝ above the
bottom Chalk
Line
5
⁄16˝
35
Drill Holes
Chalk Line 1˝
above the desired
1˝
3
⁄4˝
5
24˝
3
⁄4˝
5
bottom position.
Recommended
3
46
⁄8˝ from the oor.
1˝ space
471⁄4˝
Drill Holes
Chalk Line 1˝
above the desired
bottom position.
Recommended
5
7
⁄8˝
32˝
75⁄8˝
371⁄4˝ from oor.
 Loading...