

Page 1
Instruction Sheet
Endura Models PC44KBC
Customer Service Dept.
2245 Delany Road
Waukegan, IL 60087
Ph: 847/244-1800 • 800/323-4656
Fax: 847/244-1818 • 800/327-1698
PC44KBC
1 - Top Shelf
- Middle Shelves
1
1 - Bottom Shelf
1 - Keyboard Shelf
2 - Runners
- “L” Brackets
4
1 - Power Cord-Surge
Protected
8 - Legs
2 - Casters
- Casters w/Brake
2
PARTS LIST
4 - Self Tapping Screws (in
unner Pkg.)
R
6 - 5/8˝ screws
14- Sheet Metal Screws (in
Runner Pkg.)
- Cabinet pack assembly
1
TOOLS REQUIRED:
1 - Rubber Mallet (included)
- Slotted Screwdriver
1
1 - Phillips Screwdriver
1
3
Cord Guide Cover
Cable Grommet Hole
GROMMET
HOLE
Grommet Cap
Grommet Ring
CORD WRAP
BRACKET
2
4
Self Tapping Screws
Sheet Metal Screws
(in Runner Bag)
Runner
Metal Keyboard Shelf
“L” Brackets
3
5
K
ROMMET HOLE
G
GROMMET RING
STOVE
BOLTS
Install the back panel in the same manner as side
panels. Insert two stove bolts as illustrated through
“U” bracket into back panel and through slots in
cord wrap bracket. Align the cord wrap bracket
onto stove bolts from the outside of back panel,
and secure with two kep nuts.
NUT
ORD
C
RAP
W
BRACKET
“U”
BRACKET
EP
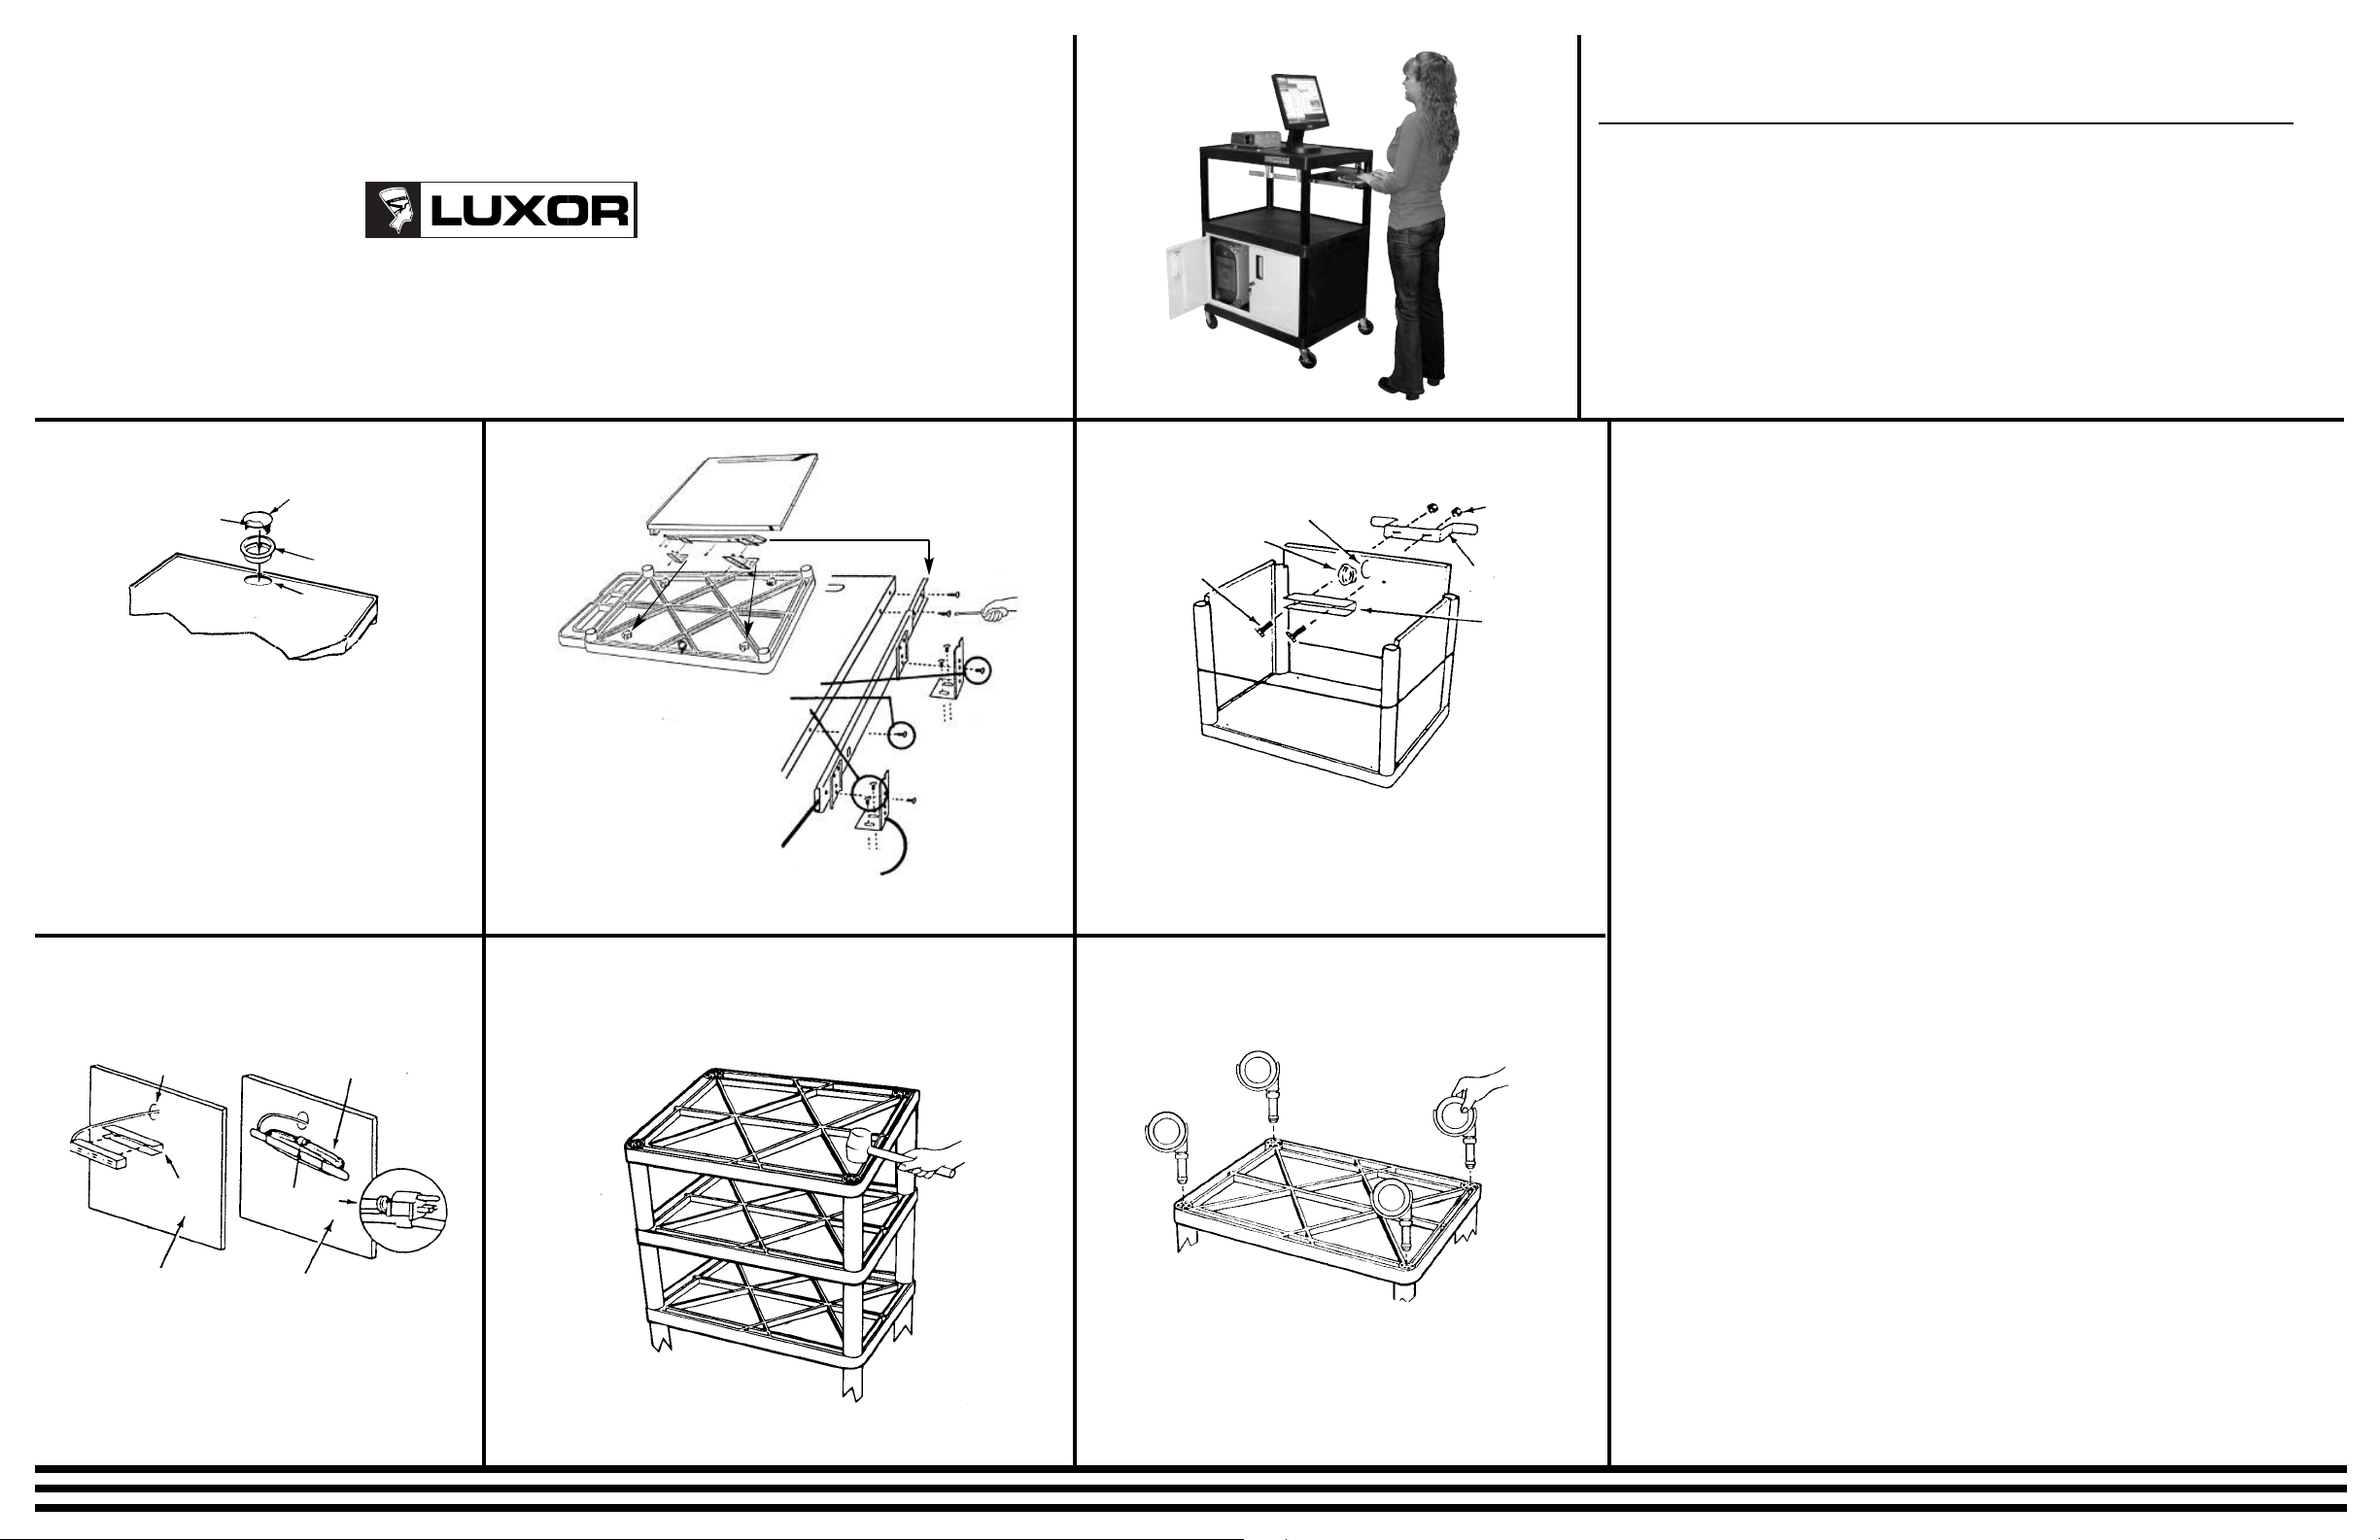
1. Install grommet ring into gromet hole on top shelf.
2A. To install metal pull-out shelf, first turn workstation middle shelf upside
down, locate the four “L” bracket support members as shown in step 1.
2B. Secure “L” brackets to “L” bracket support members using two 5/8 sheet
metal screws per bracket. Do not fully tighten screws at this time. Note:
“L” brackets must face each other pointing in towards center of workstation shelf.
2C. Next, identify left runner from right runner. This is done by extending
runner fully to locate the three holes used to attach to metal shelf. The
portion of the runner with holes must face toward front of metal shelf.
Turn metal shelf upside down and install runners on each side using
three sheet metal screws on each side. Note: Remember all assembly is
being done upside down. Position assembled shelf and runner between
“L” brackets to determine proper spacing of “L” brackets. Carefully
remove metal shelf and fully tighten “L” brackets.
2D. Use self tapping screws to secure runner to “L” brackets. For maximum
clearance use hole on “L” bracket that is farthest away from workstation
top shelf.
3. Install cabinet pack according to the instructions in the cabinet pack
assembly box. Install electric assembly.
urn right side up and install upper legs and top shelf with keyboard.
T
4.
“U”
BRACKET
INSIDE
BACK PANEL
Press 3-outlet power cord into “U” bracket and feed
remaining cord through grommet hole and wrap
remaining cord around cord wrap bracket. For safety and neat appearance, secure cord plug to cord
with plug snap.
PLUG SNAP
OUTSIDE
BACK PANEL
Install casters into each of the four corners.
5
ers are fully seated. T
urn cart right side up. Y
Important: Make sure cast
our Endura is ready to use.
-
 Loading...