

Page 1
Instruction Sheet
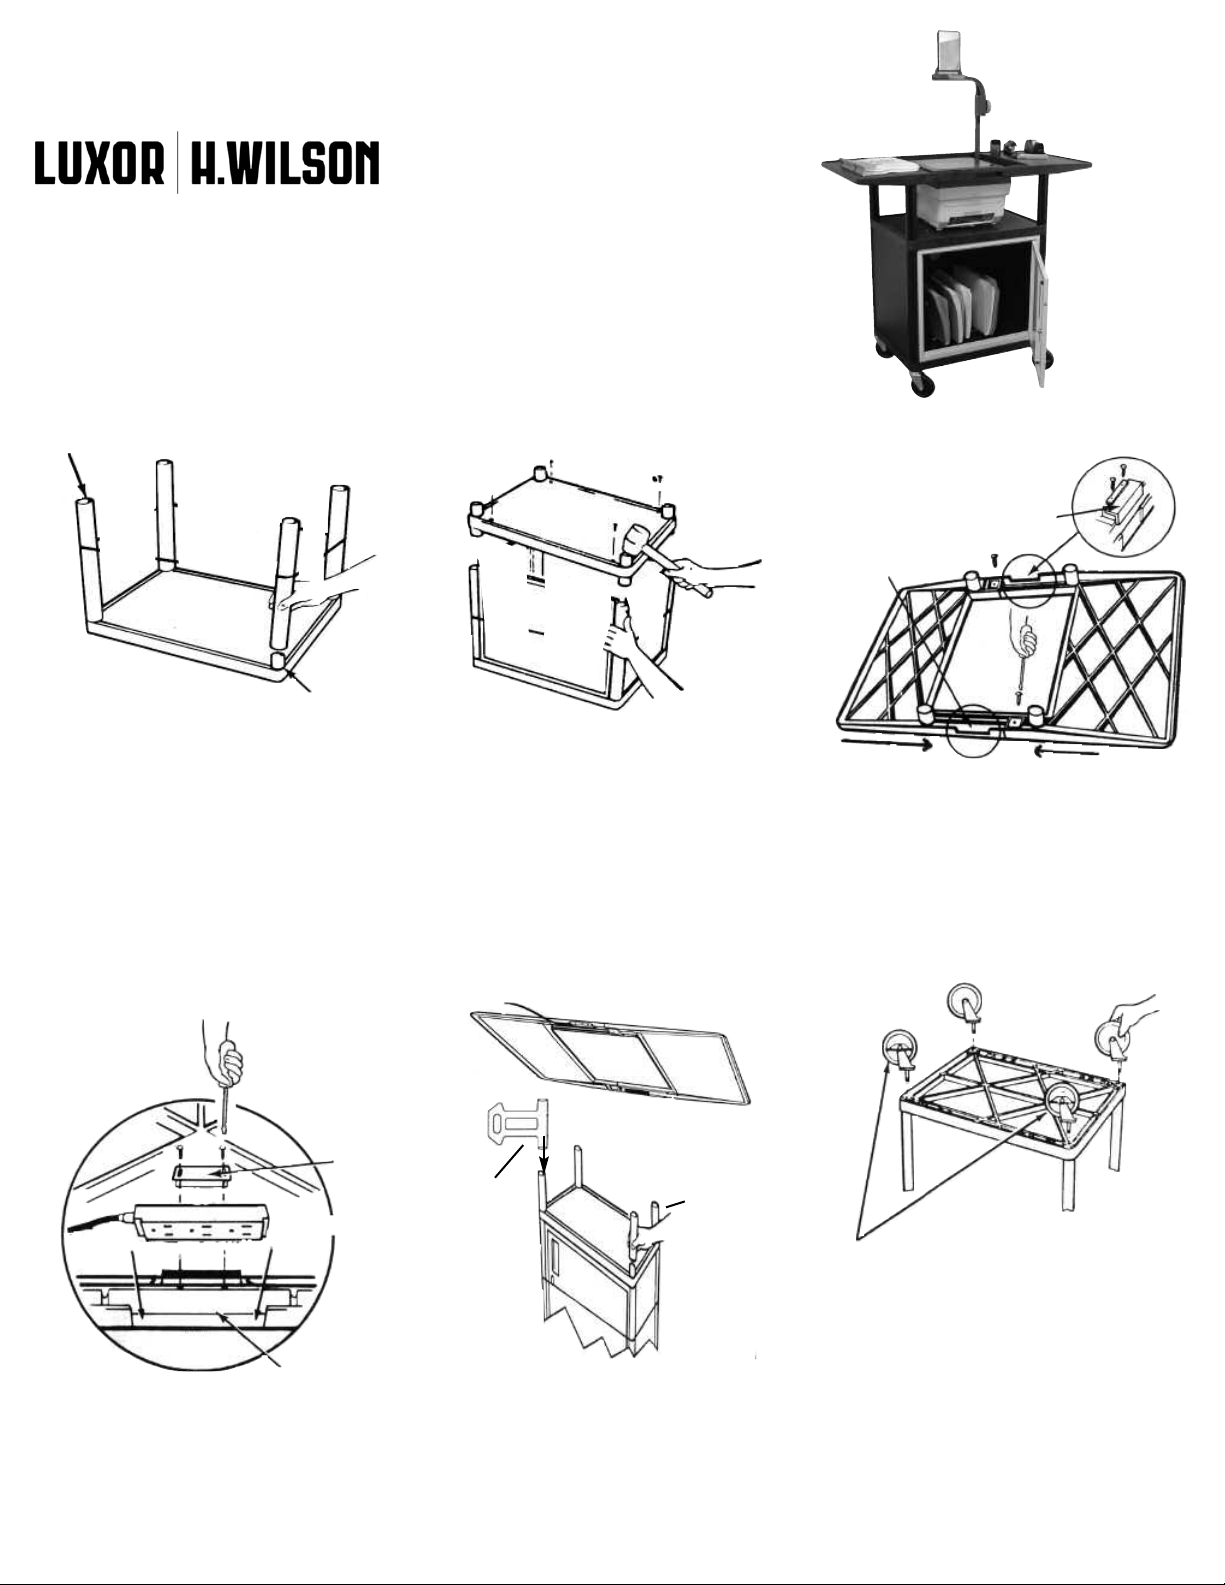
OHT50 Overhead Projector Cart
Customer Service Dept
2245 Delany Rd
Waukegan, IL 60087
Ph: 847/244-1800 • 800/323-4656
Fax: 847/244-1818 • 800/327-1698
1
17
⁄2˝ LEG
CENTER SHELF
BOTTOM
SHELF
TOP SHELF (2 PCS)
ELECTRICAL
HOUSING
COVER
ELECTRICAL
ASSEMBLY
LEG POST
With bottom shelf facing up push all four 17 1/2˝
legs onto leg posts. Using rubber mallet hammer
legs firmly into position. Legs must be seated
(flush) against the shelf surface.
“L”
BRACKET
3 PLUG UNIT
POWER CORD
Gently tap corner post into leg. Repeat on all
4 sides until all posts are partially inserted
into legs. Now repeat hammering action more
firmly going around to each shelf post and
driving the leg posts more securely into the
legs.
TOP
SHELF
CORD
WRAP
CENTER
SHELF
6˝ LEGS
Lay two halves of top shelf, ribbed side up, on a
smooth surface. Join both halves using 2 sheet
metal screws into predrilled shelf holes as shown,
and secure. There are 2 plug housings. Close up
one using electrical housing cover and 2 screws.
PLACE LOCKING CASTERS AS
ILLUSTRATED
PLUG HOUSING
Push power cord into other plug housing. Secure
power cord with “L” bracket and 2 screws.
Push remaining 4 legs onto shelf posts as illustrated. Slide cord wrap over leg as shown. Place top
shelf onto legs. Insert posts into legs of top shelf.
Using rubber mallet, firmly hammer top shelf unto
legs until all 4 legs are seated against shelf surfaces. Remove rubberband.
Push the four casters firmly into the holes in
each corner of the bottom shelf. Important:
casters must be fully seated. Tap firmly with
rubber mallet to properly seat casters. Turn
your table right side up.
 Loading...