

Page 1
Instruction Sheet
Model LLTS24
Customer Service Dept
2245 Delany Rd
Waukegan, IL 60087
Ph: 847/244-1800 • 800/323-4656
Fax: 847/244-1818 • 800/327-1698
LLLLTTSS224
4
Parts List
O 28 pcs shelf support
P 4 pcs locking bar cover
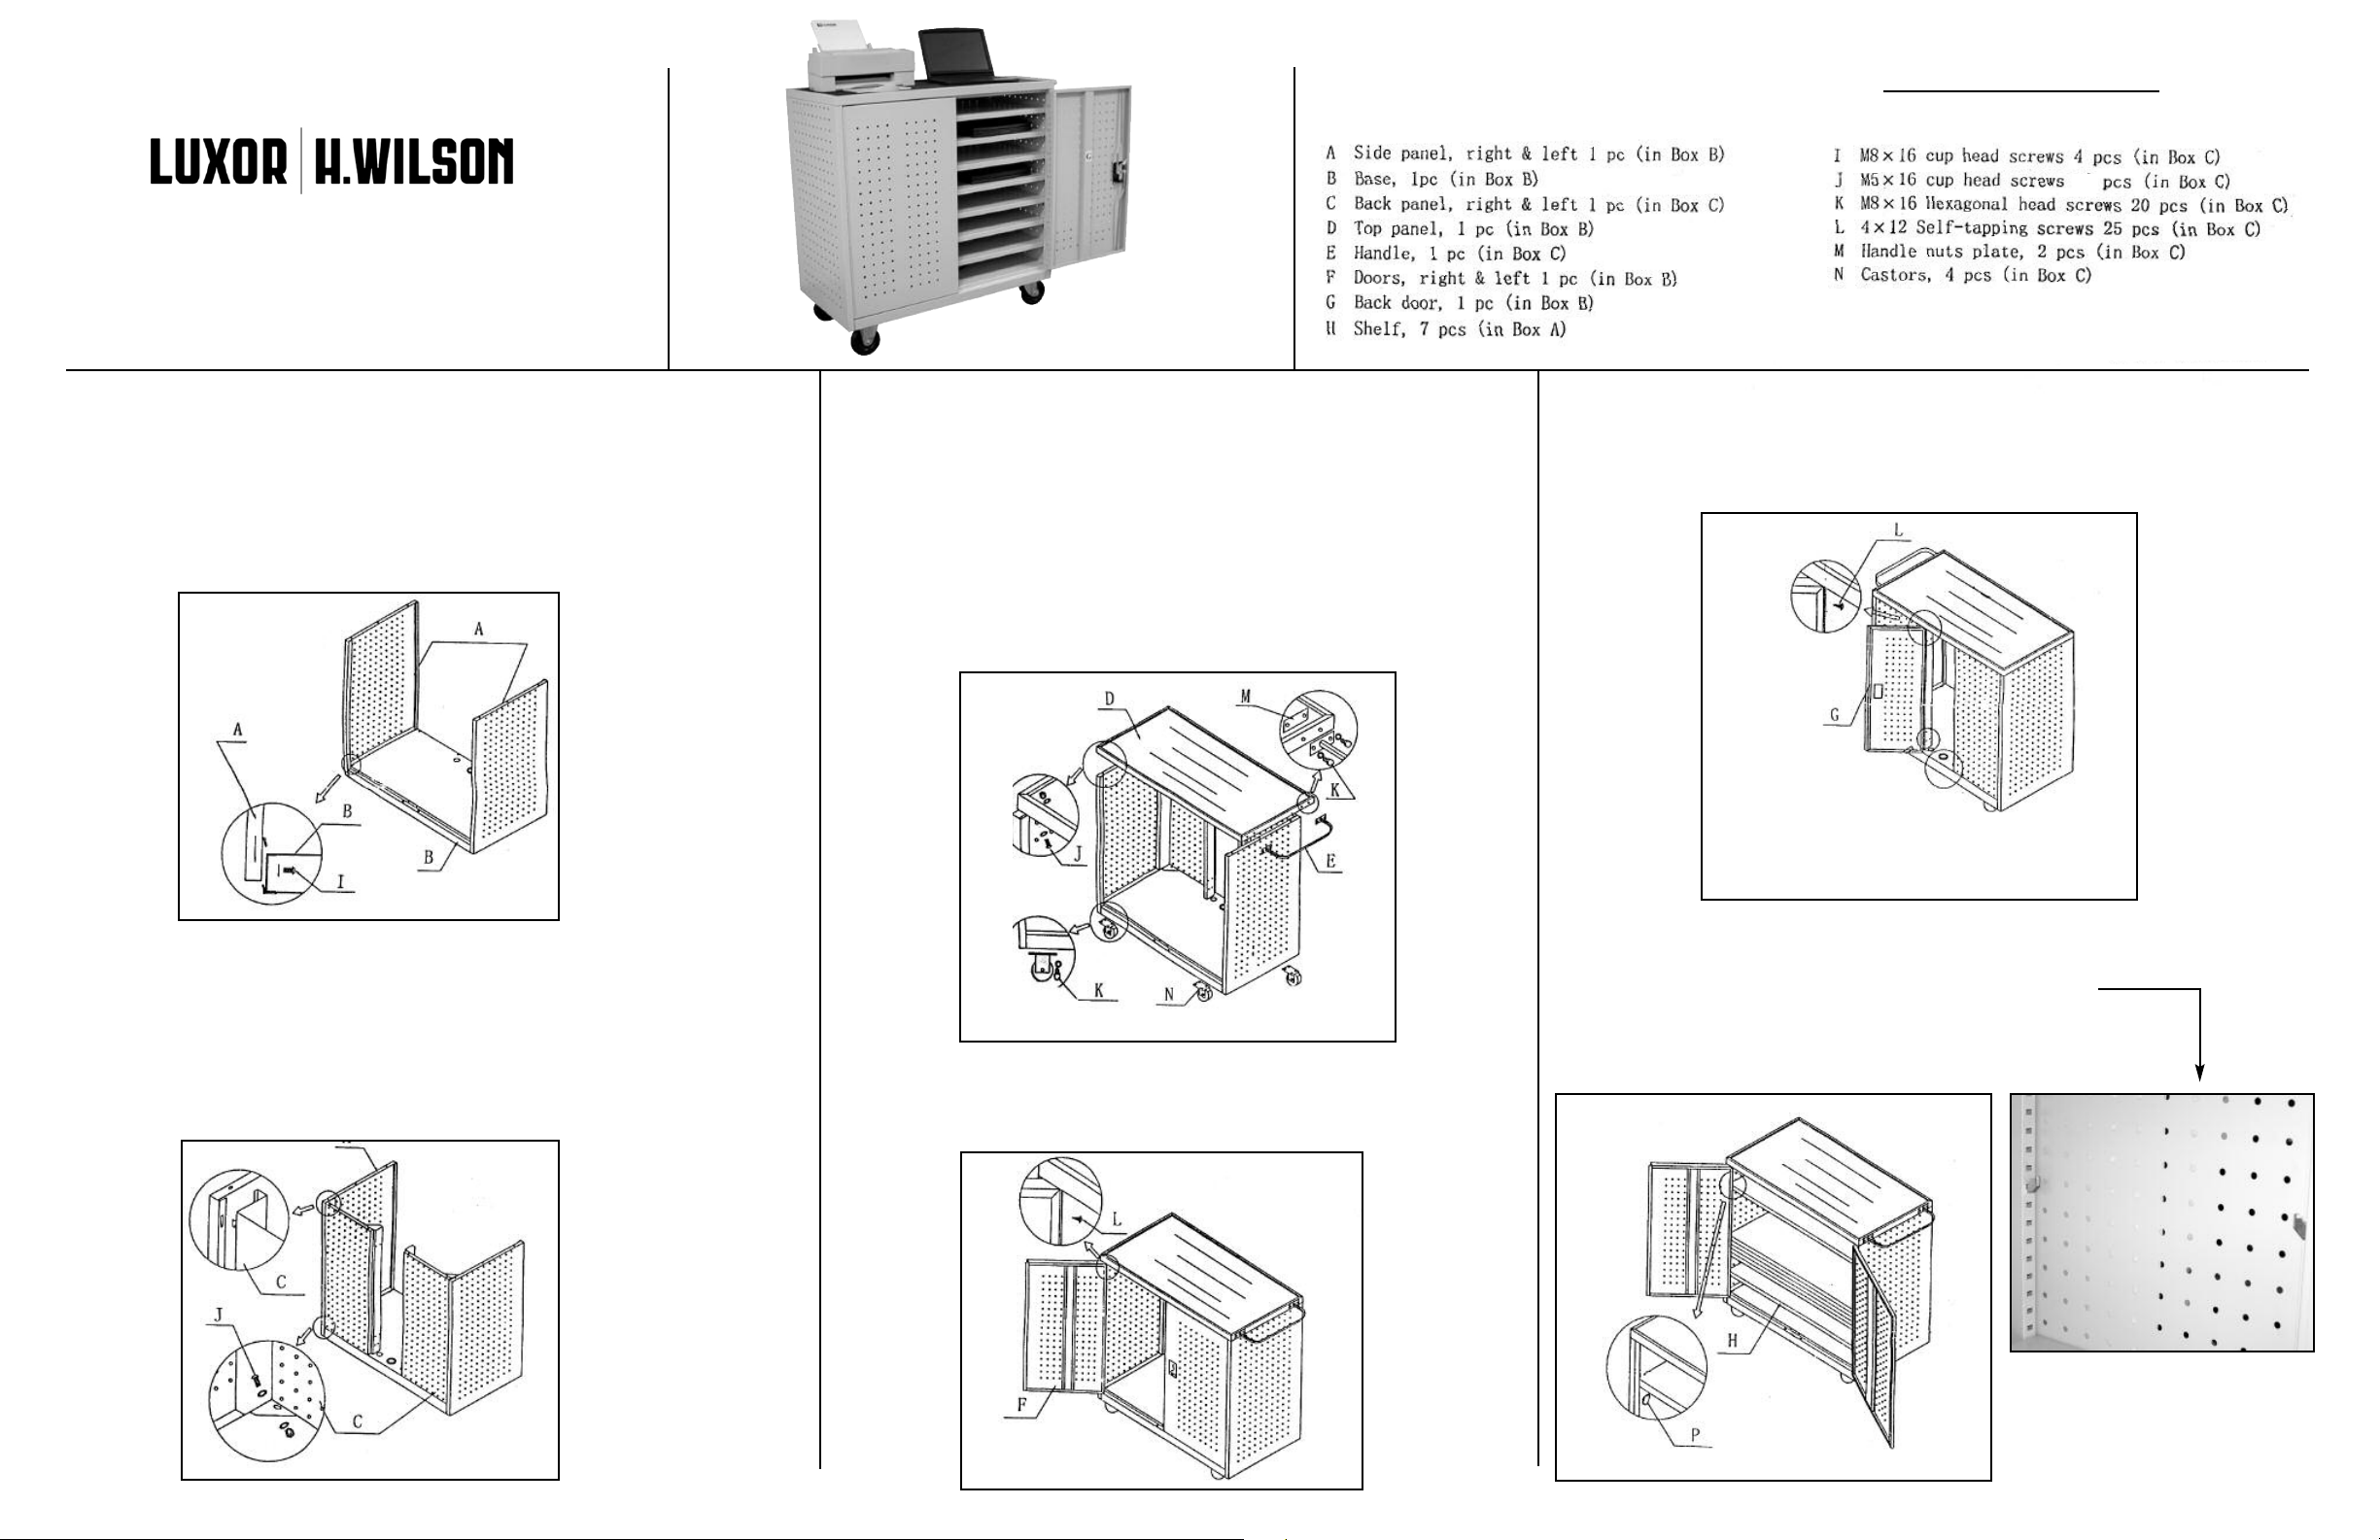
SStteepp 1
Attach left and right panels A to the base B. Push down firmly to assure
attachment. Note: flip assembly upside down to view underside of base B.
Tighten down side panels A to base B with 4 screws I. Upright assembly again.
Note: be sure to have the slots of the side panels A towar
bottom base B which will leave the opposite side with 6 holes at the top front of
the base B.
SStteepp 2
The tabs of the back panels C left and right are inserted into the slots
of the side panels A left and right. Turn assembly either on a side or
upside down to secure the back panels C with scr
nuts J to the base B.
1
d the rear of the
2
ews, washers and
SStteepp 3
Attach handle E to top D by aligning the handle nut plates M over
the inside holes screwing the hexagonal head screws K through the
handle and top D into the handle nut plates on both sides, see
illustration. Align mating holes place top D into place over side and
back panels A and C with the handle to the preferred side. Once
holes are aligned join the parts with bolts and washers J. Tur
assembly upside down to install the casters N
swivel and have breaks should be attached to the base B on the
handle E side of the cart using hexagonal head scr
assembled unit to its upright position
SStteepp 4
Front doors F are to be screwed into side panels A. With 6 self-tapping
screws L per door.
3
n
. The casters that
ews K. Return the
4
SStteepp 5
Repeat process to attach back door G to back panel C. Can be
mounted to open on left or right side.
SStteepp 6
When installing shelves H the bottom 2 shelves need to be
installed first. See photo for orientation of shelf support
brackets. Stack the remaining shelves on top of the lower two
and install them from top to bottom.
5
6
10Mar10
 Loading...