

Page 1
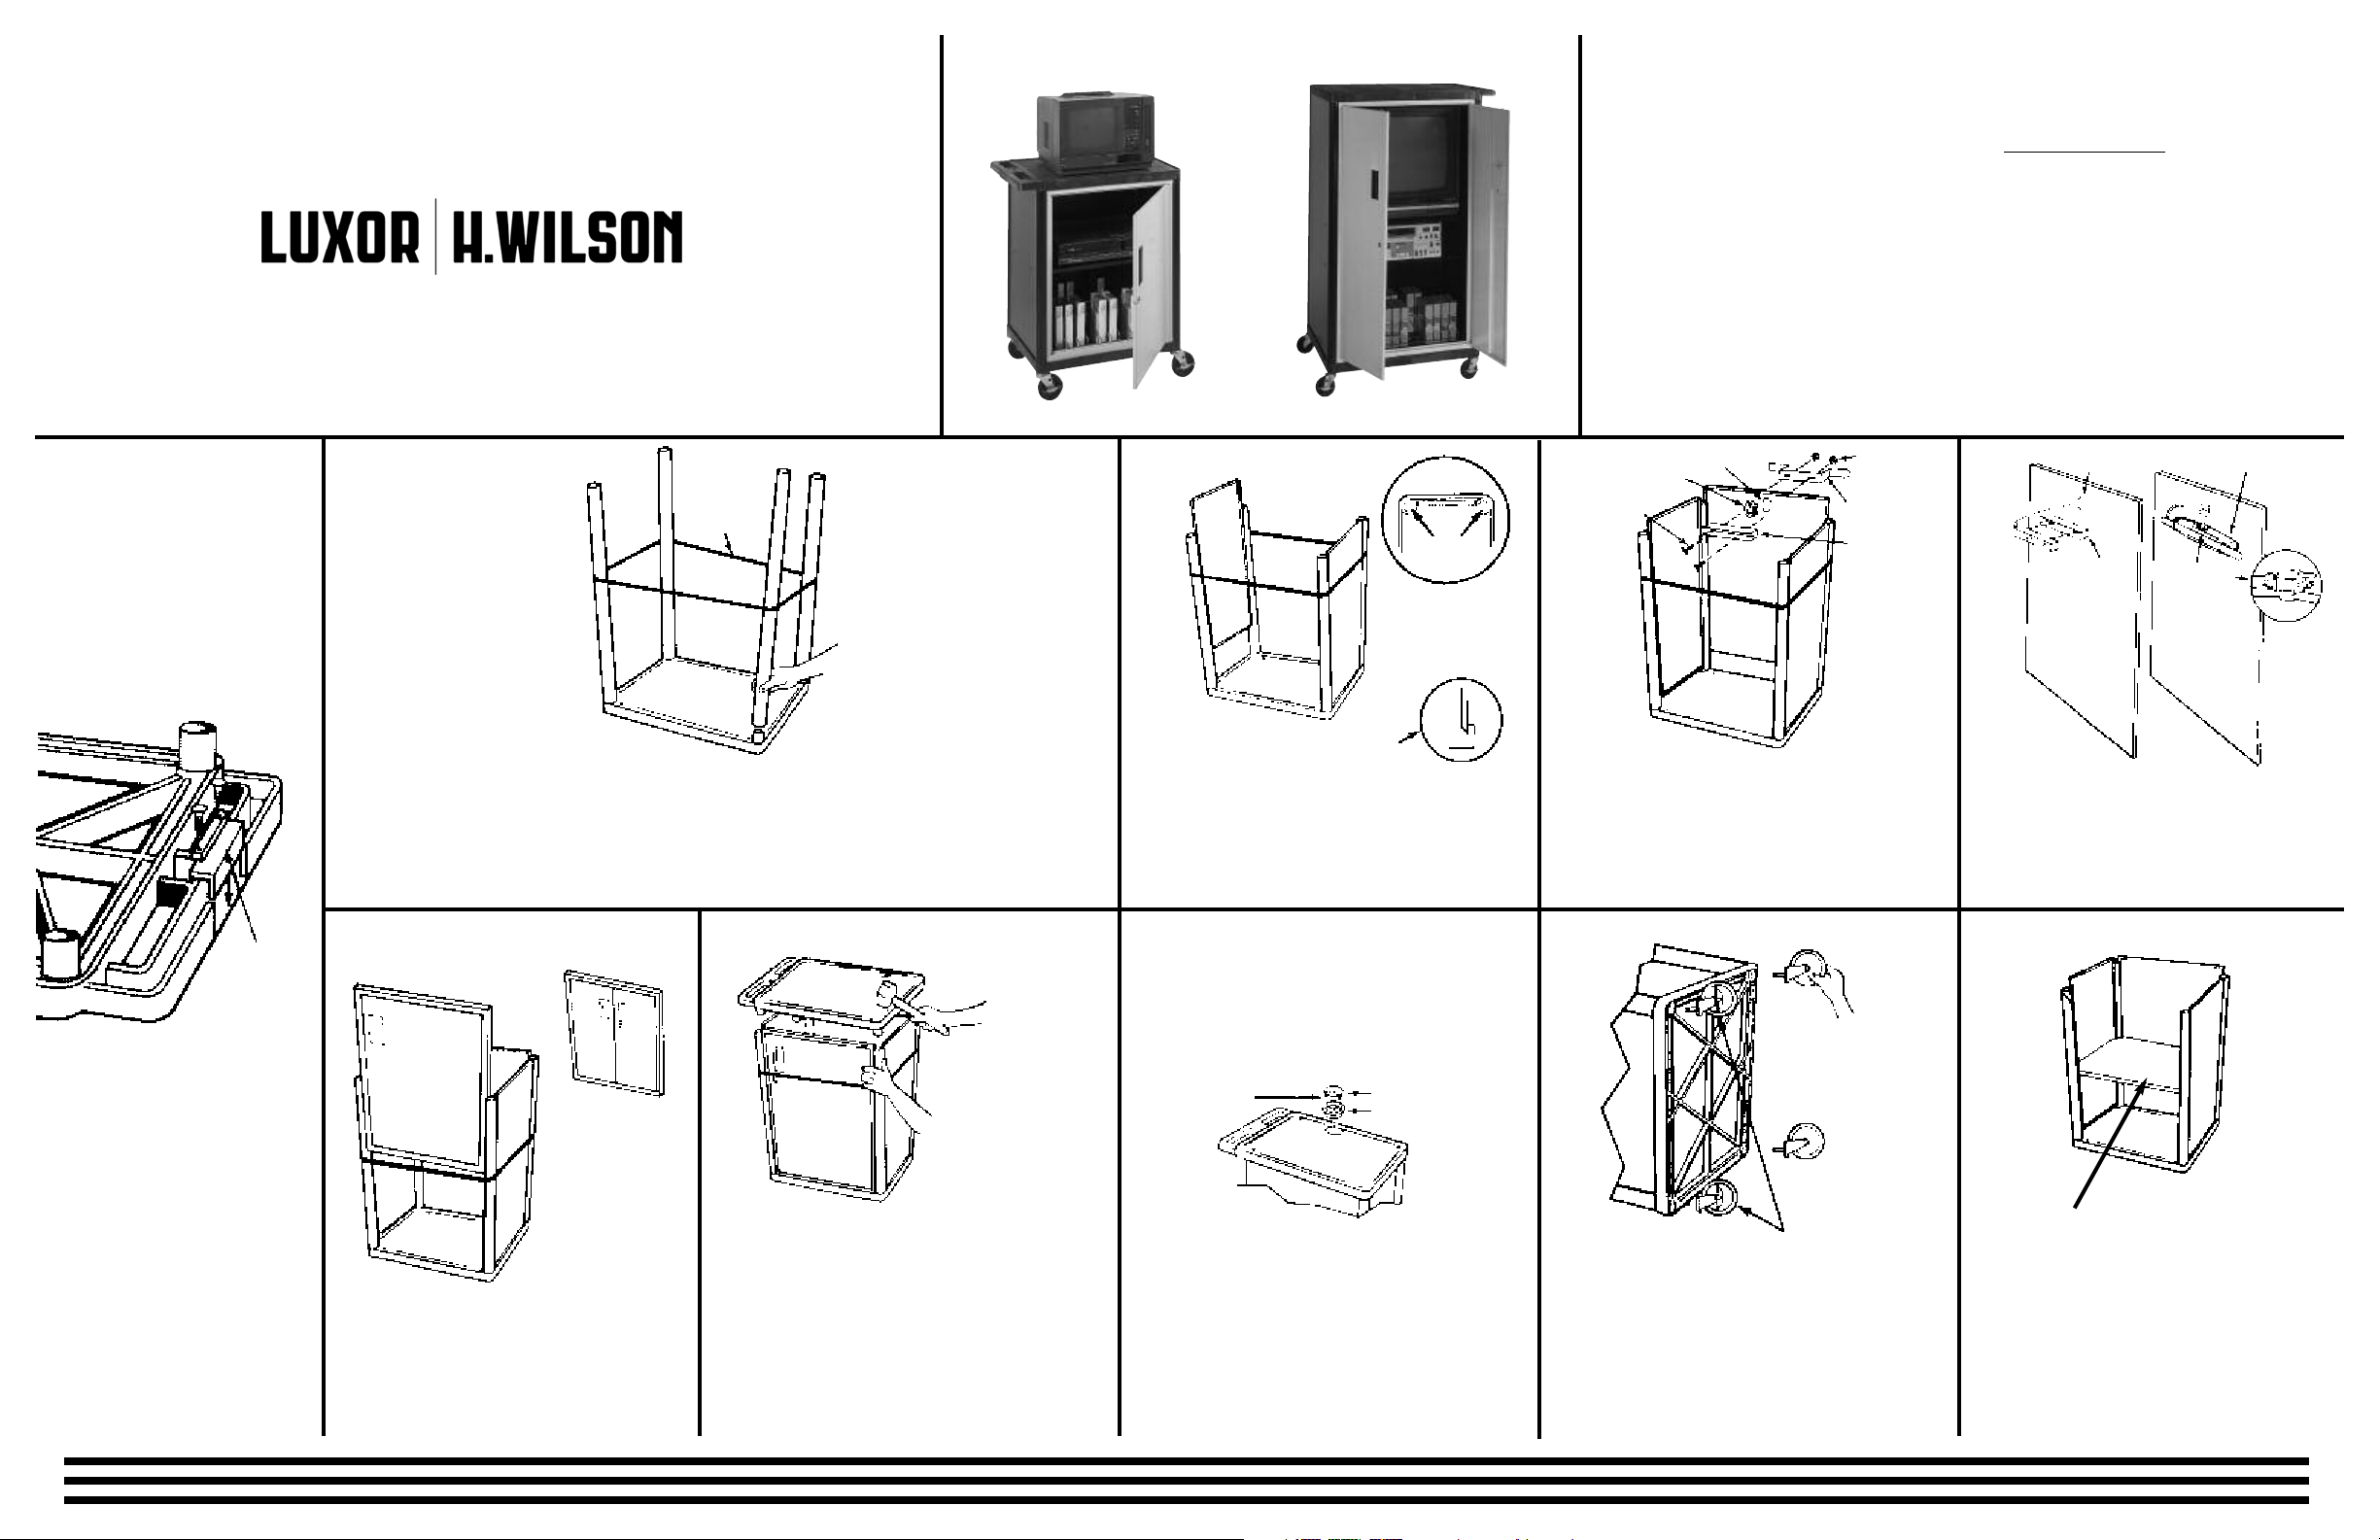
INSTRUCTION SHEET - Endura Mobile Cabinet Tables
ModelS LEF-34C, LEF-40C, LEF-42C AND LEF-56C
Customer Service Dept
2245 Delany Rd
Waukegan, IL 60087
Ph: 847/244-1800 • 800/323-4656
Fax: 847/244-1818 • 800/327-1698
LEF-34C LEF-56C
PARTS LIST
1 - Top Shelf w/handle
4 - Tubular Legs
1 - Bottom Shelf
2 - Cabinet Side Panels
1 - Back Panel
1 - Door in Frame
4 - Casters ( 2 w/brake)
1 - Grommet Cap
1 - Cord Guide Cover
1 - Grommet Rings
1 - Large “U” Bracket
1 - Cord Wrap Bracket
2 - Machine Screws
2 - Small Kep Nuts
1 - Rubber Band
OOLS REQUIRED:
T
1 - Rubber mallet
1 - Slotted screwdriver
7
⁄16˝ wrench
1 -
Start by closing the electric
plug housing in the handle of
the top shelf as illustrated.
PLUG
HOUSING
COVER
NOTE: MODELS LEF-40C AND
LEF-56C HAVE DOUBLE
DOORS
RUBBER BAND
BOTTOM
SHELF
1.
With bottom shelf facing up push all four legs onto corner posts. Using rubber mallet hammer legs firmly into
position. Legs must be seated (flush) against the shelf
surface. Place rubber band around legs to aid in the
assembly of side panels and doors.
TOP
SHELF
MAKE SURE STUD WELDS ARE
CLOSER TO BOTTOM THAN TOP.
SIDE
PANEL
SIDE VIEW WITH PANEL
SEATED INSIDE SHELF LIP
TOP VIEW
LEGS
2.
Install the side panels first. Slide panels down between
legs until they are nested inside the shelf lip and flush
against the shelf surface. Rubber band will hold legs
and side panels in place while installing back panel and
front door.
GROMMET HOLE
GROMMET RING
MACHINE
SCREWS
BACK
PANEL
KEP NUT
CORD WRAP
BRACKET
“U”
BRACKET
3.
Install the back panel in the same manner as side panels. Install grommet ring into grommet hole. Insert two
machine screws as illustrated through “U” bracket into
back panel and through slots in cord wrap bracket. Align
the cord wrap bracket onto machine screws from the outside of back shelf and secure with two kep nuts.
GROMMET
HOLE
“U”
BRACKET
INSIDE
BACK PANEL
CORD WRAP BRACKET
PLUG SNAP
OUTSIDE
BACK PANEL
4.
Press 3-outlet power cord into “U” bracket and feed
remaining cord through grommet hole and wrap
remaining cord around cord wrap bracket. For safety
and neat appearance, secure cord plug to cord with
plug snap.
MAKE SURE
TO TAKE KEYS
FROM INSIDE
OF DOOR.
5.
Install door panel same as back panel with door
handle at top. Be sure door opens outward and
door frame is also placed between legs and nested flush on the shelf floor.
6.
Begin seating of top shelf by holding door panel, leg and
side panel as illustrated. Gently tap corner posts into
legs until all posts are partially inserted into legs. Repeat
hammering action more firmly going around to each corner, being certain that each panel nests inside the lip of
the top shelf. Repeat this action until top shelf is fully
nested.
CORD GUIDE
COVER
GROMMET
GROMMET
TOP
SHELF
CAP
RING
7.
Install grommet ring and grommet cap into top shelf.
For tables with electric assembly, snap off cord guide
cover from grommet cap to allow equipment plug entry.
Insert grommet cap into grommet ring.
PLACE LOCKING CAST-
ERS AS ILLUSTRATED
8.
Push the four casters firmly into the holes in each corner of the bottom shelf. Important: casters must be
fully seated. T
seat casters. Turn your Endura Table right side up.
ap firmly with rubber mallet to properly
9.
Open door and insert exrta shelf onto the shelf
supports on the side panels.
 Loading...