

Page 1
01/31/13
www.luxorfurn.com
www.hwilson.com
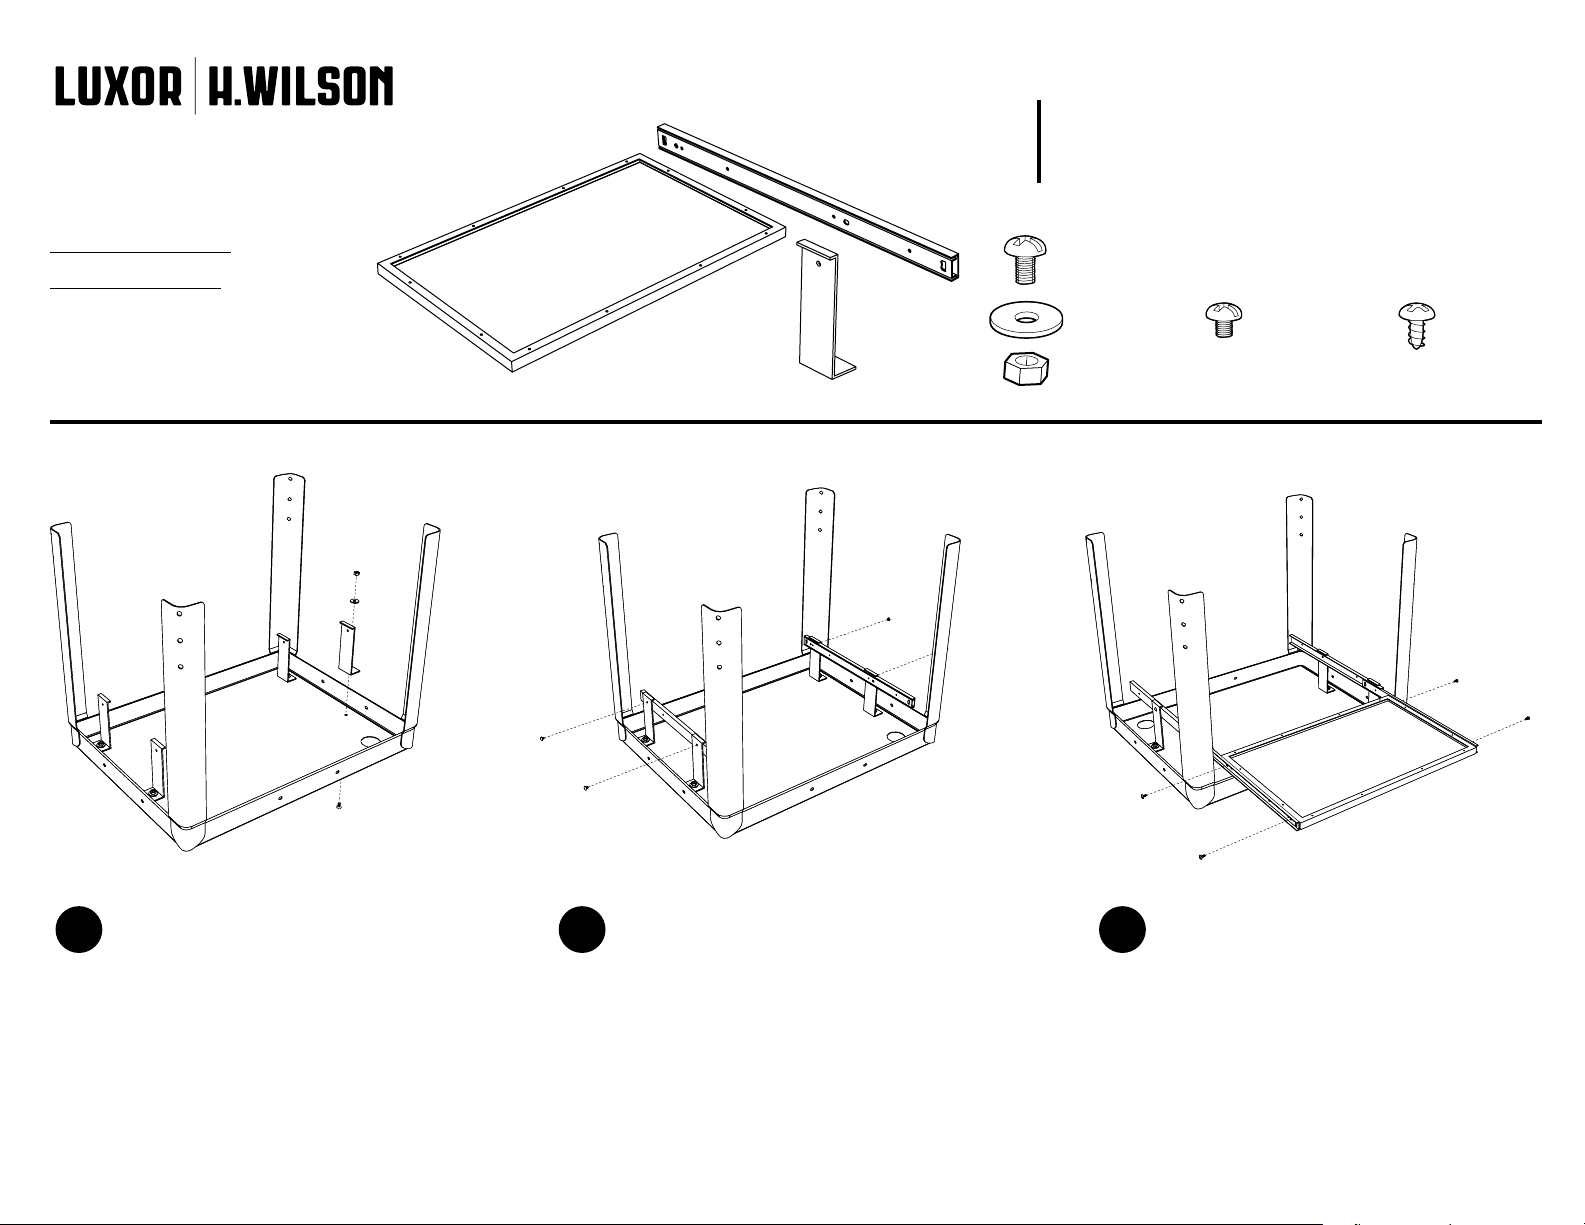
Pullout Shelf
Instructions
AVJ42KB, W42AKB
(Front)
C
B
F
Parts List
H x1
Tools Required
G x2
- Phillips Screwdriver
- Pliers or Adjustable Wrench
A x4
F x4
B x4
D x4 E x4
C x4
(Front) (Back)
G
D
A
(Back)
(Back) (Front)
1 2 3
Take the top shelf of your metal cart
and lay it at. Collect parts: F, A, B &
C. Push Screw A through the hole at
the top of the shelf. Lay bracket F and
washer B on top of screw A. Take nut C
and fasten with a screwdriver and pliers.
Collect parts: G & D. Align the pullout
shelf runner G so that the threaded
screw holes match up with the holes on
bracket F. Make sure the runner slides
toward the front of the cart. Take screw
D and fasten through bracket F into the
threaded screw holes of runner G.
H
E
Collect parts: H & E. Slide out runner G
so that it is fully extended. Align pullout
shelf H and runner G so that the screw
holes meet. Take screw E and fasten it
through runner G into the screw holes
of pullout shelf H. The pullout shelf
assembly is now complete.
Page 2
01/31/13
www.luxorfurn.com
www.hwilson.com
Adjustable Height
Metal Cart Instructions
AVJ42, W42A
C
Parts List
Non-slip mat
A x1 B x1 C x4
A
Cabinet comes
pre-assembled
on units that
include a cabinet.
Tools Required
- Phillips Screwdriver
- Rubber Mallet
- Pliers or Adjustable Wrench
D x4 E x4
A
E
D
B B B
1 2 3
Position the bottom shelf B so that the
caster holes are facing up. Insert caster C
into the caster holes on the bottom of shelf
B. Use a mallet to set the casters properly.
Flip bottom shelf B so that it is on its side.
Set top shelf A so that it overlaps bottom
shelf B. Align the screw holes so that the
top shelf A is at the desired height.
E
Insert screw D through the aligned screw hole
of A and B and fasten nut E with pliers and
screwdriver. Place Non-slip mat on desired
shelf. The cart is now complete.
D
Page 3

01/31/13
www.luxorfurn.com
www.hwilson.com
Electric Assembly
Instructions
Number of outlets
may vary.
Parts List
Tools Required
- Screwdriver
A x1 B x1 C x2 D x2
D
D
(Plastic or Metal
Mounting Surface)
C
1
Push screw C through electric outlet A. Make sure
the electric outlet A and cord wrap B align with the
mounting surface screw holes. Push screw C through
cord wrap B and the mounting surface screw holes.
Use wing nut D and screwdriver to fasten.
B
A
C
 Loading...