

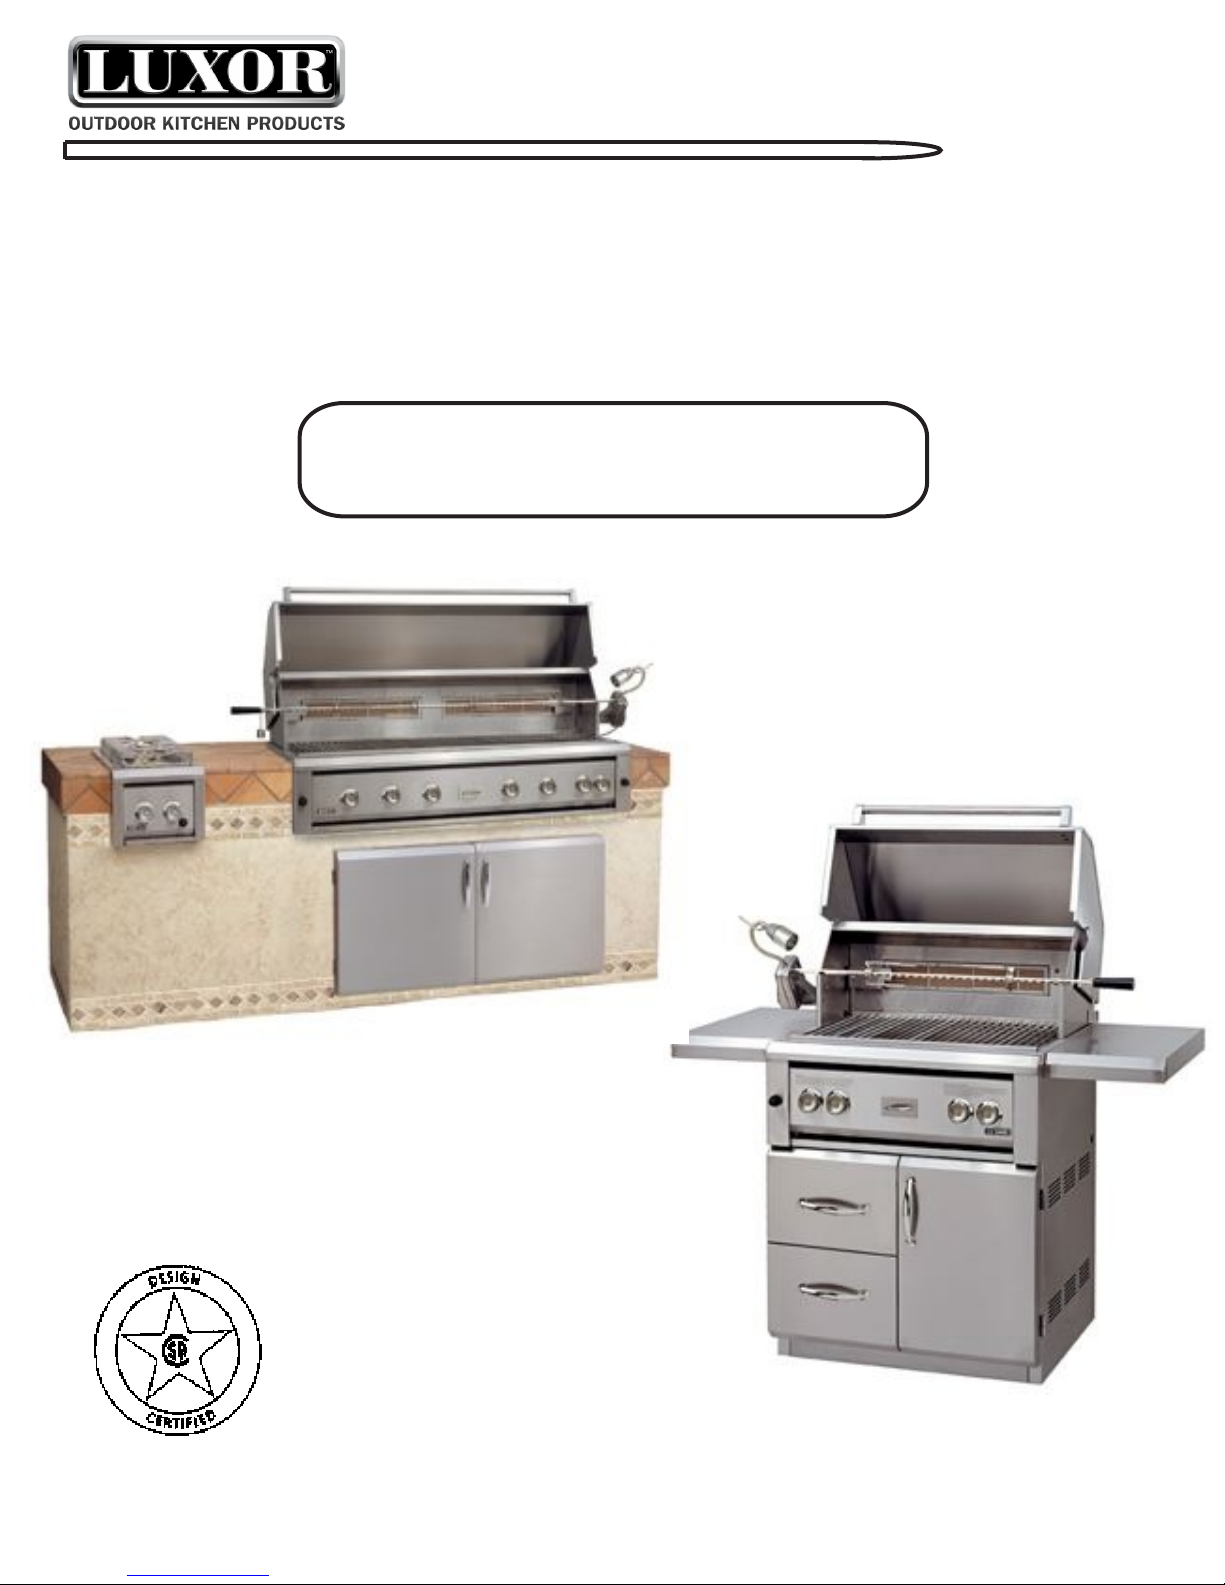
30, 42, 54 GAS GRILL
Manufactured by
AMERICAN HEATING TECHNOLOGIES
INSTALLATION, MAINTENANCE, OPERATING INSTRUCTIONS
AND OWNERS MANUAL
CONGRATULATIONS
ON YOUR NEW GAS GRILL
PLEASE RETAIN THESE INSTRUCTIONS FOR FUTURE REFERENCE.
TABLE OF CONTENTES
SAFETY PRECAUTIONS..................................................
LEAK TESTING..............................................................
LOCATING THE GRILL...................................................
GAS CONNECTIONS....................................................
IDENTIFICATION...........................................................
BURNER ADJUSTMENTS................................................
BURNER MAINTENANCE & CLEANING..........................
LIGHTING INSTRUCTIONS...................................................
MATCH LIGHTING...................................................................
USING THE GRILL....................................................................
USING THE ROTISSERIE........................................................
USING THE SMOKER..............................................................
SERVICE INFORMATION.......................................................
CONVERSIONS.........................................................................
BREAK DOWN..........................................................................
WARRANTY...............................................................................
3,4,5
5
6
7,8,9
10
11
12,13,14
15
16
17,18
18
19
20
21
22
23,24
WARNING:
This appliance is designed for outdoor use only and must not be installed
on or in recreational vehicles and / or boats.
FOR OUTDOOR USE ONLY.
NEVER USE A RUSTY OR DENTED PROPANE TANK.
SHUT OFF TANK WHEN NOT IN USE.
DO NOT STORE A SPARE GAS CYLINDER WITHIN 15 FEET OF OR UNDER THIS
GAS GRILL OR ANY OTHER OPEN FLAME, HEAT PRODUCING APPLIANCE OR
HEAT SOURCE. FAILURE TO FOLLOW THESE INSTRUCTIONS CAN RESULT IN
PROPERTY DAMAGE OR A FIRE CAUSING DEATH OR SERIOUS INJURY.
DO NOT ALLOW YOUR LP GAS CYLINDER TO BE FILLED BEYOND ¾ FULL.
PAGE 2
SAFETY PRECAUTIONS
FOR YOUR SAFETY
Do not use this appliance in a space where
gasoline or other liquids having flammable
vapors are used or stored.
WARNING:
FOR OUTDOOR USE ONLY.
If you smell gas:
Step 1: Shut off gas to the appliance.
Step 2: Extinguish any open flame.
Step 3: Open lid.
Step 4: If odor continues, immediately
call your gas supplier.
WARNING
WARNING
Do not try lighting this Appliance without reading the “LIGHTING
section of the manual.
TESTED IN ACCORDANCE WITH ANSI Z21.58a-1998 STANDARD FOR OUTDOOR COOKING GAS
APPLIANCES. THIS GRILL IS FOR OUTDOOR USE ONLY. THIS OUTDOOR COOKING APPLIANCE IS NOT
INTENDED TO BE INSTALLED IN OR ON RECREATIONAL VEHICLES AND OR BOATS.
INSTRUCTIONS”
Check your local building codes for the proper method of installation. In the absence of local codes, this
unit should be installed in accordance with the National Fuel Gas Code number ANSI Z223.1 and the
National Electric Code ANSI/NFPA No.70
CALIFORNIA PROPOSITION 65 - WARNING
The burning of gas cooking fuel generates toxic by-products, which are on the list of substances which
are known by the State of California to cause cancer or reproductive harm. California law requires
businesses to warn customers of potential exposure to such substances. To minimize exposure to these
substances, always operate this unit according to the use and care manual, ensuring you provide good
ventilation when cooking with gas. This warning is issued pursuant to California Health & Safety Code
Sec.25249.6
WARNING
Improper alteration, installation, adjustment, maintenance or service can cause injury
property damage or death. Read maintenance installation, and operating instructions
thoroughly before installing or servicing this equipment.
PLEASE RETAIN THESE INSTRUCTIONS FOR FUTURE REFERENCE.
PAGE 3

SAFETY PRACTICES & PRECAUTIONS
1)
NEVER LEAVE THE GRILL UNATTENDED WHILE COOKING.
2)
WHEN IN USE, PORTIONS OF THE GRILL ARE HOT ENOUGH TO CAUSE SEVERE BURNS.
All service on this grill should be performed by a qualified technician.
3)
Never use natural gas in a unit designed for liquid propane or visa versa.
4)
Children should not be unattended or alone in an area where a grill is located. Place your grill
5)
well away from areas where children play. Do not store items that may interest children in or
around the grill, in the cart or masonry enclosure. When in use, portions of the grill are hot enough
to cause severe burns.
6)
Have an ABC Fire Extinguisher accessible - never attempt to extinguish a grease fire with water
or other liquids.
7)
Insure that the gas supply hose is free of kinks and at least 3” away from hot surfaces.
8)
Do not heat unopened food containers as a build-up of pressure may cause the container to burst.
Never store additional or empty propane cylinders in the grill cabinet or around the grill. Do not
9)
store propane cylinders indoors or on their sides.
10)
Do not use aluminum foil to line drip pans or grill racks. This will change combustion airflow or trap
excessive heat in the control area. This can result in melted knobs and melted igniters.
11)
Whenever the grill burners have been removed, follow the installation instructions.
12)
Avoid wearing long sleeves or loose-fitting garments while using the grill. Never touch the grill racks,
hood or immediate surrounding metal surfaces with your bare hands as these areas become
extremely hot during use and could cause burns. Use an insulated glove or mitt when opening and
operating the grill. Open grill lid slowly to allow heat and smoke to escape before fully opening.
Never lean over hot grill surface or look directly into the grill when attempting to light.
13)
The grill hood must be fully opened when lighting.
Never use charcoal in the grill. Never operate the grill in a windy area, if windy conditions exist, install
14)
a suitable windbreak.
15)
Cooking excessively fatty meats and other such products will cause flare-ups. Internal fires or
damage caused by flare-ups or the grill being left unattended while cooking, are not the
responsibility of AHT and any resulting damage is not covered under the terms and conditions of
our Warranty.
16)
Grease is extremely flammable. Let hot grease cool down before attempting to handle or dispose
of it. The drip tray should be cleaned of grease on regular basis.
17)
Always adhere to the required clearances from combustibles as detailed. The grill is designed for
outdoor use only. Never operate in a garage, building, shed, breeze way or other enclosed area.
Never grill without the drip pan in place. The drip pan must be pushed all the way to the back of
18)
the grill. Without the drip pan in place, hot grease could leak downward and produce a fire
explosion hazard.
19)
Store your grill in a well-ventilated area. Remove the LP cylinder, if so equipped, and store it outdoors
in a well-ventilated area away from heat and away from where children may tamper with it.
PAGE 4
SAFETY PRACTICES & PRECAUTIONS
If the grill is installed by a professional installer or technician, be sure that they show you where
20)
your gas supply shut-off is located. All gas lines must have a shut-off that is readily and easily
accessible. If you smell gas, check for gas leaks immediately. Check only with a soap and water
solution.. NEVER CHECK FOR GAS LEAKS WITH AN OPEN FLAME.
Keep any electrical supply cord away from any heated surface. Electrical cords should be placed
21)
away from walkways to avoid tripping hazard.
22)
Do not use this unit until a leak check has been performed.
23)
Do not move grill while hot or in use.
24)
Do not operate this unit under the influence of drugs, heavy medication, or alcohol.
25)
Do not lean on shelves or place more than 25 pounds on a side shelf.
If any burner does not light or goes out during operation, turn off all gas control knobs with hood
26)
open and wait (5) minutes before attempting to re-light.
LEAK TESTING
NOTE: NEVER USE GRILL WITHOUT LEAK TESTING.
HOW TO PERFORM A LEAK TEST:
A) Create a soapy solution of half water and half dishwashing detergent.
B) Make sure that all control knobs are in the off position.
C) Turn on fuel supply. Turn cylinder valve knob counter clockwise (right to left) one rotation.
D) Apply soap solution generously by paint brush or squirt bottle on all connections and fittings.
E) If you see any “growing” bubbles on any of the connection points, you have detected a
gas leak. IMMEDIATELY turn off the gas from the main gas source.
F) A leak may be stopped by tightening the loose joint, or by replacing the faulty part with a
replacement part recommended by the manufacturer.
E) Do not attempt to repair the cylinder valve if it should become damaged,THE CYLINDER MUST
BE REPLACED.
E) Check the hose for signs of cracks abrasion and leaks.
DANGER: TO PREVENT EXPLOSION OR FIRE HAZARD:
DO NOT use or permit sources of ignition including smoking in the area while doing a leak test
Perform leak tests outdoors only. Never use flame or fire to do a leak test.
PAGE 5

LOCATING THE GRILL
LOCATION:
Select a suitable location for your grill by avoiding traffic paths and exposure to wind. Keep all
gas supply lines as short as possible. Do not locate the grill in a shed, the garage of a building,
storage, or other enclosed areas. To assure the unit is level front-to-back and side-to-side, use a
"spirit level". If the unit is not level the burner combustion may be erratic and the unit may not
function efficiently. If the floor is uneven or there is a slope, you may need to re-level the unit
after each moving of the unit.
FOR BUILT -IN INSTALLATIONS:
The Luxor Built-In model is designed for installation in a masonry or a non combustible enclosure.
The grill drops into the opening, and hangs from its counter top trim. There is no support required
from the bottom. Pay attention to the provisions for gas line hook-up. The enclosure must have
ventilation holes to prevent gas build-up in case of a leak. The counter top should be level and
flat. Electrical service should be provided for the units equipped with rotisserie.
CLEARANCE:
- To a non-combustible construction a minimum of 5” clearance should be kept from back of
the grill. Do not locate the grill at a spot where It will be difficult to clean the exhaust and grease
from the grill.
- To a combustible construction you must keep a minimum of 16” clearance from back of the grill.
A 16” minimum clearance must also be maintained above and below the cooking surface and
in any combustible construction.
Do not build your LUXOR gas grill directly below unprotected overhead combustible construction.
WARNING: Installing this product into a combustible enclosure could
result in fire, property damage and personal injury.
PAGE 6
GAS CONNECTION
The LUXOR gas grill is equipped to use (LP) propane Or (NG) natural gas. Your grill is designated a
gas type and the rating plate must agree with that of the gas supply. Do not operate the grill
on any gas other than what the grill is regulated and orificed for.
The rating plate which contains the information pertaining your grill is
located inside the cabinet wall of the freestanding units or behind
Also a conversion kit is required to convert the grill from (LP) propane
to (NG) natural gas or (NG) natural gas to (LP) propane..
NEVER CONNECT
APPLIANCE REGULATOR
AN UNREGULATED
GAS LINE TO THE GRILL
PROPANE (LP)
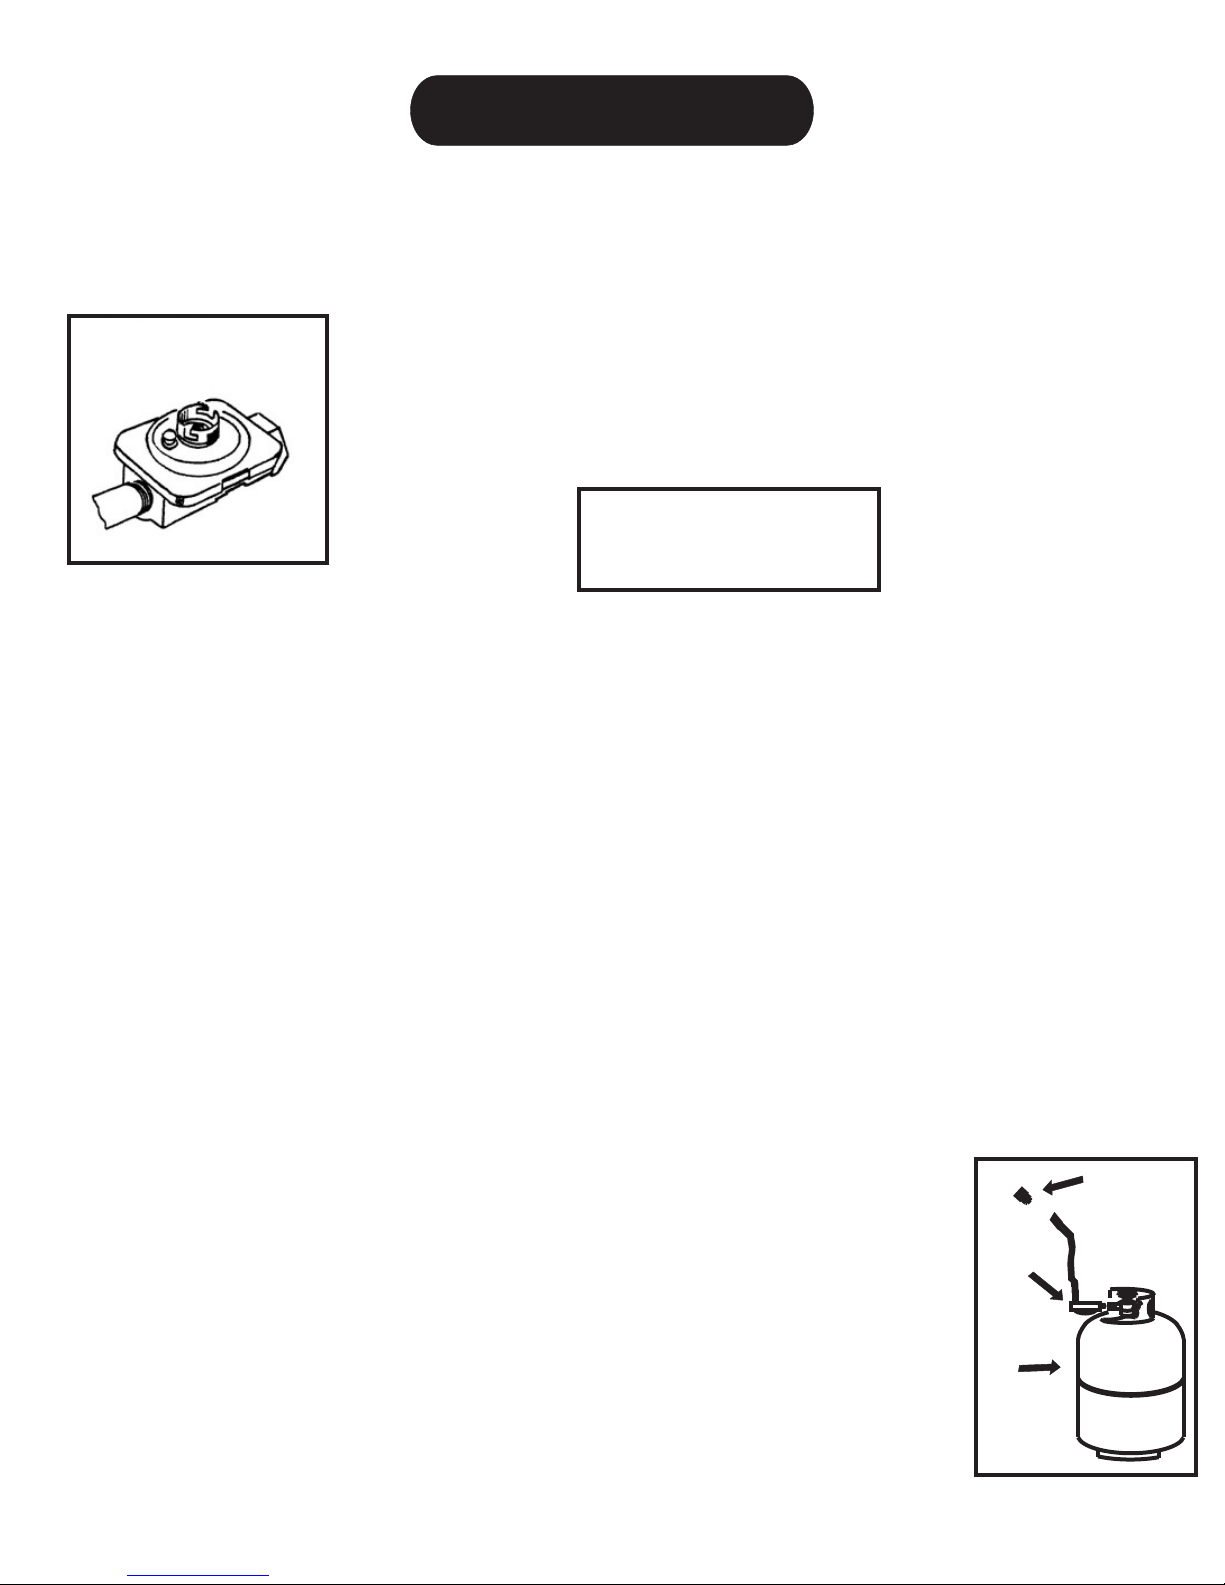
- The LP gas grill comes equipped with a (Type 1or QCC1 regulator) high capacity LP Regulator hose
assembly for connection to a standard 20 lb. LP cylinder. .
- L.P. Hose and fittings are included, the connection is a 1/2” NPT male with a 3/8” flare adapter..
- The operating pressure is 10.0” W.C.
A) Connect the 3/8” flare end of the L.P. Hose to the brass adapter on the manifold.
B) Connect the regulator to the tank with the tank valve fully closed.
C) Insert the regulator inlet into the tank valve and turn the black plastic coupler clockwise until the
coupler is tight.
D) Make sure not to over tighten the coupler.
PURGING THE GAS LINE
A) All the controls must be in OFF position.
B) Slowly turn the main tank valve on.
C) Turn one burner control valve on the unit to the “Hi“ position. (DO NOT LITE THE GRILL).
D) The unit has to be purged, leave the control ON for about 15 seconds to allow the air in system
to purge.
E) Wait 10 minutes before lighting the burners. (DO NOT LIGHT THE GRILL WITHIN 10 MINUTES OF PURGING.)
The regulator with hose Type 1or Q. C. connection has the following safety
features:
- The system has a thermal element that will shut off the flow of gas between
115 and 150 C ( 240 and 300 F).
- The system will not allow gas to flow until a positive connection has been made.
- The system has a flow limiting device which, when activated, will restrict the flow
of the gas to 10 cubic feet per hour.
- The CYLINDER CONTROL VALVE MUST BE TURNED OFF BEFORE ANY CONNECTION
IS MADE OR REMOVED.
REGULATOR
L.P. TANK
CONNECTION
ADAPTOR
PAGE 7

GAS CONNECTION
Gas Connection (continued)
L.P. Cylinder (tank) requirements:
The LP Tank / gas cylinder for your grill is not provided from by our factory. Therefore, make sure that
only D.O.T. approved 20 Lb., or CAN/CGA-B339 approved L.P. gas tanks are used with the grill. All
approved Cylinders must have an integral collar designed to provide protection around the
cylinder valve and prevent damage. Do not use a damaged gas cylinder. Do not attempt to
repair a damaged tank at anytime. A dented or rusty L.P. tank may be hazardous and should be
checked by your L.P. supplier. Never use a cylinder with a damaged valve. Always
check for leaks after every L.P. tank change.
The L.P. gas cylinder must be constructed and marked in accordance with the specifications for
the L.P. gas cylinder of the U.S. Department of Transportation (DOT) and designed for use with a
QCC or type 1 system. The gas cylinder must be provided with a shut off valve terminating in an L.P.
gas supply cylinder valve outlet specified, as applicable, for connection type QCC1 in the standard
for compressed gas cylinder valve outlet and inlet connection ANSI/CGA-V-l.:
Manifold pressure: (operating) 10.5" W.C.
Additional tips for safety:
- Extra or spare gas tanks must be stored at least 15 feet fam the grill or any open flame, or
other types of heat producing device or source.
- Gas tanks are equipped with a pressure relief valve. In case a tank is exposed to excessive heat,
the relief valve lets the highly flammable gas vapor or liquid escape. That is why you should never
store the gast tank near heat or a flame.
- Store the gast tank in a well ventilated area
- Do not fill your gas cylinder beyond 3/4 full
L.P. Gas Connection:
When connecting the L.P. gas tank, make sure the hose does not come in contact with the grill
or a hot surface. For the use with an L.P. tank / cylinder, the LUXOR grill is equipped with its own
regulator. DO NOT REMOVE THIS REGULATOR.
If the assembly needs to be replaced, use a unit specified by LUXOR Grills only. Then:
1. Remove the panel in the back of the BBQ to reach the regulator and gas connection area.
2. Route the female end of the hose through the cart
3. Fasten the hose connection to 1/2" x 3/8" flare fitting connected to the Grill Regulator
A proper regulator should always be used with any gas operation. Check with the local Gas
Codes for proper installation. You must use a regulator approved by A.H. T. for any application.
NEVER CONNECT THE GRILL TO AN UNREGULATED GAS SUPPLY
PAGE 8

GAS CONNECTION
Gas Connection (continued):
Natural Gas Connection
The installation of this Gas Grill must be in compliance with local codes (or in the absence of
local codes), to the national fuel gas code, ANSI Z223.1a- 1988. Installation in Canada must be
in compliance with the Standard CAN/CGA-B149.1 Natural Gas Installation or CAN/ CGA-b149.2.
Propane Installation Code.
Manifold pressure: (operating): 4"
Total gas consumption (per hour) with all burners on "HI":
Conventional Burners
30" Grill 68,500 BTU
42" Grill 95,500 BTU
54" Grill 134,500 BTU
(with side burners)
Side Burner Consumption: 17,000 BTUs each
Infra-Red Burners
30" Grill 58,500 BTU
42" Grill 80,500 BTU
54" Grill 114,500 BTU
NOTE: Deduct 12,000 BTUs from figures above when NO Rotisserie in use
Make sure that the gas supply is equipped with a shut off valve. The shut-off valve
should be easily accessible.
For use with Natural Gas, the grill has its own regulator. Do Not remove the regulator.
If it needs replacing, use a specified regulator as suggested by LUXOR.
1. Remove the back panel from the BBQ which will give you access to the regulator and
Gas connection
2. Connect the proper and flexible connector to the Grill Regulator.
NOTE: The 3/8" ID hose (flexible type) has a maximum capacity of
60,000 BTUs. This hose should be used with 30" Grills. Larger models,
or 30" models with side burners require the use of a 1/2" ID hose. If
a 3/8" ID hose is used, the result will be a poor performance due to
inadequate gas supply
PAGE 9

IDENTIFICATION
30
Ignitor
Ignitor
Rotis
42
Rotis
Grill
Grill
Smoker
Grill
Smoker
Tray
Smoker
Ignitor
Smoker
Tray
Ignitor
Rotis
54
Grill
BURNER
Smoker
Ignitor
Grill
SIDE BURNER
PAGE 10
Grill
Rotis
BURNER
Ignitor
Grill

BURNER ADJUSTMENTS
As all of American Heating Technologies products, the grills have also been tested in the factory
before shipping. However, due to different gas pressures and heating values of different gas
suppliers, burner flame adjustments might be necessary, especially when converting a unit from
one type of gas to another. This adjustment could be made by reducing or enlarging the air inlets
at the tip of the burners. Please see diagram (A). The goal of adjusting burner flames is to get a
stable blue fire with no yellow tips and no lifting.
PROBLEM
LIFTING:
A gap between the burner and the flame
as if the flame is not connected to that
burner
YELLOW TIPS:
When the amount of air going into the
burner is not enough, or burner ports
are blocked by debris and other particles,
causing the tips of the flame to look yellow
Diagram A
Valve
SOLUTION
Too much air going through the burner is causing
this. Turn the air shutter dial to reduce air inlet holes
while observing burner flames for changes.
Turn air shutter dial to open air inlet and allow more
air. Make sure all burner ports are clear of dust and
other debris and particles.
Air inlet
LOW setting adjustment:
Adjust the burner "Low" setting by using a long stemmed flat-head screwdriver, inserting the screwdriver
into the Burner Control Valve stem, and turn the adjustment screw (turn counter clockwise)
producing a stable flame when the Burner Control Valve is set on "low." This applies to all operations.
Air shutter
PAGE 11

BURNER MAINTENANCE & CLEANING
Your LUXOR grill is made of non-rusting, non- magnetic stainless steel. After some initial usage,
you will notice discoloration in some areas of the grill. It is a normal process caused by the
high amount of heat produced by the burners. There are many different stainless cleaners
available in the market, but be sure to use a mild cleaning product first, always scrubbing in
the direction of the grain. If there are noticeable scratches in the stainless steel, use a dry 100 grit
emery paper to sand the area. Sometimes, greasy specks collecting on the surface can look
like rust. To remove these specks, use an abrasive pad together with a stainless steel cleaner.
Remember to rub in the direction of the grain.
NOTE: The best way to maintain stainless steel is to wipe it down with a damp cloth. Excessive
moisture causes a rust-like discoloration and may eventually require replacement. Never use steel
"Brillo" pads or similar products as these will leave traces of material behind. This material will quickly
rust. This rust is not a defect in the grill.
ATTENTION
Before removing burners, gas supply must be shut off and the knobs turned to "OFF". Allow
the grill to completely cool down.
STAINLESS STEEL U BURNER
GRILL BURNERS:
To begin, remove grill racks and radiant trays. Hold the burner, pull it up and slightly to the back
of the unit. This way the burner head comes off the brass orifice at the front. Turn the burner
sideways and remove the burner. Be careful not to block or upset the air shutter position.
BURNER CLEANING::
Use a wire brush to clean the exterior of the burner. To clear stubborn scale, use a metal scraper.
Clean any clogged ports with a straightened paper clip. Do not use a wooden toothpick as it may
break off and clog the port. Use a flashlight to check the burner inlet for possible blockage. Shake
out any debris through the air shutter. If you see any obstructions, use a metal wire coat hanger
that has been straightened out.
ORIFICE CLEANING:
After the burner has been removed, remove the orifice and hold a flashlight through the opening
to check for possible blockage. Use a needle to clean any debris. use extreme caution so you
do not enlarge the hole or break off the needle.
PAGE 12

BURNER MAINTENANCE & CLEANING
Burner Maintenance And Cleaning (continued)
REASSEMBLE THE BURNERS:
When replacing the burner, align the orifice with the center hole on the air shutter . Slide the
air shutter onto the orifice and rest the rear of the burner (the U shaped end) on the support
rack at the back of the burner box. Make sure the burner is resting firmly and does not rock.
Do not upset the original position of air during this procedure.
Light all burners and check the flames for irregularities. If adjustments are needed, see the
adjustment section in your manual labeled: Burner Adjustments.
CERAMIC BRIQUETTES
BRIQUETTE TRAY
VALVE
U BURNER
ATTENTION
If the burners are not centered firmly and correctly, a dangerous condition may
occur that can cause personal injury and damage to your gas grill.
SPIDERS & INSECTS:
Sometimes spiders and insects may crawl inside burners and nest there. In this case, the gas
will flow from the front of the burner. It can create a dangerous situation and start a fire behind the
valve panel. This can damage the grill and make the operation of it unsafe..
PAGE 13

BURNER MAINTENANCE & CLEANING
Burner Maintenance And Cleaning (continued)
INFRA RED BURNER
GRILL BURNERS:
Make sure grills are not hot. Begin by removing the cooking grills off the gas grill, Grab the burner
from the sides and gently lift the part resting on the burner bracket. Slide burner up and back
gently making sure you do not brake the electrode.
BURNER CLEANING:
Brush of the metal screen. If necessary a vacuum can be used to lift debris out of the ceramic ports.
IT IS JUST AS IMPORTANT TO CLEAN INSIDE THE GAS INTAKE PIPE (VENTURI) by a small and long brush. You
should use a flashlight to make sure it is clean and there are no restrictions in the burner or the venturi.
ORIFICE CLEANING:
After the burner has been removed, remove the orifice and hold a flashlight through the opening
to check for possible blockage. Use a needle to clean any debris. use extreme caution so you
do not enlarge the hole or break off the needle.
REASSEMBLE THE BURNERS:
When replacing the burner, align the
orifice with the center hole on Infra red burner.
Slide the burner onto the orifice and rest the
rear of the burner (the U shaped end) on the
support rack at the back of the burner box.
Make sure the burner is resting firmly and
does not rock. Light all burners and check
the flames for irregularities.
CERAMIC BURNER
VALVE
ATTENTION
If the burners are not centered firmly and correctly, a dangerous condition may
occur that can cause personal injury and damage to your gas grill.
SPIDERS & INSECTS:
Sometimes spiders and insects may crawl inside burners and nest there. In this case, the gas
will flow from the front of the burner. It can create a dangerous situation and start a fire behind the
valve panel. This can damage the grill and make the operation of it unsafe..
PAGE 14

LIGHTING INSTRUCTIONS
WARNING, before lighting:
Prior to turning the gas "on," inspect the gas supply piping or hose. Any evidence of cuts wear,
or abrasion must be replaced prior to use.
The replacement pressure regulators and hose assembly must be the type specified by
the manufacturer. Do not use the grill if the odor of gas is present. The pressure regulators
and hose assembly supplied with the unit must be used. Locate the unit L.P., screw the regulator
into the tank and leak check the hose and regulator connections with a soap and water solution
before operating the grill. Turn all knobs to "off" then slowly turn on the gas supply valve.
Remember to always keep your face and body as far away from the grill as possible when
lighting. Do not attempt to "light" the grill if the odor of gas is present. Call for service. Always wait
at least 5 minutes before relighting a hot grill.
CONTROL KNOB
IGNITION BUTTON
Rotis Burner (not all models)
Grill Burners
To Light:
Open the lid, turn the corresponding knob on
"Hi". Immediately press and hold the ignition
button for 5 seconds. (See picture on left.)
You will hear a "clicking" sound.
If the burner does not light in 5 seconds, turn
knobs to "OFF" wait 3 minutes and try relighting,
or try Match Lighting (see section on Match
Lighting).
NOTE: If you don't hear clicking sound from the
igniter turn all knobs to "OFF" and check ignition
battery. Repeat the process after 3 minutes.
To Light:
Open the lid. Turn the Rotis knob on "HI" and press it in. Press and hold the ignition button for 5
seconds. You will hear a "clicking" sound. If not, turn all knobs to "OFF" and check ignition
battery.
If the burner does not light within 4 seconds, release the knob and turn the control knob to
"OFF". Once lit,keep pressing and holding the knob in for 10 more seconds, then release it.
The rotis burner should reach cooking temperature in about 1 minute. The orange or red glow
will even out in about 5 minutes.
If burners do not light after several attempts, see instructions on match lighting, on next page)
Always wait at least 5 minutes before relighting a hot burner!)
PAGE 15

MATCH LIGHTING
Match Lighting:
If burners do not light after several attempts, they can be match lit. If you have just
attempted to light the burner with the igniter, allow 5 minutes for any accumulated gas to
dissipate.
Grill Burners: Make sure all knobs are in the OFF position.
Keep your face as far away from the grill as possible.
With the lid open, light a paper book match and
hold it to the ports of the burner using the lighting stick
or lighting rod attached permanently to the appliance
with a chain. Press and turn the corresponding control
dial of the burner to "lHI”.
If the burner does not light in 4 seconds, turn the
dial off and wait 5 minutes before attempting
again (see picture on the right).
Rotis Burner: Make sure all knobs are in the OFF position.
With the lid open, light a, paper book match and
hold it close to the burner tiles of the Infra-Red burner.
Push and turn the Rotis control knob to "Hi" and push it in.
Hold knob in for 10 seconds after lighting and then
release. If the burner does not light in 4 seconds, turn
the knob off and wait 5 minutes before attempting it
again (see figure on right).
If the burner stays lit only while you are holding the safety
button, it may be adjusted after it has been cooled)
(as shown in figure on the right)
PAGE 16

USING THE GRILL
Before Using The Grill:
- Make sure that the grill has been tested for leaks and properly located
- Remove all packaging material
- Read and understand the instructions provided in this manual
Using The Grill:
Grilling requires high heat for searing and proper browning. Most food are cooked when dial is
on "Hi" heat for the entire cooking time - lid staying open during this time. However, when grilling
large pieces of meat and poultry, it may be necessary to turn the heat to a lower setting after
the initial browning This allows your meat to cook throughout without burning the outside. Note that
food cooked for a long time or basted with sweet or sugar-based marinade may need a lower
heat setting near the end of the cooking period.
Indirect Cooking
This type of cooking is referred to the process of placing the food on one side of the grill. The
burner below the food must be on "OFF" and the adjacent grill burner should be placed on "HI".
Place a drip pan on top of the burner that is switched off and not in use. This way the pan prevents
any dripping from clogging up the unused burner. Then...
- Check to be sure that the drip tray is in place and does not contain debris
- Light the burner (see section labeled: Lighting Instructions )
- Turn the control button to "HI" and preheat the grill for 5 -15 minutes. During this preheat time, the
top cover must be kept closed and opened during high heat grilling.
-
- Place your food on the grill and cook to your desired wellness. Adjust heat settings when required.
- The control button may rest at any position between "HI" and "LO".
- The drip tray must be cleaned after each use. To do this, always allow the grill to cool first.
Hood Position
The burner system generates an intense
amount of heat that must be controlled
while cooking with a CLOSED HOOD. The
Heat Setting button must be kept on "MED"
indicating the highest safe setting when
cooking with a closed hood (see figure
below).
OFF
HI
Hood must be open when lighting
grill burners. While grilling with control
knob should be set in the range
between "MED" and "HI".
Hood may be closed when all
control knobs are set below "MED"
WARNING
MED
LO
or when the grill is not in use
PAGE 17

USING THE GRILL
Using The Grill (continued)l
How To Avoid Flare-Ups
With attention and care the risk of flare ups can be
reduced and avoided by:
- Properly pre-heating the grill
- Cleaning the grill on regular basis to avoid grease
built-up
- installing the grill grids properly with V-shape up
- Trimming excess fat from meat
- Repositioning the location of meat during cooking
USING THE ROTISSERIE
ATTENTION
DO NOT ALLOW WATER TO
CONTACT THE BURNER AS
DAMAGE WILL OCCUR.
WATER DAMAGE IS NOT
COVERED BY YOUR
WARRANTY
The Rotisserie on LUXOR
Since the location of the rotis burner is more susceptible to strong winds, it is recommended to
avoid using rotis during windy conditions. As an added safety feature LUXOR equipped its burner
with an automatic safety valve which will not allow gas to flow to the rotis burner unless:
a. The Rotisserie knob is on "HI," pressed down, and held
b. The tip of the safety valve thermocouple has been sufficiently heated to keep safety valve
open. The "cold junction" must be protected from the intense heat to keep the valve on.
Skewer (Spit) Rod::
In assembling the skewer for the rotis into the motor assembly, it is required that the pointed end
is placed into the motor allowing its threaded end to rest on the support at the opposite side of
the grill. By now, the skewer should be pushed into the motor and the unit resting on the bracket.
Loading the Skewer: begin with the handle in place and slide one of the meat holders onto
the skewer. Make sure prongs are facing away from the handle. Push the skewer through the
center of the food, then slide the second meat holder onto the skewer - prongs towards the food.
Make sure the food item is centered on the skewer. Then, push the meat holders firmly together to
hold the food. Make sure the wing nuts are tightened (use of pliers may be necessary). In addition,
you may need to wrap the food with butchers string to secure any loose portions of the food.
Never use nylon or plastic strings. After securing the food, insert the skewer into the motor.
Remove the warming rack, the grill racks, and the briquette trays, if necessary. The skewer may
flex when cooking large foods which is quite normal. Place a basting pan under the food for
basting and easier cleaning after use. Never operate a Grill Burner with a basting pan in place.
The rotis motor is capable of turning meat and poultry weighing up to 26 lbs.
PAGE 18

USING THE SMOKER
The smoker system on LUXOR utilizes a specific, low BTU burner for precise control.
The slide-out Smoker Trays on LUXOR gas grills are made of stainless steel. All units are equipped
with the smoker tray.
The ideal flavor for your food is based on the wood chips you choose. To help you decide on
wood chips, a chart outlining types of wood chips and recommended flavors can be found in
this section.
After deciding which wood chips to use, soak them in water then place them into the tray. Light the
Smoker and leave on "Hi" setting for 5 minutes. This will start the smoker. However, it needs to be lowered
after initiating the smoker to avoid burning the chips too fast. Adjust to desired cooking setting then place
your food on the grill.
To maximize the smoking effect, the lid should be closed as much as possible, but never leave the
smoker / grill unattended during this period.
To minimize burn potential do not remove the smoker tray when hot
The smoker system may be used alone for roasting and smoking at low temperature or in
conjunction with other burners. The tray can also act as a steamer when filled by water.
A list of recommended Wood Chips
Selection of wood chips is a personal choice. It is based on your personal taste. The most popular
wood chips are Hickory and Mesquite. Hickory is usually used for read meats. Mesquite is used
with poultry and seafood because of its sweeter taste. See the list below for more information.
ALDER: A medium, tart smoke taste. Ideal on salmon and other fish, chicken or
game
APPLE: A light, sweet flavor. Excellent with poultry, ham or sausage
GRAPEVINE: Strong smokey flavor. Great with beef or poultry
HICKORY: Heavy smoke flavor best with fish , beef and poultry
MAPLE: Sweet, rich smoke flavor. Great with fish, jerky or bacon
MESQUITE: Lighter smoke flavor compared to other wood chips. Great with fish,
poultry or beef
OAK: Heavy smoke flavor . Best with beef, lamb or pork
PECAN: A sweet, versatile flavor. Goes best with everything.
PAGE 19

SERVICE INFORMATION
Obtaining Service::
Please read the following check-list before calling for service:)
#1. Currently, is there gas being supplied to your Grill?
#2. Is there a power outage where you live? Are you able to run electronic appliances?
#3. When was the last time you refilled your Liquid Propane (LP) tank?
For warranty, service, contact your local LUXOR / American Heating Technologies authorized
service agency. Please provide the service representative with the Model #, Serial #, type of gas,
date of installation, and a brief description of the problem. If you need assistance in locating an
authorized service agency in your area, contact LUXOR/ A.H.T. Customer Service and Parts at:
American Heating Technologies
501 W. Glenoaks Blvd.
Suite #125
Glendale, CA 91202
.Iwww.AmericanHeatingTechnologies.com
Damaged Shipment
If a shipment arrives damaged, please follow these directions:
- In case of visible loss or damage, check to see if it is noted on freight bill or express receipt
and signed by the person who delivered it to you.
- Make sure you file a claim for damages immediately, regardless of extent of damage
- In dealing with concealed loss or damage and unnoticed until merchandise is unpacked,
contact and inform the transportation company or carrier immediately and file a "concealed
damage" claim with them. This claim should be made within 15 days of the date delivery is
made to you. Save the box or container for inspection. We can not assume responsibility for
damaged or loss taking place in transit.
PAGE 20

CONVERSIONS
The following is a step-by-step list of converting from L.P. Gas to Natural Gas or from natural Gas
to L.P.
1. Remove the top panel in the back from the Grill to gain access to the regulator
2. Remove the existing regulator and install the appropriate regulator provided by LUXOR
manufacturer, and corresponding with the gas type
3. Remove the Grill's cooking grids and burners. Be cautious and do not move or damage the
electrodes on the igniter..
4. At the entrance of the burner throat find the main burner orifices. Unscrew these orifices and
put them aside.
5. Replace EACH INDIVIDUAL ORIFICE WITH THE SPECIFIED ORIFICE provided by American Heating
Technologies. (You must replace the main burner orifices, smoker burner orifice, back burner
orifices, and side burner orifices.)
6. Refit the access panel in the back of the grill
7. Attach the main burners onto the burner valve orifices. Do not damage or move the igniter
electrodes.
8. After correctly converting the Grill and testing for leaks, follow the instructions for lighting the
grill and check the burner flames for possible irregularities (color, look, etc.)
9. Adjust the burner "Low" setting by using a long stemmed flat-head screwdriver, inserting the
screwdriver into the Burner Control Valve stem, and turn the adjustment screw (turn
counter clockwise) producing a stable flame when the Burner Control Valve is set on "low."
This applies to all operations / burner types.
10. If the burner is running properly, place the cooking grids back in position.
11. To indicate the change made, make sure to mark the proper setting on the rating plate.)
WHEN CONVERTING A UNIT GAS TYPE YOU MUST ONLY USE
A CONVERSION KIT SPECIFIED BY AMERICAN HEATING TECHNOLOGIES.
WARNING
PAGE 21

14
BREAKDOWN
11
17
15
13
16
20
# Description
1 Knob
2 Bezel
3 Ignitor
4 Housing
5 Manifold
6 Valve
7 U-Burner
8 Rock Grate
9 Ceramic Briquettes
10 Cooking Grills
11 Back Burner
12 Infra-red Burner
13 End Cap
14 Hood
10
15 Handle
9
8
7
12
22
16 Warming Rack
17 Hood Support
18 N.G. Regulator
20 L.P. Regulator
21 Lighting stick & chain
6
4
3
23
2
18
5
1
22 Electrode
23 Grease tray
21
PAGE 22

WARRANTY
IN ORDER TO RECEIVE WARRANTY SERVICE FILL OUT AND MAIL IN
YOUR WARRANTY CARD WITHIN 30 DAYS OF PURCHASE.
This warranty is limited to the replacement of the defective parts.
LIMITED WARRANTY
American Heating Technologies must give authorization in writing, to the customer to
return the defective parts.
LIMITED LIFETIME WARRANTY
A.H.T. warrantees the stainless steel body housing, ceramic infra red burners, and the stainless steel
burners to be free from defects in material and workmanship when subjected to normal domestic
use and service for the lifetime of the original purchaser. This warranty excludes discoloration,
surface corrosion, and scratches which may occur during regular use.
LIMITED FIVE-YEAR WARRANTY
A.H.T. warrantees the structural integrity of the interior grill parts, exterior, and drip pans to be free
.
from defects in material and workmanship, when subjected to normal domestic use and service,
for a period of five years from the date of purchase.
LIMITED ONE-YEAR WARRANTY
A.H.T. warrantees all other grill components to be free from defects in material and workmanship
for a period of one year from the original date of purchase. A.H.T. will replace or repair parts
found to be defective at no cost to the original purchaser.
WHAT IS NOT COVERED
A.H.T. shall not be responsible for and shall not pay for the following:
1. Installation or start-up
2. Service by an unauthorized service provider
3. Damage or repair due to service by an unauthorized service provider or use of
unauthorized parts
4. Improper installation
5. Damage caused by accidents, abuse, alteration, misuse, incorrect installation or
installation not in accordance with the instructions contained in the Owners Manual,
or local codes
6. Units installed in non-residentail applications such as day-care centers, bed and
breakfast centers, churches, nursing homes, restaurants, hotels, schools, etc.
7. To correct normal adjustments or settings, due to improper installation,
commissioning or local gas supply properties
8. Transportation costs, exports duties, or installation cost
9. the cost of a service call to diagnose trouble, or
10. Removal or re-installation cost
PAGE 23

WARRANTY
IN ORDER TO RECEIVE WARRANTY SERVICE FILL OUT AND MAIL IN
YOUR WARRANTY CARD WITHIN 30 DAYS OF PURCHASE.
LIMITED WARRANTY
LIMITED WARRANTY (continued)
EXCLUSIONS AND LIMITATIONS
- A.H.T. will not cover replacement of the ceramic burner if the burner has cracked due to water
damage.
- A.H.T. Is not responsible for any labor pertaining installation, normal adjustment to burners, or
gas regulators.
- A.H.T. warranty applies only to the original purchaser of the LUXOR and may not be transferred.
- A.H.T. warranty is in lieu of all other warranties, expressed or implied and all other obligations or
liabilities related to the sale or use of its grill products.
- A.H.T. warranty shall not apply and A.H.T. is not responsible for damage resulting from misuse,
abuse, alteration of or tampering with the appliance, accident, hostile environment, flare-ups,
improper installation, or installation not in accordance with the instructions contained in the
Owners Manual, or the local codes.
- A.H.T. shall not be liable for incidental, consequential, special or contingent damages resulting
from its breach of this written warranty or any implied warranty.
- Some states do not allow limitations on how long an implied warranty lasts, or the exclusions of
or limitations on consequential damages. This warranty gives you specific legal rights and you
may have other rights which vary from state to state.
- A.H.T. Is not responsible for any damages occurred during shipping.
- No one has the authority to add to or vary A.H.T.'s warranty, or to create for A.H.T. any other
obligation or liability in connection with the sale or use of its products.
PAGE 24
 Loading...