

LuxHome HA71FA User Manual
HA71FA 868MHz Solar Powered Wire Free Siren
INTRODUCTION
The HA71FA is an 868MHz Solar Powered Wire Free Siren with flashing comfort lights. The unit is designed to work with
the USC423A 868MHz GSM Alarm Panel.
HA71FA
HOUSING
The unit is encapsulated in a tough polycarbonate housing. This housing provides full protection against adverse weather
conditions. All electronic components are specially treated to ensure long, reliable, trouble free operation and an integral
tamper switch gives maximum security protection to the unit.
SOLAR PANEL
The Solar Panel mounted on the top of the housing will maintain a charge to the rechargeable battery during daylight hours.
During darkness, a negligible amount of energy is released by the rechargeable battery to operate the Siren.
RECHARGEABLE BATTERY
A high capacity 6V 1.2Ah sealed lead acid rechargeable battery ensures that the Siren is self maintained during darkness
and long winter periods.
INITIAL POWER-UP BATTERY
An Alkaline 9V PP3 battery is supplied in the Siren unit to support the initial power up.
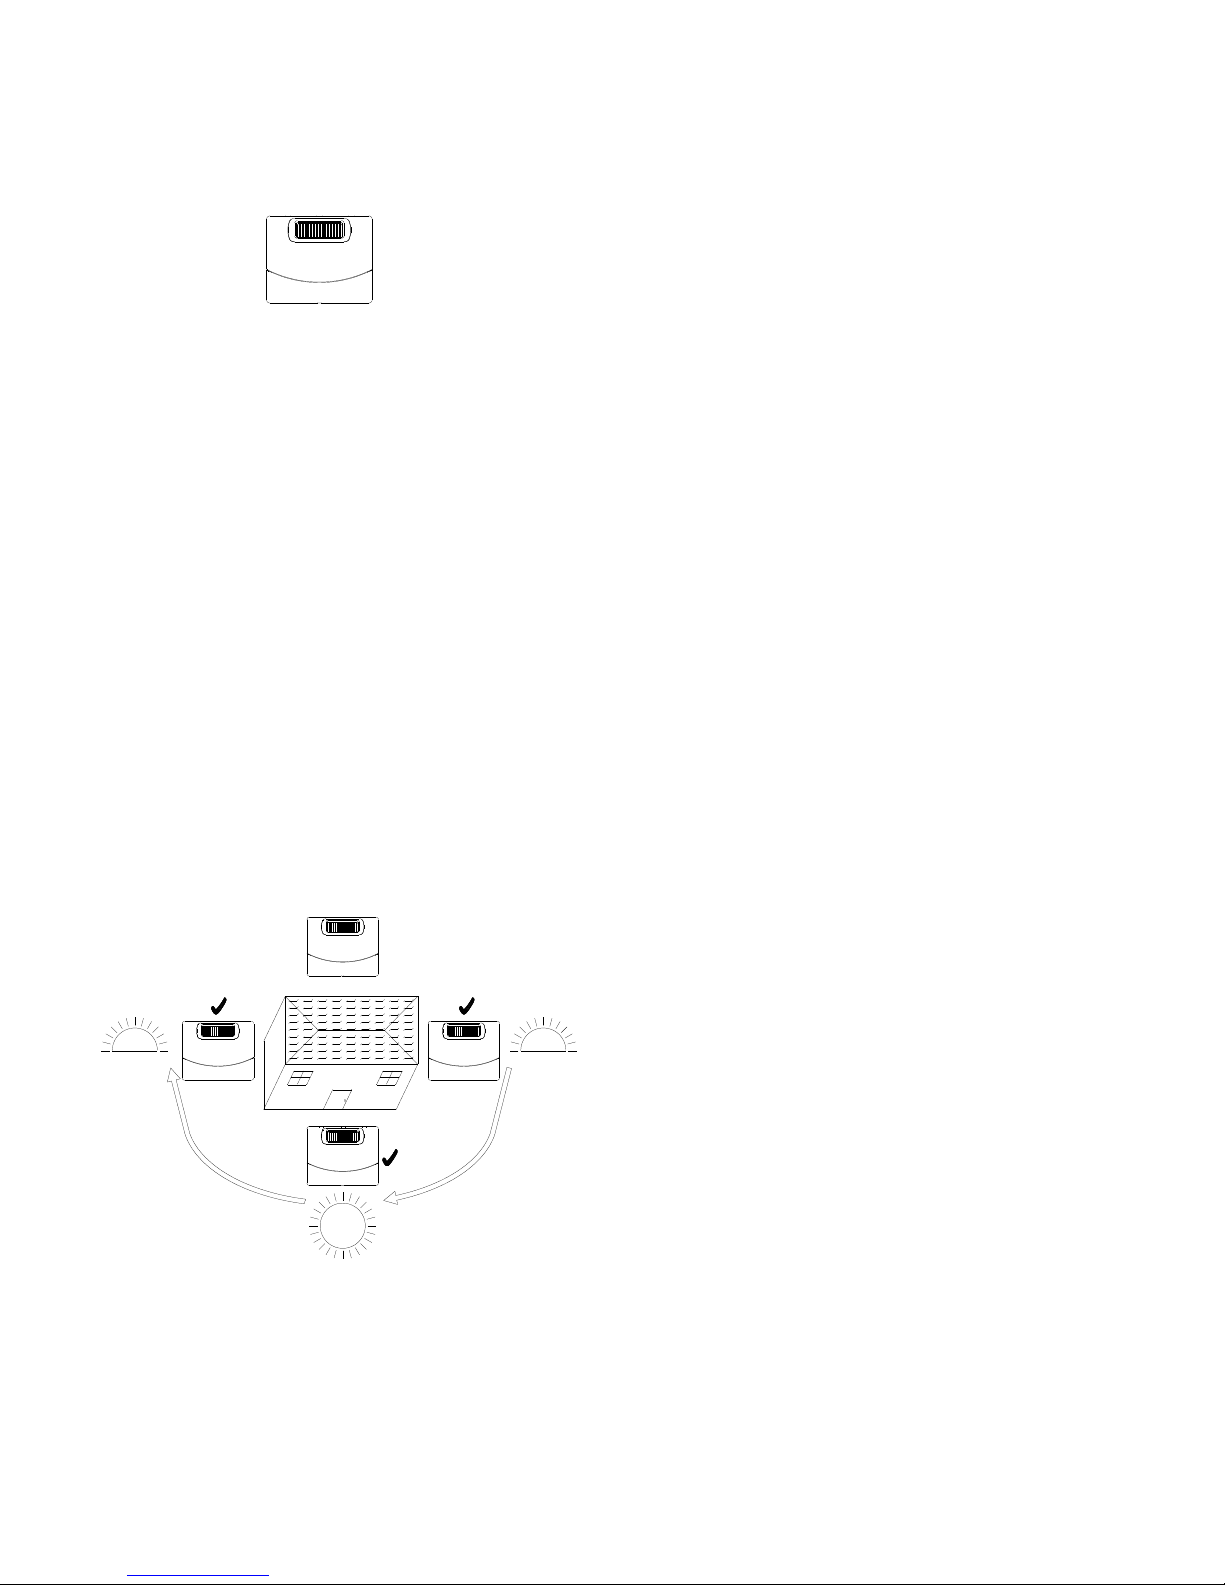
LOCATION
The Siren unit should be fitted to the outside of the building in a position that is clearly visible and at a height which is
relatively inaccessible to an intruder.
To provide the optimum amount of sunlight to the Solar Panel, you should ideally mount the Siren on a south facing wall. If
this is not possible an easterly or westerly position will suffice.
Although the Siren is designed to work on any aspect wall, you should try to avoid a north facing wall where possible.
Shadows cast by neighbouring walls, trees and roof overhangs should also be avoided. In practice, the Siren should be
positioned a minimum of twice the width of the eaves overhang, below the eaves. Remember that in winter the sun is lower
in the sky and you should avoid winter shadows where possible.
The Siren contains a sophisticated radio receiver. Reception of radio signals can be affected by the presence of metallic
objects within close proximity of the Siren. It is therefore important to mount the Siren a minimum distance of one metre
away from any external or internal metalwork, i.e. external drainpipes, gutters and internal radiators etc.
INSTALLATION
Remove the screw at the base of the housing and carefully lift off the front cover. All electronic components are housed
within the front cover.
Use the rear back-plate as a template to mark the position of the four fixing holes on the external wall. Drill four holes and
insert the plastic wall plugs. Mount the back-plate using the four screws provided.
SOUTH
WEST
Possible
Avoid if
NORTH
EAST
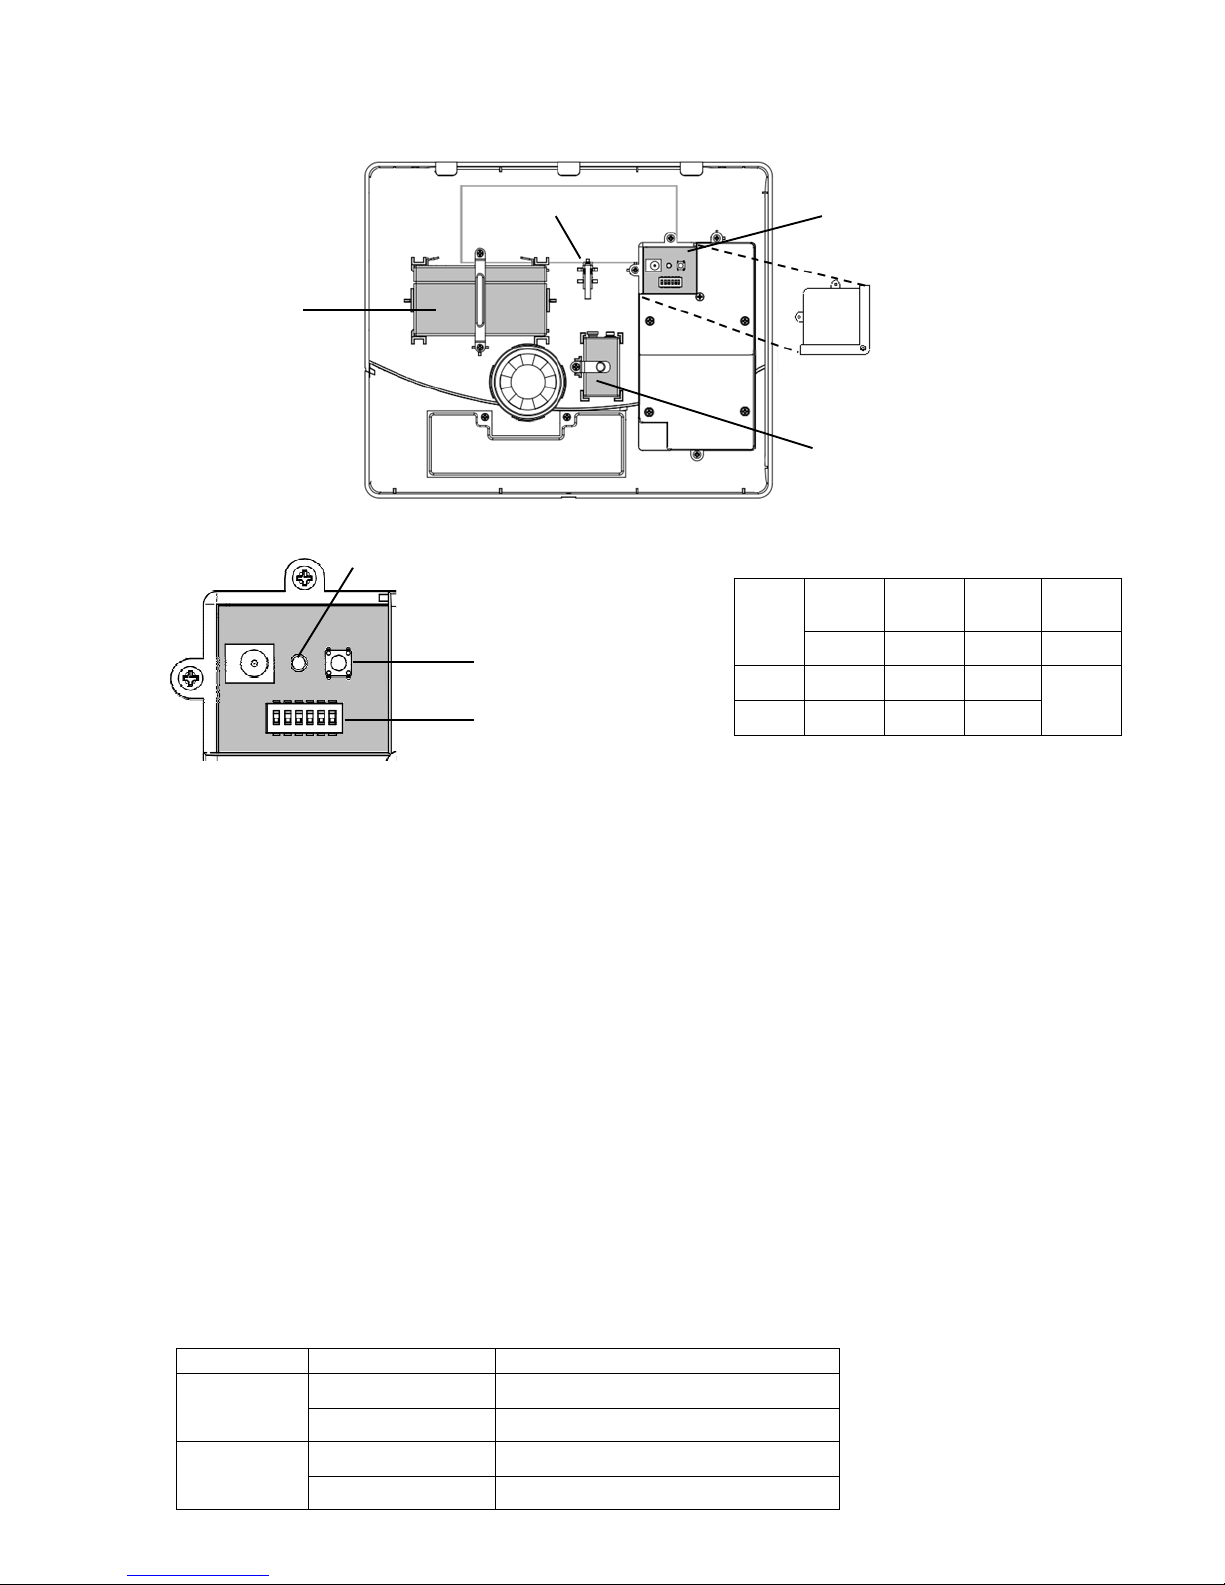
SETTINGS
Remove the three screws holding the Control Box cover in place and remove the cover. FIGURE 1.
FIGURE 1
Inside the Control Box:
DIP Switch Settings:
The recommended DIP Switch settings are DIP1, DIP 2 and DIP 3 all set to ON. But you can set DIP Switches 1, 2, and 3
to your desired settings if you prefer.
INITIAL POWER-UP
Connect the 9V PP3 initial power-up battery to the clip-on connector. Connect the rechargeable battery to the charging
leads red to red(+) and black to black (-).
NOTE: Once the batteries have been connected, the unit will be operational and it is important that the solar panel
receives sufficient light to maintain the battery charge.
CONNECTING THE HA71FA SIREN TO THE USC423A GSM ALARM PANEL
1. Before attempting to Learn the Siren to the Panel ensure that the Wireless Siren Setting is Enabled on the USC423A
panel. Do this by entering PIN Code + 04 + PARM on the panel. By default the 0 key will not be lit up, press it so that it
lights up and press PARM to save the settings, Wireless Siren Setting is now enabled meaning you can proceed with the
below.
2. On the alarm panel, enter your PIN + DISARM Key to disarm the system.
3. On the siren, press the learning key for more than 3 seconds and release. The Learning LED will flash repeatedly once
every second.
4. Within 30 seconds, on the alarm panel, enter your PIN + DISARM Key to start the binding process.
5. Refer to table below for binding results:
Binding Indicator on Siren Status
Successful
LED Learning LED blinks once
Sound Beeps once
Failed
LED Learning LED flashes 3 times
Sound Beeps rapidly 3 times
DIP
Switch
Setting
Siren
Sounder
Period
Siren
Sounder
On/Off
Siren
Beep
On/Off
DIP1 DIP2 DIP3 DIP 4-6
ON 15 mins Siren On Beep On
Factory
Use Only
OFF 3 mins Siren Off Beep Off
6V 1.2Ahr
rechargeable
battery
9V initial power
up battery
Control Box
Control
Box
cover
Tamper
switch
Learning LED
Learning Key
DIP Switches
1 - 6 (left to right)
 Loading...