

Page 1
Premium Babyproducts
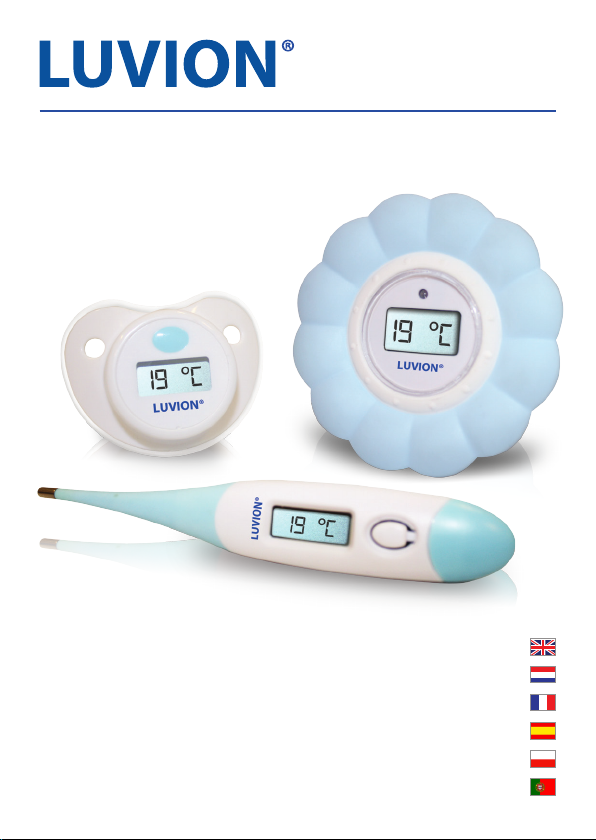
Thermometer Set Exact 70
INSTRUCTION MANUAL
MANUEL D’UTILISATION
MANUAL DE INSTRUCCIONES
INSTRUKCJA OBSŁUGI
MANUAL DO UTILIZADOR
HANDLEIDING
Page 2

USER MANUAL (ENGLISH)
INTRODUCTION
Thank you for purchasing the Luvion Digital Thermometer Set Exact 70.
Please retain your original dated sales receipt for your records. For serviceand warranty issues you will always be asked for a copy of this receipt. For
warranty issues you can contact your local Luvion dealer or distributor. More
information can be found on www.luvion.com.
The user manual provides you with all information for a safe and easy use
of this thermometer set. Before using the thermometer set we ask you to
thoroughly read this user manual. We ask for your special attention for the
safety instructions.
CONTENTS OF PACKAGE
- Digital ex-tip thermometer
- Digital soother thermometer
- Digital bath and room thermometer
SAFETY INSTRUCTIONS
- Only use the ex-tip and soother thermometers to measure human body
temperature.
- Before each use check the nipple of the soother for tears or cracks and pull
it to ensure that it is rmly attached to the shield. Do not use it if a defect is
found or if it is loose.
- Ensure an adult supervises the use of the thermometers.
- Store the thermometers out of reach of children; they are not toys.
- Temperature measurement is not a substitute for consulting your physician.
CARING FOR THE THERMOMETERS
- Do not store the thermometers in direct sunlight or at a high temperature.
2
Page 3
- Do not disassemble the thermometers.
- Never use boiling water or a chemical solvent to clean the thermometers.
- Do not wash in dishwasher.
- Do not put in microwave or microwave steriliser.
BEFORE FIRST USE
Clean the ex-tip thermometer and the soother thermometer before rst use.
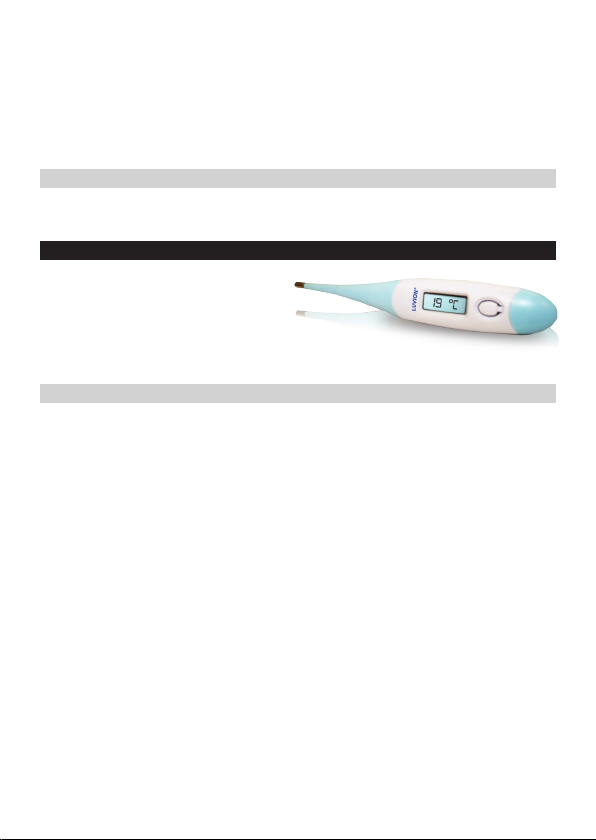
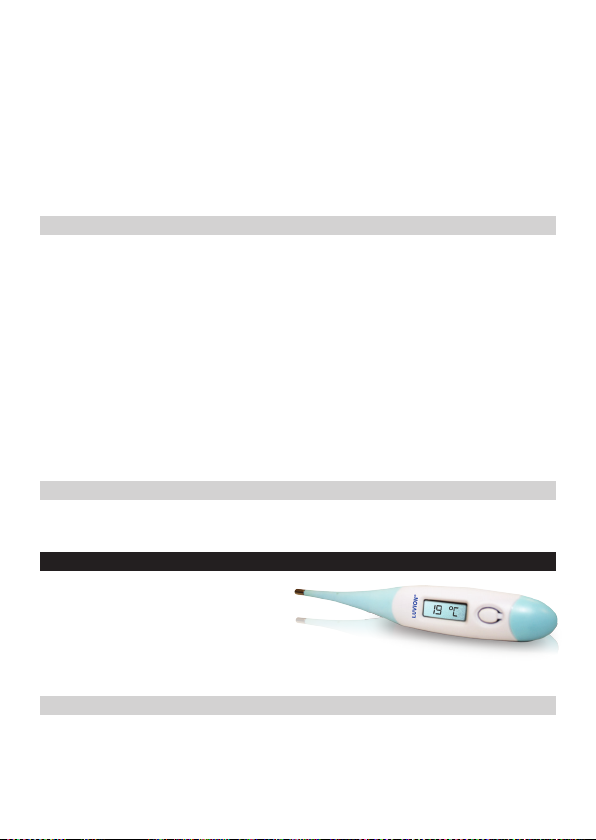
THE DIGITAL FLEX-TIP THERMOMETER
The digital ex-tip thermometer
can be used to measure your
baby´s temperature anally
(rectum) or axially (armpit).
USING THE FLEX-TIP THERMOMETER
1. Remove the protection cap from the thermometer.
2. Press the power button to switch the thermometer on. The display will
read “188.8E,” conrming that the thermometer is working.
3. Choose the place of the temperature measurement. Anal measurements
are most accurate and are suitable for both infants and children. Axial
measurements are not reccommended for accurate measurements.
- When used anally (rectum), the temperature sensor needs to be
inserted for about 1 to 2 cm. Vasaline can be used for lubrication.
Measurement time 30 seconds
Normal temperature about 37°C-98.6°F
- When used axially (armpit), put the temperature sensor in the armpit.
Press and x it with the arm.
Measurement time 3~5 minutes
Normal temperature about 36.7°C-98.1°F
3
Page 4

Note: The body temperature is dierent for all humans and changes during
the day. You are therefore advised to measure the temperature at a specic
time in the morning.
4. Start the measurement when the screen displays “Lo °C“ or “Lo °F“. During
measurement the symbol “°C“ or “°F“ will ash while the temperature
increases. When a maximum value is reached, the symbol “°C“ or “°F“ will
cease to ash. A buzzing sound that lasts about 10 seconds indicates that
the measurement is completed.
10 beeps in 10 seconds means that the measured temperature is normal
(below 37.8°C) 3 sets of short beeps in 10 seconds means a possible fever
(measured temperature above 37.8°C).
- When the display reads “Lo °C“ or “Lo °F“ then the measured
temperature is below 32.0°C/ 90 °F
- When the display reads “Hi °C“ or “Hi °F“ then the measured temperature
is above 43.0°C/ 109.9 °F
5. Press the power button to turn the thermometer o.
Note: The thermometer will automatically switch o after 10 minutes. Switch
the thermometer o directly after use to prolong battery life.
RECALL THE LAST TEMPERATURE
Press the power button while turning on the ex-tip thermometer. The
display will now read the last measured temperature. This is indicated by the
letter “M” displayed under the degree sign. After 3 seconds the display will
read 37.0°C and is ready for a new measurement.
CLEANING
The thermometer is waterproof and can be cleaned with water, steralization
lotion or a soft cloth.
4
Page 5
REPLACING THE BATTERY
When the display becomes indistinct or when the “ “ symbol appears it is
time to replace the battery.
To replace the battery:
1. Open the battery cover, the blue cover at the top of the thermometer.
2. Remove the old battery.
3. Place a new battery and reattach the battery cover.
SPECIFICATIONS
Measuring Range 32.0°C ~ 42.9°C (89.6°F ~ 109.2°F)
Measuring Time About 3 ~ 5 minute
Accuracy ± 0.1°C (±0.2°C) for 35.0 ~ 42.0°C (95°F ~ 107.6°F) & ±0.2°C
Display LCD (Unit of display : 0.1°C / 0.1°F)
Battery 1.5VDC (LR41) alkaline
Power Consumption 0.15 mW
Dimensions 129mm(L) x 21mm(W) x 12.5mm(H)
Battery Life About 250 hours or 1000 times.
Weight Approx. 12 g. (with battery)
(±0.4°F) for remaining range at an ambient of 22°C (71.6°F)
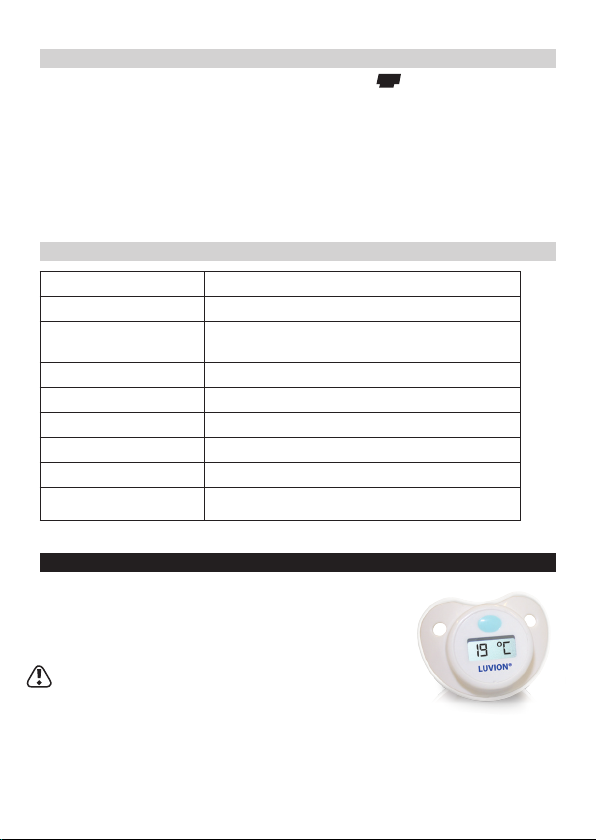
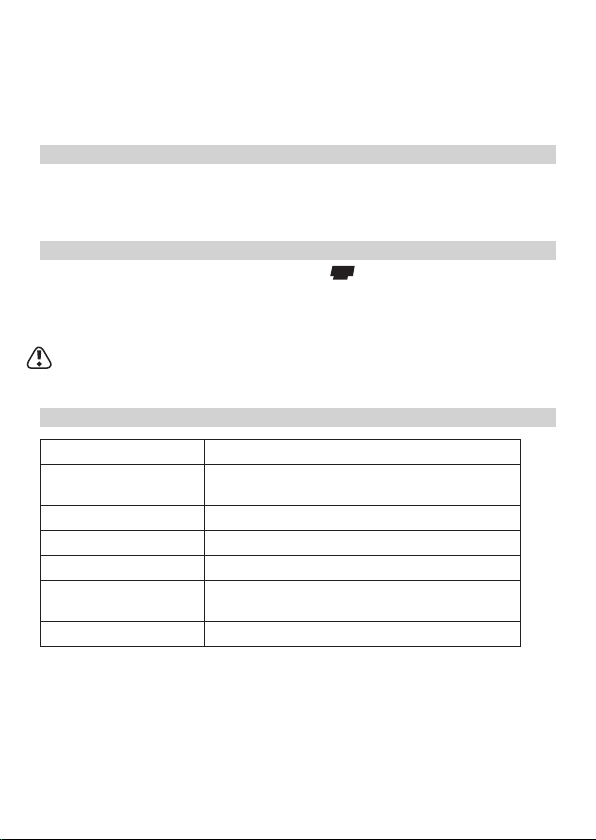
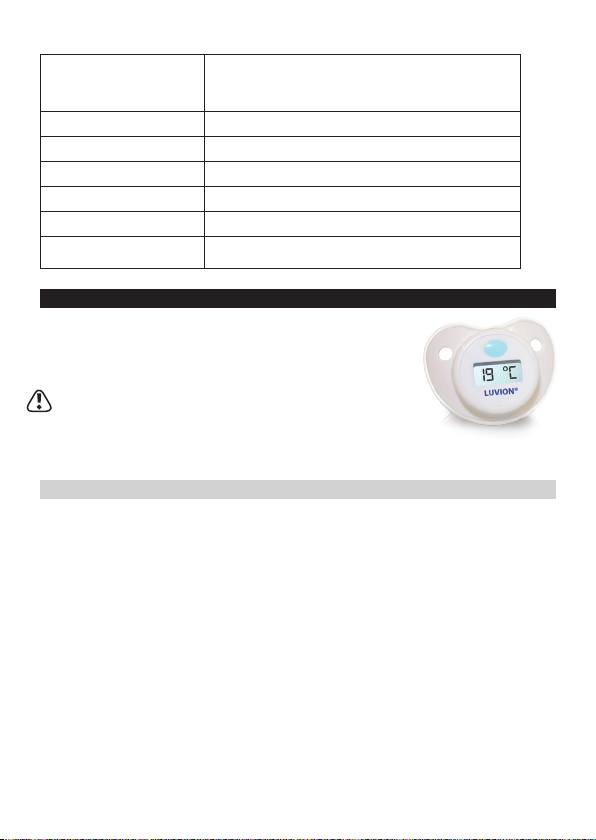
THE SOOTHER THERMOMETER
The most convenient way to measure your baby´s
temperature is with a soother thermometer.
Note: Oral (mouth) measurements are often about
0.5 °C or 1.0 °F lower than body temperature readings
(anal measurement).
5
Page 6

USING THE SOOTHER THERMOMETER
1. Remove the protection cap from the soother.
2. Press the power button. The display will read “188.8E,” conrming that the
thermometer is working.
3. Place the soother in the baby’s mouth.
The measurement starts when the screen displays “Lo °C“ or “Lo
°F“. During measurement the symbol “°C“ or “°F“ will ash while the
temperature increases. When a maximum value is reached (after approx.
3 minutes’, the symbol “°C“ or “°F“ will cease to ash. A buzzing sound
indicates that the measurement is nished.
Note: It is reccommended to leave the soother thermometer in the baby´s
mouth for 6-8 minutes to allow the soother to warm up and to get a more
accurate measurement.
- When the display reads “Lo °C“ or “Lo °F“ then the measured
temperature is below 32.0°C/ 90 °F
- When the display reads “Hi °C“ or “Hi °F“ then the measured temperature
is above 43.0°C/ 109.9 °F
Note: Drinking or eating prior to use may aect the temperature reading.
Wait half an hour before taking a measurement.
4. Press the power button to switch o the soother thermometer.
Note: The thermometer will automatically switch o after 10 minutes.
Switch the thermometer o directly after use to prolong battery life.
RECALL THE LAST TEMPERATURE
To recall the last temperature:
Press and hold the power button while turning on the soother thermometer
6
Page 7
for at least 2 seconds. The display will now read the last measured
temperature. This is indicated by the letter “M” displayed under the degree
sign.
CLEANING
Wash the soother thermometer after use with luke warm water and a mild
soap.
BATTERY
When the battery is almost exhausted, the “ “ symbol will appear on the
display. This means that it is time to discard the unit.
Note: Do not use the soother thermometer as a regular soother after the
battery is exhausted.
SPECIFICATIONS
Measuring Range 32.0°C ~ 43.9°C (89.6°F ~ 109.9°F)
Accuracy ± 0.1°C (±0.2°C) for 35.0 ~ 38.0°C (95°F ~ 100.4°F) ambient
Display LCD (Unit of display : 0.1°C / 0.1°F)
Power Consumption 0.15 mW
Dimensions 40mm(L) x 43mm(W) x 53mm(H)
Battery Life More than 200 hours of continuous use. (approx. 2 years if
Weight Approx. 14 g. (with battery)
temperature of 22°C (71.6°F)
used10 minutes a day)
7
Page 8
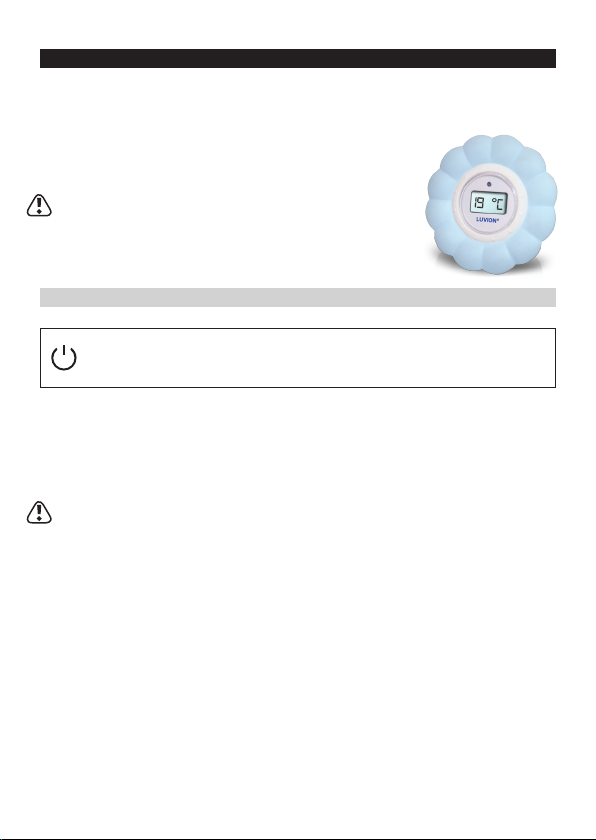
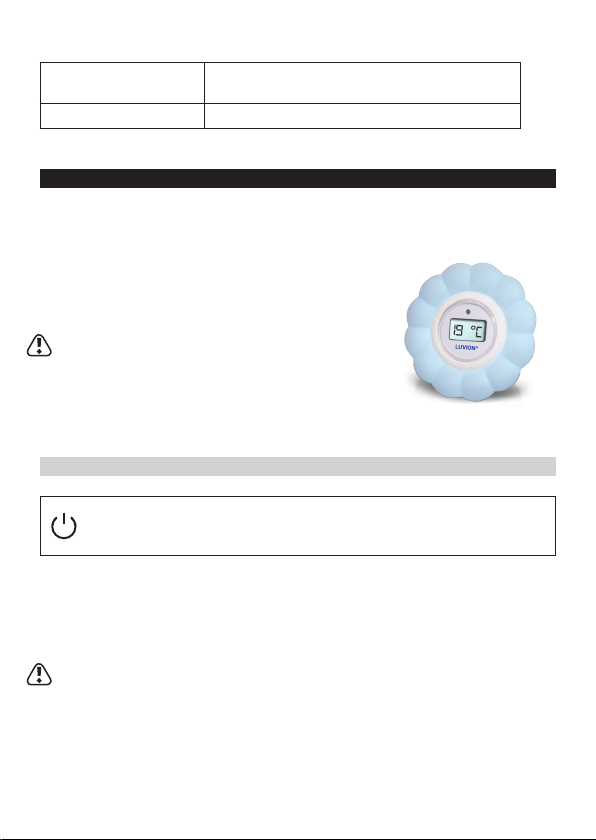
THE BATH AND ROOM THERMOMETER
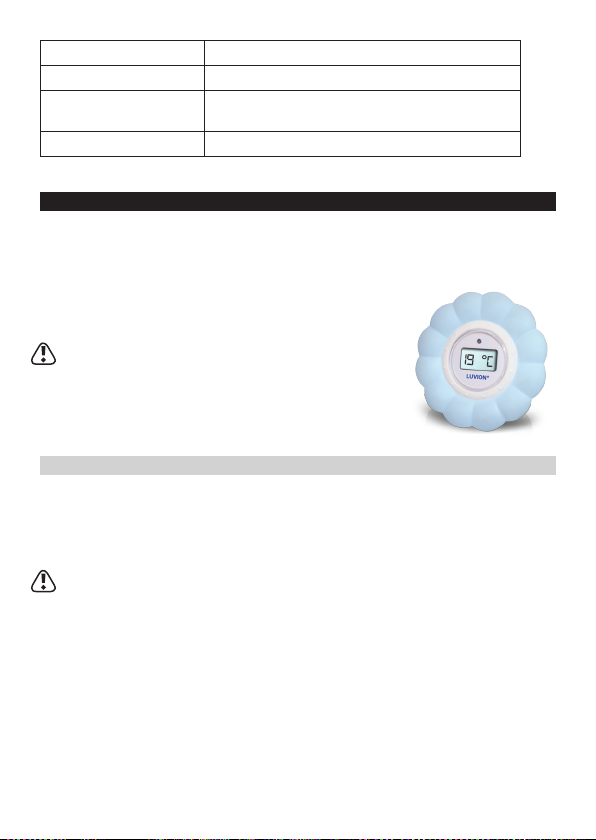
Use the Bath and Room Thermometer to conveniently measure the
temperature of the baby room or the bathwater.
Note: Your baby will feel most comfortable in bath if
the water temperature is between 36.5°C and 38°C .
A temperature of 39°C and above is too hot and your
baby could get burned! At a room temperature of about
18°C babies feel most comfortable when sleeping.
USING THE BATH AND ROOM THERMOMETER
Switching on: Switch on the bath thermometer by lmly hitting the
bottom side with a at hand.
Just let the thermometer oat in the bathwater or let it stand on a shelf in the
baby’s room to start measuring.
Note: Mix the water thoroughly before measuring the water temperature
or put the thermometer in the tub while lling it. This will ensure a fast and
accurate reading of the water temperature.
- The display will read “COLD” when the measured temperature is below 33°C.
A comfortable bathwater temperature is between 36.5°C and 38°C.
- Warm water alert: the red warning LED will start to ash when the
measured temperature is 39 °C or above. The display will then ash “Hot.”
8
Page 9

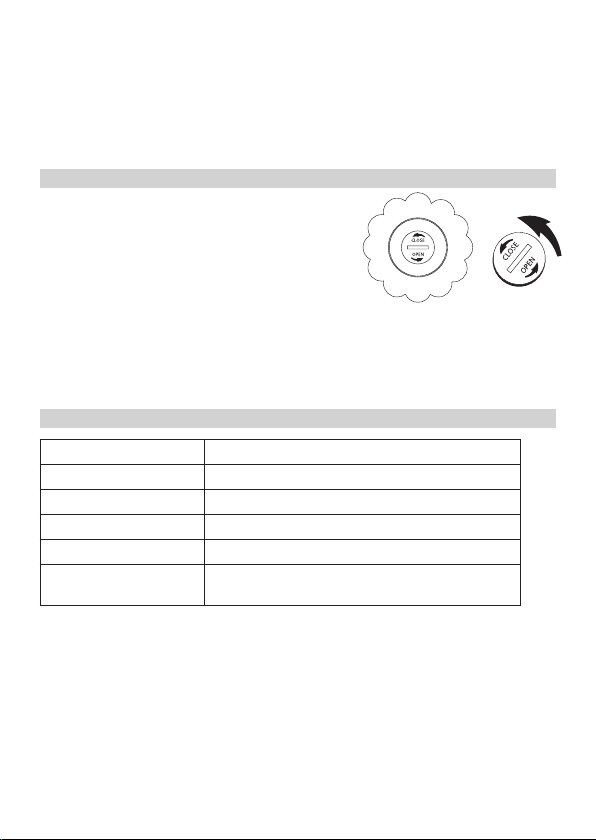
REPLACING THE BATTERY
After about 2 years the batteries may go at. You can then replace them.
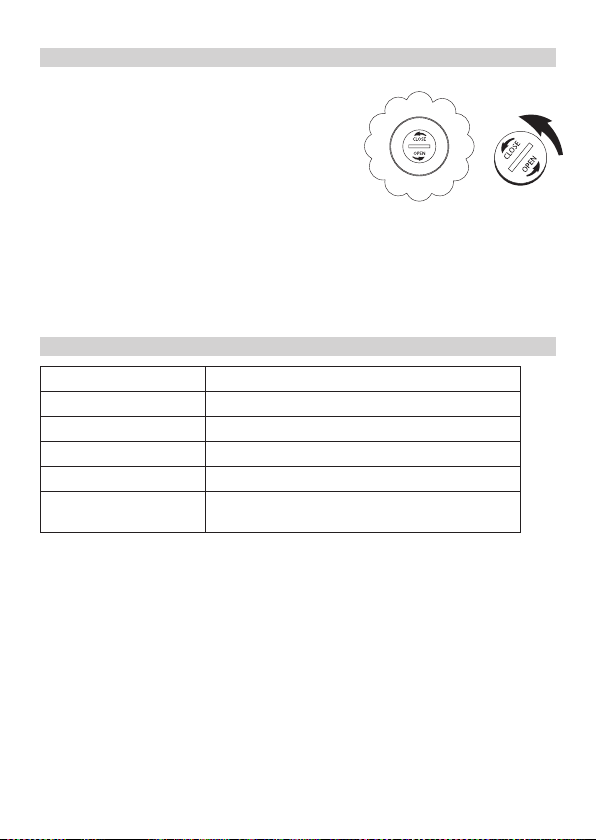
To replace the batteries:
1. Push the measurement unit out of the
rubber housing
2. Remove the battery cover located at
the back of the measurement unit by
using a coin or similar
3. Carefully remove the empty batteries
with a pair of tweezers
SPECIFICATIONS
Measuring Range 0°C ~ 50°C (32°F ~ 122°F)
Accuracy ± 1°C (2°F)
Display LCD (Unit of display : 0.1°C / 0.1°F)
Battery 1x CR2032
Dimensions 40mm(L) x 43mm(W) x 53mm(H)
Battery Life about 1 year ( based on 1 hour of use a day)
9
Page 10

HANDLEIDING (NEDERLANDS)
VOORWOORD
Hartelijk dank voor de aanschaf van deze Luvion Digitale Thermometer Set
Exact 70.
Zorgt u ervoor dat u altijd uw originele aankoopbewijs bewaard. Voor
garantiegevallen zal u altijd gevraagd worden om een kopie van uw
aankoopbewijs. Voor garantiegevallen kunt u contact opnemen met de
Luvion dealer, of met de lokale Luvion vertegenwoordiging. Meer informatie
vind u op www.luvion.com
Deze handleiding verzorgt alle nodige informatie om veilig gebruik
te kunnen maken van deze Luvion Thermometer set. Voordat u de
thermometers gebruikt adviseren wij u deze handleiding aandachtig door te
lezen. Wij vragen uw extra aandacht voor de veiligheidsinstructies.
PAKKET INHOUD
- Digitale exibele punt thermometer
- Digitale speen thermometer
- Digitale bad en kamer thermometer
VEILIGHEIDSINSTRUCTIES
- Gebruik de exibele punt thermometer en de speen thermometer alleen
om de lichaams temperatuur te meten.
- Voor ieder gebruik zorgvuldig nakijken of het mondstukje van de speen
niet los is geraakt en of er barsten, spleten of scheuren in zitten. Gebruik de
thermometer niet wanneer dit het geval is.
- Gebruik de thermometers altijd in het bijzijn van volwassenen.
- Bewaar de thermometers buiten bereik van kinderen; het is geen
speelgoed.
- Het meten van de temperatuur is geen vervanging voor het raadplegen van
een arts.
10
Page 11
ONDERHOUDEN VAN DE THERMOMETERS
- Bewaar de thermometers niet in direct zonlicht of bij een hoge
temperatuur.
- Haal de thermometers niet uit elkaar.
- Gebruik nooit kokend water of een chemisch oplosmiddel om de
thermometers te reinigen.
- Niet geschikt voor de vaatwasser.
- Niet geschikt voor de magnetron.
VOOR GEBRUIK
Maak de exibele punt thermometer en de speen thermometer schoon voor
gebruik.
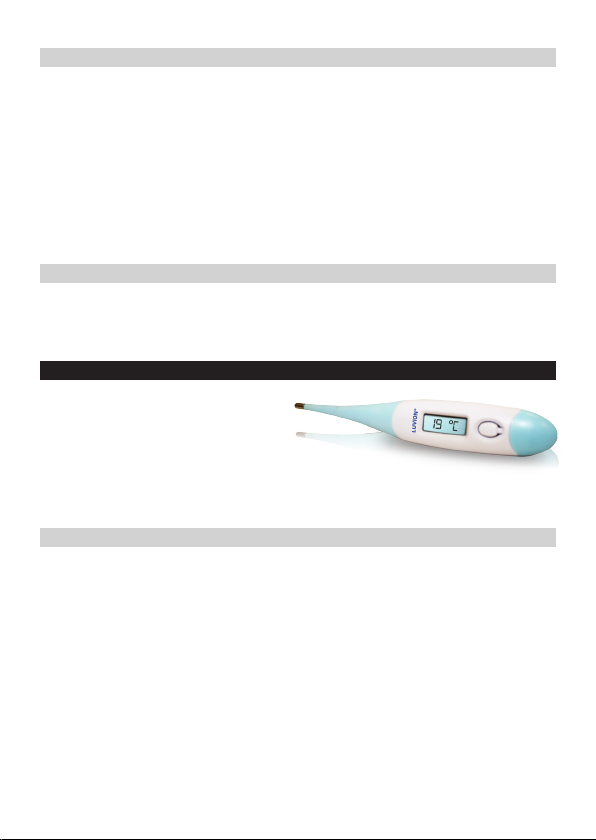
DE DIGITALE FLEXIBELE PUNT THERMOMETER
De digitale exibele punt
thermometer kan gebruikt worden
om uw baby´s temperatuur rectaal
(in de anus) of onder de oksel te
meten.
GEBRUIK VAN DE FLEXIBELE-PUNT THERMOMETER
1. Verwijder het beschermingskapje van de thermometer.
2. Druk op de aan/uit knop om de thermometer aan te zetten. Op de
display zal dan “188.8E” verschijnen, dit betekent dat de thermometer
goed functioneerd.
3. Kies de plaats van de temperatuur meting. Rectale metingen zijn het
meest accuraat en zijn geschikt voor zowel baby’s als kinderen. Metingen
onder de oksel worden niet aanbevolen als het meetresultaat accuraat
dient te zijn.
- Wanneer de thermometer rectaal (in de anus) gebruikt wordt, dan
11
Page 12

moet de temperatuur sensor 1 a 2 cm ingebracht worden. Vasaline kan
gebruikt worden om dit te vergemakkelijken.
Meettijd 30 seconden
Normale temperatuur licht rond de 37°C-98.6°F
- Wanneer de thermometer onder de oksel gebruikt wordt, klem de
thermometer dan vast met de arm.
Meettijd 3~5 minuten
Normale temperatuur licht rond de 36.7°C-98.1°F
Let op: De lichaamstemperatuur verschilt per persoon en kan gedurende de
dag veranderen. U wordt daarom geadviseerd om op een vast moment in de
ochtend uw temperatuurmeting te doen.
4. Start de meting als “Lo °C“ or “Lo °F“ op het scherm verschijnt. Gedurende
de meting zal het symbool “°C“ or “°F“ knipperen. Ook zal de temperatuur
langzaam oplopen. Als een maximale waarde is bereikt dan zal het
symbool “°C“ or “°F“ stoppen met knipperen. Een pieptoon gedurende
ongeveer 10 seconden geeft aan dat de meting is voltooid.
10 pieptonen in 10 seconden betekent dat de gemeten temperatuur
normaal is (onder 37.8°C) 3 series korte pieptonen in 10 seconden
betekent mogelijk koorts (gemeten temperatuur is boven 37.8°C)
- Wanneer het scherm “Lo °C“ or “Lo °F“ aangeeft dan is de gemeten
temperatuur onder 32.0°C/ 90 °F
- Wanneer het scherm “Hi °C“ or “Hi °F“ aangeeft dan is de gemeten
temperatuur boven 43.0°C/ 109.9 °F
5. Druk op de aan/uit knop om de thermometer uit te zetten.
12
Page 13

Let op: De thermometer zal zichzelf automatisch uitschakelen na 10
minuten. Schakel de thermometer meteen uit na gebruik om de batterij te
sparen.
DE LAATST GEMETEN TEMPERATUUR OPVRAGEN
Druk op de aan/uit knop om de exibele punt thermometer aan te zetten.
Het scherm geeft nu de laatst gemeten temperatuur aan. Dit wordt
aangegeven met de letter “M” onder het graden teken. Na 3 seconden zal het
scherm 37.0° aangeven en is de thermometer klaar voor een nieuwe meting.
REINIGING
De thermometer is waterdicht en kan gereinigd worden met water, sterilisatie
vloeistof of een zachte doek.
DE BATTERIJ VERVANGEN
Wanneer het scherm onduidelijk wordt of het “ “ symbool verschijnt dan is
het tijd om de batterij te vervangen.
Om de batterij te vervangen:
1. Verwijder het batterijkapje, het blauwe kapje bovenaan de thermometer.
2. Verwijder de oude batterij.
3. Plaats een nieuwe batterij en plaats dan het batterijkapje terug.
SPECIFICATIES
Meetbereik 32.0°C ~ 42.9°C (89.6°F ~ 109.2°F)
Meettijd Ongeveer 3 ~ 5 minuten
Nauwkeurigheid ± 0.1°C (±0.2°C) for 35.0 ~ 42.0°C (95°F ~ 107.6°F) & ±0.2°C
Display LCD (Unit of display : 0.1°C / 0.1°F)
Batterij 1.5VDC (LR41) alkaline
Energieverbruik 0.15 mW
(±0.4°F) for remaining range at an ambient of 22°C (71.6°F)
13
Page 14
Dimensies 129mm(L) x 21mm(W) x 12.5mm(H)
Levensduur Batterij Ongeveer 250 uur of 1000 keer.
Weight Approx. 12 g. (with battery)
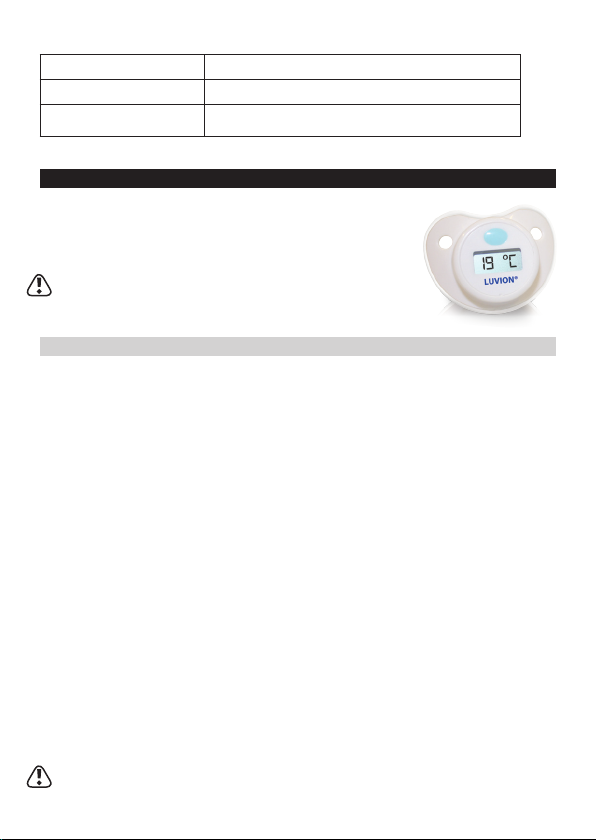
DE SPEEN THERMOMETER
De speen thermometer is de meest comfortabele
manier om de baby´s temperatuur te meten.
Let op: Orale (mond) metingen zijn vaak ongeveer 0.5
°C or 1.0 °F lager dan lichaamsmetingen (rectaal).
GEBRUIK VAN DE SPEEN THERMOMETER
1. Verwijder het beschermingskapje van de speen.
2. Druk op de aan/uit knop om de thermometer aan te zetten. Op de
display zal dan “188.8E” verschijnen, dit betekent dat de thermometer
goed functioneerd.
3. Plaats de speen in de mond van de baby
Start de meting als “Lo °C“ or “Lo °F“ op het scherm verschijnt. Gedurende
de meting zal het symbool “°C“ or “°F“ knipperen. Ook zal de temperatuur
langzaam oplopen. Als een maximale waarde is bereikt (na ongeveer 3
minuten) dan zal het symbool “°C“ or “°F“ stoppen met knipperen. Een
pieptoon geeft aan dat de meting is voltooid.
- Wanneer het scherm “Lo °C“ or “Lo °F“ aangeeft dan is de gemeten
temperatuur onder 32.0°C/ 90 °F
- Wanneer het scherm “Hi °C“ or “Hi °F“ aangeeft dan is de gemeten
temperatuur boven 43.0°C/ 109.9 °F
Let op: Eten of drinken vlak voor het gebruik van de thermometer kan de
meting beinvloeden. Wacht daarom een half uur voordat u de temperatuur
meet.
14
Page 15
4. Druk op de aan/uit knop om de speen thermometer uit te schakelen.
Let op: De thermometer zal zichzelf automatisch uitschakelen na 10
minuten. Schakel de thermometer meteen uit na gebruik om de batterij te
sparen.
DE LAATST GEMETEN TEMPERATUUR OPVRAGEN
Om de laatst gemeten temperatuur op te vragen:
Houd de aan/uit knop voor 2 seconden ingedrukt op het moment dat u de
thermometer inschakelt. Het scherm zal nu de laatst gemeten temperatuur
weergeven. Dit wordt op het scherm weergegeven met de “M” onder het
graden symbool.
REINIGING
Reinig de speen thermometer na gebruik met lauw water en milde zeep.
BATTERIJ
Als de batterij bijna leeg is dan verschijnt het “ ” symbool op het scherm.
Dit betekent dat het tijd is om de speen thermometer weg te gooien.
Let op: Gebruik de speen thermometer niet als een gewone speen als de
batterij leeg is.
SPECIFICATIES
Meetbereik 32.0°C ~ 43.9°C (89.6°F ~ 109.9°F)
Nauwkeurigheid ± 0.1°C (±0.2°C) for 35.0 ~ 38.0°C (95°F ~ 100.4°F) ambient
Display LCD (Unit of display : 0.1°C / 0.1°F)
Energieverbruik 0.15 mW
Dimensies 40mm(L) x 43mm(W) x 53mm(H)
temperature of 22°C (71.6°F)
15
Page 16
Levensduur Batterij Meer dan 200 uur (ongeveer 2 jaar bij en gebruik van 10
Gewicht Ongeveer 14 g. (met batterij)
minuten per dag)
DE BAD EN KAMER THERMOMETER
Gebruik de bad en kamer thermometer om op een eenvoudige manier de
temperatuur van de babykamer of het badwater te meten.
Let op: Uw baby zal zich het meest comfortabel
voelen in een bad met een water temperatuur
tussen de 36.5°C and 38°C. Een temperatuur van
39°C of meer is te heet en kan de baby brandwonden
oplopen! Bij een kamer temperatuur van ongeveer
18°C zullen babies zich het meest comfortabel
voelen.
HET GEBRUIK VAN DE BAD EN KAMER THERMOMER
Inschakelen: Schakel de badthermometer in, door stevig tegen de
onderkant te slaan met een vlakke hand.
Laat de thermometer in het badwater drijven of zet het op een kast neer om
de temperatuur te meten.
Let op: Meng het water goed voordat u de watertemperatuur meet. Op
deze manier kunt u snel en nauwkeurig de watertemperatuur aezen.
- Het scherm zal “COLD” aangeven wanneer de gemeten temperatuur lager
is dan 33°C. Een comfortabele badwater temperatuur is tussen de 36.5°C en
38°C.
16
Page 17
- Warm water alarm: het rode waarschuwings LEDje zal gaan knipperen
als de gemeten temperatuur 39 °C of meer is. Op het scherm zal dan de
waarschuwing “Hot” knipperen.
DE BATTERIJ VERVANGEN
Na ongeveer 2 jaar kunnen de batterijen leeg
raken. U kunt de batterijen dan vervangen. Om
de batterijen te vervangen:
1. Druk de meet unit uit de rubber behuizing.
2. Verwijder het batterijklepje met behulp van
een munt of iets dergelijks.
3. Verwijder voorzichtig de oude batterijen met een pincet.
4. Plaats de nieuwe batterijen en plaats het batterijklepje terug.
SPECIFICATIES
Meetbereik 0°C ~ 50°C (32°F ~ 122°F)
Nauwkeurigheid ± 1°C (2°F)
Display LCD (Unit of display : 0.1°C / 0.1°F)
Batterij 1x CR2032
Dimensies 40mm(L) x 43mm(W) x 53mm(H)
Levensduur Batterij ongeveer 1 jaar ( gebaseerd op een gebruik van 1 uur per
dag)
17
Page 18

MANUEL D’UTILISATION (FRANÇAIS)
PRÉFACE
Nous vous remercions d’avoir choisi le Luvion Thermomètre Digital Set
Exact 70.
Il est important et recommandé de toujours conserver votre bon d’achat
original. En cas de garantie vous serez convié d’envoyer une copie de votre
bon d’achat original.
En cas de garantie vous pouvez prendre contact avec votre agent Luvion ou
bien avec votre représentant local Luvion. Pour plus d’information veuillez
naviguer sur la page internet www.luvion.com.
Ce manuel d’utilisation vous procure toutes les informations nécessaires an
de vous permettre d’utiliser le Luvion Thermomètre Set confortablement et
en toute sécurité.
Préalablement à votre première utilisation nous vous conseillons de lire
attentivement ce manuel d’utilisation. Nous vous prions de porter une
attention particulière aux consignes de sécurité.
CONTENUE DU KIT
- Thermomètre digital pointe exible
- Tétine Thermomètre digital
- Thermomètre digitale bain et chambre
INSTRUCTIONS DE SÉCURITÉ
- Utilisez le thermomètre à pointe exible et la tétine thermomètre que pour
mesurer la température corporel.
- Avant chaque utilisation veuillez à vérier soigneusement que
l’embouchure de la tétine ne s’est pas détaché et/ou ne s’est ssuré, fendu
ou déchiré. Ne pas utiliser le thermomètre lorsque les cas mentionné cidessus sont constaté.
- Veuillez utiliser le thermomètre qu’en présence d’un adulte.
18
Page 19

- Conservez les thermomètres hors de la portée des enfants; ce ne sont pas
des jouets.
- Mesurer la température ne remplace pas la consultation d’un médecin.
L’ENTRETIEN DES THERMOMÈTRES
- Conserver les thermomètres à l’abri du soleil ou de toute source de
température élevée.
- Ne pas démonter les thermomètres.
- Ne jamais utiliser de l’eau bouillante ou une solution chimique pour
nettoyer/désinfecter les thermomètres.
- Les thermomètres ne sont pas adaptés au nettoyage au lave-vaisselle.
- Les thermomètres ne sont pas adaptés aux micro-ondes.
AVANT UTILISATION
Nettoyez le thermomètre à pointe exible et la tétine thermomètre avant
votre première utilisation.
LE THERMOMÈTRE DIGITAL À POINTE FLEXIBLE
Le thermomètre digital à pointe
exible convient à une mesure de
la température rectale (dans l’anus)
ou bien sous les aisselles.
UTILISATION DU THERMOMÈTRE À POINTE FLEXIBLE
1. Ôtez le capuchon de protection du thermomètre.
2. Appuyer sur le bouton Marche/Arrêt pour la mise en route du
thermomètre. Sur l’écran apparait alors le signe “188.8E”, ce message
signie que le thermomètre fonctionne correctement.
3. Choisissez l’endroit où voulez eectuer la mesure de la température. Les
mesures rectale sont les plus exactes et sont aussi bien convenue pour
les bébés que les enfants. Les mesures sous les aisselles ne sont pas
recommandées si les données mesurées doivent être précises.
19
Page 20

- Lorsque vous désirez prendre la température rectale (dans l’anus), le
capteur du thermomètre doit être enfoncé de 1 à 2 cm dans l’anus. Pour
faciliter cette manœuvre vous pouvez utiliser de la vaseline.
Temps de mesure: 30 secondes.
Une température normale se situe autour des 37°C-98.6°F
- Lorsque vous désirez prendre la température sous les aisselles, serrez le
thermomètre avec l’aide du bras.
Temps de mesure: 3~5 minutes.
Une température normale se situe autour des 36.7°C-98.1°F
Attention: La température corporelle varie en fonction de la personne et
tout au long de la journée. Nous vous conseillions, pour éviter toute variation,
d’eectuer votre mesure de température le matin à une heure déterminé au
préalable.
4. Commencez la mesure lorsque le signe “Lo °C“ ou “Lo °F“ s’ache
sur l’écran. Pendant toute la durée de la mesure les symboles “°C“ ou
“°F“ clignoteront. La température s’élève lentement. Lorsque la valeur
maximale est atteinte le symbole “°C“ ou “°F“ cesse de clignoter. Un bip
sonore d’environ 10 secondes indique que la mesure est terminée.
Lorsque vous entendez 10 bip sonore en 10 secondes, cela indique que
la température mesurée est dite normale (inférieure à 37.8°C). Lorsque
vous entendez 3 séries de bip sonore en 10 secondes, cela indique une
éventuelle èvre (supérieure à37.8°C)
- Lorsque l’écran indique “Lo °C“ ou “Lo °F“, la température mesurée est
inférieure à 32.0°C/ 90 °F
- Lorsque l’écran indique “Hi °C“ ou “Hi °F“, la température mesurée est
20
Page 21

supérieure à 43.0°C/ 109.9 °F
5. Appuyez sur le bouton Marche/Arrêt pour éteindre le thermomètre.
Attention: Le thermomètre s’éteint automatiquement après 10 minutes.
Éteignez le thermomètre directement après usage pour économiser les
batteries.
DEMANDE DE LA DERNIÈRE MESURE DE TEMPÉRATURE
Appuyez sur le bouton Marche/Arrêt pour allumer le thermomètre à pointe
exible. L’écran ache la dernière mesure de température eectuée. Celle-ci
est achée avec la lettre “M” sous le signe de l’unité des degrés. Après 3
secondes, l’écran ache 37.0°, et le thermomètre est prêt à l’utilisation pour
une nouvelle mesure.
NETTOYAGE
Le thermomètre est étanche et peut être nettoyé à l’eau, avec un produit
liquide stérilisant ou à l’aide d’un chion.
REMPLACEMENT DES BATTERIES
Lorsque l’écran devient ou ou que le symbole “ “ apparait, il est temps de
remplacer les batteries.
Pour remplacer les batteries:
1. Ôtez l’abattant de la batterie, le bâtant bleu en haut du thermomètre.
2. Ôtez les batteries vides.
3. Placez les nouvelles batteries et remettre en place le bâtant de la batterie.
SPECIFICATIES
Sensibilité de mesures 32.0°C ~ 42.9°C (89.6°F ~ 109.2°F)
Temps de mesure Approx. 3 ~ 5 minutes
21
Page 22
Précision ± 0.1°C (±0.2°C) pour 35.0 ~ 42.0°C (95°F ~ 107.6°F) &
Écran LCD (Unité de l’écran: 0.1°C / 0.1°F)
Batterie 1.5VDC (LR41) alcaline
Consommation d’énergie 0.15 mW
Dimensions 129mm(L) x 21mm(L) x 12.5mm(H)
Durée de vie des batteries Environ 250 heures ou 1000 fois.
Poids Approx. 12 g. (avec batteries)
±0.2°C (±0.4°F) pour la gamme restante à une température
ambiante de 22°C (71.6°F)
LE THERMOMÈTRE TÉTINE
Le thermomètre tétine est le plus confortable pour
mesurer la température du bébé.
Attention: Les mesures orales (bouche) sont souvent
de 0.5 °C à 1.0 °F inférieure à la température corporelle
mesurée (rectale).
UTILISATION DE LA TÉTINE THERMOMÈTRE
1. Ôtez le bouchon de protection de la tétine.
2. Appuyer sur le bouton Marche/Arrêt pour la mise en route du
thermomètre. Sur l’écran apparait alors le signe “188.8E”, ce message
signie que le thermomètre fonctionne correctement.
3. Placez la tétine dans la bouche du bébé. Commencez la mesure lorsque
le signe “Lo °C“ ou “Lo °F“ apparait sur l’écran. Pendant toute la durée de
la mesure les symboles “°C“ ou “°F“ clignoteront. La température s’élève
lentement. Lorsque la valeur maximale est atteinte (après environ 3
minutes) les symboles “°C“ ou “°F“ cessent de clignoter. Un bip sonore
indique que la mesure est terminée.
- Lorsque l’écran indique “Lo °C“ ou “Lo °F“, la température mesurée est
inférieure à 32.0°C/ 90 °F
22
Page 23
- Lorsque l’écran indique “Hi °C“ ou “Hi °F“, la température mesurée est
supérieure à 43.0°C/ 109.9 °F
Attention: Aliments et boissons avant l’utilisation du thermomètre peuvent
altérés les mesures eectuées. An d’éviter toute altération, attendre une
demi-heure après la prise d’aliments ou de boissons avant l’utilisation du
thermomètre tétine.
4. Appuyez sur le bouton Marche/Arrêt pour éteindre le thermomètre.
Attention: Le thermomètre s’éteint automatiquement après 10 minutes.
Éteignez le thermomètre directement après usage pour économiser les
batteries.
DEMANDE DE LA DERNIÈRE MESURE DE TEMPÉRATURE
Pour demander la dernière mesure du thermomètre:
Appuyez sur le bouton Marche/Arrêt pendant 2 secondes pour allumer le
thermomètre. L’écran ache la dernière mesure de température eectuée.
Celle-ci est achée avec la lettre “M” sous le signe de l’unité des degrés.
NETTOYAGE
Nettoyez le thermomètre après utilisation à l’eau tiède et avec du savon doux.
BATTERIE
Lorsque les batteries dont presque vide le symbole “ ” apparait sur l’écran.
Cela signie qu’il est temps de jeter à la poubelle le thermomètre tétine.
Attention: Ne pas utiliser le thermomètre tétine comme tétine normale
lorsque les batteries sont vides.
SPÉCIFICATIONS
23
Page 24

Sensibilité de mesures 32.0°C ~ 43.9°C (89.6°F ~ 109.9°F)
Précision ± 0.1°C (±0.2°C) for 35.0 ~ 38.0°C (95°F ~ 100.4°F)
Écran LCD (Unité de l’écran: 0.1°C / 0.1°F)
Consommation d’énergie 0.15 mW
Dimensions 40mm(L) x 43mm(L) x 53mm(H)
Durée de vie Batteries Plus de 200 heures (environ 2 ans avec une utilisation de
Poids Environ 14 g. (avec batteries)
température ambiante de 22°C (71.6°F)
10 min par jour)
THERMOMÈTRE DE BAIN ET CHAMBRE
Utilisez le thermomètre de bain et chambre an de mesurer aisément la
température de l’eau du bain et celle de la chambre
bébé.
Attention: Votre bébé se sent le plus confortable
dans un bain avec une température de l’eau variant
entre les 36.5°C et 38°C. Une température de 39°C ou
plus est trop chaude et peut engendrer des brûlures!
Votre bébé se sent le plus confortable à une température d’environ 18°C.
UTILISATION DU THERMOMÈTRE BAIN ET CHAMBRE
Activer: Activer le thermomètre de bain en frappant dessous avec une
main à plat!
Laissez otter le thermomètre dans l’eau du bain ou placez le thermomètre
sur une armoire pour mesurer la température.
Attention: Bien mélanger l’eau du bain avant de mesurer la température
de l’eau. De cette façon vous pouvez mesurer la température rapidement et
avec précision.
24
Page 25
- L’écran ache “COLD” lorsque la température mesuré est inférieure à 33°C.
Entre 36.5°C et 38°C la température de l’eau est dite agréable.
- Alarme eau chaude: La petite lumière LED rouge se mets à clignoter lorsque
la température mesuré est 39 °C ou au-delà. Le message “HOT” s’ache en
clignotant sur l’écran.
REMPLACEMENT DES BATTERIES
Les batteries peuvent être vides après une utilisation d’environ 2 ans. Vous
pouvez alors remplacer les batteries. Pour remplacer les batteries:
1. Poussez l’unité pour mesurer hors du boîtier en caoutchouc.
2. Ôtez l’abattant de la batterie à l’aide d’une pièce de monnaie ou d’un
objet similaire.
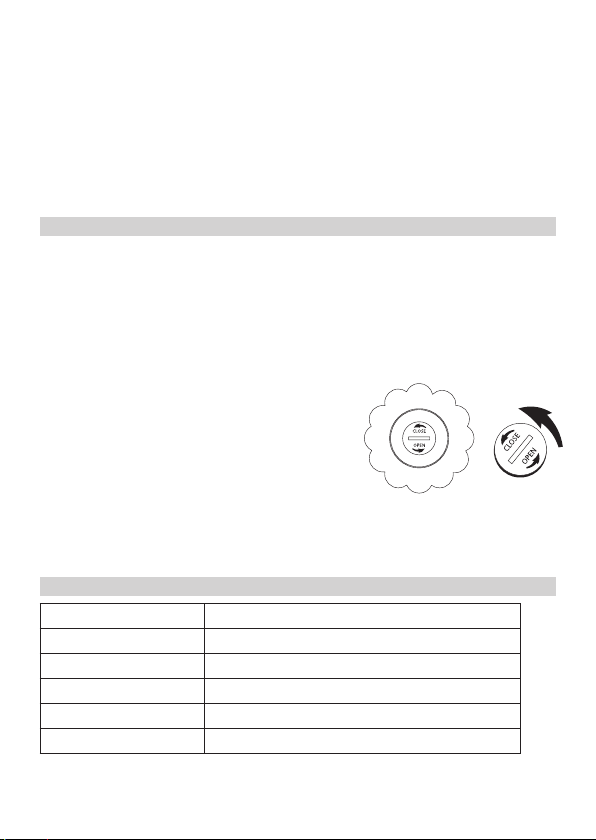
3. Ôtez délicatement les batteries usagées à
l’aide d’une pince.
4. Placez les nouvelles batteries et remettez en
place l’abattant de protection.
SPÉCIFICATIONS
Sensibilité de mesures 0°C ~ 50°C (32°F ~ 122°F)
Précisions ± 1°C (2°F)
Écran LCD (Unité de l’écran : 0.1°C / 0.1°F)
Batterie 1x CR2032
Dimensions 40mm(L) x 43mm(L) x 53mm(H)
Durée de vie des Batteries environ 1 an (basé sur l’utilisation d’une heure par jour)
25
Page 26

MANUAL DE INSTRUCCIONES (ESPAÑOL)
INTRODUCCIÓN
Le agradecemos que haya comprado el termómetro digital Set Exact 70 de
Luvion.
Conserve el resguardo de venta original en el que gura la fecha. Para todo
lo relacionado con las reparaciones o la garantía se le pedirá siempre que
facilite una copia de este resguardo. Para resolver cualquier duda respecto a
la garantía, puede ponerse en contacto con el distribuidor Luvion de su zona.
Para más información, visite la página web www.luvion.com.
Este manual de instrucciones le ofrece toda la información necesaria para
utilizar el termómetro de forma fácil y segura. Lea detenidamente el manual
antes de utilizar el termómetro. Preste especial atención a las instrucciones de
seguridad.
CONTENIDO DEL PAQUETE
- Termómetro digital de punta blanda
- Termómetro digital de chupete
- Termómetro digital de baño / temperatura ambiente
INSTRUCCIONES DE SEGURIDAD
- Emplee los termómetros de punta blanda y de chupete únicamente para
medir la temperatura corporal.
- Revise antes de cada uso la tetina del chupete para comprobar que no
presente grietas y tire de ella para asegurarse de que esté rmemente
sujeta al disco. No lo utilice si encuentra fallos o si está suelta.
- Asegúrese de que un adulto supervise el uso de los termómetros.
- Guarde los termómetros fuera del alcance de los niños, no son juguetes.
- Tomar la temperatura no sustituye la visita al médico.
26
Page 27
CUIDADO DE LOS TERMÓMETROS
- No guarde los termómetros expuestos directamente a la luz solar o a una
temperatura elevada.
- No desmonte los termómetros.
- No limpie nunca los termómetros con agua hirviendo o disolventes
químicos.
- No los lave en el lavavajillas.
- No los meta en el microondas o en el esterilizador de microondas.
ANTES DE UTILIZARLO POR PRIMERA VEZ
Limpie los termómetros de punta blanda y de chupete antes del primer uso.
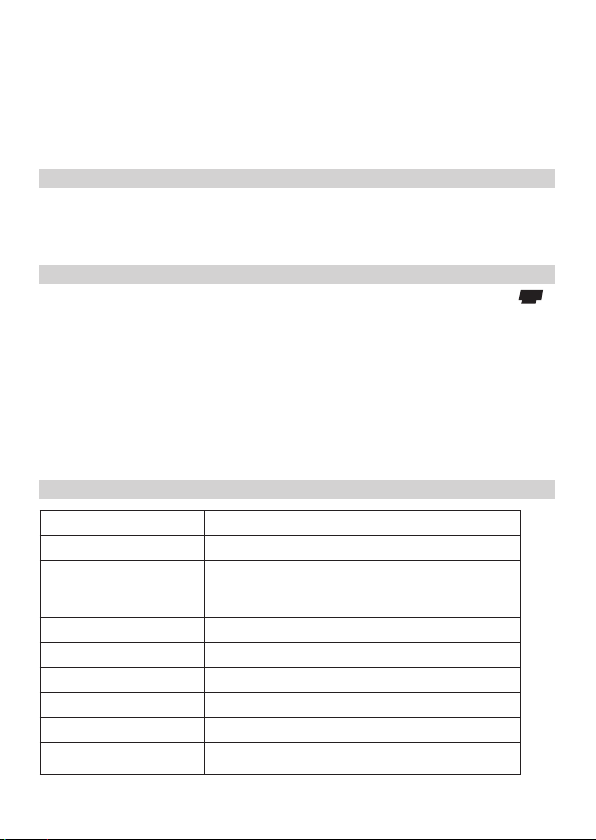
EL TERMÓMETRO DIGITAL DE PUNTA BLANDA
El termómetro digital de punta
blanda se puede usar para medir la
temperatura rectal (en el recto) o
axilar (bajo el brazo) de su bebé.
USO DEL TERMÓMETRO DE PUNTA BLANDA
1. Retire la tapa protectora del termómetro.
2. Pulse el botón de encendido del termómetro. En la pantalla aparecerá
“188.8E”, lo cual conrma que el termómetro está en funcionamiento.
3. Decida el lugar donde va a tomar la temperatura. Las mediciones rectales
son más precisas y están indicadas tanto para bebés como para niños.
No se recomienda la medición en la axila si se quiere obtener un valor
preciso.
- Si se utiliza rectalmente, es necesario introducir el sensor de
temperatura entre 1 y 2 cm. Puede utilizar vaselina para lubricar.
Tiempo de medición: 30 segundos
Temperatura normal: en torno a 37 °C (98,6 °F)
27
Page 28

- Cuando lo utilice en la axila, coloque el sensor de la temperatura bajo el
brazo. Presiónelo contra la piel y sujete el brazo del niño.
Tiempo de medición: 3~5 minutos
Temperatura normal: en torno a 36,7 °C-98,1 °F
Nota: la temperatura corporal es diferente en cada persona y varía
durante el día. Por lo tanto, se recomienda medir la temperatura a una
hora concreta por la mañana.
4. Tome la medición cuando en la pantalla muestre “Lo °C“ o “Lo °F“. Durante
el proceso parpadeará el símbolo “°C” o “°F” mientras va aumentando la
temperatura. Al alcanzar el valor máximo deja de parpadear el símbolo
“°C” o “°F”. Cuando haya acabado la medición oirá un zumbido de 10
segundos de duración aproximadamente.
Si suenan 10 pitidos en 10 segundos, indica que la temperatura tomada
es normal (inferior a 37,8 °C). Tres series de pitidos cortos en 10 segundos
indican posible ebre (temperatura superior a 37,8 °C).
- Si la pantalla muestra “Lo °C” o “Lo °F”: la temperatura medida es inferior
a 32,0 °C (90 °F).
- Si la pantalla muestra “Hi °C” o “Hi °F”: la temperatura medida es superior
a 43,0 °C (109,9 °F).
5. Pulse el botón de encendido del termómetro para apagarlo.
Nota: el termómetro se apaga automáticamente a los 10 minutos.
Apáguelo directamente después de cada uso para prolongar la duración
de la pila.
RECUPERAR LA ÚLTIMA TEMPERATURA
Mantenga pulsado el botón de encendido mientras enciende el termómetro
28
Page 29
de punta blanda. En la pantalla aparecerá la última temperatura tomada. Se
indica mediante la letra “M” bajo el signo de grado. Después de tres segundos
aparece en la pantalla 37,0 °C y el termómetro está listo para una nueva
medición.
LIMPIEZA
El termómetro es impermeable y se puede limpiar con agua, una loción
esterilizadora o un paño suave.
SUSTITUCIÓN DE LA PILA
Cuando la pantalla empieza a estar poco denida o aparece el símbolo “ “
es necesario cambiar la pila.
Para ello:
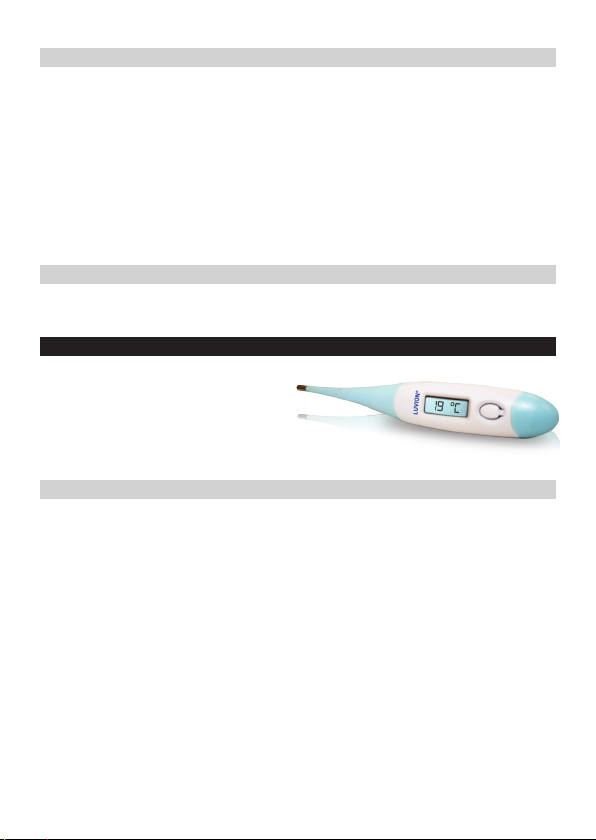
1. 1. Abra la tapa de la pila, de color azul, en la parte superior del
termómetro.
2. Extraiga la pila gastada.
3. Ponga una pila nueva y vuelva a colocar la tapa.
ESPECIFICACIONES
Rango de medición 32.0°C ~ 42.9°C (89.6°F ~ 109.2°F)
Tiempo de medición About 3 ~ 5 minute
Precisión ± 0,1 °C (±0,2 °C) para 35,0 ~ 42,0 °C (95 °F ~ 107,6 °F) y
Pantalla LCD (Unidad de pantalla: 0,1 °C / 0,1 °F)
Batería 1,5 V cc (LR41) alcalina
Consumo de energía 0.15 mW
Dimensiones 129 mm (Long) x 21 mm (Anch) x 12,5 mm (Alt)
Duración de la pila Unas 250 horas o 1.000 usos
Peso Aprox. 12 g. (con la pila instalada)
±0,2 °C (±0,4 °F) para el rango restante a una temperatura
ambiente de 22 °C (71,6 °F)
29
Page 30
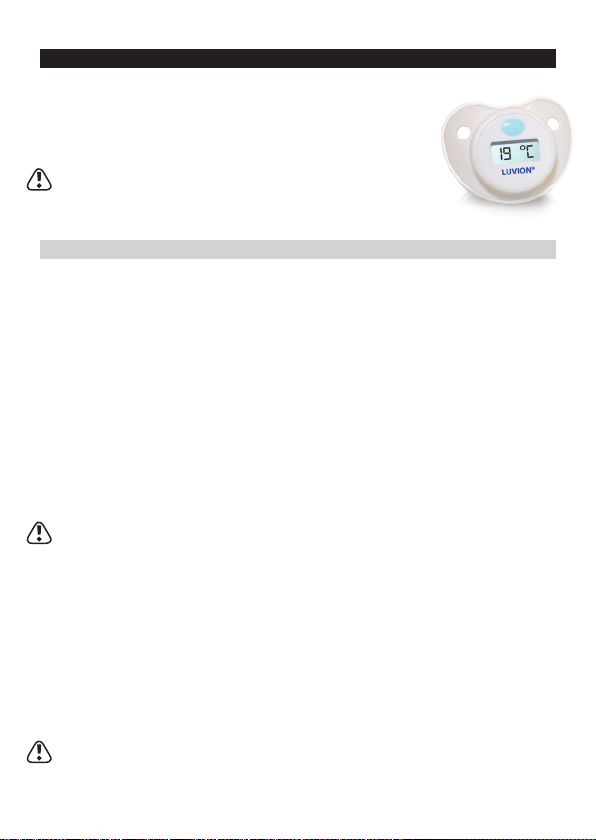
EL TERMÓMETRO DE CHUPETE
El modo más práctico de medir la temperatura de su bebé
es mediante un termómetro de chupete.
Nota: las mediciones tomadas oralmente suelen dar un
valor 0,5 °C (1,0 °F) por debajo de la temperatura corporal
(y la obtenida en el recto).
USO DEL TERMÓMETRO DE CHUPETE
1. Retire la tapa protectora del chupete.
2. Pulse el botón de encendido. En la pantalla aparecerá “188.8E”, lo que
conrma que el termómetro está en funcionamiento.
3. Introduzca el chupete en la boca al bebé.
La medición comienza cuando la pantalla muestre Lo °C” o “Lo °F”.
Durante el proceso parpadeará el símbolo “°C” o “°F” mientras va
aumentando la temperatura. Al alcanzar el valor máximo (a los tres
minutos, aproximadamente), deja de parpadear el símbolo “°C” o “°F”. Un
zumbido indica que ha acabado la medición.
Nota: se recomienda mantener el termómetro de chupete en la boca del
bebé entre seis y ocho minutos para dejar que se caliente y obtener una
medición más precisa.
- Si la pantalla muestra “Lo °C” o “Lo °F”: la temperatura medida es inferior
a 32,0°C (90 °F).
- Si la pantalla muestra “Hi °C” o “Hi °F”: la temperatura medida es superior
a 43,0 °C (109,9 °F).
Nota: comer o beber antes de utilizar el termómetro puede inuir sobre la
medición de la temperatura.
Espere media hora antes de realizar la medición.
30
Page 31
4. Pulse el botón de encendido para apagar el termómetro de chupete.
Nota: el termómetro se apaga automáticamente a los 10 minutos.
Apáguelo directamente después de cada uso para prolongar la duración de
la pila.
RECUPERAR LA ÚLTIMA TEMPERATURA
Para recuperar la última temperatura:
Mantenga pulsado el botón de encendido al encender el termómetro de
chupete durante al menos dos segundos. En la pantalla aparecerá la última
temperatura tomada. Se indica mediante la letra “M” bajo el signo de grado.
LIMPIEZA
Limpie el termómetro de chupete después de su uso con agua tibia y jabón
suave.
PILA
Cuando la pila esté casi agotada, aparecerá el símbolo “ ” en la pantalla.
Esto indica que hay que desecharla.
Nota: no utilice el termómetro de chupete como si fuera un chupete normal
cuando se haya acabado la pila.
SPECIFICATIONS
Rango de medición 32.0°C ~ 43.9°C (89.6°F ~ 109.9°F)
Precisión ± 0,1 °C (±0,2 °C) para 35,0 ~ 38,0 °C (95 °F ~ 100,4 °F) a una
Pantalla LCD (Unidad de pantalla: 0,1 °C / 0,1 °F)
Consumo de energía 0.15 mW
Dimensiones 40 mm (Long) x 43 mm (Anch) x 53 mm (Alt)
temperatura ambiente de 22 °C (71,6 °F)
31
Page 32
Duración de la pila Más de 200 horas de uso continuado. (aprox. dos años si se
Peso Aprox. 14 g. (con la pila instalada)
utiliza 10 minutos al día)
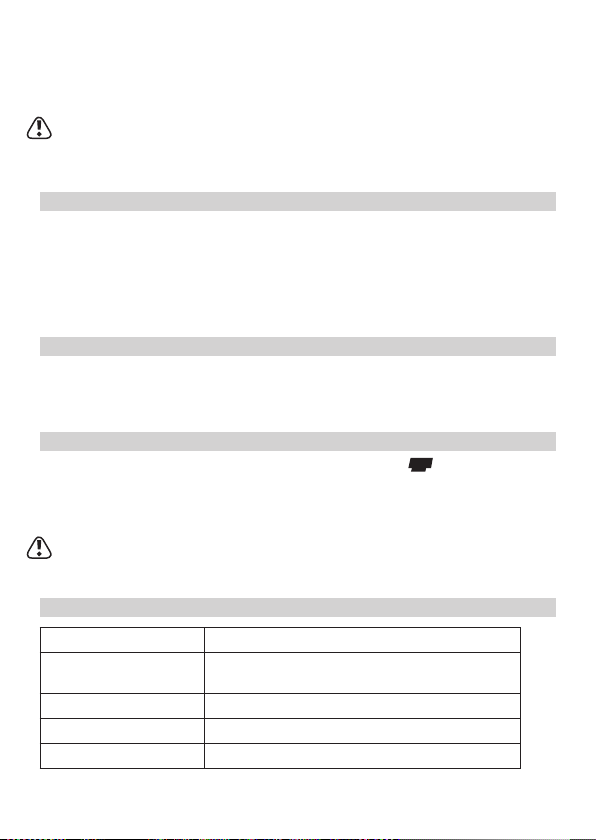
TERMÓMETRO DE BAÑO Y TEMPERATURA AMBIENTE
Utilice el termómetro de baño y temperatura ambiente para medir
adecuadamente la temperatura de la habitación del bebe o del agua de baño.
Nota: la temperatura a la que su bebé se
encontrará más cómodo en el agua oscila
entre 36,5 °C y 38 °C. Una temperatura de
39 °C o superior es excesiva y el niño se
podría quemar. Una temperatura ambiente de 18 °C
aproximadamente es la más indicada para que el
bebé duerma cómodamente.
USO DEL TERMÓMETRO DE BAÑO Y TEMPERATURA AMBIENTE
Deje que el termómetro ote en el agua o colóquelo en una estantería de la
habitación del niño para que empiece a medir.
Nota: Mezcle bien el agua antes de medir la temperatura o introduzca el
termómetro en la bañera mientras se llena. Así obtendrá una lectura rápida y
precisa de la temperatura del agua.
-Si la temperatura es inferior a 33 °C, en la pantalla aparecerá “COLD”.
Una temperatura agradable para el agua del baño oscila entre 36,5 °C y 38 °C.
-Alerta de agua caliente: el LED rojo de advertencia empezará a parpadear
si la temperatura medida supera los 39 °C. A continuación aparecerá en la
pantalla el mensaje “Hot”.
32
Page 33
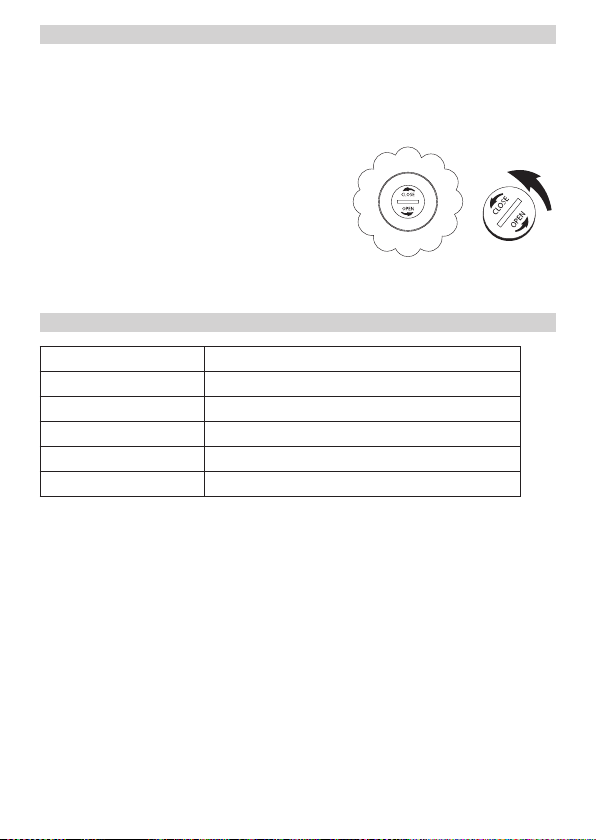
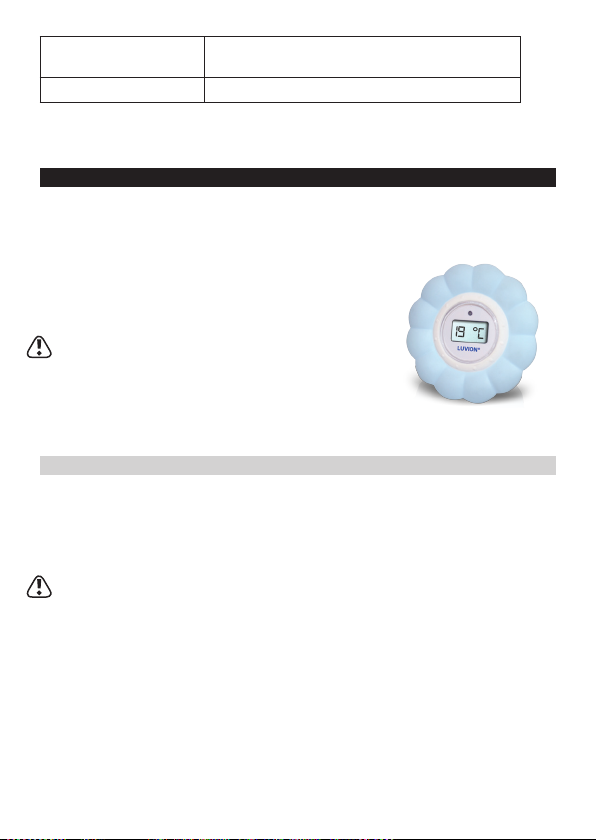
SUSTITUCIÓN DE LA PILA
Las pilas pueden agotarse a los dos años aproximadamente por lo que habrá
de reemplazarlas. Para cambiar las pilas:
1. Extraiga la unidad de medición del receptáculo de goma.
2. Retire la tapa de la pila situada en la parte posterior de la unidad de
medición con una moneda u objeto
similar.
3. Extraiga con cuidado las pilas gastadas
con unas pinzas.
4. Instale las pilas nuevas y vuelva a colocar
la tapa.
ESPECIFICACIONES
Rango de medición 0°C ~ 50°C (32°F ~ 122°F)
Precisión ± 1°C (2°F)
Pantalla LCD (Unidad de pantalla: 0,1 °C / 0,1 °F)
Pila 1x CR2032
Dimensiones 40 mm (Long) x 43 mm (Anch) x 53 mm (Alt)
Duración de la pila Aprox. un año (una hora de uso al día)
33
Page 34

INSTRUKCJA OBSŁUGI (POLSKI)
WPROWADZENIE
Dziękujemy za zakup zestawu termometrów Luvion Digital Thermometer Set
Exact 70.
Prosimy zachować dowód zakupu, jest on niezbędny do realizacji
ewentualnych świadczeń gwarancyjnych. W sprawie gwarancji skontaktuj
się bezpośrednio ze sklepem w którym dokonałeś zakupu lub ocjalnym
dystrybutorem produktów Luvion w Polsce. Więcej informacji uzyskasz na
stronach: www.luvion.com oraz www.luvion.pl
Instrukcja obsługi zawiera wszystkie niezbędne informacje potrzebne aby
sprawnie i bezpiecznie używać termometrów z zestawu. Przed rozpoczęciem
użytkowania któregokolwiek z termometrów prosimy o dokładne zapoznanie
się z treścią instrukcji. Prosimy o zwrócenie szczególnej uwagi na instrukcje
związane z bezpieczeństwem użytkowania.
ZAWARTOŚĆ OPAKOWANIA
- Cyfrowy termometr z miękką i elastyczną końcówką
- Cyfrowy termometr w smoczku
- Cyfrowy termometr do kąpieli i pomiaru temperatury w pokoju dziecka
INSTRUKCJA BEZPIECZEŃSTWA
- Cyfrowego termometru z elastyczną końcówką oraz cyfrowego termometru
w smoczku używaj tylko i wyłącznie do pomiaru temperatury ciała
człowieka.
- Przed rozpoczęciem pomiaru temperatury cyfrowym termometrem w
smoczku sprawdź czy na smoczku nie ma żadnych pęknięć oraz upewnij się,
że smoczek jest trwale umocowany do pokrywy. Nie używaj termometru
jeśli zauważysz jakieś uszkodzenia lub smoczek jest luźno umocowany.
- Upewnij się że każdy pomiar temperatury jest nadzorowany przez osobę
34
Page 35
dorosłą.
- Przechowuj termometry poza zasięgiem dzieci, termometry nie są
zabawkami.
- Pomiar temperatury nie może zastąpić bezpośrednich konsultacji z
lekarzem.
PRZECHOWYWANIE TERMOMETRÓW
- Nie przechowuj termometrów w miejscach bezpośrednio oświetlonych
słońcem lub innych o wysokiej temperaturze.
- Nie otwieraj i nie rozkładaj na części termometrów
- Nigdy nie używaj wrzątku lub chemicznych środków aby wyczyścić
termometry.
- Nie czyść termometrów w zmywarce.
- Nie wkładaj termometrów do kuchenek mikrofalowych ani do
sterylizatorów przeznaczonych do kuchenek mikrofalowych.
PRZED PIERWSZYM UŻYCIEM
Przed pierwszym użyciem przetrzyj termometr z elastyczną końcówką oraz
termometr w smoczku.
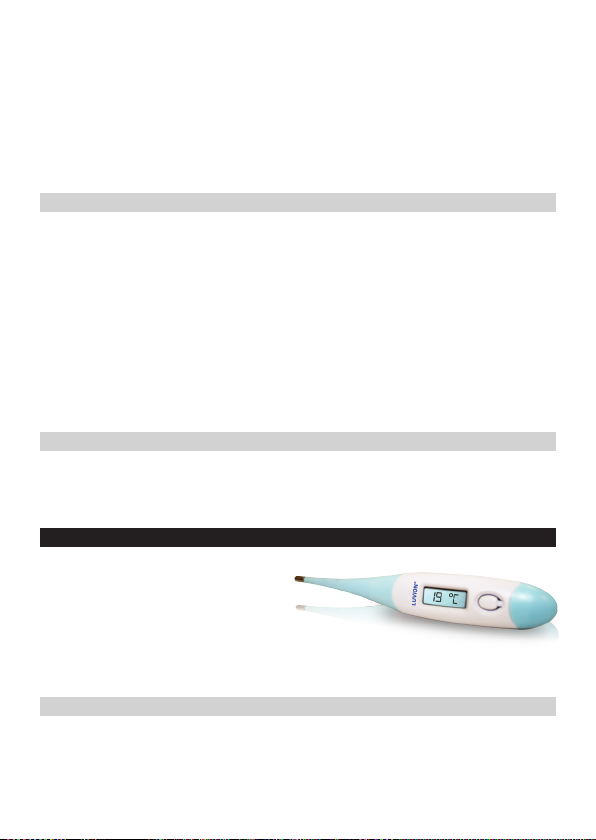
CYFROWY TERMOMETR Z ELASTYCZNĄ KOŃCÓWKĄ
Cyfrowy termometr z elastyczną
końcówką może być stosowany do
pomiaru temperatury w odbycie
(per rectum) oraz tradycyjnie pod
pachą.
INSTRUKCJA UŻYTKOWANIA
1. Zdejmij ochronną nakładkę z termometru.
2. Naciśnij przycisk Power aby włączyć termometr. Na wyświetlaczu
pojawi się napis “188.8E,” co oznacza potwierdzenie że termometr został
włączony.
35
Page 36

3. Wybierz miejsce pomiaru temperatury. Pomiar w odbycie jest najbardziej
dokładnym pomiarem zarówno dla niemowląt jak i dzieci. Pomiar pod
pachą nie jest tak dokładny jak pomiar w odbycie.
- Przy pomiarze temperatury w odbycie (per rectum), sensor termometru
należy wprowadzić na głębokość 1 do 2 cm. Można zastosować wazelinę
w celu nawilżenia. Czas pomiaru będzie wynosił od 30 sekund. Normalna
temperatura powinna wynosić około 37°C (98.6°F).
- Przy pomiarze pod pachą , wsuń termometr pod pachę i przyciśnij rękę
unieruchamiając sensor pod pachą. Pomiar temperatury będzie wynosił
od 3 do 5 minut. Normalna temperatura wynosi około 36.7°C (98.1°F).
Uwaga : Temperatura ciała człowieka zmienia sie w ciągu dnia. Dlatego
zalecany jest pomiar o stałej porze, najlepiej w godzinach porannych.
4. Rozpocznij pomiar kiedy na wyświetlaczu pojawi się napis “Lo °C“ lub
“Lo °F“. Podczas pomiaru symbol “°C“ lub “°F“ będzie migał wraz ze
wzrostem temperatury. Kiedy maksymalna wartość temperatury zostanie
osiągnięta, symbol “°C“ lub “°F“ przestanie migać. Sygnał dźwiękowy
trwający około 10 sekund oznacza że pomiar temperatury został
zakończony. 10 sygnałów dźwiękowych w ciągu 10 sekund oznacza
że temperatura jest w normie (poniżej 37.8°C) natomiast 3 sekwencje
krótkich dźwięków w ciągu 10 sekund oznaczają możliwą podwyższoną
temperaturę (powyżej 37.8°C).
- Kiedy na wyświetlaczu pokazuje się napis “Lo °C“ lub “Lo °F“ to oznacza
że temperatura pomiaru jest poniżej 32.0°C/ 90 °F.
- Kiedy na wyświetlaczu pokazuje się napis “Hi °C“ lub “Hi °F“ to oznacza
że temperatura pomiaru jest powyżej 43.0°C/ 109.9 °F.
5. Naciśnij przycisk Power aby wyłączyć termometr.
36
Page 37

Uwaga: Termometr wyłączy się automatycznie po 10 minutach. Zawsze
wyłączaj termometr po dokonaniu pomiaru aby wydłużyć żywotność baterii.
ZAPAMIĘTYWANIE OSTATNIEGO POMIARU
Naciśnij przycisk Power aby włączyć termometr. Na wyświetlaczu pojawi się
teraz ostatni pomiar jakiego dokonano. Ten pomiar jest oznaczony literką
“M” która wyświetla się poniżej symbolu stopni temperatury. Po upłynięciu
3 sekund na wyświetlaczu pojawi się napis 37.0°C oznaczający gotowość
termometru do nowego pomiaru temperatury.
CZYSZCZENIE
Termometr jest wodoodporny i może być czyszczony wodą, płynem
dezynfekującym i miękką szmatką.
WYMIANA BATERII
Kiedy napisy na wyświetlaczu stają się niewyraźnie lub kiedy symbol “ “
pojawia się na wyświetlaczu to oznacza że należy już wymienić baterię.
Proces wymiany baterii:
1. Otwórz pokrywę baterii, niebieską część na końcu termometru.
2. Wyciągnij zużytą baterię.
3. Włóż nową baterię i zamknij pokrywę baterii.
SPECYFIKACJA
Measuring Range 32.0°C ~ 42.9°C (89.6°F ~ 109.2°F)
Measuring Time About 3 ~ 5 minute
Accuracy ± 0.1°C (±0.2°C) for 35.0 ~ 42.0°C (95°F ~ 107.6°F) & ±0.2°C
Display LCD (Unit of display : 0.1°C / 0.1°F)
Battery 1.5VDC (LR41) alkaline
Power Consumption 0.15 mW
(±0.4°F) for remaining range at an ambient of 22°C (71.6°F)
37
Page 38

Dimensions 129mm(L) x 21mm(W) x 12.5mm(H)
Battery Life About 250 hours or 1000 times.
Weight Approx. 12 g. (with battery)
TERMOMETR W SMOCZKU
Najwygodniejszym sposobem mierzenia temperatury
jest użycie termometru w smoczku.
Uwaga: Pomiar temperatury w buzi jest często niższy
o około 0.5 °C lub 1.0 °F od pomiaru w odbycie.
INSTRUKCJA UŻYTKOWANIA
1. Zdejmij osłoną ze smoczka.
2. Naciśnij klawisz Power. Na wyświetlaczu pojawi się napis “188.8E,” co
oznacza że termometr jest gotowy do pracy.
3. Włóż termometr do buzi dziecka. Pomiar temperatury zostanie
rozpoczęty kiedy na wyświetlaczu pojawi się napis “Lo °C“ lub “Lo °F“.
Podczas pomiaru symbol “°C“ lub “°F“ będzie migał wraz ze wzrostem
temperatury. Kiedy maksymalna wartość temperatury zostanie
osiągnięta, symbol “°C“ lub “°F“ przestanie migać. Sygnał dźwiękowy
oznacza że pomiar temperatury został zakończony.
Uwaga: Rekomendujemy pozostawienie termometru w smoczku w ustach
dziecka przez okres około 6-8 minut aby uzyskać bardziej precyzyjny wynik.
- Kiedy na wyświetlaczu pokazuje się napis “Lo °C“ lub “Lo °F“ to oznacza
że temperatura pomiaru jest poniżej 32.0°C/ 90 °F
- Kiedy na wyświetlaczu pokazuje się napis “Hi °C“ or “Hi °F“ to oznacza
że temperatura pomiaru jest powyżej 43.0°C/ 109.9 °F
Uwaga: Picie lub jedzenie bezpośrednio przed pomiarem może wpłynąć
na wynik pomiaru temperatury. Odczekaj 30 minut po posiłku zanim
38
Page 39
rozpoczniesz pomiar.
4. Naciśnij przycisk Power wyłączyć termometr.
Uwaga: Termometr wyłączy się automatycznie po 10 minutach. Zawsze
wyłączaj termometr po dokonaniu pomiaru aby wydłużyć żywotność baterii.
ZAPAMIETYWANIE OSTATNIEGO POMIARU
Jeśli chcesz odczytać ostatni pomiar:
Naciśnij i przytrzymaj przycisk Power przez minimum 2 sekundy. Na
wyświetlaczu pojawi się wynik ostatniego pomiaru.. Ten pomiar jest
oznaczony literką “M” która wyświetla się poniżej symbolu stopni
temperatury.
CZYSZCZENIE
Po dokonaniu pomiaru przemyj termometr ciepłą wodą i łagodnym
mydełkiem.
BATERIA
Kiedy bateria jest prawie wyczerpana na ekranie wyświetlacza pojawi się
symbol “ “, który oznacza że termometr należy wyrzucić.
Uwaga: Po wyczerpaniu baterii nie należy używać termometru w smoczku
jako smoczka na co dzień dla dziecka.
SPECYFIKACJA
Zakres Pomiaru 32.0°C ~ 43.9°C (89.6°F ~ 109.9°F)
Czas Pomiaru około 3 minuty (zalecane 6-8 minut)
Dokładność ± 0.1°C (±0.2°C) dla 35.0 ~ 38.0°C (95°F ~ 100.4°F) dla tem-
Wyświetlacz LCD ( : 0.1°C / 0.1°F)
peratury w otoczeniu 22°C (71.6°F)
39
Page 40
Konsumpcja energii 0.15 mW
Wymiary 40mm(dł.) x 43mm(szer.) x 53mm(wys.)
Żywotność baterii Więcej niż 200 godzin ciągłej pracy. (około 2 lata przy
Waga Około. 14 g. (z baterią)
założeniu użytkowania około 10 minut na dzień)
TERMOMETR DO KĄPIELI I POMIARU TEMPERATURY W POKOJU
Termometr wygodny do pomiaru wody do kąpieli dziecka oraz temperatury
w pokoju dziecka.
Uwaga: Twoje dziecko będzie czuło się najbardziej
komfortowo podczas kąpieli w wodzie o
temperaturze od 36.5°C do 38°C . Temperatura 39° i
powyżej jest zbyt wysoka i może popatrzyć dziecko.
W pokoju dziecka temperatura około 18°C jest
najbardziej komfortowa podczas snu dziecka.
INSTRUKCJA UŻYTKOWANIA
Pozostaw termometr na wodzie lub postaw na półce w pokoju aby rozpocząć
pomiar temperatury.
Uwaga: Przemieszaj wodę w wanience przed pomiarem temperatury lub
włóż termometr do wanienki już podczas napełniania wodą. Te czynności
umożliwią najbardziej precyzyjny pomiar.
- Na wyświetlaczu pojawi się napis “COLD” jeśli temperatura wody jest niższa
niż 33°C. Najbardziej komfortowa temperatura wody do kąpieli dla dziecka to
36.5°C do 38°C.
- Alarm o zbyt gorącej wodzie: czerwona DIODA ostrzegawcza zacznie migać
jeśli temperatura będzie wynosić 39 °C lub więcej stopni. Na wyświetlaczu
pojawi się migający napis “Hot.”
40
Page 41
SUSTITUCIÓN DE LA PILA
Po około 2 latach bateria zostanie wyczerpana
Wtedy możesz wymienić baterie, aby to uczynić
postępuj zgodnie z instrukcją poniżej:
1. Wyciągnij moduł pomiaru temperatury z
gumowej obudowy
2. Zdejmij pokrywę baterii umiejscowioną w
tylnej części, używając monety lub innego
przedmiotu.
3. Delikatnie wyciągnij zużytą baterię pęsetą.
4. Wsuń nową baterię i zamknij pokrywę.
ESPECIFICACIONES
Zakres pomiaru 0°C ~ 50°C (32°F ~ 122°F)
Dokładność ± 1°C (2°F)
Wyświetlacz LCD (jednostka pomiaru : 0.1°C / 0.1°F)
Bateria 1x CR2032
Wymiary 40mm(dł.) x 43mm(szer.) x 53mm(wys.)
Żywotność Około 1 roku ( prz y założeniu użytkowania około 1 godziny
na dzień)
41
Page 42

MANUAL DO UTILIZADOR (PORTUGUÊS)
INTRODUÇÃO
Obrigado por ter adquirido o conjunto de termómetros Luvion Digital Exact
70. Com o comjunto de termómetros Luvion Digital Exact 70 pode medir
com exactidão a temperatura do corpo do seu bebé, da água do banho e do
quarto do bebé.
Por favor guarde a factura datada original nos seus registos. Para questões
de serviço e garantia ser-lhe-á sempre solicitada a cópia desta factura. Para
questões de garantia pode contactar o seu retalhista ou distribuidor Luvion.
Para mais informações aceda a www.luvion.com.
O manual de utilizador dá-lhe toda a informação para uma utilização segura
e fácil deste conjunto de termómetros. Antes de utilizar o conjunto de
termómetros pedimos-lhe que leia atentamente este manual. Pedimos a sua
especial atenção para as instruções de segurança.
CONTEÚDO DA EMBALAGEM
- Termómetro digital de ponta exível (axilas ou rectal)
- Termómetro digital chupeta (oral)
- Termómetro digital de banho ou de temperatura de quarto/ambiente
INSTRUÇÕES DE SEGURANÇA
- Apenas use o termómetro de ponta exível e o termómetro chupeta para
medir temperatura humana corporal. Nunca utilize como uma chupeta
normal
- Antes de cada utilização do termómetro chupeta verique se a tetina
não tem rasgos e se não se solta da chupeta (puxando-a). Não utilize se
encontrar defeito ou se a tetina estiver solta.
- Certique-se que a utilização dos termómetros é supervisionada por um
adulto.
42
Page 43
- TGuarde os termómetros longe do alcance da criança; Não são brinquedos.
- A medição de temperatura não é um substituto para consultar o seu
médico.
- Não deixe a criança sozinha com qualquer dos termómetros.
- Não utilize o termómetro de ponta exível para medições orais
- Não deve utilizar tas ou cordões nos termómetros.
CUIDADOS COM OS TERMÓMETROS
- Do not store the thermometers in direct sunlight or at a high temperature.
- Não guarde os termómetros sob a luz directa solar ou em temperaturas
elevadas.
- Não desmonte os termómetros.
- Não utilize água a ferver ou solventes químicos para limpar os termómetros.
- Não lave na máquina de lavar loiça.
- Não coloque no microondas ou num esterilizador.
- Guarde os termómetros de ponta exível e chupeta com as respectivas
capas, por forma os manter limpos.
ANTES DE USAR
Limpe os termómetros de ponta exível e chupeta antes de utilizar.
O TERMÓMETRO DIGITAL DE PONTA FLEXÍVEL
O termómetro digital de ponta
exível pode ser usado para medir
a temperatura do bebé rectal ou
axial.
UTILIZAÇÃO DO TERMÓMETRO DE PONTA FLEXÍVEL
Clean the ex-tip thermometer and the soother thermometer before rst use.
43
Page 44

1. Retire a capa protectora do termómetro.
2. Para ligar o termómetro carregue no botão power. No ecrã irá aparecer
“188.8E.,” conrmando que o termómetro está a funcionar.
3. Escolha o local de medição da temperatura. As medições anais são mais
precisas e são adequadas tanto para lactentes como para crianças. A
medição nas axilas não é aconselhada para medições precisas.
- Quando utilizado de forma anal (recto), o sensor de temperatura
precisa de estar inserido entre 1-1.5cm.Pode-se utilizar vaselina para
lubricação. Quando notar alguma dor ou inconveniente para a medição
imediatamente.
Tempo de Medição 30 segundo
Temperatura normal 37°C-98.6°F
- Quando usado axialmente (axila), coloque o sensor de temperatura na
axila. Pressione e segure com o braço.
Tempo de Medição 3~5 minutos
Temperatura normal 36.7°C-98.1°F
Nota: A temperatura corporal é diferente em cada ser humano e altera-
se durante o dia. Como tal, aconselhamos a medir a temperatura num
momento especíco da parte da manhã.
4. Inicie a medição quando a tela mostrar “Lo °C“ ou “Lo °F“. Durante a
medição o símbolo “°C“ ou “°F“ pisca à medida que a temperatura vai
subindo. Quando o valor máximo for atingindo, o símbolo “°C“ ou “°F“
para de piscar. Um zumbindo que dura cerca de 10 segundos indica que
a medição está completa.
10 bips em 10 segundos signica que a temperatura medida é normal
(abaixo 37.8°C) 3 conjuntos de curtos bips em 10 segundos signica
possivelmente febre (temperatura medida acima dos 37.8°C).
44
Page 45

- Quando a tela exibir “Lo °C“ ou “Lo °F“ , então a temperatura medida é
inferior a 32.0°C/ 90 °F
- Quando a tela exibir “Hi °C“ ou “Hi °F“ então a temperatura medida é
superior a 43.0°C/ 109.9 °F
5. Pressione o botão power para desligar o termómetro.
Nota: Nota: O termómetro desliga-se automaticamente passados 10
minutos. Desligue o termómetro directamente para prolongar a vida da
bateria.
RECORDAR A ÚLTIMA TEMPERATURA
Carregue no botão power ao mesmo tempo que liga o termómetro de ponta
exível. O display Irá agora ler a última temperatura medida. Isto é indicado
através da letra ‘M’ que aparece no local do símbolo de graus.. Passados 3
segundos, aparece na tela 37ºC e o termómetro está pronto a fazer uma nova
medição.
LIMPEZA
O termómetro é à prova de água e pode ser limpo com água, loção
esterilizadora ou pano macio.
SUBSTITUIÇÃO DA PILHA
Quando o display ca indistinto ou aparece o símbolo “ “ signica que está
na altura de trocar a pilha.
Para substituir a pilha:
1. Abra a tampa da bateria, a tampa azul na parte de cima do termómetro.
2. Retire a pilha antiga.
3. Coloque a nova pilha e feche a tampa do termómetro.
45
Page 46
ESPECIFICAÇÕES
Intervalo de Medição 32.0°C ~ 42.9°C (89.6°F ~ 109.2°F)
Tempo de Medição Cerca 3 ~ 5 minutos
Precisão ± 0.1°C (±0.2°C) para 35.0 ~ 42.0°C (95°F ~ 107.6°F) & ±0.2°C
Display LCD (Unidade do display : 0.1°C / 0.1°F)
Pilha 1.5VDC (LR41) alcalina
Consumo de Energia 0.15 mW
Dimensões 129mm(L) x 21mm( W) x 12.5mm(H)
Vida útil da bateria Cerca de 250 horas ou 1000 vezes.
Peso Approx. 12 g. (com pilha)
(±0.4°F) para os restantes intervalos para uma temperatura
ambiente de 22°C (71.6°F)
THE SOOTHER THERMOMETER
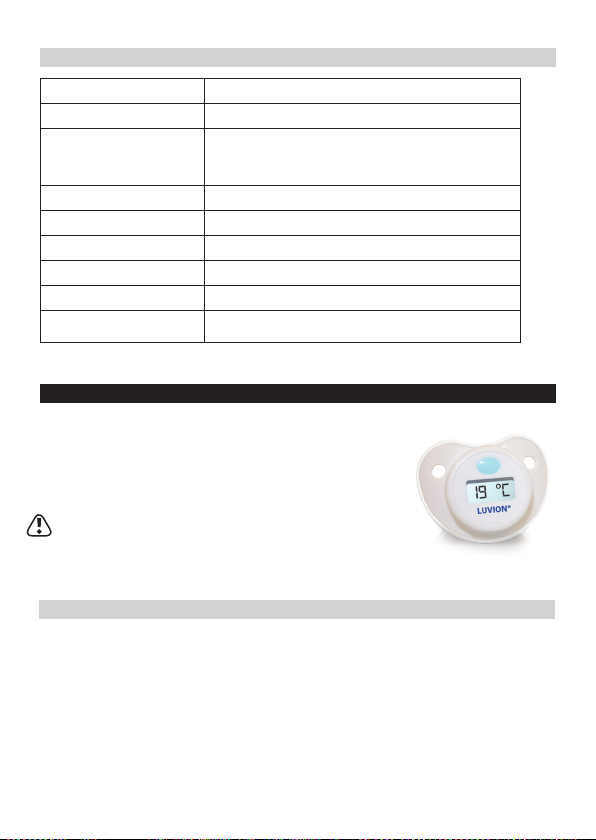
A maneira mais conveniente de medir a temperatura
do seu bebé é através do termómetro chupeta.
Nota: As medidas orais (boca) são
frequentemente mais baixas cerca de 0.5 °C ou 1.0
°F que as medições corporais (medidas através do
recto).
UTILIZAÇÃO DO TERMÓMETRO CHUPETA
1. Retire a capa protectora da chupeta.
2. Para ligar o termómetro carregue no botão power. No ecrã irá aparecer
“188.8E.,” conrmando que o termómetro está a funcionar
3. Coloque a chupeta na boca do bebé.
A medição começa quando o ecrã mostra “Lo °C“ ou “Lo °F“.“. Durante a
medição o símbolo “°C“ ou “°F“ pisca à medida que a temperatura vai
subindo. Quando o valor máximo for atingindo, o símbolo “°C“ ou “°F“
46
Page 47

para de piscar. Um zumbindo que dura cerca de 10 segundos indica que
a medição está completa.3 minutes’,
Nota: É recomendado deixar a chupeta termómetro na boca do bebé
durante 6-8 minutos para que esta consiga aquecer e, consequentemente,
fazer uma medição mais precisa.
- Quando a tela exibir “Lo °C“ ou “Lo °F“ , então a temperatura medida é
inferior a 32.0°C/ 90 °F
- Quando a tela exibir “Hi °C“ ou “Hi °F“ então a temperatura medida é
superior a 43.0°C/ 109.9 °F
Nota: Comer ou beber antes da utilização deste termómetro pode afectar a
medição de temperatura. Espere 30 minutos antes de efectuar a medição.
4. Pressione o botão power para desligar o termómetro.
Nota: O termómetro desliga-se automaticamente passados 10 minutos.
Desligue o termómetro directamente para prolongar a vida útil da bateria.
RECORDAR A ÚLTIMA TEMPERATURA
Para aceder à última temperatura: quando estiver a ligar a chupeta pressione
durante 2 segundos o botão power. O display mostra a última temperatura
medida. Isto é indicado através da letra ‘M’ no local do símbolo dos graus.
LIMPEZA
Após utilizar o termómetro chupeta lave-o com água morna e sabão neutro.
BATERIA
Quando a bateria está quase esgotada, aparece no ecrã o símbolo “ “ sIsto
signica que chegou o momento de descartar a unidade.
47
Page 48
Nota: Mesmo que esteja sem bateria, não utilize a chupeta termómetro
como uma chupeta normal
ESPECIFICAÇÕES
Intervalo de medição 32.0°C ~ 43.9°C (89.6°F ~ 109.9°F)
Precisão ± 0.1°C (±0.2°C ) para 35.0 ~ 38.0°C (95°F ~ 100.4°F) temper-
Display LCD (Unit of display : 0.1°C / 0.1°F)
Consumo de Energia 0.15 mW
Dimensões 40mm(L) x 43mm( W) x 53mm(H)
Vida útil da bateria Mais de 200 horas de uso contínuo. (aprox. 2 anos se usado
Peso Aprox. 14 g. (com bateria)
atura ambiente de 22°C (71.6°F)
10 minutos por dia)
TERMÓMETRO DE BANHO OU DE TEMPERATURA AMBIENTEUse the
Utilize este termómetro para medir confortavelmente a água do banho ou a
temperatura ambiente do quarto do bebé.
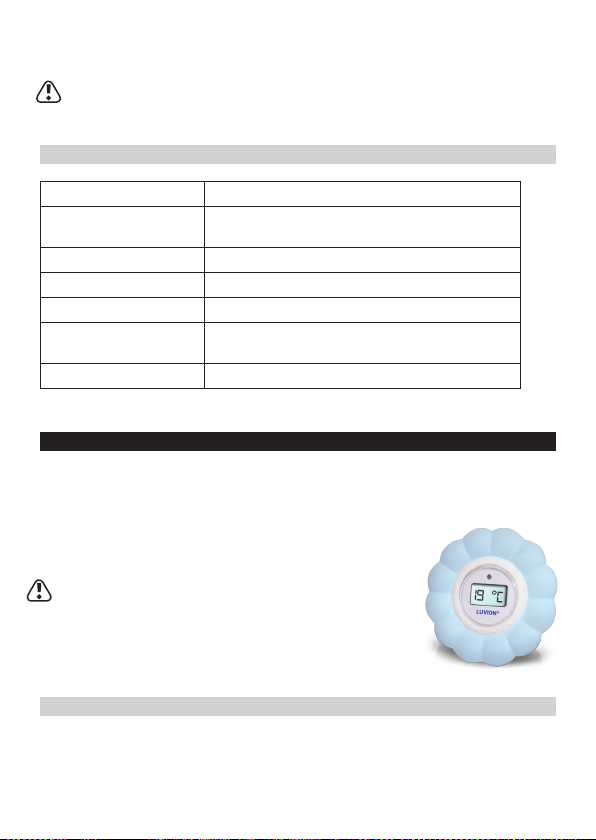
Nota: O seu bebé irá sentir-se mais confortável no
banho se a temperatura da água estiver entre os 36.5ºC
e os 38ºC.Temperaturas de e acima dos 39ºC são muito
quentes e poderão queimar o seu bebé. Os bebés irão
sentir-se mais confortáveis a dormir se a temperatura
ambiente do quarto rondar os 18ºC.
UTILIZAÇÃO DO TERMÓMETRO DE BANHO E DE TEMPERATURA AMBIENTE
Para começar a medição basta deixar o termómetro a utuar na água ou
simplesmente pousado numa prateleira do quarto do bebé.
48
Page 49
Nota: Misture bem a água antes de medir a temperatura ou coloque o
termómetro na banheira à medida que a vai enchendo com água. Assim a
leitura da temperatura da água é mais rápida e precisa.
- O display mostra “COLD” quando a temperatura medida é abaixo dos 33°C.
Uma temperatura confortável da água encontra-se entre os 36.5°C e os
38°C.
- Alerta de água quente: o aviso vermelho LED começa a piscar se a
temperatura medida estiver acima dos 39ºC. No display irá piscar a palavra
“Hot” (quenrte).
SUBSTITUIR A BATERIA
As pilhas podem-se esgotar passado 1 ano. Nessa altura pode substituí-las.
Para mudar as pilhas: .
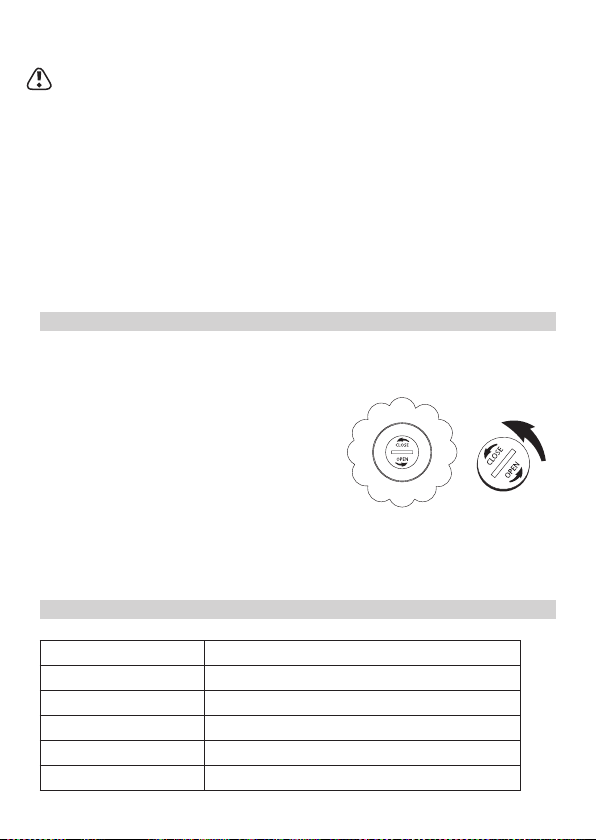
1. Puxe a unidade de medição para for a da
cápsula de borracha.
2. Com uma moeda (ou similar) remova a
tampa da bateria localizada na parte de
traz da unidade de medição.
3. Retire cuidadosamente as pilhas com
um par de pinças.
4. Coloque as novas pilhas e reponha a tampa da bateria.
ESPECIFICAÇÕES
Intervalo de medição 0°C ~ 50°C (32°F ~ 122°F)
Precisão ± 1°C (2°F)
Display LCD (Unit of display : 0.1°C / 0.1°F)
Pilha 1x CR2032
Dimensões 40mm(dł.) x 43mm(szer.) x 53mm(wys.)
Vida útil da pilha Aprox. 1 ano (com 1 hora de utilização /dia)
49
Page 50

Luvion Premium Baby products
Visit us at:
www. Luvion.com
v. 201310-01
 Loading...