

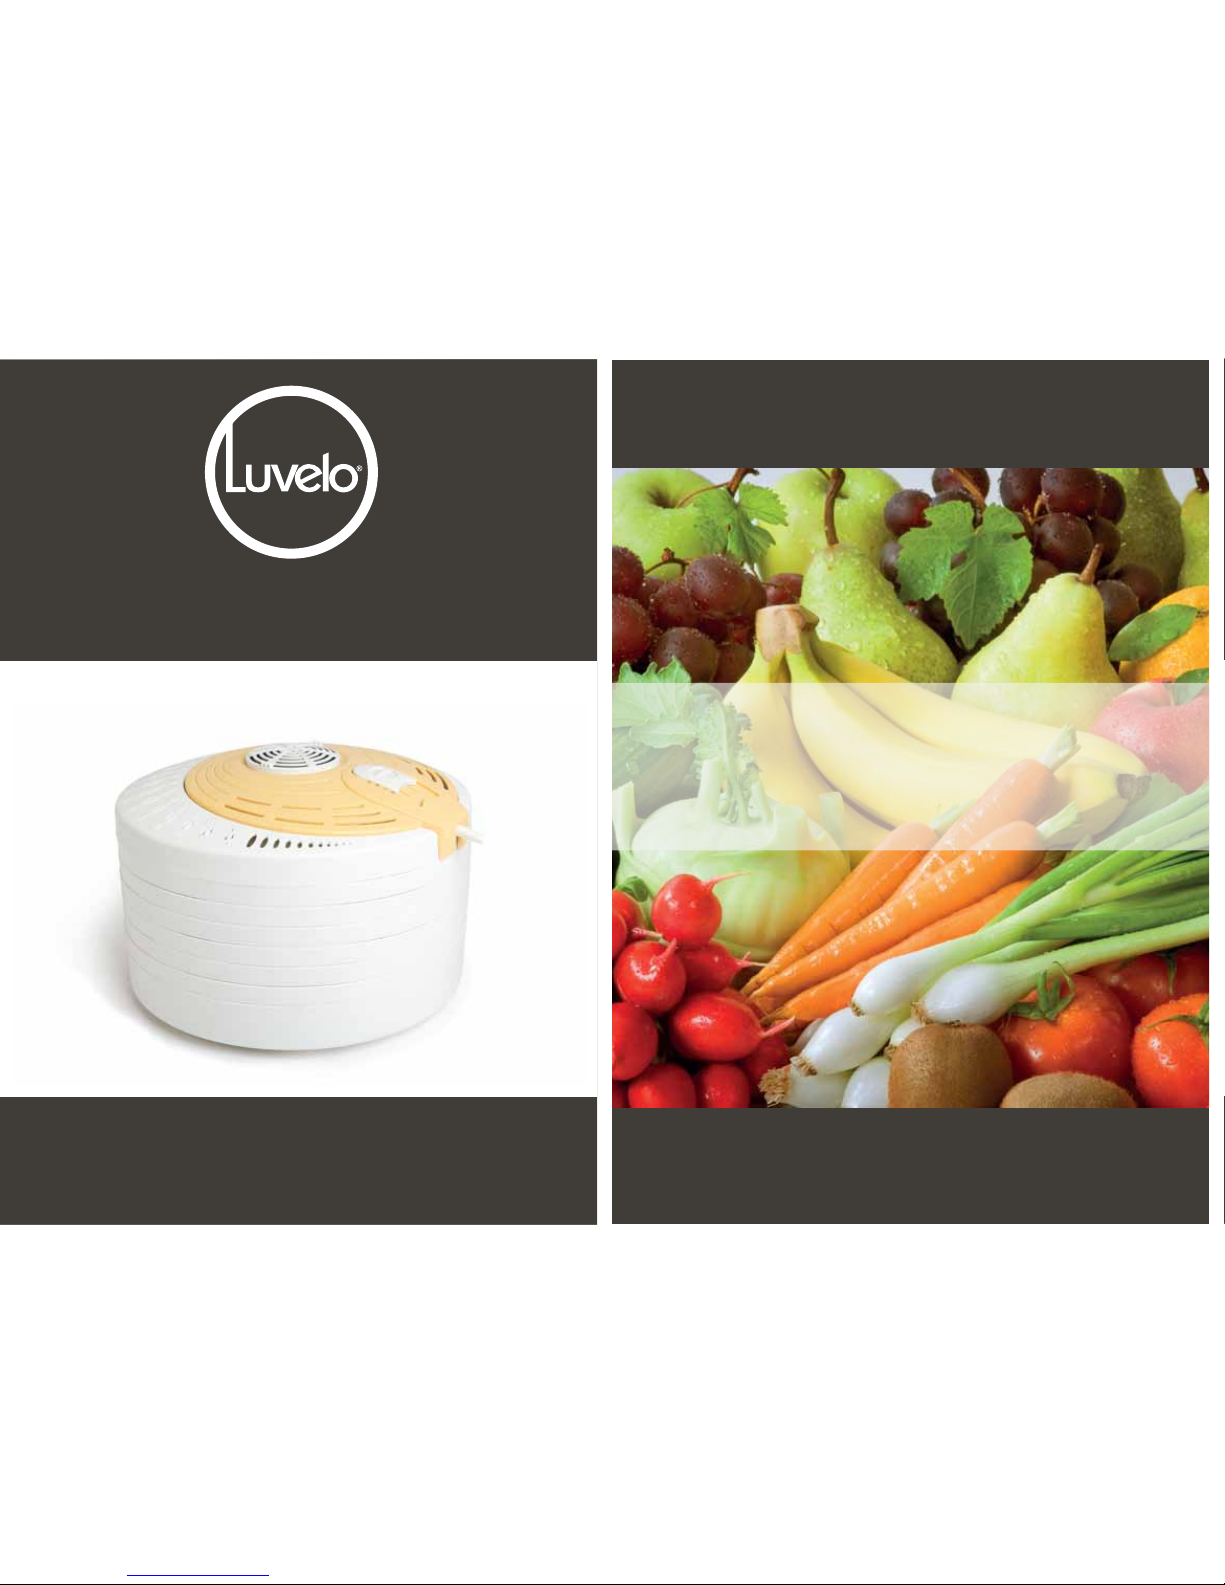
Luvelo express Food Dehydrator
LEFD400
Instructions
Congratulations
on the purchase of your new Luvelo express Food Dehydrator

Safety Instructions
P/3
Please be sure to read all of the following instructions before using the
Luvelo express Food Dehydrator. Keep the instructions for future reference.
Remove all packaging material from Food Dehydrator before first use.
Do not place the Food Dehydrator near the edge of a bench or table during
operation. Ensure the surface is level and free of liquids or other substances.
Do not place the Food Dehydrator near or on a hot stove or oven. Do not place
any parts of the Food Dehydrator in a dishwasher or microwave oven.
Never operate damaged appliance, including damaged main cable.
Do not use your appliance with an extension cord unless this cord has been
checked and tested by a qualified technician or service person.
Always use your appliance from a power outlet of the voltage (A.C. only)
marked on the appliance.
Young children should be supervised to ensure that they do not play
with the appliance.
Do not use the appliance for any purpose other than its intended use.
Do not immerse the appliance in water or any other liquid unless recommended.
Never remove main cable with wet hands, or lay cable on hot surfaces,
or let cable come into contact with hot surfaces.
Unplug the appliance after each use, when the appliance in not in use and before
changing accessories or cleaning the appliance.
Do not try and perform any maintenance, other than cleaning. For any
maintenance issues please contact Luvelo Australia.
Use well away from walls and curtains.
Avoid using on metal surfaces e.g. sink.
Introduction to Food Dehydration
How Food Dehydration works
Electric Food Dehydrators eliminate much of the guess work in food drying and
gives you the flexibility to dry food anytime of the day or night and in any weather.
Drying food is the oldest method of preserving food. It is a natural process that
creates an environment in which water is removed from food. Dehydrating food
also seals in the flavours and nutrients of the food, leaving a high nutrient and
vitamin content in your dried foods.Drying fresh, ripe fruit, vegetables, meats and
just about any other type of food, allows you to enjoy these luxuries all year round.
Storing of food is easy and takes up little storage space. Dried food has a long
shelf life in air tight storage jars of approximately 4-6 months depending on type
of food and climate.
Drying fruit and vegetables with your Luvelo Food Dehydrator will produce food
that differs in colour and appearance from produce purchased in Health Food
Stores and Supermarkets. This is because most commercially dried foods have
artificial colouring and preservatives added to them. Whereas your Luvelo Food
Dehydrator requires no preservatives or additives.
You can dry herbs, flowers, fruits and vegetables straight from your garden. You
can make delicious beef jerky with your favourite herbs and spices. Natural
healthy snacks can easily be created using your Luvelo Food Dehydrator, also
a variety of fruit rolls-ups. It is all about experimenting, the choices are endless.
P/4
Know your Luvelo Food Dehydrator
Top Mounted
Heating Fan
Base
6x Drying Trays
400 watts of heating
power allows fast
drying results.
Enjoy your dried
foods sooner.
Comes with six
drying trays. The
Luvelo Food
Dehydrator is
expandable
to 15 trays.
Base captures any
drips from food drying
for easy cleaning
afterwards.
The opaque exterior
helps block harmful
light which can
destroy the nutritional
content of food that
is being dehydrated.
Opaque Exterior
Fan Speed control
The 3-setting control is used
to set the right fan speed
for the produce to be
dehydrated . Setting 1
is for produce with a
low water content
like mushrooms,
spinach, onions etc.
Setting 2 is for produce
with a moderate water
content like apples, apricots,
peaches, plums, etc. Setting 3
is for produce with a high water
content like meat jerky, tomatoes,
citrus, etc.
P/5
Ezy Stack System
The trays are
designed to fit into
each otherwhen
not in use,for easy
storage.
Micro Mesh Filter
The luvelo express
food dehydrator is the
first in its class to feature a
stainless steel mesh filter. This filter
captures and prevents large airborne
particle from entering the dehydrator
and contaminating your food.
The Luvelo express Food Dehydrator is ideal for home use and for professionals
who want to make their own natural dried foods. These can include fruit roll-ups,
dried fruits and vegetables, beef jerky, etc.
The Luvelo express Food Dehydrator comes with six trays. It has a quiet 400
watt motor which allows food to dry in hours not days. It provides the flexibility to
dry all types of fruits, vegetables, herbs, even cured meat.
Before using your new dehydrator
1. Wash the trays in warm soapy water
2. Do not put top mounted power unit in water. Wipe the top mounted power
unit with a damp cloth only.
1. Set the base on a level bench top or table.
2. Stack the six trays on to the base, making sure they rest on top of each
other, not into each other.
(The trays have an ‘ezy stack system’ that allows them to fit into each other
for easy storage, please see page No.5)
3. Place the top mounted power unit on top of the six trays.
4. Then plug cord into electrical outlet and you’re ready to being dehydrating
selected foods.
Accessories
A. The Luvelo express Food Dehydrator is expandable to 15 trays. You
can purchase spare trays in packs of 3.
B. Spare Fruit Roll-up sheets are available in packs of 3.
C. Spare non-stick mesh liner are available in packs of 3.
D. Meat Jerky Guns for making jerkys are also available.
The dehydrator trays are easy to clean. Simply soak the trays in warm water with
detergent for several minutes. Use a soft brush to clean off any food particles that
remain. Do not use any metal objects or scouring pads to clean trays with as they
may damage the surface of the trays. Caution: Do not place trays in dishwasher.
Top Mounted Power Unit
Use a damp cloth or towel to remove dried food particles from the top mounted
power unit of the dehydrator. Avoid dripping any liquid into electrical parts.
Caution: Be sure the unit is unplugged before cleaning the top mounted power
unit. Do not immerse in water
Know your Luvelo Food Dehydrator
P/6

Drying Instructions #1
P/7
Selecting Food & Loading Tray
Select high quality produce that is ripe and full of flavour for the best results.
Wash all fruits and vegetables to remove any debris, dust or insects. Cut away
any bruised or damaged sections. Lay food pieces evenly onto the trays. Do not
overlap the food pieces as this may inhibit drying. As each tray is loaded, stack it
on the dehydrator to begin the drying process.
Drying Time
Drying times will vary, depending on the type and amount of food, the thickness
of the slices, the percentage of water in the food and the weather when using the
Dehydrator.
Fan Speed control (heat setting)
There are three fan speed settings that can be used when dehydrating produce.
This gives you control over the intensity of the heat the dehydrator will produce.
Setting 1 (Low)
This is for produce with a low water content like mushrooms, spinach, onions etc.
It is also for delicate items like herbs and flowers.
Setting 2 (Medium)
This is for produce with a moderate water content, it is suitbale for most types of
Fruits and Vegetables.
Setting 3 (High)
This is for produce with a high water content like meat jerky, tomatoes, citrus, etc.
IMPORTANT: Before each use remove the White Mesh Filter Cover
by turning it clock-wise. Once this has been remove lift the Stainless Steel
Mesh Filter out and check that the mesh filter is clear of any dust build-up.
Wash under warm water if required and dry thoroughly before placing back
into position. Then reattaching the White Mesh Filter Cover.
P/8
Drying Instructions #2
Storage
The storage area should be cool, dry, and dark. The darker and cooler the storage
area, the longer the dried foods will last. The ideal storage temperature for
dehydrated food is 15°C to below freezing. The ideal storage place is a freezer or
refrigerator, particularly for storing low acid foods such as meats, fish and veg.
Rehydrating Dried Food
Enjoy dehydrated foods when dry or rehydrate foods to use in recipes.
Rehydrating can be done by placing dried foods in enough water to cover
food and then soaking for approximately one hour. Boiling water will
rehydrates foods much faster than cold water. Fruits or vegetables may also
be rehydrated in liquids other than water, including fruit juices, cider,
vegetable juices, milk etc. Adding salt or sugar during rehydration will slow
the rehydration process down.
Cooking Dried Food
After rehydrating food, cook it as you would normally. Most fruits and
vegetables will rehydrate to about 70-90% of their fresh state. Keep in mind
they will be more chewy than fresh or frozen fruit and vegetable. Dried food
used in cooking will absorb additional liquid, so adjust the recipe accordingly
by adding more water.
Packaging
Dried foods should be packaged straight after drying to prevent stickiness and
rehydration caused by humidity. Store dried foods in airtight, moisture proof
containers. If foods are insufficiently dried, or are exposed to moisture from faulty
packaging, they can lose quality and nutrition, and can even form mould during
storage. The Luvelo Vacuum Sealer is ideal for packaging dried foods. It can
extend the shelf life of dried foods 3 to 4 times. The Luvelo Vacuum Sealer can
be purchased from our website www.luvelo.com.
Plastic freezer bags can be used. Plastic storage bags that are not labelled for use
in the freezer generally are not airtight nor moisture-proof and should not be used
to store dried foods. Since most packaging materials are transparent, store
packaged dried foods in a plastic or metal container which will not allow the light
to penetrate. Store all foods separately so flavours do not mix. Fruit roll-ups are
best if removed while still warm. Wrap in plastic wrap and place in airtight
moisture-proof containers for storage.

Accessories Available
Add extra Trays
If you are enjoying your dried foods why not add extra trays to increase
the drying potential of your new Food Dehydrator. Luvelo offers packs of
three spare trays. The Luvelo express Food dehydrator can be stacked to fifteen
trays. Drying more food in one batch is an efficient, power saving way to enjoy
more dried foods more often.
Non-stick Mesh Liner
Luvelo non stick mesh liners are used to prevent foods with high
sugar content, such as bananas, tomatoes and watermelon, from
sticking to the drying trays. Without this mesh liner sticky foods can be
difficult and frustrating to peel or scrape off the trays. The mesh liners also help
prevent small pieces of food, like herbs, from falling through the trays. Lastly,
they minimize liquid or juice from dripping down from one tray onto another.
The mesh liners are non-stick, easy to clean, heat-resisting, reusable and they
carry SGS (Global) and FDA (USA) food safety approvals. They are available in
packs of three.
Fruit Roll-up Sheet
The Luvelo fruit roll-up sheet is a plastic liner that fits inside a dehydrator tray.
They are used for foods that are high in liquid content which cannot be dehydrated
directly on the drying tray or mesh liner because they would drip through. The
roll-up sheet provide a way to make fruit roll-ups like you buy at the supermarket
out of just about any fruit combination imaginable. They can also be used to dry
crackers, thick or pureed foods such as applesauce, spaghetti sauce, yoghurt,
soups, stew, refried beans and pea soup. They are available in packs of three.
Meat Jerky Gun
The Luvelo Jerky Gun allows you to make great tasting jerky in your own home.
You can make perfect jerky sticks or strips, with ease every time, using the Luvelo
Jerky Gun.
These accessories and other can be purchased from our website
www.luvelo.com
P/9
Drying Fruit #1
P/10
Preparation
Wash fruit and dry with paper towels. Remove any blemishes, pips and stones,
then slice evenly. Pre-treat where recommended. Read following table for further
information.
Pre-Treatment
The pre-treatment of fruit is recommended to help slow down browning while the
fruit is drying. We recommended you use a natural pre-treatment solution of
pineapple or lemon juice. Soak prepared, sliced fruit for 1-2 minutes in the juice
before placing on drying racks.
Blanching
Some fruits with natural protective wax coatings e.g. figs, grapes and prunes, need
to be blanched to speed the drying process. To blanch place whole fruits in boiling
water for 1 - 2 minutes. Then plunge into ice cold water, slice and commence
drying.
Soak in pre-treatment
Soak in pre-treatment
Dip in pre-treatment
None
None
None
Pliable
Pliable
Pliable
Crisp
Crisp
Crisp
8-12 Hrs
Apples
Apricots
Bananas
Berries
Citrus
Fruits
Coconut
Fruits Preparation Pre-Treatment Dry-Test Time
Core & Slice
Cut in half, stone,
slice in quarters
Peel & Slice
Remove stalks
& slice
Remove liquid
& grate flesh
Peel & Slice
12-18 Hrs
12-14 Hrs
7-12 Hrs
14-18 Hrs
18-20 Hrs

Drying Fruit #2
P/11
Cherries
Fruits Preparation Pre-Treatment Dry-Test Time
Peel & Slice
Remove stems,
cut in half &
remove stone
Blanch
Peel & Slice
Figs
Grapes
Kiwi Fruit
Mangoes
Melons
Nectarines
Paw Paw
Peach
Pineapple
Plums
Remove Stem
and half or quarter
Blanch
Blanch
Use seedless,
remove stem &
halve
None
None
None
Remove skin &
seeds
Halve & remove
stone
Peel & remove
Black seeds
Peel, halve &
remove stone
Peel & remove
core
Halve & remove
stones
Soak in
pre-treatment
None
Soak in
pre-treatment
None
None
Leathery 10-14 Hrs
Leathery
14-18 Hrs
Pliable 18-22 Hrs
Pliable
10-12 Hrs
Pliable
8-10 Hrs
Leathery
14-16 Hrs
Pliable 12-16 Hrs
Leathery 12-16 Hrs
Leathery 12-16 Hrs
Pliable
14-16 Hrs
Leathery 12-16 Hrs
Drying Fruit Roll-up
P/12
Preparation Directions
Place fruit roll-up sheet onto the drying rack. Puree fresh or canned fruit and/or
vegetables to a consistency that can be spread easily with a spatula. Drain any
syrup or liquids from canned fruit or vegetables before pureeing. Spread the puree
over the fruit roll sheet to a maximum thickness of 5mm, and then commence the
drying process. Fruit Rolls are ready when the centres are no longer sticky to
touch. Remove the fruit while it is still warm to prevent sticking.
Hints
• You can coat fruit roll-up sheets with a little oil to prevent the puree from
sticking to sheets and this will also make it easier to peel off.
• Why not try combined fruit and vegetables, the combinations are endless.
• Pureed raw food can darken when it dries. To keep the roll-up light in
colour you can add pineapple and/or lemon juice to the puree. Peel foods
before pureeing because skins can darken roll-up. Also, blanch or cook
foods before making a puree.
• Taste puree before drying, remembering the finished product will be
sweeter than the puree because the water will evaporate.
Fruits Drying timeFlavourings
Apples
None needed 8-10 Hrs
8-10 Hrs
Apricots Honey & lemon juice
8-10 Hrs
Bananas Vanilla, ginger, lemon juice
Cherries Lemon juice, almond essence
Oranges Cinnamon, lemon juice
Peaches Honey, cinnamon, nutmeg
Pears Lemon juice, nutmeg
Pineapples Cinnamon, honey
Rhubarb
Honey, sugar
Strawberries Lemon juice, honey
8-10 Hrs
8-10 Hrs
8-10 Hrs
8-10 Hrs
8-10 Hrs
8-10 Hrs
8-10 Hrs

Drying Vegetables #1
P/13
Preparation
Wash all vegetables thoroughly and remove any blemishes. Pre-treat where
recommended. Read following chart for further information
Pre-Treatment
Blanching may be required to speed up the drying process for certain vegetables.
Steam Blanch
Bring a saucepan of water to the boil then place vegetables in a colander, place
colander into saucepan and cover. You can also steam vegetables in the
microwave. Steam for as long as suggested in the drying chart below, then cool
in ice water, drain and pat vegetables dry. Commence drying. Blanching preserves
colour, stops the ripening process and generally makes the produce dry faster.
Blanch
Soak vegetables in boiling water for 1-2 minutes. Then plunge into ice cold water
and slice.
8-12 Hrs
Steam until tender.
Steam blanch for
4-5 minutes
Steam blanch
until translucent
Cook until tender
Steam blanch
Brittle
Brittle
Brittle
Brittle
Brittle
Brittle
Asparagus
Preparation Pre-Treatment Dry-Test Time
8-10 Hrs
6-8 Hrs
12-14 Hrs
10-12 Hrs
10-14 Hrs
Vegetables
Artichoke
hearts
Beans
Beetroot
Broccoli
Brussel
Sprouts
Cut hearts
into strips
Cut into lengths
Cut into lengths
Remove skin
and slice
Soak in salt water
for 5 minutes, to
remove hidden
insects.
Remove outer
leaves, cut in half
Sream blanch for
3 minutes
Drying Vegetables #2
P/14
Fruits Preparation Pre-Treatment Dry-Test Time
Cut into strips
Peel, cut into
cubes or slices
Cut into
flowerettes
Cut into lengths
Remove stems
& slice
Remove husk &
trim cobs
Slice
Remove skin
& slice
Shell & wash.
Remove seeds,
cut in to strips
Potatos
Zucchini
Remove ends
& slice
Steam cobs until
cooked. Remove
kernels & dry
Slice
None
None
10-12 Hrs
10-12 Hrs
10-12 Hrs
10-12 Hrs
10-12 Hrs
10-12 Hrs
6-8 Hrs
12-16 Hrs
6-8 Hrs
6-8 Hrs
8-10 Hrs
Cabbage
Carrots
Cauliflower
Celery
Corn
Eggplant
Mushrooms
Onions
Peas
Red/Green
Peppers
Tomatoes
Sream blanch for
4-5 minutes
Sream blanch for
5 minutes
Sream blanch for
3 minutes
Peel & Slice
Sream blanch
for 5 minutes
None
None
Steam blanch
Steam blanch until
cooked
None
Steam blanch for
2 minutes
Leathery
Leathery
Brittle
Crisp
Leathery
Brittle
Leathery
Crisp
Crisp
Crisp
Brittle
Brittle
Pliable
8-10 Hrs
10-12 Hrs

Drying Herbs #1
P/15
Most herbs may be dried in your Luvelo Food Dehydrator right on the plant stalk
or stem. Seeds and leaves are easily stripped from the plant when dry. Do not dry
herbs with fruits and vegetables. Store finished product in a cool, dark place to
reduce flavour loss. Do not powder leaves until you are ready to use.
Preparation
Leaves and stems should be washed under cold running water to remove any
dust or insects. Remove any dead or discoloured parts. If flowers are to be used
in teas, dry them whole. When seed pods have dried, their outer covering may be
removed by rubbing the seeds between the palms of your hands while blowing on
them to remove the husks. Place larger seeds on a mesh liner and place smaller
seeds loosely on a fruit roll-up sheet. Dehydrate until there is no moisture evident.
1-3 HrsLeaves
Rinse in cold water
Italian and Mediterranean
dishes, tomato dishes,
meat, salads, soups, fish,
poultry dishes
Caraway
Clip entire plant,
then dip in boiling
water
Seeds
Pork, sauerkraut,
rye bread, cheese,
vegetables and cookies
Part of Plant Preparation Use Time
3-5 Hrs
5-10 Hrs
2-3 Hrs
2-5 Hrs
3-5 Hrs
Herbs
Basil
Chili Peppers
Pods Rinse and dice
Powder for seasoning
Chives Leaves
Chop, rinse in
cold water
Mild onion flavor,
use in moist recipes
Coriander
Seeds
Clip entire plant,
dip in boiling water
Sausage, pickling, spices,
apple and pear dishes
Cumin
Seeds Rinse in cold water
Curries and chili dishes
Drying Herbs #2
P/16
Preparation TimeHerbs Part of Plant Use
Dill
Leaves Rinse in cold water
Salads, vegetables,
potatoes and fish
Fennel
Fennel Seeds
Leaves
Rinse in cold water
Rinse in cold water
Salads, soups or
stews
Cakes, cookies,
breads
Cut in half length
ways
Salt, powder, recipes
6-12 Hrs
Meat, vegetables,
grate cookies and
dessert dishes
Mint Leaves Rinse in cold water
Rinse in cold water
Rinse in cold water
Rinse in cold water
Rinse in cold water
Rinse in cold water
Rinse in cold water
Rinse in cold water
Mustard Seeds
Corned beef,
sauerkraut, salad
dressings & cabbage
Oregano
Leaves
Italian, Greek,
Mexican & tomato
dishes
Rosemary Leaves
Barbecue sauces, eggs
poultry, meats, dishes,
lamb,& vegetables
Leaves
1-3 Hrs
1-3 Hrs
3-5 Hrs
2-5 Hrs
Garlic Clove
Ginger
Root
Rinse then slice
or grate
Sauces, mint jelly &
lamb dishes.
Parsley
Leaves &
stems
Powder, use leaves
for flakes
Tarragon Leaves
Sauces, salads, fish
and poultry
Sage
Thyme
Leaves &
stems
Poultry, pork, lamb,
veal & fish dishes
Meat, fish & poultry
dishes, green beans,
beets, carrots & potatoes
1-3 Hrs
2-5 Hrs
1-3 Hrs
1-3 Hrs
1-3 Hrs
1-3 Hrs
1-3 Hrs
1-3 Hrs

Drying Meats / Drying Crafts
P/17
Drying Meat
Preparation Directions
Trim excess fat from the meat and slice into thin strips. Marinate your meat in the
refrigerator for 6-8 hours in marinade of your choice. Place meat to dry on a
non-stick mesh liner and place fruit roll-up sheet under tray to catch any excess
drips. Then dry meat uninterrupted for 8-10 hours
Storage
Store dried meat in an air-tight container. Refrigerate if storing for any length of
time. The recommended shelf life is 3 months. Be sure to test for dryness every
2-3 weeks.
Drying Flowers
You can dry your own flowers, blossoms and petals using your new Luvelo
express Food Dehydrator.
Preparation Directions
Cut flowers when they are dry and cool. Choose flowers that are firm but only
half open. Full bloom flowers tend to lose their petals. Position your flowers and
petals sparsely on the drying trays and dry for 8-10 hours until flowers are brittle.
To make potpourri use a handful of flowers, blossoms and petals and combine
with 3-4 drops of perfumed oil e.g. tea rose or lavender. Arrange flowers, blossoms
and petals sparsely on the drying trays then dry for 6-8 hours. When drying is
completed, place flowers into a large air tight glass container and apply another
3-4 drops of perfumed oil.
For more recipies and ideas on how to make the most of your new Luvelo
express Food Dehydrator please visit our website www.luvelo.com or
our Facebook page www.facebook.com/luvelohealth.
 Loading...