

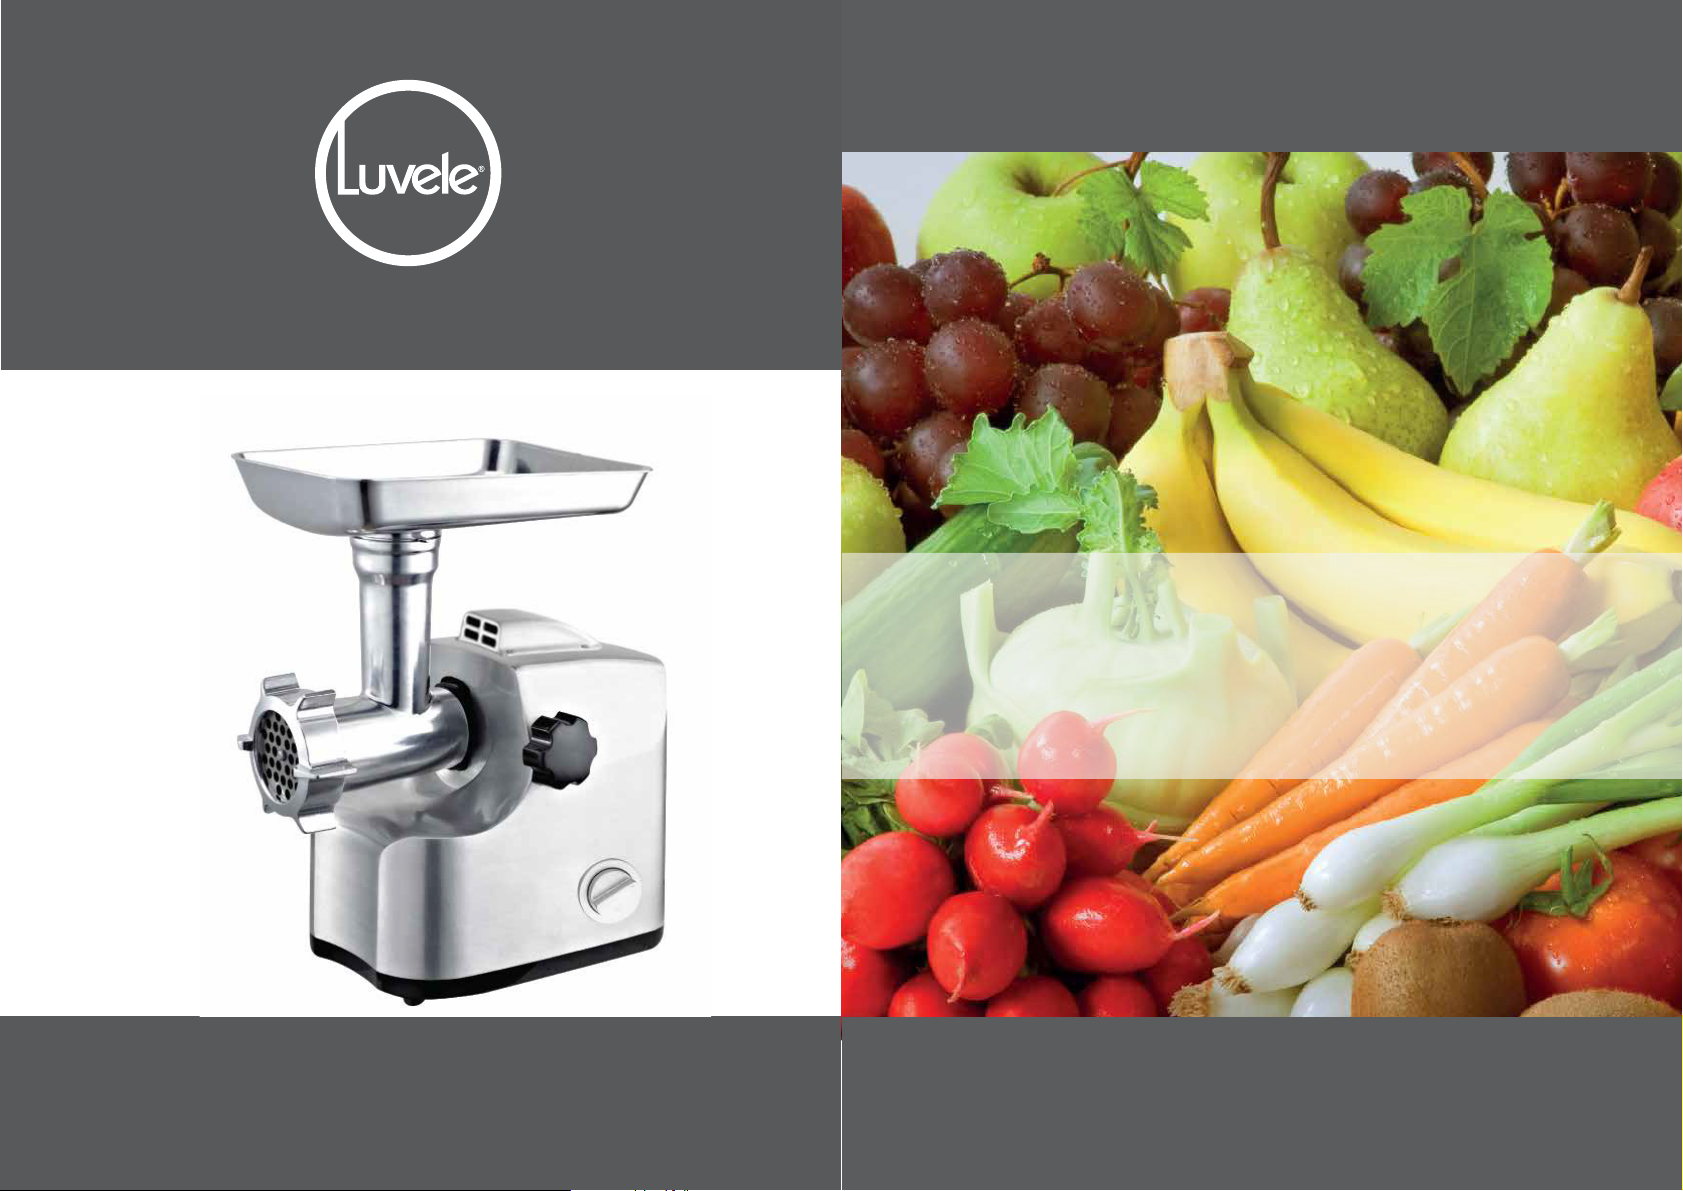
Luvele Ultimate Meat Grinder
Congratulations
on the purchase of your new Luvele Ultimate Meat Grinder
Instructions
LUMG700W

Safety Instructions
Please read all instructions before using your Luvele Meat Grinder.
Keep these instructions for future reference.
• Remove all packaging before using your Meat Grinder for the first time.
• Do not place Grinder near the edge of a bench or table during operation.
• Ensure the surface is level, free of liquids or other substances.
• Do not place your Meat Grinder on or near a hot stove or oven.
• Always use extreme care when handling the blade and cutting plates.
• Unplug from power outlet when not in use, before putting on or taking off
attachments, and before cleaning.
• Only use the pusher that is supplied with this Meat Grinder.
• Do not put your fingers or any utensil into the head.
• Do not put hot meat into the meat grinder.
• All attachments should be removed with care before cleaning.
• Only use the accessories provided and recommended by Luvele.
• Do not overload the Meat Grinder.
• Do not place any parts of the Grinder in a dishwasher or microwave oven.
• Do not immerse the body of the Meat Grinder in water or other liquids.
• Never operate damaged appliance (incl. Mains cable).
• Operate appliance only through a professionally installed socket
supplying the correct voltage and do not use extension cables.
• Never remove main cable with wet hands, or lay cable on hot surface, or let
cable come into contact with oil.
• Unplug the appliance after each use, when the appliance is not in use and
before changing accessories or cleaning appliance.
• Do not try and perform any maintenance, other than cleaning. For any
maintenance issues please contact Luvele Australia/UK.
• Do not operate outdoors.
• This appliance is not intended for use by young children or infirm persons
without supervision.
• Use a fire blanket only to extinguish fires on appliance.
• The appliance is not designed for commercial or industrial use; it is for
household use only.
Safety Instructions
This appliance is intended to be used in household and similar applications
such as:
- Staff kitchen areas in shops, offices and other working environments;
- Farm houses;
- By clients in hotels, motels and other residential type environments;
- Bed and breakfast type environments
This appliance is not intended for use by persons (including children) with
reduced physical, sensory or mental capabilities, or lack of experience and
knowledge, unless they have been given supervision or instruction concerning
use of the appliance by a person responsible for their safety.
Children should be supervised to ensure that they do not play with the appliance.
If the supply cord is damaged, it must be replaced by the manufacturer,
its service agent or similarly qualified persons in order to avoid a hazard.
IMPORTANT: Do not place any parts of the Grinder in a dishwasher.
P/3
P/4
Notes
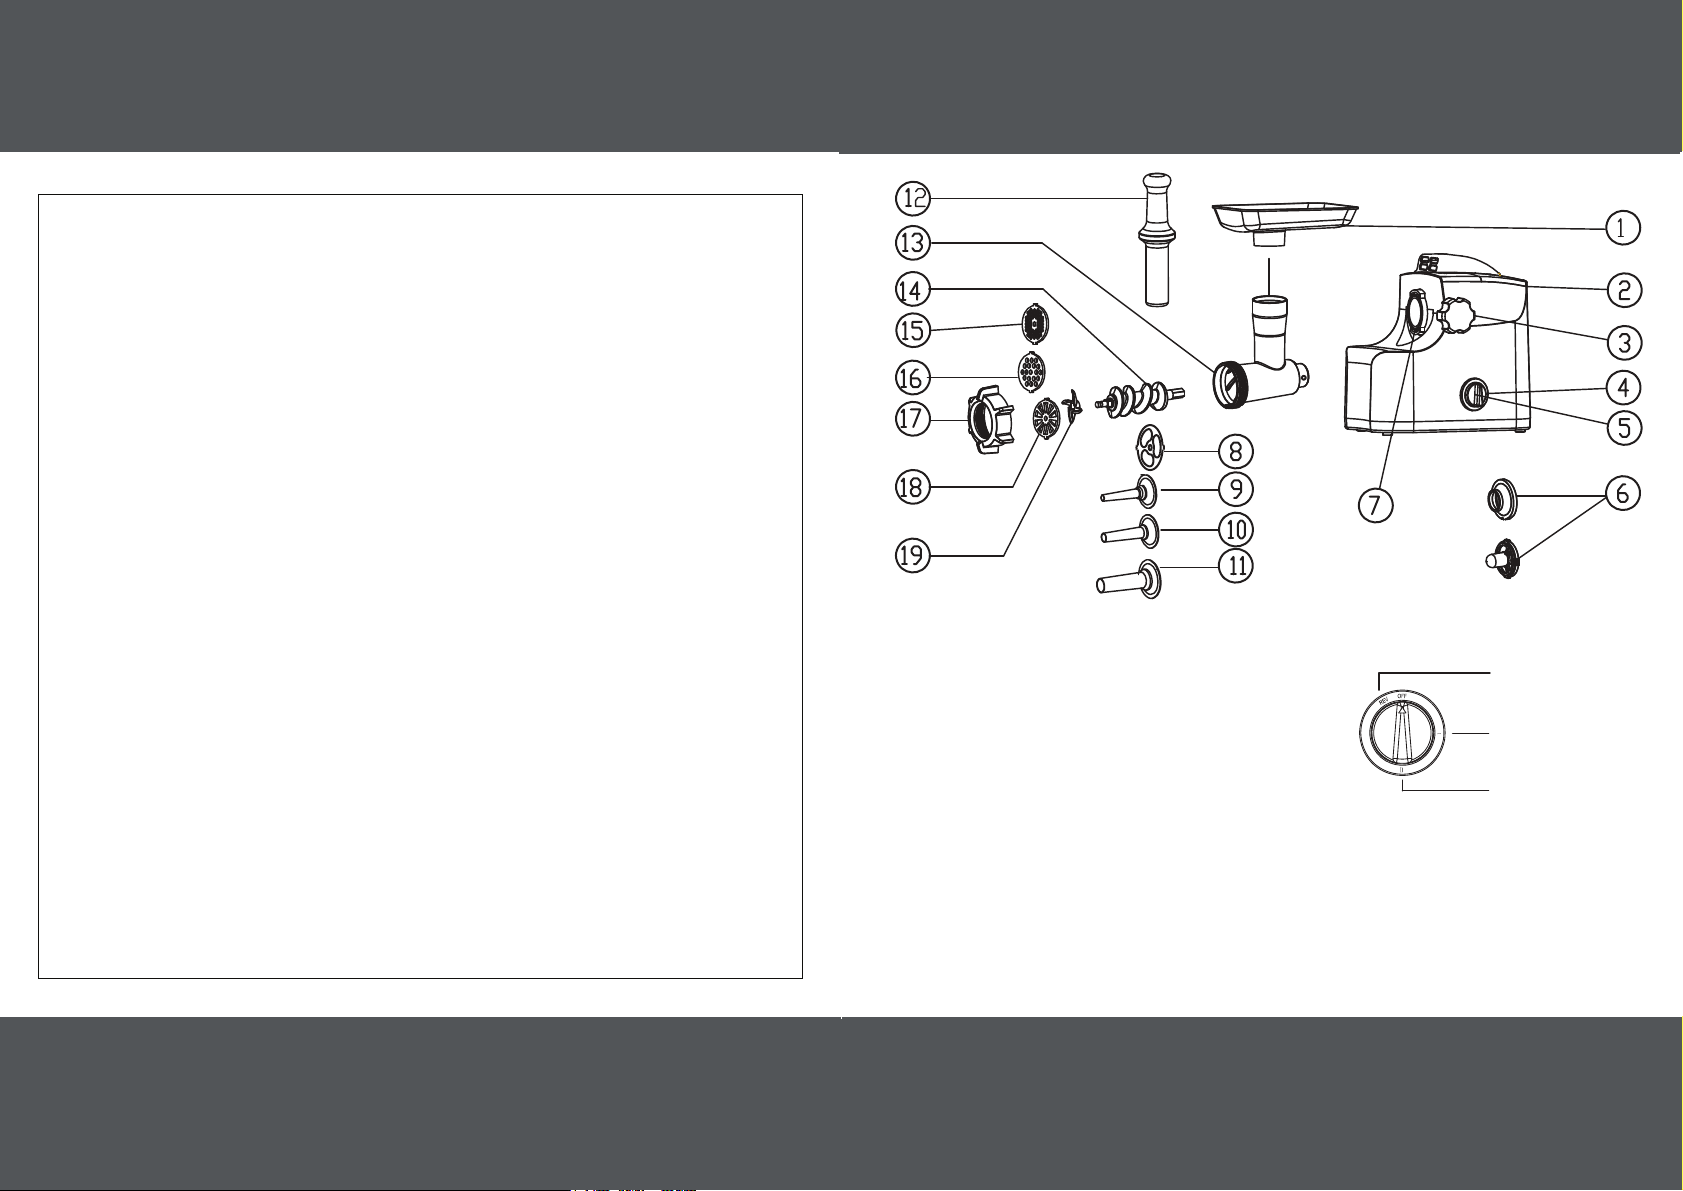
Know your Luvele Meat Grinder
P/5
1. Hopper Plate
2. Body
3. Fasten Button
4. Control Dial
5. Reverse Option
6. Kibbe Attachment
7. Head Inlet
8. Sausage Cutting Plate
9. Sausage Nozzle (16mm)
10. Sausage Nozzle (22mm)
11. Sausage Nozzle (32mm)
12. Food Pusher
13. Head
P/6
P/6
Control Dial
14. Grinding Screw
15. Cutting Plate (Fine)
16. Cutting Plate (Medium)
17. Fixing Ring
18. Cutting Plate (Fan)
19. Cutting Blade
Reverse Mode
Half Power
Full Power

Using your Luvele Meat Grinder
Before using your Luvele Meat Grinder
Wash all attachments in warm soapy water using a mild detergent. Dry each
part thoroughly before use.Before you assemble the Meat Grinder ensure that
the power cord is unplugged.
NOTE: All attachments must be firmly in place before using the appliance.
Using your Luvele Meat Grinder
Basic assembly steps
1
Insert head into body of grinder Screw fasten button into place
2
IMPORTANT: Do not place any parts of the Grinder in a dishwasher
or microwave oven.
Reverse Mode
Use the reverse mode if there is a blockage. If the Meat Grinder is in
operation then turn control dial to the stop position, wait for 30 seconds,
then turn the control dial to ‘Reverse’ setting to clear blocked food.
IMPORTANT: Do not select the reverse button while the Meat Grinder is in
operation. The motor must have completely stopped.
Once the blockage has been cleared unplug the appliance and clean
out remaining food from the head of the Meat Grinder.
Half Mode
Half mode is used when a slower grinding speed is required.
Recommended for sausage and kibbe making.
IMPORTANT: Do not operate Meat Grinder for more than 10 minutes at
a time. Allow motor to cool for 10 minutes after 10 mintues of operation.
The appliance is not designed for commercial or industrial use; it is
for household use only.
3
Place grinding screw into head Place blade onto grinding screw
5
Place cutting blade into head Screw fixing ring on
7
Place hopper plate on head
4
6
P/7
P/8

Using your Luvele Meat Grinder
Using your Luvele Meat Grinder
Mincing Meat
Fitting and using the cutting blades
1. Place the Meat Grinder body, facing you on a level, dry surface.
2. Fit the grinding screw inside the head.
3. Fit the blade over the grinding screw ensuring that the flat side of the blade
faces the cutting plate, away from the grinding screw.
4. Fit the cutting plate (depending on the type of mince you require).
5. The fixing ring then fits over the cutting plate and screws into place.
6. Align the head into the grinder body. Screw the fasten button into place.
Please note: The head can be fixed into the grinder body prior to the
accessories being attached if desired and as shown on page 6.
7. Before use, ensure all elements are securely in place.
8. Place a bowl underneath the fixing ring for mince collection and the hopper
plate on top of the head.
9. Place prepared meat into the hopper plate. Plug the power cord into a
230-240V AC power outlet and turn control dial to the ON position.
10.Using the food pusher, gently push meat through the head.
NOTE: Do not use excessive force to push meat through the head as it could
damage the appliance.
11. When grinding is complete, turn the dial to the off position to stop grinder.
1
IMPORTANT:
2
CAUTION: Do not use anything else apart from the food pusher supplied with
this meat grinder to push meat through the head. NEVER use your hands or
fingers to push meat through the head. (Fig.2)
P/9
P/10

3
Using your Luvele Meat Grinder
Making sausages
Using your Luvele Meat Grinder
Fitting and using the Sausage attachments
1. Place the meat grinder body, facing you on a level, dry surface.
2. Fit the grinding screw inside the head.
3. Fit the blade over the grinding screw ensuring that the flat side of the blade
faces the cutting plate, away from the grinding screw.
4. Fit the Sausage cutting plate, followed by the small, medium or large stainless
steel sausage nozzle. (Fig.3)
5. The fixing ring then fits over the sausage nozzle and screws into
place. Do not tighten the fixing ring yet as it will be harder to lock into the
grinder body.
6. Align the head into the grinder body. Screw the fasten button into place.
7. Once the grinder body is in place, tighten the fixing ring and ensure all
elements are securely in place.
8. Place the hopper plate on top of the head.
9. Place prepared sausage mix or unprocessed meat on to the hopper plate.
Plug the power cord into a 230-240V AC power outlet and press
the ‘ON’ button.
10.Using the food pusher, gently push sausage mix or meat through the head.
11. As the mixture comes through the nozzle, ease the skin off as it fills. Twist
the skin at the desired length to form individual sausages once all of the
casings are filled.
NOTE: Do not use excessive force to push meat through the head as it could
damage the appliance.
P/11
CAUTION: Do not use anything else apart from the food pusher supplied with
this meat grinder to push meat through the head. NEVER use your hands or
fingers to push meat through the head.
P/12

Using your Luvele Meat Grinder
Making Kibbe
Using your Luvele Meat Grinder
Fitting and using the Kibbe attachments
6
8
7
1. Place the meat grinder body, facing you on a level, dry surface.
2. Fit the grinding screw inside the head.
3. Fit the kebbe attachment. (Fig.6)
5. Secure the kibbe attachments with the fixing ring. Loosely secure
with fixing ring.
6. Align head into the grinder body. Screw and tighten the fastening
button, ensuring all elements are securely in place. (Fig.7)
7. Place the hopper plate on top of the head.
8. Plug the power cord into a 230-240V AC power outlet and press
the ‘ON’ button.
10. Using the food pusher, push the kibbe mixture into the head. (Fig.8)
11. Cut kibbe into desired lengths.
P/13
P/14

Hits & Tips
Hits & Tips
Hits for grinding meat
• Remove all large pieces of fat from meat before grinding.
• For fatty cuts of meat we recommend that you cut meat into 5cm cubes.
For lean cuts of meat; cut into strips approximately 15cm long and 5cm
thick or into cubes.
• Remove any bones from meat as this may damage the grinder.
• If changing cutting plates or changing to another attachment, always ensure
that any meat that is around the fixing ring or blade is removed. This will
ensure that all parts will reassemble and operate correctly.
• Minced meat should be used within 1-2 days. Freeze uncooked mince that will
not be used within this time frame.
• Mince can be frozen for 2-3 months.
• Thaw mince in refrigerator overnight, DO NOT refreeze uncooked meat.
• When cooking mince it needs to be cooked thoroughly. Mince that has been
used for hamburgers or meat patties should be cooked until well done.
Hints for sausage making
• Salt is an important component of sausage making. It is responsible for the
control of growth of micro-organisms. It also aids in dissolving the myosin
(protein) out of the muscle fibres which then acts as a glue to bind the meat.
• Freshly made sausages are better when allowed to sit in the refrigerator
for a minimum of 12 hours and for up to 24 hours.
• Fresh sausages are highly perishable products as they do not contain the
preservatives that are present in most store-bought sausages. They should
be cooked within 2-3 days of being made or frozen.
• Ideally, sausages should contain up to 30% fat content to provide a tender
and moist product.
• Sausages should be thoroughly cooked to kill all microbes. Internal
temperatures must reach 70-75°c.
• Intentional piercing of sausage skin releases much needed moisture but
prevents the sausage from possibly splitting and being disfigured.
• Things to look for when making sausages:
Choose good quality ingredients - Fat to meat ratio (30:70) - Spices and
seasoning should be combined in amounts that compliment the meat type.
• Casings (skin) can be purchased from butchers that supply your fresh meat.
If preserved in salt, it should be soaked in lukewarm
water for up to 30 minutes before use. Flush skins with cold water to expel
excess salt.
• Unused fresh casings must be drained, covered with salt and frozen.
• Sausages should be stored in an airtight container or sealed with cling
film in the refrigerator.
• A good way to make sure that all the sausage mince has come through the
mincer is to break up 1-2 slices of bread and push though mincer, this will
force any remaining mixture into the casing.
• Gentle cooking over medium heat prevents interior from boiling which in turn
bursts the skin, leaking out moisture and flavour. This then produces a hard
textured product.
P/15
P/16

Cleaning tips
When you have completed grinding, unplug the meat grinder from the
power outlet.
1 Year Warranty
The complete Luvele range of products are backed by our 1 Year Total
Cover Warranty. Our warranty will cover any manufacturing fault with the
product and will also cover damage caused during transit.
Your warranty starts from the purchase date of your Luvele product.
Ensure that all accessories and attachments are washed thoroughly with
hot, soapy water.
IMPORTANT: Do not place any parts of the Grinder in a dishwasher.
To remove meat that is stuck in the fine and medium cutting plates, use hot,
soapy water and a scrubbing brush, clean thoroughly.
Ensure that all attachments are thoroughly cleaned and free of meat to
prevent contamination. Then dry thoroughly before storing.
Warning: Take care in washing all attachment components to ensure that
there are no food particles left in/around the cutting plates, sausage/kebbe
making attachments, blade and grinding screw. We do not recommend
dishwashing any of the mincing attachments.
Note: Always unplug the grinder to clean. Do not wash/immerse the grinder
body in water – clean this part only by wiping using a damp cloth.
You do not need to register your warranty as your details are automatically
processed at the time of purchase if ordered directly from Luvele. If your
product was ordered through a seperate retailer, then please keep store
invoice for warranty claims.
Warranty Process
We want to make any warranty claim as simple as possible for you. All you
need to do is contact us at support@luvele.com and provide us information
about the problem you are having with your item. Firstly, we will suggest some
troubleshooting ideas to establish whether or not the issue can be fixed
without a return. Photos of the fault may be requested if and where appropriate,
and if it will ensure a faster resolution.
Generally, if you have an issue with your item within 30 days of receiving it,
we will email you a prepaid return label that can be printed out and used to
send the item back with. We will then generally send you a brand new item.
The new item will be shipped within 48 hours of receiving the faulty item back.
A confirmation email will be send when your faulty item is received back.
If you have an issue after the 30 day period we will consider repairing your
item if suitable. If it cannot be repaired it will be replaced with a brand new
item. Refunds will only be offered within the 30 day money back guarantee,
if you choose this option over a new replacement. Outside of this 30 day
period, your item will be repaired or replaced.
P/17
We are here to help, so please email us and the best solution to meet your
needs will be offered. support@luvele.com
P/18
 Loading...