


Sivoia® QS
roller 100TM
wall mount
Installation
Instructions

Sivoia® QS | roller 100TM wall mount
Installation instructions
Tools required:
Tape Measure 1/4 in. Hex-Head Driver
Wire Cutter/Stripper Level
Pliers Power Drill
#2 Phillips Screwdriver
Box contents:
(1) Sivoia QS roller 100 (2) Wall sub-brackets
Left and right side shade brackets
(attached)
(8) Mounting screws
(#8x1-3/4 in (#8 x 44 mm) Hex head screws)
(2) 4 in (102 mm) cable ties
(1) 4-pin terminal block
(2) Extra retaining screws
(#6x1/4 in (#6 x 6 mm) Phillips head screws)
(2) 7 in (178mm) cable ties
Page 1
Sivoia® QS roller 100TM Wall Mount Installation instructions

Sivoia® QS | roller 100TM wall mount
Installation instructions (continued)
CAUTION: Risk of bodily injury, follow all installation instructions.
Notes:
• The Sivoia QS roller 100 must be used only with shading systems approved by Lutron®.
• There must be a clearance of at least 1.3 ft (0.4 m) between the fully lowered system
and any permanent object.
• Installation shall be executed by a qualified electrician according to national wiring rules.
• Codes: Install in accordance with all local and national electrical codes.
• Environment: Ambient operating temperature: 32 to 104 °F (0 to 40 °C), 0 to 90% humidity,
non-condensing. Indoor use only.
Sivoia® QS roller 100TM Wall Mount Installation instructions
Page 2

System Width
(bracket to bracket width)
System Height
1
Confirm system dimensions
Package Label
1.1
Compare system dimensions on
the package label with the window
dimensions to verify appropriate
window/shade combination.
This information can also be found
on the shade tube by lowering the
fabric down far enough to expose
the tube.
System Width
System Height
System width
(bracket to bracket width
System height
Page 3
Sivoia® QS roller 100TM Wall Mount Installation instructions

2
2.1
Pre-drill for cable
Determine where to drill for cable access. See options below. Cable should exit
from wall, ceiling or jamb on EDU side of system.
Note: Leave 12 to 18 in (305 to 457mm) of cable exposed.
Wall
Drill for cable 1.25 to 2 in (32 to 51 mm)
from end of system and 2 in to 2.5 in
(51 to 64 mm) from top of system.
Ceiling
Drill for cable 0.5 in (13 mm) from
end of system and 0.5 in (13 mm)
from mounting wall.
Jamb
Drill for cable 0.5 in (13 mm) from
end of system and 0.5 in (13 mm)
from mounting wall.
Sivoia® QS roller 100TM Wall Mount Installation instructions
Page 4
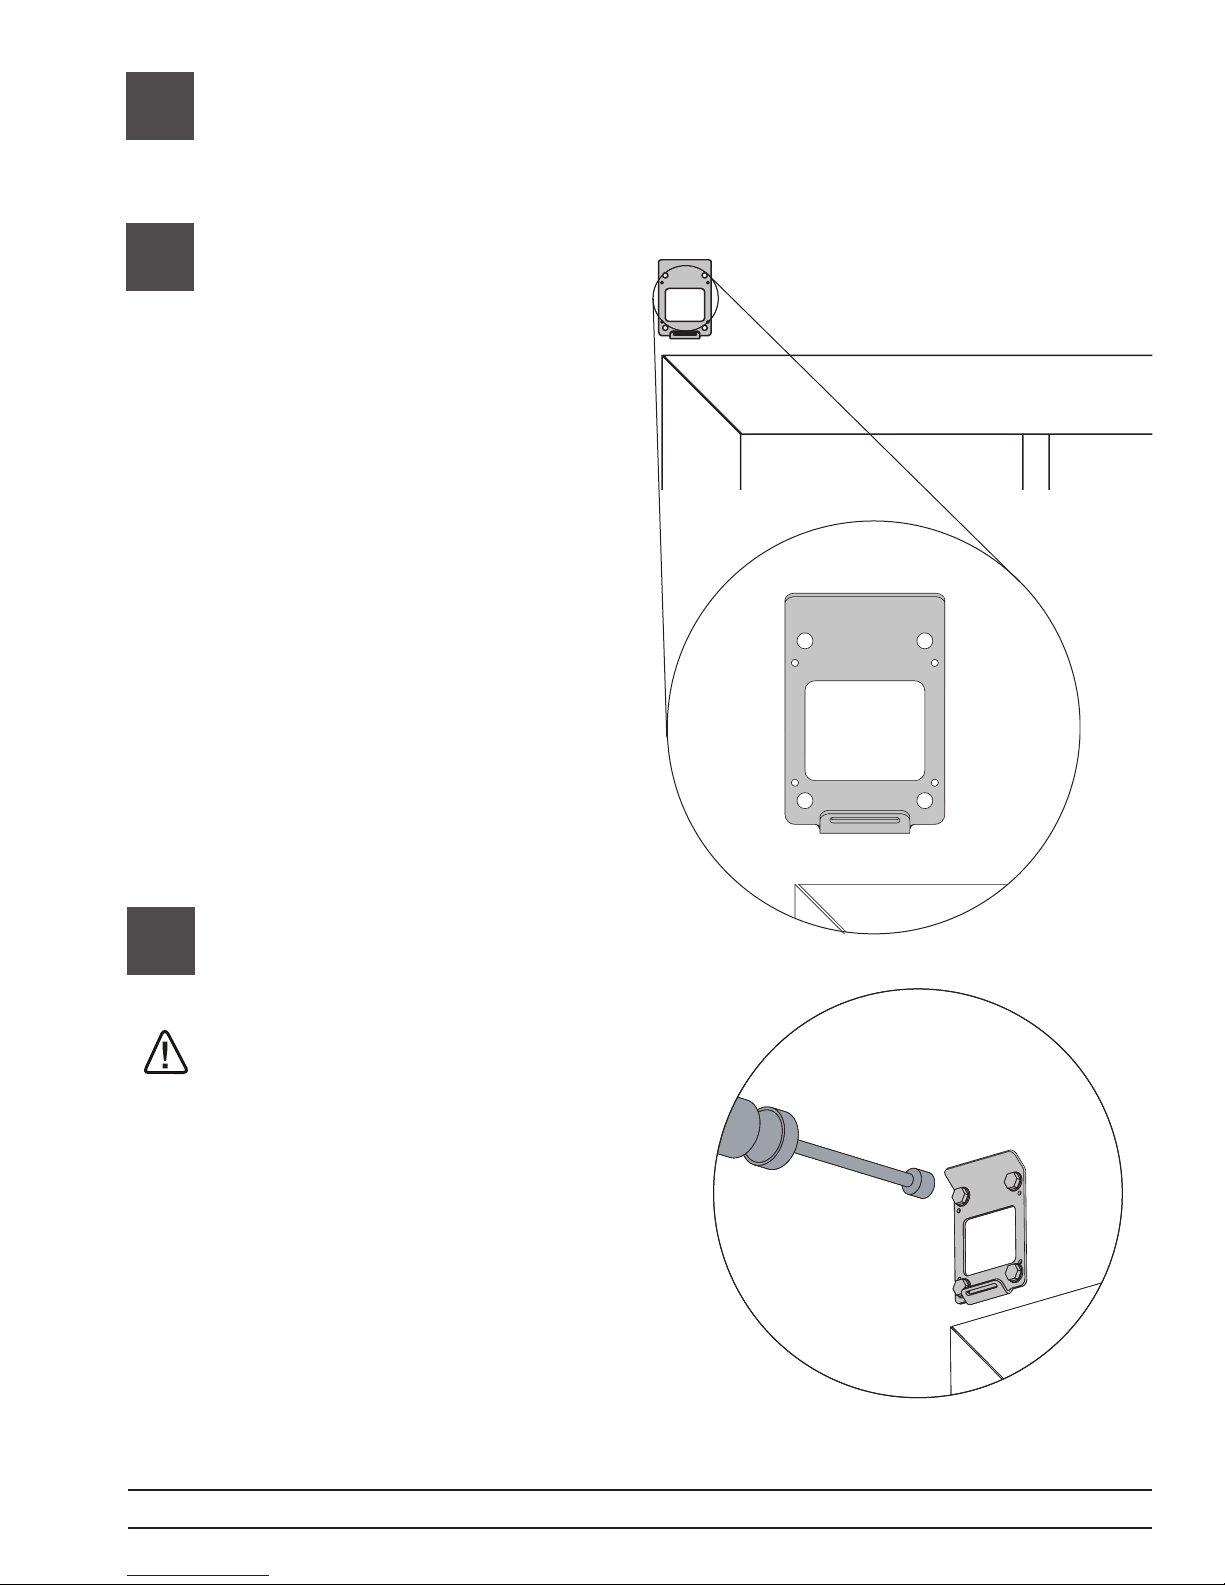
3
3.1
Mount Sub-Brackets
Use fabric alignment holes to
position the sub-bracket right
to left. The fabric alignment
holes will line up with the outside
edge of the shade tube.
Note: Fabric edge may not line up
with the edge of the tube.
Once their position has been
3.2
established, mount sub-brackets
using appropriate fasteners.
CAUTION: Risk of bodily injury
from falling heavy object.
The sub-brackets for each
shade tube must be mounted
to support a weight of at least
300 lbs (136 kg). The fasteners
provided with the subbrackets
may not be appropriate
for use in all applications.
Page 5
Sivoia® QS roller 100TM Wall Mount Installation instructions

4
Wire 4-pin terminal block
4.1
4.2
Strip 2 in (51 mm) of the jacket off the cable run from the wall.
2 in
(51 mm)
Wire the 4-pin terminal block (provided) to the cable using a screwdriver.
Make sure to tighten the screws tightly and that no insulation is inside of the terminal block.
Notes:
• The EDU connector will support wire sizes from AWG #12 (2.5 mm) to
AWG #26 (0.2 mm). See the instruction sheet for your power supply
to choose an appropriate wire size for your application.
• Strip insulation from wires so that 0.25 in (6 mm) of bare wire is exposed.
MUX (Pin 4)
MUX (Pin 3)
24 V (Pin 2)
Common (Pin 1)
}
To EDU
Connector
Sivoia® QS roller 100TM Wall Mount Installation instructions
Page 6
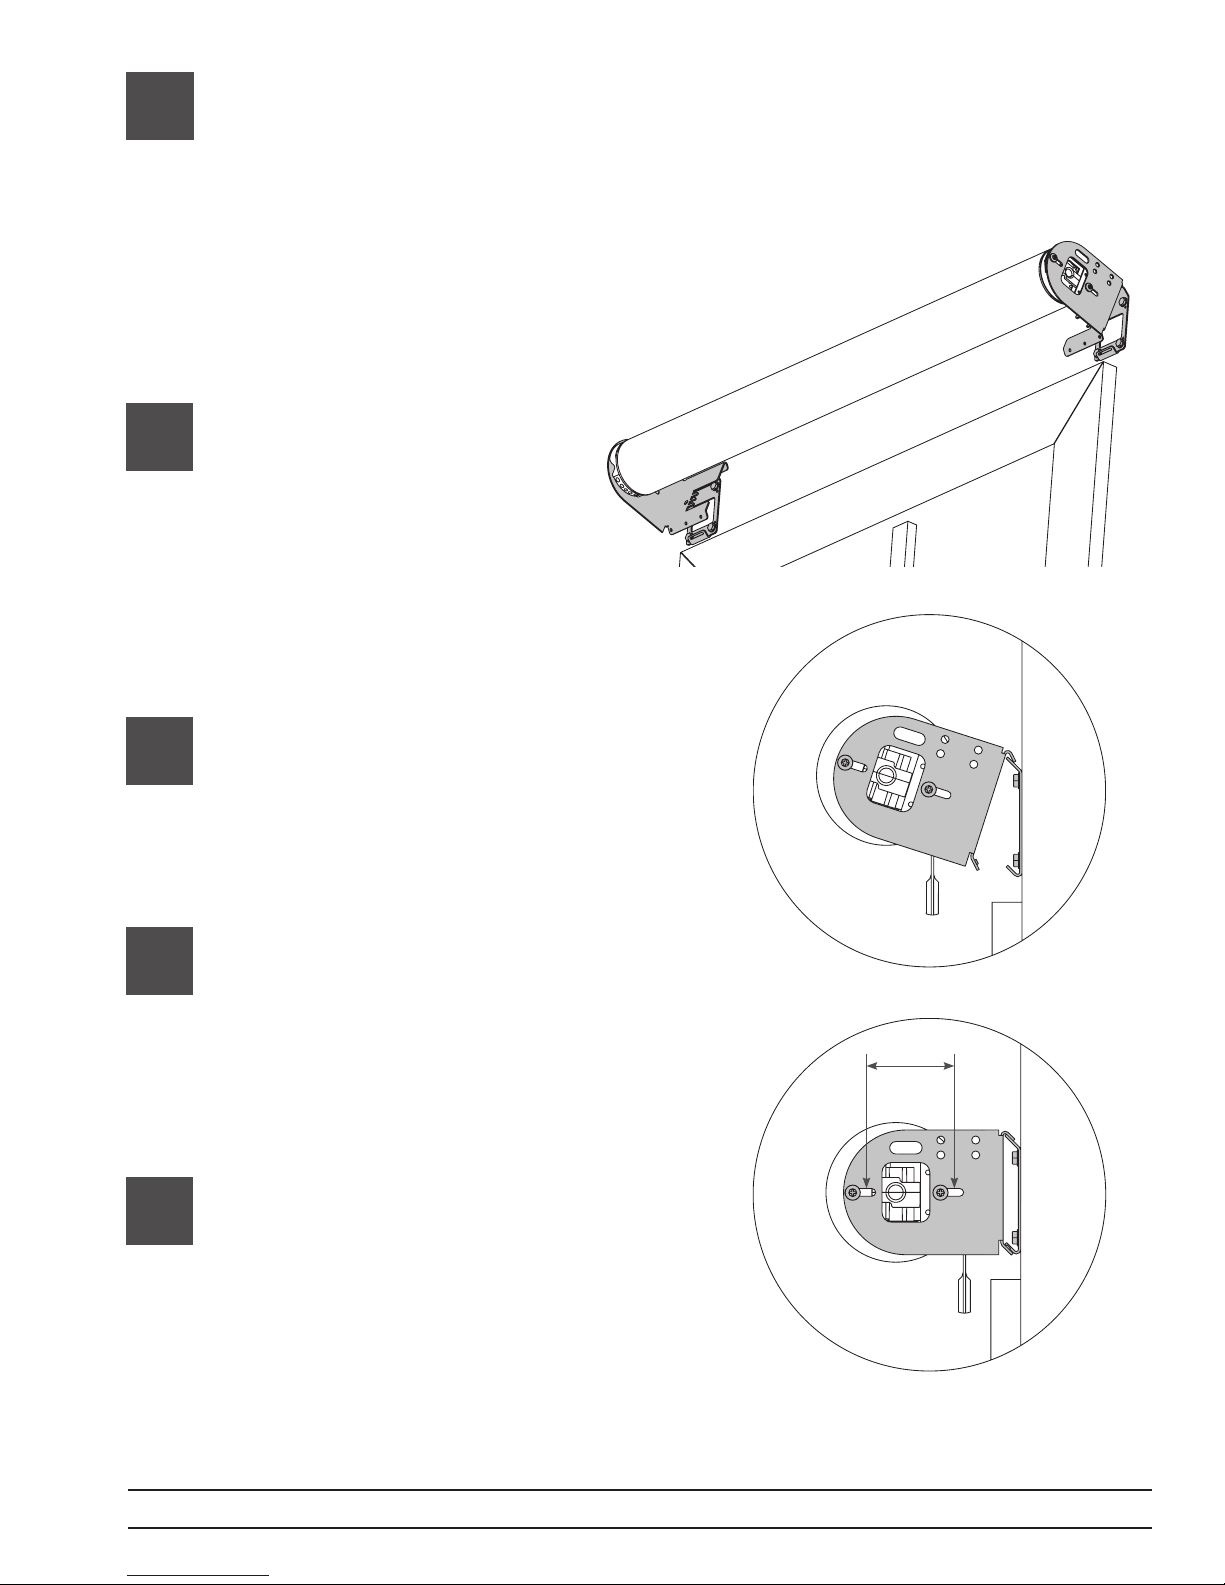
5
5.1
Mount the shade to sub-brackets
NOTICE: Shades wider than 4 ft
(1.2 m) require two people to install.
Remove retaining
screws from shade
brackets.
Note: Leave protective
wrapping on shade
during installation.
Hook the lip of each shade
5.2
bracket onto the top of
each sub-bracket.
Swing shade down until
5.3
bottom of shade brackets
rest against sub-brackets.
Route cable wires from
5.4
wall, ceiling or jamb
between the shade bracket
and the sub-bracket being
careful not to pinch wire.
Page 7
Sivoia® QS roller 100TM Wall Mount Installation instructions
 Loading...