

Lutema MIT4CAVHB, MIT4CAVHR Instruction Manual

Caution
Warning
Attention
Mit4cavhb/mit4cavhr
Flying Practice
Caution
Warning
Attention
1. Th is helicopter is operated by inf rared technology. It is impo rtant to make su re you always use
new or fully ch arged batt eries . Do NOT allow the batteries to run low, o r you coul d los e control
of the helicopter.
2. Do NOT allow any of the electronic components to get wet as this may lead to electrical damage.
3. You should complete a successful range check of your radio equipment prior to flying the helicopter.
4. Do NOT use any sol ve nts to cle an the he lic opter. Solvent s w ill dam age the pla sti c and
composite parts.
5. Al ways tur n on the transmitter befo re t urni ng on the helicopter and be s ure to turn off t he u nit
before charging.
1. Chec k yo ur surroundings bef ore flying the heli copter.
2. Do N OT allow the helicopter to fly out of sight wh en o perating.
3. Do N OT allow chi ldren under the rec ommended age to ope rate the helico pter.
4. Ma ke othe r h elic opte rs in t he area are no t on th e sa me f req uenc y c hann el.
D o NOT u se a n a da pte r ot her t han t ho se su ppl ie d in th e b ox t o c ha rg e t he un it .
Us ing non-c er tif ied th ird party a dap ter s t o char ge th e i nte rnal b at ter y m ay damage t he
ba tte ry and p ote nti all y c ause f ir e.
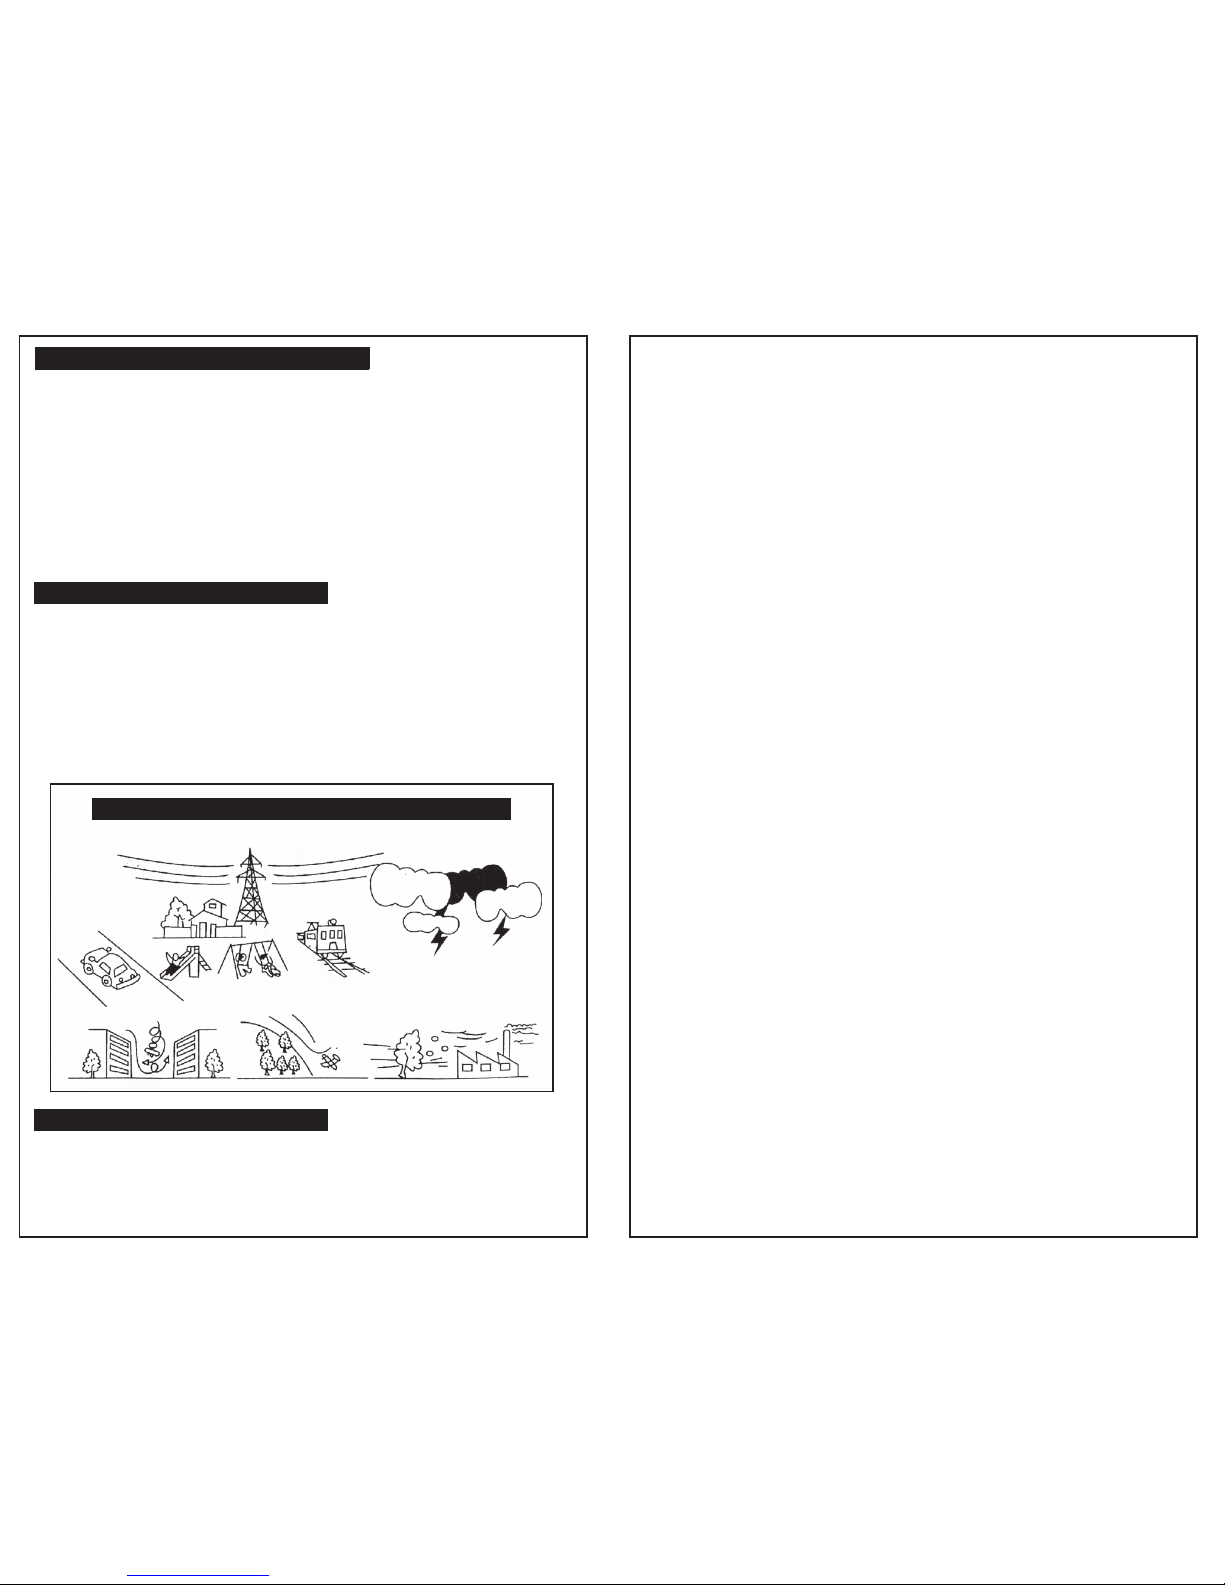
Do n ot oper at e the h elico pt er in b elow s et ting s
2
2
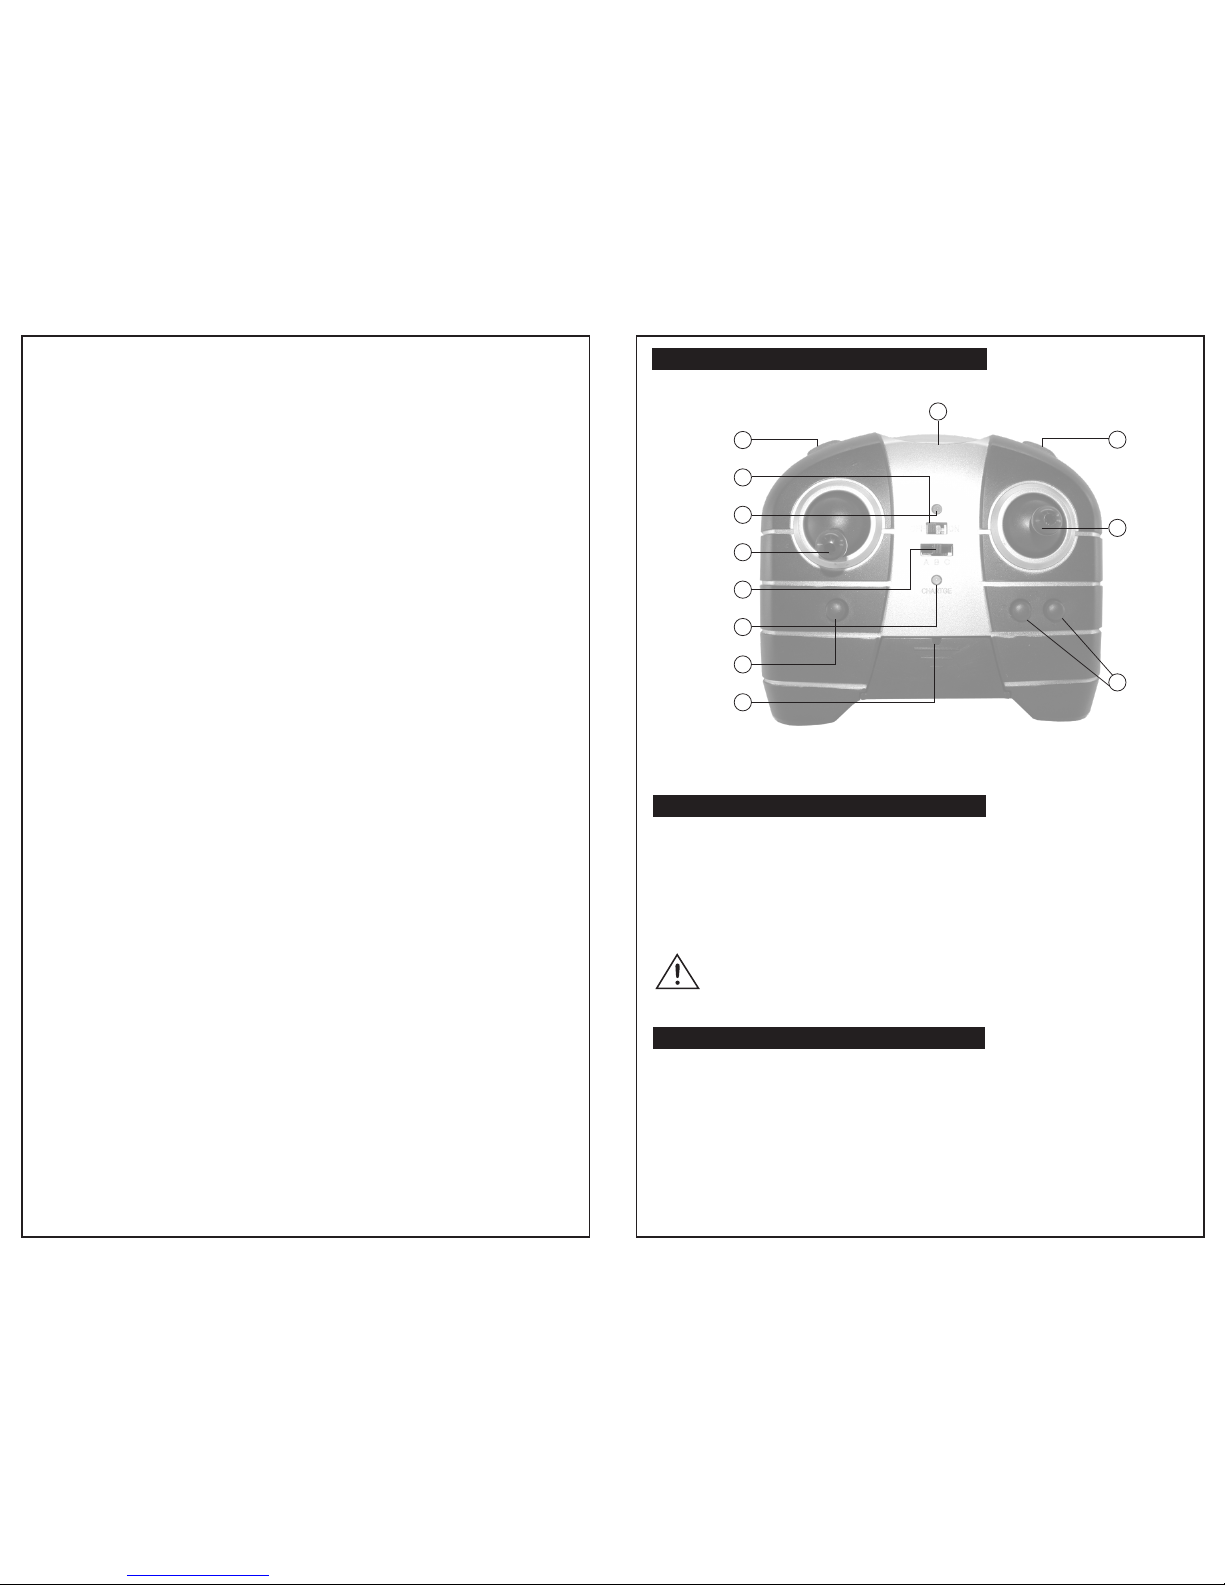
Remote Control Features
Remote Control Features
Remote Control Synchronization
2
3
**Remote Control Uses 6 x AA Batterie s (Not In cluded)
St ep 1– Turn on the re mote c ontrol trans mitter and s elect your c hannel . Yo u shou ld see a
b lin kin g re d li ght on th e r emot e co ntro l.
Step 2– Turn on the helicopt er using the power switch on the si de.
Step 3 – Stand 3 to 5 feet back. Move the throttle stick to 100% throttle level and then back down to 0%
thro ttle level wi thin 2 second s.
Step 4– Repeat Step 3 above and the light on the remote control should now stop blinking and show
a s olid red. This me ans the h elicopter is synchronized and ready to fly.
1. The red indicator light will stay solid when the remote control has syncronized with the helicopter.
The indicator light will flash when the controller is out of sync or if the helicopter or remote contro l
are low on batter y.
2. The green in dica tor light will illu minate when the hel icopter is full y ch arged using the rem ote
controls charging cable. Charging the helicopter using the remote control may take up to 20 minutes.
Do NOT use any other remote contr ols with ch arging features other than the one supp lied
in the box to charg e the unit. Using non-c ertifi ed thi rd par ty dev ices t o char ge the
inter nal batt ery ma y dam age t he ba tter y an d po tent iall y caus e fir e.
11
9
8
7
6
5
4
3
2
1
10
12
Hover L eft
Power S witch
Sync In dicator
Horizon tal Lever
Frequen cy Number
Chargin g Indicator
Acceler ation Mode
Compart ment
Steerin g Trim
Steerin g Lever
Hover Right
Infrare d Transmitt er
 Loading...