

1
FOR USE IN SOIL ONLY. DO NOT USE IN LIQUIDS.
IMPORTANT INFORMATION REGARDING YOUR NEW METER
These instructions cover all aspects related to the analyzer’s function and will help guide you to experiencing the proper temperature, pH and
fertility range for the plants you intend to grow.
BEFORE TESTING THE SOIL
If you are preparing to plant a bed of plants or shrubs, or to plant a crop of fruits and vegetables, or to put out grass seed, you will find it
beneficial to sample and test the soil in a number of locations in the area to confirm that the soil is warm enough for what you want to plant,
that the soil‘s pH is generally consistent over the entire area and that it is within the plant‘s pH range.
BASIC OPERATING INSTRUCTIONS
1. Press the power button to turn the meter on and off.
2. When the meter is turned on for the first time it defaults to fertility.
3. After using for the first time, the meter will default to the function last used.
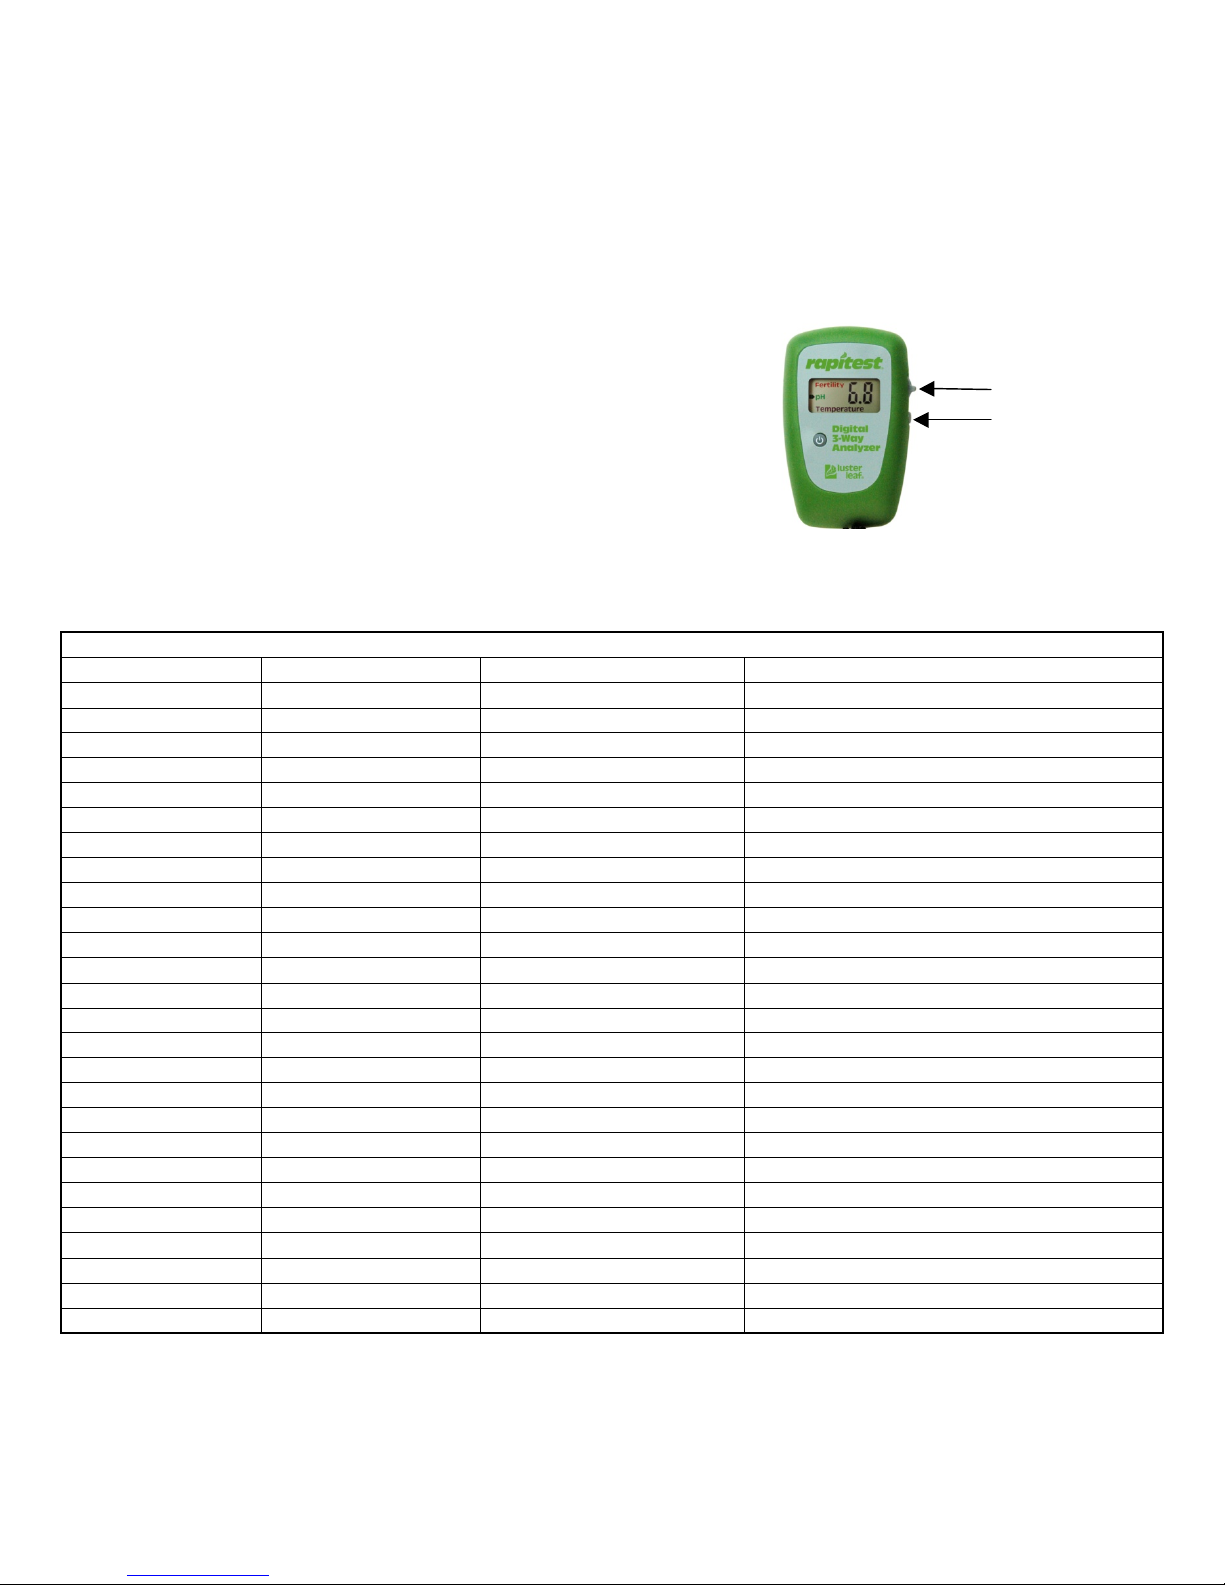
4. The toggle switch is located on the right side of the meter.
5. Move the toggle switch up or down to change test function.
6. The test function in use is indicated by the blinking arrow on the meter face.
7. When not in active use, the meter will turn off after about four (4) minutes,
to preserve battery life.
HOW TO USE YOUR METER TO MEASURE SOIL TEMPERATURE
1. With the unit turned on, and in temperature mode, insert the probe to a minimum depth of 2” to 3” (5-8 cm) into the soil.
2. Wait 60 seconds to acclimatize the probe and note the LCD reading. Remove the probe from the soil.
Soil Temperature Ranges
Vegetable
Will Germinate
Ideal Germination
Transplanting Seedlings Out
Asparagus
50F - 90F
70F
Beans
60F - 90F
80F
Beets
40F - 90F
80F
Broccoli
40F - 90F
80F
50F
Cabbage
40F - 90F
80F
45F
Cantaloupe
60F - 100F
90F
65F
Carrot
40F - 90F
80F
Cauliflower
40F - 90F
80F
Celery
40F - 80F
70F
45F
Chard
40F - 90F
80F
Corn
50F - 100F
80F
60F
Cucumber
60F - 100F
90F
65F
Endive
40F - 75F
75F
Lettuce
40F - 75F
75F
Okra
60F - 100F
90F
70F
Onion
40F - 100F
90F
45F
Parsley
40F - 90F
80F
Parsnip
40F - 90F
70F
Peas
40F - 80F
70F
45F
Pepper
60F - 90F
80F
65F
Pumpkin
60F - 100F
90F
65F
Radish
40F - 90F
80F
Spinach
40F - 80F
75F
Squash
60F - 100F
90F
65F
Tomato
50F - 100F
80F
60F
Watermelon
60F - 110F
90F
65F
HOW TO USE YOUR METER TO MEASURE pH
1. Remove the top 2” of the surface soil. Break up & crumble the soil underneath to a depth of 5”. Remove any stones or organic debris
such as leaves and twigs because they can affect the final result.
2. Thoroughly wet the soil with water (ideally rain or distilled water) to a mud consistency.
3. Use the toggle switch to move the indicator arrow to point to pH.
Toggle Switch
Hold Button

2
4. Using the supplied pad, lightly shine 3” - 4” (7 - 10 cm) of the probe, carefully avoiding the bullet shaped tip, to remove any oxides that
may have formed on the surface of the metal. Wipe the probe clean using a cotton ball or tissue. Always wipe away from the probe
tip, toward the probe handle.
5. Use the toggle switch to move the indicator arrow to point to pH.
6. Take the initial reading: Push the probe directly into the moistened soil to a depth of 2½”-3”. If it does not slip into the ground fairly
easily, select a new position. Never force the probe. Twist the probe clockwise and counter-clockwise between your fingers several
times to ensure that damp soil is well distributed over the surface of the probe. Wait for 60 seconds for the probe to acclimatize and
note the LCD reading. Remove the probe from the soil.
7. Based on the results of the initial reading, take the final reading:
a. If the initial reading is pH 7 or higher, wipe any soil particles from the surface of the probe. Re-shine the probe and insert
back into the soil at a different point, avoiding the first hole made by the probe. Twist the probe two or three times between
the fingers, as before, and wait 30 seconds before taking the final reading.
b. If the initial reading is below pH 7, wipe any soil particles from the surface of the probe. Do not re-shine the probe. Insert the
probe back into the soil at a different point, avoiding the first hole made by the probe. Twist the probe two or three times
between the fingers, as before, and wait 60 seconds before taking the final reading.
In order to obtain an even more accurate result when measuring soil pH with your unit, the following procedure may be
adopted. Take the sample of soil to be tested from the ground and remove stones and organic debris. Prepare the
sample by crumbling the soil into small particles. Measure two cups of soil from the prepared sample. Fill a clean glass or
plastic container with two cups of distilled or de-ionized water and add the measured soil sample. Ensure the soil and
water is thoroughly mixed and compact the sample firmly. Drain off any excess water. Proceed to step 3 of “How to Use
Your Meter to Measure pH.
ADDING LIME TO INCREASE pH
Lime can be added at any time of year but it does need time to take effect – which is why the autumn, winter and early spring are the preferred times.
The two main types of lime are ground limestone and hydrated lime. Ground limestone is slower acting but more pleasant to handle. Hydrated lime may
take effect in two or three months but ground chalk or limestone may take up to six months. The amount of lime needed to raise a spade‘s depth of top
soil by 1 pH varies from 5.5 oz. of hydrated lime or 7.5 oz. ground limestone on sandy soil to 11 oz. of hydrated lime or 15 oz. ground limestone on heavy
clays or peaty soils per square yard. So do not expect pH correction to be too precise! Avoid adding lime at the same time as sulfate of ammonia,
superphosphate, basic slag or animal manures. Lime may be used in combination with sulfate of potash or muriate of potash. It is because of the natural
drop in pH that there is such an emphasis on adding lime. While lime stimulates the availability of most plant foods, you will see from the “pH and Plant
Nutrient” table that soils should not automatically be limed because large amounts of plant food become increasingly “locked up” over pH7.
BENEFITS OF LIMING
• Reduces acidity, increases pH.
• Binds the fine particles of clay into larger particles and so helps aerate and drain the soil.
• Helps to retain moisture and plant foods in sandy soils.
• Balances the addition of acidic fertilizers; nitrochalk is an example.
• The lime content of soil will sometimes affect flower and foliage color. Blue & red hydrangea flowers are the most common examples.
• Supplies the plant food calcium.
• Makes nitrogen available by stimulating the micro-organisms that help decompose organic matter.
• Increases the earthworm population.
• Protects against a few diseases, such as club root in brassicas (but causes scab in potatoes) and is disliked by organisms that help decompose organic
matter.
ADDING CHEMICALS AND ORGANICS TO REDUCE pH
The best way to reduce pH is to use the compost heap and farmyard manure to regularly introduce decaying humus. This not only reduces pH gradually
but helps hold plant foods and moisture. Peat, relatively inert and usually only about 4% nitrogen content, is another useful soil conditioner of an acid
nature.
Sulfate of ammonia and flowers of sulfur are chemical treatments and sulfate of ammonia also adds nitrogen. While the tiny bacteria and microorganisms work unseen in the soil, breaking down fresh organic matter into plant food, they produce acids. But if this process eventually creates too low
a pH the organisms will work less efficiently, and lime is then needed as a balance and stimulant. It is sensible to progress gradually towards a reduced pH
and certainly not to expect to be able to be precise in exactly how much of a material will reduce pH by a given amount. Avoid adding animal manures or
sulfate of ammonia at the same time as lime or basic slag (a phosphate food).
HOW MUCH TO APPLY
How much to apply depends on the particle size of your soil. A sandy soil needs less lime for an equivalent pH change than a heavy clay but will not hold its
pH as long.
SOIL TYPES
Sandy Soils: A light, coarse soil comprised of crumbling and alluvial debris.
Loam Soils: A medium friable soil, consisting of a blend of coarse (sand) alluvium and fine (clay) particles mixed within fairly broad limits with a little lime
and humus.
Clay Soils: A heavy, clinging, impermeable soil, comprised of very fine particles with little lime and humus and tending to be waterlogged in winter and
very dry in summer.

3
Amounts listed are pounds per 100 square feet. Do not add more than 5lbs. of lime or sulfur in one application.
Please note: To use Sphagnum Peat Moss to increase soil acidity, mix in up to one third total soil volume when planting acid loving plants.
Excessive acidity in the soil causes calcium, phosphorous and magnesium to be changed into forms that plants cannot use, causing them to suffer a
deficiency of these elements. Plants won‘t tolerate highly acid conditions. Slowdown of beneficial bacterial action is part of the reason; increased toxicity
from certain trace elements like aluminum is another. Deficiency of calcium and magnesium is a third possibility. The best explanation is that in acid soils,
chemical reaction can lock up major nutrients, especially phosphorous, making them unavailable to plants. Heavy use of inorganic, high-analysis fertilizers
causes soil to become more acid, as does heavy use of sulfur-containing fungicides. The same result can stem from using organic fertilizers that have an
acidifying effect. Acidity and alkalinity are measured in pH units, the pH being a symbol for the relative amount of hydrogen in a substance. On a pH scale
from I to 14, 5 and below are extremely acid and 10 or more extremely alkaline. Soil alkalinity or acidity, then, is determined by the reaction of various
minerals and organic compounds with moisture in the soil. Plants are often listed according to their pH preference. Some plants respond differently to pH
in different soils. Other plants tolerate a comparatively wide range of pH. Obviously, for high yields, the gardener or farmer must know the soil‘s pH. Then
the gardener/farmer can either grow the kinds of plants that do best in soil of that particular pH, or steps can be taken to change the soil pH to within
the preferred range for the plants desired. For the majority of common plants, a pH of 6.5 to 7 is optimum. Soils in this pH range offer the most
favorable environment for microorganisms that convert atmospheric nitrogen into a form available to plants. It also offers the best environment for the
bacteria that decompose plant tissue and form humus. In this pH range, all of the essential mineral nutrients are available to plants in sufficient quantities,
and generally in a much greater amount than at any other pH. Also, soil having a pH within this range is more workable, because a good crumb structure is
more easily maintained. Too acid a soil means the bacteria which decompose organic matter cannot live. Manganese & aluminum are so soluble in very acid
soil that they become present in amounts toxic to plants. Strong acidity also decreases nutrient availability, and plants may literally starve to death for
one essential mineral nutrient while having so much of another that it poisons them. This becomes accelerated the more you fertilize. On the other hand,
too alkaline a soil decreases nutrient availability. It causes loss of soil structure and development of “puddling”. Strong alkalinity dissolves and disperses
humus. “Black alkali” is caused by the accumulation of alkali and humus at the surface of the soil. Strong alkalinity causes a concentration of salts that
completely inhibit plant growth.
TO RAISE OR LOWER pH OF YOUR SOIL
Raising and lowering pH is not an exact science and most plants have a reasonably wide tolerance, certainly to within 1 pH point. Consult plant pH
preferences in this booklet and you will see that the majority can manage well on a pH around 6.5 but some need an alkaline soil and some a particularly
acid soil. Altering pH takes time so do not expect rapid changes; rather, work steadily towards giving a plant its ideal conditions.
FERTILITY
A fertile soil is one which produces satisfactory yields of crops and, because of the incorporation of plant and animal residues, contains an abundance of
organic matter or humus. It has good texture, not too loose and light nor too heavy and stiff, is well drained and has a proper pH for best plant growth. A
fertile soil has sufficient amounts of the three major elements, nitrogen, phosphorous and potassium (potash). It also contains a sufficient supply of the
micronutrients such as boron, copper, iron, sulfur, magnesium and molybdenum and consists of an abundance of organic matter and humus.
The
fertility portion of the instrument measures the soil‘s Nitrogen, Phosphorous and Potash (NPK) content, in combination.

4
HOW TO USE YOUR METER TO MEASURE FERTILITY
1. Remove the top 2” of the surface soil. Break up & crumble the soil underneath to a depth of 5”. Remove any stones or organic debris
such as leaves and twigs because they can affect the final result.
2. Thoroughly wet the soil with water (ideally rain or distilled water) to a mud consistency.
3. Use the toggle switch to move the indicator arrow to point to Fertility.
4. Wipe the meter probe clean with a tissue or paper towel. Insert probe into soil up to the probe base.
5. Wait 10 seconds and take reading.
In order to obtain an even more accurate result when measuring soil fertility with your unit, the following procedure
may be adopted. Take the sample of soil to be tested from the ground and remove stones and organic debris. Prepare
the sample by crumbling the soil into small particles. Measure two cups of soil from the prepared sample. Fill a clean
glass or plastic container with two cups of distilled or de-ionized water and add the measured soil sample. Ensure the soil
and water is thoroughly mixed and compact the sample firmly. Drain off any excess water. Proceed to step 3 of “How to
Use Your Meter to Measure pH.
The standards by which the instrument is calibrated are as follows:
IF THE TESTER READS “TOO LITTLE”
1. Liquid feed with a brand of soluble fertilizer that is recommended for the plants you intend to grow.
2. Liquid feed within 3 weeks after planting or potting and do this every month whenever you water your plants.
IF THE TESTER READS “IDEAL”
Water once a month with a soluble fertilizer that is recommended for the plants you are growing.
IF THE TESTER READS “TOO MUCH“
1. Water thoroughly to leach out the excess fertilizer from the soil.
2. For potted plants, repot with new soil.
3. For greenhouse plants water thoroughly to leach excess fertilizer from the soil.
4. Do not add any fertilizer. You can add manure, compost, clippings, plant wastes, residues, leaves and any other organic matter to the soil.
HOW TO INCREASE SOIL FERTILITY
There are many ways to increase and maintain the valuable nutrients of your soil which contribute to its fertility. Just as some plants need a rather acid
soil, while others need a slightly alkaline soil, they also need varying amounts of nitrogen, phosphorous and potash known as NPK. Each plant brings about
changes in the soil and has soil needs different from other plants. You won’t need to worry much about having exactly the right amount of each element
for each plant you grow. As long as your soil is well balanced and rich in organic matter your plants will not suffer.
FERTILIZER
Fertilizer is a substance added to the soil to improve fertility. Since a variety of elements contribute to the fertility of the soil, many individual elements
and combinations of elements are considered fertilizers.
THE VALUE OF NITROGEN
Nitrogen is synonymous with plant nutrition. It is directly responsible for producing leaf growth and green leaves. A deficiency causes yellow leaves and
stunted growth. Too much nitrogen causes overabundant foliage with delayed flowering; the plant becomes subject to disease and its fruit is of poor
quality. Soil deficient in nitrogen can be corrected by adding compost, manure or other nitrogen-rich fertilizers such as dried blood, tankage, cottonseed
meal and peanut shells. Grass clippings, weeds and garden wastes returned to the soil will increase its humus and nitrogen content.
THE VALUE OF PHOSPHOROUS
Growing plants need phosphorous. It is the major constituent of plant genetics and seed development. A deficiency causes stunted growth and seed
sterility. Phosphorous aids plant maturity, increases the seed yield, increases fruit development, increases vitamin content and aids the plant‘s resistance
to disease and winterkill. The best source of phosphorous is phosphate rock, when it is finely ground. Bacteria that thrive in pH 6.5 to pH 7 help
breakdown the phosphorous making it available to plants. Other sources of phosphate are bone meal, cottonseed meal and activated sludge. Barring any
great deficiencies, a pound of phosphate rock for every ten square feet of your garden space is a goodly amount to apply once every two or three years.
Phosphorous has the tendency to “grab” hold of the soil. In this manner, phosphorous is not easily leached from the soil as is nitrogen and potash.
THE VALUE OF POTASSIUM (POTASH)
Potash strengthens the plant. It helps form carbohydrates and promotes protein synthesis. It further aids early growth, stem strength and cold hardiness.
Plants deficient in potash are usually stunted and have poorly developed root systems. Leaves are spotted, curled and appear dried out at the edges.
Yields for potash deficiency are low. Sources for potash are plant residues, manures, composts and natural sources like granite dust, basalt rock or
greensand, wood ashes, leaves and seaweed.

5
TESTING FOR PLANTS POTTED IN SOIL OR POTTING SOIL
Only test at the beginning of, or during, the growing season, never in the dormant period. Do not test the soil for a plant that has been recently
repotted as the plant will be in a delicate state and not yet reestablished.
For established plants a pH reading should be taken just after watering. First, water each plant (without adding plant food). Rainwater should
always be used for houseplants as calcium present in domestic water systems can adversely affect acid loving plants, see pH preference list.
Leave the pot to drain to ensure the soil is thoroughly moistened. *Proceed to step 3 of “How to Use Your Meter to Measure pH”. If you are
testing the soil in a planter and the reading is not reflecting the plant‘s desired pH range, you should repot the plant. Do not try to add a
balancing agent to the top of the soil in an attempt to alter the soil‘s pH. Note: If you have a healthy, thriving plant (despite a reading that does
not conform to the pH preference chart) do not disturb the plant as it may have acclimatized itself.
GARDENING TIPS
• Altering the pH takes time. Do not expect instant changes, but work steadily towards the ideal range. Most plants have a “range” of pH.
Consult your “tables” for the pH range of your plants.
• Adding lime before planting is most beneficial because it takes time to take effect. Liming in the fall, winter or early spring is preferred.
• Avoid adding lime at the same time as fertilizers whether they are organic or chemical.
• When testing a lawn, water thoroughly and push the probes into the soil up to the plastic case base.
• Use lime sparingly. It encourages weeds and worms. Worms then attract moles.
• Save clippings, vegetable & fruit wastes for compost.
• Bone meal is an excellent fertilizer to be used at the time of planting.
METER TIPS
• Do not leave probes in soil longer than necessary because the metal electrodes may pit and cause erroneous readings.
• Always clean both probes immediately after using.
• Be sure to keep the probes away from metal objects.
SPECIAL CLEANING PAD
The cleaning pad supplied with this analyzer has been specially selected for its compatibility with the meter probe metals. Other types of
cleaners may cut or otherwise damage probe surfaces and/or adversely affect readings. Additional pads are available at a cost of $2.00 for 3
pads, plus $1.00 for postage and handling to the address at the end of these instructions. Checks only please payable in US funds. No phone
orders.
LIMITED WARRANTY
The tester is warranted free from defects for one year from date of purchase. During this period the unit may be returned to Luster Leaf
Products, Inc. with proof of purchase and $5.00 to cover postage and handling. It will be repaired or replaced. During the initial 90 days of this
warranty period the selling dealer is also authorized to replace a defective meter.
This warranty does not cover abuse, accidental damage, repair by anyone other than Luster Leaf Products, Inc., or consequential loss or
inconvenience resulting from use of the meter. This warranty gives you certain specific legal rights and you may also have other rights which
vary from state to state.
SERVICE
If adjustment or repair becomes necessary after the warranty expires, return the meter to Luster Leaf Products, Inc. with $10.00 to cover
postage, handling and service. Service includes labor & parts as required, except for replacement of externally damaged or lost components. For
service, or information regarding other Luster Leaf Products, Inc. items, please address:
REPLACEMENT BATTERIES: Three (3) #357 silver oxide, 1.55 volt, (generally sold in 3-packs)
This unit will operate for approximately 1,000 – 1,200 tests per battery set.
Luster Leaf Products, Inc.
22
20 Techcourt
Woodstock, Illinois 60098
Engineered and designed in the US. Made in China.

NAME pH NAME pH NAME pH NAME pH NAME pH
FRUIT VEGETABLES AND HERBS
APPLE 5.0 - 6.5 SAGE 5.5 - 6.5 GENISTA 6.5 - 7.5
APRICOT 6.0 - 7.0 SHALLOT 5.5 - 7.0 GERANIUM 6.0 - 8.0 ASPERULA 6.0 - 8.0 LAUREL 6.5 - 7.5
AVOCADO 6.0 - 7.5 SORGHUM 5.5 - 7.5 GLOXINIA 5.5 - 6.5 ASPHODOLINE 6.0 - 8.0 LAVENDER 6.5 - 7.5
BANANA 5.0 - 7.0 SOYBEAN 5.5 - 6.5 GRAPE IVY 5.0 - 6.5 ASTER 5.5 - 7.5 LIATRIS 5.5 - 7.5
BLACKBERRY 5.0 - 6.0 SPEARMINT 5.5 - 7.5 GRAPE HYACINTH 6.0 - 7.5 AUBRITA 6.0 - 7.5 LIGUSTRUM 5.0 - 7.5
BLUEBERRY 4.0 - 6.0 SPINACH 6.0 - 7.5 GREVILLEA 5.5 - 6.5 AZALEA 4.5 - 6.0 LILAC 6.0 - 7.5
CANTALOUPE 6.5 - 7.5 SWEDE 5.0 - 7.0 GYNURA 5.5 - 6.5 BALLOON FLOWER 6.0 - 6.5 LILY OF THE VALLEY 4.5 - 6.0
CHERRY 6.0 - 7.5 THYME 5.5 - 7.0 HEDERA (IVY) 6.0 - 8.0 BAYBERRY 4.0 - 6.0 LITHOSPERMUM 5.0 - 6.5
CRANBERRY 5.5 - 6.5 TOMATO 5.5 - 7.5 HELIOTROPIUM 5.0 - 6.0 BERGENIA 6.0 - 7.5 LOBELIA 6.5 - 7.5
CURRENT: Black 6.0 - 8.0 TURNIP 5.5 - 7.0 HENS AND CHICKENS 6.0 - 7.0 BLEEDING HEART 6.0 - 7.5 LUPINUS 5.5 - 7.0
Red 5.5 - 7.0 WATER CRESS 6.0 - 8.0 HERRINGBONE PLANT 6.0 - 6.0 BLUEBELL 6.0 - 7.6 MAGNOLIA 5.0 - 6.0
White 6.0 - 8.0 HOUSE and GREENHOUSE PLANTS HIBISCUS PLANT 6.0 - 8.0 BROOM 5.0 - 6.0 MAHONIA 6.0 - 7.0
DAMSON 6.0 - 7.5 ABUTILON 5.5 - 6.5 HOYA 5.0 - 6.5 BUDDLEIA 6.0 - 7.0 MARIGOLD 5.5 - 7.0
GOOSEBERRY 5.0 - 6.5 ACORUS 5.0 - 6.5 IMPATIENS 5.5 - 6.5 BUPHTHALUM 6.0 - 8.0 MOLINIA 4.0 - 5.0
GRAPEVINE 6.0 - 7.0 AECHMEA 5.0 - 5.5 IVY TREE 6.0 - 7.0 BUTTERFLY BUSH 4.0 - 6.0 MORAEA 5.5 - 6.5
GRAPEFRUIT 6.0 - 7.5 AFRICAN VIOLET 6.0 - 7.0 JACARANDA 6.0 - 7.5 CALENDULA 5.5 - 7.0 MORNING GLORY 6.0 - 7.5
HAZELNUT 6.0 - 7.0 AGLAONEMA 5.0 - 6.0 JAPANESE SEDGE 6.0 - 8.0 CAMASSIA 6.0 - 8.0 MOSS 6.0 - 8.0
HOP 6.0 - 7.5 AMARYLIS 5.5 - 6.5 JASMINUM 5.5 - 7.0 CANDYTUFT 6.0 - 7.5 MOSS, SPHAGNUM 3.5 - 5.0
HUCKLEBERRY 4.0 - 6.0 ANTHURIUM 5.0 - 6.0 JERUSALEM CHERRY 5.5 - 6.5 CANNA 6.0 - 8.0 MYOSOTIS 6.0 - 7.0
LEMON 6.0 - 7.0 APHELANDRA 5.0 - 6.0 JESSAMONE 5.0 - 6.0 CANTERBURY BELLS 7.0 - 7.5 NARCISSUS 6.0 - 8.5
LYCHEE 6.0 - 7.0 ARAUCARIA 5.0 - 6.0 KALANCHOE 6.0 - 7.5 CARDINAL FLOWER 4.0 - 6.0 NASTURTIUM 5.5 - 7.5
MANGO 5.0 - 6.0 ASPARAGUS FERN 6.0 - 8.0 KANGAROO THORN 6.0 - 8.0 CARNATION 6.0 - 7.5 NICOTIANA 5.5 - 6.5
MELON 5.5 - 6.5 ASPIDISTRA 4.0 - 5.5 KANGAROO VINE 5.0 - 6.5 CATALPA 6.0 - 8.0 PACHYSANDRA 5.0 - 8.0
MULBERRY 6.0 - 7.5 AZAELA 4.5 - 6.0 LANTANA 5.5 - 7.0 CELOSIA 6.0 - 7.0 PAEONIA 6.0 - 7.5
NECTARINE 6.0 - 7.5 BABY'S BREATH 6.0 - 7.5 LAURUS ( BAY TREE) 5.0 - 6.0 CENTAUREA 5.0 - 6.5 PANSY 5.5 - 7.0
PEACH 6.0 - 7.5 BABY'S TEARS 5.0 - 6.0 LEMON PLANT 6.0 - 7.5 CERASTIUM 6.0 - 7.0 PASSION FLOWER 6.0 - 8.0
PEAR 6.0 - 7.5 BEGONIA 5.5 - 7.0 MIMOSA 5.0 - 7.0 CHRYSANTHEMUM 6.0 - 7.0 PASQUE FLOWER 5.0 - 6.0
PINEAPPLE 5.0 - 6.0 BIRD OF PARADISE 6.0 - 6.5 MIND YOUR OWN BUSINESS 5.0 - 5.5 CISSUS 6.0 - 7.5 PAULOWNIA 6.0 - 8.0
PLUM 6.0 - 7.5 BISHOP’S CAP 5.0 - 6.0 MONSTERA 5.0 - 6.0 CISTUS 6.0 - 7.5 PENSTEMON 5.5 0 7.0
POMEGRANATE 5.5 - 6.5 BLACK-EYED SUSAN 5.5 - 7.5 MYRTLE 6.0 - 8.0 CLARKIA 6.0 - 6.5 PERIWINKLE 6.0 - 7.5
QUINCE 6.0 - 7.5 BLOOD LEAF 5.5 - 6.5 NEVER NEVER PLANT 5.0 - 6.0 CLIANTHUS 6.0 - 7.5 PETUNIA 6.0 - 7.5
RASPBERRY 5.0 - 7.5 BOTTLEBRUSH 6.0 - 7.5 NICODEMIA (INDOOR OAK) 6.0 - 8.0 CLEMATIS 5.5 - 7.0 PINKS 6.0 - 7.5
RHUBARB 5.5 - 7.0 BOUGAINVILLEA 5.5 - 7.5 NORFOLK ISLAND PINE 5.0 - 6.0 COLCHICUM 5.5 - 6.5 POLYGONUM 6.0 - 7.5
STRAWBERRY 5.0 - 7.5 BOXWOOD 6.0 - 7.5 OLEANDER 6.0 - 7.5 COLUMBINE 6.0 - 7.0 POLYANTHUS 6.0 - 7.5
WATERMELON 5.5 - 6.5 BROMELIADS 5. 0 - 7.5 OPLISMENUS 5.0 - 6.0 CONVOLVULUS 6.0 - 8.0 POPPY 6.0 - 7.5
VEGETABLES AND HERBS BUTTERFLY FLOWER 6.0 - 7.5 ORCHID 4.5 - 5.5 COREOPSIS 5.0 - 6.0 PORTULACA 5.5 - 7.5
ARTICHOKE 6.5 - 7.5 CACTI 4.5 - 6.0 OXALIS 6.0 - 8.0 CORONILLA 6.5 - 7.5 PRIMROSE 5.5 - 6.5
ASPARAGUS 6.0 - 8.0 CALCAOLARIA 6.0 - 7.0 PALMS 6.0 - 7.5 CORYDALIS 6.0 - 8.0 PRIMULA 6.0 - 7.5
BASIL 5.5 - 6.5 CALADIUM 5.0 - 6.0 PANDANUS 5.0 - 6.0 COSMOS 5.0 - 8.0 PRIVET 5.0 - 7.5
BEAN 6.0 - 7.5 CALLA LILY 6.0 - 7.0 PEACOCK PLANT 5.0 - 6.0 COTTONEASTER 6.0 - 8.0 PRUNELLA 6.0 - 7.5
(Runner, Broad, French) CAMELIA 4.5 - 5.5 PELLIONIA 5.0 - 6.0 CRAB APPLE 6.0 - 7.5 PRUNUS 6.5 - 7.5
BEETROOT 6.0 - 7.5 CAMPANULA 5.5 - 6.5 PEPEROMIA 5.0 - 6.0 CROCUS 6.0 - 8.0 PYRETHRUM 6.0 - 7.5
BROCCOLI 6.0 - 7.0 CAPSICUM 5.0 - 6.5 PHILODENDRON 5.0 - 6.0 CYNOGLOSSUM 6.0 - 7.5 RED HOT POKER 6.0 - 7.5
BRUSSELS SPROUTS 6.0 - 7.5 CARDINAL FLOWER 5.0 - 6.0 PILEA 6.0 - 8.0 DAFFODIL 6.0 - 6.5 RHODODENDREN 4.5 - 6.0
CABBAGE 6.0 - 7.5 CASTOR OIL PLANT 5.5 - 6.5 PLUMBAGO 5.5 - 6.5 DAHLIA 6.0 - 7.5 ROSES:
CALABRESE 6.5 - 7.5 CANTURY PLANT 5.0 - 6.5 PODACARPUS 5.0 - 6.5 DAY LILY 6.0 - 8.0 HYBRID TEA 5.5 - 7.0
CARROT 5.5 - 7.0 CHINESE EVERGREEN 5.0 - 6.0 POINTSETTIA 6.0 - 7.5 DELPHINIUM 6.0 - 7.5 CLIMBING 6.0 - 7.0
CAULIFLOWER 5.5 - 7.5 CHINESE PRIMROSE 6.0 - 7.5 POLYSCIAS 6.0 - 7.5 DEUTZIA 6.0 - 7.5 RAMBLING 5.5 - 7.0
CELERY 6.0 - 7.0 CHRISTMAS CACTUS 5.0 - 6.5 POTHOS 5.0 - 6.0 DIANTHUS 6.0 - 7.5 SALVIA 6.0 - 7.5
CHICORY 5. 0 - 6.5 CINERARIA 5.5 - 7.0 PRAYER PLANT 5.0 - 6.0 DOGWOOD 5.0 - 7.0 SCABIOSA 5.0 - 7.5
CHINESE CABBAGE 6.0 - 7.5 CLERODENDRUM 5.0 - 6.0 PUNICA 5.5 - 6.5 EDELWEISS 6.5 - 7.5 SEDUM 6.0 - 7.5
CHIVES 6.0 - 7.0 CLIVIA 5.5 - 6.5 SANSERIERIA 4.5 - 7.0 ELAEAGNUS 5.0 - 7.5 SNAPDRAGON 5.5 - 7.0
CORN - SWEET 5.5 - 7.0 COCKSCOMB 6.0 - 7.0 SAXIFRAGA 6.0 - 8.0 ENKIANTHUS 5.0 - 6.0 SNOWDROP 6.0 - 8.0
CRESS 6.0 - 7.0 COFFEE PLANT 5.0 - 6.0 SCINDAPSUS 5.0 - 6.0 ERICA 4.5 - 6.0 SOAPWORT 6. 0 7.5
COURGETTES 5.5 - 7.0 COLEUS 6.0 - 7.0 SHRIMP PLANT 6.0 - 7.0 EUPHORBIA 6.0 - 7.0 SPEEDWELL 5.5 - 6.5
CUCUMBER 5.5 - 7.5 COLUMNEA 4.5 - 5.5 SPANISH BAYONET 6.0 - 7.5 EVERLASTINGS 5.0 - 6.0 SPIRAEA 6.0 - 7.5
FENNEL 5.0 - 6.0 CORAL BERRY 5.5 - 7.5 SPIDER PLANT 6.0 - 7.5 FIRETHORN 6.0 - 8.0 SPRUCE 4.0 - 5.0
GARLIC 5.5 - 7.5 CRASSULA 5.0 - 6.0 SUCCULENTS 5.0 - 6.5 FORGET-ME-NOTS 6.0 - 7.0 STOCK 6.0 - 7.5
GINGER 6.0 - 8.0 CREEPING FIG 5.0 - 6.0 SYNOGONIUM 5.0 - 6.0 FORSYTHIA 6.0 - 8.0 STONECROP 6.5 - 7.5
HORSERADISH 6.0 - 7.0 CROTON 5.0 - 6.0 TOLMIEA 5.0 - 6.0 FOXGLOVE 6.0 - 7.5 SUMACK 5.0 - 6.5
KALE 6.0 - 7.5 CROWN OF THORNS 6.0 - 7.5 TRADESCANTIA 5.0 - 6.0 FRITILLARIA 6.0 - 7.5 SUNFLOWER 5.0 - 7.0
KOHLRABI 6.0 - 7.5 CUPHEA 6.0 - 7.5 UMBRELLA TREE 5.0 - 7.5 FUCHSIA 5.5 - 7.5 SWEET PEA 6.0 - 7.5
LEEK 6.0 - 8.0 CYCLAMEN 6.0 - 7.0 VENUS FLYTRAP 4.0 - 5.0 GAILLARDIA 6.0 - 7.5 SWEET WILLIAM 6.0 - 7.5
LENTIL 5.5 - 7.0 CYPERUS 5.0 - 7.5 WEEPING FIG 5.0 - 6.0 GAZANIA 5.5 - 7.0 TAMARIX 6.5 - 8.0
LETTUCE 6.0 - 7.0 DIEFFENBACHIA 5.0 - 6.0 YUCCA 6.0 - 7.5 GENTIANA 5.0 - 7.5 TRILLIUM 5.0 - 6.5
MARJORAM 6.0 - 8.0 DIPLADENIA 6.0 - 7.5 ZEBRINA 5.0 - 6.0 GEUM 6.0 - 7.5 TULIP 6.0 - 7.0
MARROW 6.0 - 7.5 DIZGOTHECA 6.0 - 7.5 FLOWERS, TREES GLADIOILI 6.0 - 7.0 VIBERNUM 5.0 - 7.5
MILLET 6.0 - 6.5 DRACAENA 5.0 - 6.0 AND SHRUBS GLOBULARIA 5.5 - 7.0 VIOLA 5.5 - 6.5
MINT 7.0 - 8.0 EASTER LILY 6.0 - 7.0 ABELIA 6.0 - 8.0 GODETIA 6.0 - 7.5 VIRGINIA CREEPER 5.0 - 7.5
MUSHROOM 6.5 - 7.5 ELEPHANT’S EAR 5.0 - 6.0 ACACIA 6.0 - 8.0 GOLDEN ROD 5.0 - 7.0 WALLFLOWER 5.5 - 7.5
MUSTARD 6.0 - 7.5 EPISCIA 6.0 - 7.0 ACANTHUS 6.0 - 7.0 GYPSOPHILIA 6.0 - 7.5 WATER LILY 5.5 - 6.5
OLIVE 5.5 - 6.5 EUONYMOUS 6.0 - 8.0 ACONITUM 5.0 - 6.0 HAWTHORN 6.0 - 7.0 WEIGELIA 6.0 - 7.5
ONION 6.0 - 7.0 FERNS: ADONIS 6.0 - 8.0 HEATHER 4.0 - 6.0 WISTARIA 6.0 - 8.0
PAPRIKA 7.0 - 8.5 BIRD’S NEST 5.0 - 5.5 AGERATUM 6.0 - 7.5 HELIANTHUS 5.0 - 7.0 ZINNIA 5.5 - 7.5
PARSLEY 5.0 - 7.0 BOSTON 5.5 - 6.5 AILANTHUS 6.0 - 7.5 HELLEBORUS 6.0 - 7.5 TURF AND ORNAMENTAL GRASSES
PARSNIP 5.5 - 7.5 BUTTON 6.0 - 8.0 AJUGA 4.0 - 6.0 HOLLY 5.0 - 6.5 BAHAI 6.5 - 7.5
PEA 6.0 - 7.5 CHRISTMAS 6.0 - 7.5 ALTHEA 6.0 - 7.5 HOLLYHOCK 6.0 - 7.5 BENT 5.5 - 6.5
PEANUT 5.0 - 6.5 CLOAK 6.0 - 7.5 ALYSSUM 6.0 - 7.5 HONEYSUCKLE 6.0 - 7.5 BERMUDA 6.0 - 7.0
PECAN 4.0 - 6.0 FEATHER 5.5 - 6.5 AMARANTHUS 6.0 - 6.5 HYACINTH 6.5 - 7.5 CANADA BLUE 4.5 - 6.4
PEPPER 5.5 - 7.0 HART’S TONGUE 7.0 - 8.0 ANCHUSA 6.0 - 7.5 HYDRANGEA (Blue) 4.0 - 5.0 CLOVER 6.0 - 7.0
PEPPERMINT 6.0 - 7.5 HOLLY 4.5 - 6.0 ANDROSACE 5.0 - 6.0 HYDRANGEA (Pink) 6.0 - 7.0 KENTUCKY BLUE 6.0 - 7.5
PISTACHIO 5.0 - 6.0 MAIDENHAIR 6.0 - 8.0 ANEMONE 6.0 - 7.5 HYDRANGEA (White) 6.5 - 8.0 MEADOW 6.0 - 7.5
POTATO 4.5 - 6.0 RABBITS FOOT 6.0 - 7.5 ANTHYLLIS 5.0 - 6.0 HYPERICUM 5.5 - 7.0 PAMPAS 6.0 - 8.0
POTATO - SWEET 5.5 - 6.0 SPLEENWORT 6.0 - 7.5 ARBUTUS 4.0 - 6.0 IRIS 5.0 - 6.5 RED TOP 6.0 - 6.5
PUMPKIN 5.5 - 7.5 FIG 5.0 - 6.0 ARENARIA 6.0 - 8.0 IVY 6.0 - 7.5 RYE 6.0 - 7.0
RADISH 6.0 - 7.0 FITTONIA 5.5 - 6.5 ARISTEA 6.0 - 7.5 JUNIPER 5.0 - 6.5 ST. AUGUSTINE 6.5 - 7.5
RICE 5.0 - 6.5 FREESIA 6.0 - 7.5 ARMERIA 6.0 - 7.5 KALMIA 4.5 - 5.0 TALL FESCUE 6.0 - 7.0
ROSEMARY 5.0 - 6.0 GARDENIA 5.0 - 6.0 ARNICA 5.0 - 6.5 KERRIA 6.0 - 7.0 VELVET BENT 5.0 - 6.0
Plant pH Reference List
HOUSE and GREENHOUSE PLANTS
FLOWERS, TREES
AND SHRUBS
FLOWERS, TREES
AND SHRUBS
 Loading...